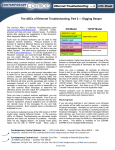
1
Archive
Service Bulletins
Published 1/94 through 10/00
This Archive contains a collection of service bulletins
which have been written by members of the Polaroid
Technical Support Organization.
Use the Bookmarks to the left to locate and open
documents by product name and subject matter.
Americas Business Center
Technical Services
201 Burlington Road
Bedford MA 01730
TEL: 1.781.386.5309
FAX: 1.781.386.5988
Polaroid Corporation
Customer Support Service
201 Burlington Road
Bedford, MA 01730-1406
FILM INFORMATION NOTICE
INITIATOR:
H. LIMBO
NOTICE #
024123
REVIEW:
B. DONOVAN
DATE:
FEBRUARY 2, 1994
PRODUCT:
POLABLUE BN
SUBJECT: POLABLUE "MYSTERY" STREAKS; CHANGE IN
REFRIGERATED STORAGE RECOMMENDATION
SENSITIVE MATERIAL - LIMITED DISTRIBUTION
X Internal Polaroid
X U.S. Service Centers
International Film Mfg.
X International Subsidiaries
Pack
4X5
Large Format
Integral
X 35mm
All
DESCRIPTION:
Since its introduction in 1987, PolaBlue has been plagued by a low level defect labeled by film
manufacturing as “Mystery Streaks”. These streaks are a form of processing streaks which can start
at any point during processing, have a wavy appearance , a brownish stain and transfer of material to
the backside of the film strip. Film manufacturing has not been able to determine the cause of this
defect but they have identified that refrigeration of the processing pack is a contributing factor.
While work continues to identify the cause of these streaks, manufacturing is recommending that
customers not refrigerate the processing pack. Refrigeration of the film cartridge is still encouraged
and the tip-sheet will be modified to reflect these changes, along with a “goldenrod” insert in the film
pack.
NOTE: THIS CHANGE EFFECTS ONLY POLABLUE, NOT ANY OTHER INSTANT 35mm
FILMS.
When the customer goes to process an exposed film cartridge, the code on the cartridge should match
the code on the processing pack.
If you have any questions, please contact Brendon Donovan at PTN 225-5206 or Harro Limbo at PTN
221-4424.
Polaroid Corporation
Customer Support Service
201 Burlington Road
Bedford, MA 01730-1406
FILM INFORMATION NOTICE
INITIATOR:
E. DACEY
REVIEW:
SUBJECT:
EXPIRATION DATING
NOTICE #
044124
DATE:
APRIL 15, 1995
PRODUCT:
T-600 HD; SPECTRA/IMAGE;
95FILM PRODUCTS
SENSITIVE MATERIAL - LIMITED DISTRIBUTION
X Internal Polaroid
X U.S. Service Centers
International Film Mfg.
X International Subsidiaries
Pack
4X5
Large Format
X Integral
35mm
All
All Hybrid IV film products, which currently include:
T-600 HD(US)
T-600 Plus(EUR)
Spectra(US)
T-990
Image(EUR)
Vision95(EUR)
JoyCam95(NPKK)
Captiva95(US)
as well as T-331 (B & W Autofilm)
are now designated as having a 15 month shelf life. That is, the expiration date indicated on the film
package is 15 months beyond the date of manufacture as opposed to the current 12 month expiration
dating.
All testing indicates that Hybrid IV and T-331(B&W) Autofilm chemistry is stable and produces acceptable photos throughout the extended life of the film. Data reviewed to verify this fact includes shelf life,
sensitometry and functional testing, plus customer surveys and marketing information.
This change has been initiated with film manufactured in February, 1994. As an example, film manufactured in February 1994 has an expiration date of May 1995.
Polaroid Corporation
Consumer Services
784 Memorial Drive
Cambridge, MA 02139-4639
FILM INFORMATION NOTICE
INITIATOR: E. Dacey
NOTICE #:
054125
REVIEW:
S. King / B. Vaan Holt
DATE:
May 31, 1994
SUBJECT:
Yellow/Blue Fogging
PRODUCT: T600 Plus, T600 HD, Spectra HD,
Image HD, T779, T339
SENSITIVE MATERIAL - LIMITED DISTRIBUTION
Internal Polaroid
U.S. Service Centers
International Film Mfg.
International Subsidiaries
Pack
4X5
Large Format
Integral
35mm
All
PROBLEM:
Since the first quarter of 1992, the Waltham and Enschede Film Manufacturing facilities have produced
film lots with a random fogging defect. The film lots include:
T600 Plus
T600 HD
Spectra HD
Image HD
T779
T339
The defect is exhibited in the Hybrid IV products (T600 and Spectra/Image film), as fogging that ranges
from flat colors with a faint yellow cast throughout the entire photo to a bright yellow fog with a faint
image in the photo. The defect as seen in Star chemistry film (T779 and T339 lines) is the same except
that the fogging is blue.
Intensive studies have been undertaken to determine the cause of the problem, but no conclusions have
been reached to date.
ACTION:
If you receive any customer complaints that fall within the parameters of the problem description above,
gather any finished photos, the remaining film pack, and any packaging components (box, pouch, etc;)
and send them to the nearest Film/Customer Liaison office. The Liaison office should then forward the
material to:
Polaroid Corporation
Attn: Shari King
R-2, Reservoir Facility
868 Winter Street
Waltham, MA 02154-1274
QUESTIONS:
If you have any questions concerning this notice, please call either Ed Dacey in Cambridge (577-2959),
Shari King in Waltham (386-0184), or Benno Vaan Holt in Enschede (244-1421)
Polaroid Corporation
Consumer Services
784 Memorial Drive
Cambridge, MA 02139-4639
FILM INFORMATION NOTICE
INITIATOR: ED DACEY/SHARI KING
NOTICE #:
FIN 094126
REVIEW:
PAUL FLEMING
DATE:
SEPTEMBER 9, 1994
SUBJECT:
REVERSED SHEET ON T-331
PRODUCT:
T-331
SENSITIVE MATERIAL - LIMITED DISTRIBUTION
X Internal Polaroid
X U.S. Service Centers
International Film Mfg.
X International Subsidiaries
Pack
4X5
Large Format
X Integral
35mm
All
DESCRIPTION
Film Manufacturing has identified several T-331 film lots that were assembled with a reversed sheet.
When the sheet is reversed, the fixing chemical layer is on the wrong side and causes the film image to
remain soft and susceptible to damage. Also, the reversed sheet will develop crystals on the back (black)
side of the frame several hours after processing. The affected lots are numbered 08-14-060 through
08-14-063.
This problem has been identified and corrected in manufacturing. However, some product was released
to the field before the problem was discovered.
POLICY:
If a customer is known to have T-331 film from lots 08-14-060 through 08-14-063 or, if you receive any
complaints which could be related to this problem, please replace the film.
Polaroid Corporation
Consumer Services
784 Memorial Drive
Cambridge, MA 02139-4639
FILM INFORMATION NOTICE
INITIATOR:
Harro E. Limbo
REVIEW:
SUBJECT:
Discontinuation of T-2000 Film
NOTICE #:
104127
DATE:
10/3/94
PRODUCT:
T-2000 Film
SENSITIVE MATERIAL - LIMITED DISTRIBUTION
X Internal Polaroid
U.S. Service Centers
International Film Mfg.
X International Subsidiaries
X Pack
4X5
Large Format
Integral
35mm
All
T-2000 Film, PID #613917, which is T-669 type film balanced for use with Polaroid Electronic ID
Systems (ID2000, ID3000, ID4000), is no longer being manufactured. It has been replaced by EID-UV
Film, PID #618560, which incorporates an ultraviolet sensitive coating as an additional safety feature.
EID-UV is actually PC ID-UV Film which is balanced for the Polaroid Electronic ID Systems.
The following positive sheet line code suffixes identify the films referred to in this notice:
Product
T-2000 Film
EID-UV Film
PC ID-UV Film
Suffix
F
48
46
If you have any questions concerning this notice, please call Sallyann Hawko at PTN 226-1295 or Harro
Limbo at PTN 221-4424.
Polaroid Corporation
Consumer Services
784 Memorial Drive
Cambridge, MA 02139-4639
FILM INFORMATION NOTICE
INITIATOR:
H. LIMBO
NOTICE #:
104128
REVIEW:
DATE:
10/20/94
SUBJECT: Introduction of T-51HC, Positive/Negative
Black & White Sheet Film
PRODUCT:
T-51HC
SENSITIVE MATERIAL - LIMITED DISTRIBUTION
x
x
x
Internal Polaroid
U.S. Service Centers
International Film Mfg.
International Subsidiaries
Pack
x 4X5
Large Format
Integral
35mm
All
BACKGROUND:
We have been notifying customers who use T-51 film that Polaroid would no longer manufacture this
product after August, 1994. This action was necessary because the vendor who provided negative for
T-51 film indicated that they could no longer supply us.
Because of the unique characteristics of T-51, customers could not switch to other Polaroid film products and get the same results.
To meet our customer's needs, we have developed a new film, T-51HC, as a replacement for T-51.
On the reverse side of this page is a summary of selected parameters, comparing the characteristics of
T-51HC to T-51. Additionally, a Technical Data Sheet for T-51HC and a copy of the T51HC Tip Sheet
are attached.
If you have questions concerning this notice, please contact Harro Limbo via E-Mail (cc:mail), via
telephone at PTN 221-4424, or via FAX at 221-4892.
- over -
COMPARISON OF T-51HC AND T-51:
Parameter
T-51HC
T-51
Spectral Sensitivity
Panchromatic
Orthochromatic
Positive Speed
ISO 320/26o (5500oK)
ISO 200/24o (3200oK)
ISO 320/26o (5500oK)
ISO 120/22o (3200oK)
Positive Contrast
High > 3.5
High > 2.5
Usable Negative
Not available
(clear in 18% sodium sulfite sol.)
ISO 50/18o (5500oK)
ISO 32/16o (3200oK)
Negative Contrast
Medium 0.85
Not available
Processing Time @ 71oF
30 seconds
15 - 20 seconds
Expiration Dating
12 months
15 months
REFER TO FILM TECHNICAL DATA
SHEETS FOR DETAILED INFORMATION
Polaroid Corporation
Consumer Services
201 Burlington Road
Bedford, MA 01730-1406
FILM INFORMATION NOTICE
INITIATOR:
SHARON KING
NOTICE #:
015129
REVIEW:
B. SCHRANDT
DATE:
JANUARY 11, 1995
SUBJECT:
INCOMPLETE COVERAGE AT TRAP END
PRODUCT:
T-339
SENSITIVE MATERIAL - LIMITED DISTRIBUTION
X
X
X
X
Internal Polaroid
U.S. Service Centers
International Film Mfg.
International Subsidiaries
Pack
4X5
Large Format
X Integral
35mm
All
Some random lots of T-339 film manufactured in 1994 have a potential of exhibiting
incomplete coverage at the center of the trap end. This potential problem depends
upon the age of the film when it is used and the equipment which is used for processing.
If a customer reports film with this problem, please replace it and return samples of
the defective film to either Shari King (R2-3) or Ed Dacey (BED 1-1A).
If you have any questions, call:
Shari King at 617.386.0184 (PTN 226-0184)
Ed Dacey at 617.386.5490 (PTN 226-5490)
or,
Polaroid Corporation
Consumer Services
201 Burlington Road
Bedford, MA 01730-1406
FILM INFORMATION NOTICE
INITIATOR: SHARON KING
NOTICE #:
015130
REVIEW:
M. RENY
DATE:
JANUARY 11, 1995
SUBJECT:
COPY SERVICE MESSAGE ON
SPECTRA FILM
PRODUCT:
SPECTRA
SENSITIVE MATERIAL - LIMITED DISTRIBUTION
X Internal Polaroid
X U.S. Service Centers
International Film Mfg.
International Subsidiaries
Pack
4X5
Large Format
X Integral
35mm
All
Starting in September 1994, a message has been added to each Spectra film frame.
The message is located on the back of the frame, below the film code.
Shown below is a sample of the film code with the new message:
09417101567 - 2W 0900 1000
COPIES & ENLARGEMENTS CALL 800-421-1030
If you have any questions, call:
Shari King at 617.386.0184 (PTN 226-0184)
Ed Dacey at 617.386.5490 (PTN 226-5490)
or,
Polaroid Corporation
Consumer Services
201 Burlington Road
Bedford, MA 01730-1406
FILM INFORMATION NOTICE
INITIATOR: SHARON KING
NOTICE #:
015131
REVIEW:
B. SCHRANDT
DATE:
JANUARY 11, 1995
SUBJECT:
YELLOW STAINING ON THE MASK PRODUCT:
T-600 / SPECTRA
SENSITIVE MATERIAL - LIMITED DISTRIBUTION
X
X
X
X
Internal Polaroid
U.S. Service Centers
International Film Mfg.
International Subsidiaries
Pack
4X5
Large Format
X Integral
35mm
All
PROBLEM:
Discoloration of the mask ( a yellowish stain) may appear in T-600 and Spectra film
if the frames are stacked in a pile soon after processing and are then stored this way
for a period of time. The staining is caused by the reagent diffusing through the paper
pod tape on the backside of the frame.
SOLUTION:
Film manufacturing is currently developing a pod tape with barrier characteristics which
prevent the reagent from diffusing through the tape. It is expected that this pod redesign
will be incorporated in film starting in the second quarter of 1995.
If you have any questions, call:
Shari King at 617.386.0184 (PTN 226-0184)
Ed Dacey at 617.386.5490 (PTN 226-5490)
or,
Polaroid Corporation
Customer Support Service
201 Burlington Road
Bedford, MA 01730-1406
FILM INFORMATION NOTICE
INITIATOR:
E. DACEY / R. DEFERRARI
REVIEW:
SUBJECT:
NEW VENDOR FOR 35MM FILM
NOTICE #
035132
DATE:
MARCH 30, 1995
PRODUCT:
35mm ONE FILM
SENSITIVE MATERIAL - LIMITED DISTRIBUTION
X
X
X
X
Internal Polaroid
U.S. Service Centers
International Film Mfg.
International Subsidiaries
Pack
4X5
Large Format
Integral
X 35mm
All
Introduction & Marketing Stategy
Beginning in the second quarter of 1995, Polaroid will begin to sell 35mm OneFilm manufactured by Agfa in Germany. This new Onefilm will be designated as OF1 and is suitable for
most consumer snapshots and family picture users.
Onefilm OF1 incorporates a combination of technologies, including:
a) new interlayers to prevent dye migration
b) stabilizers to assure fresh film results even with prolonged shelf or camera storage
c) better bleachability for good results when processing the negative
d) computerized manufacturing technology for consistently high quality
As a result, OneFilm OF1 has greater exposure latitude than the previous OneFilm and is less
grainy.
-over-
Packaging
The package graphics will be similar to our current OneFilm product with two exceptions;
"ISO 200" speed will be printed on the sides of the box, and “Made in Germany” on the back
panel. OF1 will be sold in 110 and 35 mm formats, in rolls of 24 or 36 exposures.
Technical Information
Granularity:
Fine grain / diffuse RMS granularity = 5.0
Exposure:
Color balanced at 5500 K at ISO 200
Exposure Latitude:
+3 to -2 stops
Reciprocity:
no correction from 1/10,000 to 1/2 second
+1 stop for 1 second
+2 stops for 10 seconds
+3 stops for 100 seconds
Performance Curves: Refer to Technical Specialists
Film Identification
Packaging:
(see paragraph above)
Cassette:
Black plastic container (versus gray of previous)
White metal container with OF xx Exps ISO 200 (versus blue of previous)
Negative:
Developed negative will have legend Polaroid OF1 200
Developing
OF1 uses C-41 or equivalent processing chemistry. The DX channel for OF1 is 49-5 or, its
close cousin, 17-6. Printer control strips can be ordered from normal suppliers or from Polaroid
Material Services Department in Bedford, MA.
Polaroid Corporation
Customer Support Services
201 Burlington Road
Bedford, MA 01730-1406
FILM INFORMATION NOTICE
INITIATOR:
DATE: November 20, 1995
REVIEW:
SUBJECT:
105133
NOTICE #:
Edward J. Dacey
Integral Film Low Smear Reagent
PRODUCT:
T-600HD/ Spectra,Image/
T990/ Grid Film/ Captiva,
Vision, JoyCam
SENSITIVE MATERIAL - LIMITED DISTRIBUTION
X
X
X
X
Internal Polaroid
U.S. Service Centers
International Film Mfg.
International Subsidiaries
X
Pack
4X5
Large Format
Integral
35mm
All
Ref Lotus Notes: 950919130350EJ
Starting in August, 1995, all hybrid IV products (T-600 HD; Spectra/Image/T-990/Grid Film: Captiva/
JoyCam/Vision) have been manufactured with a low smear reagent. This reagent significantly reduces the
appearance of pod smear (streaks) in light color backgrounds or scenes.
There is no change to the frame code, but all of the above products with 085 as the first three characters of
the code are the new low smear product. The pack expiration date has been changed from Aug*96 to Aug/96
- the slash representing the inclusion of low smear reagent.
POLAROID CORPORATION
Customer Support Services
201 Burlington Road
Bedford, MA 01730
GLOBAL TECHNICAL
SERVICES
PRODUCT ALERT
Int'l
EXP
SUB
P.A. NO.
SPEC 94-14
SPECIAL
DATE:
JANUARY 14, 1994
TECH. SERVICES:
MAT'L SERVICES:
QUAL. CONTROL:
OPERATIONS:
TO:
LIST
FROM:
E. DACEY
SUBJECT:
RE-LAUNCH OF SPECTRA/IMAGE CAMERAS
INTRODUCTION:
Polaroid Marketing is re-launching the Spectra and Image family of cameras. These cameras
include:
Image-A/Image-2
Spectra-A/Spectra-2
All four models are sold in International Markets while the America's Market is limited to the
Spectra-A and Spectra-2 models
INTERNATIONAL MARKET: (see Figure 1)
All four Image and Spectra camera models for International Markets are black with:
gold color mid-cover graphics,
gold hot-stamped erect and door latch buttons,
new front decorative plates which have gold and red printing
on a glossy black background.
Image-2 and Spectra-2 models use the same cover assembly as the Image-A with a black button
bezel and black insert on a black top cover.
Small quantities of Image-2 and Image-A models are currently selling in Denmark with a target
of 4th quarter, 1993 for the rest of Europe.
THIS BULLETIN SHOULD BE FILED IN THE SERVICE MANUAL OF THE PRODUCT TO WHICH IT REFERS.
AMERICAS MARKET:
The Spectra-A will have new front and rear decorative plate graphics with the logo removed
from the mid-cover and the hot stamp removed from the erect button. Graphics may be later
added to the gear cover to indicate the film door latch.
The Spectra-2 model will be painted the same grey as current OneStep and ProCam models and
will have new front and rear decorative plate graphics. The gripper will be a grey molded plastic
and the erect button will be black.
Spectra-A and Spectra-2 camera models will be re-launched in the Americas during the 1st
quarter of 1994.
REPAIR POLICY:
Any re-launched Spectra or Image camera returned for repair must have unique piece parts
(covers, panels, or buttons, etc.) replaced with similar parts. Do not use parts from earlier
models in place of damaged re-launch camera parts.
PARTS AVAILABILITY:
The unique piece parts for re-launched Spectra and Image cameras will be available from the
Material Sevices in Cambridge, Massachusetts in the first quarter of 1994. Please order from
normal sources.
Material Services will not make a final buy on existing decals, buttons, covers, etc. As older
parts run out, they will be replaced with the current updated parts.
The Materials Matrices on the following page show all the unique parts for the new models.
FRONT
BACK
FIGURE 1 NEW IMAGE / IMAGE2 MODELS
(SPECTRA MODELS NOT AVAILABLE FOR PHOTO)
POLAROID CORPORATION
Consumer Services Division
784 Memorial Drive
Cambridge, MA 02139
TECHNICAL SERVICES
DEPARTMENT
PRODUCT ALERT
Int’l
EXP
SUB
P.A. NO. Spec. #94-15
SPECIAL
DATE:
February 3, 1994
TECH. SERVICES:
MAT’L SERVICES:
QUAL. CONTROL:
OPERATIONS:
TO:
LIST
FROM:
ED DACEY
SUBJECT:
NEW GOLD FLASH SHIELDS
BACKGROUND
During the first quarter of 1994, all manufacturing facilities will phase-in the use of a new gold-colored
flash shield in place of the current peach-colored shield. This change will be made in all 600 line/Sun
hard body cameras, Impulse Fixed Focus and Auto Focus cameras, and Spectra/Image cameras being
manufactured. Studies of the value of replacing the shield on folding 680 cameras are still underway.
Over the past several years, various improvements in photographic emulsions (i.e. Star to Hybrid to
Hybrid IV) have resulted in a color offset between indoor and outdoor pictures that is now considered to
be unacceptable. The use of the new gold-colored flash shield will yield color performance improvements of 40% (measuring color performance of flash pictures versus ambient pictures). It is expected
that this change will be perceived by our customers as an improvement which will lead to increased film
sales.
REPAIR POLICY
It is recommended that repair facilities replace the peach flash shield with the gold flash shield on any
of the above-listed cameras received for any repair. Follow the instructions in the applicable Service
Manuals for guidance in replacing the shields.
Inventories of flash assemblies with the peach flash shield should be reworked to the gold shield. discard all peach flash shields.
THIS BULLETIN SHOULD BE FILED IN THE SERVICE MANUAL OF THE PRODUCT TO WHICH IT REFERS.
PARTS AVAILABLITY
Gold-colored flash shields will be available after February 20, 1994. Order them under the following
part numbers:
CAMERA
600 Line/Sun Hard Body
Impulse Fixed Focus,
Impulse Auto Focus
and
Spectra/ Image
Please order from normal sources.
GOLD FLASH SHIELD P/N
550167E
791611C
POLAROID CORPORATION
Consumer Services Division
784 Memorial Drive
Cambridge, MA 02139
TECHNICAL SERVICES
DEPARTMENT
NEW PRODUCT INFORMATION
Int'l
EXP
SUB
NPI NO.
SPEC #94-16
SPECIAL
DATE:
JUNE 15, 1994
TECH. SERVICES:
MAT'L SERVICES:
QUAL. CONTROL:
OPERATIONS:
TO:
LIST
FROM:
ED DACEY
SUBJECT:
INTRODUCTION OF "LIGHT LOCK" CLOSEUP UNIT
DESCRIPTION
Polaroid will soon market a closeup lens unit, called “Light Lock”. (see Figure 1) "Light Lock" is
designed to snap onto the front of all Image and Spectra cameras (except for ProCam) when a closeup
exposure is desired. It emits two light beams, which when crossed, indicate that the proper focus
distance of 10 inches (25.4 cm) has been achieved. Simply placing the subject at the light beam crossing point assures proper exposures for closeup images. Once "Light Lock" is activated, the aiming
lights will stay on for 15 seconds before shutting off. The unit uses two AA replaceable alkaline batteries that will be included. To take exposures at normal distances, "Light Lock" can easily be removed
from the camera.
An illustrated instruction decal is adhered to the top of the unit. The decal shows how to install "Light
Lock" on the camera, how to turn the unit on, how to achieve proper focusing distance, and how to
remove the unit.
For those scenes which may cause the aiming light beams to be invisible or very difficult to see, "Light
Lock" will also be equipped with a draw string measuring tape.
"Light Lock" is manufactured for Polaroid by an external vendor. A manufacturing date code is located inside the battery compartment. Units with simple instructions will be packaged in a B Flute box
identified with the product name on the outside.
THIS BULLETIN SHOULD BE FILED IN THE SERVICE MANUAL OF THE PRODUCT TO WHICH IT REFERS.
BATTERY
COMPARTMENT
BACK VIEW
INSTRUCTION
DECAL
MEASURING
TAPE
FRONT VIEW
FIGURE 1 "LIGHT LOCK CLOSEUP UNIT
MARKETING STRATEGY
"Light Lock", targeted for April, 1994 distribution, will initially be sold as part of Law Enforcement II
and Heath II kits in the U.S. markets. Additionally, it will be sold in the U.S. as a separate accessory.
The list price for the "Light Lock" accessory is $49.95. The PID number for a “Light Lock” unit is
#618929.
Business Marketing is now considering a trade-in program for owners of the manual unit. The trade-in
program will be handled by an outside house and at a price to be determined by Marketing.
International Marketing groups are reviewing the "Light Lock" concept to determine if their markets
would like to carry the unit.
Current manufacturing plans are to fabricate 10,000 units per year for all markets.
2
REPAIR/ SERVICE STRATEGY
"Light Lock" is warranted for 1 year except for the replaceable batteries. Units under warranty that are
determined to be defective (excluding battery failures) will be replaced with a new unit. Customers will
be asked to return all defective units for the purpose of failure analysis by the design team. Replacement units can be ordered from:
Polaroid Customer Service Support
Material Services Department
748 Memorial Drive
Cambridge, MA 02139.
1)
Early Returns
The first 25 defective units that are returned should be replaced and the defective unit forwarded (with a
completed Incident Awareness Form - sample attached) to:
Polaroid Corporation
Attn: Bob McCune/Joe Dow
Nor 4-1 - Norwood Manufacturing Center
Upland Road
Norwood, MA 02062
Fax a copy of the completed Incident Awareness Form to Ed Dacey in Cambridge at (617) 577-4892.
Incident Awareness Forms are available from Ed Dacey or Russ Battle at 784 Memorial Drive, Cambridge, MA 02139 phone (617) 577- 2959 or 577- 2921.
2)
Normal Returns
Beyond the warranty period replacements for defective units can be purchased from CSS Material
Services Department for $39.95. All defective units must be sent to Polaroid Customer Support Services - Material Services Dept., 784 Memorial Drive, Cambridge, MA 02139.
TRAINING
A “Light Lock” unit will be sent to each Polaroid Customer Service location in the Americas, Europe,
and the Far East. Customer service personnel should use the unit by following the instruction book and
by observing the picture decal on top of the unit. "Light Lock" is used in a manner similar to the current manual draw string closeup lens attachment unit, so there should be no need for any additional
formal training.
3
POLAROID CORPORATION
Customer Support Services
201 Burlington Road
Bedford, MA 01730
TECHNICAL SERVICES
DEPARTMENT
NEW PRODUCT INFORMATION
Int'l
TO:
LIST
FROM:
EDWARD J. DACEY
EXP
SUB
P.A. NO. SPEC #94-17
SPECIAL
DATE: NOVEMBER 21, 1994
TECH. SERVICES:
MAT'L SERVICES:
QUAL. CONTROL:
OPERATIONS:
SUBJECT: RESTYLING OF SPECTRA AND IMAGE CAMERAS
BACKGROUND
To rejuvenate Spectra/Image Camera
sales and increase Spectra/Image
film sales, a restyled family of
Spectra/Image Cameras will be
introduced (see Fig. 1).
All new external parts give the
restyled cameras a rounded, fresh
look. A unified handle/viewfinder
affords a sleek, wraparound appearance.
Rounded, slightly raised S1 buttons
are color-coded by model: red for SE,
blue for A, yellow for 2.
The restyled cameras will have the same
optics and one-board electronics as
present Spectra/Image cameras; there
are no internal changes.
The restyled cameras will be introduced
in the U.S. in Oct. 1994; in N.P.P.K. in
November 1994; in Europe in May 1995;
Fig. 1 Restyled Spectra/Image Camera
and the rest of the world in June 1995.
Currently, the restyling program
includes the Spectra A, Spectra SE/
Image Elite and Spectra 2/Image 2.
THIS BULLETIN SHOULD BE FILED IN THE SERVICE MANUAL OF THE PRODUCT TO WHICH IT REFERS.
LAUNCH PROMOTION
Introduction of the restyled cameras will be supported by regional promotions and publicity, as well as dealer co-op and POS materials.
WARRANTY (U.S. MARKET)
For the U.S. market, each camera line will carry the following warranty:
SE/Elite
A
2
-
Lifetime
Five years
One year
For markets other than the U.S., please consult the marketing managers or
the Restyled Camera Operations Manual.
CUSTOMER SERVICE
Spectra cameras with a 12-digit code with serial number beginning with
K4 (October 1994) and ending with either F (for Spectra SE/Image Elite),
E (for Spectra/Image A), or D (for Spectra/Image 2) are restyled cameras.
(Example: K4BxxxxxVHBE)
In addition to the various Warranty periods listed above, the camera lines
will also feature:
SE/Elite
Glass coated lens, perfect picture guarantee program(U.S.)
Image Elite
(NPPK only)
A and 2
Standard Warranty
No early returns program will be needed, but customer data will be reviewed
to identify any issue related to the restyled components.
PID NUMBERS
Spectra (US)
SE/Elite
A
2
610002R
610000S
615203R
Image (NPKK)
691364
TBD
TBD
Image
TBD
TBD
TBD
CAMERA REPAIR
CI&L Parts will order a two-year supply of current-design externals. A
separate Product Alert will be issued defining interchangeability of new
and old parts, and part numbers of the new external parts.
POLAROID CORPORATION
Consumer Services Division
784 Memorial Drive
Cambridge, MA 02139
TECHNICAL SERVICES
DEPARTMENT
PRODUCT ALERT
Int'l
EXP
SUB
P.A. NO. SPEC # 95-18
SPECIAL
DATE:
MARCH 21, 1995
TECH. SERVICES:
MAT'L SERVICES:
QUAL. CONTROL:
OPERATIONS:
TO:
LIST
FROM:
ED DACEY
SUBJECT:
MISMATCH OF SPECTRA/IMAGE FRONT DOOR AND BOTTOM COVER
BACKGROUND:
To replenish repair inventories, a quantity of front doors for older style Spectra/Image models was made
by Camera Manufacturing. However, these doors have a new draft angle on the trailing edge (the part
that pivots against the bottom cover when the door is opened). This new angle was initiated as part of the
restyling program for the Spectra/Image family and was carried forward when the old style doors were
made. When a front door with the new draft angle is installed on a camera with an old bottom cover, an
unacceptable mismatch occurs. (see illustration) To resolve this problem follow the procedure below.
MISMATCH
EXAGGERATED
FOR CLARITY
DRAFT
ANGLE
PROCEDURE:
1.
If you must replace an old style door with door #776086K (which has the new draft angle), you
must also replace the bottom cover with bottom cover #776083F.
2.
Salvage all reuseable old style doors and bottom covers. Use the salvaged parts if you must
replace an old style door or old style bottom cover.
3.
If a door defect centers around the roller system, try to replace only the roller system, rather
than the entire front door assembly.
THIS BULLETIN SHOULD BE FILED IN THE SERVICE MANUAL OF THE PRODUCT TO WHICH IT REFERS.
POLAROID CORPORATION
Camera Products Services
201 Burlington Road
Bedford, MA 01730
TECHNICAL SERVICES
DEPARTMENT
REPAIR INFORMATION
Int'l
EXP
SUB
P.A. NO.
SPEC # 95-19
SPECIAL
DATE:
AUGUST 14, 1995
TECH. SERVICES:
MAT'L SERVICES:
QUAL. CONTROL:
OPERATIONS:
TO:
LIST
FROM:
ED DACEY
SUBJECT:
SPECTRA/IMAGE DOOR LATCH BUTTONS MADE FROM MOLDS A, B, C, & D
BACKGROUND:
From September of 1993 to May of 1995 all Spectra/Image cameras made at the Vale of Leven were assembled with door
latch buttons made from molds marked A, B, C, or D. The piece parts made from these molds are not correct and have a
tendency to either make the door difficult to close or make the button too easy to remove from the camera.
Molds marked #5 through #8 are made to original specifications and piece parts from these molds do not cause either of the
noted problems. See the illustration below for a comparison of the piece parts.
PARTS INVENTORY:
Examine your parts inventory to determine if the door latch buttons you have on-hand are from molds A, B, C, or D. If they
are, discard them and reorder door latch buttons #770689G from Material Services in Bedford, Massachusetts. They will
provide known good door latch buttons. (Please order from normal sources.)
REPAIR:
If you receive a Spectra/Image camera which was manufactured in the Vale of Leven between September 1993 and May
1995 and which has been returned because it will not close or because the button has come off, remove the door latch button
and check the mold identification. If the button is marked A, B, C, or D, replace it with one marked mold 5, 6, 7, or 8.
Door latch buttons with mold marks A, B, C, or D on cameras made June 1995 or later, are OK.
Good Door
Latch Button
Bad Door
Latch Button
CAV C
CAV 8
Short hook on door
latch button does not
fully engage door latch
Door
Latch
Large hook on
door latch button fully
engages door latch
Door
Latch
THIS BULLETIN SHOULD BE FILED IN THE SERVICE MANUAL OF THE PRODUCT TO WHICH IT REFERS.
POLAROID CORPORATION
Consumer Services Division
784 Memorial Drive
Cambridge, MA 02139
TECHNICAL SERVICES
DEPARTMENT
PRODUCT ALERT
Int'l
EXP
SUB
P.A. NO.
SPECIAL
DATE:
600AM #94-43
February 7, 1994
TECH. SERVICES:
MAT'L SERVICES:
QUAL. CONTROL:
OPERATIONS:
TO:
LIST
FROM:
ED DACEY
SUBJECT:
NEW GOLD FLASH SHIELDS
BACKGROUND
During the first quarter of 1994, all manufacturing facilities will phase-in the use of a new goldcolored flash shield in place of the current peach-colored shield. This change will be made in all 600
line/Sun hard body cameras, Impulse Fixed Focus and Auto Focus cameras, and Spectra/Image cameras being manufactured. Studies of the value of replacing the shield on folding 680 cameras are still
underway.
Over the past several years, various improvements in photographic emulsions (i.e. Star to Hybrid to
Hybrid IV) have resulted in a color offset between indoor and outdoor pictures that is now considered
to be unacceptable. The use of the new gold-colored flash shield will yield color performance improvements of 40% (measuring color performance of flash pictures versus ambient pictures). It is
expected that this change will be perceived by our customers as an improvement which will lead to
increased film sales.
REPAIR POLICY
It is recommended that repair facilities replace the peach flash shield with the gold flash shield on any
of the above-listed cameras received for any repair. Follow the instructions in the applicable Service
Manuals for guidance in replacing the shields.
Inventories of flash assemblies with the peach flash shield should be reworked to the gold shield.
discard all peach flash shields.
-overTHIS BULLETIN SHOULD BE FILED IN THE SERVICE MANUAL OF THE PRODUCT TO WHICH IT REFERS.
PARTS AVAILABLITY
Gold-colored flash shields will be available after February 20, 1994. Order them under the following
part numbers:
CAMERA
GOLD FLASH SHIELD P/N
600 Line/Sun Hard Body
Impulse Fixed Focus,
Impulse Auto Focus
and
Spectra/ Image
550167E
>
Please order from normal sources.
791611C
POLAROID CORPORATION
Customer Services Support
201 Burlington Road
Bedford, MA 01730
TECHNICAL SERVICES
DEPARTMENT
NEW PRODUCT INFORMATION
Int'l
EXP
SUB
P.A. NO.
SPECIAL
DATE:
600AM #95-44
March 27, 1995
TECH. SERVICES:
MAT'L SERVICES:
QUAL. CONTROL:
OPERATIONS:
TO:
LIST
FROM:
FRANK BLESZINSKI
SUBJECT:
INTRODUCTION OF 636 AF (AUTOFOCUS) CAMERA
Introduction:
A new camera model, the 636 AF will be introduced in 1995 in the following markets :
Europe.............April 1995
Asia / Pacific....July 1995
U.S..................July 1995
Worldwide product volume is expected to be about 500 K cameras per year.
Product:
The 636 AF camera, an extension of the 636 camera line, is an autofocus integral camera intended for
general photography. The 636 AF camera uses a slightly modified version of the Impulse shutter and a
repackaged version of the Joshua electronics. It features Wink autofocus from 2 feet to infinity, a rapid
recharge strobe with a 10 ft. range and the shutter has a maximum aperture of f/12. The 636 AF uses
Type 600 film.
THIS BULLETIN SHOULD BE FILED IN THE SERVICE MANUAL OF THE PRODUCT TO WHICH IT REFERS.
Unique Parts:
Except for the parts listed below, the 636 AF camera uses a combination of parts from the 636 camera,
the Impulse shutter, and Joshua electronics.
- Electronic Flash Lower Housing Assembly............ 1A2965A
- Graphic Gripper U.S............................................. 1B2984C
- Graphic Gripper International................................ 1B2984D
- Trim Button Retainer ........................................... 550277C
- Trim Button ......................................................... 1A2942A
- Apron .................................................................. 1A2959A
- Front Plate ........................................................... 1A2957A
- Front Plate Panel Decal ........................................ 1A2958A
- Configuration Label ............................................. 778006J
- Apron Plug .......................................................... 1A2975A
- S-1 Button ........................................................... 1A2968A
- Cone .................................................................... 755991E
- Lens / Shutter Assembly ....................................... 1A2950A
- Exposure Flex Assembly ...................................... 1D5665A
- Baseblock ........................................................... 1A2943A
- Blade Assembly (set of 3) .................................... 1A2946A
- Lens Mounting Plate ............................................ 1A2945A
- Ambient Photometer Lens .................................... 1A2953A
- Photometer IR Lens ............................................. 1A2954A
- IR Pinwheel ......................................................... 1A2971A
- Ambient Pinwheel ................................................ 1A2970A
- Logic Board Assembly ......................................... 1D5668A
- LMP Encoder Cap ............................................... 1A2956A
- LMP Encoder Assembly ....................................... 1D5681A
- Shutter Latch ....................................................... 1A2981A
These unique parts will be available from Materials Services, Bedford Massachusetts after April 1995.
Each market should assess their needs and order parts from normal sources.
Repair Procedures:
Any 636 AF cameras returned for repair must have unique parts replaced with the unique parts listed
above. Any repairs should duplicate the ruggedizing features provided at original manufacture soldered connections, tape reinforcement, etc..
Warranty:
The 636 AF camera will have a one year warranty from date of sale.
Early Returns:
An Early Returns program will be in effect (only for reasons of functional performance) as follows:
the first 150 cameras returned from Enschede
the first 100 cameras returned from the United States
When a defective camera is received, it should be recorded on an Incident Awareness Form and copies of
the IAF should be faxed to:
1 -
Polaroid Corp. - Customer Support Services
Attn: Frank Bleszinski
201 Burlington Road / BED 1A-1
Bedford Massachusetts 02130-1406
FAX 617 386 5611
2 -
Polaroid (U.K.) Ltd.
Ken McElroy
Vale of Leven Industrial Estates
Dumbarton G82 3PW
Vale of Leven Industrial Estates
Scotland
FAX 011 44 389 5 5101
The camera and the IAF should then be shipped to Ken McElroy in the Vale as expeditiously as possible
for in-depth analysis. Any film samples which are available should also be forwarded with the camera.
Test Equipment:
The 636 AF camera will be tested on the B-600 or Star Testers for ambient and flash exposures, provided
that the IR level measures less than 390 @ 100cfs. This measurement should be made using a Polaroid
"IR/VIS Ratio Calibrator", Part # 12630, available from Material Services in Bedford, Massachusetts.
POLAROID CORPORATION
Customer Support Services
201 Burlington Road
Bedford, MA 01730
TECHNICAL SERVICES
DEPARTMENT
PRODUCT ALERT
Int'l
EXP
SUB
P.A. NO. 600AM #95-45
SPECIAL
DATE:
JULY 9, 1995
TECH. SERVICES:
MAT'L SERVICES:
QUAL. CONTROL:
OPERATIONS:
TO:
LIST
FROM:
KEVIN O'NEILL
SUBJECT:
PHOTOMETER LIGHT LEAK IN MODEL 635/636 CAMERAS
BACKGROUND:
Camera use testing of the Model 635 and 636 cameras has revealed an intermittent light leak problem which results
in black pictures. Engineering analysis found that the problem is caused by ambient light "piping" to the photometer from behind an erected strobe. When this happens, the photometer signals premature blade closure and a black
or very dark picture results.
SOLUTION:
To prevent this condition from occurring, a design change has been incorporated into Model 635/636 cameras
manufactured since the second quarter of 1995 .
All Model 635/636 cameras returned for repair should be checked to determine date of manufacture. If they were
made before the second quarter of 1995, a piece of black foam tape should be adhered to the right side of the
molded mirror light seal. (See Figure 1)
1/8" THICK
BLACK FOAM TAPE
1/4" LONG X 5/8" WIDE
MOLDED MIRROR LIGHT SEAL
AS VIEWED FROM THE FRONT
FOAM TAPE LINED
UP WITH BOTTOM
EDGE OF LEG
FIGURE 1 TAPING THE MOLDED MIRROR LIGHT SEAL TO PREVENT LIGHT LEAKS
THIS BULLETIN SHOULD BE FILED IN THE SERVICE MANUAL OF THE PRODUCT TO WHICH IT REFERS.
POLAROID CORPORATION
Consumer Services Division
784 Memorial Drive
Cambridge, MA 02139
TECHNICAL SERVICES
DEPARTMENT
PRODUCT ALERT
Int'l
EXP
SUB
P.A. NO.
SPECIAL
DATE:
PROCAM #94-3
FEBRUARY 11, 1994
TECH. SERVICES:
MAT'L SERVICES:
QUAL. CONTROL:
OPERATIONS:
TO:
PROCAM REPAIR PERSONNEL
FROM:
FRANK BLESZINSKI
SUBJECT:
PROCAM BLACK BAR
INSTALLING NEW BELLOWS/CONE ASSEMBLY & CHECKING ERECT SWITCH
ACTUATOR CLEARANCE PLUS VISIBILITY OF DATE IMPRINT
BACKGROUND
Some ProCam Cameras manufactured before September 1993 may not fully erect or may produce a
picture with a "Black Bar" across the bottom. These problems may be further aggravated when a
camera, loaded with film, is stored in a cool environment.
To address this problem, Camera Manufacturing has been using an improved Bellows/Cone Assembly
P/N 1A5790A (CPS) since September 1993. The new assembly has the following features:
- added booster spring
- added second erect spring
- improved bellows
- improved cone pivot points
ProCam Cameras not erecting properly or producing "Black Bar" pictures should be sent to the appropriate Polaroid repair facility for installation of the improved Bellows/Cone Assembly.
REPAIR POLICY
All ProCam Cameras received for repair with the failure mode described above should have the improved Bellows/Cone Assembly installed.
Additionally, check for the proper clearance dimension of the door/erect switch and for the full visibility
of the date imprint on the picture.
-overTHIS BULLETIN SHOULD BE FILED IN THE SERVICE MANUAL OF THE PRODUCT TO WHICH IT REFERS.
INSPECTION/REPAIR PROCEDURE
1.
Determine if the date imprint is fully visible by taking a picture. If the imprint is not fully
visible on the picture, replace the Date Module Assembly 1B6725A before reassembling the
camera as instructed below.
2.
Examine the clearance dimension of the Door Latch/Erect Switch as follows:
a.
Erect the camera, open the film door, and insert an empty film pack.
b.
As shown in Figure 1, position a Door/Erect Switch Actuator Gage or a piece of 0.120"
(3mm) shim stock measuring about 1" x 2" (25mm X 50mm) on the lower edge of the
mid-cover and close the door. The camera should dark slide. (The gage or shim stock
indicates that the Door Latch/Erect Switch has a minimum 0.050" (1.3mm) safety margin
until the door bottoms out.)
c.
If the camera does not dark slide, replace the Door Latch/Erect Assembly 1B6649A.
Figure 1 Checking Erect Switch Clearance Using Actuator Gage or 0.0120" Shim Stock
3.
Replace the old Bellows/Cone Assembly with the new improved design Bellows/Cone Assembly
PN 1A5790A (CPS). For removal instructions, see Section 3, pages 3-31 and 3-32 of the ProCam Service Manual.
When installing the new Assembly particularly note the several alignment points between the
Assembly and the Mainframe as shown below.
Figure 2 Replacing the Bellows/Cone Assembly
4.
3.1
Compress the erecting hinge mechanism and hold the Bellows/Cone Assembly in the
collapsed position as shown.
3.2
Holding the Assembly at an angle as shown, insert it into the Mainframe.
3.3
Metal edge "A" slips under lip "B" on the Gear Drive. Keep the wires from being caught
under "A" or "B" - - route them as shown.
3.4
Seat end "C" of the hinge pin in its recess and then tabs "D" and "E" into their respective
slots. Replace the screw holding "C".
3.5
Complete the installation by seating the Assembly on the Mainframe locating pins and
engaging the Assembly legs on the Mainframe bosses ("F" and "G").
Reassemble the camera and check for proper operation and picture quality.
PARTS AVAILABILITY
Initial supplies of the new Bellows/Cone Assembly 1A5790A (CPS) will be shipped to NPKK,
Enschede, and Atlanta. Additional quantities of the new Bellows/Cone Assembly as well as the Date
Module Assembly 1B6725A, the Door Latch/Erect Assembly 1B6649A, and the ProCam Door/Erect
Actuator Gage are now available from Material Services in Cambridge, Massachusetts.
POLAROID CORPORATION
Customer Support Services
201 Burlington Road
Bedford, MA 01730
GLOBAL TECHNICAL
SERVICES
PRODUCT ALERT
Int'l
EXP
SUB
P.A. NO. PROCAM #94-4
SPECIAL
DATE:
MAY 31, 1994
TECH. SERVICES:
MAT'L SERVICES:
QUAL. CONTROL:
OPERATIONS:
TO:
LIST
FROM:
FRANK BLESZINSKI
SUBJECT:
PROCAM DATE PRINT BACKGROUND MASK
PROBLEM
When scene brightness causes the top left corner of a ProCam picture
to be very light, the numbers of the date print can be difficult or
impossible to read. This can happen in outdoor pictures, for example,
in which bright sky or bright objects occupy the date print area of
the picture.
SOLUTION
A Date Module Mask (P/N 1B6748) has
been developed which creates a
black rectangular background area
1.5 x 0.5 cm behind the white date
numerals, in the upper left corner
of the print (see Fig. 1). This
new Mask produces the black background in every picture, even if
the Date Display is turned OFF.
A Mask Installation Tool (P/N
B13605) has also been developed
for installing the Mask.
Fig. 1
Black background date print after
installing Date Module Mask
THIS BULLETIN SHOULD BE FILED IN THE SERVICE MANUAL OF THE PRODUCT TO WHICH IT REFERS.
ProCam Date Print Background Mask, cont’d.
- 2 -
REPAIR POLICY
This modification should be done only on customer request. Be sure the
customer understands that the black background will appear in every picture, even if the date display is turned OFF.
MASK INSTALLATION PROCEDURE
(see Fig. 2)
1. Insert the Mask into the
Installation Tool as shown
in Inset “A” of Fig. 2, with
the straight and angled edges
of the Mask flush with the
edges of the Tool jaw.
CAUTION: Handle Mask edges
carefully: they create the
imaging edges in photo.
2. Latch the Tool arms to hold
the Mask in place.
3. Open the Film Door and
illuminate Date Module
Tunnel with a work light.
4. Insert the Installation Tool
with Mask into the film slot
area, locating the angled
side of the Mask toward the
centerline of the Camera.
5. Locate the two tabs on the
Mask above the DCM Mirror and
below the top of the Tunnel
Housing (Inset “B” of Fig. 2)
6. Press the Mask into the
Tunnel until the two tabs
click into place.
7. Unlatch the Tool arms and
remove it from the Camera.
8. Inspect the Mask for proper
fit and take test photo.
Fig. 2
Installing the Date Module Mask
in a ProCam Camera
PARTS AVAILABILITY
Date Module Mask P/N 1B6748 and Mask Installation Tool P/N B13605 are now
available from Material Services, Cambridge, MA. Order through normal
sources.
POLAROID CORPORATION
Consumer Services Division
784 Memorial Drive
Cambridge, MA 02139
TECHNICAL SERVICES
DEPARTMENT
PRODUCT ALERT
Int'l
EXP
SUB
P.A. NO.
SPECIAL
DATE:
PROCAM #94-5
JUNE 29, 1994
TECH. SERVICES:
MAT'L SERVICES:
QUAL. CONTROL:
OPERATIONS:
TO:
LIST
FROM:
FRANK BLESZINSKI
SUBJECT:
PROCAM EXPOSURE SPECIFICATION VALUES
The Testing & Adjustments section of the ProCam Service Manual dated July 1993 contains a series of
exposure tests for the camera. At the time the manual was written, the specification values for the camera had not been finalized. The purpose of this bulletin is to provide you with the testing specifcations. It
is suggested that you file this bulletin in the ProCam manual and tape a copy next to the tester.
PROCAM EXPOSURE TESTING SPECIFICATIONS
Service Manual
Page Number
Test
2-10
Ambient Exposure
-.15 to +.35 stops
2-12
Strobe Exposure
-.35 to +.15 stops
2-13
ZLS Graywall
315 ZLS to 395 ZLS
2-14
Hybrid
1.50 to 2.25
2-15
Blade Speed
25 ms to 30 ms
Specification
THIS BULLETIN SHOULD BE FILED IN THE SERVICE MANUAL OF THE PRODUCT TO WHICH IT REFERS.
POLAROID CORPORATION
Customer Support Services
201 Burlington Road
Bedford, MA 01730
TECHNICAL SERVICES
DEPARTMENT
PRODUCT ALERT
Int'l
EXP
SUB
P.A. NO. ProCam #95-6
SPECIAL
DATE:
April 19, 1995
TECH. SERVICES:
MAT'L SERVICES:
QUAL. CONTROL:
OPERATIONS:
TO:
LIST
FROM:
FRANK BLESZINSKI
SUBJECT:
PRO CAM CLOSE UP LENS REPLACEMENTS
BACKGROUND:
Some ProCam customers have made requests for replacement Close-Up Lenses, citing such reasons as
lost, broken, or defective lens, or a lens not being packaged with the camera.
POLICY:
The plan for resolving these requests is to have the local Customer Service Representative provide the
lens for the customer. Non-U.S. Customer Service Reps can order a supply of these lenses from
Enschede, using part number 1B6677A. The question of whether or not to charge for lens replacements has been left to the determination of local Marketing Managers. They may choose to either absorb
the cost or establish a local pricing structure.
ORDERING INFORMATION:
In U.S. markets, Close Up Lenses may be ordered through CPS Material Services, located at 201
Burlington Road in Bedford, Massachusetts. Outside the U.S., order through:
IDSC, Enschede, The Netherlands
Attn: J. Estevez or K. v.d. Veen.
FAX number - 31 53 82 1662
Phone numbers are 31 53 82 1334 or 31 53 82 1303.
Order as follows:
Part Description:
Part Number:
Unit Price:
ProCam Close Up Lens
1B6677A
$ 9.66 (U.S. Dollars)
THIS BULLETIN SHOULD BE FILED IN THE SERVICE MANUAL OF THE PRODUCT TO WHICH IT REFERS.
POLAROID CORPORATION
Customer Support Services
201 Burlington Road
Bedford, MA 01730
TECHNICAL SERVICES
DEPARTMENT
NEW PRODUCT INFORMATION
Int'l
EXP
SUB
P.A. NO. 35mm #94-4
SPECIAL
DATE: April 14, 1994
TECH. SERVICES:
MAT'L SERVICES:
QUAL. CONTROL:
OPERATIONS:
TO:
LIST
FROM:
FRANK BLESZINSKI
SUBJECT:
INTRODUCTION OF TWO NEW POLAROID 35MM CAMERAS
(FOCUS FREE AND AUTOFOCUS DATE BACK MODELS)
Background
Polaroid has been marketing two low cost 35mm cameras in the U.S. under the names “Polaroid
One Film Camera - Autofocus” and “Polaroid One Film Camera - Fixed Focus”. These models
will be discontinued. To fill their place in the product family, a new line identified as the 1240
series, is being introduced. The 1240 line consists of two new compact 35mm cameras - an
autofocus model with a date imprint feature and a focus free (fixed focus) autoflash model. These
cameras have been designed and manufactured for Polaroid with an exclusive Polaroid body
design. Introduction of the new cameras is planned for May of 1994 in the Americas, Australia,
Scandinavia, and European Export markets. Other European introductions will coincide with the
September 1994 Photokina Exposition. It is expected that the cameras will be introduced in a
variety of kits which may include Polaroid 35mm color print film, AAA alkaline batteries, a
pouch, a camera strap, an instruction booklet and the camera. Additional information can be
obtained from the Polaroid 1240 Series Customer Service Information Manual.
|
THIS BULLETIN SHOULD BE FILED IN THE SERVICE MANUAL OF THE PRODUCT TO WHICH IT REFERS.
Product Description
The Polaroid 35mm, low cost 1240 series cameras are easy-to-use, point and shoot (fixed focus
and auto focus) models. They have features such as built-in electronic flash, a fill flash button,
built-in automatic red eye reduction, easy film loading, automatic advancing, and powered rewinding. Although we recommend the use of Polaroid Color Print films In 12, 24 or 36 exposure
rolls, the cameras can accommodate ISO 100, ISO 200 and ISO 400 speed color print film of all
35mm brands. We do not recommend using 35mm slide films with these cameras.
Each model camera uses two 1.5 volt AAA alkaline batteries to power the automatic functions
and the electronic flash. The cameras can also accommodate the use of a single DL123A 3 Volt
Lithium battery or CR123A 3 Volt Lithium battery or equivalents.
A film identification window on the film door indicates the type of film loaded in the camera and
the number of exposures in the roll. Also, a film counter window located on the top of the camera, indicates the number of pictures taken (1 - 36). During rewind, the counter counts backwards
and “S” (Start) will appear after the film has been fully rewound. Whenever the camera door is
opened, the counter resets to ‘S” (start).
For ambient exposures, the focus distance for both camera models is 4' to infinity. For flash
exposures, the range for both models is as follows:
4' (1.2m) to 10' (3.0m) using ISO 100 film.
4' (1.2m) to 12' (3.7m) using ISO 200 film.
4' (1.2m) to 14' (4.3m) using ISO 400 film.
The flash is automatic in both models and is turned on/off automatically by a sensor. On both
models a red LED is on during charging to indicate Do Not Fire. Strobe charge is insufficient
during this time and if an exposure is attempted, underexposed pictures may result. A green ready
LED lights when the flash is charged, indicating OK to Fire.
The lens system for both cameras has two plastic elements and a coated glass front element. The
system has a normal focal length of 34mm and an aperture of f/5.6 for both ambient and flash
modes.
Serial Number
The serial number is located inside the camera door (see illustration below).
The first letter of the code identifies the assembly line which manufactured the camera. The next
two digits indicate the month of manufacture. The fourth digit identifies the year of manufacture.
Additional code letters or numbers will be used to identify significant changes in camera design,
tooling or assembly.
EXAMPLE: 3-074-D
3 indicates the camera was manufactured on assembly line #3
07 indicates the camera was manufactured during the month of July
4 indicates the camera was manufactured during 1 994
D indicates the version of the camera (supplier internal code)
Serial
Number
Warranty
Polaroid offers a one year warranty on the cameras. Replacement cameras for dealer/customer
returns will be provided by the manufacturer. Polaroid will send exchange units from inventory to
its direct customers or wait issue dealer credit. Polaroid is responsible for maintaining inventories.
Defective customer and dealer-returned cameras to Enschede will be transferred to Atlanta for
return to the manufacturer. Polaroid will not repair defective cameras.
In most cases, a customer will return a defective camera to the dealer. The dealer in turn, will
either refund or replace the camera. These defective cameras will be returned to Polaroid through
the dealer return policy in place and the dealer will receive credit from Polaroid. Polaroid Atlanta
will accumulate all defective cameras for eventual shipment to the manufacturer. The manufacturer will provide new replacements to Polaroid.
Early Returns
The intent of the Early Returns Program is to insure rapid communication of problems in the field
to appropriate Polaroid groups. This will result in expedient action being taken to solve problems
and to help determine the level of product quality being supplied to Polaroid.
An early returns program will be in effect in Enschede for the return of 50 customer cameras of
each model. An early returns program will also be in effect in Atlanta for the return of 100 customer or dealer cameras of each model.
Defective units will be analyzed by the Systems Quality and Reliability group for feedback to the
manufacturer.
Repair Procedures
Defective cameras returned to Polaroid by dealers or customers will not be repaired by Polaroid.
Polaroid will return defective cameras to the supplier for full replacement.
Out-of-warranty cameras will be handled by the designated Authorized Service Center
POLAROID CORPORATION
Customer Support Services
201 Burlington Road
Bedford, MA 01730
GLOBAL TECHNICAL
SERVICES
PRODUCT ALERT
Int'l
EXP
SUB
P.A. NO. JOSH #94-7
SPECIAL
DATE:
JANUARY 17. 1994
TECH. SERVICES:
MAT'L SERVICES:
QUAL. CONTROL:
OPERATIONS:
TO:
LIST
FROM:
RUSSELL D. BATTLE
SUBJECT:
JOSHUA TEOUBLESHOOTING GUIDE
The Joshua Troubleshooting Guide attached was prepared by Camera Manufacturing and I am indebted
to them for their time and effort represented.
Although the problems described in this Guide may not always be exactly the same as those seen by the
field in the finished product, the Guide nonetheless will help - as we analyze and repair Joshua products the types of failures/problems that can occur in specific areas.
The Guide covers the following topics, in two main areas:
A. Lower camera back Assembly
B. Final Camera Assembly
l.
2.
3.
4.
5.
6.
7.
8.
9.
10.
1. Viewfinder shadows
No darkslide - S1 Ok
No S1 cycle
No darkslide
Midcycle failure on darkslide
Counter won’t Index
Dirt in Viewfinder
TMC won ‘t lay flat
Green light always on
Black bar
Camera cycles with door open
THIS BULLETIN SHOULD BE FILED IN THE SERVICE MANUAL OF THE PRODUCT TO WHICH IT REFERS.
1. CHECK FOR MISSING FILM SHADE
2. CHECK DOOR STOP LINK N/S TO DOOR STOP
3. CHECK THREE WIRE SWITCH FOR DISTORTED
LOWER WIRE SLIGHT BEND
NO S1 CYCLE
1. CHECK ERECT SENSOR - BIAS SENSOR OVER WITH STICK
2. CHECK FOR BENT WIRE UNDER FLEX PLUG (S1B)
TRIM
S1B
EOP
DKEC
F I LM SPEED
S1-A
S1-B
FULL C. L .
NO DARK SLIDE
1. BATTERY CONTACTS N/S
2. PLATEN N/S
3 FLEX PLUG N/S
4 3 WIRE SWITCH N/S TO FLEX STREETS
5. DOOR LATCH SENSOR STICKY
6. POWER ACTUATOR SPRING MISSING
7. SPRING MISSING
8. POOR CONNECTIONTO SHUTTER FLEX
MIDCYCLE FAILURE ON DARK SLIDE
1. PRIMARY PICK DOES NOT RETURN FULLY IN MAIN FRAME SLOT
2. DOOR LATCH SENSOR STICKY TRIP LATCH AND CHECK FOR DOOR LATCH SENSOR MOVEMENT
3. FULL CHAMBER LINK SEATED UNDER OVERIDE SLIDER
4. FULL CHAMBER LINK WIRE N/S
5. BROKEN POWER ACTUATOR
6. BATTERY CONTACTS N/S
7. VER TO B+
8. DKEC SWITCH
9. DOOR LATCH SENSOR HITS FLEX - NOT GLUED TO M/F
10. FLEX STREETS MlSREGISTERED
COUNTER WON’T INDEX
1. CHECK FOR BENT COUNTER DETENT
DIRT IN VIEWFINDER
1. (LOOK THROUGH EYE LENS) C.C. MIRROR DIRT DIRT MOVES AS VMC MOVES FROM ERECT TO CLOSE
2. (LOOK THROUGH SHUTTER LENS) FRESNEL MIRROR DIRT WILL BE IN SHARP FOCUS, C.C. MIRROR DIRT OUT OF FOCUS
3. (LOOK THROUGH EYE LENS) FRESNEL DIRT/SCRATCH ALWAYS IN SHARP FOCUS
TMC WON’T LAY FLAT
1. CHECK FOR BAFFLE WIRE N/S THOUGH HOLE(S) IN BAFFLE
2. CHECK BAFFLE D ISTORTION
3. CHECK FOR BENT TAKING BAFFLE WIRES
4. CHECK FOR D I RT I N MA I N FRAME SLOT FOR TMC
5. CHECK FOR INNER VIEW FINDER EYE LENS CLIP N/S TO MAIN FRAME
6. CHECK FOR LONG P I N - SHORT P I N
7. CHECK FOR INNER VF EYE LENS PUSHED IN TOO FAR AT BOTTOM
8. "S” FEATURE OF BAFFLE HITS TAKING MIRROR
GREEN LIGHT ALWAYS ON
1. CHECK FILM SHADE HANG UP
BLACK BAR
1. TAKING BAFFLE WIRE NOT SEATED IN BAFFLE PROPERLY
2. DISTORTED PlVOTS ON VIEWING MIRROR CARRIER
3. BENT TAKING BAFFLE WIRE(S)
4. BENT BAFFLE
5. FLASHING ON MAINFRAME PIVOT AREA
6. INNER VIEW FINDER EYELENS CLIP NOT SEATED
7. REAR SEAL NOT SEATED ON V.M.C.
8. BELLOWS NOT SEATED PROPERLY IN REAR SEAL
9. RECOCK LINK BENT FORWARD
10. FLASH ON MAIN FRAME ABOVE TMC PIVOT
11. BROKEN MAIN FRAME POST BY RECOCK LINK HOOK
CAMERA CYCLES W/ DOOR OPEN
1. CHECK THAT VER AND B+ WIRES ARE SEATED PROPERLY INTO DOOR LATCH SENSOR AND ERECT SENSOR
2. CHECK THAT DOOR LATCH IS IN THE MIDDLE OF THE BOTTOM CHUTE SLOT WHEN THE DOOR IS OPEN
POLAROID CORPORATION
Customer Support Services
201 Burlington Road
Bedford, MA 01730
GLOBAL TECHNICAL
SERVICES
PRODUCT ALERT
Int'l
EXP
SUB
P.A. NO.
SPECIAL
DATE:
JOSH #94-8
FEB 2, 1994
TECH. SERVICES:
MAT'L SERVICES:
QUAL. CONTROL:
OPERATIONS:
TO:
LIST
FROM:
RUSSELL D. BATTLE
SUBJECT:
SERVICING JOSHUA CAMERA JAMS
BACKGROUND
Film jams are one of the leading reasons Joshua Cameras are being returned by customers. Generally, analysis of these returned Cameras reveals that midcycle has occurred.
POLICY
It is recommended that all Joshua Cameras have the new 5-Wire Detail Switch (P/N
1A2708A). If a Camera is returned for repair for any reason, then the 5Wire Detail Switch and Drive Cover shall be changed (if not already present) to the
latest configuration.
REDESIGNED 5-WIRE DETAIL SWITCH AND DRIVE COVER
In on-going, concentrated engineering efforts to significantly reduce the mid- cycle
problem, Camera Design has made several design changes in certain parts, and these
changes have been implemented in Cameras manufactured as early as April 1993.
The purpose of this Product Alert is to explain in which Joshua Cameras (by Serial
Number and Configuration) a redesigned 5-Wire Detail Switch and two versions of the
Drive Cover should be used during servicing. Table A later in this bulletin details
the correct application of these parts.
THIS BULLETIN SHOULD BE FILED IN THE SERVICE MANUAL OF THE PRODUCT TO WHICH IT REFERS.
Servicing Joshua Camera Jams, cont’d.
- 2 -
The 5-Wire Detail Switch, P/N 1A2708A, has been redesigned with larger ground plane
contact areas in the TRIM (Lighten/Darken) and DKEC (Darkslide/End of Cycle) Switches, to assure more positive switching (see Fig. 1).
Fig. 1
New 5-Wire Detail Switch P/N 1A2708A
The Drive Cover has been modified to correct both a Viewfinder problem and contact
bounce in the DKEC Switch, and is available in two different forms:
The Repair Drive Cover (P/N T22067SK01, see Fig. 2A) must be used when installing
the new 5-Wire Switch in Cameras with the Serial Numbers and Configuration Codes
shown in the first three lines of Table A. These Repair Covers are easily identified by a silver “X” marked on their upper side and two extended pins over the
Viewfinder opening. On the Camera Mainframe, be sure the features in the Viewfinder area look like those in Fig. 2B. The extended pins on the Repair Cover
seat in the two notches shown on the Mainframe.
Fig. 2A
Repair Drive Cover
P/N T22067SK01
Fig. 2B Early Mainframe Configuration
(takes Repair Cover at left)
Servicing Joshua Camera Jams, cont’d.
- 3 -
A new Drive Cover (P/N 1A2067A, see Fig. 3A) has the notch, ramp and pin on its
underside shown in the illustration. These Covers are for use in the Camera
Serial Numbers and Configurations listed in the bottom four lines of Table A.
The new Mainframe configuration is shown in Fig. 3B, and is identified by the
raised central rib in the Viewfinder area.
Fig. 3A
New Drive Cover
1A2067A
Fig. 3B Latest Mainframe Configuration P/N
(takes new Drive Cover at left)
REPAIR PROCEDURES — PARTS APPLICATION
In all Joshua Cameras with the Serial Numbers and Configuration codes listed in
Table A:
A.
Replace the existing 5-Wire Detail Switch with the new Switch (P/N 1A2708A),
unless the new Switch is in the Camera, and
B.
Depending on the particular Camera Serial Number and Configuration, either
- replace the Drive Cover with the Repair Cover (T22067SK01), or
- reuse the old Drive Cover, or
- install a new Drive Cover (1A2067A)
NOTE:
During any repair, if the Camera has an early Mainframe with a plastic
Gear #3, replace it with the new metal Gear #3 P/N 1A2808A
Servicing Joshua Camera Jams, cont’d.
- 4 -
CAMERA ID AND CONFIGURATION CODE LOCATIONS
To read the Camera Serial Number, open the Picture Removal Door and read the first
two characters of the Serial Number printed on the inside of the Door. (Example: In
Serial Number G2LQB149NBFA, the ID “G2” indicates manufacture in July 1992.)
To read the Camera Configuration, open the Film Loading Door Assembly and disengage
the Pack Frame from the Door Assembly (refer to Page 4-12 of the Service Manual).
Now open up the Door Assembly enough to permit viewing the
two- or three-character Configuration code marked on the Mainframe. It is located
just below the Battery Contacts and near the Film Pick Assembly. The first two
characters denote the gear side configuration; the third character denotes the
configuration of the opposite side.
NOTE: After Oct. 93, the Configuration (previously marked in silver, grease pencil
or lead pencil) is not marked on Mainframe.
To read the molded-in Mainframe Configuration, open the Film Loading Door Assembly
and disengage the Pack Frame from the Door Assembly (see Page 4-12 of the Service
Manual). Now open the Door Assembly enough to see the
configuration letter molded in the Mainframe near the small projecting tab (see Fig.
4). NOTE: By inserting the tip of a small, bright penlight into the film chamber
below the end of the Pack Frame, it may be possible to read the molded configuration
letter without having to disengage the Pack Frame.
Fig. 4
Locating the molded-in Configuration letter
Servicing Joshua Camera Jams, cont’d.
- 5 -
APPLICATION OF NEW PARTS
Camera
Serial No.
Silver ink
Configuration
Molded-in
Mainframe
Use Drive
Cover No.:
G2 thru L2
AE thru BLE
B
T22067SK01
L2,A3,B3,C3
BME thru CCG
E issue 8
T22067SK01
A3,B3,C3
CDG, CDH thru
CNG & CNH
E issue 8
T22067SK01
C3,D3,E3,
F3,G3
COG,COH thru
DU
E issue 8
Reuse same
Drive Cover
(must have ramp
and pin)
E3,F3,G3
DCG,DH,DJ,DQ
F
Use same or new
1A2067A Cover
F3,G3,H3,
J3,K3
DV thru FD
F
Use same or new
1A2067A Cover
J3,K3,L3,
M3
EP, FE thru FQ
——
No longer on
Mainframe
Table A
-
Updated E
Use same or new
(New Viewfinder
1A2067A Cover
Blind guiding)
C
Use same or new
1A2067A Cover
Application of new parts
(Cont’d. on back)
Servicing Joshua Camera Jams, cont’d.
- 6 -
INSTALLATION NOTE - 5-WIRE DETAIL SWITCH
After replacing the 5-Wire Detail Switch, check to be sure that sufficient clearance
exists between the edge of the DKEC ground plane element and the Counter Wheel: use
a feeler gauge or shim stock to verify that a minimum of 0.020" (0.51mm) to a nominal of 0.035" (0.89mm) exists (see Fig. 5).
Also, check that the DKEC wire element is centered over the DKEC ground plane element, for optimum operation.
Fig. 5
Check clearance between DKEC ground plane and Counter Wheel
PARTS AVAILABILITY
The new parts listed in this Product Alert are available now from Material Services
in Cambridge. Order from normal sources.
POLAROID CORPORATION
Customer Support Services
201 Burlington Road
Bedford, MA 01730
GLOBAL TECHNICAL
SERVICES
PRODUCT ALERT
Int'l
EXP
SUB
P.A. NO. JOSH #94-9
SPECIAL
DATE:
FEBRUARY 24, 1994
TECH. SERVICES:
MAT'L SERVICES:
QUAL. CONTROL:
OPERATIONS:
JOSH
TO:
LIST
FROM:
RUSSELL D. BATTLE
SUBJECT:
JOSHUA SERIES CAMERAS — CONFIGURATIONS “A” THROUGH “D”
Configuration “D” has now been announced for all Joshua-series Cameras, indicating the addition of a Rear Lens Baffle which mates with a
revised Baseblock and the crescent fix in all Joshua “A” Cameras. The
crescent fix is described in detail in another Joshua Product Alert.
The “D” designation appears as the 10th character of the 12-character
serial number, located on a label inside the Camera and visible when
the Front Door is opened.
Previously announced Joshua configurations are summarized below:
Configuration
Letter
Effective
Date
Description
A
7/29/92
Baseline Configuration
B
3/15/93
Non-Scratch Fix
C
8/23/93
Date+ Camera Series/Crescent Fix
D
9/24/93
Added Rear Lens Baffle, revised Baseblock
Crescent Fix fully implemented by 9/27/93
On the reverse side of this bulletin is an explanation of the information contained in the 12-character Serial Number code.
THIS BULLETIN SHOULD BE FILED IN THE SERVICE MANUAL OF THE PRODUCT TO WHICH IT REFERS.
SERIAL NUMBER CODE
(JOSHUA SERIES CAMERAS)
The serial number contains the following information:
1st
2nd
charac. charac.
3rd
charac.
10th
charac.
11th
charac.
12th
charac.
Month
Year
Day of
Consecutive Manufacturing Config.
the month Serial No.
Location
letter
Product
Group
Model
A=Jan
B=Feb
C=Mar
D=Apr
E=May
F=Jun
G=Jul
H=Aug
J=Sep
K=Oct
L=Nov
M=Dec
7=1987
8=1988
9=1989
0=1990
1=1991
2=1992
3=1993
4=1994
5=1995
6=1996
7=1997
etc.
(I omitted)
A
B
Z
5
6
7
8
9
0
1
= 1
= 2
etc.
= 24
= 25
= 26
= 27
= 28
= 29
= 30
= 31
4th-8th
charac.
(letter/#)
00001
thru
N = Norwood A - Z
V = Vale of
Leven
(I & O
C = China
omitted)
F 3 B 99999 N A F A
This camera was
manufactured on
June
2nd
1993
with sequential
serial #99999
in Norwood
and carries the
Baseline Configuration “A”
is a Joshua type
F
A =
Mod A
Joshua
99999
(I & O
omitted)
Example:
and Model A
9th
charac.
A =
Baseline
B =
Non-scratch
C =
Date+ series/
Crescent fix
D =
Rear Lens Baffle,
rev. Baseblock &
Cres. fix fully
implem. by 9/27/93
E=
Shutter PC Bd to
ROM 11 and new
Timing Gear
1A2077B.
B =
Date+
POLAROID CORPORATION
Customer Support Services
201 Burlington Road
Bedford, MA 01730
GLOBAL TECHNICAL
SERVICES
PRODUCT ALERT
Int'l
FROM:
SUB
P.A. NO. JOSH 94-9A*
SPECIAL
DATE:
JULY 5, 1994
TECH. SERVICES:
MAT'L SERVICES:
QUAL. CONTROL:
OPERATIONS:
LIST
TO:
EXP
*(This is an UPDATE of Product Alert
JOSH #94-9, dated 2/27/94)
RUSSELL D. BATTLE
SUBJECT: JOSHUA A and DATE+ — CONFIGURATION “E” ADDED TO “A” THROUGH “D”
Configuration “E” is announced for Joshua A and Date+ Cameras, indicating that the
Shutter PC Board is upgraded to the ROM 11 chip and a new Timing Gear 1A2077B is
being used. How these new components help reduce mid-cycle and film jams is described in Product Alert JOSH 94dated
.
The “E” designation appears as the 10th character of the 12-character serial number,
located on a label inside the Camera and visible when the Picture Removal Door is
opened.
All present Joshua configurations are summarized below:
Configuration
Letter
Effective
Date
A
7/29/92
B
3/15/93
C
8/23/93
D
E
9/24/93
5/5/94
Description
Baseline Configuration
Non-Scratch Fix
Date+ Camera Series/Crescent Fix
Added Rear Lens Baffle, revised Baseblock, Crescent
Fix fully implemented by 9/27/93 (Film Support)
ROM 11 on Shutter PC Board, and new Timing Gear
On the reverse side of this bulletin is an explanation of the information contained
in the 12-character Serial Number code.
THIS BULLETIN SHOULD BE FILED IN THE SERVICE MANUAL OF THE PRODUCT TO WHICH IT REFERS.
The serial number contains the following information:
1st
2nd
charac. charac.
3rd
charac.
10th
charac.
11th
charac.
12th
charac.
Month
Year
Day of
Consecutive Manufacturing Config.
the month Serial No.
Location
letter
Product
Group
Model
A=Jan
B=Feb
C=Mar
D=Apr
E=May
F=Jun
G=Jul
H=Aug
J=Sep
K=Oct
L=Nov
7=1987
8=1988
9=1989
0=1990
1=1991
2=1992
3=1993
4=1994
5=1995
6=1996
7=1997
(I omitted)
4th-8th
charac.
(letter/#)
A
B
= 1
00001
= 2
etc.
thru
Z = 24
5 = 25
99999
6 = 26
7 = 27
8 = 28
9 = 29
0 = 30
1 = 31 M=Dec
(I & O
omitted)
Example:
June
2nd
1993
with sequential
serial #99999
in Norwood
and carries the
Baseline Configuration “A”
and Model A
N = Norwood A - Z
V = Vale of
Leven
(I & O
C = China
omitted)
F
A =
Mod A
Joshua
B =
Date+
A =
Baseline
etc.
F 3 B 99999 N A F A
This camera was
manufactured on
is a Joshua type
9th
charac.
B =
Non-scratch
C =
Date+ series/
Crescent fix
D =
Rear Lens Baffle,
rev. Baseblock &
Cres. fix fully
implem. by 9/27/93
E =
Shutter PC Bd to
ROM 11 and new Timing
Gear 1A2077B.
POLAROID CORPORATION
Customer Support Services
201 Burlington Road
Bedford, MA 01730
GLOBAL TECHNICAL
SERVICES
PRODUCT ALERT
Int'l
TO:
EXP
SUB
P.A. NO.
JOSH 94-9B
SPECIAL
DATE: FEBRUARY 22, 1995
TECH. SERVICES:
MAT'L SERVICES:
QUAL. CONTROL:
OPERATIONS:
LIST
FROM:
RUSSELL D. BATTLE
*(This is an UPDATE of
Product Alert JOSH #94-9A,
dated 7/5/94)
SUBJECT: JOSHUA BADGECAM — CONFIGURATION “F” ADDED TO “A” THROUGH “E”
Configuration “F” is announced for Joshua Series Cameras, to indicate the BadgeCam
and BadgeCam Date versions of Joshua.
These new models in the Joshua series,
designed for making full-color, instant ID badges at low cost, are described in New
Product Information bulletin 95-22, dated Feb. 22, 1995.
The “F” designation appears as the 10th character of the 12-character serial number,
located on a label inside the Camera and visible when the Picture Removal Door is
opened.
All present Joshua configurations are summarized below:
Configuration
Letter
Effective
Date
A
7/29/92
B
3/15/93
Description
Baseline Configuration
Non-Scratch Fix
C
8/23/93
Date+ Camera Series with Crescent Fix
D
9/24/93
Added Rear Lens Baffle, revised Baseblock, Crescent
Fix fully implemented by 9/27/93 (Film Support)
E
5/9/94
F
9/26/94
ROM 11 on Shutter PC Board, and new Timing Gear
BadgeCam and BadgeCam Date camera models
On the reverse side of this bulletin is an explanation of the information contained
in the 12-character Serial Number code.
THIS BULLETIN SHOULD BE FILED IN THE SERVICE MANUAL OF THE PRODUCT TO WHICH IT REFERS.
The serial number contains the following information:
1st
2nd
charac. charac.
3rd
charac.
10th
charac.
11th
charac.
12th
charac.
Month
Year
Day of
Consecutive Manufacturing Config.
the month Serial No.
Location
letter
Product
Group
Model
A=Jan
B=Feb
C=Mar
D=Apr
7=1987
8=1988
9=1989
0=1990
A
B
Z
= 1
= 2
etc.
= 24
4th-8th
charac.
(letter/#)
00001
thru
E=May
F=Jun
G=Jul
H=Aug
J=Sep
K=Oct
L=Nov
1=1991 5 = 25
99999
2=1992 6 = 26
3=1993 7 = 27
4=1994 8 = 28
5=1995 9 = 29
6=1996 0 = 30
7=1997 1 = 31 M=Dec
(I & O
(I omitted)
omitted)
Example:
June
2nd
1993
with sequential
serial #99999
in Norwood
and carries the
Baseline Configuration “A”
and Model A
N = Norwood A - Z
V = Vale of
Leven (I & O
C = China
omitted)
F
A =
Mod A
Joshua
B =
Date+
A =
Baseline
etc.
F 3 B 99999 N A F A
This camera was
manufactured on
is a Joshua type
9th
charac.
B =
Non-scratch
C =
Date+ series/
Crescent fix
D =
Rear Lens Baffle,
rev. Baseblock &
Cres. fix fully
implem. by 9/27/93
E =
Shutter PC Bd to
ROM 11 and new Timing
Gear 1A2077B.
F =
BadgeCam & BadgeCam Date
Camera versions
POLAROID CORPORATION
Customer Support Services
201 Burlington Road
Bedford, MA 01730
GLOBAL TECHNICAL
SERVICES
PRODUCT ALERT
Int'l
TO:
LIST
FROM:
RUSSELL D. BATTLE
EXP
SUB
P.A. NO.
JOSH 94-10
SPECIAL
DATE: MARCH 31. 1994
TECH. SERVICES:
MAT'L SERVICES:
QUAL. CONTROL:
OPERATIONS:
SUBJECT: JOSHUA 5-WIRE DETAIL SWITCH WITH GOLD-PLATED GROUND PLANE
CONTACTS P/N 1A2708B
In continuing engineering efforts to reduce the midcycle problem in Joshua series
cameras, the 5-Wire Detail Switch, P/N 1A2708A, has undergone two design changes.
The first change increased the ground plane contact area of the TRIM (L/D) Switch
and the DKEC (Darkslide/End of Cycle) Switch. This improvement is described and
illustrated in Product Alert JOSH 94-8, dated 2-2-94.
The latest change embodies gold-plating the ground plane switch contact elements, to
lower resistance and improve switching reliability. Some Switches will have all
ground plane contacts gold-plated, while others will have only certain elements
gold-plated. All versions, however, may be used interchangeably.
The 5-Wire Detail Switch with gold-plated contact areas has been incorporated in
Cameras since mid-February, 1994.
REPAIR POLICY
All Cameras returned for repair should have the new 5-Wire Detail Switch 1A2708B
installed, along with other updating described in Product Alert JOSH 94-8.
PART AVAILABILITY
This Switch (P/N 1A2708B) will be available on and after the end of March 1994, from
Material Services in Cambridge.
Order through normal sources.
THIS BULLETIN SHOULD BE FILED IN THE SERVICE MANUAL OF THE PRODUCT TO WHICH IT REFERS.
POLAROID CORPORATION
Customer Support Services
201 Burlington Road
Bedford, MA 01730
GLOBAL TECHNICAL
SERVICES
PRODUCT ALERT
Int'l
TO:
EXP
SUB
P.A. NO.
SPECIAL
DATE:
JOSH 94-11
APRIL 5, 1994
TECH. SERVICES:
MAT'L SERVICES:
QUAL. CONTROL:
OPERATIONS:
LIST
FROM:
RUSSELL D. BATTLE
SUBJECT:
IMPROVED JOSHUA FLEX PLUG FOR SWITCH BLOCK
(P/N 1A2905A)
BACKGROUND
In the continuing engineering efforts directed at product improvement, the Flex Plug
for the Switch Block now has a tab added to it which helps ensure proper orientation
of both the Plug and the Flex when the Plug is inserted. This improved design is
identified by the issue 05 designation (“IS05”) molded into its top surface (see
Fig. 1).
REPAIR POLICY
An issue 5 or later Flex Plug should be used:
1.
Whenever the Flex Plug, Switch Block (of any issue) is removed from the Camera
(removing the Flex Plug subjects it to stress; replacement with a new Plug
is recommended), and
2.
Whenever work is performed using an updated 5-Wire Detail Switch P/N 1A2708A
or P/N 1A2708B; Repair Drive Cover T22067SK01; or the new Drive Cover
1A2067A.
(These parts and their application in Joshua repair procedures are described and
shown in Product Alerts JOSH #94-8 and JOSH 94-10. The 5-Wire Detail Switch
P/N 1A2708B, and Flex Plug, Switch Block 1A2905A Issue 05 will be used in
Cameras manufactured beginning late February/early March 1994.
THIS BULLETIN SHOULD BE FILED IN THE SERVICE MANUAL OF THE PRODUCT TO WHICH IT REFERS.
PART AVAILABILITY
The Flex Plug, Switch Block, Issue 05, P/N 1A2905A is available now from Material
Services in Cambridge, MA. Order from normal sources.
When issue 05 parts are obtained, discard existing stocks of the part which are
older than Issue 5.
Fig. 1
Improved design of Joshua Flex Plug Switch Block
POLAROID CORPORATION
Customer Support Services
201 Burlington Road
Bedford, MA 01730
GLOBAL TECHNICAL
SERVICES
PRODUCT ALERT
Int'l
TO:
LIST
FROM:
RUSSELL D. BATTLE
SUBJECT:
EXP
SUB
P.A. NO.
SPECIAL
DATE:
JOSH 94-12
MARCH 31, 1994
TECH. SERVICES:
MAT'L SERVICES:
QUAL. CONTROL:
OPERATIONS:
REAR LENS BAFFLE ADDED TO JOSHUA BASEBLOCK
BACKGROUND
To minimize the potential problem of light spilling outside normal paths in the
Joshua Shutter Assembly, a new part was added to the Baseblock and the Baseblock
itself was modified to accept the part, in Joshua series Cameras manufactured after
August, 1993.
The new part is a Rear Lens Baffle (P/N 1A2723A) shown in Fig. 1. It can be used
only with the modified Baseblock Assembly (P/N 1A2573A); earlier Baseblocks do not
provide clearance beneath a tab to allow insertion of the Rear Lens Baffle.
PART AVAILABILITY
The Rear Lens Baffle and modified Baseblock Assembly will be available by April 30,
1994 from Material Services in Cambridge.
Order through normal sources, as needed.
Fig. 1
New Rear Lens Baffle 1A2723
for Joshua Cameras
THIS BULLETIN SHOULD BE FILED IN THE SERVICE MANUAL OF THE PRODUCT TO WHICH IT REFERS.
POLAROID CORPORATION
Customer Support Services
201 Burlington Road
Bedford, MA 01730
GLOBAL TECHNICAL
SERVICES
PRODUCT ALERT
Int'l
EXP
SUB
P.A. NO.
SPECIAL
DATE:
JOSH 94-13
APRIL 5, 1994
TECH. SERVICES:
MAT'L SERVICES:
QUAL. CONTROL:
OPERATIONS:
TO:
LIST
FROM:
RUSSELL D. BATTLE
SUBJECT:
NEW JOSHUA SHUTTER FLEX CONNECTOR CAP & REMOVAL TOOL
PROBLEM
Partial or crooked insertion of a Joshua Shutter Flex Connector Cap can cause a
variety of problems, including no power to the Shutter, no darkslide, a midcycle,
shorts, etc. These are the result of mismatched, shorted or absent
electrical connection between misaligned Connector contacts and the Flex streets
(see Fig. 1). In addition, the Connector Cap could be difficult to remove without
breaking.
SOLUTION
To answer these and other problems, a new Flex Connector Cap (P/N 1A2358A), Issue 2
and above (see Fig. 4), and a Retainer Removal Tool (P/N 13589) have been developed.
As Figs. 2 - 4 show, the Tool has a thin blade with a beveled, hook tip. When the
blade is inserted straight into the Connector Cap, it disengages the Cap’s internal
locking tab. The hook or tang on the tip of the blade facilitates lifting the Cap
straight up and off the Connector.
PARTS AVAILABILITY
The Flex Connector Cap and Retainer Removal Tool will be available after Mar. 1,
1994 from Material Services in Cambridge, MA. Order through normal sources.
REPAIR POLICY
Once the Connector Cap has been removed, it is recommended that a new Cap is used,
since the old one may have been damaged. Discard existing stocks of the old Connector Cap.
THIS BULLETIN SHOULD BE FILED IN THE SERVICE MANUAL OF THE PRODUCT TO WHICH IT REFERS.
POLAROID CORPORATION
Customer Support Services
201 Burlington Road
Bedford, MA 01730
TECHNICAL SERVICES
DEPARTMENT
NEW PRODUCT INFORMATION
Int'l
EXP
SUB
P.A. NO. JOSH 94-14
SPECIAL
DATE:
JULY 11, 1994
TECH. SERVICES:
MAT'L SERVICES:
QUAL. CONTROL:
OPERATIONS:
TO:
LIST
FROM:
RUSSELL D. BATTLE
SUBJECT:
NEW CAPTIVA QPS PREMIUM CAMERA
(PID# 1A2614)
A limited quantity of a Captiva Cameras for use as a premium in the
U.S. market was manufactured in the first quarter of 1994.
The Camera is identical to the present Captiva, except for QPS imprinted on the Top Cover (P/N 1A2933J) (see Fig. 1).
Fig. 1
Top Cover of Captiva “QPS” premium Camera
THIS BULLETIN SHOULD BE FILED IN THE SERVICE MANUAL OF THE PRODUCT TO WHICH IT REFERS.
POLAROID CORPORATION
Customer Support Services
201 Burlington Road
Bedford, MA 01730
GLOBAL TECHNICAL
SERVICES
PRODUCT ALERT
Int'l
EXP
SUB
P.A. NO. JOSH 94-15
SPECIAL
DATE:
JULY 11, 1994
TECH. SERVICES:
MAT'L SERVICES:
QUAL. CONTROL:
OPERATIONS:
TO:
LIST
FROM:
RUSSELL D. BATTLE
SUBJECT:
NEW JOSHUA PICK ASSEMBLY
(P/N T12540SK09)
The Pick Assembly P/N 1A2540A used in Joshua Cameras from 1992 until mid-June 1993
was redesigned in 1993. The new design has been used in all Joshua Cameras since
mid-June 1993.
The new Pick Assembly is P/N T12540SK09 and is shown in Fig. 1. It is easily differentiated from the earlier design by the absence of the flag on the Pick
Carrier (see dotted outline identified by arrow in Fig. 1), and by the reduced tab
height (balloon callout).
NOTE:
The new Pick Assembly P/N T12540SK09 MUST BE USED in
Joshua-series Cameras manufactured from mid-June 1993 onward.
NOTE:
Old Pick Assemblies (with flag) can be identified in older Cameras
manufactured before mid-June 1993 by moving the Pick forward and
viewing the flag in the bottom of the Viewfinder.
REPAIR POLICY
Change the Pick Assembly only if it is defective.
PART AVAILABILITY
Pick Assembly P/N T12540SK09 is
available from Material Services
in Cambridge. Order through
normal sources.
The older Pick Assemblies are
not interchangeable with the new
P/N T12540SK09 design: thus you
should maintain supplies of both
styles.
Fig. 1
Redesigned Pick Assy P/N T12540SK09
THIS BULLETIN SHOULD BE FILED IN THE SERVICE MANUAL OF THE PRODUCT TO WHICH IT REFERS.
POLAROID CORPORATION
Customer Support Services
201 Burlington Road
Bedford, MA 01730
GLOBAL TECHNICAL
SERVICES
PRODUCT ALERT
Int'l
EXP
SUB
P.A. NO.
SPECIAL
DATE:
TECH. SERVICES:
MAT'L SERVICES:
QUAL. CONTROL:
OPERATIONS:
TO:
LIST
FROM:
RUSSELL D. BATTLE
SUBJECT:
NEW JOSHUA COUNTER WHEEL (P/N 1A2084B)
In June 1994, Camera Manufacturing began installing new Counter Wheels (Fig. 1) in
all Joshua-series cameras.
Both of
actuate
the EOP
Of Pack
the new Counter Wheels have a slightly shorter and wider cam or tab to
the End Of Pack (EOP) Switch, to solve a problem caused by interference with
switch wire. This wire could trap the Counter Wheel, producing a false End
signal and preventing the Counter Wheel from resetting.
POLICY
Either the interim or new style Counter Wheel should be installed whenever:
1. A new 5-Wire gold-contact Detail Switch upgrade is done (see JOSH 94-__) or
2. The customer reports an EOP signal when depressing the Shutter Button
(Counter stuck on “0”).
PART AVAILABILITY
The new Counter Wheel P/N 1A2084B is available from Material Services in Cambridge,
MA. Please order through normal sources. Note that Material Services will stock
only the latest Counter Wheel.
When you receive your supply of new counter
wheels, you should scrap all old Joshua Counter Wheels.
Fig. 1
New Joshua Counter Wheel (right) with enlarged EOP cam
THIS BULLETIN SHOULD BE FILED IN THE SERVICE MANUAL OF THE PRODUCT TO WHICH IT REFERS.
POLAROID CORPORATION
Customer Support Services
201 Burlington Road
Bedford, MA 01730
GLOBAL TECHNICAL
SERVICES
PRODUCT ALERT
Int'l
EXP
SUB
P.A. NO.
SPECIAL
DATE:
JOSH 94-17
JULY 11, 1994
TECH. SERVICES:
MAT'L SERVICES:
QUAL. CONTROL:
OPERATIONS:
TO:
LIST
FROM:
RUSSELL D. BATTLE
SUBJECT:
NEW PLASTIC LENS FOR VISION CAMERAS
On Jan. 1, 1994, Manufacturing began using a new plastic taking lens in all Vision
Cameras. Accompanying this change, the Decorative Plate was also changed to eliminate the words “coated glass lens” (left hand illustration, Fig. 1). Cameras with
the new plastic lens may be identified by a narrow space between the lens surface
and bezel (see arrow in right hand illustration, Fig. 1).
NOTE: In 1994, only the JoyCam, Joshua Date+ and special edition cameras have a
glass lens. Captiva Cameras have always had plastic lenses.
PARTS AVAILABILITY
The plastic Taking Lens (P/N 1A2031B) and accompanying Decorative Plate(P/N 1A2157K)
will be available 8/1/94 from Material Services in Cambridge, MA. Order through
normal sources.
Fig. 1
Vision glass lens (left); new plastic lens & dec plate (right)
THIS BULLETIN SHOULD BE FILED IN THE SERVICE MANUAL OF THE PRODUCT TO WHICH IT REFERS.
POLAROID CORPORATION
Customer Support Services
201 Burlington Road
Bedford, MA 01730
GLOBAL TECHNICAL
SERVICES
PRODUCT ALERT
Int'l
TO:
FROM:
SUBJECT:
EXP
SUB
P.A. NO.
SPECIAL
DATE:
JOSH 94-18
AUGUST 1, 1994
TECH. SERVICES:
MAT'L SERVICES:
QUAL. CONTROL:
OPERATIONS:
LIST
RUSSELL D. BATTLE
NEW ROM-11 SHUTTER PC BOARD/FLASH TUBE ASSEMBLY &
TIMING GEAR FOR JOSHUA A AND DATE+
BACKGROUND
In the continuing effort to improve camera performance reliability and quality,
engineering has upgraded the Joshua Shutter PC Board/Flash Tube Assembly to use a
ROM 11 integrated circuit, and improved the Timing Gear. These changes were made in
Joshua A and Date+ models, beginning with mid-May, 1994 (E4) production.
The new ROM was installed to help reduce film jams and/or mid-cycle problems. Specifically, it ignores the Full Chamber Switch (a source of electrical contact noise
— see Fig. 1) and, in conjunction with the new Timing Gear, allows the DKEC switch
to electrically open and close only once per cycle, not twice as previously. (Note
the cam action of the Timing Gear in Fig. 2.)
PART NUMBERS
The ROM-11 Shutter PC Board/Flash Tube Assembly for Joshua A Cameras is P/N 1A2485E.
For the Joshua Date+, the ROM-11 Shutter PC Board/Flash Tube Assembly is P/N
1A2438D. They are not_interchangeable. The new Timing Gear, which must be used with
the new PC Board/Flash Tube Assembly, is P/N 1A2077B (see Fig. 2).
THIS BULLETIN SHOULD BE FILED IN THE SERVICE MANUAL OF THE PRODUCT TO WHICH IT REFERS.
Joshua ROM 11 Shutter PC Board/Flash Tube Assy & Timing Gear
- 2 -
Fig. 1
DKEC and FULL switch traces with ROM 10, ROM 11 & gold switch
contacts
Fig. 2
New Timing Gear 1A2077B (left) used with ROM 11 PC Board/
Flash Tube Assy
Old Timing Gear 1A2077A (right) used with ROM 10 and earlier ROM
PC Board/Flash Tube Assemblies back to 1992
Joshua ROM 11 Shutter PC Board/Flash Tube Assy & Timing Gear
- 3 -
IDENTIFYING CAMERAS WHICH HAVE THE ROM 11 PC BOARD
To determine whether a camera contains a ROM 11 PC Board, remove the Dec Plate and
look for the letters CL, SL, S, C or a + sign scribed in ink on the Front Shutter
Housing (see Fig. 3). Also, look to see if the number 11 is marked on the Drive
Cover, as shown in Fig. 3. The “11” marking was discontinued in July 1994.
In the Camera Serial number, note that Cameras with the ROM 11 PC Board/Flash Tube
Assembly will be marked configuration “E.” Please refer to Joshua Product Alert 949A (this is a revision of JOSH 94- 9, originally published 2/24/94).
Fig. 3
Various Shutter markings identifying ROM 11 installations
Joshua ROM 11 Shutter PC Board/Flash Tube Assy & Timing Gear
- 4 -
REPAIR POLICY
Cameras received for repair with a defective ROM 10 or earlier PC Board/Flash Assembly should have the Assembly replaced with a ROM 10 Assembly, if available. In
addition, the 5-Wire Switch and Counter Wheel should be replaced with the new gold
5-Wire Switch and new Counter Wheel, respectively (see JOSH 94-10).
When ROM 10 Assemblies are depleted, use ROM 11 Assemblies with the new Timing Gear
and gold Switch.
NOTE:
A “ROM 10” Timing Gear (1A2077A) works ONLY with a “ROM 10” and earlier
(ROM 9, 8, 7, etc.) Shutter PC Board/Flash Tube Assy (P/N 1A2432A).
A mismatch of Timing Gear and PC Board/Flash Tube Assy
midcycle or jam.
may result in a
If a Camera has a defective ROM 11 Shutter PC Board/Flash Tube Assembly, it must be
replaced with the new ROM 11 Assembly.
Replace ROM 10
or earlier with:
and change to:
Gold
Switch
ROM 10
X
ROM 11
X
New
Timing
Gear
New
Counter
Wheel
X
X
X
TEST EQUIPMENT CHANGE
There is a test equipment change required to test this ROM 11 PC Board/Flash Tube
Assembly in the ambient mode. (Present equipment permits testing in the flash
mode.) Details of this test equipment change will be forthcoming.
POLAROID CORPORATION
Customer Support Services
201 Burlington Road
Bedford, MA 01730
GLOBAL TECHNICAL
SERVICES
PRODUCT ALERT
Int'l
TO:
EXP
SUB
P.A. NO.
SPECIAL
DATE:
JOSH 94-19
JULY 11, 1994
TECH. SERVICES:
MAT'L SERVICES:
QUAL. CONTROL:
OPERATIONS:
LIST
FROM:
RUSSELL D. BATTLE
SUBJECT:
NEW JOSHUA VIEWING MIRROR CARRIER/BELLOWS ASSEMBLY
Shortly, Camera Manufacturing will began installing a new Viewing Mirror Carrier/
Bellows Assembly in all Joshua-series cameras. The new VMC, P/N 1A2114B, has thicker mounting tabs (“A” in Fig. 1), to solve a problem of the VMC slipping out of the
Baseblock and causing light leaks. To accept the new, thicker VMC tabs, the mating
slots in the Baseblock have also been enlarged. The new Baseblock is P/N 1A2573D.
Inventories of both old VMC/Bellows Assembly (P/N 1A2114A) and the new
VMC/Bellows Assembly (P/N 1A2114B) should be maintained, since the new
VMC can be used only with new Baseblocks (1A2573D), and the old VMC will not fit
snugly in the new Baseblock slots. (See chart on reverse side.)
PART AVAILABILITY
The new VMC/Bellows Assembly is available from Material Services in Cambridge, MA.
Order through normal sources.
Fig. 1
New Joshua VMC/Bellows Assembly with thicker tabs “A”
THIS BULLETIN SHOULD BE FILED IN THE SERVICE MANUAL OF THE PRODUCT TO WHICH IT REFERS.
New VMC/Bellows Assembly
cont’d
Old Baseblock |
|
X
|
_______________|___________|___________|________________
|
|
|
New Baseblock |
X
|
|
_______________|___________|___________|________________
New version of |
|
|
Baseblock
|
|
|
X
_______________|___________|___________|________________
|
|
|
?
|
X
|
X
|
_______________|___________|___________|________________
|
|
|
Mfd. 7/94
|
|
|
X
_______________|___________|___________|________________
POLAROID CORPORATION
Consumer Services Division
784 Memorial Drive
Cambridge, MA 02139
TECHNICAL SERVICES
DEPARTMENT
PRODUCT ALERT
Int'l
EXP
SUB
P.A. NO.
SPECIAL
DATE:
JOSH 94-20
SEPT. 8, 1994
TECH. SERVICES:
MAT'L SERVICES:
QUAL. CONTROL:
OPERATIONS:
TO:
LIST
FROM:
RUSSELL D. BATTLE
SUBJECT:
IMPROVED SHUTTER DECORATIVE PLATE - JOSHUA CAMERAS
BACKGROUND:
The shutter Decorative Plate on Joshua-series cameras has been redesigned to incorporate thicker, stronger mounting tabs. (See arrows in Figure 1, below.) This change was made to correct a problem of the tabs breaking and the
resultant pieces being left inside the shutter assembly.
POLICY:
The new Decorative Plates will be phased-in at manufacturing facilities as inventories of the old plates are used up.
Existing Decorative Plates at repair facilities should continue to be used until repair inventories are depleted.
PARTS AVAILABILITY:
Refer to the Joshua/Joshua+ Parts Catalog for the proper part numbers to be used when ordering Decorative Plates.
(Please note that the part numbers for the new Decorative Plates remain the same as the part numbers for the earlier
Decorative Plates.)
FIGURE 1 IMPROVED DECORATIVE PLATE WITH STRENGTHENED TABS
THIS BULLETIN SHOULD BE FILED IN THE SERVICE MANUAL OF THE PRODUCT TO WHICH IT REFERS.
POLAROID CORPORATION
Consumer Services Division
784 Memorial Drive
Cambridge, MA 02139
TECHNICAL SERVICES
DEPARTMENT
PRODUCT ALERT
Int'l
EXP
SUB
P.A. NO.
SPECIAL
DATE:
JOSH 94-21
SEPT. 8, 1994
TECH. SERVICES:
MAT'L SERVICES:
QUAL. CONTROL:
OPERATIONS:
TO:
LIST
FROM:
RUSSELL D. BATTLE
SUBJECT:
VISION PICTURE REMOVAL DOOR FOR KOREAN MARKET
To meet Korean government requirements, Vision cameras sold there must have the words "Made in the
U.S.A." visible on an external surface of the camera. Accordingly, Korean-Market Vision cameras
manufactured starting in March 1994, (PID# 618697) will have this statement engraved on the outside
tab of the Picture Removal Door. (See Figure 1) The part number for the door is 1A2145B. Please
note that the engraved doors are available for repair inventories only through special order.
This camera also has the strengthened Decorative Plate (1A2157K) described in Product Alert JOSH
94-20, dated August 17, 1994. In all other respects, the camera is the same as the latest Vision cameras
made in 1994.
FIGURE 1 PICTURE REMOVAL DOOR FOR KOREAN-MARKET VISION CAMERAS
THIS BULLETIN SHOULD BE FILED IN THE SERVICE MANUAL OF THE PRODUCT TO WHICH IT REFERS.
POLAROID CORPORATION
Customer Support Services
201 Burlington Road
Bedford, MA 01730
TECHNICAL SERVICES
DEPARTMENT
NEW PRODUCT INFORMATION
Int'l
TO:
LIST
FROM:
RUSSELL D. BATTLE
EXP
SUB
P.A. NO. JOSH 95-22
SPECIAL
DATE:
FEBRUARY 22, 1995
TECH. SERVICES:
MAT'L SERVICES:
QUAL. CONTROL:
OPERATIONS:
SUBJECT: WORLDWIDE INTRODUCTION OF BadgeCam AND BadgeCam Date CAMERAS
BACKGROUND
A unique new extension of the
Joshua Camera design produces
high-quality, attractive
badges instantly, combining a
portrait with custom-designed
artwork.
The new BadgeCam (PID 619410)
can produce temporary visitor
passes, name badges for
seminars, conferences and
trade shows, IDs for shortterm workers, and promotional
souvenirs at theme parks,
concerts and public events.
BadgeCam is easy to use,
produces up to 200 ready-touse badges/hour (no die
cutting or laminating needed)
and uses standard Polaroid
95 Film. The special
BadgeCam Date model (PID #
619411) imprints a settable
date stamp on each badge.
New BadgeCam Camera makes attractive,
instant badges on Polaroid 95 Film.
THIS BULLETIN SHOULD BE FILED IN THE SERVICE MANUAL OF THE PRODUCT TO WHICH IT REFERS.
BadgeCam introduction, cont’d.
- 2 -
BADGECAM OPERATION
The BadgeCam produces an instant print containing both the subject’s
portrait and the elements of custom-designed artwork. It does this by
exposing the portrait image onto the film through an acetate overlay,
which contains the individual artwork (see Fig. 1A & 1B). The overlay
can be placed in either the camera or in the film pack.
The portrait area of the badge may be at either the center, left or
right side (see Fig. 2A & 2B). To be sure the camera is correctly
aimed for the particular portrait position chosen, three framing ovals
on the BadgeCam’s special Taking Mirror Carrier appear in the Viewfinder (see Fig. 3). These oval-shaped outlines also guide the operator in obtaining correct head size in the portrait image.
In addition, the BadgeCam has a special Lens Assembly to provide optimal focus at 3.5 feet (1.1m), rather than the normal 5.3 feet (1.6m).
The BadgeCam’s exposure values have been specially optimized for overlays made on the Kodak ColorEase (T.M.) Printer: Polaroid cannot assure equal print quality if other manufacturers’ acetate overlays or
printers are used.
Fig. 1A Location of acetate overlay
in BadgeCam Mainframe. Acetate is
held in place with double-sided tape.
Fig. 1B Location of acetate in
film pack.
Wear white gloves
when handling acetate overlays.
Fig. 2A In-camera acetates for
left, center & right portraits.
Fig. 2B Film Pack acetates for
left, center & right portraits.
BadgeCam Introduction, cont’d.
- 3 -
Fig. 3 Unique TMC (Taking Mirror Carrier) framing ovals help
position and correctly size subject’s head at left, center or right
BADGECAM UNIQUE PARTS
The BadgeCam Shutter Assembly differs from the standard Captiva Shutter Assembly in the following ways:
- Sol 2, Far Focus Lens, Latch Return Spring Latch Actuator, Lens
Latch and one screw are not present.
- Special Lens Assembly provides optimal focus at 3.5 feet (1.1m)
- Shutter Decorative Plate and Top Cover are imprinted BadgeCam or
BadgeCam Date
- Special Taking Mirror Carrier (TMC) Assembly incorporates three
oval-shaped subject framing guides
Part Name
BadgeCam Part
BadgeCam Date Part
Lens Assembly (3.5'/1.1m focus).1A2976B..........1A2976B
Taking Mirror Carrier Assy......1A2110C..........1A2110C
Shutter Decorative Plate........1A2157L..........1A2157M
Top Cover.......................1A2933K..........1A2933L
Baseblock Assy..................1A2573E..........1A2573E
A limited supply of the unique BadgeCam and BadgeCam Date parts listed
above will available from Material Services in Bedford, MA.
CONFIGURATION
Configuration letter “F” (10th character of serial number) will be
used to identify the BadgeCam and BadgeCam Date Camera models.
CAMERA WARRANTY
BadgeCam Cameras are warranted for five years from purchase date.
BadgeCam Date Cameras have a lifetime warranty. (NOTE: These Warranty
periods may differ in certain countries.)
BadgeCam Introduction, cont’d.
- 4 -
ACETATE OVERLAY WARRANTY
Acetates overlays which are installed in the Camera Mainframe (as
contrasted with acetate overlays in film packs) are warranted by the
distributor who supplies them (not by Polaroid) for five years from
date of camera purchase.
SERVICE
BadgeCam Cameras will be serviced at regional centers in Atlanta,
Enschede, NPKK, etc.
At the present time, the acetate overlays are being supplied by authorized dealers, not by Polaroid. Consequently, if the customer experiences a problem with the acetate overlay, he should be directed back
to the dealer who supplied the acetate.
Customers with BadgeCams carrying an acetate overlay installed in
the camera will be asked to return a defective unit to the special
network dealer from whom the camera was purchased. The acetate should
be removed by the dealer, who will then send the camera (minus the
acetate) to the appropriate Center or Subsidiary for service.
If the acetate overlay is in the film pack and it appears that the
problem is in the camera, the customer should remove the acetate from
the film pack and return the camera to a Service Center or to a local
subsidiary.
No special test equipment is required for BadgeCam servicing, but
special Star Tester or B Tester exposure values should be used:
Strobe Exposure at 4.5 feet:
0.497 ± 0.25 STOP
Ambient Exposure at 100 candles/ft²:
0.371 ± 0.25 STOP
NOTE:
Tests should be done without acetate in Camera.
No early returns program for BadgeCam is planned.
TRAINING
Self-training packages will be supplied to all service centers, consisting of BadgeCam descriptive literature, unique parts information
and a BadgeCam familiarization videotape.
POLAROID CORPORATION
Customer Service Support
201 Burlington Road
Bedford, MA 01730
TECHNICAL SERVICES
DEPARTMENT
PRODUCT ALERT
Int'l
EXP
SUB
P.A. NO. Josh #95-23
SPECIAL
DATE:
April 15, 1995
TECH. SERVICES:
MAT'L SERVICES:
QUAL. CONTROL:
OPERATIONS:
TO:
LIST
FROM:
R. BATTLE/D. BILLINGSLEY
SUBJECT:
ANALYZING BLACK BAR PROBLEMS IN JOSHUA PRINTS
"Black Bar" problems in Joshua prints have been traced to a variety of causes, including the presense of foreign
material in the camera (e.g., adhesives), as well as distortion and binding associated with the Taking Mirror Carrier
(TMC), Viewing Mirror Carrier (VMC), Bellows, Baffle, Recock Link, or Mainframe parts.
To help isolate the cause, a procedure for systematic analysis and remedial action is attached to this Product Alert.
Illustrated below is the camera mounted on a test fixture (Joshua Sled P/N 1360) required to complete the procedure, and samples of "Black Bar" prints.
You may wish to review the videotape "TMC Troubleshooting Guide" recently sent to key repair facilities. This
videotape is available from:
Polaroid Camera Products Services
Technical Service Department (Bed 1A-2)
201 Burlington Road
Bedford, MA 01730
When ordering, please refer to Product Alert Josh # 95-23 dated April 15, 1995 and the videotape
Joshua Camera Mounted on Sled
Typical Black Bar Prints
THIS BULLETIN SHOULD BE FILED IN THE SERVICE MANUAL OF THE PRODUCT TO WHICH IT REFERS.
POLAROID CORPORATION
Customer Support Services
201 Burlington Road
Bedford, MA 01730
GLOBAL TECHNICAL
SERVICES
PRODUCT ALERT
Int'l
TO:
EXP
SUB
P.A. NO.
JOSH 95-24
SPECIAL
DATE:
APRIL 20, 1995
TECH. SERVICES:
MAT'L SERVICES:
QUAL. CONTROL:
OPERATIONS:
LIST
RUSSELL D. BATTLE
FROM:
SUBJECT:
TROUBLESHOOTING MIRROR TRAVEL PROBLEMS IN JOSHUA TMC
(TAKING MIRROR CARRIER)
BACKGROUND
A number of telltale signs of mirror travel obstruction in the Joshuaseries cameras TMC (Taking Mirror Carrier) have now been identified and
effective solutions developed to correct them.
Attached to this Product Alert is a list of common symptoms, common causes
and troubleshooting procedures for TMC travel problems.
Please note that this information should be used in conjunction with the
recently-released videotape, “T.M.C. Troubleshooting Guide”,
which was sent to certain key repair facilities.
A copy of this Videotape is available from Camera Products Services, Technical Services Dept., 1A2, 201 Burlington Road, Bedford, MA 01730. When
ordering, please refer to this Product Alert (JOSH 95dated 3/17/95),
and the videotape name “T.M.C. Troubleshooting Guide.”
THIS BULLETIN SHOULD BE FILED IN THE SERVICE MANUAL OF THE PRODUCT TO WHICH IT REFERS.
3-17-95
IDENTIFYING AND CORRECTING MIRROR TRAVEL PROBLEMS
IN THE JOSHUA TAKING MIRROR CARRIER (TMC)
Common symptoms of Mirror travel problems:
Black bar
— Baffle is visible in picture
Light leak — high light leak readings at the Light Leak
Station may indicate Mirror travel
obstruction.
Abnormal
— excessively low or an erratic range of
Exposure
exposure readings at Exposure Tester may
Readings
indicate Mirror travel obstruction.
Common causes of Mirror travel obstruction:
Loose or broken material inside Viewfinder
Camera is not fully erected
Mirror Catcher is not seated
Shutter Actuator is malfunctioning
Inner Viewfinder Lens Retainer is not seated
Adhesives or broken material are obstructing the Recock
link under the Drive Cover.
Clutch Gear is defective
Recock Post is broken on Mainframe
Adhesive present under TMC (Taking Mirror Carrier)
VMC/TMC is tight (VMC pivot tabs pressing excessively on TMC)
TMC pivot hole inner surface is damaged
Mirror Catcher is not seated on Mainframe
Actuator is not being operated by Shutter
Inner Viewfinder Lens is not seated in Mainframe
Glossary:
TMC
VMC
MF
ID
Taking Mirror Carrier
Viewing Mirror Carrier
Mainframe
Inside Diameter/Inner Surface (of a pivot hole)
Joshua TMC Mirror Travel Problem Troubleshooting
Page 3
MIRROR TRAVEL TROUBLESHOOTING FLOWCHART
1. Insert empty Film Pack
2. Simulate taking picture while
feeling VMC Backplate. Hitting?
yes
+———*p 16*Repeat step three times
no
3. Remove Film Pack. Are Baffle
wires seated?
no
+———*p 16*Reseat & repeat step 1
yes
4. Advance/reverse the Clutch Gear
yes
three times. Is it slipping?
+———*p 16*Replace defective Clutch
Gear Spring
no
5. Look through Viewfinder. Recock yes
spring witness mark visible?
+———*p 16*Broken post on Mainframe
no
6. Remove Rear Panel. Is pin moving? yes
+——*p 16*TMC pivot hole inner
surface is damaged
no
7. Drop the Shutter & unseat the
bellows. Is Baffle damaged?
yes
+———*p 16*Replace the Baffle
no
8. Are adhesives under TMC holding
it down?
yes
+———*p 16*Remove by cleaning Mainframe
& possibly replacing TMC
no
9. Carefully remove TMC/VMC. Is the
junction at pivot tight?
yes
+———*p 16*Adjust VMC pivot tabs
or replace VMC
no
10.Is hinge pin tight at TMC?
yes
+———*p 16*TMC pivot hole inner
surface is damaged. Replace TMC
or check for bent hinge pin.
TMC
VMC
Taking Mirror Carrier
Viewing Mirror Carrier
MF Mainframe
ID Pivot hole Inside Diameter/Inner Surface
POLAROID CORPORATION
Customer Service Support
201 Burlington Road
Bedford, MA 01730
GLOBAL TECHNICAL
SERVICES
REPAIR INFORMATION
Int'l
EXP
SUB
RIB NO. JOSH # 95-25
SPECIAL
DATE:
NOVEMBER 21, 1995
TECH. SERVICES:
MAT'L SERVICES:
QUAL. CONTROL:
OPERATIONS:
TO:
LIST
FROM:
DWAYNE BILLINGSLEY
SUBJECT:
RECOCK LINK SPRING POST REPAIR
Introduction:
There have been a number of reports of breaking recock link spring posts on the Vision/JoyCam/Captiva
main frame. (See Figure 1) When the post breaks, the camera is rendered inoperative requiring a repair
that consists of replacing the main frame. A repair part has been developed which allows the main frame
to be repaired, rather than replaced.
Recock
Link
Recock Link
Spring
Recock
Latch
Recock
Latch
Spring
Recock
Link Spring
Post
Figure 1 Affected Area of Main Frame
THIS BULLETIN SHOULD BE FILED IN THE SERVICE MANUAL OF THE PRODUCT TO WHICH IT REFERS.
Repair Procedure:
NOTE:
If the post on the main frame has broken, there is a liklihood that the recock link spring
has fallen into another part of the camera and caused more extensive damage. Examine
the camera carefully and if additional damage is found, make an analysis to determine if
the following procedure should be done or if the entire camera should be replaced.
1.
Remove the main frame from the camera and disassemble it to the point where the area of the
broken post is accessible.
2.
If necessary, file down the post area so the surface on the main frame is smooth.
3.
As shown in Figure 2, orient the repair recock link spring hook #1A2678A over the wall of the
main frame and insert it so the flat bottom portion rests in the main frame cavity and the upper
hook portion is latched onto the wall. Figure 3 shows a correctly inserted repair recock link
spring hook.
4.
Reassemble the camera and cycle it a few times to verify proper operation.
File this area smooth,
if necessary
Repair Recock Link
Spring Hook #1A2678A
Repair Recock Link
Spring Hook in position
Main frame
cavity
Figure 2
Figure 3
Parts Availability:
Repair recock link spring hook # 1A2678A will be available from Material Services in Bedford Massachusetts after
. Please order from normal sources
POLAROID CORPORATION
Consumer Services Division
784 Memorial Drive
Cambridge, MA 02139
TECHNICAL SERVICES
DEPARTMENT
PRODUCT ALERT
Int'l
EXP
SUB
P.A. NO.
SPECIAL
DATE:
GEN #94-4
JUNE 27, 1994
TECH. SERVICES:
MAT'L SERVICES:
QUAL. CONTROL:
OPERATIONS:
TO:
LIST
FROM:
DICK CURTIS
SUBJECT:
SUSPECT AD-90 MINIROLLERS #1B8281A (PID #618492)
BACKGROUND:
Reports of film spread problems have been traced to AD-90 minirollers with date codes of E412A and E413A.
(Figure 1) The problem, which is not customer-correctable, is evidenced as incomplete coverage.
CORRECTIVE ACTION:
Customers who complain of incomplete coverage problems, should be asked to remove and examine the AD-90
minirollers. If the date code is either E412A or E413A, the customer should be told to stop using the minirollers
and a new set of minirollers should be sent at no charge. (This assumes that the minirollers have been properly
cleaned and that debris could not be causing the incomplete spread.)
Please note that not all minirollers with these date codes are defective. Minirollers with these date codes should be
replaced only if these has been a complaint of incomplete coverage.
DATE CODE
LOCATED ON SIDE OF
PLATFORM OPPOSITE
"POLAROID" IMPRINT
FIGURE 1
LOCATION 0F DATE CODE ON AD-90 MINIROLLERS
THIS BULLETIN SHOULD BE FILED IN THE SERVICE MANUAL OF THE PRODUCT TO WHICH IT REFERS.
POLAROID CORPORATION
Customer Support Services
201 Burlington Road
Bedford, MA 01730
TECHNICAL SERVICES
DEPARTMENT
PRODUCT ALERT
Int'l
EXP
SUB
P.A. NO.
SPECIAL
DATE:
545 #95-31
April 20, 1995
TECH. SERVICES:
MAT'L SERVICES:
QUAL. CONTROL:
OPERATIONS:
TO:
LIST
FROM:
DICK CURTIS
SUBJECT:
REMOVING TRAPPED END CAPS IN 545i FILMHOLDER
BACKGROUND:
There have been a number of 545i Filmholders returned for repair with complaints of end caps being
trapped inside. The removal of end caps from this filmholder is a simple procedure, which customers can
easily be taught to do. When you return a filmholder after removing the end cap, insert the accompanying procedure with the unit.
THIS BULLETIN SHOULD BE FILED IN THE SERVICE MANUAL OF THE PRODUCT TO WHICH IT REFERS.
TO REMOVE A FILM END CAP FROM A 545i FILMHOLDER:
1.
Turn the selector lever to "L" (load).
2.
Open the roller cover.
3.
Lay the filmholder flat and grasp under one of
the adaptor clips with the tips of your fingers.
Firmly pull the clip upward to free it from the
lower member. If necessary, pry the clip off the
lower member using a tool which will not mar
the finish of the unit. (A soldering aide is ideal
for this purpose.) Remove the second adaptor
clip in the same manner.
4.
Lift the lower member off the main
member and remove the end clip.
Orient the lower member over the main
member and secure the two assemblies
by snapping the adaptor clips in place.
Note that the top of the adaptor clip is
narrower than the base. The base fits
under the main member while the top
snaps over the lower member.
6.
Close the roller cover and check the
operation of the filmholder. If the
filmholder does not work properly, be
certain that you have assembled the unit
properly. If you cannot get the unit to
work properly, return it to the nearest
Polaroid Authorized Repair Facility.
5.
April, 95
Roller
Cover
Adaptor
Clip
Adaptor
Clip
Lower
Member
Main
Member
Roller
Cover
Adaptor
Clip
Adaptor
Clip
Lower
Member
Main
Member
Pry up
and out
Pry up
and out
Roller Cover
Opened
End Cap
End Cap
POLAROID CORPORATION
Customer Support Services
201 Burlington Road
Bedford, MA 01730
GLOBAL TECHNICAL
SERVICES
PRODUCT ALERT
Int'l
EXP
SUB
P.A. NO. 545 #95-32
SPECIAL
DATE:
SEPT 25, 1995
TECH. SERVICES:
MAT'L SERVICES:
QUAL. CONTROL:
OPERATIONS:
TO:
LIST
FROM:
DICK CURTIS
SUBJECT:
LOWER MEMBER REWORK FOR COMPATIBILITY WITH
WISTA & LINKHOF TECHNIKA CAMERAS
BACKGROUND:
Manufacturing at the Vale of Leven in Scotland has initiated a rework on the Lower Member of 545i
Filmholders. The purpose of the rework is to make the 545i compatible with Wista and Linkhof
Technika cameras. As seen on the attached Deviation Notice, the 5.776" dimension of the Lower Member has been changed to 6.00".
IDENTIFICATION:
As a result of this modification, the part number of the Lower Member changes from 1D1059A to
1D1059B. Additionally, the configuration code of 545i Filmholders made with the modified Lower
Member has changed from "B" to "C" and, starting with lot #021, master shipping cartons and individual
shipping cartons containing the modified Filmholder carry a date code of "H4".
-over-
THIS BULLETIN SHOULD BE FILED IN THE SERVICE MANUAL OF THE PRODUCT TO WHICH IT REFERS.
5.766"
6.00"
POLAROID CORPORATION
Customer Support Services
201 Burlington Road
Bedford, MA 01730
TECHNICAL SERVICES
DEPARTMENT
NEW PRODUCT INFORMATION
Int'l
EXP
SUB
P.A. NO.
SPECIAL
DATE:
LCD 94-1
JU;Y 11. 1994
TECH. SERVICES:
MAT'L SERVICES:
QUAL. CONTROL:
OPERATIONS:
TO:
LIST
FROM:
NICK CURRERI
SUBJECT:
INTRODUCTION OF POLAROID LCD PANELS
Introduction
Three LCD Panel Overhead Projection systems
(Polaview 1500, 1800, and 3000) have been
recently introduced by Polaroid. Each LCD panel
is designed to convert an overhead projector into a
computer output device.
The Polaview LCD panels are compatible with
most PC’s (Apple Macintosh and IBM compatibles)
and will display resolutions up to 640 x 480.
The Polaview 1500 uses Film Super Twist Nematic
(FSTN) technology which is referred to as a
passive matrix. This panel is the least expensive of
the three panels.
The Polaview 1800 and 3000 use Thin Film Transistor (TFT) technology which is referred to as an active
matrix. The TFT type has a brighter and higher contrast than the FSTN type.
Refer to the Comparison Chart at the end of this New Product Alert for specific information pertaining to
the features of the new LCD panels (Polaview 1500, 1800, and 3000) and the existing DP2000 LCD
panel.
THIS BULLETIN SHOULD BE FILED IN THE SERVICE MANUAL OF THE PRODUCT TO WHICH IT REFERS.
Availability
The Polaview LCD Panels (1500, 1800, and 3000) will be available for sale during the second quarter of
1994.
Service Policy
U.S.
The Polaview User Manual instructs the customer to call Polaroid Technical Assistance Hotline (1 800
225 1618, Mon - Fri. 8AM - 8PM EST). A Technical Assistance Representative, in turn, will advise and
assist the Customer. If the Technical Representative determines that remedial phone actions cannot
resolve the situation, the Customer will be instructed to return the defective Polaview prepaid and insured
in the original or comparable packaging to:
Polaroid
784 Memorial Drive
Cambridge, Ma. 02139
Attn: IndustriaI Repair
The Polaview will be repaired or exchanged and then returned to the Customer within 5 working days
after the receipt of the defective unit by Polaroid.
International
If outside the U.S., Customers must contact the nearest Polaroid Office (addresses are in the rear of the
User Manual).
Early Return Program
To provide Polaroid with early information on Customer acceptance and performance of the Polaview, an
Early Returns Program is being implemented.
Under this program, all defective Polaviews will be initially analyzed against performance standards,
estimated failure rates, and estimated reliability standards in an attempt to: isolate deviations; address
comments and questions from Customers; and to recommend solutions. Reports highlighting Early
Return findings and information will be issued.
Warranty Policy
All LCD Panels are warranted for one year from the date of purchase.
OutofWarranty Policy
The procedures will be the same as they are for warranty repairs, except the Customer will be charged for
work performed, parts, and labor.
Parts/Documentation
Parts and Documentation for the LCD Panels will be available as follows:
Parts Catalog
Parts Availability
Service Manual
DP1500
DP1800/3000
7/1/94
8/15/94
7/1/94
7/1/94
7/1/94
7/1/94
Training
Service Centers will be provided with a Service Manual and a Parts Catalog. Training will be provided if
necessary.
Polaroid LCD Panels
Polaroid LCD Panels
Feature Comparison
Chart
PolaView
1500
PolaView
1800
DP
2000
PolaView
3000
LCD Type
LCD Size (ding)
LCD Resolution
Max.lnput Resolution
Max.Color Capability
Contrast Ratio
Response Time
Direct Video Input
Amplifier & Speaker
Infrared Remote Control
Mouse Emulation
Hard Attache Case
Dimensions
Weight
SVGA
VGA
EGA
CGA
MAC 11
MAC ILC
Quadra
Centris
Power Book
DualScan Passive
8.4 inches
640x480
800x600
256,000
20:1
100 ms.
No
No
Yes
Yes
Yes
12.2x1 2.2x1 .57 in.
4.7 lb.
Yes
Yes
Yes (opt.cable)
Yes (opt.cable)
Yes
Yes
Yes
Yes
Yes
Active Matrix TFT
8.4 inches
640x480
800x600
2.1 million
100:1
30 ms.
No (opt)
No
Yes
No
Yes
12.2x1 2.2x1.57 in.
5.5. lb. 4.7 lb.
Yes
Yes
Yes (opt.cable)
Yes (opt.cable)
Yes
Yes
Yes
Yes
Yes
Active Matrix TFT
10.4 inches
640x480
640x480
16.7 million
100:1
30 ms.
No (opt)
No
No
No
Yes
12.2x12.2x1.75 in
4.7 lb
No
Yes
Yes (opt. cable)
Yes (opt. cable)
Yes
Yes
Yes
Yes
Yes
Active Matrix TFT
8.4 inches
640x480
800x600
16.7 million
100:1
30 ms.
Yes
Yes
Yes
Yes
Yes
12.2x12.2x1.57 in.
4.7 lb.
Yes
Yes
Yes (opt.cable)
Yes (opt cable)
Yes
Yes
Yes
Yes
Yes
Suggested Retail
$3495.00
$4995.00
$5995.00
$6695.00
The latest "dualscan"
passive color LCD
technology, remote
mouse emulation right
on the remote control.
Displays 2 1 million colors
from SVGA,VGA, or
Macintosh computers.
High contrast, fast
response time,easy to
use,low weight and small
size makes it a a very
portable LCD panel.
World’s first panel
capable of accurately
interpreting and
displaying all 16.7
million colors from a
24bit computer
video sources
A”real” Multimedia LCD
panel with true color,
onboard amp. and
speaker, direct video
inputs, microphone,
timer and mouse
emulation included on
the remote control.
POLAROID CORPORATION
Customer Support Services
201 Burlington Road
Bedford, MA 01730
TECHNICAL SERVICES
DEPARTMENT
NEW PRODUCT INFORMATION
Int'l
EXP
SUB
P.A. NO. LCD #95-2
SPECIAL
DATE:
December 13, 1995
TECH. SERVICES:
MAT'L SERVICES:
QUAL. CONTROL:
OPERATIONS:
TO:
List
FROM:
Arvin M. Arvind
SUBJECT:
NEW POLAVIEW LCD PROJECTORS
Polaview
LCD
Projector
INTRODUCTION:
Starting in the 3rd Quarter of 1995, five desktop Polaview LCD Projectors will be available from Polaroid. They are:
MODEL
PID Number
Polaview Model 105 LCD Projector
Polaview Model 95 LCD Projector
Polaview Model 90 LCD Projector
Polaview Model 85E LCD Projector
Polaview Model 80 LCD Projector
620222
620220
620218
620495
620216
THIS BULLETIN SHOULD BE FILED IN THE SERVICE MANUAL OF THE PRODUCT TO WHICH IT REFERS.
The Polaview LCD projectors are completely self-contained personal computer peripherals which
project computer and video images onto a large screen for audience viewing. They use an active
matrix LCD for sharp, crisp projected images and are the brightest desktop projectors in the marketplace today.
The Polaview LCD projectors display resolutions up to 640 x 480 and are compatible with most computers (including Apple Macintosh and IBM compatibles) .
PRODUCT LINE DESCRIPTION:
Key features of two of the Polaview LCD Projectors are summarized below as examples of features of
all:
Polaview 105 LCD Projector:
·
Advanced polysilicon LCD delivers brilliant images in any lighting conditions. 300 ANSI lumens
and advanced optics project bright saturated colors.
·
Easy remote control of image size (1 to 1.6 diagonal size) and focus vida power zoom lens
·
Projects 16.7 million brilliant colors
·
Directly compatibile with your personal computer
·
Easy set-up
·
Low profile, compact housing
·
Lightweight (23 lbs or 10.5 Kg), sturdy design for portability
·
Integrated video and audio support (with speakers)
Polaview 95 LCD Projector:
•
500 ANSI lumens create bright, colorful images on-screen in well-lit rooms;
projects 2 million colors from a palette of 16.7 million
•
Metal halide lamp illuminates bright projected images
•
Active matrix LCD for sharp, crisp images
•
Low profile, compact design
•
Light weight and sturdy for portability
SERVICE POLICY:
U.S.
If a customer has a problem with the LCD Projector, the User Manual instructs him/her to call the
Polaroid Technical Assistance Hotline (1-800-432-5355, Mon.- Fri, 8AM to 8PM EST). If the Technical
Assistance Representative determines remedial actions over the phone cannot resolve the situation,
the Customer will be instructed to return the defective LCD projector prepaid and insured in the original or comparable packaging to:
Polaroid EIS Tech Support Division
6755 Mira Mesa Blvd
Suite 123-315
San Diego, CA 92121-4311
and to mark the outside of the shipping box with the Return Authjorization (RA) number (this will
speed up the processing of their repair)
Non-US:
Customers outside the United States must contact the nearest Polaroid Office (addresses are in the
LCD Projector User’s Manual).
EARLY RETURNS PROGRAM:
There is no early returns program for the LCD Projectors.
WARRANTY POLICY:
All LCD Projectors are warranted for one year from the date of purchase.
OUT-OF-WARRANTY POLICY
The procedures will be the same as they are for warranty repairs, except the customer will charged for
work performed, parts, and labor.
PARTS/DOCUMENTATION:
Parts and Documentation for the LCD Projectors will be available as follows:
Parts Catalog
Parts Availabity
Service Manual
After October 1995
After October 1995
None
TRAINING:
Formal training will not be necessary, since Polaroid will not be repairing these products in the US.
Service Centers will be provided with a Parts Catalog.
POLAROID CORPORATION
Consumer Services Division
784 Memorial Drive
Cambridge, MA 02139
TECHNICAL SERVICES
DEPARTMENT
NEW PRODUCT INFO
Int'l
EXP
SUB
N.P.I. NO.
PD #94-1
SPECIAL
DATE:
SEPT. 22, 1994
TECH. SERVICES:
MAT'L SERVICES:
QUAL. CONTROL:
OPERATIONS:
TO:
LIST
FROM:
BILL BOBROWSKI
SUBJECT:
INTRODUCTION OF THE POLAROID PICTUREDRIVE LINE
BACKGROUND:
Polaroid is introducing a new line of removable computer hard disk drives which are intended primarily
for users with high memory storage needs. These include graphic designers, desktop publishers, imaging
and multi-media experts. There are three drives in the line and they are called;
PictureDrive 270 - can read and write 3.5" cartridges in 270MB and 105MB formats
PictureDrive 200 - can read and write 5.25" cartridges in 200MB, 88MB, and 44MB formats
PictureDrive 88 - can read and write 5.25" cartridges in 88MB and 44MB formats
Each PictureDrive is based upon proven Winchester drive mechanism technology and each uses fast,
reliable SyQuest cartridges. Each drive also features automatic error detection/correction and extensive
defect management. The PictureDrive 270, typical of all three drives, is shown in Figure 1.
Figure 1 Picture Drive 270 with SyQuest Cartridges
THIS BULLETIN SHOULD BE FILED IN THE SERVICE MANUAL OF THE PRODUCT TO WHICH IT REFERS.
DESCRIPTION:
Each of the PictureDrives has a SCSI II interface to provide fast access times. In fact, the PictureDrives
are described as the only secondary storage drives which are fast enough to be primary drives. They have
burst data transfer rates of up to 5MB per second.
Among the other features of these drives are:
• the drive heads never come in contact with the disk surface
• on-the-fly error correction
• all of the benefits of removable storage including
- unlimited capacity
- off-line storage
- data transportability
- data security
- fast backups
SPECIFICATIONS:
PictureDrive 270
Interface:
SCSI II
Capacity:
256MB or 105MB formatted minimum
Performance:
average seek time
13.5 msec
average latency
8.33 msec
sustained data transfer rate 2.4 MB per sec
buffer size
128K
Reliability:
non-recoverable data errors 1 in 1012 bits
MTBF
100,000 hours power on time
cartridge insertions
20,000 cycles minimum
component design life
5 years
PictureDrive 200
Interface:
SCSI II
Capacity:
200MB, 88.8MB, or 44.39MB formatted minimum
Performance:
average seek time
18.0 msec (200MB cartridge)
average latency
9.32 msec
sustained data transfer rate 2.0 MB per sec (200MB cartridge)
buffer size
64K
Reliability:
non-recoverable data errors 1 in 1012 bits
MTBF
100,000 hours power on time
cartridge insertions
20,000 cycles minimum
component design life
5 years
SPECIFICATIONS (Continued)
PictureDrive 88
Interface:
SCSI II
Capacity:
88.8MB or 44.39MB formatted minimum
Performance:
average seek time
20 msec (88MB cartridge)
average latency
9.32 msec
buffer size
32K
Reliability:
non-recoverable data errors 1 in 1012 bits
MTBF
100,000 hours power on time
cartridge insertions
20,000 cycles minimum
component design life
5 years
WARRANTY:
Each PictureDrive has a two year warranty. The cartridges carry a five year warranty.
SCHEDULE:
PictureDrives have been available in Japan since June of 1993. They were introduced in the USA at
MacWorld in Boston in August, 1994. It is expected that shipments will begin in late September, 1994.
The current plan is to have units available only through Macwarehouse until some pending issues are
resolved.
EARLY RETURNS PLAN:
An Early Returns Plan will be set up with all customer returns/failures forwarded to Cambridge. An
analysis team will be established to examine each return with the intent of providing early market feedback information to the factory. Once sufficient data has been collected, all returns will be sent to Oak
Brook.
SERVICE PLAN/PARTS AVAILABILITY:
Current plans call for all failed/returned units to be sent to Oak Brook for functionality testing only. Once
testing is completed, units will be forwarded to SyQuest for repairs. Polaroid will not stock repair parts.
PRICING:
PictureDrive PID #
Sugg. List
Cartridges
PID#
Sugg. List
270
618932
$649.00
200
88
TBD
618726
$669.00
$499.00
3.5" 270MB
3.5" 105MB
5.25" 200MB
5.25" 88MB
5.25" 44MB
618933
618970
TBD
618728
618727
$ 99.00
$ 69.00
$109.00
$109.00
$ 79.00
POLAROID CORPORATION
Consumer Services Division
784 Memorial Drive
Cambridge, MA 02139
TECHNICAL SERVICES
DEPARTMENT
REPAIR INFO BULLETIN
Int'l
EXP
SUB
P.A. NO. 35mmScan #94-1
SPECIAL
DATE: November 28, 1994
CPS
TECH. SERVICES:
QUAL. CONTROL:
OPERATIONS:
MATERIAL SVCS:
MANUFACTURING
QUALITY:
MFG. ENG.
DESIGN ENG:
TO:
LIST
FROM:
JIM FEE
SUBJECT:
ELECTRONICS CHANGE IN 35MM SCANNER CONTROLLER BOARDS TO
ELIMINATE LOW LEVEL NOISE
BACKGROUND:
Engineering has authorized a running change in 35mm Scanner Controller Boards #1E6535A. The
purpose of the change is to address customer complaints regarding low level noise seen in the dark
portions of some images. The change involves the installation of a new diode on the board.
ACTION:
If you receive a customer complaint which leads you to believe that a low level noise problem is the
cause, examine the controller board to determine whether new diode D3 has been installed. If it has not,
install the diode according to the procedure which follows:
THIS BULLETIN SHOULD BE FILED IN THE SERVICE MANUAL OF THE PRODUCT TO WHICH IT REFERS.
Part Required:
One National 1N914 or 1N4148 diode or equivalent
Procedure:
1.
Locate microprocessor U14 on the controller board (see Figure 1).
2.
Using an X-acto knife, cut the traces from VDD to Pins 10 and 11 of U14 (see Figure 2).
3.
Bend the legs of the new diode to allow the anode leg to be soldered to pin 1 of R58 and the
cathode leg to be soldered across pins 10 and 11 of U14 (see Figure 3).
NOTE:
4.
For Controller Boards 1E1193A, the reference designation of the resistor noted in
the previous step is R59.
Assemble the unit and run it through a couple of cycles to verify proper operation.
Microprocessor
U14
FIGURE 1
CUT
HERE
U14
Solder anode to
pin 1 of R58 (R59)
R58
ANODE
CUT
HERE
FIGURE 2
D3
CATHODE
Solder cathode across
pins 10 and 11 of U14
FIGURE 3
POLAROID CORPORATION
Consumer Services Division
201 Burlington Road
Bedford, MA 01730
TECHNICAL SERVICES
DEPARTMENT
PRODUCT ALERT
Int'l
EXP
SUB
P.A. NO. 35mm Scan # 95-2
SPECIAL
DATE: June, 1995
TECH. SERVICES:
MAT'L SERVICES:
QUAL. CONTROL:
OPERATIONS:
TO:
LIST
FROM:
JIM FEE
SUBJECT:
SPRINTSCAN 35 CONFIGURATION CHANGES
The SprintScan 35 Scanner was produced in one configuration with no suffix at the end of its serial
number (H400235). However, continuous improvements to the scanner lead to design Configuration " C
".
At present there are now four SprintScan 35 Scanner configurations. Their differences are shown in
Table 1.
Table 1. SprintScan 35 Scanner Configurations
Configuration
Serial Number
Description
Function
No Suffix - First
generation
H400235
N/A
N/A
A
L400500A
Filter Wheel
Changed.
Changes filter wheel neutral
density from 0.5 to 0.6 and
ensures scanning uniformity
with all color channels.
B
M40033B
Controller PC
Board Modified.
Reduces noise to prevent
vertical\diagonal lines.
C
C5001762C
Adds slot cover
to chassis assembly.
Inhibits filter wheel from
over rotating and getting
lost, stuck, or jammed.
Note: The first Configuration " C " unit will be manufactured with the serial number C5001762C.
This configuration also includes the changes made to configurations " A " and " B ".
THIS BULLETIN SHOULD BE FILED IN THE SERVICE MANUAL OF THE PRODUCT TO WHICH IT REFERS.
Configuration Identification
Location
The Serial Number (Figure 1) is located:
• On the outside of the shipping carton (All Configurations)
• Back panel of the Scanner below its SCSI ports (First generation to Configuration " B ")
• Bottom of Scanner (Configuration " C " and all subsequent Configurations)
Identification
The Serial Number identifies the SprintScan 35mm Scanner as follows:
Month: A - January
B - February
C - March
Sequential Number
C 5 001762 C
Year: 4 - 1994
5 - 1995
Hardware Configuration Levels: A - Filter Wheel Changed
B - Controller PC Board
Modified
C - Adds Slot Cover
to Chassis Assembly
Rear Panel
SCSI Connectors
* Location of
Serial Number
* Serial Number for Configuration " C "
located on bottom of scanner
Figure 1. Serial Number Location
POLAROID CORPORATION
Consumer Services Division
201 Burlington Road
Bedford, MA 01730
TECHNICAL SERVICES
DEPARTMENT
PRODUCT ALERT
Int'l
EXP
SUB
P.A. NO. 35mm Scan # 95-3
SPECIAL
DATE: June, 1995
TECH. SERVICES:
MAT'L SERVICES:
QUAL. CONTROL:
OPERATIONS:
TO:
LIST
FROM:
JIM FEE
SUBJECT:
SprintScan 35 SCSI TERMINATION POWER
Problem
SprintScan 35 scanner malfunctions have resently taken place when a laptop computer (PowerBook type)
was connected to it. The type of malfunction that took place was a " Scanner Hardware Error ". This
type of error prevented the scanner from :
• Properly performing its self-test routine
• Finding its analog range
Investigation found that a blown SCSI interface fuse on the main controller PC board caused the error.
Since laptop computers do not provide termination power, the scanner's external SCSI terminator
dragged the SCSI signals to ground prohibiting the laptop computer from properly communicating with
its hard drive.
Causes of Blown SCSI Interface Fuse
• Power surges during hot connecting or disconnecting SCSI cable to host computer
• Shorting termination power pin to ground through the SCSI connector
• Incorrectly plugging the scanner into the host computer's parallel port instead of its SCSI port
Caution:
NEVER HOT DISCONNECT OR CONNECT THE HOST COMPUTER
TO THE SCSI INTERFACE CONNECTOR.
THIS BULLETIN SHOULD BE FILED IN THE SERVICE MANUAL OF THE PRODUCT TO WHICH IT REFERS.
Checking for Blown SCSI Interface Fuse
1.Turn off the scanner by setting its Power On/Off (1/0) switch to Off (0).
WARNING
•
When turning on the system always make sure that the
scanner is turned on first and then the host computer.
•
When turning off the system its the opposite - always turn
off the host computer first and then the scanner.
2. Disconnect host computer from the SCSI interface connector.
Note: Do not disconnect SCSI terminator.
3. Turn on the scanner by setting its Power On/Off (1/0) switch to On (1). The green Power LED
lights
to indicate that the scanner
is turned on.
4. During power-up, the scanner initiates its self-test routine. The yellow Ready LED is off while the
scanner cycles through its self-test routine.
5. Upon completion, the transporter returns to its home position and the yellow Ready LED lights
steady
to indicate that the scanner is ready to operate.
Notes: • If the yellow Ready LED comes on or continually blinks, the SCSI interface fuse is OK.
• If the yellow Ready LED is dim, the SCSI interface fuse is blown . Replace SCSI
interface fuse as explained in the provided replacement procedure.
Replacing SCSI Interface Fuse
CAUTION
The SCSI fuse is soldered to the main controller PC board.
The Main Controller PC Board is particularly sensitive to
static discharges. Be sure to use an anti-static mat and wrist
strap during this procedure.
1. Remove the top housing as explained in Section 4 of the SprintScan 35 Slide Scanner Service Manual.
2. Unsolder the SCSI interface fuse (Figure 1) and then replace it with a new one.
Notes:
• When replacing it be very careful not to damage the main controller PC board.
• Fuse Rating
-
• Fuse Part Number -
1.0A Fast Action/Surface Mount
5N0008001
3. Re-install the top housing as explained Section 4 of the SprintScan 35 Slide Scanner Service Manual.
Parts Availability
Fuse 5N0008001 will be available after August 1, 1995 from:
Material Services Department
Polaroid Corporation
201 Burlington Road
Bedford, MA 01730
Please order from normal sources.
SCSI
Interface Fuse
Main Controller
PC Board
Figure 1 Replacing SCSI Interface Fuse on Main Controller PC Board
POLAROID CORPORATION
Consumer Services Division
201 Burlington Road
Bedford, MA 01730
TECHNICAL SERVICES
DEPARTMENT
REPAIR INFO BULLETIN
Int'l
EXP
SUB
R.I.B. NO. 35mm Scan # 95-4
SPECIAL
DATE: June, 1995
TECH. SERVICES:
MAT'L SERVICES:
QUAL. CONTROL:
OPERATIONS:
TO:
LIST
FROM:
JIM FEE
SUBJECT:
35mm SprintScan Firmware (CPU) Update/Replacement
Background
All SprintScan 35mm Scanner's that are returned from the field with any of the following problems must
be replaced with the latest firmware (CPU).
Note: System software is resident in the firmware (CPU).
•
•
•
•
Intermittent hanging or crashing during a scan
Non-repeatable quality from scan-to-scan
High frequency noise/striping in scanned images (includes diagonal, horizontal or vertical lines)
Artifacts at non-native resolution settings
SprintScan 35mm Scanner's with serial numbers before B500634B must also be replaced with the latest
firmware (CPU).
Serial Number Location and Identification
Location (Figure 1)
The Serial Number is located:
• On the outside of the shipping carton (All Configurations)
• Back panel of the Scanner below its SCSI ports (First generation to Configuration " B ")
• Bottom of Scanner (Configuration " C " and all subsequent Configurations)
THIS BULLETIN SHOULD BE FILED IN THE SERVICE MANUAL OF THE PRODUCT TO WHICH IT REFERS.
Identification
The Serial Number identifies the SprintScan 35mm Scanner as follows:
Month: A - January
B - February
Sequential Number
B 5 00634 B
Hardware Configuration Level
Year: 4 - 1994
5 - 1995
Rear Panel
SCSI Connectors
* Location of
Serial Number
* Serial Number for Configuration " C "
located on bottom of scanner
Figure 1. Serial Number Location
FIRMWARE (CPU) UPGRADE/REPLACEMENT
Required Tools
• Anti-Static Mat and Wrist Strap
• Phillips Screw Driver
• Universal PLCC Chip Puller
CPU Removal/Replacement
Caution: The Main Controller PC Board is particularly sensitive to static discharges. Be sure to use an
anti-static mat and wrist strap during this procedure.
1. Turn off the SprintScan 35mm Scanner.
2.
Unplug the AC power cord and then remove it from the socket of the scanner.
HIGH VOLTAGE
WARNING
Failure to remove the power cord from the scanner
could cause severe electrical shock.
3. Remove the scanner cover as explained in the SprintScan 35mm Scanner Service Manual.
4. Position the scanner as shown in Figure 2.
Caution: Always touch the metal plate supporting the SCSI connectors before touching the Main
Controller PC Board.
5. Locate the CPU on the Main Controller PC Board. Observe its orientation in its socket - dot and
beveled corner faces front of scanner (Figure 2).
6. Insert the fingers of the chip puller into the provided slots at the top left and bottom right corners of
the socket.
7. Remove the CPU by gently but firmly squeezing the handles of the chip puller together.
8. Properly position the replacement CPU (Part number 1F4554A) squarely into its socket making sure
that its beveled corner goes to the beveled corner of the socket.
9. Place a thumb in the middle of the CPU and two fingers underneath it. Evenly squeeze the
replacement CPU into place.
Note: The replacement CPU should be close to flush and parallel with the top of its socket when it
is properly seated.
Universal PLCC
Chip Pull
CPU
CPU
Figure 2. CPU Replacement
10. Install the scanner cover as explained in the SprintScan 35mm Scanner Service Manual.
11. Plug the AC power cord into the socket of the scanner and then plug it into an AC power receptacle.
12. Turn on the scanner by setting its Power On/Off (1/0) switch to On (1). The yellow Ready LED
blinks.
Note: After CPU replacement, the power-up sequence must be cycled twice to turn on the scanner.
WARNING
•
When turning on the system always make sure that the
scanner is turned on first and then the host computer.
•
When turning off the system its the opposite - always turn
off the host computer first and then the scanner.
13. During power-up, the scanner initiates its self-test routine. The yellow Ready LED is off while the
scanner cycles through its self-test routine.
14. Upon completion of the self-test routine, the yellow Ready LED continually blinks (flashes)
indicating that the CPU has been replaced.
15. Power-down, wait approximately 10 seconds and then power-up again. This action resets the
system.
16. Upon completion of the self-test routine (passed), the transporter returns to its home position and the
yellow Ready LED lights steady to indicate that the scanner is ready to operate.
Note: If the yellow Ready LED continually blinks (flashes), the scanner failed its self-test routine.
Check and reseat the CPU, if necessary and then repeat the power-down, power-up sequence.
17. During the first scan and each subsequent scan that detects drift in the lamp or the front end, the
scanner initiates its calibration routine.
Parts Availability
Replacement CPU # 1F4554A is available from:
Material Services Department
Polaroid Corporation
201 Burlington Road
Bedford, MA 01730
Please order from normal sources.
POLAROID CORPORATION
Customer Support Services
201 Burlington Road
Bedford, MA 01730
TECHNICAL SERVICES
DEPARTMENT
PRODUCT ALERT
Int'l
EXP
SUB
P.A. NO. 35MM Scan 95-5
SPECIAL
DATE:
June, 1995
TECH. SERVICES:
MAT'L SERVICES:
QUAL. CONTROL:
OPERATIONS:
TO:
LIST
FROM:
JIM FEE
SUBJECT:
STREAKING CAUSED BY DEFECTIVE VERTICAL CLOCK DRIVER (U9)
PROBLEM
Recently a scanner was returned for repair with the customer complaining of streaks in the images. This
particular scanner had been upgraded with an issue 02 Controller Board (1E6536 ). Additionally, the
Sensor Board (1E6533) had been upgraded to issue 02. Through thorough engineering analysis the
cause of the streaking was positively determined to be a defective vertical clock driver (U9).
This failure warrants special attention because, aside from the streaking, the scanner was normal in every
other aspect. The streaks were not visible in all images and it is likely that this unit would have passed
LabView testing. Because of the subtlety of this failure mode, all scanners returned for repair should
be subjected to the following test before they are returned to the customer.
- over -
THIS BULLETIN SHOULD BE FILED IN THE SERVICE MANUAL OF THE PRODUCT TO WHICH IT REFERS.
TESTING
1.
Connect the negative lead of a DC voltmeter to the scanner back panel (ground).
2.
Place the voltmeter positive probe on the VCLK NEG pad of the Sensor Board (see Figure 1):
the voltage should be -6.0 VDC + .5 volts
3.
Now, place the voltmeter positive probe on the VCLK POS pad of the Sensor Board (Figure 1):
the voltage should be 8.5 VDC + .5 volts
IF EITHER OF THESE VOLTAGES ARE OUT-OF-SPEC, THE SENSOR BOARD
MUST BE REPLACED WITH A NEW ONE.
VCLK NEG
VCLK POS
FIGURE 1 SENSOR BOARD TEST POINTS
POLAROID CORPORATION
Consumer Services Division
201 Burlington Road
Bedford, MA 01730
TECHNICAL SERVICES
DEPARTMENT
PRODUCT ALERT
Int'l
TO:
LIST
FROM:
JIM FEE
SUBJECT:
STREAKS
EXP
SUB
P.A. NO. 35 mm Scan #95-5a
SPECIAL
DATE:
March 1, 1996
TECH. SERVICES:
MAT'L SERVICES:
QUAL. CONTROL:
OPERATIONS:
Problem
A SprintScan 35 mm scanner has been recently returned from the field with a streaking problem. Upon
close examination, it was determined that this particular scanner had been updated with an issue 02
Controller PC Board and an issue 02 Sensor PC Board. A defective vertical clock driver (U9) on the
Sensor PC Board was positively identified as the cause of the streaking.
This malfunction requires special attention because, aside from the streaking problem, the scanner
functions normally in every way. The streaks were not visible in all images, and it was most likely that
this scanner would have passed its LabView test.
Due to this subtle scanner malfunction, it is recommended that all scanners returned for repair should be
checked out to make sure that the vertical clock driver (U9) on the Sensor PC Board functions properly.
Checking Vertical Clock Driver (Figure 1)
CAUTION
The PC boards inside the scanner are particularly sensitive
to static discharge. Be sure to use an anti-static mat and
wrist strap during this procedure.
1. Remove the top housing as explained in Section 4 of the SprintScan 35 Slide Scanner Service Manual.
2. Connect the negative lead of a dc voltage meter to the ground located on the scanner back panel.
THIS BULLETIN SHOULD BE FILED IN THE SERVICE MANUAL OF THE PRODUCT TO WHICH IT REFERS.
3. Check the negative (VCLK_NEG) and positive (VCLK_POS) output voltages of the vertical clock
driver (U9) on the Sensor PC Board as follows:
•
Connect the positive lead of a dc voltage meter to the negative output voltage (VCLK_NEG) pad
on the Sensor PC Board. The output voltage should read - 6.0 vdc +/- .5.
•
Connect the positive lead of a dc voltage meter to the positive output voltage (VCLK_POS) pad
on the Sensor PC Board. The output voltage should read 8.5 vdc +/- .5.
4. If either the VCLK_NEG or VCLK_POS output voltages are out of specification, replace the Sensor
PC Board.
Figure 1. Sensor PC Board Test Points
POLAROID CORPORATION
Consumer Services Division
201 Burlington Road
Bedford, MA 01730
TECHNICAL SERVICES
DEPARTMENT
PRODUCT ALERT
Int'l
EXP
SUB
P.A. NO. 35 mm Scan #96 -1
SPECIAL
DATE:
March 1, 1996
TECH. SERVICES:
MAT'L SERVICES:
QUAL. CONTROL:
OPERATIONS:
TO:
LIST
FROM:
JIM FEE
SUBJECT:
LOW LEVEL HORIZONTAL BANDS
Background
SprintScan 35 mm scanners have been recently returned from the field with two discernible types of low
level horizontal band problems. Table 1 list the problem types, causes and action that is needed to correct
the problem.
Problem 1
This low level horizontal band problem was caused from SCSI termination power load variations. The
load on the scanner's 5 vdc power supply that was required to supply SCSI termination power during burst
activity caused low frequency cross-regulation on the power supply's 15 vdc line voltage. This coupled
into the output images through the CCD.
As seen on a PC, the output images showed low level horizontal bands that tended to be fairly neutral in
color and usually had a period of 64k bytes.
As seen on a MAC, the output images showed low level horizontal bands that tended to be faint colored
bands which at the highest resolution were grouped into RGB or CMY consecutive bands separated by 32
lines vertically Red-to-Green and Green-to-Blue (or Cyan-to-Magenta and Magenta-to-Yellow). Usually
only one or two of the bands in a group were visible as a function of the image content (color and details).
When first seen , they were most often visible in negatives in areas of flat pastels such as blue sky.
THIS BULLETIN SHOULD BE FILED IN THE SERVICE MANUAL OF THE PRODUCT TO WHICH IT REFERS.
Problem 2
This low level horizontal band problem was caused by unexpected CCD behavior when operated under
common modes using certain negative film files, or with scanner's with particularly dimmed bulbs and
more negative film files. This effect which seemed only to appear in a fraction of the scanners caused a
slight increase in the blue signal for one or two lines only at a stop-start boundary, resulting in a faint blue
horizontal band. Based on the platform speed, available memory, scan widths etc., stop-starts could be
invoked as low as half of full resolution. Due to the nature of the negative film files, the effect may be seen
primarily in the blue channel, and secondarily in the red. It differs in nature to the SCSI related banding in
that it appears to be limited to one or two lines, and requires a stop-start to appear at all. In general it is
much more difficult to detect than the SCSI related banding, which does not necessarily have to be
connected to a stop-start.
Table 1. Low Level Band Problems
Problem
1
Cause
CCD Susceptible
Made worse if:
• Host computer has blown
termination fuse or low
termination power supply.
• Scanner's 5 vdc power supply
high.
Controller PC Board (Issue 04)
Corrective Action
PC - If no writable storage devices on
SCSI bus (hard drives, etc.), run with
no external terminator with a short
SCSI cable.
MAC - Run with scanner 1ST in SCSI
chain (closest to host computer)
and place the external terminator
at the end of the chain.
Replace termination power diode - Phillips
PRLL5817 with BYD77A.
Note: Replacement of the termination
power diode reduces the scanner
termination power to a voltage lower
than the host computer reducing the
banding effect significantly as long as
the host or another SCSI peripheral
provided nominal termination power.
Host computer must not have blown
termination power fuse.
2
CCD susceptible, problem may
occur with negative film tables:
•
•
•
•
•
•
Fuji Reala 4F
Kodak Ektapress 400 67
Fuji HG 1600 6D
Kodak Ektar 6F
Fuji Super G 400 75
Kodak Ektapress 1600 75
• Try to repeat problem with a lower
table on the list. If it occurs with the
last few tables, switch film tables.
• Replace firmware with version 1.02 or
above.
Aging bulb with CCD susceptible,
problem may occur with negative
film tables:
• Try to repeat problem with a lower
table on the list. If it occurs with the
last few tables, switch film tables.
Kodak Royal Gold 77
Fuji HG 400 7D
Fuji Super G 100 83
Kodak Gold 88
Kodak VPS 8A
• Replace bulb.
• Replace firmware with version 1.02 or
above.
Table 1. Low Level Band Problems (Con't)
Problem
2 (Con't)
Cause
Really dim bulb with CCD
susceptible, problem may
occur with negative film
tables:
Corrective Action
• Try to repeat problem with a lower
table on the list. If it occurs with the
last few tables, switch film tables.
• Replace bulb.
Polaroid One Film 94
Agfa Optima 96
Polaroid HD3 9C
Raw Negative AE
Generic Negative AE
• Replace firmware with version 1.02 or
above.
POLAROID CORPORATION
Consumer Services Division
201 Burlington Road
Bedford, MA 01730
TECHNICAL SERVICES
DEPARTMENT
PRODUCT ALERT
Int'l
TO:
LIST
EXP
SUB
P.A. NO. 35 mm Scan # 96-2
SPECIAL
DATE:
March 1, 1996
TECH. SERVICES:
MAT'L SERVICES:
QUAL. CONTROL:
OPERATIONS:
FROM:
JIM FEE
SUBJECT:
DRIVE MOTOR SCREW PITCH
Scanner drive motors with an incorrect screw pitch of .06 have been mistakenly placed into stock. The
screw pitch for the scanner drive motor should be .074.
When replacing a drive motor always make sure it has the correct screw pitch. Figure 1 shows the correct
drive motor type to be used. If the drive motor is incorrect, please send it back to materials control for
replacement.
Type 4H4018S0465
PN 9513
.074 Pitch
Type 4H4018S0455
PN 9533
.06 Pitch
Correct Pitch
Incorrect Pitch
Figure 1. Drive Motor
THIS BULLETIN SHOULD BE FILED IN THE SERVICE MANUAL OF THE PRODUCT TO WHICH IT REFERS.
POLAROID CORPORATION
Consumer Services Division
201 Burlington Road
Bedford, MA 01730
TECHNICAL SERVICES
DEPARTMENT
PRODUCT ALERT
Int'l
EXP
SUB
P.A. NO. 35 mm Scan #96-3
SPECIAL
DATE:
March 1, 1996
TECH. SERVICES:
MAT'L SERVICES:
QUAL. CONTROL:
OPERATIONS:
TO:
LIST
FROM:
JIM FEE
SUBJECT:
STREAKS INDUCED BY ANALOG NOISE
Problem
SprintScan 35 mm scanners have been recently returned from the field with streaking problems induced by
analog noise from its power supply and inverter PC boards. To rectify this problem it is recommended
that a metal protective shield (PN 1E1159A) be installed above its power supply and inverter PC boards.
Metal Protective Shield Installation (Figure 1)
CAUTION
The PC boards inside the scanner are particularly sensitive
to static discharge. Be sure to use an anti-static mat and
wrist strap during this installation procedure.
1. Remove the top housing as explained in Section 4 of the SprintScan 35 Slide Scanner Service Manual.
2. Disconnect the following electrical cables from the controller PC board:
•
•
•
•
J1 (Transport Stepper Motor)
J3 (CCD PC Board)
J4 (Filter Wheel Stepper Motor)
J5/J6 (Power Supply)
THIS BULLETIN SHOULD BE FILED IN THE SERVICE MANUAL OF THE PRODUCT TO WHICH IT REFERS.
3. Remove the four (4) screws that secures the controller PC board to the chassis mount assembly and to
its bottom case supports.
4. Gently lift off the controller PC board so that you can easily access the three (3) screws that secures
the chassis mount assembly to its bottom case supports.
5. Remove the three (3) screws that secures the chassis mount assembly to its bottom case supports.
6. Gently lift off the chassis mount assembly being careful not to damage the CCD PC board.
7. Install the metal protective shield as follows:
•
•
•
Remove the four (4) screws that secures the power supply PC board to the bottom case.
Place the metal protective shield over the power supply PC board making sure its feet are
properly aligned with the mounting holes on the power supply PC board.
Install and tighten the four (4) secures that secures the metal protective shield and power supply
PC board to the bottom case.
8. Install and tighten the three (3) screws that secures the chassis mount assembly to its bottom case
supports.
9. Install and tighten the four (4) screws that secures the controller PC board to the chassis mount
assembly and to its bottom case supports.
10. Connect the following electrical cables to the controller PC board:
•
•
•
•
J1 (Transport Stepper Motor)
J3 (CCD PC Board)
J4 (Filter Wheel Stepper Motor)
J5/J6 (Power Supply)
11. Install the top housing as explained in Section 4 of the SprintScan 35 Slide Scanner Service Manual.
Shie ld
Figure 1. Metal Protective Shield
POLAROID CORPORATION
Consumer Services Division
201 Burlington Road
Bedford, MA 01730
TECHNICAL SERVICES
DEPARTMENT
PRODUCT ALERT
Int'l
EXP
SUB
P. A. NO. 35mm Scan # 96-4
SPECIAL
DATE: March, 1995
TECH. SERVICES:
MAT'L SERVICES:
QUAL. CONTROL:
OPERATIONS:
TO:
LIST
FROM:
JIM FEE
SUBJECT:
35MM SPRINTSCAN FIRMWARE/HARDWARE UPDATE
Background
All SprintScan 35mm Scanner's that are returned from the field with firmware .77 through .85 must be
replaced with the latest firmware.
This Product Alert also lists the past and current hardware updates to the SprintScan 35mm scanner.
Firmware Updates
Table 1 lists and describes the past and current modifications made to the scanner's firmware.
THIS BULLETIN SHOULD BE FILED IN THE SERVICE MANUAL OF THE PRODUCT TO WHICH IT REFERS.
Table 1. Firmware Updates (Past and Current)
Version
Description
Function
.77
None.
First generation of firmware.
.78
Improves uniformity
correction.
Reduces high frequency noise in
scanned image.
.81
• Improves uniformity
correction.
• Reduces high frequency noise in
scanned image.
• Tightens amount of drift
allowed before the
scanner recalibrates.
• Improves scan-to-scan repeatability.
• Fixes decimation artifact.
• Eliminates horizontal lines at
non-native resolution settings.
.82
Fixes timing glitch in new
ASIC's.
Eliminates scanner hang-up caused by
timing glitch while scanning.
.83
Eliminates race condition
while scanning on
Power PC.
Eliminates scanner hang-up caused by
race condition while scanning negatives.
.84
Eliminates race condition
Eliminates scanner hang-up caused
while acquiring image date. by special software.
.85
Eliminates timing bug.
Corrects image line count.
1.0
Masked programmed.
Incorporates hardware diagnostics.
1.02
Eliminated LSYNC time
out errors.
Corrected false LSYNC error condition.
Note: Sometimes a scanner with a CCD
with a new metal mask fails to
calibrate after the new version of
firmware is installed. If this happens,
replace the new firmware with
version 1.0.
Firmware Version Identification
There are two methods to identify the version of firmware being used by the scanner:
• Visual
• Software
Visual Identification
Remove the scanner cover and look at the label affixed to the firmware. This label contains firmware
version currently being used by the scanner.
Software Identification
MAC
Double click the mouse on the SCSI Probe. The SCSI Probe will display all the SCSI devices.
ID
1
2
3
4
5
6
7
Type
Vendor
Product
Version
SCAN
Polaroid
35mm
.85
Windows
Click the mouse on the About Box. The About Box will display the firmware version (i.e., .85).
Parts Availability
Replacement firmware (PN 1F4699A) is available from:
Material Services Department
Polaroid Corporation
201 Burlington Road
Bedford, MA 01730
Please order from normal sources.
Hardware Updates
Table 2 lists and describes the past and current modifications made to the scanner's hardware.
Table 2. Hardware Modifications
Serial Number
Suffix
Description
Function
H400235
None - First
generation
N/A
N/A
L400500A
A
Filter wheel
changed.
Changes filter wheel neutral
density from 0.5 to 0.6 and
ensures scanning uniformity
with all color channels.
M40033B
B
Controller PC
board modified.
Reduces noise to prevent
vertical\diagonal lines.
C5001762C
C
Adds slot cover to
chassis assembly.
Inhibits filter wheel from
over rotating and getting
lost, stuck, or jammed.
L5110253D
D
Added:
• New inverter PC
board.
• Extends lamp life.
• Metal protective
• Shields the system electronics
shield between
against power supply and
power supply and
inverter induced analog noise.
inverter PC boards. (This eliminated streaks caused
by the induced analog noise.)
Serial Number Location and Identification
Location (Figure 1)
The Serial Number is located:
• On the outside of the shipping carton (All Configurations)
• Back panel of the Scanner below its SCSI ports (First generation to Configuration " B ")
• Bottom of Scanner (Configuration " C " and all subsequent Configurations)
Identification
The Serial Number identifies the SprintScan 35mm Scanner as follows:
Month: A - January
B - February
Sequential Number
B 5 00634 B
Hardware Configuration Level
Year: 4 - 1994
5 - 1995
Rear Panel
SCSI Connectors
* Location of Serial Number
* Serial Number for Configuration " C "
located on bottom of scanner
Figure 1. Serial Number Location
POLAROID CORPORATION
Consumer Services Division
201 Burlington Road
Bedford, MA 01730
TECHNICAL SERVICES
DEPARTMENT
PRODUCT ALERT
Int'l
EXP
SUB
P. A. NO. 35mm Scan # 96-6
SPECIAL
DATE: March, 1996
TECH. SERVICES:
MAT'L SERVICES:
QUAL. CONTROL:
OPERATIONS:
TO:
LIST
FROM:
JIM FEE
SUBJECT:
CONTROLLER PC BOARD UPDATE/REPLACEMENT
BACKGROUND
Currently, all SprintScan 35's are being manufactured with a new Light Tunnel assembly. This change
replaces the existing filter wheel and motor assembly. Because of this change the Controller PC Board
was updated to version 07.
Note: SprintScan's with serial number B60xxxE and above contain the new Light Tunnel assembly and
the updated (version 07) Controller PC Board.
Both versions (01-04 and 07) of Controller PC Board (Figure 1) can be used in the existing and modified
SprintScan 35. Table 1 shows the differences between the old style (version 01-04) and the new style
(version 07) of the Controller PC Board.
Table 1. Controller PC Board
Old Style
New Style
Part Number
1E6536 / 01-04
1E6536 / 07
Resistor R5
Populated
Not Populated
Optical Switch U4
Populated
Not Populated
Filter Wheel Connection
Connected (J4)
Not Used (J4)
THIS BULLETIN SHOULD BE FILED IN THE SERVICE MANUAL OF THE PRODUCT TO WHICH IT REFERS.
Old Style
(P/N 1E6536 / 01-04)
Filter Wheel
New Style
(P/N 1E6536 / 07)
Light Tunnel
Figure 1. Controller PC Board
Controller PC Board Replacement
As stated, both versions (01-04 and 07) of Controller PC Board (Figure 1) can be used as a replacement
part for the existing and modified SprintScan 35. However, certain conditions must be met to achieve
interchangeability. Table 2 shows what must be done to achieve interchangeability.
Note: Currently, both styles of the Controller PC Board are stocked by CSS. Once the old style
Controller PC Boards are depleted, only the new style Controller PC Board will be ordered.
Table 1-2. Controller PC Board Interchangeability
Old Style Board
SprintScan 35 with Filter Wheel
SprintScan 35 with Light Tunnel
Direct Replacement.
Can be used as a replacement with
following change/changes:
• Resistor R5 must be unsoldered
and removed.
New Style Board
Can be used as a replacement with
following change/changes:
• Remove resistor R5 from the old
PC Board being removed and solder
it onto the new replacement PC board.
• Remove optical switch U4 from the
old PC Board being removed and solder
it onto the new replacement PC board.
• Connect filter wheel assembly cable to
connector J4.
Direct Replacement.
POLAROID CORPORATION
Consumer Services Division
201 Burlington Road
Bedford, MA 01730
TECHNICAL SERVICES
DEPARTMENT
PRODUCT ALERT
Int'l
EXP
SUB
P. A. NO. 35mm Scan # 97-1
SPECIAL
DATE: April, 1997
TECH. SERVICES:
MAT'L SERVICES:
QUAL. CONTROL:
OPERATIONS:
TO:
LIST
FROM:
Gerald DiBello
SUBJECT:
2-PIXEL WIDE STREAKS CAUSED BY DEFECTIVE A/D CONVERTER (U18)
Background
One to two percent of SS35 Plus controller PC boards (P/N AA0977A) produced in 1996 may
have a defective A/D converter (U18 - P/N XR D8794AIK ). Defective A/D converters cause
random vertical streaks spaced 2-pixels apart in the scanned images.
Suspected A/D converters have a date code less than 9646 (Figure 1).
Controller PC board
J14
J13
J12
XR D8794AIK
9603
SCSI
Fuse
J10
A/D Converter
(U 18)
J6
LYSNC
J1
J8
AGND
J5
ADIN
J3
Figure 1. A/D converter location
THIS BULLETIN SHOULD BE FILED IN THE SERVICE MANUAL OF THE PRODUCT TO WHICH IT REFERS.
This failure requires special attention because, aside from the vertical streaks, the slide scanner
operates normally in all other aspects. The streaks will not be visible in all scanned images and
it’s possible that the slide scanner will pass a LabView test.
Because of the subtlety of this malfunction, it is recommended that all SS35 PLUS slide
scanners returned for repair with serial numbers from H6 XXXXX Y to M6 XXXXX Y (X is a
number from 0 to 9, Y is a letter from A to Z) be tested before they are returned.
Serial Number Identification and location
Identification
The serial number identifies the SS35 PLUS slide scanner as follows:
Notes:
•
If the slide scanner serial number is from H6 XXXXX Y to M6 XXXXX Y
(X is a number from 0 to 9, Y is a letter from A to Z), testing is required.
Perform the A/D Converter Streak Test procedure in this Product Alert.
•
If the slide scanner serial number is not from H6 XXXXX Y to M6 XXXXX Y
(X is a number from 0 to 9, Y is a letter from A to Z), no testing is required.
Month: A - January
H - August
Sequential Number
H 6 00634 B
Year: 6 - 1996
7 - 1997
Location (Figure 2)
The Serial Number is located:
•
•
On the outside of the shipping carton
Bottom of the slide scanner
Hardware Configuration Level
Po
laro
Serial no. on bottom
of the slide scanner.
id
Sp
rin
tSc
an
35
PL
US
SERIAL NO/NO DE SERIE
S/N M601490B
Figure 2. Serial number location
Checking and Testing
Tools Needed
•
Anti-Static Mat and Wrist Strap
•
Phillips Screwdriver
•
EXAR A/D Streak Test Kit P/N 13700 (Includes: 1 DSHD Disk, 1 Streak Target)
•
Macintosh 68k or Power PC computer with at least 24MB of RAM
•
Adobe PhotoShop version 3.0.5 or higher
•
SprintScan 35ES and 35Plus Software for Macintosh version 2.6 or higher
Software Installation
Load film files Ident4x.CV2 and SS35P.CV2 from the EXAR kit disk into SprintScan 35p
folder.
Note: Path to folder:
System Folder - Preferences - SprintScan 35 - SprintScan 35p
Previewing Streaks
Images that may be opened and viewed in Adobe PhotoShop are provided on the disk
included with the EXAR A/D Streak Test Kit. These pictures preview the images seen after
scanning the streak target on a test unit.
Files showing scanned images from normal and defective A/D converters are provided.
There are four (4) image files on the disk:
•
Normal Preview
-
•
Normal ADC
-
JPEG image (Figure 4)
•
Defective Preview
-
Screen shot (Figure 5)
•
Defective ADC
-
Screen shot (Figure 3)
JPEG image (Figure 6)
Preview Scan of Streak Target Image - Normal Operating A/D Converter
The file Normal Preview (Figure 3) is a screen shot showing an Adobe PhotoShop window
after Acquire - SprintScan 35 is selected from the File menu.
Note:
For later versions of Adobe Photoshop, Import - SprintScan 35 is selected
from the File menu.
The right side of the image shows the steak target preview image produced on a slide
scanner with a normal operating A/D converter. Notice the selected area that was
chosen for the final scan.
Selected Area for Final Scan
Figure 3. Preview scan of streak target image - normal operating A/D converter
Final Scan of Streak Target Image - Normal Operating A/D Converter
The file Normal ADC (Figure 3) is an actual JPEG format file that was saved after the
Scan button was selected. Just the selected area (Figure 4) in the Normal Preview
screen is shown. It is the magnified image (1:4) of a portion of the streak target produced
from a slide scanner with a normal operating A/D converter. Further magnify the image to
1:1. Use the scroll buttons in the window to view the scanned area.
Figure 4. Final scan of selected area - no streaks
Preview Scan of Streak Target Image - Defective A/D Converter
The file Defective Preview (Figure 5) is a screen shot showing a Adobe Photoshop
window after Acquire - SprintScan 35 is selected from the File menu.
The right side of the image shows the steak target preview image produced on a slide
scanner with a defective A/D converter. Notice the selected area that was chosen for the
final scan. Also notice the vertical lines that show even in the preview scan.
Selected Area for Final Scan
Figure 5. Preview scan of streak target image - defective A/D converter
Final Scan of Streak Target Image - Defective A/D Converter
The file Defective ADC (Figure 5) is an actual JPEG format file that was saved after the
Scan button was selected. Just the area selected (Figure 6) in the Defective Preview
screen is shown. It is the magnified image (1:4) of a portion of the streak target produced
from a slide scanner with a defective A/D converter. Further magnify the image to 1:1.
Vertical lines can be clearly seen spaced two pixels apart which are produced by the
defective A/D converter.
Figure 6. Final scan of selected area - two pixel streaks
Checking Date Code of A/D Converter
Caution
The controller PC board is sensitive to static discharges. Be sure to use
an anti-static mat and wrist strap when removing and replacing it.
1. Turn off the slide scanner.
2. Unplug the AC power cord and remove it from the socket at the back of the slide
scanner.
3. Remove the top cover of the slide scanner as explained in the SS35 Slide Scanner
Repair Manual.
4. Check the date code of A/D converter U18. Date code is located just below the A/D
converter part number (Figure 7).
Note: •
•
If the date code of A/D converter U18 is lower than 9646 (Example: 9645),
it may be defective. Perform the A/D Converter Streak Test procedure to
determine if it is defective. If necessary, replace the controller PC board.
If the date code of A/D converter U18 is 9646, or higher, there is no need to
perform the A/D Converter Streak Test procedure. Assuming the slide
scanner has passed all other testing, replace the top cover and return it to the
customer.
XR D8794AIK
9603
Date Code
Figure 7. A/D converter U18
A/D Converter Streak Test
1. Plug the AC power cord into the socket of the slide scanner and then plug the other end
into an AC power outlet.
2. Connect the SCSI cable to the host computer. Turn the terminator switch on the slide
scanner’s back panel to its ON position.
3. Turn on the slide scanner by setting its Power On/Off (1/0) switch to its On (1) position.
The slide scanner should turn on and, after its self test sequence completes, the green
and yellow status lamps will be on continuously.
4. Insert the streak target from the EXAR A/D Streak Test Kit into the slide scanner
carriage.
The arrow on the front of the streak target should face toward the lamp with the arrow at
the bottom facing toward the front of the slide scanner and pointing down.
5. From the Adobe Photoshop File menu, select:
Acquire - SprintScan 35…
or
Import - SprintScan 35… (depending on the version of Adobe Photoshop)
6. When the Settings Dialog box (Figure 8) appears, setup fields as follows:
•
•
•
•
Set Resolution: to 2700 dpi
Set Film: to Ident4x.CV2
Turn off Automatic Exposure control in the Preferences Dialog box
Set View: to Portrait mode
Figure 8. Setting dialog box
7.
Click on the Preview button to preview the streak target.
8.
Once the streak target preview image appears (Figure 9), select a small area for
scanning (2700 x 130), at 100% scaling.
Selected Area
Figure 9. Selected area for scanning
8.
Click on the Scan button to scan the selected area of the streak target preview
image.
9.
View the scanned image of the streak target at 1:1 magnification.
Note:
Scanned streak target image must be magnified to see the vertical
streaking. It may not be evident at lower magnifications.
10. Check the scanned image for streaks. Scroll, in the horizontal direction, across the
magnified image of the streak target.
Note:
•
If the A/D converter is defective, the magnified image shows vertical
lines spaced 2 pixels apart. It might also show high levels of noise or
contouring.
•
If the A/D converter operates normally, the magnified image shows
smooth transitions from black-to-white with no vertical lines.
11. Normal A/D Converter - No Streaks (Figure 4)
Install the slide scanner top cover and then return the slide scanner to the customer or
to stock.
12. Defective A/D Converter - Streaks (Figure 6)
Remove and replace the controller PC board.
Note:
•
Before replacing the controller PC board, check the date code of A/D
converter U18 on the replacement controller PC board as explained in the
Checking Date Code of A/D Converter procedure.
•
After replacing the controller PC board run the LabView test again to
make sure the replacement controller PC board passes all tests and then
repeat the A/D Converter Streak Test procedure.
Parts Availability
Replacement controller PC boards (P/N AA0977A) are available from:
Material Services Department
Polaroid Corporation
201 Burlington Road
Bedford, MA 01730
Please order from normal sources.
POLAROID CORPORATION
Consumer Services Division
201 Burlington Road
Bedford, MA 01730
TECHNICAL SERVICES
DEPARTMENT
PRODUCT ALERT
Int'l
EXP
SUB
P.A. NO. 35mm Scan # 97-2
SPECIAL
DATE: August, 1997
TECH. SERVICES:
MAT'L SERVICES:
QUAL. CONTROL:
OPERATIONS:
TO:
List
FROM:
Gerald DiBello
SUBJECT:
Modified CCD Board (SS35 PLUS)
Background
In order to improve the yield of CCD’s manufactured by Polaroid, the CCD has been modified.
The key element in the CCD modification is its blue filter portion.
All SS35 Plus slide scanners manufactured beginning July 1997 will include the modified CCD.
Info for Field Service Departments - CCD Board Replacement
New CCD Boards with the modified CCD are available as a replacement part for the repair
of slide scanners with a defective CCD Board.
After the CCD Board is replaced in older models of slide scanners, an internal Configuration
Code must be changed to accept the replacement CCD Board.
Note:
The slide scanner’s firmware does not have to be upgraded beyond the current 5.90
version.
The Configuration code is changed:
•
Using the latest version (1.02 or, higher) of the LabVIEW IPT software.
•
After the installation of the new CCD Board.
THIS BULLETIN SHOULD BE FILED IN THE SERVICE MANUAL OF THE PRODUCT TO WHICH IT REFERS.
For details on how to change the Configuration code, refer to the CCD Board Replacement
procedure provided with this Product Alert.
The LabVIEW IPT tester software is used to change the Configuration code from its previous
value of 0 to a new value of 1 in the slide scanner’s EEPROM.
Note:
The Configuration code change gives new instructions to the slide scanner allowing it
to work correctly with the modified CCD.
Once the Configuration code change is completed, advise the Customer that version 2.7 (or
higher) of the application software must be used.
Note:
Older versions of the application software will NOT work correctly with the
modified CCD.
Info for Telephone Service Support - CCD Board Replacement
If a Customer reports image quality problems (Example: Color changes in scans, especially in
blue tones), telephone support should include CCD Configuration code checks in their script.
If it’s determined that the slide scanner has the wrong Configuration code for the type of
CCD Board installed, it is possible to have the Customer change it.
For details on how to change the Configuration code, refer to the CCD Board Replacement
procedure provided with this Product Alert.
Some reasons why the Configuration code may be incorrect:
•
Configuration code was not changed after a defective CCD Board was replaced with a
modified CCD Board.
•
Slide scanner has the modified CCD Board installed but it’s EEPROM data has been
corrupted and it reverted back to the old CCD Configuration code of 0.
2
Slide Scanner Identification with Modified CCD
Serial Number Location
The slide scanner serial number (Figure 1) is located in two places:
•
On the outside of the original shipping carton (All Configurations)
•
Bottom of the slide scanner (Configuration " C " and all subsequent Configurations)
Month: F - July
Sequential Number
F 7 xxxxx C
Hardware Configuration Level
Year: 6 - 1996
7 - 1997
Figure 1. Serial number
Changes to Serial Number with Modified CCD
The configuration letter in the serial number is changed to identify slide scanner’s
manufactured with the modified blue filter CCD.
SprintScan 35 Plus - Serial number are assigned a hardware configuration level of C to
identify the CCD change. Slide scanner’s with the modified blue filter
CCD will start with serial number F7xxxxxC.
Modified CCD Board Identification by Markings
Modified CCD Boards can be visually identified as follows:
•
Part Number 1AJ012A
•
Blue stripe on end of CCD Board cable connector J1.
Note:
Blue stripe is visible after removing the top cover of the slide scanner and
looking on the left end of the CCD Board (as viewed from the front of the slide
scanner).
3
Modified CCD Board Service Issues
There are service issues that may occur in conjunction with the introduction of the modified CCD
Board and the latest application software.
Table 1 lists negative and chrome scanned image problems that can be seen if a mix-up occurs.
It also indicates the corrective action to take. Figure 2 shows example scans with modified
CCD.
Table 1. Negative and Chrome Scanned Image Problems
Problem
Corrective Action
1. Config 0 (old version) CCD type
installed in slide scanner configured
for modified Config 1 CCD
Change slide scanner Config code to 0.
Negatives - Have undeniable yellow hue
Chromes - Blues and yellows look flat
2. Config 1 (modified version) CCD type
installed in slide scanner configured
for old Config 0 CCD
Change slide scanner Config code to 1.
Negatives - Have undeniable blue hue
Chromes - Blues extra saturated
3. Config 1 (modified version) CCD type
installed in slide scanner but, incorrect
application software installed
(version 2.6 or, earlier)
Update to application software to version 2.7.
No CCD Configuration data reported by
software.
Negatives - Have undeniable blue hue
Chromes - Blues extra saturated
4
CCD Type: 1, CCD Config: 1, no Auto Expose
( Correct Config Code )
CCD Type: 1, CCD Config: 0, no Auto Expose
( Incorrect Config Code )
Figure 2. Examples of scans with modified CCD
5
Reading and Changing Configuration Code Using Application Software
Note:
T o change CCD Configuration code, version 2.7 or, higher SprintScan application
software must be installed.
Conditions that require the CCD Configuration code to be changed are:
•
Slide scanner has modified type Config 1 CCD but, incorrectly configured for it.
•
Slide scanner does not have modified type Config 1 CCD but, correctly configured for it
(Config code set to 1, should be 0).
For PC or PC Compatible Computers
Reading CCD Configuration Code
1. Start up PhotoShop or SprintScan Direct application.
2. Check Configuration code under the Help menu in the SprintScan 35 Preview
window.
3. Select Help menu and then choose Diagnostic.
The Diagnostic window (Figure 3) appears indicating:
•
Firmware Version
•
CCD Configuration
Note:
The example shown in Figure 3 indicates that a Config 0 CCD is in a SS35
Plus slide scanner with version 5.90 firmware.
6
Figure 3. Diagnostic window
7
Changing CCD Configuration Code
1. Start up Photoshop or SprintScan Direct application.
2. Activate SprintScan Control Panel window.
3. While holding down the Alt key, press B key on the computer keyboard. Once the
warning message dialog box appears about using the Debug function, cancel it.
The Debug menu choice (Figure 4) appears in the Preview window.
Figure 4. Debug menu
4. Select Rd/Wr Datatype from the choices listed in the Debug Menu.
5. When the Datatype window appears, choose CCD Info from the pop-up menu at the
top of the window. The number appearing in the first column at the top left is the CCD
type.
Note:
In the example shown in Figure 4, the CCD reads out as a 1 indicating that
this particular slide scanner is configured for the modified CCD.
8
6. Change the Configuration from 1 to 0 or 0 to 1 by dragging the I - beam cursor through
the number that appears and then type in the corrected number.
7. After filling in the Configuration number touch the Wr (Write) button with the mouse
pointer to send the new Configuration information to the slide scanner EEPROM.
8. Confirm the new Configuration, by touching the Rd (Read) button with the mouse
pointer.
9. Finally, to correctly view the change in a scanned image exit the SprintScan
application and then restart the SprintScan Direct program or, Acquire/Import the
slide scanner in PhotoShop.
Note:
A second method is to select any new film type and then re-select the film
type desired. Either method re-initializes the slide scanner so you can
correctly scan with the changed CCD Configuration setting.
9
For Mac Computers
Reading CCD Configuration Code
1. Start up PhotoShop and do an Acquire/Import to start the SprintScan application.
2. At the top of the Apple menu (top left corner of the screen) choose
“ About SprintScan 35… ”.
The About dialog box (Figure 5) appears.
Figure 5. About dialog box
3. The numbers indicated at the right-bottom of the About dialog box are: (reading from
top to bottom)
•
CCD configuration code (shown as c0 in this example)
•
firmware version
•
software version
10
Changing CCD Configuration Code
1. Change configuration number from 0 to 1 or, 1 to 0 by holding down the Option key
and single clicking the mouse pointer while pointing at the configuration number.
The CCD Programming Dialog box (Figure 6) appears .
Figure 6. CCD programming dialog box
2. Change the CCD configuration type by typing in the configuration for the CCD that’s in
the slide scanner (1 or 0).
3. After typing in the new Config number touch the Program the Scanner button with the
mouse pointer or, press the Return key.
This action sends the new configuration code to the slide scanner EEPROM.
Note:
To confirm the new Configuration code, select About Sprintscan 35… under
the Apple menu and then read the new Configuration code.
4. Finally, to correctly view the change in a scanned image you must exit the SprintScan
application and Acquire/Import the slide scanner in PhotoShop.
Note:
A second method is to select any new film type and then re-select the film type
desired. Either method re-initializes the slide scanner so you can correctly
scan with the changed CCD Configuration setting.
11
CCD Board Replacement (Older Slide Scanners)
If the CCD board fails in an older SprintScan 35 Plus, replace it with a modified blue filter CCD
Board as follows:
1. Make sure that the firmware in the slide scanner is version 5.90 or, higher.
2. Replace the defective CCD Board as explained in the SprintScan 35 Repair Manual.
Note: Stop at the step where the LabVIEW IPT tester is used to test the slide scanner.
3. After starting the LabVIEW IPT tester, (version 1.02 or, higher) make the applicable
change to the normal test setup.
Note:
On the main LabVIEW window is a selection box marked CCD Configuration.
Up to this point you have been instructed to set the option in this box to Do Not
Update (Figure 7).
CCD Configuration
Selection Box
Figure 7. Scanner tester (w) panel
12
4. Change selection to CCD Config 1 (Figure 8a)
As the LabVIEW test runs, the configuration data in the slide scanner EEPROM will be
changed to operate correctly with the modified CCD.
After the LabVIEW test is completed, the new configuration will be reported at the bottom
right corner of the scanner test panel as CCD Configuration. This window should read 1
(Figure 8b).
Note:
The Configuration code only needs to be changed once. On subsequent runs of
the LabVIEW IPT tester, leave the CCD Configuration selection at Do Not
Update.
A
B
Figure 8. CCD config widow
Parts Availability
Replacement CCD Boards ( P/N 1AJ012A) for the SprintScan 35 Plus are available from:
Material Services Department
Polaroid Corporation
201 Burlington Road
Bedford, MA 01730
Please order from normal sources.
13
POLAROID CORPORATION
Consumer Services Division
201 Burlington Road
Bedford, MA 01730
TECHNICAL SERVICES
DEPARTMENT
PRODUCT ALERT
Int'l
EXP
SUB
P.A. NO. 35mm Scan # 97-3
SPECIAL
DATE:
August, 1997
TECH. SERVICES:
MAT'L SERVICES:
QUAL. CONTROL:
OPERATIONS:
TO:
LIST
FROM:
Gerald DiBello
SUBJECT:
SPRINTSCAN 35, 35ES & 35PLUS SCSI TERMINATION POWER
Revision
Replaces Product Alert 35mm Scan # 95-3: June 1995
Problem
Macintosh Laptops
Slide scanner malfunctions have taken place when a laptop computer (PowerBook) was
connected to it. The type of malfunction that took place was a " Scanner Hardware Error ".
This type of error prevents the slide scanner from :
•
•
Properly performing its self-test routine
Finding its analog range
Investigation found that a blown SCSI interface fuse on the main controller PC board caused
the error.
Since laptop computers do not provide termination power, the slide scanner's external SCSI
terminator dragged the SCSI signals to ground prohibiting the laptop computer from properly
communicating with its hard drive.
Other Computers
In some cases, a blown term power fuse can cause SCSI communication failures. Error
messages for this type of problem can vary.
THIS BULLETIN SHOULD BE FILED IN THE SERVICE MANUAL OF THE PRODUCT TO WHICH IT REFERS.
POLAROID CORPORATION
Consumer Services Division
201 Burlington Road
Bedford, MA 01730
TECHNICAL SERVICES
DEPARTMENT
PRODUCT ALERT
Int'l
EXP
SUB
P. A. NO. 35mm Scan # 97-4
SPECIAL
DATE: December, 1997
TECH. SERVICES:
MAT'L SERVICES:
QUAL. CONTROL:
OPERATIONS:
TO:
LIST
FROM:
Gerald DiBello
SUBJECT:
Horizontal Color Banding at Very Bottom of Scanned Image
Background
Typical Customer Complaint
When scanning in the Portrait or the Superslide mode horizontal color banding occurs at
the very bottom of the scanned image.
Note: This problem does not occur in the Landscape mode.
Slide Scanners Affected
• SS35 ES and PolaScan 35 with light tunnel.
• SS35 Plus, PolaScan 35 Plus.
Note: This problem does not affect slide scanners with an older style filter wheel.
Problem
Due to a manufacturing problem, some light tunnels were improperly installed. The left side
of the slide carriage arm, as viewed from the top of the slide scanner with its front facing
forward, can interfere with the right front side of the light tunnel. If this occurs, color registration will be affected because scan speed is effectively lowered. The point of the interference
is shown in Figure 1.
For correct alignment, the light tunnel must be installed so that it’s front is exactly parallel and
spaced 1mm away from the bottom of the slide carriage when it is in its resting position (not
scanning).
THIS BULLETIN SHOULD BE FILED IN THE SERVICE MANUAL OF THE PRODUCT TO WHICH IT REFERS.
POLAROID CORPORATION
Consumer Services Division
201 Burlington Road
Bedford, MA 01730
TECHNICAL SERVICES
DEPARTMENT
PRODUCT ALERT
Int'l
EXP
SUB
P. A. NO. 35mm Scan # 97-5
SPECIAL
DATE: December, 1997
TECH. SERVICES:
MAT'L SERVICES:
QUAL. CONTROL:
OPERATIONS:
TO:
LIST
FROM:
Gerald DiBello
SUBJECT:
Manufacturing Changes to SS35 LE
Background
The following manufacturing changes were made to the SS35 LE at the beginning of October
1997:
• Firmware Revision Level
• Power Supply Vendor
Table 1 indicates the problems corrected by the changes made to the SS35 LE.
Table 1. Problems Corrected by Changes
Change
Firmware - Updated from
version 1.4 to 1.6.
Problems Corrected
•
Prevents horizontal white lines from appearing
in final scan when Agfa XRG 100 negative film
type is selected and user scans at less than
full resolution (1950dpi).
•
Prevents vertical white lines, at times, from
appearing in the upper right hand corner of the
scanned image.
Note: Firmware 1.5 produced but
never shipped with any
SS35 LE Slide Scanners.
Power Supply
Changed Vendor (TDK to Kentex).
THIS BULLETIN SHOULD BE FILED IN THE SERVICE MANUAL OF THE PRODUCT TO WHICH IT REFERS.
Serial Number Identification and location
Identification
The slide scanner serial number begins at K7 XXXXX D (X is a number from 0 to 9,
D indicates firmware revision 1.6 installed.
Month: 7 - July
Sequential Number
K 7 xxxxx D
Year: 7 - 1997
Hardware Configuration Level
(D - indicates firmware 1.6 installed)
Location (Figure 2)
The Serial Number is located:
•
•
On the outside of the shipping carton
Bottom of the slide scanner
Po
laro
id
Sp
rin
tSc
an
Serial no. on bottom
of the slide scanner.
35
LE
SERIAL NO/NO DE SERIE
S/N K701490D
Figure 2. Serial number location
Alignment Procedure
Note: The following procedure should only be performed by Polaroid authorized service
centers that have been trained on this product.
1. Turn the slide scanner power off and then remove the power cord.
2. Remove the lamp.
3. Remove the slide scanner top cover.
4. Loosen the two (2) light tunnel hold-down screws that secures it in place.
5. Re-position the light tunnel so it is spaced approximately 1mm away from the slide carrier
and then re-tighten the two (2) light tunnel hold-down screws.
6. Manually rotate the leadscrew so the slide carrier moves down until the arm is next to the
right side of the light tunnel.
7. Make sure there is clearance between the light tunnel and the slide carrier arm.
8. Re-assemble the slide scanner and then re-test it’s operation in the Portrait or the
Superslide mode.
Hold-Down
Screw
Interference
Occurs Here
Slide Carrier
Arm
Light Tunnel
Hold-Down
Screw
1mm
(.040)
Slide Carrier
Front of Scanner
Figure 1. Partial Top View of SprintScan or PolaScan Slide Carriage Assembly.
Checking for Blown SCSI Interface Fuse
Equipment Required
• SCSI Interface Fuse P/N 5N0008001
• Passive Terminator, 50-Pin Centronic P/N 1E5543A or equivalent
1. Turn off the scanner by setting its Power On/Off (1/0) switch to Off (0).
WARNING
•
When turning on the system always make sure that the
slide scanner is turned on first and then the host
computer.
•
When turning off the system its the opposite - always
turn off the host computer first and then the slide
scanner.
2. Disconnect host computer from the SCSI interface connector.
Notes:
•
Do not disconnect SCSI terminator.
•
If the slide scanner you are testing is a SS35 Plus, set the terminator switch
to its OFF position and leave it off while doing this test. Connect an external
SCSI terminator to its Centronics type 50-pin connector.
3. Turn on the slide scanner by setting its Power On/Off (1/0) switch to On (1). The green
Power LED lights to indicate that the slide scanner is turned on.
4. During power-up, the slide scanner initiates its self-test routine. The yellow Ready LED is
off while the slide scanner cycles through its self-test routine.
5. Upon completion, the transporter returns to its home position and the yellow Ready LED
lights steady to indicate that the slide scanner is ready to operate.
• If the yellow Ready LED comes on or, continually blinks the SCSI interface fuse is OK.
• If the yellow Ready LED is dim (under most lighting conditions it will look like it is "off"),
the SCSI interface fuse is blown . Replace SCSI interface fuse as explained in the
provided replacement procedure.
Replacing SCSI Interface Fuse
CAUTION
The SCSI fuse is soldered to the main controller PC
board. The main controller PC board is particularly
sensitive to static discharges. Be sure to use an antistatic mat and wrist strap during this procedure.
1. Remove the top housing as explained in Section 4 of the Slide Scanner Repair Manual.
2. Unsolder the SCSI interface fuse (Figure 1) and then replace it with a new one.
Notes:
• When replacing it be very careful not to damage the main controller PC board.
• Fuse Rating
-
1.0A Fast Action/Surface Mount
• Fuse Part Number
-
5N0008001
3. Re-install the top housing as explained Section 4 of the Slide Scanner Repair Manual.
SCSI Fuse
SCSI Fuse
SS35/SS35 ES
SS35 PLUS
Figure 1. Replacing SCSI Interface Fuse on Main Controller PC Board
Parts Availability
Fuse 5N0008001 and Terminator 1E5543A are available from:
Material Services Department
Polaroid Corporation
201 Burlington Road
Bedford, MA 01730
Please order from normal sources.
POLAROID CORPORATION
Consumer Services Division
201 Burlington Road
Bedford, MA 01730
TECHNICAL SERVICES
DEPARTMENT
REPAIR INFO BULLETIN
Int'l
TO:
LIST
FROM:
JIM FEE
SUBJECT:
CCD FILTER TEST
EXP
SUB
R.I.B. NO. 35 mm Scan # 96-1
SPECIAL
DATE: March 1, 1996
TECH. SERVICES:
MAT'L SERVICES:
QUAL. CONTROL:
OPERATIONS:
Purpose
To verify that the CCD filter functions correctly. (If it functions incorrectly, vertical, grey bands will be
visible across the entire image.)
Required Materials and Software
•
•
•
•
Test slide (horizontal color bars - multi-color bar, 13638 and magenta test target, 13639)
Sample images scanned with defective filter (on diskette)
Adobe PhotoShop (MAC version)
SprintScan 35 plug-in
Filter Test Procedure
1. Scan the test slide using the following parameters:
•
•
•
•
Area of Interest
Film Table
Auto Exposure
All other Settings
-
All color bars (red through magenta)
Fuji Super 6 400
OFF
OFF
2. At a magnification of 1:4, examine the entire image for vertical, grey bands while viewing:
•
•
•
•
R, G, B
R color plane only
G color plane only
B color plane only
THIS BULLETIN SHOULD BE FILED IN THE SERVICE MANUAL OF THE PRODUCT TO WHICH IT REFERS.
3. Repeat step 2 at a magnification of 1:1, scrolling horizontally across the entire image.
Note: If vertical, grey bands are visible in steps 2 and 3, the CCD filter is faulty. Replace the CCD
PC Board.
4. If the CCD PC Board is replaced, repeat this procedure to verify that the CCD filter is OK.
POLAROID CORPORATION
Consumer Services Division
784 Memorial Drive
Cambridge, MA 02139
TECHNICAL SERVICES
DEPARTMENT
PRODUCT ALERT
Int'l
EXP
SUB
P.A. NO.
SPECIAL
DATE:
MCAM #94-2
APRIL 8, 1994
TECH. SERVICES:
MAT'L SERVICES:
QUAL. CONTROL:
OPERATIONS:
TO:
LIST
FROM:
H. LIMBO
SUBJECT:
INTERMITTENT FAILURES OF MICROCAM REMOTE BUTTON
The Vale of Leven manufacturing facility has identified an intermittent failure problem with the Remote
Button Assembly (#1D3405A) of some MicroCam microscope cameras. These failures have been limited
to MicroCams with serial numbers between B4445C and C4050C. Manufacturing estimates that approximately 3% of MicroCams with serial numbers falling in the noted range may have this problem.
The suspect MicroCams are identified as follows:
PID #
LOT #
QTY
CUSTOMER
618089
618089
618089
618910
618910
008
009
011
002
003
42
64
64
64
64
Japan
Enschede
Enschede
USA
USA
Vale of Leven Manufacturing has developed a repair procedure which has been distributed to appropriate facilities. If you receive any defective units, forward them to Enschede or Oak Brook for repair.
If you have any quesitons concerning this Product Alert, please call Stephen McGrogan at 240-2615 or
Harro Limbo at 221-4424.
THIS BULLETIN SHOULD BE FILED IN THE SERVICE MANUAL OF THE PRODUCT TO WHICH IT REFERS.
POLAROID CORPORATION
Consumer Services Division
784 Memorial Drive
Cambridge, MA 02139
TECHNICAL SERVICES
DEPARTMENT
PRODUCT ALERT
Int'l
EXP
SUB
P.A. NO.
SPECIAL
DATE:
MCAM #94-3
APRIL 15, 1994
TECH. SERVICES:
MAT'L SERVICES:
QUAL. CONTROL:
OPERATIONS:
TO:
LIST
FROM:
H. LIMBO
SUBJECT:
LOCATION OF SERIAL NUMBER ON MICROCAM
Depending on the date of manufacture, the serial number of the MicroCam can be located in
two different places. On units manufactured before June 1993, the serial number is located on
the CB-33 Door Assembly (P/N 761143B). On MicroCams manufactured in June or later, the
serial number was relocated to the inside of the MicroCam Main Housing (P/N 1D3427A)
adjacent to the CB-33 Main Frame. In order to read the latter serial number the film cartridge
must be removed.
Do not confuse the CB-33 serial number with the MicroCam serial number. The CB-33
serial number is located in the FRONTof the film cartridge compartment, on the CB-33 mainframe. It has 7 or 8 characters and begins with one or two letters. For example,
J3340GR or BA90351G.
The MicroCam serial number is located in the BACK of the film cartridge compartment and,
it currently consists of six characters. For example,
B4445C.
The serial number was relocated so that the identity of the MicroCam would not be lost in the
event the entire CB-33 camera back or it's door assembly was replaced.
THIS BULLETIN SHOULD BE FILED IN THE SERVICE MANUAL OF THE PRODUCT TO WHICH IT REFERS.
POLAROID CORPORATION
Customer Support Services
201 Burlington Road
Bedford, MA 01730
GLOBAL TECHNICAL
SERVICES
PRODUCT ALERT
Int'l
TO:
EXP
SUB
P.A. NO. MCAM #94-4
SPECIAL
DATE:
NOVEMBER 14, 1994
TECH. SERVICES:
MAT'L SERVICES:
QUAL. CONTROL:
OPERATIONS:
LIST
FROM:
HARRO LIMBO
SUBJECT:
MICROCAM DOUBLE IMAGE PROBLEM
PROBLEM
A double image problem has been identified with MicroCams manufactured from late March 1994
through August 1994. Serial numbers encompass C4460* to J4000C.
The problem is estimated to affect 10% of the approximately 4000 units manufactured during this period.
(If you are on Lotus Notes, see Service Work Order #HE940919100829 for a history of this problem.)
SOURCE OF PROBLEM
A defective 80C Color Conversion Filter is the cause of the problem. This Filter converts 3400o K light
to 5500o K, for which the T-339 Film is balanced.
Depending on the total exposure time, the MicroCam logic varies the length of time the 80C Filter is used
during the exposure. When the exposure is less than one second, the Filter is in place for the entire time
and no double image problem should occur. If the exposure is longer than nine seconds, the 80C Filter is
not used at all — thus no double image problem here as well. But for exposure times in the one to nine
second range, the double image problem occurs, peaking when the Filter is used for 50% of the total
exposure time, occurring in the four to six second range. (There is no problem, of course, when T-331
or T-337 settings are used.)
(Cont’d.)
THIS BULLETIN SHOULD BE FILED IN THE SERVICE MANUAL OF THE PRODUCT TO WHICH IT REFERS.
ACTION TAKEN
All MicroCam inventories, worldwide, have been placed on hold (Corporate Hold Document issued on
10/26/94 by S. McGrogan). A procedure has been provided to the subsidiaries for screening these units.
All defective units are to be returned to the Vale of Leven Manufacturing group, attention of Steve
McGrogan.
If a customer's unit is found to have this defect, the Shutter Base Assembly (part number 1D3430A) must
be replaced. If you are on Lotus Notes, refer to Work Order #HE940919100829 for a history of this
problem.
QUESTIONS
If you have any questions regarding this problem, please contact one of the following:
Harro Limbo at 784MD-2B in Cambridge, Massachusetts at PTN 221-4424
Kim Wyman at 565TS-8M in Cambridge, Massachusetts at PTN 226-6011
Stephen McGrogan at Vale of Leven, Scotland at PTN 240-2378
POLAROID CORPORATION
Customer Support Services
201 Burlington Road
Bedford, MA 01730
TECHNICAL SERVICES
DEPARTMENT
NEW PRODUCT INFORMATION
Int'l
EXP
SUB
P.A. NO. DIGPAL #94-5A
SPECIAL
DATE:
DECEMBER 9, 1994
TECH. SERVICES:
MAT'L SERVICES:
QUAL. CONTROL:
OPERATIONS:
TO:
LIST
FROM:
NICK CURRERI
SUBJECT:
NEW HR-6000 HIGH-RESOLUTION DIGITAL PALETTE
PERFORMANCE DESCRIPTION
A new high-resolution Digital
Palette Color Film Recorder for
creating professional-quality
35mm slides, prints and chromes
in minutes from personal computers
and workstations has recently been
introduced by Polaroid.
The new HR 6000 (PID #619282)shown
at right contains enhanced Polaroid
optics, a high-precision 3" CRT and
dynamic focus circuitry which produces
4000-line resolution slides which are
sharp out to the edges and corners.
The HR 6000 reproduces up to 24-bit
color images using a proprietary,
internal 33-bit color exposure
process delivering smooth ramped
backgrounds with up to 16.7 million
colors.
New HR 6000 High-Resolution
Digital Palette Color Film
Recorder
THIS BULLETIN SHOULD BE FILED IN THE SERVICE MANUAL OF THE PRODUCT TO WHICH IT REFERS.
HR 6000 Digital Palette CFR, cont’d.
- 2 -
FEATURES
The new HR 6000 Digital Palette, for both IBM and Macintosh computers, can
utilize more than 20 types of film.
It can be equipped with camera backs for the following films:
o
o
o
o
o
35mm
31/4 x 41/4 pack film
3 x 4 AutoFilm
4 x 5 pack film
Bulk film back from third party source
COMPATIBILITY
The HR 6000 is a universal color film recorder for both IBM and Macintosh
computers. On both platforms, it supports networking with Zenographics
SuperPrint for the Digital Palette for Windows; Graphx RasterPlus P/S for
DOS/Windows; and Digital Palette software for Macintosh.
WARRANTY
The HR 6000 Digital Palette is warranted for one year from date of purchase
by original user. Warranty extension in the form of service contracts will
be available. Contract types and periods will be described in a later
bulletin.
SERVICE
(U.S.A.)
The HR 6000 is the latest addition to the CI-3000/CI-5000 product line and
as such, will have the same repair policies and technical assistance provisions.
An Early Returns Program operating in the first few months following product introduction will analyze defective units returned to 784 Memorial
Drive in Cambridge. Analysis will compare defects to performance standards, estimated failure rates and reliability standards, in an effort to
identify and isolate deviations, address customer comments and questions,
and devise effective solutions. Early Returns findings will be reported to
you.
In-Warranty: If a unit requires service, the customer will be asked to
call the Polaroid Resource Center (1 800 432-5355). If it is determined
that the unit needs to be serviced, the customer should ship it insured and
prepaid to Polaroid Corp., ATTN Industrial Repair, 2020 Swift Drive, Oak
Brook, IL 60521. The unit will be repaired or exchanged and returned to
the customer within five working days.
Out-of-Warranty: Same, except customer pays for parts and labor.
Documentation:
An HR 6000 Parts Catalog and Addendum to the CI-5000 Service Manual will be available in November, 1994.
HR 6000 Digital Palette CFR, cont’d.
- 3 -
SERVICE (Non-U.S.A.)
Each Subsidiary will establish its own service support strategy.
PARTS AVAILABILITY
Most HR 6000 parts are the same as those used in the CI-5000 Palette.
A Product Alert listing unique HR 6000 parts and their availability will be
published in November 1994.
POLAROID CORPORATION
Consumer Services Division
201 Burlington Road
Bedford, MA 01730
TECHNICAL SERVICES
DEPARTMENT
REPAIR INFO BULLETIN
Int'l
EXP
SUB
R.I.B. NO. Dig Pal #95-6
SPECIAL
DATE: February 1, 1995
TECH. SERVICES:
MAT'L SERVICES:
QUAL. CONTROL:
OPERATIONS:
TO:
LIST
FROM:
NICK CURRERI
SUBJECT:
UPGRADING THE HR-6000 TO "B' CONFIGURATION
BACKGROUND
Problems with HR-6000 CRT's combined with luminance stability problems have led to needed design
changes. All HR-6000 "A" type configurations that are returned from the field must be upgraded to a
"B" type configuration.
Table 1 shows the two HR-6000 configurations and their differences.
Table 1. HR-6000 Configurations
Configuration "A"
Configuration "B"
Firmware
Version
5.05
5.06
Monitor PC
Board
Original 01 PCB
Reworked to 02 PCB
CRT
Old Phosphor
Old Phosphor
CRT Clamp
Adjustment
120 oz-in
120 oz-in
Same as CI-3000/5000
Same as CI-3000/5000
Same as CI-3000/5000
R18 - 6.0 ft-l @ 150
VR1 - 200 @ 6.0 ft-l
Same as CI-3000/5000
Adjustments
Luma
AutoLuma
Dark Current
THIS BULLETIN SHOULD BE FILED IN THE SERVICE MANUAL OF THE PRODUCT TO WHICH IT REFERS.
Table 2 lists and describes the upgrades to "B" from "A" configurations.
Table 2. HR-6000 Upgrades
Upgrade
Firmware
5.06
Description
Includes 5.06 changes
for autoluma.
Function
Eliminates saturated photocell
autoluma errors (bug).
Change E-PROM
to version 5.06
Monitor PC Reworked to
Board
issue 02
Set potentiometer R29
to 270 K ohms.
Set potentiometer R55
to zero (0) ohms.
Optimizes autoluma dynamic range.
Note:
In conjunction with firmware, provides
more capability for CRT's that drift up
and down.
Change resistor R34
to 1.3 M ohms.
Autoluma
Calibration
Monitor PC Board
Set R18 luminant to
6.0 ft - l @ 150.
Logic PC Board
Set VR1 autoluma to
200 @ 6.0 ft - l.
Provides better range capability to
accommodate varying monitor
luminance.
The following paragraphs describe how to upgrade the monitor PC board and how to re-calibrate the
autoluminant function.
MONITOR PC BOARD UPGRADE (Refer to Figure 1)
1. Turn off and unplug the HR6000 Digital Palette Film Recorder.
2. Remove the cover.
3. Remove the paper guard from the rear of the monitor PC board (Figure 1).
4. Using an ohmmeter, set potentiometers:
•
•
R29 to 270 K ohms
R55 to zero (0) ohms
5. Using a soldering iron and a solder sucker, remove existing resistor R34 and replace with new resistor R34
which has a value of 1.3 M ohms.
6. Replace the EPROM with version 5.06.
Note: These changes will optimize the autoluma dynamic range. In conjunction with the firmware,
will provide more capability for the CRT's that drift up or down.
7. Plug in and turn on the HR6000 Digital Palette Film Recorder.
8. Re-adjust autoluminance to the new autoluma calibration specifications as described below.
AUTOLUMINANT ADJUSTMENT
The autoluminant adjustment for the HR6000 Digital Palette Film Recorder is identical to the CI3000/CI5000
Digital Palette Film Recorder except for the following:
Specification
Adjustment/Location
6 ft - l @ 150
R18 - Monitor PC Board
200 @ 6 ft - l
VR1 - Logic PC Board
Note: Refer to the autoluminant adjustment procedure in Section 5 of the CI3000/CI5000 Service Manual
for the steps necessary to adjust the HR6000 autoluminant.
CRT CLAMP REPLACEMENT
Always us a new clamp assembly (PN 1A7065A) if a CRT is removed or replaced. Torque the new clamp
assembly as follows:
CI3000/CI5000
HR6000
96 oz - in
120 oz-in
NOTES
R55
R29
R34
Figure 1. Monitor PC board
POLAROID CORPORATION
Consumer Services Division
201 Burlington Road
Bedford, MA 01730
TECHNICAL SERVICES
DEPARTMENT
PRODUCT ALERT
Int'l
EXP
SUB
P.A. NO. HR-6000 # 95-1
SPECIAL
DATE: January 3, 1995
TECH. SERVICES:
MAT'L SERVICES:
QUAL. CONTROL:
OPERATIONS:
TO:
LIST
FROM:
NICK CURRERI
SUBJECT:
HR-6000 CONFIGURATION CHANGES
The HR-6000 was produced in one configuration - Configuration "A". However, problems with the CRT's and with
luminance stability produced the need for design changes, leading to Configuration "B". These changes are described in bulletin DIG PAL #95-6
As these changes were being phased in , an unexpected change in phosphor lots by the CRT manufacturer, CRT
Scientific, created the need for more redesign. Examination of samples of the new CRT's showed red spectral
transmission to be about 16% higher than before. This forced another firmware change to better match the film
tables to the new CRT's. Accordingly, there are now three HR-6000 configurations. Their differences are shown
below in Table 1.
Table 1. HR-6000 Configurations
Configuration "A"
Configuration "B"
Configuration "D"
Firmware
Version
5.05
5.08
5.09
Monitor PC
Board
Original 01 PCB
Reworked to 02 PCB
Reworked to 02 PCB
CRT
Old Phosphor
Old Phosphor
New Phosphor
CRT Clamp
Adjustment
120 oz-in
120 oz-in
120 oz-in
Same as CI-3000/5000
Same as CI-3000/5000
Same as CI-3000/5000
R18 - 6.0 ft-l @ 150
VR1 - 200 @ 6.0 ft-l
Same as CI-3000/5000
R18 - 6.0 ft-l @ 150
VR1 - 200 @ 6.0 ft-l
Same as CI-3000/5000
Adjustments
Luma
AutoLuma
Dark Current
THIS BULLETIN SHOULD BE FILED IN THE SERVICE MANUAL OF THE PRODUCT TO WHICH IT REFERS.
IDENTIFYING NEW PHOSPHOR CRT FOR CONFIGURATION " D "
CRT
CRT).
-
CRT Scientific Label (Serial number 2000 or greater located on the right side of the
(Figure 1)
Yoke
-
Monitor PC Board
Syntronic Instruments Label (Suffix letter P located on top of the white plastic cover).
(Figure 1)
Wells Gardner Label (Issue 02 located below the heat shield and under capacitors C15
and C16). (Figure 2)
Yoke
C17035-2
99409-94-50
A88322PC
C17055-1
99409-94-51
CRT
Figure 1. CRT
Assy1E4391/A
Issue02,P744
Figure 2. Issue 02 Monitor PC Board Identification
POLAROID CORPORATION
Customer Support Services
201 Burlington Road
Bedford, MA 01730
GLOBAL TECHNICAL
SERVICES
PRODUCT ALERT
Int'l
EXP
SUB
P.A. NO.
Dig Pal #95-8
SPECIAL
DATE:
October 30, 1995
TECH. SERVICES:
MAT'L SERVICES:
QUAL. CONTROL:
OPERATIONS:
TO:
LIST
FROM:
ARVIN ARVIND
SUBJECT:
USER MANUALS FOR CI3000/CI5000/HR6000 DIGITAL PALETTES
User Manuals for the Digital Palette Color Film Recorder line are now available through Material Services in Bedford, Massachusetts. The table below shows the part numbers of each of these manuals.
Please make the necessary pen and ink additions to your copy of the Digital Palette Film Recorder CI3000/CI5000 and HR6000 Parts Catalog, dated January 1995.
Part No.
Part Description
1E0529A
HR6000, CI5000S, CI3000S Digital Film Recorders
Hardware Manual
1E0528A
HR6000, CI5000S, CI3000S Digital Film Recorders
DOS Software Manual
1E0527A
HR6000, CI5000S Digital Film Recorders
Macintosh Softare Manual
Please order these manuals through normal sources.
THIS BULLETIN SHOULD BE FILED IN THE SERVICE MANUAL OF THE PRODUCT TO WHICH IT REFERS.
POLAROID CORPORATION
Customer Support Services
201 Burlington Road
Bedford, MA 01730
TECHNICAL SERVICES
DEPARTMENT
NEW PRODUCT INFORMATION
Int'l
EXP
SUB
P.A. NO.
Dig Pal #95-9
SPECIAL
DATE:
October 30, 1995
TECH. SERVICES:
MAT'L SERVICES:
QUAL. CONTROL:
OPERATIONS:
TO:
LIST
FROM:
ARVIN ARVIND
SUBJECT:
INTRODUCTION OF NEW 35MM CAMERA BACKS/ADAPTORS FOR
DIGITAL PALETTE LINE
New 35mm Camera Back/Adaptor
Mounted on Digital Palette
INTRODUCTION:
Effective October 1995, Polaroid is shipping a new automated 35mm camera back/adaptor with HR6000 and
CI-5000S Digital Palettes. The camera back/adaptorss are designated R6000 and R5000. (The R5000 camera
back is also compatible with the CI3000S models.) As with previous camera backs, the new camera allows the
user to photograph an image displayed by the Digital Palette Film Recorder. However, the new camera increases
productivity through features that provide convenience and enhanced error protection. The 35mm camera back/
adaptor consists of a lens, a shutter, a logic board that controls the camera and also controls communication
between the camera and the Palette, and mounting interface hardware.
THIS BULLETIN SHOULD BE FILED IN THE SERVICE MANUAL OF THE PRODUCT TO WHICH IT REFERS.
Unlike its predecessors the new 35mm camera back/adaptor automatically loads and counts each frame, operating
only when the film is properly loaded. It also recognizes film speed through DX encoding, displaying this information on a liquid crystal display. The display also communicates recorder status information including film speed,
number of frames remaining, and error messages. The camera back uses a variety of 35mm film.
Since the image displayed by the Digital Palette is a fixed distance from the camera, there is no need to focus. The
Palette supplies electrical power to the camera back and controls the exposing of the film. A pair of thumb screws
secure the camera back to the Palette.
The following are the PID numbers for the respective units:
PID #
620235
620236
CAMERA BACK/
ADAPTOR
R6000
R5000
AVAILABILITY:
The R6000 and R5000 camera back/adaptors are available as finished goods items.
SERVICE POLICY:
US:
If customers have problems with the camera back/adaptor, the film recorder User Manual instructs them to call the
Polaroid Technical Assistance Hotline (1.800. 432.5355, Mon. - Fri., 8 AM - 8 PM EST). If the Technical
Assistance Representative determines remedial actions over the phone cannot resolve the problem, the customer will
be instructed to return the defective R6000 /R5000 camera back/adaptor prepaid and insured in the original or
comparable packaging to:
Polaroid Industrial Repair
2020 Swift Drive
Oak Brook, IL 60521
Attention: Industrial Repair
Non-US:
Customers outside the U.S., must contact the nearest Polaroid Office (addresses are in the User’s Manual which
come with the Digital Palette recorder).
EARLY RETURNS PROGRAM:
There is no early returns program.
WARRANTY POLICY:
All R5000/R6000 camera back/adaptors are warranted for one year from the date of purchase.
OUT-OF-WARRANTY POLICY
The procedures will be the same as they are for warranty repairs, except the Customer will charged for work
performed, parts and labor.
PARTS/DOCUMENTATION:
Parts and Documentation for the LCD Projectors will be available as follows:
Parts Catalog (in service manual)
Parts Availability
Service Manual
After October 95
After October 95
After October 95
TRAINING:
Service Centers will be provided with a Service Manual. Formal training will not be necessary.
POLAROID CORPORATION
Consumer Services Division
784 Memorial Drive
Cambridge, MA 02139
TECHNICAL SERVICES
DEPARTMENT
PRODUCT ALERT
Int'l
EXP
SUB
P.A. NO.
ID4 #94-16
SPECIAL
DATE:
APRIL14, 1994
TECH. SERVICES:
MAT'L SERVICES:
QUAL. CONTROL:
OPERATIONS:
TO:
LIST
FROM:
DICK CURTIS
SUBJECT:
LIGHT LEAK IN ID4 2-UP HORIZONTAL CAMERAS
Some 2-UP horizontal format ID4 cameras manufactured during 1992 and early 1993 have been returned by
customers with a complaint of overexposed subject areas. These complaints have been limited to the bottom card
(the second exposure) of the 2-UP format.
Manufacturing has traced the cause of this problem to misformed light seals behind the camera back and the
backplate. If the seals (1A3902B and 1A3903B) are misformed, they allow ambient light to penetrate to the
subject area of the bottom card.
If you receive an ID4 camera with a light leak problem as described above, change the light seals and then check
it as follows:
1.
Load a pack of black & white film into the camera and secure the door.
2.
Using a light source such as a flashlight, shine a light down onto the top
of the camera back for a short length of time. (about 30 seconds)
3.
Move the camera back to bring the second card into the exposure position.
4.
Without exposing the second card, pull the film frame.
5.
Peel the film and examine the frame for signs of light leaks.
If the camera back or back plate have to be replaced for any reason, also replace the two light seals (1A3902B
and 1A3903B). These light seals are identified in Plate 6 of the ID-4 Parts Catalog as key numbers 1 and 2.
THIS BULLETIN SHOULD BE FILED IN THE SERVICE MANUAL OF THE PRODUCT TO WHICH IT REFERS.
POLAROID CORPORATION
Consumer Services Division
784 Memorial Drive
Cambridge, MA 02139
TECHNICAL SERVICES
DEPARTMENT
PRODUCT ALERT
Int'l
EXP
SUB
P.A. NO.
ID4 #94-17
SPECIAL
DATE:
JUNE 10, 1994
TECH. SERVICES:
MAT'L SERVICES:
QUAL. CONTROL:
OPERATIONS:
TO:
LIST
FROM:
DICK CURTIS
SUBJECT:
NEW ELECTRONICS PACKAGE AND SHUTTER FOR ID-4 CAMERAS
BACKGROUND:
Starting in June 1994, Manufacturing will be using a new electronics package and a new Polaroiddesigned shutter in the ID-4 camera.
The electronics package consists of four new pc boards: display board, mirror motor board, ranging
board, and logic board. The primary change on these boards is the use of modified connectors which
should reduce the incidence of accidental uncoupling.
The shutter is designed to be easy to disassemble and reassemble without the need for special tools or
fixtures.
INTERCHANGEABILITY:
The new electronics package (all four boards) can be used with either new or old shutters. None of
the boards individually is interchangeable with the old boards. i.e. You cannot replace an old
logic board with a new logic board, an old display board with a new display board, etc;
New shutter assemblies cannot be installed in camera heads manufactured before May, 1994. (An
exploded view and parts list for the new shutter is included with this alert.)
over
THIS BULLETIN SHOULD BE FILED IN THE SERVICE MANUAL OF THE PRODUCT TO WHICH IT REFERS.
PLATE 1
ID1033A - SHUTTER ASSEMBLY
PARTS LISTS 1
ID1033A - SHUTTER ASSEMBLY
KEY
NO.
PART
NUMBER
PART NAME
1
2
3
4
5
6
7
8
9
10
11
12
13
14
15
16
17
18
19
20
21
22
23
24
25
26
27
28
29
30
2713010
2721190
1 B2214A
1B2215A
1 B7549D
1B2213A
1B2217A
1A6786A
1 B221 OA
1 B2208B
74333B
1D1037A
1D1020A
1 B2209A
1 B2239A
1A4740A
1 B2221 A
1 B2207A
1 B2222A
770890A
2725070
79710SA
770890A
794895A
1 B3255B
1 B2204A
1 B2211A
1 B3301 C
1 B2205A
1 B2206A
Lens F4.5 114mm
Spring Detent
Aperture Ring
Detent Disc
Screw, #256 Flathead (3)
AB Mount
Interceptor
Extension Spring
Spacer (1)
Walking beam
Screw, Plastite
Retainer Plate Assembly
Cushion (2)
Opening Spring
Exposure Cable Solenoid Assembly
Connector, 4Pin (Comes with assembly)
Compression Spring
Pivot Walking Beam
Plunger Adapter
Roll Pin (2)
Polarizer Assembly (in Current Product)
Compression Spring
Roll Pin
Brightener Solenoid Assembly
Screw, #256 Panhead
Lens Mounting Plate
C Element Mount
Pin/Dowel .093" Diameter
Shutter Blade Bottom
Shutter Top Blade
PARTS AVAILABILITY:
Material services in Cambridge will continue to stock old electronics boards and shutters as well as the
new parts. The following chart shows part number for both old and new.
PART NAME
OLD
NEW
LOGIC BOARD
794238A
1B2995A
MIRROR MOTOR BOARD
798234A
1D3318A
RANGING BOARD
798059A
1D3316A
DISPLAY BOARD
797052A
1D3253A /B /C *
SHUTTER ASSEMBLY
271028
ID1033A
*
A = Horizontal Format
B = Vertical Camera Head
C = Fixed Back (side pull
)Ploease order from normal sources.
POLAROID CORPORATION
Consumer Services Division
784 Memorial Drive
Cambridge, MA 02139
TECHNICAL SERVICES
DEPARTMENT
PRODUCT ALERT
Int'l
EXP
SUB
P.A. NO.
SPECIAL
DATE:
ID-4 #94-18
AUGUST 12, 1994
TECH. SERVICES:
MAT'L SERVICES:
QUAL. CONTROL:
OPERATIONS:
TO:
LIST
FROM:
DICK CURTIS
SUBJECT:
DEFECTIVE CAPACITORS ON ID4 DATA BOARDS
BACKGROUND:
ID-4 camera heads manufactured in late 1992 and most of 1993 are having a higher than expected
return rate because of failed Data PC Boards (1A6338A).
Analysis of the failed boards has isolated the problem to capacitors C3 and C5 on the data board.
These capacitors, yellow in color, were manufactured by Hua Jung Co. LTD. Failure of C3 causes
the upper data tube to not fire, while failure of C5 causes the lower data tube to not fire.
CORRECTIVE ACTION:
An Engineering Change Notice has been issued for the data board print. Hua Jung Co. LTD. has been
removed as an approved source for these capacitors, leaving Siemans as the only approved vendor.
The Siemans capacitors are blue and carry part number 1A4814A.
Materials Services has placed an order for the Siemans capacitors, but these components are a longlead item and are not expected to be available until the end of August. It is suggested that defective
boards be replaced and that faulty boards be held until Siemans capacitors are available. At that time,
replace C3 and C5 with the blue Siemans capacitors.
THIS BULLETIN SHOULD BE FILED IN THE SERVICE MANUAL OF THE PRODUCT TO WHICH IT REFERS.
POLAROID CORPORATION
Consumer Services Division
784 Memorial Drive
Cambridge, MA 02139
TECHNICAL SERVICES
DEPARTMENT
PRODUCT ALERT
Int'l
EXP
SUB
P.A. NO.
SPECIAL
DATE:
ID4 #94-19
OCTOBER 24, 1994
TECH. SERVICES:
MAT'L SERVICES:
QUAL. CONTROL:
OPERATIONS:
TO:
LIST
FROM:
DICK CURTIS / DWAYNE BILLINGSLEY
SUBJECT:
INSTALLING POSISTORS IN CONFIGURATION "S" CAMERA HEADS
BACKGROUND:
Problems have been reported with ID4 camera heads bearing configuration code "S" (indicating the new
shutter) which were shipped from the factory after August 8, 1994. The problem could manifest itself by
the overheating and actual burning of the solenoids in the camera head and U8 on Logic Board 1B2995A.
At this time, it is believed that all suspect camera heads were recovered before delivery to customers and
they should all be located in warehouses in Needham, Massachusetts and Enschede, The Netherlands.
CORRECTIVE ACTION:
To correct this problem in new units, manufacturing is adding three posistors (also called polyswitches)
to the ID4 camera head. These posistors (# CPS477) control current fluctuations, which are the cause of
the overheating problems.
When servicing ID4 camera heads which are configuration "S", check to determine whether the posistors
have been installed in the locations described below. If they have not, install them as instructed in the
following steps.
This procedure should take about 35 minutes to complete. This includes unpacking, disassembly, reassembly and repacking.
THIS BULLETIN SHOULD BE FILED IN THE SERVICE MANUAL OF THE PRODUCT TO WHICH IT REFERS.
REPAIR PROCEDURE:
NOTE: Before beginning, check the camera to be certain that it is functioning properly. If it is
not, correct the problem before starting this procedure.
Preparation:
1.
Using the inset in Figure 1 as a guide, trim the leads of three posistors # CPS477 leaving
just enough bare wire for soldering.
2.
Disassemble the camera head to gain access to the internal wiring.
Procedure:
1.
Locate connector J2 at the LED board on the camera back and disconnect it from the board.
2.
Trace the first wire at the left of the ribbon cable back about an inch from the connector. (The
connector has a key on the bottom. Use this key to identify the left wire of the ribbon cable.)
Cut and strip the wire as close to the connector as possible. (See Figure 1)
FIGURE 1
3.
Solder one of the previously trimmed posistors to the wire. Use black electrical tape to fully
cover the soldered joints and the posistor.
NOTE: The shutter blades are heat sensitive. Do not try to use shrink tubing in place of the tape.
4.
Reconnect J2 to the LED board.
FIGURE 2
5.
Using Figure 2, locate connector J1 and disconnect it from the brightness solenoid.
6.
Identify the wire from pin 1 and trace it back toward the logic board. Cut and strip the wire about
four inches from the connector.
7.
Solder one of the trimmed posistors to the wire. Use black electrical tape to fully cover the
soldered joints and the posistor.
8.
Reconnect J1 to the brightness solenoid.
9.
Using Figure 2, locate connector J7 and disconnect it.
10.
Identify the wire from pin 4 and trace it back. Cut and strip the wire about six inches from the
connector.
11.
Solder one of the trimmed posistors to the wire. Use black electrical tape to fully cover the
soldered joints and the posistor.
12.
Reconnect J7.
13.
Using a permanent marker, place a black dot next to the "S" on the configuration code label.
14.
Reassemble the camera and test it to be certain that it is functioning properly.
PARTS AVAILABILITY:
Posistors #CPS477 (labeled AN RXE 025 by their manufacturer, RAYCHEM) are available from
Material Services in Cambridge, Massachusetts. Please order from normal sources.
POLAROID CORPORATION
Consumer Services Division
784 Memorial Drive
Cambridge, MA 02139
TECHNICAL SERVICES
DEPARTMENT
PRODUCT ALERT
Int'l
EXP
SUB
P.A. NO.
SPECIAL
DATE:
ID4 #95-20
FEB. 10, 1995
TECH. SERVICES:
MAT'L SERVICES:
QUAL. CONTROL:
OPERATIONS:
TO:
LIST
FROM:
DICK CURTIS
SUBJECT:
BLADES ON ID4 SHUTTER (IE8400A) STAYING OPEN
BACKGROUND:
Some ID4 cameras manufactured between July 1994 and November 1994 are exhibiting a "shutter
blades-open" problem which makes the camera non-functional. The cause has been traced to a cushion
pad used during manufacture of the camera shutter. Cameras assembled during the noted period use
shutters which have a single piece foam cushion under the retainer plate. (See accompanying exploded
view.) The purpose of the foam cushion is to exert pressure against the retainer plate, thus allowing the
exposure solenoid plunger (roll pin) to have free movement as it is extended and retracted. It has been
discovered that these single piece cushions are compressing over time and as a result, the solenoid plunger is hanging up, keeping the shutter blades open.
Since November 1994, the shutters used in ID4 cameras use a two piece cushion under the retainer plate.
The two piece foam cushion is not as susceptible to compression as the single piece cushion. The new
two piece cushion carries part number 1D1020A.
CORRECTIVE ACTION:
If you receive a camera which was manufactured between July and November of 1994, examine the
shutter. If there is a single piece foam cushion under the retainer plate, replace it with a new two piece
cushion (1D1020A). Even if the shutter has the new two piece cushion, examine both pieces to be sure
they have not compressed. If they have, replace them with new cushions.
THIS BULLETIN SHOULD BE FILED IN THE SERVICE MANUAL OF THE PRODUCT TO WHICH IT REFERS.
IE8400A SHUTTER ASSEMBLY
KEY
NO.
1
2
3
4
5
6
7
8
9
10
11
12
13
14
15
16
17
18
19
20
21
22
23
24
25
26
27
2B
29
30
PART
NUMBER
2713010
2721190
1D1035A
1B2215A
1 B7549D
1B2213A
1B2217A
1A6786A
1B2210A
1B2208B
743333B
1B2218A
1D1020A
1B2209A
1B2239A
1A4740A
1B2221A
1B2207A
1B2222A
770B9OA
2725070
797105A
770890A
794B95A
1 B3255B
1 B2204A
1B2211A
1B3301C
1 B2206A
182205A
PART NAME
LensF45114mm
Spring Detent
Aperture Ring
Detent Disc
Screw, #256 Flathead (33
AB Mount
Interceptor
Extension Spring
Spacer (1)
Walking beam
Screw, Plasffte
Retainer Plate Assembly
Cushion (2)
Opening Spring
Exposure Cable Solenoid Assembly
Connector, 4Pin (Comes with assembly)
Compression Spring
Pivot Walking Beam
Plunger Adapter
Roll Pin(2)
Polarizer Assembly (in Current Product)
Compression Spring
Roll Pin
Brightener Solenoid Assembly
Screw, #256 Panhead
Lens Mounffng Plate
C Element Mount
Pin/Dowel .093" Diamet
Shutter Blade Bottom
Shutter Top Blade
POLAROID CORPORATION
Customer Support Services
201 Burlington Road
Bedford, MA 01730
TECHNICAL SERVICES
DEPARTMENT
PRODUCT ALERT
Int'l
EXP
SUB
P.A. NO.
SPECIAL
DATE:
ID4 #95-21
AUGUST 1, 1995
TECH. SERVICES:
MAT'L SERVICES:
QUAL. CONTROL:
OPERATIONS:
TO:
LIST
FROM:
DICK CURTIS
SUBJECT:
UPPER MIRROR MOTOR ASSY PROBLEM IN VERTICAL ID-4’s
PROBLEM
If you receive an ID-4 vertical-format system for repair with complaints of multiple indicator lights illuminating on the display board and/or a shutter malfunction, the problem
may be caused by a small piece of black masking tape on the mirror carrier.
This problem is most apt to occur in vertical-format systems manufactured during October of 1994. The black masking tape was used in a rework of horizontal-format ID-4’s
and should not be present in vertical systems.
SOLUTION
Removing the tape from the mirror carrier will solve the problem. To gain access to the
tape, see the procedure and illustration on the reverse side. Any disassembly necessary
is described in Section 4, pages 4-40 to 4-45 of the ID-4 Service Manual.
THIS BULLETIN SHOULD BE FILED IN THE SERVICE MANUAL OF THE PRODUCT TO WHICH IT REFERS.
REMOVING TAPE FROM MIRROR CARRIER OF VERTICAL ID-4 SYSTEMS
1.
Disassemble the camera to the point shown in Figure 1 (see Section 4 of ID-4
Service Manual).
2.
Remove the wire retainer as shown in Figure 1.
3.
If the top left corner of the mirror carrier (see Figure 1 balloon) is not visible and
accessible, move the mirror carrier up by manually rotating the gear train: turn
small gear nearest the motor with a fingertip.
the
4.
Use a penlight and turn the camera at an angle to see the small piece of masking
tape on the top left side of the mirror carrier.
5.
Remove the tape with tweezers or similar tool, being careful not to damage the
surface of the mirror carrier.
BLACK
MASKING
TAPE
WIRE
RETAINER
MIRROR
CARRIER
Figure 1 Tape Location on Vertical Format ID-4 Mirror Carrier
POLAROID CORPORATION
Customer Support Services
201 Burlington Road
Bedford, MA 01730
GLOBAL TECHNICAL
SERVICES
PRODUCT ALERT
Int'l
EXP
SUB
P.A. NO.
ID4 #95-22
SPECIAL
DATE:
SEPT. 25, 1995
TECH. SERVICES:
MAT'L SERVICES:
QUAL. CONTROL:
OPERATIONS:
TO:
LIST
FROM:
DICK CURTIS
SUBJECT:
END OF ID4 MANUFACTURE / SHUTTER SOLENOID DISENGAGING FROM
LENS MOUNTING PLATE
NOTICE:
This Alert serves notice that manufacture of the ID4 camera system will be
discontinued after November 1995. A final buy of ID4 parts is currently being
planned by Technical Services Logistics.
BACKGROUND:
Some ID4 Polaroid shutters (manufactured between July, 1994 and April, 1995) have been returned for
repair with a "blades not closing" complaint. When the camera head was opened, it was found that the
solenoid had disengaged from the lens mounting plate and in some instances, the solenoid plunger was
completely bypassing the walking beam.
Investigation by Manufacturing determined that the cause for this problem lay in the fact that the lens
mounting plate post heights do not fall within specification. (Posts 1 and 2 shown in the illustration are
0.030" too high while post 3 is 0.020" too high.) Thus, the retaining plate cannot compress the cushions
sufficiently to keep the solenoid in position.
CORRECTIVE ACTION:
Monitoring is continuing to determine the full extent of this problem and also to determine whether the
modification outlined below is a satisfactory solution. Since current analysis indicates that the problem
will occur at a very low rate (less than 2%), the following minimal action is thought to be adequate:
-overTHIS BULLETIN SHOULD BE FILED IN THE SERVICE MANUAL OF THE PRODUCT TO WHICH IT REFERS.
1.
Remove the camera front cover.
2.
Remove the two screws securing the strobe assembly and lift the assembly aside to the extent its
electrical leads allow. This provides access to the shutter solenoid.
3.
(Refer to Figure below.) Remove the three screws holding the retaining plate and disengage the
extension spring between the plate and the interceptor. Set the retaining plate aside.
4.
Firmly seat the solenoid in its nest on the mounting plate, being certain that it is properly aligned
with the walking beam. Apply a thin bead of hot melt glue (Black and Decker #22235) on both
sides of the solenoid as shown.
5.
When the glue has cooled, apply pressure to the solenoid. It should not be able to move up or
down or side-to-side and must be aligned with the walking beam. If these conditions are not met,
repeat steps 4 and 5.
6.
Reassemble the shutter and the camera head.
7.
Power up the camera head and cycle it five times to ensure that the blades are opening and closing
correctly. If they are not, determine the reason and correct it.
8.
Mark the letter "G" after the serial number on the camera head to indicate that this procedure has
been done.
9.
Keep a record of the number of camera heads returned for this failure and whether any camera
heads are returned for this failure after the hot melt glue procedure has been completed. This
information will be needed for the monitoring program mentioned earlier.
MATERIALS REQUIRED:
Black and Decker hot melt glue # 22235 or equivalent
RETAINING PLATE
EXTENSION
SPRING
APPLY THIN BEAD
OF HOT MELT GLUE BOTH SIDES OF
SOLENOID
POST 1
POST 2
POST 3
MOUNTING PLATE
POLAROID CORPORATION
Customer Support Services
201 Burlington Road
Bedford, MA 01730
TECHNICAL SERVICES
DEPARTMENT
NEW PRODUCT INFORMATION
Int'l
EXP
SUB
P.A. NO. ID100 #94-1
SPECIAL
DATE:
May 31, 1994
TECH. SERVICES:
MAT'L SERVICES:
QUAL. CONTROL:
OPERATIONS:
TO:
LIST
FROM:
DWAYNE BILLINGSLEY
NEW ID-100 INSTANT PHOTO IDENTIFICATION SYSTEM
SUBJECT:
DESCRIPTION
The ID-100 shown in the accompanying illustration is a new, low-cost,
portable ID Camera for making two identical or two different ID cards
on one sheet of Polaroid film. The System can use Polaroid T-669
Polacolor, Polacolor ID Ultraviolet, or Polacolor 100 film.
The System consists of the Camera Head, Camera Stand, Dust Cover, Die
Cutter and Laminator. It is expected to be available mid-second quarter of 1994.
PID numbers for Camera and Laminator model are:
ID-100 Camera Horizontal (110V)
ID-100 Camera Vertical
(110V)
ID-100 Camera Horizontal (220V)
-
618294
618295
618293
ID-100 Laminator
ID-100 Laminator
-
618264
618289
(110V)
(220V)
NOTE: Initially, the ID-100 Camera will be available
in the Horizontal format only.
APPLICATIONS/MARKETS
The ID-100 System is designed for non-DMV applications with low to
medium print volume. Expected users include manufacturing and service
companies, schools, hospitals, local government agencies, etc.
THIS BULLETIN SHOULD BE FILED IN THE SERVICE MANUAL OF THE PRODUCT TO WHICH IT REFERS.
New ID-100 Photo ID System, cont’d.
- 2
WARRANTY - U.S.A.
Polaroid warrants the ID-100 Camera, Die Cutter and Laminator for one
year from the date of sale.
WARRANTY - OUTSIDE U.S.A.
A warranty for non-U.S.A. customers will be developed by Polaroid
subsidiaries.
EARLY RETURNS - U.S.A.
To provide an opportunity for complete product analysis, all ID-100
Systems will be centrally repaired by the manufacturer during the
Early Returns Program. The Early Returns Program will exist for the
first six months after introduction or the first 50 units, whichever
comes first.
An Incident Awareness Form (IAF) should be completed by the first
Polaroid representative in contact with the customer. Systems to be
serviced and the IAF should be shipped to Polaroid Corporation, 784
Memorial Drive, Cambridge, MA 02139 ATTN: Dwayne Billingsley.
Use of exchange units issued by Oak Brook will be promoted for customers requiring service.
SERVICE PLAN - U.S.A. (Ongoing)
After the Early Returns Program, ongoing repairs and service will be
provided by the manufacturer, through Polaroid Corporation, 2020 Swift
Drive, Oak Brook, IL 60521.
Use of exchange units issued by Oak Brook will be promoted for customers requiring service.
SERVICE PLAN - OUTSIDE U.S.A.
Ongoing service will be determined by the Regional Service management.
SERVICE TRAINING
Product simplicity allows self-training with a Service Manual and
videotape, which will be available during the second quarter of 1994.
PARTS AVAILABILITY
Parts or exchange units will be available in the second quarter 1994,
along with recommendations for initial start-up inventory.
New ID-100 Photo ID System, cont’d.
New ID-100 Instant Photo Identification System
- 3 -
New ID-100 Photo ID System, cont’d.
- 4 -
Feature Comparison — ID-100 and ID-4
ID-100
ID-4
Camera Type
Portable
Configuration
Focus
Sonar Ranging
All Photo
Yes
H/V 2 Up
Fixed
No
All Photo
Yes
H/V 2/I Up
Fixed
Yes
Images per sheet
Two identical images
Removable Cardholder
Timer
Camera Back
2
Yes
No
(2) Battery
Fixed
1 or 2
No
Yes
(2) Electronic/Battery
Moveable
Polarizer Val Plate
Laminator
Die Cutter
Security Key
Warranty
Yes
Heat/Pressure
2 chip
No
One year
Yes
Heat/Pressure
1 & 2 chip
Yes
One year
Operator Diagnosis
Carry Case
Weight
Data Card Sizes
Data Magnification
No
Optional
24 lbs. (10.8 kg)
3-1/4"
0.7
Yes
Yes
46 lbs. (20.9 kg)
3-1/4, 3-1/2 & 4"
0.65 to 0.80
Face Magnification
.092 @ 54"
.125 @ 40"
Yes
Fixed
Continuous adj.
0.3 stop increm.
over 0.5 stop range
Fixed
.092 @ 54"
.125 @ 40"
Yes
Replaceable
Continuous adj.
1.5 stop increm.
over 1.5 stop range
Variable f/4.5 - f/45
Fixed
20,000 cycles: one
misfire/5000 cycles
Variable +1.5 stop
0.3 stop increments
Fixed
25,000 cycles: one
misfire/5000 cycles
Variable +1.5 stop
Stored position:
Operating mode (vert. camera)
Close-Up Lens
Aim Light
Portrait Light Control
Face Aperture
Data Aperture
Strobe Reliability
Data Strobe Output
Dimensions
18 x 14.5 x 11.3"
(45 x 36.8 x 28.7cm)
31.5 x 23 x 11.25"
(80.0 x 58.4 x 28.6cm)
Open position:
Carrying case w/base (handle folded)
29.5 x 14.5 x 11.3"
(74.9 x 36.8 x 28.7cm)
17.75 x 23 x 11.25"
(45.1 x 58.4 x 28.6cm)
POLAROID CORPORATION
Consumer Services Division
201 Burlington Road
Bedford, MA 01730
TECHNICAL SERVICES
DEPARTMENT
PRODUCT ALERT
Int'l
EXP
SUB
P. A. NO. ID100 # 96-1
SPECIAL
DATE: JUNE, 1996
TECH. SERVICES:
MAT'L SERVICES:
QUAL. CONTROL:
OPERATIONS:
TO:
LIST
FROM:
DICK CURTIS/DWAYNE BILLINGSLEY
SUBJECT:
DATA/SUBJECT STROBE PC BOARD UPDATE
Problem
ID100 cameras manufactured before 12/31/95 have experienced subject/data card strobe malfunction
when photographing either the subject or the data card.
Source of Problem
After analyzing the subject/data card strobe malfunction, it was determined that the trigger capacitors
on both the subject strobe and the data card strobe PC boards were defective. Because of the defective
trigger capacitors the subject/data card strobe failed to fire.
Action Taken
It is recommended that the trigger capacitors on the subject/data card PC board for all ID100 cameras
manufactured before 12/31/95 be replaced when they are received for repair whether they have a
subject/data card strobe malfunction or not.
Strobe PC board
Before 12/31/95
After 12/31/95
Subject
C1 - .047uf 400V Poly Film
C1 - .1uf 500V Ceramic
Data Card
C1/C2 - .047uf 400V Poly Film
C1/C2 - .1uf 500V Ceramic
THIS BULLETIN SHOULD BE FILED IN THE SERVICE MANUAL OF THE PRODUCT TO WHICH IT REFERS.
Replacing Subject/Data Card Trigger Capacitors
Caution: Shock Hazard - High Voltage
It takes approximately 90 seconds to discharge the strobe capacitors
down to 48 Vdc. Always wait at least two (2) minutes to make sure
the strobe capacitors are fully discharged before attempting to remove
the subject/data card strobe PC board.
Use a dump probe after the two (2) minute discharge time has elapsed to
make sure the strobe capacitors are fully discharged.
1. Remove the subject/data card strobe PC board as explained in section 4 of the ID100 Service
Manual.
2. Unsolder the .047uf 400V Poly Film trigger capacitors from the subject/data card strobe PC board
being careful not to damage the subject/data card strobe PC board.
Note: Refer to the subject/data card strobe schematic and board layout (Figures 1and 2) for the
location of the trigger capacitors.
3. Solder the replacement trigger capacitors (.1uf 500V Ceramic) onto the subject/data card strobe
PC board.
4. Install the subject/data card strobe PC board as explained in section 4 of the ID100 Service Manual.
Parts Availability
Trigger capacitors (Part No. CPS 512) will be available after July 1, 1996 from:
Material Services Department
Polaroid Corporation
201 burlington Road
Bedford, MA 01730
Our inventory of strobe/data card PC boards will be purged and replacement PC boards will be
available ASAP.
Subject Strobe
Data Card Strobe
Replace C1
with
.1uf 500V
Ceramic Capacitor
Replace C1/C2
with
.1uf 500V
Ceramic Capacitor
Figure 1. Subject/Data Card PC Board Schematic
Subject Strobe
Data Card Strobe
Replace C1
with
.1uf 500V
Ceramic Capacitor
Replace C1/C2
with
.1uf 500V
Ceramic Capacitor
Figure 2. Subject/Data Card PC Board Layout
POLAROID CORPORATION
Customer Support Services
201 Burlington Road
Bedford, MA 01730
TECHNICAL SERVICES
DEPARTMENT
NEW PRODUCT INFORMATION
Int'l
EXP
SUB
P.A. NO.
TX #94-4
SPECIAL
DATE: FEBRUARY 28, 1994
TECH. SERVICES:
MAT'L SERVICES:
QUAL. CONTROL:
OPERATIONS:
TO:
LIST
FROM:
NICK CURRERI
SUBJECT:
NEW TX-100 & TX-2000 THERMAL PRINTERS (NON-USA MARKETS)
BACKGROUND
Two new A6-size thermal printers of improved design - Model TX-1100 and Model TX-2000 are being
introduced to replace the existing TX-1000 and TX-1500 Printers. Features include 8 bit color and 60
second imaging time. Media is the same as used by the TX-1000.
At this time the new Printers will be sold only in the non-U.S.A. markets.
FEATURES
o PAL signal compatibility
o Stored image preview
o Field or Frame capture
o Negative reversal
o PUB, 15.625 kHz compatibility
o Multiimage: I,2,4,16~25 pictures/print
o S-VHS compatibility
o IEC 601 approved
o Remote control (optional)
o 8 bit continuous tone
o Mirror reversal
o 60second print tone
Both Printers are of the same general design, but the TX-2000 has these additional features:
o Cetronics input
o Four and eight picture video instead
of one and two picture video
0 RS232C input
THIS BULLETIN SHOULD BE FILED IN THE SERVICE MANUAL OF THE PRODUCT TO WHICH IT REFERS.
WARRANTY
Model TX-1100 and Model TX-2000 thermal printers are warranted for one year from date of original
purchase.
AVAILABILITY
The TX-1100 Printer (PAL) is now in stock at the Polaroid Distribution Center in Enschede.
TX-2200 Printers (NTSC) are available through Polaroid NPKK.
REPAIRS
All repairs of these Printers should be handled through normal channels in Europe and Japan. Presented
below are the PID numbers of the various models.
TX2000 UNIVSL
TX2000 EUR
TX1100 E
Japan
Europe
Europe
TX1100 Remote Control
PID #618305
PID #618201
PID #618200
PID #618443
POLAROID CORPORATION
Consumer Services Division
784 Memorial Drive
Cambridge, MA 02139
TECHNICAL SERVICES
DEPARTMENT
PRODUCT ALERT
Int'l
EXP
SUB
P.A. NO.
SPECIAL
DATE:
TX94-5
JULY 11, 1994
TECH. SERVICES:
MAT'L SERVICES:
QUAL. CONTROL:
OPERATIONS:
\TO:
LIST
FROM:
NICK CURRERI
SUBJECT:
VERTICAL LINES/STRIKES IN TX1100 & TX2000 THERMAL PRINTER IMAGES
BACKGROUND:
Several European customer complaints of vertical lines or strikes in thermal printer images (see Figure 1
on next page) prompted an investigation by Polaroid. It was discovered that the lines or strikes result
from a residue buildup on the thermal head. The buildup causes the media to travel through the printer in
an intermittent drive of slip and feed, slip and feed, rather than in a smooth, steady motion. Each vertical
line on the finished print is an indication of the media slipping.
Further checking found that the buildup occurred only with certain media and only when the prints being
processed were in the medium density range. For medium density prints, the thermal head temperature is
at a value that results in the donor ribbon occasionally hanging up instead of slipping past the head as it
properly should. This action does not occur with high density or low density images.
-over-
THIS BULLETIN SHOULD BE FILED IN THE SERVICE MANUAL OF THE PRODUCT TO WHICH IT REFERS.
VERTICAL LINES
VERTICAL LINES
Figure 1 Example of Vertical Lines/Strikes in Thermal Printer Images
The next phase of the investigation was to determine why procesing medium density prints resulted in a
buildup on the thermal head. The problem was traced to a batch of media donor ribbon which has an
incorrect coating. Normally, any residue on the head is cleaned by the action of the media feeding through
the machine. However, the buildup from the incorrectly coated media donor ribbon is so great when
medium denisty prints are being processed, that the normal cleaning action does not work. In fact, each
pass of defective media causes the buildup to increase. Lines or strikes which are most pronounced are
from heads that have the greatest residue buildup.
Product tracing has determined that the defective media is in lots which was made in December 1993,
January 1994, and February 1994. This media can be identified by the manufacturing dates located
on the display boxes (i.e. 1993.12, 1994.1 and 1994.2) or from lot numbers located on the ink
cassette. (Figure 2)
Configuration
Code
Figure 2 Location of Configuration Code on Ink Cassette
-over-
The following table explains how to read the configuration code to identify media manufactured between
December, 1993 and February 1994.
Thermal Media Configuration Code:
1. Configuration
HI
OOOO
XXXX
HI - Hitachi
PO - Polaroid
Jumbo Roll Number
Day:
Jan thru Oct (01 thru 31)
Nov & Dec (01 + 50 thru 31 + 50)
Example: (51 = 1st; 81 = 31st)
Month: Jan thru Oct (0 - 9);
Nov & Dec (0 & 1 with day code as noted)
2. Lot No.
Year:
Month
Jan
Feb
Mar
Apr
May
Jun
EXAMPLE:
4001
4101
4201
4301
4401
4501
the last digit of the year (1994 = 4)
Lot No.
Month
-
Jul
Aug
Sep
Oct
Nov
Dec
4031
4128
4231
4330
4431
4530
Lot No.
4601
4701
4801
4901
4051
4151
-
4631
4731
4830
4931
4080
4181
Defective media made in December 1993 would have a code of 3151 through 3181
Defective media made in January 1994 would have a code of 4001 through 4031
Defective media made in February 1994 would have a code of 4101 through 4128
CORRECTIVE ACTION:
Replacement media has already been shipped to Polaroid-Europa and is now available in our distribution
system. Customers should be instructed to avoid use of media with the noted date codes.
If the lines or strikes have been barely visible, there is a possibility that running some test cycles with
good media will clean the heads. If the lines or strikes indicate a heavier buildup, the heads may have to
be cleaned with alcohol.
There may be instances where cleaning the heads with alcohol will not remove the buildup and lines still
appear on test prints. In these cases, the head must be removed and a new thermal head installed in the
printer.
POLAROID CORPORATION
Consumer Services Division
784 Memorial Drive
Cambridge, MA 02139
TECHNICAL SERVICES
DEPARTMENT
PRODUCT ALERT
Int'l
EXP
SUB
P.A. NO.
SPECIAL
DATE:
TX94-6
JULY 11, 1994
TECH. SERVICES:
MAT'L SERVICES:
QUAL. CONTROL:
OPERATIONS:
TO:
LIST
FROM:
NICK CURRERI
SUBJECT:
STRIPPED GEAR IN TX1100/TX2000 THERMAL PRINTERS
CAUSED BY JAMMED MEDIA
BACKGROUND:
A small number of TX1100/TX2000 thermal printers have been found with a stripped gear problem. The gear in question (6437411) is identified as key number 25A in Parts List 2 of the revised
TX1100E Printer Parts Catalog, dated June 1994.
Analysis of this problem has determined that the gear can be stripped as a consequence of a media
jam. Specifically, if message "Error 14" is displayed on the printer readout, it is an indication of a
jam which must be cleared by a repair person.
If the printer is unplugged when message "Error 14" is displayed, the error message will not
reappear when the machine is plugged in again and the customer will likely attempt to cycle the
machine. If this happens, there is a strong possibility that the teeth on the gear identified above
will be stripped.
CORRECTIVE ACTION:
Customers should be advised to send printers to a Polaroid location for repair whenever message
"Error 14" is displayed on the printer readout. Future generations of TX1100 and TX2000
printers will have an electronic redesign that retains the error message even after the machine is
unplugged. As a result, when the machine is turned on again, the error message will reappear on
the readout.
THIS BULLETIN SHOULD BE FILED IN THE SERVICE MANUAL OF THE PRODUCT TO WHICH IT REFERS.
POLAROID CORPORATION
Consumer Services Division
784 Memorial Drive
Cambridge, MA 02139
TECHNICAL SERVICES
DEPARTMENT
PRODUCT ALERT
Int'l
EXP
SUB
P.A. NO.
TX 95-7
SPECIAL
DATE:
JAN. 6, 1995
TECH. SERVICES:
MAT'L SERVICES:
QUAL. CONTROL:
OPERATIONS:
TO:
LIST
FROM:
NICK CURRERI
SUBJECT:
CLEARING PAPER JAMS IN THE TX-1500 PRINTER
When a paper jam occurs in the TX-1500 printer, the READY, INK, and PRINT button lights all blink at
the same time. To clear a paper jam, do the following:
1.
With the unit ON, unplug the power cord from the wall. Leave it unplugged for about 5 seconds.
2.
Plug the power cord back in. This allows the unit to cycle and will often allow the paper to free
itself, thus clearing the jam.
IF THE PAPER REMAINS JAMMED:
1.
Referring to Figure 1, remove the ink cartridge.
FIGURE 1 REMOVING THE INK CARTRIDGE
THIS BULLETIN SHOULD BE FILED IN THE SERVICE MANUAL OF THE PRODUCT TO WHICH IT REFERS.
In the following step, DO NOT FORCE THE DRUM.
2.
Try turning the drum GENTLY counter-clockwise as shown in Figure 2. If the drum moves
freely, the jammed paper can be removed. If the drum does not move freely and you attempt to
force it, it is likely that one of the plastic gears in the drum roller mechanism will be stripped.
3.
If the drum does not move freely, return the printer to a service location.
FIGURE 2 TURNING THE DRUM COUNTER-CLOCKWISE
POLAROID CORPORATION
Customer Support Services
201 Burlington Road
Bedford, MA 01730
GLOBAL TECHNICAL
SERVICES
PRODUCT ALERT
Int'l
EXP
SUB
P.A. NO.
SPECIAL
DATE:
CI-700 #94-2
FEBRUARY 21. 1994
TECH. SERVICES:
MAT'L SERVICES:
QUAL. CONTROL:
OPERATIONS:
TO:
LIST
FROM:
SUSSAN COLEY
SUBJECT:
CI-700 PHOTOPRINTER PRODUCTION DISCONTINUED
BACKGROUND:
A decision has been made by the EIS Business Unit to cease further production of the CI-700
PhotoPrinter.
REPAIRS - POLAROID-BRANDED PRODUCT:
All repairs and service of Polaroid-Branded CI-700 units will be performed in Cambridge, MA via exchange units. (An inventory of PhotoPrinters will be maintained for this purpose.)
REPAIRS - OEM UNITS:
A quantity of PhotoPrinter OEM units have been sold with no requirement for service - that is, with no
warranty charge imbedded in the price of these units to the OEM.
Account managers have been so informed and urged to offer attractive pricing/terms on units stocked for
exchange purposes.
THIS BULLETIN SHOULD BE FILED IN THE SERVICE MANUAL OF THE PRODUCT TO WHICH IT REFERS.
Digital Products
Service BULLETIN KB# 981009163430GD
201 Burlington Rd. Bedford MA 01730
Polaroid ColorShot Parallel
From:
Date:
Subject:
•
Vol. 1, No. 1
New Products Service Support Group
October 7, 1998
Windows 95 OS - Slow Printing
Category: EI Service Bulletin
The purpose of this message is to alert Telephone Service and Repair providers
regarding the solution to the problem of slow printing (3 – 5 minutes) when using
the ColorShot Parallel version running under Windows 95.
•
Products Affected:
Polaroid ColorShot Parallel printer
Polaroid PhotoMAX PhotoPrinter
•
Details:
The customer successfully installs the printer on their PC but, after clicking on
the “Print” button in their image editing application, the time to output a print is 3
to 5 minutes.
•
Resolution:
The solution is for the user to get (from another PC, a friend, or other source)
the latest version of a driver named Lpt.vxd and install it on their user’s PC. The
version should 4.00.503, or later. The path to this file is:
C:WINDOWS\SYSTEM (where C is the typical letter designating the root drive)
A second way to get the driver is to download it from Microsoft. Connect to the
following Microsoft FTP site on the World Wide Web:
ftp://ftp.microsoft.com/services/whql/drivers/win95/printr.
Download the file named A1701.exe. A1701.exe is a self extracting file that,
once expanded, contains the lpd.vxd file. Copy this file to the
WINDOWS\SYSTEM folder.
After the file is updated, restart the PC. After restarting, try printing again. Print
time should now be about 30 seconds.
Contact: Gerald DiBello
Cc:mail: DIBELLO, GERALD
Internet: [email protected]
Polaroid’s Electronic Imaging Systems service bulletins are subject to change as necessary. The information above
was believed to be correct at the time of printing. If you have any questions regarding this document, please refer to
the information sources outlined above.
Polaroid ColorShot Parallel Bulletin V1, N1 Page 1 of 1
Digital Products
Service BULLETIN KB# 981012091903GD
201 Burlington Rd. Bedford MA 01730
Polaroid ColorShot Parallel
From:
Date:
Subject:
•
Vol. 1, No. 2
New Products Service Support Group
October 9, 1998
Problems with Printer Installation/Operation Compaq Deskpro PC’s
Category: EI Service Bulletin
The purpose of this message is to alert Telephone Service and Repair providers
regarding the solution to problems the can happen when installing the
ColorShot Parallel on Compaq Deskpro 2000, 4000, or 6000 series PC’s.
•
Products Affected:
Polaroid ColorShot Parallel printer
Polaroid PhotoMAX PhotoPrinter
•
Details:
1. User is unable to install the printer either by the plug and play method, or
using the Add printer Method. If you change the port setting in the Compaq’s
proprietary BIOS has no effect on the PC’s ability to recognize the printer.
2. User may be able to install the printer, but when trying to print an error
message is seen.
•
Resolution:
The solution is to get the latest version of the lpt.vxd driver from Compaq.
Connect to the following Compaq location on the World Wide Web:
http://www.compaq.com/support/techpubs/customer_advisories/dt0005.html
There is a link on the bottom of this page (an application note regarding printer
problems) to a file download page. On the download page select the file named
SP2345.exe and download it. SP2345.exe is a self extracting file that, once
expanded, contains the file Prntupd4 and a readme file. The readme file
instructs the user on how to launch the upgrade to automatically install a new
version 4.00.954 lpt.vxd file.
If the ColorShot printer was not already installed it should now be recognized as
a plug and play device and install normally. If the user had already installed the
printer you may need to uninstall it, re-start the PC, and install it again.
Contact: Gerald DiBello
Cc:mail: DIBELLO, GERALD
Internet: [email protected]
Polaroid’s Electronic Imaging Systems service bulletins are subject to change as necessary. The information above
was believed to be correct at the time of printing. If you have any questions regarding this document, please refer to
the information sources outlined above.
Polaroid ColorShot Parallel Bulletin V1, N2 Page 1 of 1
Digital Products
Service BULLETIN KB# 980612084030GD
201 Burlington Rd. Bedford MA 01730
Polaroid ColorShot USB
From:
Date:
Subject:
•
Vol. 1, No. 1
New Products Service Support Group
June 12, 1998
Image Breakup in Prints
Category: Product Alert
The purpose of this message is to alert service providers regarding a printing
problem that might be seen by end user’s.
•
Products Affected:
Polaroid ColorShot USB printer
•
Details:
Problem Description: End user selects the “Print” command from their image
editing application. While a print cycle is in process, the user switches to
another application and begins to work in that application. The print cycle will
appear to be working normally and a print will eject. After the print develops the
image that develops is broken up horizontally. The sample image, below, shows
one type of image breakup. In other cases, the effect may appear as horizontal
banding in only part of the printed image. In this instance, the image looks Ok
above and below the banded or broken-up portion.
This problem appears to be hardware dependent. It is more likely to happen on
older and slower Pentium processors (100Mhz or, below) with certain types of
graphic boards. Typically, the user has a number of applications open when the
print command is selected and they switch to one of the applications while the
print cycle is in process.
Polaroid’s Electronic Imaging Systems service bulletins are subject to change as necessary. The information above
was believed to be correct at the time of printing. If you have any questions regarding this document, please refer to
the information sources outlined above.
Polaroid ColorShot Bulletin V1, N1 Page 1 of 2
•
Resolution:
If users report this type of problem, ask them to try to print again but, do not
switch to another application during the print cycle. Another suggestion would
be to close one or more open applications before they select the Print
command.
Contact: Gerald DiBello
Cc:mail: DIBELLO, GERALD
Internet: [email protected]
Polaroid’s Electronic Imaging Systems service bulletins are subject to change as necessary. The information above
was believed to be correct at the time of printing. If you have any questions regarding this document, please refer to
the information sources outlined above.
Polaroid ColorShot Bulletin V1, N1 Page 2 of 2
Digital Products
Service BULLETIN KB# 980702143545GD
201 Burlington Rd. Bedford MA 01730
Polaroid ColorShot USB
From:
Date:
Subject:
•
Vol. 1, No. 2
New Products Service Support Group
July 2, 1998
Windows 98 Compatibility
Category: EI Service Bulletin
The purpose of this message is to alert telephone support and service providers
regarding issues with ColorShot Software and the Windows 98 Operating
System
•
Products Affected:
Polaroid ColorShot USB printer
•
Details:
Two subjects are covered in this bulletin
1. ColorShot software version 1.03. This is the first release that is designed to
be fully compatible with Windows 98
2. Correct ColorShot software installation when a Windows 95 PC is upgraded
to Windows 98
•
Resolution:
1. Version 1.03 software is designed to be fully compatible with Windows 98.
Version 1.02 can be used but, it may have anomalies.
2. Before upgrading a PC from Window 95 to Windows 98 the ColorShot
software should be removed. Use the normal de-install procedure to do this.
A review of the procedure is as follows: a) Remove the USB cable from the
back of the printer. b) Use Add-Remove Programs to remove Polaroid IQA
for ColorShot. c) Delete the Polaroid ColorShot from the Printers folder.
After the Windows 98 upgrade is complete, re-install the ColorShot software.
Note that installation of the ColorShot software on a Windows 98 PC is a
slightly different procedure than the one outlined in the existing QuickStart
Guide.
Contact: Gerald DiBello
Cc:mail: DIBELLO, GERALD
Internet: [email protected]
Polaroid’s Electronic Imaging Systems service bulletins are subject to change as necessary. The information above
was believed to be correct at the time of printing. If you have any questions regarding this document, please refer to
the information sources outlined above.
Polaroid ColorShot Bulletin V1, N2 Page 1 of 1
Digital Products
Service BULLETIN KB# 980710145413GD
201 Burlington Rd. Bedford MA 01730
Polaroid ColorShot USB
From:
Date:
Subject:
•
Vol. 1, No. 3
New Products Service Support Group
July 10, 1998
Intel USB Ready Utility
Category: EI Service Bulletin
The purpose of this message is to alert Telephone Service providers regarding
the availability of a useful USB checking utility.
•
Products Affected:
Polaroid ColorShot USB printer used with Windows 95
•
Details:
A new version 2.8 of Intel’s USB Checking program has been released. The
new version is more user friendly than the older version. The new version
checks the host PC’s hardware and software to determine USB readiness.
•
•
•
If the appropriate USB hardware and Windows 95 software is found:
The program reports - “System hardware has USB Support.”
If there is no USB host controller in the PC: The program reports - “System
Hardware DOES NOT have USB Support. Recommend upgrade system
hardware for USB support”
Recommends that the user upgrade to Windows 98 for "Full" USB support
A copy of USBReady.exe can be downloaded from the web at the following
location: www.usb.org./USB/Usbready.exe
Suggested uses for USBready.exe:
•
•
For Potential customers – They can check their PC for USB readiness prior
to purchase of the ColorShot printer
For Customers that already have the printer - Telephone Support can
quickly determine the PC’s USB readiness.
Sample windows from USBready.exe are shown on the next page:
Polaroid’s Electronic Imaging Systems service bulletins are subject to change as necessary. The information above
was believed to be correct at the time of printing. If you have any questions regarding this document, please refer to
the information sources outlined above.
Polaroid ColorShot Bulletin V1, N3 Page 1 of 2
Screen 1
Screen 2 (after clicking Yes button on Screen 1)
Screen 3 (after clicking on Details button on Screen 2)
Contact: Gerald DiBello
Cc:mail: DIBELLO, GERALD
Internet: [email protected]
Polaroid’s Electronic Imaging Systems service bulletins are subject to change as necessary. The information above
was believed to be correct at the time of printing. If you have any questions regarding this document, please refer to
the information sources outlined above.
Polaroid ColorShot Bulletin V1, N3 Page 2 of 2
Digital Products
Service BULLETIN KB# 980904144249GD
201 Burlington Rd. Bedford MA 01730
Polaroid ColorShot USB
From:
Date:
Subject:
•
Vol. 1, No. 5
New Products Service Support Group
September 4, 1998
Win 95 - Missing Root Hub
Category: Software Info Bulletin
The purpose of this message is to alert Telephone Service and Repair providers
regarding the solution to a problem of a missing USB Root Hub when operating
under Win 95.
•
Products Affected:
Polaroid ColorShot USB printer
•
Details:
The Customer tries to install the ColorShot USB printer and it is not recognized.
A look in the device manager shows that that USB icon is present but, only the
following text appears when the USB icon is expanded (click on + sign next to
USB gray diamond icon) “Intel 82371AB PCI to USB Universal Host
Controller.” See image, below, showing the problem. No “Root Hub” listing is
an indication that the PC has an Intel 440LX or 430TX Chipset on it’s
motherboard that it’s not recognized by the USB supplement software.
Polaroid’s Electronic Imaging Systems service bulletins are subject to change as necessary. The information above
was believed to be correct at the time of printing. If you have any questions regarding this document, please refer to
the information sources outlined above.
Polaroid ColorShot Bulletin V1, N5 Page 1 of 2
•
Resolution:
The Intel 82371AB PCI to USB Universal Host Controller is part of the Intel
430TX or 440LX chipset found on many PC motherboards. In Microsoft
Windows 95, special device information (*.INF) files are used to specify and
define the characteristics of various controller and device classes of the
operating system. These *.INF files can be found in the \WINDOWS\INF
directory.
However, the PCI Device ID’s for the functions embedded in the 440TX or
440LX chipset are not listed in the current version of Windows 95 OEM Service
Release 2 that contains the USB supplement. For this reason, after installation
of Windows 95 in Intel 430TX and 440LX the USB Root hub will not be present
in the Device Manager.
Instruct the customer to download and install a patch that’s available from Intel
on the World Wide Web. The patch makes changes to the MACHINE.INF,
MSHDC.INF, NODRIVER.INF and USB.INF files. For customers without web
access there other ways to get the patch file.
1. Check CD-ROM installation disks that came with their PC. In some cases
this file is called PIIXFIX.exe.
2. Contact the manufacturer of the PC.
3. Download the file so that it can be sent to the customer
The patch file named “Intel(R) 82371xB INF Update Installer Version 3.2.2” is
available (as of the date of this bulletin) on the web at:
http://developer.intel.com/design/pcisets/setupex.htm
The customer should execute the file and then re-boot their PC. After restart the
USB root hub should be installed and shown in the Device Manager.
Contact: Gerald DiBello
Cc:mail: DIBELLO, GERALD
Internet: [email protected]
Polaroid’s Electronic Imaging Systems service bulletins are subject to change as necessary. The information above
was believed to be correct at the time of printing. If you have any questions regarding this document, please refer to
the information sources outlined above.
Polaroid ColorShot Bulletin V1, N5 Page 2 of 2
Digital Products
Service BULLETIN KB# 981012172712GD
201 Burlington Rd. Bedford MA 01730
Polaroid ColorShot USB
From:
Date:
Subject:
•
Vol. 1, No. 6
New Products Service Support Group
October 12, 1998
Software Releases
Category: Software Info Bulletin
The purpose of this message is to provide a summary of the ColorShot USB
released software history for Telephone Service and Repair providers.
•
Products Affected:
Polaroid ColorShot USB printer
•
Details:
Since the ColorShot USB printer was first released for sale, a number of
revisions have been made to the software. A summary of the releases:
Released Software
Version
Description
1.02
First USB version (for Windows 95)
1.03
Windows 98 and Windows 95 compatibility
1.04
Software revision to correct a potential misread of the film pack
presence switch (located inside the printer).
1.05
(Current released version) Adds new IQA color profiles for
enhanced color performance.
Available Software Update Files
At the time this bulletin was released, two software update files exist. These
small files can be e-mailed or put on a floppy disk to send to users. If you need
these files, contact the author of this bulletin.
Update 1 – Installs updates for Windows 98 users, only
Update 2 – Installs version 1.05 color profiles in any version of the software.
Contact: Gerald DiBello
Cc:mail: DIBELLO, GERALD
Internet: [email protected]
Polaroid’s Electronic Imaging Systems service bulletins are subject to change as necessary. The information above
was believed to be correct at the time of printing. If you have any questions regarding this document, please refer to
the information sources outlined above.
Polaroid ColorShot Bulletin V1, N6 Page 1 of 1
Digital Products
Service BULLETIN NPI#: 971217143846 GD
201 Burlington Rd. Bedford MA 01703
SprintScan
From:
Date:
Subject:
•
Vol. 1, No. 14
New Products Service Support Group
12/16/97
SPRINTSCAN 45 CCD & CONTROLLER BOARD REPLACMENT
Category: Product Alert
The purpose of this message is to alert service providers that repair the
SprintScan 45 regarding CCD and Controller Board compatibility issues
•
Products Affected:
SprintScan 45 and SprintScan 45 Pro.
•
Details:
Problem: Replacing a known defective CCD board does not repair the problem
and, in some cases, seems to make the problem worse. The problem is caused by
mismatched board revision levels. Revision level must be considered when
replacing boards.
•
Resolution:
Recent information received from Manufacturing shows that board revision level
must be taken into consideration when replacing CCD or Controller boards. The
two acceptable board revision level combinations are as follows:
1. Rev. A3 Controller Boards must be paired with rev. A3 CCD boards.
2. Rev A4 Controller Boards must be pair with rev. B1 CCD boards (The current
revision levels of product shipping from the manufacturer).
Please take this information into account when repairing the SprintScan 45.
Mixing revision levels can lead to image quality problems. Note: If you only have
revision level B1 CCD boards in your stock and you are repairing a unit that has a
rev A3 Controller board then you must also replace the controller board with a rev
A4.
How to identify circuit board revision level
a) CCD Board Revision Level
Revision level information can be found at the top of the circuit board (see
Figure 1). Revision level marks are shown as X, Y in Figure 1 where
X = A or B and Y = a number.
Polaroid’s Electronic Imaging Systems service bulletins are subject to change as necessary. The information above
was believed to be correct at the time of printing. If you have any questions regarding this document, please refer to
the information sources outlined above.
SprintScan Service Bulletin V1, N14 Page 1 of 2
45tp-CCD REV X
Y
Figure 1 – CCD Board (rear view)
b) Controller Board Revision Level
Revision level information can be found at the rear of the circuit board (see
Figure 2) near the SCSI connectors. Revision level marks are shown as X, Y in
Figure 2 where X = A and Y = a number.
45tP-M
REV- X Y
Figure 2 – Controller Board (rear of board – top view)
•
Contact: Gerald DiBello
E-mail: DIBELLO, GERALD, Internet: [email protected]
Polaroid’s Electronic Imaging Systems service bulletins are subject to change as necessary. The information above
was believed to be correct at the time of printing. If you have any questions regarding this document, please refer to
the information sources outlined above.
SprintScan Service Bulletin V1, N14 Page 2 of 2
Digital Products
Service BULLETIN KB# 980428153244JJ
201 Burlington Rd. Bedford MA 017030
SprintScan
From:
Date:
Subject:
•
Vol. 2, No. 4
New Products Service Support Group
April 23, 1998
SprintScan 35 Plus & PolaScan 35 Ultra Controller Board – L3
Defective
Category: Hardware Failure
The purpose of this message is to alert telephone support and service providers
regarding a potentially defective part on SprintScan 35 Plus and PolaScan 35
Ultra Controller Boards. If the part fails, customers will report error messages
related to calibration failures when they try to a scan or preview a slide.
•
Products Affected:
SprintScan 35 Plus and PolaScan 35 Ultra
•
Details:
Problem: Customers report that when they try to scan or preview a negative
(typically, positive scans work OK) they get error messages. Examples:
• 30000H errors
• Change Light Bulb messages even though bulb is new
• Calibration error message – any type (especially when scanning negatives)
•
Resolution:
Background
TDK, the manufacturer of inductor L3 (used on SprintScan and PolaScan 35
Ultra Controller Boards) has informed Polaroid Manufacturing that a potential
defect in their production process can cause the part to fail prematurely. When
L3 fails, the A to D converter loses its power supply. TDK has now changed
their production process to fix the defect. Since receiving notification from TDK
about the potential defect, our Controller Board manufacturer has taken the
following actions:
1. Purged their inventory of all suspect parts.
2. 100% screening of L3 beginning in March 1, 1998.
3. All old stock of L3 has been purged.
Polaroid’s Electronic Imaging Systems service bulletins are subject to change as necessary. The information above
was believed to be correct at the time of printing. If you have any questions regarding this document, please refer to
the information sources outlined above.
SprintScan Service Bulletin V2, N4 Page 1 of 2
Units affected
All 35 Plus units manufactured between January and February of 1998. The
serial number range of these scanners is A8XXXXXC to B8XXXXXC. It should
be noted that scanners manufactured before January 1998 could also be
affected because TDK could not supply information on the length of time that
bad parts were produced.
Failed part identification
Failed parts exhibit an open circuit when measured with an ohmmeter (See
Figure 1). You can measure the resistance of L3 from the top of the board by
measuring across points 1 and 2 in Figure 1. If L3 is defective it will measure as
an open circuit.
2
1
L2
D3
D3
J3
L2
U20
J5
Top view of
Controller Board
Figure 1 – Top View of Controller Board
Contact: Gerald DiBello
Cc:mail: DIBELLO, GERALD, Internet: [email protected]
Polaroid’s Electronic Imaging Systems service bulletins are subject to change as necessary. The information above
was believed to be correct at the time of printing. If you have any questions regarding this document, please refer to
the information sources outlined above.
SprintScan Service Bulletin V2, N4 Page 2 of 2
Digital Products
Service BULLETIN KB# 980512121625GD
201 Burlington Rd. Bedford MA 017030
SprintScan
From:
Date:
Subject:
•
Vol. 2, No. 5
New Products Service Support Group
May 12, 1998
SprintScan/PolaScan 35 Plus Firmware Upgrade to V5.94
Category: Product Alert
The purpose of this message is to alert service providers regarding a firmware
upgrade for the SprintScan/PolaScan 35 Plus.
•
Products Affected:
SprintScan 35 Plus and PolaScan 35 Plus
•
Details:
•
•
•
•
Beginning May 1998 firmware was upgraded from Version 5.90 to 5.94 for
the SprintScan and PolaScan 35 Plus slide scanners. The new version
firmware corrects a potential problem of the CCD Config code resetting
itself.
Serial number suffix of scanners containing the NEW firmware is “D”
Beginning serial number of scanners with NEW firmware: C801487D
Resolution:
Background
First, let’s review SprintScan Product Alert 97-2 that talks about
SprintScan/Polascan scanners using version 5.90 firmware with new modified
CCD boards. When the new modified blue filter CCD board was introduced
(beginning with scanner Serial Number F7xxxxC), a feature called the "Config"
code (standing for Configuration) was added. The Config code is a way to tell
the scanner firmware what type of CCD is being used. You set the Config code
by using LabVIEW Image Performance Test or, application software to read
and/or change the Config setting. For example, if an older CCD board is
replaced in a scanner with a new modified type the Config must be reset from a
"0" to a "1.
Polaroid’s Electronic Imaging Systems service bulletins are subject to change as necessary. The information above
was believed to be correct at the time of printing. If you have any questions regarding this document, please refer to
the information sources outlined above.
SprintScan Service Bulletin V2, N5 Page 1 of 2
The Config setting procedure changes when a Controller Board has the new
version 5.94 firmware installed. The 5.94 firmware was changed in one
significant way. The Config code is now factory set (when the chip is
programmed) to a 1. What this means for service: If a controller board with the
5.94 firmware is replaced on a scanner that has an older type CCD board, you
must reset the Config code to a "0." On the other hand, if the scanner has a
new modified CCD board you don't have to change the Config since it is, by
default, set to a "1."
Changing Config Code
When replacing CCD boards or Controller Boards follow these guidelines:
a) If scanner has OLD CCD board and 5.94 firmware: Change Config to 0
b) If scanner has NEW CCD board and 5.94 firmware: No change to Config
In both instances, check the Config code before returning the scanner to the
customer.
Ordering New Firmware
Version 5.94 firmware part number – 1AN312A
New firmware may be ordered from:
Polaroid Corporation
Material Services
201 Burlington Rd
Bedford, MA 01730
Telephone: 800-343-4846 or, (781) 386-5649
Fax: (781) 386-5606
cc:mail: [email protected]
Contact: Gerald DiBello
Cc:mail: DIBELLO, GERALD
Internet: [email protected]
Polaroid’s Electronic Imaging Systems service bulletins are subject to change as necessary. The information above
was believed to be correct at the time of printing. If you have any questions regarding this document, please refer to
the information sources outlined above.
SprintScan Service Bulletin V2, N5 Page 2 of 2
Digital Products
Service BULLETIN KB# 980513101339GD
201 Burlington Rd. Bedford MA 017030
SprintScan
From:
Date:
Subject:
•
Vol. 2, No. 6
New Products Service Support Group
May 13, 1998
SprintScan/PolaScan 35 & 35ES New Replacement CCD
Category: Product Alert
The purpose of this message is to alert Depot Repair Service providers of a
change in the type of CCD that’s now available as a replacement part for the
SprintScan/PolaScan 35 and 35ES.
•
Products Affected:
SprintScan 35 and SprintScan 35ES
•
Details:
The Polaroid Parts Department has exhausted its stock of the older type of CCD
boards used in the SprintScan 35, 35ES and PolaScan part number 1E6533A.
Effective immediately, only new modified blue filter CCD boards part number
1AJ011A will be available. The new modified CCD board must only be installed
in scanners with version 1.04 or, higher of firmware. After CCD installation, the
customer must upgrade to version 2.7 or higher of the SprintScan software.
•
Resolution:
Identifying Existing Firmware Revision Level
When you replace an older CCD board with the new modified blue filter type, P/N 1AJ011A,
you must first check the scanners’ firmware revision level. The revision level must be 1.04 or
higher to work correctly with the new CCD. To identify the existing firmware revision level, note
what is printed on the label of the existing firmware using the following procedure.
1. Turn off power to the scanner and disconnect the power cord.
2. Remove the top cover of the scanner using instructions in the SprintScan Repair
Manual.
3. Identify the Firmware IC U11 on the Controller Board and note the revision level that’s
printed on an attached label.
If the revision level is current, then you do not need to change the firmware. If not current,
change the firmware to the latest version - P/N 1F4699B. You may order this part from the
Parts Department (address is listed at end of this Bulletin).
Caution: Firmware is static sensitive, use proper procedures when replacing this part.
Polaroid’s Electronic Imaging Systems service bulletins are subject to change as necessary. The information above
was believed to be correct at the time of printing. If you have any questions regarding this document, please refer to
the information sources outlined above.
SprintScan Service Bulletin V2, N6 Page 1 of 7
Replacing the CCD Board
Replace the CCD board using the procedure outlined in Section 5 of the SprintScan Repair
Manual. A copy of the manual can be found on Volume V or, later of the Polaroid Electronic
Library CD-ROM. The procedure requires the use of the LabVIEW based IPT test to correctly
align the new CCD board. The IPT test software is also used to change the Config code.
To change the Configuration code, perform the following steps:
1. Replace the CCD board using the directions in the Sprintscan Repair Manual. Stop
at the point where you will use LabVIEW IPT to test the scanner.
2. After starting up the LabVIEW IPT test software, (version 1.02 or, higher) make the
following change to the normal test setup procedure.
3. On the main LabVIEW window is a selection box marked “CCD Config.” See Figure
1.
Figure 1
Polaroid’s Electronic Imaging Systems service bulletins are subject to change as necessary. The information above
was believed to be correct at the time of printing. If you have any questions regarding this document, please refer to
the information sources outlined above.
SprintScan Service Bulletin V2, N6 Page 2 of 7
e) Change the selection to CCD Config 1 - See Figure 2a. When the LabVIEW test
cycle runs, the configuration data in the scanner EEPROM will be changed to operate
correctly with the new CCD. When the LabVIEW test is complete, the new configuration
is reported at the bottom right corner of the scanner test panel as “CCD Configuration.”
This window should now read a “1” - see Figure 2b.
Figure 2a
Figure 2b
f) The configuration only needs to be altered once. On subsequent runs of the
LabVIEW tester, you may leave the CCD Configuration at “Do Not Update”.
Reading and Changing Configuration Using Application Software
Under certain circumstances, it is possible for the Config code to revert back to a “0” even
though it was changed to a “1.” If this happens, scanned negatives will have an undeniable
blue hue and positives will have extra saturated blues. The code can be changed in the field
using the SprintScan or PolaScan application software. Use method 1) for a PC or, 2) for a
Macintosh computer.
1) Windows based PC
Reading the CCD Config Code
To change the CCD configuration code in the field you need version 2.7 or higher of
the SprintScan application software. You will only need make a configuration change if
you have found that the scanner has the modified type Config 1 CCD but, is incorrectly
configured for it. The customer will notice that scanned negatives will have an
undeniable blue hue and positives will have extra saturated blues.
Start up Photoshop or, the SprintScan Direct application on your PC. You can check
the configuration code under the “Help” menu in the Sprintscan 35 Preview window.
Select the Help menu and choose “Diagnostics.”
The Diagnostic window, as shown in Figure 3, provides information on the Firmware
version and CCD configuration. This example shows that a Config 0 CCD is in a SS35
scanner with version 1.02 of the firmware. Since you have already changed the
firmware, you should see that version 1.04 or, later is installed.
Polaroid’s Electronic Imaging Systems service bulletins are subject to change as necessary. The information above
was believed to be correct at the time of printing. If you have any questions regarding this document, please refer to
the information sources outlined above.
SprintScan Service Bulletin V2, N6 Page 3 of 7
Figure 3
Changing the Config Code
a) Start up SprintScan Direct or Photoshop or application.
b) Make the Sprintscan Control Panel window active.
c) While holding down the “Alt” key, touch the B key on the host computer keyboard.
After you see a warning message dialog box about using the Debug function…Cancel
it. A new menu choice appears in the Preview window named “Debug.” See Figure 4,
below.
Figure 4
Polaroid’s Electronic Imaging Systems service bulletins are subject to change as necessary. The information above
was believed to be correct at the time of printing. If you have any questions regarding this document, please refer to
the information sources outlined above.
SprintScan Service Bulletin V2, N6 Page 4 of 7
d) Select “Rd/Wr Datatype” from the choices in the Debug Menu. When the Datatype
window appears, choose “CCD Info” from the pop-up menu at the top of the window.
The number appearing in the first column at the top left is the CCD type. In the
example, shown on Figure 4, the CCD reads out as a 1 indicating that this scanner
contains the modified Config 1 CCD.
e) Change the configuration from 1 to 0 or. 0 to 1 by dragging the I - beam cursor
through the number that appears and then type in the correct number.
f) After filling in the new Config number touch the “Wr” (Write) button with the mouse
pointer to send the new configuration to the scanner EEPROM.
g) Confirm the new configuration, by touching the “Rd” (Read) button with the mouse
pointer.
h) Finally, to correctly view the change in a scanned image you must “Exit” the
Sprintscan application and re-start the Sprintscan Direct program or, Acquire/Import the
scanner in Photoshop. A second method is to select any new Film Type and then reselect the Film Type you want to use. Either method re-initializes the scanner so you
can correctly scan with the changed CCD Configuration setting
2) Macintosh Computers
Reading the CCD Configuration Code using the Application Software
Start up the Photoshop on your computer and do an Acquire/Import to bring up the
Sprintscan application. At the top of the “Apple” menu (top left corner of your monitor
screen) choose “About SprintScan 35…”. The “About” Dialog box appears as in Figure
5.
Figure 5 - Macintosh “About” Box
The numbers reported at the right-bottom of the Dialog box are (reading from top to
bottom) the CCD configuration (reported as c0 in our example), the firmware version
and the software version.
Changing the CCD Configuration Code using the Application Software
a) Change the configuration number from 0 to 1 or, 1 to 0 by holding down the Option
key and single clicking the mouse pointer once on top of the Configuration number.
Another Dialog box appears as shown in Figure 6.
Polaroid’s Electronic Imaging Systems service bulletins are subject to change as necessary. The information above
was believed to be correct at the time of printing. If you have any questions regarding this document, please refer to
the information sources outlined above.
SprintScan Service Bulletin V2, N6 Page 5 of 7
Figure 6 - Macintosh CCD Programming Dialog Box
b) Change the CCD configuration type by typing in the configuration for the CCD that’s
in the scanner (1 or 0).
c) After filling in the new Config number, touch the “Program the Scanner” button with
the mouse pointer or press the Return key. This action sends the new configuration to
the scanner EEPROM. To confirm the new configuration select “About Sprintscan 35…”
under the Apple menu and read the new configuration number.
d) Finally, to correctly view the change in a scanned image you must “Exit” the
Sprintscan application and Acquire/Import the scanner in Photoshop. A second method
is to select any new Film Type and then re-select the Film Type you want to use. Either
method re-initializes the scanner so you can correctly scan with the changed CCD
Configuration setting
PARTS AVAILABILITY
Contact:
Polaroid Corporation
Material Services
201 Burlington Rd
Bedford, MA 01730
Telephone: 800-343-4846 or, (781) 386-5649
Fax: (781) 386-5606
cc:mail: [email protected]
Please order from normal sources.
Contact: Gerald DiBello
Cc:mail: DIBELLO, GERALD
Internet: [email protected]
Polaroid’s Electronic Imaging Systems service bulletins are subject to change as necessary. The information above
was believed to be correct at the time of printing. If you have any questions regarding this document, please refer to
the information sources outlined above.
SprintScan Service Bulletin V2, N6 Page 6 of 7
Digital Products
Service BULLETIN KB# 980515102016GD
201 Burlington Rd. Bedford MA 017030
SprintScan
From:
Date:
Subject:
•
Vol. 2, No. 7
New Products Service Support Group
May 15, 1998
SprintScan 45 – Defective Power Supply Interconnect Cable
Category: Product Alert
The purpose of this message is to alert service providers regarding a potential
problem affecting the SprintScan 45.
•
Products Affected:
SprintScan 45 and SprintScan 45 Pro
•
Details:
Erratic operation of the SprintScan 45 can, in some instances, be caused by a
defective power interconnect cable assembly. In two instances, a defective
power supply interconnect cable caused the following symptoms:
• Flickering lamp (cold cathode fluorescent)
• Erratic motion of the carriage during scanning
•
Resolution:
A single cable assembly connects the power supply of the SprintScan 45 to J4
and J9 on the main circuit board. When symptoms such as a flickering lamp or
erratic carriage motion are seen, check and/or replace the power supply
interconnect cable. It is suggested that at least one known good cable assembly
be on-hand for quick substitution.
Spare cables can be ordered through normal sources. Order “Cable, Power
W/Core” part number AA0212A.
Polaroid Corporation
Material Services
201 Burlington Rd
Bedford, MA 01730
Telephone: 800-343-4846 or, (781) 386-5649
Fax: (781) 386-5606
cc:mail: [email protected]
Contact: Gerald DiBello
Cc:mail: DIBELLO, GERALD
Internet: [email protected]
Polaroid’s Electronic Imaging Systems service bulletins are subject to change as necessary. The information above
was believed to be correct at the time of printing. If you have any questions regarding this document, please refer to
the information sources outlined above.
SprintScan Service Bulletin V2, N7 Page 1 of 1
Digital Products
Service BULLETIN KB# 981012132053GD
201 Burlington Rd. Bedford MA 017030
SprintScan
From:
Date:
Subject:
•
Vol. 2, No. 9
New Products Service Support Group
October 12, 1998
New SCSI Host Adapter for SS35 Plus & LE
Category: New Product Bulletin
The purpose of this message is to alert service and telephone support providers
regarding a new SCSI Host adapter board that will soon be bundled with new
SprintScan 35’s.
•
Products Affected:
SprintScan 35 Plus, SprintScan 35LE
•
Details:
As of November 1998 (approximate date), a new PCI Plug and Play SCSI Host
Adapter will be bundled with the SprintScan 35 Plus and LE. Specifications for
the new board are as follows:
Manufacturer: Advansys (www.advansys.com)
Model Number: ABP-922
PID Number: 629450
Computer Bus: PCI (Plug and Play)
SCSI Connector: 25 Pin type D
Device Protocol: SCSI-1, SCSI-2, Fast SCSI-2
Device Support: Up to 7 devices
Features: Multi-tasking, multithreaded I/O, disconnect/reconnect,
synchronous and asynchronous data transfer, ASPI compliant
OS Support: Windows 95 and 98, Windows NT4
Electrical Termination: Active
The board package includes Advansys Super SCSI on CD-ROM. Applications
contained on the CD-ROM: 1) Allow the user to directly connect to the Advansys
website to download drivers 2) Do SCSI bus troubleshooting 3) Install drivers for
the Advansys 922 board 4) SuperView allows the user to see SCSI devices that
are on the bus.
Contact: Gerald DiBello
Cc:mail: DIBELLO, GERALD
Internet: [email protected]
Polaroid’s Electronic Imaging Systems service bulletins are subject to change as necessary. The information above
was believed to be correct at the time of printing. If you have any questions regarding this document, please refer to
the information sources outlined above.
SprintScan Service Bulletin V2, N9 Page 1 of 1
R e p a i r I n f o B u lle t i n
P o l a r o i d K no w l e d g e * B a s e
RIB Document Details
Product:
ProPalette 8000
Date:
11/04/96
Product Type:
Film Recorder
Document #:
961104161822JF
Product Group:
PDI
Posted By:
Jordan Freedman
Received on:
Category:
Film:
RED FILTER REPLACEMENT
Details, Diagrams
Problem
Some ProPalette 8000 units produce an uneven flat field color. The condition is
particularly noticeable when printing black-and-white images on color film. The center of
the image is cyan, and the outer edges are magenta. The symptom often results from a
defective (out of specification) red filter, and replacing the filter according to the following
procedure usually corrects the problem
.Affected Units
This problem has been observed in ProPalette units manufactured before October, 1996.
The serial numbers of the units are in the format K6nnna. The first character (K) indicates
the month of manufacture (A -M excluding I), and the second character (6) is the year of
manufacture.
Required Materials and Equipment
Replacement red filter, part no. 1E6562A
Short Phillips-head screwdriver
Snap-ring removal tool or small pliers
Cotton gloves
Anti-static mat and wrist strap
Filter-Replacement Procedure
CAUTION
Components within ProPalette can be easily
damaged by static discharge. Be sure to use the
anti-static mat and wrist strap during this procedure.
1. Turn the ProPalette unit on its side and remove the bottom access door (Figure 1).
2. Reach inside the compartment with the short Phillips-head screwdriver to remove the filter
wheel blinder (Figure 2).
3. Use the snap-ring removal tool or small pliers to remove the filter wheel snap ring (Figure
2), and remove the filter wheel from its pivot.
Figure 1. Removing the bottom access door
Figure 2. Removing the filter wheel from its pivot
4. Without removing the filter wheel from the compartment, locate the red filter by observing
the filter names printed on the filter wheel.
Note: Upon direct observation, the red filter does not appear to
be red in color. The filter name indicates the color observed
when a white light is viewed through it.
CAUTION
Be sure to wear white cotton gloves when working
inside the compartment to avoid fingerprints on the
filters and CRT face.
5. Press one of the filter retaining tabs to release the filter (Figure 3) and lift the filter out of
the wheel.
6. Insert the replacement filter in the wheel by pressing the tab, positioning the new filter, and
releasing the tab.
7. Pivot the spring-mounted stepper motor shaft away from the filter wheel pivot, mount the
filter wheel back on the pivot, and release the stepper motor shaft so it contacts the
outside of the filter wheel.
Note: Be sure the filter wheel lip is located in the photo-interrupter slot
(Figure 2).
8. Reinstall the filter wheel snap ring on the pivot shaft.
9. Pivot the stepper motor shaft away from the filter wheel and verify that the wheel rotates
freely.
10. Clean the filters.
11. Reinstall the filter wheel blinder.
12. Clean the CRT face.
13. Reinstall the bottom access door.
Figure 3. Removing a filter from the wheel
Distribution:
APPROVALS:
Int'l EXP
Int'l Subsidiaries
Special
CPS Tech Services
CPS Operations
CPS Materials
Manufacturing:
Engineering:
Design:
© 1996 Polaroid Corporation. All rights reserved.
Material may not be reproduced or distributed in any form without permission.
P o l a r o i d K no w l e d g e * B a s e
R e p a i r I n f o B u lle t i n
RIB Document Details
Product:
ProPalette 8000
Date:
01/07/97
Product Type:
Film Recorder
Document #:
970107112250JF
Product Group:
DIPS
Posted By:
Jordan Freedman
Category:
Image Quality
Received on:
Film:
HORIZONTAL LINES
Details, Diagrams
Some causes of horizontal lines in ProPalette 8000 images
I.
Environmental conditions
1.
Electromagnetic interference can cause low level horizontal line artifacts. Sources of this are noisy Computer
monitors and power supply transformers. For sensitive 4x5 imaging applications the printer should be placed at a
distance from
the Computer monitor.
2.
Vibration, since the unit takes at least 15 seconds to scan from top to bottom, any significant mechanical vibration
can cause horizontal artifacts. This includes someone bumping the table while imaging. A bump usually will cause a
pair of colored lines in the image. For example, a gray flat field image if bumped during the red plane will leave a cyan
line and a magenta line at the location of the bump. Vibration noise would be uncorrelated from color plane to color
plane.
3.
Autoluma red lines, if the customer removes the dark slide before the autoluma calibration is complete, then the
autoluma scans will be superimposed on the image. There would be widely separated red lines in the image in this case.
II.
Unit construction
1. The parallel port connector screws must always be installed after reworking a unit. It is tempting to leave them out,
especially if you can't find the proper tools. These screws connect the circuit board ground to the chassis ground,
which eliminates ground noise from the image, especially when imaging with the SCSI port.
Distribution:
APPROVALS:
Int'l EXP
Int'l Subsidiaries
Special
CPS Tech Services
CPS Operations
CPS Materials
Manufacturing:
Engineering:
Design:
© 1997 Polaroid Corporation. All rights reserved.
Material may not be reproduced or distributed in any form without permission.
P o l a r o i d K no w l e d g e * B a s e
P r o d u c t A le r t B u lle t i n
PA Document Details
Product:
ProPalette 8000
Date:
01/14/97
Product Type:
Film Recorder
Document #:
970114162151JF
Product Group:
PDI
Posted By:
Jordan Freedman
Category:
Software
Received on:
Film:
ADOBE 4.0 & WIN95 SOFTWARE ERROR
Details, Diagrams
PROBLEM
A problem exists between the latest version of Adobe Photoshop ver. 4.0 and Palette Export for Win95. The second time
that an image is outputted, the application will abort with a Memory Access Violation, the PC will continue to operate. This
problem is not apparent with earlier versions of Photoshop or Windows.
CAUSE
This is caused by a bug in the version 4 software from Adobe. The memory stack is corrupted because an internal index
register in the CPU is improperly overwritten.
SOLUTION
Until a solution is provided by Adobe there are two alternative solutions to the problem. The first would be to revert to an
earlier version of Adobe Photoshop. The second would be to not use Palette Export but to print out through the queue of
RasterPlus 95.
Distribution:
APPROVALS:
Int'l EXP
Int'l Subsidiaries
Special
CPS Tech Services
CPS Operations
CPS Materials
Manufacturing:
Engineering:
Design:
© 1997 Polaroid Corporation. All rights reserved.
Material may not be reproduced or distributed in any form without permission.
P o l a r o i d K no w l e d g e * B a
P r o d u c t A le r t B u lle t i n
PA Document Details
Product:
CI-5000S, HR-6000 CFR, ProPalette 8000
Date:
01/16/97
Product Type:
Film Recorder
Document #:
970116084902JF
Product Group:
PDI
Posted By:
Jordan Freedman
Category:
Hardware, Software
Received on:
Film:
PARALLEL PORT PROBLEMS
Details, Diagrams
Situation:
Certain parallel port configurations on a limited number of Windows 95 computers will not communicate
with Palette film recorders that are attached via the parallel port. RasterPlus95 has been revised to build
46 to provide a solution for this issue.
Α ctions/ Solutions:
If you have experienced any difficulty attaching your Palette film recorder to your PC via the parallel port,
you may need to upgrade your RasterPlus95 software to build 46. Alternatively, you may wish to attach
your Palette film recorder to your PC via the SCSI port.
Upgrades for RasterPlus95 to build 46 can be obtained by contacting David Hemingway at Polaroid in
Cambridge, Massachusetts, USA. Please call (617)386-3511, ccMail, or email David at
[email protected]. In the US, disk sets can be obtained by calling Polaroid Technical Support at
(800)432-5355.
NOTE: If you use the SCSI port to connect your Palette film recorder to your PC, it is not necessary
to upgrade your RasterPlus95 software from build 43 (the previous release) at this time.
Distribution:
APPROVALS:
Int'l EXP
Int'l Subsidiaries
Special
CPS Tech Services
CPS Operations
CPS Materials
Manufacturing:
Engineering:
Design:
© 1997 Polaroid Corporation. All rights reserved.
Material may not be reproduced or distributed in any form without permission.
P o l a r o i d K no w l e d g e * B a s e
E I S e r v i c e B ul l e t i n
EISB Document Details
Product:
ProPalette 8000
Date:
02/27/97
Product Type:
Film Recorder
Document #:
970227160743JF
Product Group:
PDI
Posted By:
Jordan Freedman
Category:
Software, Installation
RASTERPLUS95 SCSI ERRORS
Details, Diagrams
Problem:
After installing RasterPlus95 on a desktop PC running under WIN95, RasterPlus95 does not see the ProPalette as
a SCSI device and returns a "busy, disconnected or off" status when trying to produce an image through the SCSI
port. The ProPalette was seen and identified correctly during the computer boot process. When the parallel port is
picked as the output port, the ProPalette is on-line.
Reason:
The Queue Property configuration item "SCSI Adapter #" must reflect the location of the SCSI host adapter that
supports the ProPalette.
Solution:
Use a SCSI utility, like EZSCSI from Adaptec, to determine how many SCSI buses are present on the computer.
For example the CD drive on a Sound Blaster card is resident on it's own SCSI host adapter and occupies a
number. A subsequent SCSI card will reside as the second SCSI adapter. Properly identify the number of the host
adapter that supports the ProPalette.
In RasterPlus95, go to Queue Properties. Under the Device tab, click on Options. At the bottom of the screen is a
field labeled "SCSI Adapter #" Select the number that corresponds to the adapter that contains the ProPalette. In
this case, set the number to "1" because the ProPalette is resident on the second host adapter, the first adapter
supporting the CD drive is 0.
Save these settings by clicking OK. Ensure that the SCSI id number and bus termination are correct. The
ProPalette should now be on-line.
Distribution:
APPROVALS:
Int'l EXP
Int'l Subsidiaries
Special
CPS Tech Services
CPS Operations
CPS Materials
Manufacturing:
Engineering:
Design:
© 1997 Polaroid Corporation. All rights reserved.
Material may not be reproduced or distributed in any form without permission.
S o f t w a r e I n f o B u lle t i n
P o l a r o i d K no w l e d g e * B a s e
SIB Document Details
Product:
CI-3000S, CI-5000S, HR-6000 CFR, ProPalette 8000
Date:
03/18/97
Product Type:
Film Recorder
Document #:
970318125619JF
Product Group:
PDI
Posted By:
Jordan Freedman
Category:
Software
Received on:
Film:
MULTIPLE CFR INSTALLATION
Details, Diagrams
Subject / Situation:
Palette for Macintosh, the Chooser level driver for Palette film recorders,
provides three possible installations; one for the CI-5000S, the HR 6000(SE),
and the ProPalette 8000. If multiple installations are performed on the same
computer and a different model film recorder is selected during one of the
additional installations, the resulting Polaroid Film Tables directory contains a
mixture of CI, HR, and/or Pro8 film tables.
This will work fine for Palette for Macintosh Chooser level driver and Si Print
Assistant, the batching utility. The problem exists when Palette Export for
Macintosh, the Photoshop Plug-in, is used. Palette Export will report that the
Polaroid Film Tables directory can not be found. This error message is
incorrect. Actually, the directory exists, but has "unknown" film tables contained
within.
Products Affected:
ProPalette 8000
HR 6000(SE)
CI-5000S
Palette Export for Macintosh v1.1.5
Palette for Macintosh v4.0.2
Actions/ Solutions:
If Palette Export for Macintosh reports: "Polaroid Film Tables directory can not
be found," discard the Polaroid Film Tables directory found inside the System
folder of the Macintosh. Re-install the Palette for Macintosh drivers for the
Palette model that is going to be used. If a different Palette film recorder will be
used on this same system at a later date, it will be necessary to place the
existing film tables into a temporary directory to "hide" them from Palette Export,
and then perform a Palette for Macintosh installation for the new film recorder
model.
NOTE: This only affects Palette Export for Macintosh and will only affect
resellers, sales people, and product demonstrators that are most likely to
use more than one Palette film recorder model on their Macintosh.
Distribution:
APPROVALS:
Int'l EXP
Int'l Subsidiaries
Special
CPS Tech Services
CPS Operations
CPS Materials
Manufacturing:
Engineering:
Design:
© 1997 Polaroid Corporation. All rights reserved.
Material may not be reproduced or distributed in any form without permission.
P o l a r o i d K no w l e d g e * B a s e
S o f t w a r e I n f o B u lle t i n
SIB Document Details
Product:
ProPalette 8000
Date:
04/23/97
Product Type:
Film Recorder
Document #:
970423083038JF
Product Group:
PDI
Posted By:
Jordan Freedman
Category:
Software
Received on:
Film:
PAGE SIZE FOR FILM RECORDERS
Details, Diagrams
The purpose of this Technical Application Note is to provide a guide for obtaining the correct aspect ratio
image for the format of the film you are exposing on your Polaroid Palette film recorder. Using these
methods will help you avoid using interpolation (fabricating data) to correct the size the image. Following
this procedure will ensure that you obtain the sharpest output possible by utilizing Polaroid’s
programmable resolution feature of the Palette color film recorders.
The complete Word formatted file is attached.
sizing.doc
Distribution:
APPROVALS:
Int'l EXP
Int'l Subsidiaries
Special
CPS Tech Services
CPS Operations
CPS Materials
Manufacturing:
Engineering:
Design:
© 1997 Polaroid Corporation. All rights reserved.
Material may not be reproduced or distributed in any form without permission.
P o l a r o i d K no w l e d g e * B a s e
P r o d u c t A le r t B u lle t i n
PA Document Details
Product:
R-6000
Date:
05/27/97
Product Type:
Film Recorder
Document #:
970527134404JF
Product Group:
PDI
Posted By:
Jordan Freedman
Category:
Hardware
Received on:
Film:
MOUNTING SCREWS
Details, Diagrams
PROBLEM
Production of R6000 camera from 4/4/97 to 5/13/97 have too much paint on the thumb screws which causes a tight fit
when mounting the camera.
SOLUTION
To remedy the problem, run the thumb screws through a 1/4-20 machine die. This will clean out the excess paint in the threads.
There is no need to remove the thumb screws from the camera to clean them.
Distribution:
APPROVALS:
Int'l EXP
Int'l Subsidiaries
Special
CPS Tech Services
CPS Operations
CPS Materials
Manufacturing:
Engineering:
Design:
© 1997 Polaroid Corporation. All rights reserved.
Material may not be reproduced or distributed in any form without permission.
P o l a r o i d K no w l e d g e * B a s e
R e p a i r I n f o B u lle t i n
RIB Document Details
Product:
ProPalette 7000, ProPalette 8000
Date:
06/03/97
Product Type:
Film Recorder
Document #:
970603082047JF
Product Group:
PDI
Posted By:
Jordan Freedman
Category:
Hardware
Received on:
Film:
NON-REPEATABLE ERRORS
Details, Diagrams
Subject / Situation:
A limited number of Digital circuit boards (1F5570A) have been found to have either an unsoldered pin or cold
solder joint on pin #60 of U101. The product will exhibit intermittent non-repeatable errors. See diagram below for
location of U101 and orientation of pin #60.
Actions/ Solutions:
The integrated circuit should be inspected and the problem verified. If the fault is found and the repair center is a
qualified surface mount repair facility, the pin should be re-soldered. If there is any question about the ability to
repair the solder joint, the board should be replaced and the product calibrated.
Distribution:
APPROVALS:
Int'l EXP
Int'l Subsidiaries
Special
CPS Tech Services
CPS Operations
CPS Materials
Manufacturing:
Engineering:
Design:
© 1997 Polaroid Corporation. All rights reserved.
Material may not be reproduced or distributed in any form without permission.
P o l a r o i d K no w l e d g e * B a s e
E I S e r v i c e B ul l e t i n
EISB Document Details
Product:
HR-6000 CFR, ProPalette 7000, ProPalette 8000
Date:
06/11/97
Product Type:
Film Recorder
Document #:
970611161412JF
Product Group:
PDI
Posted By:
Jordan Freedman
Category:
Information
PALETTE HELP FILES
Details, Diagrams
Subject / Situation:
Several new self-help files have been added to Polaroid’s FTP site on the Internet. These files
include film table lists, common questions and answers, software driver information, product
specifications and descriptions, and trouble shooting tips.
For the best results from your Palette color film recorder, please access and use this information.
Actions/ Solutions:
The easiest way to get to Polaroid's FTP Internet site is from the World Wide Web site. From
Polaroid's Home page (www.Polaroid.com), please click on Software Drivers and Film Table Files at
the bottom of the ProPalette 8000 More Info page.
This procedure will bring you directly to the ProPalette 8000 section of Polaroid's FTP Internet site.
The Palette Information file names are as follow:
PALETQNA.DOC
PRO8INFO.DOC
MACINFO.DOC
RP95INFO.DOC
TROUBLE.DOC
(Palette Questions and Answers)
(ProPalette 8000 Information)
(Palette for Macintosh Information)
(RasterPlus95 Information)
(Palette Troubleshooting Information)
NOTE: These files are formatted for MSWord v7.0.
trouble.doc PaletQnA.DOCpro8info.doc rp95info.doc macinfo.doc
Distribution:
APPROVALS:
Int'l EXP
Int'l Subsidiaries
Special
CPS Tech Services
CPS Operations
CPS Materials
Manufacturing:
Engineering:
Design:
© 1997 Polaroid Corporation. All rights reserved.
Material may not be reproduced or distributed in any form without permission.
P o l a r o i d K no w l e d g e * B a s e
S o f t w a r e I n f o B u lle t i n
SIB Document Details
Product:
ProPalette 8000
Date:
06/11/97
Product Type:
Film Recorder
Document #:
970611160418JF
Product Group:
PDI
Posted By:
Jordan Freedman
Category:
Software
Received on:
Film:
COLOR TUNE
Details, Diagrams
Subject / Situation:
Palette ColorTune, a film tables utility for matching the computer monitor to the film output of a
ProPalette 8000, is currently available on Polaroid’s FTP site. Both Macintosh and Windows 95
versions are available.
Actions/ Solutions:
The easiest way to get to Polaroid's FTP Internet site is from the World Wide Web site. From
Polaroid's Home page (www.Polaroid.com), please click on Software Drivers and Film Table Files at
the bottom of the ProPalette 8000 More Info page.
This procedure will bring you directly to the ProPalette 8000 section of Polaroid's FTP Internet site.
The Palette ColorTune files are called CTWIN95 and CTMAC. Documentation is available in a
MSWord v7.0 formatted file.
NOTE: Palette ColorTune is compatible with the ProPalette 8000 film recorder ONLY.
CTWin95.EXECTMac.hqx colrtune.doc
Distribution:
APPROVALS:
Int'l EXP
Int'l Subsidiaries
Special
CPS Tech Services
CPS Operations
CPS Materials
Manufacturing:
Engineering:
Design:
© 1997 Polaroid Corporation. All rights reserved.
Material may not be reproduced or distributed in any form without permission.
P o l a r o i d K no w l e d g e * B a s e
R e p a i r I n f o B u lle t i n
RIB Document Details
Product:
ProPalette 8000
Date:
06/13/97
Product Type:
Film Recorder
Document #:
970613160125JF
Product Group:
PDI
Posted By:
Jordan Freedman
Category:
Hardware
Received on:
Film:
LOW INPUT VOLTAGE
Details, Diagrams
Subject / Situation:
In regions of the world where the input line voltage can fall under 100 Vac, the ProPalette has a safety feature (Power
Fail signal) that will shut off the CRT. This was designed to prevent phosphor burns on the CRT caused by
unregulated low voltages. As delivered, the Power Fail signal from the Low Voltage power supply trips at
approximately 95 Vac.
Actions/ Solutions:
This Power Fail signal must be adjusted prior to sale in these regions. Potentiometer R32 on the Low Voltage power
supply controls the trip point of the Power Fail signal. With the R32 potentiometer in the full clockwise position, the
Power Fail signal line trips at approximately 75 Vac. The low voltage outputs remain in regulation down to 62 Vac. There
is no indication of flashing CRT at power levels from 90 to 240 Vac.
The recommended procedure is to remove the Electronics Draw from the ProPalette to gain access to the Low Voltage
power supply. Looking at the power supply as it is mounted on the Electronics Draw, R32 is a small circular
potentiometer mounted on the PC board located below a transformer in the lower right corner of the assembly. No
electrical measurements are necessary during the adjustment, just turn the control fully clockwise and re-assemble.
All units manufactured after June 1997 will have this adjustment performed prior to shipment.
Distribution:
APPROVALS:
Int'l EXP
Int'l Subsidiaries
Special
CPS Tech Services
CPS Operations
CPS Materials
Manufacturing:
Engineering:
Design:
© 1997 Polaroid Corporation. All rights reserved.
Material may not be reproduced or distributed in any form without permission.
P o l a r o i d K no w l e d g e * B a s e
P r o d u c t A le r t B u lle t i n
PA Document Details
Product:
ProPalette 7000, ProPalette 8000
Date:
07/10/97
Product Type:
Film Recorder
Document #:
970710154500JF
Product Group:
PDI
Posted By:
Jordan Freedman
Category:
Hardware, Software
Received on:
Film:
IMAGE SPACING
Details, Diagrams
Problem:
A small group of ProPalette’s were delivered to Distribution that might exhibit an uncertainty in the inter-frame
gap on 35 mm film. This problem is a result of a planned improvement to the Richo camera back used in the
ProPalette and manifests itself with inconsistent spacing between the images.
Reason:
The suspect camera can be identified by the color of the printed circuit board material that supports the
contacts that provide the interface between the camera and the ProPalette. A brown board was used on the
earlier design camera and will not exhibit the problem. A green board is used on the newer design and will
exhibit the problem dependent on the date of the firmware release.
Solution:
Firmware, ver. 562 dated May 23 1997 for the ProPalette 8000 and ver. 702 dated April 29 1997 for the
ProPalette 7000 is subject to the failure. An interim release to the firmware, ver. 562 dated July 8 1997 for the
ProPalette 8000 and ver. 702 dated July 1 1997 for the ProPalette 7000, will resolve the problem. The version
date can be determined by selecting “Diagnostics/Power On Message” from the ProPalette LCD display.
Any unit that has a serial number with the format 8G7nnna for the ProPalette 8000 or 7G7nnna for the
ProPalette 7000 will have the correct firmware installed.
Distribution:
APPROVALS:
Int'l EXP
Int'l Subsidiaries
Special
CPS Tech Services
CPS Operations
CPS Materials
Manufacturing:
Engineering:
Design:
© 1997 Polaroid Corporation. All rights reserved.
Material may not be reproduced or distributed in any form without permission.
P o l a r o i d K no w l e d g e * B a s e
E I S e r v i c e B ul l e t i n
EISB Document Details
Product:
ProPalette 7000, ProPalette 8000
Date:
07/29/97
Product Type:
Film Recorder
Document #:
970729141654JF
Product Group:
PDI
Posted By:
Jordan Freedman
Category:
Hardware
UNKNOWN EXTENDED SENSE ERROR
Details, Diagrams
Problem:
A user will report the occurrence of an "Unknown Extended Sense Error" being displayed by
the application software while printing to a ProPalette.
Reason:
This message is reported by the application when an "unknown" error is reported back on the
SCSI bus from the ProPalette. An unknown error is only an error which has an id number not
listed in the driver's database of errors.
Solution:
When the software reports Unknown hardware error, the hardware has the issue stored in the
diagnostics area. On the ProPalettes, use the keypad, go to diagnostics; show last error.
Record the message that is displayed.
Sometimes Diagnostics/show last error gives us a secondary or derivative error that masks
the original error. A way around this is to keep an eye on the LCD and try to record the
original error before it gets "bumped" by subsequent errors.
The "last error" record is stored in DRAM and survives until a new error occurs or the unit
is reset. If there have not been any errors since the unit was last turned on the LCD will
say "Unit just powered on".
Distribution:
APPROVALS:
Int'l EXP
Int'l Subsidiaries
Special
CPS Tech Services
CPS Operations
CPS Materials
Manufacturing:
Engineering:
Design:
© 1997 Polaroid Corporation. All rights reserved.
Material may not be reproduced or distributed in any form without permission.
P o l a r o i d K no w l e d g e * B a s e
P r o d u c t A le r t B u lle t i n
PA Document Details
Product:
ProPalette 8000
Date:
08/26/97
Product Type:
Film Recorder
Document #:
970826112926JF
Product Group:
PDI
Posted By:
Jordan Freedman
Category:
Software
Received on:
Film:
COLOR FRINGING
Details, Diagrams
Situation:
A small group of ProPalette 8000’s were delivered to Distribution that might exhibit color fringing
along the right side of the image. It will become apparent when non-standard image resolutions are
processed. This problem is a result of test firmware that was not upgraded in the unit prior to
shipment. The firmware is identified as version 562 dated April 25, 1997. The firmware date can be
determined by selecting "DIAGNOSTICS/SHOW POWER-ON MESSAGE" from the ProPalette
keypad.
Solution:
The released firmware version 562 dated May 23, 1997 does not exhibit this problem. All ProPalette
8000 Digital Printers should be updated to the correct firmware version at this time.
Polaroid's FTP site on the Internet has two files that contain the correct version 562 firmware.
http://ftp.polaroid.com/pub/imaging/output/cfrecord/prop8000
Currently the easiest way to get to the FTP site is from Polaroid's home page. Please follow
these steps for easy access to Polaroid's FTP site:
1.
2.
3.
4.
5.
Internet access to Polaroid's home page is at: www.Polaroid.com
From the home page, press the Products button.
From the Products page, press the Color Film Recorders button.
From the Color Film Recorders page, press the More Info button under ProPalette 8000.
At the bottom of the ProPalette 8000 Information page, press Software Drivers and Film
Table Files.
This method will bring you directly to Polaroid's FTP site, a storage area for the very latest
ProPalette 8000 information including film tables, software upgrades, firmware upgrades, and
self-service documentation files.
For Macintosh, access file PRO8V562.hqx. For PC/Windows, access file PRO8V562.EXE. Both
files are self-extracting. Double-click to open them and read the README.TXT file for important
information before beginning. NOTE: The Macintosh installer requires that the ProPalette 8000
is set to SCSI ID #4.
Distribution:
APPROVALS:
Int'l EXP
Int'l Subsidiaries
Special
CPS Tech Services
CPS Operations
CPS Materials
Manufacturing:
Engineering:
Design:
P o l a r o i d K no w l e d g e * B a s e
E I S e r v i c e B ul l e t i n
EISB Document Details
Product:
ProPalette 8000
Date:
08/26/97
Product Type:
Film Recorder
Document #:
970826123156JF
Product Group:
PDI
Posted By:
Jordan Freedman
Category:
Image Quality
SERVICE REQUIRMENTS
Details, Diagrams
Problem
It is recommended that all EI Service Centers periodically evaluate the quality of a ProPalette 8000
repair by producing an image suite on 4 x 5 media in addition to the normal 35 mm media. Since
some artifacts are not apparent in the 35 mm size, all customers who claim to use the 4x5 format
should have their unit processed with that size.
Additional Equipment
The following additional equipment will be required to support this effort, the last three items are
commercially available:
Polaroid 4x5 camera back for ProPalette 8000 (PID 621080)
4 x 5 sheet film holders
Kodak Ektachrome 100 Plus Professional 4x5 Sheet Film "EPP"
Dark room or changing bag equivalent
Additional Skills
In addition to training the service personnel with the skills to handle the additional film format, the
film processing facility must be able to handle the additional size.
Distribution:
APPROVALS:
Int'l EXP
Int'l Subsidiaries
Special
CPS Tech Services
CPS Operations
CPS Materials
Manufacturing:
Engineering:
Design:
© 1997 Polaroid Corporation. All rights reserved.
Material may not be reproduced or distributed in any form without permission.
P o l a r o i d K no w l e d g e * B a s e
E I S e r v i c e B ul l e t i n
EISB Document Details
Product:
ProPalette 8000
Date:
09/05/97
Product Type:
Film Recorder
Document #:
970905091846JF
Product Group:
PDI
Posted By:
Jordan Freedman
Category:
Hardware
HARDWARE UPGRADE
Details, Diagrams
The following circuit board assemblies have been updated in the ProPalette 8000.
From
To
Analog PCB Assembly
1D9710A
1AH823A
Digital PCB Assembly
1D9575A
1F5570A
These changes reflect the latest build (revision J) of this product. Please update all of
your documentation.
Distribution:
APPROVALS:
Int'l EXP
Int'l Subsidiaries
Special
CPS Tech Services
CPS Operations
CPS Materials
Manufacturing:
Engineering:
Design:
© 1997 Polaroid Corporation. All rights reserved.
Material may not be reproduced or distributed in any form without permission.
P o l a r o i d K no w l e d g e * B a s e
E I S e r v i c e B ul l e t i n
EISB Document Details
Product:
ProPalette 7000
Date:
09/15/97
Product Type:
Film Recorder
Document #:
970915151919JF
Product Group:
PDI
Posted By:
Jordan Freedman
Category:
Hardware
SIZING ERRORS
Details, Diagrams
PROBLEM:
Recently there have been alignment sizing problems with the ProPalette 7000 product. It has been discovered that
incorrect resistors as specified by the most recent BOM are being installed in the boards.
REASON:
During manufacturing pilot (Spring ‘97) it was discovered that the center point of the sizing process required
movement, and as a result R56, R55, R108 of the vertical channel and R6 of the horizontal channel were changed.
These changes were found to fix the sizing problems. These changes were incorporated as an ECN, which is
released.
The PCB manufacturer apparently is still using the original BOM to build the ProPalette 7000 analog board, which
explains why the sizing problems have reappeared. Units that have been shipped and passed the initial sizing
adjustment pose no risk for customer returns. Units that may have failed sizing on the first try and passed with a
subsequent attempt may cause in some instances an image smaller than desired by the customer (equivalent to a
sizing failure). The fix for this would be to replace the incorrect resistor values with the correct ones.
SOLUTION:
To determine if the correct resistors are installed, look at R55 and R108 which are power resistors near the top of
the unit near the analog board heat sink. If these resistors are labeled 47 ohms, then the wrong values have been
installed, if they are labeled 40 ohms, the correct values have been installed.
The proper values must be installed according to the following chart:
Correct values
Incorrect values
Vertical channel
R56
R55
R108
301 ohms, 1 %
40 ohms, 3W
40 ohms, 3W
0 ohms
47 ohms, 3W
47 ohms, 3W
2.49K, 1%
3.92K, 1%
Horizontal channel
R6
Manufacturer Part numbers:
R6
R56
R55 & R108
or
Rohm
Rohm
Ohmite
Memcor-Truohm SL340
MCR18F2491
MCR18F3010
43F40
Distribution:
APPROVALS:
Int'l EXP
Int'l Subsidiaries
Special
CPS Tech Services
CPS Operations
CPS Materials
Manufacturing:
Engineering:
Design:
P o l a r o i d K no w l e d g e * B a s e
R e p a i r I n f o B u lle t i n
RIB Document Details
Product:
R-6000
Date:
10/01/97
Product Type:
Film Recorder
Document #:
971001105844JF
Product Group:
PDI
Posted By:
Jordan Freedman
Category:
Firmware
Received on:
Film:
VARIABLE FRAME SPACING
Details, Diagrams
PROBLEM:
It was discovered that the R6000 35mm camera for the HR/CI family of film recorders was occasionally skipping a perforation
between frames on 36 exposure rolls of film.
REASON:
The analysis of failed cameras reveal a timing problem in the microprocessor firmware, version 1.3, due to the variable motor
torque requirement for the 36 exposure film.
SOLUTION:
The problem has been addressed and a new version of firmware has been generated. The new firmware is installed by replacing the
microprocessor on the logic board (1E8210A) with the part R6000 Programmed Micro ver 1.4 (p/n AA0095 issue 03). This item is
socket mounted on the logic board, ensure proper orientation when inserting the new device.
The new firmware, version 1.4, has two added features and a requirement as listed below:
Requirement:
When version 1.4 is installed into a camera back the "self-test" must be run. The "self-test" performs two functions, it identifies the
camera back version and initializes the counters in eeprom.
NOTE: Since the identification process uses the perforation sensor to determine which camera is attached the operator
must ensure that the perforation sensor is free from any obstructions. Make sure there is no film in the camera when the
"self-test" routine is initiated.
Feature:
1. When the "self test" routine is started a hexadecimal cycle counter will be flashed on the LCD as a record of how many cycles
the camera has performed in it’s lifetime beginning with this firmware release.
ex:
Hex
00B0
2.
Decimal
176
cycles
On power up the version of the firmware will be displayed.
To order parts; indicate part number, full part name and quantity desired. Give exact shipping instructions and complete shipping
and billing address. Address all parts orders to:
Polaroid Corporation
Material Services Department
201 Burlington Rd.
Bedford MA 01730
Distribution:
APPROVALS:
Int'l EXP
Int'l Subsidiaries
Special
CPS Tech Services
CPS Operations
CPS Materials
Manufacturing:
Engineering:
Design:
© 1997 Polaroid Corporation. All rights reserved.
P o l a r o i d K no w l e d g e * B a s e
E I S e r v i c e B ul l e t i n
EISB Document Details
Product:
ProPalette 7000, ProPalette 8000
Date:
11/18/97
Product Type:
Film Recorder
Document #:
971118134903JF
Product Group:
PDI
Posted By:
Jordan Freedman
Category:
INVALID INITIALIZATION TEST MESSAGES
Details, Diagrams
PROBLEM:
With 562/702 and earlier firmware, a ProPalette may occasionally display a false Vertical or Horizontal Test failure during the
startup diagnostics.
REASON:
These failures may be due to noise in the sensing circuitry rather than in the high precision deflection circuitry being measured.
SOLUTION:
Before authorizing a service return please have the customer confirm that the failure is repeatable.
Distribution:
APPROVALS:
Int'l EXP
Int'l Subsidiaries
Special
CPS Tech Services
CPS Operations
CPS Materials
Manufacturing:
Engineering:
Design:
© 1997 Polaroid Corporation. All rights reserved.
Material may not be reproduced or distributed in any form without permission.
P o l a r o i d K no w l e d g e * B a s e
P r o d u c t A le r t B u lle t i n
PA Document Details
Product:
ProPalette 7000, ProPalette 8000
Date:
11/19/97
Product Type:
Film Recorder
Document #:
971119141308JF
Product Group:
PDI
Posted By:
Jordan Freedman
Category:
Hardware, Software
Received on:
Film:
SWERR ERROR MESSAGE
Details, Diagrams
Subject / Situation:
On certain Windows PCs running at processor speeds of 200MHz or above, like a Pentium 200, 233, and 266, Palette
Export can cause software errors (SWERR) to appear on the ProPalette 7000 and ProPalette 8000 LCD panel. This error is
the result of the software failing to check the ProPalette’s memory availability and sending image data faster than the
ProPalette can respond to say that it is not ready (full).
NOTE: This has been reported on PC platforms that have processor speeds at 200MHz and above.
Products Affected:
ProPalette 8000
ProPalette 7000
Palette Export for Windows 95 v1.3.0
ctions/ Solutions:
Polaroid is revising Palette Export for Windows 95 v1.3.0 to correct this problem with fast PC platforms. The revised
version of Palette Export will be made available on Polaroid’s FTP site. Another technical bulletin will be created to alert
you when the new version of Palette Export is available.
Distribution:
APPROVALS:
Int'l EXP
Int'l Subsidiaries
Special
CPS Tech Services
CPS Operations
CPS Materials
Manufacturing:
Engineering:
Design:
© 1997 Polaroid Corporation. All rights reserved.
Material may not be reproduced or distributed in any form without permission.
P o l a r o i d K no w l e d g e * B a s e
E I S e r v i c e B ul l e t i n
EISB Document Details
Product:
ProPalette 7000
Date:
11/25/97
Product Type:
Film Recorder
Document #:
971125164625JF
Product Group:
PDI
Posted By:
Jordan Freedman
Category:
HI VOLTAGE POWER SUPPLY
Details, Diagrams
Problem:
Almost all of the ProPalette 7000 high voltage power supplies manufactured between June and September '97
have difficulty starting at 28V. This is within the acceptable range of the power supplied by the low voltage power
supply
Reason:
The vendor agrees that the design was not robust enough for the variation in components. The date code is
embedded in serial number in the format (yymmxxx).
Solution:
All ProPalette 7000's with start up problems or non-repeatable failures should be checked for HV Power Supply
compliance. All those units that are affected should go back to Service for repair. The unit must be re-aligned at a
qualified Service Center after a replacement of the high voltage power supply.
Distribution:
APPROVALS:
Int'l EXP
Int'l Subsidiaries
Special
CPS Tech Services
CPS Operations
CPS Materials
Manufacturing:
Engineering:
Design:
© 1997 Polaroid Corporation. All rights reserved.
Material may not be reproduced or distributed in any form without permission.
P o l a r o i d K no w l e d g e * B a s e
E I S e r v i c e B ul l e t i n
EISB Document Details
Product:
ProPalette 7000, ProPalette 8000
Date:
12/22/97
Product Type:
Film Recorder
Document #:
971222095003JF
Product Group:
PDI
Posted By:
Jordan Freedman
Category:
Software
MAC OS8
Details, Diagrams
Subject / Situation:
Palette for Macintosh v4.1.2 software was released internally by Polaroid today. This new version of the Palette film
recorder driver software is compatible with Apple’s new operating system, System 8 (OS8) and backward compatible with
System 7. The software kits (shown below) will include a new CD-ROM disk that contains the following:
Palette
Macintosh
driver
software
version
4.1.2 (System 8 compatible)
Si
Printfor
Assistant
3.0.6
(System
8 compatible)
Palette
forversion
Macintosh
version
1.4.0
(unchanged)
Palette Export
ColorTune
for Macintosh
version
1.0
(unchanged, ProPalette 8000 only)
Steps currently required to make this new software available in inventory are CD-ROM mastering, duplication, and kitting.
As a result, the Macintosh OS8 Software Upgrade kit will be available in inventory during the week of January 5. The
Macintosh OS8 Kits for All Palettes will be available in inventory during the week of January 12.
NOTE: These new kits utilize the same Polaroid Identification (PID) numbers as the current kits. The kit labels distinguish
between the current (System 7) version 4.0.4 software and the new version 4.1.2. The new labels have “OS8”
added to the kit name label and contain version 4.1.2. Please specify when ordering.
Products Affected:
623879 Macintosh OS8 Kits for All Palettes
623946 Macintosh OS8 Software Upgrade – All Palettes
ctions/ Solutions:
Polaroid’s FTP site on the Internet contains a file named PATCH412.HQX. This file provides a free upgrade from version
4.0.2 (distributed on diskette only) and version 4.0.4 (available on CD-ROM only) to version 4.1.2. This software patch
requires either version 4.0.2 or 4.0.4 to be installed fresh and includes a README.TXT file with instructions for
performing the software upgrade. Please make certain to follow these installation instructions carefully.
Distribution:
APPROVALS:
Int'l EXP
Int'l Subsidiaries
Special
CPS Tech Services
CPS Operations
CPS Materials
Manufacturing:
Engineering:
Design:
© 1997 Polaroid Corporation. All rights reserved.
Material may not be reproduced or distributed in any form without permission.
P o l a r o i d K no w l e d g e * B a s e
E I S e r v i c e B ul l e t i n
EISB Document Details
Product:
ProPalette 7000, ProPalette 8000
Date:
01/29/98
Product Type:
Film Recorder
Document #:
980129161012JF
Product Group:
PDI
Posted By:
Jordan Freedman
Category:
Hardware
Alignment Error
Details, Diagrams
Problem:
A single large white spot or two may be visible in the upper right quadrant of the
face of the CRT during geometry alignment. It is likely that the alignment process
will fail because of the image artifact.
Reason:
The spots are a result of the filter wheel sensor emitting infrared light that reflects
off the CRT and is picked up by the alignment camera.
Solution:
It’s possible to mount the sensor in either of two orientations and still have the
proper functionality. If the sensor is mounted in a way that has the emitting side of
the sensor on the outside of the filter wheel the dots would appear. When that same
sensor is reversed the dots disappear. The easiest solution is to re-mount the
sensor so as to have the emitting side of the sensor is behind the filter wheel and
unable to reflect off the face of the CRT.
Remove the filter wheel sensor and position it such that blue/green wire pair are
pointing down toward the bottom of the film recorder. This will ensure the correct
orientation. All film recorders manufactured after 15 December 1997 will have the
proper placement.
Distribution:
APPROVALS:
Int'l EXP
Int'l Subsidiaries
Special
CPS Tech Services
CPS Operations
CPS Materials
Manufacturing:
Engineering:
Design:
© 1998 Polaroid Corporation. All rights reserved.
Material may not be reproduced or distributed in any form without permission.
P o l a r o i d K no w l e d g e * B a s e
E I S e r v i c e B ul l e t i n
EISB Document Details
Product:
ProPalette 8000
Date:
02/27/98
Product Type:
Film Recorder
Document #:
980227140811JF
Product Group:
PDI
Posted By:
Jordan Freedman
Category:
Image Quality
4x5 Focus
Details, Diagrams
Problem
There have been reports of soft focus on one side of the image for some ProPalette 8000's that have a 4x5
camera attached.
Reason
There can be an interference in the mounting of the 4x5 camera back caused by the toe of the mounting bolt
that is used to hold the 35 mm camera mounting mechanism. The intermittence of the problem is caused by
normal manufacturing variations in the bolt length.
Solution
A "nipping" tool will be provided to the authorized repair centers. This tool will remove the excess length of the
bolt. All 4x5 camera's in US inventory will be modified to provide a clearance hole for the bolt.
Distribution:
APPROVALS:
Int'l EXP
Int'l Subsidiaries
Special
CPS Tech Services
CPS Operations
CPS Materials
Manufacturing:
Engineering:
Design:
© 1998 Polaroid Corporation. All rights reserved.
Material may not be reproduced or distributed in any form without permission.
P o l a r o i d K no w l e d g e * B a s e
S o f t w a r e I n f o B u lle t i n
SIB Document Details
Product:
Product Type:
HR-6000 CFR, ProPalette 7000, ProPalette 8000, Raster Plus 95 Date:
Document #:
Film Recorder
Product Group:
PDI
Posted By:
Category:
Software
Received on:
02/27/98
980227160439JF
Jordan Freedman
Film:
PowerPoint & Win NT
Details, Diagrams
Subject / Situation:
Printer driver settings for PowerPoint from Office 97 will not stay after the program has been closed. Occurs under
Windows NT only when running RasterPlus 95. The resulting error message is "Wrong camera back installed"
Products Affected:
All CFR’s running Raster Plus Software under NT
ctions/ Solutions:
To make the printer driver retain the settings for use with any program (I.E. PowerPoint, Freelance Graphics etc.) Follow
the steps listed below:
Go to the start menu and choose "Printers" from the settings choice
Select (highlight) the Polaroid digital palette driver currently installed
Go to the file menu and choose "Document Defaults"
In the new window, choose the Advanced Tab
Under Paper size, select Powerpoint 35mm if using a 35mm back.
Select the correct film type for your camera back under the printer features section.
The palette driver should retain these settings and apply them correctly each time you open Powerpoint and choose to print.
Distribution:
APPROVALS:
Int'l EXP
Int'l Subsidiaries
Special
CPS Tech Services
CPS Operations
CPS Materials
Manufacturing:
Engineering:
Design:
© 1998 Polaroid Corporation. All rights reserved.
Material may not be reproduced or distributed in any form without permission.
P o l a r o i d K no w l e d g e * B a s e
E I S e r v i c e B ul l e t i n
EISB Document Details
Product:
ProPalette 7000, ProPalette 8000
Date:
03/10/98
Product Type:
Film Recorder
Document #:
980310095621JF
Product Group:
PDI
Posted By:
Jordan Freedman
Category:
Image Quality
Horizontal Lines
Details, Diagrams
Problem
The occurrence of horizontal lines across the image of a ProPalette can be the result of several
problems. Several of the major reasons are discussed here.
Solution
A slow host computer may force the ProPalette to wait for data during a line scan. This will result in a
regular pattern of dark lines within the image. To eliminate this problem, Pacing should be enabled
on the LCD panel. This will insert a user-defined wait between scan lines allowing the host computer
to process the necessary image data. The amount of pacing should be increased in small steps until
the data wait lines have been eliminated. An excessive pacing time will increase the total exposure
time of the entire image.
Horizontal lines across image can be caused if the CRT scan light blinks on and off due to a slow (or
busy) host computer. One way to check for this is to expose the image that exhibits the problem with
some dummy film and once the exposure starts remove the camera from the front of the unit. Look
in at the CRT and see if the scan is blinking on and off. If so, the fix is to increase the Pacing value
via the keypad. Try to use the same image and printing conditions that produced the problem.
Make certain that the computer that the film recorder is connected to is completely DEDICATED to
imaging with the ProPalette. Every time a message comes in, or a key is pressed, or Appleshare is
polled, this causes a software interrupt in the CPU. These interrupts borrow time from the process of
processing the image for the film recorder. If the film recorder has to wait for image data, "data wait"
lines can appear on the film.
Check to make sure that no other electrical devices are close enough to the unit that could cause
electro-magnetic interference. Monitors and electric motors are common culprits. Never stack film
recorders. Never run a film recorder back-to-back with the computer's monitor or CPU.
Check to make sure that the surface used to hold the film recorder is vibration free. This is
particularly important with the medium format and 4x5 camera backs. The 4x5 camera should never
be used without bolting it to the ProPalette. Banging on the surface during exposure will cause image
artifacts.
Ensure that the computer (CPU) and the film recorder are plugged into the same power outlet and
share a common ground to eliminate the possibility of a ground-loop problem.
Distribution:
APPROVALS:
Int'l EXP
Int'l Subsidiaries
Special
CPS Tech Services
CPS Operations
CPS Materials
Manufacturing:
Engineering:
Design:
© 1998 Polaroid Corporation. All rights reserved.
Material may not be reproduced or distributed in any form without permission.
P o l a r o i d K no w l e d g e * B a s e
E I S e r v i c e B ul l e t i n
EISB Document Details
Product:
ProPalette 7000, ProPalette 8000
Date:
03/25/98
Product Type:
Film Recorder
Document #:
980325134018JF
Product Group:
PDI
Posted By:
Jordan Freedman
Category:
Hardware
Digital Board - Jumper Configuration
Details, Diagrams
Subject/Situation:
There are four jumper blocks on the ProPalette Digital board (1F5570A). There are designated as:
JP201
JP202
JP501
JP601
At the present time, only JP501 has any functionality associated with it. This jumper controls the
Watchdog timer that prevents power on initialization errors.
Action/Solution:
JP501 should be set according to the following table. Normal usage is to enable the circuit.
JP501
Pin 1 – 2
Pin 2 - 3
Disabled
Enabled
Distribution:
APPROVALS:
Int'l EXP
Int'l Subsidiaries
Special
CPS Tech Services
CPS Operations
CPS Materials
Manufacturing:
Engineering:
Design:
© 1998 Polaroid Corporation. All rights reserved.
Material may not be reproduced or distributed in any form without permission.
P o l a r o i d K no w l e d g e * B a s e
E I S e r v i c e B ul l e t i n
EISB Document Details
Product:
ProPalette 7000, ProPalette 8000
Date:
03/24/98
Product Type:
Film Recorder
Document #:
980324102437JF
Product Group:
PDI
Posted By:
Jordan Freedman
Category:
Hardware
ESD Damage
Details, Diagrams
Products Affected:
ProPalette 7000
ProPalette 8000
Subject / Situation:
The Manufacturing line has experienced a high failure rate of capacitors and active
circuits on the entire ProPalette line. While monitoring one of the power supply lines
some substantial ESD transients were observed whenever the operator adjusted the
yoke of the CRT during “Functional” test. The measured voltages were bipolar with a
total range as high as 55v.
Cause / Reason
These components are not qualified to be subjected to negative voltages and are not
rated for the stress they are receiving. Additionally, the flash memory was corrupted
sporadically during this operation and is probably an ESD related problem also. It was
determined that when the neck clamp of the yoke was grounded the ESD transient was
eliminated.
Actions / Solutions:
The operator should “ground” the metal yoke neck clamp, before AC power is applied,
whenever the yoke is adjusted during assembly and testing. The earth ground
connection at the green wire should be the reference point. The operator should also
wear ESD protection during the adjustment process
Distribution:
APPROVALS:
Int'l EXP
Int'l Subsidiaries
Special
CPS Tech Services
CPS Operations
CPS Materials
Manufacturing:
Engineering:
Design:
© 1998 Polaroid Corporation. All rights reserved.
Material may not be reproduced or distributed in any form without permission.
P o l a r o i d K no w l e d g e * B a s e
E I S e r v i c e B ul l e t i n
EISB Document Details
Product:
ProPalette 7000, ProPalette 8000
Date:
03/25/98
Product Type:
Film Recorder
Document #:
980325134018JF
Product Group:
PDI
Posted By:
Jordan Freedman
Category:
Hardware
Digital Board - Jumper Configuration
Details, Diagrams
Subject/Situation:
There are four jumper blocks on the ProPalette Digital board (1F5570A). There are designated as:
JP201
JP202
JP501
JP601
At the present time, only JP501 has any functionality associated with it. This jumper controls the
Watchdog timer that prevents power on initialization errors.
Action/Solution:
JP501 should be set according to the following table. Normal usage is to enable the circuit.
JP501
Pin 1 – 2
Pin 2 - 3
Disabled
Enabled
Distribution:
APPROVALS:
Int'l EXP
Int'l Subsidiaries
Special
CPS Tech Services
CPS Operations
CPS Materials
Manufacturing:
Engineering:
Design:
© 1998 Polaroid Corporation. All rights reserved.
Material may not be reproduced or distributed in any form without permission.
P o l a r o i d K no w l e d g e * B a s e
E I S e r v i c e B ul l e t i n
EISB Document Details
Product:
ProPalette 7000, ProPalette 8000
Date:
04/02/98
Product Type:
Film Recorder
Document #:
980402135536JF
Product Group:
PDI
Posted By:
Jordan Freedman
Category:
Hardware
Camera Interface Test Tool
Details, Diagrams
PURPOSE
This document will describe the use of tool #13705 to troubleshoot and validate the camera
connector for the ProPalette product line. The switch configuration can be set to simulate all
available cameras. Additionally the functionality of the film door of the 35mm camera can be tested.
FUNCTIONALITY
There is a bank of four dip switches located on the top of the tool. Switches #S1- S3 are used to
select the camera back according to Table 1. Switch S4 is used to simulate the door of the 35-mm
camera. As such it only has meaning when the switches S1–S3 are set to simulate a 35-mm camera.
USE
1. Apply power to the ProPalette and wait until the “Ready” message is displayed on the LCD panel.
2. Remove the 35-mm camera from the unit, the LCD panel should indicate “Out of Film” on the
bottom line.
3. Set all of the switches to the OFF position.
4. Insert the tool into the camera connector with the switch bank on the top.
INDICATIONS
S1-S3 Camera Back
While there are eight possible combinations for these switches, only six combinations have meaning
at this time. The remaining two are reserved for future use. The LCD panel will display the camera
back type according to the following table.
S1
S2
S3
0
0
0
35-mm/Out of Film
1
0
0
Pack
0
1
0
Auto
1
1
0
4x5
0
0
1
6x7
0
1
6x8
1
Message
Table 1
S4 – Film Door Switch
With S1-S3 in the OFF position, changing S4 to a 1 should indicate the door open. The transition
from 1 to 0 initiates the film load sequence.
S4
Message
1
Film Door Open
0
Loading Film - Film Load
Failed - Out of Film
Table 2
AVAILABILITY
This tool, part number 13705, is available from:
Polaroid Corporation
Technical Services Department
201 Burlington Road
Bedford MA 01730
Distribution:
APPROVALS:
Int'l EXP
Int'l Subsidiaries
Special
CPS Tech Services
CPS Operations
CPS Materials
Manufacturing:
Engineering:
Design:
© 1998 Polaroid Corporation. All rights reserved.
Material may not be reproduced or distributed in any form without permission.
E I S e r v i c e B ul l e t i n
P o l a r o i d K no w l e d g e * B a s e
EISB Document Details
Product:
ProPalette 7000, ProPalette 8000
Date:
04/07/98
Product Type:
Film Recorder
Document #:
980407132152JF
Product Group:
PDI
Posted By:
Jordan Freedman
Category:
Hardware
ProPalette Revision History
Details, Diagrams
The following tables describe the revision history for the ProPalette family. The
revision letter designator is the last character of the unit serial number. This
character should be updated to reflect any change made to the unit.
Configuration of ProPalette 7000
Lette
r
Description
A
Original
B
Firmware corrected for proper spacing of picture frames on new camera backs (Jul-1-1997)
C
Firmware re-corrected for proper spacing of picture frames on new camera backs
(Aug-28-1997)
D
Convert analog board from issue 01 to issue 02 - resistor change for sizing failures (8-16-97
E
4 diodes added to U18 inputs to protect U18 from yoke capactive discharge
U35 negative supply disconnected from -15b, connected to -15va (Nov 13 1997)
Configuration of ProPalette 8000
Lette
r
Description
A
Original
B
Jumper on analog board
C
White line capacitor
D
Time out capacitor-digital board
E
Surface mount capacitor on autoluma board
F
Daughter board-CRT burn prevention
G
Diode on analog board-prevent positive voltage from going to negative side of capacitor
H
Watchdog on digital board
J
Version 562
K
L
Firmware corrected for proper spacing of picture frames on new camera backs (Jul. 8
1997)
Firmware re-corrected for proper spacing of picture frames on new camera backs (Aug.
1997)
M
4 diodes added to U18 inputs to protect U18 from yoke capactive discharge
U35 Negative supply disconnected from -15b, connected to -15va (Nov. 13 1997)
These latest configurations are supported by the following circuit boards:
rev
Analog
Digital
ProPalette 7000
E
1AE545A
Is 2
1F5570A Is 1
ProPalette 8000
M
1AH823A
Is 1
1F5570A Is 1
Distribution:
APPROVALS:
Int'l EXP
Int'l Subsidiaries
Special
CPS Tech Services
CPS Operations
CPS Materials
Manufacturing:
Engineering:
Design:
© 1998 Polaroid Corporation. All rights reserved.
Material may not be reproduced or distributed in any form without permission.
T e c hni c a l B r i e f
P o l a r o i d K no w l e d g e * B a s e
TNote Document Details
Product:
Product Type:
PDI - ProPalette 8000
FlmRec
Date:
06/17/98
Document #:
Knowledge*BASE
980617094542JF
Posted By:
Related to:
Public/Private:
Public
Sent To:
KnowledgeBase@Polaroid
06/17/98 09:48:35 AM
Image size on film
Details:
Problem Reported:
Solution:
Use the camera adjust feature built into the driver application. In RasterPlus95, the procedure is detailed on page 3-29 of
the software manual that accompanies the CD-ROM for Windows. For the Macintosh software, the procedure is on
page 3-14 of the manual. The date of the manual in either case is 3/97.
Approvals:
Entered by:
Approved by:
Jordan Freedman 06/17/98
Joseph J Oleary-III/LNOTES/POLAROID/US 06/17/98 10:00:13 AM
© 1998 Polaroid Corporation. All rights reserved.
Material may not be reproduced or distributed in any form without permission.
R e p a i r I n f o B u lle t i n
P o l a r o i d K no w l e d g e * B a s e
RIB Document Details
Product:
ProPalette 7000, ProPalette 8000
Date:
07/02/98
Product Type:
Film Recorder
Document #:
980702084310JF
Product Group:
PDI
Posted By:
Jordan Freedman
Category:
Image Quality
Received on:
Film:
Horizontal Line Artifacts
Details, Diagrams
Issue:
The ProPalette product is susceptible to horizontal line artifacts in the image. These
notes are suggestions that point to the possible causes for these artifacts.
Details:
1. Check to make sure that no other electrical devices are close enough to the unit
that could cause electro-magnetic interference. Monitors and electric motors are
common culprits. Never stack film recorders. Never run a film recorder
back-to-back with the computer's monitor or CPU.
2. Check to make sure that the surface used to hold the film recorder is vibration
free. This is particularly important with the medium format and 4x5 camera
backs. The 4x5 camera should never be used without bolting it to the ProPalette.
Banging on the surface during exposure will cause image artifacts.
3. If the lines are fuzzy straight regularly repeating lines then check the grounds.
Ensure that the computer (CPU) and the film recorder are plugged into the same
power outlet and share a common ground to eliminate the possibility of a
ground-loop problem.
4. Make sure the little screws that connect the parallel port connector to the
chassis back plane are screwed in; make sure the cable connecting the CPU to
the CFR is OK. If this is OK try a different CPU.
5. If the lines are slightly curved lines that go from edge to edge then this could be
a hardware version issue. Check the serial number suffix to see if the box is an
old one that e.g. may have "F" dacs in it.
6. If the lines are fuzzy relatively short lines then try a different film e.g. Ektachrome
EPP or Fuji Provia. Stay away from Fuji Velvia. Velvia is especially critical i.e. it
shows lines better than other films. We use it to test; customers should get
better results with other films.
7. If the lines are fine black lines, straight, and extend from edge to edge then
they're probably intermittency lines caused if the CRT scan light blinks on and
off due to a slow (or busy) host computer. One way to check for this is to expose
the image that exhibits the problem with some dummy film and once the
exposure starts remove the camera from the front of the unit. Look in at the CRT
and see if the scan is blinking on and off. If so, the fix is to increase the Pacing
value via the keypad. Try to use the same image and printing conditions that
produced the problem.
A slow host computer may force the ProPalette to wait for data during a line
scan. This will result in a regular pattern of dark lines within the image. To
eliminate this problem, Pacing should be enabled on the LCD panel. This will
insert a user defined wait between scan lines allowing the host computer to
process the necessary image data. The amount of pacing should be increased in
small steps until the data wait lines have been eliminated. An excessive pacing
time will increase the total exposure time of the entire image.
Make certain that the computer that the film recorder is connected to is
completely DEDICATED to imaging with the ProPalette. Every time a message
comes in, or a key is pressed, or the network is polled, causes a software
interrupt in the CPU. These interrupts borrow time from the process of
processing the image for the film recorder. If the film recorder has to wait for
image data, "data wait" lines can appear on the film.
Use firmware ver 564 or 704 and block mode drivers, which makes better use of
the printer DRAM to sustain the exposure.
Distribution:
APPROVALS:
Int'l EXP
Int'l Subsidiaries
Special
CPS Tech Services
CPS Operations
CPS Materials
Manufacturing:
Engineering:
Design:
© 1998 Polaroid Corporation. All rights reserved.
Material may not be reproduced or distributed in any form without permission.
E I S e r v i c e B ul l e t i n
P o l a r o i d K no w l e d g e * B a s e
EISB Document Details
Product:
ProPalette 7000, ProPalette 8000
Date:
07/14/98
Product Type:
Film Recorder
Document #:
980714142633JF
Product Group:
PDI
Posted By:
Jordan Freedman
Category:
Installation
PCPlus Configuration
Details, Diagrams
Category: Performance
PCPlus is a MS-DOS based terminal emulation program that will allow an operator to access the
ProPalette through its serial port for diagnostic purposes. The purpose of this message is to alert
service providers of the proper configuration parameters for using PCPlus.
Details:
The PCPlus executable must be in the system path and the following DOS environment variable must
be established when PCPlus is used for serial communication with a ProPalette.
SET PCPLUS=C:\PCPLUS
The following parameters must be established within PCPlus:
Communication Parameters (ALT-P)
8 data bits
1 stop bit
115200 baud rate (or other)
Setup Utility (ALT-S)
non-default parameters
In PROTOCOL OPTIONS Menu
Under GENERAL OPTIONS
(A)
Protocol timing
(B)
Aborted downloads
(C)
Abort xfer if CD lost
Under ASCII PROTOCOL OPTIONS
(A)
Echo locally
(B)
Expand blank lines
(C)
Expand tabs
(D)
Character spacing (millesec)
(E)
Line pacing (1/10 sec)
(F)
Pace character
(G)
Strip 8th bit
(H)
ASCII download timeout
(I)
CR translation (upload)
(J)
LF translation (upload)
(K)
CR translation (download)
(L)
LF translation (download)
pcplus.pdf Pcplus.doc
Distribution:
APPROVALS:
NORMAL
KEEP
NO
YES
YES
YES
0
0
0
NO
10 seconds
NONE
STRIP
NONE
NONE
E I S e r v i c e B ul l e t i n
P o l a r o i d K no w l e d g e * B a s e
EISB Document Details
Product:
ProPalette 7000, ProPalette 8000
Date:
07/22/98
Product Type:
Film Recorder
Document #:
980722113223JF
Product Group:
PDI
Posted By:
Jordan Freedman
Category:
Software, Installation
Restoration of ProPalette Firmware
Details, Diagrams
Category: Performance
The purpose of this bulletin is to alert service providers of a method to restore corrupted firmware in
a ProPalette. If the Control code has been corrupted there is no way to communicate with the unit
and it is necessary to re-install the firmware. This procedure will not restore or modify the calibration
data.
Product Affected:
ProPalette 7000 and ProPalette 8000
Details:
l
l
l
l
l
Procedure:
1.
2.
3.
4.
5.
6.
7.
8.
9.
10.
11.
Know location of current FLASHMAN.HEX file
Know location of current KACNTRL.HEX file
Terminal emulation program (ProComm Plus) must be available. See Notes Knowledge
Base bulletin 980714142633JF
Know how to disable/enable watchdog timer. See Notes Knowledge Base bulletin
980325134018JF
Know how to enable/disable Monitor mode. See ProPalette 8000 Service Manual Section 4.
Troubleshooting and Diagnostics
Disable watchdog timer
Enable Monitor mode
Connect ProPalette to computer through COMM port
Turn on ProPalette
Run terminal emulator
Confirm communication to ProPalete
Upload FLASHMAN.HEX to ProPalette
Run FLASHMAN.HEX
Remove the Control Code by entering the commands:
R<cr>
1<cr>
Note that code block (1) is gone
Upload the new Control Code by entering the commands:
H<cr>
1<cr>
Respond to the question “Enter data name string” with:
the_firmware<cr>
At the prompt "Ready to receive hex file"
Press Pg Up
R<cr>
Type in the fully qualified path to the CNTRL.HEX file if it isn’t in the active directory
d:\path\xxCNTRL.HEX<cr>
xx = KA for the ProPalette 8000
xx = VT for the ProPalette 7000
12.
After the upload is complete, wait until the flash is programmed and the Flashman menu
re-appears.
13.
Note that code block (1) is back
14.
Shut down the ProPalette
15.
Enable watchdog timer
16.
Disable Monitor mode
17.
Turn on the ProPalette and verify that it functions properly
Contact: Jordan Freedman via:
E-mail: Freedman,Jordan
Internet: [email protected]
Distribution:
APPROVALS:
Int'l EXP
Int'l Subsidiaries
Special
CPS Tech Services
CPS Operations
CPS Materials
Manufacturing:
Engineering:
Design:
© 1998 Polaroid Corporation. All rights reserved.
Material may not be reproduced or distributed in any form without permission.
P r od u ct Ale rt B u l le t in
P o l a r o i d K no w l e d g e * B a s e
PA Document Details
Product:
ProPalette 8000
Date:
08/04/98
Product Type:
Film Recorder
Document #:
980804154701JF
Product Group:
PDI
Posted By:
Jordan Freedman
Category:
Software
Received on:
Film:
Expanded Highlights for ver 564
Details, Diagrams
Highlights of Version 564
· 35mm Bulk Camera Back Support
· Faster SCSI Printing via Block Mode
· High Density Deflection for smoother images
· Dither Modifications
· Film name and resolution displayed during R & G portions of exposure
· Artifact Warning Signs on LCD
· Improved ability to mix resolutions within a batch
· Error log kept in flash memory
· Hardware configurations display in LCD
· Bug fixes
35mm Bulk Camera Back Support
Initial support for the bulk camera back from Double M. The CFR will detect and display
the bulk back on the LCD whenever it is mounted. To expose bulk images use the
standard 35mm drivers and film tables.
Faster SCSI Printing via Block Mode
SCSI block mode is activated to cut exposure times. Requires RP95 version 1.49 or later
and Mac driver 4.0.4 or later. To get the full speedup one needs a relatively recent logic
board (H configuration or later i.e. logic board version 7 or later)
High Density Deflection for Smoother Images
High-density grids are enabled, and one will see an "initializing" message at startup or
when cameras are swapped. Please note that the 4x5 camera can take four or five
minutes to initialize.
Dither Modifications
The dither algorithm that extracts the optimum beam positioning was modified to improve
flat-field pastel performance
Film name and resolution displayed during R & G portions of exposure
The current film-table name displays during the red exposure to help prevent inadvertent
film table selection mistakes. Also, the actual resolution now displays during the green
exposure. This shows off Polaroid's unique variable resolution capability, i.e. bitmap
images expose at their native resolution without time-consuming pixel interpolation or
re-rendering.
Artifact Warning Signs on LCD
The LCD will warn if the host computer is unable to maintain the steady supply of pixel
data needed for artifact-free images. The artifacts are thin dark horizontal lines,
particularly noticeable in pastel regions of the image.
If this occurs customers should
- Turn on "buffer to disk" if their software driver supports it, or
- Shut down unnecessary applications competing with the driver, or
- Make sure they're not using a heavily loaded network, or
- Do any rotating, cropping, or scaling before starting the exposure, or
- Add more memory, disk, or CPU power, or
- Increase the pacing setting either via the keypad or via the driver
The warning sign appears in front of the line number during the exposure and remains
there until the next image. If at any time during an exposure pixel data is not available for
200 msec an underscore "_" will display and one may get artifacts. At 400 msec it
changes to a dash "-", and at 600 msec it changes to an equal sign "=" at which point
artifacts are likely.
Error log kept in flash memory
Should an error occur it is recorded in flash memory. The log is accessible at Polaroid
Service Centers to speed the turnaround of units sent in for repair.
Hardware configurations display in LCD
Diagnostics/Show Power-on Message now shows two screens, each lasting 10 seconds.
The first is (as before) model, version numbers, date, and time; the second shows the
serial number (if known) and the hardware versions: analog, digital, and video in that
order. The current Pro8000 versions are 4 7 2.
Board versions
Analog
Version 0: Original PP8000 12/95 release
Version 2 (There is no version 1): Original PP8000 release with upgraded capacitors,
sample and hold grounding etc. for improved flat field performance.
Version 3: Equivalent of version 2 with power fail rework for CRT protection.
Version 4: Respin including all reworks of version 2 and version 3 and 20% increase in
video gain
Version 10: initial Pro7000
Digital
Version 5: original release
Version 6: initial revisions to 2 for 1 circuitry.
Version 7: final version of 2 for 1, gives fastest block mode exposures. Used in Pro7000
and Pro8000's
Video
Version 0: Prerelease video circuit where COS4 reference current relative to video
current is 20% less than later designs
Version 1: Uses 2.49K offset and gain resistors
Version 2: Uses 3.01K offset and gain resistors for 20% increase in final video gain
Bug Fixes
More reliable high-speed SCSI operation. Improved accuracy of the buffer sizes reported
to the host driver. Customers may need the latest host-side driver version(s) to get the full
benefit. Also fixed a small memory leak that occurred whenever resolutions changed
within a batch
Can no longer mix film tables between ProPalette models. A "FilmTable, bad size" error
occurs if a Pro7000 table is downloaded to a Pro8000 or vice-versa.
Fixed a bug in FWLOAD.EXE that required one to have a dpalette.cfg file.
SCSI now properly reports video not smooth and luma not smooth autoluma errors.
Heap and stack memory tuned up to work with the improved throughput
Autoluma improvements
Fixed bugs in autoluma, sped up dark current measurement, improved bottom level
hunt
COS4
Added adjustment for video version 0 hardware
Analog Diagnostics
Fixed horizontal and vertical size tests.
Fixed bug in horizontal test failure readout to LCD.
564 Highlights.PDF
564 Highlights.doc
Distribution:
APPROVALS:
P o l a r o i d K no w l e d g e * B a s e
E I S e r v i c e B ul l e t i n
EISB Document Details
Product:
ProPalette 8000
Date:
08/12/98
Product Type:
Film Recorder
Document #:
980812091236JF
Product Group:
PDI
Posted By:
Jordan Freedman
Category:
Image Quality
Image Tilt
Details, Diagrams
I. Subject / Situation:
Reports of tilted and otherwise misaligned images have been filtering in over the past three months for the
ProPalette 8000. This issue is easiest identified by examining a strip of film that has been exposed by the ProPalette
8000, and observing every image on the strip having an identical rotation of a few degrees from zero. Severe cases
show the corner of the image being clipped off on every image.
Rotated images are caused by the yoke of the CRT slipping and/or rotating during extremely severe shipping
conditions of ProPalette 8000 units. This issue has been limited to the ProPalette 8000 model due to its heavy yoke
assembly relative to the ProPalette 7000. There have been no reports of rotated images on the ProPalette 7000.
II.
Products Affected:
ProPalette 8000 film recorder
III.
Actions / Solutions:
An Engineering Change Notice (ECN) has been issued with a solution for this issue. The yoke assembly is normally
held in place by a torqued metal band collar and hot melt glue. All ProPalette 7000 and 8000 units are now
manufactured with an abrasive paper collar applied to the neck of the CRT before the yoke assembly is added. This
self-adhesive collar provides a more effective means of preventing the yoke from rotating on the CRT neck during
shipping.
This manufacturing process change is in addition to the hot melt glue and clamp that is applied to the yoke for the
same purpose. Further testing will reveal whether the hot melt glue continues to be necessary.
NOTE: Due to the difficulty of installation, the small number of reports, and the re-alignment required after
installation, Service is not recommending this ECN for units that are in the field. If a ProPalette 8000 is returned for
service, it will be evaluated against the rotation specification. If the yoke has moved since manufacture, the abrasive
collar ECN will be added to the serviced unit.
imgtilt.PDF imgtilt.doc
Distribution:
APPROVALS:
Int'l EXP
Int'l Subsidiaries
Special
CPS Tech Services
CPS Operations
CPS Materials
Manufacturing:
Engineering:
Design:
© 1998 Polaroid Corporation. All rights reserved.
Material may not be reproduced or distributed in any form without permission.
P o l a r o i d K no w l e d g e * B a s e
E I S e r v i c e B ul l e t i n
EISB Document Details
Product:
HR-6000 CFR, ProPalette 7000, ProPalette 8000
Date:
08/19/98
Product Type:
Film Recorder
Document #:
980819160722JF
Product Group:
PDI
Posted By:
Jordan Freedman
Category:
Maintenance
Cleaning CRT Faceplate
l
Details, Diagrams
Category:
The purpose of this bulletin is to alert service providers with alternate methods of cleaning the face of a CRT.
l
Products Affected:
HR6000, ProPalette 7000, ProPalette 8000
l
Details:
Our CRT manufacturers have been contacted on the subject of what to use to clean tape, glue, epoxy, etc.,
from the optically coated surface of the CRT faceplate.
Alcohol works well for fingerprints and ordinary dirt.
A commercial product called "Goo Gone" works well for tape glue. It's available from hardware stores, etc.
Another commercial product called "Jasco" removes most things, including epoxy. It's available from
industrial supply sources.
DO NOT use Acetone. It can damage the coating
CRT Bulletin.PDFCRT Bulletin.doc
Distribution:
APPROVALS:
Int'l EXP
Int'l Subsidiaries
Special
CPS Tech Services
CPS Operations
CPS Materials
Manufacturing:
Engineering:
Design:
© 1998 Polaroid Corporation. All rights reserved.
Material may not be reproduced or distributed in any form without permission.
E I S e r v i c e B ul l e t i n
P o l a r o i d K no w l e d g e * B a s e
EISB Document Details
Product:
ProPalette 7000, ProPalette 8000
Date:
08/26/98
Product Type:
Film Recorder
Document #:
980826161619JF
Product Group:
PDI
Posted By:
Jordan Freedman
Category:
Software
ProPalette Error Logging
Details, Diagrams
PERFORMANCE
This document describes the use of the host side utility ERRSTAT.EXE. Should an error occur in the
film printer, it is temporarily displayed on the LCD and simultaneously recorded in flash memory. The
log is accessible at Polaroid Service Centers to speed the turnaround of units sent in for repair. This
capability is only available in firmware version 564 and version 704.
There are 3 classes of errors that are logged:
l
Asynchronous Hardware Errors
These are hardware errors where the film printer loses process control, the classic being filter wheel
jam. There are about 35 of these, each with own unique error number. The explanation of each error
code is listed in this document.
l
Asynchronous Software Errors
These are just like the hardware errors except there isn't a unique error number. A 64 character
string is stored with the filename, line number, and description.
l
Power On Hardware Diagnostics
These are tests that are run at startup and generate an error message to the LED and which require
an operator keystroke to proceed.
DETAIL:
We would like to know what errors have occurred and when. Since there is no internal clock in the film
printer, we keep track of the total number of pictures exposed. We use the number of pictures as our
notion of "time".
The host side utility will display:
1. The serial number of the unit. A separate host side utility provides this function.
2. The current version of all major circuit boards. A list of all production versions is provided.
3. The current picture count.
4. The time/date when these statistics were last reset. The command
errstat -reset_counts
will delete all error statistics from the flash memory of film printer
5. A histogram of all the asynchronous hardware errors and the "picture count" when the error last
occurred.
Note: that one of these errors is JUST_POWERED_ON (HE 1). When a normal reset or power on
occurs, this error is generated and we know how many times the unit has been powered on.
6. A histogram of all the startup errors and the "picture count" when the error last occurred.
7. The last 10 software error messages and the "picture count" when they occurred.
8. A full autoluma history (64 samples) of the last 3 autoluma failures
SYNTAX
The proper command structure for this host side utility is:
errstat
By default, the utility will access the port COM 1 of the host computer. The help file is accessed with the
command
errstat ?
ERROR MESSAGES:
ASYNC_POWERED_ON
HE(1)
Just powered on
ASYNC_PREV_EXP
HE(2)
Previously exposed film
ASYNC_MOVEWHEEL
HE(3)
Error moving filter wheel
ASYNC_NOFILM
HE(4)
Ran out of film
ASYNC_CAL_DARK_X1_NOT_REPEAT
HE(5)
ASYNC_CAL_DARK_X1_BAD
HE(6)
ASYNC_CAL_DARK_x10_NOT_REPEAT
HE(7)
ASYNC_CAL_DARK_X10_BAD
HE(8)
ASYNC_CAL_SCALE_NON_LINEAR
HE(9)
ASYNC_CAL_NOT_STABLE_IN_TIME
HE(10)
ASYNC_CAL_CRT_NOT_BRIGHT_ENUF
HE(11)
ASYNC_CAL_CRT_NOT_DIM_ENUF
HE(12)
ASYNC_CAL_CRT_BRT_NO_INCREASE
HE(13)
ASYNC_BADVRAM
HE(14)
ASYNC_BADVIDDATA
HE(15)
ASYNC_GIOFAIL
HE(16)
ASYNC_UNKNOWN_POWERON_FAILURE
HE(17)
ASYNC_TOO_BRIGHT
HE(18)
ASYNC_BAD_DAUGHTER_BD_ID
HE(19)
GAL code is unknown
ASYNC_FB_MEMORY_FAILURE
HE(20)
Frame Buffer mem failed
ASYNC_BAD_CAMERA_FUSE
HE(21)
Camera fuse is blown
ASYNC_BAD_CB
HE(22)
Unknown camera back
ASYNC_DOOR_OPEN
HE(23)
Film door is open
ASYNC_SHUTTER
HE(24)
Shutter failed to open
ASYNC_LOAD_FAIL
HE(25)
Film load failed
ASYNC_FILM_JAM
HE(26)
Film is jammed
ASYNC_CAL_REQFL_TOO_LARGE
HE(27)
ASYNC_CAL_REQFL_TOO_SMALL
HE(28)
ASYNC_CAL_INTERNAL_ERROR
HE(29)
ASYNC_CAL_LUMA_NOT_SMOOTH
HE(30)
ASYNC_CAL_VIDEO_NOT_SMOOTH
HE(31)
ASYNC_CAL_RESERVED3
HE(32)
ASYNC_CAL_RESERVED2
HE(33)
ASYNC_CAL_RESERVED1
HE(34)
ASYNC_LAST_HARD_ERROR
HE(35)
Must be LAST
SAMPLE REPORT
The following is a sample report generated by ERRSTAT.EXE
errstat, Reports accumulated film printer errors
Version 564/704
Compiled on Jun 9 1998
Stats read:
Tue Aug 25 08:44:12 1998
serial number = A6020H
Analog version = 4
Digital version = 7
Video version = 2
Picture Count = 0
Getting stats from film printer.... Could take 30 seconds
ERROR_HISTORY last reset: Thu Jul 09 08:38:08 1998
STARTUP_AND_ASYNC_HDW_ERRORS:
Async Hardware Error Histogram:
Which
Count LastPicNum
HE 1
24
0
*Unit just powered on
Startup Diagnostic Error Histogram:
Which
Count LastPicNum
SOFTWARE_ERRORS:
There are 2 stored software errors:
0 SWERR:expmemry.cpp,402:Offset outside of expanded_mem block
0 SWERR:expmemry.cpp,402:Offset outside of expanded_mem block
AUTOLUMA_ERRORS:
There are 0 stored autoluma errors:
BOARD VERSIONS
Analog Version 0:
Original PP8000 12/95 release
Analog Version 2
Original PP8000 release reworked with upgraded capacitors, sample and hold
grounding etc. for improved flat field performance.
Analog Version 3:
Equivalent of version 2 with power fail rework for CRT protection
Analog Version 4:
Respin including all reworks of version 2 and version 3 and 20% increase in video
gain
Analog Version 10:
Initial Pro7000
Digital version 5:
Original release
Digital version 6:
Initial revisions to 2 for 1 circuitry.
Digital version 7:
Final version of 2 for 1, gives fastest block mode exposures. Used in Pro7000 and
Pro8000's
Video version 0:
Prerelease video circuit where COS4 reference current relative to video current is
20% less than later designs.
Video version 1:
Uses 2.49K offset and gain resistors. Firmware cos4 compensation.
Video version 2:
Uses 3.01K offset and gain resistors for 20% increase in final video gain. Firmware
cos4 compensation.
Errstat.exe Errstat.doc Errstat.PDF
Distribution:
APPROVALS:
Int'l EXP
Int'l Subsidiaries
Special
CPS Tech Services
CPS Operations
CPS Materials
Manufacturing:
Engineering:
Design:
© 1998 Polaroid Corporation. All rights reserved.
Material may not be reproduced or distributed in any form without permission.
E I S e r v i c e B ul l e t i n
P o l a r o i d K no w l e d g e * B a s e
EISB Document Details
Product:
ProPalette 7000, ProPalette 8000
Date:
09/02/98
Product Type:
Film Recorder
Document #:
980902140350JF
Product Group:
PDI
Posted By:
Jordan Freedman
Category:
Software
Host Side DOS Utility (SN.EXE)
l
Details, Diagrams
Category:
The purpose of this bulletin is to inform service providers about the new serial number feature that is
part of firmware versions 564 and 704.
l
Product Affected:
ProPalette 7000, ProPalette 8000
l
Details:
This document explains the usage of the host side DOS utility (SN.EXE) to read or write a serial
number into the ProPalette. The unit serial number can be used by the firmware to modify its
functionality based upon the hardware configuration that is imbedded in the syntax of the serial
number. During initialization of the ProPalette, the LCD display reports the unit’s serial number and
revision numbers of the three main circuit boards that are installed.
l
Syntax:
The most common usage of the utility will be to either read or write a serial number string. The
command syntax to read the serial number is:
sn<cr>
An example on the output report is shown in the following section.
The command syntax to write the serial number is:
sn -burn=string<cr>
where string is the unit serial number
To display the complete help screen for the utility, enter the command:
sn ? <cr>
Where <cr> indicates pressing the Enter key and the default connection to the ProPalette is through
COM1.
l
Example:
The following is an example of the output from the utility. It reports the serial number along with the
major circuit board versions.
sn, Reports and optionally sets serial number
Version 564/704
Compiled on Jun 12 1998
The current film printer number is :
serial number = A6020H
Analog version = 4
Digital version = 7
Video version = 2
l
Resources:
The DOS executeable file and copies of this bulletin in Word and Acrobat format are attached
sn.doc sn.pdf
Sn.exe
Distribution:
APPROVALS:
Int'l EXP
Int'l Subsidiaries
Special
CPS Tech Services
CPS Operations
CPS Materials
Manufacturing:
Engineering:
Design:
© 1998 Polaroid Corporation. All rights reserved.
Material may not be reproduced or distributed in any form without permission.
P o l a r o i d K no w l e d g e * B a s e
E I S e r v i c e B ul l e t i n
EISB Document Details
Product:
ProPalette 7000
Date:
09/16/98
Product Type:
Film Recorder
Document #:
980916141858JF
Product Group:
PDI
Posted By:
Jordan Freedman
Category:
Hardware
Incorrectly Marked Analog Boards
Details, Diagrams
Category: Performance
The purpose of this message is to alert service providers to a problem with the identification/marking
of ProPalette 7000 analog boards.
Product Affected:
ProPalette 7000
Details:
An undetermined number of ProPalette 7000 analog boards have made it through the system with
the wrong revision level marked on the board. The vendor incorrectly marked them as 1AE545A
IS03, these boards are actually IS05. There has never been a released 1AE545A IS03 analog board.
Distribution:
APPROVALS:
Int'l EXP
Int'l Subsidiaries
Special
CPS Tech Services
CPS Operations
CPS Materials
Manufacturing:
Engineering:
Design:
© 1998 Polaroid Corporation. All rights reserved.
Material may not be reproduced or distributed in any form without permission.
P o l a r o i d K no w l e d g e * B a s e
E I S e r v i c e B ul l e t i n
EISB Document Details
Product:
ProPalette 8000
Date:
10/02/98
Product Type:
Film Recorder
Document #:
981002140058JF
Product Group:
PDI
Posted By:
Jordan Freedman
Category:
Hardware
Yoke Collar
Details, Diagrams
I.
Subject / Situation:
Reports of tilted and otherwise misaligned images have been reported recently for the ProPalette 8000. This issue is easiest
identified by examining a strip of film from the ProPalette 8000 and observing that every image on the strip has an identical
rotation
Rotated images are caused by the yoke of the CRT slipping and/or rotating during extremely severe shipping conditions of
ProPalette 8000 units. There have been no reports of rotated images on the ProPalette 7000.
II.
Products Affected:
ProPalette 8000 film recorder
III.
Actions / Solutions:
An Engineering Change Notice (ECN) has been issued with a solution for this problem. The yoke assembly is normally held in
place by a torqued metal band collar and hot melt glue. All ProPalette 7000 and 8000 units are now manufactured with a collar
of self-adhesive abrasive paper, 220 grit, applied to the neck of the CRT before the yoke assembly is added. This collar provides a
more secure means of preventing the yoke from rotating on the CRT neck. The amount of clearance under the yoke collar
requires that the strips are not overlapped.
The adhesive abrasive paper should be obtained locally in the Service regions. Samples will be provided by CFR manufacturing.
220_grit.PDF
220_grit.doc
Distribution:
APPROVALS:
Int'l EXP
Int'l Subsidiaries
Special
CPS Tech Services
CPS Operations
CPS Materials
Manufacturing:
Engineering:
Design:
© 1998 Polaroid Corporation. All rights reserved.
Material may not be reproduced or distributed in any form without permission.
P o l a r o i d K no w l e d g e * B a s e
E I S e r v i c e B ul l e t i n
EISB Document Details
Product:
ProPalette 7000, ProPalette 8000
Date:
10/07/98
Product Type:
Film Recorder
Document #:
981007093818JF
Product Group:
PDI
Posted By:
Jordan Freedman
Category:
Software
Monitor Mode
Details, Diagrams
Category: Performance
The purpose of this message is to alert service providers of the two alternate methods to activate Monitor mode in the ProPalette.
The first is through the LCD/keypad front panel and the second is with a jumper configuration on the Digital board. Monitor
mode is used to communicate with the ProPalette through its serial port.
Product Affected:
ProPalette 7000 & 8000
Details:
Method 1:
To activate from the ProPalette LCD menu, select “Diagnostics” from the top level menu and then select “GoTo Monitor Mode”
from the second level menu. The LCD panel will display “Film Printer In Monitor Mode” and control of the ProPalette passes to
its EEPROM. Press the Reset button on the rear of the ProPalette to restart the system and return to normal mode.
Method 2:
To activate from the digital board, the state of two startup switches J3-6 and J3-8 on the digital board must be set. If both of
those points are tied to ground, the unit will power-up in the “Monitor” mode. All of the pins along the bottom of J3 are at
ground potential. The LCD panel does not work when you enter “monitor mode” in this manner and there is no indication that
you have been successful. Load up a terminal emulator to the serial port to verify that the EEPROM has control. Remove the
jumpers and restart the system to return to normal mode.
This method must be used when the firmware has become corrupt and there is only a blinking cursor on the LCD display.
Figure 1
Digital Board - J3 header
Contact: Jordan Freedman
E-mail: Freedman,Jordan, Internet: [email protected]
EI Service Bulletin
Product:
Product Type:
Product Group:
Category:
Polaroid Knowledge*Base
ProPalette 7000
Film Recorder
PDI
Software
Date:
Document #:
Posted By:
10/20/98
981020134924JF
Jordan Freedman
Firmware 705 Upgrade
Category: Performance
The purpose of this message is to alert service providers of a solution to a problem that
ProPalette 7000 customers may experience when upgrading from firmware version 704 to
version 705.
Product Affected:
ProPalette 7000
Details:
Connect a ProPalette 7000 to a Mac daisy chained first, second or third device "does not
matter." Turn the ProPalette 7000 "ON" and then reboot the MAC. Use Cfrupdate to
download version 705 VTCNTRL.HEX over version 704 dated 8/21. Cfrupdate host
displays Unknown Error and the status of ProPalette 7000 LED is memory error 591
Resolution:
Connect a ProPalette 7000 to a Mac daisy chained first, second or third device "does not
matter." Turn the ProPalette 7000 "ON" and then reboot the MAC. After the MAC has
been rebooted, reset the ProPalette 7000 by pressing the reset button in back of the
ProPalette 7000 film recorder. Use Cfrupdate to download version 705VTCNTRL.HEX
control code. The user should receive no problems.
Contact: Jordan Freedman
E-mail: Freedman,Jordan,
Internet: [email protected]
APPROVALS:
© 1998 Polaroid Corporation. All rights reserved.
Material may not be reproduced or distributed in any form without permission.
EI Service Bulletin
Product:
Product Type:
Product Group:
Category:
ProPalette 7000, ProPalette 8000
Film Recorder
PDI
Software
Polaroid Knowledge*Base
Date:
Document #:
Posted By:
10/29/98
981029132131JF
Jordan Freedman
Serial Number Error Check
Category: Performance
The purpose of this message is to alert service providers of a solution to a problem that
ProPalette service technicians may experience. With firmware version 564/704 or higher, the
ProPalette has the capability to store its serial number in flash memory. There is a validity test,
an invalid serial number will generate the following error message:
OSWERR:FPSRLNUM.CPP,134:SERIAL NR CRT/MODEL CONFLICT
Product Affected:
ProPalette 7000 and ProPalette 8000
Details:
The unit firmware and alignment station software use this embedded serial number to set
internal parameters for the proper adjustment of the equipment. That software error is there to
catch invalid information in the eighth character of the serial number, and it doesn't respond
graciously to Pre-Production (PPC) or Manufacturing Pilot (MP) units. It monitors the eighth
position of the serial number for a valid character.
The model type is specified by the character in the first position of the serial number.
ProPalette 7000’s must have a blank eighth character in the serial number. ProPalette 8000’s
can only have a blank, "T", or "W" as the eighth character; otherwise, you'll get the software
error. Blank denotes an AEG CRT (clear gun); "T" signifies a first generation Thomas CRT
(black gun- our current production); "W" indicates the future second generation Thomas CRT
(white gun). The color refers to the glass seal of the CRT observed through the neck
connector. If the firmware finds a "T", it changes the color balance & cos4 parameters to
compensate for first generation Thomas CRTs.
Resolution:
When entering a serial number for pre-production or manufacturing pilot units, replace the
PPC or MP with "8", leave the month "K" (second character) and the year "5" (third
character) so there will be no confusion to when the unit was originally manufactured. In
addition, it will prevent the chance of having two units with the same serial number.
APPROVALS:
EI Service Bulletin
Product:
Product Type:
Product Group:
Category:
Polaroid Knowledge*Base
ProPalette 7000, ProPalette 8000
Film Recorder
PDI
Software
Date:
Document #:
Posted By:
11/02/98
981102112810JF
Jordan Freedman
Restoration of ProPalette Firmware using Alignment Station
Category: Performance
The purpose of this bulletin is to alert service providers of a method to restore corrupted
firmware in a ProPalette using the “Upgrade Firmware” functionality of the Alignment
station. If the Control code has been corrupted, the Alignment station cannot
communicate with the unit and the operator will not be able to restore the Control code
using the “Upgrade Firmware” option. This procedure will circumvent this problem.
Product Affected:
ProPalette 7000 and ProPalette 8000
Prerequisite:
Watchdog Timer
Jumper JP501 controls the Watchdog timer that prevents power on initialization errors.
JP501 should be set according to the following table. Normal usage is to enable the
circuit.
JP501
Pin 1 – 2
Disabled
Pin 2 - 3
Enabled
Monitor Mode
To activate Monitor Mode from the digital board, the state of two startup switches J3-6
and J3-8 on the digital board must be set. If both of those points are tied to ground, the
unit will power-up in the “Monitor” mode. All of the pins along the bottom of J3 are at
ground potential. The LCD panel does not work when you enter “monitor mode” in this
manner and there is no indication that you have been successful.
Remove the jumpers and restart the system to return to normal mode
Procedure:
1.
Connect ProPalette to the Alignment station in the normal fashion.
2.
Disable watchdog timer. (see above)
3.
Enable Monitor mode. (see above)
4.
Turn on ProPalette.
5.
Setup the Alignment station for the correct product.
6.
Use the “F1” option to upgrade the firmware.
7.
Shut down the ProPalette.
8.
Enable watchdog timer. (see above)
9.
Disable Monitor mode. (see above)
10.
11.
Turn on the ProPalette and verify that it initializes properly.
Continue with the Alignment station procedures.
APPROVALS:
© 1998 Polaroid Corporation. All rights reserved.
Material may not be reproduced or distributed in any form without permission.
EI Service Bulletin
Product:
Product Type:
Product Group:
Category:
Polaroid Knowledge*Base
ProPalette 8000
Film Recorder
PDI
Hardware
Date:
Document #:
Posted By:
11/24/98
981124102322JF
Jordan Freedman
CRT/Serial Number Verification
Product Affected:
ProPalette 8000
Category:
With the introduction of firmware version 564, the ProPalette now has the capability to
store the serial number of the unit in flash memory. This functionality is required so that
the installed firmware can adjust the exposure parameters appropriately for the different
CRT’s that are available for the ProPalette 8000
Details:
ProPalette 8000's have been manufactured with two types of CRT’s, the original AEG and
the current Thomas tubes. Future improvements in the CRT are currently planned. The
eighth character in the serial number defines what type of CRT is installed, it can only be a
blank, "T", or "W" in the serial number, otherwise a software error will be reported on the
LCD panel. Blank means AEG CRT (clear gun - initial production); "T" indicates a first
generation Thomas CRT (black gun - our current production); "W" means the future 2nd
generation CRT (white gun - future production). The firmware will change the color
balance & cos4 parameters to compensate for the installed CRT based upon the serial
number. This topic was initially discussed in the Lotus Notes Knowledge Base article
981029132131JF.
Resolution:
The color mentioned in the preceding paragraph refers to the glass seal of the CRT
observed through the neck connector. It is necessary for the Service technician to verify
the type of CRT by observing the color of the glass seal at the neck of the CRT before
they enter the serial number into flash memory. The outer shell of the chassis must be
removed, but no further disassembly is required, to conduct this inspection
APPROVALS:
© 1998 Polaroid Corporation. All rights reserved.
Material may not be reproduced or distributed in any form without permission.
EI Service Bulletin
Product:
Product Type:
Product Group:
Category:
Polaroid Knowledge*Base
ProPalette 7000, ProPalette 8000
Film Recorder
PDI
Hardware
Date:
Document #:
Posted By:
11/30/98
981130095843JF
Jordan Freedman
Modified Testing Sequence
Category: Performance
The purpose of this message is to alert regional service providers of a change to the
recommended testing sequence for all ProPalette’s.
Product Affected:
ProPalette 7000 and ProPalette 8000
Details:
There have been instances reported where a burn may have occurred on a ProPalette
CRT during Service due to either a hardware fault or corrupted firmware.
Resolution:
To reduce the possibility of this happening it is suggested that before a unit is powered
up for service, the socket at the base of the CRT is unplugged from the CRT. The initial
digital and analog tests should be performed on the unit before that connector is
reinstalled on the neck of the CRT. This will preclude the generation of any beam current
before we can ensure that the unit is functioning.
The connector on the back of the CRT should be removed if any circuit board is replaced
or firmware installed. After the initial functional tests are performed, and the unit has
passed all its internal diagnostics, AC power should be shut down on the ProPalette, the
CRT connector re-installed and the unit powered up again. At this time it is safe to
proceed with any tests that will put light on the tube.
APPROVALS:
© 1998 Polaroid Corporation. All rights reserved.
Material may not be reproduced or distributed in any form without permission.
EI Service Bulletin
Product:
Product Type:
Product Group:
Category:
Polaroid Knowledge*Base
HR-6000 CFR
Film Recorder
PDI
Hardware
Date:
Document #:
Posted By:
12/08/98
981208164648JF
Jordan Freedman
Video Monitor Board Final Assembly
Category:
The purpose of this message is to alert service providers of a change to the part number
for the Video Monitor Board Final Assembly.
Product Affected:
HR6000
Details:
The HR6000 Video Monitor Assembly 1E4391A is now incorporated into the Monitor
Board Final Assembly 1AH901A. This will ensure that the anode clips and caps are
installed on the board.
Please use the 1AH901A part number when you next order the HR6000 monitor boards.
Old part number:
1E4391A
New part number:
1AH901A
APPROVALS:
© 1998 Polaroid Corporation. All rights reserved.
Material may not be reproduced or distributed in any form without permission.
EI Service Bulletin
Product:
Product Type:
Product Group:
Category:
Polaroid Knowledge*Base
ProPalette 7000, ProPalette 8000
Film Recorder
PDI
Software
Date:
Document #:
Posted By:
12/21/98
981221100843JF
Jordan Freedman
Firmware Corruption
Category:
The purpose of this message is to alert service providers of the chance to corrupt the
alignment parameters during a firmware upgrade when using the Alignment station
equipment.
Product Affected:
ProPalette 7000 & 8000
Details:
The Alignment station has the functionality to upgrade the firmware of a UUT. The utility
has been designed with a specific work process flow intended. If the Alignment station is
used to upgrade the firmware of a working ProPalette, all of the alignment and calibration
parameters in the unit will be lost.
The work process assumes that an alignment will be performed on the UUT and any highdensity parameters must be erased before the Alignment station will work correctly. Highdensity parameters were implemented with firmware versions 564 for the ProPalette 8000
and 702 for the ProPalette 7000.
Resolution:
The correct procedure to change the firmware of aworking ProPalette is to use the
provided capability when the upgrade, either EXE or HQX, is downloaded from the
Polaroid web site.
APPROVALS:
© 1998 Polaroid Corporation. All rights reserved.
Material may not be reproduced or distributed in any form without permission.
EI Service Bulletin
Product:
Product Type:
Product Group:
Category:
Polaroid Knowledge*Base
ProPalette 7000, ProPalette 8000
Film Recorder
PDI
Hardware
Date:
Document #:
Posted By:
01/11/99
990111163912JF
Jordan Freedman
OSSTRTUP Error Message
Details:
There have a number of non-fatal error messages reported from the field. The displayed
error message will typically read:
SWERR OSSTRTUP.CPP:155 (2 UI)
These are caused by a static charge generated by the Mylar film substrate when the film is
pulled out of the film canister to load into the mounted 35mm camera. The discharge path
into the ProPalette is through the DX encoding pins that contact the film canister. This is
aggravated by the extremely dry seasonal weather.
Resolution:
Two workarounds will help to eliminate this problem:
Reset the ProPalette with the switch on the rear chassis. This will clear the non-fatal
error and allow proper operation.
Pull out 1 - 2 inches of film from the film canister before installing it into the mounted
35mm camera. This will allow the built-up charge to be dissipated before the DX pins
are engaged.
APPROVALS:
© 1999 Polaroid Corporation. All rights reserved.
Material may not be reproduced or distributed in any form without permission.
EI Service Bulletin
Product:
Product Type:
Product Group:
Category:
Polaroid Knowledge*Base
ProPalette 7000
Film Recorder
PDI
Hardware
Date:
Document #:
Posted By:
01/12/99
990112141226JF
Jordan Freedman
Analog Board Change
Category:
The purpose of this message is to alert service providers of a phase-in change to the
Analog circuit board for the ProPalette 7000. Units using this board or its re-worked
equivalent will be defined as a "K" revision.
Details:
An Engineering Change Notice #IS11776 has been released that documents a change to
the Analog circuit board for the ProPalette 7000. The complete matrix of change is
defined in the following documents:
Part Number
1AE543A
1AE544A
1AE545A
Description
Analog PCB Schematic
Analog PCB Fabrication
Analog PCB Assembly
Old Rev
05
03
05
New Rev
06
04
06
Date
12/01/98
12/01/98
12/01/98
The change reflects the addition of capacitor C801 (22 F @ 35V) and two diodes D801
and D802 (1N4004). These components are configured to add additional protection
against CRT burns.
Deviation Notice 18554 details the necessary modifications to rework a 1AE545A Is05
board to the Is06 level.
APPROVALS:
© 1999 Polaroid Corporation. All rights reserved.
Material may not be reproduced or distributed in any form without permission.
EI Service Bulletin
Product:
Product Type:
Product Group:
Category:
Polaroid Knowledge*Base
ProPalette 7000, ProPalette 8000
Film Recorder
PDI
Installation
Date:
Document #:
Posted By:
01/18/99
990118092644JF
Jordan Freedman
Errors on LPT
Category:
The purpose of this message is to alert service providers of a solution to a problem that
ProPalette customers may experience when printing to the LPT port.
Details:
Corruption of data while printing to the LPT port can result in either of the following error
messages in a small number of cases:
“First character of Command not ESCAPE”
“Start Exposure Issued without prior Term. Exp”
Resolution:
To enhance the speed of operation, the RIP software will typically write directly to the LPT
port. The data is corrupted because the Plug and Play (PnP) function in the PC BIOS can
poll the LPT port at the same time resulting in data corruption.
The PnP polling for the port must be disabled in the system BIOS by setting the port to
ECP. This allows the operating system and application software to directly control the port
with no interference from the BIOS.
If this fails to resolve the problem, the user must switch to printing via the SCSI port.
APPROVALS:
© 1999 Polaroid Corporation. All rights reserved.
Material may not be reproduced or distributed in any form without permission.
EI Service Bulletin
Product:
Product Type:
Product Group:
Category:
Polaroid Knowledge*Base
ProPalette 7000, ProPalette 8000
Film Recorder
PDI
Hardware
Date:
Document #:
Posted By:
01/19/99
990119153416JF
Jordan Freedman
ProPalette Front Bezel
Category:
The purpose of this message is to alert service providers of a clarification to the ProPalette
Parts Catalog (Stocked Parts Only).
Details:
Plate #5 details the component parts that make up the Front Bezel and Keyboard assembly
for the ProPalette product line. Information is lacking regarding the top-level assembly
number for the assembled Front Bezel
Resolution:
The top-level assembly number for the assembled ProPalette Front Bezel is:
Assembly Number
ProPalette 7000
1F5486A
ProPalette 8000
1F2534A
These assemblies contain all of the components detailed in plate #5 of the ProPalette Parts
Catalog (Stocked Parts Only).
APPROVALS:
© 1999 Polaroid Corporation. All rights reserved.
Material may not be reproduced or distributed in any form without permission.
EI Service Bulletin
Product:
Product Type:
Product Group:
Category:
Polaroid Knowledge*Base
ProPalette 7000, ProPalette 8000
Film Recorder
PDI
Hardware
Date:
Document #:
Posted By:
01/20/99
990120133548JF
Jordan Freedman
Camera and Adapter Sub-Assembly
Category:
The purpose of this message is to alert service providers of a clarification to the ProPalette
Parts Catalog (Stocked Parts Only).
Product Affected:
ProPalette 7000 & 8000
Details:
Plate #6 of the ProPalette Parts Catalog details the component parts that make up the
Camera and Adapter assembly for the ProPalette product line. Information is lacking
regarding the top-level assembly number.
Resolution:
The top-level assembly number for the assembled ProPalette Camera and Adapter is:
Assembly Number
ProPalette 7000
1F2537A
ProPalette 8000
1F2537A
These assemblies contain all of the components detailed in plate #6 of the ProPalette Parts
Catalog (Stocked Parts Only).
APPROVALS:
© 1999 Polaroid Corporation. All rights reserved.
Material may not be reproduced or distributed in any form without permission.
EI Service Bulletin
Product:
Product Type:
Product Group:
Category:
Polaroid Knowledge*Base
ProPalette 7000, ProPalette 8000
Film Recorder
PDI
Hardware
Date:
Document #:
Posted By:
01/22/99
990122100026JF
Jordan Freedman
Camera Interface Error Messages
There are several errors that occur when a 35 mm camera is installed on a ProPalette which result because
of defective U501 & U505 IC's on the ProPalette digital board (1F5570A). They are:
"Film door is open" error
"Select 6x7 camera back" error
The error message may remain even when the camera is removed. Additionally the film may not load properly.
We are proposing a change to the BOM for the ProPalette digital board that would replace the CMOS chips
used at U501 and U505 with LS chips.
The impact of this change would be to reduce the number of failures and returns from ESD that occurs at the
camera interface connector.
The changes are:
U501
U505
old
74HC244
74HCT257
new
DM74ALS244AWM-ND
DM74ALS257M-ND
The new part numbers reflect the ordering information from the supplier Digi-Key.
Replacing the chips should resolve the problem defined above. Verify image quality before performing a
geometery realignment on the unit.
APPROVALS:
© 1999 Polaroid Corporation. All rights reserved.
Material may not be reproduced or distributed in any form without permission.
EI Service Bulletin
Polaroid Knowledge*Base
Product:
Product Type:
Product Group:
Category:
Date:
Document #:
Posted By:
ProPalette 8000
Film Recorder
PDI
Hardware
02/05/99
990205102212JF
Jordan Freedman
1AH823A Analog Board Modifications
Performance
The purpose of this bulletin is to provide service providers with a board modification process to upgrade the
1AH823A Analog board.
Product Affected:
1AH823A Analog board for the ProPalette 8000
Details:
These procedures will upgrade the functionality of the 1AH823A Is01 or Is01B Analog board for the
ProPalette 8000 to match the functionality of the 1AH823A Is01C in two steps.
Process:
Step 1 - 1AH823A Is01 to 1AH823A Is01B
U18 Protection
This modification is required to protect U18 on the Analog board from high voltage
discharge from the CRT yoke. Ensure that the added components have very short
leads and are mounted as close as possible to the pins of the U6 and U31.
1. Connect a diode (1N4148) between pin 2 and 4 of U6 (cathode to pin 2)
2. Connect a diode (1N4148) between pin 2 and 7 of U6 (cathode to pin 7)
3. Connect a diode (1N4148) between pin 2 and 4 of U31 (cathode to pin 2)
4. Connect a diode (1N4148) between pin 2 and 7 of U31 (cathode to pin 7)
image (U18 FIX.JPG)
U35 Protection
This modification is required to comply with U35 design limitations on the analog board.
1. Cut the trace that connects TP47 to the junction of U35-4 and DC35A(-)
2. Cut the trace that connects DC35A(+) to CR12 (anode)
3. Add jumper from R54 (right side) to CR12 (anode)
4. Add jumper from CR15 (bottom right) to U35-4
image (1AH823A U35.TIF)
Digital/Analog Converter
U2 and U34 must be populated with a DAC16-007; this is recognized by a white dot in the pin #1 identifier
position.
Step 2 - 1AH823A Is01B to 1AH823A Is01C
This final step is required to further protect the CRT from possible burns. It defines the changes outlined in
the manufacturing deviation notice Dev. No. 18555
Connect two 1N4004 diodes in series between the bottom end of R45 (anode) and U4-12 (cathode).
Connect the negative side of a 22 mf/35 Vdc capacitor to the junction of the two diodes defined in the
previous step.
Connect the positive side of the 22 mf/35 Vdc capacitor to the left-hand lead of C31.
The components should be fastened to the board with a non-conductive adhesive. Ensure that no leads
lay across any conductors or components.
image (CRT FIX.TIF)
U18 FIX.JPG1AH823A U35.tif CRT FIX.tif
APPROVALS:
© 1999 Polaroid Corporation. All rights reserved.
Material may not be reproduced or distributed in any form without permission.
EI Service Bulletin
Product:
Product Type:
Product Group:
Category:
Polaroid Knowledge*Base
ProPalette 7000, ProPalette 8000
Film Recorder
PDI
Software
Date:
Document #:
Posted By:
02/08/99
990208105356JF
Jordan Freedman
Mac G3 Firmware
Subject:
Polaroid has released firmware versions 707 and 567 for ProPalette 7000 and 8000 film recorders.
This new firmware version is required for those ProPalettes that will be connect to a Apple Power
Macintosh G3 series computer that has recently become available. SCSI card adapters intended for
the Mac G3s operate on the PCI bus at address 1, rather than the standard address 0. This change
has made it necessary to update the ProPalette firmware.
Please notify your Palette resellers and customers about this important new firmware upgrade for the
ProPalette 7000 and 8000 now available on Polaroid’s FTP site.
Products Affected:
ProPalette 7000 film recorders require firmware version 707 to operate properly with the Apple
Power Macintosh G3, contained in file PRO7V707.EXE (Win) and PRO7V707.HQX (Mac).
ProPalette 8000 film recorders require firmware version 567 to operate properly with the Apple
Power Macintosh G3, contained in file PRO8V567.EXE (Win) and PRO8V567.HQX (Mac).
Actions / Solutions:
From the following directory on Polaroid’s FTP site, download the appropriate file for the
ProPalette film recorder to be updated. These files contain a utility for installing the firmware, the
new firmware hex code, and a README.TXT file with instructions and details about this version of
the firmware.
ftp://ftp.polaroid.com/pub/imaging/output/cfrecord/AllModels/Pro8000/ … or /Pro7000/
NOTE: Contained inside the archives is a file named README.TXT. This file contains instructions
for installing the new firmware. Please follow these instructions carefully. For best performance with
the Apple Power Macintosh G3, all ProPalette film recorders should have their firmware upgraded
to these new versions at this time.
APPROVALS:
© 1999 Polaroid Corporation. All rights reserved.
Material may not be reproduced or distributed in any form without permission.
EI Service Bulletin
Product:
Product Type:
Product Group:
Category:
Polaroid Knowledge*Base
ProPalette 7000, ProPalette 8000
Film Recorder
PDI
Software
Date:
Document #:
Posted By:
02/08/99
990208111248JF
Jordan Freedman
Mac G3 SCSI Software Issues
Situation:
Apple Computer, Inc. has recently introduced a new line of computers called the Power
Macintosh G3. For connectivity, the new G3s include FireWire and Universal Serial Bus (USB)
ports only. SCSI has been excluded. The absence of SCSI presents a problem for connecting
Palette film recorders, which utilize SCSI, to Macintosh computers.
Apple will soon provide a SCSI adapter card for connecting SCSI devices (like the Palette) to the
Power Macintosh G3. This is similar to the way that SCSI is handled on Windows computers,
with one important exception: the SCSI card for the G3 is set to occupy PCI bus Address 1 rather
than 0. All Palette software for Macintosh was written to assume Address 0. As a result, none of
the Macintosh software currently available for Palette film recorders will work on a Power
Macintosh G3.
Products Affected:
All Palette film recorders with SCSI interface (excludes the CI-3000).
All Macintosh software, including CFRUpdate, the firmware update utility.
Actions / Solutions:
There are four major initiatives currently underway to provide a solution to this platform
incompatibility issue:
1.
2.
3.
4.
Palette for Macintosh has been revised and is currently being tested with the Power
Macintosh G3. A software patch will be made available on Polaroid’s FTP site.
ProPalette 7000 and 8000 firmware has just been released and is currently available on
Polaroid’s FTP site.
RasterPlus for Macintosh is being modified by Graphx and is currently being tested in
Polaroid’s SQE laboratory. This software is still on schedule for a March 8 release.
Palette Export and CFRUpdate will be revised and posted on Polaroid’s FTP as available.
NOTE: This problem is not unique to Polaroid film recorders. Most SCSI devices from other
manufacturers will experience similar problems with the Power Macintosh G3 computers.
APPROVALS:
© 1999 Polaroid Corporation. All rights reserved.
Material may not be reproduced or distributed in any form without permission.
EI Service Bulletin
Product:
Product Type:
Product Group:
Category:
Polaroid Knowledge*Base
ProPalette 7000, ProPalette 8000
Film Recorder
PDI
Hardware
Date:
Document #:
Posted By:
02/24/99
990224131408JF
Jordan Freedman
Digital Board (1F5570A) Revisions
Category: Performance
The purpose of this message is to alert service providers of the revision change history to
1F5570A Digital board.
Product Affected:
ProPalette 7000, ProPalette 8000
Details:
The ProPalette Digital board (1F5570A) has undergone six revisions since it was initially
released. This document will define the changes for each revision and detail which parts
should be changed to improve the reliability of the board.
History:
Each subsequent higher Issue Number (ISii) incorporates the previous revision changes.
IS01 - Baseline release.
IS02 & IS03 - Change of approved supplier and part number for U519.
IS04 - Change the value of R334, in the Watchdog timer, from 4.7 Kohm to 3.0 Kohm.
IS05 - Change the standoff voltage rating of C802 and C804 from 20 Vdc to 35 Vdc.
Change of approved supplier and part number for U306.
IS05B - Change U501 and U505 from CMOS to LS devices. Change of approved
supplier and part number for U203 & U204.
IS06 - Re-spin to add functionality to support the ProPalette 80xx design
Required Changes
The following parts should be changed to bring a functioning board up to the latest revision
level:
Part
Description
R334
3.0 Kohm
C802
C804
U501
U505
22 F – 35Vdc
22 F – 35Vdc
74LS244
74LS257
Supplier/Part Number
ROHM/MCR18JW302
AVX/CR32302JT
KOA/*RM73B2BTE302J
SPRAGUE/293D226X0035E2T
SPRAGUE/293D226X0035E2T
DigiKey/DM74ALS244AWM-ND
DigiKey/DM74ALS257M-ND
These defined changes will bring a 1F5570A board up to IS05B. No support will be
provided bring the revision level any higher.
APPROVALS:
© 1999 Polaroid Corporation. All rights reserved.
Material may not be reproduced or distributed in any form without permission.
EI Service Bulletin
Product:
Product Type:
Product Group:
Category:
Polaroid Knowledge*Base
ProPalette 7000
Film Recorder
PDI
Hardware
Date:
Document #:
Posted By:
03/05/99
990305111710JF
Jordan Freedman
Analog Board (1AE545A) Revisions
§ Category: Performance
The purpose of this bulletin is to furnish service providers with a board modification process to upgrade the 1AE545A
Analog board.
§ Product Affected:
1AE545A Analog board for the ProPalette 7000
§
Details:
These procedures will upgrade the functionality of the 1AE545A Is01 Analog board for the ProPalette 7000 to match
the functionality of the 1AE545A Is05B/Is06 in two steps.
Process:
Step 1 - 1AE545A Is01 to 1AE545A Is02/Is05
U18 Protection
This modification is required to protect U18 on the Analog board from high voltage
discharge from the CRT yoke. Ensure that the added components have very short
leads and are mounted as close as possible to the pins of the U6 and U31.
1. Connect a diode (1N4148) between pin 2 and 4 of U6 (cathode to pin 2)
2. Connect a diode (1N4148) between pin 2 and 7 of U6 (cathode to pin 7)
3. Connect a diode (1N4148) between pin 2 and 4 of U31 (cathode to pin 2)
4. Connect a diode (1N4148) between pin 2 and 7 of U31 (cathode to pin 7)
U18 FIX.JPG
U35 Protection
This modification is required to comply with U35 design limitations on the analog board.
1. Cut the trace between the two feed-through (topside) coming off of Q7-C
2. Cut the trace (bottom side) between CR12-anode and the trace between DC35A and DC35B
3. Connect a jumper wire (bottom side) from DC35B left side to R123 right side (-15VA)
4. Connect a jumper wire (bottom side) from CR12-anode to R125 right side (-15VB)
1AE545A bot.jpg 1AE545A top.jpg
Digital/Analog Converter
U34 must be populated with a DAC16-007; this is recognized by a white dot in the
pin #1 identifier position.
Step 2 - 1AE545A Is02/Is05 to 1AE545A Is05B/Is06
This final step is required to further protect the CRT from possible burns. It defines
the changes outlined in the manufacturing deviation notice Dev. No. 18555
1. Connect two 1N4004 diodes in series between the bottom end of R45 (anode) and
U4-12 (cathode).
2. Connect the negative side of a 22 mf/35 Vdc capacitor to the junction of the two
diodes defined in the previous step.
3. Connect the positive side of the 22 mf/35 Vdc capacitor to the left-hand lead of
C31.
4. The components should be fastened to the board with a non-conductive adhesive.
Ensure that no leads lay across any conductors or components.
CRT FIX.jpg
APPROVALS:
© 1999 Polaroid Corporation. All rights reserved.
Material may not be reproduced or distributed in any form without permission.
EI Service Bulletin
Product:
Product Type:
Product Group:
Category:
Polaroid Knowledge*Base
ProPalette 7000, ProPalette 8000
Film Recorder
PDI
Software
Date:
Document #:
Posted By:
03/23/99
990323103749JF
Jordan Freedman
SWERR ferrhist.cpp Error Message
Category: Performance
The purpose of this message is to alert service providers to a problem that ProPalette
customers may experience.
Product Affected:
ProPalette 8000 & 7000
Details:
The ProPalette will display an error message in the LCD panel. The system passes the initial
power-on diagnostic test but will not go into the “READY” state. It stops and with the
error of "SWERR:ferrhist.cpp,189:Error burning ERR"
After the initial diagnostics finish, the “just powered on” message is generated as an error
and written into flash memory as it is supposed to do. If the error history in flash has
somehow become corrupted it will set an error and attempt to restart and you’re in a
circular loop.
This problem is resolved in firmware version 565/705 and later. Three attempts are made to
write to flash, then vFlash 1 is erased and then tried once more.
Resolution:
The firmware should be upgraded to version 565/705 or later. This can be performed at a
Service Center or by using the procedure outlined in the Lotus Notes Knowledge Base
article 980722113223JF.
APPROVALS:
© 1999 Polaroid Corporation. All rights reserved.
Material may not be reproduced or distributed in any form without permission.
EI Service Bulletin
Product:
Product Type:
Product Group:
Category:
Polaroid Knowledge*Base
ProPalette 7000, ProPalette 8000, R-6000
Film Recorder
PDI
Hardware
Date:
Document #:
Posted By:
03/24/99
990324130140JF
Jordan Freedman
Modification to Ricoh Camera
Category: Performance
The purpose of this message is to alert service providers of a solution to the ESD problem
that ProPalette and HR6000 customers may experience.
Product Affected:
ProPalette 7000, ProPalette 8000, R6000
Details:
This bulletin summarizes the actions to minimize the occurrence of “Camera not
recognized” or “6 x 7 Camera Selected” errors seen on ProPalette’s. The problem comes
from an electrostatic discharge to the “DX pins” inside the 35mm Ricoh camera back which
destroys the interface chips. The firmware displays some other camera back on the LCD
and prevents normal 35mm exposures. There has been no indication of this failure for the
R6000 but it uses the identical camera body.
The hardware solution is to cut the wires in the Ricoh camera back that connect the DX
pins to the camera edge connector. This has no effect on the functionality of the unit.
An upcoming firmware solution (568) will be to add a new option to the LCD menu: “Lock
Camera Back”. The default is “AutoSense”, alternatives are 35mm and Bulk 35mm for both
models with 4 x 5, 6 x 7 and 6 x 8 also available on ProPalette 8000. If the customer starts
seeing the wrong camera in the LCD they can lock in the right camera back and continue
imaging.
Resolution:
1. With camera lens facing away from you of the circuit board and remove them. Use care
not to damage adjacent wires.
2. Replace top cover.
3. Identify the modification by placing a small white dot next to the DX code pins inside
the film chamber.
4. Update the configuration code for the ProPalette
ProPalette 7000
ProPalette 8000
Old Revision
K
P
New Revision
L
R
APPROVALS:
© 1999 Polaroid Corporation. All rights reserved.
Material may not be reproduced or distributed in any form without permission.
EI Service Bulletin
Product:
Product Type:
Product Group:
Category:
Polaroid Knowledge*Base
ProPalette 8000
Film Recorder
PDI
Hardware
Date:
Document #:
Posted By:
03/25/99
990325130433JF
Jordan Freedman
Hi Voltage Cable Assembly (P/N 1F5479A)
Category: Performance
The purpose of this message is to alert service providers to a problem that has become
apparent with the replacement Hi Voltage cable assembly (P/N 1F5479A).
Product Affected:
ProPalette 8000
Details:
All replacement cable assemblies are wired with the –150 Vdc lines reversed on the J34
connector that plugs into the analog board. This is recognized by observing the green/black
twisted pair wires on the connector. The correct orientation is to have the green wire on the
outside pin. As supplied, the black wire is on the outside pin. <see MONSTER.JPG>
Resolution:
The resolution is to re-wire the connector properly in either one of two acceptable
methods.
Snap the cap off the connector. Remove the wires and re-install properly. Ensure that the
wire insulation is pierced properly when the wire is inserted into the connector. Replace the
connector cap.
or
Cut the wires approximately 1” back from the connector body. Place heat shrink tubing on
the cut wires and move it back along the wire so that it is out of the way. Strip back
sufficient insulation on all four wires to ensure a good connection. Cross-connect and splice
the wires with solder. Move the heat shrink tubing up over the splice and heat the tubing to
protect the connection.
monster.jpg
APPROVALS:
© 1999 Polaroid Corporation. All rights reserved.
Material may not be reproduced or distributed in any form without permission.
EI Service Bulletin
Product:
Product Type:
Product Group:
Category:
Polaroid Knowledge*Base
ProPalette 7000, ProPalette 8000
Film Recorder
PDI
Image Quality
Date:
Document #:
Posted By:
04/05/99
990405153958JF
Jordan Freedman
ProPalette Color Quality
Category
The purpose of this message is to alert service providers of a non-subjective method to
evaluate the color balance of a ProPalette.
Details:
Color balance will be evaluated by measuring the color densities with a transmittive
densitometer and evaluating the measured readings. The standard image file
GRAYCARD.TIF will be exposed on Kodak EliteChrome film to the ProPalette with
an imaging application. The file is placed in the film tables directory when the imaging
application is installed. This image should provide densities between 1.5 and 0.7 density
units.
Independent of the ProPalette, the film itself and its processing must obviously meet
this specification. This can be checked by producing an optical image by a daylight
exposure of a MacBeth chart or an 18% gray card with a 35mm camera; or by xenon
strobe and a neutral density step wedge. This baseline image should also have a density
between 1.5 and 0.7 density units.
Evaluation:
The absolute difference between the color densities must be less than or equal to 0.06
density units.
Absolute value of
max Delta
density
Rdensity - Gdensity
Rdensity - Bdensity
Bdensity - Gdensity
0.06
0.06
0.06
APPROVALS:
© 1999 Polaroid Corporation. All rights reserved.
Material may not be reproduced or distributed in any form without permission.
EI Service Bulletin
Polaroid Knowledge*Base
Product:
Product Type:
Product Group:
Category:
Date:
Document #:
Posted By:
ProPalette 7000
Film Recorder
PDI
Image Quality
04/13/99
990413133530JF
Jordan Freedman
Green Color Cast
Category: Performance
The purpose of this message is to alert service providers of a problem that customers may
experience with an overall green color cast to their images. This will be apparent when an
image is exposed onto Kodak Elite II film.
Product Affected:
ProPalette 7000
Details:
The color transmission characteristics of the green filter, used in the ProPalette 7000, have
changed since December 1998 due to process variations in the manufacturing of the filters.
The color properties for which the film table was designed have changed appreciably.
Since the manufacturing inventory contained a mix of old and new filters, the color cast
problem is not apparent in all units. The difficulty was not apparent in Manufacturing
during final image inspection because evaluation was done on Presentation Chrome film,
which has different color renditions and does not exhibit this problem to such a great
extent.
Resolution:
To determine if the unit has a problem, expose the GRAYCARD.TIF image to Elite II film
and evaluate the flat field for color purity.
A new firmware version is under development that will correct this problem but it is not
available presently. This firmware will interrogate the unit serial number to determine its
configuration and determine if a correction must be made to the color balance. A utility to
alter the unit serial number will be made available.
In the interim, any units that exhibit this problem should be placed on hold until the
firmware fix and correct procedures are available. There are no “old” green filters available
for replacement.
APPROVALS:
© 1999 Polaroid Corporation. All rights reserved.
Material may not be reproduced or distributed in any form without permission.
EI Service Bulletin
Product:
Product Type:
Product Group:
Category:
Polaroid Knowledge*Base
ProPalette 7000, ProPalette 8000
Film Recorder
PDI
Software
Date:
Document #:
Posted By:
05/10/99
990510130756JF
Jordan Freedman
Reported SWERR Error Messages
This Knowledge Base note will list the common SWERR error messages as they are reported
from the field. An attempt will be made to explain the error, why it occurs, how to resolve it
and possible planned improvements in the product to eliminate them.
SWERR:ferrhist.cpp,189:Error burning ERR
SWERR:osstratup.cpp, 162:2 UI
SWERR:rico.cpp, 486: perf hi as expc
SWERR:dp2layer.cpp, 215: Unknown analog b
SWERR:ferrhist.cpp,189:Error burning ERR
This is a result of the corruption of the portion of flash memory that holds the error log. The
fix was to remove the error log using FLASHMAN and let the unit re-initialize the log. The
easiest way for the log to become corrupt is to shut off the unit while the log is being written.
I don't know if this was the case for you but it can happen that way. Suffice it to say that a
corrupt error log will cause the error message. A planned upgrade to the firmware will resolve
this problem from happening.
SWERR:osstratup.cpp, 162:2 UI
This error occurs when the microprocessor in the ProPalette is starting up and it receives an
unexpected interrupt (2 UI). Resetting the unit with the switch on the back will clear the
error. There are many reasons that the unexpected interrupt can occur and they all revolve
around electrical noise. It could be a discharge from the CRT, noise on the low voltage power
supply or even an external static discharge from someone touching the outside shell.
SWERR:rico.cpp 486 perf hi as expc
This error occurs when the film perforation after film transport is not what the firmware
expects to see. There are two models of Ricoh camera's in use and the firmware determines
which model is installed by measuring the signal from the perforation sensor. If the sensor
doesn't see what it expects after initialization, then an error is reported. This could be a
camera film advance problem.
SWERR:dp2layer.cpp, 215: Unknown analog b
Immediately after replacing the Analog board in a ProPalette, the indicated error message
may appear after the firmware version is displayed in the LCD display during the power-up
sequence self test. A unit may give this error message if the analog board is changed without
upgrading the firmware on the Digital board. All board upgrades are hardware backwards
compatible with the proper firmware
APPROVALS:
© 1999 Polaroid Corporation. All rights reserved.
Material may not be reproduced or distributed in any form without permission.
EI Service Bulletin
Product:
Product Type:
Product Group:
Category:
Polaroid Knowledge*Base
ProPalette 7000, ProPalette 8000
Film Recorder
PDI
Image Quality
Date:
Document #:
Posted By:
05/20/99
990520094526JF
Jordan Freedman
Color Adjustment
Category:
The purpose of this message is to alert service providers of a method to make adjustments
to a particular film tables color characteristic curve for each RGB channel.
Product Affected:
ProPalette 7000, ProPalette 8000
Details:
The need for adjusting our film tables has been apparent for some time. This would allow
an operator the capability to tailor the output of a film recorder to their expectations. The
“advanced” options in Raster Plus can only provide a control to lighten or darken each
color.
Resolution:
Adobe Photoshop has several ways to make fine adjustments to color. We recommend
using this program to adjust the gamma within the color in question. The following
procedure assumes that the initial results obtained with image/film table combination are
close, just not perfect.
In Photoshop, open the image in the RGB mode
Select Image, Adjust, and Levels
In the Channel drop-down menu, select the color to be adjusted (i.e., if red is too
weak, select the Red channel)
Move the center (gamma) slider ONLY to the left (to increase Red) or to the right (to
decrease Red). Make changes of no more than 0.05 gamma units. Example: 1.05 will
increase Red significantly, 0.95 will decrease Red significantly.
Repeat for other color channels, if necessary. This step is optional. We recommend
adjusting only one color channel at a time between exposures.
Expose the image and examine, using the Export plug-in is the fastest method.
Examine, evaluate and repeat the process if necessary.
After a few iterations to get this right, the new gamma settings can be saved and used for
every image that comes from the same source and uses the same film table. Since the final
color balance is dependent on several factors, the entire procedure would need to be
repeated for other image sources and other film tables.
Note that by adjusting gamma, as opposed to just the brightness and contrast, the image
data in the extremes, deep shadows and bright highlights are preserved and "clipping" of
the image is prevented.
APPROVALS:
© 1999 Polaroid Corporation. All rights reserved.
Material may not be reproduced or distributed in any form without permission.
EI Service Bulletin
Product:
Product Type:
Product Group:
Category:
Polaroid Knowledge*Base
ProPalette 7000, ProPalette 8000
Film Recorder
PDI
Software
Date:
Document #:
Posted By:
05/24/99
990524104404JF
Jordan Freedman
Description of the FLASHMAN utility
Category:
The purpose of this bulletin is to inform service providers of the structure and use of the
FLASHMAN.HEX host side utility for the ProPalette products. The Flash devices in the
ProPalette are programmable, non-volatile memories that are used, primarily, to store the
control code and calibration data for the ProPalette. Other programs and data can be
placed in the system such as diagnostics and control information. The flash contains data
blocks of various sizes. There is no fixed order of data blocks in flash. They are
programmed into flash as they are received. Data blocks cannot be duplicated; there's only
one copy of a given data type in flash at any time. If a data block is to be programmed and
an older copy already exists, then the older copy is overwritten. A code block is defined by
six terms:
Block number
Version
Type
Size
Name
Starting segment (if applicable)
Note that the version number does not reflect the version of the firmware installed but rather the version
of the program that wrote that specific block of code. If the block was written by the firmware then it will
reflect the firmware version.
The physical flash device can be broken into a number of logical (virtual) flash devices.
Each virtual flash is independent of the other virtual flash. If an erase occurs on one virtual
flash, it won't affect the contents of the other virtual flash.
The Flash Manager FLASHMAN.HEX is a host side utility that can add data blocks,
remove data blocks, and erase the entire flash. FLASHMAN displays the contents of the
flash memory in the ProPalette. It is divided into two sections, virtual flash 0 (VF0) and
virtual flash 1 (VF1). See figures 1 and 2 respectively. The top part of the screen lists the
code blocks that are stored in the virtual flash while the bottom half of the screen lists the
menu options that are available to the operator.
° Menu options: all options are menu driven and self-explanatory, they are executed by
pressing the “Enter” <cr> key.
(H)
Hex Download & Program into Flash
initiate a firmware download and burn it into flash memory
(R)
Remove a data block from Flash
erase a specific data code block
(E)
Erase this Virtual Flash
erase all data blocks within the virtual flash
(G)
Garbage Collect
erase deleted Blocks and optimize remaining datae
(V)
set Virtual flash
change between virtual flash’s
Menu choices not defined are used by the software developers and not of use to Service.
°
°
Common code blocks:
There are two code blocks that are common to both Virtual Flashes, block (8)
Copyright and block (9) Flash_types. These blocks are written by the monitor and will
be replaced if erased.
VF0 code blocks
Virtual Flash 0 characteristically contains the configuration parameters for the
ProPalette that are established by the alignment station and must be maintained when
power is removed from the unit. The removal of any of this information will seriously
impact the functionality of the unit. They include:
Control Code
XY Gridpoints
Serial number
defl parms desc
Cos4 gridpoints
Cal Data Desc
defl parms
Dfoc Gridpoints
Autoluma data
§ Control Code –firmware that runs the ProPalette
§ Defl parms and Defl parms desc – high-density parameters that are calculated
whenever the unit is powered up during the “initialization” display.
§ XY Gridpoints – geometry parameters determined during alignment
§ Cos4 Gridpoints – Cos4 parameters determined during alignment
§ Dfoc Gridpoints – Dynamic focus parameters determined during alignment
§ Cal Data Desc – header information that defines the structure of the gridpoint data
§ Autoluma data – Default autoluma data used during the calibration process prior to an
exposure
§ Serial number – as entered by the Service operator
VF1 code blocks
Virtual Flash 1 typically contains the configuration parameters for the ProPalette that are
set by the operator or the system and must be maintained when power is removed from
the unit. The removal of any of this information will result in the use of the default value
of the parameter. They are self-explanatory and include:
SCSI Bus ID
Film Type
Pacing
SCSI termination
Camera back
Frame count
Leave Leader
Language
Error history
A code block will be present in vFlash1 if the default choice in the LCD display was changed at any time.
Running FLASHMAN.HEX
Know location of current FLASHMAN.HEX file – (firmware version dependent)
Terminal emulation program (ProComm Plus) must be available. See Notes Knowledge
Base bulletin 980714142633JF for correct configuration. If a different terminal emulator
program is used, ensure that the configuration parameters are set to the indicated values.
Know how to disable/enable watchdog timer. See Notes Knowledge Base bulletin
980325134018JF
Know how to enable/disable Monitor mode. See Notes Knowledge Base bulletin
981007093818JF
Know how to upload a hex file to the ProPalette. See the ProPalette Service manual,
section 4 Troubleshooting and Diagnostics – Configuring a PC to Upload a Hex File
Procedure:
Disable watchdog timer
Enable Monitor mode
Connect ProPalette to computer through COMM port
Turn on ProPalette
Run terminal emulator
Confirm communication to ProPalete
Upload FLASHMAN.HEX to ProPalette
Run FLASHMAN.HEX by typing the command g 0<cr> Virtual Flash 0 will be
displayed by default, see Fig.1.
Perform the necessary operation (see examples)
Exit the terminal emulator
Shut down the ProPalette
Enable watchdog timer
Disable Monitor mode
Turn on the ProPalette and verify that it functions properly
Examples:
Reload firmware
Confirm you are in vFlash0.
Remove the Control Code by entering the commands:
R<cr>
1<cr>
Note that code block (1) is gone
Upload the new Control Code by entering the commands:
H<cr>
1<cr>
Respond to the question “Enter data name string” with:
the_firmware<cr>
At the prompt “Ready to receive hex file”
Press Pg Up
R<cr>
Type in the fully qualified path to the xxCNTRL.HEX file if it isn’t in the active
directory
d:\path\xxCNTRL.HEX<cr>
xx = KA for the ProPalette 8000
xx = VT for the ProPalette 7000
After the upload is complete, wait until the flash is programmed and the FLASHMAN
menu re-appears.
Note that code block (1) is back
Swap between virtual flash
To change between each virtual flash, type in the commands: v<cr> and then either
0<cr> or 1<cr> depending on which virtual flash you want to display.
Erase entire vFlash1
Change to virtual flash 1 by typing in the commands: V<cr> and then 1<cr> vFlash1
will be displayed, see Fig 2
To erase vFlash1, type the command E<cr>. The system will ask for a confirmation
and you must respond with Y<cr>. When the screen refreshes, all of the code blocks
will be gone and the display will state that vFlash1 is empty.
The default code blocks will be initialized when the unit is re-set and the default user
parameters will be in effect.
Erase single code block
Change to virtual flash 1 by typing in the commands: V<cr> and then 1<cr> vFlash1
will be displayed.
To remove the Error History type in the command R<cr> and then 20<cr>. When the
screen refreshes, verify that code block 20 has been deleted.
To delete a different code block, determine the number of the code block from the
display of vFlash1 in FLASHMAN and follow the same instructions.
APPROVALS:
© 1999 Polaroid Corporation. All rights reserved.
Material may not be reproduced or distributed in any form without permission.
EI Service Bulletin
Product:
Product Type:
Product Group:
Category:
Polaroid Knowledge*Base
ProPalette 7000, ProPalette 8000
Film Recorder
PDI
Hardware
Date:
Document #:
Posted By:
05/25/99
990525083938JF
Jordan Freedman
Adaptec 1542 SCSI Controller
Category:
The purpose of this message is to alert service providers of a problem that customers may
experience when communicating between an Adaptec 1542 SCSI card in a Wintel PC and
a ProPalette that has firmware version 567/707 installed.
Product Affected:
ProPalette 7000 and ProPalette 8000
Details:
A problem in firmware version 567/707 will cause the RasterPlus driver to incorrectly
report that the ProPalette is either disconnected, busy or off. This firmware was only
available from the Polaroid web site to resolve a SCSI problem encountered by the G3
Macintosh. No product was shipped from the factory with this version.
Resolution:
There is no work around for this hardware/software configuration. A new version of the
firmware, 568/708, which will work with this combination is being tested and will be
available from the Polaroid web site. The new firmware will address this SCSI issue,
supplementary film names have been added to the “Lock Film Names” menu and the
“Lock Camera Type” function has been implemented in the LCD menu.
APPROVALS:
© 1999 Polaroid Corporation. All rights reserved.
Material may not be reproduced or distributed in any form without permission.
EI Service Bulletin
Product:
Product Type:
Product Group:
Category:
Polaroid Knowledge*Base
ProPalette 7000, ProPalette 8000
Film Recorder
PDI
Hardware
Date:
Document #:
Posted By:
06/02/99
990602103008JF
Jordan Freedman
New Monitor Mode
§ Category:
The purpose of this message is to alert service providers of an alternative method to set “Monitor
Mode” in a ProPalette that does not require the removal of the outer shell.
§ Product Affected:
ProPalette 7000, ProPalette 8000
§ Details:
Monitor Mode refers to the rudimentary operating system that is hard coded into the on-board
microprocessor. It is used to provide base level control and communication to the ProPalette.
Monitor mode is used to communicate with the ProPalette through its serial port.
The newest method is to power up with two keys pressed on the keypad. Note that this is only
available on the new ProPalette 8000 plus series or on an earlier ProPalette that has an upgraded
Digital board.
To activate Monitor Mode from the front panel, power down the unit, press the scroll-up and
scroll-down keys simultaneously while applying power. The unit powers up in the Monitor mode.
Restart or reset the system in the normal fashion to return to standard mode.
This method will only work with digital board 1F5570A Is06 or higher. If an earlier issue digital
board is used, this method will work if the EPROM U103 has been upgraded with the ProPalette
ROM v548 P/N102423.
Procedure:
Replace EPROM U103 on Digital board 1F5570A with part number 102423.
Verify proper operation.
Ordering Information:
Polaroid Corporation
201 Burlington Rd
Material Services
Bedford, MA 01730
Telephone: 800-343-4846 or, (781) 386-5649
Fax: (781) 386-5606
e-mail: [email protected]
APPROVALS:
© 1999 Polaroid Corporation. All rights reserved.
Material may not be reproduced or distributed in any form without permission.
EI Service Bulletin
Polaroid Knowledge*Base
Product:
Product Type:
Product Group:
Category:
Date:
Document #:
Posted By:
ProPalette 7000
Film Recorder
PDI
Software
06/04/99
990604102024JF
Jordan Freedman
Green Tint Resolution
Category: Performance
The purpose of this message is to alert service providers of a solution to the
overall green color cast to their images. This will be apparent when an image is
exposed onto Kodak Elite II film.
Product Affected:
ProPalette 7000
Details:
The color transmission characteristics of the filters used in the ProPalette 7000
have changed due to process variations in the manufacturing of the filters. The
color properties for which the film table was designed have changed
appreciably. Since the manufacturing inventory contained a mix of old and new
filters, the color cast problem is not apparent in all units and cannot be
determined by a date code.
Resolution:
To determine if the unit has a problem, expose the GRAYCARD.TIF image to
Elite II film and evaluate the flat field for color purity. The color should be gray
without a green tint. If a green tint is apparent, the following procedure should be
followed.
If the color correction is necessary, then the unit serial number must be
changed. A new firmware version, 708, has been released that will interrogate
the unit serial number and make the correction to the color balance if the serial
number has been modified properly. The new firmware is available from the
Polaroid web site. The utility, FSN.EXE, to alter the unit serial number is
attached to this message and available from Service.
Procedure
Upgrade the firmware to the ProPalette in the normal manner using the
FWLOAD utility over the parallel port. Attach the parallel cable between your PC
and your ProPalette. From the DOS prompt type:
FWLOAD vtcntrl.hex
IMPORTANT: Once the firmware upgrade software has begun, do not attempt to
interrupt the process. Do not press any buttons or interrupt the power to the film
recorder. This can cause the flash memory in the ProPalette to become
corrupted. If this happens, your film recorder will require service.
The DOS utility FWLOAD will run some preliminary checks, upload the firmware
to your ProPalette, and instruct you to wait about 40 seconds before attempting
any further action with the ProPalette. Once the firmware is loaded into flash
memory, the ProPalette will reinitialize and run its startup diagnostics.
Only the firmware gets changed. SCSI ID, termination status, frame counts, etc.
are unaffected by the firmware upgrade.
Note: If you are using LPT2 instead of LPT1, add the character "2" at the end of
the DOS command, by typing:
FWLOAD vtcntrl.hex 2<cr>
Install the FSN.EXE host side utility onto the PC. This utility will add the letter “F”
as the eighth character to the unit serial number. Note: Do not perform these
following steps if the observed color is acceptable.
Execute FSN from the DOS prompt to modify the unit serial number by typing the
command:
FSN –interface=parallel
If you are using LPT2 instead of LPT1, modify the command to:
FSN –interface=parallel –lpt=2
There is no similar utility for a Macintosh computer.
Note: Be sure that the color correction is required. The only way to reverse this
operation is to have the unit sent back to Service.
Perform a hard reset on the ProPalette. The new firmware will interrogate the
serial number and make the proper adjustments to the color.
From the LCD/Keypad, select Diagnostics/Power-on Message. Confirm that on
the initial display the firmware version is 708 dated May 26 99
‘ and that on the
second display the serial number has been successfully modified by adding the
character F in the eighth position.
Verification
Re-expose the GRAYCARD.TIF image to Elite II film and evaluate the flat field
for color purity. The color should be gray without a green tint. If a color tint is still
visible then return the unit to Service for additional repair.
APPROVALS:
© 1999 Polaroid Corporation. All rights reserved.
Material may not be reproduced or distributed in any form without permission.
EI Service Bulletin
Product:
Product Type:
Product Group:
Category:
Raster Plus For Macintosh
Film Recorder
PDI
Software
Polaroid Knowledge*Base
Date:
Document #:
Posted By:
07/13/99
990713091546JF
Jordan Freedman
Errors Printing with PostScript Page-Layout Programs
Category:
The purpose of this message is to alert service providers of a solution to a problem that
RasterPlus for Macintosh customers may experience.
Product Affected:
RasterPlus for Macintosh
Details:
Using the new released version of RasterPlus for Macintosh may generate error messages
or display errant behavior with PostScript page-layout programs. Customers will expect to
be able to print from all PostScript applications because RasterPlus is a PostScript level 2
and 3 RIP.
Printing from PowerPoint works well, but problems have been observed with
QuarkXPress 3.32 and 4.0, Illustrator 7 and 8, and PageMaker 6.5. Either error messages
(Quark 4.0, PageMaker 6.5), the image is dramatically cut off (Quark 3.2, PageMaker
6.5), the copies to print are "0" so it doesn't print (Illustrator, PageMaker), or the colors
are extremely warped (Illustrator 7 and 8). The developer of the program, Graphx, knows
about these problems and is presently fixing them, but the shipping version will not have
any fixes.
Resolution:
An update has been made available for Quark 4.0 and above usersfrom the developer web
site at:
http://www.graphx.com/support/rasterplus_macintosh_updates203.htm
When you connect to this link, scroll down to find four Polaroid specific PPD files. The
PPD file will resolve the random Postscript errors that have been generated from printing
directly out of Quark 4.0 and later..
Download the appropriate PPD file from the web site:
Place this file in the System folder: Extensions folder: Printer Descriptions folder. Thus
replacing the existing RasterPlus or device specific PPD.
Restart the computer
In RasterPlus 2.03 go to the tools menu and select create printer. You will be
prompted to name the printer. Name and click OK. (RasterPlus will now create a new
desktop printer using the new PPD file)
Launch Quark under the file menu go to Page Setup. Once in page setup select the
setup tab.
Change Printer Description selection to the PPD we've just added.
Click on the Pagesetup button at the bottom of the dialog box. (This will bring up your
LaserWriter Postscript printer pagesetup preferences.
Format for: Should be set to the RasterPlus printer you want to use.
Paper: Should match the media you are using.
Orientation: Should match your expected output orientation. Click OK
Once back in the Quark page setup window click on the printer button at the bottom.
This will bring up the LaserWriter print dialog box. Make sure the printer selected is
the device you want to output to. Make sure the destination is Printer. Note: By
changing destination from printer to file, will cause the desktop printer to create and
save the .PS file in the location of your choice. This will not print directly to the
RasterPlus queue.
Once you've confirmed the device and destination click Print. This will bring you back
to the Quark Page Setup window where you must clickPrint from here.
Your file will now spool to the desktop printer, create a Postscript file (.PS) then advance
into the RasterPlus queue. Once in RasterPlus the file will either sit in the queue or start
processing out to your device. This will be determined by how your "Send RIP output to"
options are setup in RasterPlus. You should now be ready to output directly from all
versions Quark.
APPROVALS:
© 1999 Polaroid Corporation. All rights reserved.
Material may not be reproduced or distributed in any form without permission.
EI Service Bulletin
Product:
Product Type:
Product Group:
Category:
Polaroid Knowledge*Base
ProPalette 7000, ProPalette 8000
Film Recorder
PDI
Software
Date:
Document #:
Posted By:
07/14/99
990714090321JF
Jordan Freedman
SWERR Error Message - Unknown analog board version
Category:
The purpose of this message is to alert service providers of a solution to a problem that
ProPalette Service providers may experience when replacing an Analog board.
Product Affected:
ProPalette 7000, ProPalette 8000
Details:
Immediately after replacing the Analog board in a ProPalette, the following error message
may appear after the firmware version is displayed in the LCD display during the powerup sequence self test.
SWERR: dp2layer.cpp, 215: Unknown analog board version
Resolution:
The firmware must be upgraded to the latest version. A unit may give the “Unknown
analog board version” error message, if the analog board is changed without upgrading the
firmware on the Digital board. The older firmware may not recognize the newer analog
boards. All board upgrades are hardware backwards compatible with the proper firmware.
APPROVALS:
© 1999 Polaroid Corporation. All rights reserved.
Material may not be reproduced or distributed in any form without permission.
Digital Products
Service BULLETIN KB#981113073344GD
201 Burlington Rd. Bedford MA 017030
SprintScan
From:
Date:
Subject:
•
Vol. 2, No. 10
New Products Service Support Group
November 11, 1998
PolaColor Insight vers 2.X and Win 98
Category: Product Alert
The purpose of this message is to alert Service providers of a problem that
occurs when installing PolaColor Insight version 2.X on PC’s running Window
98.
•
Products Affected:
SprintScan 35, SprintScan 35ES, SprintScan 35/LE
•
Details:
The customer has upgraded their Windows 95 to Windows 98. As soon as the
PolaColor Insight application opens the user gets a message stating that “No
scanners are found.” A check in the Device Manager shows a listing for a
Scanner, Polaroid Scanner, or ADPT Scanner.
•
Resolution:
Windows 98 uses a new way of recognizing scanners. This new method is
known as Still Imaging Technology. Using this new technology, a scanner can
operate under Windows 98 without TWAIN or an ASPI layer. Under this new
system a scanner is known to the system as an “Imaging Device.” PolaColor
Insight, version 2 and later, will only recognize a scanner if it appears in the
Device Manager as an Imaging Device.
There are two solutions to this problem:
Solution 1 –
Note: This solution is a copy of the one found in the PolaColor Insight ReadME
file.
1. Open the Device Manager
2. Select the Scanner listing with the mouse pointer
3. Click on the Remove button
4. Re-boot the PC.
5. After the Windows 98 re-boots, open the Device Manager. Check and see if
the Scanner is now listed as an “Imaging Device.”
6. If there is no Imaging Device Listed - go to Solution 2.
Polaroid’s Electronic Imaging Systems service bulletins are subject to change as necessary. The information above
was believed to be correct at the time of printing. If you have any questions regarding this document, please refer to
the information sources outlined above.
SprintScan Service Bulletin V2, N10 Page 1 of 2
Solution 2 1. Use the Find command and look for a file named Polascan.inf. If found,
delete the file.
2. Uninstall Adaptec EZ-SCSI or EZ-SCSI lite. Note: In most cases a feature of
EZ-SCSI is the reason the SprintScan is not recognized as an Imaging
Device. One of the features of EZ-SCSI is a generic scanner device driver.
This driver provides a simple control for a generic scanner. It’s this driver
that blocks the SprintScan from being recognized as an Imaging Device.
3.
4.
5.
6.
7.
8.
You can check the Registry editor and verify the Adaptec driver is the cause
of the problem. Look in the following path: root drive letter (usually C)
\HKEY_LOCAL_MACHINE\Enum\SCSI\
POLAROID35MM____________5\ROOT&SCSIADAPTER&0000X0. Click
on the folder ROOT&SCSIADAPTER… and view it’s contents in the right
hand pane of the Registry window. If the class type is “ADPT Scanner” then
the EZ-SCI scanner device driver is causing the scanner not found problem.
Open the Device Manager
Select the Scanner listing with the mouse pointer
Click on the Remove button
Re-boot the PC.
After Windows 98 re-boots, open the Device Manager. Check to see if the
Scanner is now listed as an “Imaging Device.”
Re-install EZ-SCSI or EZ-SCSI lite.
Contact: Gerald DiBello
Cc:mail: DIBELLO, GERALD
Internet: [email protected]
Polaroid’s Electronic Imaging Systems service bulletins are subject to change as necessary. The information above
was believed to be correct at the time of printing. If you have any questions regarding this document, please refer to
the information sources outlined above.
SprintScan Service Bulletin V2, N10 Page 2 of 2
Digital Products
Service BULLETIN KB#981120063728GD
201 Burlington Rd. Bedford MA 017030
SprintScan
From:
Date:
Subject:
•
Vol. 2, No. 11
New Products Service Support Group
November 18, 1998
New Firmware v1.80 Released
Category: EI Service Bulletin
The purpose of this message is to alert Service Providers regarding new
firmware that has been released for the SprintScan 45 and 45 Pro. The new
firmware corrects problems with Windows 98, Windows NT and SCSI
compatibility.
•
Products Affected:
SprintScan 45 and SprintScan 45 Pro
•
Details:
Reports from the field indicate that the SprintScan 45 has SCSI and operating
system compatibility problems with Windows 95, 98 and NT version 4. In
response to the reported problems the manufacturer has revised the firmware. A
new version 1.80 firmware (the previous version was 1.65) has been tested and
proven to solve these reported issues. The new firmware corrects these
problems:
• Windows 98 compatibility – Scanner is now fully compatible
• Windows NT version 4 compatibility ( i.e. Scanner not found errors or
scanner disappears off SCSI bus after a period of time) – problem corrected
• General SCSI bus problems (i.e. Scanner not recognized on the SCSI bus,
scanner disappearing from the SCSI bus, problems being recognized by
some Host Adapter cards esp. Adaptec 2940 family boards – problem
corrected
•
Resolution:
The manufacturer began shipping scanners with version 1.80 firmware as of
November 1998. Scanners with the new firmware may be identified by the suffix
“F” in the serial number (last character of the serial number). The new software
will be installed in SprintScan 45’s beginning with serial number K801218F (this
is the estimated cut-in serial number).
Polaroid’s Electronic Imaging Systems service bulletins are subject to change as necessary. The information above
was believed to be correct at the time of printing. If you have any questions regarding this document, please refer to
the information sources outlined above.
SprintScan Service Bulletin V2, N11 Page 1 of 3
Upgrading the firmware in the SprintScan 45 requires that two EPROM’s be
removed and replaced. The EPROM’s are labeled U49 and U50. Use the
following procedure to replace the firmware:
Tools and Materials Required:
• Anti-static wrist strap
• EPROM remover tool
• Philips screwdriver
Procedure:
1. Before removing power from the scanner make sure that the carriage is in
the home position. Then, remove the power cord and SCSI cable from the back
of the scanner. Note: The cover removal procedure in Steps 2, 3 and 4 can
found on page 7 of the SprintScan 45 Service Manual. The manual is on the
Electronic Library CD.
2. Remove the six Philips screws that affix the cover to the base of the
SprintScan 45.
3. After removing the screws, turn the unit over so that the front end of the
scanner faces to your right.
4. Slowly lift the cover off the unit. Note that the cover can only be partially
lifted off, as you will need to disconnect a lead from the LED panel on the
cover that connects to the main circuit board in the base of the unit.
5. Connect the anti-static wrist strap ground clip to bare metal on the carriage
assembly (but not on the two carriage chromed rails) and the wrist strap to
the wrist you will use to handle the EPROM’s.
6. The two EPROM’s can be viewed and removed through the cut out in the
center of the cast metal carriage assembly. Remove the old EPROM’s.
7. The two new EPROM’s, U49 and U50 need to be put back in the correct
sockets. See illustration below.
8. Reassemble and test.
Pin
1
Rear of
scanner
Pin
1
U49
U50
Front of
scanner
Cutout in
carriage assy.
Version 1.80 firmware will be stocked by Parts Logistics. The set of EPROM
firmware, U49 and U50 is available as Part Number 542-21-327512.
Polaroid’s Electronic Imaging Systems service bulletins are subject to change as necessary. The information above
was believed to be correct at the time of printing. If you have any questions regarding this document, please refer to
the information sources outlined above.
SprintScan Service Bulletin V2, N11 Page 2 of 3
CAUTION: If other sources are used to obtain these parts, it should be noted
that only 120 or 150 nanosecond IC’s should be used for this application. IC’s
with slower access speeds will not work correctly.
Order through normal sources
Polaroid Corporation
Material Services
201 Burlington Road
Bedford, MA 01730 USA
Telephone: 800.343.4846 or. 781.386.5649
Fax: 781.386.5606
Cc:mail – [email protected]
Contact: Gerald DiBello
Cc:mail: DIBELLO, GERALD
Internet: [email protected]
Polaroid’s Electronic Imaging Systems service bulletins are subject to change as necessary. The information above
was believed to be correct at the time of printing. If you have any questions regarding this document, please refer to
the information sources outlined above.
SprintScan Service Bulletin V2, N11 Page 3 of 3
Digital Products
Service BULLETIN KB#9901299095746GD
201 Burlington Rd. Bedford MA 017030
SprintScan
From:
Date:
Subject:
•
Vol. 3, No. 1
New Products Service Support Group
January 27, 1999
PolaColor Insight vers 2.X and Win 98 Update
Category: Product Alert
The purpose of this message is to alert Service providers of a problem that
occurs when installing PolaColor Insight version 2.X on PC’s running Window
98. Note: This bulletin replaces SprintScan Bulletin V2, N 10 dated November
11, 1998. Bulletin V2, 10 should be discarded.
•
Products Affected:
SprintScan 35, SprintScan 35ES, SprintScan 35/LE
•
Details:
The customer has upgraded their Windows 95 to Windows 98, or is using a PC
that came with Windows 98. As soon as the PolaColor Insight application opens
the user gets a message stating that “No scanners are found.” A check in the
Device Manager shows a listing for a Scanner, Polaroid Scanner, or ADPT
Scanner.
•
Resolution:
Windows 98 includes a new technology to recognize scanners known as “Still
Imaging.” Using this new technology, a scanner can operate under Windows 98
without TWAIN or ASPI. Unlike Windows 95, Windows 98 recognizes a scanner
as an “Imaging Device.” PolaColor Insight, version 2, will only recognize a
scanner if it appears in the Device Manager as an Imaging Device. When you
launch PolaColor Insight and you see an error message telling you that no
scanners are found, it’s probably not recognized as an Imaging device. To fix
the problem, follow the steps below.
Step 1 – Is the scanner seen in the Device Manager?
If it’s listed as Unknown Device, Scanner, or Polaroid Scanner; skip to Step 2. If
there is no scanner listed, read on…
1a) Note that the scanner is recognized a bootup time (Plug & Play adapters):.
The first time you connect a scanner to a PC running Windows 98 you must see
the scanner recognized during bootup. In most cases you see the board’s on
screen listing just after the CNTRL>A prompt listing (for changing adapter
configuration settings). If the adapter has a BIOS you will see a listing for any
Polaroid’s Electronic Imaging Systems service bulletins are subject to change as necessary. The information above
was believed to be correct at the time of printing. If you have any questions regarding this document, please refer to
the information sources outlined above.
SprintScan Service Bulletin V2, N10 Page 1 of 2
SCSI devices (example: Polaroid 35MM) that are connected to it named along
with their SCSI ID number.
1b) If the card is an older ISA type (example: Adaptec 1505) you must use a
utility like Adaptec’s SCSI explorer to see if the scanner is recognized.
2) Scanner hardware recognition
The hardware recognition step is basic. If the scanner is not recognized
something is wrong with the scanner, host adapter, or the cabling. Don't bother
to do anything else at this point besides getting the scanner recognized. If it's
not recognized at bootup it won't appear in the Device Manager. Note: At this
time, it does not matter whether ASPI software is installed correctly or, even
installed…you can worry about this later. You just have to be concerned that the
miniport driver for the host adapter is the right one and correctly installed.
Example: The Advansys 922 board uses ASC.mpd as it’s miniport driver. You
will find this file in C:/WINDOWS/SYSTEM/IOSUBSYS. When the scanner is, at
least, recognized got to Step 2.
Step 2 Check for two required .sys Files
Two critical Windows 98 files that are needed to have a scanner recognized as
an "Imaging Device" must be present on the host PC. These files should load
from the Windows 98 CD the first time the scanner is recognized (you get a
message telling you to put the Win 98 CD in the drive). These files are not
loaded in a standard Win 98 install, or when upgrading from Win 95. For some
reason they sometimes don't get installed. The files are:
SCSImap.sys
SCSIscan.sys
After installation, both files reside in the following path C:\WINDOWS\SYSTEM32\DRIVERS
The two .sys files are in a compressed CAB format on the Windows 98
installation CD and, therefore, not easy to get. One way to get the files is to
extract them from the compressed file using a procedure outlined in Microsoft
Knowledge Base article Q129605 named “How to Extract Original Compressed
Windows Files.” Find the article on the web at :
http://support.microsoft.com/support/kb/articles/Q129/6/05.asp
Once you are sure that the files are installed, go to Step 3.
Step 3 – Check for and Delete: Polasan.Inf
Use the Find command and look for a file named Polascan.inf. If found, delete
the file. In most cases, you will only find this file if the customer had the scanner
working with the old SprintScan software with Win 95 and upgraded to Win 98.
After you are sure the file is not on the system do the following:
1.
2.
3.
4.
Open the Device Manager
Select the Scanner listing with the mouse pointer
Click on the Remove button
Re-boot the PC.
After Windows 98 re-boots, open the Device Manager. Check to see if the
Scanner is now listed as an “Imaging Device.” If it’s still shown as a Polaroid
scanner, go to step 4.
Polaroid’s Electronic Imaging Systems service bulletins are subject to change as necessary. The information above
was believed to be correct at the time of printing. If you have any questions regarding this document, please refer to
the information sources outlined above.
SprintScan Service Bulletin V2, N10 Page 2 of 2
Step 4– Is scanner registered as Adaptec generic scanner?
1. Open the Registry editor and check if an Adaptec scanner driver is the
cause of the problem.
2. Look in the following path (Note: this example applies to a
SprintScan 35ES or Plus):
C:\HKEY_LOCAL_MACHINE\Enum\SCSI\POLAROID35MM____________5
\ROOT&SCSIADAPTER&0000X0. Click on the folder
ROOT&SCSIADAPTER… to view it’s contents in the right hand pane
of the Registry window. If the class type is “ADPT Scanner” Note: In
most cases a feature of EZ-SCSI is the reason the SprintScan is not
recognized as an Imaging Device. One of the features of EZ-SCSI is
a generic scanner device driver. This driver provides a simple control
for a generic scanner. It’s this driver that blocks the SprintScan from
being recognized as an Imaging Device.
3. Uninstall Adaptec EZ-SCSI or EZ-SCSI lite. Check and be sure if the user
has his or her original disks before uninstalling.
4. Open the Device Manager
5. Select the Scanner listing with the mouse pointer
5. Click on the Remove button
6. Re-boot the PC.
7. After Windows 98 re-boots, open the Device Manager. Check to see if the
Scanner is now listed as an “Imaging Device.”
8. The user can now re-install EZ-SCSI or EZ-SCSI lite.
Contact: Gerald DiBello
Cc:mail: DIBELLO, GERALD
Internet: [email protected]
Polaroid’s Electronic Imaging Systems service bulletins are subject to change as necessary. The information above
was believed to be correct at the time of printing. If you have any questions regarding this document, please refer to
the information sources outlined above.
SprintScan Service Bulletin V2, N10 Page 3 of 2
Digital Products
Service BULLETIN KB#990315095220GD
201 Burlington Rd. Bedford MA 017030
SprintScan
From:
Date:
Subject:
•
Vol. 3, No. 2
New Products Service Support Group
March 11, 1999
PolaColor Insight Pro version 3.0 Introduced
Category: Software Info Bulletin
The purpose of this message is to alert Telephone Service and Repair Service
providers of important changes in version 3 of PolaColor Insight software.
•
Products Affected:
All SprintScan's
•
Summary:
PolaColor Insight version 3 has been changed since version 2. A partial list of
the changes follows:
a) Change! – Version 2, when run under Windows 98, required the scanner to
register (in the Device Manager) as an “Imaging Device.” This requirement
does not apply to Insight Version 3.
b) New! – Support for the SprintScan 45
c) New! – Tone Curve tab adds tone curve correction, white and black
eyedroppers.
d) New! - Support for the newly released SprintScan 4000 scanner
e) New! – PolaColor Insight “plug-in” for the Macintosh
•
Details:
PolaColor Insight and Windows 98
Version 2 of PolaColor Insight would only recognize a SprintScan under
Windows 98 if it was registered as an “Imaging Device.” (see SprintScan
Service Bulletin V3, N1). Version 3 of Insight drops this requirement.
When installing a SprintScan under Windows 98 it should appear in the Device
Manager as a “Polaroid Scanner.” For reliable operation, ASPI must be
functional and up to date with latest revisions from Adaptec (version 4.57 as of
the date of this bulletin) and the miniport driver for the SCSI host adapter that’s
used should be the most current revision. You can check for a functional ASPI
layer with the program named ASPICHK.exe that’s available on the Adaptec
website. As of the date of this bulletin it is available at the following address:
http://www.adaptec.com/cgi-bin/drivers.pl. Note that Adaptec has some miniport
drivers that are just for Windows 98, use the special driver if it exists.
Polaroid’s Electronic Imaging Systems service bulletins are subject to change as necessary. The information above
was believed to be correct at the time of printing. If you have any questions regarding this document, please refer to
the information sources outlined above.
SprintScan Service Bulletin V3, N2 Page 1 of 2
SprintScan 45 Support
PC: Version 3 of PolaColor Insight fully supports the SprintScan 45. Batch
scanning capability is not included in this version. Users who require this
capability can continue to use SprintScan version 1.0.3. Batch scanning
capabilities will be added in future versions of PolaColor Insight for the PC.
Macintosh: Batch scanning capability is supported in the Mac version of the
software as a Scripted feature. When running on a Macintosh system,
PolaColor Insight software can automatically execute multiple scans to capture
several different areas of the image, with different correction and scanning
settings for each area. This feature is explained, in detail, starting on page 68 of
the Users Guide that’s included on the Insight CD-ROM.
Tone Curve Controls
Tone curve correction is added in this version. The tone curve correction
controls appear on a new tab named “Curves.” The user selects the Curves tab
to define whitepoint or blackpoint or for adjusting highlights, midtones or
shadows using tonecurves correction. The tone curves let the user selectively
adjust the brightness values of the highlights, shadows or the tones between
them. You can also independently adjust the red, green, or blue values
individually.
SprintScan 4000 Support
The new SprintScan 4000 is supported by Insight 3. When a SprintScan 4000 is
connected to a computer, additional user controls appear. The Preview tab adds
a control named “Frame Number.” This control allows the user to select an
individual frame in a filmholder to be scanned. The frame number increments
from 1 to 6 for the film strip holder and 1 to 4 for the slide holder. The scanner
automatically advances to the selected frame when the user selects the Preview
button.
Two new selections appear in the Scanner menu when a SprintScan 4000 is
detected. One selection is named “Eject Film.” This selection allows the user to
automatically eject a filmholder or APS cartridge (optional accessory). A second
selection named “Update Film Carrier” resets the Frame Number box to the
current frame after the film carrier has been changed.
Adobe PhotoShop Plug-in” for the Macintosh
A plug-in installer is now part of the Insight software package for the Macintosh,
only. The plug-in works with Adobe Acrobat, Adobe PhotoDeluxe or any image
editing program that supports Adobe type plug-ins. If the user decides to use
the plug-in, they must install it using a separate installer program that’s included.
Contact: Gerald DiBello
Cc:mail: DIBELLO, GERALD
Internet: [email protected]
Polaroid’s Electronic Imaging Systems service bulletins are subject to change as necessary. The information above
was believed to be correct at the time of printing. If you have any questions regarding this document, please refer to
the information sources outlined above.
SprintScan Service Bulletin V3, N2 Page 2 of 2
Digital Products
Service BULLETIN KB#990630104111GD
201 Burlington Rd. Bedford MA 017030
SprintScan
From:
Date:
Subject:
•
Vol. 3, No. 3
New Products Service Support Group
June 30, 1999
SCSI Troubleshooting for Windows 95/98 PC’s
Category: EI Service Bulletin
The purpose of this bulletin is to give Telephone Service providers general SCSI
bus information to help in troubleshooting common SCSI bus problems on a PC.
•
Products Affected:
All SprintScan scanners running in a Windows 95 or 98 environment
•
Details:
Problem: When the PolaColor Insight application opens it reports that no
scanners are found.
Solution: There are a number of steps to follow, in order, to have a
scanner recognized on the host PC’s SCSI bus.
Step 1 – Is the scanner seen in the Device Manager? (See example Figure 2)
One way to view the Device Manager is to right-click on the My Computer icon
and choose “Properties”
§ Win 95 – If it is listed as a Polaroid Scanner. Go to Step 2
§ Win 98 – If it is listed as an Imaging Device. Go to Step 2
§ Win 98 – If it is listed as a Polaroid Scanner Go to Step 3
§ Win 95/98 If it is NOT seen and the Host Adapter (SCSI card) is a Plug and
Play type go to Step 1a)
§ Win 95/98 If it is NOT seen and the Host Adapter is NOT a Plug and Play type go to
Step 1b)
Step 1a) - If the user has a PCI (Plug & Play) type host adapter, check and see
if the host adapter and scanner are recognized at bootup time. The first time
you connect a scanner to a PC running Windows 95 or 98 you must see the
scanner recognized during bootup. In most cases you see the board’s on screen
listing just after a CNTRL>A prompt listing and before the point when the
Windows 95 or 98 screen appears. If the adapter has a BIOS you will see a
listing for any SCSI devices (example: Polaroid 35MM is the listing for a
SprintScan 35) that are connected to it and their SCSI ID number. Example: An
Adaptec 2940 and an Advansys 922 both have BIOS chips. If the scanner is not
listed at bootup time, the card may be incorrectly installed. Example: board
connector is not completely pushed into the mating connector on the PC’s
motherboard. After the SCSI card is installed correctly, go to Step 1c)
Polaroid’s Electronic Imaging Systems service bulletins are subject to change as necessary. The information above
was believed to be correct at the time of printing. If you have any questions regarding this document, please refer to
the information sources outlined above.
SprintScan Service Bulletin V3, N3 Page 1 of 7
Step 1b) - If the card is an older ISA type (example: Adaptec 1505 or 1505AE)
you must use a utility like Adaptec’s SCSI explorer to see if the scanner is, at
least, recognized by Windows. Note that non-plug and play SCSI cards install
differently than a plug and play board. The correct method to install these cards
is included in this bulletin. After the SCSI card is installed, go to Step 1c).
Step 1c) - Scanner hardware recognition
After the host adapter is correctly installed, the hardware recognition step is
next. If the scanner is not seen in the Device Manager but, the host adapter is
seen, something is wrong with the scanner, host adapter, the SCSI cabling or
the PC itself. Don't bother to do anything else at this point besides getting the
scanner recognized. Note: At this time, it does not matter whether ASPI
software or a TWAIN interface is installed correctly…you can worry about this
later. You must be sure that the miniport driver for the host adapter is the right
one, it’s the latest version and installed in the right place. A listing of many
popular host adapter miniport drivers that lists their current version numbers can
be found in Table 1. After you get the scanner recognized in the Device
Manager but you still cannot Preview or Scan an image, go to Step 2.
Tip: Look for extra copies of the SCSI card miniport driver. If you find extra
copies on the users hard drive, delete them. Example: The Advansys 922 board
uses ASC.mpd as its miniport driver. You will find this file in:
C:/WINDOWS/SYSTEM/IOSUBSYS.
Step 2 – Correcting ASPI layer problems in Windows 95 & 98
If the user has an Adaptec SCSI card go the Step 2a)
If the user has an Advansys SCSI card go to Step 2b)
Step 2a). - The easiest way to find problems with the ASPI layer is to have the
customer download an executable program called ASPICHK.exe from the
Adaptec website. Once the software is loaded on the customers PC they should
run it. This application allows the technician to recognize problems like missing
files and mismatched file version numbers. See Figure 1 for an ASPI check
sample on screen display window. An Adaptec SCSI card requires the following
four ASPI files (file version numbers are current as of the date of this bulletin):
WNASPI32.DLL, version 4.57, Location: C\WINDOWS\SYSTEM
WINASPI.DLL version 4.57, Location: C\WINDOWS\SYSTEM
APIX.VXD version 4.57, Location: C\WINDOWS\SYSTEM\IOSUBSYS
ASPIENUM version 4.57, Location: C\WINDOWS\SYSTEM
Troubleshooting Tools & SCSI Board Manufacturer Service Phone #’s
Adaptec: SCSIcheck.exe and the latest miniport drivers are available from
Adaptec at http://www.adaptec.com/support/files/upgrades.html
Adaptec Tech Support Monday - Friday (except holidays) 6:00 AM - 5:00 PM
Pacific Time. Call 1.408.934.7274. Worldwide support: check Adaptec’s website
Advansys: SuperSCSI utility is included with Advansys card bundled with
scanners. Win 98/95 Miniport drivers are available from:
http://www.advansys.com/support/fastultra.htm Tech Support operates from 8:30AM to
5:30PM PST Monday through Friday (except holidays). Telephone: 800.5257440 or 408.383.9400
Polaroid’s Electronic Imaging Systems service bulletins are subject to change as necessary. The information above
was believed to be correct at the time of printing. If you have any questions regarding this document, please refer to
the information sources outlined above.
SprintScan Service Bulletin V3, N3 Page 2 of 7
Figure 1 – Adaptec ASPIcheck display window
Step 2b) - Advansys does not supply ASPI for Windows 95/98 PC's on their
SuperSCSI CD-ROM that is included with the ABP-922 SCSI card. The CDROM installs the miniport driver and the SuperSCSI troubleshooting application.
Advansys relies on the fact that Windows 95/98 will install an ASPI layer in all
new OS installations by default. The files Windows installs are:
•
•
•
Winaspi.dll version 1.00, Location: C\WINDOWS\SYSTEM
Wnaspi32.dll version 1.0.0.0 , Location: C\WINDOWS\SYSTEM
Apix.vxd version 4.00.951, Location: C\WINDOWS\SYSTEM\IOSUBSYS
Tips:
1. If you run Adaptec's ASPI check application on a PC using the drivers listed
above it will report that ASPI is NOT functional when, in reality, it is working OK.
After you complete steps, 2a) or 2b) the scanner should work correctly.
2. Check and delete multiple copies of the ASPI DLL’s on the users hard drive.
Look for outdated versions mixed with newer versions. Keep the latest version
and delete the old ones.
Step 3 – Windows 98: Scanner recognized as “Polaroid Scanner”
This symptom could mean that one or both of the following problems exist:
Problem 1 -The scanner is recognized by the PC as a generic type of scanner.
In this case, PolaColor Insight will not recognize it. Go to Step 3a).
Problem 2 – Missing .sys files. Go to Step 3b).
Step 3a) Scanner is listed in the Registry as a generic device
1. Open the Registry editor and check if an Adaptec scanner driver is the
cause of the problem.
2. Look in the following path (Note: this example applies to a
SprintScan 35ES or Plus):
C:\HKEY_LOCAL_MACHINE\Enum\SCSI\POLAROID35MM____________5
\ROOT&SCSIADAPTER&0000X0. Click on the folder
ROOT&SCSIADAPTER… to view it’s contents in the right hand pane
of the Registry window. Check to see if the class type is “ADPT
Scanner” If it’s not, skip to Step 3b).
Polaroid’s Electronic Imaging Systems service bulletins are subject to change as necessary. The information above
was believed to be correct at the time of printing. If you have any questions regarding this document, please refer to
the information sources outlined above.
SprintScan Service Bulletin V3, N3 Page 3 of 7
Tip:
In most cases, a feature of EZ-SCSI (from Adaptec) is the reason the
SprintScan is not recognized as an Imaging Device. One of the
features of EZ-SCSI is a generic scanner device driver that provides
a simple control for a generic scanner. The generic driver blocks the
SprintScan from being recognized as an Imaging Device.
3. Uninstall Adaptec EZ-SCSI or EZ-SCSI lite. Check and be sure if the user
has his or her original disks before uninstalling.
4. Open the Device Manager
5. Select the Scanner listing with the mouse pointer
6. Click on the Remove button
7. Re-boot the PC.
8. After Windows 98 re-boots, open the Device Manager. Check to see if the
Scanner is now listed as an “Imaging Device.”
9. The user can now re-install EZ-SCSI or EZ-SCSI lite.
Step 3b) Missing .sys files
Two critical Windows 98 files that are needed to have a scanner recognized as
an "Imaging Device" must be present on the host PC. These files should load
from the Windows 98 CD the first time the scanner is recognized (you get a
message telling you to put the Win 98 CD in the drive). These files are not
loaded in a standard Win 98 install, or when upgrading from Win 95. For some
reason they sometimes aren’t installed. The files are:
SCSImap.sys
SCSIscan.sys
After installation, both files reside in the following path C:\WINDOWS\SYSTEM32\DRIVERS
The two .sys files are in a compressed CAB format on the Windows 98
installation CD and, therefore, not easy to get. One way to get the files is to
extract them with a shareware application called WinZip that’s available in many
locations on the Worldwide Web or direct from htttp:\\www.winzip.com
Polaroid’s Electronic Imaging Systems service bulletins are subject to change as necessary. The information above
was believed to be correct at the time of printing. If you have any questions regarding this document, please refer to
the information sources outlined above.
SprintScan Service Bulletin V3, N3 Page 4 of 7
Figure 2 – Windows 95 Device Manager Example
(Shows listing for SprintScan 35)
Host Adapter
Type
Miniport Driver
&Version
Plug-n-Play
Aic78xx.mpd
ver. 2.3
Plug-n-Play
Aic78u2.mpd
vers. 3.03
Plug-n-Play
Aic 78xx.mpd
ver. 2.3
Plug-n-Play
Aic 78xx.mpd
ver. 2.3
Asc.mpd
ver. 2.9D
Sparrow.mpd
Ver. 2.05
Model
Adaptec AHA 2940 & 2940W
2940AU,2940UW
Adaptec AHA 2940U2W
2930U2
Adaptec AHA 3940, 3940W
3940U, 3940UW
3940AU,
39040AUW
Adaptec AVA 2902
Advansys 922 &
3922
Adaptec AVA 1505, 1502AE
Plug-n-Play
ISA (NOT
plug and play)
Table 1 – SCSI Host Adapter Information
Polaroid’s Electronic Imaging Systems service bulletins are subject to change as necessary. The information above
was believed to be correct at the time of printing. If you have any questions regarding this document, please refer to
the information sources outlined above.
SprintScan Service Bulletin V3, N3 Page 5 of 7
Installing an Adaptec 1505 or 1502AE ISA type Host Adapter
In a WIN 95 or 98 PC (non plug and play)
Note: In most cases, you will need the original Windows 95 or 98 Installation CD-ROM
for this procedure.
Step 1
Step 2
Step 3
Step 4
Step 5
Step 6
Step 7
Step 8
Open the Control Panel (Start menu/Settings/Control Panel)
Select (Double-click) “Add New Hardware” Icon
The Add New Hardware Wizard now asks; “Do you want to search for new
hardware.” Select “No” and click on the Next button.
Next you are asked to select the Type of Hardware. Select SCSI controllers.
It’s near the bottom of the scrolling list. Click on the Next button.
Select from the Adaptec list the host adapter you are installing. Depending
on the board you have, select Adaptec AVA -1505 SCSI Host Adapter or
Adaptec AVA -1502 SCSI Host Adapter. Click on the Next button after
making the selection.
Next; you will see a dialog box saying “Windows can install your hardware,
using the following settings.” Note two items: The two digit “Interrupt
Request” number Windows 95 assigns and a three digit Port Address.
Example: Interrupt Request 11 and Port address 340h.
Click on the Next button.
The system will now ask you to place the Windows 95 installation CD-ROM
in the CD-ROM drive to install resources needed for the Host Adapter. Note:
It will only do this if you do not have the drivers and files needed for the Host
Adapter pre-installed. Follow the instructions carefully. After the installation
is complete, shut down the computer
Second - Install the SCSI Host Adapter board.
Step 9
Step 10
Step 11
Set the IRQ jumper on the board to the IRQ number that you noted in the
first part of this procedure. Example: The default IRQ setting for the AVA 1502AE is 10…If this IRQ was noted in Step 6, don’t change the jumper
position. The default IRQ setting for the AVA - 1505 is 11…If this IRQ was
noted in Step 6, don’t change the jumper setting. If the IRQ you noted in
Step 6 was not the default, change it now. For instructions on changing the
jumpers, consult the Installation Guide that came with the board (or, look on
the board for a jumper setting chart). Set the port address jumper to the
address you noted in Step 6. If what you noted is the board default setting
(typically, 140h) don’t move the jumper. If the setting you noted is 340h,
change the jumper setting.
Install the Host Adapter board per the Installation Guide in one of the ISA
slots (usually a black colored connector) in your PC. Choose a slot so that
the SCSI board won’t touch the sides of any other board when it’s installed.
Connect a SCSI device (example: a slide scanner) to the connector on the
Host Adapter board (outside the PC) and turn on the power to the device
and then to your PC.
Polaroid’s Electronic Imaging Systems service bulletins are subject to change as necessary. The information above
was believed to be correct at the time of printing. If you have any questions regarding this document, please refer to
the information sources outlined above.
SprintScan Service Bulletin V3, N3 Page 6 of 7
Step 12
Install the EZ-SCSI Lite version 4.x or 5.x, using the instructions printed on
the disk. This disk will update the SCSI files and drivers that were copied
from the Windows 95 CDROM to the latest versions. After installation is
complete, you will see a message asking if you want re-start your PC now.
Click on the OK button and allow your PC to re-start
Note: EZ-SCSI Lite Version 4 does not install the sparrow.mpd driver needed for
the 1505 board. The default sparrow.mpd driver that comes with the Windows 95
will remain. The latest drivers can be found on Adaptec’s website at
www.adaptec.com.
Step 13
Install the software for the SCSI device now. In most cases, you will have to
re-start your PC when the installation is complete.
Contact: Gerald DiBello
Cc:mail: DIBELLO, GERALD
Internet: [email protected]
Polaroid’s Electronic Imaging Systems service bulletins are subject to change as necessary. The information above
was believed to be correct at the time of printing. If you have any questions regarding this document, please refer to
the information sources outlined above.
SprintScan Service Bulletin V3, N3 Page 7 of 7
Digital Products
Service BULLETIN KB#990407170921GD
201 Burlington Rd. Bedford MA 017030
SprintScan
From:
Date:
Subject:
•
Vol. 3, No. 4
New Products Service Support Group
April 7, 1999
SprintScan 4000 & Insight Software for Macintosh v3.0 Known Problems
Category: EI Service Bulletin
The purpose of this bulletin is to give Telephone Service providers information
regarding known problems with PolaColor Insight version 3.0 for the Macintosh
when used with the SprintScan 4000.
•
Products Affected:
SprintScan 4000
•
Details:
The following is a list of problems that might be reported by customers using the
SprintScan 4000 with PolaColor Insight version 3.0 on a Macintosh computer.
The problems will be fixed in version 3.1 of PolaColor Insight. Version 3.1 is
scheduled for release in April 1999.
1. Problem: Unknown error message type 173XX to 174XX (where XX is a
number from 00 to 99) is seen by the user.
These error messages will most often occur:
a) When doing a “Preview” scan.
b) Immediately after the user sees the message "Insert carrier until scanner
grabs it" [and the carrier is not properly inserted and ready].
Solution: Review the following procedure for inserting a carrier with the user:
The procedure must be followed before clicking on the Preview button.
a) Push the carrier into the scanner until the activity lamp (the yellow or green
lamp, this depends on the date the scanner was manufactured) turns off.
b) At this point, the user should let go of the carrier and let the scanner pull it
inside. The holder automatically positions itself and is ready for scanning.
When the carrier is in the ready position, the activity lamp is “on” steady and
has stopped blinking.
c) The user should click on the Preview button only after Step a) and b) are
completed.
Polaroid’s Electronic Imaging Systems service bulletins are subject to change as necessary. The information above
was believed to be correct at the time of printing. If you have any questions regarding this document, please refer to
the information sources outlined above.
SprintScan Service Bulletin V3, N4 Page 1 of 2
2. Problem: Customer chooses any of the black and white films in the Profiles
menu (on the Preview tab), or moves the Saturation slider (on the Color tab)
to the B&W position and clicks the Preview button. The preview works
normally. After the user clicks on the Scan button, the Progress dialog box
reaches the point of “Writing image to file…”. At this point, a dialog box
appears with the text: Unknown error 27728 or Time out error -2003.
Solution: Scan the image in color. After scanning, open the image in
PhotoShop and change Mode (on the Image menu) to Grayscale.
3. Problem: Insight locks up the Macintosh when writing the scanned file to the
harddrive.
Solution: This problem is more likely to occur with pre-G3 Macintosh computers
and when scanning at high resolutions. The frequency of this error appears low.
There is no workaround for this problem. Recover from the error by restarting
the computer (one method is to hold down the Apple and Control keys and
press the Power button that is on the keyboard).
Contact: Gerald DiBello
Cc:mail: DIBELLO, GERALD
Internet: [email protected]
Polaroid’s Electronic Imaging Systems service bulletins are subject to change as necessary. The information above
was believed to be correct at the time of printing. If you have any questions regarding this document, please refer to
the information sources outlined above.
SprintScan Service Bulletin V3, N4 Page 2 of 2
Digital Products
Service BULLETIN KB#990409105547GD
201 Burlington Rd. Bedford MA 01730
SprintScan
From:
Date:
Subject:
•
Vol. 3, No. 5
New Products Service Support Group
April 9, 1999
Blue G3 Macintosh SCSI Host Adapters
Category: EI Service Bulletin
The purpose of this bulletin is to provide Telephone and Repair Service
organizations information regarding known compatible SCSI host adapters for
use the new blue G3 Macintosh computers.
•
Products Affected:
SprintScan Models: 35ES, 35 Plus, 35LE, 45, 4000
•
Details:
Some models of the new Blue G3 Macintosh computers released in January of
1999 do not include built-in SCSI. Testing has shown that the following two
SCSI host adapters are compatible with SprintScans and the blue G3.
•
•
Adaptec model 2906
Power Domain (made by Adaptec) model 2930U
The two host adapters were tested under the following conditions:
Computer: Blue 400 MHz G3 Macintosh with built-in Ultra-Wide SCSI host
adapter.
Software: PolaColor Insight versions 2.2 and 3.0
Scanners tested: SprintScan: 35ES, 35 Plus, 35LE
SprintScan 4000
SprintScan 45 (with Insight 3.0, only)
Adaptec 2906 Notes
The 2906 is a host adapter that can also be used on Windows PC’s. The
product packaging includes software and instructions for use on both Macintosh
and Windows computers. To get the board to work correctly with the Mac you
must install an extension named “Adaptec SCSI Card 2906 driver.” that’s on the
Macintosh Software CD-ROM included with the host adapter. Make sure the
user has copied the 2906 extension in the Extensions folder that’s inside the
System folder. After the extension is loaded the Mac must be restarted.
Although the Mac software CD-ROM contains a Power Domain control utility
that allows the user to configure terminations options no changes are needed
for the host adapter to work with SprintScans.
Polaroid’s Electronic Imaging Systems service bulletins are subject to change as necessary. The information above
was believed to be correct at the time of printing. If you have any questions regarding this document, please refer to
the information sources outlined above.
SprintScan Service Bulletin V3, N5 Page 1 of 2
Adaptec 2930U Notes
Testing has shown that the 2930U a plug and play host adapter when used with
a SprintScan. No software needs to be loaded on a Macintosh G3 for proper
operation with SprintScans.
Contact: Gerald DiBello
Cc:mail: DIBELLO, GERALD
Internet: [email protected]
Polaroid’s Electronic Imaging Systems service bulletins are subject to change as necessary. The information above
was believed to be correct at the time of printing. If you have any questions regarding this document, please refer to
the information sources outlined above.
SprintScan Service Bulletin V3, N5 Page 2 of 2
Digital Products
Service BULLETIN KB#990526053947GD
201 Burlington Rd. Bedford MA 01730
SprintScan
From:
Date:
Subject:
•
Vol. 3, No. 6
New Products Service Support Group
May 26, 1999
SprintScan 4000 – Case Opening Tool
Category: EI Service Bulletin
The purpose of this bulletin is to provide Repair Service organizations
information regarding the availability of a special tool to remove the cover of the
SprintScan 4000.
•
Products Affected:
SprintScan 4000
•
Details:
A special tool is now available that is made specially to open the case of the
SprintScan 4000 without risk of damaging the cover tabs. To begin opening the
case, the tool is pushed into one of the four slots on the bottom of the scanner.
In one motion, the cover tab is unlatched and the cover is pushed up and away
from the base. The tool is pushed into the four slots, one at a time, until all tabs
are released.
Tool Name: SS4000 Case Tool
Tool Part Number: CPS 541
Purchase from:
Polaroid Corporation
Material Services
201 Burlington Rd
Bedford, MA 01730
Telephone: 800-343-4846 or, (781) 386-5649
Fax: (781) 386-5606
e-mail: [email protected]
Contact: Gerald DiBello
Cc:mail: DIBELLO, GERALD
Internet: [email protected]
Polaroid’s Electronic Imaging Systems service bulletins are subject to change as necessary. The information above
was believed to be correct at the time of printing. If you have any questions regarding this document, please refer to
the information sources outlined above.
SprintScan Service Bulletin V3, N6 Page 1 of 1
Digital Products
Service BULLETIN KB#990604112200GD
201 Burlington Rd. Bedford MA 01730
SprintScan
From:
Date:
Subject:
•
Vol. 3, No. 7
New Products Service Support Group
June 4, 1999
SprintScan 4000 Door Open Errors seen when using Version
3.0 or 3.1 of PolaColor Insight
Category: EI Service Bulletin
The purpose of this bulletin is to provide Telephone Support Service
organizations with information regarding certain customer reported error
messages. The error messages are seen when using PolaColor Insight version
3.0 or 3.1 on a Macintosh or Windows PC.
•
Products Affected:
SprintScan 4000
•
Details:
The user has version 3.0 or 3.1 of PolaColor Insight installed in their computer.
Macintosh OS.
1. User reports seeing Error 1003 when they launch PolaColor Insight
2. User reports seeing Error 17899 when they click on the Preview button
Windows 95/98 or NT 4
User reports seeing the following error when they click on the Preview button Firmware Error: Unknown Sense Code. Please Call Polaroid Customer Support
for Assistance.
•
Resolution:
One possible cause for the error codes listed above is that the scanner door is
not closed. If the customer reports seeing the error codes listed in “Details”, it is
possible that the scanner door is not locked in the “up” position. The scanner
door must be closed before the scanner will operate.
Note: Mac OS error 1003 is a scanner not recognized error. If the door is closed
and error 1003 is still seen, check for SCSI card problems, cabling problems,
scanner malfunctions (example: status lamps not on steady) and SCSI ID
conflicts with other devices.
Contact: Gerald DiBello
Cc:mail: DIBELLO, GERALD
Internet: [email protected]
Polaroid’s Electronic Imaging Systems service bulletins are subject to change as necessary. The information above
was believed to be correct at the time of printing. If you have any questions regarding this document, please refer to
the information sources outlined above.
SprintScan Service Bulletin V3, N7 Page 1 of 1
Digital Products
Service BULLETIN KB#990623150908GD
201 Burlington Rd. Bedford MA 01730
SprintScan
From:
Date:
Subject:
•
Vol. 3, No. 8
New Products Service Support Group
June 23, 1999
SprintScan 4000 CCD Cable Detaches
Category: Product Alert Bulletin
The purpose of this bulletin is to provide Telephone Support Service and Repair
organizations with information regarding a possible hardware problem affecting
the SprintScan 4000.
•
Products Affected:
SprintScan 4000
•
Details:
The user reports the results of a Preview scan using PolaColor Insight:
• When a positive film type is selected, they see an all black preview image
• When a negative film type is selected, they see an all white preview image
User also notes that the preview scan time is much longer (compared to when
the scanner was working normally).
•
Resolution:
Required Tools & Equipment
•
•
•
•
RTV Silicon Sealant
Cotton Tipped Applicators (see Figure 4)
Long tipped needle-nose pliers
Cover Removal Tool part number: Polaroid P/N CPS 541
Problem: The CCD cable connecting the main logic board to the CCD board has
come off one of its mating connectors. The cable may detach at either end but,
in most cases, detaches from the CCD board connector.
This defect applies to all SprintScan 4000’s. The manufacturer is working on a
solution to the problem. When the manufacturer implements a solution, a
Bulletin will be issued to notify the field.
NOTE: This Bulletin only suggests a method to fix the cable detaching defect. It
is also suggested that the fix be applied to all units returned for service even if
the cable has not detached. Local repair policy for the SprintScan 4000 should
be consulted before implementing the fix suggested in this bulletin.
Polaroid’s Electronic Imaging Systems service bulletins are subject to change as necessary. The information above
was believed to be correct at the time of printing. If you have any questions regarding this document, please refer to
the information sources outlined above.
SprintScan Service Bulletin V3, N8 Page 1 of 3
The following suggested repair method has been approved by the manufacturer
of the scanner:
1) Lift the scanner cover using the special tool P/N CPS 541, (see SprintScan
Service Bulletin V2, N6 dated May 26, 1999) or some other suitable method.
2) Remove the two door switch cable connectors and the power switch cable
connector from their mating connectors on the front of the main logic board
(see Figure 1). In most units, a wire retainer at the top left of the main logic
board retains the power switch assy. wires. Release the retainer so the all
five power switch assy wires are free (see Figure 2).
Caution: The wires connecting to the door switches are very short and can
easily detach from the door switch LED’s. To remove the cover without
damaging the wiring -: First, gently pull up the cover from the base and tilt it
to the left side of the scanner (approx. 45 degrees). Second, while the cover
is tilted, detach the three connectors from the main logic board before lifting
off the cover.
3) Reconnect the CCD cable. If the cable has detached from the back of the
CCD board take care not to move the position of the CCD board when
reattaching the cable. Do not loosen the two screws that fix the board
assembly to the scanner chassis.
Needle nose pliers appear to be the most effective tool for this operation.
4) Apply RTV (also called silicone sealer) using a cotton tipped applicator (see
Figure 4) to fix the CCD cable connector to the header on the CCD board
(see Figure 3). Coat both the top and bottom sides of the connectors with
the sealant material.
5) Repeat the procedure on the CCD cable connector end that connects to the
Main Circuit board. Coat both sides of this connector.
6) Reassemble the scanner and test its operation.
2 inches
(5 cm)
Step 1 – Lift Cover
Step 2 – Tilt cover to left side
Figure 1 – Removing the Scanner Cover
Polaroid’s Electronic Imaging Systems service bulletins are subject to change as necessary. The information above
was believed to be correct at the time of printing. If you have any questions regarding this document, please refer to
the information sources outlined above.
SprintScan Service Bulletin V3, N8 Page 2 of 3
Power switch
assembly wires
(5 wires)
Wire
Retainer
Top left corner of
Main Logic circuit
board
Figure 2 – Wire Retainer Detail
CCD board header connector
CCD cable connector
Front of
Scanner
Apply silicone sealant
in this area
Silicone sealant
Applicator
Top view of
CCD board
assembly
Silicone sealant
Side view of
CCD board
assembly
Figure 3 – Applying Silicone Sealer
Polaroid’s Electronic Imaging Systems service bulletins are subject to change as necessary. The information above
was believed to be correct at the time of printing. If you have any questions regarding this document, please refer to
the information sources outlined above.
SprintScan Service Bulletin V3, N8 Page 3 of 3
6 – inch (15 cm)
Cotton Tipped Applicator
Aplicadore con cabeza de algodon
Applicateur a embout de coton
Watteapplikatoren
Place silicone sealer
on cotton tip
Figure 4 – Cotton Tipped Applicator
Contact: Gerald DiBello
Cc:mail: DIBELLO, GERALD
Internet: [email protected]
Polaroid’s Electronic Imaging Systems service bulletins are subject to change as necessary. The information above
was believed to be correct at the time of printing. If you have any questions regarding this document, please refer to
the information sources outlined above.
SprintScan Service Bulletin V3, N8 Page 4 of 3
Digital Products
Service BULLETIN KB# 990702104629GD
201 Burlington Rd. Bedford MA 017030
SprintScan
From:
Date:
Subject:
•
Vol. 3, No. 9
New Products Service Support Group
July 2, 1999
New SCSI Host Adapter bundled with Sprintscans in US
Category: EI Service Bulletin
The purpose of this message is to alert service and telephone support providers
regarding a new SCSI Host adapter board that will be included with new
SprintScans sold for use with a Windows based PC in some regions.
•
Products Affected:
SprintScan 4000, SprintScan 35 Plus, SprintScan 35LE
•
Details:
Notes
As of July 1999 (approximate date), a new PCI Plug and Play SCSI host
adapter is included with Sprintscan for Windows based PC’s in the US and may
be an option in other regions. The 3922 replaces the Advansys ABP922 host
adapter that was formerly included. This bulletin replaces SprintScan Bulletin
V2, N9 dated October 12, 1998 which can be discarded.
Product Summary
Manufacturer: Advansys (www.advansys.com)
Model Number: ABP-3922
PID Number: 101523
Computer Bus: PCI (Plug and Play)
SCSI Connector: 25 Pin type D
Device Protocol: SCSI-1, SCSI-2 and Fast SCSI-2
Interface Protocal: Bus Master DMA
Bootable: Yes
Device Support: Up to 7 SCSI devices
SCSI Transfer Rate: Up to 10MB/Sec
Win 95/98 Miniport Driver: ASC.mpd
Win NT 4 Miniport Driver: ASC.sys
Product Summary: Multi-tasking, multithreaded I/O, disconnect/reconnect,
synchronous and asynchronous data transfer, ASPI compliant
OS Support: Macintosh**, Windows 95 and 98, Windows NT4
Electrical Termination: Single-ended Active
** Not tested for compatibility with Sprintscans
Polaroid’s Electronic Imaging Systems service bulletins are subject to change as necessary. The information above
was believed to be correct at the time of printing. If you have any questions regarding this document, please refer to
the information sources outlined above.
SprintScan Service Bulletin V3, N9 Page 1 of 2
Package Contents
1) 3922 Host Adapter
2) Advansys Super SCSI on CD-ROM with the following features:
• Allow the user to directly connect to the Advansys website to download
updated drivers
• Do SCSI bus troubleshooting
• View SCSI bus
• Install drivers for the Advansys 3922 board
• SuperView allows the user to see SCSI devices that are on the bus.
• Includes ASPI for Windows NT4
3) Printed installation instructions for Windows 95/98, Windows NT4 and
Macintosh
Contact: Gerald DiBello
e:mail: DIBELLO, GERALD
Internet: [email protected]
Polaroid’s Electronic Imaging Systems service bulletins are subject to change as necessary. The information above
was believed to be correct at the time of printing. If you have any questions regarding this document, please refer to
the information sources outlined above.
SprintScan Service Bulletin V3, N9 Page 2 of 2
Digital Products
Service BULLETIN KB#990415172632GD
201 Burlington Rd. Bedford MA 01730
PolaColor Insight
From:
Date:
Subject:
•
Vol. 2, No. 1
New Products Service Support Group
April 14, 1999
PolaColor Insight version 3.x for the PC – Error message seen
when user tries to Open the application
Category: EI Service Bulletin
The purpose of this bulletin is to provide Telephone Support organizations with
information on how to correct a PolaColor Insight version 3 installation problem.
•
Products Affected:
SprintScan Models: 35ES, 35 Plus, 35LE, 45, 4000 used with a PC
•
Details:
Customer has installed PolaColor Insight version 3.X on their PC and previously
had version 2 installed. When they open the application, the following error
message appears:
IQA error: Unable to initiate the image processing library
•
Resolution:
The error will only occur when the user uninstalls version 2 of PolaColor Insight
before installing version 3. After Insight 2 is uninstalled, the file named Pltbxc.dll
is not removed. Pltbxc.dll is a file associated with IQA. If this file is left behind
when Insight 2 was uninstalled, the IQA files from Insight 3 are not installed and
the error message “IQA error: Unable to initiate the image processing library” is
seen.
To correct the problem, delete the file “Pltbxc.dll” that is in the C:/WINDOWS
directory. After the file is deleted, re-install PolaColor Insight version 3.
When version 3 of Insight is installed without uninstalling version 2, the problem
will not be seen. This is the preferred method for installing Insight 3.
Contact: Gerald DiBello
Email: DIBELLO, GERALD
Internet: [email protected]
Polaroid’s Electronic Imaging Systems service bulletins are subject to change as necessary. The information above
was believed to be correct at the time of printing. If you have any questions regarding this document, please refer to
the information sources outlined above.
PolaColor Insight Service Bulletin V2, N1 Page 1 of 1
Digital Products
Service BULLETIN KB#990526115010GD
201 Burlington Rd. Bedford MA 01730
PolaColor Insight
From:
Date:
Subject:
Vol. 2, No. 2
New Products Service Support Group
May 17, 1999
Color Matching Tips for Insight v3 (or later) and Photoshop 5.x
Products Affected:
SprintScan Models: 4000, 35ES, 35 Plus, 35LE, 45
Problem:
You are using Photoshop version 5.x on a Macintosh or Windows PC. Your scans and prints
have color casts that are not seen on the original scanned image. It’s a good possibility that
your are not following the Adobe recommended color management procedures required for
Photoshop 5.x
Solution:
Photoshop 5 Color Management – Brief Summary
A scanner interprets an image as certain RGB values according to the scanner’s particular
specifications and light sensitivity. A given monitor displays RGB colors according to the
specifications of its CRT phosphors; a color inkjet printer outputs in RGB according to its own
specifications. The open color management system used in Photoshop 5.x lets you
automatically compensate for the differences in devices by translating the different RGB color
spaces for you. By using device profiles and a specified color space in Photoshop 5.x, the
compensation feature allows the color information to be used through your input-output
workflow in a device-independent manner with more color accuracy. For the compensation
feature to work properly, there are some initial setup steps required:
1. Calibrate your monitor and create a monitor profile. Use Photoshop’s built-in Adobe
Gamma control panel utility or a third–party product.
2. Setting up files for proper conversion of your SprintScan scanned images to Photoshop
5.x.
3. Setting up Color Settings preferences in Photoshop 5.x
4. Converting SprintScan scanned images to Photoshop 5.x color space before making any
additional corrections.
5. How to print to an Epson inkjet using color management profiles.
The five setup procedures suggested here are for a quick setup of the Color Management
system. The quick setup procedure assumes that the SprintScan is not the only input device.
When a scanned image is opened in Photoshop you will see a dialog box asking what profile
you want to apply to the image (see Step 4). Customers wanting to learn more about the
subject of Color Management should consult the Photoshop User Guide. They can also get an
Polaroid’s Electronic Imaging Systems service bulletins are subject to change as necessary. The information above
was believed to be correct at the time of printing. If you have any questions regarding this document, please refer to
the information sources outlined above.
PolaColor Insight Service Bulletin V2, N2 Page 1 of 6
Acrobat document named “Adobe Photoshop 5.0 Color Management” at the following web
address: http://www.adobe.com/supportservice/custsupport/TECHGUIDE/PSHOP/main.html
Setting up Color Management
1. Calibrate your Monitor
Calibrate your monitor using one of the following methods:
a) Use the Adobe Gamma control panel utility to create a monitor profile. The
profile is automatically stored in the ColorSync folder on a Macintosh or the
Color folder on a PC.
b) Use a third - party calibration utility and an ICM 2.0 or ColorSync compatible ICC
profile generator.
2. Setting up files for proper conversion of your SprintScan scanned
images to Photoshop 5.x.
Macintosh
a) Open the System Folder so that it’s window is on the left side of the monitor
screen. Re-position the window if necessary.
b) Open the Preferences folder so that its window opens on the right hand side of
the screen. Re-position the window if necessary so it does not cover the System
folder window.
c) Locate the ColorSync Folder inside the System Folder.
- Macintosh System 8.5 or later: The ColorSync Folder is in the System Folder
- Earlier Mac Systems: The ColorSync folder is in the Preferences Folder. Scroll
through the Preferences folder until you find the ColorSync folder and doubleclick to open it so it is open on top of the previously opened System Folder.
d) Again, scroll through the Preferences folder contents and find the folder named
Polaroid IQA Profiles. Look in the folder and scroll through its contents and find
the profile named “Monitor, PC generic 1.8 gam.icc”.
e) Place the cursor over the profile and, while holding down the Option key (notice
that a “+” sign appears to the right of the cursor) drag a copy of the file into the
ColorSync folder. This action will place a copy of the monitor profile, with the
name unchanged, in the ColorSync folder.
f) Close all open windows
Windows 95/98
a) Open an Explorer window on the Desktop.
b) Use the Explorer to open the Polaroid Profiles folder in the following path:
C:\Program Files \Common Files \Polaroid Imaging \Profiles
c) Open the Profiles folder so its contents appear in the right hand side of the
window. Scroll down to find the profile named “Monitor, PC generic 1.8 gam.icc”
d) Open a second Explorer window on the Desktop so that both windows are
visible and they do not overlap each other. Find the Color Folder in the following
path: C:\Windows\System\Color. Open the Color folder so its contents appear in
the right hand pane of the open window.
e) Point to the icon for the H Monitor, PC generic 1.8 gam.icc profile and hold
down the “Ctrl” key (notice that a “+” sign appears to the right of the cursor).
Drag the copy to the Color folder in the other open Explorer window. This action
will place a copy of the monitor profile, with the name unchanged, in the Color
folder.
f) Close both Explorer windows.
Polaroid’s Electronic Imaging Systems service bulletins are subject to change as necessary. The information above
was believed to be correct at the time of printing. If you have any questions regarding this document, please refer to
the information sources outlined above.
PolaColor Insight Service Bulletin V2, N2 Page 2 of 6
Windows NT4
a) Open an Explorer window on the Desktop.
b) Use the Explorer to open the Polaroid Profiles folder in the following path:
C:\Program Files \Common Files \Polaroid Imaging \Profiles
c) Open the Profiles folder so its contents appear in the right hand side of the
window. Scroll down to find the profile named “Monitor, PC generic 1.8 gam.icc”
d) Open a second Explorer window on the Desktop so that both windows are
visible and they do not overlap each other. Find the Color Folder in the following
path: C:\WINNT\SYSTEM32\Color. Open the Color folder so its contents appear
in the right hand pane of the open window.
e) Point to the icon for the H Monitor, PC generic 1.8 gam.icc profile and hold
down the “Ctrl” key (notice that a “+” sign appears to the right of the cursor).
Drag the copy to the Color folder in the other open Explorer window. This action
will place a copy of the monitor profile, with the name unchanged, in the Color
folder.
f) Close both Explorer windows.
3. Setting up Preferences in Photoshop (Macintosh, Windows 95/98 & NT 4)
A. Choosing a Monitor Profile
1) Open Photoshop
2) Choose from the File menu; Color Settings>RGB Setup… (see illustration)
3) Make the following choices in the RGB Setup dialog box:
• Select the “Colormatch RGB” choice from the dropdown menu.
Note: 1.80 Gamma, White Point and Primaries will automatically fill–in when
ColorMatch RGB is chosen.
• Check the box “Display Using Monitor Compensation”
4) Click on the OK button and close the RGB Setup window.
Polaroid’s Electronic Imaging Systems service bulletins are subject to change as necessary. The information above
was believed to be correct at the time of printing. If you have any questions regarding this document, please refer to
the information sources outlined above.
PolaColor Insight Service Bulletin V2, N2 Page 3 of 6
B. Profile Setup (Macintosh, Windows 95/98 & NT 4)
1) Choose from the File menu; Color Settings/Profile Setup… (see illustration)
2) Make the following choices in the “Profile Setup” dialog box:
In the Embed Profiles section; check - RGB, CMYK, and Grayscale
Under Assumed Profiles, RGB: choose “Ask When Opening” from the
dropdown menu.
Under Profile Mismatch Handling, RGB: choose “Ask When Opening”
3) Click on the OK button and close the Profile Setup dialog box. Note: You
must shut down and re start your computer for these changes to take effect.
4. Converting SprintScan scans to Photoshop 5.x color space before
making any additional corrections. (Macintosh, Windows 95/98 & NT 4
a) Open the PolaColor Insight application On the Preview tab in the Profiles
section, under Display; choose - “Monitor, calibrated to 1.8 gamma” from the
dropdown menu choices.
b) Preview and scan an image.
c) Open the saved image in Photoshop. Notice that when you open the colormatched image you just scanned, the Missing Profile dialog box appears (see
illustration).
Polaroid’s Electronic Imaging Systems service bulletins are subject to change as necessary. The information above
was believed to be correct at the time of printing. If you have any questions regarding this document, please refer to
the information sources outlined above.
PolaColor Insight Service Bulletin V2, N2 Page 4 of 6
d) Make sure the Input Conversion choices are as shown in the illustration.
From: Monitor, calibrated to 1.8 gamma
To: RGB Color
Engine: Built-in
Intent: Perceptual (Images)
Black Point Compensation; - checked
5. Printing using color management profiles with Epson Inkjet 800
Following are some suggestions for setting up an Epson Stylus Color 800
Printer to print accurate images that were scanned using PolaColor Insight. The
Macintosh version of the printer driver dialog boxes is shown in the illustrations,
Windows dialog boxes are similar.
a) The best quality results are obtained by using glossy inkjet photographic paper.
Make sure that the printer is set correctly for the paper that’s used.
b) For “Space” choose Colormatch RGB from the dropdown menu.
c) Access the Main printer settings dialog box and click Advanced; then More
Settings (See illustration).
d) In the More Settings dialog box select: (see illustration).
Polaroid’s Electronic Imaging Systems service bulletins are subject to change as necessary. The information above
was believed to be correct at the time of printing. If you have any questions regarding this document, please refer to
the information sources outlined above.
PolaColor Insight Service Bulletin V2, N2 Page 5 of 6
•
•
•
•
“Superfine 1440 dpi: for Print Quality
“Error Diffusion” for Halftoning
“Epson Standard” for ColorSync Profile
“Perceptual” for Rendering
e) Close the dialog boxes and print the image.
Contact: Gerald DiBello
Email: DIBELLO, GERALD,
Internet: [email protected]
Polaroid’s Electronic Imaging Systems service bulletins are subject to change as necessary. The information above
was believed to be correct at the time of printing. If you have any questions regarding this document, please refer to
the information sources outlined above.
PolaColor Insight Service Bulletin V2, N2 Page 6 of 6
Digital Products
Service BULLETIN KB#990630113234GD
201 Burlington Rd. Bedford MA 01730
PolaColor Insight
From:
Date:
Subject:
Vol. 2, No. 4
New Products Service Support Group
June 28, 1999
PolaColor Insight Pro version 3.5 Released
Category: Software Info Bulletin
The purpose of this bulletin is to provide Telephone Support and Repair
organizations with information on the new features of PolaColor Insight version
3.5
Products Affected:
SprintScan Models: 4000, 35ES, 35 Plus, 35LE, 45
Details:
PolaColor Insight Pro version 3.5 has been released as of the date of this
Bulletin. The new software has the following improvements and changes
(compared to version 3.1)
New Feature Summary
Ø Scratch disk selection (Macintosh only)
Ø 12-bit-per-channel (36-bit) raw image file format
Ø Autofocus control
Ø Profile embedding
Software Availability: English version available on Polaroid website at:
http://www.polaroid.com/service/sfwdownload/index.html
The version 3.5 software on CD-ROM is scheduled to be available July 1999.
Ø English version including Adobe PhotoDeluxe 2.0 – PID No. 103224
Ø Five language version without PhotoDeluxe – PID No. 103242
New Feature Listing
Macintosh Version
New! Scratch Disk Selection
Description: During image processing on Macintosh computers, PolaColor
Insight software stores temporary files on the hard disk. The disk used for these
files is called the “scratch” disk. If necessary, you can select a different drive for
use as a scratch disk with these steps:
Polaroid’s Electronic Imaging Systems service bulletins are subject to change as necessary. The information above
was believed to be correct at the time of printing. If you have any questions regarding this document, please refer to
the information sources outlined above.
PolaColor Insight Service Bulletin V2, N4 Page 1 of 2
1 Click Preferences on the Edit menu.
2 Click the Scratch Disk popup and select a disk drive.
3 Click OK.
New! Settings File Converter
Description: Allows settings files that were created in earlier versions of
PolaColor Insight to be recognized and used by version 3.5
Macintosh and Windows
New! 12-bit-per-channel (36-bit) raw image file format
Description: PolaColor Insight Version 3.5 allows images to be saved in a 12-bitper-channel format intended for highly sophisticated image processing with
other applications or for scientific and analytical uses. These 12-bit-per-channel
image files contain the raw image data directly from the scanner without any
PolaColor Insight image corrections applied.
To save an image in this format, follow the PolaColor Insight instructions to
preview and scan an image. (Any corrections you make will be ignored.) When
the Save Image File As dialog box appears, make sure Scan 12 Bits per
Channel is enabled (checked).
This feature is available only when saving as TIFF or Photoshop 3.0 images on
Macintosh systems or as TIFF images on PC systems.
New Autofocus control
To reduce the time required for a scan, the scanner automatic focus function is
normally disabled. For most scans at normal sizes and resolutions, disabling
autofocus does not degrade the image. When scanning small areas at high
resolutions, however, enabling autofocus may improve image sharpness.
To enable or disable autofocus during the final scan:
1 Click Preferences on the Edit menu.
2 Click the Scanning tab (PC systems only).
3 Click Enable Autofocus on Final Scan to display or remove the checkmark.
4 Click OK.
New! Profile embedding
PolaColor Insight version 3.5 software lets you embed color pro-file information
within image files. The result is more accurate color rendition when you view or
print these files with Adobe Photoshop software (version 5 or later) or other
applications compatible with the ColorSync color management system or conforming to ICM standards. This system uses the color profile information to
compensateautomatically for color space differencesamong scanners, monitors,
printers and other devices.
Refer to PolaColor Insight Bulletin V3, N2 dated May 17, 1999 for full details on
color matching and profile embedding.
Contact: Gerald DiBello
Email: DIBELLO, GERALD; Internet: [email protected]
Polaroid’s Electronic Imaging Systems service bulletins are subject to change as necessary. The information above
was believed to be correct at the time of printing. If you have any questions regarding this document, please refer to
the information sources outlined above.
PolaColor Insight Service Bulletin V2, N4 Page 2 of 2
Digital Products
Service BULLETIN KB990716134701GD
201 Burlington Rd. Bedford MA 01730
PolaColor Insight
From:
Date:
Subject:
Vol. 2, No. 5
New Products Service Support Group
July 16, 1999
PolaColor Insight Scripting for Macintosh – Some Scripts
Don’t Seem To Work
Category: Product Alert Bulletin
The purpose of this bulletin is to provide Polaroid Telephone Support providers
with information concerning problems with sample Applescripts provided with
the current Macintosh version of PolaColor Insight. The samples are included
with the PolaColor Insight version 3.5 that was released June 1999 on
Polaroid’s website (www.polaroid.com).
Products Affected:
SprintScan Models: 4000, 35ES, 35 Plus, 35LE, 45
Details:
Introduction
PolaColor Insight version 3.5 for the Macintosh was released on Polaroid’s
website on June 23, 1999. The release version contains a number of sample
programs written in Applescript (A scripting tool provided with the Mac OS) and
intended to provide the user with the tools to automate the scanning process in
PolaColor Insight. The sample scripts provided are intended to give the user a
starting place to customize the provided scripts for their own needs and/or help
them to learn scripting.
For example, one script provided is named “Run Batch Folder.” This script will
scan a number of slides or filmstrips based on preset parameters (i.e. preprepared Insight settings files) and stop when it runs out of settings files. This
particular script was originally developed to automatically scan all four slides in
a SprintScan 45 4-slide filmholder. Since each slide is in a different location
within the holder, the four settings files provide, among other parameters, a
crop rectangle for the location of each slide. If a user wanted to modify the
script to work with a SpintScan 4000 they would have to add a frame counter
position to script.
Problem: User can’t modify three of the sample scripts
If the user is learning Applescripting and wants to modify one of the sample
scripts for their own use, they can do so using the Applescript scripting editor
that’s included free with the Mac OS. To edit a script using the scripting editor
Polaroid’s Electronic Imaging Systems service bulletins are subject to change as necessary. The information above
was believed to be correct at the time of printing. If you have any questions regarding this document, please refer to
the information sources outlined above.
PolaColor Insight Service Bulletin V2, N5 Page 1 of 3
you would normally choose a sample script, double-click on the script icon and
this opens the script for editing. The following three sample scripts contain
references that Applescript can’t find and it appears to the user that the script
will not run and can’t be edited:
1. Run Batch Folder
2. SS 4000 Batch w/Notify
3. Run Multiple Scans (sample)
Getting Applescript help
Two new sources for Applescript learning tools are:
1. Your HD: Apple Extras: AppleScript: About Applescript 1.3.6 (version
number varies depending on what you've installed on your Mac). This
document gives a very brief intro to Applescript.
2. Apple's Help Center found on the users hard drive, and
http://www.apple.com/applescript.
Resolution:
Following are workaround suggestions that will give users a way to edit the
three sample scripts that, to the user, appear to be non-functional. All the other
sample scripts included with Insight 3.5 may be edited without the need for
workarounds. The English only version of PolaColor Insight 3.5 for the
Macintosh that’s currently (as of the date of this bulletin) found on Polaroid’s
website will be modified. After modification, all three sample scripts that
currently have problems will be fixed. The localized five-language version of
PolaColor Insight version 3.5 will have the corrected scripts inserted before it’s
released (scheduled release – month the of July 99).
1. Run Batch Folder script
When the user attempts to run or edit the script they see a Dialog box
similar to the one shown in Figure 1. The message indicates that the script
editor is looking for an application name “Blink Debug” that’s referred to in
the script.
Figure 1
A workaround allowing script to be edited is - Point Applescript to the PolaColor
Insight 3.5 application. To do this you would click the mouse pointer to select
Polaroid’s Electronic Imaging Systems service bulletins are subject to change as necessary. The information above
was believed to be correct at the time of printing. If you have any questions regarding this document, please refer to
the information sources outlined above.
PolaColor Insight Service Bulletin V2, N5 Page 2 of 3
PolaColor Insight 3.5 in the list and then click on the Open button. After this
action is taken, Applescript opens up the script for editing. After edits are
complete you can save the script with a different name.
2. SS4000 Batch w/Notify script
When the user tries to run or edit this sample script, Applescript comes up with
a Dialog box similar to the one shown in Figure 1. In this case, the message
seen is: Where is SendNotification? SendNotification is a reference to a thirdparty application that sends an e-mail notification to a chosen person when a
batch scan is complete (this is explained within the script). Since the application
SendNotification is not found, Applescript posts a Dialog box asking where to
find it. A workaround, allowing the user to edit the script is to choose any
application on the users hard drive. After the application is chosen, the name of
the application will be inserted within the script and the user will then be able to
open the script for editing. When editing, the reference to the SendNotification
application can be removed and the script can be saved with a different name
chosen by the user.
3. Run Multiple Scan (sample) script
If the user tries to run or edit this script they will see the same Dialog box as
shown in Figure 1 asking: “Where is Blink Debug?” The workaround to allow this
script to be edited is the same as the one for the Run Batch Folder script.
Contact: Gerald DiBello
Email: DIBELLO, GERALD; Internet: [email protected]
Polaroid’s Electronic Imaging Systems service bulletins are subject to change as necessary. The information above
was believed to be correct at the time of printing. If you have any questions regarding this document, please refer to
the information sources outlined above.
PolaColor Insight Service Bulletin V2, N5 Page 3 of 3
Digital Products
Service BULLETIN KB# GD990217143741
201 Burlington Rd. Bedford MA 01730
Polaroid ColorShot Printer - (General) Vol. 1, No. 1
From:
Date:
Subject:
•
New Products Service Support Group
February 16, 1999
Software Update
Category: Software Info Bulletin
The purpose of this message is to notify Telephone Service and Repair
providers of ColorShot printer software updates now available to customers via
the world wide web.
•
Products Affected:
Polaroid ColorShot Parallel printer, PhotoMAX Photo Printer & ColorShot USB
printer
•
Details:
1. Summary of new software available at: www.colorshot.com:
• New! Internet Explorer and Netscape Navigator plug-in (Beta version)
A printer plug-in is now available for Internet Explorer version 4 and Netscape
Navigator version 4, or later. The plug-in allows a user to choose and print many
types of images found on the world wide web directly to ColorShot or PhotoMAX
printers.
•
Update! USB version 1.1 software released
Summary of changes:
- Automatic image sharpening when IQA is turned on.
- New color profiles
- New sample images
- IQA upgraded to version 1.94 for improved color performance
- Software now refers to the printer as “Polaroid Digital Photo Printer – USB”
2. How to install the new USB version 1.1 software for Windows 95 or 98
NOTE: The new software is a large file. Telephone modem users should expect
lengthy download times.
a) Go to the Printers folder and delete the ColorShot USB entry.
b) Go to Add-Remove Programs in the Control Panels folder and delete the
entry; “Polaroid IQA for PhotoPrinter.”
c) Re-boot the PC
d) Install the new version 1.1 software
- Continued on next page Polaroid’s Electronic Imaging Systems service bulletins are subject to change as necessary. The information above
was believed to be correct at the time of printing. If you have any questions regarding this document, please refer to
the information sources outlined above.
Polaroid ColorShot (General) Bulletin V1, N1 Page 1 of 2
3. Notes on the new test images included with USB software version 1.1
After the new software is installed, the Samples folder placed on the user’s C
drive now contains new sample images. These images are intended for use by
the customer to help test the operation of the printer. The images look best
when printed with IQA turned “on.”
a) “Fish” is an image that should be printed in Landscape mode.
b) “Flowers” is an image that should be printed in Portrait mode.
Contact: Gerald DiBello
e-mail: DIBELLO, GERALD
Internet: [email protected]
Polaroid’s Electronic Imaging Systems service bulletins are subject to change as necessary. The information above
was believed to be correct at the time of printing. If you have any questions regarding this document, please refer to
the information sources outlined above.
Polaroid ColorShot (General) Bulletin V1, N1 Page 2 of 2
Digital Products
Service BULLETIN KB# 981121135007GD
201 Burlington Rd. Bedford MA 01730
Polaroid ColorShot USB
From:
Date:
Subject:
•
Vol. 1, No. 7
New Products Service Support Group
November 24, 1998
IQA Version Conflict with PolaColor Insight v 2.X
Category: Software Info Bulletin
The purpose of this message is to alert Telephone Service and Repair providers
about a software conflict with PolaColor Insight version 2.X. The conflict will only
occur if the user has version 1.03, or earlier, of the USB software. It’s expected
that this problem will mostly be seen by Polaroid Sales and Service personnel.
•
Products Affected:
Polaroid ColorShot USB printers operating with version 1.01, 1.02, or 1.03 (or
earlier Beta versions) of the software running under the Windows 95 or
Windows 98 OS.
•
Details:
The user has any version, prior to 1.1, of the ColorShot USB software installed
and working normally. After PolaColor Insight Version 2.X is installed, an error is
reported when the user tries to print using the ColorShot. The error message
reads: “Polaroid ColorShot internal software error.” The error occurs after the
Preview window comes up and you click the printer icon at the top. The same
error will also occur when the user tries to print without using the Preview
feature.
•
Resolution:
You can find out what version of software is installed on a user’s PC with one of
the following methods:
1. Look at the version number printed on the ColorShot CD-ROM
2. Open the Printers folder and select the ColorShot USB printer icon. Rightclick on the icon and choose Properties. Choose the Graphics tab in the
Properties window that opens. Click on the About button and the window
that appears will show the version number.
The problem happens because PolaColor Insight version 2.X contains a newer
version of IQA than the one installed by the ColorShot Software. This problem
will not occur if the user has version 1.X, or later, of the software. Use the
following steps to fix this problem:
Polaroid’s Electronic Imaging Systems service bulletins are subject to change as necessary. The information above
was believed to be correct at the time of printing. If you have any questions regarding this document, please refer to
the information sources outlined above.
Polaroid ColorShot USB Bulletin V1, N7 Page 1 of 2
1.
2.
3.
4.
Disconnect the USB cable from the back of the ColorShot Printer.
Delete PolaColor Insight using the Add/Remove programs function.
Delete ColorShot IQA using the Add/Remove programs function.
Delete the ColorShot USB printer that’s inside the Printers folder by RightClicking on its icon and choosing Delete.
5. Delete the entire folder named “Polaroid Imaging” that can be found in the
path: C:\Program Files\Common Files\Polaroid Imaging
6. Find the file “Pltbxc.dll” and delete it.
7. Re-start the PC.
8. Install PolaColor Insight
9. Install the ColorShot USB software
10. Re-start the PC.
Contact: Gerald DiBello
Cc:mail: DIBELLO, GERALD
Internet: [email protected]
Polaroid’s Electronic Imaging Systems service bulletins are subject to change as necessary. The information above
was believed to be correct at the time of printing. If you have any questions regarding this document, please refer to
the information sources outlined above.
Polaroid ColorShot USB Bulletin V1, N7 Page 2 of 2
Digital Products
Service BULLETIN KB#981218180133GD
201 Burlington Rd. Bedford MA 01730
Polaroid ColorShot Parallel
From:
Date:
Subject:
•
Vol. 1, No. 3
New Products Service Support Group
December 18, 1998
Software Version 1.1 Released
Category: Software Info Bulletin
The purpose of this message is to alert Telephone Service and Repair providers
regarding the latest release of software for the Parallel version of the ColorShot
Digital Photo Printer
•
Products Affected:
Polaroid ColorShot Parallel digital photo printer
•
Details:
1. New Features & Benefits
Software Version 1.1 (PID #629403) has been released for the ColorShot
Parallel printer. This software replaces the previously released version 1.0. The
new software has the following new features:
• Updated printer profiles – Provides improved highlight detail and color
performance.
• New sharpening feature – This feature greatly enhances image quality.
Note: the sharpening feature is only active when IQA is “on.”
• Lpt.vxd version 4.00.953 driver file included on CD-ROM. This will be a help
to the user who does not have web access, or any other way to get this
updated driver.
• New test images – Test images have changed since version 1.0.
2. Installing the New Version 1.1 Software
a) Go to the Printers folder and delete the ColorShot Parallel.
b) Go to Add-Remove Programs in the Control Panels folder and delete the
entry; “Polaroid IQA for PhotoPrinter.”
c) If you are installing the printer on a Compaq Deskpro PC (Note: this does
not apply to Deskpro model EN) you may need to install a new version of the
file Lpt.vxd. See 3. Installing a new Lpt.vxd file.
d) Re-boot the PC
e) Install the new version 1.1 software
Polaroid’s Electronic Imaging Systems service bulletins are subject to change as necessary. The information above
was believed to be correct at the time of printing. If you have any questions regarding this document, please refer to
the information sources outlined above.
Polaroid ColorShot Parallel Bulletin V1, N3 Page 1 of 2
3. Installing a New Lpt.vxd file
If the customer is experiencing slow printing (takes 5 minutes or more to print a
picture), or have a Compaq Deskpro PC they may have an old version of the
Lpt.vxd driver on their PC.
a) To check what version is currently installed, you can find the Lpt.vxd file in
the following path: C:\Windows\System (assuming C is the letter of their root
drive).
b) Right click on the file name and choose Properties. In the Properties window
that appears, choose the Version tab. Read the version number.
c) If the version number is earlier than 4.00.953 you should replace it with the
newer version.
d) Ask the customer to make a copy of the existing Lpt.vxd file in case
something happens to the new version file. By making a copy, you can
always go back to the old file if it’s needed.
e) Use the Explorer to search for the Utility folder on the ColorShot CD-ROM.
Find the file named UpgradeLPTdriver.exe. Double-click on this file to
launch it. It will unpack the new Lpt.vxd file to a location you choose (default
location is: Windows\Temp).
f) Copy the new Lpt.vxd file to: C:\Windows\System
g) Restart the PC and try printing again.
4. New Test Images
The Samples folder on the ColorShot CD-ROM contains two new sample
images. These images are intended for use by the customer to help test the
operation of the printer. These images look best when printed with IQA turned
“on.”
a) “Fish” is an image that should be printed in Landscape mode.
b) “Flowers” is an image that should be printed in Portrait mode.
Contact: Gerald DiBello
Cc:mail: DIBELLO, GERALD
Internet: [email protected]
Polaroid’s Electronic Imaging Systems service bulletins are subject to change as necessary. The information above
was believed to be correct at the time of printing. If you have any questions regarding this document, please refer to
the information sources outlined above.
Polaroid ColorShot Parallel Bulletin V1, N3 Page 2 of 2
Digital Products
Service BULLETIN KB# 990216134044GD
201 Burlington Rd. Bedford MA 01730
Polaroid ColorShot Parallel
From:
Date:
Subject:
•
Vol. 2, No. 1
New Products Service Support Group
February 15, 1999
Firmware Defect
Category: Service Alert Bulletin
The purpose of this message is to notify Telephone Service and Repair
providers of a firmware defect that affects the ColorShot Digital Photo Printer –
Parallel model. Note: USB models are NOT affected because they contain
different firmware.
•
Products Affected:
Polaroid ColorShot Parallel printer & PhotoMAX Photo Printer
•
Details:
Reported problem: A parallel printer is correctly installed and has been working
normally. The customer reports that they are now seeing one of the following
error messages:
• Device Internal Problem
• Printer Communication Problem
•
Resolution:
One source of the error messages is a fault in the printers’ firmware code.
Since there are other sources that can cause the error messages listed, above,
there is a method you can use to determine if the firmware fault caused the
error.
Use the Explorer and look in the following path - C:\WINDOWS\TEMP for files
named “SeqXXX.txt” (where XXX is a number beginning at 000). These are
Sequence files created each time the printer is used. Scroll through the list and
look for the two newest Sequence files created. The newest files are the ones
that have the most recent date and time as listed in the “Modified” column of the
Explorer window. Double-click on a Sequence file to open it with Notepad. Ask
the user to quickly scan each of the two Sequence files and look for one, or
both, of the following example messages:
11:03:52.840: readModuleData "Error1 Code" (146)
11:03:53.120: readModuleData "Error1 Code" (128)
The first characters of the message are the time that the error occurred and can
be ignored. The most important part of the information is the number seen
within the parentheses.
Polaroid’s Electronic Imaging Systems service bulletins are subject to change as necessary. The information above
was believed to be correct at the time of printing. If you have any questions regarding this document, please refer to
the information sources outlined above.
Polaroid ColorShot Parallel Bulletin V2, N1 Page 1 of 2
Note that the (146) and the (128) numbers are the unique identifiers of the
firmware fault. If you see these numbers along with the “readModuleData”
listing, then the firmware problem is the cause of the error message seen by the
customer.
Solution: Clear the error condition by removing and replacing the pack of
film that’s in the printer. After the film pack has been removed and replaced the
customer can start printing again. If you only open and close the film loading
drawer the problem will not be fixed, the film pack must be removed and put
back in. Remember that the top piece of film will now be exposed and will be
ejected before the next real print is ejected.
Important! If the numbers within the parentheses of the are NOT 128 or
146 (or the noted error message does not appear in the Sequence log), use
information in the “ColorShot Telephone Support Guide” to help you find other
causes of Internal Problem or Communication Problem error messages.
Contact: Gerald DiBello
e-mail: DIBELLO, GERALD
Internet: [email protected]
Polaroid’s Electronic Imaging Systems service bulletins are subject to change as necessary. The information above
was believed to be correct at the time of printing. If you have any questions regarding this document, please refer to
the information sources outlined above.
Polaroid ColorShot Parallel Bulletin V2, N1 Page 2 of 2
Digital Products
Service BULLETIN KB#998618141449GD
201 Burlington Rd. Bedford MA 01730
Polaroid Photo Printer -Parallel
From:
Date:
Subject:
•
Vol. 2, No. 2
New Products Service Support Group
June 17, 1999
New Software Version 1.2 Released
Category: Software Info Bulletin
The purpose of this Bulletin is to notify Telephone Service and Repair Service providers
of a new released version 1.2 of the [ColorShot] Photo Printer - Parallel Software.
•
Products Affected:
Polaroid ColorShot Photo Printer Parallel
•
Details:
1. New Feature Listing (compared to version 1.1)
New features in Version 1.2 of the Parallel Photo Printer software:
•
A single page “Release Notes” document is included with the new software. A
copy of the release notes is attached to the last page this bulletin.
• LPT.vxd parallel port drive update for Windows 95 computers
The CD-ROM now contains a LPT.vxd parallel printer port driver updater in the “Utility”
folder. If the user sees “Communication Error Occurred” messages or encounters slow
printing (files takes 5 minutes or more to print) the LPT.vxd file should be updated.
Instructions for updating the file are included in the Release Notes.
•
English only Web browser printer plug-in (version 1.23) for Internet Explorer
version 4 and Netscape version 4, or later.
A new feature is included with this version of the software. Users can now print images
(note: some image types are not supported) directly from their web browser. Previously
this software was only available on the Polaroid website. The Release Notes (a copy is
on the last page of this Bulletin) include instructions on how to install the web plug-in
software.
Note: Version 1.23 is an update to a version 1.1 that, previously, was only available on
the Colorshot.com website. See ColorShot Bulletin V1, N1 released in December 1998.
• JavaScript Engine update instructions for Internet Explorer version 4
The users of Windows 95 PC’s may require a JavaScript Engine update. The update is
needed if printing from the web does not work. The new Engine is available from
Microsoft via the World Wide Web. Instructions on how to get and install the update are
included in the Release Notes (a copy is on the last page of this Bulletin).
(new features continued on next page)
Polaroid’s Electronic Imaging Systems service bulletins are subject to change as necessary. The information above was
believed to be correct at the time of printing. If you have any questions regarding this document, please refer to the information
sources outlined above.
Polaroid Photo Printer- Parallel Bulletin V2, N2 Page 1 of 3
• English only Web Printer Plug-in On-line Help
You can learn how to use the web printer plug-in by going to the following web URL:
www.polaroid.com/products/digitalphotoprinter/plugins/index.html
2. How to get the Software
•
CD-ROM: Order Parallel Photo Printer v1.2; Software PID No. is 629403
•
Web plug-in: www.Polaroid.com – go to ColorShot page
3. Installing new Version 1.2 software if an older version exists on the user’s PC
Note: Uninstalling old software is not mentioned in the Readme or Release notes
a) Go to the Printers folder and delete the ColorShot Parallel or Photo Printer Parallel.
b) Go to Add-Remove Programs in the Control Panels folder and delete the entry;
“Polaroid IQA for PhotoPrinter.”
c) If the user had a older version of the web-browser plug-in, go to Add-Remove
Programs and remove “Plug-in for Polaroid Photo Printer.”
d) Re-boot the PC
e) Install the new software
4. Reprint of Readme file (this page) and printed Release Notes (page 3) that are
included with version 1.2 of the Parallel Photo Printer software.
Photo Printer Plug-in Readme
System Requirements
------------------This is the English Language version of the Photo Printer Plug-in and is intended to run
on English versions of Windows 95 and Windows 98.
The "minimum" Hardware Configuration includes:
* Polaroid Digital Photo Printer
* 5 MB of Available Disk Space
* 16 MB of Memory
* Super VGA Monitor (1 MB of VRAM)
* Pointing Device (Mouse)
Installation Instructions
------------------------You install the Plug-in by running setup.exe that you will find in the folder "Plugins"
located on the CD.
YOU MUST REBOOT YOUR SYSTEM IN ORDER FOR ALL DELIVERED COMPONENTS TO
BE LOADED
PROPERLY BY WINDOWS.
Release Notes
------------If you elect to uninstall the plug-in, you must run a cache file clean up utility,
named CleanUpIQADataFiles.exe, before running the uninstaller. Otherwise residual files
will be left behind.
Polaroid’s Electronic Imaging Systems service bulletins are subject to change as necessary. The information above was
believed to be correct at the time of printing. If you have any questions regarding this document, please refer to the information
sources outlined above.
Polaroid Photo Printer- Parallel Bulletin V2, N2 Page 2 of 3
Polaroid ColorShot Photo Printer Release Notes
Version 1.2
Communication Error — Windows 95 ONLY
(for parallel port users only)
The parallel port driver requires updating when the message, "Communication Error Occurred"
displays. This error can occur anytime after a successful installation of the Polaroid ColorShot
Photo Printer software. Note: Not applicable to Windows 98 because the drivers are updated.
To correct this error:
1.
2.
3.
4.
Insert Polaroid ColorShot Photo Printer CD
Double click My Computer
Double click CD
Double-click UpdateLPTDriver.exe in the Utility folder
This updates the parallel port driver.
If printer errors continue, call Polaroid's Electronic Imaging Specialist at: 1-800-432-5355.
Installation of Web Browser Plug-in
Installation of the Polaroid ColorShot Photo Printer plug-in allows Web browsers (Netscape or
Internet Explorer) to function as an imaging application. This allows you to print Web images
directly from a Web site.
• Install Web browsers (Netscape or Internet Explorer) before installing the
Polaroid ColorShot Photo Printer plug-in.
• Reboot the system after installing Polaroid ColorShot Photo Printer driver.
To install Polaroid ColorShot Photo Printer plug-in:
1.
2.
3.
4.
Insert Polaroid ColorShot Photo Printer CD
Double click My Computer
Double click CD
Double click setup.exe in the plug-in folder
Internet Explorer 4/Windows 95 environments require a current version of Microsoft's
JavaScript Engine for successful execution of the Polaroid ColorShot Photo Printer plug-in.
Refer to JavaScript Engine for Internet Explorer (IE) version of Polaroid ColorShot Plug-in
paragraph for additional information.
JavaScript Engine for Internet Explorer (IE) version of Polaroid ColorShot Plug-in
The IE version of the plug-in requires the JavaScript engine (Microsoft Scripting Engine)
for Windows 95. The engine may be downloaded from Microsoft's Web site
[http://www.microsoft.com/msdownload/vbscript/scripting.asp] after selecting the applicable
language version of the engine (i.e., US English x86 Alpha) and following the instructions.
Tips
Reinstall the Web plug-in if the Polaroid ColorShot Photo Printer Driver Software is uninstalled
and reinstalled.
The latest version of the Web plug-in and other Polaroid ColorShot Photo Printer related
software is available for downloading. Visit our Web site: www.polaroid.com.
Polaroid’s Electronic Imaging Systems service bulletins are subject to change as necessary. The information above was
believed to be correct at the time of printing. If you have any questions regarding this document, please refer to the information
sources outlined above.
Polaroid Photo Printer- Parallel Bulletin V2, N2 Page 3 of 3
Digital Products
Service BULLETIN KB#981221155740GD
201 Burlington Rd. Bedford MA 01730
Polaroid ColorShot
From:
Date:
Subject:
•
Vol. 1, No. 1
New Products Service Support Group
December 21, 1998
Netscape Browser Plug-In Released
Category: Software Info Bulletin
The purpose of this bulletin is to alert Telephone Service providers regarding the
release of a Netscape “Plug-in.” The plug-in allows any ColorShot Digital Photo
Printer to print images found on the World wide web.
•
Products Affected:
Polaroid ColorShot Parallel or USB digital photo printers.
•
Details:
Features
Netscape Plug-in Version 1.1 has been released for the ColorShot Digital Photo
Printers. The software can be downloaded from: www.ColorShot.com
The Plug-in works as an extension of the browser application. Note: The plug-in
is an English only version and is scheduled to be localized and released on
newer versions of the ColorShot software CD-ROM. The software has the
following features:
• Works with Netscape version 4 or later.
• Capture and print images directly from the worldwide web.
• Captures jpeg, bmp, and tiff images, only.
• The software has controls and options for:
- Image rotation
- Fill frame
- Best fit
- IQA (including sharpening)
- Print preview option
- Number of copies to print
Installation
a) Download the plug-in to your local hard drive.
b) Run the downloaded “Plug-in.exe” file by double-clicking on the icon.
c) Files are unpacked in the Windows/Temp directory (the default location).
The files in the Temp directory can be deleted after the installation is
complete.
d) The files will automatically be loaded in the correct locations in Netscape.
Polaroid’s Electronic Imaging Systems service bulletins are subject to change as necessary. The information above
was believed to be correct at the time of printing. If you have any questions regarding this document, please refer to
the information sources outlined above.
Polaroid ColorShot Bulletin V1, N1 Page 1 of 2
Using the Software
a) Go to a web location where a picture you want to print is located.
b) If it’s a picture you can see on the page, place the cursor over the picture
and right-click. If the image is a link, the picture appears directly in the
ColorShot film frame after the link is selected and you can skip Step c).
c) Select the “View Image” choice in the drop-down menu. Note that the image
name and its file type appear next to the View Image choice. Make sure the
image is a: .jpg, .tif or .bmp file.
d) The image appears in a ColorShot window in a Spectra film-size frame.
Controls for Number of images to print, a Print button and a Refresh button
are under the frame.
e) Right click-on the image to access the rotation controls and “Preferences”
from the drop down menu.
f) Use the Preferences choice to make adjustments for Best fit, Fill frame, IQA
controls and a Print preview feature.
g) Note: The better the quality of the original image, the better the print quality.
Low resolution images may appear pixilated when printed.
Contact: Gerald DiBello
Cc:mail: DIBELLO, GERALD
Internet: [email protected]
Polaroid’s Electronic Imaging Systems service bulletins are subject to change as necessary. The information above
was believed to be correct at the time of printing. If you have any questions regarding this document, please refer to
the information sources outlined above.
Polaroid ColorShot Bulletin V1, N1 Page 2 of 2
Service Bulletin
Worldwide Customer Support Services
201 Burlington Road
Bedford, MA 01730
Tel: 781-386-5651
Fax: 781-386-5611
No. PAF120399
______________________________________________________________________________________
Subject:
Author:
Date:
T55 Film “wood grain” Defect
Philip J. Cravotta
December 3, 1999
Service Bulletin:
The purpose of this bulletin is to alert service providers to a deviation in the
quality and/or performance of a specific film manufacturing cycle.
Product:
Type 55 P/N Film
Manufacturing Codes:
The following positive codes and expiration dates are affected:
G9xxxxxxxx
H9xxxxxxxx
J9xxxxxxxxx
K9xxxxxxxx
April 2000
May 2000
June 2000
July 2000
Issue:
A problem has occurred in the coating of the positive sheet resulting in a nonuniformity of the image that can be described as a “wood grain” pattern. The
pattern appears in the instant print only, and is most prominent in the light gray
areas. Pictures already taken and print-coated will not worsen with age.
However, aging of unprocessed film will cause an increased "wood grain” effect
when the film is used. The negative is not affected by the defect, and customers
who refrigerate their film will slow down this age-related pattern.
This product has been shipped worldwide.
Customer Resolution:
Replace any film held by customers who have this problem.
Corrective Action:
Film return issues should be dealt with on an individual basis. The film is not
being recalled from the dealers because most of the film has already been sold
through to the end users. Also, customers who only use the negative may be
indifferent to the quality of the instant print, and customers who refrigerate their
film may not experience the problem.
In an effort to help Manufacturing have a better understanding of customer
impact, please arrange to have representative samples sent to the following
address:
Polaroid Corporation
1265 Main Street
Waltham, MA 02154-1799
USA
Attn: Brian Tanguay
Phone: 781-386-0097
Contact:
Please direct questions to
Phil Cravotta
Worldwide Customer Support Services
201 Burlington Road
Bedford, MA 01730
USA
Phone: 781-386-5651
E-mail: [email protected]
Distribution:
Polaroid Service Centers
Service Bulletin
No. IF010500
Worldwide Customer Support Services
201 Burlington Road
Bedford, MA 01730
Tel: 781-386-5651
Fax: 781-386-5611
Second Release
______________________________________________________________________________________
Subject:
Author:
Date:
Dead Battery Issue
Philip J. Cravotta
December 15, 1999
Service Bulletin:
The purpose of this bulletin is to alert service providers to a deviation in the
quality and/or performance of a specific film manufacturing cycle.
Product:
Type 600 and Type 779 Film
Manufacturing Codes:
Film with positive codes and expiration date listed below will be affected to a
relatively small degree.
129xxxxxxxx
March 2001
Issue:
A problem has occurred in a manufacturing run of batteries that will result in the
customer experiencing a dead battery throughout the film pack. It is expected that
the defect occurrences will be sporadic and will cause a slight increase in the
number of customers with dead battery issues.
Customer Resolution:
Follow the standard troubleshooting procedure and replace any film held by
customers who have this problem.
Corrective Action:
Film return issues should be dealt with on an individual basis. Replace the
customers’ defective film with film coupons or film, whichever is appropriate.
United States customers only – after replacing the customers’ film, and until
further notice, ask the customer to mail the defective film back to Polaroid for
analysis. Inform the customer that Polaroid, in appreciation for their effort, will
send them an additional film coupon for each pack they send in. Provide the
customer with a SCOPUS reference number that should be included on the return.
The film should be mailed to the following address:
Polaroid Corporation
920 Winter Street
Waltham, MA 02451
Attn: Anne O’Neil
Phone: 978-386-5507
Contact:
Please direct questions to
Phil Cravotta
Worldwide Customer Support Services
201 Burlington Road
Bedford, MA 01730
USA
Phone: 781-386-5651
E-mail: [email protected]
Distribution:
Polaroid Service Centers
Service Bulletin
Worldwide Customer Support Services
201 Burlington Road
Bedford, MA 01730
Tel: 781-386-5651
Fax: 781-386-5611
No. PAF101000
______________________________________________________________________________________
Subject:
Author:
Date:
Pod Smear
Philip J. Cravotta
August 3, 2000
Service Bulletin:
The purpose of this bulletin is to alert service providers to a deviation in the
quality and/or performance of a specific film manufacturing cycle.
Product:
Type 669 film
Manufacturing Codes:
The defect occurs randomly and may exist in any film lot, although not all film
lots will have the problem.
Issue:
Polacolor 669 ER film is showing early signs of pod smear. Although the
problem is exacerbated with age, it has recently been present in customer returns
with as much as six months left on the expiration date. The customer will
describe this defect on the phone as “streaked, pinkish streak, pink swirl or, part
of the picture is covered in pink.”
This problem can be reduced considerably if the film is stored in a refrigerator.
This product has been shipped worldwide.
Customer Resolution:
When customers return film for pod smear, replace the film with fresh dated film
that is less than three months old, having at least nine months left on the
expiration date. On a temporary basis, do not use a film coupon as compensation
for pod smear. We want to make sure that the customer’s replacement film is
fresh, in order to minimize the possibility of a recurrence of the same problem in
the replacement film, which could be brought on by aging.
If you are unable to obtain replacement film with at least nine months left on the
expiration date, you should notify David Kennedy at the Vale. David has agreed
to have long-dated replacement film shipped directly to the customer from the
Vale. Send David your request by email at [email protected].
Corrective Action:
Manufacturing is working on both a short-term and a long-term solution to the
pod smear problem, by making changes in the processing chemistry.
The Services Group is expected to manage the situation with film replacement in
the meantime. Also, as a preventative step, the customer should be advised that
storing the film at high temperatures would increase the likelihood of this
problem. Refrigeration is the best storage condition, but at minimum the film
should be stored in a cool, dry environment. The film should be allowed to reach
room temperature before being used.
Contact:
Direct questions or unmanageable situations to:
Polaroid Corporation
Worldwide Customer Support Services
201 Burlington Road
Bedford, MA 01730
Attention: Phil Cravotta
Phone: 781-386-5651
E-mail: [email protected]
Distribution:
Polaroid Service Centers
Service Bulletin
Worldwide Customer Support Services
201 Burlington Road
Bedford, MA 01730
Tel: 781-386-5651
Fax: 781-386-5611
No. PAF091900
______________________________________________________________________________________
Subject:
Author:
Date:
TPX Film Speed Deviation
Philip J. Cravotta
September 21, 2000
Service Bulletin:
The purpose of this bulletin is to alert service providers to a deviation in the
performance of a specific film manufacturing cycle.
Product:
Type TPX 8x10 Radiographic Transparency Film
Manufacturing Codes:
The following positive codes and expiration dates are affected:
J0xx173
J0xx237
September 2001
September 2001
Issue:
An increase in sensitivity by a factor of two has occurred in TPX film. All other
characteristics of this film are within specifications and the customer will
experience no deficiencies in image quality, once an adjustment has been made
for the proper exposure.
This product has been shipped worldwide.
Customer Resolution:
A notice has been packaged with the film that explains the increase in sensitivity
and the corrective course of action to take. The notice reads as follows:
Attention
This material is more sensitive than
the product you are currently using.
Please reduce your exposure level
by 50% to achieve the same results
that you are accustomed to.
Thank you
This notice should be sufficient explanation in most cases. If further explanation
is needed, however, you should explain that a 50% reduction in the level of
exposure could be accomplished by reducing the intensity of the radiation by 50%
or by reducing the duration of the radiation by 50%.
Image quality is unaffected so film replacement is not expected.
Corrective Action:
Normal film sensitivity is expected for TPX film manufactured in the future.
Contact:
Please direct questions to:
Phil Cravotta
Worldwide Customer Support Services
201 Burlington Road
Bedford, MA 01730
USA
Phone: 781-386-5651
E-mail: [email protected]
Distribution:
Polaroid Service Centers
Digital Products
Service BULLETIN KB001026093504GD
201 Burlington Rd. Bedford MA 01730
PolaColor Insight
From:
Date:
Subject:
Author:
Vol. 3, No. 11
New Products Service Support Group
October 26, 2000
Windows 2000 SCSI error message seen when starting Insight
Gerald DiBello
Category: Software Info Bulletin
The purpose of this bulletin is to alert Telephone Support and Repair
organizations regarding Windows 2000 and PolaColor Insight support issues.
Products affected:
PolaColor Insight version 4.5, 4.5.1 and later
Details:
When starting PolaColor Insight the user sees this error message:
Specified module could not be found and SCSI support found but no SCSI
boards available. In all cases, the SCSI card was correctly installed because it
is seen in the device manager.
Resolution:
1. Checking to see if a SCSI card is recognized by Windows 2000
a) Right click on the My Computer icon
b) Choose Properties
c) Select the Hardware Tab
d) Click the Device Manager button
e) Check to see if a SCSI card is listed under the SCSI Controllers category
f) If a SCSI card is shown, go the Step 2. If not, it is possible that the SCSI
card is not seated correctly in its socket on the PC’s motherboard.
2. Update the ASPI layer. If it’s an Adaptec SCSI card go to
http://www.adaptec.com/support/files/upgrades.html and download the file:
ASPI32.exe
3. Run ASPI32.exe to update or newly install an ASPI layer. The software
installer requires a re-boot of the PC. Note: Just like the older Windows NT 4,
an ASPI layer is not included with the operating system and must be manually
installed by the user. The ASPI layer must be present for a SCSI card to work
with the operating system.
Polaroid’s Electronic Imaging Systems service bulletins are subject to change as necessary. The information above was
believed to be correct at the time of printing. If you have any questions regarding this document, please refer to the
information sources outlined above.
PolaColor Insight Service Bulletin V3, N11 Page 1 of 2
4. Start PolaColor Insight and it should now run without error messages.
5. Note that there are Windows 2000 specific miniport drivers available for many
Adaptec SCSI cards. Users should install a new driver, if one is available. Go
to this location to find them:
http://www.adaptec.com/support/overview/scsiha.html find the card number,
click on and you will go to a page where you can select and download the
Windows 2000 specific driver for the card. Readme instructions with the
driver tell you how to install it.
Polaroid’s Electronic Imaging Systems service bulletins are subject to change as necessary. The information above was
believed to be correct at the time of printing. If you have any questions regarding this document, please refer to the
information sources outlined above.
PolaColor Insight Service Bulletin V3, N11 Page 2 of 2
Software Information Bulletin
June 5, 2000
Worldwide Customer Support Services
201 Burlington Road
Bedford, MA 01730
Tel: 781-386-5471
Fax: 781-386-5611
______________________________________________________________________________________
RasterPlus Windows Edition Version 3.0.3 for Polaroid
Software Information Bulletin
The purpose of this bulletin is to provide Telephone Support and Repair organizations
with information on the features of the new RasterPlus Windows Edition v3.0.
Products Affected
ProPalette 7000, ProPalette 8000 Series, HR6000, CI5000, CI3000
Details
RasterPlus Windows Edition v3.0 has been released as of the date of this bulletin. The
new software has the following feature changes:
New Feature Summary
Windows 2000 support
New User Interface
New PostScript Level 3 / PDF support
Software Availability
July 14, 2000
PID Numbers
115445
Software CFR – All ProPalettes
115533
Software for CI and HR
115446
Software Upgrade – All Palettes
Note: A previous version of RasterPlus must already be installed on the computer for
the upgrade to install.
RasterPlus Version 3.0.3
Page 2
New Feature Listing
Windows 2000 Support RasterPlus. Windows Edition v3.0 fully supports Windows
2000 Professional and Windows 2000 Server with all the files needed for a seamless
installation.
Notice: Previous versions of RasterPlus (RasterPlus95 v2.0 or earlier) do not support
Windows 2000 and may cause problems in the printing subsystem of the operating
system.
NEW! Visual Print Workflow with Archive. The power of RasterPlus has never been
easier to use. With the new three-step visual print workflow, incoming files are placed in
a Hold area where they can be previewed and released. Once approved, files go to a
Print engine that quickly renders files to the device resolution. After printing, all files are
collected in an Archive for future reprints. Each step is managed independently, so you
can now preview and print files at the same time!
Comparison: Application printing to the queue for previewing in v2.0 required the
customer to first configure a RasterPlus Enabled, Active, or Disabled queue. New in v3.0
is the ability to Print to Hold area right from the application.
ALL NEW PostScript 3. RasterPlus raises performance printing to a new level:
PostScript 3. With the new world class PostScript 3 engine, RasterPlus delivers rich new
graphics capabilities that fulfill the creative expression requirements of imaging
professionals. Print quality is dramatically improved with smooth shading technology that
renders gradient blends at the targeted device resolution. Better yet, it processes files up
to 3 times faster than before!
NEW! Native PDF Processing. RasterPlus v3.0 adds native PDF processing to its
extensive file format list. Now your clients can preview in Adobe Acrobat and send you
the same file for a consistent print workflow. Simply drop the PDF file to the queue and it
will automatically print.
NEW! Integrated Font Manager. RasterPlus v3.0 introduces a manager for adding
PostScript Type 1 fonts needed in processing EPS or Postscript files that do not include
fonts. Also, when directly File-Printing to RasterPlus, all the necessary fonts are
automatically included before printing. Either way, you can finally say goodbye to font
substitution errors.
NEW! JPEG-EXIF and Multipage Bitmap Support. Most modern digital cameras
export their images as multi-page bitmap files (usually EXIF). Simply drag-and-drop the
camera files into RasterPlus v3.0 and instantly print.
NEW! Tab View Print Queues. Because RasterPlus Windows Edition is a true multitask print application, several print queues can be used at once. Each print queue can
be assigned different properties and even different printers, all operating at the same
time. To easily manage each print queue, an intuitive Tab View is used so you can
quickly switch from one to another.
NEW! Automatic Save State. Once you tailor RasterPlus to your liking, it automatically
saves before you quit. The next time you start RasterPlus, all program settings, including
print queues and window sizes, are restored to the way you left them.
RasterPlus Version 3.0.3
Page 3
ALL NEW! Web-Ready Print Logs. Keeping track of what you print is now easier than
ever with the new Web-ready (HTML) print log in RasterPlus. Each print is recorded with
the time and owner name so you can easily account for your print jobs. Better yet, the
print log can be accessed and printed within RasterPlus or from any Web browser on the
network!
NEW! Automatic Internet Updates. RasterPlus now features an Internet update client
that automatically connects to the Graphx Web server and lets you download new
RasterPlus components. Keeping your RasterPlus current is now just a click away!
Service Resource
Dwayne Billingsley
Telephone: 1-781-386-5471
E-mail: [email protected]