1
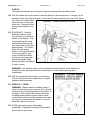
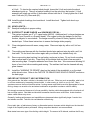
FORM #9666.05-092605 PRINTED IN U.S.A. PAGE 4 OF 10 Position the spring onto the axle. Raise the jack and mate the rear spring eye to the shackle. Insert factory bolt from the inside, facing outward. Install factory nut and hand tighten only. Position top U-bolt plate, and bottom U-bolt cradle, and install the supplied U-bolts. Snugup, do not fully tighten U-bolts. As with the spring eye bolts, they are fully tightened later. Repeat steps 4 and 5 on passenger side. 6) PITMAN ARM #01-1109 OR #01-1112… Inspect all steering link ends for looseness and/or wear and replace as necessary. Center the steering wheel so that the tires (if they were on the vehicle), point straight ahead. Make a note of the factory pitman arm’s position in relationship to the steering box/frame. Remove the cotter key and jam nut on the drag link where it attaches to the pitman arm. Use a pickle fork or other suitable tool to separate the drag link. Remove the jam nut on the end of the sector shaft. Using a pitman arm puller tool (available at most auto parts stores), separate the pitman arm from the sector shaft. IMPORTANT: Prior to installing the dropped pitman arm, compare the spline count and indexing lugs of the stock pitman arm with the supplied pitman arm to verify the correct arm has been applicated for the vehicle. This can be accomplished by stacking the stock arm on the supplied arm (see DIAGRAM 1). The splines and indexing lugs must line up exactly. If a difference is noted (i.e. the pitman arms do not line up), contact Superlift before proceeding. Position the Superlift pitman arm (#01-1109 on models made prior to 2/28/99 or #01-1112 on models made on or after 3/1/99) on the sector shaft in the exact same position as the original arm. Reinstall the factory jam nut and tighten (200) Reconnect the drag link to the pitman arm, install the jam nut, and tighten (67). Once the nut is torqued, install a new cotter key.