1
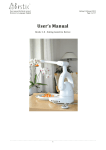
PD2018_Manual for Bestic_EN_ver1 Language: English Date: 2014-11-14 Manual for Bestic Manual for Bestic Eating Assistive Device Bestic software version 2.3 - Bestic AB c/o Business Hub, Årstaängsvägen 21 C SE- 117 43 Stockholm, Sweden Website: www.besticinc.com E-mail: [email protected] Telephone: +46(0)733 - 93 00 07 © Bestic AB 2014-11. All rights reserved. Page 1 of 28 PD2018_Manual for Bestic_EN_ver1 Language: English Date: 2014-11-14 Manual for Bestic Table of contents 1. 2. 3. 4. 5. Introduction 4 1.1 Intended use 4 1.2 Bestic philosophy 4 1.3 Contact 4 Safety 4 2.1 Information about the warning sign 4 2.2 Disclaimer 5 2.3 Safety instructions 5 Product overview 6 3.1 Description 6 Handling 7 4.1 Lifting Bestic 7 4.2 Connecting a control device 7 4.3 Charging 8 4.4 To attach and dismantle the spoon 8 4.5 The plate 8 4.6 Turning Bestic on and off 9 4.7 Emergency stop 9 4.8 Reset 9 4.9 Do not restart 9 Care instructions 9 5.1 Cleaning 10 Bestic AB c/o Business Hub, Årstaängsvägen 21 C SE- 117 43 Stockholm, Sweden Website: www.besticinc.com E-mail: [email protected] Telephone: +46(0)733 - 93 00 07 © Bestic AB 2014-11. All rights reserved. Page 2 of 28 PD2018_Manual for Bestic_EN_ver1 Language: English Date: 2014-11-14 Manual for Bestic 6. 7. 8. Transport and storage 10 6.1 Packing for transportation 10 6.2 Storage 10 How to eat with Bestic 11 7.1 Start 11 7.2 Start menu 11 7.2.1 Start menu – with only one user 11 7.2.2 Start menu – with multiple users/profiles 12 7.3 Control modes 13 7.4 Switching control device/control mode 15 Menus and settings 15 8.1 Symbols and abbreviations in the menus 16 8.2 Main menu 17 8.2.1 Individual settings 18 8.2.2 General settings for the Bestic device 21 8.3 Alphabet, numbers and special characters 8.3.1 Renaming and adding users 23 23 Appendices Appendix 1 – How to use the Bestic Picasso MINI control 24 Appendix 2 – Serving tip 25 Appendix 3 – Notes for personal settings 26 Appendix 4 – Other notes 27 Appendix 5 – Proper USB-insert and spoon removal 28 Bestic AB c/o Business Hub, Årstaängsvägen 21 C SE- 117 43 Stockholm, Sweden Website: www.besticinc.com E-mail: [email protected] Telephone: +46(0)733 - 93 00 07 © Bestic AB 2014-11. All rights reserved. Page 3 of 28 PD2018_Manual for Bestic_EN_ver1 Language: English Date: 2014-11-14 Manual for Bestic 1. Introduction 1.1 Intended use Bestic is an eating assistive device intended for use by persons that has a reduced functionality in their arms or hands. The user controls the device via different control devices. Bestic is intended to use as a daily support during mealtimes. It is intended to be placed steadily on a flat surface, e.g. on a table while in use. Bestic can be used by both adults and children but it is not intended to be used as a toy. 1.2 Bestic philosophy Bestic is designed for use by persons with involuntary arm movements, inability to use their arms/hands or who have weak arm/hand movements. Bestic is controlled by the user who chooses which piece of food is lifted to the mouth and when. Since every individual has different assistive needs, it is possible to connect Bestic to different control devices. Handling the control device does not require much effort. The idea is that eating should be made possible with the least amount of effort, with the user deciding on what type of food and when it shall be eaten. Bestic waits for your instructions and does not move until the user decides to give the next command. 1.3 Contact Bestic is a Class I/CE-marked medical device, manufactured by Bestic AB, Stockholm, Sweden. For local contact persons and service, please go to our website (www.besticinc.com) to find contact information in your country. 2. Safety It is important to read this chapter thoroughly and to understand it, before starting to use Bestic. 2.1 Information about the warningsign This picture indicates a warning. If it is shown next to a paragraph, it means that there is a risk of injuries for a person, or a risk of damage to Bestic if the information is neglected. Bestic AB c/o Business Hub, Årstaängsvägen 21 C SE- 117 43 Stockholm, Sweden Website: www.besticinc.com E-mail: [email protected] Telephone: +46(0)733 - 93 00 07 © Bestic AB 2014-11. All rights reserved. Page 4 of 28 PD2018_Manual for Bestic_EN_ver1 Language: English Date: 2014-11-14 Manual for Bestic 2.2 Disclaimer Bestic AB takes no responsibility for damages caused by incorrect use. Only persons who have been informed and instructed on its use should operate the eating device. It must be operated according to the instructions in this User's Manual. Bestic AB has the right to change specifications on Bestic without notification. 2.3 Safety instructions Always evaluate what demand the user’s health condition and how diagnose affects the meal environment, especially concerning the risk of choking. Using Bestic does not cause an elevated risk for choking compared with being fed by a person. Follow the safety instructions below: 1. Make sure that you understand all the instructions and warnings before you connect and start using Bestic. 2. The plate shall stand to the left of Bestic when the text in the display is facing the user. The plate shall stand so that it touches the “feet” of Bestic and have a non-slip mat underneath. 3. Do not dismantle any screws from Bestic. Do not try to open it in any way. 4. Never pour liquids over Bestic or immerse into liquids. 5. Never hold the power-cable, or any contact, with wet hands. 6. Place Bestic on a flat and steady surface. Make sure Bestic stands steadily without risk of falling. 7. Attach only the supplied power-adaptor to Bestic. Never modify the power-adaptor yourself. 8. Take hold of the plug when disconnecting from an electrical outlet, do not pull the cable. 9. Be aware of the risks for squeezing. When the arm is moving, the risk areas occur near the joints. 10. Make sure the temperature around Bestic does not exceed +40 degrees Celsius/100 degrees Fahrenheit. Do not leave Bestic in the sunlight or in a trunk of a car on a sunny day. 11. Do not put fragile objects close to Bestic as they might be tipped or damaged by the movements of the arm. Be extra careful with candles. 12. Never put Bestic in the dishwasher. 13. Do not transport Bestic in a bag with wheels; the trembling that occurs might damage it. 14. When Bestic shall be transported, all control devices and contacts shall be unplugged to prevent it from starting. 15. Should the function of Bestic change in any way or behave unexpectedly, turn off the unit, unplug the power adaptor and contact your local service contact. Bestic AB c/o Business Hub, Årstaängsvägen 21 C SE- 117 43 Stockholm, Sweden Website: www.besticinc.com E-mail: [email protected] Telephone: +46(0)733 - 93 00 07 © Bestic AB 2014-11. All rights reserved. Page 5 of 28 PD2018_Manual for Bestic_EN_ver1 Language: English Date: 2014-11-14 Manual for Bestic 3. Product overview 3.1 Description Overview of Bestic, system parts: 1. Spoon holder 2. Carrying handle 3. Menu window 4. On/Off/ button 5. Phone plug (connection port) 6. USB (connection port) 7. Charging connector for power cord 8. Reset button 9. Spoon 10. Power adapter Bestic AB c/o Business Hub, Årstaängsvägen 21 C SE- 117 43 Stockholm, Sweden Website: www.besticinc.com E-mail: [email protected] Telephone: +46(0)733 - 93 00 07 © Bestic AB 2014-11. All rights reserved. Page 6 of 28 PD2018_Manual for Bestic_EN_ver1 Language: English Date: 2014-11-14 Manual for Bestic 4. Handling 4.1 Lifting Bestic When lifting Bestic, use the built-in handle in the lower, thicker part of the arm, see picture. Do not lift Bestic with the thin upper part of the arm. 4.2 Connecting a control device Bestic can only be connected to approved and validated control devices. If the unit is connected with a control device that has not been validated there is a risk of electrical disturbance or damages. A complete and updated list of approved and validated control devices is available on our website www.besticinc.com. There are two types of connectors for control devices on Bestic: 5. Phone plug 6. USB The connector depends on which control device you are using. Available connectors on the side of Bestic: 4. 5. 6. 7. Black on/off button Phone plug (connection port) USB (connection port) Charging connector for power adaptor (The numbers above correspond to the same numbers on page 6). Bestic AB c/o Business Hub, Årstaängsvägen 21 C SE- 117 43 Stockholm, Sweden Website: www.besticinc.com E-mail: [email protected] Telephone: +46(0)733 - 93 00 07 © Bestic AB 2014-11. All rights reserved. Page 7 of 28 PD2018_Manual for Bestic_EN_ver1 Language: English Date: 2014-11-14 Manual for Bestic 4.3 Charging Bestic contains a battery that needs to be charged. If Bestic does not start or if the display tells you to charge, connect the power-adaptor. Connection and disconnection of the power-adaptor can be done at any time. When the power-adaptor is connected the battery is automatically charged. The time to charge a completely empty battery is app. 3 hours. If you are operating the device during charging, it may take a longer time before it is fully charged. 4.4 To attach and dismantle the spoon Attach the spoon: Attach the spoon by aiming the end of the spoon into the fissure and snap onto the rear part of the spoon-holder. It is easier to attach and dismantle the spoon when the arm is raised to starting position. Dismantle the spoon by pressing on the side of the spoon holder to make it pop out a bit in the rear end then lift the rear part of the spoon holder back and towards the side. 4.5 The plate Use the plate that is supplied with Bestic in order to ensure a good eating assistive functionality. This plate has been carefully selected due to the edge which facilitates scooping of the food. The diameter of the plate also corresponds with the arm movements of Bestic. Bestic AB c/o Business Hub, Årstaängsvägen 21 C SE- 117 43 Stockholm, Sweden Website: www.besticinc.com E-mail: [email protected] Telephone: +46(0)733 - 93 00 07 © Bestic AB 2014-11. All rights reserved. Page 8 of 28 PD2018_Manual for Bestic_EN_ver1 Language: English Date: 2014-11-14 Manual for Bestic 4.6 Turning Bestic on and off Bestic is turned on and off by using the black on/off button. When the black on/off button is pressed… ONE TIME - Bestic will immediately stop where it stands and start to turn off. TWO TIMES* - (within five seconds and while the display is lit up with the text “Bestic shuts down”) Bestic will fold to resting position. THREE TIMES* – (within five seconds and while the display is lit up with the text “Bestic folds to resting position” or the equivalent in your language). Bestic will stop where it stands. FOR AT LEAST 2 SECONDS - you will get the option to enter the main menu (see paragraph 8.2 Main menu). This action will also prompt the spoon/arm to stop. *Bestic can only go to resting position when it is in eating mode. This is to prevent the arm from moving during transport. Thus, the above description of pressing press two times and three times is only true when Bestic is in eating mode. You can turn off Bestic at any time, no matter which menu option is shown in the display or if it is in eating mode. 4.7 Emergency stop Turning off Bestic for emergency stop is done by pressing the on/off button. 4.8 Reset If Bestic does not react on command or reacts strangely in any way, a “Reset” might help. Press the reset button underneath Bestic with a pen through the hole where it says “Reset”. 4.9 Do not restart If the display shows the following text: Contact service do not restart DO NOT try to restart or reset the device. Unplug all control devices and the power-adaptor and contact your local sales representative: www.besticinc.com/contact/distributors Enjoy your Enjoy your Bestic AB c/o Business Hub, Årstaängsvägen 21 C SE- 117 43 Stockholm, Sweden Website: www.besticinc.com E-mail: [email protected] Telephone: +46(0)733 - 93 00 07 © Bestic AB 2014-11. All rights reserved. Page 9 of 28 PD2018_Manual for Bestic_EN_ver1 Language: English Date: 2014-11-14 Manual for Bestic 5. Care Instructions 5.1 Cleaning 1. Make sure Bestic is turned off. 2. Disconnect the power-adapter and control device. 3. The spoon with the holder and the plate can be washed by hand or in a dishwasher. 4. Cleaning of the main unit, the power-adapter and control device is done with a moist cloth with dishwashing liquid for manual washing-up or alcohol. Do not use strong detergents, solvents or abrasive detergents. When needed, a soft brush may be used. 6. Transport and storage 6.1 Packing for transportation When the unit is being transported, make sure it is turned off in the resting position. In the resting position it is folded and compact which is suitable for transportation. To get Bestic into resting position, view paragraph 4.6 “Turning Bestic on and off”. Make sure any control devices or the power adapter are unplugged when carrying or shipping Bestic. Do not place Bestic in a bag on wheels. Shaking and vibrations may cause damage to the unit when transported this way. Preferably use the dedicated backpacks or flight case when transporting Bestic. Try to avoid pressure or shaking. The arm in particular is sensitive for enduring inappropriate pressures. 6.2 Storage For maintenance reasons, the battery in Bestic needs to be charged at least once per year during 3 hours, otherwise the battery might be damaged. Store the unit in a standing-up position on a flat surface. Bestic AB c/o Business Hub, Årstaängsvägen 21 C SE- 117 43 Stockholm, Sweden Website: www.besticinc.com E-mail: [email protected] Telephone: +46(0)733 - 93 00 07 © Bestic AB 2014-11. All rights reserved. Page 10 of 28 PD2018_Manual for Bestic_EN_ver1 Language: English Date: 2014-11-14 Manual for Bestic 7. How to eat with Bestic Before starting to use Bestic – make sure you have read and understood all the safety instructions in chapter 2 “Safety”. You should also have read chapter 4 “Handling”. Bestic does not move unless instructed to do so by the user via the control device. 7.1 Start 1. Make sure that Bestic is placed on a flat, steady surface. 2. Place the plate on to the non-slip mat. 2. Place Bestic close to the plate, so that the device touches the plate with its “feet”. 4. Connect your control device. 5. To start, press the black on/off button on the side of Bestic. 6. Go through the start menu (view paragraph 7.2 Start menu) 7. When the spoon is in starting position, i.e. the arm is stretched out and in the air, attach the spoon. Non-slip mat to be placed under plate. 7.2 Start menu The start menu will appear in the display when Bestic is turned on with the black on/off button, as well as when leaving the main menu after pressing OK for Save & exit. 7.2.1 Start menu – with only one user Enjoy your meal! Battery 44% Björn Press any button/direction on the control device you are going to use, and the display will change to eating mode. 5usb Battery charging Björn 5usb Bestic is in eating mode Bestic AB c/o Business Hub, Årstaängsvägen 21 C SE- 117 43 Stockholm, Sweden If the power-adaptor is plugged in during eating mode, the text Battery charging will appear. Website: www.besticinc.com E-mail: [email protected] Telephone: +46(0)733 - 93 00 07 © Bestic AB 2014-11. All rights reserved. Page 11 of 28 PD2018_Manual for Bestic_EN_ver1 Language: English Date: 2014-11-14 Manual for Bestic 7.2.2 Start menu – with multiple users/profiles If you have the Multiple User Option on your Bestic unit and you wish to choose another user, press LEFT or RIGHT to switch between users. Press OK to choose user, e.g. Anni-Frid. Only shown if you have added a third/fourth user/profile in setup. Choose user < Agnetha > Choose user < Björn > Choose user < Benny > Choose user < Anni-Frid > Press OK when you have chosen the appropriate user: Enjoy your meal! Battery 44% Anni-Frid 5usb Battery charging Anni-Frid 5usb Automatically changes. One of these texts will be shown in the display while Bestic is in eating mode. With the Multiple User Option, you may store settings for up to four (4) profiles. These profiles can e.g. be settings for four different persons or four different settings for different places for one person; Home, School, Parents, TV-room. You may also choose to store two different places for two different persons: Profile 1: A Lunch, Profile 2: A Dinner, Profile 3: B Lunch, Profile 4: B Snack. If your Bestic unit does not have the Multiple User Option, only settings for one person/profile can be stored. The profiles are pre-named to Agnetha, Björn, Benny and Anni-Frid for simplicity reasons and are intended to be renamed (view paragraph 8.3.1 Renaming and adding users). N.B. When Enjoy your meal! is shown in the display, the spoon/arm will move to starting position, i.e. the spoon will go up to the user’s mouth according to the settings made in the main menu. It is important to be aware of this movement! Bestic AB c/o Business Hub, Årstaängsvägen 21 C SE- 117 43 Stockholm, Sweden Website: www.besticinc.com E-mail: [email protected] Telephone: +46(0)733 - 93 00 07 © Bestic AB 2014-11. All rights reserved. Page 12 of 28 PD2018_Manual for Bestic_EN_ver1 Language: English Date: 2014-11-14 Manual for Bestic 7.3 Control modes Bestic Single TWO-STEP (2stp) - Allows the user to control the spoon with a one button control device. When the spoon is in starting position, press the one button control device for the spoon to go down to the plate, alternating its scooping side between left and right every second time. The spoon will move in a curved path over the plate until the user presses the button. View illustration to the right for the movement pattern. If the user does not press the button, the spoon will move along the curved path five times and then stop. When pressing the button, the spoon will start to move along the curved path again. When the user presses the button while the spoon is moving across the plate, the spoon will stop and move towards the edge of the plate in the direction facing the scooping side of the spoon and pick up food when it reaches the edge of the plate. Thereafter, the spoon will follow the same pattern described above for 5usb. Repeat this pattern until finished eating. If the user presses the button before the spoon has reached the edge, it will stop and scoop up food straight away (N.B. this is only true if Bestic Single ONE-STEP (1stp) TWO-STEP is set on 2 clicks (<2>) in the setup list). - Allows the user to control the spoon with a one button control device. When the spoon is in starting position, press the one button control device for the spoon to go down to the plate and to scoop up a piece of food. The spoon then lifts up from the plate and goes to the edge of the plate to scrape off any excess food and then up to the mouth. After the first bite of food has reached the mouth, push the button again and the spoon will repeat the cycle as above but scooping up food from another area of the plate. The spoon will perform one eating cycle after each push on the one button control device, until it has covered the whole plate. Having done this, the spoon will move in a smaller area in the middle of the plate and then go out to the edge to scoop up food until Bestic is turned off. This makes it possible for the user to get the last leftover bites on the plate. If someone scrapes the food to the middle of the plate, it will be picked up by the spoon. View illustration to the rigth for scooping pattern. 5usb - Allows the user to control the spoon in any direction on the plate. To descend the spoon to the plate, press RIGHT OR LEFT. If you press RIGHT, the scooping side of the spoon will be angled to the right and vice versa. When the spoon reaches the plate, it will remain still until you press a directional button on your control devi ce; UP/DOWN/RIGHT/LEFT. To pick up food, press OK. The spoon will then scoop up food, lift up from the plate, shake off excess food and scrape off towards the edge of the plate and then Bestic AB c/o Business Hub, Årstaängsvägen 21 C SE- 117 43 Stockholm, Sweden Website: www.besticinc.com E-mail: [email protected] Telephone: +46(0)733 - 93 00 07 © Bestic AB 2014-11. All rights reserved. Page 13 of 28 PD2018_Manual for Bestic_EN_ver1 Language: English Date: 2014-11-14 Manual for Bestic go up to the mouth. Thus, after pressing OK, you do not need to give m ore signals to Bestic until after you have eaten the food from the spoon. P ress when you want the spoon to descend to the plate once more. 4usb – Works as 5usb above, except that the OK signal comes from a one button control device. The four directional signals for UP/DOWN/RIGHT/LEFT come from a control connected to the USB, and the OK signal comes from a one button control device connected to the phone plug outlet. The OK command generates the same signals as described here above for 5usb. N.B. When a one button control device is plugged into Bestic, you can use this button to turn on Bestic, i.e. instead of pressing the black on/off button. It is important to be aware of this function of the one button control as not to startle the user if Bestic starts because the user has pressed the one button control involuntarily. In addition to this, make sure you therefore ALWAYS unplug any control devices from Bestic when it is carried around or put into storage. Never put Bestic in a backpack/carton or similar with a control device plugged in since this can prompt Bestic to turn on and start moving. 5usb 4usb 2stp 1stp Five button control Five button control device with One button control One button control device disabled OK + one button control device device device + + + + + Bestic AB c/o Business Hub, Årstaängsvägen 21 C SE- 117 43 Stockholm, Sweden Website: www.besticinc.com E-mail: [email protected] Telephone: +46(0)733 - 93 00 07 © Bestic AB 2014-11. All rights reserved. Page 14 of 28 PD2018_Manual for Bestic_EN_ver1 Language: English Date: 2014-11-14 Manual for Bestic 7.4 Switching control device/control mode Both the phone plug connection and the USB connection can be connected at the same time. If you wish to switch between control devices, e.g. from 5usb to 2stp, you simply push on the device you want to use (provided you have connected it first) and Bestic will react to the signal from this control device. E.g. if you have used the Bestic Picasso MINI (5usb) and want to change to the one button control and use Bestic Single TWO-STEP (2stp), you push your one button control device and this will automatically happen in the display. Battery 44% User 2 Switching to 2stp 5usb Battery 44% User 2 2stp The one button control device is now connected and can be used to control Bestic. If you wish to switch back to your five button control device, just simply do the reverse; press on the five button control device and it will change back to 5usb: Battery 44% User 2 Switching to 5usb 2stp Battery 44% User 2 5usb 8. Menus and settings This manual will give instructions on how to navigate the menus with a five button control device (the Bestic Picasso MINI). For information on how to use other control devices such as joysticks, please view the specific instructions for your choice of control device. Bestic is built around two menus; the start menu and the main menu. To switch between the top levels of the main menu and start menu, scroll horizontally (LEFT OR RIGHT). The main menu contains lists with different options; you scroll the lists by using the four directions on your five button control device: vertically to go UP and DOWN the and horizontally to go LEFT or RIGHT. A more detailed description of UP the Bestic Picasso MINI, LEFT OK DOWN RIGHT including safety instructions, can be found in Appendix 1 in this manual. Bestic AB c/o Business Hub, Årstaängsvägen 21 C SE- 117 43 Stockholm, Sweden Website: www.besticinc.com E-mail: [email protected] Telephone: +46(0)733 - 93 00 07 © Bestic AB 2014-11. All rights reserved. Page 15 of 28 PD2018_Manual for Bestic_EN_ver1 Language: English Date: 2014-11-14 Manual for Bestic 8.1 Symbols and abbreviations in the menus Battery 62% Agnetha 5usb 2stp The control mode set for a specific user, in this case “Agnetha”. Indicates that you are using a five button control device to control Bestic via the USB connection port. 1stp Indicates that you are using a one button control device to control Bestic by using the control mode Bestic SINGLE 2stp the phone plug connection port. Indicates that you are using a one button control device to control Bestic by using the control mode Bestic SINGLE 4usb ONE-STEP via TWO-STEP via the phone plug connection port. Indicates that you are using a joystick or similar and have disabled the OK-button and connected a one button control device to select OK. This way of controlling is most common with a chin joystick or the control device “Moozi” in order to eliminate the possibility of the user pushing OK involuntarily. You will have the joystick plugged in via the USB connection port and the one button control device connected via the phone plug connection port. * Indicates that you need to press OK if you want to select this option, if you do not wish to select the indicated option, you simply press UP/DOWN to move to the former or the next option on the list. The symbol is shown for the following options: Test spoon pos. Add user More settings Remove user Back Service Save & exit <> Indicates that you may change a value/option by pressing the RIGHT OR LEFT button. If the value on the display says <32>, by pressing RIGHT, you will increase the value to <33> and by pressing LEFT, you will decrease the value to <31>. The same applies when switching between users (< Agnetha >)/ Yes and No (<Yes> < No>) and other special options. Bestic AB c/o Business Hub, Årstaängsvägen 21 C SE- 117 43 Stockholm, Sweden Website: www.besticinc.com E-mail: [email protected] Telephone: +46(0)733 - 93 00 07 © Bestic AB 2014-11. All rights reserved. Page 16 of 28 PD2018_Manual for Bestic_EN_ver1 Language: English Date: 2014-11-14 Manual for Bestic 8.2 Main menu The main menu is where you make all the settings for your device as well as the settings for each user. To enter the main menu, press the black on/off button at any time on your Bestic device for at least 2 seconds until this appears in the display: Go to main menu? < No > Switch between Yes and No by using the right and left button on your control device. Scroll to Yes and make your choice by pushing OK and you will enter the main menu: A second user/profile or as well as a third and fourth will only be shown if they have been added in the setup list. Setup To enter the submenu More settings, press OK and make your settings. When you press OK for Back in this submenu, you will again end up on More settings in the list (the same place as you entered More settings) and you press Down in order to go to Save & exit. > < Agnetha > Spoon height <32> Spoon out < 0> Test spoon pos. * Single <2stp> More settings * Save & exit * < Björn > Spoon height <29> Spoon out < 0> Test spoon pos. * Single <1stp> More settings * Save & exit * More settings 2stp clicks <2> Spoon size <L> High path < No> OK from USB <Yes> 1stp pause < No> Scrape off <Yes> Back * More settings 2stp clicks <1> Spoon size <s> High path < No> OK from USB <Yes> 1stp pause <Yes> Scrape off < No> Back * < Setup Rename user Add user Remove user < English Service Save & exit > * * * > * * TIP! All lists are connected at the top/bottom and forms a “wheel”, i.e. if you have made adjustments to the spoon height and know that you do not need to do any other adjustments, simply press up two times and you will end up at the bottom of the list at Save & exit straight away without having to scroll down the whole list. Bestic AB c/o Business Hub, Årstaängsvägen 21 C SE- 117 43 Stockholm, Sweden Website: www.besticinc.com E-mail: [email protected] Telephone: +46(0)733 - 93 00 07 © Bestic AB 2014-11. All rights reserved. Page 17 of 28 PD2018_Manual for Bestic_EN_ver1 Language: English Date: 2014-11-14 Manual for Bestic < Benny Spoon height > 36 Press DOWN Benny Spoon height Benny Spoon height <36> Press LEFT OR RIGHT to decrease/increase your value. <34> < Benny > Spoon height <36> Spoon out < 0> Test spoon pos. * Single <2stp> More settings * Save & exit * Press UP < Benny Spoon height > 34 Press UP Benny Save & exit Press OK * Battery 54% Benny 2stp 8.2.1 Individual settings To make individual settings for user profile “Björn”, you scroll LEFT/RIGHT until Björn appears in the display: < Björn Spoon height > 29 Press DOWN. Björn Spoon height Press LEFT OR RIGHT to decrease/increase this value. <29> Press DOWN to continue down the list and make your settings until you reach the bottom of the list. Björn Save & exit * Press OK and you will enter eating mode, i.e. you may start eating. Battery 92% Björn * N.B. When leaving the main menu, the spoon will always go to the mouth position. Beware of this movement. 1stp Bestic AB c/o Business Hub, Årstaängsvägen 21 C SE- 117 43 Stockholm, Sweden Website: www.besticinc.com E-mail: [email protected] Telephone: +46(0)733 - 93 00 07 © Bestic AB 2014-11. All rights reserved. Page 18 of 28 PD2018_Manual for Bestic_EN_ver1 Language: English Date: 2014-11-14 Manual for Bestic Spoon height This regards the height of the spoon/arm of Bestic over the plate. Increase or decrease the value accordingly to the user’s preferences. Set the spoon height so that the user has a comfortable eating position at the kitchen table (or the place normally used for eating). If e.g. the user’s nose gets in the way of the spoon, try to increase the spoon height with a few centimeters. Please view the technical specification for Bestic for further details. Spoon out This setting defines the spoon position with respect to the user’s mouth in the serving position in order to come close to the mouth. By increasing the value, you will move the spoon closer towards the user. Changing this value should be done in agreement with the user. Please view the technical specification for Bestic for further details. Test spoon pos. If you would like to test the settings you just made, press OK. The spoon/arm will move to its starting position and if the position is satisfactory for the user, press DOWN in order to move down the list. To adjust the settings, press up to move to spoon height and/or spoon out again and make new settings and try them again. The spoon position is very important in order for the user’s eating experience to be optimal. The settings can be altered as many times as needed. Single Default setting is Bestic Single TWO-STEP (<2stp>), press LEFT or RIGHT to change to Bestic Single one- step. More settings Press OK to enter the submenu More settings (view details below). Save & exit Press OK or use UP/DOWN to go through the list again. Once you press OK, you will be shown Enjoy your meal! In the display and Bestic is ready for use. More settings 2stp clicks Double click (<2>) is the default setting for the control mode Bestic Single TWO-STEP. This means that you may press again before the spoon reaches the edge of the plate and pick up food. I.e. press once and the spoon will go down to the plate and starts moving up and down the plate. Press again for the Bestic AB c/o Business Hub, Årstaängsvägen 21 C SE- 117 43 Stockholm, Sweden Website: www.besticinc.com E-mail: [email protected] Telephone: +46(0)733 - 93 00 07 © Bestic AB 2014-11. All rights reserved. Page 19 of 28 PD2018_Manual for Bestic_EN_ver1 Language: English Date: 2014-11-14 Manual for Bestic spoon the start moving towards the edge, press a third time and the spoon will pick up food straight away instead of pushing food all the way to the edge. If you choose 1 click (<1>) you will not have the option to press a third time. It is appropriate to change to 1 click (<1>) if the user has difficulties managing “double clicks”. Spoon size Change the default setting large (<L>) to small (<s>) if you eat with a small size spoon. High path The default setting No (< No>) means that the spoon moves in an ascending and descending curve movement pattern from the plate to the mouth and back. If you change to Yes (<yes>), the spoon moves straight up from the plate and when reaching mouth height, it starts moving towards the user. On its way back to the plate, it first backs off horizontally until it is over the plate and then moves down. This is especially useful for users controlling Bestic with their chin, in order to avoid the spoon from getting in the way of the joystick on its way down to the plate. OK from USB The default setting is No (< No>). If you choose Yes (<Yes>), it is possible to control Bestic in any direction with a five button control device (joystick) together with a separate OK button connected into the “Phone plug” contact. This means that the usual OK on the five button control device is turned off. The procedure is primarily intended for use with the “mini-joystick with push”, when operated with the chin. The advantage is that you can use the joystick for the four directions and adding a separate one-button next to the head for confirmation. Important! Please note that after you have selected “OK from USB”, you will always need to have a one button control device connected, in order to achieve the OK command. 1stp pause The default setting for Bestic Single one-step (1stp) is No (< No>). If you choose Yes (<Yes>), the spoon will make a pause by the user’s mouth. This is especially helpful for users with involuntary movements (e.g. difficulties to stop clicking the one button control device). The pause means that during 13 seconds when the spoon is up by the user’s mouth, the spoon will not move down to the plate regardless of how many times the user presses the one button control device during those 13 seconds. Bestic AB c/o Business Hub, Årstaängsvägen 21 C SE- 117 43 Stockholm, Sweden Website: www.besticinc.com E-mail: [email protected] Telephone: +46(0)733 - 93 00 07 © Bestic AB 2014-11. All rights reserved. Page 20 of 28 PD2018_Manual for Bestic_EN_ver1 Language: English Date: 2014-11-14 Manual for Bestic Scrape off Yes (<Yes>) is default for scrape off. This means that the spoon will always go towards the end of the plate in order to scrape off any excess food underneath. If you would like to disable this function, you change the setting to No (< No>). Back Press OK to move back to the list (you will again end up on the option More settings, simply press DOWN to move to the next option on the list). If the user experiences that the settings are not optimal, it is always possible to enter the main menu and renew the settings. 8.2.2 General settings for the Bestic device < Setup Rename user > Press DOWN Setup Rename user * Press OK to rename user (view paragraph 8.3.1). Name Agnetha____ ¯ * * Press OK to add user (view paragraph 8.3.1). Name Benny______ ¯ * Press DOWN Setup Add user Press DOWN to continue to the end of the list. Setup Save & exit * * Press OK Choose user < Björn Choose user and press OK. Battery 92% Björn Start menu > * 1stp Eating mode Rename user If you would like to assign the user’s actual name to his/her individual settings you can do this here (for more detailed information, view paragraph 8.3 “Alphabet, numbers and special characters”). The Bestic AB c/o Business Hub, Årstaängsvägen 21 C SE- 117 43 Stockholm, Sweden Website: www.besticinc.com E-mail: [email protected] Telephone: +46(0)733 - 93 00 07 © Bestic AB 2014-11. All rights reserved. Page 21 of 28 PD2018_Manual for Bestic_EN_ver1 Language: English Date: 2014-11-14 Manual for Bestic characters in a name are limited to 11 including spaces or hyphens. E.g. Anni-Frid contains 9 characters and Bjorn Borg 10 characters. Add user This option will only be shown if you have the “Multiple User Option”. To add a user, press OK. You may choose to rename the user immediately or let Björn/Benny/Anni-Frid remain. You may always go back and rename a user. Remove user This option will only be shown if you have the “Multiple User Option”. To remove a user, press OK. You will need to confirm the removal. If you have more than one user, you will be asked to first choose which user you wish to remove. Switch between users by pressing LEFT or RIGHT and press OK when the user you wish to remove is shown in the display. <English> Press LEFT or RIGHT to choose language; the language will change immediately. Simply press DOWN to continue down the list when you have made your choice. N.B. The display text language is set for the whole device, not for the individual user, and therefore it is only possible to have ONE language setting per Bestic device. This means that if you have one Swedish speaking user and one Finnish speaking user, you will have to choose one or the other for the display text. Service To enter the service menu, you need to have access to a special code which is only available to trained technical staff. If you accidentally press OK on the service option and end up here: Service 0000 Simply press OK again to get back to the setup list. Save & exit Press OK to save your settings. You will then be sent to the start menu where you have to choose user again. If you entered setup while someone was eating with Bestic Single ONE-STEP, the spoon will continue at the same place within the “eating cycle” as it were when the cycle was interrupted. Bestic AB c/o Business Hub, Årstaängsvägen 21 C SE- 117 43 Stockholm, Sweden Website: www.besticinc.com E-mail: [email protected] Telephone: +46(0)733 - 93 00 07 © Bestic AB 2014-11. All rights reserved. Page 22 of 28 PD2018_Manual for Bestic_EN_ver1 Language: English Date: 2014-11-14 Manual for Bestic 8.3 Alphabet, numbers and special characters All letters, numbers and characters are built as two long lists that connect at the “ends”. There are two different lists depending on whether you want capital or low case letters. The first row with capital letters are default, press OK to enter the second row with lower case letters (å and ö are only available as low case letters). The number of characters for a name is limited to 11 including spaces or hyphens; e.g. Anni-Frid contains 9 characters and Bjorn Borg 10 characters. 8.3.1 Renaming and adding users Name Agnetha____ * The blinking square indicates that this letter is “active” i.e. this is the letter you can change. To change the name “Agnetha” to “Björn”, you scroll up once to get to “B”. To move to “g” you press RIGHT and the square will move to the next letter. Press up until you get to “J”. To change to lower case “j” you press OK once. Press RIGHT again to continue to make the “n” active and switch this to “ö”. Continue until you have written “Björn”. Since Agnetha has two more letters than Björn, you will need to take away the “h” and the “a” at the end. You do this by finding the space in the list. When the display reads “Björn”, press RIGHT until * is active and press OK to get back to the setup list. Of course, you may also use numbers and letters and write e.g. “Björn 2”. List 1 Name Bjnetha____ 2 ö * å Name Bjöetha____ * Name Björtha____ * Z z A a “ö” and “å” are only available in lowercase letters. Etc. continued all the way to ”a”. Space Name Björnha____ * Name Björn_a____ * Name Björn______ * Name Björn______ * . . _ _ 9 9 0 0 ö Bestic AB c/o Business Hub, Årstaängsvägen 21 C SE- 117 43 Stockholm, Sweden Punctuation Hyphen Etc. continued all the way to “0” Back to start/end of list. Website: www.besticinc.com E-mail: [email protected] Telephone: +46(0)733 - 93 00 07 © Bestic AB 2014-11. All rights reserved. Page 23 of 28 PD2018_Manual for Bestic_EN_ver1 Language: English Date: 2014-11-14 Manual for Bestic Appendix 1 - How to use the Bestic Picasso MINI control Compatible with Bestic software from version: 1.01 Requirements: 1. Bestic main unit 2. Bestic Picasso MINI 3. USB cable 3. 1. 2. Setup: 1. Connect the USB cable to Bestic Picasso MINI as shown in the picture above. Note that the USB cable has different connector sizes on each of its two ends. The smaller one connects to Bestic Picasso MINI. 2. Turn the Bestic main unit on by pressing the black button. 3. Plug in the other end of the USB cable to Bestic. N.B. Make sure that the two holes on the USB-connector is facing upwards. 4. While roaming the menus and eating with Bestic, use the directional arrows on Picasso mini to change the values and steer the spoon. Use the round button in the middle for ”OK” and for picking up the food. You can change the USB-cable (USB A to USB micro B) for a different length cable than the standard one up to 2 m. Those cables can be purchased at computer accessory stores. Cleaning instructions: To be cleaned with a moist cloth if needed. Safety information for Bestic Picasso MINI Not to be used in contact with water. Do not keep close to any fire. Do not open. Bestic AB c/o Business Hub, Årstaängsvägen 21 C SE- 117 43 Stockholm, Sweden Website: www.besticinc.com E-mail: [email protected] Telephone: +46(0)733 - 93 00 07 © Bestic AB 2014-11. All rights reserved. Page 24 of 28 PD2018_Manual for Bestic_EN_ver1 Language: English Date: 2014-11-14 Manual for Bestic Appendix 2 – Serving tip Bestic can handle food which is easily picked up with a spoon. This includes e.g. stews, yoghurt, porridge, rice, macaroni etc. and other foods which can be cut into pieces small enough for the spoon. Difficult foods to pick up are e.g. pizza, uncut sandwiches, slices of thin meat, spaghetti, etc. Do not serve a large “pile” of food in the middle of the plate, since this is where the spoon always goes down first and it will make it difficult for the spoon to pick up food. It is preferable to serve a second plate of food instead of putting a large amount of food on the plate all at once. Let user him/herself decide whether or not the food should be spread out in different areas on the plate or if he/she prefers that potatoes/rice/pasta is spread out first and then put meat/fish/pulses and sauce on top. One does NOT need to mix all the food together on the plate if the user does not wish to. Make sure that the serving looks tasty! If the food is very thick, e.g. mashed potatoes, large amounts of mash may get stuck on the spoon. Try to make the mash a bit less thick if possible. Control mode Bestic Single ONE-STEP (1stp) For one-step, the food needs to be spread out evenly on the plate. The layer should be less than one inch. Control mode Bestic Single TWO-STEP (2stp) Since the spoon moves back and forth in the middle, it will create a ”lane” in the middle of the plate, it is preferable to serve the food so the spoon can move more easily. Do not put a drinking glass, a vase of flowers, a candle etc. close to the end of the plate in order to avoid the spoon/arm from knocking anything down. Bestic AB c/o Business Hub, Årstaängsvägen 21 C SE- 117 43 Stockholm, Sweden Website: www.besticinc.com E-mail: [email protected] Telephone: +46(0)733 - 93 00 07 © Bestic AB 2014-11. All rights reserved. Page 25 of 28 PD2018_Manual for Bestic_EN_ver1 Language: English Date: 2014-11-14 Manual for Bestic Appendix 3 – Notes for personal settings Profile 1: ______________ Profile 3: ______________ Spoon height: _________ Spoon height: _________ Spoon out: _________ Spoon out: _________ Single: _________ Single: _________ More settings More settings 2 stp clicks: _________ 2 stp clicks: _________ Spoon size: _________ Spoon size: _________ High path: _________ High path: _________ OK from USB: _________ OK from USB: _________ 1 stp pause: _________ 1 stp pause: _________ Scrape off: _________ Scrape off: _________ Profile 2: ______________ Profile 4: ______________ Spoon height: _________ Spoon height: _________ Spoon out: _________ Spoon out: _________ Single: _________ Single: _________ More settings More settings 2 stp clicks: _________ 2 stp clicks: _________ Spoon size: _________ Spoon size: _________ High path: _________ High path: _________ OK from USB: _________ OK from USB: _________ 1 stp pause: _________ 1 stp pause: _________ Scrape off: _________ Scrape off: _________ Bestic AB c/o Business Hub, Årstaängsvägen 21 C SE- 117 43 Stockholm, Sweden Website: www.besticinc.com E-mail: [email protected] Telephone: +46(0)733 - 93 00 07 © Bestic AB 2014-11. All rights reserved. Page 26 of 28 PD2018_Manual for Bestic_EN_ver1 Language: English Date: 2014-11-14 Manual for Bestic Appendix 4 –Other notes Bestic AB c/o Business Hub, Årstaängsvägen 21 C SE- 117 43 Stockholm, Sweden Website: www.besticinc.com E-mail: [email protected] Telephone: +46(0)733 - 93 00 07 © Bestic AB 2014-11. All rights reserved. Page 27 of 28 PD2018_Manual for Bestic_EN_ver1 Language: English Date: 2014-11-14 Manual for Bestic Appendix 5 – Proper USB-insert and spoon removal 1 2 3 4 Bestic AB c/o Business Hub, Årstaängsvägen 21 C SE- 117 43 Stockholm, Sweden Website: www.besticinc.com E-mail: [email protected] Telephone: +46(0)733 - 93 00 07 © Bestic AB 2014-11. All rights reserved. Page 28 of 28