1
6(59,&(0$18$/
$(30RGHO
8.0RGHO
SPECIFICATIONS
Signalling format
Frequency range
GSM 900 power class
GSM 1800 power class
SIM
Display
Channel spacing
Number of channels
Frequency stability
Antenna type
RF output power
Battery
Dimensions
Weight
Volume
Dual-Band
E-GSM 900 MHz, Transmit:
880 ~ 915 MHz
Receive:
925 ~ 960 MHz
GSM 1800 MHz, Transmit:
1710 ~ 1785 MHz
Receive:
1805 ~ 1880 MHz
Class 4 (2W)
Class 1 (1W)
3V and 5V Pluggable mini SIM card / SAT Class 2
High resolution full graphics display
4 Grey-scale type
Resolution: 96 x 92 pixels
7 lines (excluding 1 status icon line), proportional font
200 kHz
E-GSM 900: 174
GSM 1800: 374
Transmit frequency drift (synchronized)
< 0,1 p.p.m
Patch antenna
E-GSM 900: 2W, 33dbm
GSM 1800: 1W, 30dbm
Lithium Polymer / 680 mAh
Standby : 50 -220 h (Network dependent)
Talk time : 2.6 - 8 h (Network dependent)
91 mm x 50 mm x 25 mmñ
95 g
90 cmñ
3257$%/(',*,7$/&(//8/$57(/(3+21(
:,7+$&&(6625,(6
Power requirements
Operating temperature
Accessories operating temperature
Connectors
WAP
Email
Supplied accessories
Optional accessories
3.9 V (nominal)
-10C to +55C
± 0C to +45C
External RF connector
Universal Connector (12-pin flat I/O connector)
Mini plug head set jack
Supported by the WAP v.1.1 compliant browser
WTLS Class 1, HTTP/HTML
Supported by the e-mail protocols: SMTP & POP 3
AC Adapter
QN-3AC1 (AEP)
AC Adapter
QN-3AC2 (UK)
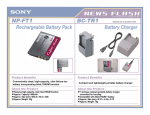
Battery (std.)
QN-Z7BPS
Handsfree Car Kit
QN-3HFK
Car Phone Holder
QN-Z7PH
Cigar Lighter Charger
QN-3CC
Data Cable RS
QN-3RS
Data Cable USB
QN-3USB
Mobile Data Software
QN-3DS
Headset
QN-3HS
Travel Charger
QN-3TC
Design and specifications are subject to change without notice.
This equipment complies with the essential requirements of the Directive 1999/5/EC Radio and
Telecommunications Terminal Equipment Directive.
NOTE
This device contains electrostatically sensitive components. Damage can occur to these
components if the appropriate handling is not adhered to.
ESD Handling precautions:
A working area in which Digital Cellular Telephones may be safely handled without undue risk of damage
from electrostatic discharge must be available.
The area must be equipped as follows:
½
½
½
All working surfaces must have a dissipative bench mat, safe for use with live equipment, connected
via 1.2M• resistor to a common ground point.
A quick release skin contact device with a flexible cord, which has a built-in safety resistor of a range
between 5.2K•Ω and 1.2MΩ• shall be used. The flexible cord must be attached to a dissipative earth
point.
All containers and storage must be of the conductive type.
Batteries:
This device contains an internal battery in addition to the external battery pack. These batteries are
recyclable and should be disposed of in accordance with national legislation. They must not be incinerated,
or disposed of as ordinary rubbish.
CAUTION
VARNING
Danger of explosion if battery is incorrectly replaced.
Replace only with the same or equivalent type recommended
by the manufacturer.
Discard used batteries according to the manufacturer’s
instructions.
Explosionsfara vid felaktigt batteribyte.
Använd samma batterityp eller en likvärdig typ som
rekommenderas av apparattillverkaren.
Kassera använt batteri enligt gällande föreskrifter.
ADVARSEL!
ADVARSEL
Lithiumbatteri-Eksplosionsfare ved fejlagtig håndtering.
Udskiftning må kun ske med batteri af samme fabrikat og type.
Levér det brugte batteri tilbage til leverandøren.
VAROITUS
Paristo voi räjähtää, jos se on virheellisesti asennettu. Vaihda
paristo ainoastaan laitevalmistajan suosittelemaan tyyppiin.
Hävitä käytetty paristo valmistajan ohjeiden mukaisesti.
2
Eksplosjonsfare ved feilaktig skifte av batteri.
Benytt samme batteritype eller en tilsvarende type
anbefalt av apparatfabrikanten.
Brukte batterier kasseres i henhold til fabrikantens
instruksjoner.
TABLE OF CONTENTS
SECTION 1
Specifications ……………………………………………………… (see Cover sheet)
SECTION 2
General Descriptions
2.1 Multi Band ………………………………………………………. 04
2.2 Radio Frequency Power Level ……………………………….. 05
2.3 Speech Codec …………………………………………………. 05
2.4 Languages ………………………………………………………. 05
2.5 Battery Charging ……..………………………………………… 06
2.6 Battery Safety …………………………………………………… 06
2.7 Battery Capacity ….…………………………………………….. 06
2.8 Accessory Interface ..…………………………………………... 07
SECTION 3
Operating Instructions
3.1 Basic Features ………………………………………………….. 08
3.2 Security Codes ………..…………………………………………09
3.3 Icon Glossary …………………………………………………… 10
3.4 Menu Overview …………………………………………………. 10
3.5 Applications Menu ……………………………………………… 10
SECTION 4
Disassembling/Testing
4.1 Disassembly …………………………………………………….. 11-13
4.2 Interface to GSM-Tester ……………………………………….. 14
4.3 Jigs and Tools…………………………………………………… 15
SECTION 5
Programming Instructions
5.1 Requirement ..…………………………………………………… 16
5.2 Hardware Set-up ..…...…………………………………………. 16
5.3 Software Set-up .………………………………………………... 16
5.3.1 Software Download to Mobile ………………………………. 16-17
5.3.2 Save Personal Data in Mobile ………………………………. 17
5.3.3 Reset of Personal Data ……………………………………… 17
5.3.4 Reset of Security Lock ………………………………………. 17
SECTION 6
Explosion View
6.1 Spare Parts List ………………………………………………… 18
6.2 Accessories ……………………………………………………... 19
3
SECTION 2
GENERAL DESCRIPTIONS
2.1 Multi-band :
CMD-Z7 support E-GSM 900 and GSM 1800 multi-band functionality.
For the use in Europe and in other countries worldwide, ETSI has specified GSM standards into two frequency
bands. That is the 900-MHz and 1800-MHz band and is usually referred to as GSM900 and GSM1800 (formerly
DCS1800).
While the 900-MHz band has 124 channels (extended version: 175), the 1800-MHz band with its 375 channels
provides a three-times higher capacity. Not only as a result of this large range of channels but also due to the low
transmission power and the transmission distance, GSM1800 supports a higher quantity of RF-channels.
The Dual band technology enables a network operator with spectrum at both 900MHz and 1800MHz to support the
seamless use of dual band handsets across both frequencies. By supporting seamless handovers between
900MHz and 1800MHz, Dual band networks can provide major benefits in terms of capacity enhancement and
revenue optimisation through the introduction of new services.
The CMD-Z7 is a phase II, GSM900 class 4, GSM1800 class 1 mobile phone.
The nominal maximum output power for GSM900 is 2W, for GSM1800 1W.
It supports the extra functionality required for multi-band mobile stations: Inter-band/”seamless” hand-over,
channel assignment, cell selection and re-selection, all between both bands within a Public Land Mobile Network.
The manual and automatic PLMN selection in both bands is given.
The user does not need any special action to use the multi-band functionality of the phone.
Users are able to manually roam between PLMN’s operating in E-GSM900 and GSM1800 bands.
E-GSM
With the further development of the GSM standard, an additional range of frequencies has been made available to
the “Global system for mobile communications”. For each of the two duplex frequency ranges, one for the forward
direction and one for the reverse direction, additional 10 MHz have been added to the bottom end of the bands,
extending the frequency range to 50 further channels.
The mobile station transmits in the 880- to 915 MHz range, and the base station transmits in the 925- to 960 MHz
range. A duplex spacing of 45 MHz is used, the base station always transmits on the high side of the duplex
frequency pair.
The numbering for these additional channels is from 974 to 1023. This is done to avoid assigning one channel
number twice within the same standard.
Compared to the primary GSM system, Channel number 0 is used in the extended GSM system, since it does not
make sense to reserve it at a guard band within the E-GSM bands. Now, the lowest channel, number 974 (880.0
MHz), serves as the guard band between GSM and other services on lower frequencies.
GSM 1800
GSM-1800 uses the frequency ranges of 1710 to 1785 MHz in the uplink direction, and 1805 to 1880 MHz in the
downlink direction.
From these figures it follows that the duplex spacing is 95 MHz with 374 channels with bandwidths of 200 kHz
each.
The channels are numbered from 512 to 885 in order to distinguish them from the channels in the primary and
extended GSM frequency bands.
4
2.2 Radio Frequency Power Levels:
Between the GSM1800 and the E-GSM System are differences regarding the power level. GSM1800 basically
needs lower power levels. If the performance of a MS for GSM900 system was certified of 2W (Power Class 4),
then in the GSM1800 system it is only 1W (Power Class 1). There are also reduced BTS power levels due to
microcell applications, which means instead of the 40W (Power Class 4) in the E-GSM900 system GSM1800
needs only 20W (Power Class 1).
Preferences
GSM 900
E-GSM
GSM 1800
Frequency band
uplink:
downlink:
MHz
890 - 915
935 - 960
MHz
880 - 915
925 - 960
MHz
1710 -1785
1805 - 1880
Radio Channels
124
174
374
max. BS-Power
40 W (46 dBm)
20W (43 dBm)
max. MS-Power
2 W (33 dBm)
1W (30 dBm)
2.3 Speech Codec
The CMD-Z7 supports the following speech codecs.
•
•
•
Full Rate (FR) Codec
Half Rate (HR) Codec
Enhanced Full Rate (EFR) Codec
The speech codec forms the human voice into a digital signal, which is sent in the GSM network.
The GSM system currently has three different speech codec standards.
At first, the Full Rate (FR) Codec was introduced. With new requirements concerning speech quality and
availability of radio channel resources two further standards were introduced, the Half Rate (HR) Codec and the
Enhanced Full Rate (EFR) Codec. The Half Rate (HR) Codec requires only half the channel capacity of a Full Rate
(FR) Channel. The Enhanced Full Rate (EFR) Codec requires the same radio channel resources as a Full Rate
(FR) Codec but offers Fixed Line quality with superior vocal clarity.
2.4 Languages
The CMD-Z7 supports the following languages:
•
•
•
•
•
•
•
Bulgarian
Croatian
Czech
Danish
Dutch
English
Finnish
•
•
•
•
•
•
•
•
•
•
•
•
•
•
•
French
German
Greek
Hungarian
Italian
Norwegian
Polish
5
Portugese
Romanian
Russian
Slovakian
Slovenian
Spanish
Swedish
Turkish
2.5 Battery Charging
There is no charging circuitry in the battery pack. The CMD-Z7 has complete charger function internally.
The telephone can be charged only with the battery connected the phone. This situation can be sub-divided into
two situations: the phone is on or off. It can be charged with the AC Adapter, Travel Charger or Cigar Lighter
Charger.
The battery symbol is used to indicate the charging, and to indicate when the battery is fully charged. This is done
using the following sequence of icons:
The uncharged segments of the battery are moving in a right to left manner until the charging stops. The
sequences for each charging level is repeated until the battery is charged to that level.
When the charging sequence is finished the flashing of the battery level sign stops.
The phone shows the full-battery icon.
Note: When the battery pack is completely discharged, it can take some time until the battery icon appears when
charging
2.6 Battery Safety
The battery pack contains a single Li-polymer cell, a safety circuitry and, in addition, a microprocessor unit which
manages RTC information by reading out the binary counter value in the microprocessor. The charging circuitry
and the safety circuitry together guarantee a double fail-safe battery pack. This means that each component can
be either short or open and still all the safety requirements will not be violated.
The safety concept protects against:
Over voltage: The charging is stopped when Battery Voltage (Vbat) reaches 4.27V- 4.3V. The charging resumes
when Vbat falls below (4.045V - 4.145V).
Under voltage: When the cell voltage drops below 2.242V – 2.358V the cell is disconnected for discharging.
Charging is still possible.
Current fuse: Finally, if all protection functions are out of order due to abnormal condition, the current fuse protects
the device from explosion and fire with melting. The fuse melts 10A during 1 second.
2.7 Battery Capacity
QN-Z7BPS
680mAh; Lithium Polymer Technology
The phone can be charged even during making phone calls.
However, the shortest charging time will be reached when the phone is switched off.
6
2.8 Accessory interface
The table explains what kind of pins the phone supplies to the different accessories.
Pins
GND
Charge
GEN
Power
RX
TX
Audio
Audio
I/O
OUT
(IN)
(OUT)
ACC RS232 RS232
ID
RTS
CTS
Out
IN
3
4
5
6
7
8
9
10
11
12
√
√
√
1
2
Charger
√
CLC
√
√
√
HFK
√
√
Data Cable RS
√
√
√
√
√
√
√
√
Data Cable USB
√
√
√
√
√
√
√
√
√
√
AGND
Connector layout
Connector view from base of phone
The connector comprises the following pins:
Audio
Audio In, Audio Out and Audio GND:
Audio IN:
Is a single ended input with a maximum sensitivity of 365 mVrms.
Audio OUT:
The single ended output delivers 0.8Vpp into a 1kΩ load.
These two signals are referred to as AGND.
RS232 Interface
5-pin interface: RX, TX, RTS(RFR), CTS and Gen I/O(DTR or DCD):
This is the communication interface to the Data cable “QN-3RS/USB”.
Pin 3 is connected to a general IO pin on the baseband digital chip. The functionality can be assigned on an
accessory by accessory basis to be input, output or interrupt.
Charge
The Charge pin represents the positive contact for the charging funtionality.
GND
The Ground pin represents the digital interface and charger return current.
ID
This pin shows the presence of an accessory and is also an analog ID for the accessory. Accessories which
provide charger functionality only, do not support this pin and their presence is detected with a valid charger
voltage.
Power Out
Power-out has a different functionality with different accessories.
In the car-kit environment the ext. Vbat indicates that a phone call is accepted/in progress. This information is used
by the car-kit to power up the audio section of the car-kit, mute the car stereo and keep the car-kit powered up
even when the ignition is switched off.
Due to the fact that the ID of the accessory is detected first, the ACC power is not current limited (protected).
7
SECTION 3
OPERATING INSTRUCTIONS
3.1 The Basic Features of the CMD-Z7
• Parts and Controls
This section provides a brief guide to the operation and facilities available on the CMD-Z7. Refer to the Operating Manual for full
operational information.
10
Clear Key
11
On/Off Key
Call End Key
Voice Mail Key
12
External Antenna Connector
4
Keypad
13
Headset Connector
5
Microphone
14
Finger Stop
6
Flip
15
Loudspeaker
7
Display
16
Battery Cover
8
Send Key
17
Charging Indicator
9
Memo Key
18
Battery Release Button
19
External connector
(Charging and Accessories)
1
Ear piece
2
Advanced Jog Dial
3
• Jog Dial
The Jog Dial provides fast and easy menu navigation with only one hand.
Operation Function
Function
Rotate the Jog Dial clockwise
or counter-clockwise
Scrolls through menu options.
Opens Phonebook in Standby Mode.
Press the Jog Dial straight
into the phone
Opens Menu in Standby Mode.
Selects an option (highlighted in the display)
Keep the Jog Dial pressed
Dials the phone number selected.
Press the Jog Dial forward
Exits from one menu to the previous screen.
Also ends a call.
Press the Jog Dial backward
Opens the “pop up menu”.
Also opens help.
8
• Loudspeaker
v During a call, press the Jog Dial backward and select Loudspeaker to turn the loudspeaker on/off.
• The Voicemail Key
v Press and hold
to access your Voicemail
• Manner Mode
v In standby mode when the flip is closed, press the Jog Dial backward to activate/deactivate the
manner modes.
v Once selected, it is possible to switch among the manner mode functions. All manner mode icons
appear in the display; rotate the Jog Dial to select one:
Silent Mode
:turns the ringer and all tones to silent mode.
Ringer to Single beep
Vibra Alert
Outdoor
:ringer is restricted to a discrete single beep.
:Vibra Alert without the ringer.
:turns the ringer and all tones to the maximal volume.
3.2 Security Codes
CODE TYPE
NUMBER OF
DIGITS
DESCRIPTION
PIN
Personal Identification Number
4 to 8
Controls SIM security. Supplied by the
Service Provider !
PIN 2
4 to 8
Controls memory security. Supplied by the
Service Provider !
8
Used to unblock PIN and PIN 2.
A PIN or PIN 2 will become blocked if the wrong
PIN or PIN 2 is entered three times.
When the blocked PIN or PIN 2 is unblocked, a
new PIN or PIN 2 must be entered. If the wrong
PUK or PUK 2 is entered 10 times, the SIM card
will be unusable.
Supplied by the Service Provider !
Bearing Password
4
Controls the call bar function. If the wrong
password is entered three times, this
service will be revoked.
Supplied by the Service Provider !
Security Code
4 to 8
Controls the access to wap-and e-mail settings.
The default Security Code is: 0000
Refer to Section 5 “Programming Instructions”
PIN / PIN 2
Personal Unblocking Key
(PUK / PUK 2)
9
3.3 Icon Glossary
ICON
Explanation
ICON
Explanation
Network not available
Missed calls
Network signal strenght (strong)
Incoming call barring
Battery strength
Outgoing call barring
SMS (Envelope Icon)
Incoming + Outgoing call barring
Voicemail
Conditional Divert
Alarm
Unconditional Divert
Silent Mode
Active call
Vibra Alert
Call hold
Single Beep
Mute Microphone
Outdoor Mode
Headset connected – active call
Ringer off
Handsfree Kit connected (auto answer on)
Conversation Privacy (ciphering) not supportet
Loudspeaker on
T9 (Text editing system)
Search
Paste
Press theJog Dial backward (pop-up menu)
3.4 Menu Overview
3.5 Applications Menu
Press the Jog Dial from standby mode to
access the Main menu:
Press the Jog Dial backward from standby mode to
access the Applications menu:
10
SECTION 4
DISASSEMBLY
IMPORTANT NOTE :
The IMEI number is the electronic identification of the hardware, which is stored electronically. There should be no discrepancy
between the number on the sticker and the number within the set memory allowed.
In case of replacing the lower cabinet it is to make sure that the IMEI Sticker mounted on the lower case (visible from the
battery compartment) will be replaced to the new housing part as well.
Follow the disassembly procedure in the numerical order given.
CABINET UPPER & LOWER
MAIN BOARD ASS’Y
NOTE:
Do not detach the shield
case from the main board
11
FLEX KEY MOUNT, ASS’Y
FRAME LCD, ASS’Y
Note 1: Certain repairs may require that the )5$0(/&'$66<
has tobe detached from the /&'02'8/(.
Note 2: On reassembly the )5$0(/&'$66< must be placed
after the/&'02'8/( and the *8,'(/&'$66< have
been put back into the *8,'(.(<6833257
12
GUIDE, KEY SUPPORT & ANTENNA
CABINET LOWER
Re-assembly procedure :
To re-assemble the unit, apply the reverse order of the above mention disassembly procedure.
13
4.2 Interface to GSM-Tester
Test Set Up for CMD-Z7 Level 1 Testing
CMD- Z 7
+
Battery Pack
+
Test SIM Card
Service Test Connector
RF output :
SMA jack*
STC-05 Part No.
3-235-700-01
RF input Connector *
GSM – TESTER
This unit acts as a base station providing
all the necessary GSM signalling
requirements and provides GSM signal
measuring facilities as well.
* Use special RF-Adapter for connection of STC-05 to your GSM –Tester !
14
Level Test Procedure with GSM TESTER recommendation:
•
•
Simulate GSM call processing – to check the functionality of transmitting and receiving audio
signals of loudspeaker and microphone.
Basic GSM transmission & reception parameter testing – to ensure that handset’s performance
compiles with standard GSM specification.
4.3 Jigs & Tools
Description
DATA TRANSFER CABLE
DTC-04
HOOK RELEASE JIG
SERVICE TEST CONNECTOR
STC-05
Part No
Remark
1-757-348-11
Necessary For Software Update
3-043-180-01
For Housing Opening
3-235-700-01
For Connection To GSM Measure
Equipment
HOOK RELEASE JIG
DATA TRANSFER CABLE
SERVICE TEST CONNECTOR
15
Section 5
PROGRAMMING INSTRUCTIONS
5.1 Requirement
• PC (486 type or higher) with Microsoft “Windows” Operating System
• One COM-port free for usage
• The Data Transfer Cable (p/n 1-757-348-11)
PREPARATION FOR SOFTWARE UPDATE
DATA
TRANSFER
CABLE
5.2 Hardware set-up
• Copy all the files to the PC (define own directory).
• Connect the Data Transfer Jig to the PC COM-port (COM 1 or COM 2) and the CMD-Z7 external connector.
• Insert a test SIM in the CMD-Z7; this is because during the procedure the Flash Loader will attempt to
perform data control operations, which are not generally permitted by original SIMs. The test SIM is not
absolutely necessary for a generally software update, although it is useful.
• Attach battery pack to CMD-Z7; the CMD-Z7 is powered up from the battery pack.
• The initial settings of the flash.exe program may not correspond with the normally correct settings. It is highly
advisable to check the settings first (see 5.3 Software set-up).
5.3 Software set-up
5.3.1 ∗ Download Software to Mobile (Software Update)
• Start the program flash.exe by double-clicking on its icon in the Windows Explorer.
16
Z7 Flash.exe
• Select “file”/”Settings…” and check if the settings for the “Com Port”and “Speed” are correct.
− The FlashLoader automatically detects all available Com ports on the PC.
(COM 1 or COM 2)
− Baud rates up to 812500bps will be supported, but standard PCs, unless
it is correctly customised (i.e. with a Fast Serial Board), will not support
Baud rates > 115200bps.
− The default values are
• Click on the “Load” button and select an SRE file for downloading.
− The CMD-Z7 software is located in the Z7.SRE file.
− Any other SRE file is either only needed for the program itself, or can be a personal data file.
Note: If a “flash.sre” file appears, please mind that this is application software (do not use / modify)
• Switch on the CMD-Z7.
• Now the program runs automatically.
5.3.2 ∗ Save User Data in Mobile (Get Data / Write Data)
•
•
•
•
•
Check if the settings for the “Com Port” and “Speed” are correct.
Switch on the CMD-Z7.
Click on “Get Data”.
Now the program runs automatically (if the application does not start after a while, press any key of the CMD-Z7)
After the read data is downloaded, either reload it in another mobile (reconnect a new mobile and click on
“Write Data”) or save it on the disc using File/Save option.
• When the message “write user data complete” appears, disconnect the Data Transfer Cable and make sure
that the attached battery pack will be removed (do not switch off the terminal with the ON/OFF key).
5.3.3 ∗ Reset of User Data (Erase Data)
•
•
•
•
Check if the settings for the “Com Port” and Speed” are correct.
Switch on the CMD-Z7.
Click on “Erase Data”.
Now the program runs automatically, all individual settings (such as Phonebook entries and WAP settings etc.)
will be deleted.
• When the message “erase user data complete” appears, disconnect the Data Transfer Cable and make sure
that the attached battery pack will be removed (do not switch off the terminal with the ON/OFF key).
5.3.4 ∗ Reset of Security Code Lock (Clear Lock)
• Check if the settings for the “Com Port” and Speed” are correct.
• Switch on the CMD-Z7.
• Click on “Clear Lock”.
• The individual Security Code will be reset to the default setting: 0000 !
For any of the above stated functions, follow the instructions written in the status bar (the first
one from the top).
Follow up the progress of the up/download process by checking the Progress bar (the second
one from the top).
Note: Do not forget to remove the test SIM before returning an intact mobile phone.
17
SECTION 6
SPARE PARTS AND ACCESSORIES LIST
6.1 Spare Parts
Note:
• The parts with no reference in the exploded view are not supplied.
5HI1R
3DUW1R
'HVFULSWLRQ
A-3649-351-A
3-235-393-01
1-542-460-11
A-3649-364-A
3-235-137-01
&$%,1(7)/,3
%$'*(35,17,1*
0,&523+21(
&$%,1(7833(5$66<
&$3-$&.
3-046-953-01
3-046-952-01
3-235-142-01
A-3649-361-A
3-237-037-02
5HPDUN
5HI1R
3DUW1R
'HVFULSWLRQ
1-815-605-21
1-815-308-21
3-929-548-01
3-224-788-01
1-815-606-11
5)&2$;,$/&211(&725
&211(&725%$77(5<
6&5(:6
[
6&5(:6
[
&211(&725(;7(51$/
%($5,1*$66</
%($5,1*$66<5
&86+,21%($5,1*
)5$0(/&'$66<
$'+(6,9(/&'
1-816-067-11
1-754-193-11
A-3649-363-A
1-796-133-11
1-544-848-11
&211(&7253,1
$17(11$3$7&+*60
)/(;-2*68%$66<
-2*6:,7&+
08/7,$&725
1-804-381-11
X-3381-121-1
3-235-131-01
3-235-132-01
A-3622-547-A
/&'02'8/(
*8,'(/&'$66<
.(<3$'
*8,'(.(<6833257
)/(;.(<02817$66<
1-756-187-11
X-3381-193-1
A-3649-388-A
3-235-134-01
3-230-732-01
%$77(5<3$&.
&$%,1(7/2:(5$66<
/,'%$77(5<
&$35)
6,0&$5'75$<
1-251-898-41
5(&(,9(5
1-815-608-31 -$&.+($'6(7
18
5HPDUN
6.2 Accessories
5HI1R
3DUW1R
'HVFULSWLRQ
1-476-203-12
1-476-508-11
1-756-187-11
$'$37(5$&$&9 (8
$'$37(5$&$&9 8.
%$77(5<3$&.
3-233-439-12
3-233-439-22
3-233-439-32
3-233-439-42
3-233-439-52
3-233-439-62
3-233-439-72
3-233-440-12
3-233-440-22
3-233-440-32
3-233-440-62
0$18$/,16758&7,21
0$18$/,16758&7,21
0$18$/,16758&7,21
0$18$/,16758&7,21
0$18$/,16758&7,21
0$18$/,16758&7,21
0$18$/,16758&7,21
0$18$/,16758&7,21
0$18$/,16758&7,21
0$18$/,16758&7,21
0$18$/,16758&7,21
9-870-405-01
5HPDUN
(1*/,6+
*(50$1
)5(1&+
'87&+
,7$/,$1
63$1,6+
32578*8(6(
&=(&+
32/,6+
785.,6+
6:(',6+
101
AC adapter (1)
102
Sony Ericsson
Mobile Communications AB
Lithium Polymer Battery Pack (1)
© 2001.9
Published by After Sales Service