1
Rev
1
Description
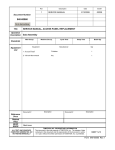
SERVICE MANUAL
Date
ECO#
2/13/2008
00239
Document Number:
040-00061
Form Instructions
Title
Operation
Description
Standards
Equipment
List
SERVICE MANUAL, BELLY PAN REPLACEMENT
Sub Assembly
Man Occup.
Machine Occup.
Equipment
Cycle Time
Setup Time
Manufacturer
Batch Qty
Qty
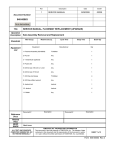
1- Belly pan
T3 Motion
1
2- 5/32 inch Allen wrench
Any
1
3- LocTite #248 Thread lock
LocTite
1
Document #
Description
Description
Document #
Reference
Docs
Related
Files
RESP
ENGR
Mark Jones
ALL TEXT AND GRAPHICS
COMPUTER GENERATED, DO
NOT REVISE MANUALLY
T3MOTION, INC. PROPRIETARY INFORMATION
This document is the sole property of T3MOTION, Inc. The release of data
contained in this document and the reproduction of this document in whole
or in part, without the written permission of T3MOTION, Inc. is prohibited.
SHEET 1 of 9
Form 040-00061 Rev.1
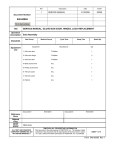
SERVICE MANUAL
Item#
Part #
Description
Qty
1
500-00025
Belly pan
1
T3MOTION PROPRIETARY INFORMATION
Use or disclosure of data contained on this sheet is
subject to the restriction on the cover or title page of this
document.
Document No
Revision
040-00061
1
Sheet
2
SERVICE MANUAL
Serious electrical
shock can occur
if precautions are
not followed.
• ALWAYS TURN OFF POWER BREAKER IN GLOVE BOX AND REMOVE POWER
MODULES BEFORE PERFORMING ANY ELECTRICAL WORK.
Power breaker in glove box
Power modules
• ALSO SET THE PARKING BRAKE PRIOR TO ANY WORK.
Parking brake
T3MOTION PROPRIETARY INFORMATION
Use or disclosure of data contained on this sheet is
subject to the restriction on the cover or title page of this
document.
Document No
Revision
040-00061
1
Sheet
3
SERVICE MANUAL
WORK INSTRUCTIONS:
1.0
Recommended tools for replacing the belly pan assembly.
See equipment table above for the details.
A power drill with a
5/16 Allen bit can
be helpful, but is
not required.
2- Assorted 5/16
Allen wrenches.
3- LocTite 248
2.0
Pad the area next to the T3 unit to protect the bodywork from any potential
damage when you turn it on its side. A foam pad as shown works well, but
several layers of blankets or other similar padding will work.
Make sure the padding is thick enough to
keep the front fender off the ground.
Foam pad.
Also protect handle
bar end.
You may want to have a second person help
lay the vehicle on its side. Set the brake and
lean it over slowly. Remember, it weighs 260
pounds without the batteries.
T3MOTION PROPRIETARY INFORMATION
Use or disclosure of data contained on this sheet is
subject to the restriction on the cover or title page of this
document.
Document No
Revision
040-00061
1
Sheet
4
SERVICE MANUAL
3.0
There are thirteen 5/16 Allen head fasteners holding the belly pan on.
3.1
Use the Allen wrench of your choice to remove the thirteen fasteners.
3.2
Sometimes the washers stay attached to the belly pan; sometimes they come off
with the fastener. If they stick to the pan, just pull them off by hand, or with a flat
screwdriver if needed.
T3MOTION PROPRIETARY INFORMATION
Use or disclosure of data contained on this sheet is
subject to the restriction on the cover or title page of this
document.
Document No
Revision
040-00061
1
Sheet
5
SERVICE MANUAL
3.3
3.4
4.0
Remove the old belly pan.
The vehicle with no pan. Now is a good time for a quick visual inspection.
This is a new belly pan.
T3MOTION PROPRIETARY INFORMATION
Use or disclosure of data contained on this sheet is
subject to the restriction on the cover or title page of this
document.
Document No
Revision
040-00061
1
Sheet
6
SERVICE MANUAL
4.1
Apply the LocTite to the threads of all thirteen of the fasteners.
4.2
Hold the Belly pan up to the bottom of the T3 unit and start one of the fasteners. A
wrench can be helpful for the first one.
4.3
It may be necessary to center the mounting clips with the holes. This can easily be
accomplished by putting an Allen wrench through the holes and aligning the clips to
the holes before inserting a fastener.
T3MOTION PROPRIETARY INFORMATION
Use or disclosure of data contained on this sheet is
subject to the restriction on the cover or title page of this
document.
Document No
Revision
040-00061
1
Sheet
7
SERVICE MANUAL
4.4
5.0
Hand thread all the fasteners into the belly pan. Do not tighten any of them until all
are in place or it may be difficult to start some of them. Once all are in, use the
wrench to tighten them down. Do not over tighten them.
Carefully lift the T3 unit back up on its wheels. Lifting it while the brake is set makes
this more manageable. Again, a second person is helpful for this.
For addition information, contact T3 Motion at: (714)-619-3600.
T3MOTION PROPRIETARY INFORMATION
Use or disclosure of data contained on this sheet is
subject to the restriction on the cover or title page of this
document.
Document No
Revision
040-00061
1
Sheet
8