1
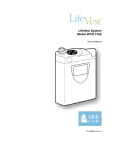
LifeVest System
Model WCD 3100
Operator’s Manual
PN 20B0040 Rev FI
LifeVest System WCD 3100 Operator’s Manual
Restricted sale
Federal (USA) law restricts this device to sale by or on the order of a physician.
Effectivity
This manual describes the LifeVest® WCD™ 3100 wearable defibrillator system with
software version 5.1 and up.
Disclaimer
Information, operation, specifications, and product appearance may change without
notice. Names and data used in examples are fictitious.
Trademarks
Lifecor, WCD, and LifeVest are trademarks or registered trademarks of ZOLL Lifecor
Corporation in the United States of America. All other product names mentioned herein
are the trademarks of their respective owners.
Copyright notice
Copyright 2006 Zoll Lifecor Corporation.
Patents
US patents: 6,681,003; 6,280,461; 6,253,099; 6,169,387; 6,097,982; 6,065,154;
5,944,669; 5,929,601; 5,741,306; 5,078,134; 4,928,690; others pending.
Software nonexclusive license
The LifeVest device includes certain software (“Software”). ZOLL Lifecor grants you a
nonexclusive license to use the Software solely for diagnostic and treatment purposes as
part of use of the LifeVest device. You are prohibited from: (i) reproducing the Software;
(ii) removing or destroying any proprietary markings, copyright notices or other legends
which are part of the Software; (iii) modifying or reverse engineering the Software; or
(iv) removing the Software from the LifeVest device. Title to the Software will remain at all
times with ZOLL Lifecor. You must keep the Software confidential.
Contact information
ZOLL Lifecor Corporation
121 Freeport Road
Pittsburgh, PA 15238-3495
USA
Page ii
Phone
Toll free (USA)
Fax
Web
412-826-2146
1-800-LIFECOR (1-800-543-3267)
412-826-9485
www.lifecor.com
1-800-LIFECOR
Contents
Contents
1: Introduction .............................................................................................................................1-1
About this manual................................................................................................................... 1-1
What’s in this manual ............................................................................................................. 1-1
About the LifeVest system......................................................................................................1-2
Safety information................................................................................................................... 1-5
2: Patient fitting ...........................................................................................................................2-1
Before you start ...................................................................................................................... 2-1
Components of the LifeVest belt assembly ............................................................................ 2-1
How to measure the patient.................................................................................................... 2-2
How to assemble the electrode belt to the garment............................................................... 2-3
How to put the garment on the patient and finalize assembly................................................ 2-4
3: Patient training........................................................................................................................3-1
Main points to teach the patient ............................................................................................. 3-1
Summary of operating modes ................................................................................................ 3-3
Demonstrating the alarms ...................................................................................................... 3-4
4: Monitor setup for a new patient ............................................................................................4-1
About this section ................................................................................................................... 4-1
Menu structure........................................................................................................................ 4-1
How to put the monitor in setup mode.................................................................................... 4-2
How to set up a new patient ................................................................................................... 4-4
How to baseline a patient ....................................................................................................... 4-5
How to manually re-baseline a patient ................................................................................... 4-7
5: Data management ...................................................................................................................5-1
About LifeVest Network .......................................................................................................... 5-1
How to view patient data on LifeVest Network ....................................................................... 5-2
6: Clinical information ................................................................................................................6-1
Indications............................................................................................................................... 6-1
Contraindications.................................................................................................................... 6-1
Pacemaker interactions .......................................................................................................... 6-1
Recommendations for patients with pacemakers................................................................... 6-2
Recommendation for double counting of a normal rhythm .................................................... 6-2
Clinical studies........................................................................................................................ 6-3
Appendix A: Quick charts ......................................................................................................... A-1
Appendix B: Part Numbers ....................................................................................................... B-1
Appendix C: Symbols ................................................................................................................ C-1
Index
1-800-LIFECOR
Page iii
LifeVest System WCD 3100 Operator’s Manual
This page intentionally left blank.
Page iv
1-800-LIFECOR
Introduction
1: Introduction
About this manual
This manual:
y
is for operators of the LifeVest wearable defibrillator.
y
gives you instructions on how to fit patients, as well as instruct patients in the
use and care of the device.
y
supplements the patient manual, which gives patient instructions on the use
and care of the LifeVest device.
What’s in this manual
Here’s how to use this manual:
1-800-LIFECOR
y
The next few pages contain details about the LifeVest system, plus safety
information.
y
Patient fitting explains how to fit a patient and assemble the components of
the LifeVest belt.
y
Patient training gives guidelines for instructing the patient about the LifeVest
system and how to respond to alarms.
y
Monitor setup for a new patient covers the basic procedures and menus for
setting up the monitor before use by a new patient. (If you need to change
other settings, see the programming section of the Service Manual.)
y
Data management tells how to view patient data on the LifeVest Network
using a computer with Internet access.
y
Clinical information contains indications, contraindications, a summary of
the clinical studies, and other clinical details.
y
Appendixes include Quick charts, Part numbers, and Symbols. The quick
charts are particularly helpful as reminders of how to do things.
y
Use the Index at the back of the manual to find what you’re looking for
quickly.
Page 1-1
LifeVest System WCD 3100 Operator’s Manual
About the LifeVest system
The LifeVest is a cardioverter defibrillator worn by a patient at risk for sudden
cardiac arrest (SCA). It monitors the patient’s heart continuously and, if the
patient goes into a life-threatening arrhythmia, can deliver a shock treatment to
restore the patient’s heart to normal rhythm.
Two main components
The LifeVest system consists of two main components: (1) an electrode belt and
garment that surrounds the patient’s chest, and (2) a monitor that the patient
wears around the waist or from a shoulder strap.
Washable garments are available in sizes to suit most patients. The LifeVest
device’s electrodes are dry and non-adhesive to provide patient comfort.
The monitor weighs about 1.8 pounds, making it the lightest external defibrillator
available. The device contains pushbuttons and indicators for the user, as well as
a speaker for sounding alarms and voice prompts.
Treatment cycle less than a minute
When the device detects a treatable arrhythmia, an alarm sequence begins,
giving a conscious patient time to stop the treatment. This keeps inappropriate
arrhythmia detections from becoming inappropriate shocks, a key difference
between the wearable defibrillator and an implanted defibrillator.
If the patient holds the two “response” buttons at any time during the treatment
sequence, the alarms stop and no shocks will be delivered.
If the patient does not respond or releases the response buttons, the device
continues to give alarms and spoken warnings to bystanders that a treatment
shock is about to be delivered.
Gel within the electrodes is released just prior to delivering the treatment shock in
order to deliver the shock most efficiently.
The entire event, from arrhythmia detection to delivery of the shock treatment,
typically takes less than one minute.
If the arrhythmia continues after the first shock, up to 5 shocks may be given.
Page 1-2
1-800-LIFECOR
Introduction
Treatment sequence
After identifying VF, there is a response time of 25 seconds (programmable up to
55 seconds) to allow the patient time to respond to the alarms, as shown below.
The lower threshold for VF identification can be set from 120 to 250 beats per
minute (bpm), with a default of 200 bpm.
If the system identifies VT, there is a response time of 60 seconds
(programmable up to 180 seconds). The lower threshold for VT identification can
be set from 120 to the VF threshold, with a default setting of 150 bpm.
Typical treatment sequence during ventricular fibrillation
The LifeVest device can deliver up to 5 defibrillating pulses during an arrhythmic
episode. The energy of the pulses can be programmed individually to between
75 and 150 joules (±5%), with a default setting of 150 joules.
ECG recording of events
The patient’s electrocardiogram (ECG) is recorded for all detected arrhythmias,
including before and after treatment. The patient can also manually record an
ECG at any time by pressing the response buttons on the device.
Patients transmit information from their devices by telephone to the LifeVest
Network. Physicians can then access their patient’s information from virtually any
computer with an Internet connection. LifeVest Network allows physicians to view
ECG recordings, patient use, ECC interference, and other device-related
information.
Biphasic waveform delivers efficient energy
The LifeVest device delivers its defibrillating energy in a biphasic truncated
exponential waveform, whereby the signal goes positive, then negative very
quickly. This type of waveform has been shown to be effective defibrillating at
lower energy levels.
The amplitude and width of the phases of the energy waveform are automatically
adjusted to deliver a precise energy amount regardless of the patient’s body
impedance.
1-800-LIFECOR
Page 1-3
LifeVest System WCD 3100 Operator’s Manual
Reliable detection algorithm
The LifeVest has proved to be effective at detecting ventricular tachycardia (VT)
and ventricular fibrillation (VF). The detection algorithm was 100% sensitive for
VF and 95% sensitive for VT in bench testing. The algorithm uses the patient’s
baseline vectorcardiogram as a template for detecting changes in cardiac signal
morphology in addition to standard rate determination of arrhythmias.
Page 1-4
1-800-LIFECOR
Introduction
Safety information
This information helps you safely operate the LifeVest system. Read and
understand these warnings, cautions, and symbols before using the device.
Terms used
WARNING: Alerts of possible injury or death caused by misuse of the device.
This includes device failure that could lead to the patient not being protected by
the device.
CAUTION: Alerts of a possible problem with the device. Such problems include
damage to the device or other property, or minor injury.
Rescue defibrillation
y
If the patient should require conventional defibrillation, a warning label on the
garment informs medical personnel to unfasten and lay open the garment,
thus removing the front therapy pad from the patient’s chest. If medical
personnel fail to do so, the LifeVest device may interfere with the
defibrillation, and the conventional defibrillator may damage the device.
Shock hazard
y
Do not attempt to open the monitor, battery, battery charger, or modem. This
may expose you to high voltage and damage the system.
To help ensure proper operation
1-800-LIFECOR
y
Use only the cables, batteries, and accessories specified in this manual. If
you use any other items, the system may not operate correctly.
y
Operate the system within the range of 0°C to 50°C (32°F to 122°F), up to
95% relative humidity (non-condensing), and up to 10,000 feet in altitude.
Page 1-5
LifeVest System WCD 3100 Operator’s Manual
This page intentionally left blank.
Page 1-6
1-800-LIFECOR
Patient fitting
2: Patient fitting
This section explains how to fit a patient and assemble the components of the
LifeVest belt.
Before you start
y
Gather the electrode belt and garment.
y
Read through these procedures completely.
y
Familiarize yourself with the components and what they’re called.
y
Have a clean, flat area to lay out and assemble the components, such as a
table or counter. You might want to put a towel or cloth on the table to protect
the components as you assemble them.
Components of the LifeVest belt assembly
Electrode Belt
The electrode belt comes in one
size and fits any patient. The
parts of the electrode belt are
as follows:
1 Therapy pads
2 ECG electrodes
3 Vibration box
4 Cable and connector
Garment
The garment comes in a variety
of sizes to suit the patient.
In this chapter, you will
measure the patient to
determine what size garment to
use.
1-800-LIFECOR
Page 2-1
LifeVest System WCD 3100 Operator’s Manual
How to measure the patient
Measure the patient to determine what size garment to use.
1
Have patient stand and remove all upper body clothing, including
undergarments.
2
Place a measuring tape around the patient’s chest, centered at the
xiphoid. Measure to the closest inch or centimeter.
3
Find the patient’s measurement in the chart below and get the size
garment indicated.
Chest measurement
inches
centimeters
Garment
10A0964-A0X
26-27
66-70
A01
28-30
71-78
A02
31-33
79-85
A03
34-36
86-93
A04
37-40
94-103
A05
41-45
104-116
A06
46-50
117-128
A07
51-56
129-142
A08
Note: The sizes in this chart are suggested sizes. You may vary from
the sizes indicated in order to suit patient.
Example: Patient measures 44 inches. Read the chart to locate this
measurement.
According to the
chart, patient needs
garment A06
Page 2-2
1-800-LIFECOR
Patient fitting
How to assemble the electrode belt to the garment
Assemble the belt and garment as described in the Patient Manual, but do not
fasten the straps. The fully assembled electrode belt and garment should look
like the following figures.
Toward patient’s body
Make sure that this side faces toward the patient’s body.
Away from patient’s body
Make sure that this side faces away from patient’s body.
1-800-LIFECOR
Page 2-3
LifeVest System WCD 3100 Operator’s Manual
How to put the garment on the patient and finalize assembly
Place the garment and belt assembly on the patient as follows.
1
All clothing and undergarments must be removed
before putting on the garment. All clothing,
including underwear, must be worn over the
device, not under it.
2
Apply unscented hand lotion or skin cream to the
four ECG electrodes.
3
Help the patient put on the garment. Connect the
ends of the garment together in the front.
4
Page 2-4
y
Make sure that the garment doesn’t get twisted
as the patient puts it on.
y
Tell the patient that the metal mesh pockets
must touch bare skin in order for a defibrillating
pulse to be delivered.
y
Female patients should be encouraged to wear
a bra over the garment. Make sure the metal
surface of the front therapy pad presses against
the patient’s body rather than the underside of
her left breast.
Position straps over the patient’s shoulders and
bring them under the patient’s arms around to the
patient’s back.
1-800-LIFECOR
Patient fitting
5
6
1-800-LIFECOR
Without stretching the strap, find the hole that lines
up with the button. Then stretch the strap slightly
and attached the button to the next hole.
y
Do not cut the strap.
y
Excess strap can be folded over and buttoned
again.
y
Repeat for each of the two long straps.
y
Adjust the garment for a good fit.
Bring the remaining strap down the front of the
patient’s chest and button it to the front of the
garment.
y
Do not cut the strap.
y
Excess strap can be folded over and buttoned
again.
Page 2-5
LifeVest System WCD 3100 Operator’s Manual
At left is the garment and belt assembly as viewed
from the patient’s front.
7
Page 2-6
Have the patient look in a mirror to make sure that:
y
Garment and belt assembly is being worn
correctly.
y
Garment is not twisted.
y
Electrodes and therapy pads are pressing
against bare skin.
1-800-LIFECOR
Patient training
3: Patient training
This section gives guidelines for instructing the patient about the LifeVest system
and how to respond to alarms.
We suggest that you:
1
Go over the main points below.
2
Explain the operating modes and alarms as described on page 3-3.
3
Demonstrate the types of alarms that can occur as described on page 3-4.
Main points to teach the patient
When you instruct the patient, stress the following points, explained below and
on the following page:
y
If you get a siren alarm, hold the response buttons.
y
If you get a gong alarm, read the message.
y
If you get shocked, call your doctor and send data.
y
Review the Patient Manual so that the patient is familiar with its contents and
where to find things.
If you get a siren alarm, hold the response buttons
y
The response buttons will light red when you are to press them so they will be
easy to find, even in the dark.
y
As long as you are able to, hold the response buttons to stop a treatment. As
long as you remain conscious and hold the response buttons, you are in no
danger of receiving a treatment shock.
y
If you lose consciousness, of course you will not be able to hold the response
buttons. In this case, and if the lethal heart rhythm continues, the device will
go through the treatment cycle and deliver a treatment shock.
y
It is very important that only you (the patient) hold the response buttons. This
is how the monitor knows whether or not you are conscious. DO NOT let
anyone else hold the response buttons for you.
If you get a gong alarm, read the message
1-800-LIFECOR
y
Read the display and do what it says to fix the problem. Check the Patient
Manual (section 5) for reminders about what to do for various messages.
y
Keep in mind that the monitor gives alarms, messages, and voice prompts to
guide you in what to do.
Page 3-1
LifeVest System WCD 3100 Operator’s Manual
If you have an event, call your doctor and send data
y
If you have any kind of cardiac event, even if you manage to stay conscious
and hold the response buttons, you should contact your physician and report
the incident.
y
Any cardiac event is recorded by the monitor so you can send the data later.
y
As soon as possible after any cardiac event, you should send data using the
modem.
Review the contents of the Patient Manual
Review how to:
y
change and charge the battery
y
change the garment
y
disassemble and reassemble the garment and electrode belt
y
send data using the modem
Also be sure to review the warnings and cautions located in the Patient Manual.
Page 3-2
1-800-LIFECOR
Patient training
Summary of operating modes
As you instruct the patient, keep in mind that the device has basically three
operating modes:
Mode
Message
Normal
monitoring – no
alarms
Gong alarm
Various messages can
appear, for example:
What it means
What the patient needs to do
Monitor is operating
normally.
Nothing.
Patient needs to take
action.
Read monitor and do what it
says.
Check Patient Manual for more
information. See section 5, If you
get alarms.
Siren alarm
An arrhythmia is
being detected.
and
1-800-LIFECOR
Press and hold the response
buttons if conscious.
Check Patient Manual for more
information. See section 5, If you
get alarms.
Page 3-3
LifeVest System WCD 3100 Operator’s Manual
Demonstrating the alarms
Demonstrate the alarms to help the patient learn how to respond. Follow the
procedures below to:
y
Place the system in training mode, then
y
Simulate alarm conditions.
How to enter training mode
View the navigation buttons from the top of the monitor with the
display facing you.
1
Remove and reinsert the battery.
2
While the opening screen is displayed, hold the response
buttons and hold ◄ at the same time. Continue holding these
buttons until the screen changes.
This screen may be displayed for more than 10 seconds.
3
Page 3-4
Press ▲ or ▼ to choose a language, then press ►.
1-800-LIFECOR
Patient training
4
With PATIENT selected, press ►.
5
Press ▲ or ▼ to select TRAINING, then press ►.
6
Press ► to select OK, then press the response buttons.
7
Press the response buttons again.
8
The monitor is now in training mode, with these messages
alternating.
Press the response buttons to silence the gong alarm.
9
1-800-LIFECOR
The monitor is ready to demonstrate the noise and
arrhythmia alarms.
Page 3-5
LifeVest System WCD 3100 Operator’s Manual
Connect patient for training mode
Page 3-6
1
Outfit the patient with the electrode belt and garment.
2
Connect the electrode belt to the monitor.
3
Continue with the procedures on the next page.
1-800-LIFECOR
Patient training
How to demonstrate the arrhythmia alarms
1
With this screen displayed, press ▼.
The device runs through the alarm sequence that will occur if
an arrhythmia is detected:
2
y
Vibration alarm activates and response buttons light red.
y
Siren alarm sounds.
y
Display shows that an arrhythmia has been detected and
tells patient to press response buttons.
y
Voice prompts announce to bystanders that that patient is
going to be shocked.
Tell the patient to press and hold the response button during
the alarms.
The alarms stop as long as the patient holds the response
buttons.
Tell the patient to release the response buttons to show that
the alarm sequence resumes.
3
1-800-LIFECOR
To stop the arrhythmia demonstration, press ▼.
Page 3-7
LifeVest System WCD 3100 Operator’s Manual
How to demonstrate a noise alarm
1
With this screen displayed, press ▲.
2
Tell the patient what to do when the gong alarm sounds:
3
y
Read the display. This particular message states that
ECG signal is not clear. The ECG electrodes are not
sending a good signal to the monitor.
y
Take action to correct problem. In this case, adjust the
belt so that the ECG electrodes make better contact with
the skin.
y
Press response buttons if display so states. This stops
the gong alarm.
With a noise alarm, when you press the response buttons,
the monitor checks for an improvement in the ECG signal.
For the demonstration, the ADJUST BELT message returns.
4
After three cycles, the monitor displays this message.
When this happens, the patient is expected to check the belt
as described in the Patient Manual.
Pressing the response buttons does not make this message
go away.
5
Page 3-8
To stop the noise alarm demonstration, press ▲.
1-800-LIFECOR
Patient training
How to exit training mode
1-800-LIFECOR
1
Remove and reinsert the battery.
2
Press the response buttons as normal.
3
Monitor resumes normal operation.
Page 3-9
LifeVest System WCD 3100 Operator’s Manual
This page intentionally left blank.
Page 3-10
1-800-LIFECOR
Monitor setup for a new patient
4: Monitor setup for a new patient
About this section
y
This section covers the basic procedures and menus for setting up the
monitor before use by a new patient.
y
This section applies to software version 5.1 and up.
y
If you need to change any other settings, see the programming section of the
Service Manual.
Menu structure
1-800-LIFECOR
Page 4-1
LifeVest System WCD 3100 Operator’s Manual
How to put the monitor in setup mode
Before entering new patient information, follow this procedure to place the
monitor in setup mode.
View the navigation buttons from the top of the monitor with the display
facing you.
1
Remove and reinsert the battery.
2
While the opening screen is displayed, hold the response buttons and
hold ◄ at the same time. Continue holding these buttons until the
screen changes.
This screen may be displayed for more than 10 seconds.
3
Press ▲ or ▼ to choose a language, then press ►.
Note: The language you choose only affects the setup screens and
will not affect the patient screens.
4
The main menu displays, showing that the monitor is in setup mode.
You may now proceed to program the monitor. See page 4-4 for
details on setting up a new patient.
Page 4-2
1-800-LIFECOR
Monitor setup for a new patient
5
1-800-LIFECOR
When you are finished programming the monitor, do one of the
following to return to normal operation:
y
Navigate back to the main menu, select EXIT, then press ►.
y
Wherever you are in any menu, remove and reinsert the battery.
Page 4-3
LifeVest System WCD 3100 Operator’s Manual
How to set up a new patient
New patient setup consists of entering the patient’s name and the rate thresholds
for ventricular tachycardia and ventricular fibrillation.
1
With the monitor in setup mode (see page 4-2), and with PATIENT
selected, press ►.
2
With NEW PATIENT selected, press ►.
Note that the response buttons light red to show you are in edit mode.
3
Enter patient’s first name (or ID number) as follows:
y
Press ▲ and ▼ to select characters.
y
To advance to next character, press ►. To go back, press ◄.
y
To save the name, press the response buttons.
4
Enter patient’s last name. Follow same procedure as with first name.
5
To accept the values shown for the rate thresholds without changing
them, press the response buttons.
To change one or both values:
6
y
Use ► or ◄ to select the threshold you want to change.
y
Then press ▲ or ▼ to change the value.
y
Repeat to change the other value.
y
To save the new values, press the response buttons.
Press ► or ◄ to select OK, then press the response buttons.
Baseline the patient as described on the next page.
Page 4-4
1-800-LIFECOR
Monitor setup for a new patient
How to baseline a patient
The monitor’s arrhythmia detection algorithm uses the patient’s baseline ECG as
a template to help determine if a treatable arrhythmia exists.
When you set up a new patient, the monitor automatically goes into the baseline
mode when you exit the setup mode or the next time the system powers up.
Follow this procedure to baseline the patient.
1
Prepare the patient, attach the garment and electrode belt, and
connect the electrode cable to the monitor.
Have the patient sitting or lying down, relaxed, and not talking or
moving around.
Put a fully-charged battery into the monitor.
2
When you see the READY TO RECORD message, press the
response buttons.
This message displays while the monitor records the baseline. The
monitor also shows the patient’s ECG.
Baseline recording time will vary depending on the patient, strength of
the ECG signal, and the amount of noise on the ECG signal.
Recording the baseline may take up to 5 minutes.
1-800-LIFECOR
Page 4-5
LifeVest System WCD 3100 Operator’s Manual
3
When you see the BASELINE COMPLETE message, press the
response buttons.
The monitor returns to normal operation.
If you get the BASELINE FAILED message, the monitor could not
learn the patient’s baseline. Do the following:
Page 4-6
y
Verify that the ECG electrodes are properly contacting the
patient’s skin. You may need to clean the skin or clip excessive
hair before fitting the patient with the electrode belt and garment.
y
Try to baseline the patient again. Remove the battery and repeat
this procedure starting on the previous page.
y
If problems continue, the patient may have a rhythm that is difficult
for the monitor to learn. If so, discontinue attempting to baseline
the patient and call ZOLL Lifecor.
1-800-LIFECOR
Monitor setup for a new patient
How to manually re-baseline a patient
Use this procedure if you need to manually re-baseline a patient.
1
Prepare the patient, attach the garment and electrode belt, and
connect the electrode cable to the monitor.
Have the patient sitting or lying down, relaxed, and not talking or
moving around.
1-800-LIFECOR
2
With the monitor in setup mode (see page 4-2), press ▲ or ▼ to
select PATIENT, then press ►.
3
Press ▲ or ▼ to select BASELINE, then press ►.
4
Press ► or ◄ to select OK, then press the response buttons.
5
When you see the READY TO RECORD message, press the
response buttons.
Page 4-7
LifeVest System WCD 3100 Operator’s Manual
This message displays while the monitor records the baseline. The
monitor also shows the patient’s ECG.
Baseline recording time will vary depending on the patient, strength of
the ECG signal, and the amount of noise on the ECG signal.
Recording the baseline may take up to 5 minutes.
6
When you see the BASELINE COMPLETE message, press the
response buttons.
The monitor returns to normal operation.
If you get the BASELINE FAILED message, the monitor could not
learn the patient’s baseline. Do the following:
Page 4-8
y
Verify that the ECG electrodes are properly contacting the
patient’s skin. You may need to clean the skin or clip excessive
hair before fitting the patient with the electrode belt and garment.
y
Try to baseline the patient again. Remove the battery and repeat
this procedure starting on the previous page.
y
If problems continue, the patient may have a rhythm that is difficult
for the monitor to learn. If so, discontinue attempting to baseline
the patient and call ZOLL Lifecor.
1-800-LIFECOR
Data management
5: Data management
Have the patient follow the procedure in the Patient Manual to transfer patient
data from the monitor to the LifeVest Network.
Follow the procedure in this section to view the data using a computer with
Internet access.
About LifeVest Network
LifeVest Network is an Internet Web site for viewing patient data.
When patients send data from a LifeVest monitor using a modem, the data
resides on LifeVest Network and forms a patient history of ECG recordings and
other data.
You can view patient data from virtually any computer with Internet access. This
data is available at any time so it can be viewed at your convenience.
LifeVest Network is a secure site that guards patient privacy. Only users with
login names and passwords may enter the site. Only users with specific
permission may view each patient’s data.
What you can do with LifeVest Network
y
View or change patient information from any computer with Internet access.
y
View and print reports on patient ECG recordings, treatment events,
compliance data, and noise data.
y
Download and print forms for patient care.
Computer requirements to use LifeVest Network
Your computer will need to have Internet access and an Internet browser such as
Internet Explorer or Netscape Navigator. You will also need the Adobe Acrobat
Reader to view and print reports.
Your screens may look different
Due to product improvements, your screens may not look exactly like what’s
shown in this manual.
1-800-LIFECOR
Page 5-1
LifeVest System WCD 3100 Operator’s Manual
How to view patient data on LifeVest Network
This procedure requires a computer connected to the Internet.
1
From your Internet browser, enter the LifeVest Network web site address:
https://wcdnet.lifecor.com
2
When the login screen appears, select your language preference.
3
Type your Login Name and Password, then click Login.
4
When the opening screen appears, select a patient name to be viewed. You
can also search by the patient’s last name or ID.
5
With a patient name displayed, click on the options along the left side of the
screen to view ECG recordings, treatment events, compliance data, and
noise data.
Some pages include a Help For This Page button along the left side. Click
on the button for more detail.
6
Page 5-2
Log off LifeVest Network when finished.
1-800-LIFECOR
Clinical information
6: Clinical information
Indications
The LifeVest system is indicated for adult patients who are at risk for sudden
cardiac arrest and are not candidates for or refuse an implantable defibrillator.
Contraindications
The LifeVest system is contraindicated for use on patients with an active
implantable defibrillator.
Pacemaker interactions
WARNING: Use appropriate caution when prescribing a LifeVest device to a
patient who is dependent on a pacemaker. All patients who have pacemakers
should be examined for proper pacemaker function after a defibrillation.
Several interactions with pacemakers are possible:
y
If a patient goes into a ventricular arrhythmia and the pacemaker continues to
pace, the pacemaker’s pulses may be the dominant signal.1 This may
potentially cause the LifeVest device to lock on the pacemaker’s signal as the
cardiac rhythm and prevent the LifeVest device from detecting the
arrhythmia. The risk varies according to the type of pacemaker and the
programmed mode of the pacemaker.
y
If the patient is baselined with the pacemaker active, an unpaced QRS
complex may be interpreted by the LifeVest device as a change in the QRS
morphology. As a result, if the rate goes above the arrhythmia rate threshold,
the LifeVest device may then declare the unpaced rhythm a treatable
arrhythmia and begin the treatment alarm sequence. As long as the patient
uses the response buttons of the LifeVest device, the device will not deliver a
treatment shock. However, be aware that an increased potential for an
unnecessary shock does exist.
y
After the shock is delivered, the pacemaker may have difficulty capturing the
myocardium2 or may be reset to a default mode.
1
Glikson, et al, “Importance of Noise Reversion as a Potential Mechanism of Pacemaker-ICD Interactions,” PACE, May 1998, 21:
1111-1121.
2
Altamura, et al., “Transthoracic DC Shock May Represent a Serious Hazard in Pacemaker Dependent Patients,” PACE, January
1995, 18 (Part II): 194-198
Other articles of interest:
Brode, et al, “ICD-Antiarrhythmic Drug and ICD-Pacemaker Interactions,” Journal of Cardiovascular Electrophysiology, July 1997,
8:830-842.
Geiger, et al, “Interactions Between Transvenous Nonthoracotomy Cardioverter Defibrillator Systems and Permanent Transvenous
Pacemakers,” PACE, March 1997, 20 (Part I): 624-630.
1-800-LIFECOR
Page 6-1
LifeVest System WCD 3100 Operator’s Manual
Recommendations for patients with pacemakers
If the pacemaker does pace during ventricular fibrillation, there is a risk that the
pacemaker stimulus artifact would be tracked by the LifeVest device as a valid
heart rate during ventricular fibrillation. In order for this to occur, the pacemaker
stimulus artifact must be greater than the ventricular fibrillation signal. Patients
whose pacemaker stimulus artifact is greater that 0.5 mV in any ECG lead should
not use the LifeVest device.
Because of the risk that the patient’s unpaced ECG signal may be interpreted as
a ventricular tachycardia if it exceeds the arrhythmia rate threshold, set the VT
rate threshold above the maximum paced rated when a patient is baselined while
being paced.
After shock delivery, check the pacemaker’s programming and ability to capture.
Recommendation for double counting of a normal rhythm
Double counting of a normal rhythm is known to occur with ICDs and other
rhythm analysis devices.
Patients likely to experience double counting declarations may have high
T waves and/or low QRS amplitudes. If a patient does experience such false
arrhythmia declarations, there are two actions which may help: increasing the
arrhythmia rate threshold and/or lengthening the response time. Increasing the
arrhythmia rate threshold should reduce the frequency of false arrhythmia
declarations due to double counting, while lengthening the response time gives
the patient additional time to respond to the alarms if a shock is not necessary.
Asystole detection
The LifeVest monitors the ECG signal and declares asystole when the amplitude
of the ECG input signal falls below 100 microvolts for at least 16 seconds.
When the device declares asystole, it generates the following voice messages to
notify bystanders: “Device disabled. Call ambulance.”
To silence the alarms and restore the device to normal operation, remove and
reinsert the battery.
Page 6-2
1-800-LIFECOR
Clinical information
Clinical studies
Initial FDA-approved study1
Conducted between 1990 and 2001, the objective of the FDA-approved trial was
to demonstrate safety (low false shock rate) and efficacy (survival after sudden
cardiac arrest). There were 289 high SCA risk patients who used the device an
average of 3 months. Of 8 SCA events that occurred during the trial, 6 were
successfully converted. There were 6 appropriate shocks during the trial. The
trial design was to demonstrate superiority of the wearable defibrillator to reliance
on the EMS system for SCA treatment.
Biphasic electrophysiology laboratory sub-study2
This study was conducted between March 2001 and November 2001. Twelve
patients were electively induced into VT or VF, and all 12 were converted or
defibrillated with the first biphasic shock (either 70 or 100 joules). A total of
23 successful biphasic shocks were delivered. There were no post-shock
arrhythmias or skin burns. The average patient impedance was 68 ±8 ohms.
WCD 3000 clinical evaluation
This study was conducted between September 2001 and April 2002. The
objective was to demonstrate the safety of the LifeVest WCD 3000 device by
comparing the incidence of false arrhythmia declarations (false alarms) with the
WCD 3000 device to the WCD 2000 device. The study would be considered
successful if the incidence of false arrhythmia declarations was less than, or
equal to, the WCD 2000 device. A minimum of 10 patients and 100 weeks of
cumulative device use would be required.
A prospective, non-randomized, multi-national trial involving four centers (three
U.S. centers and one European center) evaluated the safety of the WCD 3000
device with patients at risk of sudden cardiac death. Two populations at SCA risk
were chosen:
y
The first population consisted of patients waiting for heart transplant or
patients having an equivalent cardiac status, namely New York Heart
Association Class III or IV heart failure and an ejection fraction below
30 percent.
y
The second patient population included acute myocardial infarction (MI)
patients and patients immediately following a coronary artery bypass graft
procedure. Additional requirements for both the MI and bypass patients
included VT/VF within the first 48 hours or a left ventricular ejection fraction of
less than 30 percent. A Killip Class III or IV 72 hours following the MI and
syncopal VT/VF after 48 hours post-MI also qualified patients for WCD 3000
device use.
1
Feldman et al., “Use of a Wearable Defibrillator in Terminating Tachyarrhythmias in Patient at High Risk for Sudden Death: Results
of WEARIT/BIROAD,” PACE, 2004, 27:4-9.
2
Reek et al., “Clinical Efficacy of a Wearable Defibrillator in Acutely Terminating Episodes of Ventricular Fibrillation Using Biphasic
Shocks”, PACE, 2003, 26:2016-2022.
1-800-LIFECOR
Page 6-3
LifeVest System WCD 3100 Operator’s Manual
Table 4. Patient demographics
Parameter
Total Study (n=13)
WEARIT (n=7)
BIROAD (n=6)
Ejection fraction
21% ±7, n=11
18% ±6
25% ±5, n=4
QRS width (msecs)
105 ±15, n=9
106 ±18, n=5
104 ±12, n=4
Age (years)
56 ±11
56 ±13
57 ±9
Male
69%
71%
67%
History of smoking
83%, n=12
67%, n=6
100%
History of hypertension
83%, n=12
86%
80%, n=5
History of NSVT
89%, n=9
80%, n=5
100%, n=4
History of VT
44%, n=9
33%, n=3
50%
Beta-blocker medication
82%, n=11
67%, n=6
100%, n=5
Anti-arrhythmia medication
9%, n=11
0%, n=6
20%, n=5
Inotropic medications
0%, n=11
0%, n=6
0%, n=5
The study population consisted of 13 patients with 105 patient weeks of patient
device experience. There were 214 false arrhythmia detections during that time.
The rate of false detections using the WCD 3000 device was 2.0 per patient
week of use as compared to 4.5 per patient week using the WCD 2000 device.
There were no treatable tachyarrhythmic events during the study. There were
four true arrhythmias recorded during the study, all four resolved spontaneously.
There were no inappropriate defibrillations during the study.
One adverse event was reported during the study. This event involved a patient
who received an asystole alarm due to incompletely connecting the electrode belt
to the monitor. The patient called an ambulance to take her to the hospital as the
device directed. She was hospitalized as a precaution and transferred from this
local hospital to the investigational site where she was examined and discharged
to home. No injury resulted from this event. The patient continued to wear the
device.
Page 6-4
1-800-LIFECOR
Quick charts
Appendix A: Quick charts
Overview of new patient setup
Program monitor for new patient
Fit patient with garment and electrode belt
1-800-LIFECOR
Page A-1
LifeVest System WCD 3100 Operator’s Manual
Train patient
To view patient data
When patient is finished with device
Page A-2
1-800-LIFECOR
Part numbers
Appendix B: Part Numbers
1-800-LIFECOR
Description
ZOLL Lifecor Part Number
WCD 3100 Programmed Monitor
10A0967-Axx
Battery
10A0894-A01
Battery Charger with Power Supply
11B0009-A01
Modem
10A0924-A0x or 10A0903-A01
Test Plug
10A0922-A01
Holster
10B0844-A01
Electrode Belt
10A0889-A01
Garment
10A0964-A0x
Tote Bag
10B0822-A01
WCD 3100 Patient Manual
20B0039
WCD 3100 Quick Guide
20B0042
WCD 3100 Operator’s Manual
20B0040
WCD 3100 Service Manual
20B0041
WCD 3100 Patient Checklist
20B0043
Page B-1
LifeVest System WCD 3100 Operator’s Manual
This page intentionally left blank.
Page B-2
1-800-LIFECOR
Symbols
Appendix C: Symbols
Battery charger: Battery charged.
Battery charger: Battery charger is charging or testing battery.
Battery charger: Battery charger needs service.
Battery charger: Battery needs service.
Battery: Do not incinerate.
Battery: Do not short circuit.
Caution: Consult accompanying documents.
CE marking, indicates conformance with European Medical Device Directive.
Laundering symbol: Normal cycle in warm water.
Laundering symbol: Tumble dry warm.
Laundering symbol: Only non-chlorine bleach, when needed.
Laundering symbol: No anti-static spray.
Laundering symbol: Iron on low temperature.
1-800-LIFECOR
Page C-1
LifeVest System WCD 3100 Operator’s Manual
Laundering symbol: No fabric softener.
Manufacturing date.
Monitor connector: Type BF defibrillator-proof connector.
Packaging: Battery
Packaging: Battery charger
Packaging: Monitor.
Packaging: Modem.
Packaging: Electrode belt.
Packaging: Garment.
Power supply electrical information: Alternating current (AC).
Power supply electrical information: Direct current (DC).
Therapy pad label: Place this side (foil side) of the therapy pad next to your skin.
Page C-2
1-800-LIFECOR
Index
Index
A
E
accessory part numbers, B-1
address
ZOLL Lifecor, ii
alarms
demonstrating, 3-4
arrhythmia
demonstrating, 3-7
assembly
electrode belt to garment, 2-3
asystole detection, 6-2
effectivity, ii
exclamation point symbol, C-1
B
baseline, 4-5
failed, 4-6, 4-8
manual, 4-7
basic programming, 4-4
belt
components, 2-1
BF symbol, C-2
C
cautions, 1-5
CE symbol, C-1
chapters of this manual, 1-1
chest measurement, 2-2
clinical information, 6-1
component part numbers, B-1
computer
for LifeVest Network, 5-1
contact ZOLL Lifecor, ii
contents of this manual, iii
contraindications, 6-1
copyright, ii
D
data management, 5-1
quick chart, A-2
defibrillation
conventional, warning, 1-5
demonstrating
alarms, 3-4
device
description, 1-2
double counting
recommendation, 6-2
downloading, 5-1
1-800-LIFECOR
F
fit patient
quick chart, A-1
G
garment
sizes, 2-2
garment and electrode belt
quick chart, A-1
garment on patient, 2-4
I
indications, 6-1
instructing patient, 3-1
Internet access, 5-2
introduction, 1-1
L
laundering
symbols, C-1
LifeVest Network, 5-1
computer, 5-1
login, 5-2
patient search, 5-2
login
LifeVest Network, 5-2
M
manual baseline, 4-7
manual organization, 1-1
manufacturing date symbol, C-2
measure and fit patient
quick chart, A-1
measure patient, 2-2
menu
structure, 4-1
monitor setup for new patient
quick chart, A-1
Index-1
LifeVest System WCD 3100 Operator’s Manual
N
rescue defibrillation, 1-5
new patient
programming, 4-4
programming quick chart, A-1
new patient setup
quick chart, A-1
noise
demonstrating, 3-8
S
O
operating
modes, 3-3
organization of this manual, 1-1
P
pacemaker
interactions, 6-1
recommendations, 6-2
packaging symbols, C-2
part numbers, B-1
patents, ii
patient
data transfer, 5-1
fitting, 2-1
programming quick chart, A-1
training, 3-1
viewing data, 5-2
patient finished with device
quick chart, A-2
patient setup
quick chart, A-1
patient training
quick chart, A-2
phone
number, ii
prescription note, ii
programming, 4-1
basic, 4-4
new patient, 4-4
Q
quick charts, A-1
R
re-baseline patient, 4-7
reconditioning
after patient is finished with device, A-2
record baseline, 4-5
reference guides, A-1
Index-2
safety information, 1-5
search patient
on LifeVest Network, 5-2
sections of this manual, 1-1
send patient data, 5-1
setup, 4-1
quick charts, A-1
setup mode, 4-2
software license, ii
symbols, C-1
system
components, B-1
T
teaching patient, 3-1
therapy pads
label symbol, C-2
timing
treatment sequence, 1-3
trademarks, ii
training
alarms, 3-4
arrhythmia, 3-7
exit, 3-9
mode, 3-4
noise, 3-8
patient, 3-1
transfer patient data, 5-1
transmitting data, 5-1
treatment sequence, 1-3
V
view patient data
quick chart, A-2
viewing patient data, 5-2
W
warnings, 1-5
Web address
company, ii
LifeVest Network, 5-2
Z
ZOLL Lifecor address, ii
1-800-LIFECOR