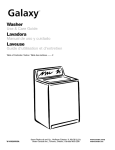
1
REFRIGERATED EURO ROUND GLASS FRONT MERCHANDISER SERVICE AND PARTS MANUAL November, 98 P/N 4208793 Rev C TABLE OF CONTENTS SERVICE MANUAL SPECIFICATIONS............................................1 INTRODUCTION...............................................2 UNPACKING.....................................................2 INSTALLATION ................................................3 GROUNDING (EARTHING) & ELECTRICAL 3 LOADING PRODUCTS ...................................4 CHANGING AUGER TIMING, TRAY SPACING & TRAY CONFIGURATION ........5 Auger Timing..............................................................................5 Tray Spacing ...............................................................................5 Tray Configuration ...................................................................6 Candy to Snack.......................................................................6 Snack to Candy.......................................................................6 Edit POS Message Mode................................................13 Auto Reinstatement Mode..............................................14 Promo Vend Mode...........................................................14 Reset Totals Mode..........................................................14 Refrigeration Control Mode...........................................15 Refrigeration Selection Range ..................................15 Defrost Command.......................................................15 Temperature Display ..................................................15 Cut-In Temperature.....................................................15 Cut-Out Temperature..................................................15 Set Defrost Duration...................................................16 Defrost Start Times .....................................................16 REFRIGERATION TROUBLESHOOTING 16 TROUBLESHOOTING FLOWCHART .......19 Initial Startup or Reset..........................................................19 Price Setting .............................................................................20 Vend Sequence.........................................................................21 Coin Mechanism......................................................................22 CARE & CLEANING .....................................23 Cabinet Exterior......................................................................23 Cabinet Interior.......................................................................23 CONTROLLER FUNCTIONS.........................7 Sales Mode ...................................................................................7 Service Mode ...............................................................................7 Error Messages .......................................................................7 To clear the controller of errors.......................................7 Low Level................................................................................8 Coin Dispense Mode.........................................................8 Tube Fill Mode..............................................................8 Motor Count Mode............................................................8 Alternate POS Message Mode ........................................9 Non-Resettable Totals Mode...........................................9 Set Price Mode ...................................................................9 Copy Price Option ........................................................9 Verifying Vend Prices..................................................9 Time Programming Mode ..............................................10 Test Vend Modes.............................................................10 Test Vend Single Selection ............................................10 Test Vend Complete Row...............................................10 Test Vend Complete Machine .......................................11 High Level..............................................................................11 No Change Mode.............................................................11 Forced Vend Mode..........................................................12 Discount Mode.................................................................12 Language Mode ...............................................................12 Lottery Odds Mode .........................................................12 Resettable Totals Mode..................................................12 MIS Mode .........................................................................13 Stop Clock Mode .............................................................13 All Options Off Mode.....................................................13 Multi-Vend Mode............................................................13 i Refrigeration System..............................................................23 BEFORE CALLING FOR SERVICE ...........23 PARTS MANUAL GENERAL INFORMATION ..........................26 FINAL ASSEMBLY........................................27 DOOR ASSEMBLY........................................28 Selector Panel Assembly .....................................................30 Delivery Assembly ...............................................................32 Light Assembly .....................................................................34 CABINET ASSEMBLY..................................36 Tray Assembly – 3- and 4-Wide ........................................40 Tray Assembly – 5-Wide.....................................................42 Control Panel Assembly ......................................................44 Coin Box Holder Assembly ................................................46 Cabinet Insulation.................................................................47 Refrigeration Assembly .......................................................48 Evaporator Assembly ...........................................................49 Condensor Assembly............................................................50 WIRING SCHEMATIC ...................................52 QUICK REFERENCE SERVICE COMMANDS...................................................53 SPECIFICATIONS This Manual covers the following models: 3106, 3107, 3108: 230 VAC 3115, 3116, 3117: 115 VAC Physical Dimensions Model Numbers Width Depth Weight Height 115 VAC 230 VAC Inches Cm Inches Cm Pounds Kg Inches Cm 3-Wide 3115 3106 29-5/16 74 35-1/2 87 577 261 72 183 4-Wide 3116 3107 35-3/16 89 35-1/2 87 648 295 72 183 5-Wide 3117 3108 41 104 35-1/2 87 778 329 72 183 Electrical 230 Volt AC, 50 Hz, 3.75 Amps or 115 Volt AC, 60 Hz, 7.5 Amps Refrigeration System Type: 1/3 Hp Hermetically Sealed Controls: Electronic Refrigerant: R-134a Charge: 5.9 Ounces Factory Configuration 3-Wide: 24 Select - Expandable to 36 4-Wide: 36 Select - Expandable to 48 5-Wide: 40 Select - Expandable to 60 Coinage MDB version - any MDB peripheral device INTERNATIONAL DOMESTIC Mars Executive Mech Mars TRC-6010 Coinco L-Plus Coinco 9302L 1 INTRODUCTION This manual contains instructions, service and installation guidelines for the Euro Round Glass Front Merchandiser Series product line. All Glass Front models are equipped with an electronic control system. All programming of the vend functions, pricing and features is done at the controller. Changes can be made without any additional accessories or remote parts. Selections can be priced individually from $.05 to $99.95 in five cent increments (U.S. currency). When adapted to accept international or foreign currency, the maximum vend price will be 255 times the smallest denomination of coin being accepted. Cash accountability records Total Cash transactions and Total Vend cycles performed by the vendor. Information for individual selections, complete rows or total machine can be compiled and used for inventory and ordering records. Electrical malfunctions are recorded and displayed when the machine is placed in the Service Mode. Non-functional motors or selections are indicated. Each selection has an individual motor. Functional selections will continue to operate if other motors become nonfunctional. The vending sequence is "first-in, first-out" for each selection, eliminating the need for stock rotation to maintain fresh products in the vend area. Each Glass Front vendor has the capability of supporting a "satellite" vending machine, such as a Can Vendor or Food Merchandiser (Menu Mart II). The satellite vendor utilizes the Glass Front Vendor's existing controller, coin mechanism, bill validator and keypad to perform the vend functions they require. For details on the satellite vendor refer to the Service Manual pertaining to the specific vendor for installation instructions. On air-conditioned Glass Front models temperature is controlled electronically. the This manual should be read thoroughly to familiarize yourself with the functions of all components, along with the features that are available. The initial set-up of a vending machine is a very important step of insuring that the equipment operates in a trouble-free manner. Following the instructions at the initial installation of the machine will avoid service problems and minimize set-up time. 2 Should you have any questions pertaining to information in the manual, replacement parts or the operation of the vendor you should contact your local distributor or: VendNet 165 North 10th Street Waukee, Iowa 50263 Phone: 515-274-3641 Parts Fax: 515-987-4447 Sales Fax: 515-274-0390 E-Mail: [email protected] UNPACKING This machine was thoroughly inspected before leaving the factory and the delivering carrier has accepted this vendor as their responsibility. Note any damage or irregularities at the time of delivery and report them to the carrier. Request a written inspection report from the claims inspector to file any claim for damage. File the claim with the carrier (not the manufacturer) within 15 days after receipt of the machine. Carefully remove the outside packing material so as not to damage the finish or exterior of the machine. Inspect the machine for concealed shipping damage. Report any damage hidden by the shipping material directly to the delivering carrier on a hidden damage report. Record the model number and serial number of the vendor for your records. These numbers can be found on the Serial Plate on the rear of the cabinet and/or inside the vendor. Refer to these numbers on all correspondence and inquiries pertaining to this vendor. Remove the "Knock-A-Way" Support by placing a 2x6 under the vendor, inserting a screwdriver or prying tool into the groove and splitting it in two. Turn the leveling screws in as far as possible. See Figure 1. Grounding (Earthing) & Electrical Before connecting the vendor, the integrity of the main electrical supply must be checked for correct polarity, presence of ground (earth) and correct voltage. These checks should be repeated at 6-month intervals with the routine safety electrical testing of the vendor itself. To verify that the receptacle is properly grounded and polarized, insert one probe of a Multi-Meter (set to check AC line voltage) or a test light in the ground terminal (hole) and the other probe into the hot terminal of the outlet. If the receptacle is not properly grounded or polarized, you should contact a licensed electrician to correctly polarize and/or ground the receptacle to ensure safe operation. A noise suppresser has been installed in this machine to compensate for any mains signal noise that could interfere with the normal operation of the controller. Figure 1 INSTALLATION Position the vendor in its place of operation no further than nine feet from the power outlet or receptacle and check that the door will open fully without interference. Leave at least six (6) inches of space between the back of the machine and any wall or obstruction for proper air circulation. Level the vendor, making sure all levelers are touching the floor. The vendor must be level for proper operation and acceptance of coins through the coin mechanism. Retrieve the keys to the vendor from the coin return cup. Open outer door and remove all internal packing material. Consult local, state and federal codes and regulations before installation of the vendor. For proper operation of any equipment utilizing electronically controlled components, the equipment should be placed on an isolated or dedicated noisefree circuit, properly polarized and grounded. For 115-Volt vendors the circuit should be a minimum 15 Amp, 60 cycle. For 230-Volt vendors the circuit should be a minimum 7.5 Amp, 50 cycle properly polarized and grounded. Shown in Figure 2 and Figure 3 are two properly grounded and polarized wall outlets. Figure 2 shows two 230 volt wall outlets. Figure 3 shows a 115 volt, two-wire outlet with a three- plug adapter in place. U.S. U.K. EARTH LIVE NEUTRAL HOT NEUTRAL GROUND Figure 2. 230 Volt Outlets 3 Figure 4. Loading Example Figure 3. 115 Volt Outlets NOTE: The hot (live) terminal should always be counter-clockwise from the ground terminal. The neutral terminal is clockwise from the ground (earth) terminal. LOADING PRODUCTS To load products, lift the tray slightly and pull forward until the tray stops. The upper-most trays tilt for easierloading. Load products from front to back, making sure all items fit freely between the augers. Do not attempt to force oversize items or packages into the spaces. Do not skip a space. Place the product on the bottom of the compartment on the product augers, with the label facing the front of the machine for easy identification by the customer. See Figure 4. When finished loading each tray, return the tray to its proper standby position. All trays must be pressed to the rear of the cabinet and properly seated in the "detent" position. 4 The size of the item being vended must be larger than the diameter of the auger being used to vend properly. Undersize items could cause vend problems. If the product does not fit the auger properly, use a different pitched auger. See Table 1 for augers available from your distributor or service entity. Table 1. Available Augers PRODUCT SIZE AUGER WIDTH THICK QTY PART NO. CANDY 2-3/4 1-3/16 15 4200272-000 2-3/4 15/16 18 4200272-001 2-3/4 21/32 24 4200272-002 2-3/4 1/2 30 4200272-003 2-3/4 1-1/2 12 4200272-004 2-3/4 2-1/32 9 4200272-005 2-3/4 3-3/32 6 4200272-006 SNACK 5-1/2 1-13/16 10 4200272-007 5-1/2 1-1/2 12 4200272-008 5-1/2 1 -/16 15 4200272-009 5-1/2 2-11/16 7 4200272-010 5-1/2 2-5/8 8 4200272-011 CHANGING AUGER TIMING, TRAY SPACING & TRAY CONFIGURATION By re-timing the augers, difficult-to-vend items can be dispensed more dependably. By altering tray spacing, larger items can be vended. By changing the tray configuration, different product mixes can be accommodated. Auger Timing Each auger can be rotated in 20-degree increments for a different drop-off point. Most items can be vended successfully when the auger end is positioned at 6 o'clock. To change the auger end position: 1. Remove the motor cover. See Figure 5. 2. Raise the motor slightly and pull forward on the auger until it separates from the motor. 3. Rotate the auger to the desired position and reinsert the auger coupling into the motor. 4. Make sure the auger coupling is seated over the vertical rail or retaining rib on the tray. 5. Replace the motor cover making sure it is securely tightened. Tray Spacing The trays can be adjusted up or down in one-inch increments to provide additional headroom for vending taller products. When increasing the height in one area, the same amount of room will be lost at the tray above or below the one being adjusted. To change tray spacing: 1. Pull out the tray to be adjusted until it stops. 2. Disengage the tray harness from its snap-open harness clamp on the right side wall. 3. Disconnect the tray plug from its receptacle on the right-hand side wall. 4. Lift up on the front of the tray and pull slightly (approximately 1/2 inch/1 cm) forward to clear the tray stop. 5. Lift up on the rear of the tray and remove it from the vendor. 6. Disengage both left and right tray rails from their corresponding slots on the left and right side walls by pulling inward on the bottom front of each rail and lifting its flange out of the slot. 7. Pull each rail forward to disengage its rear tabs from the hole in the rear wall. 8. Re-locate both left and right rails by reversing steps 6 and 7. NOTE: 9. 10. 11. 12. Rails must be level from front to back and evenly spaced from top to bottom of each side. Replace the tray by placing its rear rollers on the left and right rails and lifting up on the front of the tray as it is pressed back. Install the tray plug into its receptacle on the right side wall. Re-engage the tray harness into its harness clamp and snap the clamp closed. Test vend the tray in its new position to assure that the tray plug is properly seated. Figure 5 5 Tray Configuration Candy to Snack 1. Order the conversion kit from your local distributor or service entity. 2. Unplug and remove the tray assembly from the vendor. Place the tray harness in the tray before removal. 3. Remove the motor cover and retain any hardware. 4. Remove existing tray divider and discard. 5. Remove existing auger assemblies and discard. 6. Remove the existing "even" numbered motor. This motor will not be needed. 7. Dress terminals removed from the motor around the tray harness and tape in place. 8. Move the "odd" numbered motor to the center slot of the compartment. 9. Install the auger retainer furnished as part of the conversion kit. 10. Install auger assembly furnished as part of the conversion kit, making sure the motor coupling properly engages the motor and is securely snapped over the vertical rail or retaining rib on the tray. 11. Re-assemble the motor cover removed in step 2. 12. Replace the tray assembly into the vendor making sure that the tray is properly located and latched and connect the tray harness 13. Set the selection to the desired vend price and adjust the price scroll to agree. 14. Test vend the converted selections for proper operation and price settings. NOTE: In large item selections, the selection numbers will be the "odd" numbers. For example, selections C3 and C4 are converted to a single selection, C3. 6 Snack to Candy 1. Order the conversion kit from your local distributor or service entity. 2. Unplug and remove the tray assembly from the vendor. Place the tray harness in the tray before removal. 3. Remove the motor cover and retain any hardware. 4. Remove the existing auger assembly and discard. 5. Remove the auger retainer and discard 6. Move motor from the center slot to the left slot in the compartment. 7. Add the new motor furnished as part of the conversion kit in the right hand slot of the compartment. 8. Properly wire the motor and switch. (Refer to the “Schematic” section for wire colors and locations). 9. Add the divider furnished as part of the conversion kit. 10. Install new auger assemblies furnished as part of the conversion kit, making sure the motor couplings properly engage with the motor and are securely snapped over the vertical rail or retaining rib on the tray. 11. Re-assemble the motor cover removed in step 2. 12. Replace the tray assembly into the vendor making sure that the tray is properly located and latched and connect the tray harness. 13. Set the selections to the desired vend price and adjust the price scrolls to agree. 14. Test vend the converted selections for proper operation and price settings. CONTROLLER FUNCTIONS • BATTERY BACKED RAM FAILURE displays if the system is unable to access the battery-backed RAM. Call your service entity or distributor for more information. • MOTOR= indicates motors which are jammed. The flagged motors were functional when Sales Mode was last activated, but, due to failures or removal, are not in the circuit now. Sales Mode The Sales Mode is the normal operating mode of the vendor. While in the Sales Mode the following messages may display: • The scrolling Point of Sales (POS) message displays only if the coin mechanism has an adequate supply of coins in the change tubes. If the change supply falls below the low-level sensors in the change tubes, the EXACT CHANGE ONLY message displays. The POS message is a programmable, 100character message used to encourage a purchase. • The EXACT CHANGE ONLY message displays if the level of coins in the change tubes is below the low-level sensors. When the change tubes are low, this message takes priority over the POS message and the DISCOUNT AVAILABLE NOW message. • Faulty motor selection numbers will be displayed in a rotational sequence. If no selection numbers are displayed when the controller is first placed into the Service Mode, no electrical problems with motors were detected since the last pression of the Service Mode switch. The selection number indicates the area where the problem was detected and will assist service personnel in isolating the source or cause of the problem. The DISCOUNT AVAILABLE NOW message displays along with one of the above when the Discount Mode is activated. Refer to Discount Mode section for instructions. Service Mode Use the Service Mode to alter programming, establish a new program, and retrieve diagnostic information. In the Service Mode the keys on the keypad perform different functions depending on the specific mode or requirements of the program. Furnished in the Service Packet is a keypad overlay indicating the functions of individual keys while in the Servie Mode. To place the controller in the Service Mode, press the Service Mode Button on the control board. See Figure 6. Error Messages Each time the controller is placed in the Service Mode the motor circuits are scanned to determine the number of active or operational motors and the battery-backed up RAM is checked. Immediately record any errors that display. The controller must be cleared of any errors before any changes can be made to the programming. Possible error messages: Figure 6 To clear the controller of errors Press key <A>, then <C>, then <K>. If defective motors were displayed, the errors must be cleared and those motors run successfully from the Test Vend mode of the Service Mode before the controller will recognize them as functional. 7 Service Mode – Low Level Upon entering the Service Mode you are in the Low Level and can access the following modes: Table 2. Low Level Service Modes Press <1> <2> <3> <4> <5> <6> <7> <8> <9> <0> To Access Mode Dispense Coins Display Motor Count Alternate POS Message Non-Resettable MIS Set Price Set Time Enter High Level Test Vend by Selection Test Vend by Row Test Vend Machine To exit back to the Sales Mode, press <L> twice, or press the Service Mode Button once. If no keypad input is detected after approximately 25 seconds, the Service Mode is exited automatically. Coin Dispense Mode In this mode coins stored in the coin mechanism change tubes can be removed. To access the Coin Dispense Mode: 1. In the Service Mode, press key <1>. DISPENSE COINS displays. 2. Press <A>. The nickel change tube is activated. 3. Press <B>. The dime change tube is activated. 4. Press <C>. The quarter change tube is activated. 5. Press <D>. The dollar coin change tube is activated. Pressing a key once will pay out one coin. Pressing and holding a key will continuously pay out coins. NOTE: If a coin mechanism does not use a certain coin tube, as may be the case of Coinco L+ International coin mechanisms, there will be no activity when the corresponding key is pressed. Pressing any key other than <A>, <B>, <C> or <D> will exit back into the Service Mode. To exit back to the Sales Mode, press <L> twice, or press the Service Mode Button once. 8 Tube Fill Mode When a MDB coin mechanism is used the coin change tubes must be filled via the coin mechanism so the controller records the exact number of coins in each coin tube. To enter the Tube Fill Mode: 1. In the Service Mode, press <1>. DISPENSE COINS displays. 2. Press <F>. Deposit the coins into the coin mechanism. They are recorded in the controller’s memory. Total cash and total vend records are not affected. Motor Count Mode This mode displays the total number of functional motors configured, which should be the same as the total number of selections in the machine. Individual selection numbers are not displayed. To enter the Motor Count Mode, in the Service Mode, press key <2>. The number of functional motors displays for approximately three seconds in the format MOTORS XXX. EXAMPLE: If there are 24 functional motors, MOTORS 024 displays. If the motor count displayed does not equal the total number of selections in the machine, the electrical circuit of all motors is not complete. To determine what motor(s) are not functioning: • Were faulty motors displayed when placed in the Service Mode? Repair the indicated motors. • Test vend all selections by pressing the Service Mode Button and pressing the <0> key. • Refer to the Troubleshooting section of this manual for further assistance. To exit back to the Sales Mode, press the <L> key twice, or press the Service Mode Button once. Alternate POS Message Mode In this mode, the scrolling message that is displayed while the machine is in the Sales Mode can be altered to include the EXACT CHANGE ONLY message. To access the Alternate POS Message Mode: 1. In the Service Mode, press <3>. POS/CORRECT CHANGE ALTERNATE, 1=ALTERNATE ON, 0=ALTERNATE OFF displays followed by the current status (ALT OFF or ALT ON). 2. To change the status, press the corresponding key (<1> or <0>) and then <L> to save. To leave the status unchanged, press <L>. NOTE: To change the status, wait for the status to display before pressing a key. Non-Resettable Totals Mode NOTE: The "$" sign is only displayed with the vend price when a U. S. coin mechanism is used. To set vend prices: 1. In the Service Mode, press <5>. SET PRICEENTER SELECTION displays followed by ??=SEL. 2. Enter the selection letter and number of the item to be priced. XX $XX.XX displays, with the most significant digit of the price flashing. EXAMPLE: If you are pricing selection A1 and the current price is fifty cents, A1 $00.50 displays, with the first zero flashing. 3. To leave the price unchanged, press <J>. To change the price, enter the four digits. EXAMPLE: If the numbers 0, 1, 2 and 5 were pressed, that item would have a vend price of $1.25. The total vends and total cash count can be displayed for individual selections, entire rows, or the entire machine. This information is not resettable to zero. • • To enter the Non-Resettable Totals Mode: • 1. In the Service Mode, press <4>. NONRESETTABLE TOTALS displays followed by ??=SEL. 2. To display totals for an individual selection press the letter, then the number of the selection, such as <A><1> for item A1. 3. To display totals for an entire row press the row letter twice, such as <A><A> for row A. 4. To display totals for the entire machine press <A><L>. The total number of vends displays, followed by the total cash value for the specified item(s). Set Price Mode A vend price must be set for each selection. On items that will be vended at the same vend price, the Copy Price option can be used to duplicate the vend prices. Make sure the price scrolls on the product shelves agree with the vend prices set, and that the selection labels are properly located below the items they identify. Press <J> to save the new price, Press <C> to copy the price to another selection (see the Copy Price Option section below), or Press <L> to exit back to the Service Mode without saving the changed price. Once a selection price is saved, ??=SEL displays, enabling you to continue pricing other selections by repeating steps 3 & 4. Copy Price Option To copy the price of one selection to one or more of the other selections, press <C> in Step 3. COPY PRICE displays briefly, followed by ??. Enter the selection letter and number for the selection to which you want the price copied. The selection number and the price displays briefly for verification. That selection will have the new price. To exit back to the Sales Mode, press <L> twice, or press the Service Mode Button once. If no keypad input is detected after approximately 25 seconds, the Service Mode is exited automatically. Verifying Vend Prices The vend price of each selection can be verified while the machine is in the Sales Mode. Press the 9 specific selection letter and number. The current vend price displays for approximately three seconds. “Troubleshooting” section, to quickly identify problem areas. When the controller is in the Discount Mode and a time interval has been activated, the discounted price will be displayed. The controller will check the motor circuit and, if the circuit is complete and the motor is functional, run the selection through one complete vend cycle. If the motor is not functional, or the motor circuit is not complete on a particular selection or row, the test function will not be made. If that specific selection has been recorded as a faulty motor or has been removed by the controller, SELECT OTHER ITEM displays. This indicates that the selection is not functional. Time Programming Mode Use this function with the Discount Mode to enter the correct time of day into the controller. If desired, the time of day can be displayed along with the POS message. To set the correct time: 1. In the Service Mode, press key <6>. TO SET CLOCK ENTER ‘J’ displays continuously. 2. Press <J>. The current time displays in the format TIME XX:XX, with the most significant digit flashing. The time is displayed in the 24hour, or military, format. EXAMPLE: 4:23 P.M is entered as 1623. 8:30 P.M. is entered as 2030. 3. Enter the correct time, then press <J> to save the change, or <L> to exit without saving the change. To display the time during the Sales Mode, refer to the “Edit POS Message Mode” section of this manual. To exit back to the Sales Mode, press <L> twice, or press the Service Mode Button once. Test Vend Modes CAUTION: Because this vendor utilizes DC motors, do not attempt to turn the helix manually or damage to the motor could occur. The machine can be tested by individual selections, a complete row, or all selections in the entire machine. The Test Vend Modes do not affect the total vends and total cash counts. Use these modes to identify any faulty motors or motor circuits and, when used in tandem with the 10 Test Vend Single Selection To test vend a single selection: 1. In the Service Mode, press <8>. TEST VENDENTER SELECTION displays, followed by ?? = SEL. 2. Enter the letter and number of the selection to be tested. If the motor is functional, the motor will run one complete cycle and the selection number and price of the selection being tested will display for the duration of the motor run. If the test vend is successfully completed, ??= SEL displays. If the test vend is unsuccessful, JAMMED displays. To test vend another selection, repeat step 2. To exit back to the Sales Mode, press <L> twice, or press the Service Mode Button once. Test Vend Complete Row You must observe the testing of the selections to verify the operation, as the controller will skip any motor(s) not sensed on the motor circuit prior to beginning the row test. If none of the motors is sensed when the test sequence starts, the controller will automatically return to the Service Mode. To test vend a complete row of motors: 1. In the Service Mode, press key <9>. TEST VEND - ENTER ROW displays followed by ? = ROW. 2. Press the letter of the row to test. Beginning with the first motor of that row, each motor runs in sequence. The selection number displays along with the price of the selection being tested in the format XX=SEL. Once all motors have been tested, the program returns to the Service Mode. The row test may be stopped at any time by pressing and holding any key. Doing this returns the program to the Service Mode. To test vend another row, repeat steps 2 and 3. NOTE: A motor that will not function properly due to a fault or a bad connection will be skipped by the test procedure. To exit back to the Sales Mode, press <L> twice, or press the Service Mode Button once. Test Vend Complete Machine You must observe the testing of the selections to verify the operation, as the controller will skip any motor(s) that is not sensed on the motor circuit prior to beginning the row test. If none of the motors is sensed when the test sequence starts, the controller will automatically return to the Service Mode. To test vend the machine: 1. In the Service Mode, press key <0>. PRESS THE 'J' KEY TO VEND ENTIRE MACHINE displays. 2. Press <J> to start the test vend sequence. Beginning with the first motor of the first row, each motor runs in sequence. The number of the selection displays along with the vend price of the selection being tested in the format XX = SEL. Once all motors have been tested, the program returns to the Service Mode waiting for further input. The machine test may be stopped at any time by pressing and holding any key on the selection keypad. Doing this returns the program to Service Mode. To exit back to the Sales Mode, press <L> twice, or press the Service Mode Button once. Service Mode - High Level To access the High Level of the Service Mode: 1. In the Service Mode, press <7>. ENTER CODE displays followed by CODE=????. 2. Enter the fixed access code (1,2,3,4). If the access code is entered correctly, ACCEPTED displays, then HIGH LEVEL. If the access code is entered incorrectly, REJECTED displays, then SERVICE. Table 3. High Level Service Modes Press <1> <2> <3> <4> <5> <6> <7> <8> <9> <0> <A> <B> <C> <D> <E> <F> <G> <H> To Access Mode No Change Forced Vend Discount Language Lottery Odds Not Used Resettable Totals MIS Totals Stop Clock All Options Off Multi-Vend Edit Point Of Sale Message Auto Reinstatement Promo-Vend Reset MIS Totals Not Used Refrigeration Controls Menu Mart (Satellite) Interface No Change Mode If an MDB coin mechanism is used and the coins in the change tubes are below the low-level sensors, full credit sometimes may not be refunded on an over-deposit. Activating the No Change Mode prevents a vend from being made if the coin mechanism does not have the exact change combination necessary to refund credit on an overdeposit. In the Service Mode – High Level, 1. Press <1> to display the current status (NC ON or NC OFF). 2. Press <1> to turn No Change on or press <0> to turn No Change off. 3. Press <J> to save changes or press <L> to exit to the Service Mode without changing the option. When the No Change Mode is off and a refund is required on over-deposit, the coin mechanism will refund as much change as possible. The remaining credit displays. After 20 seconds the credit will be removed. The only way the customer can receive the credit is to deposit the exact change equal to another vend. Once the Service Mode- High Level has been accessed, the following functions are available: 11 Forced Vend Mode When the Forced Vend Mode is on, the customer must make a purchase when a dollar bill is inserted, overriding the "coin return" command. Return of 5¢, 10¢, and 25¢ coins is not affected. 1. Press <2> to display the current status of the Forced Vend Mode (FV ON or FV OFF). 2. Press <1> to turn Forced Vend on or press <0> to turn it off. 3. Press <J> to save changes or press <L> to exit to the Service Mode without changing the option. Discount Mode This mode provides up to three time intervals when a group of selections can be discounted by a set amount. If a discounting interval is on, DISCOUNT AVAILABLE NOW displays alternately with the POS message during the Sales Mode. WARNING: Any selection with a vend price equal to or less than the discount amount will be free vended. 1. Press <3>. DISCOUNT GROUP=1 2 3 displays. Discount groups that are on will be flashing. 2. Press <1>, <2>, or <3> to select the group to edit. After a group is selected, the status of that group displays along with GRP # OFF. 3. Press <1> to turn that group on or press <0> to turn that group off. ROW –1 displays. 4. Press the letter corresponding to the beginning row for the discount group and then press <0> to continue. TO –0 displays. 9. Additional discounts can now be changed, or press <L> to exit to the High Level Service Mode. Language Mode There are five pre-programmed languages and one auxiliary (user defined) option. Only one of these language choices may be used: B = DUTCH E = ENGLISH F = FRENCH G = GERMAN H = SPANISH D = ITALIAN A = Auxiliary (user-defined) Press <4> to display the set language. To change the language, press the appropriate letter, followed by <J> to save. Press <L> to exit. If the auxiliary language <A> is chosen, the equivalent of the following six messages can be entered. • "USE CORRECT CHANGE" • "USE COINS ONLY" • "MAKE ANOTHER SELECTION" • "SELECT FREE ITEM" • "DISCOUNT AVAILABLE NOW" • "YOU WIN" Thirty (30) character are available for each message. The messages are viewed or edited using the same method as the POS message, described under the “Edit POS Message” section of this manual. Lottery Odds Mode This mode awards a free vend to the customer during the Sales Mode, displays YOU WIN, and sounds five beeps. 1. Press <5>. ODDS=0000 displays. 5. Press the letter corresponding to the ending row and then press <0> to save. DISC $00:00 displays. 2. Enter the desired odds. The odds number represents the fixed number of vends between lottery winners. 6. Enter the amount for the discount. Press <J> to save the price, or press <L> to exit without saving. TIME 00:00 displays. EXAMPLE: 7. Enter the discount start time. Press <J> to save the time, or press <L> to exit without saving. TO 00:00 displays. 3. Press the <J> key to save or press <L> to exit without saving. 8. Enter the discount end time. Press <J> to save the time, or press <L> to exit without saving. 12 Setting the odds at 0100 the controller would initiate a free vend every 100th vend. Resettable Totals Mode The MIS (Management Information System) total vends and total cash count can be displayed by individual selections, entire row, or entire machine Press <7>. RESETTABLE TOTALS displays followed by ??=SEL. • Enter an individual selection, such as <A><1>, to display the total vends and total cash for that selection. • Totals for an entire row can be shown by pressing <A><A> to display row A totals, <B><B> for B, etc. • To display the entire machine totals, press <A><L>. The sales information in this function is resettable to zero by following the instructions outlined as in the High Level “Reset Totals to Zero Mode” section. MIS Mode 1. Press <8>. <A>=TOTAL VENDS <B>=TOTAL CASH <C>=TOTAL VALUE CARD <D>=TOTAL LOTTO/PROMO <E>=TOTAL BILLS <F>=TOTAL DISCOUNTS displays followed by ?=CHOICE. 2. Press a letter once to display the total message and amount. 3. Press a letter twice to skip the total message and only display the amount. 4. Press <L> to exit to the High Level. Stop Clock Mode If the machine is to be placed in storage or out of operation for an extended period of time, the clock should be stopped to preserve the life of the battery. Press <9>. TO STOP CLOCK ENTER ‘J’ displays. Press <J> to stop the clock and exit. Press any other key to exit with the clock running. All Options Off Mode Press <0> to turn off Forced Vend, Multi-Vend and Discount modes without having to access each option individually. Multi-Vend Mode 1. Press <A>. The status displays (MV ON or MV OFF). 2. Press <1> to turn Multi-Vend on. Press <0> to turn Multi-Vend off. 3. Press <J> to save changes or press <L> to exit to without changing the option. Edit POS Message Mode The Point of Sales (POS) message can be used as advertising or as an encouragement to the customer to purchase products. The POS message displays continuously while the machine is in the Sales Mode as long as the coin mechanism has an adequate supply of coins in the change tubes. If the coins are below the low-level sensor in the change tubes, the EXACT CHANGE ONLY message displays. Messages can be up to 100 characters including spaces. While in this mode the keypad functions similar to a typewriter keyboard. A Keypad Overlay is furnished in the Service Packet defining the positioning of the characters. See Figure 9. By placing the overlay over the selection panel, the owner operator can "type" the new message into the controller's memory. Each key can be used to type in two different characters. To type the “upper” character, press the key; to type the “lower” character, press <NEXT MENU>, then the key. To enter a new message or edit an existing message: 1. Press <B>. 2. Type in the new message. For special effects, see Table 4. Use the keypad overlay for the location of characters on the keypad. 3. Press the <NEXT MENU> key twice to save the message. NOTE: If the <NEXT MENU> key is not pressed twice, portions of the previous message may remain. When on, instead of immediately returning the change after a vend, the credit will remain on the display for up to 25 seconds. To receive change on an over-deposit, the coin return button must be pressed. If a coin return is not requested within 25 seconds the change will then be returned. 13 A K B Q C U D V E W F X SPACE * G Y H Z I 0 J 1 L 2 M 3 N 4 O 5 P 6 R 7 S 8 T 9 NEXT MENU ENTER BACK SPACE Upper Character Lower Character $ Figure 9 Table 4. Available Special Effects Press To <*> + <B> Beep once <*> + <D> Display the temperature of the refrigerated compartment <*> + <H> Scroll message horizontally (default) <*> + <P> Pause the display 0.5 seconds per occurrence <*> + <T> Display time in 12-hour format <*> + <V> Scroll the following portion of the message vertically Auto Reinstatement Mode Use this feature for a satellite can drink or similar vendor utilizing a sold-out or empty switch. Normally, when an empty selection is detected during an attempted vend, that selection is flagged inoperative and requires resetting before it can be vended again. The satellite units use a range of selections within the controller and use a switch in series with the motor as a sold-out switch. Programming this range of selections into the auto reinstatement will eliminate the necessity of resetting the controller after re-loading a selection that had went into an empty condition. 14 1. Press <C>. INPUT REINSTATEMENT RANGE followed by 1=ON 0=OFF. AUTOdisplays 2. Press <0> to turn off this feature and exit to the High Level, or Press <1> to turn on this feature. BEGIN -displays. 3. Enter the beginning alphanumeric selection. 4. When the alpha is flashing, press <0> to save the setting. END -- displays. 5. Enter the ending alphanumeric selection. 6. Press <0> to save the setting and exit. Promo Vend Mode Use this mode to promote new items. It enables the customer to buy one item, (within one of three programmable ranges) and get a second item (within a programmable range) free. When a customer purchases an item from a promo group, SELECT FREE ITEM displays one time, followed by XX TO XX, indicating the range of free items available. This will scroll continuously for 25 seconds or until a patron selects the free item. If a selection outside the free range is selected, or if a free vend fails, the vendor will beep and display PLEASE MAKE ANOTHER SELECTION once before returning to XX TO XX. 1. Press <D>. PROMO GROUP = 1 2 3 displays. Promo groups that are on are flashing. 2. Press <1>, <2>, or <3> to select a group to edit. The status of that group is displayed with GRP X OFF, where X is the group number. 3. Press <1> to turn group X on, or press <0> to turn group X off. BUY- displays. 4. Enter the beginning selection in the buy range and press <0> to save the setting. TO – displays. 5. Enter the ending selection in the buy range and press <0> to save the setting. FREE – displays. 6. Enter the beginning selection in the free range and press <0> to save the setting. TO – displays. 7. Enter the ending selection in the free range. Press <0> to save an exit. Reset Totals Mode Defrost Command This function resets to zero all resettable individual motor counters. The information stored in the nonresettable counters will not be affected. To manually defrost the vendor: 1. Press <E>. RESET MIS? displays. 2. Press <J> to reset MIS and exit. Press any other key to exit without resetting the MIS. Refrigeration Control Mode Press <G>. Seven options display. To select an option, press the specified key. Table 5. Refrigeration Control Mode Options PRESS <0> OPTION Refrigeration Selection Range <1> Defrost Command <2> Temperature Display <3> Cut-In Temperature <4> Cut-Out Temperature <5> <6> Defrost Duration Defrost Start Times ENTER Begin (Sel) + <0> End (Sel) + <0> <1> = On <0> = Off <D> = Start <L > = Abort <F> = Fahrenheit <C> = Celsius <L> = Abort <1> = Plus (+) <0> = Minus (-) Enter Temperature <1> = Plus (+) <0> = Minus (-) Enter Temperature 10 Min. Recommended Recommendation - All Times Set To 00.00 Refrigeration Selection Range This is a “Health Safety” feature that prevents the sale of items if the temperature inside the cabinet area exceeds 45°F (7.2°C). Due to the operating temperature range of this vendor this feature should be turned off at all times. 1. Press <1>. PRESS ‘D’ FOR MANUAL DEFROST ‘L’ TO ABORT displays. 2. Press <D> for manual defrost or <L> to abort and return to the Refrigeration Control Menu. To set the duration of the defrost cycle, see the Set Defrost Time section. Temperature Display To change the units in which the temperature displays, press <2>. Then, press <F> to display the temperatures in Fahrenheit, or press <C> to display the temperatures in Celsius. Or, press <L> to quit without saving and return to the Refrigeration Control Menu. Cut-In Temperature This feature controls when the compressor will turn on. The factory setting is +65°F (+18°C). The maximum cut-in temperature is +70°F (+21°C). 1. Press <3>. CUTIN +-- displays. 2. Press <1> to enter a plus (+). 3. Enter the desired temperature at which the compressor will turn on. Keep in mind the recommended factory setting of 65°F. 4. Press <J> to save the new setting and return to the Refrigeration Control Menu. Cut-Out Temperature This feature controls when the compressor will turn off. The factory setting is +58°F (+14°C). The maximum cut-out temperature is +65°F (+18°C). 1. Press <4>. CUTOUT +-- displays. 2. Press <1> to enter a plus (+). 1. Press <0>. INPUT REFRIGERATED SELECTION RANGE followed by BEGIN-displays. 3. Enter the desired temperature at which the compressor will turn on, keeping in mind the recommended factory setting of +58°F. 2. Press <0>. END displays. 4. Press <J> to save the new setting and return to the Refrigeration Control Menu. 3. Press <0>. 1=ON 0=OFF displays. 4. Press <0>, and the Refrigeration Control Menu displays. 15 Set Defrost Duration This feature controls the amount of time the system remains in a defrost cycle. The factory setting is 10 minutes. The maximum defrost time is 39 minutes. 1. Press <5>. DF TIME XX displays. 2. Enter the desired duration. Know and understand how to service the unit and how it operates. Units may vary, but the operation is basically the same. Never guess at the problem; find the symptom before attempting any repair. NOTE: Most refrigeration problems are electrical. 1. Press <6>. DEFI 00.00 displays. The sealed hermetic system was not meant to be worked on outside the Factory Service Center. The three things that can go wrong with a sealed system and should be repaired at the Factory Service Center are: 1. Low Charge - usually caused by leaks; look for oil around seals and welds. Unit will not cool properly. The capillary tube will be frosted before it enters the evaporator inlet tube. 2. Restriction in Systems (unit frost, then melts) not cooling properly. 3. Bad valves - unit does not cool properly; noisy compressor. 2. Enter the first defrost time (in 24-hour format). Compressor will not start 3. Press <L> to save and continue to the next cycle. When all four times are set and saved the Refrigeration Control Menu displays Compressor has no power: • Machine not plugged in. • Tripped breaker or blown fuse. • Faulty wall outlet. • Short or tear in power cord. • Thermistor circuit is open. Check with the Multi-Meter. • Improper wiring. • Low voltage: 5 % below. Check the power source with the Multi-Meter. • Overload defective: Trips too fast. Check overload with the Multi-Meter. • Start relay defective: Check start relay with the Multi-Meter. • Compressor has open windings. Check compressor windings with a Multi-Meter. • Defective refrigeration relay. • Unplug power to the machine; remove the relay plate. Use an insulated jumper wire to short the wires on relay terminals 2 and 4 or 6 and 8; then restore power to the machine. The compressor should start, indicating a problem in the control circuit. • Check relay terminals 1 to 0 with a Multi-Meter. Should have 24VDC applied to them. • No DC voltage: Check control board output terminal for a loose connection. 3. Press <J> to save the new setting and return to the Refrigeration Control Menu. Defrost Start Times This feature controls when the system will automatically be placed into a defrost mode. Up to four (4) defrost times are available for up to 39 minutes each. The factory settings are set to 00.00 as a defrost is normally not necessary. If the recommended setting does not provide optimum results in your environment, the settings may be tailored to suit your needs. NOTE: The vendor will automatically go into a defrost cycle if the compressor runs continuously for 2 hours. REFRIGERATION TROUBLESHOOTING If the refrigeration unit is turned off or the power is interrupted, the refrigeration unit will not start for at least three (3) minutes regardless of the temperature. 16 • Compressor trips on Overload 1. Improper voltage: 5-10% above, 5% below. Check power source with Multi-Meter. 2. Overload defective: Trips too fast. Check overload with Multi-Meter. 3. Relay defective: Won’t open after starting. Check relay with Multi-Meter. 4. Compressor has shorted windings: Check compressor windings with Multi-Meter. 5. Short in other component: Isolate and eliminate each electrical component until short is found. 6. Compressor is too hot. • Dirty condenser. • Faulty condenser motor or blade. • Restricted air flow. CAUTION: Condenser must be kept clean of dirt and debris to allow for proper air circulation. Noisy or vibrating unit 1. Components rubbing or touching each other. • Check fan blades and motor. • Loose shrouds and harness. • Copper tubing. • Loose or unsecured parts. 2. Worn or aged grommets. 3. Compressor • Bad valves • Slugging • Bad windings (See Schematic 1.) • Low voltage Unit short cycles 1. Thermistor defective or not mounted in the return air duct. 2. Defective control board. 3. Temperature setting set too warm. See “Refrigeration Controls Mode” section of this manual. 4. 5. 6. 7. Air flow blocked by product in front of evaporator or air duct openings Gasket leak around door. Excessive load: After loading, unit will run longer to pull out excessive heat from product. Shortage of refrigerant or restriction. Bad controller. Refrigerated space too cold • • • • Thermistor defective. Check with Multi-Meter. Refrigeration control setting too cold. See “Refrigeration Controls Mode” section of this manual. Refrigeration relay bad. Check with MultiMeter. Faulty control board. Refrigerated space too warm 1. Thermistor defective. Check with Multi-Meter. 2. Refrigeration control setting too warm. See “Refrigeration Controls Mode” section of this manual. 3. Refrigeration relay bad 4. Faulty control board 5. Restricted evaporator space Evaporator motor or blades faulty, causing the coils to ice over the evaporator Condenser air flow restricted • Plugged or dirty condenser • Condenser motor or blades bad • Blade stuck Condensing space restricted • Unit placed too close to a wall. Compressor - bad valves • Capillary tube will start frosting 8 to 10 inches past evaporator connection tube. • Check for oil around brazed connections. Unit operates long or continuously 1. Thermistor defective or not mounted in the return air duct. 2. Refrigeration relay shorted. 3. Air flow restricted • Faulty evaporator motor or blades causing coils to ice over. • Loose connections on evaporator motor. (One motor not running.) 17 Troubleshooting circuits with Multi-Meter • • Check the power source. Use voltage section of the Multi-Meter. Should measure within 5-10% above, 5% below. Check overload. NOTE: Power must be off and fan circuit open. • • • Using the resistance section of the Multi-Meter, check terminals 1 and 3 for continuity. If no continuity is measured (infinity), overload may be tripped. Wait 10 minutes and try again. If still no continuity, overload is defective. Check relay (See Schematic 1.) Unscrew lead terminals and remove relay from compressor. (NOTE: keep relay upright) Check terminals 1 and S, or L and S with the Multi-Meter. Replace relay if continuity exists. Check thermistor with the Multi-Meter. Check compressor windings as shown in Schematic 1. Check winding resistance with the Multi-Meter. If readings are not within 2 Ohms, the compressor is faulty. WARNING: Wiring diagrams must be followed as shown. Any miswiring can cause serious electrical hazard and potential damage or rupture component electrical parts Table 6. Winding Resistance Approximate resistance reading across terminals use RXI scale: COMMON to START: 12 Ohms COMMON to RUN: 2 Ohms RUN to START: 14 Ohms COMMON to SHELL: No Continuity Schematic 1 Refrigeration Unit Removal The refrigeration unit is a hermetically sealed completely self-contained modular 1/3 H.P. unit charged with 5.9 ounces of ozone-friendly R-134-a refrigerant. The complete refrigeration unit can be removed if there is a service problem. CAUTION: 1. 2. 3. 4. 5. 6. 7. 8. 9. 10. 11. 12. Do not place any object in the evaporator assembly area or inside the cabinet area that will block the air flow. This may damage the refrigeration system, which may void the refrigeration warranty. Unplug the power cord. Open the door. Remove the screws at the bottom, front of the cabinet (three in 3-Wide). At the front corners, pry up with fingers. Lift enough to clear the foam over the lip. Tip the back up and rock to remove the cover. Take the screen out and clean. Unplug the refrigeration harness on the right, back side of unit. Unplug the tray harness and remove the bottom tray. Remove the right side rail. Loosen the screws on the brackets holding the refrigeration unit in place. Slide the keyhole slots off. Move the sensor cord out of the way. Pull refrigeration unit forward and lift out. To reinstall the unit, follow the preceding steps in reverse. 18 TROUBLESHOOTING FLOWCHART Initial Startup or Reset 19 TROUBLESHOOTING FLOWCHART Price Setting 20 Vend Sequence 21 TROUBLESHOOTING FLOWCHART Coin Mechanism 22 CARE & CLEANING BEFORE CALLING FOR SERVICE WARNING: Please check the following: • Does your machine have at least 6” of clear air space behind it? • If the power is turned on at the fuse box, is the machine the only thing that doesn’t work? • Is the machine plugged directly into the outlet? Always disconnect the power source before cleaning. Cabinet Exterior Wash with a mild detergent and water, rinse and dry thoroughly. Wipe occasionally with a quality car wax. Plastic exterior parts may be cleaned with a quality plastic cleaner. Cabinet Interior Wash with mild detergent and water. Eliminate odors by including baking soda or ammonia in the cleaning solution. Remove and clean drain hose to eliminate any deposits that may restrict condensate water flow. The vend mechanisms must be kept clean. Any build-up can cause the mechanisms to malfunction. Use soap and water with great care so as not to get water into the electrical components. To insure proper vending keep delivery slide area free of dirt and sticky substances. WARNING: Extension cords cause problems. DO NOT USE EXTENSION CORDS. • • • • • • Refrigeration System Clean dust from condenser and screen in the front door with a soft bristle brush or vacuum cleaner. Remove any dirt or debris from the refrigeration system compartment. Remove and clean the condensation pan. Do not block the evaporator or any area of the air flow with product or supplies. • • Is the evaporator coil free of dust and dirt? Is the condenser coil free of dust and dirt? Is the compressor free of dust? (A blanket of dust can prevent the compressor from cooling off between workouts). Is the circuit breaker at the fuse box reset? Are evaporator fans running? Fold a sheet of 8 1/2” x 11” paper in half from top to bottom so it is now 8 1/2” x 5 1/2”. Place the paper in front of the evaporator coil and see if the evaporator fans will blow the paper away. Is the condenser fan running? Fold a sheet of 8 1/2” x 11” paper in half. Place the paper in front of the condenser coils and see if it draws the paper to it. Is the shelf in front of the evaporator coil clear? (No tools or other air-restricting items). Is the cold control set between 0 and 2? NOTE: Setting the temperature colder accelerate cooling of product. does not 23 24 PARTS MANUAL 25 GENERAL INFORMATION You may order direct from your distributor or through VendNet. If you have any questions when placing your order, please call and we’ll be happy to assist you. Please provide the following information when placing your order: • Quantity Required • Part Number • Shipping and Billing Address • Description • Preferred Method of Shipment • Vendor Model Number • Customer Account Number • Serial Number MINIMUM ORDER $25.00. You may wish to inquire on prices of parts at the time of your order. If you order less than the minimum, please check our catalog for other parts you may require to bring your order up to the minimum order. Payment OPEN ACCOUNT with approved credit. MASTER CARD - VISA - C.O.D. Order by Mail You may place your order for replacement parts by providing the necessary information as requested above, and mailing your order to: VendNet 165 North 10th Street Waukee, Iowa 50263-0488 Order forms are available upon request from VendNet, or you may use your own purchase order form. To Order by Fax You may Fax your order for replacement parts by providing the necessary information as requested above to VendNet. 1-515-987-4447 To Order by Phone You may call in your order for replacement parts. Ask for the VendNet Parts Department. Please provide the necessary information, as requested above, to allow us to provide you with prompt courteous service. Returns A restocking charge of 20% will apply to merchandise accepted by VendNet for return, except items processed as warranty. All returned items must be accompanied by a Return Form clearly stating the reason for return. Returns are to be shipped freight prepaid to VendNet, 165 North 10th Street, Waukee, Iowa 50263-0488. (Return Forms are available upon request from VendNet.) Limitation of Liability VendNet shall not be liable for any injury, loss or damage, whether direct, incidental or consequential arising out of the use of or the inability to use any part, parts or products sold by VendNet. The remedies of the buyer set forth herein are exclusive, and the liability of VendNet. With respect to any contract or sale or anything done in connection herewith, whether in connection therewith, whether in contract, in tort, under any warranty, or otherwise, shall not, except as expressly provided herein, exceed the price of the part, parts or products on which such liability is based. Any statements or representations about the parts or product, other than those contained herein, do not constitute warranties and shall not be relied on by the buyer and shall have no force of effect unless contained in a written agreement signed by officers of VendNet. Key 115 V 230 V VAL NO VAL 3-W 4-W 5-W A/R 115 Volt Power Supply 230 Volt Power Supply With Validator Without Validator 3-Wide Units 4-Wide Units 5-Wide Units As Required USA 1-800-833-4411 Canada 1-800-858-4730 Other locations 1-515-274-3641 If you have any questions, check out our Website at http:\\www.vendnetusa.com or please call VendNet at 1-800-833-4411. Ask for the Parts Department. We will be happy to assist you. Or E-Mail us: [email protected] Include model number and serial number 26 FINAL ASSEMBLY ITEM 1 2 3 4 5 6 7 8 9 10 11 12 13 Not Shown PART NO. DESCRIPTION 1214428-xxx 4050767 1131275-001 8801388 4060310 8810014 1212060-005 1212216-xxx 1212285-xxx 1212060-006 8810013 7186148-000 4050066 Cabinet Assembly - See Page 36 3/8 Nylon Flat Washer Leg Weld Assembly 5/16-18x1 Screw Leg Leveler 12-14x1/2 Philllips TH Type AB Hinge Stake – Lower Door Assembly – See Page 28 Tray Assembly – See Pages 40 - 42 Hinge Stake – Upper 5/16x1 Carriage Bolt Lock Washer – 5/16 Hex Nut – 5/16-18 4208506 1212286-002 4203793-001 4203793-002 4203870 4205137-003 4205466 4205749 4208793 4206816 7250135-002 Air Deflector (Optional) Service Package $1 Labels $2 Labels Service Mode Label Duct Closure Keypad Overlay Bumper Service and Parts Manual Safety Manual Hole Plug 1” 3-W 4-W 5-W 1 1 4 16 4 1 1 1 A/R 1 3 3 1 1 1 4 16 4 1 1 1 A/R 1 3 3 1 1 1 4 16 4 1 1 1 A/R 1 3 3 1 1 1 1 1 1 1 1 35 1 1 4 1 1 1 1 1 1 1 35 1 1 4 1 1 1 1 1 1 1 35 1 1 4 27 Door Assembly 28 ITEM PART NO. DESCRIPTION 3-W 4-W 5-W 1212216-006 1212216-007 1212216-008 Complete Door Assembly Complete Door Assembly Complete Door Assembly 1 1 2 3 4 5 6 7 8 9 10 11 12 13 14 15 16 17 18 19 20 21 22 23 24 25 26 27 28 29 30 31 32 33 1212026-xxx 1214461-xxx 4203209-xxx 4203208-xxx 4203207-xxx 4203477-xxx 4050747 8324099-6 4050202 8801080 1214362-xxx 4208480 4050513 4050585 4050239 4207926-xxx 4203946-xxx 4203954-002 4203955-002 4203947-xxx 4205152-xxx 4205153-xxx 4203466-xxx 7201418-006 1212034-xxx 4205036-002 7202038-998 4203486 4050338 4050546 4203263 4203387 4025610 Door Weld – Specify Color Selector Panel Assembly – See Page 30 Coin Cup Bezel - Specify Color Coin Cup Door - Specify Color Coin Cup - Specify Color ¼” Nut ¼” Stamped Hex Nut Plastic Wire Clamp - 3/8 x ½ 8 – 18 x ½ HWH Tek E-Ring, 5/16 Delivery Assembly – See Page 32 Power Harness #8-32 Twin Whiz Nut #8 External Tooth Lockwasher #8-32 X 3/8 PhillipsScrew Product Deflector – Column 1 Display Window – Column 2 Left Door Part Window Retainer Window Gasket – Column 3 Top Door Deflector – Column 4 Top Window Retainer – Column 5 Door Gasket – Column 7 Pop Rivet Light Assembly - See Page 34 Switch Plate Lock Cylinder W/Keys 1/4 Turn Handle - Black #10-32 X 1/2 Phillips FH MS #10-32 Twin Whiz Nut 1/4 X 1/2 Foam Tape – 0.25 ft Door Lift Mount Door Glide 1 1 1 1 1 4 4 1 30 4 1 1 8 1 1 1 1 1 2 1 1 1 1 30 1 1 1 1 2 2 4 1 1 1 1 1 1 1 4 4 1 30 4 1 1 8 1 1 1 1 1 2 1 1 1 1 32 1 1 1 1 2 2 4 1 1 1 1 1 1 1 4 4 1 30 4 1 1 8 1 1 1 1 1 2 1 1 1 1 34 1 1 1 1 2 2 4 1 1 Not Shown 4203994-001 Keypad/Display Harness 1 1 1 3-W 4-W 5-W 3-W 4-W 5-W 1 1 COLUMN 1 Product Deflector COLUMN 2 Display Window COLUMN 3 Window Gasket 4207926-003 4207926-004 4207926-005 4203946-003 4203946-004 4203946-005 4203947-003 4203947-004 4203947-005 COLUMN 4 Top Door Deflector COLUMN 5 Top Window Retainer COLUMN 6 Door Gasket 4205152-006 4205152-007 4205152-008 4205153-006 4205153-007 4205153-008 4203466-003 4203466-004 4203466-005 29 Door Assembly Selector Panel Assembly 30 Selector Panel Assembly ITEM 1 2 3 4 5 6 7 8 9 10 11 12 13 14 15 16 17 18 19 20 21 22 Not Shown PART NO. DESCRIPTION 1214461 1214461-001 Selector Panel Assembly – without Validator Selector Panel Assembly – for CBV Validator 4203644-002 4025723 4200659 4050420 4203037 4207765 4050420 8800956 8330164 4203186-xxx 4203187-001 4207279-001 4050423 1212227-001 1212029 4203696 4050423 4060116 1212028-003 1212028-002 4025741 1214152-009 1214152-007 1214152-006 1214495 Display Mounting Bracket Controller Stand-Off Readout Window 8-18 x ¼ Phillips HWH Type B Display Board – SMIV Display Cover – without Validator 8-18 x ¼ Phillips HWH Type B - without Validator Validator – See your local distributor 8 – 32 Hex Nut w/ ETW - for CBV Validator 8 – 32 Thumb Nut – Brass - for CBV Validator Coin Insert – Specify Color Coin Return Button – Specify Color Coin Insert Retainer 8-18 x 3/8 Phillips PH Type AB Coin Insert Assembly Coin Insert Assembly Ribbon Cable Clamp 8-18 x 3/8 Phillips PH Type AB Plastic Wire Clamp 3/8 Keypad Assembly – Orange Keypad Assembly – Black Push Button Selection Panel Weld – without Validator Selection Panel Weld – for CBV Validator Selection Panel Weld – for BA32SA Validator Validator Filler Weld – for CBV Validator 4207504 Selection Panel Decal 115V X X X X X X X X X X X X X 230V NO VAL X X X X X X X X X X 1 4 1 4 1 1 2 X X X X X X X X X X X X X X X X X X X X X X X X X VAL X 1 1 1 6 1 1 1 3 1 1 21 1 1 4 1 4 1 1 10 4 1 1 1 6 1 1 1 3 1 1 21 1 1 1 1 1 1 31 Door Assembly Delivery Assembly 32 Delivery Assembly ITEM PART NO. DESCRIPTION QTY 1214362-003 1214362-004 1214362-005 Delivery Assembly – 3-W Delivery Assembly – 4-W Delivery Assembly – 5-W 1 2 3 4 5 6 7 8 9 10 11 12 13 14 15 16 17 18 19 20 21 4050239 4207772-002 4208365-xxx 4208364-xxx 4050663 4205329 4208363-xxx 1214361-xxx 8800956 4208362-xxx 4050423 4207772-003 4025263-001 8801080 8324353 4203386-044 4207697 4207695 4030100 4208366-xxx 8-32x3/8 Phillips PH Type T Side Deflector - Right Delivery Shaft – Column 1 Door Back – Column 2 Delivery Door – Column 3 Rivet Arrow Clip False Box – Column 4 Wrapper Weld – Column 5 8-32 Hex Nut w/ ETW Wrapper Back – Column 6 8-18 x 3/8 Phillips PH Type AB Side Deflector – Left Type 5 Nyliner 5/16 ID Bushing E Ring 5/16 5/16 Flat Washer 8-32 x 5/8 Captive Stud Anti-Cheat Link Delivery Link Bushing – Spacer Anti-Cheat – Column 7 10 1 2 1 1 8 2 1 1 10 1 3 1 4 4 8 4 2 2 8 2 Not Shown 4205705-xxx Delivery Pad (Optional) - Column 8 1 3-W 4-W 5-W 3-W 4-W 5-W COLUMN 1 Delivery Shaft COLUMN 2 Door Back COLUMN 3 Delivery Door COLUMN 4 False Box 4208376-003 4207698-004 4207698-005 4208365-003 4208365-004 4208365-005 4208364-003 4208364-004 4208364-005 4208363-003 4208363-004 4208363-005 COLUMN 5 Wrapper Weld COLUMN 6 Wrapper Back COLUMN 7 Anti Cheat COLUMN 8 Delivery Pad 1214361-003 1214361-004 1214361-005 4208362-003 4208362-004 4208362-005 4208366-003 4208366-004 4208366-005 4205705-003 4205705-004 4205705-005 33 Door Assembly Light Assembly 34 Light Assembly ITEM 1 2 3 4 5 6 7 8 9 10 PART NO. DESCRIPTION QTY 1212034-003 Light Assembly 1 1211462-008 4205094-002 4050423 4205101 4207171 4203131 4203682 4203465 4050423 4207172 Light Weld Light Door – White 8-18 x 3/8 Phillips PH Type AB Light Diffuser Lamp Socket Lamp – F30 T12 Terminal Housing Lamp Harness 8-18 x 3/8 Phillips PH Type AB Lamp Socket Harness 1 1 4 1 2 1 1 1 1 2 35 Cabinet Assembly 36 Cabinet Assembly ITEM 1 2 3 4 5 6 7 8 9 10 11 12 13 14 15 16 17 18 19 20 21 22 23 24 25 26 27 28 29 30 31 32 33 34 35 36 PART NO. DESCRIPTION 3-W 1214428-003 1214428-004 1214428-005 Cabinet Assembly – 3-W Cabinet Assembly – 4-W Cabinet Assembly – 5-W 1 1131275-001 1212052-003 1212060-005 1212280 1212329-002 1214414 1214429-xxx 1214432-xxx 1214455 Leg Weld Coin Box Holder Assembly – See Page 46 Hinge Stake – Lower Drain Pan Weld Screen Weld Refrigeration Assembly – See Page 48 Cabinet Insulation - See Page 47 Insulation Cover Assembly Left Panel Weld Control Panel Assembly – See Page 44 Connector-Line Splice Cable Tie – 7 3/8” 8-18 x ½ Phillips HWH Tek 8-32 x 3/8 Phillips PH MS Plastic Wire Clamp Heater Retainer Tray Receptacle Bottom Box Chute Nut Mount Bracket Snap On Clip Split Nut Assembly Anti-Cheat Anti-Cheat Heating Element - 230V Heating Element - 115V Ballast Support Top Foam Cover – Column 1 8-Plug Main Harness Anti-Storage Label Upper Right Cover Spring Relay DPST 24VAC/DC30A Temperature Sensor – RRF Right Side Panel Air Duct Refrigeration Bracket Access Door 4 1 1 1 1 1 1 1 1 1 2 2 71 2 1 1 1 1 1 6 1 1 1 1 1 1 1 1 1 1 1 1 1 1 1 2 1 4033527 4033712 4050202 4050240 4060116 4202901-001 4203143 4203199 4203255 4203468 4203634 4203645 4203645-001 4203968 4203968- 001 4203985-004 4203998-xxx 4205090 4205119 4205300-002 4205542 4206643 4206782-002 4207924 4208281 4208442 4208450 4-W 5-W 1 1 4 1 1 1 1 1 1 1 1 1 2 2 71 2 1 1 1 1 1 6 1 1 1 1 1 1 1 1 1 1 1 1 1 1 1 2 1 4 1 1 1 1 1 1 1 1 1 1 2 71 2 1 1 1 1 1 6 1 1 1 1 1 1 1 1 1 1 1 1 1 1 1 2 1 37 Cabinet Assembly continued 38 Cabinet Assembly continued ITEM PART NO. 37 38 39 40 41 42 43 44 45 46 47 48 49 50 51 4208451-xxx 4208462 4208472 4208472-001 4208478 4208479 4208668 7250135-000 7250135-001 7250135-007 8800638 8801388 4050149 4050113 8800955 Not Shown 4205465-xxx 1212060-006 3-W 4-W 5-W DESCRIPTION 3-W 4-W 5-W Anti-Storage Bracket – Column 2 Power Cord – Great Britain Right Lower Cover Left Lower Cover Relay Bracket Relay Cover – Black Power Harness – Heater Hole Plug – 1 3/8 BP Hole Plug – ½ BPF Hole Plug – 2 ¼ BP 10-16 x 3/8 Phillips PH Type B 5/16 – 18 x ¾ HWH Type D 6-32x1 Phillips 6-32x1/2 Phillips 6-32 Nut 1 1 1 1 1 1 1 2 3 2 2 16 1 2 3 1 1 1 1 1 1 1 2 3 2 2 16 1 2 3 1 1 1 1 1 1 1 2 3 2 2 16 1 2 3 Kick Panel (Optional ) – Column 3 Hinge Stake Upper 1 1 1 1 1 1 COLUMN 1 Top Foam Cover COLUMN 2 Anti-Storage Bracket COLUMN 3 Kick Panel 4203998-009 4203998-010 4203998-011 4208451-003 4208451-004 4208451-005 4205465-003 4205465-004 4205465-005 39 Cabinet Assembly Tray Assembly – 3- and 4-Wide 40 Tray Assembly – 3- and 4-Wide ITEM 1 2 3 4 5 6 7 8 9 10 11 12 13 14 15 16 17 18 19 20 21 22 23 24 25 26 27 28 Not Shown PART NO. DESCRIPTION 3-W 1212284-301 1212284-303 1212284-304 1212284-305 1212284-401 1212284-403 1212284-404 Tray Assembly – 3-W- 12 Select Tray Assembly – 3-W- 18 Select Tray Assembly – 3-W- 15/24 Gum & Mint Tray Assembly – 3-W- 12/15 Select Tray Assembly - 4-W - 12 Select Tray Assembly - 4-W - 18 Select Tray Assembly - 4-W - 15/24 Gum & Mint 4 1 1 1 4203275 4203276 4060670-004 4203509 4203468 4203989-003 4203989-004 4203277-003 4203277-004 4203432-002 4025748 4200272-007 4200272-008 4200272-009 4200272-010 4200272-011 4202015 4200272-000 4200272-001 4200272-002 4200272-003 4200272-004 4200272-005 4200272-006 1200106-012 4203432-003 4200164-000 4202625-001 4202624-001 4203101 4202313 4025797 4200340 8370660-5 8370998 4200281 1200321-002 1200321-003 4203341-001 4203229-003 4203229-004 4203707 1200106-012 Product Tray – 3-W Product Tray – 4-W Roller Cable Tie Harness Clamp Tray Harness – 3-W Tray Harness - 4-W Motor Cover – 3-W Motor Cover - 4-W 24 VDC Motor - 360 Degree Product Pusher/Ejector Auger - 10 Select - Snack Auger - 12 Select - Snack Auger - 15 Select - Snack Auger - 7 Select - Snack Auger - 8 Select - Snack Auger Coupling Auger - 15 Select - Candy Auger - 18 Select - Candy Auger - 24 Select - Candy Auger - 30 Select - Candy Auger - 12 Select - Candy Auger - 9 Select - Candy Auger - 6 Select - Candy Gum and Mint Auger Assembly 24 VDC Motor - 180 Degree - G & M #8-32x1-1/4 Shoulder Screw G & M Helix Tube Gum & Mint Spacer Strip End Cap Auger - 36 Select - Gum & Mint Product Divider Helix Retainer Product Spacer Spacer Support Spring Clip Tray Rail - Left Side Tray Rail - Right Side Price Scroll Label Holder – 3-W Label Holder - 4-W Selection Identification Label Gum and Mint Auger Assembly 1 1200137-261 1200137-262 Gum & Mint Auger Kit – 36 ct. (Optional) Gum & Mint Auger Kit – 48 ct (Optional) 4-W 3 2 1 2 1 1 1 1 2 1 1 1 1 A/R A/R A/R A/R A/R A/R A/R A/R A/R A/R A/R A/R A/R A/R A/R 1 1 1 1 1 1 A/R A/R A/R A/R A/R 1 1 A/R 1 1 A/R A/R A/R A/R A/R A/R A/R A/R A/R A/R A/R A/R A/R A/R A/R 1 1 1 1 1 1 A/R A/R A/R A/R A/R 1 1 A/R 1 1 1 A/R A/R A/R A/R 41 Cabinet Assembly Tray Assembly – 5-Wide 42 Tray Assembly – 5-Wide ITEM PART NO. 1214877-001 1214877-005 1214877-007 1214877-008 1214877-009 DESCRIPTION Tray Assembly - 5-W - 12 Select Tray Assembly - 5-W - 18 Select Tray Assembly - 5-W – 12/15 Select Tray Assembly - 5-W - 18/15 Select Tray Assembly - 5-W – 24/30/40 Select G & M 5-W 2 1 1 1 1 1 2 4202015 4200272-000 4200272-001 4200272-002 4200272-003 4200272-004 4200272-005 4200272-006 4025748 4200281 8370998 8370660-5 4200340 4025797 4203432-002 8045133 4025802-001 4203989-005 4050513 4060116 4050262 4025799 4025798 4060670-001 8331913 1200321-002 4022408-000 4202013 4201209-xxx 4200051 4200052 1200321-003 4200272-007 4200272-008 4200272-009 4200272-010 4200272-011 4203432-003 4200164-000 4202625-001 4202624-001 4203101 4202313-007 1200137-261 1200137-262 4060622 4203793-001 4203793-002 Auger Coupling Auger - 15 Sel - Candy Auger - 18 Sel - Candy Auger - 24 Sel - Candy Auger - 30 Sel - Candy Auger - 12 Sel - Candy Auger - 9 Sel - Candy Auger - 6 Sel - Candy Product Ejector Spring Clip Spacer Support Spacer Auger Retainer Divider 24 VDC Motor - 360 Degree #8-32 X 3/8 Thumb Screw Motor Cover Tray Harness - 5-W #8-32 Twin Whiz Lock Nut Wire Clamp 8-32x3/4 Phillips PH MS Motor Mounting Plate Product Shelf Roller .254 x 5/8 Washer – AP for item 18 Side Rail - Right Side Label Holder – 5W 1/32 x 3/8 Tape - 28 Inches Selection Strip -Specify “A” Thru “H” Price Label - 1.50 - 3.15 Price Label - .10 – 1.50 Side Rail - Left Side Auger - 10 Select - Snack Auger - 12 Select - Snack Auger - 15 Select - Snack Auger - 7 Select - Snack Auger - 8 Select - Snack 24 VDC Motor - 180 Degree - G/M #8-32 X 1 1/4 Shoulder Screw G & M Helix Tube Gum & Mint Spacer Strip End Cap Auger - 40 Sel - Gum & Mint Gum & Mint Helix Kit – 36 ct. (Optional) Gum & Mint Helix Kit – 48 ct. (Optional) ½ Filament Tape Dollar Label - $1 Dollar Label - $2 A/R A/R A/R A/R A/R A/R A/R A/R A/R A/R A/R A/R A/R A/R A/R 3 1 1 1 1 1 1 1 2 2 1 1 A/R A/R A/R A/R 1 A/R A/R A/R A/R A/R A/R A/R A/R A/R A/R A/R A/R A/R A/R A/R A/R 3 4 5 6 7 8 9 10 11 12 13 14 15 16 17 18 19 20 21 22 23 24 25 Not Shown 43 Cabinet Assembly Control Panel Assembly 44 Control Panel Asembly ITEM 1 2 3 4 5 6 7 8 9 10 11 12 13 14 15 16 17 18 19 20 21 22 23 24 25 26 Not Shown PART NO. DESCRIPTION 115V 1212045-005 1214460 Control Panel Assembly Control Panel Assembly X 1212104 1212785-003 4021017 4025423 4050423 4200238 4200705 4200709 4203136-010 4203137-002 4203144 4203181 4203467-003 4203467-005 4203468 4203477 4203509 4203639 4203640 4208738 4203870 4209675 4205108-001 4205314-002 4206765 4208480 4206648 4203992 4209291 4209708 4209676 4209705 Coinage Weld Coinage Weld – 230V Spring Controller Stand-Off 8-18 X 3/8 Phillips PH Type AB Self Adhesive Feet MS 1600 Data Harness (Executive Controller) MS 1600 Power Harness (Executive Controller) Control Panel Controller Mount Mode Button 1/4 I.D. Snap Bushing 3 Amp Circuit Breaker 5 Amp Circuit Breaker Snap-In Clip 1/4 Nut Cable Tie Door Interlock Switch Interlock Cheat SM LC Control Board Versatile Service Mode Label Control Board Harness Door Switch Mount Controller Cover Relay Harness Power Harness Coin Mech Harness - MDB Coin Mech Harness Temp Sensor Temp Sensor Plate Refrigeration Control Harness Door Switch Harness X 230V 1 1 X X X X X X X X X X X X X X X X X X X X X X X X X QTY X X X X X X X X X X X X X X X X X X X X X X X X X X X X X X X 1 1 1 4 16 1 1 1 1 1 1 1 1 1 1 1 1 1 1 1 1 1 1 1 1 1 1 1 1 1 1 1 45 Cabinet Assembly Coin Box Holder Assembly ITEM 1 2 3 4 5 6 7 8 9 10 11 12 13 46 PART NO. DESCRIPTION 1212052-003 Coin Box Holder Assembly 1212127 4060318 1211449-002 4203730-003 8800612 4203625-001 4203625 4203134 1210952 8324099-6 4050513 4050239 4050585 4208480 4050423 Coin Box Weld Assembly Cash Box Lock & Keys (Optional) Box Mount Weld RFI Filter 8-18 X 1/2 Phillips PH Type AB Ballast Assembly - 230 V Ballast Assembly - 115 V Transformer Assembly – 230 V Transformer Assembly – 115 V Clamp – 3/8 x ½ 8-32 Twin Whiz Lock Nut 8-32x3/8 Phillips #8 External Tooth Lockwasher Power Harness 8-18x3/8 Phillips PH Type AB 115V 230V QTY X X X X X X X X X X X X X X X X X X X X X X X X X X X 1 1 1 1 2 1 1 1 1 1 1 1 4 1 2 Cabinet Insulation ITEM 1 2 3 4 5 6 7 8 9 10 11 12 13 14 3-W 4-W 5-W PART NO. DESCRIPTION QTY 1214429-003 1214429-004 1214429-005 Insulation Installation – 3-W Insulation Installation - 4-W Insulation Installation - 5-W X X X 1214410-xxx 4208496-001 4208496-002 4208496-xxx 4208496-xxx 4208494-001 4208494-002 4208494-003 4208497-xxx 4208497-002 4208497-001 4208495-xxx 4208495-002 4208495-001 Cabinet Weld – Column 1 Top Insulation – Left Top Insulation – Right Top Insulation – Middle – Column 2 Top Insulation – Front – Column 3 Side Insulation – Middle Side Insulation – Bottom Side Insulation – Front Bottom Insulation – Middle - Column 5 Bottom Insulation – Right Bottom Insulation – Left Back Insulation – Column 4 Back Insulation – Right Back Insulation – Left 1 1 1 1 1 2 2 2 1 1 1 1 1 1 COLUMN 1 COLUMN 2 Cabinet Weld Top – Middle 1214410-003 1214410-004 1214410-005 4208496-003 4208496-004 4208496-005 COLUMN 3 COLUMN 4 Insulation Top– Front Back 4208496-006 4208496-007 4208496-008 4208495-003 4208495-004 4208495-005 COLUMN 5 Bottom Middle 4208497-003 4208497-004 4208497-005 47 Cabinet Assembly Refrigeration Assembly ITEM 1 2 3 4 5 6 7 8 9 10 11 12 13 14 15 16 48 PART NO. DESCRIPTION 1214414 1214414-001 R-134a Refrigerant Assembly - 1/3 H.P 230 V 115 V 1214415-xxx 1214416-xxx 4025410-500 4033712 4060480-002 4205507-305 4205507-306 4208269 4208465 4208701 4208724 8324099-6 8324099-7 8365271-500 8800852 8800956 8801204 Condenser Assembly – See Page 50 Evaporator Assembly – See Page 49 Drain Tubing – by Foot Cable Tie – 7 3/8” Accumulator Refrig Serial Label – 230 V Refrig Serial Label – 115 V Insulation Refrig Harness Anchor Rivet Standoff 3/8 x ½” P-Clamp ½ x 5/8” P-Clamp Insulation – by Foot 8-32 x 3/8 Phillips PH Type T 8-32 Nut w/ ETW 10-16 x 3/8 Phillips TH w/ ETW Type B 115V 230V QTY X X X X X X X X X 1 1 1.83’ 2 1 1 1 1 1 6 6 1 1 0.75 3 1 4 X X X X X X X X X X X X X X X X X X X X X X X X X X X Evaporator Assembly ITEM 1 2 3 4 5 6 7 8 9 10 11 PART NO. DESCRIPTION 115V 1214416 1214416-001 Evaporator Assembly – 230 V Evaporator Assembly – 115 V X 4034344-001 4034344-000 4050608 4050663 4202284 4206047-001 4208266 4208268 7100042-000 7250135-003 8800829 8801204 Evaporator Fan – 230 V Evaporator Fan – 115 V ½” Flat Washer - Zinc Rivet ½” Push Nut Evaporator Evaporator Mount Drain Pan Drain Tube Hole Plug – ¾” BPF 10 – 24 x 3/8 Phillip TH w/ ETW Type 23 10 – 16 x 3/8 Phillip TH w/ETW Type B X X X X X X X X X X X 230V QTY X X X X 2 2 1 4 1 1 1 1 1 1 8 4 X X X X X X X X X X 49 Cabinet Assembly Condensor Assembly 50 Condensor Assembly ITEM 1 2 3 4 5 6 7 8 9 10 11 12 13 14 15 16 17 18 19 20 PART NO. DESCRIPTION 1214415 1214415-001 Condenser Assembly – 230 V Condenser Assembly – 115 V 1214434 4050608 4050773-000 4203686 4205468 4205471 8045052-29 8333894-2 8344305 8344306 8344308 4203790 8045052-27 8333894-15 8344305 8344306 8344308 4208267 4208275 4208428 4208445 4208446 4208492 4208492-001 4208531 7332393-000 8323090-1 8800852 8801180-002 8801180-003 8801204 8916923 Suction Line Assembly ½ Flat Washer – Zinc #17 Hitch Pin Clip Condenser Coil Drier – Bonded Core Compressor 1/3 HP – 230 V Overload Protector (Not Shown) Starting Relay (Not Shown) Overload Spring (Not Shown) Bale Strap (Not Shown) Cover Terminal (Not Shown) Compressor 1/3 HP – 115 V Overload Protector (Not Shown) Starting Relay (Not Shown) Overload Spring (Not Shown) Bale Strap (Not Shown) Cover Terminal (Not Shown) Condenser Mount Fan Shroud Condenser Top Condensor Fan Mounting Bracket Fan Blade 8.25 x 30D Condenser Motor – 230 V Condenser Motor – 115 V Discharge Line ¼ -20 x 3/8 Sltd HH MS Grommet 8-32 x 3/8 Phillips PH Type T ¼ x 3” Tubing ¼ x 6” Tubing 10-16 x 3/8 Phillips TH w/ ETW ¼ - 20 Twin Spring Nut 115V 230V QTY X 1 1 X X X X X X X X X X X 1 4 4 1 1 1 1 1 1 1 1 1 1 1 1 1 1 1 1 1 1 1 1 1 1 4 4 1 1 2 13 2 X X X X X X X X X X X X X X X X X X X X X X X X X X X X X X X X X X X X X X X X X X X X X X X X X X 51 WIRING SCHEMATIC 52 QUICK REFERENCE SERVICE COMMANDS Press the Service Mode Button on the Control Board and follow the steps outlined below: NOTE: To clear faults, press the Service Mode Button and then press <A><C><K> Press Function To Program Enter The Following <1> + <A> = 5¢ <1> + <B> = 10¢ <1> Dispense Coins <1> + <C> = 25¢ <1> + <D> = $1.00 (IF APPLICABLE) <1> + <F> - FILL COIN TUBES (NON CREDIT) <2> Motor Count <2> = NUMBER OF ACTIVE MOTORS <3> Alternating POS Or <1> = ALTERNATE ON + <J> OR Permanent Use Exact Change <0> = ALTERNATE OFF + <J> <4> + SELECTION <4> Non-Resettable MIS <4> + (SEL) ROW LETTER TWICE <4> + “AL” MACHINE TOTAL <5> Set Price <5> + (SEL) + (PRICE) + <J> Copy Price <5> + (SEL) + (PRICE) + <C> + (SEL) + (SEL) + <L> TWICE <6> Set Time (24 Hour Mode) <6> + <J> + (TIME OF DAY) + <J> <7> Service Mode - High Level <7> + ACCESS CODE - ???? <8> Test Vend Single Selection <8> + (SEL) - <L> TWICE TO EXIT <9> Test Vend Entire Row <9> + (ROW) - ANY KEY TO EXIT <0> Test Vend Entire Machine <0> + <J> - ANY KEY TO EXIT <7> High Level Service Mode <7> + ACCESS CODE = ???? 0> All Options Off <0> = OFF <1> - NO CHANGE “ON” <1> No Change Mode <0> - NO CHANGE “OFF” <1> = FORCED VEND “ON” <2> Forced Vend <0> = FORCED VEND “OFF” <L> = EXITS WITHOUT SAVING <3> Discount Group REFER TO SERVICE MANUAL <E> + <J> = ENGLISH <F> + <J> = FRENCH <4> Language <G> + <J> = GERMAN <H> + <J> = SPANISH <D> + <J> = ITALIAN <A> = AUXILIARY <5> Lottery Odds “ODDS 0000” + <J> <7> + SELECTION <7> Resettable MIS <7> + (SEL) ROW LETTER TWICE <7> + “AL” MACHINE TOTAL <8> + <A> = TOTAL VENDS <8> + <B> = TOTAL CASH <8> MIS Totals <8> + <C> = TOTAL VALUE CARD <8> + <D> = TOTAL LOTTERY/PROMO <8> + <E> = TOTAL BILLS <8> + <F> = TOTAL DISCOUNT <9> Stop Clock <9> + <J> <A> Multi-Vend <A> + <1> = MULTI-VEND “ON” <A> + <0> = MULTI-VEND “OFF” <B> Edit Point Of Sale Message REFER TO SERVICE MANUAL <D> Promo Vend REFER TO SERVICE MANUAL <E> Reset Mis <E> + <J> <G> + <0> <G> + <0> Refrigeration Selection BEGIN (SEL) + <0> END (SEL) + <0> PRESS <1> TO TURN HEALTH CONTROL “ON” PRESS <0” TO TURN HEALTH CONTROL “OFF” <G> + <1> Defrost Command <G> + <1> + <D> = START <G> + <2> Temperature Display <G> + <2> + <F> = FAHRENHEIT <G> + <2> + <C> = CELSIUS <G> + <3> “Cut In” Temperature <1> TO ENTER PLUS (+) - <0> TO ENTER MINUS (-) (Turn On) ENTER TEMPERATURE NUMBER <G> + <4> “Cut-Out” Temperature <1> TO ENTER PLUS (+) - <0> TO ENTER MINUS (-) (Turn Off) ENTER TEMPERATURE NUMBER <G> + <5> Defrost Duration “DF TIME XX” 10 MINUTES RECOMMENDED <G> + <6> Defrost Start Times “DEFRI 00:00 (TIME) + <L> TO SAVE - CONTINUE (4 Available) TO SET NEXT THREE BY THE SAME METHOD FACTORY RECOMMENDATION - ALL TIMES SET TO “00.00” 53