1
O-20
SETTING UP MICROCUT
1.
2.
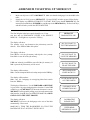
Turn the power ON to MICROCUT. Wait for the MEMORY TEST to complete.
If the display says PRESS AUTOMATIC TO START, DON'T press the AUTOMATIC key, but
instead press and hold any NUMBER key and then press the PROGRAM key. Release both
keys and this will take you into the SETUP ROUTINE.
NOTE: MICROCUT software comes in two different SET-UP ROUTINE versions. If the prompts
appear differently than listed here, refer to the ADDENDUM TO SETTING UP MICROCUT (see
the TABLE OF CONTENTS).
The first 24 lights in the base console should be on. If not stop
here and see DIAGNOSTIC LIGHTS in the SERVICE
MANUAL. If all lights are on press the YES key.
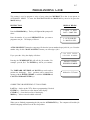
SETUP STEP 001
DIAGNOSTICS OK?
The display will show:
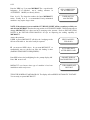
Press NO to save the job memory and skip the next prompt.
Press YES to erase all of the job memory.
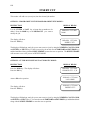
SETUP STEP 002
CLEAR MEMORY Y,N
If YES was selected, press NO to erase all of the job memory. If
YES is pressed the job memory will be saved.
SETUP STEP 002
SAVE JOBS YES, NO
The display will show:
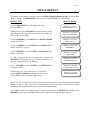
The memory test is non destructive (the job memory won't be
altered). Press YES or NO to this option.
SETUP STEP 003
MEMORY TEST Y, N
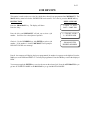
Turn the handwheel forward and backward. Does the display
count down moving forward and up going back? Press the
FORWARD and REVERSE keys. Does the motor drive the
backgauge in the right direction?
SETUP STEP 004
CHECK DIRECTION
If the count or drive direction are wrong: Turn the 110 VAC power to MICROCUT off. Open the
base console door. Count direction wrong -- interchange the shaft encoder wires 5 & 6. Motor
direction wrong -- interchange the motor wires.
Press the REVERSE key until the backgauge reaches the rear limit switch. Release the key.
MICROCUT will take over to calibrate.