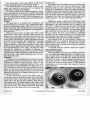
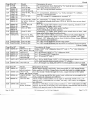
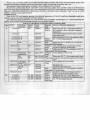
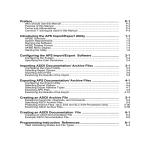
1
Presents: http://victorylibrary.com/books1.htm Anothcs SclwK>n From The VICTORY W LIBRARY The Finest in Harley-Davidson Technical Literature Post Office Box 133, West Hempstead NY 11552-0133 VICTORY LIBRARY also offers these other booklets (all prices are + postage): Super-Tuning Amal Concentric Carburetors and Intake Systems for Briti sh Motorcycles; want more performance from your older Triumph, BSA, Norton, Royal Enfield or Matchless OHV pushrod or side-valve single, twin or triple with Amal Concentric carburetors? Already have Amal carburetors, but don't know how to adjust them? Doesn't run "right", and won't respond to the changes you've made? Can't make any sense of the xeroxed generic 40 year old "instructions"? This booklet will help you. $ 17.95. Super-Tuning Amal Monobloc Carburetors and Intake Systems for British Motorcycles; want more performance from your older Triumph, BSA, Norton, Royal Enfield or Matchless single or twin with Monoblocs? Already have carburetors, but don't know how to adjust them? Doesn't run "right", and won't respond to the changes you've made? Can't make any sense of the xeroxed generic 40 year old "instructions"? This booklet will help you. $ 17.95 Mikuni Tuning for Harley-Davidson & Indian; for the 30_44mm Mikuni round-slide "VM" type carburetor. Want more performance from your Harley-Davidson Knucklehead , Panhead, 45, U-Series, or Indian Chief, Scot, 741, etc.? Already have a Mikuni carburetor, but don't know how to adjust it? Doesn't run "right", and won't respond to the changes you've made? Can't make any sense of the original Japanese "instructions"? Looking for an affordable alternative to replacing or rebuilding your tired Linkert? If you've considered using a Mikuni, you should read this. $ 13.95 Super-Tuning Mikuni VM Carburetors and Intake Systems for British Motorcycles; for the Mikuni "VM" type 26_38 mm round-slide carburetor. Want more performance from your older Triumph, BSA, Norton, Royal Enfield or Matchless OHV pushrod twin? Already have Mikuni carburetors, but don't know how to adjust them? Doesn't run "right", and won't respond to the changes you've made? Can't make any sense of the original Japanese "instructions"? Looking for an affordable alternative to replacing or rebuilding your tired Amal Triumphs or Concentrics? If you've considered using a Mikuni, you should read this booklet. $ 13.95 The Linkert Book n·; this is the complete VICTORY LIBRARY book on the Linkert (L&L) Model "M" brass carburetor, as used on all Harley-Davidson motorcycles 1933-56 (and some until 1964), as well as Indian twins. $ 17.95 80 Performance; the complete collection of all VlCTORY LIBRARY U-Series power & speed booklets including strokers, porting, big valves; 12 subjects. $ 17.95 British Transmission Ideas; comments, hints & shortcuts to installing an early non-unit British 4-spd. box from a Triumph, BSA, Norton, Royal Enfield, &c. in your 45 solo for hand-clutch & foot shift operation, better acceleration, &c. with 15 charts & 22 illustrations. cc $ 8.95 The "45 Magnum"; comments on installing 900 1957-71 iron Sportster OHV cylinders & heads on a 45 lower end for killer performance and appearance, very complex, requires heli-arc welding, machining and frame modifications. Includes dimensions, list of required parts, illustrations and diagrams. $ 8.95 Chrysler Poly Performance is the definitive booklet on obtaining the best speed & performance from your 1955 66 Plymouth, 1955-58 Chrysler, 1955-58 DeSoto, or 1955-66 Dodge V8 "poly" wide-block motor. Your "obsolete" poly is capable of surprising speed & power, without loss of reliability. It's the most complete do-it yourself literature you can buy to get the most from your poly motor. Before making any decisions about modifying (or even rebuilding) your motor, get the best help available, and do it right the first time. $ 17.95 The following titles are still in progress, with completion and sale ex pected in 2009. Don' t order these yet, e-mail [email protected] to be notified when available. Triumph 650 & 750 "B" Range Twin Performance; want more performance from your unit Triumph twin? Rather than merely summarize and repeat what you've already read in Shenton, Taylor, etc . this booklet will focus on more advanced and complex infonnation beyond what' s currently on the market. Shovelhead & Sportster Rocker Arm Tuning; want more performance from your 1966-83 shovelhead big twin or 1957-85 ironhead Sportster? Top end seems noisier than it should? Rocker arms and valve stems have strange wear patterns? Installing a high-lift cam and want to maximize results? These engines are simi lar in valve train and rocker box (and very different from the panhead) design, and the same methods can be used to correct and improve the rocker-arm geometry with only minor work, without visible alterations. Shop owners: this is a great service to add to your customer's engine rebuild. Panhead Rocker Arm Tuning; want more perfonnance from your 1948-65 panhead EL, FL, FLH &c? Top end seems noisier than it should? Rocker arms and valve stems have strange wear patterns? Installing a high-lift cam and want to maximize results? This booklet will focus on more advanced and complex information beyond what's currently available including the factory service manual, Palmer's book and Shop Dope. Shop owners: this is a great service to add to your customer's engine rebuild. Another Selection From The VICTORY m LIBRARY THE FINEST IN HARLEy-DAVIDSON TECHNICAL LITERATURE POST OFFICE Box 133 WEST HEMPSTEAD NY 11552-0133 Introduction Thank you for selecting this booklet. It represents roughly 35 years of curiosity, research, and experi mentation with the Harley-Davidson 45 engine. I assume that the reader is already familiar with motors in general, and has personal experience with Harley-Davidson 1937-73 "45" (VIN letters: "w" or "G") side-valve motors in particular; therefore, no attempt will be made to explain the various technical terms used. With some interpolation, the information is poten tially useful for other similar motors, but I have no experience with them. If you have questions about another engine or installation, please consult another source. This is not a repair manual, and does not contain instructions on how to tune a stock engine or make repairs. The information presented here is believed to be accurate and reliable, and is honestly offered to assist you in obtaining the best results from your 45 engine. The level of satisfaction that you will achieve is largely a function of the amount oftime and effort that you are willing to devote to this project. However, in the same way that I cannot take credit for your suc cess, I also cannot be held responsible for any failures or unanticipated results. Despite my best efforts, this book may contain inadvertent typographical errors and inaccurate data. You must use your own good judgment in these mat ters, keeping in mind that gasoline is highly flamma ble, and that motorcycles are inherently dangerous to operate. Any additional information or ideas that you may discover or develop in your own research is always of interest, and will be included (with your pennission) in the next revision of this article, with proper credit. Reference to a diagram in the text will give the Page number on which the illustration appears: "Pg. 8", etc. This material is copyright protected. Copyright ©2005 Jeffrey Diamond, all rights reserved. The "copyright" claim is asserted for the literary content of this book, as well as drawings or photographs attributed to the author. ISBN notification and Library of Congress submission pending at the date of notice. Legal notice: This sale constitutes a "limited use agreement". By purchasing or otherwise acquiring this product and accepting delivery you the "buyer" and/or "recipient" have agreed without exception or objection to the following terms of use: any use except personal and non-commercial, and any reproduction or distribution of this material, in whole or in part including quotations, with or without attribution, for any purpose, is absolutely pro hibited without the prior written permission of the author. Violations will be prosecuted to the full extent of the statute. Recovery of damages, including but not limited to lost revenue both actual and projected, legal fees and costs and punitive damages will be asserted against the buyer and recipient(s). Buyer or recipient agrees to pay all legal fees and costs resulting from, or associated with, any claim or recovery for prohibited use of this material, and to hold Jeffrey Diamond harmless from any claim, third party claim or cross-claim for injury, damage or loss arising from this material. No affiliation with, or authorization by, the Harley Davidson Motor Company® is implied. The names "Harley-Davidson®", "Harley®", "H-D®", "Servi-Caroo" and "Sportster®" are shown for reference purposes only. May 15,2005 "45 Performance", by VICTORY LmRARY Page 10f34 45 POWER I Purpose This is the introduction to getting better perform ance from your stock 45 motor. The information applies to 1937-73 solo (W & WL), Servi-Car (G), and military (WLA & WLC) models. I won't go into lengthy technical detail, just tell you what works, and how to do it. I'II assume that you don't want to take your motor completely apart; by completely I mean separating the cases, splitting the Bad Rumors: Let's throw out some of the nonsense that has been printed about 45 motors. You can forget what you may have heard about... » Using UL (80" flathead) cams: they don't fit (too many teeth on the gears). » Using Sportster cams: they don't work (only .267" lift - less than stock! And have too much timing for our purposes). » Using WR cams: they're not that good (designed in 1941 - how fast were cars back then?), plus, they require special tappets, blocks, covers, etc. - $$$. » Putting on UL barrels: they won't fit (much too big). » Installing a front-drive magneto: lots of trouble (major machine work). » "Bolting on" Sportster heads & barrels: you can't, it's lots of work (welding, etc.). » Installing Sportster rods, etc.: it's do-able, but do you really need this? Lots of trouble. » Using a WR close-ratio transmission: bad accel eration, lousy in traffic. » "Bolting on" K heads: they don't fit (unless you're using K barrels, which require modifications). » Keeping the compression stock: all late 45 solos Stage I The motor is fully assembled, in the frame. Its mechanical condition is very good to excellent (no known problems or strange noises). Your compression tests out at 90 Ibs. or better in both cylinders (test Stage II The motor is still assembled and in the frame, but you feel OK about taking the heads off. Stage III The top end is coming off, either for repair (smoke, noises, bad compression, etc.), or just im Stage IV The top end is off. You want to install mild cams, with no more lift than stock. This requires removing anything in the way, such as controls, pegs, oil lines, etc. The limit is the cam cover gasket surface. Page 2 of40 "45 Performance", by flywheels, etc. This discussion will concern itself entirely with what can be done with the engine in the frame, and still substantially assembled. None of this advice will make your motor refuse to start, idle like a coffee can full of rocks, overheat, or blow up. If you follow this material (and your service manual) carefully, you will have no problems doing all of this yourself (even if this is your first time). are 6-1, the K is 6.5-1, the KH is 6.8-1, Indian Chief Bonneville is 6.75-1, etc. » Staying with a small carb: I have successfully used 38 mm carburetors on 45" motors. Before I begin, a warning: if your motor is worn out, or even tired, no amount of speed equipment is going to help. Never, never modify a worn-out motor! A lot of the missing power will suddenly "appear" when your motor is freshened up! A motor that smokes, uses oil, makes lots of noise, etc. is a candi date for a rebuild. After you tighten it up (if you're still not happy), come back and read this. First: what are we trying to do? When most people say they want more power, what they mean is more torque - especially at low to moderate speeds. This is the power range most riders really want - power that lets you take off from a light, pass in traffic, ride double, and generally have fun, without having to down-shift all the time to keep the motor turning fast. This is what we will concentrate on. Let's divide up the work into categories based on how far apart you're willing to take the motor; we'll call this the "limit". taken with motor warm, both plugs out, throttle wide open). The limit is to remove only the external sys tems, such as the intake, exhaust, ignition, etc. and not touch the engine itself. The limit is the head gasket surface. provement. The limit is the cylinder base gasket sur face. Anything more complicated at this point puts you into the expert class - you should be reading "45 Power II" (following pages)! Now, the actual work. VICTORY LmRARY May 15, 2005 Clean off the top end of the motor as best you can with solvent, air pressure, etc. This is a good time to check for loose cylinder base nuts, oil leaks, etc. Use Kroil, CLP, WD40 or your choice on all hardware that will be coming off 24 hours before starting work: intake manifold nuts, exhaust clamps, carb bolts, etc. Exhaust A small gain can be made by dropping the original 2 into 1 pipe set, & using individual pipes. Mufflers are hard to fit on these (especially on a solo) due to space & ground clearance limitations, so plan carefully. The longest pipes you can fit will work best. Another set-up (for those of you that have a friend at Muffler King) is to use your old rear pipe, a drag-style front pipe (available from Paughco), and a bit of work to put both of them into a larger pan-type Y pipe (Paughco again). See my "45-EX" booklet for more detail. This cuts out the restriction where your front pipe is squashed to pass under the cam cover, increases the pipe diameter where they join by 39%, and allows you to use a 1%" (big twin size) tail-pipe and muffler. This still looks fairly stock, and has much better ground clearance than dual pipes. Do not use silencers that fit inside the pipes. One of the best mufflers around is the factory "off-road" accessory unit. Another good choice is the Supertrapp, but it doesn't sound good! Don't confuse noise with power a bad choice of muffler will lose a lot of power; if you're not sure it works well, don't buy it. Ignition If you can find a 1964-73 Servi-Car (trike) dis tributor, take it. This looks much like the older type, but the cap is flat on top, and held in place by a screw on the side. The 1965-69 Sportster unit is almost as good, and looks identical, but the advance curve is too long and should be shortened by 50% (from 30° to 15°). These have an automatic-advance feature (like a . car), and both are a drop-in fit. Either one will im prove your idle quality, keep your motor cooler in traffic, and give a bit more power at low speeds. Adjust it so that (when the point plate is held to fully-advanced position) the points just begin to open when the timing mark is centered in the inspection hole, or slightly to the rear of this point. This should be at 30° (.3125" = 5/ 16" BTDC, or Before Top Dead Center, the absolute highest point the piston reaches when the engine is rotated) at full advance. A magneto is a good way to bum a hole in your wallet, but only helps at very high engine speeds. A used magneto is a dangerous purchase unless you can see it run in a motor - don't buy one at a swap meet, they're expensive to fix. Don't bother unless it's cheap. May \5,2005 "45 Perfonnance", Stage I Coil The original coils are terrible by modem stan dards. Get yourself an Andrews, Action or Accel high-perfonnance unit. This is also a good time to consider going to a 12 volt set-up - more voltage at the plugs, stronger generator output, and makes bulbs easier to find, too. Spark Plugs All aluminum heads (and all iron heads up to 1955 or so) use the 18mm (large) spark-plugs. The correct plug not only fits the hole, but has the right heat range for the motor's intended use & power output. There is no single proper plug for your motor - for best results use the right plug for each job. For break-in & traffic, use NGK A6 (equivalent to H-D factory #3). For parkway & high-perfonnance, use NGK A7 (equiva lent to H-D factory #4). If they come out black & dry, check your carb; black & wet, you have an oil prob lem; 2 different colors, you have an air leak in the cylinder with the lighter colored plug - fmd it & fix it. Do not over-tighten the plugs - 25 ftllbs is plenty. For full-throttle use (racing), keep a set of A8 (equivalent to H-D factory #5) around; use these when you try out different jets, etc. Gap them at .025" for best power, .030" for traffic use. Magneto only: .020" Carburetor If you have a W or G motor with I" Linkert or small Tillotson (1937-73 M-16,M-18 orDC,etc.),get rid of both the carburetor and the manifold. What you want is the 1936-52 solo & military mani fold - looks the same but bigger, and bolts directly to your cylinders. You can improve it a bit with a little grinding & polish- '----_ _ _ _ __ __ __ _ --' ing inside; remove most of the sharp edge splitting the flow between the 2 legs to the cylinders - make a smooth radius instead. A spacer between the carb & manifold helps a bit. This manifold takes the 1W' Linkert (such as the M-88, M-41, M-51, etc.). Find one with a 11/16" venturi as a minimum (see my "Linkert Book" for a complete list of carb numbers). Most of these carburetors will work well with no modification, and are a big step up from the smaller unit. If you have a 1 1/4" set-up and want more, get (or make) an adapter to install a 1IJ4" or 1'l2" SU (MG mm Midget, Sprite, Volvo, Herald, etc.); 32 or 34 Mi kuni, Dell'Orto, or Amal; Tillotson, Bendix or Keihin. by VICTORY LIBRARY Page 3 of 40 Don't try to use a 1% or 2" SU, S&S, or Weber. Certain 1Yz" Linkerts are good, but be very careful about which one you use. Don't run without an air filter (unless you like rebuilding motors!). "K&N" brand is very effective, with no loss of power. Some of our modifications will require a slight carburetor adjustment, generally richer. On the Linkert, tum the idle and power screws out to do this. If you get a "pop" or flat-spot when the throttle is opened fast, this means you're too lean! Go richer until it stops. Be sure your plugs come out with a color between card-board and chocolate (no color at all is dangerously lean, sooty black is too rich). If you don't take the trouble to get your carb jetting on the money, you're wasting your time. Temperature A cooler motor is a faster motor (lasts longer, too). Never polish, paint or chrome aluminum heads glass-beaded or sand-blasted is best. For iron heads, use heat-proof black (not VHT!). Trikes especially may need an oil cooler - install this in your return line from the bottom of the motor to your oil tank. A cheap cooler can be made from a power-steering cooler from a Cadillac, police car, etc. (junk-yard); if you can find one. Make sure they're clean first, mount them where they won't block air flow to the cylinders, and be sure the hoses can't touch the pipes! I also suggest you add Marvel Mystery Oil to your gas; just follow the can directions. What this does is put some lubricant on your cylinder walls above the pistons, as well as your valve stems. This has a definite effect on engine tem perature (also helps it last longer). Gearing Strictly speaking, the chassis is not part of our discussion. However, note that ALL motor sprocket sizes are a compromise: speed against power. The smaller sizes (27-29 for a solo) greatly improve accel Stage II: Aluminum Heads If you don't have them, get them. They're a bolt on for any cylinder that uses 7/ 16" bolts (not Ys" studs!). If you can find #6 ("6" is stamped on the right side), use them; if they're #5 (stock 1940-45 & mili tary) mill them to #6 specs (take about .120" off the gasket surface). Use copper head gaskets. Check your parts manual for all the hardware you'll need. Re member that the head bolts may bottom out when your heads are milled; measure before installation, you may need a small washer as a shim above the Stage 111: Pistons Even if you use stock pistons, remember that how well the cylinders are prepared will have a big effect on your power. I prefer the last finish to be done with a Flex-Hone (2%" 180 SC). Use only honing oil (or Page 4 of40 "45 Performance", by eration, but reduce cruising speed & top speed, in crease engine noise, vibration, & wear, and generally reduce rider comfort. Most of my customers report that they are happiest with the largest size they can find (33 tooth can still be found, 34 is the largest available), unless they never use the machine on the parkway. The standard method of determining the maximum safe engine rpm is to calculate the point at which the pistons reach some set speed. This is considered to be 2500 feet per minute for cruising, and 4000 flm for top end. With the stock motor, these points arrive at 3934 rpm (for cruising), and 6295 rpm (for shifting and top speed). If you consult my chart "45-GR", you'll see that a solo needs a 33 tooth sprocket to cruise at 71 mph (which is reached at the 2500 flm limit, assuming a rear tire of 26" diameter). The theo retical top speed with this sprocket is 113 mph, which is probably not possible due to insufficient power in the case of a mild motor (should take about 40 hp, still within the range of a stock-size motor in a high state of tune (big cams & carb, relieved, big valves, high compression, etc.). 100 mph, however, is possible, with 3 require ments: » Big sprocket (a 29 tooth will just make it, and will have the best acceleration up to 100, but makes an uncomfortable cruising machine) » Heavy valve springs to allow enough rpm (radical cam timing is not necessary for this, but is helpful in the next Stage) » Enough power; about 30 hp will do it That's about the whole list of what can be done without taking the motor apart - remember that a careful tune-up is always the last step. Next we will work on only the upper end; the motor can remain in the frame, etc. thick protective washer (always ·used between the bolts and head surface). Torque all the bolts to 20 Ibs. First, then do them all to 30, then 40, then 45, and let it sit overnight. Try them all again at 45 Ibs. The next day, and re-torque them after the motor warms up the first time. They take the old-style large (18 mm ) plugs. Please note: WR, K or KH heads do NOT fit your motor - don't waste your time & money. Next we will take the cylinders off; the motor can still remain in the frame, etc. motor oil) while doing this - never Safety-Kleen fluid, kerosene, gas, or any other thin liquid! When finished, clean the walls thoroughly with detergent, rinse care fully, then blow dry with compressed air. VICTORY LmRARY May 15, 2005 A white cloth passed down the bore should show no marks! Do not bother to polish the piston dome, as it will have no effect. For best results, put 1000 miles on the motor before using full throttle. The best pistons are (in this order): 1. KJKH replacements, which are slightly too tall for your cylinders, but will work fine with a thin (1/ 16" or so) shim of aluminum stock under the cylinders as a spacer. Be sure that the pistons are at least .020" down from the top of the cylinder at their highest travel! 2. Stock late (1955-73) pistons, or repro using late, thin (1/ 16") compression rings. 3. Stock early & military pistons using thick e/32") compression rings. Rings For best results your ring end gaps should come as close as possible to the minimum specs listed in our data table. Most ring sets will fall on the loose end of factory specs (.020" or so). If you have a loose set (all .015" or more), try to average them out - don't put both the tight compression rings in one cylinder. You may wish to use the next oversize ring set (that is, use a set of .020" oversize rings with your .010" oversize pistons, etc.). This will tighten up the end gap - more than you think! Adding .010" to the ring size will close up the gap by .031" (formula for circumference of a circle: C = I1 * D). In all cases this will require you to carefully file or grind material from the end of each ring in order to obtain the proper minimum end gap. If you don't have a ring compressor use popsicle sticks or something soft to get the rings in - not a screw-driver! Even small marks on the rings perma nently damage them. Compression All side-valve designs are limited to fairly low compression by the chamber shape. More compres sion will help, up to about 6.5-1 (if it can be done without hurting breathing). Besides high-compression heads, another way this can be done is by milling some material right off the top of the cylinders. For some very complicated reasons, this works better than you think. The amount to remove is just enough to leave .021" between the top of the cylinder and the top of the piston at TDC. This will bring the piston to .040" of the un derside of the head when at TDC (assuming a head gasket thickness of .019"; use you own gasket thick ness to do the math). If you're going to put in fresh pistons, bore the cylinders now, put in the new pistons, then measure the distance between the piston and the cylinder's top surface at TDC. Subtract .021", and mill off the figure you have left. For example: May 15, 2005 Distance from piston to cylinder top (@ TDC): .075" Subtract clearance: .021" .054" Remainder to mill off top surface: If you prefer not to go through the measurements, I'll cut out the math, and say that in almost all cases it is safe & advisable to cut .030" off the top gasket surface (any big automotive machine shop can do this). This must be done before any valve seat work or relieving! Big Valves A larger intake valve is very useful. A WR or K valve is easy to install by cutting the existing seat to about the same size as the valve head (be sure the seat angle is cut correctly - the WR is 30°, the K is 45°, like you have now). You can make a good valve from auto parts (see Page 16). 18071-41V valves (available from KNS Cycle) are lighter than stock, and come with complete instructions and all necessary parts. In some cases, one edge of the new valve will just touch the pocket in the head (directly above it) when the valve is fully open. A little metal can be easily re moved from the pocket with a Dremel tool to cure this. Cut your existing seats to the same size as the OD of the new valve head, at the same angle (300is best for air-flow; if possible, re-cut the valve to 30° 1st). Narrow the seat from the inside @ 70° to .080" width. If they're in good condition, your old exhaust valves can be improved by narrowing the seat area to about .100" wide (from the inside). Use a shallow angle to remove as much metal as possible without cutting into the radius where the stem joins the head. Use a 200stone (or the factory relief cutter) to narrow the seats in the cylinders from the outside to 1.58" OD (smaller than the valve OD), and then from the inside with a 700stone to .080" wide. Oil H-D's new bikes all come with 20W50 oil - I like it for all-round use. It makes the motor easier to kick over in cold weather. For hot weather, (over 80°), use H-D 105. If not available, use a good Pennsylvania type 60 wt. Such as Kendall, Quaker State, Wolfs Head, Valvoline, etc. The best oil is marked "For Service SG" on the can (this is the highest current test standard). For low temperatures, use 40 wt. Change the oil at least every 2000 miles, more often if you have no air cleaner; change the filter (if you have one) every other oil change. If you want to know what's going on in your pump, don't bother with a 100 lb. gauge screwed directly to the motor - your normal reading will not exceed 113 of the scale, the vibration will shorten the life of the gauge, and you won't be able to read it unless you hang half-way off the bike. "45 Perfonnance", by VICTORY LIBRARY Page 5 of40 The smart thing to do is to replace your oil pres hidden).Give your feed pump a check-up for dirt, bad sure sending switch (on the back of your cam cover) springs, etc. Make sure all lines are free of kinks and with a Ys" NPT close nipple and a female T. Put the sharp bends, and do not go within 1" of exhaust pipes sender back in the 2nd leg of the T, and install an or cylinders. Installing a "Z"-modified rotor will help power electric sender in the 3rd leg. Now you can put a good 60 lb. gauge anywhere you want, without a leaking and oil consumption, but this is very difficult to do hose leading to the gauge (just a single wire, easily with the motor in the frame. Stage IV: Cams The limit is the cam cover gasket surface. No head down the length to .001". Remove the old cams, and or cylinder modification is needed, although stronger measure them. Be careful to record the exact number and position of each shim on the old cams. Use what valve springs are recommended. If the new cams are on hand, measure each cam ever shims you need to get the same end-play on the across the thrust ends (where it touches the bushing replacement cams on as the originals. If not sure, use flanges) with a micrometer or dial caliper, and write the factory specs. 45 POWER II }) use big intake valves Purpose The following material is intended to assist the » use the best possible coil (especially if still 6 volt) serious mechanic in obtaining the best performance » use an oil filter of some kind from his 45 motor. I'll begin by assuming that you are }) use new & heavier valve springs every time the already familiar with the factory service manual, motor is apart engine assembly procedures, and have at least some » have maximum weight removed from the chassis » use a larger intake manifold (WLD or UL as a acquaintance with hot-rodding. This is not going to be another one of those guides minimum) on how to construct a hot motor by using factory Intake Manifold Even the solo (largest factory) manifold is too racing parts. Those parts work, and in many cases are very useful, but are rapidly becoming very expensive, small for our purposes. If you insist on using this, use as well as difficult to find & identify. When I refer to a spacer between the manifold & carb to increase motor parts in this booklet, we are talking about stock manifold volume, and enlarge the passages. Remove military, solo or trike parts (WLA, WL, or G), unless I the "V" separating the 2 port legs as much as possible say differently. (stop before you break through). JB Weld, Devcon Using only std. parts does reduce the maximum etc. can be added to the exterior to allow more interior power potential to some degree, but careful selection, enlargement. For best results, locate a ULlWLD (3 preparation, and modification of these parts can nearly bolt) or WRIKIKH (4 bolt) manifold and prepare it in double power output. Since these parts are still avail the same way. Both of these require adaptation (not a able for the right price, you'll have no problem with bolt-on); this is generally done by using a hose be spares. tween the bare manifold leg and the outside of the The following are useful, but are fairly difficult intake nipple. Besides the larger size, the 4 bolt mani and/or expensive for the help they offer: fold allows the use of any pan/knuck carb adapter » magneto (even the Morris has no advance mecha (same bolt pattern). Try to enlarge the port opening nism) and close up the manifold leg to the same size to make » belt drive (severely limits choice of drive ratios a neatly tapered transition. If dual carbs are desired, and top speed) new ports can be machined into the cylinders (see » Linkert WR MR-3 or MR-4 carburetor (only about "2PORT" for details on this operation). 32mm) Carburetor Every 45 high-performance motor should: All Linkerts are too small, even the M-74B (yes, » be relieved this is even larger than the factory racing model such » have minimum deck clearance as MR-3, etc.). If you insist on using a Linkert, try to )} use aluminum heads get aM-53, M-53A, MR-3, MR-4, MR-4A, or M-61 » have the front case baffle removed & skirt oilers as these are the closest factory models to what you'll installed need for your motor. Even a stock-size 45 (meaning » have altered breather timing (see "BT-HP" for one with stock stroke and a normal piston oversize) can use a larger carb to good advantage. details) » have at least 6-1 compression Page 6 of40 "45 Performance", by VICTORY LrnRARY May 15,2005 A motor with big cams, K manifold, etc. can and elevated engine temperature. The quick cure is to mm successfully use a 38 Mikuni, or factory Bendix, retard the spark to nearly TOC, which also raises the Tillotson, or Keihin. I have also seen 1%" SUs used temperature even higher and kills power completely. (early Jaguar etc.) such as H6, HS6, HD6; also Rivera Ricardo reasoned that the problem could be cured Eliminator. by cooling off the far end of the chamber. This is done Remember that the demand of a 45 motor is noth by placing the 2 surfaces (the top of the piston dome ing like that of an overhead (shovel, Sportster, etc.) and the underside of the head) in very close proximity even if the maximum power is close. A hot 45 has (allowing only a safety margin to allow for heat ex much less low-speed vacuum, and will need much pansion and component flexibility). As the gas be richer low-speed circuits to operate in traffic. Count comes excited by the combustion process, these two on re-jetting any carb that was used last on a bigger surfaces approach each other, and the gas loses heat to motor - just because it works doesn't mean it can't be them very quickly (this is part of the reason why made to work much better. Accurate jetting is worth aluminum heads are so helpful). Finally, the distance more than a few extra millimeters of size! If you're between them becomes too small for any volume of going to use a Bendix or Keihin, get an adjustable combustible material to remain (the previous gas main jet, and the smallest low-speed (also called slow volume has been "squished" across the chamber back or idle) jet you can fmd. towards the plug to be burned normally). This turbu Combustion Chamber lence mixes the gas very efficiently, which improves The very basis for the construction of the flat-head the percentage burned (hemi motors such as the (or side-valve) motor is the "Ricardo Principle", shovelhead and Chrysler are fairly bad at this). patented by Sir Harry Ricardo around 1923. The idea Pistons was to design a combustion chamber that would per Unless the cylinders have been milled, you should mit a reasonable compression ratio which would func be using WR, K, or other high-dome pistons (such as tion with normal low-octane gas (which the previous 22255-52A) to improve your compression and com IOE type would not do, such as the JO & Power Plus). bustion efficiency. If your cylinders' head-gasket The problem is that when the plug fires, the burn surface has been milled by at least .050", you may be ing process should progress from the electrode across able to get by with standard-type 45 pistons - check to the chamber at a predictable rate (like lighting a fuse). see that your deck clearance is .060" or less (remember However, when the compression ratio reaches a cer to allow for your base-gasket & head-gasket thick tain number (depending on fuel quality, bore size, nesses). Try to use pistons with I1t6" compression rings, as these provide a better seal at high engine speeds. material, etc.) several undesirable things occur: » a pressure increase takes place throughout the There is some advantage to preparing the skirts with Kal-Gard Piston-Kote, (easy to apply, bake it on entire chamber due to the increased gas temperature » a shock wave crosses the chamber like a ripple in your toaster oven). This reduces skirt scuffing & friction somewhat, and reduces motor temperature effect » a heat wave crosses the chamber by radiation and slightly. The dome (above the top ring land only) can be increases the temperature of the gas on the side away glass-beaded for texture (mask off the ring lands with from the plug When these take place, the gas opposite the plug . tape first), and given several coats of white VHT paint, then baked to cure it. This also helps motor spontaneously ignites, causing a violent jump in pres temperature a bit, and is also worth some free power sure BEFORE the piston reaches TOC. This is re ferred to as knocking or pinging, and quickly results it prevents energy from escaping from the chamber by in damage to the head, dome, rings, pin, rollers, etc., soaking through the aluminum. Compression ratio vs. Combustion Chamber Volume 61;4-1 5I,4-1 6~-1 Compression Ratio 5-1 5~-1 5%-1 6-1 4.10" 4.30" 5.01" 4.75" 4.51 " std. bore & stroke 5.64" 5.31 " 67 cC 74cC 70cC 82 cc CC 92 cC 87 cc 78 cc 4.19" 4.39" +.030" bore 5.76" 5.12" 4.85" 4.61 " 5.43" 69cC 76 cC 72 cC 84 cC 80 cC CC 94 cC 89 cc ratios. To use this, look up your motor size first, then Compression The chart indicates combustion chamber volume your desired ratio, and mill your heads to obtain the (in ccs & cubic inches) for the std. size motor and volume shown. May 15,2005 "45 Performance", by VICTORY LIBRARY Page 7 of40 As an alternate, look for your present volume, and find your actual ratio. Remember that the volume includes: » deck clearance (minus pop-up dome volume, if present) » valve seat and relief area » gasket thickness head volume (including pop-up relief, if present). Cams What we want for a practical motor is the most lift possible (.375" - .425" at the cam) with moderate duration to keep a broad torque range. There is an old saying in motor racing: "Horsepower sells motors, but torque wins motor races!". Still true today. The roller tappet limits you to what is currently on the market for H-D motors. Most of these grinds are for overheads, and have little or no lift advantage over the stock 45 cams (.312" at the lobe; would produce .468" at the valve in a Sportster due to its rocker arm ratio). These motors also have much more compres sion than we can use, and generally have more cam duration (especially on the intake closing side) than is practical for a 45. Very long duration produces a shaky idle, "soft" low-speed power, and only offers a power gain at high rpm - about what you'd get if you used stock late 900cC Sportster cams. Andrews has a cam set for the WLDR but it's quite mild (dates to 1939), and may not offer much help. If you ask nicely, you may get them to make up a special pair of intake cams with a different lobe shape, such as their # 3 (246°, .360" lift), or "M" (264°, .413") at extra charge. The KKlKHK intake cam is an excellent choice; pay particular attention to the concave flanks (the lobe is a "figure 8"; the sides are slightly hollow-ground). KR grinds marked "A" on the lobe are also safe (about 288°, .395" lift), but have ball-bearing spin dles. You must press the cain & gear (I piece) off the old spindle, and install the spindle from a standard 45. A slot (Y7 round) must be ground in the correct place for the ignition ball on the #2 (rear intake) cam - just. match the slot in your 45 #2. The KNS Cycle 25506 37V (296°, .375" lift) is slightly milder than either of these 2, but can be made from any 45 cam in excellent condition; this and other 45 regrinds are available from KNS Cycle. I believe that a flat-faced lifter of the original WR type has advantages over the std. roller tappet. Of course, the cam profile is completely different - flat lifters must never be used on a roller-type cam! Valve Springs Any motor with improved breathing will develop power at higher speeds than the stock unit. In order to Page 8 0[40 "45 Performance", by allow proper valve action at higher rpm, a stiffer spring is needed. The 18201-52 spring set (which is about 30% heavier than the standard spring) offers some help in this area, but even more tension is defi nitely useful. If you have the larger 1930-38 VLIUL covers, you can use the super-duty springs (Crane, Crower, etc.). For this one you will also need some of the UL spring stack parts. The bigger covers screw right onto your tappet blocks, and are very attractive, but will require clearance grinding on your fins and cylinder base flanges. Valve spring efficiency is directly affected by the weight of all reciprocating components, including the tappet, adjuster, valve, collar, and locks. The locks are best left "as-is", both for safety's sake, and because very little material can be removed. The remaining components can all be lightened to some degree, and I strongly suggest that this be done in all cases. Since the 45 does not use rocker arms, there is no bending or wiping motion exerted on any component, and there fore they can be lighter than the comparable part in a pushrod motor, without fear of breakage or loss of proper valve action. The size of the hex on both the adjuster & lock nut can be reduced by careful grind ing. It is preferable to shorten the valve stems as much as possible first, and then trim the adjuster when the proper length for correct lash is known (the stem is a solid steel bar .312" diameter, the adjuster is only .270"). The diameter of the stem below the guide can be reduced on a lathe (very carefully!); remember to allow for your lift, don't touch the area on the tip end of the lock groove, and polish well as a last step. Part of the threads at the bottom of the adjuster can be cut off (once the length necessary for a proper valve adjustment is known, of course); leave enough to properly anchor the adjuster in the tappet body, of course. A carbide drill could be used to remove a few molecules by hollowing out the center of the adjuster. Metal can be removed from various areas of the tappet body. The collar can have material removed from its edge by drilling to "scallop" away ~ round holes; this is done by positioning the point of the drill immedi ately adjacent to the outer rim, so that Y7 the drill diameter falls inside the rim, causing a semi-circular cut (this may also be carefully done with a die grinder, etc.). A total of 4 holes is generally used; this still leaves sufficient metal to adequately support the spring without flexing. A substantial improvement to both weight & flow can be had by sleeving the existing guides down to .316" ID and using custom stainless valves with 5/ 16" stems. VICTORY LmRARY May 15, 2005 Manley does this sort of work (it may be possible to reduce the stem to .250" for even better results, but this is unknown as of this point). Flywheel Assembly A considerable improvement to acceleration & throttle response can be made by removing weight from the flywheels. This does not produce more power, it simply allows the engine to pick up speed more rapidly. The following effects can be expected: » better acceleration in 151 gear (less noticeable in rd 2nd, practically no change in 3 ). » best acceleration improvement in machines using small motor sprockets (more effect from a 27 than a 33, etc.). » slightly harder to kick through, due to lack of inertia to "carryover" into the compression stroke. » slight increase in carb idle setting may be neces sary to hold the motor at the same idle speed, due to more irregular pulses (most noticeable in motors with high compression). » slightly higher idle speed may be necessary to prevent motor from stalling, same reason. » more careful clutch operation will be required for getting away from a dead stop. » in general, the motor will run slightly rougher at low speeds, and be more prone to lugging. » slightly improved braking (assuming the clutch remains engaged), as the brakes do less work slowing down the flywheels. » shifting may be improved (with practice) as the engine will conform more rapidly to the rpm required after a gear-change. » engine will appear to respond to open throttle faster in neutral; do not assume that it is safe to lean out your carb - this effect will not occur in gear, and in some cases slightly richer mixture will be required. Connecting Rods If you wish, the sides of the rod beams can be polished along their length (not across) to remove potential crack-forming surface irregularities. Don't remove a lot of metal, only enough to get a smooth (not perfect) surface. The rods should be shot-peened afterwards if possible. Additional lubrication for the lower end can be had by cutting (filing or grinding) small notches (.020" deep by .060" wide) across the outside of the big ends of the rods. See the picture in the "Stroking" section. Bearings A small improvement can be made to the pinion side bearing assembly by simply reversing the outer cage, and installing 24 .250" x .270" rollers (in place of the 12 .250" x .550" used prior to 1955). There is no gain in bearing area, but the shorter length of the May IS , 2005 new rollers permit more mis-alignment of the fly wheels without scoring or edge-contact (as may occur during rpm ranges of imbalance, or extreme power). This same idea was used in the big twin beginning in 1954, and continues through today. Balancing Due to its relatively light pistons & rods, and the large rod-to-stroke ratio (1.95-1), the 45 does not suffer as badly as larger H-D motors from inaccurate balancing. However, an expert balance job will im prove high-speed smoothness, allow freedom from vibration, and more mileage between rebuilds. If you are stroking the motor, or altering the weight of the components to a large degree (Sportster rods, light ened flywheels, short-skirted pistons, etc.) balancing is necessary for best results. Various "balance factors" between 50 & 60% have been used for different pur poses; the larger percentages appear to be most useful in cases where the rod angle is the most severe (strok ers) or increased piston weight (this is very rare in 45 motors). Drag Racing The basic problem is that the motor tune-up specs, and chassis preparation for the drags are not useful for street purposes. The following observations will be of use to anyone anticipating a try-out. Use the lowest-profile tire & rim you can find (probably easiest to make up a separate wheel for this; a mid-size Jap hub with 16" alloy rim and nylon sprocket is our 1st choice). The idea is not only to change the gearing, but to reduce the gyroscopic effect of the wheel as much as possible for a good "gate". Stock-weight flywheels are best, as you will want to light the tire for take-off, which will require a strong shock.. Use a small motor sprocket. If you have good high rpm breathing, you should allow the motor to turn 6000 rpm in the traps. The exact tooth count will depend on the expected top speed, and rear tire diame ter. For example, if you think (seriously) you might reach 90 mph, and you have a 24" tire, you'll need a 30 tooth motor sprocket (using the stock rear wheel sprocket). This is a better set-up than a 27 tooth sprocket and 26" tire, as it will "launch" harder, even though the over-all gearing comes out very close. Run the motor as cold as possible. If it starts easily, shut it off while waiting to run. Run high pressure in both tires. In the front, it reduces rolling resistance. In the rear, it makes it easier to light the tire; this is what keeps your rpm & power up for best acceleration. The more cam timing you have, the faster your motor must tum during take-off. "45 Perfonnance", by VICTORY LIBRARY Page 9 of40 An auxiliary hand lever for the clutch may make for better control during take-off. Run the highest octane gas you can find, as protec tion against detonation (in the event you guess wrong on mixture or spark, etc.). Rich up your idle & part-throttle settings to allow for best response when you snap the clutch out. You'll also need a bit extra for a cold motor. The motor will take more spark in low gear than in high. If you have a hand spark control, consider short ening the travel to restrict it to about 5°. This will allow you to run (for example) 35° for take-off, and drop back to 30° when you make the 2-3 shift for better top end (and less chance of damage). Please note that these figures are probably safe for all motors, but are not best for all motors. Find your own maximum high gear setting by test! BIG INTAKE VALVES Purpose Any 45 motor being re-designed for high performance should be use larger intake valves. What can you expect to gain from this work? More power! The motor will pull harder on top end (much like with hotter cams, but without loss of low speed smoothness or gas mileage). Rather than search for obsolete factory high performance parts such as WR or K intake valves, we will use a common auto part. The intake valve from a pre-1963 Chevrolet or GMC 6 cylinder 235" or 261" motor, is an excellent choice. The head diameter (as supplied) is D'g" = l.875", exactly W' (.250") larger than the 45, the material is excellent quality, the stem diameter is about .001" larger than the original (your slightly used guides may be used, rather than replaced), and the shape is far better for air-flow than stock. The lock groove is for the common GM 11 h2" split locks. The new valve spring collar is 1W' OD, and is available in steel or titanium, and may be found used from many cam & speed equipment manufacturers but no longer in production. The only draw-back is the work involved. This can also be utilized as a method of restoring the breathing capacity of worn, rusted or pitted intake seats, which would ordinarily produce less power. After installation of larger valves, they will perform better than new. 45 Valve Modifications Sharp Top Corner 1/32" Radius Top Corner ~ .fS)USH fW)fUS KNS CyclelTRW Intake Valve Preparation All milling on the cylinder's top gasket surface for repair or compression increase must be completed before the new seats can be planned. A slight mill cut (by Bridgeport, etc.) off this surface is strongly rec ommended as a preliminary step. This increases com pression slightly, but (most important) reduces the piston-to-head clearance @ TDC to a smaller figure. Generally, taking between .030" and .050" off here will correct the sloppy original factory tolerances, and put the piston .040-.050" below the head's quench surface @ TDC. Page 10 of 40 Modified Stock Exhaust Valve Standard valve shape Face \ ~------------J- Margin Seat "45 Performance", by VICTORY LmRARY Radius May 15, 2005 Remember to include the head gasket's com and smooth with a file, then garnet paper, etc. pressed thickness in your calculations. This will also Some additional work can improve the valve a bit elevate the highest side of the existing seat area to - see the following pages for more details. flush with the gasket surface. This increases compres The lock groove is slightly too far away from the sion very slightly, and reduces the amount of work to valve head, and will not provide enough spring ten relieve this area. The edge of the new seat is also sion. For a stock or nearly stock cam, add .090" total closer to the bore opening, so that the relief is shorter shim thickness to each spring stack (inside the upper (less work again). cover, or between the cover and guide flange). For If you examine your aluminum head carefully, you more cam lift, deduct the added lift from .090" to get will notice that the intake valve pocket is larger than the shim total: new cam .375", std. cam .312", differ the valve head, but may not completely clear larger ence is .063". Subtract .063" from .090" = .027" valves "as is", and require minor trimming. shims. In any case, the springs must have at least The head diameter can be slightly reduced on a .020" between each of 3 coils when the valve is fully lathe etc. to 1 13 / 16 " = 1.8125" for slightly better torque open (total .060" before all coils touch each other). If and a potentially easier installation. this is not done, parts will break. The stem must be shortened from the lock end by The valve stem clearance in the guide should be %" = .750". Be careful: if not enough is removed, the .0035". stem is too long to permit valve adjustment. If too The new valve spring collar is too large to enter much is removed, the stem end will be below the collar the std. 45 cover. Since the std. 45 valve spring seats surface. If possible, re-harden the end with Kasenite, it on the inner ring, remove the outer ring completely. If or simply heat and quench. Dress the end square, flat using 1'14" special springs, omit this step. Parts Required Component Intake valve Valve collar Valve lock Shim 11/ " 1.25" OD, 11/32" stem Specifications 1.875" OD 1.25" x .030" 32 GM 11/32 " Mfg. & Part NQ TRWV2275 Crane 99916 TRW 623201 Term Face Margin Seat Bowl Stem Head Stub Guide Boss Roof Definition & Description Top of the valve opposite the stem; this part is inside the combustion chamber Small area between the valve seat and the face; it's parallel to the stem Angled part of the valve or cylinder that forms the mating & sealing surface The 2 seats align & contact each other when the valve is closed Port area immediately below the seat, roughly parallel to the valve stem Rod-shaped part of the valve that rides inside the valve guide Disc-shaped part of the valve that closes offthe port when seated End of the port where it joins the intake manifold (intake) or exhaust pipe (exhaust) Removable metal (iron, steel, bronze) insert that the valve stem rides in Raised area in the port that surrounds & supports the guide Upper curved part of the port leading away from the bowl into the port stub, when the cylinder is in normal assembledQosition The breathing capacity of the std. 45 cylinder (casting numbers 120-36 front & 120-361 rear) is chiefly limited by its design, not by the size of the ports. Once relieving has been done, additional flow capacity can be added by improving the efficiency of the ports. Intake Port The intake port begins where the intake manifold ends. The manifold is attached to the port with a nut and male-threaded nipple, approximately 1.19" ID. The nipple threads into the port, and secured by a rivet. The rivet protrudes into the ID of the nipple, and disrupts flow a bit. May 15, 2005 Porting There is no larger replacement nipple available, but a skilled machinist can re-thread the port, or bore it out to take the next larger (WLD, UL) nipple. The original nipple can be enlarged (die grinder, etc.) to about 1.28" ID. If you enlarge the nipple ID, you will have to trim or remove the "button" or inner head of the rivet. This will compromise its original function (no longer in tension), and reduce it to a mere locating dowel, as well as a potential air leak. If a nut & seal will be used you must leave the rivet body (stem) in place, as this prevents nipple rotation when the mani fold nut is tightened. "45 Perfonnance", by VICTORY LIBRARY Page II of40 It is not possible to enlarge the nipple radius (make the turn more gradual). Do not simply bevel this up ID to match the port diameter, which is to align with the seat, the larger the radius the better. The port contains some casting roughness, which can be larger. A smooth transition is the best we polished out. can do here. If the port can be made clean enough, Intake Valve An oversize intake Marine-Tex, JB Weld, Deveon, or silver Modified intake valve valve should be fitted solder, lead, brass, etc. can be added to form a fillet or radius here. This material (see Page 14). If the Sharp angle will come out if not attached to a surgi new valve is larger / to margin than 1%" = 1.75" (such cally-clean surface. In extreme cases, the nipple can be as the KNS 1Ys" = entirely removed, and a new stub or exten 1.875" oversize, or K sion (such as an EL, WLD or UL nipple) Model), it's possible to threaded or inserted into the enlarged cut the new seat at a Removed opening, or attached to the face of the 30° angle (in prefer by back-cut existing port opening by welding or braz ence to the original 45° ing. This stub should be a match for the leg seat), which improves L--_ _ _ _ _ __ __ __ __ _- ' of the larger manifold being used, such as flow. Enlarge the entire throat to %" below the seat to 1.650", and WLD, UL, etc. I suggest not using the blend the cut into the existing wall curvature. The valve itself (oversize or std.) can be improved by narrow larger UL nuts to attach the manifold, as the alignment is critical; I prefer O-rings or ing the seat face to .080" wide with a back-cut at a very shallow angle (as small as 7°). This cut should just touch the stem-to-head sleeves. The bowl (or throat), the curved tract radius, and remove the greatest amount of metal from the back of leading from the port below the guide up to the valve head. This reduces weight, and improves flow. Try to the valve seat is not well shaped. There are make the valve look more like a "T" in cross-section. Grind off many casting irregularities, etc. that would any raised numbers or marks on top of the valve. The outside require major work to remove, reshape, edge where the face joins the margin (at the top of the valve) etc. If an oversize valve is fitted, the bowl should be left at a sharp 90° angle - no radius or bevel. Polish the enlargement will take out a lot of this mate top. rial; blend the cut into the existing walls, Intake Seat see the chart to calculate bowl size. The seat (as fitted for the std. valve) is cut at a 45° angle, the The port immediately before & after factory recommended width being .125" (Ys"). A somewhat the guide can be slightly opened up on narrower seat is acceptable, with .080" the lowest safe figure. both sides to "make up" for the loss of area Narrow the seat from inside with a 60° stone to .080" wide, caused by the presence of the guide & then from the inside with a 75° stone. For more flow area using valve stem. This will produce an elliptical the std. valve, the bowl ID can be increased to 1.51", and the shape (from the original roughly round bottom of the cut blended into the ledge where the factory seat cross-section). The guide is about .565" machining stops. wide by .300" tall, for an area of about Intake Guide Boss .170 !n. 2• If applied evenly to the left & There is no "boss" or protrusion in the floor supporting the right sides, that's about .085 In? in area for valve guide. No substantial improvement is practical here. each side. A depression about .125" deep However, if the bowl is substantially enlarged, the area be can be cut or ground in each side of the hind the guide will be partially removed, and the ledge remaining port wall, centered at the top of the guide, should be narrowed by removing material from both sides only, and tapering off to blend in with the exist leaving the length of the ledge intact. Taper it on both sides with ing wall. The port is now elliptical, stretch the "long" axis aligned with the gas flow (roughly following a ing the sides to increase the area only line drawn between the guide center and the bore). where the boss intrudes into the flow. Do Making it "boat-shaped", with the leading (intake port) end this very carefully, or not at all. rounded and the trailing (bowl) end a smooth point. This has the The short-side curve (roof of the port effect of "streamlining" the guide, directing gas more easily stub) is too abrupt (bend is very sharp), around it with less resistance and flow disturbance, by using the and should be smoothed out to increase the remaining boss to direct gas around the stem & guide. Page 12 of40 "45 Performance", by VICTORY LIBRARY May 15,2005 Intake Guide This is shorter (less guide body in the flow area), and Taper the portion of the guide that protrudes into is 5/ 16" ID for those who would like to use a thinner the port itself to only 1/16" wall thickness at the top. valve stem for additional air flow, and some weight The guide body can be narrowed to 3/32" wall (mini savings. mum) on both sides, making it boat-shaped, with the Valve Sizes "long" axis aligned with the gas flow (roughly follow The intake & exhaust valve head diameters are ing a line drawn between the guide center and the #2 normally the same size as the outside diameters of head bolt). This "streamlines" it a bit, directing gas their seats (unless the seats are deeply worn or sunken, more easily around the stem & guide, with less resis etc.). To calculate the most efficient valve head di tance and flow disturbance. ameter for a given bowl size (or calculate how large to We're looking into the possibility of using another make the bowl for a given valve head diameter), first guide: the Manley intake for the thin-stem ORY motors. decide the seat angle, then the width: Seat angle 45° 30° Use Standard (best life, more accurate seating) Improved flow (shorter life) Valve head OD Seat ID + (width x 1.414) Seat ID + (width x 1.732) Seat ID Valve head OD - (width x 1.414) Valve head OD - (width x 1.732) Seat width Std. Minimum Maximum Intake .100" .125" .080" .125" Exhaust .125" .100" Exhaust Valve Exhaust Guide The guide should be left heavier than The stock size exhaust valve (1 %" = 1.625") is big enough (WR & KR race motors actually had even smaller valves). The std. the intake, as it carries more heat. The top valve can be improved by narrowing the seat face to .100" wide can be tapered off to 1/ 16", as suggested at with a back-cut at a very shallow angle (as small as 11°), as pic top of Page 3. tured on Page 16. This cut should just touch the stem-to-head Exhaust Guide Boss The boss can be narrowed by remov radius, and remove the greatest amount of metal from the back of the valve head. This reduces weight, and improves flow. Try to ing material from both sides only, leaving the length intact. Taper it on both sides make the valve look more like a "T" in cross-section. with the "long" axis aligned with the gas Grind off any raised Modified exhaust valve flow (roughly following a line drawn numbers or marks on top between the guide center and the #2 head of the valve to prevent / Radius here bolt). Making it boat-shaped, with the them from becoming hot leading (bowl) end rounded and the spots under full load. The outside edge of the face at trailing (pipe) end a smooth point. This the comer of the valve has the effect of "streamlining" the guide, (opposite the seat) should directing gas more easily around it with be back-cut 25° & radi less resistance and flow disturbance, by used a bit e/16" - Va") to using the remaining boss to direct gas make a smooth curve from L - -_ _ _ _ __ __ __ _ __ around the stem & guide. the margin (straight area) to the top of the valve, as indicated in the Exhaust Port picture, above. A high polish on the top will slightly reduce heat The bowl of the port directly below absorption. the seat can be enlarged slightly to 1.45" Exhaust Seat ID, with the cut going down into the The seat (as fitted) is cut at a 45° angle, the factory recom bowl area about W'. Blend the bottom of mended width being .125" (Va"). A somewhat narrower seat is the cut into the existing wall. You will acceptable, with .100" the lowest safe figure, as the valve's cooling find that this increase in diameter helps is largely through heat transfer to the seat. Narrow the seat inside the "short-side" radius. with a 60° stone to .1 00" wide, then from the inside with a 75° This is the curve on the side away stone. from the bore, that passes under the bolt For more flow area using the std. valve, the bowl ID can be hole and forms the "roof' of the port. increased to 1.45", and the bottom of the cut blended into the ledge where the factory seat machining stops. May 15,2005 "45 Perfonnance", by VICTORY LIBRARY Page 13 of40 The "long side" is the side closest to the bore, which contains the guide, and forms the "floor". The short-side curve is too abrupt (bend is very sharp), and should be smoothed out to increase the radius (make the tum more gradual). The port contains some casting roughness, which can be polished out. Be sure not to remove any metal from the machined 1~" ID pipe receptacle, located at the very end of the port stub. If this is disturbed, the pipe will not fit well, and exhaust gas will leak until it "carbons up". Do not drill the rear exhaust port to hold the pipe in place. The screw will rust & vibrate loose, and cause the hole to crack and break the casting. Best method is to weldlbraze a small tab (chain side plate is excellent) to the back (invisible) side of the pipe. Drill a hole in a thick part of the cylinder above the port. Use a 2-stroke expansion chamber spring to hook the 2 together. Paint the end of the pipe with maple syrup before assembly - this will carbon up immediately. RELIEVING Purpose The goal here is to improve the volumetric and thennal efficiency of the std. "45" combustion cham ber in the following models: 1936-73 R, G, W, WL, WLD & WLDR. This will be the limit of my subject matter; other breathing considerations are discussed in other booklets. What can you expect to gain from this work? More power! The motor will pull harder on top end (much as it would with hotter cams, but without loss of low-speed smoothness or gas mileage). Any 45 motor being re-designed for high-performance should be relieved. Most people also experience a modest drop in engine temperature, caused by increased exhaust efficiency. The only draw-back is the work involved, and a slight loss of compression (which can be compensated for, if you wish - see Page 8). This can also be utilized as a method of restoring the breathing & cooling capacity of worn, rusted or pitted cylinders that would ordinarily produce less power and run hotter. After proper relieving, they will per fonn better than new. Definition "Relieving" is the traditional term used to describe improvement of gas flow between the valves and the cylinder by selective metal removal. Most of this work is done on the head-gasket surface of the cylin der, the balance in the head itself. The basic idea is to fonn channels to guide & direct gas along the correct paths, so that all the gas entering the port may be drawn into the cylinder (and out again, of course) with minimal restriction, but without removing any more metal than necessary. To give you a better idea of the shape of the re lieved area, picture the gasket surface as a river map, as seen from above. Gas must flow easily from the intake valve seat into the bore opening, then back to the exhaust seat. The deepest part of the intake relief will lead from the deep side of the intake seat to the edge of the bore. The exhaust relief will lead back from the bore to the deep side of the exhaust seat. Page 14 of 40 Diagram A (page 4) shows all 8 bolt holes num bered in order of their placement in the cylinder, and references to the bolt locations will be made in the text ("B 1" = Head Bolt # 1, the top motor mount bolt on both front & rear cylinders) to give you a better idea of where we are. BI-B2-B3 are around the intake seat, B3-B4-B5 are around the exhaust seat, B6-B7 B8 are around the bore. The head-bolt numbering sequence will be counter-clockwise on the front cylin der and clockwise on the rear cylinder, so that the same bolt will refer to the same area on both cylinders. The preferred tool is a die-grinder, Dremel, etc. equipped with a W' carbide or abrasive bit. Once the general shape of the pattern to be followed is under stood, anyone with a steady hand and good judgment can do a decent job. I will deal with the cylinder, head and compres sion as separate topics. Cylinder, Preparation All valve-guide, valve seat and compression mill ing work must be completed before you begin reliev ing. In most cases, it is desirable to install slightly larger (KNS Cycle, K-Model, etc.) intake valves. Not only will this improve the breathing by itself, but also elevate the seat area to flush with the gasket surfaces. The new seat is shown in the photo ¢. This increases compression a bit, and reduces the amount of work to relieve this area. "45 Performance", by VICTORY LIBRARY May 15,2005 The edge of the new seat is also closer to the bore opening, so that the relief is shorter (less work again). If you examine your aluminum head carefully, you will notice that the intake valve pocket (BI-B2-B3) is larger than the intake valve head, and will clear most larger valves "as-is", or with only very minor trimming. The first step is to get the correct tools. An air die grinder is fastest (also most likely to cause mistakes). An electric die-grinder is fine (Sears Craftsman Indus trial model is an excellent buy for the money), just a bit slower. A Dremel is going to take longer due to the smaller motor. The best bits are carbide (don't bother with "high-speed steel", etc. as they will quickly become dull), and are available in a wide variety of shapes. I use a W' cylindrical bit for roughing out work. They're expensive, but unless you drop it, it'll last a long time and cut through iron like cheese. For small curves, radii, etc. you may find abrasive bits helpful; I use 1" ball & Y;" cone shapes a lot. "Cratex" and abrasive cartridge rolls of various sizes are useful for finishing work (use low speed for these). You will not need finer polishing material than 240 grit, as a satin-smooth finish is quite sufficient. You must wear eye protection when doing this work, for obvious reasons. Be sure to use ear protec tion as well (shooting muffs, etc.). Wear a dust mask, abrasive dust is hard on the lungs. Layout Begin with an absolutely clean gasket surface. Completely cover the gasket pattern with a single layer of duct tape; use a rolling pin, etc. to make sure it's firmly attached. Feel with your finger-tip for the head-bolt holes, and cut through at least 4 of the holes using an Exacto, utility knife, single-edge razor blade, etc. Take a copper head-gasket (used, in good condi tion OK), and very carefully position it on top of the cylinder, being certain to line up the bolt holes all around. Now, trace a line following the inside surface of the gasket. Trim off the tape inside the gasket. Carefully peel it back, and discard. Only the exposed surface may be relieved, and the remaining tape will offer good protection against accidents. If you prefer, use Dykem, etc., coating the cylinder top surface as per product directions. Spray paint may be substituted - lightly spray the top surface from directly above. Wait 5 minutes, then remove the gasket. In the case of Dykem, you now have a line separating the area need ing work from the area that must not be touched. If paint is used, only the painted area may be cut. You may find it useful to apply masking tape to the head gasket pattern to protect it from accidents. The area inside the gasket is the absolute limit to the reliefs in any case, but please note that not all this May 15,2005 area will be cut. The bore outline that is not relieved (B7-B8, etc.) should be chamfered at a 45° angle, 1/ 16" deep by 1/ 16" wide, especially if a "pop-up" piston relief is ma chined into the head. Removing additional metal that does not directly affect flow is a negative. Some conunon layout errors are: » Shallow side of the relief is cut to the same depth as the deep side (i.e., cuts are parallel depth to gasket surface). » "Wedge" area (triangle @ B3 at the gasket be tween the 2 seats) is removed, reduced, etc. » Deep side of the intake relief is made full-depth all the way to the head-gasket line @ B 1. » Shallow side of the exhaust relief runs all the way to the gasket surface between B5 & 6. When trying to decide how extensive to make your reliefs, remember that it is easier to remove metal than to put it back!. If not sure, do a mild job as shown in the photo (shown, left; this is aU-Series cylinder for reference only; don't copy this). You can always do it over when the top end is off. The most frequently made mistake is doing the 151 cylinder to the max, and not having the patience to do the 2 nd one to match it. Any relief at all is a big improvement, and the first metal you take off has the greatest effect. As you have noticed, the valve seats are not paral lel (flush) to the gasket surface. This is because each cylinder is at a 22Y;° angle from vertical (45° angle to each other), but all of the valve stems, guides, tappets, tappet blocks, etc. are at an 18° angle. The resultant misalignment is 4Yz°, which is the "tilt" of the seats in relation to the gasket surface. This is true in all H-D side-valve motors (except WLDR "40A Special", WR, K, KH & KR, which have even more complex alignment). "45 Perfonnance", by VICTORY LIBRARY Page 15 of40 The deep side of the intake relief will follow the head-gasket pattern most closely where it passes nearest to B 1. The absolute deepest part of this relief is located approximately 3/ 16" in-board of the gasket at this point and rolls uphill @ 4S0 to the gasket line on one side, and angles up to the exhaust relief much more gradually (parallel to the valve seat) on the other side. Please note that this will cause an inward curve to the relief (as shown, seen from above). Aside from this specific area, the remainder of the relief is "aimed" at the piston. When in doubt, go slowly. The front & rear cylin ders are mirror images of each other (exactly alike, but reversed), and must have matching reliefs. Alignment The alignment of both the intake & exhaust reliefs is intended to direct gas flow between the leg is parallel to the valve seat, and only 4~0 (nearly center of the valve throat opening and the center of the flat) to the gasket surface. bore. They will follow and be parallel to an imaginary Limits line connecting the center of each valve guide to the The relief begins as an outer circle concentric & center of the piston (use your actual piston by inserting parallel to the valve seat OD, but Ys" larger in diame it in the bore at Top Dead Center - most have small ter. This means a flat ring 1/16" wide all around the machining marks indicating the center still visible). valve seat. On the deep side of both reliefs, a 4So cut As mentioned above, the valve seats themselves rises from this ring toward the gasket surface. are not flush with the gasket surface, but are inclined Moving outward from the valve, the next step is a at a 4~0 angle - your reliefs must be at the same non-concentric circle, offset to the deep side of the angle. As seen from the bore, they will form shallow relief. Outer limits of reliefs around the valve seats are "V"s. The short leg is at approximately a 60° angle no larger than: toward the gasket side of the intake relief. The long Position Letter Intake Seat Exhaust Seat Deep Y-t" Ys" away from intake relief D 3 11/ / " Rear R 16 16" Shallow Ys" away from exhaust relief 11/ 16" before rising to gasket surface S The outer edge of the relief must not be too far metal here (and especially in the head) will hurt both away from the valve seat. The chamber wall straight compression and flow. ens and steadies the gas flow, so removing too much Specifications, Cylinder Distances given are from the shaft of an installed head-bolt to closest edge of the relief. B3 is at the "Wedge". B7 & B8 are around far end of bore - no reliefs. Intake Relief for 1'/8" KNS valve to: Bl Ys" .12S" 11/32" .344" B2 9/32" B3 .281 " 1 Exhaust Relief for std. valve to: 9 / 16" .S63" B3 7 / 16" .438" B4 ~" .SOO" BS ~8" .62S" B6 Maximum width of relief channels between seats and bore: 1 1 Page 16of40 "45 Performance", by VICTORY LIBRARY Diagram A May 15, 2005 Valve Type HeadOD Intake (OD +%") Exhaust (OD + 31 16) 45 Std. WR, K, KR Std. KNS Oversize Valve 13 1Yg" 1%" (1.625) 1 / 16" (1.8125) (1.875) 3 2" 2~" (2.000) 2 / 16 " (2.19) (2.25) 1%" 113 / 16" (1.813) (1.75) Maximum depth of these reliefs is the lowest part the head diameter by .078459 (this is the sine of the of the valve seat OD (the outer-most part of the seat, valve inclination angle of 4'li°). For fresh, high seats which will actually contact the relief where they meet). (shallow end flush with the gasket surface), use the To calculate the maximum relief depth, multiply following chart: 1.875" (118) Valve Head OD 1.625" (1 %) 1.8125" (l 13 / 16) KNS Cycle Intake K -Model Intake Std. Intake & Exhaust Comment .147" .142" .127" Maximum Relief Depth Do not remove any metal from the roughly triangular area (B3) between the 2 seats and the gasket surface. This "wedge" is filled by part of the head. If done carefully, the wedge shape can be transferred to the gasket surface, and blended into the reliefs. The extent of the relieved area depends on a number of factors; among them are: » Size of the intake valve, as previously discussed » Valve seat condition (deeply sunk or rusted seats require deep reliefs; new or over size seats need less) » Have the cylinders been top-milled? If so, some of the factory relief machine-cut is missing. » Breathing capacity of the motor (bore & stroke? carb size? manifold volume? cam timing?) » Final compression ratio desired The reliefs should join the seat edges smoothly and gradually. For maximum effect, the relief should be this same depth all the way from the seat edge to the bore opening, although in very mild motors this is probably not necessary. Obviously, if the cylinder has had many valve jobs, or is in otherwise poor May 15,2005 shape, more metal must be removed to cut the reliefs down to the level of the sunken seats. Although this does reduce com pression a bit, the improvement in breathing far outweighs the slight drop in pressure. When planning relief depths, bear in mind that in no circumstance may the reliefs go below the highest point of ring-travel. If the rings are exposed, they will quickly fail, so try to keep the ring land @ TDC at least .030" below the lowest point of the relief. Remember that K, WR, strokers and other special pistons will not have the same ring land place ment as the stock 45 piston - take careful measurements. The edge of the relief should receive a rentle radius downwards where it joins the bore opening; (/ 16" is suffi cient); this is to prevent the sharp edge from becoming over heated by the flame and causing premature ignition. Generally speaking, removing all sharp edges inside the chamber is good practice. To avoid losing your "mirror" effect, I suggest working alternately on both castings: mark out each cut on both, do one, then the other before moving on to the next cut. If you cannot remove all grinding marks, remember that those run ning in the same direction as the gas flow are relatively harm less, but the ones that cut across this line are bad. If you must leave any surface roughness, end with light strokes in the same plane as the gas flow (parallel to it). Head Heads are (sometimes) marked outboard of the mating surface with a number to identify the compression ratio. I assume you're using aluminum heads, which are only made in High & Medium ratios. If a 2-digit number is present, this is the chamber volume, in cubic inches: "4.5" (High, 6-1 com pression), or "5.5" (Medium, 5-1). Original aluminum heads may also be marked on the right (cam) side with the actual ratio, "5" or "6". Both heads must have the same volume & ratio after all modifications are completed. Welding If any welding is to be done to repair plug thread, mating surface, or fill breakage do this first. Milling for compression, mating surface truing, etc. can be reserved for post-relief to balance out chamber volumes, or raise the final compression ratio to the desired level. "45 Perfonnance", by VICTORY LIBRARY Page 170[40 For extreme efforts, additional aluminum may be added to the walls to "close up" the chamber, especially around the valve pockets, both to improve gas flow, and increase compression. If you find that the wall of your head is more than 1/16" away from our planned relief outline, you may wish to do this. Especially important is the "Wedge" (B3), which should match & cover the triangle of flat (gasket-height) surface of the cylinder bounded by the intake & exhaust reliefs, and the gasket outline. If the existing Wedge is smaller than this area, or the point is irregular, add heli-arc to correct this. A light surface cut or mill is necessary to correct warpage if welding has been done! Pop-Up For motors with pop-up (1948-51 WR, K, KH, and converted 45s), some re-shaping of the last edge of the "trans fer" (where it touches the dome relief cut) is helpful. Undercut the wall slightly with a 'l4" radius cutter, so that the curve ends point ing down. This is a 1948 51 WRhead. If you wish, a major re-shaping of the transfer will be help ful, but very difficult. If your pop-up relief cut is already done, you will have to clean it up a bit when you're done. If you haven't done it yet, make it the last step. The transfer is the scooped-out curved area (above the piston) that directs gas down into the bore. This cannot be removed, but its size, shape and location (and that of the squish ledge above the piston) can be dramatically altered without loss of effective gas flow area. This is done by adopting the pattern used in the factory pop-up motors, and transferring it to the mating surface. A great deal of heli-arc welding is required here, so a head already damaged by water, ring breakage, etc. is an excellent candidate. Do not attempt this unless expert welding is available. The remaining alteration will be very time-consuming, and is best left to ex perts with porting tools. Alignment To best way to accurately locate each head onto its cylinder is to lightly bolt them together (with the gasket you're using for a template in place), using all bolts. Reach down into the cylin der, and scribe a mark around the bore onto the head with a marker. Disassemble and inspect - is the mark accurately placed? If not, back off on all bolts and try to wiggle the head a bit. When you believe it to be as good as possible, re-assemble, and drill 2 holes 1/16" in diameter through the head & gasket, and Ys" into the cylinder deck surface. Ideal places for these are near B 1, and between B5 & B6 The depth will be about J,t~ - Ya" total. Try to get between the fins, and in the center of the gasket width. 2 old (dull, broken) 1/16" drills or pieces of drill rod are now used as locating dowels Page 18 of 40 "45 Performance", by to be sure every assembly goes together the same way; it also exactly places your gas ket/template on the surface for accurate transfer. These dowels will not be used when assembling the motor - remove them after snugging down the bolts a bit. An outline should be scribed or marked on the mating surface, using the same head gasket as a template. Inboard of this, a tracing of the actual relief area is transferred from the cylinder to the head. Remember to use the matching cylinder, front or rear! This is easy to mix up, as the tracing will fit both if flipped over. Do not remove any metal from the point of the "Wedge" that separates the intake & exhaust pockets. This is necessary to direct flow out of the bowl & seat area as the valve opens. Do not use the head-gasket as a guide here. Leave the actual mating surface of the wedge completely intact, although the walls of the pocket may be straightened. With the mating surface up & absolutely horizontal, cut the chamber wall straight back to match the intake relief on the deep side (cut is 90° to the mating surface). Do not cut the pocket back to the head gasket outline. The exhaust relief (shallow side will be closest to the mating surface) will probably fall inside the existing cham ber wall, but check to be sure. Again, do not move the wall of the pocket back. Do not touch the mating surface at all between B5-B6-B7. This area does not need help, and the squish area must remain as large as possible. Cutting the wall back vertically to the existing edge of mating surface (not the head-gasket surface) be tween B5-B6 may help a bit if you need to "lose" some compression, but don't move the edge back. The "pocket" or recess for the intake valve must be deep enough for the valve to go to full lift (see your cam specs) + .120". The exhaust valve pocket only needs full lift + .080". These figures are not for safety, but to allow gas to use the area above the valve for added flow. If not deep enough, this can be done with a Bridgeport, etc., or by hand with a large end-cutting bit in a die-grinder. Blend the new floor(s) into the chamber wall; Va" radius is fine. VICTORY LIBRARY May 15,2005 Be sure that the new "floor" (actually the ceiling) is flat, and parallel to the old surface, which is "tilted" 4'li° to align with the valve head. The chamber wall can also be undercut a bit to move part of it away from the valve head. This cut can be up to 1/16" deep for intake, 1/32 " for exhaust The cut Valve Pkt. Depth BI B2 Intake Lift + .120" VB" Exhaust Lift + .080" NA NA NA = not applicable. B3 is at the Wedge. B7 & B8 are around far end of bore - no reliefs. Compression This is very complex, as best peak power in hot motors comes from compression ratios of 6'li-1 or less. As the power potential of the motor falls, the maximum compression ratio rises. A 45" motor in a mild state of tune may use up to 6'li-l, but a relieved motor with big cams & K manifold should stick to 6 I. In all cases, the final ratio should be no lower than 5'li-1. Stroked motors can use higher figures, Y:z point or more. Any relieving at all will remove metal from the combustion chamber, and reduce compression. It's a Chamber Volume Milled Off Vol. Removed New Vol. .00LU~m. 5.5 LU.Jn. .000" (std.) .010 .10 5.4 .020 .20 5.3 .030 .30 5.2 .040 .40 5.1 .050 .50 5.0 .060 .60 4.9 .070 .70 4.8 .080 .80 4.7 .090 .90 4.6 .100 1.00 4.5 .110 1.10 4.4 .120 1.20 4.3 .130 1.30 4.2 Compo Ratio 5.5-1 5.75-1 4.75 Lu.ln. 5.01"UiTn. Chamber Vol., C.L 82 cc 78 cc Chamber Vol., C.C. These volume figures are not suggestions. They will be useful to match the compression ratios after work is completed. For smaller engines the higher ratios will not be practical in any case. Remember to add gasket thickness, piston deck clearance (or sub tract pop-up), chamber relief volumes, etc. to head casting measurement. See my booklet "MAGIC" for math details, or write me for calculations (make all May 15,2005 does not go to the mating surface, and will be invisi ble from directly above. Remove any sharp edges from the plug thread insert. Specifications, Head Distances @ B given are from edge of bolt hole to chamber wall Pocket depth is minimum B3 B4 B5 B6 NA NA NA trade-off, but you'll will always wind up with more power from less (rated or nominal) pressure with a relieved motor. However, in most cases you'll want the benefit of both, and will wish to increase the compression ratio to compensate for this drop. If you have high compression "6" heads, this is probably not necessary, but medium-compression (and military) heads should be milled for best results. This will not, repeat not change your piston-to-head clearance (except in pop up motors). Roughly, a mill cut off the gasket (mating) surface of a Medium head removes about .10 In.3 for each .010" of depth cut, as shown in the following chart. Remarks Original casting (nominal) Approx. "High Ratio (6.0-1)" volume Safe limit (mating surface flush with cstg.) 6.5-1 6.0-1 6.25-1 4.30 Lu.ln. 4.51 eu.ln. 4.10Lu-:m. 67 cc 74 cc 70 cC volume measurements, give bore & stroke, and I will supply the ratio). Remember that the only ways a relief can hurt you are: » Relief work has damaged the valve seat }) Relief extends into the gasket surface » Lack of symmetry (the front & rear cylinders do not match) "45 Performance", by VICTORY LIBRARY Page 19 of40 » Combustion chamber volume error results in more than 111 0 point difference in compression between the front & rear cylinders » Squish area is reduced » Wedge is removed, reduced, etc. » Piston ring travel appears in the relief area » Extreme roughness (waves, lumps, grinding marks, etc.) After the work has been completed to your satis faction, it is probably advisable to lap the valves in again, to "heal" any light scratches on the seating surfaces and insure proper sealing. Of course, the final step is a thorough cleaning before re-assembly. Note: the comments given here are believed to be accurate and reliable, and based on well-proven, time tested techniques and are safe & effective for all motors (if careful applied). I feel that modem air-flow research may be able to improve on this, but such developmental work is beyond my financial means. In all likelihood, other patterns & theories are effective (to a greater or lesser degree), but the ideas given here are taken from professionally-prepared motors, as well as interpolations from factory racing department drawings & instructions. STROKING Purpose All Harley-Davidson 45 motors 1929-1973 (ex cept XA) share the same stroke length: 3 131t6" (3.8125"), the same as 1952-1953 K & KK Models, 1953-1969 KR, and all 1957-85 900cC & 1000cC iron, and 1986-* 883 cc , l100cc & 1200cC Evo Sportsters®. The bore-to-stroke ratio of the 45 motor is radically "under-square" (the stroke is greater than the bore) and obsolete by modem standards, but the only effec tive method of increasing the displacement is to in crease the stroke, using "stroker" flywheels. This permits displacement increases of up to 59 In.3 or 970 cC with std. bore pistons. This is especially useful in motors equipped with big-port WLDR, WR and K-Model cylinders, as the increased vacuum, compression, and sharper rod angle will greatly reduce the normally "soft" low-speed response of these motors. My subject here is some of the more basic work involved in planning and installing these parts. I will not cover engine assembly in general; consult your service and parts manuals, as well as "How to Restore Your Harley-Davidson" by Bruce Palmer III. I strongly recommend that the breather timing modified per "BT-HP" instructions, and that the cylinders be relieved. Please read this entire article thoroughly before purchasing or modifying any components. Large strokes and/or heavier rods will require extreme re liefs to the cylinder mouth areas. Certain combina tions ofrod & extreme stroke are not practical due to severe interference with the crank-cases, case fasten ers, and cylinder base flange. For reading conven ience, I will refer to 1957-1985 iron-head Sportster® parts as "XL". Dimensions Each std. flywheel contains centered Va" (.875") tapered holes to receive the sprocket & pinion shafts. Rotation takes place around this shaft axis. The std. Page 20 of40 1.00" crank-pin holes are off-set from these shaft holes by 1.90625" (Y2 of the std. stroke of 3.8125"), so that the crank-pin & rods follow a different path. The amount of off-set determines the stroke length: Stroke Length = 2 x Off-set Distance This is the only dimension that affects the stroke. Rod length (although otherwise important) does not change the size of the motor. In addition to the obvious change in displacement, compression is also increased, and other functions are also affected. Selection of Components The total height of the assembled parts: 50% of stroke + rod length between centers + piston com pression distance with the new stroke must equal the total height of the motor: crank-case deck height + stroker plate (if used) + cylinder height + piston to head clearance. Changes in any dimensions must be compensated for in the other components. If the stroke is increased but the motor height remains stock, the rod and/or piston must be shortened to compensate for the stroke Increase. Certain combinations of stroke length, piston, etc. appear to offer the advantage of maximum size, when compared to other choices. It's important to keep in mind that re-designing the motor allows you to make other improvements as well. The most important of these is increasing the efficiency of the combustion chamber. Positive deck ("pop-up") pistons add power and torque to any size motor, and are well worth the extra trouble to calculate the measurements and do the machine work. No factory race or high-performance side-valve motor (including Indians) was built without this fea ture after 1948. Before making your final choices, remember that pop-up is almost certainly worth more power than an extra inch or two of displacement. "45 Performance", by VICTORY LIBRARY May 15, 2005 If given a choice between stroke alone, and stroke included with the flywheels, but available from S&S among others. Special pistons are required, which Flywheels S&S does not supply. Truett & Osborn of Wichita, Kansas produces 45 It is also possible to adapt commercially stroker flywheels which are direct replacements in all manufactured stroker flywheels intended for XL-type respects except stroke length. The material is 80,000 motors. Sources include S&S, T &0 & H-D factory psi ductile steel, far superior to the original factory 1954-56 KH (49/ 16,,) flywheels. I will not go into cast-iron. They are available in 4 7/ 16" (4.4375"), 4W' detail here, let's just say it's more trouble than it's (4.500") and 4%" (4.625") stroke, and other sizes are worth. available on request for additional charge. The T &0 Indian Chief 74 (4 7/ 16") & 80 (4 13/ 16,,) flywheels 45 flywheels accept std. 45 & WR parts, including Ys" have been used for a long time, but are not easily = .875" diameter sprocket & pinion shafts, 1" crank available, and require major modifications. pin & bearing assembly, and std. 45 rod set. Special There is also a H-D factory stroker flywheel that pistons are required, either modified std. pistons, or has been used in the past, but because of its extreme aftermarket sources (Arias, JE, Venolia, Wiseco, &c.). rarity it's not likely to be available: 1954 KHR (not Since T&O has made flywheels for H-D motors for 25 KH). All early (1939-196?) "R"-type flywheels have years, to avoid confusion in this article I will specify .875" shaft tapers, including WLDR, WR, KR & the new product for the 45 as follows: "T&0-45". XLR, but only this year has 4.5625" (49/ 16") stroke The only other available flywheel that fits the 45 and 1.00" crank-pin tapers, permitting the std. 45 or directly is the S&S Cycle Products replacement for "stepped" 1939-1954 WR 1 v,." pin (23960-3 9R) to be the WR, #32-3013 (stamped "KRS" + code # for used. The previous year (KR) is std. stroke, and the stroke length on the wheels for identification). The next year uses the much larger 1v,." tapered, 1W' S&S flywheels accept std. 45, WR & KR Ys" sprocket journal 23960-55R crank-pin. & pinion shafts, but require a special short 1 v,." (XL Flywheels specifically made for 45 use are avail diameter) crank-pin, which is included with the fly able from both T &0 and S&S in many stroke lengths, wheels. An XL rod set is also required, which is not but in my opinion the only practical choices are: 1j 5 Stroke, fractional 5" 4%" 4 7/ 16" 4~" 4 h6" 4 h6" Stroke, decimal 4.8125" 5.000" 4.3125" 4.4375" 4.5000" 4.6250" In.l 51.0 53.3 In.2 54.7 In.2 52.5 In.2 57.0 In.2 59.2 In.2 Size, std. bore + pop-up, go with pop-up. Size, CC Added stroke, fractional Added stroke, decimal Y7 stroke added Increase, % S&S code number 836cC Y7" .5000" .2500" 13% #3 861 cC %" .6250" .3125" 16% #4 Bame The ."baffle" is part of the crankcase casting, closing off the front cylinder opening (shown right), leaving only a slot for rod movement (as well as half of the rear cylinder opening in pre-war motors). In 45 motors I've measured, it's about v,." - 9/32 " thick (.25 .28"). Its purpose is to increase (not reduce) the amount of oil on the front cylinder wall, which functions as follows: oil is splashed from the pressure-fed crank pin bearings, &c. onto the underside of the baffle. As the front piston rises, a vacuum forms in the cylinder between the piston and baffle, causing vapor to rush up from the crankcase, carrying the oil with it and depositing it on the front cylinder wall. May 16,2005 "45 Perfonnance", 873 cC 11/16" 897 cC u/ 16" .6875" .34375" 18% #11 .8125" .40625" 21% #6 933 cC I" 1.000 .500 26% #7 970cC 1~/16" 1.1875" .59375 31% #8 The rear cylinder is more than adequately lubri cated by centrifugal splash from the rotating fly wheels, as well as oil removed from the flywheel's diameter by the crankcase scrapers. In early motors the rear cylinder half-baffle actually deflects some of this oil to prevent overloading the oil control ring (no longer necessary with more modem oil rings) . The baffle method works fairly well as far as its primary purpose is concerned: lubricating the front piston. However, this makes the front piston perform an extra function as an air-pump, forcing vapor in & out of the rod slot. This reduces power, and increases oil temperature. If the front baffle is removed (or even reduced), the vacuum effect vanishes. by VICTORY LIBRARY Page 21 of 42 All later motors use some other method of oiling the walls; the panhead, shovel head, & Sportster® drain the rocker oil back through the cylinder, and on to the piston. The K-Model motor has an oiling port in the cylinder wall, pressure fed from the pump. The conclusion is clear - the baffle was dropped immediately when some other method of oiling the front piston was per fected. If you wish to modify your oil system to provide a pressure feed to the front cylinder (the rear is helpful but not critical) you will not only increase piston life and reduce cylinder temperature, but you will gain power by removing the (now un-necessary) front baffle. If you remove the baffle and make no other provision for front cylinder lubrication, increased temperature and wear will occur in street use. Motors operated at racing speeds only appear to do well without baffles, probably due to the high oil droplet content of crankcase vapor, which is not present at moderate engine speeds. At this point you must make a decision. If you wish to leave the motor as close to stock as possible and not remove the baffle from the front (or front & rear) cylinder(s), the motor will produce slightly less power (as described above). The dimensions of the pistons (at least of the piston to be installed in the front cylinder) will be different, in that the skirt must be short enough to safely clear the baffle when the piston is at its lowest point @ BDC. If you intend to, or already have, removed the baffle (compare your motor to the picture), I strongly suggest that you install some form of skirt oiling to the front cylinder. The front stroker plate (if used) is an excellent place to install a skirt oiler. The front piston will now look exactly like the rear piston, in that the skirts must be short enough to safely clear the outside diameter of the flywheel rim when the pis ton is at its lowest point @ BDC. This al lows approximately .25 - .28" longer skirt on the front piston. If in doubt, it's safe to shorten the skirt in any case. Pistons The problem is height. The additional stroke length causes the piston to rise farther up towards the top of the cylinder @ TDC by 50% of the stroke increase, and to retreat Page 22 of40 farther down towards the flywheel's rim @ BDC by the other 50%. The latter "down" distance can be "fixed" by shortening the skirt of the piston (below the piston pin), reducing the fly wheel's diameter, increas ing the rod length, or any combination of the three. The former "up" distance cures include taller cylin ders, "stroker plates" (spacers under the cylin ders), shorter pistons, shorter rods, or any combination of the four. There are no taller cylinders for the 45 (except 1954-1956 KH, which are very helpful, but are not discussed here), and stroker (spacer) plates would have to be extremely thick to make up this distance, which will interfere with the intake manifold, valve covers, 2-1 exhaust, spark plug access, head steady, valve stem length & alignment, etc. A shorter piston will have the "up" distance removed (com pletely or partially, depending on which other components are modified) from the piston's compression distance ("CD"). This is measured between the piston pin centerline and the top of the dome. The new CD should be less by ~ the stroke increase (except as noted). There is presently no specific stroker piston available for the 45. For motors with "pop-up" heads (1948 1952 WR, 1952-56 K, KH or modified 45 heads with a dome relief cut in the head), which I strongly recommend, custom pistons can be made to your specifications by lE, Arias, Veno lia, Wiseco, etc. The illustration (Page 32, View 1) shows a "generic" 45 piston at Top Dead Center (TDC). Please note that the dome is below the cylinder's head gasket surface, which is true for all 45 motors, except 1948-52 WR. The two dimensions that require examination here are the "compression distance" ("CD"; how tall the dome is above the piston pin, not the cylinder), and the "skirt length" (how long the piston is below the piston pin). The additional stroke length causes the piston to rise farther up towards the top of the cylinder @ TDC by ~ of the stroke increase, and to retreat farther down towards the flywheel's rim @ Bottom Dead Center (BDC) by the other K The latter "down" distance can be "fixed" by shortening the bottom of the piston skirt. There are other methods, but they aren't applicable to this installation. The former "up" distance can be cured by either of2 methods: 1. Shorter ("stroker") pistons are specially-made (or adapted from another application) with a shorter CD than the stock piston's by approximately ~ the stroke increase. "45 Performance", by VICfORY LIBRARY May \5 , 2005 The skirt is usually shortened by the same amount, so the piston is shorter from top to bottom than the stock piston by the full stroke increase. 2. "Stroker plates" are flat spacers (usually aluminum) that resemble the cylinder base flange, and are installed in be tween the cylinders and the crankcase to raise the cylinders. This places the top of the piston dome with the new stroke at the same position relative to the cylinder's head gasket surface (deck height) L..-_ _ __ _ _ __ _ _ __ that the stock piston was with the original stroke. The stroker plate thickness is approximately the same as the CD adjustment on a stroker piston: ~ the stroke increase. Since a base gasket is generally used between the cylinder base and the crankcase, the gasket thickness should be subtracted from the plate thickness for calculations. The gasket is frequently paper (.002"), and should be meas ured compressed (after tightening the base nuts) for the actual thickness. Do not use this drawing as a template - not to scale. In some cases, a combination of a thinner stroker plate and a different stroker piston may be used. The total height adjust ment remains the same, it's simply achieved by splitting the adjustment between two components. Stroker plates will make the entire motor taller, and also separate the front & rear cylinders slightly. This growth will slightly interfere with the intake manifold, 2-1 exhaust, spark o View 1 ~sket Dome Top " Surface Compression Distance Skirt Length I e- ~ In all three of the illustrations above, the piston dome and cylinder head-gasket surface have been placed at the same deck height for comparison. Note that the modified std. piston (View 2) has its piston pin at the same height as the stock piston (View May 15,2005 I ~sket Dome Top" I e- run: Ordinarily, compensation for the new, longer stroke must be made by shortening the piston skirt by 1'2 the stroke increase. However, that's the absolute outer limit it's not always necessary, since the stock piston has a little "slack" in it. You won't need to take off the whole 1'2, just remove enough for the bottom of the skirt to clear the baffle or flywheel rim by 1/16" @ BDC. Remember that in motors that still have baffles, the front piston must clear the baf fle, but the rear piston can be longer - it only needs to clear the flywheel rim. The illustrations on the following page (not to scale - I have exaggerated the differ ences to provide more contrast) will provide more detail. 45 Piston Comparison View 3 View 2 Stroker piston with reduced skirt Std. piston with skirt shortened from the bottom (only for use with length and shorter compression distance (stroker plates not needed) stroker plates) Std. piston l~sket Surface plug access, head steady, &c. A washer equal to the plate thickness between the upper valve spring covers and the valve guide flange lengthens the covers. If neces sary, use "lash caps" on the valve stems for some extra length. Modifying Stock 45 Pistons There are 2 different areas where the std. piston requires modification for use with stroker plates: the length of the piston skirt (below the piston pin), and a point on the bottom of the skirt where the pistons will contact each other @ BDC. I will explore these in order. » Skirt clearance to the baflle or flywheel Compression Distance Skirt length ~ Surface Dome Top " e- I Compression Distare I Skirt length ~ 1); the difference is the shorter skirt for flywheel and/or baffle clearance @ BDC. Compare the lengths at the piston's bottoms. This piston must be used with a stroker plate to compensate for the compression distance. "45 Perfonnance", by VICTORY LmRARY Page 23 of40 The 3rd piston (View 3) is a custom product (can't be made from a std. piston); note that the skirt length matches the modified piston (View 2), but its CD is shorter than the previous two. Compare the heights from the piston pins to the piston tops. This piston doesn't require a stroker plate. For motors without baffles, both front & rear pistons will look alike, and the skirts only need to clear the flywheel rim @ BDC. Since the stock pis tons safely clear the baffle now with stock stroke, and the baffle is about .25" - .28" thick, you may not need Rear piston, facing II ( 0 - Frontface ~ \ Missing Arc 7 ~ Skirt T Length ----.L to remove very much from the bottoms of the skirts of both pistons. Check the clearance yourself to be sure. » Skirt clearance between the front & rear pistons @ BDC: The leading (forward-facing) skirt of the rear piston will strike the trailing (rearward-facing) skirt of the front piston at or near BDC. The trailing skirt is the major thrust surface, and must be left as long as possible. Cut the leading skirt of the rear piston with a die grinder or Dremel, finished with a large, fine, Y2 round file. The picture shows the rear piston's front face after the cut has been made. The actual cut will be an inward curve, actually an arc of a circle with a radius of ~ the bore diameter: roughly 1Ys" for the 45, the mirror image of the skirt that will pass by it. Enough metal must be removed to allow a medium paperclip (about Ih6'') to pass between them as the flywheels pass through BDC. Remove any sharp edges. Remember that the pistons can't be reversed (faced the other way) or interchanged (front to rear) now. Mark the domes with an arrow for forward and "F" or "R" with a china marker. Special Stroker Pistons For "zero-deck" (no pop-up) heads, there may commercially-available pistons worth adapting, in tended for small cars* and larger Japanese motorcy cles. The 45 bore size is 69.72 mm , so look for bore sizes from 70_nmm. The domes that I've researched are too short (from the top ring land top the dome's upper surface) to be used as pop-up, and therefore cannot be used in a pop-up (WR, K, KH, &c.) installa tion. They will be only be useful in motors where size is the sole consideration. The top ring's placement Page 24 of 40 will also limit the maximum depth of the intake relief channel - the ring must not pass into the relief, but should be at least .030" below the deepest part of the relief @ TDC. Do not use a piston with a shorter CD than you need, this is extremely important. The motor will assemble without problems, but will have no power, overheat, and refuse to respond to adjustments. The KH piston is not a stroker piston, and will not help you. Truett & Osborn Piston T&O can supply a piston in std. bore and +.010", +.020", +.030", +.040", +.050", +.060" & .070" oversizes, with the proper compression distance and skirt length to safely accommodate their 47/ 16" & 4W' stroke flywheels. The skirt length will clear the front cylinder baffle, and the deck height will be approxi mately the same as stock. These pistons can be used with longer (but not shorter) strokes by using small stroker plates, &c. Ford Festiva Piston* The 71 mm Ford® "Festiva" (1988-94 with Mazda supplied 1300CC) piston is 45 std. + .050". The piston pin is strong enough, just the wrong diameter at .787", but a new pin bushing with this ID can be made & substituted for the original bushing, or the piston honed to H-D® size. The piston pin is off-set in the piston, and must be installed with the pin closest to the rear of each cylin der. KB/Silv-O-Lite can supply this in several sizes, as #3126. The dome contains a shallow depression, which should be removed for best results. It's about .040" deep, and a simple lathe cut will do this. Be careful not to distort the skirt when mounting it, and to make the cut flat to the dome surface. Again, a large, fine flat file may be substituted by the careful craftsman. Remove all sharp edges and lightly radius the dome. The CD (as supplied) is 1.12", compared to the 45 at about 1.469". After the .040" cut to remove the depression, the remaining height is about 1.080". The difference of about .389" requires a stroke increase of twice this figure, or +.778" to 4.5905". This will put the new piston very close to the original position as to deck height @ TDC (the distance that the dome is below the head-gasket surface of the cylinder). Since this is generally not close enough to the head's squish surface, some additional height is desirable, about .040-.050" in most motors. With this figure added to the height, the new stroke length is 4.67 - 4.69", or roughly 4"/ 16" . Unless some other adjustment has been made, use the next larger stroke (4 13 / 16"), and add a plate or shim (about .060") to compensate. " 45 Performance", by VICTORY LmRARY May 15,2005 If you prefer, a special (shorter) stroker piston can be made to your specifications by lE, Arias, Venolia, Wiseco, &c., in either normal negative-deck (piston dome is below the cylinder's head gasket surface @ TDC), or positive-deck ("pop-up", where the dome is above the gasket surface @ TDC, as used in 1948-1952 WR, 1952-56 K, KH). Shown on Page 34 is a 1952-56 K & KH model piston (22251-52A); the WR is very similar but dome is lower. A special piston will have the "up" distance removed from the piston's compression distance (completely or partially, de pending on whether or not you are also using stroker plates), which is not practical to do to a std. piston. The new CD should be smaller than the stock piston by the same adjustment calculated for stroker plate thickness, above. The skirt will also be short enough to clear the flywheel or baffle. To my knowledge, no manufacturer carries such a product, nor do they have the dimensions of the std. piston on hand. The custom piston you receive will be no better than the information and instructions you can provide to the manufacturer. Remember, your choice of whether or not to retain the baffle affects your choice of skirt length, and whether the two pistons are alike. You have a choice between old (wide) rings, or late (narrow) rings - narrow is preferred, if you can't send them a sample piston using late rings I think the data is available to them. You can also specify two slightly different bore sizes if your cylinder are slightly off no, it won't affect the balance, don't worry about it. Don't limit your choice to "normal" over sizes - they can make any size at all. I suggest an in-between size slightly smaller than the next oversize, such as .045" (rather than .050"), so that the .050" rings will be tighter, allowing you to set the final end gap by hand. If you go through the "deck height" steps, you'll have a pre cise figure to include with your sample piston, so the instructions to the manufacturer will be something like: "I need 2 pistons for a Harley-Davidson Model W air-cooled side-valve 750cc 45" V -twin exactly like the enclosed sam ple, except for the following changes: 1. reduce the compression distance by .XXX" . 2. shorten the skirts by .YYY". 3. the final bore size is sample +.045" (or exactly 2.800", &c.)." Positive-Deck Pistons It's important to keep in mind that re-designing the motor allows you to make other improvements as well. The most impor tant ofthese to increase the efficiency of the combustion chamber. Positive-deck pistons (which I strongly recommend) can be used by modifying 45 heads with a dome relief cut in the head. May 15,2005 "45 Perfonnance", by This adds power and torque to any size motor, and is well worth the extra trouble to calculate the measurements and do the machine work. No factory race or high performance side-valve motor (including the Indian 45 Sport Scout, 74 Bonneville & 80 Blackhawk Chiefs) was built without this feature after 1948. If given a choice between stroke alone, and stroke + pop-up, go with pop-up. The only available H-D factory positive-deck piston is the K piston (shown, above left), which is similar to the 45 piston except that the dome ends above the head-gasket surface, and the skirt length is shorter to clear the flywheel rim with 4 9/ 16" (KH) stroke. A K piston can easily be substituted for a 45 piston; they're reproduced, have the same bore size and use the same piston pin e--+--+ Skirt Length _--------~--.J ----L diameter and ring set as the late 45 piston. The picture (shown left), shows a 45 aluminum head with a relief cut for a K type piston dome made with a Bridgeport mill. The depth calculations appear on Page 35 . Stroker Plates If you're going to use modified std. 45 pistons, you'll have to make the stroker plates (see the diagram on Page 4). Unfor tunately, aluminum plate is not easily available in precise sizes for this purpose, generally only Ys" increments (Y-t", %", &c.), so you have a choice: use W' and add shims, or %" &c. and machine it down to the correct thickness (as described on Page 6). Steel plate may be available in 5/ 16" thickness, but it's harder to work with, and this thickness may still not be completely accurate as you will see from the calcula tions. VICTORY LIBRARY Page 25 of40 If using '14" plates, height can be added with alu minum or brass shim stock, easily available in hobby & craft stores as model airplane stock ("K-D" brand). This can be cut to size with a razor saw or even shears. 2 pieces about 3W' wide by 4'14" long is enough for both plates. Commercial-quality plate is suffi ciently parallel that surfacing shouldn't be required, but check to be sure. Note that the %" cylinder base stud hole pattern is not square but rectangular. The spigot (center) hole must be large enough not to contact the cylinder mouth; 3.00" is [me. I suggest that the fit & placement of the stud holes can be slightly "tighter" than found in the cylinder flange for a snug fit. Setting the Deck Clearance Regardless of whether you have chosen to use modified std. 45 pistons with stroker plates, stroker pistons, or a combination of both, proper positioning of the pistons @ TDC cannot be done by mathemati cal prediction alone. The final "adjustment" should be made by actual measurement of the components to be installed, before final assembly. The piston dome's distance from the head @ TDC (the "squish" or "quench" distance) is critical to the engine's life, power and efficiency. The "deck height" in a negative-deck (non-pop-up) motor is how far the top of the piston dome is below the top of the cylin der's head-gasket surface @ TDC. The remainder of the squish distance is the head-gasket thickness, which is about .019" with copper gaskets. The deck height in a positive-deck (pop-up) motor is the depth of the piston dome recess in the cylinder head (plus the head gasket thickness as above), minus the distance the top of the piston dome is above the top of the cylinder's head-gasket surface @ TDC. Please note that WLD, WLDR, WR, K & KH motors used silver paint was as a sealer instead of head gaskets. Deck height measurements must be very accurate, and allow for gasket compression. If this distance is less than .016" (negative deck motors), thin shim stock (or thicker spacer, gasket, &c.) must be installed Crank-Pin Flywheels S&S 1W' Special S&S Special Std. 1.00" T&0-45, Chief or 1954 KHR WR 11;4" T&0-45, Chief or 1954 KHR Connecting rods S&S: use some version of the XL rod set. These are available used, repro, heavy-duty, super-duty, and Carrillo (in order of price). Various lengths are avail able: 6.926", 7.113", 7.4375" and 8.00" (not in all types). The Carrillo's extreme beam width will not fit with the longer stroke lengths. under the cylinders to get a minimum of .035" be tween piston and head. It is extremely important that the piston miss the head @ TDC by a very small margin. The absolute smallest saft distance is .035". Distances larger than .050" greatly reduce the motor's efficiency and make it more knock-sensitive. If the distance is more than .050" (the piston is below deck by .031" or more), consider reducing the stroker plate thickness (if used) and/or a light mill cut off one of the following surfaces (if stroker pistons are used), in order of practicality: » cylinder head-gasket surface » cylinder base-gasket surface » crankcase deck surface Page 26 of40 VICTORY LIBRARY "45 Perfonnance", by » please note that milling a non pop-up head is not included - it does not work To install std. 45 pistons with modified skirts or K pistons, a stroker plate of ~ the stroke increase is predicted, but since the 45 motor's factory deck clear ance is very "loose", some of the predicted stroker plate thickness is not necessary - we can simply allow some of the stroke increase to move the piston upward to a more favorable position @ TDC. In 45 motors I've measured, the amount of excess deck clearance is about .030-.060"*, meaning that this amount can be safely added to the "up" distance by removing it from the predicted stroker plate thickness. Crank-pin The following flywheel choices make use of specific crank-pins mandatory: » S&S 45 flywheels: the supplied special short XL type 1'14" crank-pin must be used. » T&0-45, Chief or 1954 KHR flywheels: the origi nal 1.00" crank-pin (23960-29) is used with the origi nal rods, or the "stepped" 1939-1954 WR 1'14" pin (23960-39R) with WR rods. Crank-pin bearing assembly Use a bearing assembly consistent with the crank pin choice: Roller Bearing & Cage Assembly 1952-* XL J/ 16" original W' 1939-1954 WLDRIWR (parts are obsolete) T&0-45 Chief or 1954 KHR flywheels: try to find a good 1939-1954 WLDRlWRlKR complete rod assembly. This has the small stepped crank-pin (1" tapers, 1W' journal), and a heavier rod beam than the 45, but still interchanges with the std. 45 rod set as to width and length. May 15,2005 Motor Rod Length Comment cC All 45, K, KH, XL 9001l000 1932-85 7.4375" includes WR 883, 1100, 1200ce 1983-84 XRI000, Evo XL 1986-* 6.926" S&S #7900 for Evo XL stroker (up to 4 5 / 16") 7.113" adds clearance for stock frames Rod Pair Crank-Pin Length Width Flywheel Use Std. 1" 7.4375" 1.38" std. 45, T&O-45, '54 KHR, Chief Std. 45 WR 1114" WR 1W' S&S Special 7.4375" 1.50" S&S Special XL std. 7.113" S&S 7900 Special 6.926" Evo &XRI000 8.00" Carrillo stroke, and piston and rod paths. Preparation, Flywbeels This is usually the right case only, Check the 2 oil holes in the right wheel to verify alignment of oil transfer between the pinion shaft and crank-pin holes - elon tilted to angle the pinion shaft about 30° gate the wheel holes and radius as required. S&S informs us that down. The assembled flywheels are in alignment of this oil passage is critical in 40/&" & larger flywheels. place, with pinion rollers & cages, right If you wish, mark the left wheel for TDC (a dot is the usual end-play collar, pistons with no rings, and mark). The formula for determining the movement of the fly both cylinders snugged down (no base gaskets) on 2 studs each. wheel in inches for each degree of rotation is OD * n -i- 360. Now the motor can be rotated (forward At the rim, the wheels are Tis" (7.875") OD, giving a circum or clockwise - the normal direction), and ference of 24.74". This makes each degree of crank rotation .0687" of move the points of contact can be checked & ment. To find TDC (from a 30° timing mark slot), measure .206" measured. All components must miss each other during roJation by a minimum of back with a tape along the rim (against engine rotation). The effective size of the inspection hole in the left case is J/J 6" (a large paper clip as a feeler gauge is .53", which allows a movement of about 4° in either direction to slightly too small, but useful). Many com be observed. A second dot (or 2 small dots, 1 above the other, ponents will touch or pass each other too &c.) at 10° BTDC may be useful. This should be between the closely, and must be relieved. The case mouths must have the exist TDC and 30° marks. ing clearance notches deepened a bit. Crankcases Aluminum must be removed from the The cases must be a matched pair. If the bottom numbers do shaded areas (front and rear of each open not match, machine the deck surface, main bearing bore, motor ing, a total of 4 cuts in each case half, as mounts, &c. shown, left), and also widened for the extra Bore the case mouth(s) straight through to remove the baf flees) completely. The mouths should be radiused at the bottom, beam size, if heavier WR or XL rods are with the curve ending at the exact placement of the cylinder used. spigot. This will improve cylinder oiling, and reduce pumping losses. The scrapers should clear the flywheel OD by no more than .005-010" if possible. Remove & discard the original base studs (soak them in Kroil, Rustbuster, &c. for 24 hours first). Lightly e/32") counter sink the stud holes before installing the new longer studs. Very carefully draw a large, flat, fine file over the deck sur face of the mated cases to be sure that the deck has not pulled up around the studs. If so, carefully reduce this area flush with the deck. Perform the same operation on the cam cover gasket sur face & case mating faces - only to remove high spots. Install S&S XL, or H-D factory 16830-54 (1954-1971 KH & 900cC XL) or 16830-72 (1972-1985 1000ee XL) cylinder base studs (also use flat washers & high-quality base nuts). For best results, a "Y2-assembly" is used to detem1ine the points of interference between components caused by the longer o May 15,2005 "45 Perfonnance", by VICTORY LmRARY Page 27 0[40 More room is necessary in the right case, where the crank-pin nut will touch the cam bearing ledge, main bearing boss, &c. The best available information suggests that 4 13 / 16" flywheels will require much aluminum to be removed from the cases in the areas shown, but will successfully clear the case center stud at "B" (24812-37) and through-bolts at "A" & "c" (4080). With even longer strokes, or heavier and/or longer rods, modification to these fasteners may be needed. In some extreme cases, the original bolt or stud holes are closed with alumi num stock and/or heli-arc, and new holes are drilled located farther away from the rod path to allow deeper reliefs. If the new fastener is NAS quality (ARP, &c.) a slightly smaller diameter will work OK (7 mm instead of 5/ 16,,), as long as its installed torque meets or exceeds the original. Small radiused channels can be cut into the inside case walls in the shape of a "V" to direct drain oil down into the main races. Remove any obvious flashing, casting roughness, &c. and clean very carefully to remove debris. Glass beading is not pre ferred here, as the beads cannot be com pletely removed, and will eventually wind up in the oil system. Use walnut shells, plastic media, &c. Connecting Rods The female rod must be relieved in the area where the male rod shoulder seats (when the rods are held together, as shown, Page 40). Using crayon, &c. on the male rod beam will show the area to be trimmed. A Ys" carbide cutter in a die grinder is the fastest method. Do not re move any more material than necessary; be sure to blend in the cut to the remaining surface . S&S & Carrillo rods are already relieved, but check to be sure. The female rod needs .020-.025" side clearance between the flywheel halves. If the clearance is excessive (beyond .030"), slightly thicker thrust washers are avail able, or some added torque to the crank-pin nuts may help. If too tight, the washers can be thinned on a surface grinder, or the thrust surfaces of the rod can be narrowed very carefully. Page 28 of40 The wider Sportster rod beam can be slightly narrowed if to improve clearance necessary by removing up to .030" from the shoulder at the point of interference, and blending the cut into the remaining body of the rod over a distance of at least several inches, very carefully. Restore the curvature of the area as much as possible, and polish the surface, then shot peen if possible. If done prop erly, the modification should be nearly invisible. Do this as a last resort only, if all other clearances are at maximum and there is still interference. If using XL-type rods (which are substantially heavier than std. 45), a small increase in '-----_ _ _ _ __ _ __ _----' engine smoothness can be obtained by lightening the rod beams as on WR & JD motors (before balancing, of course). Layout a pattern of holes, about 3/ 16" smaller in diameter than the width of the rod web (the depressed area in the center of the beam). Keep equal spacing between the holes. Once the holes are drilled to size, countersink the holes lightly, then carefully radius rod here the holes on both sides to completely remove all sharp edges. This reduces the reciprocating weight a bit, but must be done ygy carefully. The remaining beam structure will be much more than enough to support the RPM, piston weight, and power levels your motor will experience. The picture is not a template, but only a general guide; the size, '---_ _ __ __ _ _ __ -----' placement & number of holes is up to you. Cylinders The cylinder spigots (extending down from the flange bottom into the cases, seen here, inverted for detail) must be notched for rod clearance. Please note that the rods will need more room in the front & rear only - be careful to identify which side of the cylinder needs work. 45 cylinders have the casting number (as shown, left) in between the cylinders: rear of the front cylinder & front of the rear cylinder. The top (deepest part) of the notch should not be a square cut - use a big radius with no sharp edges, and smooth the cut with a file, &c. "45 Performance", by o o o o o o VICTORY LIBRARY May 15,2005 Allow at least 1/16" around each rod at all points. For example, if the rod width is W', add Ys" (1/16" each side), for a total of %" notch width. The comers at the bottom of the cut should be a small radius (not square). In the picture below, the left image is how most stock cylinder flanges are clearanced in at least 1 place for rod movement now. The right image (notch size exaggerated for illus tration) is a typical K or Sportster relief - wider for the thicker beam, and deeper (nearly up to the flange gasket) for a wider rod. If the notch shown, right, was cut deeper still (up above the bottom or lower gasket surface ofthe cylin der flange) it would approach reliefs as found in KH motors. This is OK if necessary, but be conservative remove no more metal than needed. The absolute depth limit is the point where the notch passes through most of the flange and ap proaches the top or upper cylinder flange surface (where the base nuts seat). If the reliefnotch traverses the flange completely, the flange will crack. A potential cure for this is to use stroker plates to raise the cylinders (rather than shorter custom stroker pistons), so the cuts in the flanges will be slightly less severe. This allows a less radical cut to achieve the same level of safety (but will not affect the case re liefs). . Be sure to clearance the plates as above, and mark them for installation (which cylinder, top or bottom, facing front or rear, &c.). Pistons Once the cylinders have been bored, the pistons cannot be interchanged (between cylinders), or re versed (faced the other way) - be sure what you're doing. In most cases, the piston skirts too long. The leading skirt of the rear piston will strike the trailing skirt of the front piston. The trailing skirt is the major thrust surface, and must be left as long as possible. Cut the leading skirt of the rear piston with a large, fine, Y2-round file. The actual cut will be an inward curve, actually an arc of a circle with a radius of Y2 the May 15,2005 bore diameter: roughly I %" for the 45, the mlITor image of the skirt that will pass by it. Ordinarily, compensation must be made by mak ing the piston shorter by 50% of the stroke increase. The piston must have its skirt below the pin shortened to clear the flywheels @ BDC. You may not need to take off the whole 50%, just remove enough for the bottom of the skirt to clear the wheels by 1/16". The maximum skirt length of the piston (measured directly under the pin hole) can be calculated using the for mula in "MAGIC". S&S recommends clearance to the std. flywheel rim of 1/16". The piston's distance from the head @ TDC (the "squish" or "quench" distance) is critical to the en gine's life, power and efficiency. The "deck height" is how far the top of the piston is @ TDC below the top of the cylinder (the remainder of the distance is the gasket thickness). Deck height measurements must be very accurate, and allow for gasket compression. If this distance is less than .015", thin shim stock must be installed under the cylinders to get a minimum of .035" be tween piston and head; this assumes use of copper gaskets about .020" thick. It is extremely important that the piston miss the head @ TDC by a very small margin. The absolute smallest safe distance is .035". Distances larger than .050" greatly reduce the motor's efficiency and make it more knock-sensitive. If the distance is more than .050", consider a light mill cut off one of the following surfaces, in order of practicality (please note that milling a non pop-up head is not included): » cylinder head-gasket surface » cylinder base-gasket surface » crank-case deck surface Balancing The wheels must be balanced; use whatever pro cedure your balancer feel comfortable with. This must be done accurately, however, due to the rod/stroke ratio . The balance weight (large eccentric area opposite the crank-pin hole) may not be sufficiently heavy, so some weight may have to be removed from the area near (not at) the crank-pin hole. The alternative is to drill holes in the balance area, and fill them with "Mallory metal" (a tungsten alloy, even heavier than lead). The difference between the steel removed and the Mallory metal installed adds weight, but costs $$$. A less efficient alternative is to drill the wheels for the largest safe pipe tap pilot size, thread the hole, fill with lead, and close with an allen-head pipe plug. "45 Performance", by VICTORY LIBRARY Page 29 of 40 Vent the plug with a 1116" drill to allow air to escape as the plug is tightened. The plug should be flush or slightly recessed, and peened over to prevent .4375" .339" Hole Diameter 14-18 NPT Ys-27 NPT Pipe Thread Letter "R" I 16" Pilot Drill loosening. The following chart shows common pipe thread sizes: "Short-Rod" Flywbeel Assembly A different method can be used to install 47's" flywheels. The additional stroke length 3/ 16" , or .8125") raises the piston farther up towards the top of the cylinder @ TDC by 50% of the stroke increase (.40625"), and farther down @ BDC by the other 50%, as discussed previously. The usual method of coping with this is a shorter piston. The method I will explore here is to remove most of this height from the assembly by using a shorter connecting rod set. Please note that this is only a method of avoiding use of an expensive specially made custom piston, and is most effective when used with WR, WLDR or K-Model cylinders, due to their large intake ports. A motor with std. cylinders will last longer and breath better with std. length rods. The S&S Special stroker flywheel set uses a spe cial crank-pin, but will accept any XL rod pair. The std. XL rods are the same length (center of race to center of pin bushing) as all 45, WR, K or KH. How ever, there are other lengths available, see Table on the top of Page 5. The S&S 7.113" long rod pair is the one I will explore. It is available from S&S as #34-7901 & 7902 (bare male & female rods). These rods are super strong, but must still be checked for this stroke length (relieve the female rod mouth as shown in the previ ous diagram). This crank-pin is unique to the S&S 45 wheels, a rod set is not directly available. However, these rods can be fitted by S&S to the correct crank-pin on re quest. The rod length is .3245" (just under 11 /32") shorter than the original 45 (or std. XL) rod, and "uses up" (compensates for) a great deal of that .40625" "up distance" we needed to lose. The remainder is .08175". Since the std. 45 piston does not reach close enough to the cylinder top @ TDC in the std. motor, we only need about a Ih2" (.03125") shim under each cylinder to put the piston right where we want it: .035" away from the squish surface of the head @ TDC, or .015" below the cylinder's gasket surface (this assumes use of copper gaskets about .020" thick). Measurements must be done as described above. The K piston (used only with K heads, 1948-52 WR heads, or other heads modified for pop-up) also does not come close enough to the squish ledge, and can be brought closer, with the math & adjustments being about the same. Remember that the K does not normally use head gaskets, and that the .035" clear ance will now occur inside the head, and that the dome will come out of the bore @ TDC (dome will protrude from the top of the cylinder). The skirt must still be shortened, by enough that the lower edge clears the flywheel OD. Taking our instructions from "MAGIC", page 2, the skirt length is determined: NP = L - (S -;- 2) - CD -;- 2) - 1/ 16", where NP skirt length measured down from the pin L rod length 7.113" S stroke 4.625 D flywheel diameter 7.875 1/ 16" safety margin Solving, we get NP = .801" from the pin center to the skirt bottom, or .405" from the pin's lower edge (pin diameter is .791 "). The skirt along the thrust face can and should be slightly longer, due to the curvature of the flywheel. To determine this length, we refer to "MAGIC" again: NT = NP + CD -;- 2) - (R2 - B22)"5, where NT skirt length measured down the thrust axis NP skirt length (above) on pin axis .801 " R piston diameter -;- 2 1.3725" NT 1.048" Note: I cannot supply any of the parts or services listed in this article (except as noted: *). Parts listed above as being available from KNS Cycle must be ordered from them. The comments given above are not suggestions, but observations, and are not practical in all instances. It is your own responsibility to make all measure ments and decisions. e Page 30 o f 40 .5781 " %-18 NPT 37 / 64 " " 45 Performance", by VICTORY LmRARY .7031 " NPT ~-14 45 164" .9219" %-14 NPT ':J'JI64" May 15, 2005 Materials List Component Flywheel set, 4'/16" for std. 45 lower end Flywheel set, choice of stroke XL special 1'14" crank-pin XL std. 1'14" crank-pin Crank-pin nuts, locks Special short S&S XL rod set Std. repro XL rod pair or set Stroker pistons, 4'/16 & 4Y2" Special pistons (your dimensions) Ford Fiesta pistons Std. 45 pistons K pistons Sportster pinion cage, new & used 3/ 16" Sportster roller bearings Aluminum 6061 stock for custom plates Long base studs 0;)/16" longer base studs Special length base studs Part No 23903-02R see text NPN 23960-54 34-7902 & 7902 NPN 3126 22216-29, &c. 22216-52A, &c. 24718-54* see text NPN* 16830-54 or 72 NPN Source Victory 00/ Victory, T &0, S&S S&S KNS Cycle, S&S KNS Cycle, S&S • S&S KNS Cycle T&O Arias, lE, Venolia, Wiseco Silv-O-Lite (see Summit or leg's) KNS Cycle KNS Cycle Victory KNS Cycle Victo_IY KNS Cycle S&S ARP (see Summit or leg's) FACTORY HOT PARTS If you own a stock 45 solo, Servi-Car or military model, you can increase your horsepower and durabil ity by adding or adapting parts from one of the factory high-performance motors. The standard models have serial letters (VINs) as follows: 1932-36 R, RL 1937-1952 W, WL, WLA, WLC 1937-1973 G, GE, GA The high-performance motors have VINs as follows: 1932-36 RLDR 1939 WLDD 1939-1946 WLD 1937-1941 WLDR 1941-1952 WR 1952-1953 K, KK 1953-1969 KR, KRM, KRTT 1954-1956 KH, KHK, KHR, KHRM, KRHTT 1957-* XLR A great deal of confusion exists as to the identifi cation of these parts, and much inaccurate data is passed off as factual. To clarify the history and con struction of these motors, I have assigned all similar and/or interchangeable parts to the same group, which I will refer to as a "Type". I will use these Type num bers (shown in the lSI Column) to indicate a specific and related state of tune. Generally, similar parts with the same Type number or number group are inter changeable (except as noted). The degree of similarity can be deduced by a comparison of the Type numbers; i.e., 2.00 and 2.01 are very close, whereas 2.00 and 3.00 are quite different (perform the same function, May 15,2005 but cannot be directly interchanged). Wherever practi cal, the same Type number will be used to indicate parts in the same stage of development, that were originally used in combination. For example, a WR head and cylinder are both listed as Type 3, &c. In some cases, this is (obviously) impossible, as with manifolds, &c. The type of part number used by H-D® has varied over the years. Always present is the "characteristic", a number sequence indicating the function of the part; all modem crank-pins have similar numbers, as in "239XX". After this characteristic, a hyphen ("-") appears, then the 1st. year of use. This may not be the earliest year the part can be used - retro-fitting is some times possible, see the specific listings for details. I have used the type of H-D® part number consis tent with the age of the part wherever practical to make searching lists for these pieces easier. In the 1930s, a 5-digit number was used, with the 151 digit being "8" (indicating a racing part), then the identifying characteristic, then the hyphen, and ending with the year. For example: a WR intake manifold is 81107 -40. The next type began in mid-1940s, with a 5-digit number beginning with "R" in place of the "8", otherwise identical: RI107-40. The last type is mod em (1950-*), in which a different characteristic refer ence is used, then the hyphen & year, with the letter "R" as a suffix, as: 27020-40R. When 2 part numbers are listed in Column 2, the nd 51 1 is the left, front, or upper, the 2 is the right, rear, or lower of a pair. "45 Perfonnance", by VICTORY LmRARY Page 31 of 40 A 2nd pair is the later or alternate number for the means substantially identical to the Type quoted, same part. except for the differences specified. I will list parts in H-D® rough part-number order, A letter "X" in the part number or year means "exact number unknown". The phrase "as 1.00" beginning at the top of the motor: Cylinders (Note: std. bore of all 45, K, KH & KR cylinders is 2.745" or 69.72mm) Q Description & notes Model Type PartN Base cstg #120-36 (front), 120-361 (rear), can use only Type 1.00 iron 1937-73, all with 1.00 16460-36 16461-36; 3/8" studs heads; both valves 1.625" (1 %") OD, have 45° seat L; 1 Yz" pipe fits into 2-36,3-36 exhaust port 1937-38 WLDR As 1.00, except relieved, and intake port enlarged to 1'/16" ID and U1.01 80002-37 sized nipple inserted 80003-37 1940-73, all with As 1.00, except can use any Type 1.2X-l.4X heads with 7h6" holes (iron 1.20 16460-40 7/ 16" bolts or aluminum) 16461-40 As 1.20, except full-width gasket surface, uses 1.30 type aluminum head 16460-4X 1946-4* WL 1.21 16461-4X Cstg # 120-39 (front), 120-391 (rear~, similar to 1.20, but slightly thicker 80002-39 1939WLDD 1.30 early 1939 WLD base flange, has 2" manifold nut, 1 h6" ID intake port, full-width gasket 80003-39 surface, std. Valves 1.31 80002-39A 1939 WLDR, late Similar to 1.30, but heavier casting with thicker base flange, bigger fins, std. Valves 80003-39A 1939-46 WLD 1940-41 WLDR As 1.31, except 2Ys" nut, f1116" ID port, std. Valves lAO 80002-40 80003-40 As 1.40, except valves closer to bore, guides are "tipped" towards bore: 2.00 80002-40A 1940A WLDR (Special) 80003-40A intake 1°2' L, exhaust 3°32' L 1941-52 WR 3.00 80002-41 Similar to 2.00, but has 1.81" intake seat, 19/ 16" exhaust seat, 30° valve 80003-41 ; seat L, intake slightly closer to bore opening, exhaust much closer to ROO02-41 bore, guides are "tipped" towards bore: intake 1°2' L, exhaust 3°32' L; ROO03-41 4.00 16471-52 1952-53 K, KK Resembles 3.00 (different casting), but for 2 base studs (under exhaust 16473-52 ports), 1%" pipe fits over exhaust port stub, guides are "tipped" towards bore, different head-bolt pattern, 45° seat L 4.01 16471-54R 1953-69 KR As 4.00, except ported & relieved, 30° valve seat L 16473-54R KRM,KRTT (many other part numbers during 1950s & 1960s) 5.00 16471-69R 1969 KRLowAs 4.01, except shorter (head gasket to base gasket distance), exact 16473-69R Boy distance unknown 6.00 16471-54 1954-56 KH, As 4.00, except .375" taller 16473-54 KHK 6.10 16475-54R 1954-56 KHR, As 6.00, except ported & relieved, 30° valve seat L 16476-54R KHRM,KHRTT Valves, Exhaust Type Part NQ 1.00 18080-32 2.00 2.10 2.20 3.00 1808X-52 80164-41 18080-55R 1808X-54 Page 32 of39 Model Description & Notes 1937-73 G, WL, WLD, WLDR Exhaust 1.625" (1 %") diameter' head, 45° seat L, stem diameter, 5.59" long 1952-53 K As 1.00 except 1.56" (1'1/ 16") diameter head 1941-52 WR; 1953-54 KR As 2.00 except 30° seat L 1955-68 KR As 2.10 except '/ 16" stem 1954-56 KH As 2.00 except 5.875" long stem "45 Performance", by VICTORY LmRARY 11/32" May \5, 2005 Heads Type Part~ 1.00 9-36B 10-36B 1.01 80009-36 80010-36 1.20 16692-40 16695-40 1.21 16681-39 16683-39 1.30 80009-39 80010-39 Model 1936 RL 1937-39 WL 1936 RLDR 1937-38 WLDR 1940-46 WL, WLA, WLC 1947-52 WL Description & notes 6-1 compression, iron, fastened by jig" studs & nuts to cylinder, 18 mm plug thread, marked "4.5" As 1.00, except polished chamber 5-1 compression, aluminum, .11 16" bolts, stamped "5", military, casting # 119-39/119-391 As 1.20, except 6-1 compression, stamped "6" 6-1, aluminum, I 116" bolts, wide gasket surface (no indents between bolt holes, 1939-41 WLDR does not use head gasket) 2.00 80009-40 As 1.30, except valve reliefs close to bore opening, similar to 3.00 80010-40 except smaller intake valve relief 3.00 80009-41 Aluminum,' I 16" bolts, wide gasket surface 80010-41 Valve reliefs close to bore opening 1948-52 WR 3.10 ROO09-48 Aluminum, 11 16" bolts, wide gasket, valve reliefs close to bore, .090" R0010-48 deep relief above bore for -.£iston dome 4.00 166XX-5X 1952-67 K, KK, 6.5-1 (K) or 6.8-1 (KH), aluminum, different bolt pattern than 45, KR; 1954-56 KH different casting with "deck" connecting fins together, 14mm plug KHK,KHR thread, .150" deep relief above bore for piston dome; many different part numbers and variations 4.10 166XX-6XR 1967-68 KR As 4.00, except different squish ledge shape 5.00 166XX-6XR 1968-69 KR As 4.00, except different~op-up relief for radiused dome on piston Valves, Intake Type Part~ Model Description & Notes 1.00 18070-32 1937-73 G, W, Intake 1.625" (1 VB") diameter head, 45° seat L, 11/32 " stem diameter, WL, WLD, WLDR 5.53" long l.1O 1807X-52 1952-53 K As 1.00 except l.8125" (1 IJ/16") diameter head 2.00 1807X-54 1954-56 KH As 1.10 except 5.875" long stem l.20 80163-41 1941-52 WR; As 1.10 except 30° seat L 1953-54 KR 1.21 18071-41 V all 45 & K 1937-73 As 1.20, by KNS Cycle, 1.875" (11'8") diameter head, thinner head with small ~_ecial stem-to-head radius ("T"-shape) As 1.20 except ~116" stem, fits all 45 if correct guide or sleeve is used l.30 18070-55R 1955-68 KR Tappets Model Type Part NQ Description & Notes l.00 18490-29 1929-73 Roller tappet design, steel body, interchangeable in 1.0X tappet blocks all std. motors (also used on VLIUL), 2 large holes through the body for weight saving l.10 18508-52R 1952-* KK, As 1.00, except 3 holes through the body, Larger internal id for lighter KHK,KR,KHR weight 2.00 80200-40 1940A WLDR As 1.00, except special for this model only, rollers are on an angle to the (Special) body, intakes & exhausts are different 3.00 80200-41 1941-52 WR Flat & wider contact surface on an angle to the body: intake 1°2' L, ex haust 3°32' L, resembles an ice-skate, use only 3.XX cams, all 4 tappets are different 4.00 18490-53R 1953-55 Similar to 3.00 (flat), except contact surface is .375" wide (same as roller KRM,KHRM tappet), and at 90° to the body axis (not tipped), intended for use in std. K blocks with special cams for this desert-racer motor May 15,2005 1939 WLDD; 1940 46 WLD; 1940-41 WLDR 1940A WLDR (Special) 1941-47 WR "45 Perfonnance", by VICTORY LIBRARY Page 33 of39 Tappet Blocks Type Part NQ 1.00 18605-30 Description & Notes Model 1930-54 all std. 2 bolt flange, front & rear are different, accepts all tappet Types, uses motors, incl. 1939 any screw-on spring covers (including VL & UL 1930-38), roller slot . approx. 3/" IS 8 WI·d e 41 WLDR As 1.00, except has a small hole in rear of tappet bore for oil drain 1.01 186XX-55 1955-73 all std. motors Same flange as 1.00; seals to special push-on covers with O-rings, all 2.00 80235-40X 1940 WLDR (Special) 4 blocks are different, tappet bores are off-set & angled: intake 1°2' L, exhaust 3°32' L, use only 2.00 (roller) tappets Similar to 2.00, use only 3.00 (flat) tappets, all 4 blocks are different, 1941-52 WR 3.00 80234-41 (set) intake & exhaust are offset & angled: intake 1°2' L, exhaust 3°32' L, tappet contact surface slot is much wider than roller !ITes (I.OX, 2.00) Valve Spring Covers Q Description & Notes Model Type PartN 2 piece, flat rubber band for seal between halves, threaded lower 1.00 182XX-41 1941-68 matches 1.00 blocks all std. motors As 1.00, except has O-ring seal between halves 1.01 182XX-69 1969-73 all motors 3 piece, O-ring seal, large diameter, 1.10 182XX-30 1930-38 VL & UL threads on the lowest section match 1.00 blocks 1940 WLDR (Special), 2 piece, O-ring seal to block, 2.00 80173-40 80174-40 1941-52 WR only fits 2.00 & 3.00 blocks Crank-Pins Q Type PartN Description & Notes Model 1.00 23960-29A 1937-73 1.00" OD; 1.00" diameter @ larger end of tapered holes; roller all std. motors bearing journal area is 1.40" long, pinion side is drilled for oil 1.10 23960-39R 1939-51 WLDR, WR; 1.25" OD; 1.00" tapers ("stepped" like a miniature UL or EL pin); 1953-54 KR, KHR 1.40" long; requires 1.1 X cages, rollers & rods, fits all stock 45 flywheels 1937-73 2.00 23960-54 1954-56 KH; 1.25" OD; 1.25" tapers; 1.50" long; 1957-81 XL like shorter straight FLH pin 2.10 23960-81 1981-* XL As 2.00 except for "commonized" ta~ers on shaft holes 2.20 S&S 513 45 special As 2.00 except shorter for use only with S&S 3012/3 std. Or stroker flywheels for 45 3.00 23960-55R 1955-69 KR; 1955-56 1.50" 00; 1.25" tapers ("stepped" like a giant UL or EL pin); KHR; 1957-* XLR; 1.50" long; requires 3.00 rods, &c. 1970-71 XR Flywheels Note: all flywheels are 7.875" (7?1s") diameter NQ Part Type Model Description & Notes 1.00 239XX-32/37 1937-73 all std. 3.8125" (3 1J / J6") stroke, 1.00" crank pin holes; .875" (?Is") shaft holes motors I~ larger end of tapers; Pinion side drilled for oil (all flywheels) 1.01 80338-39 1939-54 WLDR, As above, but lighter, casting # 150-406, 150-408 80339-39 WR,KR 1.10 239XX-54R 1954 KHR As 1.00 except 4.5625" (4~/J6") stroke 2.00 239XX-55R 1955-69 KR, XLR 3.8125" stroke, 1.25" crank pin holes; .875" sprocket + pinion shaft holes 2.10 239XY-55R 1955-56 KHR As 2.00 except 4.5625" stroke 3.00 239XX-54 1954-56 KH 4.5625" stroke, 1.25" crank pin holes; 1.00" shaft holes 3.10 239XX-57 1957-81 XL As 3.00 except 3.8125" stroke 3.11 239XX-81 1981-85 XL As 3.1 0 except for "commonized" tapers on shaft holes Page 34 of39 "45 Performance", by VICTORY LIBRARY May 15,2005 Crank-Pin Bearing Assemblies Type Part~ 1.00 24370-29 Model 1937-73 all std. motors IDescription & Notes 14" rollers (36) in 4 identical steel cages; 12 .550" long in 2 facing cages for Male rod, 12.270" in each side of Female rod; cages are 12 slot, 1.00" ID, 1.44" OD 1.10 R0309-39 1939-41 WLDR, J116 " rollers (54) in 4 identical steel cages; 18 .518" (M), 36 .256" (F); 1941-48 WR cages are 18 slot, 1.25" ID, 1.56" OD, .340" wide 1.11 R0309-49 1949-52 WR 1953 3/ 16" rollers (54) in 4 identical steel cages; 18.480" (M), 36 .238" (F); KR,KHR cages similar to 1.10, but slots are shallower 1.12 24370-54R 1954KR,KHR As above, different cages? J 2.00 24370-54 1954-56 K, KH, I / 16" rollers (51); 17 (M) in 1 closed aluminum cage, 34 (F) in 2 closed 1957-* XL aluminum cages 15 3.00 24370-55R 1955-* KR, / 16" rollers (51); 17 (M) in 1 closed aluminum cage, 34 (F) in 2 closed XLR,XR aluminum cazes Connecting Rods Type Part~ Model Description & Notes 1.00 24275-32 1937-73 all std. motors 7.4375" (7'/ 16") center-to-center Length; female big end 1.37" Wide; 1.500" ID races; marked "UA" on beam 1.10 24275-39R 1939-41 WLDR, 1941-52 Same L&W as 1.00; 1.625" (1 %") ill races; Heavier beam WR area, drilled for lightness; Requires 1.10 crank-pin assembly 1.11 24275-52R 1953-54 KR, KHR As 1.10, except rods not drilled for weight removal 2.00 24275-52 1952-85 K, KH, XL Same L as 1.00; 1.49" W; 1.625" ID races; solid beam marked "2429X-52" 2.01 S&S 7500, 1952-85 K, KH, XL special As 2.00, "S&S" on beam (different models), generally heav 7600, 7700 ier construction 2.10 24275-83 1983-84 XRI000, 1986-* XL As 2.00, except 6.926" L V2 2.11 S&S 7800 XL V2 special As 2.10, heavier 2.20 S&S 7900 XL V2 stroker As 2.11, except 7.113" L special, also 45 stroker 2.30 24275-04? Buell XB9 As 2.00, except 7.27" L 3.00 24275-55R 1955-68 KR; 1955-56 KHR; Same L&W as 2.00; 2.125" (2Ys") ID races; super-heavy 1957-* XLR construction; requires 3.00 crank-pin assembly 3.10 24275-69R 1969 KR "Low-Boy", 1971 As 3.00, except 6.44" (6'/ 16") L 72XR 4.00 NPN As 2.00 except very heavy "H" beam cross-section, 7.8" or Carrillo special 8.0" L for extreme strokes Cams Cam NQ Cylinder Valve Gear Rows Teeth Notes Pinion NIA N/A 4 flutes, asymmetrical 1 18 1 rear 2 tangs for oil pump drive (45 only) exhaust 1 28 rear 28&36 Spiral gear for ignition drive (except ill) 2 intake 2 + spiral 3 front intake 1 Plain 28 na 4 front exhaust 2 28 &36 Plain, may have 2 timing mark for mag May 16,2005 "45 Perfonnance", by VICTORY LIBRARY Page 35 of42 Cam Covers With 1 exception (marked *), all 45 cam covers are identical in appearance from outside, and are based on the same casting (131-372, which appears inside the cover in most cases). There are a wide variety of models used, of which the most common types appear below: Description & Notes Model Type Part NQ Plain brass bushings in all positions, 12%" long, fins run the full length of 1937-57, all l.00 25201-37 the cover. 1/4" generator screw holes. #2 bushing boss is 5/ 16" tall. Must models use early #2 cam. Cslg # 131-372 As 1.00, except '/16" generator screw holes 1958 G 1.01 25201-58 1959-73 G, GE, As 1.01, except #2 bushing boss is 'h2" tall. Must use late #2 cam. Cslg # 1.02 25200-59 25202-37 GA As 1.00, except dual-position (figure "8") idler boss for front-drive mag 1939-41 80584-39 1.10 WLDD,WLDR neto or generator Ball brg. in #2, 3 & 4 positions; no ignition drive on #2; breaker boss has 80584-41 1941-46 WR 2.00 drive hole cover plate; Idler boss for front-drive magneto Same as 2.00, except breaker mounting area is deleted from cover casting 2.01 R0584-47 1947 WR Ball brg. in #3 & 4 positions; idler boss for front-drive magneto; breaker 2.10 R0584-48 1948-49 WR hole has removable cover plate Ball brg. in #3 & 4; different casting & fin pattern; idler boss for front2.20* 25201-50R 1950-52 WR drive magneto; removable access plate (25720-50r) on face of cam cover for magneto drive Description & Notes Model Type Part NQ 1932-36 RLDR Intake only, used with std. exhaust cams, asymmetrical lobe .90 80610-32 80611-32 shape, no s£ecs l.00 2550X-37 1937-58 all std. motors 240° duration, .312" (5/ 16") lift, large-diameter journals for plain brass bushings 1959-73 G, GE, GA 1.01 2550X-59 #1,3 & 4 identical to Type 1.00 above; #2 has less undercut on cover side of gear 1.02 80610-39 1937-41 WLDR Intake only, used with std. exhaust cams, asymmetrical lobe 80611-39 shape?, no specs 1.10 R0600-39 1939-41 WLDR; 1940A As 1.00, except 270°, .320" lift WLDR (Special) 1.11 25505-02R 45 special As 1.10, supplied by KNS Cycle as a regrind 2.00 R0600-41 1941-47 WRCD Duration 300°+, .344" lift, ball brgs. on #2,3, & 4 in cam cover, lobe peaks are nearly flat on top, for use with flat t'!J)Qets only 2.10 R0600-48 1948-52 WR As 3.00, except ignition spiral drive on #2, ball brgs. on #3 & 4 in cam cover, flat tappets only 3.00 255XX-53 1952-56 K, KH Similar to 1.10, but .344" lift, #2 cam gear wider than 45, all lobes are tapered (intake 1°2' L, exhaust 3°32' L?) 3.10 . 255XX-56R 1952-56 KK, KHK As 2.00, except very broad lobe, concave (hollow) flanks, .375" lift, all lobes are tapered 4.00 255XX-53R 1953-55 KRM, Similar to 3.00 but has plain journals, for flat tappets only, all lobes are tapered KHRMCD 5.00 25499-53R 1953-69 KR, KHRCD, As 3.10, except 295-315°, .395-.440" lift (various grinds, see &c. following tables*), very broad lobes, ball brgs. on #1, 3 & 4 in cover, all lobes are tapered Note: al13.XX - 5.XX cams above have tapered lobes, exhausts are tapered more than intake. Note: all cams listed above are suitable for roller tappets only, except as noted. Page 36 of39 "45 Performance", by VICTORY LIBRARY May 15,2005 * KR "c" (25499-61R) Duration, Front Intake Duration, Rear Intake Intake Lobe C-Line, F Intake Lobe C-Line, R Lobe Separation, F Lobe Separation, R Front Intake Opens Rear Intake Opens Intake Closes Intake Lift 324° @ .010" 319° § .010" 82° ATDC 84.5° ATDC 90.5° 91.75° 80° BTDC 75° BTDC 64° ABDC .395"? Duration, Intake Intake Lobe C-Line Lobe Separation Intake Opens Intake Closes Intake Lift 316°~.010" Duration, Exhaust 282° @ .010" Exhaust Lobe C-Line 99° BTDC Overlap, Front Overlap, Rear Exhaust Opens 122° 117° 60° BBDC Exhaust Closes Exhaust Lift 42° ATDC .375"? KR "E" (25499-62R) 88° ATDC 92.5° 70° BTDC 66° ABDC .395"? Duration, Exhaust Exhaust Lobe C-Line Overlap Exhaust Opens Exhaust Closes Exhaust Lift 278° @ .010" 97° BTDC 112° 56° BBDC 42° ATDC .375"? KR "F" Duration, Intake Intake Lobe C-Line Lobe Separation Intake Opens Intake Closes Intake Lift 312° @ .010" 90° ATDC 93.5° 66° BTDC 66° ABDC .395"? Duration, Exhaust Exhaust Lobe C-Line Overlap Exhaust Opens Exhaust Closes Exhaust Lift 278° @ .010" 97°BTDC 108° 56° BBDC 42° ATDC .375"? KR "H" Duration, Intake Intake Lobe C-Line Lobe Separation Intake Opens Intake Closes Intake Lift 312° @ .010" 90° ATDC 94° 66° BTDC 66° ABDC .410" Duration, Exhaust Exhaust Lobe C-Line Overlap Exhaust Opens Exhaust Closes Exhaust Lift 280° @ .010" 98° BTDC 108° 58° BBDC 42° ATDC .405" KR "J" & "K" (25499-69R) Duration, Intake Intake Lobe C-Line Lobe Separation Intake Opens Intake Closes Intake Lift 312° @ .010" 90° ATDC 94° 66° BTDC 66° ABDC .395" Duration, Exhaust Exhaust Lobe C-Line Overlap Exhaust Opens Exhaust Closes Exhaust Lift Duration, Intake Intake Lobe C-Line Lobe Separation Intake Opens Intake Closes Intake Lift 312°@.010" 90° ATDC 96.25° 66° BTDC 66° ABDC .395" Duration, Exhaust Exhaust Lobe C-Line Overlap Exhaust Opens Exhaust Closes Exhaust Lift 280° @ .010" 98° BTDC 108° 58° BBDC 42° ATDC .395" KR "J" & "L" (25498-69R) 285° @ .010" 102.5° BTDC 106° 65° BBDC 40° ATDC .395" May \5 , 2005 "45 Performance", by VICTORY LIBRARY Page 37 of39 Intake Manifolds Q Description & Notes Model Type PartN 1936 RL, RLD, RLDR; 1937-52 WL, 1Ys" nut, 3-bolt pattern, 1j/16" ID port, takes 1v,." 1.00 27011-36 Linkert (M-41, 88, &c.) (there are several slightly WLA, WLC different models) As 1.00, except enlarged internally to 1'/ 16" ID, for 1937-38 WLDR 1.01 81107-37 use with 1.01 cylinders 1939 WLDD, WLDR; 1939-46 WLD 2" nut, 3-bolt, 1'/16" port, bolt pattern as 1.00, H: 2.00 81107-39 2 1/ 16" 1933 VLD, 1934-36 VL, 1937-38 UL Very similar to 2.00, H: 2Ys" 2.01 27012-33 Very similar to 2.01, but %" longer carburetor leg, 1939-48 UL 2.02 27012-39 H: 2%" 1940-41 WLDR, 1941-52 WR, 1952 2Ys" nut, 4-bolt, 1"/ 16" port, takes 1Yz" Linkert (M 3.00 81107-40 25,35, 36,45, 74, 75, MR-3/4, &c.) 53 K, 1954-56 KH, 1953-68 KR (27011-52) As 3.00, but for dual Tillotson, requires O-ring 3.10 27045-69R 1969 KR conversion of nipples, may have been converted to Mikunis Height is listed as "H"; measured with manifold flange facing down, to top of leg vertically: 45 manifolds (1.00, 1.01,2.00,3.00) are 37/ 64 " (3.11") wide across the legs. V & U-Series manifolds (2.01, 2.02) are 37/ 32" (3.22") wide across the legs. Carburetors Type Part NQ 1.00 2712X-37 1.01 2712X-37 2.00 2.01 3.00 3.01 2712X-40 2712X-40 27146-52 27146-52A 3.10 271XX-50 4.00 27148-46R Page 38 of39 Model 1937-52 WL 1937-48 UL 1937-46 WLD 1937-48 ULH 1940-48 EL, FL 1940-48 EL, FL 1952-53 K, KK 1954-56 KH,KHK 1950-64 Description & Notes 1v,." Linkert (M-41 , 51, 52) with 11/ 16" venturi (not M-88, 90) As 1.00, except with 1Ys" venturi (M-41L, 51L, &c.) 1Yz" Linkert with 1Ys" venturi (M-25, 35, 36, &c.) As 2.00, except with 1'/ 16" venturi (M-45, 75, &c.) 1Yz" Linkert with "bombsight" venturi(M-53) As 3.00, except with 1'/16" venturi (M-53A, AI) 1Yz" Linkert with (1/ 16" venturi (M-74B), modem air-bleed design, similar to M-53 1940-65 WLDR, WR, 1Yz" Linkert MR-4 with "bombsight" (dual) venturi KR,KHR (MR-3 & MR-3A earlier, MR-4A later) "45 Performance", by VICTORY LmRARY May 15,2005 The exact timing of the cams can be modified some what. When an engine is rebuilt or assembled from parts, the rotational position of the pin ion shaft and stack may not "time in" to the H-D factory speci fications. The cams and/or breather assembly may be out of time due to "stacked" production tolerances. There is no easy method of dealing with this, as the cam shaft and gear are one piece. However, L -_ _ _ _ __ ----' the following idea may prove useful. The pinion shaft key aligns the oil feed passage in the pinion shaft with the transfer hole in the right flywheel, which supplies oil pres sure to the crankpin. By a happy coincidence, the key's dimensions are very similar to one used in automotive applications: the Chrysler "LA" (small block) V8 camshaft drive. Keys are available for this application with various degrees of offset, where the top is shifted slightly laterally (sideways) from the bot tom, causing a partial misalignment. These keys may be easily modified to fit the H-D installation. This allows fine tuning of the cams without regrinding. The offset will cause the entire cam gear train to be ro tated forward or back (depending on which way the offset is installed) at the same point of flywheel rotation. This is not easy to do, as it requires disassembly of almost the en tire engine, but no expense or modification to the cams themselves. Closing the intake valve sooner increases cylinder Source Part N° Timing the cams pressure and torque by trapping more compression, but loses some peak power; closing it later has the opposite ef fect. A change of 4° or more should be noticeable; less than this may not be of much use. More coarse adjustment may be made by "jumping" the cam gear one tooth forward or back on the pinion gear, and fine-tuning this effect with the key offset. The most important cam event (the intake valve clos ing point, as described above) may not match on the two intake cams (#2 & 3); either one, or both, may be "off'; the lobe centers may not be separated by the correct 315°/405° interval. However, the key offset can be used to "average out" the #2 and 3 to the same intake closing point, even if it's not what the specification calls for. The thickness (the width of both the key & slot, in both the pinion shaft and right flywheel half) of both the 45 and Chrysler keys is identical at 3/ 16 " (.1875") [4.8 mm ]. The length of the Chrysler key is greater at .730" [18.5 mm ] vs . .460" [11.7mm] for the 45. However, the slots are longer than the key: .750" [19.tmm] in the flywheel, and .650" [16.5 mm ] in the pinion shaft. The total depth (height) of the Chrysler key is also greater at .300" [7.6 mm ] vs .. 173" [4.4mm] for the 45. The "top" (flat section, fits the flywheel slot) is about the same depth in both keys: .100" [2.5 mm ]. The "bottom" (curved section, fits the pinion shaft slot) is much larger in the Chrysler key. The non-matching dimensions (length & bottom depth) can be trimmed with a grinder to fit. Table 2: Harley-Davidson vs. Chrysler key dimensions Thickness Length Shaft depth Total depth 23985-12 .460" J 11.7 mm .173" 4.4 mm .073" J 1.9 mm mm .1875" !4.8 mm .730" I 19.1mm P4286500 .300" I 7.6 .200" J 5.lmm The Chrysler key is available in offsets of 1°,2°,3°,4° & 5° as a set, under the above part number H-D Chrysler J Flywheel depth .100" 2.5 mm Table 3: Chrysler key: de2rees vs. offset White Natural Red Gold Blue 5° 3° 4° 1° 2° .010" I .2Smm .OSO" I 1.27mm .020" I .51 mm .030" I .76 mm .040" I 1.02 mm In calculating the amount of rotational change, do not The smaller end of the 45 taper is about .7S0" [19.l mm ]. use the Chrysler degree figures. The offset in inches will The same formulae apply: each degree of rotation needs not change, but the Chrysler camshaft is larger in diameter about .00655" [.00017 mm ] of offset. than the 45 pinion shaft, so the same amount of offset will Do not use the figures on this table directly; it has been have a greater effect in the 45 engine. provided for illustration only. The effect of a known amount of offset can be calcu For best results, you must measure the actual compo lated based on the distance as a function of the circumfer nents yourself. Any dimensional changes will require new ence of a circle. The diameter of the circle is calculations. the diameter of the pinion shaft at the point of offset. Key Color Offset, Degrees Offset, inches & MM Table 4: Approximate effect of Chrysler offset in 45 a~plications White Red Gold Blue Natural .050" I 1.27mm .040" I 1.02mm .010" I .25 mm .020" I .Sl mm .030" I .76 mm 7.5° 6° 3.0° 4.5° 1.5° Do not remove metal from the sides (width) of the key, or must be removed only from the bottom (curved) part of the the offset area (top). The most important revision is the depth: Chrysler key, as the top is already approximately correct. The length should be reduced by removing material evenly from the new key must seat completely in both slots, or the pinion both ends to retain the curvature. shaft will not be properly secured to the flywheel. Material Key Color Offset, In. & MM Offset, Degrees » » » set flywheel end-play set cam end play install breather (unless relevant) » install idler & generator gear » install breaker A complete rotation of the engine (720°, two full turns) should tell you whether the problem is fixed. A degree wheel on the sprocket shaft, and a dial indicator on the front intake tappet is the Key offset CW Std. key ey offset ccw usual method. Be sure to rotate the engine for (advanced) (relarded) ward only (counter-clockwise, as seen from the left side) to remove gear back-lash. If the position is worse, you have the key offset facing the wrong way. If the position is improved, but not enough, use a key with more offset. If the position is now incorrect in the other direction, the offset is correctly positioned, but too large. Several trials may be necessary for The oil hole alignment between the pmlOn shaft and the right best results. Be sure to make written notes on flywheel must be modified to allow full transfer of oil. I suggest the every change. Select & install the final key and assemble flywheel be modified, as the material is softer, and the shorter passage is easier to clean. Elongating the hole with a Dremel, die grinder, etc. the engine. Tum it over slowly by hand two full in the direction of the offset by the same amount should be sufficient. revolutions to check for piston to valve clear Use Brake-Kleen etc. and then compressed air to be sure to get the ance (not required in side-valve engines). Re member that breather and breaker installations debris completely out. A trial assembly does not have to include the upper end parts, if reference TDC and the flywheel timing mark, your flywheel degree mark is accurate. The flywheels must be assem not pinion shaft position, so they will be accu bled & trued, cases should be closed, the cam chest assembled, tap rate if installed "by the book". However, the pets & blocks in place, etc. but the following steps should not be nec- physical position of the rotor and breaker will essary: change slightly to achieve this. Flywheel weight All engines have flywheels that balance out compres speed or other condition where extra flywheel weight in sion and power strokes, maintain idle, aid starting and re creases acceleration. duce component wear. If the flywheel is too light the mo However, let me clarify something that is frequently torcycle requires more effort to start, idles badly, and is mis-stated and/or mis-understood. The power a engine de prone to stalling. Weight is not the important factor here, velops is not related to flywheel weight. Heavy flywheels but inertia, which is stored energy. do not "make more torque", this is completely fictional. Flywheel inertia is stored when you rev the engine The power is merely stored by the flywheels, and they only slightly before letting the clutch out - this small amount of have what is diverted from the primary drive. extra power helps in getting the motorcycle underway with Under steady-state conditions (no speed change) more minimal effort. By "borrowing" power for a few seconds, inertia is more comfortable and allows the engine to oper the engine has to develop less to move from a standing ate at a lower speed without lugging, chain snatch &c. start. Once the clutch is completely engaged, inertia can no There is also a problem where the engine speed is not longer be borrowed - the motorcycle can only use what it "regular" (the speed of rotation is not constant throughout produces in "real time". Regardless of engine speed, or the 720° cycle). A single cylinder, or an engine with very change in speed, power is used to accelerate the reciprocat high compression, or a light flywheel will almost stop @ ing weight from dead stopped @ TOC & BDC. This power TDe and BDC, be very slow after 90° ABDC on compres is completely lost (as heat) twice in every 720° cycle. sion, and be fastest around 45°-90° ATDC on the power Any power the engine develops must accelerate the stroke. This is not only uncomfortable, and breaks parts in flywheels before leaving the sprocket shaft, and any used new ways (load reversals on cam gears, oil pumps, rollers), in bringing the flywheel up to speed is not available at the but adds new time factors to the cam lobe vs. tappet equa rear wheel. tion. This condition persists into the high RPM ranges This will not show up on a steady-state or rear wheel only recently discovered through SpinTron use. As the number of cylinders rises the cyclic variation dyno or simple desk-top dyno program, but is detectable in a transient dyno that accelerates the engine at a specific drops immediately, with results decaying as the number of rate (300 or 600 RPM per second are common). cylinders increases with almost no detectible difference be In any event, all flywheel weight reduces acceleration, tween 12 and 16 cylinders. A V12 with a heavy flywheel except for when the clutch is slipped. There is no engine and 7: 1 compression will have almost none of these effects. The bottom of the curve must be centered in the length. When properly modified, the key will seat completely up to the offset step in the pinion shaft slot. Remove the key; it should seat completely up to the offset step in the flywheel as well. Clean & dry all three parts thoroughly, and assemble. Lightly tap the pinion shaft with a block of wood, etc. to seat the taper. The shaft must not wiggle or click. If it rocks at all, the key is not fully seated, and more metal must be removed (probably from the bottom curved section). Cast-iron doesn't damp vibration very well, but more of it is certainly going to help, and more flywheel (where most of the weight differences are) will have a very slight effect against flywheels flexing due to gyroscopic stability - the spinning flywheels can be moved vertically, horizon tally, or laterally without effort (except the actual static mass), but a gyroscope strongly resists out-of-plane force. Unfortunately, that also includes banking and turning the motorcycle. Road racing, where DNF is always a possible, is a venue where flywheels weight has less value. The power lost to accelerating the flywheels varies as the square of the gear ratio, so tall (high top speed) close ratio gearing has less effect than street or drag use, and most time is spent in the upper gears in any case. For extreme performance, flywheel weight can be radi cally reduced. Flywheel inertia is not directly proportional to flywheel weight; it's possible to have a light flywheel with much more inertia than a heavier flywheel. A lighter flywheel assembly substantially increases acceleration, but roughly proportionate to the square of the overall gear ratio (individual gear ratio x primary drive x final drive). 151 gear is always the biggest difference, and it's greatest with a strong (high number) 151 gear such as the wide-ratio (trials, sidecar, &c) and high numerical overall gearing, A low numerical (viz., close ratio) 1st gear receives much less benefit from this, not to mention the lower torque from re duced gear multiplication. Machines with tall gearing don ' t get much, and no one sees a big change in high gear. However: it's worth a couple of HP in 1sl gear - very noticeable. It doesn't add any RPM (but it does reach high RPM faster in neutral) or develop more power from the en gine - it wastes less power accelerating the flywheel as sembly. Removing weight from the sides on an angle directs oil picked up from the case outward by centrifugal force to the rim where the scraper can catch it, without changing the scraper position . It also reduces inertial momentum much more than it appears. The math to predict the effect is very complex because the weight "acts" only at its mean center of mass, it's very difficult to locate, and changes when weight is removed, but I would hazard that removing 4 lbs. is worth at least 1 HP. Inertia varies with two major inputs: speed and diame ter (let's leave material as a constant). Inertia varies proportionate to the square of the RPM and also proportionate to the 41h power of the radius. This is why light-weight cam pinions &c. are nearly useless - too small and turning too slowly. Higher reciprocating weight always reduces power, but won't show up on a steady-state dyno. When comparing two flywheels or flywheel designs for the same engine the single most important considera- Obviously, there's a certain minimum amount of fly wheel inertial that should be present for several reasons: » idle stability tolerance of high compression, cam overlap, large » ports, &c. better clutch operation for low speed and traffic op » eration fewer load reversals on the driveline during low » speed better traction » » the carburetor's accelerator pump and off-idle circuit settings are closer to "real world" » damps vibration out some oil pressure is more consistent » But, other than as needed for driver preference &c. the lowest inertia you can stand the better: Reduced inertia tion is the outside diameter. If the flywheel were a simple solid disc the inertia would vary in proportion to the 4th power (1\4) of the diameter. In theory the heavy flywheels may be more comfort able because the larger mass of iron damps vibration better. This is also a mod that should be approached with ex treme caution. A 45 with light flywheels and tall gearing will have to be ridden like a 2-stroke. The lighter flywheel: » is harder to kick through when starting » requires slightly higher idle speed screw setting for stable idle is more likely to stall when cold/out of tune » is easier to shift » » has better braking (unless you disconnect the engine by pulling the clutch in while braking) » requires more delicate touch with the clutch in traffic harder on the primary chain » less tolerant of "walking speed" in gear » » improves acceleration » improves braking » reduced overall weight » best acceleration improvement in machines using small engine sprockets (more effect from a 20 than a 24, &c.) » slightly harder to kick through, due to lack of inertia to "carry over" into the compression stroke slight increase in carb idle setting may be necessary » to hold the engine at the same idle speed, due to more irregular pulses (most noticeable in engines with high compression) » slightly higher idle speed may be necessary to pre vent engine from stalling, same reason more careful clutch operation will be required for » getting away from a dead stop » in general, the engine will run slightly rougher at low speeds, and be more prone to lugging slightly improved braking (assuming the clutch re » mains engaged), as the brakes do less work slowing down the flywheels Shifting may be improved (with practice) as the engine will conform more rapidly to the rpm required after a gear change The engine will appear to respond to open throttle faster in neutral; do not assume that it is safe to lean out your carb - this effect will not occur in gear, and in some cases slightly richer mixture will be required. However: it's worth a couple of HP in I st gear - very noticeable. It doesn't add any RPM (but it does RPM faster in neutral) or develop more power from the engine - it wastes less accelerating the flywheel. Weight removed from the flywheel 00 is more impor tant than knife-edging, hole drilling &c. because it's farther away from the center of rotation. 4 Ibs. off the rim - the bike might not idle below 1,200 RPM, and the tach needle will go off-scale when you touch the throttle. Sounds great, faster, but very annoying to ride especially in traffic. Stock flywheel weight These factors suggest stock weight flywheels: » hot cams, especially late intake closing and/or high overlap » big carburetor » big engine and/or transmission sprockets ("highway" gearing) » high compression » open exhaust }) heavy chassis or rider, frequent passenger, sidecar, &c. For most casual use the heavier flywheels is preferred it's just slower. What would I do? Ask around for com ments on known mods rather than pick an arbitrary dimen sion. If you're not sure, too heavy is a far safer choice than too light. RACING SPECS This Table applies to all standard model 45" Harley-Davidson models 1937-73 Female rod end-play_ between wheels .015 - .020" Flywheel end-play in cases .015 - .018" Main roller clearances .0012 - .0015" Crank-pin roller clearance .0015" Skirt clearance .003" minimum Piston ring end gaps: top compression ring .016" minimum 2nd compression ring .012" oil ring .012" Cam end play .005 - .001" Spark advance 30° for a start up to 34° by test only Plugs NGK A6 break-in & traffic A 7 for parkway A8 for racing Plug gap .025" (battery & coil) .020" (magneto) Deck clearance .035" (minimum) .060" (maximum) Valve lash add .002" to std. to be safe Lubricate both chains thoroughly; check for tight links. Raise tire pressure by 2-4 lbs. Add Marvel Mystery Oil to the gas per can directions. Be sure the battery is fully charged. Check cylinder base nuts for tightness. 45 Bore & Stroke This Table applies to all 45 & 55" Harley-Davidson® models D, R, W, G, K & KH, 1929-73 49/ 16"r}) 47/ 16"® 3 13 / 16"<S> 4 13 / 16"<1> Bore,CD 4 5/ 8" Bore, (4.8125") Relative (4.625") Absolute (3.8125") (4.4375") (4.5625") 56.96" Std. 2.745" 45.12" 52.52" 54.74" 54.00" +.010 2.755 45.45 57.38 52.91 54.4 55.14 .020 57.79 2.765 45.78 53.29 54.79 55.54 58.21 .030 46.12 53.68 55.94 2.775 55.19 58.63 .040 2.785 46.45 54.06 56.35 55.59 56.75 59.05 .050 2.795 54.45 55.99 46.78 59.48 .060 54.84 57.16 2.805 47.12 56.39 59.90 57.57 .070 2.815 47.46 55.24 56.79 60.63 .080 2.825 57.98 47.79 55.63 57.20 60.76 .090 58.39 2.835 48.13 56.02 57.60 .100a> 61.19 2.845 58.80 48.47 56.42 58.01 .130<3> 2.875 60.05 62.48 49.50 57.61 59.24 62.92 .140 60.47 2.885 49.84 58.02 59.65 .150® 63.36 2.895 60.89 50.19 58.42 60.06 S4 Size, MM Std. SI S2 S3 +.010" 2.755" +.020" 2.765" +.030" 2.775" +.040" 2.785" +.050" 2.795" 70 +.050" 2.795" +.060" 2.805" +.070" 2.815" +.080" 2825" +.090" 2.835" 71 72 +.090" 2.835" +.100" 2.845" +.110" 2.855" +.120" 2.865" +.130" 2.875" May \6,2005 "45 Perfonnance", by VICTORY LrnRARY Page 39 of42 Notes: CD All 1929-73 D, R, W, G, K & KH 45 & 54" motors are the same bore size <n Largest commercially-available 45 piston oversize 7 mm cC (J) Norton 750 Atlas (73 ) or Indian Scout 45 (2 /8") piston ® Absolute upper bore limit of all 45 std. type cylinders, not recommended ~ Std. stroke, all 1929-02 D, R, W, G, K & XL flywheels (except 1954-56 KH, & XR750) ® Indian Chief 74" flywheels (J) 1954-56 KH flywheels ® Indian Chief 80" flywheels Gear Ratios This Table applies to Harley-Davidson® solos & Rear tire diameter is premised at 26", which is normal Servi-Cars® 1941-73, equipped with the original 59 for 5.00-16, 4.00-18, etc. Other tire diameters will tooth clutch drum, 17 tooth transmission sprocket, and affect figures proportionate to the ratio of diameters. 37 tooth (Servi-Car) or 41 tooth (solo) rear sprocket. Solo: RPM@60MPH Primary Chain Final Drive Ratio MPH@SKRPM Motor Sprocket Note 100 link (solo) 5.27-1 4090 original side-car 73 27 NA NA NA no factory sprocket 100 link 28 3810 4.91 79 100 link 29 100 link 4.74 82 3680 common solo 30 100 link 4.59 84 3560 31 common solo 100 link 4.47 3470 32 87 100 link 4.31 3340 33 90 34 largest factory 100 link 4.19 92 3250 Servi-Car: Motor Sprocket Note Primary Chain Final Drive Ratio MPH@SKRPM RPM@60MPH 22 original Servi-Car 96 link (Servi-Car) 5.84-1 66 4530 5.14 25 * either? 75 3990 4.94 26 * either? 78 3830 27 original side-car 100 link (solo) 4.76 81 3690 28 no factory sprocket NA NA NA NA 29 100 link 4.43 3440 87 30 common solo 100 link 4.28 90 3320 31 common solo 100 link 4.14 93 3210 * 25 & 26 tooth sprockets may need the larger (100 link) solo primary chain. Motor Data Bore 2.7445" - 2.7455" (just under 2%") Stroke 3.8125" (3 13/ 16", same as K & Sportster) 45.12 cu.", 739 cc Displacement Piston skirt clearance (measured at bottom of skirt) .001" - .002" @ 90° to pin axis Ring end gap .010" - .020" Crank-pin OD .999" Rod race ID 1.500" Rod length, on centers 7.4375" Piston pin bushing ID .7925" .875" Shaft OD (sprocket & pinion) .62425" Pinion shaft (bushing end) Page 40 of42 "45 Performance", by VICTORY LmRARY May 16, 2005 Main race ID (sprocket & pinion) Valve head diameter, intake & exhaust Valve stem diameter, intake & exhaust Valve length, intake & exhaust Valve seat angle, intake & exhaust Valve guide OD, intake & exhaust Valve guide ID, intake & exhaust Valve stem-to-guide clearance Valve spring (free length) Valve spring tension, closed Valve spring tension, open Cam end play Cam gear tooth count, all Rear intake & front exhaust 2 nd row Cam journal size; crank-case, all 4 cams Cam journal size; cam cover, # 1 cam (pump drive) Camjournal size; cam cover, # 2 cam (ignition) Cam journal size; cam cover, # 3 & 4 cams Feed pump pressure regulating spring (free length) Vane spring (free length) Check valve spring (free length) Head bolt torque Spark plug torque (18 mm) 1.376" 1.625" (not interchangeable) .3395" 5.502" 45° .5645" .3424" .0035" (.0055" is listed as acceptable) J9 2 h2" 50 - 60 lbs. (seated @ 23/ 16" assembled ht.) 90 - 100 lbs. (to std. lift of .312") just free - .005" 28 36 .68675" .68675" 1.12425" .7805" 1 2 / 16" (1941-73),1 5/ 8" (1937-40) 15h2" 19/ 32" 601bs. 18 - 25 lbs. Harley-Davidson transmission's intermediate gear ratios (1 st& 2°'1 are the result of the transmission of power through two pair of mating gears, one of which is the main drive gear being turned by the countershaft high gear (on the cluster). The numerical gear ratio is determined by multiplying the two pair's ratios together. Since the high gear ratio is the product of the tooth counts: 22 for the clutch gear and 14 for the countershaft Transmission Ratios gear, the lSI number is always 1.571429. The other number is the product of the pair of gears (mainshaft + countershaft) for that ratio. In 3rd gear the clutch gear is locked to the mainshaft, so no power is transmitted through the gears, and the ratio is 1.000 (1-1). Although the intermediate gears still turn, they're only idling. Below are some useful tables of common ratios and their effects on performance. Components 1st gear 2nd gear 3rd gear (clutch gear) Std. Gear Tooth Counts Countershaft Gear 14 18 22 14 Cluster Gear 1st gear 2nd gear 3rd gear Reverse gear Ratio Std. May 16,2005 Std. Ratio Calculation Teeth MIS Teeth CIS 22 14 18 18 26 (none) 51 1 2.47 Std. RPM Loss on Shift RPM Drop to 2nd 2nd 36.4% 1.57 "45 Performance", by VICTORY LIBRARY 22/14 x 22/14 28/18 (locked) Ratio 2.469388-1 1.571429-1 1.000000-1 Mainshaft Mating Gear 22 18 14 19 RPM Drop to 3rd 36.4% 3rd 1.00000 Page 41 of 42 Components 1st gear 2nd gear 3rd gear (clutch gear) WR Gear Tooth Counts Countershaft Gear 14 18 20 Cluster Gear 1st gear 2nd gear 3rd gear Ratio WR 51 1 1.96429 Components 1st gear 2nd gear rd 3 gear (clutch gear) 1sl 2.609467 Components 1st gear 2nd gear rd 3 gear (clutch gear) Page 42 of42 1940 Std. Ratio Calculation Teeth MIS Teeth CIS 13 21 17 17 21 13 x 22114 18118 (locked) Ratio 1.964286-1 1.250000-1 1.000000-1 Mainshaft Mating Gear 22 18 16 3rd 1.00000 RPM Drop to 3rd 20% 21/13 x 21/13 17117 (locked) Ratio 2.609467-1 1.615385-1 1.000000-1 1940 Std. Ratio RPM Loss on Shift 2n<1 RPM Drop to 2 n<1 RPM Drop to 3r<1 38.1% 1.615385 38.1% 1940 Special Ratio Calculation Teeth MIS Teeth CIS 21 13 17 17 15 19 19/15 3rd 1.00000 Ratio x 21/13 2.046154-1 17117 (locked) 1.266667-.1 . 1.000000-1 1940 Special Ratio Gear Tooth Counts Countershaft Gear Mainshaft Mating Gear 13 21 17 17 19 15 Cluster Gear 1st gear 2nd gear 3rd gear Ratio WR WR RPM Loss on Shift RPM Drop to 20<1 2nd 1.25 36.4% 20116 1940 Std. Ratio Gear Tooth Counts Countershaft Gear Mainshaft Mating Gear 13 21 17 17 21 13 Cluster Gear 1st gear 2nd gear 3rd gear Ratio WR WR Ratio Calculation Teeth CIS Teeth MIS 14 22 18 18 (none) 20 1sl 2.046154 1940 Special Ratio RPM Loss on Shift 2n<1 RPM Drop to 2n<1 RPM Drop to 3rd 38.1% 1.266667 21.1% "45 Performance", by VICTORY LmRARY 3rd 1.00000 May 16,2005 Service Tips Electrical » Motor misfiring only under load, but will rev OK under light throttle: problem is probably electrical (rather than mixture); check for bad ground, condenser, coil, plug wires, closed points, etc. » Easy spark timing check: 1. Open the points with a clean screwdriver blade, knife, etc. 2. Put a piece of cellophane (cigarette pack, etc.) between the points 3. Put slight tension on the cellophane as you slowly rotate the motor 4. The cellophane will pull free as the points open - this should happen when the timing mark has just ar rived in the correct position in the timing hole. » Generator-equipped bikes without magnetos must have a battery, a capacitor is not enough. » To install a late generator (65A, 58, etc. with 5/ 16" screws) in an early motor (W' screw holes): Drill the cam cover & right case half to 5/ 16", or Use Y4-24 heli-coils in the existing generator screw holes to use the Y4-24NS screws, and Use the correct drive gear; 31 075-58B for a1145 & U-Series has the oil slinger » When adding shims to adjust your generator position: if the generator body has a drain hole, make a match ing hole in each shim, or they will block the drain. Beer cans make good shim material. » To set generator gear lash, put 3 shims (.004" each) under the generator body, or until the gear turns freely. Run a sheet of newspaper through the gears to get a cut where the gear teeth mesh. Examine the paper closely: If the paper locks up the gears, the generator is too close (tight), add a shim and test again If the paper isn't cut, the generator is too far away (loose): remove a shim and test again If the marks from the teeth run across the paper on an angle, the generator body may be on an angle check for alignment The paper should only have a cut or mark at mid-gear tooth face, not at the bottom flat or valley of gear teeth, or your gear is worn out Intake » A Bernzomatic propane torch can be used to detect an intake system leak. Start the motor, and just barely crack the torch valve (don't light it). Hold the nozzle tip near any suspected leaks - if the motor speeds up or smoothes out, you've found your leak. }) Ragged idle and no response to idle mixture adjustments generally means an air leak; if the 2 spark plugs are different colors, the pale one is the cylinder with the leak; this will also be the warmer cylinder, head, and exhaust pipe. » Bad throttle response from a big carburetor - go richer. » Good valve head color as a mixture indicator: tan to brown intake, red exhaust (white exhaust is hot, lean, or both). » To tighten early intake manifold nuts (45, K & big twin 1930-54), leave the cylinder base nuts loose so that the cylinders can be slightly rotated into alignment until the thread on the 2 nd nut engages. Remember to re tighten the base nuts securely after installing the manifold. » Excellent non-factory base nut wrench: automotive starter wrench (Craftsman, Snap-On, Mac, etc.) 2Ys" 2" lYs" Wrench sizes for manifold nuts, measured across the flats 1940-68 WLDR, WR, K, KH, KR; 1940-54 OHV big twins (4 bolt manifolds) 1930-48 V & U-Series; 1936-39 OHV; 1939-* WLD 1932-73 45 std. models Crankcases » When assembling the cases in any roller-bearing type motor (pre-Timken: big twin OHV & side-valve 1917 54, all 45 & singles; no K-Models or Sportsters), you may have to use end-play collars of2 completely different sizes, rather than splitting the total end-play between 2 washers. Try to get the beam of the male rod centered between the case halves within .015". Connecting Rods » To check for a cracked or broken female connecting rod, suspend it from the small (piston pin) end with a piece of thread, and strike the big end sharply with a metal object. A good rod will ring like a bell, a bad rod will make a "clunk" sound. If bad, try 1 more test. Press out the rod races and try again - it may pass this time. A loose or cracked race will cause the same symptom as a bad rod. » To straighten a big twin rod, don't bend it in the motor - the factory now deprecates this method, as it ruins rollers, etc. Use an old 'Glide fork leg cut down a few .001". Rod Data (lengths measured center of main race to center of pin bushing) Year ID cast into rod beam Length Application 1932-1973 UA 7.4375" 45 (except 1939-52 WLDR, WR) 1957-1985 -52 K, KH, Sportster (except XRl 000) 1983-1984 -83 6.926" XR1000 1986-* Evo Sportster 1930-1936 7.6875" V-Series SA 1937-1948 7.90625" U-Series ZA 1936-1972 OHV big twin XA 7.46875" OHV big twin 1973-1983 7.4375" Oil System » After an oil change or long storage, be sure your oil feed pump is not air-locked (air bubble obscuring a passage). Remove the oil pressure sending switch and kick the engine over until a steady stream of oil comes out - this bleeds the pump. » To remove a bad flutter valve (25350-37) from a 45 or UL cam cover: If the triangle plate is gone, the hole behind it is a good fit for a 4-40 tap. Tap it thru, then I have a nice socket head 4-40 cap screw that I put thru the backside of a counter bored do-hickey (counterbored slightly larger and deeper then the valve assembly being pulled. Tum the screw till the valve lifts out. File the stake marks out of the cover first with a curved file to help (courtesy of Steve Lemay, Resurrection Cycle Works). Temperature » Use Marvel Mystery Oil in the gas (4 oz. per 10 gal., about 1 oz. in a 3~ gal. tank is OK). This reduces en gine temperature slightly, and also provides additional lubrication to valves and guides, especially in flat head motors. Transmission & Clutch » Hard shifting may be due to: Loose chains Low transmission oil level Bent shift forks Loose transmission bolts Loose rear axle or adjusters Dragging clutch » Big twin mainshaft end-play is controlled by the ball bearing (H-D # 9020). Try pulling in the clutch with the motor running; see if the pushrod adjusting end moves in and out. If you have more than a few thousandths your bearing is toast. Miscellaneous » Vibration may be caused by: Loose axles Low transmission oil level Bent shift forks Loose transmission bolts Loose rear axle or adjusters Dragging clutch » Always use a flat washer plus a lock under every bolt and nut (std. aircraft practice). » Bolt and stud threads must be long enough to show 1V; threads minimum after nut is tight. » Always use Nevr-Seize or equivalent product on any steel part going into aluminum, or you may not get it out. » To disassemble a VL wheel hub use a 4x4 hub lug wrench. Cut down the lugs with a Dremel tool to fit the VL hub nut, 3913-30. The wrench fits a V;" drive ratchet and allows removal of a stubborn and rusty hub nut. To buy the correct wrench, just measure the hub nut OD and measure the ones at the Auto store until you get a close fit and then modify to fit nut (My wrench is marked K-D 2467 and I bought it at NAPA.). This wrench eliminates using chisels and punches, which do more harm than good. (tip courtesy of Greg Fit tro, AMCA) Thread sizes » Heads bolts: Knucklehead, flathead 74 & 80,45 1940-73 7/ w 16 NS (Nat'l. Special) Head nut, 45 1929-39 + some later Servi-Cars %-16 NC (Nat'l. Coarse or USS) Panhead, shovelhead 7/ w20 NF (Nat'l. Fine or SAE) K&KHmodel 7/w14NC 3/8-20 NS » Star hub brake-drum lug » Cam cover, oil pump, tappet block screws 1930-76 \f4-24 NS » Fork stem: Big twin 1930-36 1Ys-24 NS Big twin 1936-* 1-24 NS Single, 45, K, early Sportster Ys-24 NS 15/ 16- 24 NS Later Sportster » Handlebar end threads: 13/ 16-24 NS 1931-35 big twin, 1931-3945 1936-48 big twin, 1940-57 45 Ys-24 NS » Zerk fitting, 1924-* 5/ 16-32 NEF (Nat'!. Extra Fine) 7/ 16-28 NEF » 45 clutch lever, 1941-73 7/32 - 32 NS » Gas tank top screw, 1918-35 all, 1937-7345 » Cylinder base studs 7h6-14 NC Big twin, 1930-83, to case* 7/ 16- 20 NF Big twin, 1930-83, to nut 45, K, Sportster 1929-85, to case %-16 NC 45, K, Sportster 1929-85, to nut %-24 NF * Note: same cylinder base stud pattern is used on all big twins 1926-83 » Gas tank petcock, 1940-65 %-18 NS Are Harleys That Bad? The myth is that Harley-Davidson® motorcycles are fun, patriotic, valuable, but inefficient and obso lete. They appear to produce much less horsepower than an equivalent J****ese bike, and are therefore inferior. This is not true. A fair evaluation cannot be made solely on the basis of displacement (lOOOCC, for exam ple, regardless of motor type). Dr. F. W. Lanchester, one of the earliest true geniuses of the internal com bustion engine, analyzed this problem 90 years ago, and correctly decided that comparing motors on the basis of size only gave an unfair advantage to motors with more cylinders, and favored those with larger bores and shorter strokes. He devised a formula to allow motors with different numbers of cylinders, and different proportions to compete on a fair and equal basis, with the superior product to be determined by the execution of its individual design & construction, regardless of bore and stroke. His original formula needed only slight modification to be accurate today: lIP = B1.65 X S·5 X N x C In plain English, the horsepower of a motor is equal to the Bore taken to the 1.65 power, times the ~troke taken to the .5 power, times the Number of cylinders, times a Constant representing the quality of material available, type of fuel, barometric pressure, temperature, etc. I've arbitrarily chosen to value "c" at 4 for a race motor, and 60% of that, or 2.4 for a street motor, to return a realistic number. For those of you who've forgotten their math, I've used superscript to indicate powers. "B2" is "B squared", or multiplied by itself; "B's" is "square root ofB". Today's 'pocket calculators make easy work of this. , Using this fonnula, an Evo 80 (81.7cu ,Jn,) motor has its theoretical power calculated as follows: B = 3.498", S = 4.25", N = 2, C = 4 HP = 130 (race), 78 (street) For comparison, take a "technically superior" Kawasaki motor, the 4-cylinder, double-overhead camshaft, 4-carburetor, big-bore, short-stroke KZ1000 (62cu .in,): B = 70 mm , S = 66 mm , N = 4, C = 4 (same as H-D) HP = 137 (race), 82 (street) Doesn't look that good now, does it? They should both produce about the same power. But doesn't that make the Kawasaki better? It does the same work, with less displacement? No, it's supposed to!! The Harley-Davidson@ does not have the advantage of size. Z Rotor The original 45 oil return (lower) pump & breather assembly (shown) works acceptably in std. form. It can be installed and timed on the original marks as per the service manual if you wish. How ever, breather timing is always a compromise; the most effective settings for a specific engine size and speed is not best for others. Some additional power can be had by increasing the breather timing. To avoid incomplete oil return from the crankcase (which can occur when breather timing is too extreme for the engine size and '--_ __ _ _ -' speed) we can open & close the breather at the proper times (insuring that the pressure begins to blow down when it should, etc.), but restrict the breather area during the beginning & end of this cycle, so that vapor speed is kept high enough to keep the oil droplets in suspension and return them to the cam chest as in tended. The modifications given here are based on an average of std. timing figures taken from 45 motors using the factory timing mark: A total duration of about 221 0 works well (similar to 1972-76 1000cC Sportsters). The following suggestion will produce good results in most motors, but the exact position must be "timed in". The fmal positions should be determined with a degree wheel, etc. The Kawasaki's power is the result of physics, not better quality, as the fonnula shows! ! By the way, side-valve motors, such as the 45, K, and U-Series have also been given another allowance to make up for their restricted breathing and low com pression. AMA Class "c" racing pennitted 50% more displacement for a side-valve when competing against an OHV or OHC motor. This means that the correc tion factor for theoretical power for a 45 is not 4, but 2/3 of 4, or 2.67 (2.67 + 50% = 4). The math for a 45: B = 2.745", S = 3.8125", N = 2, C = 2.67 HP = 55 (race), 33 (street) The KR motor easily beats that - over 60hp in 1969, using regular gas. A K-Model is rated 32 hp. So, even Harley-Davidson's@ oldest types are better than you thought . .. Stop apologizing, and be proud of what you ride! Rather than take a full-height parallel cut off each side of the two slots, reduce the slot area during this extended segment of the tim ing. This will be done by making a cut extending only part of the height of the existing slot on both sides. The cuts will not be made to only one side, or symmetrically to both sides, since this will affect timing and prevent use of the original mark. Instead, amounts proportionate to the added duration will be removed from the opening and closing sides (as shown here). The opening side of the rotor is '----_ _ _ __ ----' found by holding the rotor in the nonnally-installed position (drive gear on top, and the slot directly in front of you). The opening edge is on your right. The cut must widen the slot .115" more to the right, mak ing it open earlier. The bottom of the new cut will be flush with that of the existing slot, but only extend upwards by .250". This insures that any residual oil from the last cycle remaining inside the rotor will be quickly forced upwards into the cam chest, and then to the return pump. The closing side of the rotor is on your left. We will make another cut here, going .084" to the left this time, but with the top of the cut flush with that of the existing slot, and extending down .250". This is to allow additional time for clean air to flow back into the crankcase After Bottom Dead Cen ter, to prevent a strong vacuum from fonning as the pistons speed upward. Keeping the new slot extension as high as possible means it will tend to bypass any Function Total duration Breather opens Breather closes residual oil lying in the bottom of the rotor, rather than drawing it back into the crankcase. When these cuts are completed, remember to turn the rotor 180 0 , and do the other slot exactly the same way. Std. Vs. Modified Breather Duration Std. Duration Modified Duration Added Duration 169° 221° 52° 55° ATDC 25° AIDC 30° 44° ABDC 22° 66° ABDC Added Width .199" .115" .084" Good Numbers? Purpose The following information is a guide to help you fmd, match, evaluate, buy and rebuild Harley-Davidson@ 2 cylinder motors ("twins") manufactured from 1930-69. The 1970-* numbers are considerably different, both in location and appearance, and are beyond the scope of this booklet. Specific topics are separated for reference. Methods of Identifying the Engine Crankcases There are four basic "Data Items" that fonn the framework of physical and legal identification of Harley Davidson motors for the model years 1930 through 1969 (inclusive). As all four of these may not be accessible to casual inspection, the ones which can be verified take on even greater importance. All four of these items must agree (with known exceptions as noted<D). I will explore them in chronological order of production: Fonned in the molten aluminum, as the crankcases are cast at the foundry Item 1 Case Casting N~ Item 2 Physical Characteristics Partially determined by machining variations on the casting Factory-stamped after the left & right crankcase casting halves have been Item 3 Case Bottom N~ matched for use as a "mated pair", and machining has been completed Stamped in place on the boss after the bottom numbers, and only if the mo Item 4 Serial NQ tor is fully assembled Item 1: Engine Crankcase Casting Number Many engine components carry a cast-in (not individually stamped) number coded for the 1st year of use (the "model year" begins with 151 production on September 15t of the previous year), not the year of manufacture or sale. This is especially true in early models, as many components are used for long time periods, and motors may contain many parts made either earlier than the model year (due to carry-over of design from previous types) or later (by inclusion by an owner or mechanic of improved components). The exception to this rule is the cast-in number in the left crankcase half itself, which must always be the same or earlier than the Vehicle Identification Number or "VIN" ("VIN number" is, of course, redundant). Even this has exceptions (in the case of authorized dealer replacement of crankcases, and military or police contracts), in which a later crankcase set may be substituted provided that all laws are obeyed. Item 2: Physical Characteristics of the Engine It is a frequent practice to incorporate components from other model motors to improve appearance or per formance. Some of these are bolt-on modifications, others require machining, still more complex are those re quiring welding, and still others are impractical to the point of approaching impossible. Tables A & B show the most common crankcase casting numbers, and the model year group for which they are legal as original equipment. Item 3: Engine Crankcase Bottom ("Hidden") Numbers These are found on the lower exterior curved surface of the crankcase halves, below the front motor mounts. If the two halves were originally machined and assembled at the factory as a mated pair, the numbers will be identical to each other, but will not match the VIN. In 1930-47 motors the bottom numbers will appear as follows: Last 2 Digits of Year I (Hyphen) I Production Sequence (beginning with 1000) For example: 37-1634 is a 1937 motor, the 634th produced that year (may not be the 634th vehicle, or even assembled motor). The same bottom number will appear on both crankcase halves (if they are still a factory matched pair). It is common practice for the motor (or crankcase halves) to be manufactured up to 5 months prior to the model year, since new vehicle production began on September 15" and will be stamped for the actual year of production in the bottom number set (a crankcase set made & bottom-stamped in November of 1938 will be YIN-stamped for the 1939 model year). The purpose of these numbers is the factory production code sequence the crankcases are only numbered after the left & right halves have been finish-machined as a mated pair. Fol lowing this, in most instances, the motor will be completely assembled, and assigned and stamped with a VIN. Once this has been done, the motor will be sold as a complete engine (with a bill of sale indicating the VIN), or installed in a chassis and sold as a vehicle (with a title to the VIN). The vehicle is legally the year shown as the 15t 2 characters in the VIN. However, the crankcases may also be sold to a dealer for service replacement pur poses (in which the intent was for the dealer to repair a damaged motor with the new crankcases). After 1948, a slightly different code is used; the bottom numbers will appear as follows: Prefix Code + Last 2 Digits of Year I (Hyphen) I Production Sequence (beginning with 1000) A numerical prefix appears before the year as an engine type reference. Remember that engine type does not invariably indicate displacement, VIN letter type, or external appearance. Crankcase Bottom Number Preflxes VIN Primary Character Motor Description Type Prefix Single-cam big twin OHV 74 1 F m· Single-cam big twin OHV 61" 2 E m· G, W Servi-Car,45 solo or military 3 I· 74 & 80" sidevalve 4 II· U Sportster 883 & 1000cC 7 X I· For example, a 1963 Sportster may be numbered 763-3128 (7 for Sportster, 63 for 1963, and the 2127th motor pair produced that year). I do not know if production numbers begin at 1000 for each engine type, or if the 15t set of each year is 1000, and the sequence continues regardless of motor type. The production numbers will always exceed the total num ber of vehicles or motors produced that year, due to discards from errors, crankcase sets sold as replacements, etc. so the VIN will always be a lower number than the production number (except, possibly, for the very 1st motor made each year). Non-matching left & right crankcase halves are common, indicating that (if done legally) a replacement right crankcase half has been acquired and installed to replace a damaged (or obsolete) original. The left (VIN bearing) crankcase half must always have a bottom number consistent with the VIN, with the remarks above applying. Removal of these numbers (generally by grinding) does not technically fall within the scope of prose cution under the "altered VIN" statutes, but certainly it is useful as physical evidence of intent to defraud, either by destruction of evidence contradicting the (improper) VIN, or by falsifying evidence (with the presence of a re-stamped bottom number). Item 4: Serial Number The serial number (also referred to as the "VIN") contains three Data Items: I I Last 2 digits of Year Primary & Modifying Characters Title Sequence (starts @ 1000) They will appear as a stamped (recessed below the surface) impression, 3/ 16" high, in the exact order shown. No Items will be absent. I believe that VINs begin at 1001 for each engine type, not in a continuous sequence throughout the produc tion year. There may be 40U1257 and 40E1257 (each the 257 th motor of its Primary Character sold that year), but not 59XLH1483 and 59XLCH1483 (both the same Primary Character: Sportsters® of Type I). The numbers used 1930-68 will all have appearance as shown in Diagrams. The serial number has several purposes: » Proof of ownership: this is the sole identification number appearing anywhere on almost all H-D motorcy cles through 1964 (there is no frame number until the 1970 model year, with the possible exception ofvehi cles intended for export sale, military, police, etc.) » Year of sale: this may not be the year of actual manufacture of all of the components, but is always the model year for which the vehicle was sold (see Item 3) » Engine displacement: the Primary Character (s) appearing after the year is a code indicating the engine dis placement range (more than 1 choice) (see Table B) » State of tune: the letter(s) after the Primary Character also indicate the horsepower level andlor intended use of the engine. Generally, more letters means more power or more specialization. » Anti-theft coding: the numbers and letters used by H-D are not common machine types, but are of a specific size, shape, and style to make re-numbering more difficult to accomplish, and simpler to detect. » From 1960 on another feature is used, in which the year and the first digit of the title sequence must agree, odd or even. In other words, a 1963 motor will appear: 63FLI004, or a 1966: 66GA4778. The 1st number sold will be 1001 (odd years) or 2001 (even years). To get the approximate production volume, subtract 1000 (odd years) or 2000 (even years). 64FLH2448 is not the 1448th motor sold of this type (2448 - 1000 = 1448), but the 448 th (2448 - 2000 = 448). Location On all motors during this time period, the number is found on the left crankcase half, directly above the sprocket shaft, below the center crankcase through-stud, and centered between the front & rear cylinders, as shown, left (1937UH). In this area a rectangular boss is cast into the crankcase metal, slightly raised above the surface, approximately 25/ 16" long by %" high. It is always visible above the primary cover (chain case). Appearance of the Boss The surface of the boss is "as cast", and should show no polishing, grinding, filing, or machining marks. The grain structure and "coarseness" should match the aluminum of the parent crankcase casting surrounding the boss. The edges of the boss are not sharp, but slightly rounded to blend into the parent crankcase metal. The boss protrudes approximately 1/16" from the crankcase surface. The characters are all of uniform 3/ 16" height, and are accurately placed vertically (parallel), but may not be on the same horizontal line (in other words, the tops & bottoms may not exactly line up). Since the length of the boss is fixed, the characters will be more crowded when more of them appear, but the stamped characters will be centered, and the length of blank space appearing before & after the characters will be the same on either side of the boss; the numbers are never placed at one end of the boss with blank space at the other. In some VIN types such as K, Servi-Car (0) and Sportster (XL) there may be a blank space where the center stud nut clearance cut is tangent to the number boss separating the year & primary VIN character from the title sequence; see OW 16. In some motor types (such as the W & 0) the boss will show a connection with the nut for the stud (men tioned above) in its upper center. In late 1936-39 E type and all U type motors two ears or lugs appear above the boss, approximately 1" apart. In the U type they align the carburetor support bracket, and may no longer be necessary; however if they are missing or ground down, the boss may have been altered; see DW 16. Examining the Boss for Alterations When examining an assembled motor, in some crankcases only part of the exterior of the left crankcase is open to scrutiny (the casting number is either inside the crankcase, or inside the area covered by the primary cover). This is unfortunately true in the most valuable (and frequently stolen) motors: the 1936-69 E & F types. Fraud This does not even begin to explore the frauds involving non-existent numbers, how to detect fake based on case castings, how high could a number be per year, which left and right combinations are possible, bad stamps, welding. Anyone who objects to making a rubbing or pic of the VIN is a liar. There are no records of what numbers were actually made before 1960, only the total volume is known. About 113 to 112 of the stuff I see for sale has bad number stamps, and of the ones that appear genny some are good (but illegal) re-stamps, some may have liens, stolen 30 years ago in another state, etc. "Running the number through the computer" does nothing but do it anyway. My favorite un-detectable fraud: each VIN is only used once (dub), but a number series is continuous for each motor type (big twin, Sportster, 45). This means that if 51 FL3230 exists (and you can find out by watching eBay etc.) 51EL3230 DOES NOT EXIST (nor 51F3230, 51E3230), and is therefore "safe" to use as a fake number - can't be in use, can't be stolen. Probable Cause Even if the VIN itself appears genuine, the physical appearance of the left crankcase absolutely must agree with the year & motor type consistent with this number. The cylinders, heads, carburetor, etc. may all have been modified, interchanged, etc. without affecting the legality of the vehicle itself (assuming the parts were acquired legally). TABLE A: Left Drive or Sprocket Side Crankcase Half CslgN2 Bearing; Notes on Physical Appearance Motor Years VINPrim. Type Seal Size Used Character 45" Roller; Main race ID: 1Ya". Vertical generator on 1929-31 112-29 D I· Cast-in left, parallel to front cylinder, crankcase drain lever Front horizontal generator mount, crank 1932-36 112-32 R case drain lever 1937-38 More fins than 112-32, no crankcase drain 112-37 W,G 1939-73 Roller; As -37, but snap-ring seal 112-392 W,G Snap-ring 1941-52 Ball; Main race ID: 2". Similar to 112-392 but WR Snap-rinK ball bearings 45" 24534-52 K 1952-53 Timken; Unit construction; transmission service None requires crankcase disassembly 1953-54 Ball; KR Main race ID: 2". Very similar to 1952-53 Snap-ring K but ball bearing 24534-54 54KHI001 54" early 1954 Timken; Very similar to 1952-53 K 54KH2620 None 45" late 1954-69 Ball; KR Main race ID: 2". Unit construction; trans54" late 1954-56 Snap-ring mission is serviced through access ("trap") KHR door 245XX-54 54KH2621 54" late 1954-56 Timken; Very similar to 1954-69 KR 56KH**** None 245XX-57 X,XL,XLH 54" 1957-66 Sportster, all 1967-69 XLCH Sportster, kick-start only 1958-69 Ball; XLR Main race ID: 2". Very similar to 245XX Snap-ring 57 but ball bear 245XX-67 XLH 1967-69 Timken; Sportster, electric-start (large solenoid None bulge on top of transmission case) 74,80" Roller; 112-30 V 1930-36 Main race ID: 1W'. Case drain lever II· Cast-in 74,80" 1937-39 112-37 U Similar to 112-30, but no crankcase drain Roller; 74,80" 1940-48 As -37, but snap-ring seal 112-402 U Snap-ring Type Cs!g NQ III· VIN Prim. Character 112-35 E 112-406 E F 112-48 E F 245XX-53 24547-55 245XX-65 245XX-65 n· Years Used 1936-39 1940-47 1941-47 1948-52 74" 74" 74" 74" 1953-54 1955-64 1965-68 1969 Bearing; Seal Notes on Physical Appearance Roller; Cast-in Roller; Snap-ring Main race ID : 1 Yz" As -35, but snap-ring seal Roller; Snap-ring Main race ID: 1Yz". Wider top deck surface than 112-406, with oil drain channels No oil drain in decks Heavier than earlier Large flat bearing boss As above, but no seal Timken; Threaded Timken; Threaded Timken; None B: Right (pinion or Timing Side) Crankcase Half VIN Motor Years # Carns; Bearing; Notes on Physical Appearance Brg. Type Seal Char. Size Used 112-29 D 45" Main race: 1'8" ID. 1929-31 4; Brass Brass; No generator drive None 112-32 R 1932-36 Horizontal generator drive on right side 1933-36 112-37 W,G 1937-38 Roller; Main race ID: IO/S" Return pump cavity Cast-in 112-39 W 1939-52 As -37, but snap-ring seal Roller; G 1939-57? Snap-ring 24558-58 G As -39, with drains from tappet block holes 1958?-73 to crankcase interior 1941-52 4; Ball Ball; Main race ID: 2". Similar to above, but ball WR 45" Snap-ring bearings 245XX-52 K Main race ID: IO/S". Unit construction, cyl 45" 1952-53 4; Brass Roller; Snap-ring inder oil feed holes in top deck surfaces Main race ID: 2". As above, but ball bear KR 45" 1953-69 4; Ball Ball; Snap-ring ing 245XX-54 KH 54" 1954-56 4; Brass Roller; Very similar to K Snap-ring Main race ID: 1O/S". 2 rocker oil feeds from 54" 245XX-57 X 1957 Ys-27 NPT threaded holes near tappet blocks (no oil holes in deck) 245XX-57 X 54" 1958-69 4; Needle As above exc~t cam bearings Main race ID: 2". As above, but ball bear XLR 54" 1958-69 4; Ball Ball; Snap-ring ing Main race ID: 1". Horizontal generator 112-30 V 74 1930-36 4; Brass Brass; 80" 1935-36 None drive on right side 112-37 U 74 1937-39 Roller; Main race ID: 1W'. 80" Return pump cavity Cast-in As -37, but snap-ring seal 112-40 U 74 1940-48 Roller; 80" 1940-41 Snap-ring Q Type Cs!gN I· F F F F Motor Size 61" 61" 74" 61 74" TABLE Type Cs!g NQ III· VIN Motor Years Char. Size Used 61" 1936-39 112-352 E 112-40 E 112-40 E F 112-48 E F 245XX-53 F 24563-55 F 24563-58 F 61" 61" 74" 61 74" 74" 74" 74" 245XX-63 F 74" 2456X-65 F 245XX-66 F 74" 74" 1940 1941-47 # Cams; Bearing; Brg. Type Seal 1; Brass Roller; Cast-in Roller; Snap-ring 1948-52 1953-54 1955-57 1; Needle 1958 early 1963 late 1963 -1964 1965 1966-69 Notes on Physical Appearance Main race ID: 1W'. Horizontal generator drive on right side As -35, but snap-ring seal Oil feed holes in top deck surfaces; drain channel at extreme rear deck Lifter screen near rear tappet block similar to -53 Main race ID: 1%" No deck oil feed; single fitting (90 0 Ys-27 NPT) between tappet blocks Oil fed from cam cover As above Appearance of the Stamped Numbers Several types of number stamps were used in the period 1930-1958. Here are some samples of VIN stamps believed to be authentic, along with the year & model: The "Family Rule" Generally, very few components can be interchanged between the 3 major Types or "families" of engines. Each Type began as a separate engineering design, not a modification of an existing type. Both Type II· & III· are commonly referred to as "big twins", although this also refers to earlier 61 & 74" twins (1914-29), which are yet another design. Type I· is the oldest (began production in September 1928), and includes both side-valve and overhead valve versions, and both separate transmission and "unit" (integral transmission in the crankcases) construction. The only version currently in production is the Evo Sportster. Type II· is a "scaled-up" version of Type I· and very similar in appearance, but with very few interchange able parts (except for the oil system and ignition). This was built as a side-valve only, with the same separate transmission as the Type m·. Type II· production ceased in 1948; therefore it's the only "extinct" "family". Type III· is completely different from both, but has certain dimensions and components in common with Type II· as to crankcase, flywheel and cylinder base flange sizes, among others. This was built as an overhead valve only, with separate transmission. All modern big twins are Type III', including Evo motors (except Twin Cam 88). En2ine Family Types Years Displacement, in: Common Name(s) Type Design VIN, CC Inches 151 Letter I· Small4-Cam 45 solo, "3 cylinder", flathead 1929-31 45 750 D 750 R 45 solo, trike, flathead, Servi-Car 1932-36 45 750 45 trike, flathead, Servi-Car 1937-73 45 G 750 W 45 solo, army bike, flathead 1937-52 45 1952-53 45 750 K model, flathead Sportster K 1954-56 54 885 KH model, flathead Sportster ironhead Sportster, 55", 883, 900 1957-71 54 X 883 1972-85 61 ironhead Sportster, 61 ", 1000 1000 Large 4-Cam V big flathead, V, VL, VLD, 74 (called 80 II· in error) 1930-36 74 1200 big flathead, VH, VHS, VLH, 80 1935-36 80 1300 1200 U big flathead, U, UL, 74 (called 80 in error) 1937-48 74 big flathead, UH, ULH, 80 1937-41 80 1300 E HI· Single Cam knucklehead, EL, 61 1936-47 61 1000 1948-52 61 panhead, EL, 61 1000 F knucklehead, FL, 74 1941-47 74 1200 panhead, FL, FLH, Hydra-Glide, Duo-Glide, 1948-65 74 1200 Electra-Glide, 74 generator shovelhead, FLH, Electra-Glide, 74 1966-69 74 1200 Note: only Types II· & Ill· are referred to as "big twins", although some parts interchange with Type I·. Some Type I· motors (Evo Sportster 1100 & 1200) are larger in displacement than some Type m· motors (61" EL). Legal Adaptations & Conversions It is possible to use not only non-matching left & right crankcase halves (i.e., numbers don't match, but crankcases are from the same motor type), but to install a right half from the same motor type but manufactured considerably earlier or later. A clever builder can potentially use a right half from a different motor type. How much work is required is determined by the degree of similarity between the motors, but generally the "Family Rule" (Data Item 2, above) applies. Table C: Possible Adaptations Years Motor Notes & Adaptations Size D,DL,DLD 45" Simple adapt: K -type cylinders & heads, etc. 1929-31 R, RL, RLD, RLDR Possible adapt: X-type cylinders & heads by ex1932-36 tensive heli-arc on right crankcase half & machinW, WL, WLA, WLC, WLD, WLDR, WR 1937-52 mg G,GA,GE 1937-73 K, KK, KR, KRTT, KRM 45" Simple adapt: KH-type cylinders & heads bolt on. 1952-53 Possible adapt: X-type cylinders & heads by ex1952-69 KH, KHK, KHR, KHRTT, KHRM 1954-56 54" tensive heli-arc on right crankcase half & machin ing V,VC,VR,VL,VLD,VLH,VHS 1930-36 74, Simple adapt: U-type cylinders & heads bolt-on. 80" Simple adapt: E or F cylinders & heads. 1935-36 VIN Characters U, UL, US, UA, UM, UMG, UH, ULH E,EL,F,FL E,EL,F,FL,FLE,FLP,FLH 1937-48 1937-41 1936-47 1941-47 Alternator & Evo (cone) FLH, FX etc. 1200, 1340 XL, XLH, XLCH 1948-52 1948-69 1970-* 1978-* 1957-71 XLH, XLCH, XLX, XLCR, XR 1000 1972-85 Evo XLH etc. 883, 1100, 1200 1986-* 74, 80" 61, Simple adapt: F-type cylinders & heads 1948-84, 74" but cylinder flange will over-hang left crankcase deck. Possible complex adapt: Evo (1984-*). 61, Simple adapt: F-type cylinders & heads 1936-47, 74" 1966-84. Possible complex adapt: Evo (1984-*). 74, Cases accept almost any barrel up to 3.8125" with 82" out welding, studs must be moved. 55" Possible adapt: most 1952-56 K-type parts. Possible adapt: most X-type parts 1972-85. Possible complex adapt: 1936-85 F-type cylinders & heads. Possible complex adapt: Evo (1984-*), major welding. 61" Possible adapt: most 1952-56 K-type parts. Possible adapt: most X-type parts 1957-71. Possible complex adapt: 1936-85 F-type cylinders & heads. Possible complex adapt: Evo (1984-*), major welding. 54, Cases accept almost any barrel up to 3.8125" with 67, out welding, studs must be moved. 74"