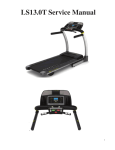
Download LS9.9T TreadmiLL LS9.9T SerViCe maNUaL
Transcript
L S 9 . 9 T T r e a d m i ll
LS9.9T
S ER V I C E MA N U Al
TABLE OF CONTENTS
CHAPTER 1: Serial number location . .......................................................... 3
CHAPTER 2: Important Safety instructions
2.1
2.2
2.3
Before Getting Started ................................................................................................ 4
Read and Save These Instructions ............................................................................ 5
Electrical Requirements .............................................................................................. 5
CHAPTER 3: Preventative Maintenance
3.1
3.2
Preventative Maintenance............................................................................................ 6
Tension and Centering the Running Belt .................................................................... 7
CHAPTER 4: USING THE CONSOLE and program description
4.1
4.2
4.3
4.4
4.5
4.6
Console Description . .................................................................................................. 8
Display Window Descriptions....................................................................................... 9
Program Information.................................................................................................... 10
Livetrack Fitness Journal System................................................................................ 13
Using A CD / MP3 Player............................................................................................. 14
Demo Mode.................................................................................................................. 14
CHAPTER 5: ENGINEERING MODE
5.1
5.2
Engineering Mode . ..................................................................................................... 15
Engineering Mode Overview........................................................................................ 15
CHAPTER 6: Troubleshooting
6.1
6.2
6.3
6.4
6.5
6.6
6.7
6.8
6.9
Electrical Diagram........................................................................................................ 16
Troubleshooting - No Power to the Console................................................................ 17
Troubleshooting - No Console Response.................................................................... 18
Troubleshooting - Erratic Speed or Stopping Suddenly (E1)....................................... 19
Troubleshooting - Incline Motor Issues........................................................................ 20
Troubleshooting - Noise Issues................................................................................... 21
Troubleshooting - Heart Rate Issues........................................................................... 22
Troubleshooting - Speaker / Audio Issues................................................................... 23
Troubleshooting - Static Shock Issues......................................................................... 24
2
CHAPTER 1: Serial Number Location
1.1 Serial Number Location
3
CHAPTER 2: Important Safety Instructions
2.1 BEfore getting started
POSITIONING THE TREADMILL
To ensure your safety and protect the equipment, read all instructions before operating the Livestrong Treadmill.
Place the treadmill on a level surface. There should be 7 feet of clearance behind the treadmill, 3 feet on each side and one foot in front for folding and
the power cord. Do not place the treadmill in any area that will block any vent or air openings. The treadmill should not be located in a garage, covered
patio, near water or outdoors. It is essential that your treadmill is used only indoors, in a climate controlled room. If your treadmill has been exposed to
colder temperatures or high moisture climates, it is strongly recommended that the treadmills is warmed up to room temperature before first time use.
Failure to do so may cause premature electronic failure.
FOLDING THE TREADMILL
Firmly grasp the back end of the treadmill. Carefully lift the end of the
treadmill deck into the upright position until the foot lock latch or deck lock
pin engages and securely locks the deck into position.
Make sure the deck is securely latched before letting go. To unfold, firmly
grasp the back end of the treadmill. Gently press down on the foot lock
latch (A or B) with your foot until the lock latch disengages or pull the
deck lock pin to release the deck. Carefully lower the deck to the ground.
MOVING THE TREADMILL
Your treadmill has 2 transport wheels* built into the frame. To move,
make sure the treadmill is folded and securely latched. Then firmly grasp
the handlebars, tilt the treadmill back and roll. *Some treadmills have 4
transport wheels and 2 wheel locks that must be released before moving.
To unlock wheels, push down on the top lever of the rear wheel locks
located on the rear corners of the base frame. Then firmly grasp the
handlebars, and slowly move the treadmill. After moving to the desired
location, push down on the bottom lever of the rear wheel locks to lock
the rear wheels. NOTE: Both rear wheel locks must be locked before
using the treadmill.
LEVELING THE TREADMILL
Your treadmill should be level for optimum use. Once you have placed
your treadmill where you intend to use it, raise or lower one or both of
the adjustable levelers located on the bottom of the treadmill frame*.
A carpenter’s level is recommended. If your treadmill is not level, the
running belt may not track properly. Once you have leveled your
treadmill, lock the levelers in place by tightening the nuts against the
frame.
4
CHAPTER 2: Important Safety Instructions
2.2 Read and Save these instructions
2.3 Electrical Requirements
To ensure your safety and protect the equipment, read all instructions
before operating the LIVESTRONG LS9.9T treadmill.
When using an electrical product, basic precautions should always be
followed including the following:
This product is for use on a nominal 110-volt circuit and has a grounding
plug that looks like the illustration below. This product must be used on a
dedicated circuit. NOTE: There are usually multiple outlets on one circuit.
This treadmill should be used with a minimum 15-amp circuit.
DANGER: To reduce the risk of electric shock: Always unplug this
equipment from the electrical outlet immediately after using and
before cleaning.
To determine if you are on a dedicated circuit, shut off the power to that
circuit and observe if any other devices lose power. If so, move devices to
a different circuit.
WARNING: To reduce the risk of burns, fire, electrical shock or
injury to persons that may be associated with using this product.
This product must be grounded. If a treadmill should malfunction or
breakdown, grounding provides a path of least resistance for electrical
current to reduce the risk of electrical shock. This product is equipped
with a cord having an equipment-grounding conductor and a grounding
plug. The plug must be plugged into an appropriate outlet that is properly
installed and grounded in accordance with local codes and ordinances.
Improper connection of the equipment-grounding conductor can result in
a risk of electric shock. Check with a qualified electrician or serviceman if
you are in doubt as to whether the product is properly grounded. Do not
modify the plug provided with the product. If it will not fit the outlet, have a
proper outlet installed by a qualified electrician.
An appliance should never be left unattended when plugged in. Unplug
from the outlet when not in use and before putting on or taking off parts.
This product must be used for its intended purpose described in this service
manual. Do not use other attachments that are not recommended by the
manufacturer. Attachments may cause injury.
To prevent electrical shock, never drop or insert any object into any opening.
Never operate the treadmill with the air opening blocked. Keep the air
opening clear, free of lint and hair.
Never operate product if it has a damaged cord or plug, if it is working
improperly, if it has been damaged, or immersed in water.
Do not carry this unit by its supply cord or use the cord as a handle.
Keep any power cord away from heated surfaces.
Close supervision is necessary when the treadmill is used by or near children or disabled persons.
Do not use outdoors.
Do not operate where aerosol (spray) products are being used or when
oxygen is being administered.
To disconnect, turn all controls to the off position, then remove plug from the
outlet.
Connect this treadmill to properly grounded outlets only.
5
CHAPTER 3: Preventative Maintenance
3.1 PREVENTATIVE MAINTENANCE
Preventative maintenance is the key to smoothly operating equipment, as well as keeping the user’s liability to a minimum. Equipment needs to be
inspected at regular intervals. Defective components must be replaced immediately. Improperly working equipment must be kept out of use until it is
repaired. Ensure that any person(s) making adjustments or performing maintenance or repair of any kind is qualified to do so.
AFTER EACH USE (DAILY)
Clean and inspect, following these steps:
•
•
•
•
•
•
Turn off the treadmill with the ON / OFF switch, then unplug the power cord at the wall outlet.
Wipe down the running belt, deck, motor cover, and console casing with a damp cloth. Never use solvents, as they can cause damage to the
treadmill.
Inspect the power cord. If the power cord is damaged, contact Customer Technical Support.
Make sure the power cord is not underneath the treadmill or in any other area where it can become pinched or cut.
Check the tension and alignment of the running belt. Make sure that the treadmill belt will not damage any other components on the treadmill by
being misaligned.
If any labels are damaged or illegible, contact Customer Technical Support for replacements.
EVERY WEEK (WEEKLY)
Clean underneath the treadmill following these steps:
•
•
•
•
•
Turn off the treadmill with the ON / OFF switch, then unplug the power cord at the wall outlet.
Fold the treadmill into the upright position, making sure that the lock latch is secured.
Move the treadmill to a remote location.
Wipe or vacuum any dust particles or other objects that may have accumulated underneath the treadmill.
Return the treamill to its previous position.
EVERY MONTH - IMPORTANT!
•
•
•
•
•
Turn off the treadmill with the ON / OFF switch, then unplug the power cord at the wall outlet.
Inspect all assembly bolts of the machine for proper tightness.
Remove the motor cover. Wait until ALL display screens turn off.
Clean the motor and lower board area to eliminate any lint or dust particles that may have accumulated. Failure to do so may result in premature
failure of key electrical components.
Vacuum and wipe down the belt with a damp cloth. Vacuum any black / white particles that may accumulate around the unit. These particles may
accumulate from normal treadmill use.
EVERY 6 MONTHS OR 150 MILES
It is necessary to lubricate your treadmill running deck every six months
or 150 miles to maintain optimal performance. Your treadmill came with
a bottle of lubricant which can be used for two applications. If you need
lubricant, contact Customer Technical Support. Only use lubricant provided
by Customer Technical Support.
•
•
•
Turn off the treadmill with the ON / OFF switch, then unplug the power
cord at the wall outlet.
Loosen both the rear roller bolts. (For best results, place two removable marks on both sides of the frame to note roller position). Once
the belt is loosened, take the bottle of lubricant and apply it to the
entire top surface of the running deck (not the belt). Tighten both rear
roller bolts (matching up the marks for proper position) to the original
position. After you have applied lubricant, plug in the power cord,
insert the safety key, start the treadmill and walk on the belt for two
minutes to spread the lubricant.
If your treadmill has air shocks, lubricate them with Teflon based
spray.
Contact Customer Technical Support with questions about applying the
lubricant to your treadmill.
6
CHAPTER 3: Preventative Maintenance
3.2 TENSIONING & CENTERING THE RUNNING BELT
If you can feel a slipping sensation when running on the treadmill, the running belt must be tightened. In most cases, the belt has stretched from use,
causing the belt to slip. This is a normal and common adjustment. To eliminate this slipping, turn the treadmill off and tension both the rear roller bolts
using the supplied Allen wrench, turning them ¼ turn to the right as shown. Turn the treadmill on and check for slipping. Repeat if necessary, but never
turn the roller bolts more than ¼ turn at a time. Belt is properly tensioned when the slipping sensation is gone.
The running belt has been properly adjusted at the factory before it was shipped. At times the belt can move off-center during shipment. Before
operating the treadmill,make sure the belt is centered and remains centered to maintain smooth operation.
If the running belt is too far to the right side: With the treadmill running
at 1 mph, turn the left adjustment bolt counter-clockwise ¼ turn at a
time (using the supplied Allen wrench). Check the belt alignment. Allow
belt to run a full cycle to gauge if more adjustment is needed. Repeat if
necessary, until the belt remains
centered during use.
If the running belt is too far to the left side: With the treadmill running
at 1 mph, turn the right adjustment bolt counter-clockwise ¼ turn at a
time (using the supplied Allen wrench). Check the belt alignment. Allow
belt to run a full cycle to gauge if more adjustment is needed. Repeat if
necessary, until the belt remains centered during use.
7
CHAPTER 4: Console Overlay and Workout Description
4.1 Console Description
A) LED display windows: time, distance, calories, heart rate, speed and incline.
B) LIVETRACK™ LCD: displays: LIVETRACK™ fitness journal information.
C) LIVETRACK™ controls: used to adjust LIVETRACK™ display settings.
D) Start: press to begin exercising, start your workout, or resume exercising after pause.
E) Stop: press to pause / end your workout. Hold for 3 seconds to reset the console.
F) Programming button: used to select program, level and time, and other options.
G) Incline + / - keys: used to adjust incline in small increments (0.5% Increments).
H) Speed + / - keys: used to adjust speed in small increments (0.1 MPH increments or 0.1 KMPH increments).
I) Speed / Incline Quick Keys: used to reach desired speed or incline more quickly. Press set incline key or set speed key to confirm.
J) Set incline key: used to confirm desired incline. Press after pressing a quick key number.
K) Set speed key: used to confirm desired speed. Press after pressing a quick key number.
L) Change display: press to change display feedback during workout.
M) Fan key: press to turn fan on and off.
N) Fan: personal workout fan.
O) Speakers: music plays through speakers when your CD / mp 3 player is connected to the console.
P) Audio in jack: plug your CD / MP3 player into the console using the included audio adaptor cable.
Q) Audio out / Headphone jack: plug your headphones into this jack to listen to your music through the headphones. NOTE: When
headphones are plugged into the headphone jack the sound will no longer come out through the speakers.
R) MP3 player pocket: used to store your MP3 player.
S) Water bottle pockets: holds personal workout equipment.
T) Reading rack: holds reading material.
U) Safety key position: enables treadmill when safety key is inserted.
8
CHAPTER 4: Console Overlay and Workout Description
4.2 DISPLAY WINDOW DESCRIPTIONS
DISPLAY WINDOWS
•
•
•
•
•
•
•
TIME: Shown as minutes : seconds. View the time remaining or the time elapsed in your workout.
DISTANCE: Shown as miles. Indicates distance traveled.
INCLINE: Shown as percent. Indicate the incline of your walking or running surface.
SPEED: Shown as MPH or KMPH. Indicates how fast your walking or running surface is moving.
CALORIES: Total calories burned.
HEART RATE: Shown as BPM (beats per minute). Use to monitor your heart rate (displayed when contact is made with both pulse grips).
LIVETRACK™ LCD display: When LIVETRACK™ is activated, the LIVETRACK™ information is displayed in this window. Use the four
buttons underneath the display to change display information.
9
CHAPTER 4: Console Overlay and Workout Description
4.3 Program Information
PROGRAM INFORMATION
1) MANUAL: Allows ‘on the fly’ manual speed and incline changes.
2) SPEED INTERVALS: Improves
your strength, speed and endurance by
increasing and decreasing the speed
throughout your workout to involve your
heart and other muscles. Speed changes
and segments repeat 90 seconds and 30
seconds.
3) PEAK INTERVALS: Improves
your strength, speed and endurance by
increasing and decreasing the speed and
incline throughout your workout to involve
your heart and other muscles. Speed
and Incline changes, segments repeat 90
seconds and 30 seconds.
Segment
Time
Warm Up
1
2
4:00 MIN
Cool Down
90 SEC
30 SEC
Level 1
1.0
1.5
2.0
4.0
1.5
4:00 MIN
1.0
Level 2
1.0
1.5
2.0
4.5
1.5
1.0
Level 3
1.3
1.9
2.5
5.0
1.9
1.3
Level 4
1.3
1.9
2.5
5.5
1.9
1.3
Level 5
1.5
2.3
3.0
6.0
2.3
1.5
Level 6
1.5
2.3
3.0
6.5
2.3
1.5
Level 7
1.8
2.6
3.5
7.0
2.6
1.8
Level 8
1.8
2.6
3.5
7.5
2.6
1.8
Level 9
2.0
3.0
4.0
8.0
3.0
2.0
Level 10
2.0
3.0
4.0
8.5
3.0
2.0
Segment
Warm Up
1
2
Cool Down
Time
4:00 MIN
90 SEC
30 SEC
4:00 MIN
Level 1
Level 2
Level 3
Level 4
Level 5
Level 6
Level 7
Level 8
Level 9
Level 10
Speed
1.0
1.5
2.0
4.0
1.5
1.0
Incline
1.0
1.5
0.5
1.5
1.5
0.0
Speed
1.0
1.5
2.0
4.5
1.5
1.0
Incline
1.5
2.5
3.0
6.5
2.5
1.5
Speed
1.3
1.9
2.5
5.0
1.9
1.3
Incline
2.0
3.0
4.0
7.5
3.0
2.0
Speed
1.3
1.9
2.5
5.5
1.9
1.3
Incline
2.0
3.0
4.0
8.0
3.0
2.0
Speed
1.5
2.3
3.0
6.0
2.3
1.5
Incline
2.5
3.5
4.5
8.5
3.5
2.5
Speed
1.5
2.3
3.0
6.5
2.3
1.5
Incline
2.5
3.5
4.5
9.0
3.5
2.5
Speed
1.8
2.6
3.5
7.0
2.6
1.8
Incline
2.5
4.0
5.5
9.5
4.0
3.0
Speed
1.8
2.6
3.5
7.5
2.6
1.8
Incline
3.0
4.0
5.5
9.5
4.0
3.0
Speed
2.0
3.0
4.0
8.0
3.0
2.0
Incline
3.0
4.5
6.0
10.0
5.0
3.0
Speed
2.0
3.0
4.0
8.5
3.0
2.0
Incline
3.0
4.5
6.0
10.0
5.0
3.0
10
CHAPTER 4: Console Overlay and Workout Description
4.3 Program Information - CONTINUED
4) WEIGHT LOSS:
Promotes weight loss by
increasing and decreasing
the speed and incline, while
keeping you in your fat
burning zone. Speed and
Incline changes, segments
repeat every 30 seconds.
Segment
Warm Up
Time
4:00 MIN
Level 1
Level 2
Level 3
Level 4
Level 5
Level 6
Level 7
Level 8
Level 9
Level 10
5) ROLLING HILLS:
Simulates running up
and down hills to improve
stamina, muscle tone, and
promote weight loss. Speed
changes and segments
repeat every 30 seconds.
6) FOOT HILLS:
Simulates a hill ascent
and descent. This
program helps tone
muscle and improved
cardiovascular ability.
Incline changes and
segments repeat every
30 seconds.
1
2
3
6
7
8
Cool Down
4:00 MIN
0.0
0.5
1.5
1.5
1.0
0.5
0.5
0.5
1.0
1.5
0.5
0.0
Speed
1.0
1.5
2.0
2.5
3.0
3.5
4.0
3.5
3.0
2.5
2.3
1.5
Incline
0.0
0.5
1.5
1.5
1.0
0.5
1.0
0.5
1.0
1.5
0.5
0.0
Speed
1.3
1.9
2.5
3.0
3.5
4.0
4.5
4.0
3.5
3.0
2.6
1.8
Incline
0.5
1.0
2.0
2.0
1.5
1.0
1.0
1.0
1.5
2.0
1.0
0.5
Speed
1.5
2.3
3.0
3.5
4.0
4.5
5.0
4.5
4.0
3.5
3.0
2.0
Incline
0.5
1.0
2.0
2.0
1.5
1.0
1.0
1.0
1.5
2.0
1.0
0.5
Speed
1.8
2.6
3.5
4.0
4.5
5.0
5.5
5.0
4.5
4.0
3.4
2.3
Incline
1.0
1.5
2.5
2.5
2.0
1.5
1.5
1.5
2.0
2.5
1.5
1.0
Speed
2.0
3.0
4.0
4.5
5.0
5.5
5.5
5.5
5.0
4.5
3.8
2.5
Incline
1.0
1.5
2.5
2.5
2.0
1.5
1.5
1.5
2.0
2.5
1.5
1.0
Speed
2.3
3.4
4.5
5.0
5.5
6.0
6.5
6.0
5.5
5.0
4.1
2.8
Incline
1.5
2.0
3.0
3.0
2.5
2.0
2.0
2.0
2.5
3.0
2.0
1.5
Speed
2.5
3.8
5.0
5.5
6.0
6.5
7.0
6.5
6.0
5.5
4.5
3.0
Incline
1.5
2.0
3.0
3.0
2.5
2.0
2.0
2.0
2.5
3.0
2.0
1.5
Speed
2.8
4.1
5.5
6.0
6.5
7.0
7.5
7.0
6.5
6.0
4.9
3.3
Incline
2.0
2.5
3.5
3.5
3.0
2.5
2.5
2.5
3.0
3.5
2.5
2.0
Speed
3.0
4.5
6.0
6.5
7.0
7.5
8.0
7.5
7.0
6.5
5.3
3.5
Incline
2.0
2.5
3.5
3.5
3.0
2.5
2.5
2.5
3.0
3.5
2.5
2.0
Speed
3.3
4.9
6.5
7.0
7.5
8.0
8.5
8.0
7.5
7.0
5.6
3.8
Warm Up
1
Time
4:00 MIN
Each segment is 30 seconds.
Level 1
1.0
1.5
2.0
2.5
3.0
Level 2
1.3
1.9
2.5
3.0
Level 3
1.5
2.3
3.0
3.5
Level 4
1.8
2.6
3.5
Level 5
2.0
3.0
4.0
Level 6
2.3
3.4
Level 7
2.5
3.8
Level 8
2.8
Level 9
3.0
Level 10
3.3
5
6
7
8
3.5
4.0
3.5
3.0
2.5
2.3
1.5
3.5
4.0
4.5
4.0
3.5
3.0
2.6
1.8
4.0
4.5
5.0
4.5
4.0
3.5
3.0
2.0
4.0
4.5
5.0
5.5
5.0
4.5
4.0
3.4
2.3
4.5
5.0
5.5
6.0
5.5
5.0
4.5
3.8
2.5
4.5
5.0
5.5
6.0
6.5
6.0
5.5
5.0
4.1
2.8
5.0
5.5
6.0
6.5
7.0
6.5
6.0
5.5
4.5
3.0
4.1
5.5
6.0
6.5
7.0
7.5
7.0
6.5
6.0
4.9
3.3
4.5
6.0
6.5
7.0
7.5
8.0
7.5
7.0
6.5
5.3
3.5
4.9
6.5
7.0
7.5
8.0
8.5
8.0
7.5
7.0
5.6
3.8
Warm Up
Time
5
Incline
Segment
Segment
4
Each segment is 30 seconds.
2
3
4
1
2
3
4
5
4:00 MIN
6
Cool Down
4:00 MIN
7
8
9
10
11
12
13
14
15
Cool Down
Each segment is 30 seconds.
4:00 MIN
Level 1
0.0
0.5
0.0
0.5
1.0
3.0
1.0
3.0
2.0
3.0
2.0
3.5
2.0
3.0
2.0
3.0
1.0
3.0
1.0
0.5
0.0
Level 2
0.0
0.5
0.0
0.5
1.0
3.0
2.0
3.0
2.0
3.0
2.5
3.5
2.5
3.0
2.0
3.0
2.0
3.0
1.0
0.5
0.0
Level 3
0.5
1.0
0.5
1.0
1.5
3.5
1.5
3.5
2.5
3.5
2.5
4.0
2.5
3.5
2.5
3.5
1.5
3.5
1.5
1.0
0.5
Level 4
0.5
1.0
0.5
1.0
1.5
3.5
2.5
3.5
2.5
3.5
3.0
4.0
3.0
3.5
2.5
3.5
2.5
3.5
1.5
1.0
0.5
Level 5
1.0
1.5
1.0
1.5
2.0
4.0
2.0
4.0
3.0
4.0
3.0
4.5
3.0
4.0
3.0
4.0
2.0
4.0
2.0
1.5
1.0
Level 6
1.0
1.5
1.0
1.5
2.0
4.0
3.0
4.0
3.0
4.0
3.5
4.5
3.5
4.0
3.0
4.0
3.0
4.0
2.0
1.5
1.0
Level 7
1.5
2.0
1.5
2.0
2.5
4.5
2.5
4.5
3.5
4.5
3.5
5.0
3.5
4.5
3.5
4.5
2.5
4.5
2.5
2.0
1.5
Level 8
1.5
2.0
1.5
2.0
2.5
4.5
3.5
4.5
3.5
4.5
4.0
5.0
4.0
4.5
3.5
4.5
3.5
4.5
2.5
2.0
1.5
Level 9
2.0
2.5
2.0
2.5
3.0
5.0
3.0
5.0
4.0
5.0
4.0
5.5
4.0
5.0
4.0
5.0
3.0
5.0
3.0
2.5
2.0
Level 10
2.0
2.5
2.0
2.5
3.0
5.0
4.0
5.0
4.0
5.0
4.5
5.5
4.5
5.0
4.0
5.0
4.0
5.0
3.0
2.5
2.0
11
CHAPTER 4: Console Overlay and Workout Description
4.3 Program Information - CONTINUED
7) MOUNTAIN CLIMBS:
A more intense version of foot
hills. Simulate a mountain
ascent and descent. This
program helps tone muscle and
improved cardiovascular ability.
Incline changes and segments
repeat every 30 seconds.
8-9) 5K / 10K: Programs
that allow you to set and
work toward a distance
goal. Treadmill automatically
adjusts incline to simulate
running on an actual course.
Incline changes and all
segments are 0.16 Km.
Segment
Warm Up
Time
4:00 MIN
Level 1
0.0
1
2
3
4
5
6
7
8
9
10
Cool Down
2.0
1.5
1.0
0.0
Each segment is 30 seconds.
0.0
1.0
1.5
2.0
2.5
3.0
3.0
2.5
4:00 MIN
0.0
Level 2
0.0
0.0
1.5
2.0
2.5
3.0
3.5
3.5
3.0
2.5
2.0
1.5
0.0
0.0
Level 3
0.0
1.0
2.0
2.5
3.0
3.5
4.0
4.0
3.5
3.0
2.5
2.0
1.0
0.0
Level 4
0.0
1.5
2.5
3.0
3.5
4.0
4.5
4.5
4.0
3.5
3.0
2.5
1.5
0.0
Level 5
0.0
1.5
3.0
3.5
4.0
4.5
5.0
5.0
4.5
4.0
3.5
3.0
1.5
0.0
Level 6
0.0
1.5
3.5
4.0
4.5
5.0
5.5
5.5
5.0
4.5
4.0
3.5
1.5
0.0
Level 7
0.0
1.5
4.0
4.5
5.0
5.5
6.0
6.0
5.5
5.0
4.5
4.0
1.5
0.0
Level 8
0.0
2.0
4.5
5.0
5.5
6.0
6.5
6.5
6.0
5.5
5.0
4.5
2.0
0.0
Level 9
0.0
2.0
5.0
5.5
6.0
6.5
7.0
7.0
6.5
6.0
5.5
5.0
2.0
0.0
Level 10
0.0
2.0
5.5
6.0
6.5
7.0
7.5
7.5
7.0
6.5
6.0
5.5
2.0
0.0
Segment
Warm Up
Distance
4:00 MIN
1
2
3
4
5
6
7
8
9
10
11
12
13
14
15
Each segment is 0.16 KM.
Cool Down
4:00 MIN
Level 1
0.0
0.5
1.0
3.0
1.0
3.0
2.0
3.0
2.0
3.5
2.0
3.0
2.0
3.0
1.0
3.0
1.0
0.5
0.0
Level 2
0.0
0.5
1.0
3.0
2.0
3.0
2.0
3.0
2.5
3.5
2.5
3.0
2.0
3.0
2.0
3.0
1.0
0.5
0.0
Level 3
0.5
1.0
1.5
3.5
1.5
3.5
2.5
3.5
2.5
4.0
2.5
3.5
2.5
3.5
1.5
3.5
1.5
1.0
0.5
Level 4
0.5
1.0
1.5
3.5
2.5
3.5
2.5
3.5
3.0
4.0
3.0
3.5
2.5
3.5
2.5
3.5
1.5
1.0
0.5
Level 5
1.0
1.5
2.0
4.0
2.0
4.0
3.0
4.0
3.0
4.5
3.0
4.0
3.0
4.0
2.0
4.0
2.0
1.5
1.0
Level 6
1.0
1.5
2.0
4.0
3.0
4.0
3.0
4.0
3.5
4.5
3.5
4.0
3.0
4.0
3.0
4.0
2.0
1.5
1.0
Level 7
1.5
2.0
2.5
4.5
2.5
4.5
3.5
4.5
3.5
5.0
3.5
4.5
3.5
4.5
2.5
4.5
2.5
2.0
1.5
Level 8
1.5
2.0
2.5
4.5
3.5
4.5
3.5
4.5
4.0
5.0
4.0
4.5
3.5
4.5
3.5
4.5
2.5
2.0
1.5
Level 9
2.0
2.5
3.0
5.0
3.0
5.0
4.0
5.0
4.0
5.5
4.0
5.0
4.0
5.0
3.0
5.0
3.0
2.5
2.0
Level 10
2.0
2.5
3.0
5.0
4.0
5.0
4.0
5.0
4.5
5.5
4.5
5.0
4.0
5.0
4.0
5.0
3.0
2.5
2.0
10) PACER: Trains you to run at a steady “race pace”. Enter in the distance plus the time limit, and the program calculates a steady pace.
11-12) CUSTOM 1 / CUSTOM 2: Lets you create and reuse a perfect workout for you with specific speed, incline and time combination.
The ultimate in personal programming. Time-based goal.
1) Select CUSTOM 1 or 2 using ARROW KEYS. Press ENTER.
2) Select WEIGHT using ARROW KEY. Press ENTER.
3) Select TIME using ARROW KEYS. Press ENTER.
4) Select SPEED for segments 1 through 15 using ARROW KEYS. Press ENTER to set each segment.
5) Select INCLINE for segments 1 through 15 using ARROW KEYS. Press ENTER to set each segment.
6) Press START to begin exercising. At this time, your program has been successfully saved into memory, and can be used for future workouts.
• While using your saved program, you are able to adjust the speed or incline, but any changes will not be saved.
12
CHAPTER 4: Console Overlay and Workout Description
4.4 LIVETRACK™ Fitness Journal System
LIVETRACK™ FITNESS JOURNAL SYSTEM
LIVETRACK™ is an innovative new software program that will allow a user to track their fitness progress over time, without the need for paper
journals or logs. LIVETRACK™ allows the user to easily compare their current workout to their personal bests or their last five workouts. With
quick access to feedback like duration of workout, distance traveled, calories burned or overall pace, the user will be able to quickly and easily
see the progress they’ve made. Workout totals can also be tracked.
SETUP:
To activate LIVETRACK™ fitness journal system a user MUST be chosen before the program begins. To select USER 1 or 2, use the ARROW
KEYS and press ENTER to confirm. All workout data will accumulate only for the user that is chosen. NOTE: If no user is selected data will not
be tracked.
RESET:
Reset all recorded information for User 1 or User 2 by selecting the user and then holding down the WORKOUT STATS / HOLD TO RESET
KEY for 10 seconds. NOTE: This step is permanent and will delete ALL previously accumulated data for the chosen user.
ACCUMULATED DATA:
With the LIVETRACK™ fitness journal system, you can scroll through your accumulated data in multiple formats by pressing the LIVETRACK™
buttons. A workout is saved when: the program ends, the console is paused and not resumed within 10 minutes, or the STOP button is held to
reset the console.
1) Personal best: allows user to scroll through and view 5 personal bests for all previous workouts. They are:
• Best Mile – fastest time in which the user has run a mile.
• Best 5K – fastest time in which the user has run a 5K.
• Longest Workout – (time).
• Longest Workout – (distance).
• Calories Burned – most calories user has burned in one workout.
2) Last 5 Workouts: allows you to view data from your previous 5 workouts. The following data from these 5 workouts can be scrolled through
and viewed by pressing the workout stats key:
• Time – total time of selected workout.
• Distance – total distance of selected workout.
• Calories – total calories burned during selected workout.
• Pace (average) – average pace during selected workout.
• Elevation Gain (feet) – total elevation climbed, in feet, during selected workout.
3) Workout Totals: allows you to view the total accumulated workout data. Pressing the workout total key will allow you to scroll through the
following totals:
• Total Workouts.
• Total Distance.
• Total Calories.
• Total Time.
• Elevation Gain – total elevation climbed in feet.
13
CHAPTER 4: Console Overlay and Workout Description
4.5 USING A CD / MP3 PLAYER
USING A CD / MP3 PLAYER
1) Connect the included audio adaptor cable to the audio jack on
the top right of the console and the headphone jack on a CD / MP3
player.
4.6 DEMO MODE
DEMO MODE
Power on the machine and remove the emergency stop key. 60
seconds later the console will enter into DEMO MODE. The LED
and LCD will display in turns.
2) Use the CD / MP3 player buttons to adjust song settings.
3) Remove the audio adaptor cable when not in use.
4) If the user does not want to use the speakers, they can plug
their headphones into the audio out jack at the bottom of the
console.
14
CHAPTER 5: Engineering Mode
5.1 engineering mode
1) To enter Engineering Mode, press & hold the INCLINE UP and SPEED
DOWN keys (Figure A) at the same time for 3-5 seconds until Engineering
Menu appears on the display.
2) Use the INCLINE and SPEED UP and DOWN keys to select a parameter.
3) Press ENTER to enter a parameter setting.
4) Use the INCLINE and SPEED UP and DOWN keys to change the
parameter.
5) Press the START key to save the change to the parameter.
6) Press and hold the STOP key to exit Engineering Mode and return to
normal operation.
FIGURE A
5.2 Engineering Mode OVerview
MODE
FUNCTIon
DESCRIPTIOn
ENG 0
Display Test
Start Key - LED on
Stop Key - LED off
Any Other Key - Will show on the display window.
Hold the STOP key for 3 seconds to return to the Engineering Menu.
ENG 1
Hardware Test
Motor & Incline Motor Test.
ENG 2
Auto Calibration
Auto calibrates the speed only.
ENG 3
Switch Function
Use the INCLINE or SPEED UP and DOWN keys to switch DEMO MODE off or on.
Use the START key to select unit (1=KM, 0=Mile).
ENG 4
Information
Accumulated Time and Distance
Press and hold the START key for 5 seconds to clear all data.
SECOND LEVEL
ENG 8
Software Version
To Get to ENG 8 - Enter into ENG 3, the press and hold the SPEED UP and INCLINE DOWN
key at the same time for 3-5 seconds.
Press ENTER at P0 - Software version.
Press ENTER at P1 - Select speed up rate (normal or quick).
Press ENTER at P3 - Hold the START key to clear all data.
15
CHAPTER 6: Troubleshooting
6.1 Electrical Diagram
16
CHAPTER 6: Troubleshooting
6.2 TROUBLESHOOTING - No power to the console
NO POWER TO THE CONSOLE
1) SYMPTOM:
a. The power switch is in the on position, but the console will not turn on.
2) SOLUTION:
a. Check to see if the power switch is lit. If it is not, try a different outlet.
- If the power switch still does not light up with a known good outlet, replace the power switch.
b. Check to see if the MCB has power. There is a power LED on the MCB that should be lit (Figure A).
c. If the MCB does not have power, check the connection of the power wiring from the power receptacle to the MCB.
- If that does not resolve the issue, replace the MCB.
d. If the MCB does have power, check the connection of the console cable wire at the UCB.
- Disconnect the console cable wire at the UCB and use a multi-meter to check the DC volts (Figure B). The red lead should go onto the VDD
port on the cable and the black lead should go to the GND port (Figure C).
- The voltage should be over 15VDC. If the voltage is below 15VDC, replace the MCB.
- If the voltage is 15VDC or above, replace the console cable and / or the UCB.
FIGURE B
FIGURE A
FIGURE C
17
CHAPTER 6: Troubleshooting
6.3 TROUBLESHOOTING - NO CONSOLE RESPONSE
THE POWER IS ON, BUT THE KEYS / TOUCHPADS HAve NO RESPONSE
1) SYMPTOM:
a. The power is on and the console lights up, but there is no response when keys are pressed.
2) SOLUTION:
a. Enter Engineering Mode if possible (See Section 5.1), and scroll to ENG 0 (Keypad Test).
- Check each keypad for function. The console should change as each key is pressed.
- Remove the screws holding the console faceplate to the conosle frame and check the connection of any keypad that is non reponsive.
- Massage the non responsive keypad to warm it slightly with your hands, and then re-test.
- If the keypad still does not respond, replace it.
b. If the non responsive keys will not allow entrance into Engineering Mode:
- Remove the screws holding the console faceplate to the console frame and check the connection of the keypads.
- After checking the connections, re-test the keys for function.
- Massage any non responsive keypad to warm it slightly with your hands, and then re-test.
- If the keypas still does not respond, replace it.
c. If replacing a keypad does not resolve the issue, but Engineering Mode can be entered:
- Enter Engineering Mode (See Section 5.1), and scroll to ENG 1 (Hardware Test).
- Test the various components of the treadmill within Hardware Test.
- If all components operate correctly in Hardware Test, replace the console.
- If all components do not operate correctly in Hardware Test, replace the MCB.
d. If replacing a keypad does not resolve the issue, but Engineering Mode cannot be entered:
- Replace the console.
- If the console does not resolve the issue, replace the MCB.
- If the console and MCB do not resolve the issue, replace the console cable.
18
CHAPTER 6: Troubleshooting
6.4 TROUBLESHOOTING - NO SPEED FEEDBACK
Erratic speed or stopping suddenly (E1 may be present)
1) SYMPTOM:
a. The machine stops suddenly and displays an E1 Error Code
b. The machine stops suddenly but the console is still counting.
c. The machine speed is erratic.
2) SOLUTION:
a. The MCB has lost the speed signal from the motor (normally an E1 will be present).
- Remove the motor cover and check the connection of the speed sensor at the MCB.
- Remove the sensor from the motor (Figure A) and clean it, then re-test.
- If the speed sensor is clean and has a good connection but still will not operate, replace the speed sensor.
b. The drive system has been interrupted.
- Check that the drive belt is still around the drive belt and roller pulleys. Re-align or replace the drive belt if needed.
- Check the connection of the motor cable at the MCB.
- Check to see if the motor spins freely. If it will not, replace the motor.
- If the motor spins freely and has a good connection, replace the MCB.
c. The treadmill belt speed is lagging or erratic.
- Check to see that the running belt is centered and has the correct tension (see Section 3.2).
- Check the mileage in Engineering Mode (see Section 5.1) to see whether running deck lubrication is needed (see Section 3.1).
- Check that the drive belt is still around the drive belt and roller pulleys. Re-align or replace the drive belt if needed.
- Check to see if the motor spins freely. If it will not, replace the motor.
- If the motor spins freely and has a good connection, replace the MCB.
FIGURE A
19
CHAPTER 6: Troubleshooting
6.5 TROUBLESHOOTING - INCLINE MOTOR ISSUES
INCLINE MOTOR ISSUES
1) SYMPTOM:
a. The incline motor operates in the opposite direction as requested.
b. The incline motor is jerky or bobbing.
c. The incline does not operate.
2) SOLUTION:
a. Enter Engineering Mode (See Section 5.1), and scroll to ENG 0 (Keypad Test).
- Check the incline keypad for function (see if Incline Up registers as up or down). Replace the keypad if needed.
- Check the connection of the incline motor at the MCB.
- Replace the incline motor. If this does not resolve the issue, replace the MCB.
b. Enter Engineering Mode (See Section 5.1), and scroll to ENG 1 (Hardware Test).
- See if the incline is jerky or bobbing during Hardware Test, if it is replace the incline motor.
- If the incline operated correctly during Hardware Test, replace the MCB.
- If neither the incline motor or MCB resolve the issue, replace the console and console cable.
c. Check the connection of the incline motor at the MCB.
- The incline motor cable includes 3 signal terminals and 3 power terminals. The 3 signal terminals (Figure A) show resistance during the
incline range, this means that we can use them to determine Incline VR.
- Use a multi-meter to ohm the the 1st and 3rd pins of the 3 pin incline motor cable. There should be approximately 10K ohms (Figure B).
- Then use a multi-meter to ohm the 1st - 2nd pins (Figure C) and the 2nd - 3rd pins (Figure D), these two ohm values should add up to
approximately 10 ohms.
- If the resistance value is much higher or lower, it means that the Incline VR is damaged, and the incline motor should be replaced.
- If the resistance value equals approximately 10 ohms, replace the MCB.
- If neither the incline motor or MCB resolve the issue, replace the console and console cable.
FIGURE A
FIGURE B
FIGURE C
FIGURE D
20
CHAPTER 6: Troubleshooting
6.6 TROUBLESHOOTING - NOISE ISSUES
Noise Issues
1) SYMPTOM:
a.
b.
c.
d.
e.
f.
g.
h.
Thumping noise twice per rotation on new machine.
Rubbing / grinding noise.
High pitched “bell-like” sound from under the motor cover.
Banging or clunking sound.
Slapping / thunking / squeaking sound with each footstep.
Rubbing sound underneath the treadmill.
Squeaking noise when raising / lowering the deck into storage positions.
Squeaking / grinding noise when using elevation.
2) SOLUTION:
a. This noise is from the roller or running belt.
- If this is a new unit, some noise is normal as the running belt forms around the rollers.
- Check that the belt is centered and tensioned correctly (see Section 3.2).
- Check the rollers for excess wax build up. Remove and clean the rollers if needed.
- Replace the rollers or running belt as needed.
b. This sound is likely a moving component.
- Remove the motor cover and check the drive belt for alignment and make sure it is not slipping or is frayed / cut in any way. Replace the
drive belt if needed.
- Make sure the optic disk on the motor is not rubbing the speed sensor.
- Turn the motor by hand to see if motor brushes or bearings are rubbing. Replace the motor if needed.
- Check the front and rear rollers, replace if needed.
c. This sound is likely caused by the optic disk.
- Check that the optic disk is tight on the motor and not rubbing the speed sensor.
d. The sound is likely due to the unit not being level.
- Check that all levelers are touching the ground.
- Move the treadmill to another flat surface.
e. This sound is from the running deck / belt.
- Check that the running deck is tightly attached to the frame.
- Check the deck shocks for detioration or crumbling. Replace if needed.
- Check to see if the air shock is making this noise, lubricate or replace if needed.
f. This sound is likely due to the air shock.
- Lubricate or replace the air shock as needed.
g. This sound is likely from the incline motor.
- Check that the incline motor connection points include Teflon washers.
- Lubricate the incline motor worm screw and connection points with grease.
- Replace the incline motor.
21
CHAPTER 6: Troubleshooting
6.7 TROUBLESHOOTING - HEART RATE ISSUES
HEart Rate Issues
1) SYMPTOM:
a. The display is stuck on heart rate.
b. Erratic heart rate.
c. No heart rate.
2) SOLUTION:
a. If the display is stuck on heart rate, it is normally due to the lighting in the workout area.
- Change the lighting in the area of the treadmill.
- Move the treadmill to a different area.
b. Something is interfering with the heart rate signal.
- Verify the proper use of the heart rate grips / chest strap.
- Verify that nothing is touching the heart rate grips (for example the safety key strap or headphone wiring).
- There are some things that will interfere with heart rate signal including: florescent lighting, electric dog fences, large electric motors, cell
phone towers, and airports.
c. The console is not receiving a heart rate signal.
- Verify the proper use of the heart rate grips / chest strap.
- Check the connection of the heart rate grip wiring at the heart rate board, there should be two 2 pin connectors (Figure A).
- Remove the screws holding the 2 halves of the heart rate grip together and check the connection of the heart rate grip wiring to the grips
(Figure B).
- If all wiring connections are good, replace the heart rate grips and / or the heart rate board.
- If the heart rate grips and / or heart rate board do not resolve the issue, replace the console.
FIGURE A
FIGURE B
22
CHAPTER 6: Troubleshooting
6.8 TROUBLESHOOTING - SPEAKER / AUDIO ISSUES
Speaker / Audio Issues
1) SYMPTOM:
a.
b.
c.
d.
e.
f.
g.
No sound through the speakers but headphones work.
No sound through headphones but the speakers work.
No sound through speakers or headphones.
IPod not charging.
Speakers buzzing.
Sound from one speaker only.
Shock from headphones.
2) SOLUTION:
a. One of the speaker boards has a bad connection or is faulty.
- Check the connection of the wires going from the speakers to the speaker power board.
- Check the connection of the wires going from the speaker power board to the amp board.
- Check the connection of the wires going from the amp board to the console.
- Replace the speaker or amp boards and wiring.
- Replace the speakers.
- If the speaker board, amp board, wiring, and speakers do not solve the issue, replace the console.
b. There is a bad connection between the headphones and the console.
- Verify the connection of the music player to the dock or audio adaptor cable.
- Verify the audio adaptor cable connection at the console.
- Replace the headphone jack.
- Replace the audio adaptor cable.
c. There is a bad connection between one of the audio boards and the console.
- Verify the connection of the music player to the dock or audio adaptor cable.
- Verify the audio apator cable connection at the console.
- Replace the audio adaptor cable.
- Replace the console.
d. IPod or IPod dock has a bad connection.
- Verify the connection of the IPod.
- Verify the connection of the IPod dock at the console.
- Replace the IPod dock.
e. Speakers are not getting a clear signal through the speaker wires.
- Check the speaker wire connections.
- Check for any kinks or cuts in the speaker wires.
- Replace the speaker wiring.
- Replace the speakers.
f. The speaker or speaker wiring is bad.
- Check the speaker wire connections.
- Switch the speaker connections from one speaker to the other to see if sound switches sides.
- If the sound does not switch sides, replace the speaker board.
- If the sound does switch sides, replace the speaker and speaker wires.
g. Grounding issue.
- Try a different set of headphones.
- Check the grounding of the console.
23
CHAPTER 6: Troubleshooting
6.9 TROUBLESHOOTING - STATIC ISSUES
STATIC Issues (Customer received a shock from the treadmill)
1) SYMPTOM:
a.
b.
c.
d.
e.
f.
g.
Location of the unit.
Inadequate lubrication of the running deck / belt surface.
Console is not properly grounded.
Defective grounding fibers in the running belt.
Sony headphones.
Nylon clothing.
Dry air.
2) SOLUTION:
a. The location of the treadmill can cause static shocks, especially if the unit is located on thick carpeting.
- Place the unit on a rubber treadmill mat.
b. Improper or inadequate lubrication on the running deck / belt surfaces can cause static shocks.
- See the deck lubrication procedure in Section 3.1.
c. The console should have a ground wire in the console.
- Check the connection of the ground wire to the frame.
- Use a file or sand paper to remove any build up of paint around the ground wire connection to the frame.
- Run a ground wire from the console down the console mast to the grounding prong in the motor compartment.
d. The running belt contains grounding fibers to disapate static charge.
- If a static shock is received from the running belt, it should be replaced.
e. Sony headphones are known to cause some static shocks when used with some cardio equipment.
- Use a different brand of headphones.
f. Nylon clothing can cause static shock when around moving equipment.
- Wear clothing that is not made from nylon.
g. Extremely dry air can cause static shock.
- Use the treadmlil in an environment that is not too dry.
24
JOHNSON HEALTH TECHNOLOGIES
1610 Landmark Drive Cottage Grove, WI 53527 USA
Toll Free 1-877-548-7864 Fax 608-839-1717
www.livestrongfitness.com
Author: Kevin Oeltjenbruns


