1
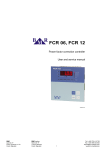
FCR05, FCR07
Power factor correction controller
User and service manual
version 3.2
BMR trading
Horní lán 17
779 00 Olomouc
Czech Republic
1
Tel: +420 778 066 566
[email protected]
www.bmr-trading.com
Development and production of systems for measurement and control
Content
1. Control and signal elements......................................................................................................................................... 3
2. Device description........................................................................................................................................................ 4
3. Instruction manual for connection and operation......................................................................................................... 4
4. Description of the function........................................................................................................................................... 5
5. Installation of the device.............................................................................................................................................. 6
6. Controller parameter setting......................................................................................................................................... 8
6.1. Target cosφ setting (CoS).................................................................................................................................. 10
6.2. Current transformer ratio setting (Itr).................................................................................................................. 10
6.3. Automatic detection of compensation stages (Aut)............................................................................................10
6.4. Deceleration of regulation at over compensation (Sht)......................................................................................10
6.5. Manual setting of compensation stages (StP).................................................................................................... 10
6.6. Discharging time (dit)......................................................................................................................................... 11
6.7. Delay for disconnection (diP)............................................................................................................................. 11
6.8. Fixed capacitor stages (FSt).............................................................................................................................. 11
6.9. Connection configuration (Con).......................................................................................................................... 11
6.10. Regulation to average or instantaneous power factor (_CS).............................................................................12
6.11. Averaging time for APFR (tAC).......................................................................................................................... 12
6.12. Recording of number of operations and maximum values (CSt)........................................................................12
6.13. De-compensation steps settings (EIC)............................................................................................................... 13
6.14. Alarms................................................................................................................................................................ 13
6.15. Configuration of RS485 communication port..................................................................................................... 14
6.16. Password for entering configuration mode (Cod)...............................................................................................14
6.17. Restart (rES)...................................................................................................................................................... 14
7. Displayed values........................................................................................................................................................ 15
7.1. Cosφ.................................................................................................................................................................. 15
7.2. Apparent current................................................................................................................................................ 16
7.3. Voltage............................................................................................................................................................... 16
7.4. Powers............................................................................................................................................................... 16
7.5. De-compensation delay..................................................................................................................................... 16
7.6. Step operation number and time........................................................................................................................ 16
8. Manual operation....................................................................................................................................................... 16
9. Alarm notification....................................................................................................................................................... 16
10. Technical features...................................................................................................................................................... 18
BMR trading
Horní lán 17
779 00 Olomouc
Czech Republic
2
Tel: +420 778 066 566
[email protected]
www.bmr-trading.com
Development and production of systems for measurement and control
1. Control and signal elements
Picture 1. Description of front control panel
1.
2.
3.
4.
5.
6.
7.
LED ind – it is ON in the case of inductive cosφ
LED cap – it is ON in the case of capacitive cosφ
LED cosF – it is ON when instantaneous or average value of cosφ is shown on the display
LED amp/volt – it is ON when value of measured current/voltage is shown on the display
LED alarm – it is ON when alarm is present
LED STAGES – those LEDs indicate status of each stage individually
Buttons for regulator control
Picture 2. Device terminal connection
BMR trading
Horní lán 17
779 00 Olomouc
Czech Republic
3
Tel: +420 778 066 566
[email protected]
www.bmr-trading.com
Development and production of systems for measurement and control
2. Device description
Power factor correction regulator FCR05 and FCR07 are designed for reactive power control in low and medium
voltage girds 50/60 Hz. FCR05 and FCR07 allows to control compensation cabinets with 6 (FCR05) respective 8
(FCR07) contactor steps.
FCR05 and FCR07 controllers do not have independent alarm output but the last step can be set as an alarm output
and this case it is not used for capacitor step operation but only for alarm purposes.
FCR05 and FCR07 controller measures also following parameters:
Parameter
Display
Maximum
Instantaneous cosφ, average cosφ (capacitive, inductive)
●
Measuring voltage
●
●
Current in the measured phase
●
●
Apparent three-phase power
●
●
Active three-phase power
●
●
Reactive three-phase power
●
●
Allowed reactive power
●
●
Odd current harmonics (1 ... 19) in %
●
●
Total harmonic distortion of current THDI
●
●
Odd voltage harmonics (1 ... 19) in %
●
●
Total harmonic distortion of voltage THDU
●
●
Number of connections of each stage
●
Total time of step usage of each step
●
Temperature
●
Table 1. Measured and displayed parameters
Power factor correction controllers FCR05 and FCR07 are produced in following variants.
Regulator variant Number of all stages
Supply and measuring voltage Panel mounting
DIN rail mounting
FCR05
6
400 VAC
●
FCR07
8
400 VAC
●
FCR05DL
6
400 VAC
FCR08DL
8
400 VAC
FCR05V230
6
230 VAC
●
FCR07V230
8
230 VAC
●
FCR05DLV230
6
230 VAC
●
FCR08DLV230
8
230 VAC
●
●
●
Table 2. Controller variants according to power supply and measuring voltage
3. Instruction manual for connection and operation
Default parameters are set to the device in production, according to the table 1. Supply voltage has to be taken from
regulated network, because it is used also for voltage measuring circuit. Value of this supply voltage is on the product
label. Current for current measuring circuit can be take from any phase. By default the connection of the regulator is
that voltage is connected between phase L2 – L3 and current transformer to the phase L1. The connection of device
is shown at picture 5 and 6.
Commissioning procedure:
1. Make connection according to connection diagram at picture 5 or 6.
2. Connect supply voltage. In the case that the value of current is lower than 5 mA, the display will show ‘---‘. If not,
the display will show instantaneous value of power factor.
3. Hold button SET for at least 5 seconds. After that device will switch to the service menu and on the display will
appear parameter CoS.
4. By pressing the button SET once again display will show target cosφ. Setting the targeting values of cosφ is done
via buttons ▲ (+) and ▼ (-).
5. Confirmation of the set value CoS is done by pressing the button SET.
6. Press the button ▲ until the parameter Itr will appear on the display. This parameter means transformer ratio of
BMR trading
Horní lán 17
779 00 Olomouc
Czech Republic
4
Tel: +420 778 066 566
[email protected]
www.bmr-trading.com
Development and production of systems for measurement and control
current transformer.
7. Press the button SET and on the display will appear set value of transformer ratio (default value is 1).
8. Using the buttons ▲, ▼ set known value of transformer ratio.
9. By pressing button SET confirm set value. On the display will appear again the parameter Itr.
10. Now again, by using the buttons ▲, ▼ move to the parameter Aut and by pressing button SET confirm it. Via
button ▲ switch to the value on and via button SET confirm set value. Device automatically perform phasing of
measured voltage, current and detection of connected compensation stages. All parameters will be saved to the
internal memory. When the detection is finished, parameter Aut will be automatically changed to the value oFF.
11. Verify if detection of power of all stages was done correctly. Press button SET for time of 5 seconds to enter
service mode. By pressing button ▲ move to the parameter StP. Press again button SET and LED 1 of first stage
will turn On. Another pressing the button SET will make the value of the power of the first stage be shown on the
display. If the value is not correct, it should be changed by pressing buttons ▲, ▼ until the correct value. In the
case of capacitor stage, LED cap, placed at the left side of display, has to light. If the power is correct press again
button SET and on the display will appear again parameter StP. Via button ▲ move to another stage and LED 2
will turn On. Repeat the same procedure the same way like for the first stage. Following the same control or
setting of all stages should be done. At the end press button SET until value of power factor will appear on the
display.
12. If everything is set correctly, on the display is shown real instantaneous value of power factor. Regulator FCR05
or FCR07 is ready for operation.
Other parameters may remain on having the default values, that were made by the manufacturer. In the case that
further changes are necessary, the user should follow detailed manual given in chapter 6.
4. Description of the function
Device digitizes measured phase to phase voltage between two phases and current in the measured phase. Then,
from those values, parameters like: power factor, effective values of voltage and current, harmonic distortion of
voltage and current, are being counted. Calculation of the needed compensation power is done by using the value of
allowed reactive power, which is set in the device in the form of requested power factor. According to its size,
regulator will switch on or switch off appropriate capacitor stages.
Within the scope of each power level, regulator uses method of circle switching. All the time connects this stage at
appropriate power level which was switched off for longest time. Everything is made so that regulator will reach
optimal compensation in one regulation cycle with minimum number of switched stages.
The regulator makes harmonics analysis of current and voltage up to 19 th harmonics and counts THD factor of
voltage and current.
BMR trading
Horní lán 17
779 00 Olomouc
Czech Republic
5
Tel: +420 778 066 566
[email protected]
www.bmr-trading.com
Development and production of systems for measurement and control
5. Installation of the device
Regulators FCR05 and FCR07 (except variant for DIN rail) is designed in metal box, which provides perfect EMC
shielding. Controller's design also provides panel mounting, into the hole 91 x 91 mm. The connection of the wires is
from the back side of regulator, to the terminal box. Measuring and auxiliary voltages are being taken from supply
voltage, which must be protected by fuse 6 A.
Picture 3: Connection of measuring circuits
Picture 4: Position of FCR12 controller in the system
Location of the current transformer has to allow both current of the load and the current of the capacitor to be
measured together. Correct location is shown on the picture 4 as well as examples of wrong location.
The complete connection is shown at the picture 5. There is only one rule that should be considered. Stages with the
same power have to be connected side by side. For example:
1st stage
2nd stage
3rd stage
4th stage
5th stage
6th stage
6,25 kVAr
6,25 kVAr
12,5 kVAr
-
25 kVAr
25 kVAr
However, ranging the powers in accordance is not necessary. There could be even gaps between particular power
levels. For example, stages 1 and 2 could be connected, then stage 3 disconnected, stages 4 and 5 connected and
so on.
BMR trading
Horní lán 17
779 00 Olomouc
Czech Republic
6
Tel: +420 778 066 566
[email protected]
www.bmr-trading.com
Development and production of systems for measurement and control
Picture 5. Connection of FCR07 controller for standard supply voltage 400 VAC
Picture 6. Connection of FCR05V230 controller for supply voltage 230 VAC
BMR trading
Horní lán 17
779 00 Olomouc
Czech Republic
7
Tel: +420 778 066 566
[email protected]
www.bmr-trading.com
Development and production of systems for measurement and control
6. Controller parameter setting
Considering various usage of controllers FCR05 and FCR07, there is a number of programmable parameters. For
easy start, regulator is set to default parameters, made by manufacturer. Set parameters are stated in the following
table.
For fast start, the parameters that should necessary be set are cosφ and transformer ratio of current transformer.
Eventually, transformer ratio of voltage transformer could also be set. Further more, there are also other parameters
that could be set, in accordance to the customer request.
In order to avoid any unwanted reprogramming of the device, it is possible to protect access to service mode by
setting the three digits password. By default, new controller does not have any password protection activated. It is
recommended to activate password protection after setting all parameters. After the protection has been activated, it
is possible to see all set parameters, but not to change any of them.
For checking respective setting set parameters follow those instructions:
1. Press the button SET for 5 seconds. Device switches to the service mode and parameter CoS will appear on the
display. This is a symbol of parameter whose currently set value will appear after another pressing of button SET.
2. Via buttons ▲, ▼ is possible to set the requested value of specified parameter.
3. By pressing the button SET again, regulator will save changed value to the internal memory and on display
symbol of the set parameter will appear again. Via buttons ▲, ▼ it is possible to move to another parameter (see
the table below).
4. If the offered parameter is not the one, which is requested to be modified, follow via buttons ▲, ▼ to the
requested parameter.
5. Regulator turns back automatically from service mode after 1 minute without any keyboard action, or by repeated
pressing of button SET during returning from parameter value setting.
Important
While service mode is activated, device is not regulating. Controller will not react to the power factor changes, neither to the
changes of other monitored variables. Alarm output will not operate as well.
Parameter Description
Factory setting Setting range
CoS
target cosφ
Itr
current transformer ratio
1
1 ... 999 in steps of 1
Utr
voltage transformer ratio
1
1 ... 300 in steps of 1
Aut
automatic detection of compensation stages
SHt
deceleration of regulation in the case of over-compensation
60
0 ... 999 s in steps of 1 s
StP
manual setting of compensation stages
0
999 kVAr C ... 999 kVAr L in step of 0,1kvar
dIt
discharging time for contactor stage
30
5 ... 900 s in step of 5 s or overdrive of 50 s
dIP
delay for disconnection of contactor stage
15
5 ... 900 s in step of 5 s or overdrive of 50 s
rSt
number of circuit closing of contactor stage
999
1 ... 999 (x100 operations)
FSt
fixed capacitor stages
Aut
Aut / oFF / on
Con
connection configuration
90
0° ... 330° in steps of 30°
orP
reactive power offset for regulation
0
999 kVAr C ... 999 kVAr L
_CS
regulation to the average power factor
on
on / oFF / Aut – off regulates on instant. cosφ
tAC
averaging time for APFR regulation
60
15, 30, 45, 60 minutes
CSt
saving the step operations and maxim to non volatile memory
oFF
on / oFF
EIC
activation of inductive steps for de-compensation
oFF
on / oFF
uLA
under-voltage alarm
oFF
on / oFF
uL
voltage trigger value for an alarm activation
0
0 ... 750 V
tuL
minimum event duration for an alarm activation
0
0 ... 900 s
ouL
alarm event disconnects compensation steps
BMR trading
Horní lán 17
779 00 Olomouc
Czech Republic
ind 0,98
oFF
oFF
8
0,80 cap. ... 0,80 ind. in steps of 0,01
on / oFF
on / oFF
Tel: +420 778 066 566
[email protected]
www.bmr-trading.com
Development and production of systems for measurement and control
uHA
over-voltage alarm
uH
voltage trigger value for an alarm activation
0
0 ... 750 V
tuH
minimum event duration for an alarm activation
0
0 ... 900 s
ouH
alarm event disconnects compensation steps
oFF
on / oFF
ILA
under-current alarm
oFF
on / oFF
IL
current trigger value for an alarm activation
0
0 ... 5 A
tIL
minimum event duration for an alarm activation
0
0 ... 900 s
oIL
alarm event disconnects compensation steps
oFF
on / oFF
IHA
over-current alarm
oFF
on / oFF
IH
current trigger value for an alarm activation
0
0 ... 8 A
tIH
minimum event duration for an alarm activation
0
0 ... 900 s
oIH
alarm event disconnects compensation steps
oFF
on / oFF
CoA
alarm for cosφ, that is permanently over set limits
oFF
on / oFF
_Co
cosφ level value for an alarm activation
0
0,80 cap. ... 0,80 ind.
tCo
minimum event duration for an alarm activation
0
0 ... 900 s
oCo
alarm event disconnects compensation steps
oFF
on / oFF
HuA
alarm of voltage harmonic distortion
oFF
on / oFF
Hdu
THDU trigger value for an alarm activation
0
0 ... 50 %
tHu
minimum event duration for an alarm activation
0
0 ... 900 s
oHu
alarm event disconnects compensation steps
oFF
on / oFF
HIA
alarm of current harmonic distortion
oFF
on / oFF
HdI
THDI trigger value for an alarm activation
0
0 ... 300 %
tHI
minimum event duration for an alarm activation
0
0 ... 900 s
oHI
alarm event disconnects compensation steps
oFF
on / oFF
otA
alarm for high ambient temperature
oFF
on / oFF
tEA
temperature level for alarm
55
10 ... 80°C
ttE
minimum event duration for an alarm activation
0
0 ... 900 s
otE
alarm event disconnects compensation steps
oFF
on / oFF
rSA
alarm for exceeding of maximum number of step closing
oFF
on / oFF
tEV
temperature level for ventilator start
35
10 ... 80°C
Id
device ID number in RS485 network
0
0 ... 255
bAu
communication speed for data transmission
0
0 ... 38,4 kBd
PAr
communication control by parity checking
Man
manual mode activation
Cod
password for access to SET mode
rES
reset to the factory setting
oFF
on / oFF
oFF
oFF / on / on_o
000
any three digits number 001 ... 999
-
Table 3. Configuration menu
Note
Overdrive is activated by permanent pressing of button ▲ or ▼.
BMR trading
Horní lán 17
779 00 Olomouc
Czech Republic
9
Tel: +420 778 066 566
[email protected]
www.bmr-trading.com
Development and production of systems for measurement and control
6.1. Target cosφ setting (CoS)
Press the button SET at least for 5 second for entering service mode. On the display will appear parameter symbol
CoS. After another pressing of button SET display will show set value. Via buttons ▲, ▼ set new requested value in
the limits from 0,8 inductive to 0,8 capacitive. Another pressing of button SET saves new value to the memory and on
display it will appear again symbol CoS.
6.2. Current transformer ratio setting (Itr)
If service mode is activated, move by buttons ▲, ▼ to the parameter Itr. After pressing button SET, the set value will
appear on the display. Via buttons ▲, ▼ is possible to change value of transformer ratio. Another press of button
SET saves new value to the memory and on display, symbol Itr will appear again.
It is important to have in mind that the value which is set, is ratio itself. It means that, for example, if primary nominal
current of transformer is 50 A and secondary is 5 A then set parameter value is Itr = 10.
Caution
Measurement range of the current inputs is from 5 mA to 6 A. Maximum of the adjustable current transformer ratio is 5000 /
5 A. If the secondary current value rises over 5,3 A, alarm will start, in the case it is enabled.
6.3. Automatic detection of compensation stages (Aut)
Another parameter in the menu is function Aut. After pressing of button SET, the display will show oFF. Via buttons
▲, ▼ change to the value on. After the pressing of button SET automatic detection will start to detect connected
stages. The symbol Con will appear on the display, and first capacitor stage will be switched on and off 6 times in the
cycle of 20 seconds.
Detection of controller connection to the system is followed by detection of power of connected capacitor stages.
During detection, the measured values of each stage are shown on the display. Measured values are being rounded
on 0,5 kvar. After the detection is finished, the regulator will switch parameter Aut back to oFF.
Important
In some cases controller is not able to make automatic detection and in place of measured power shows zeros. It can happen
in places with very fast changes of network parameters, where measured values will not be correct. In this case regulator
shows Er1 and it is necessary to set parameters manually, after detailed network measurements.
6.4. Deceleration of regulation at over compensation (Sht)
This parameter is represented by symbol Sht. This function is used for slowing down the regulation during overcompensation. At under-compensation regulation is slowed down according to average power factor. This function
assures reduction of switch on/off operation of contactor stages. After pressing the button SET, display will show set
value of deceleration. By buttons ▲, ▼ it is possible to change value and button SET saves this into the memory.
Current situation of regulation deceleration during over-compensation is shown under parameter Sht, in the menu of
measured values.
6.5. Manual setting of compensation stages (StP)
Entering the parameter StP by pressing button SET will open sub menu, where it is necessary to select the step,
which is going to be set by capacitor power value. Via buttons ▲, ▼ select the appropriate step. The step is
signalized by green LED of the step number. By pressing button SET the value of the step will appear on display. Via
buttons ▲, ▼ change the value (LED ind and LED cap inform about definition of the capacitor or de-compensation
reactor operated by controller output) and confirm it by button SET. Via buttons ▲, ▼ select another step and follow
the same procedure until all steps are set. After setting of all steps, keep pressing button SET until display will show
StP and all step LED's will be off.
Maximum value of the step is 999 kVAr of inductive and capacitive type. Since the display has only three segments to
show the values up to 99,9 kVAr are shown with one decimal place. Values over 100 kVAr are shown as a integer
although step is still in 0,1 kVAr.
For activation of de-compensation steps study the parameter EIC.
BMR trading
Horní lán 17
779 00 Olomouc
Czech Republic
10
Tel: +420 778 066 566
[email protected]
www.bmr-trading.com
Development and production of systems for measurement and control
6.6. Discharging time (dit)
For setting the absorption of steps, parameter dit is available in the menu. By this parameter, it is possible to set, for
each step separately, suitable time for capacitor discharge. Discharging time can be set from 5 to 900 seconds.
Default factory setting value is 30 seconds.
6.7. Delay for disconnection (diP)
This parameter is represented on the display by symbol diP. It is the minimum time for contactor step operation. If
during this time the request for disconnection of the step comes the step will not be disconnected until the diP time is
counted down. It is possible to be set from 5 to 900 seconds.
6.8. Fixed capacitor stages (FSt)
On the display it is represented by symbol FSt. This parameter allows to set steps as a fixed ones. The regulator is
not counting those steps for regulation cycle. Each step can stay in three working modes.
• Aut – stage is normally regulated by controller
• oFF – always off (status indication LED blinks red)
• on – always on (status indication LED blinks green)
6.9. Connection configuration (Con)
Parameter Con defines mutual position between voltage and current measuring circuits in the three-phase network.
According to controller supply and measuring voltage variant the correction angle differs.
Table 4 shows all possible combination and its correction angles of voltage and current measuring circuits for 400V
variant of controllers FCR05 and FCR07.
Current transformer location and
position
L1
L2
L3
Line voltage
L1 (4) - L2 (3)
L2 (4) - L1 (3)
L2 (4) - L3 (3)
L3 (4) - L2 (3)
L3 (4) - L1 (3)
L1 (4) - L3 (3)
k (2) - l (1)
210°
30°
90°
270°
330°
150°
l (1) - k (2)
30°
210°
270°
90°
150°
330°
k (2) - l (1)
330°
150°
210°
30°
90°
270°
l (1) - k (2)
150°
330°
30°
210°
270°
90°
k (2) - l (1)
90°
270°
330°
150°
210°
30°
l (1) - k (2)
270°
90°
150°
330°
30°
210°
Table 4. Phase shift setting for supply and measuring voltage 400 V AC
BMR trading
Horní lán 17
779 00 Olomouc
Czech Republic
11
Tel: +420 778 066 566
[email protected]
www.bmr-trading.com
Development and production of systems for measurement and control
Table 5 shows all possible combinations of voltage and current measuring circuits for 230V connection of
FCR05V230 and FCR07V230 controller variant.
Current transformer location
and position
L1
L2
L3
Phase voltage
L1 (4) - N (3)
N (4) - L1 (3)
L2 (4) - N (3)
N (4) - L2 (3)
L3 (4) - N (3)
N (4) - L3 (3)
k (2) - l (1)
180°
0°
60°
240°
300°
120°
l (2) - k (1)
0°
180°
240°
60°
120°
300°
k (2) - l (1)
300°
120°
180°
0°
60°
240°
l (2) - k (1)
120°
300°
0°
180°
240°
60°
k (2) - l (1)
60°
240°
300°
120°
180°
0°
l (2) - k (1)
240°
60°
120°
300°
0°
180°
Table 5. Phase shift setting for supply and measuring voltage 230 V AC
6.10. Regulation to average or instantaneous power factor (_CS)
his setting defines if regulator will regulate slow contactor stages to average or instantaneous power factor. If the set
value is on then usage of contactor stages is affected by average power factor. If the set value is off then regulation
is performed only according to instantaneous power factor. In configuration mode move via button ▲, ▼ to the item
ˉCS. After pressing of button SET display will show set value on / oFF / Aut. Via buttons ▲, ▼ it is possible to
change this value. Another pressing of button SET saves new value into the regulator memory.
Caution
Option Aut is a modification for Lithuanian market where there is not defined any area for cosφ (for example 0,96 ... 1) but
strict limit cosφ = 1. With enabled option Aut, controller is regulating symmetrically according to parameter SHt.
6.11. Averaging time for APFR (tAC)
This setting defines half-period of average cosφ calculation. There are available four times for average cosφ
calculation (15, 30 45 and 60 minutes). Default value of period for average cosφ calculation is 30 minutes which
refers to half-period set from factory on 15 minutes. It is suitable for most of applications.
After entering selected parameter currently set value of time period will appear. Via buttons ▲, ▼ it is possible to
change this value. Another pressing of button SET saves new value into the regulator memory.
6.12. Recording of number of operations and maximum values (CSt)
Activation of this parameters allows the controller to save maximums (the minimum value of frequency is being
recorded as well) of measured values into to internal memory.
BMR trading
Horní lán 17
779 00 Olomouc
Czech Republic
12
Tel: +420 778 066 566
[email protected]
www.bmr-trading.com
Development and production of systems for measurement and control
Monitoring of measured parameters is being done in real time but recording to non volatile memory is done 3 times
per 24 hours. Before recording the maximum (minimum) into the memory, this value is kept in standard operating
memory. In the case that power supply is lost before recording to non volatile memory the maximum (minimum)
values will be lost.
6.13. De-compensation steps settings (EIC)
For application where there is a need of de-compensation by reactors it is necessary enable inductive steps setting in
parameter EIC. If the parameter is set on yes then particular step powers can be set in inductive or capacitive power.
De-compensation by reactor steps is possible be done in two solutions. For application where there is only capacitive
load the all steps may be based on de-compensation reactors. For application where there is inductive load which
time to time turns to capacitive load the only compensation one step of controller can be based on de-compensation
reactor and rest of steps can be based on capacitors. This case the appropriate de-compensation power will be tuned
by combination of de-compensation reactor and capacitor steps.
6.14. Alarms
To allowed controller FCR05 or FCR07 to use last step as an alarm output the last step power (6 th for FCR05 or 8th for
FCR07) has to be set on 0. If it is set for some power value the alarm will be just informative without action on last
step of controller.
During normal operation alarm output is opened. If there is activated an alarm by an event the alarm output will
switch on.
Individual events, which activate alarm event can be defined in setting mode by four particular settings. Each alarm
event that is requested has to be enabled at first. After that the value of trigger that activated alarm has to be set and
also duration of event presence. Last setting option is an alarm event influence on disconnection of compensation
outputs.
Following table shows a list of available alarm events.
Code
Description
ULA
Under-voltage alarm
UHA
Over-voltage alarm
ILA
Low-current alarm
IHA
Over-current alarm
CoA
Under compensation alarm
HuA
THDU alarm
HIA
THDI alarm
otA
Temperature alarm
rSA
Alarm from maximum allowed step connection
Note
Alarm output is switched on for 1 minute. After that it is switched off.
Temperature alarm is a special alarm which behaves in two levels. If this alarm is activated, alarm output contact is
used for ventilator control and cannot be used for any other alarm event indication. Output contact closes when
temperature measured by controller goes over level set in parameter tEV. In this case, all alarm events are only
shown on the display without output contact action. Second level which disconnects all compensation stages and
gives alarm event on display is defined by parameter tEA.
Caution
If the otA alarm is enabled then alarm output is used for ventilator control. All other alarms are then only informative
without feedback on the alarm output.
BMR trading
Horní lán 17
779 00 Olomouc
Czech Republic
13
Tel: +420 778 066 566
[email protected]
www.bmr-trading.com
Development and production of systems for measurement and control
6.15. Configuration of RS485 communication port
Following parameters relate to configuration of serial communication for RS485 port (MODBUS communication
protocol).
• Id – defines the number of device in the RS485 network and can be set from 1 ... 255
• bAU – defines communication speed between the FCR controller and PC. Default value is 0.
• PAr – by default it is set to oFF and it can be changed to even (on) or odd (on_o)
6.16. Password for entering configuration mode (Cod)
Thanks to password is possible to protect regulator against unauthorized configuration. Without proper password
knowledge it is possible only see set parameters but not to change them. Password is set as four digit number. In
configuration mode move via buttons ▲, ▼ to the parameter Cod. After pressing of button SET display will show “- -”. First dash from left side is blinking. Via button ▲ set number from 0 ... 9 and confirm by button ▼. Now second
dash is blinking and first set number lights on the display. Keep the same procedure until last number is set. By
pressing of button SET, password for entering configuration mode is saved into the memory. From this moment it is
necessary, for each change, type password in order to enter configuration mode. Otherwise any change will not be
accepted.
Password protection can be deactivated by the same way as password activating but by entering the code “000”.
6.17. Restart (rES)
This function restores default configuration. It is last item in the menu and it is represented on the display by symbol
rES. Press the button SET and keep it. At the same time press the button ▼. LED of capacitor stages will turn on and
then slowly will start to go down. This cycle will repeat two times. After that, the display will show instantaneous value
of power factor. Factory setting will be restored.
Important
After restart, it is necessary to set device again or perform auto detection.
BMR trading
Horní lán 17
779 00 Olomouc
Czech Republic
14
Tel: +420 778 066 566
[email protected]
www.bmr-trading.com
Development and production of systems for measurement and control
7. Displayed values
Value choice, which will be shown on the display is independent on the operation of the regulator itself. It is possible
to change it at any time. LED on the right side of display identifies sort of shown value.
Shown values are sorted to levels so that values in one level are closely related. For switching between particular
levels use button ▲ and for changing screens within one level use button ▼. Splitting of shown values to the levels is
clear from following list. For returning to the instantaneous cosφ represented by symbol CoS press button SET.
CoS
instantaneous cosφ
▼
iCS
▼
ċCS
▼
tHd
▼
H03
▼
tHd
▼
H03
▼
PrL
▼
PrC
▼
C1t
▼
C2t
▼
C8t
inductive average cosφ at
consumption
▼
iCS
..
▼..
H19
..
▼..
H19
▼
rCP
capacitive average cosφ
at consumption
inductive average cosφ at
distribution
▼
ċCS
capacitive average cosφ at
distribution
▲
IAP
apparent current
THDI of current
3rd harmonics of current
19th harmonic of current
▲
UEF
phase voltage effective
THDU of voltage
3rd harmonics of voltage
19th harmonics of voltage
▲
PAP
three-phase apparent power
three-phase active power
three-phase reactive
power
allowed three-phase
reactive power
▲
Sht
deceleration time
▲
C1S
number of 1st stage
operation
total operation time of 1st
step
▲
C2S
number of 2nd stage
operation
total operation time of 2nd
step
.
.
▲
.
.
C8S
number of 8th stage
operation
total operation time of 8th
step
▲
UFr
system frequency
▲
tep
ambient temperature
▲
Sof
firmware version
7.1. Cosφ
Displaying the cosφ is default indication. This value will appear on display after supply voltage connection and if in
current input the current flow is ≥ 5 mA. Red LED on the left side of display marked as ind and cap indicates if
BMR trading
Horní lán 17
779 00 Olomouc
Czech Republic
15
Tel: +420 778 066 566
[email protected]
www.bmr-trading.com
Development and production of systems for measurement and control
measured power factor is in inductive or capacitive area. If measuring current drops below 5 mA, then regulator
disconnects all stages and on the display will appear "- - -".
By button ► it is possible move to average inductive power factor indication. At first, the display will show symbol iCS
and then after 1 second numeric value will be shown. Following the same procedure it is possible to move to average
capacitive power factor represented by symbol ċCS.
7.2. Apparent current
Pressing of button ▲ will move to another level - apparent current. Symbol IAP will appear on the display for 1
second. After that, the display will show effective value of apparent current on primary side of current transformer,
assuming that correct transformer ratio is set in configuration mode, under the parameter Itr.
Another value in this level is current harmonic distortion factor. After pressing the button ►, the display will show
symbol tHd, which will be replaced after 1 second by actual measured value. For getting information about maximum
value or erasing it, follow the same procedure as described above.
7.3. Voltage
This level is exactly the same as previous level, but for line voltage.
7.4. Powers
Monitoring level of power show following information about three-phase powers.
PAP – three phase apparent power in kVA
PrL – three phase active power in kW
PLC – three-phase reactive power in kVAr
rCP – allowed reactive power for the reached cosφ in kVAr
7.5. De-compensation delay
This parameter Sht shows actual remaining time (seconds) to regulation action during over-compensation. Displayed
value is decreased each second by square of true control deviation and requested power factor value.
7.6. Step operation number and time
Number of step operations is divided to the 6 for FCR05 (8 for FCR07) independent levels. For the first step, the
display will show symbol C1S and after it disappears the number of first step operation number will be displayed. By
pressing the button ▼ the symbol C1t will show and after this the total time of usage of the step will be shown. The
time is in hours.
By simultaneous pressing of buttons ▼ and SET this information can be erased.
8. Manual operation
Switching the regulator to the service mode and entering the parameter Man will activate the manual regulation of
compensation steps. On the display, symbol St1 will be shown for 1 second. After that, it will be replaced by actual
value, which blinking (manual mode indication). Button ▲ allows to change stage status with respecting the set
discharging time and delay for stage disconnection. It means that if the stage was disconnected, pressing the button
▲ will switch the stage on. If the stage was connected, the same button will switch the stage off. For another stage
selection press button ▼. After pressing this button, the display will show for 1 second symbol St2, representing
another stage. The whole procedure is the same like for the previous stage. By pressing the button SET, manual
mode can be deactivated.
9. Alarm notification
If at least one of enabled alarm events appeared, then alarm output relay No. 6 for FCR05 (output relay No. 8 for
FCR07) will be switched on for 1 minute and LED with label alarm will blink on the display. This LED will also blink
after the alarm event disappears, until it gets cancelled by button SET. Alarm notification doesn't have any influence
to regulator behaviour.
BMR trading
Horní lán 17
779 00 Olomouc
Czech Republic
16
Tel: +420 778 066 566
[email protected]
www.bmr-trading.com
Development and production of systems for measurement and control
The symbol of alarm sort is shown on the display after pressing of button SET. Symbol of the event that caused the
alarm will appear on the display. Another pressing the button SET will cancel shown alarm. If more alarm events
happened, another event symbol will appear on the display. By keeping the same procedure, it is possible to follow till
last alarm event is not cancelled. In the displayed values mode it is possible to find out which values of alarm events
activated alarm. Alarm event symbols are the same as symbols used during alarm setting in service mode.
BMR trading
Horní lán 17
779 00 Olomouc
Czech Republic
17
Tel: +420 778 066 566
[email protected]
www.bmr-trading.com
Development and production of systems for measurement and control
10. Technical features
Parameter
Value
Supply voltage / measuring voltage
400 V AC (+10%,-15%)
230 V AC (+10%,-15%)
Frequency
50 / 60 Hz
Current range
0,005 ... 6 A
Measurement accuracy of current input
± 0,2%
Measurement accuracy of voltage input
± 0,5%
THDU and THDI accuracy
(U>10%Un) ±5% / (I>10%In) ±5%
Phase error for I > 3% In
± 3° (otherwise ±1°)
Power consumption
< 3,2 VA
Output channels number
6 or 8
Switching power of alarm output
250 VAC / 5 A
Switching power of relay contacts
250 VAC / 5 A
Range of targeted power factor
0,8 ind. ... 0,8 cap.
Range of adjustable step reactive power
999 kVAr ind. .... 999 kVAr cap.
Re-connection delay of step
5 ... 900 s
Switching off delay of step
5 ... 900 s
Compensation steps value setting
manually / automatically
Communication port
RS485 (optional)
Communication protocol
MODBUS RTU
Communication speed
9600 ... 38400 Bd
Temperature limit
-40°C ... +70°C
Front panel
97 mm x 97 mm (5 DIN modules for FCR05DL/07DL)
Panel cutout
91 mm x 91 mm
Site depth
55 mm
Weight
0,65 kg (including packaging)
Protection degree
IP20 rear cover / IP54 front panel
Standards
EN 61010-1, EN50081-1, EN50082-1
BMR trading
Horní lán 17
779 00 Olomouc
Czech Republic
18
Tel: +420 778 066 566
[email protected]
www.bmr-trading.com