1
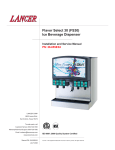
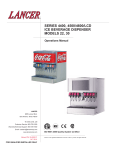
FLAVOR SELECT 22 (FS22)
ICE BEVERAGE DISPENSER
Installation and Service Manual
LANCER
6655 Lancer Blvd.
San Antonio, Texas 78219
To order parts, call
Customer Service: 800-729-1500
Warranty/Technical Support: 800-729-1550
Email: [email protected]
www.lancercorp.com
Manual PN: 28-0580/02
7/28/08
ISO 9001:2000 Quality System Certified
“Lancer” is the registered trademark of Lancer © 2008 by Lancer, all rights reserved.
TABLE OF CONTENTS
ABOUT THE FS22 ................................................................................................................3
FS22 DISPENSERS..............................................................................................................3
SPECIFICATIONS.................................................................................................................4
PRE-INSTALLATION CHECKLIST.......................................................................................5
COUNTER CUTOUT.............................................................................................................6
SAFETY ................................................................................................................................7
ICE.........................................................................................................................................8
1. INSTALLATION ...............................................................................................................8
1.1 SELECTING A LOCATION FOR THE DISPENSER................................................8
1.2 DRAIN SPIDER .....................................................................................................10
1.3 INSTALLATION OVERVIEW - 1.............................................................................11
1.4 INSTALLATION OVERVIEW - 2 ............................................................................12
1.5 CONNECTING TO WATER SUPPLY LINES.........................................................13
1.6 CONNECTING CO2 ..............................................................................................14
1.7 CONNECTING TO ELECTRICAL POWER ...........................................................14
1.8 INSTALLING THE FS22 DISPENSER...................................................................14
2. CLEANING AND SANITIZING ......................................................................................17
2.1 GENERAL INFORMATION ....................................................................................17
2.2 CLEANING AND SANITIZING SOLUTIONS .........................................................18
2.3 DAILY CLEANING..................................................................................................18
2.4 ICE BIN CLEANING - PERFORM AT STARTUP AND MONTHLY........................19
2.5 CLEANING AND SANITIZING BEVERAGE COMPONENTS - BAG-IN-BOX
SYSTEMS ..............................................................................................................21
2.6 ICE CHUTE CLEANING ........................................................................................21
3. HOW TO OPERATE AND ADJUST THE DISPENSER ................................................22
3.1 NORMAL OPERATION ..........................................................................................22
3.2 PROGRAMMING AND SETUP SOFTWARE ........................................................22
3.3 PURGING THE CARBONATION SYSTEM ...........................................................24
3.4 PURGING THE WATER AND SYRUP SYSTEMS ................................................25
3.5 ADJUSTING WATER FLOW AND WATER TO SYRUP RATIO (BRIX) ................25
P.N. 28-0580/02
2
TABLE OF CONTENTS
3.6 CARBONATOR PUMP MODIFICATIONS .............................................................26
4. TROUBLESHOOTING...................................................................................................27
5. ILLUSTRATIONS, PARTS LISTINGS, AND WIRING DIAGRAMS ..............................32
5.1 FINAL ASSEMBLY ............................................................................................32-33
5.2 ICE CHUTE ASSEMBLY........................................................................................34
5.3 PELLET ICE ASSEMBLY AND PARTS LISTING ..................................................35
5.4 LANCER FLOW CONTROL VALVE (LFCV)..........................................................36
5.5 WIRING DIAGRAM ................................................................................................37
5.6 PLUMBING DIAGRAM WITH VALVE WIRING......................................................38
ABOUT THE FS22
The FS22 is designed using the highest quality materials and state-of-the-art technology
providing our customers with consistent quality and a unique drink experience.
FS22 DISPENSERS
85-14408-06-2
ICE BEVERAGE DISPENSER, ABOVE
COUNTER MULTIBRAND, 22 INCH WIDE, 8
BRANDS / 6 FLAVORS, 115V/60Hz
CUBED ICE
85-14408N-06-2
ICE BEVERAGE DISPENSER, ABOVE
COUNTER MULTIBRAND, 22 INCH WIDE, 8
BRANDS / 6 FLAVORS, 115V/60Hz
PELLET ICE
3
P.N. 28-0580/02
FS22 SPECIFICATIONS
22”
(559 mm)
17 5/8”
14 3/8”
(365 mm)
4 1/2”
(114 mm)
40 1/4”
( 986 mm)
10”
(254 mm)
5 1/8”
(130 mm)
7 1/2”
(190 mm)
30 1/2”
(775 mm)
DIMENSIONS
Width: 22 in (559 mm)
Depth: 30.5 in (775 mm)
Height: 40.25 in (1022 mm)
WEIGHT
Without ice: 280 lbs (127 kg)
With ice: 480 lbs (218 kg)
Shipping: 310 lbs (141 kg)
SPACE REQUIRED
Left Side: 1 in (25 mm)
Right side: 1 in (25 mm)
Back: 1 in (25 mm)
Top: 6 in (152 mm)
Optional legs: 4 in (102 mm)
ICE
Capacity: 200 lbs (91 kg)
Dispensable: 170 lbs (77 kg)
ELECTRICAL
115VAC/60Hz, 7AMPs,
805 Watts
P.N. 28-0580/02
FITTINGS
Water for carbonator inlet:
3/8” barb
Plain water inlet: 3/8” barb
Brand syrup inlets: 3/8” barb
Injection flavor inlets: 1/4” barb
CO2 inlet: 3/8” barb
4
PLAIN WATER SUPPLY
Min flowing pressure: 75 PSIG
(5.28 kg/cm2, 5.16 BAR)
CARBONATOR WATER SUPPLY
Min flowing pressure: 25 PSIG
(1.76 kg/cm2, 1.72 BAR)
Max static pressure: 50 PSIG
(3.52 kg/cm2, 3.45 BAR)
CARBON DIOXIDE (CO2)
Min pressure: 70 PSIG
(4.92 kg/cm2, 4.83 BAR)
Max pressure: 80 PSIG
(5.62 kg/cm2, 5.52 BAR)
PRE-INSTALLATION CHECKLIST
BEFORE GETTING STARTED
Each unit is tested under operating conditions and is thoroughly inspected before
shipment. At the time of shipment, the carrier accepts responsibility for the unit. Upon receiving the
unit, carefully inspect the carton for visible damage. If damage exists, have the carrier note the
damage on the freight bill and file a claim with carrier. Responsibility for damage to the dispenser
lies with the carrier.
POST MIX ACCESSORIES:
CO2 Regulator Set
Beverage Tubing
CO2 Supply
Water Booster
Oetiker Clamps/Fittings
Water Regulator
BIB SYSTEM:
BIB Rack
BIB Regulator Set
BIB Connectors - ensure you have the correct connectors for syrup lineup.
BIB Syrup Boxes
DOUBLE CHECK:
Is the countertop level?
Is there enough space to install the dispenser? Be sure to include space for a top-mounted
ice machine, if necessary.
Can the countertop support the weight of the dispenser? Be sure to include the weight of an
ice machine (if necessary) plus the weight of the ice.
Does the top-mounted ice machine have a minimum clearance on all sides?
CONSIDER THE LOCATION OF THE FOLLOWING BEFORE
INSTALLATION:
Water supply lines
Drain
Grounded electrical outlet
Heating and air conditioning ducts
Direct sunlight (avoid) or overhead lighting
5
P.N. 28-0580/02
FS22 COUNTER CUTOUT
v
v
v
v
v
v
v
v
h $)!-%4%2 /04)/.!,
v
h
v
&2/.4 /& $)30%.3%2
$ 2 ) 0 4 2 !9
v
h
v
#54 /54 $!3(%$ !2%!
/04)/.!, (/,%3 &/2 &!34%.).' $)30%.3%2 4/ #/5.4%2 7)4( 3#2%73
P.N. 28-0580/02
6
SAFETY
AUTOMATIC AGITATION
The dispenser is equipped with automatic agitation and will activate
unexpectedly. Do not place hands or foreign objects in the ice storage
compartment. Unplug the dispenser during servicing, cleaning, and
sanitizing.
To avoid personal injury, do not attempt to lift the dispenser without
assistance. For heavier dispensers, use a mechanical lift.
GROUNDING
The dispenser must be properly electrically grounded to avoid serious
injury or fatal electrical shock. The power cord has a three-prong
grounded plug. If a three-hole grounded electrical outlet is not available,
use an approved method to ground the unit. Follow all local electrical
codes when making connections. Each dispenser must have a separate
electrical circuit. Do not use extension cords. Do not connect multiple
electrical devices on the same outlet.
ALWAYS disconnect power to the dispenser before attempting any
internal maintenance. The resettable breaker switch should not be used
as a substitute for unplugging the dispenser from the power source to
service the unit. Note: the keyswitch does not turn off power to the
dispenser. It must be physically unplugged.
Only qualified personnel should service the internal components of the
dispenser. Avoid any contact with water when plugging in the dispenser.
CARBON DIOXIDE
Carbon Dioxide (CO2) is heavier than air and displaces oxygen. CO2 is a
colorless, noncombustible gas with a faintly pungent odor. High
percentages of CO2 may displace oxygen in the blood. Prolonged
exposure to CO2 can be harmful. Personnel exposed to high
concentrations of CO2 gas will experience tremors which are followed
rapidly by a loss of consciousness and suffocation. Strict attention must
be observed in the prevention of CO2 gas leaks in the entire CO2 and soft
drink system. If a CO2 gas leak is suspected, immediately ventilate the
contaminated area before attempting to repair the leak.
The minimum/maximum ambient operating temperature
for the dispenser is 40 to 90 degrees F.
The dispenser is for indoor use only.
7
P.N. 28-0580/02
ICE
Dispensers using cubed ice may also use pellet ice if
properly configured (contact Lancer Customer Service or
your Sales Representative for more information).
Lancer dispensers will not dispense shaved or flaked ice.
Do not use bagged ice. Bagged ice will damage components.
1. INSTALLATION
1.1 SELECTING A LOCATION FOR THE DISPENSER
MAKE SURE THE LOCATION MEETS THESE REQUIREMENTS:
A. Access to a dedicated, grounded 20 AMP electrical outlet.
B. Convenient to an open drain with access for soda, water, and syrup lines.
C. Sufficient clearance above the dispenser for servicing.
D. Counter can support the weight of the dispenser, the weight of the ice, and if
necessary, an icemaker. The total weight may exceed 700 pounds (363 kg).
E. Sufficient clearance on the sides, top and back for icemaker ventilation and air
circulation. Refer to your icemaker manufacturer for specifications.
F. If an icemaker is not top-mounted on the dispenser, make sure to provide
sufficient clearance (a minimum of 6 inches (40.6 cm)) to allow filling the
dispenser with ice from a five gallon (19 liter) container.
G. AVOID DIRECT SUNLIGHT AND OTHER HEAT SOURCES.
THINGS TO CONSIDER:
Connecting lines can be run through the back of the dispenser or extend down
through a counter cutout. The dispenser may be installed directly on the countertop
or on an optional leg kit (PN 82-3484), if no icemaker is installed. If installed directly
on the counter, the dispenser must be sealed to the countertop.
UNPACKING THE DISPENSER:
A. Set shipping carton upright on the floor.
B. Cut band and remove.
C. Open top of carton and remove interior packing.
D. Lift carton up and off of the dispenser.
E. Remove wood shipping base from the bottom of the dispenser. Support
dispenser while removing shipping base to prevent damage to the dispenser.
P.N. 28-0580/02
8
LEVELING THE DISPENSER:
In order to facilitate proper dispenser drainage and carbonation, ensure that the
dispenser is level, front to back and side to side. Place a level on the top of the rear
edge of the dispenser. The bubble must settle between the level lines. Repeat this
procedure for the remaining three sides. Level unit if necessary.
FS22 DISPENSER, NO ICEMAKER
ENSURE SUFFICIENT CLEARANCE
FOR FILLING WITH ICE
ENSURE KEYSWITCH
IS ACCESSIBLE
FS22 DISPENSER WITH ICEMAKER:
Install the icemaker per manufacturer specifications. Points of consideration include
drainage, ventilation, and drop zones.
An adapter plate is required when installing an icemaker. Contact your Sales
Representative or Lancer Customer Service for more information.
A bin thermostat is required in order to control the level of ice in the dispenser. Contact
your icemaker manufacturer to obtain the correct bin thermostat.
Ensure the icemaker is installed properly to allow for removal of the merchandiser.
Ensure manual fill is accessible.
Clean and maintain icemaker per manufacturer’s instructions.
9
P.N. 28-0580/02
1.2 DRAIN SPIDER
The drain spider is located directly in the center of the bin under the ice shroud. The
coldplate has a cavity designed to hold the drain spider. During shipment or installation, the drain spider may become dislodged from its original position.
Prior to installing the dispenser, ensure the drain spider is in the correct position.
This will prevent drain clog issues. Inspect the lower bin area and reach under the
shroud to ensure the drain spider is secure in the coldplate cutout. If the spider is
not in place, proceed with the following steps:
A. Remove agitator clip and pin from agitator bar.
B. Remove agitator bar from paddle wheel.
C. Remove paddle wheel.
D. Remove ice shroud by lifting back then out of bin.
E. Locate drain spider and reinstall in the coldplate cavity where drain line exits
(see figure above).
F. Reinstall all components. Ensure agitator clip is locked:
P.N. 28-0580/02
10
1.3 FS22 INSTALLATION OVERVIEW - 1
11
P.N. 28-0580/02
1.4 FS22 INSTALLATION OVERVIEW - 2
P.N. 28-0580/02
12
1.5 CONNECTING TO WATER SUPPLY LINES
A. Use a filter in the water line to avoid equipment damage and beverage off-taste.
Check the water filter periodically, as required by local conditions.
B. Protect the water supply by means of an air gap, a backflow prevention device,
or another approved method that complies with NSF standards. A leaking inlet
water check valve will allow carbonated water to flow back through the pump
when it is shut off and will contaminate the water supply. Ensure the backflow
prevention device complies with ASSE and local standards. It is the
responsibility of the installer to ensure compliance.
Do not operate the carbonator pump with the water supply off.
Doing so can damage components and void the warranty.
WARNING!
C. Provide an adequate potable water supply. Water pipe connections and fixtures
directly connected to a potable water supply must be sized, installed, and
maintained according to federal, state, and local laws.
D. For the plain water supply line, the inlet water flowing pressure should be at
least 75 PSI. If the water pressure is lower than 75 PSI flowing, use a water
booster system.
If the water flowing pressure is lower than 75 PSI at the plain water inlet and a
water booster is not installed, water products will not hold a proper flow rate or
water/syrup ratio. Flow conditions at the nozzle can also be affected, causing
poor nozzle coning and mixing.
NOTE: The Lancer Water Booster/Tank (PN MC-163172) is offered as a kit. The
water booster must be installed as close as possible to the plain water circuit
inlet.
E. For the soda water supply line, do not exceed 50 PSI for the inlet water static
pressure going into the carbonator pump. If the static water pressure exceeds
50 PSI, install a water regulator before the carbonator water inlet.
NOTE: Install the water regulator (Lancer PN 18-0306) included with unit as
close as possible to the water carbonator pump inlet. The recommended water
pressure value feeding the carbonator is a minimum of 25 PSI. If the normal
water pressure does not exceed 50 PSI, but fluctuates over this value (for
example, when water usage on other equipment connected to the same water
supply causes pressure spikes), use a water regulator.
Do not connect to a hot water or soft water source. This causes
excessive foaming.
WARNING!
13
P.N. 28-0580/02
1.6 CONNECTING CO2
A. Provide a regulated CO2 supply to the dispenser through a 3/8 inch supply line.
The maximum pressure is 80 PSI.
Excessive CO2 pressure can damage components.
WARNING!
1.7 CONNECTING TO ELECTRICAL POWER
A. Check the dispenser serial number plate for correct electrical requirements of
unit. Do not plug into a wall electrical outlet unless the current shown on the
serial number plate agrees with local current available.
The dispenser must be electrically ground to avoid danger. The
power cord has a three-prong grounded plug. If a three-holed
grounded electrical outlet is not available, use an approved
method of ensuring a proper ground to the dispenser.
1.8 INSTALLING THE FS22 DISPENSER
A. Remove the cup rest, drip tray, splash plate, and top cover from the unit.
B. Remove the cover plate at the back of the unit (if not a through-the-counter
installation).
C. Connect the plain water supply line to the 3/8 inch barb fittings at the front of the
unit.
For the plain water supply line, the inlet water flowing pressure should be at
least 75 PSI. If the water pressure is lower than 75 PSI flowing, use a water
booster system.
If the water flowing pressure is lower than 75 PSI at the plain water inlet, and a
water booster is not installed, water products will not hold a proper flow rate or
water/syrup ratio. Flow conditions at the nozzle can also be affected, causing
poor nozzle coning and mixing.
NOTE: The Lancer Water Booster/Tank, PN MC-163172, is offered as a kit. The
Water Booster must be installed as close as possible to the plain water circuit
inlet.
For the soda water supply line, do not exceed 50 PSI for the inlet static water
pressure going into the carbonator pump. If the static water pressure exceeds
50 PSI, install a water regulator in front of the carbonator water inlet.
P.N. 28-0580/02
14
NOTE: Install the water regulator (Lancer PN 18-0306) as close as possible to
the water carbonator pump inlet.
The recommended water pressure value feeding the carbonator is a minimum
of 25 PSI. If the normal water pressure does not exceed 50 PSI, but fluctuates
over this value (for example, when water usage on other equipment connected
to the same water supply causes pressure spikes), use a water regulator.
Locate pump deck as close as possible to the unit.
Install the water regulator to the inlet line of the pump deck and connect 3/8”
water supply line to the inlet of the pump.
Connect 3/8” outlet carbonated water supply line to the carbonated water inlet
of the unit.
Connect the harness into the pump deck and into the power supply on the unit.
D. Place the CO2 cylinder with the CO2 regulator in a serviceable location and
route the CO2 supply line (75 PSI) to the 3/8 inch barb fitting at the front of the
unit.
E. Connect the syrup supply lines to the 3/8 inch barb inlet fittings at the front of
the unit. Connect other end to BIB pumps.
F. Connect the flavor injection lines to the barb fittings at the front of the unit.
G. Install the drip tray and extend the hose to an open drain.
H. Insulate drain lines with a closed cell insulation. Ensure that the insulation
covers the entire length of the drain hose, including fittings. To prevent
condensation from forming, install the drain so that water does not collect in
sags or other low points.
I. Install the cup rest and splash plate.
J. Connect the power cord to a grounded electrical outlet.
The bin agitation system will operate automatically. Do not place
hands in the bin or the ice chute.
K. Test motor operation by pushing the ice chute.
L. Clean and sanitize the dispenser (see section 2).
M. Fill the dispenser half full with ice. Test ice delivery by pushing the ice chute.
N. Fill the dispenser with ice.
O. Install the top cover.
P. Set the brix ratio for beverage dispensing valves according to the
manufacturer's instructions.
15
P.N. 28-0580/02
When installing an icemaker on an IBD dispenser, use a bin
thermostat to control the ice level. This will prevent damage to the
dispensing mechanism. the bracket for mounting a thermostat is
located in the ice bin.
WARNING!
During the automatic agitation cycle and while dispensing ice,
ensure there is adequate space between the top of the ice level and
the bottom of the icemaker so the ice can move without
obstruction.
Contact your icemaker manufacturer for information on a suitable
bin thermostat.
Disconnect the dispenser from the power source before removing
any parts from the bin. Automatic agitation can occur at any time.
P.N. 28-0580/02
16
2. CLEANING AND SANITIZING
2.1 GENERAL INFORMATION
Lancer equipment is shipped from the factory cleaned and sanitized in accordance
with NSF guidelines. The equipment must be cleaned and sanitized after
installation is complete. The operator of the equipment must provide
continuous maintenance as required by this manual and state and local
health department guidelines to ensure proper operation and sanitation
requirements are maintained.
NOTE: The cleaning and sanitizing procedures provided in this manual pertain to
the Lancer FS30 dispenser. If other equipment is being cleaned, follow the
guidelines established for that equipment.
Cleaning and sanitizing should be performed by trained personnel only. Use
sanitary gloves. Observe applicable safety precautions. Follow instruction warnings
on the product.
DO NOT:
Disconnect water lines when cleaning and sanitizing syrup lines,
to avoid contamination.
Use strong bleaches or detergents; these can discolor and
corrode various materials.
Use metal scrapers, sharp objects, steel wool, scouring pads,
abrasives, or solvents on the dispenser.
Use hot water above 140 degrees F (60 degrees C). This can
damage the dispenser.
17
P.N. 28-0580/02
2.2 CLEANING AND SANITIZING SOLUTIONS
CLEANING SOLUTION: Mix a mild, non-abrasive detergent with clean, potable
water at a temperature of 90 to 110 degrees F. The mixture ratio is one ounce of
cleaner to two gallons of water. Prepare a minimum of five gallons of cleaning
solution. Do not use abrasive cleaners or solvents because they can cause
permanent damage to the dispenser. Ensure rinsing is thorough, using clean,
potable water at a temperature of 90 to 110 degrees F. Extended lengths of product
lines may require additional cleaning solution.
SANITIZING SOLUTION: Prepare a minimum of five gallons of sanitizing solution
according to the manufacturer’s recommendations and safety guidelines. Ensure
the solution provides 50 to 100 parts per million (PPM) chlorine. Any sanitizing
solution may be used as long as it is prepared as directed above. Extended lengths
of product lines may require additional sanitizing solution.
WARNING!
Following sanitization, rinse with end-use product until there is no
aftertaste. Do not use a fresh water rinse. This is an NSF
requirement. Residual sanitizing solution left in the system creates
a health hazard.
For powder sanitizers, dissolve completely with water prior to
adding to the syrup system. Hot water will help dissolve powder
sanitizers.
Avoid getting sanitizing solution on circuit boards.
OTHER SUPPLIES NEEDED:
-
Clean cloth towels
Bucket
Small brush (PN 22-0017) - included with installation kit.
Extra nozzle
Sanitary gloves
2.3 DAILY CLEANING
A. Carefully remove the nozzle housings by turning counterclockwise and pulling
down from the nozzle body.
B. Wash the nozzle housings in cleaning solution and rinse with clean warm water.
C. Wet a clean cloth in cleaning solution.
D. While the nozzle housing is removed, wipe down the perimeter and end of the
nozzle body.
P.N. 28-0580/02
18
E. Fill a cup with clean warm water and rinse nozzle body.
F. Make certain that the nozzle o-ring is not torn or otherwise damaged. If
necessary, replace damaged o-ring with Lancer PN 02-0231.
G. Wet the inner surface of the nozzle housing with water and reinstall the nozzle
housing by sliding it over the nozzle body and turning clockwise to lock in
position.
2.4 ICE BIN CLEANING - PERFORM AT STARTUP AND MONTHLY
A. Disconnect power to the dispenser.
B. Remove the top cover.
C. Melt out any remaining ice from the bin.
D. Remove the splash plate, drip tray and front and rear bin covers.
E. Remove the agitator pin from the agitator shaft. Slide the agitator shaft rearward
out of the motor shaft and pull out of the rear bearing to remove.
F. Remove the dispensing wheel from the motor shaft by sliding rearward.
CONTINUED ON NEXT PAGE
19
P.N. 28-0580/02
G. WHITE WHEEL SHROUD (PELLET ICE)
Remove the gasket which secures the
shroud by pulling it out.
G. BLACK WHEEL SHROUD (CUBED ICE)
Remove the dispensing wheel shroud.
Push the front section of the shroud back. Remove the lower ice chute assembly.
Pull the shroud up and out.
Remove the lower ice chute assembly.
H. Using the cleaning solution described in the “Cleaning and Sanitizing Solutions”
section and a clean cloth or soft brush, clean all removable parts, sides of ice bin,
ice chute and surface of aluminum casting.
I. Using hot water, thoroughly rinse away the cleaning solution.
J. Wearing sanitary gloves, soak a clean cloth towel in sanitizing solution, described
in the “Cleaning and Sanitizing Solutions” section above, and wash all surfaces of
removable parts, sides of ice bin, ice chute liner, and surface of aluminum casting.
K. Wearing sanitary gloves, reassemble all removable parts.
L. Fill the unit with ice and replace the top cover.
M. Reconnect the dispenser to the power source. Ensure agitator clip is locked:
P.N. 28-0580/02
20
2.5 CLEANING AND SANITIZING BEVERAGE COMPONENTS BAG-IN-BOX SYSTEMS
NOTE: Extended lengths of product lines may require more time for flushing and
rinsing lines than stated below.
A. Disconnect the syrup quick disconnect coupling from the syrup packages and
connect the coupling to a bag valve removed from an empty Bag-in-Box (BIB)
package.
B. Place the syrup inlet line in a clean container filled with clean, potable, room
temperature water. Activate the valve until water is dispensed. Flush and rinse
the line and fittings for a minimum of sixty seconds to remove all traces of
residual product.
C. Make the sanitizing solution. Place the syrup inlet line in a container filled with
sanitizing solution.
D. Activate the valve and draw sanitizing solution through the line for a minimum of
sixty seconds. This will ensure the line is flushed and filled with sanitizing
solution. Allow the line to stand for at least thirty minutes.
E. Remove the bag valve from the quick disconnect coupling and reconnect the
syrup inlet line to syrup package. Ready the unit for operation.
F. Draw drinks to refill the lines and to flush the sanitizing solution from the
dispenser.
NOTE: Do not follow the sanitization procedure with a fresh water rinse. Purge only
with end-use product until there is no aftertaste. This is an NSF requirement.
G. Test the dispenser for proper operation. Taste the dispensed product to ensure
there is no off-taste. If off-taste is found, flush the syrup system again.
H. Repeat cleaning, rinsing, and sanitizing procedures for each valve and circuit.
2.6 ICE CHUTE CLEANING
It is recommended to perform this procedure monthly, or more often if desired. Use
the cleaning solution described above. An alternate solution of one part water to
one part vinegar may be used to remove water spots and calcium deposits.
A. Turn off power to the dispenser.
B. Remove merchandiser.
C. Unhook the spring from the upper ice chute by pulling up and out.
D. Remove the lower chute by carefully spreading apart the arms of the lower
chute.
E. Mix the cleaning solution. Put a portion of the solution into a spray bottle. Soak
the lower chute in the remaining solution.
F. Spray the upper chute with the cleaning solution.
G. With a soft sponge, clean the inside of the upper and lower chutes.
21
P.N. 28-0580/02
H. Rinse the lower chute thoroughly.
I. Dry the lower chute thoroughly.
J. Empty the cleaning solution from the spray bottle, then refill with plain water.
Rinse the upper chute thoroughly.
K. Dry the upper chute.
L. Reinstall the lower ice chute onto the upper chute, then reinstall the spring.
M. Reinstall merchandiser.
N. Reconnect power to the dispenser.
3. HOW TO OPERATE AND ADJUST THE DISPENSER
3.1 NORMAL OPERATION
A. Fill cup with desired amount of ice.
B. Place cup under nozzle below desired brand.
C. Select up to two desired bonus flavors from those available on the keypad, by
pressing against the flavor label once. Selection indicator light will illuminate,
acknowledging selection.
D. Press and hold brand label to fill cup.
E. Top off cup as desired.
3.2 PROGRAMMING AND SETUP SOFTWARE
Lancer reserves the right to make changes and updates as required. If
you have any questions regarding the latest versions of programs, please
contact your Lancer representative.
The Lancer FS22 has been factory preset to the settings necessary to comply with
the brand/flavor version of the unit requested by the customer.
Adjustments or upgrades should only be performed by trained personnel. For any
upgrades, an upgrade kit may be purchased. The kit includes all of the hardware
required for the upgrade, including bezels and valves.
CONTINUED ON NEXT PAGE
P.N. 28-0580/02
22
INITIALIZATION SCREEN
(BOOT UP ONLY)
LANCER FS SERIES
VER. 0.xxxx
MAIN MENU
FS-22 (NO PWB)
MAJOR / MINOR
SUB-CATEGORY
C
BRANDS PER SIDE
V:1 L:2 R:2
FS-22 (NO PWB)
C
CONFIG BONUS KEY
BONUS KEY SETUP
V:1 T:F M:F B:F
FS-22 (NO PWB)
C
CARB / WATER SETUP
CARB / WATER SETUP
V1 B1 SODA
FS-22 (NO PWB)
CONFIG ICE TYPE
C
CONFIG ICE TYPE
CUBE
PELLET
FS-22 (NO PWB)
VW ICE STIR TMS
C
ICE STIR ON 2000
ICE STIR OFF 60
FS-22 (NO PWB)
C
SOFTWARE VERSION
FS-22 (NO PWB)
CONTROLLER X.XXX
V1 X.XXX
C
1
Y
NUMBER OF VALVES
FS-22 (NO PWB)
RESET DEFAULTS
C
FS-22 (NO PWB)
GLOBAL CONFIG
C
2
Y
RELOAD DEFAULTS?
NO
YES
SET MAIN CONFIG
FS8 (PWB)
CANCEL
ENTER
Scrolls through Main Menu
Press "Enter" to enter sub-category
Moves cursor to right or left
Changes value (number/letter)
Press "Enter" to save changes
Press "Cancel" to exit menu
NOTE:
C = CUBED ICE
P = PELLET ICE
O = OVERRIDDEN
Valves can be adjusted by scrolling through the menus (see figure above) using the
UP and DOWN arrows. By pressing the ENTER button, a submenu is revealed. In
the submenu, the individual valves can be adjusted to the desired configuration.
B. MENUS AND SUBMENUS
23
P.N. 28-0580/02
1. Bonus Flavors
a. Decide if the bonus flavors will be set to add an injected flavor to the
brands or dispense carbonated water/plain water.
b. Choose the Valve number (1-2) by scrolling UP and DOWN arrows.
c. Use the LEFT and RIGHT arrows to shift to the Top, Middle, or Bottom
"bonus" flavors categories.
d. Press the UP and DOWN arrows under Top, Middle, or Bottom to select
it as an injected flavor, carbonated Soda water, or plain Water.
e. Press ENTER to finalize settings. Panel lights should confirm finalized
configurations.
2. Brands
a. Decide how the brands will be setup.
b. Choose the Valve number (1-2) by scrolling UP and DOWN arrows.
c. Use the LEFT and RIGHT arrows to shift to the Left or Right categories.
The Left or Right categories are set with the assumption that you
are looking at them from the front.
d. Press UP and DOWN arrows under Left (1-2) or Right (1-2) to select the
brand per side as a single or double. For example, for bezel PN 05-2120,
V:1 L:1 R:2
3. Soda/Water
a. Decide which switch locations will be carbonated and/or non-carbonated
drinks.
b. Choose the Valve number (2-3) by scrolling the UP and DOWN arrows.
c. Use the LEFT and RIGHT arrows to shift to the number categories (1-4).
The number categories correspond to the brand location (per valve)
that is being configured.
d. Press the UP and DOWN arrows under the number to select if that brand
will be carbonated Soda or non-carbonated plain Water. If a single brand
per side, only number 1 and/or 3 need to be set.
4. Automatic Agitation
a. Each Series 14400 ice beverage dispenser is equipped with automatic
agitation for the ice bin. The unit is shipped with timing set at two seconds
(2000 milliseconds) ON every sixty minutes for cubed ice. The unit is
shipped with timing set at four seconds (4000 milliseconds) ON every
150 minutes for pellet ice.
3.3
PURGING THE CARBONATION SYSTEM
Purge the carbonator tank whenever carbonation issues occur.
A. Turn off CO2 supply.
B. Turn off power to the unit. Unplug the carbonator harness from the power
supply.
C. Open the relief valve until water is coming out. Close the relief valve, checking
for any remaining air in the tank.
D. Allow the carbonator tank to fill with plain water by way of the water booster.
P.N. 28-0580/02
24
E. Once the tank is full, turn the power back on and purge the system by
dispensing a carbonated drink. You should only get plain water as the CO2 is
still off. Dispense several times.
F. Turn on the CO2 supply
G. Turn off the power in order to reconnect the pump harness. Turn power back on.
H. Dispense soda at valve until the carbonator pump comes on. Release the
button, allow the carbonator to fill and stop (usually a few seconds). Repeat this
process until the water is carbonated (about five cycles).
I. Place dispenser back into service.
NOTE: To check for CO2 leaks, close the valve on the CO2 cylinder and observe if
the pressure to the system drops with the cylinder valve closed for five minutes.
Open the cylinder valve after check.
3.4 PURGING THE WATER AND SYRUP SYSTEMS
A. Open a dispensing valve until water and syrup are flowing steadily from the
valve. Repeat for each valve.
B. Check all of the dispenser's syrup and water connections for leaks and repair if
necessary.
C. Replace the dispenser's splash plate and cup rest.
3.5 ADJUSTING WATER FLOW AND WATER TO SYRUP RATIO (BRIX)
The water flow can be adjusted between 3.25 oz/sec (96 ml/sec) and 4.50 oz/sec
(133 ml/sec) on all dispensing valves. Ensure ice is on the cold plate for at least one
hour before you brix the valves. The drink temperature should be no higher than 40
degrees F (4.4 degrees C) when the brix is set.
A. Remove merchandiser assembly.
B. If necessary, rotate switches panel forward and down by releasing the two pin
latches on its sides.
C. Rotate light panel, forward and up by releasing the two pin latches on its sides
towards the top.
D. Remove nozzle by twisting counterclockwise and pulling down.
E. Install Lancer syrup separator (PN 82-3458) in place of nozzle.
F. Activate dispensing valve to fill separator syrup tube.
G. Hold a Lancer brix cup under the syrup separator and dispense water and syrup
into cup for four seconds. Divide number of ounces of water in cup by four to
determine water flow rate per second.
H. To obtain the proper flow, remove protective cap, and use a screwdriver to
adjust water flow control.
I. Repeat process for each water valve. There can be up to six gray water valves
on this dispenser (up to four carbonated water valves and two plain water
25
P.N. 28-0580/02
valves).
J. Hold the Lancer brix cup under the syrup separator and activate valve. Check
brix.
K. To obtain the proper brix, use screwdriver to adjust syrup flow control.
L. Once proper ratio is obtained, repeat to verify.
M. Repeat process for each valve.
N. Remove syrup separator.
O. Install nozzle.
P. Once all the valves have been brixed, restore switches panel and light panel to
their original positions.
3.6 CARBONATOR PUMP MODIFICATIONS
The electric, positive displacement rotary vane pump with 170 PSI bypass should
only be serviced by trained personnel. To achieve optimum carbonation, use
filtered water with the pump.
A. Turn off power to the dispenser.
B. Remove drip tray and splash plate.
C. Turn off water.
D. Turn the CO2 off, activate the relief valve.
E. Once the pressure has been released, untighten the inlet/outlet nuts on the
pump.
F. Unscrew the mounting bracket.
G. Part should easily slide out for replacement or maintenance.
P.N. 28-0580/02
26
4. TROUBLESHOOTING
TROUBLE
4.1 No product when switch is
activated. (Switch panel does not
light up when activated.)
CAUSE
REMEDY
A. Keyswitch is off, or keyswitch
harness is disconnected.
A. Turn keyswitch on and/or
reconnect keyswitch harness.
B. 9-in valve harness is
disconnected.
B. Turn off power, reconnect 9-pin
harness, and restore power.
C. Defective switch assembly.
C. Replace switch assembly.
D. No power to unit.
D. Check internal breaker and
incoming power.
4.2 No product when switch is
A. 25-pin valve harness is
activated. (Switch panel does light disconnected.
up when activated.)
B. Defective switch assembly.
A. Turn off power, reconnect 25pin harness, and restore power.
4.3 Push chute and nothing
happens.
A. Dispenser not connected to
power source.
A. Connect dispenser to power
source.
B. Microswitch defective.
B. Replace microswitch.
C. Wiring harness not plugged in.
C. Plug in wiring harness.
D. PC board defective.
D. Replace PC board.
A. Wiring harness not plugged in.
A. Plug in wiring harness.
B. PC board defective.
B. Replace PC board.
C. Motor defective.
C. Replace motor.
A. Solenoid not connected to PC
board.
A. Connect solenoid to PC board.
4.4 Push chute. Ice door opens
but motor does not run.
4.5 Push chute. Motor runs but
ice door does not open.
B. Replace switch assembly.
B. Replace solenoic.
B. Solenoid defective.
C. Replace PC board.
C. PC board defective.
4.6 Push chute, ice door opens,
motor runs, but no ice dispenses,
or ice is of poor quality.
D. Solenoid bracket screwed too
low and not opening completely.
D. Unscrew solenoid bracket,
raise solenoid and rescrew
bracket.
A. Dispenser is out of ice.
A. Fill unit with ice.
B. Agitator pin is missing or
damaged.
B. Replace agitator pin.
C. Poor ice quality.
C. Install water
filtration/purification to icemaker
supply water.
CONTINUED ON NEXT PAGE
27
P.N. 28-0580/02
TROUBLE
CAUSE
4.7 Valves do not operate.
4.8 Water in ice bin.
REMEDY
A. Keyswitch is off, or keyswitch
harness is disconnected.
A. Turn keyswitch and/or make
sure keyswitch harness is
connected.
B. Circuit breaker tripped.
B. Reset circuit breaker.
C. Unit not plugged in.
C. Plug in dispenser.
A. Coldplate drain is obstructed.
A. Remove splash plate to obtain
access to drain tubes and clear
accordingly.
4.9 Water leakage around nozzle. A. Damaged or improperly
installed o-ring on nozzle.
A. If damaged, replace. If
improperly installed, adjust.
4.10 Miscellaneous leakage.
A. Gap between parts.
A. Tighten appropriate retaining
screws.
B. Damaged or improperly
installed o-rings.
B. Replace or adjust appropriate
o-rings.
4.11 Noisy/cavitating carbonator
pump.
A. Insufficient incoming water
supply pressure.
A. Verify incoming supply water
pressure to carbonator pump is a
minimum of 25 PSI (max 50 PSI).
4.12 Insufficient soda flow
(carbonated drinks).
A. Insufficient CO2 supply
pressure.
A. Verify incoming CO2 pressure
between 70-75 PSI.
B. Shutoff on mounting block not
fully open.
B. Open shutoff fully.
C. Foreign debris in soda flow
control.
C. Remove soda flow controlf
rom valve and clean out any
foreign material to ensure smooth
spool movement.
A. Insufficient incoming supply
pressure.
A. Verify incoming supply water
pressure to plain water inlet is a
minimum of 70 PSI (max 125
PSI).
B. Shutoff on mounting block not
fully open.
B. Open shutoff fully.
C. Foreign debris in water flow
control.
C. Remove water flow control
from valve and clean out any
foreign material to ensure smooth
spool movement.
D. Water filtration problem.
D. Service water system as
required.
4.13 Insufficient water flow (plain
water).
CONTINUED ON NEXT PAGE
P.N. 28-0580/02
28
TROUBLE
4.14 Insufficient syrup flow.
4.15 Erratic ratio.
4.16 Water only dispensed, no
syrup. Or syrup only dispensed,
no water.
CAUSE
REMEDY
A. Insufficient CO2 pressure to
BIB pumps.
A. Adjust CO2 pressure to 80 PSI
(min 70 PSI) for BIB pumps.
B. Shutoff on mounting block not
fully open.
B. Open shutoff fully.
C. Foreign debris in syrup flow
control.
C. Remove syrup flow control
from valve and clean out any
foreign material to ensure smooth
spool movement.
D. Defective BIB pump.
D. Replace pump.
A. Incoming water and/or syrup
supply not at minimum flowing
pressure.
A. Check pressure and adjust.
B. Foreign debris in water and/or
syrup flow control.
B. Remove flow control from
suspected valve and clean out
any foreign material to ensure
smooth spool movement.
C. CO2 regulator malfunction.
C. Repair or replace CO2
regulator as required.
A. Syrup BIB empty.
A. Replace syrup BIB as required.
B. Water or syrup shutoff on
mounting block not fully open.
B. Open shutoff fully.
C. Improper or inadequate water
or syrup supply.
C. Remove valve from mounting
block, open shutoff slightly and
check water and syrup supply. If
no supply, check dispenser for
other problems. Ensure BIB
connection is engaged.
D. CO2 pressure to syrup pump
too low.
D. Check the CO2 pressure to the
pump to ensure it is between 7080 PSI.
E. Stalled or inoperative BIB
pump.
E. Check CO2 pressure and/or
replace pump.
F. Kinked line.
F. Remove kink or replace line.
G. CO2 regulator malfunction.
G. Repair or replace CO2
regulator as required.
CONTINUED ON NEXT PAGE
29
P.N. 28-0580/02
TROUBLE
4.17 Valve will not shut off.
4.18 Syrup only dispensed. No
water, but CO2 gas dispensed
with syrup.
4.19 Excessive foaming.
4.20 Water continually leaking at
connections.
REMEDY
CAUSE
A. Debris in solenoid seat.
A. Activate valve a few times to
free debris. Remove the solenoid
coil and plunger and clean out
foreign material.
B. Solenoid plunger sticking.
B. Replace solenoid coil.
A. Improper water flow to
dispenser.
A. Check for water flow to
dispenser.
B. Carbonator pump motor has
timed out. (A message will be
displayed on the LCD screen.)
B. Reset by turning the unit off
and then of by using the circuit
breaker on the power supply, or
momentarily unplugging unit.
C. Liquid level probe not
connected properly to PCB.
C. Check connections of liquid
level probe to PCB assembly.
Replace PCB assembly.
D. Defective PCB assembly.
D. Replace PCB assembly.
E. Defective liquid level probe.
E. Replace liquid level probe.
A. No ice in bin.
A. Fill bin with ice and allow
coldplate to restabilize.
B. Incoming water or syrup
temperature too high.
B. Correct prior to dispenser.
C. CO2 pressure too high.
C. Adjust CO2 pressure
downward, but not less than 70
PSI.
D. Water flow rate too high.
D. Readjust and reset ratio.
E. Nozzle and diffuser not clean.
E. Remove and clean.
F. Air in BIB lines.
F. Bleed air from BIB lines.
A. Loose water connections.
A. Tighten water connections.
B. Flare seal washer leaks.
B. Replace flare seal washer.
4.21 Water leaking from ice door. A. Securing screws loosened.
B. Ice door improperly seated.
A. Tighten screws.
B. Reattach door assembly to
dispenser.
CONTINUED ON NEXT PAGE
P.N. 28-0580/02
30
TROUBLE
4.22 Circuit breaker tripping.
REMEDY
CAUSE
A. Valve wire harnesses shorted
to itself or faucet plate.
A. Detect short by disconnecting
valve harnesses from switch
panel (2 25-pin harnesses and 2
9-pin harnesses).
Restore power. If breaker does
not trip, then find and replace
shorted harness. If breaker still
trips, reinstall the eight harnesses
and proceed to Step B.
B. Controller PCB is bad.
B. Detect by disconnecting the
white 5-pin harness from the controller PCB. Restore power. If
breaker does not trip, then
replace controller PCB. If breaker
still trips, reinstall the white 5-pin
harness and proceed to Step C.
C. Secondary wire harness is
shorted.
C. Locate short from a motor or
solenoid harness and replace as
necessary.
D. Power supply is bad.
D. Detect short by disconnecting
all harnesses connected to power
supply. Restore power. If breaker
still trips, replace power supply.
4.23 BIB pump does not operate A. Out of CO2, CO2 not turned
when dispensing valve is opened. on, or low CO2 pressure.
4.24 BIB pump operating, but no
flow.
4.25 BIB pump continues to
operate when bag is empty.
A. Replace CO2 supply, turn on
CO2 supply, or adjust CO2 pressure to 70-80 PSI.
B. Out of syrup.
B. Replace syrup supply.
C. BIB connector not tight.
C. Fasten connector tightly.
D. Kinks in syrup or gas lines.
D. Straighten or replace lines.
A. Leak in syrup inlet or outlet
line.
A. Replace line.
B. Defective BIB pump check
valve.
B. Replace BIB pump.
A. Leak in suction line.
A. Replace line.
B. Leaking o-ring on pump inlet
fitting.
B. Replace o-ring.
C. Defective syrup BIB pump.
C. Replace defective pump.
CONTINUED ON NEXT PAGE
31
P.N. 28-0580/02
5. ILLUSTRATIONS, PARTS LISTINGS AND WIRING DIAGRAMS
5.1 FINAL ASSEMBLY
22
23
18
19
20
28
21
24
17
27
26
16
29
25
13
35
34
30
15
31
32
14
33
12
11
4
6
3
2
5
8
1
7
10
9
36
P.N. 28-0580/02
32
5.1
FINAL ASSEMBLY - PARTS LIST
Part No.
Description
85-14408-06-2
IBD, ACMB, 22”, 150#, 8/6, LFCV, Cubed
85-14408N-06-2
IBD, ACMB, 22”, 150#, 8/6, LFCV, Pellet
Item
Part No.
Description
1
2
82-3441/01
04-0236
3
4
5
23-0969/01
30-9194
17-0611.
6
82-3688/01
Drip Tray Assy, IBD22
Screw, 10-24 x 0.375, PHD,
PH, MS, SS
Cup Rest, Wire, 22”, IBD
Splash Plate, FS-8
Check Valve, Vented,
5/8-18
Motor Assy, Gear, 115V,
1/7HP, IBD
Motor, Agitator, 562, 115V,
4RPM, IBD
CO2 Assy, Inlet/P-Off, FS-16
Relief Valve Assy, Plastic
Nozzle Assy, Multi-Flavor
Nut, Swivel, Probe, Carb,
FS-16
Probe Cord Assy, Carb,
FS-16
Valve Assy, LFCV, .2 Syrup
Injection, Natural (Spare
with Adapter)
Valve Assy, LFCV, 3.0 - 4.5,
Soda/Water, Gray (Spare
with Adapter)
Valve Assy, LFCV, 3.0 - 4.5,
Syrup, Black (Spare with
Adapter)
Block Mounting Assy, SGL
Screw, 10-32 x 1.000, RH,
PH/SL
Seal, Shaft, Motor, IBD
91-0165/01
7
8
9
82-3370
54-0066
54-0289
01-2214
10 52-2751/02
11 82-3820
12 82-3824
13 82-3823
14 82-2317/01
15 04-1089
16 02-0406/01
E
Item
17
18
19
20
21
Part No.
Description
23-1373
54-0472
10-0762
03-0368
82-3556
Agitator Assy, FS/IBD, HEX
Bearing, Agitator, Rear, IBD
Pin, Hex Design, FS-16
Retainer, Pin, Agitator, IBD
Dispensing Wheel Assy,
Hex
Lid, Back, IBD22, RND
Lid, Front, IBD, RND
Shroud, Dispensing Wheel,
MOD, IBD
Harness, Valve 25-pin,
FS-16, Sealed
Harness, Control-To-Valve,
9-pin, M/F, FS-8
Lamp, 18”, 5W, T8, Daylight
Merchandiser, Assy, FS-22
Graphic, FS-22,
Brilliant Yellow
Assy, Power Supply, FS-8
PCB Assy, FS-IBD
Controller Board
Ice Chute Assy, IBD30,
Pellet
Bezel, M-Brand, 2L/2R
Switch Assy, FS, 2L/2R
Starter, with Condenser,
IBD
Ballast, Fluorescent Light,
LC-14-20-C
Pump Assy, Remote, FS22,
1/3 HP
Pump Assy
Motor, Carb 1/3 HP
22 05-1467
23 05-1476/01
24 05-1309/02-01
25 52-2985
26 52-2686
27 12-0146/01
28 82-3771
06-2994-02
29 82-3664
30 52-2820/01
31 82-3538/01
32 05-2058
33 82-3630
34 12-0104
35 12-0188
36 82-3791
86-0084
91-0008
A
B
C
D
ICE DOOR SOLENOID ASSEMBLY (AT LEFT):
F
G
A
B
C
D
E
F
G
H
I
J
H
I
J
33
03-0086
04-0328
04-0327
12-0195
30-5165
23-1380
10-0496
03-0110
03-0111
30-8356
Ring, Retaining (5304-18)
Washer, Rubber
Washer, Flat
Solenoid, D-90
Bracket, Solenoid
Plunger Assy
Pin, Solenoid Assy
Spring, Solenoid
Ring, Retaining (5133-62)
Linkage, Door, FS
P.N. 28-0580/02
5.2
ICE CHUTE ASSEMBLY
11
7 x2
10
9 x2
8
4
1
6
2
5
3
Item Part No.
1
2
3
4
5
6
7
8
9
10
11
P.N. 28-0580/02
34
05-2257/01
54-0406
05-0999/01
04-0268
03-0241
12-0244
05-0359
05-0928/02
03-0113
05-0546
10-0732
Description
Chute, Upper, IC
Chute, Printed, IBD
Lever, Chute, IBD
Scr, 6-19X.625 LG, PLSTI,HHSW/W
Spring, Chute, IBD
Switch, SPST, 5A, 250V, MDM
Bushing, .123 ID x .187 OD, NYLN
Trap Door, IBD
Ring, Retaining
Lever, Door
Shaft, Ice Chute Door, IC
5.3 PELLET ICE ASSEMBLY AND PARTS LISTING
Use the components listed on this page with pellet ice only.
PART NO.
DESCRIPTION
1
2
05-2325/01
23-1401/01
3
10-0762
4
03-0368
5
82-3651
Ice Shroud, IC
Agitator Assy,
Helical, IC
Pin, Hex Design,
FS-16
Retainer, Pin,
Agitator, IBD
Dispensing Wheel
Assy, Pellet Ice
6
30-9801/01
ITEM
35
Shield, Nugget, IC
P.N. 28-0580/02
5.4
LANCER FLOW CONTROL VALVE (LFCV)
LFCV VALVE ASSEMBLIES
82-3820
LFCV, BONUS INJECTOR
82-3823
LFCV, 3.0 - 4.5, SYRUP
ASSY
82-3824
LFCV, 3.0 - 4.5,
SODA/WATER ASSY
Valve Assembly
Spare Parts
LFCV SPARE PARTS
1
1
2
3
4
5
6
7
8
10-0430/05 PLUG NUT
02-0538
O-RING
12-0364/04-01COIL, LFCV
23-1301/01 CORE SEAL ASSY
03-0180/02 SPRING, CORE
02-0109
O-RING
05-1745/02 SEAT, LFCV
02-0133
O-RING
2
3
4
5
LFCV KIT
6
7
82-4020
LFCV REBUILD KIT
8
P.N. 28-0580/02
36
ICE DOOR
SOLENOID
BLACK
KEY
SWITCH
ICE
SWITCH
WHITE
BLACK
BLACK
WHITE
LED
TRANSFORMER
CARB PROBE
CARB/AGI
FOT
COMM
ICE OPTIC
ICE
SWITCH
KEY
DISPLAY
JV4
37
CONTROLLER
BOARD
JV3
POWER
ICE DOOR
NOTE:
LED COMMUNICATION LIGHTS
FLASH WHEN COMMUNICATING
SOLD OUT
NOZZLE
NOZZLE
V2
V1
WHT
GRN
BLK
POWER
SUPPLY
POWER
CORD
GROUND TO
ICE DOOR
SOLENOID
SCREW
CARB/
AGI
JV2
BLACK
LIGHTING
CARBONATOR
BALLAST
ICE
AGITATOR
BLK
CONTROLLER
POWER
JV1
PROBE
AGITATOR
REMOTE PUMP
RESETABLE
SWITCH
5.5 WIRING DIAGRAM
FS22
WIRING DIAGRAM
P.N. 28-0580/02
5.6 PLUMBING DIAGRAM WITH VALVE WIRING
BLU
WHT
V2
YEL
WHT
V2
RED
WHT
V2
IS2-3
IS2-2
IS2-1
BRN
BLK
BLU
BLK
RED
BLK
S2-4
S2-3
S2-1
VALVE HARNESS
DIAGRAM
BLU
WHT
V1
YEL
WHT
V1
IS1-3
IS1-2
BRN
BLK
RED
WHT
V1
IS1-1
RED
BLK
YEL
BLK
S1-4
S1-2
S1-1
RED
GRY
YEL
BLK
YEL
GRY
YEL
GRY
BLU
BLK
RED
GRY
SODA2
S2-2
WATER2
WATER1
S1-3
SODA1
RED
BLK
BLU
BLK
RED
BLK
IS1-1
IS2-1
S2-1
YEL
BLK
S2-2
BLU
BLK
S1-1
S2- 3
IS2-2
YEL
BLK
BRN
BLK
S1- 2
S2- 4
IS2-3
V2
S1- 3
IS1-2
IS1-3
BRN
BLK
S1- 4
V1
IS2- 3 IS2- 2 IS2- 1 IS1- 3 IS1- 2 IS1- 1
PUMP
S2- 4
CARB WATER
S2- 3 S2- 2 S2- 1 S1- 4 S1- 3 S1- 2 S1- 1
WATER
SUPPLY
PLUMBING
DIAGRAM
P.N. 28-0580/02
38
NOTES
39
P.N. 28-0580/02
LANCER
To order parts, call
Customer Service: 800-729-1500
Warranty/Technical Support: 800-729-1550
Email: [email protected]
www.lancercorp.com