1
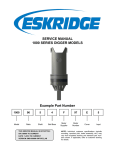
Service Manual 50 Series Digger models Example Part Number 50 05 2 1 f 54 Model Ratio Shaft Bail Boss Motor Supplier Motor Number This service manual is effective: S/N: 58670 to current date: 9-2003 to CURRENT version:SMD50L-Ac NOTE: Individual customer specifications (spindle mounting, sprocket pilot, brake assembly, etc.) may vary from exploded drawing and standard part numbers shown. If applicable, refer to customer drawing for details. Single Stage Exploded View Drawing Eskridge 5005-21F55 EFFECTIVE FROM: S/N 83000 (DATE) 04-26-10 TO: (CURRENT) M oDel D50 Digger WiT h inT egral bail ITEM 1 2 QTY 1 1 3 1 4 7 8 1 1 1 9 9A 9B 1 1 10A 10B 2 1 11A 11B 11C 11D 1 1 1 1 12A 12B 12C 13 12 12 2 2 14A 14B 14C 14D 15 * 1 1 1 10 11 12 14 1 DESCRIPTION BASE - INTEGRAL BAIL OUTPUT SHAFT - 2" HEX .516 HOLE BAIL ASSEMBLY 1-1/4" BAIL BOSSES BAIL ASSEMBLY 1" BAIL BOSSES INPUT GEAR CARRIER ASSEMBLY- SECONDARY RING GEAR THRUST W ASHERS & BEARINGS THRUST W ASHER - INPUT THRUST W ASHER - SEC. CUP SEALS & O-RINGS O-RING OUTPUT SHAFT SEAL OUTPUT SHAFT BEARINGS OUTER CONE OUTER CUP INNER CONE INNER CUP HARDW ARE SHCS (7/16-20 X 3.0) GR8 LOCKW ASHER (7/16) 12 PT CBORE CS (1/2-13 X 1.25 GR8) PIPE PLUG (3/8 NPT MAGNETIC MISCELLANEOUS SHIM LOCK RING SPLIT RING MODEL 50 GASKET MOTOR PART NO. 50-004-3303 50-004-4082L 50-005-2132 50-005-2142 85-004-1262 50-005-2031 50-004-1033 12C 12A 14D 3 9A 01-402-0560 01-405-0530 01-150-1830 01-166-0340 01-150-1460 01-207-0070 50-004-1521 50-004-1462 50-004-1452 90-004-1081 01-304-0550 12B 13 50-004-1091 50-004-1011 01-102-0140 01-103-0140 01-102-0150 01-103-0130 15 4 9B 10A 7 8 14B 14C 14A 11C 11D 13 1 11B 11A noTeS: *BEARING PRELOAD DETERMINES QUANTITY OF SHIMS. SEAL KIT (PN 85-016-0601) INCLUDES (2 EA.) ORINGS AND (1 EA.) SEAL X5005-21F55aa ECN ----- DATE: 04-20-10 HWP 10B 2 Model D50 service manual, SMD50L-AC Page Eskridge, Inc. Olathe, KS. 913-782-1238 www.eskridgeinc.com Double Stage Exploded View Drawing Eskridge 5016-21F54 EFFECTIVE FROM: S/N 83000 (DATE) 04-26-10 TO: (CURRENT) 12C 15 14D M oDel D50 Digger WiT h inT egral bail ITEM 1 2 QTY 1 1 3 1 4 5 6 7 8 1 1 1 1 1 9 9A 9B 1 1 10A 10B 2 1 11A 11B 11C 11D 1 1 1 1 12A 12B 12C 13 12 12 2 2 14A 14B 14C 14D 15 * 1 1 1 10 11 12 14 1 DESCRIPTION BASE - INTEGRAL BAIL OUTPUT SHAFT - 2" HEX .516 HOLE BAIL ASSEMBLY 1-1/4" BAIL BOSSES BAIL ASSEMBLY 1" BAIL BOSSES INPUT GEAR CARRIER ASSEMBLY- PRIMARY SUN GEAR CARRIER ASSEMBLY- SECONDARY RING GEAR THRUST W ASHERS & BEARINGS THRUST W ASHER - INPUT THRUST W ASHER - SEC. CUP SEALS & O-RINGS O-RING OUTPUT SHAFT SEAL OUTPUT SHAFT BEARINGS OUTER CONE OUTER CUP INNER CONE INNER CUP HARDW ARE SHCS (7/16-20 X 4-1/2 GR8 LOCKW ASHER (7/16) 12 PT CBORE CS (1/2-13 X 1.25 GR8) PIPE PLUG (3/8 NPT MAGNETIC MISCELLANEOUS SHIM LOCK RING SPLIT RING MODEL 50 GASKET MOTOR PART NO. 50-004-3303 50-004-4082L 50-005-2132 50-005-2142 85-004-1122 50-005-2011 85-004-1412 50-005-2041 50-004-1023 50-004-1091 50-004-1011 01-402-0560 01-405-0530 12A 12B 3 9A 4 10A 8 10A 01-102-0140 01-103-0140 01-102-0150 01-103-0130 01-150-1820 01-166-0340 01-150-1460 01-207-0070 50-004-1521 50-004-1462 50-004-1452 90-004-1081 01-304-0540 13 6 9B 7 14B 14C 14A 11C 11D 13 1 11B noTeS: 11A *BEARING PRELOAD DETERMINES QUANTITY OF SHIMS. SEAL KIT (PN 85-016-0601) INCLUDES (2 EA.) ORINGS AND (1 EA.) SEAL 10B X5016-21F54ab ECN 3393 DATE: 11-15-11 HWP 2 Model D50 service manual, SMD50L-AC Page Eskridge, Inc. Olathe, KS. 913-782-1238 www.eskridgeinc.com Lubrication & Maintenance Using the chart below, determine an appropriate lubricant viscosity. Use only EP (extreme pressure) or API GL-5 designated lubricants. Change the lubricant after the first 50 hours of operation and at 500 hour intervals thereafter. The auger drive should be partially disassembled to inspect gears and bearings at 1000 hour intervals. Recommended ambient and operating temperatures for conventional and synthetic gear lubricants -50 -25 0 25 50 75 100 125 150 175 200 225 250 F 107 121 C 80W90 conventional 75W90 conventional 85W140 conventional Min Ambient/operating temp Max Operating temp Max Ambient temp 75W90 synthetic 80W140 synthetic -45 -32 -18 -4 10 24 38 52 66 79 93 Note: Ambient temperature is the air temperature measured in the immediate vicintiy of the gearbox. A gearbox exposed to the direct rays of the sun or other radiant heat sources will operate at higher temperatures and therefore must be given special consideration. The max operating temp must not be exceeded under any circumstances, regardless of ambient temperature. If your unit was specified “shaft up” or with a “-Z” option, a grease zerk was provided in the base housing. For shaft-up operation, the output bearing will not run in oil and must be grease lubricated. Use a lithium based or general purpose bearing grease sparingly every 50 operating hours or at regular maintenance intervals. Over-greasing the output bearing should be avoided as it tends to fill the housing with grease and thicken the oil ESKRIDGE MODEL D50 OIL CAPACITIES Operating Position Oil Capacity Single stage Horizontal Shaft - Vertical Shaft (Pinion Down) 2 pints / 0.95 liters ! Double stage Oil Level Triple stage - 2.5 pints / 1.18 liters To horizontal centerline of auger drive To midway on upper/ primary gear set WARNING: While working on this equipment, use safe lifting procedures, wear adequate clothing and wear hearing, eye and respiratory protection. ESKRIDGE PART NUMBER INTERPRETATION Note: All non custom Eskridge Geardrives are issued a descriptive part number which includes information regarding the Model, means of shaft retention, base style, shaft style, input mounting, input shaft size, overall ratio and various available options. For a detailed breakdown of this information, please refer to Eskridge product specification sheets found at: http://www.eskridgeinc.com/diggers/diggerprodspecs.html Model D50 service manual, SMD50L-AC Page Eskridge, Inc. Olathe, KS. 913-782-1238 www.eskridgeinc.com Unit Disassembly Procedure There are two types of model D50 units: single planetaries without a primary carrier and double planetaries with a primary planet carrier. The differences in disassembling single stage and double stage gearboxs are clearly defined throughout this manual. Disassembly 1) All parts should be inspected as they are removed from unit. 1) Scribe across base (1), ring gear (8) and cover/ bail assembly (3) joints on outside of gearbox to assure proper orientation of oil fill and drain plugs, motor mounting, etc., as the unit is reassembled. 2) Remove hydraulic motor (15) from auger drive. Drain oil. 3) Remove the twelve 7/16 x 4-1/2” socket head cap screws (12A) and 7/16 lockwashers (12B), which retain cover/bail assembly (3) and ring gear (8) to base (1). 4) Lift cover / bail assembly (3) off of unit. Single stage: Remove input gear (4), input thrust washer (7A, 7B) carrier assembly (7) and ring gear (8). Double Stage:Remove input gear (4), input thrust washer (9A) primary carrier assembly (5). Remove secondary sun (6) thrust washer (9B) and secondary carrier (7). 5) The gearing is now disassembled and area(s) requiring repair or service should be identified by thorough inspection of the parts after they have been washed in solvent. Rotate planet gears to check for any abnormal noises or roughness in the primary planet bearings. At the same time, inspect planet gears for any damage or worn teeth. Replace carrier assembly if any problems are found in the carrier assembly. Base Subassembly CAUTION: The Load-n-lock assembly is no longer retaining output shaft. Take precautions if the unit is moved as the shaft may fall out. 2) With output shaft down through centerhole in press table and unit supported by base, press shaft out by applying press load to top end of shaft (internal end) until it passes through inner shaft bearing (11C). Outer shaft bearing (11A) and seal (10B) will come out of unit attached to shaft. 3) Inspect inner and outer bearing cups (11B & 11D). If cups are damaged remove and replace both bearing cups and cones. CAUTION: Care should be taken not to injure feet or damage output shaft during this procedure. 4) 14A 5) 13 1) Start with base (1). Turn base upside down and position on press table. Base should be pointing upward with outer bearing cup (11B) exposed. Apply a layer of lithium bearing grease to bearing cup surface. 2) Invert output shaft (2, load-n-lock retainer groove end down) and carefully lower into base (1) until the shaft’s outer bearing cone (11A) is seated against outer bearing cup (11B). 3) Press shaft seal (10B) into base until it is flush with bottom of pilot diameter. Use a press fixture, if possible, to avoid distorting seal. If press fixture is not available, a hammer and flatended drift may be used by tapping outer edge of seal lightly and alternating sides. 4) Stand base assembly upright on output shaft. 1 11B 11A 10B 2 Clean all foreign material from magnetic oil plug (13) located on bottom of base (1). Add a small amount of pipe thread compound to pipe plug before installing it back into base. Unit Reassembly 11C 11D If outer bearing cone (11A) needs to be replaced, it will need to be pressed off of output shaft. Also inspect inner bearing cone (11C). If any one bearing component needs replaced replace the both the cup and cone as a set. NOTE: When installing or removing bearings, press only on inner race of bearing cone. DO NOT press on outer roller cage of bearing or it will damage bearing. 14B 14C Place unit on a press table with the output shaft (2) protruding downward through a hole in the table; unit should be supported only by the base (1). The only thing retaining output shaft (2) is the locking ring (14B) and split ring segments (14C). Remove the locking ring (14B) by prying upward, split ring segments (14C) and shims (14A). CAUTION: The only thing holding output shaft and base together at this point is the tightness in fit of the shaft seal. Securely and cautiously turn unit upright, not allowing base and shaft to separate. 5) While holding output shaft (2) with one hand, rotate base (1) to be certain it turns freely and smoothly. The slight resistance felt, if any, is due to shaft seal load (drag) on output shaft. 6) Apply a layer of lithium bearing grease to inner bearing cup (11D) surface. 7) Install inner bearing cone (11C, small end down) over inter- Model D50 service manual, SMD50L-AC Page Eskridge, Inc. Olathe, KS. 913-782-1238 www.eskridgeinc.com nal end of output shaft. Press bearing on slowly until it is just seated against bearing cup (11D). With a slight press load still applied, rotate base (1) by hand to ensure roller bearings are rotating evenly and smoothly. Inner bearing cone (11C) may require additional press load to reach proper bearing preload. If roller bearings are seated properly, continue on to set and check bearing preload. 16) Install motor (15) with gasket (14D), using hex head cap screws (12C) and torque bolts to 55 ft-lbs. THE AUGER DRIVE IS NOW READY FOR USE.* SHAFT BEARING PRELOAD: Proper shaft bearing preload is achieved when torque required to rotate base is 50 to 80 inlbs. This rolling torque is equal to a force of approximately 11 to 18 lbs if pulling on base flange to rotate base (1). This may be determined by feel or by using a fish scale or similar measuring device to check rolling torque. 8) Install shims (14A) over internal end of output shaft (2). Shims should slide all the way down to outer bearing cone (11C), where they will rest. The same number (quantity) of shims removed from unit during disassembly should be returned. Follow shims with split ring segments (14C). Segments will sit directly on top of bearing shims. NOTE: Quantity of shims (14A) may vary from unit to unit. Bearing preload, set at the factory, determines quantity of shims. 9) Install the locking ring (14B) onto output shaft. 10) Lightly grease a new o-ring (10A) and install it into o-ring groove in base (1). Assemble ring gear (8) to base (1). Refer back to scribe marks made across external joints of gear drive prior to Disassembly Procedure. Line up scribe marks between ring gear and base to give correct hole alignment. NOTE: Be certain that o-ring (10A) stays seated in groove during Step 10. 11) Install secondary carrier assembly into unit. Carrier assembly should be installed with hub side down (24 tooth spline). Rotate carrier assembly back and forth to mesh secondary planet gear teeth (7) with ring gear (8) teeth. Once teeth mesh, let secondary carrier slide down until it contacts with output shaft spline. The carrier splined hub should spline onto output shaft. Carrier hub will rest on top of locking ring (14B) when splines are fully engaged. 12) Install the carrier cup washer (9B). Single stage: Install input gear (4), input thrust washer (9A). Double Stage: Install secondary sun gear (6) primary carrier assembly (5) input gear (4), and input thrust washer (9A). 13) Grease a new o-ring (10A) and install it into bottom of cover/ bail assembly (3). Refer back to scribe marks made across external joints prior to Disassembly Procedure. Line up scribe marks between cover/bail assembly and ring gear (8) so that orientation of motor mount holes and oil plug are back to their original positions. NOTE: Be certain o-ring (10A) stays seated in cover/bail assembly during Step 13. 14) Install all twelve of the 7/16 lockwashers (12B) and the 7/16 hex capscrews (12A) and torque to 70 ft-lbs. 15) Fill unit with oil per the capacity and lubricant recommendations posted on page 4. Model D50 service manual, SMD50L-AC Page Eskridge, Inc. Olathe, KS. 913-782-1238 www.eskridgeinc.com