1
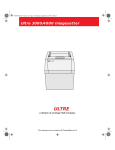
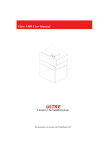
Ultre P/EImagesetter ULTRE a division of Linotype-Hell Company This document was created with FrameMaker 4.0.4 Copyright 1995 Ultre, Division of Linotype-Hell Company No part ofand this Linotronic book may be prior of written Linotype arereproduced registered without trademarks Lino-permission. type-Hell AG. Important notice! We are dedicated to improving and enhancing the hardware and software of our typesetting and communication systems and equipment. Consequently, the information in this manual is subject to change without notice. Reference is made to this fact during training courses. The contents of this documentation are correct at the time of going to press. We point out that companies, trademarks and product names mentioned in this manual fall within the regulations regarding protection of trademarks and patents. Other product names and brands not expressly mentioned in this manual are trademarks or registered trademarks of the corresponding manufacturers. The information contained in this manual about performance and speed as well as technical data concerning application of our products is not legally binding as it does not constitute a written contract of features. Linotronic, Linotype, Ultre and Ultresetter are registered trademarks of Linotype-Hell AG and/or its subsidiaries. Ultre P/E- Operation I This document was created with FrameMaker 4.0.4 Table of Contents Before You Start Ultre P or Ultre E ? . . . . . . . . . . . . . . . . . . . . . . . . . . . . . . . . . . . . . . VII Notes on this Documentation . . . . . . . . . . . . . . . . . . . . . . . . . . . . . . . IX 1 Notes on Technical Safety Correct Use . . . . . . . . . . . . . . . . . . . . . . . . . . . . . . . . . . . . . . . . . . . 1-3 General Information . . . . . . . . . . . . . . . . . . . . . . . . . . . . . . . . . . . . . 1-3 Cleaning the Unit . . . . . . . . . . . . . . . . . . . . . . . . . . . . . . . . . . . . . . . 1-4 Laser Safety . . . . . . . . . . . . . . . . . . . . . . . . . . . . . . . . . . . . . . . . . . . 1-5 Radio Interference . . . . . . . . . . . . . . . . . . . . . . . . . . . . . . . . . . . . . . 1-7 Safety Standards . . . . . . . . . . . . . . . . . . . . . . . . . . . . . . . . . . . . . . . 1-8 2 Introduction Unit Description . . . . . . . . . . . . . . . . . . . . . . . . . . . . . . . . . . . . . . . . 2-3 Installation . . . . . . . . . . . . . . . . . . . . . . . . . . . . . . . . . . . . . . . . . . . . 2-4 3 Control Panels Front Control Panel . . . . . . . . . . . . . . . . . . . . . . . . . . . . . . . . . . . . . 3-3 Operating the Knife . . . . . . . . . . . . . . . . . . . . . . . . . . . . . . . . . . . . . 3-5 Rear Control Panel. . . . . . . . . . . . . . . . . . . . . . . . . . . . . . . . . . . . . . 3-6 Machine Operation . . . . . . . . . . . . . . . . . . . . . . . . . . . . . . . . . . . . . . 3-9 4 Loading Photographic Material Photographic Material . . . . . . . . . . . . . . . . . . . . . . . . . . . . . . . . . . . 4-3 To Load Material . . . . . . . . . . . . . . . . . . . . . . . . . . . . . . . . . . . . . . . 4-4 Ultre P/E- Operation III This document was created with FrameMaker 4.0.4 Table of Contents 5 Cassette Bulk Load Supply Cassette . . . . . . . . . . . . . . . . . . . . . . . . . . . . . . . .5-3 Adjustments for Varying Media Width . . . . . . . . . . . . . . . . . . . . . . . .5-6 6 Technical Data Ultre P . . . . . . . . . . . . . . . . . . . . . . . . . . . . . . . . . . . . . . . . . . . . . . . .6-3 Ultre E . . . . . . . . . . . . . . . . . . . . . . . . . . . . . . . . . . . . . . . . . . . . . . . .6-6 IV Edition January 1995 1 Before You Start Ultre P or Ultre E ? . . . . . . . . . . . . . . . . . . . . . . . . . . . . . . . . . . . . . . VII Notes on this Documentation . . . . . . . . . . . . . . . . . . . . . . . . . . . . . IX Additional Documentation . . . . . . . . . . . . . . . . . . . . . . . . . . . . . . . . . IX Symbols in this Documentation . . . . . . . . . . . . . . . . . . . . . . . . . . . . . . X Ultre P/E - Operation V This document was created with FrameMaker 4.0.4 Ultre P/E - Operation VI Before You Start ■ Ultre P or Ultre E ? This manual covers the operation of Ultresetter P and E Imagesetters. Both versions are similar in operation. Most of the pictures in this documentation show the Ultre E. The basical differences are: ■ Maximum photomaterial width Ultre P: Ultre E: 72 pica (310mm) 72 pica (310mm) (72E), 94 pica (400mm) (94E) See Chapter 5, Supply Cassette, for operation with narrower media widths. ■ Front Control Panel The Ultre E has a LCD Display that displays the current resolution selected and error/status conditions. The knife is operated by either depressing the cut switch (Ultre E) or bringing forward and releasing the film cut lever (Ultre P; refer to Chapter 3, Control Panels, Section Operating the Knife). Ultre P/E- Operation VII Before You Start ■ Control Panel Ultre P Ready LED Film Advance Switch Film Cut Lever ■ Control Panel Ultre E Cut Switch Film Advance Switch Ready LED LCD Display VIII Edition January 1995 Before You Start ■ Notes on this Documentation This documentation contains: ● Notes on Technical Safety ● Introduction (with Installation) ● Control Panels Description of Front and Rear Control Panel and Machine Operation ● Loading Photographic Material ● Cassettes Installation of photomaterial and cassette alignment for Bulk Load Supply Cassette ● Technical Data ■ Additional Documentation You will find documentation: ● Ultre P/E- Operation additional information in the following UltreRIP Manual IX Before You Start ■ X Symbols in this Documentation 3 The text contains information which must be observed in order to protect the user from danger! 2 This information must be observed to protect the equipment, the software and the data from being damaged! 1 The text contains general or additional information about a certain subject. Edition January 1995 1 Notes on Technical Safety Correct Use. . . . . . . . . . . . . . . . . . . . . . . . . . . . . . . . . . . . . . . . . . . 1-3 General Information . . . . . . . . . . . . . . . . . . . . . . . . . . . . . . . . . . . . 1-3 Cleaning the Unit . . . . . . . . . . . . . . . . . . . . . . . . . . . . . . . . . . . . . 1-4 Laser Safety . . . . . . . . . . . . . . . . . . . . . . . . . . . . . . . . . . . . . . . . . . 1-5 Standards and Regulations . . . . . . . . . . . . . . . . . . . . . . . . . . . . . . 1-5 Service . . . . . . . . . . . . . . . . . . . . . . . . . . . . . . . . . . . . . . . . . . . . . . 1-5 Position of Laser Safety Labels . . . . . . . . . . . . . . . . . . . . . . . . . . . 1-6 Radio Interference . . . . . . . . . . . . . . . . . . . . . . . . . . . . . . . . . . . . 1-7 Notes for Users in the US . . . . . . . . . . . . . . . . . . . . . . . . . . . . . . . . 1-7 Notes for Users in Canada . . . . . . . . . . . . . . . . . . . . . . . . . . . . . . . 1-7 Safety Standards . . . . . . . . . . . . . . . . . . . . . . . . . . . . . . . . . . . . . . 1-8 Electrical Safety . . . . . . . . . . . . . . . . . . . . . . . . . . . . . . . . . . . . . . . 1-8 Mechanical Safety . . . . . . . . . . . . . . . . . . . . . . . . . . . . . . . . . . . . . . 1-8 General Safety . . . . . . . . . . . . . . . . . . . . . . . . . . . . . . . . . . . . . . . . 1-8 Electromagnetical Compatibility. . . . . . . . . . . . . . . . . . . . . . . . . . . . 1-9 Approvals . . . . . . . . . . . . . . . . . . . . . . . . . . . . . . . . . . . . . . . . . . . . . 1-9 Ultre P/E - Operation 1-1 This document was created with FrameMaker 4.0.4 Notes on Technical Safety The equipment meets the standard safety regulations for information technology equipment including electrical office equipment. ■ Correct Use The Ultresetter Imagesetter Ultre P and E are laser imagesetters for photographic material and are only to be used for this purpose in accordance with the user documentation. Do not place any objects or liquids on the unit. Ventilation outlets must be kept clear at all times. ■ General Information Pay attention to the notes on ambient conditions in chapter 6, Technical Data, and to the conditions for installing the unit in chapter 2, Introduction, section Installation. Unit connectors and sockets must be easily accesible. This is important as, in the event of a danger, the unit is to be completely disconnected from the power by pulling out the mains plug. Ultre P/E- Operation 1-3 Notes on Technical Safety The unit does not contain any parts which require servicing by the operator. 3 CAUTION: Unauthorized opening of the cabinet or improper repairs can expose the operator to great danger. Service work may only be performed by authorized personnel specialized in this field. The appropriate regulations for the prevention of accidents are to be adhered to when the equipment is serviced. Failure to observe the safety regulations may result in the loss of accident insurance! ■ Cleaning the Unit 3 The unit must be disconnected from the power supply by pulling out the mains plug if cleaning the unit involves using liquids. The unit surfaces can be cleaned using a dry cloth. If the unit is very dirty, it may be cleaned with a damp cloth which has been dipped in washing-up liquid and well drained. Make sure that no liquid gets inside the unit and keep moisture away from the connection sockets at the rear of the unit. 2 1-4 Never use abrasive cleansings or solvents! Edition January 1995 Notes on Technical Safety ■ Laser Safety ■ Standards and Regulations The Ultresetter Laser Imagesetters are certified as Class 1 laser products under the U.S. Department of Health and Human Services (DHHS) Radiation Performance Standard according to the Radiation Control for Health and Safety Act of 1968. This means that this laser imagesetter does not produce hazardous laser radiation. Since radiation emmitted inside the laser imagesetter is completely confined within protective housings and external covers, the laser beam cannot escape from the machine during any phase of user operation. ■ Service None of the parts within the protective housing require servicing by the user. Any servicing only must be done by factory-trained service technicians authorized by Linotype-Hell. 3 Ultre P/E- Operation CAUTION: Do not remove the cover or housing of the imagesetter. Otherwise there is a risk that you will be exposed to invisible laser radiation or injured by an electrical shock. 1-5 Notes on Technical Safety 3 CAUTION: Use of controls or adjustments, or performance of procedures other than those specified herein, may result in hazardous radiation exposure. ■ Position of Laser Safety Labels ■ Laser Label 1 Unit Rear Side ■ Laser Label 2 Supply Cassette Box 1-6 Edition January 1995 Notes on Technical Safety ■ Radio Interference ■ 2 Notes for Users in the US This equipment generates, uses and can radiate radio frequency energy and if not installed and used in accordance with the instructions manual, may cause interference to radio communications. It has been tested and found to comply with the limits for a Class A computing device pursuant to Subpart B of Part 15 of FCC rules, which are designed to provide reasonable protection against such interference when operated in a commercial environment. Operation of this equipment in a residential area is likely to cause interference in which case, the user at his own expense, will be required to take whatever measures may be required to correct the interference. ■ Notes for Users in Canada This digital apparatus does not exceed the Class A limits for radio noise emissions from digital apparatus set out in the radio interference regulations of the Canadian Department of Communications. Le persent apparil numerique n'emet pas de bruits radio electriques depassant les limites applicables aux appareils numeriques de la Classe A prescrites dens le reglement sue le brouillage radio electrique edicte par le ministre des communications du Canada. Ultre P/E- Operation 1-7 Notes on Technical Safety ■ Safety Standards ■ ● VDE 0805/DIN EN 60950 (Europe) ● UL 1950 (USA) ● CSA C22.2 No, 950 (Canada) ■ Mechanical Safety ● DIN 31000/31001 (Germany) ● Trade association regulations for the prevention of accidents(Germany) ■ ● 1-8 Electrical Safety General Safety GSG „Gerätesicherheitsgesetz“ (Germany) Edition January 1995 Notes on Technical Safety ■ ● only Ultre E: VDE0871, Klasse A (Europe) ● FCC Part 15, Subpart B, Class A (USA) ● DOC Radio Act SOR/88-475, Class A (Canada) ■ Ultre P/E- Operation Electromagnetical Compatibility Approvals ● GS/TÜV (Germany) ● ETL-LISTED (USA) ● CSA-CERTIFIED (Canada) 1-9 2 Introduction Unit Description . . . . . . . . . . . . . . . . . . . . . . . . . . . . . . . . . . . . . . . 2-3 Installation . . . . . . . . . . . . . . . . . . . . . . . . . . . . . . . . . . . . . . . . . . . 2-4 General Information . . . . . . . . . . . . . . . . . . . . . . . . . . . . . . . . . . . . 2-4 Mains Connection . . . . . . . . . . . . . . . . . . . . . . . . . . . . . . . . . . . . . . 2-5 Power Cord Instruction . . . . . . . . . . . . . . . . . . . . . . . . . . . . . . . . . . 2-6 Note for Installations in the UK . . . . . . . . . . . . . . . . . . . . . . . . . . . . 2-7 Data Connection . . . . . . . . . . . . . . . . . . . . . . . . . . . . . . . . . . . . . . . 2-7 On/Off Switch . . . . . . . . . . . . . . . . . . . . . . . . . . . . . . . . . . . . . . . . . 2-7 Ultre P/E - Operation 2-1 This document was created with FrameMaker 4.0.4 Introduction ■ Unit Description The Ultresetter P and E Imagesetters are high-resolution raster scanning devices for producing typesetting, graphic images, photographs, and tonal areas (grayscale and color) on silver photographic material. The light source is a laser diode operating in the near infra-red (780nm). Resolution is selectable, but normal operation is at 1200 lines per inch. 1 Ultre P/E- Operation The Ultresetter is strictly an output device. It requires a Raster Image Processor (RIP) to break images into sequential rasters (video data) ready for imagesetting. 2-3 Introduction ■ Installation ■ General Information The unit is to be connected to the power supply via the power cable included in the delivery. Pay attention to all warnings and instructions labeled or printed on the unit. Electric circuit The Ultresetter Imagesetters are intended for operation in a singlephase electric circuit with a grounded neutral conductor. Do not connect the units to other types of electric circuits. Make sure, that mains voltage and frequency of your power supply match with mains voltage and frequency as indicated on the serial number plate of the unit. Installing The unit should not be installed near air conditioning equipment and is to be protected from humidity and direct sunlight. Unit sockets and connection sockets should be near the unit and always be easily accessible. Ventilation Take care that the unit is installed at a sufficient distance from the walls (min. 80 cm, 30 inches) and other objects so that adequate ventilation can be ensured. Ventilation outlets must be kept clear at all times. The terminals located at the rear of the unit should be accessible. If the unit is brought from a cold environment into the operation room, condensation can occur. In this case, the unit should be stored in the operation room for a minimum of six hours to 2-4 Edition January 1995 Introduction aclimatize it. ■ Mains Connection The Ultresetter Imagesetter can be connected to mains supplies as indicated on the unit serial number plate (nominal input 115 V or 230 V AC, 50 or 60 Hz). The unit power supply will automatically be switched to the matching supply voltage and frequency. To connect the unit to the mains supply, use the power cord set provided with the unit or refer to the tables following to select a commercially available cord as specified. 3 Ultre P/E- Operation Note: Switching off the Ultresetter Imagesetter from the rear panel does not disconnect the unit from the mains supply. To disconnect the Ultresetter from the mains supply, remove the power plug first. The mains outlet must be easily accesible. 2-5 Introduction ■ Power Cord Instruction If you will be using the 100-120 volts power source voltage, be sure to refer to the following list. Plug Configuration Plug Type Voltage Reference Standards Power Cord North America 125V 10A 115120V ANSI C73.11 NEMA 5-15-P IEC 83 UL Listed, CSA Certified Type SJT, 18AWG If you will be using the 200-240 volts power source voltage, be sure to refer to the following list. Plug Configuration 2-6 Plug Type Voltage Reference Standards Power Cord Europe 250V 10/16A 230V CEE(7).II IV.VII IEC 83 IEC 127 <HAR> H05VV-F United Kingdom 240V 6A 220240V B.S. 1363 IEC 83 IEC 127 <HAR> H05VV-F Australia 240V 10A 240250V A.S. C112 IEC 127 <HAR> H05VV-F North America 250V 15A 240V ANSI C73.20 NEMA 6-15-P IEC 83 UL 198.6 UL Listed, CSA Certified Type SJT, 18AWG Edition January 1995 Introduction ■ 3 Note for Installations in the UK The cores in the main leads are colored in accordance with the following codes: ● green and yellow earth ● blue neutral ● brown live ■ Data Connection Input data is connected to the 37 pin "D" connector on the rear of the unit. This data connection must conform to the Ultresetter Interface Specification. Only use shielded cables in keeping with the radio interference suppression regulations. 3 CAUTION: Connect the cables with the power off! ■ On/Off Switch Power is controlled by the rocker switch on the rear control panel. When power is turned on, the machine will perform a brief diagnostic self-test and then signal that it is ready by illuminating the small green LED on the front panel. Ultre P/E- Operation 2-7 Introduction On/Off Switch 37 Pin D-Connector Power Connector 2-8 Edition January 1995 3 Control Panels Front Control Panel . . . . . . . . . . . . . . . . . . . . . . . . . . . . . . . . . . . . 3-3 LCD Display (only Ultre E) . . . . . . . . . . . . . . . . . . . . . . . . . . . . . . . 3-3 Film Advance Switch . . . . . . . . . . . . . . . . . . . . . . . . . . . . . . . . . . . . 3-4 Ready LED . . . . . . . . . . . . . . . . . . . . . . . . . . . . . . . . . . . . . . . . . . . 3-4 Operating the Knife . . . . . . . . . . . . . . . . . . . . . . . . . . . . . . . . . . . . 3-5 Cut Switch (Ultre E) . . . . . . . . . . . . . . . . . . . . . . . . . . . . . . . . . . . . 3-5 Film Cut Lever (Ultre P) . . . . . . . . . . . . . . . . . . . . . . . . . . . . . . . . . 3-5 Rear Control Panel. . . . . . . . . . . . . . . . . . . . . . . . . . . . . . . . . . . . . 3-6 DIP Switches . . . . . . . . . . . . . . . . . . . . . . . . . . . . . . . . . . . . . . . . . . 3-7 LED Bank . . . . . . . . . . . . . . . . . . . . . . . . . . . . . . . . . . . . . . . . . . . . 3-7 Density Control Knob . . . . . . . . . . . . . . . . . . . . . . . . . . . . . . . . . . . . 3-8 Jog Button . . . . . . . . . . . . . . . . . . . . . . . . . . . . . . . . . . . . . . . . . . . . 3-8 Reset Button . . . . . . . . . . . . . . . . . . . . . . . . . . . . . . . . . . . . . . . . . . 3-8 Machine Operation. . . . . . . . . . . . . . . . . . . . . . . . . . . . . . . . . . . . . 3-9 Ultre P/E - Operation 3-1 This document was created with FrameMaker 4.0.4 Control Panels ■ Front Control Panel ■ LCD Display (only Ultre E) The LCD Display is used primarily for providing feedback to the user on operating conditions of the Ultresetter. The display is divided into two lines: The top line displays the current resolution selected, the bottom line displays status and error conditions. If there are no error or status conditions present, then the bottom line will remain blank. Only one of the following status/error conditions can be displayed at a time: – JAM– STATUS TIMEOUT – OUT OF PAPER– JOG – NO CASSETTE– FILM ADVANCE – PHOTO ERROR– SELF TEST MODE – LOW VOLTAGE– CUT – POWER ON DIAGNOSTICS – VSYNC TIMEOUT Ultre P/E- Operation 3-3 Control Panels ■ Film Advance Switch Pressing the film advance switch will automatically advance the photomaterial eight inches. This amount is programmable (refer to Service Manual for programming instructions). The LED in the switch will blink at 4Hz (four times per second). The LED will respond to other conditions as listed below: CONDITION FILM ADVANCE LED – OOPS ON STEADY – JAM ON STEADY – NO CASSETTE NO AFFECT – FILM ADVANCE BLINK AT 4HZ – SELFTEST OR PRINT BLINK AT 1HZ – CUT (only Ultre E) BLINK AT 8HZ ■ Ready LED This small green LED will turn on shortly after turning on power. If the machine has detected an out-of-normal condition during turn-on, the LED will blink. The machine may still run, but service help may be needed. In general, the machine should be turned off and the turn-on cycle repeated to see if the fault clears. 3-4 Edition January 1995 Control Panels ■ Operating the Knife ■ Cut Switch (Ultre E) Pressing the cut switch will activate the motorized knife assembly thereby cutting the photomaterial. The cutter can not be activated when film advancing or printing. ■ Film Cut Lever (Ultre P) To perform a media cut bring forward and release the film cut lever. Never perform a cut when the film advance button is flashing! Ultre P/E- Operation 3-5 Control Panels ■ Rear Control Panel DIP Switches & LEDs Density Control Knob Jog Button Reset Button 3-6 Edition January 1995 Control Panels ■ DIP Switches The Dip Switches are used to select different operative modes, run diagnostics and program various registers on the PC Board Assembly. Note that when all the switches are to the left (off), the machine is in normal mode. This means: Idle, awaiting input Ultre Mode (Interface) 1200 DPI Resolution ■ LED Bank Located beneath the Dip Switches is an eight element LED (Light Emitting Diode) array which is used to display status and error conditions. It is also used for displaying register values in programming modes. These LED's are not involved in the normal operation of the machine, but are used by service personnel in troubleshooting . In the normal mode, the top LED (LED 8) will turn on after the machine has executed and passed its diagnostic self-test. The second LED from the bottom (LED 2) will turn on only if the interface cable has been plugged in and the host system powered. Only Ultre E: In general, most error messages will be displayed on the LCD Display of the front control panel. Ultre P/E- Operation 3-7 Control Panels ■ Density Control Knob The Density Control Knob can be used if a change in density is required. To increase density, turn the knob clockwise. To decrease density, turn the knob counter-clockwise. If the required density is beyond the range of the knob, then the LPM (Laser Power Multiplier) can be used. ■ Jog Button The Jog Button permits the manual operation of the film advance. As long as the button is held depressed, the film advance drive will run. This can be used for added inter-job spacing, for checking on film feeding when reloading material, and for confirmation of the operational status of the drive circuit. It is also used for programming and diagnostic modes. ■ Reset Button The Reset Button can be used to reset the electronic components of the machine. Its main function is for initializing self tests, diagnostic and programming modes. 3-8 Edition January 1995 Control Panels ■ Machine Operation In normal operation, the Ultresetter Imagesetter is completely controlled by the host system and operational procedures are limited to the re-moval of exposed material in the cassette and replacement of the cassette. With photographic material loaded and a take-up cassette in place, the Imagesetter is ready to accept information. When the host system starts to transmit, the film advance button on the front control panel will start to flash at a one-per second rate. Only Ultre E: The LCD display on the control panel will indi-cate the resolution of the job being output. The take-up cassette has a capacity of approximately thirty feet of material. During initial set up, job lengths should be limited to two feet or less before developing, to prevent waste of material. When an appropriate amount of data has been transmitted, the host system will shut down transmission. The film advance button should be depressed to indicate a timed movement of material. The button will flash at a four per-second rate until sufficient material has been advanced to place the last exposed copy safely inside the cassette (Ultre E: LCD will display "Film Advance"). When the button has finished flashing, operate the knife. Ultre P/E- Operation 3-9 Control Panels The cassette may be removed by lifting straight up. Approximately two inches of material will be protruding from the cassette as a leader for processing. Follow manufacturer's instructions for preparing the leader for threading into the processor. After processing the output, the copy may be evaluated for density. If a change in density is required, turn the density control knob as required. When the input material supply is exhausted, the film advance button will be lit continuously (Ultre E: LCD will display "Out of Paper"). Note that the film advance button will also stay lit continuously if the material has jammed, or if the pressure roller assembly is not installed (Ultre E: LCD will display "Jam" if this condition occurs). 3-10 Edition January 1995 4 Loading Photographic Material Photographic Material . . . . . . . . . . . . . . . . . . . . . . . . . . . . . . . . . . 4-3 To Load Material . . . . . . . . . . . . . . . . . . . . . . . . . . . . . . . . . . . . . . 4-4 Ultre P/E - Operation 4-1 This document was created with FrameMaker 4.0.4 Loading Photographic Material ■ Photographic Material The UltresetterImagesetter requires photographic material sensitive in the 780 nanometer range (near infra-red). Some suitable materials include: Kodak Pagi-Set Paper Kodak Pagi-Set Film Anitec Paper: Reprotype 780-LD Dupont Film: CLI4 Fuji Paper: PD-100WP Fuji Film: PD-F100 Konica Paper: 6545 IR-110p Konica Film: 6128 IR-4 Oriental Paper OLG-650 AGFA Paper: SPIR 95 RC AGFA Film: SIR 715 This list is current as of the printing of the manual and may change at anytime without notice. 1 Ultre P/E- Operation 310mm disposable cassettes are not recommended for 72 pica machines as they may interfere with the hinges on the film access door. In addition, some disposable cassettes (regardless of width) may sit too low on the film input tray making it necessary for the user to shim the box upwards for proper operation. 4-3 Loading Photographic Material ■ To Load Material 1. Remove the output cassette from the top of the machine by lifting straight up. 4-4 Edition January 1995 Loading Photographic Material 2. Open Film Access Door. Ultre P/E- Operation 4-5 Loading Photographic Material 3. Remove the Pressure Roller Carrier Assembly by grasping the handle, tipping up 45 degrees and then withdrawing from the Transport Assembly. 4-6 Edition January 1995 Loading Photographic Material 4. Place Pressure Roller Assembly aside, in a safe place. 5. Prepare a box cassette for use by following the manufacturer's instructions for opening and freeing the leader (if using the bulk load supply cassette refer to Chapter 5, Cassette before continuing). Withdraw approximately 6 inches of leader. Place the box on the Input Tray with the material exiting at the upper edge, away from you. The emulsion side should be down. Ultre P/E- Operation 4-7 Loading Photographic Material 6. As you put the box on the tray, guide the leader into the lower side of the knife, up through the upper guide and out at the exit guides on top of the machine. Approximately one to two inches of leader should be projecting from the exit guide. 4-8 Edition January 1995 Loading Photographic Material For full width material (310mm, 355mm or 400mm), center the leader between the side guides of the exit guide. Move the material sideways in both directions to feel the clearance. Then adjust the position of the input box so that the right side of the material lines up with the silver arrow on the paper guide, and is feeding straight from the box. 2 Ultre P/E- Operation Straight loading of the material is imperative for straight feeding (skewed film will track to one side). 4-9 Loading Photographic Material Once the material has been located straight, replace the pressure roller carrier by reversing the removal procedure. 7. Grip the material with the left thumb and forefinger at the exit guide (holding both film and exit guide) so that the material does not move as the pressure roller carrier is inserted and latched over with the right hand. Hold the carrier by the handle area and tipped at 45 degrees. 4-10 Edition January 1995 Loading Photographic Material 8. Guide the roller into the "corner" where the material makes a 90 degree turn. With the roller, rotate the handle down into the detent position. Check the position of the material edge by observing its position through the hole in the pivoting film guide. Ultre P/E- Operation 4-11 Loading Photographic Material 9. Close the film transport access door. 10. With main power on, operate the knife. 2 4-12 Never operate the knife repeatedly after the first cut as this may cause thin slivers of material to be cut which will interfere with proper paper feeding. Remove the projecting stub of material and discard. Edition January 1995 Loading Photographic Material 11. Press the film advance button, located on the front control panel. The button will start to flash at the four-per-second rate as material is advanced. When the timed advance is complete (approximately 8 inches of material) the button will stop flashing. At the end of the timed advance, approximately three inches of material should be projecting from the exit guide. Check that the paper is feeding evenly, and is not binding on the ends of the exit guide. (If the material is not feeding properly, repeat the loading procedure with attention to the centering and straightness of the material). 12. Operate the knife 2 Be sure the flashing has stopped (Refer to Chapter 3, Section Operating the Knife). Remove and discard the projecting stub of material. 13. Place an output cassette on the machine by aligning the slot in the cassette with the exit guides projecting from the top of the machine. Press the cassette down against the foam covered mounting surface. Note the embossed circle on the top of the cassette to identify the slot side. The machine is now ready to receive data from the host system. Ultre P/E- Operation 4-13 5 Supply Cassette Bulk Load Supply Cassette. . . . . . . . . . . . . . . . . . . . . . . . . . . . . . 5-3 Installation of Photomaterial . . . . . . . . . . . . . . . . . . . . . . . . . . . . . . 5-3 Cassette Alignment . . . . . . . . . . . . . . . . . . . . . . . . . . . . . . . . . . . . . 5-5 Adjustments for Varying Media Width . . . . . . . . . . . . . . . . . . . . . 5-6 Ultre P/E - Operation 5-1 This document was created with FrameMaker 4.0.4 Supply Cassette ■ Bulk Load Supply Cassette ■ 1 Installation of Photomaterial When using the bulk load cassette, full width media is required (310 mm for 72P and 72E and 355 mm and 400 mm for the 94E Ultresetters). 1. In a dark room, or safe-lit room (using dark green safelight filters), remove the material from its wrapping. 2. Remove the closure lid of the supply cassette by moving each slide latch mechanism located at either end of the lid toward the center and pulling the lid up. 3. Place an end cap on each end of the roll of film. 4. Place the film with the end caps in place down into the supply cassette. 5. Pull enough leader film from the roll to exit the cassette and place the lid guides into their respective channels. 6. Push the closure lid down completely and move both latch mechanisms outward to lock the lid in place. Ultre P/E- Operation 5-3 Supply Cassette ■ Cassette Alignment 1. Place the supply cassette into the Linotronic (as shown) with the film exiting the cassette upwards. 2. Feed the film between the two steel rollers, with the right side edge of the film flush against the right side (fixed) film guide. 3. Allow enough film from the supply cassette to exit the machine up through the exit guides on top of the machine. 5-4 Edition January 1995 Supply Cassette 4. Install the pressure roller assembly. The film should lie flat on the platen of the supply cassette. 5. Adjust the left film guide to the edge of the film and close the film access door. 6. Turn the Linotronic on. After the power-on diagnostic test is completed, operate the knife. 7. Place the output cassette on top of the machine. Verify LED 8 (ready mode) and LED 2 (if host system is connected) are lit. 8. Advance the film 16 inches (2 programmed film advances). This will minimize any back pressure from the output cassette. The machine is now ready to receive data from the host system. 1 Ultre P/E- Operation In order to guarantee repeatability, all four separations must be imaged and processed consecutively. 5-5 Supply Cassette ■ Adjustments for Varying Media Width The device is capable of supporting the following media widths: ● for 72 Pica machines (Ultre 72P and 72E); 310 mm ● and for 94 Pica machines (Ultre 94E); 310mm, 355 mm and 400 mm. Adjusting the device for varying width is done by loosening the thumb screws on the left side edge guide and moving it to the appropriate location on the platen. 5-6 Edition January 1995 6 Technical Data Ultre P . . . . . . . . . . . . . . . . . . . . . . . . . . . . . . . . . . . . . . . . . . . . . . . 6-3 Ambient conditions (operation) . . . . . . . . . . . . . . . . . . . . . . . . . . . . 6-4 Ambient conditions (transport) . . . . . . . . . . . . . . . . . . . . . . . . . . . . 6-4 Resolution and recorder speed . . . . . . . . . . . . . . . . . . . . . . . . . . . . 6-5 Ultre E . . . . . . . . . . . . . . . . . . . . . . . . . . . . . . . . . . . . . . . . . . . . . . . 6-6 Ambient conditions (operation) . . . . . . . . . . . . . . . . . . . . . . . . . . . . 6-7 Ambient conditions (transport) . . . . . . . . . . . . . . . . . . . . . . . . . . . . 6-7 Resolution and recorder speed . . . . . . . . . . . . . . . . . . . . . . . . . . . . 6-8 Ultre P/E - Operation 6-1 This document was created with FrameMaker 4.0.4 Technical Data ■ Ultre 72P System description Precision laser recorder, capstan technology Light source Infrared laser diode, emission wavelength 780 nm Imaging principle Rotation prism, Continuous moving transport of photographic material Imaging width 305 mm, 72 pica (imaging length dependent on application program) Maximum screen frequency Up to 52 l/cm (133 lpi) Repeat accuracy Typ. ± 50 µ m (± 2 mil) (within the ambient conditions defined below with constant environmental conditions for 4 successive pages of size 31x31 cm) Photographic materials in roll form infrared-sensitive film (780nm), RC paper and direct printing foils,0.10 to 0.18 mm thick, anti-static emulsion, roll material wound emulsion in on a 50.7 (2") core. Material width 310 mm Capacity of feed cassette Approx. 30 m (100 feet) film depending on material thickness Capacity of collecting cassette Approx. 10 m (30 feet) depending on material thickness Ultre P/E- Operation 6-3 Technical Data Mains voltage 90 - 130 V (AC), 180 - 260 V (AC), 47 - 63 Hz Nominal voltage 115/230 V (AC) Nominal frequency 50/60 Hz Power consumption 2.0/1.2 A Dimensions 11.5 x 20 x 28 inch (WxHxD) Weight 42 kg, 93 lbs. Interfaces Serial video interface Noise emission LpA ≤ 70 dB(A) (Noise measuring DIN 45635-19-01-KL2) ■ Ambient conditions (operation) Temperature +18 - +30 °C Humidity 45 - 85 %, non condensing 6-4 Edition January 1995 Technical Data ■ Ambient conditions (transport) Temperature -10 - +50 °C Humidity 35 - 85 %, non condensing ■ Ultre P/E- Operation Resolution and recorder speed Resolution pixel/cm Max. Speed cm/min Resolution dots/inch Max. Speed inch/min 236 22.1 600 8.7 315 16.5 800 6.5 394 13.2 1000 5.2 472 11.2 1200 4.4 630 8.4 1600 3.3 787 6.6 2000 2.6 945 5.6 2400 2.2 6-5 Technical Data ■ Ultre 72E and 94E System description Precision laser recorder, capstan technology Light source Infrared laser diode, emission wavelength 780 nm Imaging principle Rotation prism,continuous moving transport of photographic material Imaging width 305 mm, 72 pica (72E), 395 mm, 94 pica (94E) (imaging length dependent on application program) Maximum screen frequency Repeat accuracy Photographic materials in roll form Up to 60 l/cm (150 lpi) Typ. ± 40 µ m (± 1.5 mil) (within the ambient conditions defined below with constant environmental conditions for 4 successive pages of size 40x40 cm) Infrared-sensitive film (780nm), RC paper and direct printing foils, 0.10 to 0.18 mm thick, anti-static emulsion, roll material wound emulsion in on a 50.7 (2") core. Material width 310mm (72E), 400 mm, 355mm, 310mm (94E) Capacity of feed cassette Approx. 30 m film (100 feet) dep. on material thickness Capacity of collecting cassette Approx. 10 m (30 feet) dep. on material thickness 6-6 Edition January 1995 Technical Data Mains voltage 90 - 130 V (AC), 180 - 260 V (AC), 47 - 63 Hz Nominal voltage 115/230 V (AC) Nominal frequency 50/60 Hz Power consumption 2.0/1.2 A Dimensions 11.5 x 24.75 x 29 inch (WxHxD) Weight 49 kg, 108 lbs Interfaces Serial video interface Noise emission LpA ≤ 70 dB(A) (Noise measuring DIN 45635-19-01-KL2) ■ Ambient conditions (operation) Temperature 18 - 30 °C Humidity 45 - 85 %, non condensing Ultre P/E- Operation 6-7 Technical Data ■ Ambient conditions (transport) Temperature -10 - +50 °C Humidity 35 - 85 %, non condensing ■ Resolution and recorder speed Resolution pixel/cm Max. Speed cm/min Resolution dots/inch Max. Speed inch/min 236 43.9 600 17.3 315 33.0 800 13.0 394 26.4 1000 10.4 472 22.1 1200 8.7 630 16.5 1600 6.5 787 13.2 2000 5.2 945 10.9 2400 4.3 6-8 Edition January 1995