1
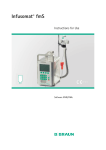
NIKI V4 Infusion Pump SERVICE MANUAL 0473 Manufacturer: C.M.E. LTD Fax 49-(7129) 925520 Tel. 49-(7129) 92550 Staufenburgstr. 23 Lichtenstein P.o.b. 1248 Lichtenstein 72805 Germany E-mail: [email protected] EDITION JULY 2004 Ref.: 100-092 NIKI V4 Operator’s Manual 2 Table of Contents 1. INTRODUCTION NIKI V4 Features. About This Manual. Safety Precautions. Limited warranty Service Information 4 5 6-7 8 9 2. NIKI V4 Volumetric Infusion Pump Overview Specifications. Front Panel – Control and Indicators Front Panel - with Open Door. Rear Panel. 10-11 12-13 14-15 16-17 3. OPERATING THE INFUSION PUMP Operation Instructions Basic Operation Priming Function Preventing Maintenance Cleaning and maintenance Alarms Automatic Calibrations Manual Calibration Changing Default "Pressure" limit Hospital Service Procedure Failure Identification 18 19-23 24 25-26 27 28-29 30-31 31 32 33-34 35 4. Testing And Troubleshooting 4.1.Startup Test 4.2.Operational Checkout 4.3.Test Performing 4.4.Testing Procedures 4.5.Corrective Actions – Disassemble and Calibration 4.6.Maintenance Flowchart NIKI V4 Operator’s Manual 3 36 37 38-41 42-49 50-53 54 1.Introduction This Manual Provides direction for setup and operation of the NIKI V4 Volumetric Infusion Pump. NIKI V4 Features 6 Small, light and compact pump. 6 Multi Programs: MACRO Macro program Infusion Rate : 1 to 999 ml/hr. Volume : 1 to 9999 ml. MICRO Micro program to be used in Neonatal and Pediatric wards. Infusion Rate: 0.1 to 99.9 ml/hr. Volume : 0.1 to 2500 ml. 6 Highly accurate fluid delivery. 6 Rechargeable internal battery. 6 Integrated Mounting Clamp for securing the pump to an IV pole. 6 A.B.S. Anti-Bolus System 6 Silent operation. 6 Ultra Sonic air detection- air bubbles greater than 50 micro liters. NIKI V4 Operator’s Manual 4 About This Manual: The information in this manual is presented as follows: 1. Introduction NIKI V4 features and capabilities. 2. NIKI V4 Volumetric Infusion Pump Overview Functional description and specifications. 3. Setting Up the NIKI V4 Infusion Pump Instructions for unpacking and setting up the pump before operation. 4. Operating the NIKI V4 Infusion Pump Procedures for operating. Terms and conditions used in manual : ) NOTE Operating procedure or condition that is essential to highlight. * CAUTION A precaution that, if not followed, could result in extensive damage to the equipment. , WARNING A precaution that, if not followed, can result in personal injury or loss of life. NIKI V4 Operator’s Manual 5 Safety Precautions , WARNING To avoid possible personal injury or loss of life, observe the following: Note : Read and understand the entire Operation Manual before using the pump since important precautions follow throughout the text. • Disconnect the pump from main, prior to opening the casing. Voltage present on internal components may cause severe shock or death on contact. Only trained service personnel should open pump cover. • Before servicing pump, remove rings, watches, and other jewelry that may cause a shock / burn hazard. • To prevent fire hazard, replace blown fuses only with fuses of same type and rating. (see fuse values on the rear Pcb close to the fuses housing) . • The Equipment is not suitable for use in the presence of flammable anesthetic mixture with air or with oxygen or nitrous oxide. • Watch your fingers / nails when opening the pump’s door. To avoid possible injury to patient, observe the following: • Make sure pump is attached securely to IV pole. • If the pump was dropped, send the pump back to be inspected by qualified service personnel. • Before operation, verify that administration set tubing is not kinked or occluded. ) NOTE: The maximum volume that may be infused under SINGLE FAULT CONDITION is 0.1 ml. NIKI V4 Operator’s Manual 6 Safety Precautions The pump Power cord should be connected to a grounded AC outlet Furnishing. , WARNING Any adjustments, maintenance or repair of the uncovered pump under voltage, should be avoided. If necessary, these repairs should be carried out be skilled technicians who are aware of the hazards involved. The should be operated within a temperature range of 15ºC (59ºF) to 45ºC (113ºF). , WARNING Do not operate pump near equipment that emits high energy radio frequencies, such as electro-surgical cauterizing equipment and cellular telephones. False alarm signals may occur. ) NOTE: * Read and understand the entire Operation Manual before using pump since important precautions follow throughout the text. CAUTION To avoid possible damage to the equipment, observe the following: • Do not immerse pump in liquids. • Clean solution spills immediately from the pump. Use a damp cloth or sponge. A cleaning disinfectant may be used. Wipe thoroughly with a dry cloth. • Do not clean pump with chemicals such as Xylene, Toluene, Acetone, or similar solvents. These chemicals cause damage to plastic components and paint. • Do not use pens or any other sharp object to press keys. Torn or punctured membranes expose keys to damage. NIKI V4 Operator’s Manual 7 Limited warranty on distribution sold products The NIKI V4 infusion pump has been carefully manufactured from the highest quality components. Caesarea Medical Electronics Ltd. Warrants that the pump will be free of defects in material and workmanship for twelve (12) months from the date of purchase by the original purchaser. CME’s or its designated representative’s obligation under this Limited Warranty shall be limited, at CME’s or its designated representative’s option, to repairing or replacing pumps which upon examination, are found to be defective in material or workmanship. The repair or replacement of any product under this Limited Warranty shall not extend the term of the Warranty beyond the original term set forth above. All repairs under this Limited Warranty should be undertaken only by qualified, trained service personnel. In the event that a pump is found to be defective during the warranty period, the purchaser shall notify CME or its designated representative within thirty (30) days after such defect is discovered. The defective pump should be sent immediately to CME or its designated representative for inspection, repair or replacement. Shipping costs are the purchaser’s responsibility. Material returned to CME or its designated representative should be properly packaged using CME shipping cartons and inserts. Inadequate packaging may result in severe pump damage. This Limited Warranty shall not apply to defects or damage caused, wholly or in part, by negligence, spilt fluids, dropping of the pump, misuse, abuse, improper installation or alteration by anyone other than qualified, trained personnel; or to damage resulting from inadequate packaging in shipping the pump to CME or its designated representative. If, after inspection, CME or its designated representative is unable to identify a problem, CME or its designated representative reserves the right to invoice purchaser for such inspection. This Limited Warranty is the sole and entire warranty pertaining to CME’s products and is in lieu of and excludes all other warranties of any nature whatsoever, whether stated, or implied or arising by operation of law, trade, usage or course of dealing, including but not limited to, warranties of merchantability and warranties of fitness for a particular purpose. Purchaser expressly agrees that the remedies granted to it under this limited warranty are purchaser’s sole and exclusive remedies with respect to any claim of purchaser arising under this Limited Warranty. Managing Director NIKI V4 Operator’s Manual 8 Service Information While under warranty, Service agreement, (optional) or lease agreement, the instrument must not be opened by unauthorized personnel. Contact your local distributor. Shipping costs for all units returned for service or warranty shall be paid by the customer, The unit must be packed in its original container or in another container that will provide adequate protection during shipment. To assure prompt return, the customer service department must be notified before shipping any unit for repair. When calling product service, pls. be prepared to provide code number and serial number of the unit. A service request number will be issued should accompany all communications A brief written description of the malfunction should be attached to the instrument when it is returned for service. NIKI V4 Operator’s Manual 9 2. NIKI V4 Volumetric Infusion Pump Overview Specifications Pumping Mechanism: Linear peristaltic movement Flow Rate: Micro - 0.1 to 99.9ml/hr in 0.1ml increments Macro - 1 to 999ml/hr in 1ml increments Total Infusible Volume: Micro - 0.1 to 2,500ml. Macro - 1 to 9,999ml. Total Time Setting 99:59 hours Accuracy: ± 5%. KVO rate: 0.1 to 5 ml/hr. Air Sensor: Ultrasonic Maximum Pressure: 0.7 bar or 10 psi Adjustable ( high, normal, low ) Power Supply: 100-240 V, 50/60 Hz. 10w Battery: Nickel-Cadmium 7.2V, 0.9Ah. Battery Operation at 125 ml/hr: 16 hours Battery Charging: Automatic when connected to an AC power source (12 hours) Alarms: Bad System Low & End Battery Push Run Air Fill Set Bad set High Pressure (HI PRES) (down occlusion) Door Open End of Program (FIN) Loc Dimensions: 138 x 138 x 72mm. 5.4’’ x 5.4’’ x 2.8’’ (l x w x h). Symbol Attention (Consult accompanying documents) 0.3A max. Classification Type CF Equipment (Degree of protection against electrical shock) IPX4 CLASS 1 Housing: NIKI V4 Operator’s Manual Protected against splashing water (Degree of protection against liquid ingress) ABS (with fire retarded) 10 Electrical Safety Comply with IEC 601-1(medical equipment) and IEC60601-2-24 (Infusion pumps and controllers) Memory Retention All calibration and set information will be retained in the pump memory for a minimum of 10 years. Electrical Safety Comply with Ph60601-1 (medical equipment) and IEC60601-2-24 (Infusion pumps and controllers) with UL 2601- 1 and CAN/CSA C22.2 No 601.1 and MDD 93/42 EEC. Weight NIKI V4 Operator’s Manual 1100 gr. 2.5 pounds 11 Front Panel – Control and Indicators NIKI V4 Operator’s Manual 12 No. Function Description 1. • Displays selected infusion rate, total time, volume to be infused, and volume infused. • Whenever the pump is operated on battery, the display will blink on and off. • The cursors indicate that the set program is running. • Sets a PIGY program - Single Pigy program - Auto Pigy program Display 2. Pigy key 3 4. • • Automatically primes the administration set Unprimed set- priming volume 16 ml. • Partially primed set- priming volume 5 ml. Prime key 5. • Guide the administration set. Tubing Guide 6. • Increases / Decreases the infusion RATE, TIME limit, and VTBI. Arrow keys • Continue to press the arrow key to increase the setting steps and speed. 7. • · Starts or stops pump operation and delivery. Hold may be used to silence an alarm condition and pause priming. RUN / HOLD Key 8. • Lights when pump operates on AC power and battery is being charged. Charging Indicator 9. • Opens and closes the pump door. Door Latch 10. • NIKI V4 VOLUMETRIC INFUSION PUMP Door Label NIKI V4 Operator’s Manual 13 Front Panel – with Door Open 1 2 12 13 14 15 3 16 4 17 5 18 6 7 19 8 20 9 21 10 11 NIKI V4 Operator’s Manual 14 No. Description Function 1. Display LED display 2. MACRO The pump is operating in the Macro program. 3. SELECT key Used to scroll between rate, time, volume to be infused, and total volume infused. 4. RUN / HOLD key Start/hold the program 5. Arrow key Setting the desired values for rate, time and vtbi. 6. Connect the pumping block to the front housing. 7. Pumping block mounting screw Latch holder 8. Pressure sensor Holds the door closed when latch is positioned. Horizontally. y Detects downstream tubing restriction and occlusion. y The alarm level can be adjusted to suit the needs of the hospital department. 9. Press plate Connected to the door by 3 springs. 10. Pump door Covers the press plate. 11. Recessed latch Push to open door. 12. RATE The rate message indicates that the figure shown on the display is the current rate. 13. VTBI The volume to be infused. 14. VI (Volume Infused) The accumulated infused volume, from the time the CLEAR key was last pressed. 15. ON/OFF key Switches the pump on and off. 16. Charge indicator Lights when pump is connected to main. 17. PRIME key Pressing the prime key, at the data setting stage, after door open or air alarm, will remove air from administration set. 18. Air sensor Ultrasonic air detector, mounted on the front housing. 19. 20. Tubing Guide Air sensor Guide the Administration set Mounted on the door. 21. Door springs Located between the door and press plate. NIKI V4 Operator’s Manual 15 Rear Panel 1 2 3 8 4 9 5 6 7 10 11 12 13 NIKI V4 Operator’s Manual 16 Description Function 1. Pump handle Pump carrying handle 2. Pole clamp handle Fixing the pump to an IV pole 3. Pump mounting screw Used to assemble/disassemble the housing 4. Pole clamp Mounts the pump on the IV pole 5. Pole clamp screw Turn clockwise to secure the pump to the IV pole 6. Buzzer Sounds an acoustic alarm 7, Pole screw adapter A plastic tip to assure connection to the IV pole 8. Pump mounting screw Same as 3 9. Electrical cord connector Attachment for AC power cord 220-240v 50/60 Hz 10. CF protection Pump safety classification 11. Serial number sticker Display’s the serial number of the pump 12. CE marking Admission to market the NIKI V4 pump in Europe 13. Pump mounting screw Same as 3 NIKI V4 Operator’s Manual 17 3. Operating the Infusion Pump Operating Instructions a. Securely attached the pump to an IV pole using the pole clamp. b. Plug pump power cord into a hospital grade electrical outlet. Verify during operation that the AC icon is displayed (see page 5 #8) and the data on the display is stable. , WARNING: The pump is calibrated to a specific set. Do not use any other set. A certified technician would be able to help you calibrate your set to the NIKI V4 pump. Call your local representative for assistance. c. Prepare the IV solution container and prime the IV set being used according to the instruction provided with the IV set. Make sure that the drip chamber is at least one third full and that the set does not contain air. If necessary prime again using the prime key. d. Hang the IV solution container. e. Open the pump's door (page 12) by pushing the door's latch. (page 12 #9) Open the door completely. f. Place the tubing in the slit, in the arrow direction. g. Close the door by pressing on the 2 recesses, until door latch clicks firmly into place. h. Switch the pump on, pressing on the on/off key. (pg. 14 #15) the display (pg.14 #1) will show on and perform a self test. When the self test is completed the display will show the last rate setting and the word rate will be displayed. Accept pressing the select key (pg.13 #3) or change with the arrow keys (pg.13 #5). The display will show the remaining VTBI. Press Run to start operation. The display will show the volume infused. Press the clear key to zero infused volume or run/hold key to start operation. Note: The infusion indicator will flush while the pump is in operation. i. To change rate during operation press hold and use the arrow keys to change desired data. Press the run/hold key to resume operation. NIKI V4 Operator’s Manual 18 Basic Operation 1. Place the IV pole and the pump near the patient. 2. Connect the pump to an AC power outlet. 3. Verify that the administration set is set up correctly. 4. Switch on the pump using the ON/OFF key. ON will appear on the display followed by the last rate setting. 5. The preset program will appear on the right side of the display. MICRO 6. Press the ARROW keys to set the requested infusion rate. ) NOTE Press the arrow up key to increase the units. The arrow down decreases the units. Press continuously the ARROW keys to set the infusion rate quickly. 7. Prime the set if necessary, use the PRIME key. 8. To set the TIME and VTBI : y Press the SELECT key , then use the arrow keys to set the TIME limit. y On the left side of the display, the word RATE will change to TIME. RATE TIME The pump will automatically calculate the Total Volume. y Press SELECT key again, to set the VTBI (optional) y The pump will automatically calculate the Total Infusion Time. NIKI V4 Operator’s Manual 19 ) NOTE: y y A “9999” can be changed to a “0” by pressing the up arrow keys. Setting either the TIME or VTBI functions, avoids an Empty Fluid Container problems. 9. Press the RUN/HOLD key to begin infusion. ) NOTE: If the RUN/HOLD key is not pressed within one minute, a “PUSH RUN” alarm appears on display. RATEVOL.- Press RUN/HOLD key to stop the alarm. The display will show HOLD. RATEVOL.- 10. Verify that the infusion is proceeding normally before leaving the pump unattended. ) NOTE: y y To change any parameter during operation, first press the RUN/HOLD key, HOLD appears on display. Use the Select key to Scroll throughout the various settings. Set the desired rate, time or VTBI, press RUN/HOLD key to start operation. The pump’s memory retains all parameters even if it was turned off. “TIME REMAIN” Display - During Operation 1. Pressing the SELECT key during operation causes the displayed “RATE” to change for 5 seconds to “Time Remains hr: min” NIKI V4 Operator’s Manual 20 RATEVOL.- ) NOTE: y “Time Remain” is stored even if the pump was switched OFF. y “Time Remain” Will automatically adjust if Total Volume is changed during operation. y If TIME function is OFF, in technician mode, the TIME function will not be available. y “Time Remain.” Will not display if total time is more than 100 hours. “VTBI” Display 1. Pressing the SELECT key twice during operation causes the displayed rate to change for 5 seconds to left “VTBI” VTBI “VOLUME INFUSED” Display. RATE 1. Pressing the SELECT key during operation causes the displayed rate to change for 5 seconds to the accumulated volume infused. ) NOTE: y y y VI The VTBI and INFUSED volume will automatically reset to zero, once it reaches 9999 ml. The volume INFUSED, can be zeroed only using the CLEAR key. When a program was completed the VTBI will reset to the original setting Changing Infusion Rate During Operation 1. Press the RUN/HOLD key to halt the operation of the pump, HOLD will appear on display. ) NOTE: Use the Select key to display current data : Rate, Time left, VTBI, Infused volume. 3. Set the desired infusion rate using the arrow keys. Pressing continuously will increase the speed and steps of changes. 4. Press the RUN/HOLD key to renew operation. NIKI V4 Operator’s Manual 21 RATEVOL.- The “Locking” Option The NIKI V4 has a unique option, which enables the user to lock out the setting keys, so that entered parameters, or set programs cannot be changed once they are set, especially during operation. This option is important in such cases as in pediatric ward, where there is a danger that the child user will play with the pump and unknowingly change the program. Further more, in the case of the P-10 program, once locking the set programs, it will remain in the pumps memory for the next use, even if the pump is switched off. Locking and unlocking: The NIKI lock out function disable all but the select key, while the pump is operating. To lock out a program: At any time during operation simultaneously press the arrow up and arrow down. The display will show “Loc” accompanied with a short beep. To de-activate or exit lock-out function, simultaneously press the arrow up and arrow down, the display will show Loc Off. ) NOTE RATEVOL.- This option can only be activated while the pump is in operational state. Battery Operation The NIKI V4 can operate on battery power, enabling operation when the patient is being moved or during electrical power failure. When the pump runs on battery power, the CHARGE indicator is off and the display flashes. At full charge, the battery provides 16 hours of operation at an infusion rate of 125ml/hr. When the pump is not in use, plug the pump’s power cord to an AC wall outlet (If possible) to retain battery charge. If the pump is out of service for a long period, discharge (to prevent the NI-CAD memory effect) and recharge the battery periodically (at least once a month - this will insure long battery life). Important: Upon receipt, or following long periods of storage, it is necessary to wait 5 minutes after the pump been connected to the power supply before operating on AC power. NIKI V4 Operator’s Manual 22 There are two battery alarm conditions: RATE- • Approximately 15 minutes before the battery runs out, a beep sounds every 15 seconds and a signal LOW BATTERY message appears on the display. VOL.- RATEVOL.- RATE- • If the battery runs out, END BATTERY appears on the display. The pump stops operating. VOL.- RATEVOL.- * Caution: Leaving the battery in a discharged state for a long period of time may damage the battery. Whenever possible, operate the pump on AC power. This preserves battery power supply for when it is needed. Replace the battery once every 4 years. NIKI V4 Operator’s Manual 23 Priming Function Priming Function is used: 1. Before starting a program. 2. After air in line alarm. Disconnect IV tubing from patient, press “PRIME” key to push air bubbles through. Priming Function Operation: 1. Switch On the pump using ON/OFF key. After a short self test the pump will display ON followed by the last rate setting. ) NOTE: Make sure the IV set is not connected to patient. 2. Press Prime. 3. The display will show FILL. RATEVOL.- 4. Once the priming is completed, the display will change from FILL to the last rate setting. . RATEVOL.- 5. Press the RUN/HOLD key to start operation. ) NOTE: The pump will prime 5 ml instead of 16 ml in case the set is partially Primed. NIKI V4 Operator’s Manual 24 Preventing Maintenance This following table has a list of problems and corrections to aid to the diagnosis of possible pump malfunctions. The table contains recommended remedies to correct malfunctions. Review this list whenever a condition exists that does not appear to be normal. Perform the specified checks and corrections. If the problem cannot be corrected remove the pump from service. Troubleshoot it in accordance to section 4.4 and repair it in accordance with section 4.5. Function Troubleshooting Guide Test Remedy The charging led plug Check the tightness of power Press the power firmly does not illuminate when Plug into the AC outlet into the AC outlet the grounded pump is Check fuse Replace if necessary Check the power fuses Replace the fuses Check the AC outlet for proper If the voltage is 5 vac, voltage connect the pump to a connected to AC. The battery indication appears while the device is plugged to AC battery. Battery below 7.2V correct supply voltage. Check the device for continuity Connect the power terminals to an AC outlet Air alarm Check the position and the Position the tubing seating of the tubing. Correct properly in the pump. any pinched or chinked tubing. Press run/hold key to resume operation. NIKI V4 Operator’s Manual Check that there are no obstruct Remove obstruction upstream or downstream tubing. and/or open roller clamp. Check the administration set for Replace administration correct type or code. set if required. 25 Preventing Maintenance Schedule: Every 12 months or as required Check Action Check occlusion Test occlusion sensor that is out of calibration accordance with sensor operation instructions on pg. If output, (code 3) is less than 10 replace it. (section 4.2.) Check air sensor Recalibrate any air sensor that is out of calibration in accordance with section 4.5. Use P1 to adjust. If sensor cannot be adjusted replace it in accordance with section 4.5. Batteries NI-CAD 7.2V Check backup battery pack voltage in accordance with section 4.2. If the backup battery is not within specification, replace it in accordance with section 4.5. Display Segments Switch pump ON, check all display segments and all barleds lit, using the arrow keys, check if all numbers are displayed correctly. Schedule: As required or at least once a month Check Pump Housing Action Clean with an agent listed on pg. Replace any labels that are damaged. Check that plastic housing is intact. Press Plate If the press plate does not operate smoothly, clean or replace in accordance with pg. 39. Battery Time Recharge by connecting to AC outlet for at least 8 hours. Check that the AC icon is displayed during. Power cord Replace the power cord if the pins are bent or the isolation is damaged. Safety (CF) Check ground resistance measured on the pump’s door if it is greater than 0.1 Ohm check tightness of grounding screws. It should be 100 microamps or less using UL2601 specified test methods (CF classification) NIKI V4 Operator’s Manual 26 Cleaning and Maintenance , WARNING: Do not steam autoclave or immerse the pump in liquid, as it may otherwise be damaged. To avoid possible electrical shock, turn pump off and disconnect the main power outlet before cleaning. Clean the pump using a soft cloth or sponge dampened with any of the cleaners listed below. Follow manufacturer’s instructions for concentrated cleaners. Device that has been used should be cleaned and disinfected with an agent from the list below, before reuse on another patient. Cleaner Manufacturer LpH Septisol Vestal Labs Cidex 7 Surgikos Super Edisonite Edison Chemical Co. Clinidine Clinipad Co. Betadine Purdue Frederick Do not clean the pump with acetone or other plastic solvents or abrasive cleaners. Dry the pump thoroughly before use. Consult the housekeeping and/or the infection control department for more information. Important: Do not touch the pressure or air sensors, only the tubing may come in contact with the sensors. Pressure / air in line sensors should not be clean. If it accidentally becomes wet, immediately dry the sensor with a lint free cloth. Periodic maintenance (every 12 months) should be initiated to assure the proper function of the pump. Dropped or damaged pumps should not be cleaned / used and should be rechecked by an authorized service technician. NIKI V4 Operator’s Manual 27 Alarms An alarm notifies the operator/user, visually and audibly that the condition shown on the display has occurred and that corrective actions must be taken to continue the infusion. The following table lists possible alarm situations and solutions for each alarm and indicator. However, this guide is for troubleshooting and may not describe every possible situation or solution. If any problem cannot be resolved, the pump must be referred to a qualified technician. When an alarm condition occurs, the following steps are recommended: • • • • • Read the alarm message displayed. Press the run/hold key to silence the alarm. The word ‘hold’ will be displayed, Determine the cause of the alarm using the troubleshooting guide. Correct the cause of the alarm using this troubleshooting guide. Press the run/hold key to restart the infusion. Follow hospital guidelines if they are different from the above recommended. Alarm Conditions Alarm RATE- Description Result Air in line. Infusion is stopped. Air is present in administration set. Door is open. Infusion is stopped. The door of the pump was not closed prior to operation, or was accidentally opened VOL.- R A T E V O L.- R A T E V O L.- RATE V OL.- Possible Cause Disconnect administration set from patient. Release air bubble from administration set using prime key. Close pump door and restart operation. Set infusion parameters and press RUN/HOLD to restart infusion. The pump is priming the administration set. NIKI V4 Operator’s Manual Remedy 28 Message displayed showing ± 15 minutes left of battery operation. RATEVOL.- RATE- Internal battery voltage less than 5.7V. Reconnect pump to AC power. Recharge battery. Battery is depleted. Reconnect pump to AC power. Recharge battery. VOL.- RATEVOL.- Displays when battery runs out. Infusion is stopped. Mechanical or electrical problem. Infusion is stopped. RATEVOL.- Err RATEVOL.- Switch the pump off and CALL FOR SERVICE. The pump has detected an Unprimed set. •Unprimed set Prime the set The pump has detected an unsuitable set. Using noncalibrated wrong set Use the set the pump was calibrated to. RATEVOL.- RATEVOL.- RATEVOL.- RATE- Press simultaneously the two arrows. Pump is in lock-mode. VOL.- NIKI V4 Operator’s Manual 29 Automatic Calibrations The NIKI V4 Volumetric Infusion Pump has many functions which allow the biomedical department to specify the device to every department. The access to the functions are not disclosed to the user manual, and are limited to the biomedical engineers as they were trained to use and to decide which modes are suitable for each hospital department. a. Automatic calibration mode (auto cal) (code 8888) Press continuously on the arrow down key while switching the pump on. A continues beep will sound. Hold pressed the arrow key until the continues beep stops (about 10 sec.) in the mean time the display will show the software version. As the beep sound stops the message on the display will change to code. Using the arrow keys scroll down to 8888. Press run/hold key to confirm. The display will show ‘auto cal’ Load an administration set, as described on pg.37. Use a bag with desalinates water. Prepare a container to infuse about 20ml. Press the run/hold key to start infusion. The display will show continuously the quantity infused. When 20ml are completed the pump will alarm and display ’20.00’. Press the run/hold key to stop the alarm. Use a scale to weight the contents of the container. The pump’s display will show 20.00, set the actual volume delivered using the arrow keys. b. Automatic pressure calibration (auto pres) (code 8888) Same as a. scroll down using the arrow keys, to 18, press the run/hold key to confirm (pres cal.). The display will show ‘auto cal’ Load an administration set, connect a pressure gage at the end of the set. Press run/hold key to start. When the pressure gage will display 0.7 bar, press the run/hold key to hold infusion. The display will show the high pressure alarm level, and will store the value in the memory. The pump will extrapolate from that figure the low and normal high pressure level. NIKI V4 Operator’s Manual 30 c. Pressure setting (code 3) Set code 3. The display will show the actual pressure. Should be between 80 to 120. Press run/hold key to continue. The display will show high pressure level. This number should be between 13 to 22. Press run/hold key to continue and set the high pressure absolute level. This level should be set to 250. d. Clock setting Set code 5. The display will show clock on/off. Alternate the actual setting with the select key. The clock off choice will eliminate the use of the time setting. d. Volume calibration setting (code 1) Set code 1. The display will show the actual calibration between 150 to 165. Those numbers are the motor pulses requested to deliver 1 ml. Manual Calibrations 1. Press continuously on the down arrow key while switching the pump on. 1.1 Press code 1 and press run key. 1.2 Pump will display "cal 1" massage for Baxter set and "cal 3" massage for Abbot set. 1.3 If calibration is not suitable for the set you are working with change setting: 1.3.1 Turn the pump off and press continuously on the down arrow key while switching the pump on again. 1.3.2 Set code 6 and press run key. Change set setting and turn the pump off. 2. Turn the pump on. Set the pump to infuse at rate 200 ml/hr. VTBI 30 ml. Infuse into a measuring cup. 3. Scale the VI. 4. If different than 30 (±5%) change calibration as follows: 4.1 Press continuously on the down arrow key while switching the pump on. 4.2 Set code 1. 4.3 Pump will display "cal" message press run key. 4.4 Pump will display a number – change according to the differences in volume (if volume was more than VTBI, set to lower number and if the volume was lower set to higher number). 4.5 Repeat steps 2-4 until VI will be 30 ml. ±5%. NIKI V4 Operator’s Manual 31 Changing the current default “Pressure” Limit to another Press SELECT key continuously. Switch on the pump by using the ON/OFF key. Press the RUN/HOLD key, PRES shows on display for one second, thereafter the current pressure will appear. RATEVOL.- By pressing the SELECT key scroll through, and choose the desired limit. The following pressure parameters can be set: ) NOTE Low = 0.3 bar. RATE- (5 psi) VOL.- RATE- Normal = 0.5 bar. High - (7 psi) VOL.- RATE- = 0.7 bar. (10 psi) VOL.- ) NOTE The selected pressure setting will remain in the pump’s memory until changed again. Press the RUN/HOLD key, in order to store the parameter in the pump’s memory. NOTE ) The pump has an antibolus system, which prevent a bolus delivery to the patient, once a downstream occlusion is released. NIKI V4 Operator’s Manual 32 Hospital service procedure Introduction This section contains a table describing preventing maintenance which should be performed on the NIKI V4 Volumetric infusion pump. The maintenance procedures outline in this section may be performed in the hospital, by the biomedical department. An abnormal condition accurse which is not correctable by performing the following procedures, remove the device from service and troubleshoot it in accordance with section 4.4. or return it for service. Replacement of main power fuse: 1.1 Switch the device off by pressing the on/off key. 1.2 Check if the AC icon is displayed. 1.3 Remove the power cord from AC power outlet. 1.4 Separate the front and the rear pump's housing as described on pg. 1.5 Remove the fuses from the fuse socket on the rear PCB, and check using an ohmmeter electrical continuity. 1.6 If necessary, replace with a new fuse of the same value, type and voltage. 1.7 Replace and tight fuses in the fuses housing. On the main PCB located a battery protecting fuse (F1). The nominal of the battery protecting fuse is 1.2 A. Fuses - Nominal On the rear PCB of the pump are located 2 safety fuses protecting the AC/DC converter. The nominal requested values of the fuses are 800mA NIKI V4 Operator’s Manual 33 Tailoring the Pump to the Hospital Needs Changing the current default Program to another: 1. Press SELECT key continuously. 2. Switch on the pump using the ON/OFF key. 3. Release the SELECT key once SLCT shows on display RATEVOL.- Using the SELECT key, scroll through the different programs and choose the desired program from the following choices: MICRO MACRO 5. Press the RUN/HOLD key, in order to store the parameter in the pump’s memory. ) NOTE The selected program will remain in the pump’s memory until changed again. List of programs The NIKI V4 volumetric infusion pump features 2 different programs. Following are the specifications for each program: MACRO program. Rate: 1 to 999ml/hr Total volume to be infused: 1 to 9999ml. MACRO MICRO program to be used in Neonatal and Pediatric wards. MICRO Rate: 0.1 to 99.9 ml/hr in 0.1ml increments. Total volume to be infused: 0.1 to 2500 ml. NIKI V4 Operator’s Manual 34 Failure Identification Specific errors which may occur in the operation of the NIKI V4 Volumetric Infusion Pump are represented on Section 3 pg.25-27. On the biomedical mode. The user can display the last 10 failures which are stored in the device's memory. The failure information, displayed, can be used to determine the nature of a device failure and to troubleshoot its cause. Go to biomedical code. The display will show the last 10 errors, each press on Run/Hold mode key will display another error, scrolling from the last to the 10th. Refer to Alarm condition pg.28 for descriptions of all failures possible and instructions on how to correct each failure. Disassemble / Reassemble and calibration procedures are located in section 4.5. NIKI V4 Operator’s Manual 35 4. Testing And Troubleshooting 4.1.Startup Test Before attaching the NIKI V4 to a patient, run a startup test to verify that all indicators and alarms work properly. When an alarm is activated the following will occur: 1. An alarm message appears on the display. 2. An audible alarm sound. 3. The infusion is stopped. Pump Operation Test: 1. Connect the pump to AC power. Verify that the CHARGE Indicator is on. 2. Insert an administration set into the pump. 3. Switch on the pump by using the ON/OFF key. The pump will display ON and perform a self-test. Verify that a long beep sound is heard and that all the leds and messages on the display are on for 2 sec. (CHARGE indicator stays on constantly). 4. Prime the set using the PRIME key. ) NOTE: Make sure the IV set is not connected to patient. 5. During priming the display will show “ FILL” RATEVOL.- 6. Verify that a “PUSH RUN” alarm appears on display after one minute. RATEVOL.- RATEVOL.- 7. Press the RUN/HOLD key to silence the alarm. NIKI V4 Operator’s Manual 36 4.2. Operational Checkout Introduction The operation checkout procedure in this section determines if the device operates properly after it has been repaired. If the device fails any part of the operation checkout, the fault must be corrected prior to placing the device in service. Pls. become familiar with all the checkout procedures before beginning. The following test equipment is required to perform the operational checkout procedure: -Administration set -Solution container (distilled/sterile water, d4w, 0.9% sodium chloride ect.) -Precision syringe -Equipment: electronic scale, oscilloscope Maintenance Flowchart Pg. flowchart illustrates the maintenance procedure for the device. The operational checkout should be corrected using the troubleshooting procedures given in section 4.4. Once a problem has been isolated to a single assembly, the assembly should be replaced in accordance with the disassembly procedure provided in section 4.5. The device should be calibrated as described in section 4.5. After all maintenance procedures are completed, perform the Operational Checkout in this section. Administration set placement To avoid possibility of fluids contacting the air sensor and pump mechanism, the solution container should be spiked and set primed before opening a pump door. The container should also be placed low enough to permit a loop in the tubing to the side of the device. Position the container so that accidental spillage onto the device will be minimized. Do not stretch the set when removing it from packing or loading it into the pump. Functional Testing Pls. become familiar with the device operating procedures in the Operator’s Manual. The procedures in this section are designed to check the ability of the device to pump primary and secondary infusion prior to test the effectiveness of its alarms. If pump fails to perform as described or stops with a failure alarm, troubleshooting in accordance with section 6 and repair it in accordance with section 4.5. before attempting to place the device in service. NIKI V4 Operator’s Manual 37 4.3.Test Performing 1. Using a solution container and an administration set according to instructions accompanying the set. 2. Spike the solution container and fully prime the set. Remove container such that the fluid level is a minimum of 18" (65 cm) above the top of the pump handle throughout the test. Make sure that the tubing is clean and dry before placing it in the pump. Make sure that the tubing is placed and seated properly in the guide channel. Ensure that there is no slack in the tubing and that it is not stretched, chinked or pinched before closing the pump's door. 3. Load the set into the pump. Close the pump's door. If excessive resistance is felt, check that the set is loaded properly through the tubing guide. Never use tools or excessive force to close a pump's door. 4. Place the distal end of the administration set in a container or a sink to dispose to pump solution. Self Test Turn on the pump using the on/off key. Check that the device performs the following self test: • The AC icon appears on the front panel. • Check that all leds of the display and the barleds illuminate. • The pump should perform a beep during self test and display 'on'. • Test the occlusion alarm (down occlusion) on 7 PSI on high pressure option. • Test the air sensor with an air bubble greater than 50 micro liter. Infusion Test - Set a flow rate of 100 ml/hr, using the arrow keys. - Press the select key to continue and set VTBI (volume to be infused) of 10 ml. - Open the roller clamp. - Press the select key to display the volume already infused. - Press the run/hold key to start infusion. If the pump stops with an alarm, refer to section 3 pg. 28 problem checklist. Let the pump continue to run and proceed to the next step. To reset the volume previously infused use the clear key. To read the total volume infused, during pump's operation, and review the infusion settings press the select key. To step the infusion press the run/hold key. To restart the program, press the run/hold key again. - When the pump has delivered the selected volume, an audible alarm is activated while the display will show 'fin' 'open vein'. - To stop an alarm, press the run/hold key. Check that the pump is infusing the KVO rate, and displays open vein. NIKI V4 Operator’s Manual 38 Air in Line Alarm Test 1. Press on the door’s latch to open pump’s door. Insert an administration set (which the pump has been calibrated to) in the pump’s tubing guide. press here 2. Close the door. Press on the door recessions until a click is heard. 3. Set the infusion rate to 500ml/hr. Use the arrows key. . RATEVOL.- 4. Press the RUN/HOLD key to start operation. Turn the drip chamber, up side down, to allow 5 mm of air to enter into the administration set. 5. AIR alarm will activate as soon as the air bubble enter the set segment located behind the pumping door. RATEVOL.- 7. Press the RUN/HOLD key to turn the alarm off. 8. HOLD appears on the display. RATEVOL.- NIKI V4 Operator’s Manual 39 Door Open Alarm Test 1. Insert primed administration set into the pump. 2. Press the RUN/HOLD key to start operation. 4. Close the door. RATEVOL.- 5. HOLD appears on the display. NIKI V4 Operator’s Manual 40 High Pressure (Occlusion) Alarm Test: 1. Occlude the administration set. Press the RUN/HOLD key to start operation at a rate of 200 ml/hr. . 2. After 10 seconds HI PRESSURE alarm will activate. (at a rate of 60 ml/hr the high pressure alarm will occur after 60 sec. at a rate of 1 ml/hr after 13 min.) RATEVOL.- RATEVOL.- 3. Press RUN/HOLD key to silence the alarm. RATE- 4. HOLD appears on the display. ) NOTE VOL.- The pressure threshold can be changed to suit the ward need, (see Changing the current default “Pressure” Limit to another on page 32). NIKI V4 Operator’s Manual 41 4.4.Testing Procedures The following list of preventing maintenance for the device, which should be performed at the intervals shown. Function Test Pressure sensor Insert a primed set into the pump. Occlude the set. At 0.7 bar the high pressure alarm will be activated, in case the high pressure alarm level was set to high. 0.5 bar correspond to normal setting and 0.3 bar to low. The default pressure setting is 20, this number is automatically registered in the pump’s memory. Pressure calibration Auto pressure calibration can be performed in the following way. Switch pump on while the arrow down key is continuously pressed. The display will show ‘code’, scroll down using the arrow key to 8888. Press run/hold key to confirm. The display will show ‘auto cal’. Load a NIKI V4 primed administration set into the pump. Connect a pressure gage at the end of the administration set. Once the pressure gage shows a pressure of 0.7 bar press the run/hold key. The display will show the pressure calibration and will automatically register that value in the pump memory. The pressure setting, as all other settings, is registered indefinitely in the pump’s memory, until changed by the user. Pressure setting Enter ‘code’ the same way as described above. Set CODE 3 press the run/hold key, the display will show the actual pressure – the number displayed should be between 80 to 100. Press the run/hold key again, the display will show the delta pressure setting. Accept or change using the arrow keys. Press the run/hold key to continue, the display will show the absolute pressure level (should be 250). Occlusion test Insert a NIKI V4 primed set into the pump. Occlude the set. Check on JP8 P5 frequency increase by (number x16›300 HZ) in case to frequency increase the sensor is either broken. Battery Check voltage drop on R45 using an avometer. Check battery voltage on connector JP8 P12. Test pump performance on battery at a rate of 125 ml/hr for minimum of 12 hours. NIKI V4 Operator’s Manual 42 Testing Procedures Function Test Pump's housing Check that all parts are in place. Clean with an agent listed on pg. Display and Barleds Switch the pump on, check that all display segments and all barleds are on during the initialization test, check that all numbers on the display appear sequentially on all 4 seven segment display. AC icon Connect the pump to mains, the AC icon shall appear on the display. Disconnect the pump from mains. Check that the AC icon disappears. When the pump is battery operated the numbers on the display will flush. Air sensor Load a primed administration set into the pump. Use an oscilloscope. On JP8 P4 should be a pulse greater than 3.8v. (pick to pick). Load a set with air. On JP8 P4 should be a pulse smaller than 0.8v (pick to pick). Load a stiff tube with air into the pump. Check on the testing connector JP8 P5 pulse is smaller than 0.8v. In case that the pulse pick to pick on JP8 P5 is greater than 1v, use the potentiometer P1 to reduce amplifier. Check pulse on JP3 P5 if the current is more than 180 MV. If less replaced sensor. Check on JP8 P4 if zero level is less than 0.8v continuously 1 msec. Motor sensors Check, using oscilloscope, motor sensor channel 1 on JP8 P2. Rotate manually the encoder and check the sensor in position 1 and zero. Check motor sensor channel 2, same procedure as above, on JP8 P3. Input 5v Switch pump on. Check using an avometer the voltage on JP8 P7. The allowed values are between 4.9 to 5.1v. Check on JP8 P8 the 12v input. Values allowed are 11.5 to 12.5v. 12V Input NIKI V4 Operator’s Manual 43 Testing Procedures Function Test Open door detection Check on JP8 P1 when pump's door is closed should be less than 0.4v and more than 4.5v when the door is open. Alarms Air Load an administration set into the pump, Locate the pump after the injection port. Using a syringe, insert into the set an air bubble of 10mm, check if Air alarm will be activated, once the air bubble enters the administration set located behind the pump's door. High pressure Load an administration set into the pump. Connect a pressure gage at the end of the administration set, start a program (rate: 50ml/hr VTBI 20ml). Check that the Hi pressure alarm is activated once the measured pressure amount becomes 0.7 bar. When performing the above mentioned test set the Hi pressure alarm level high. Fill / Bad Set Load an administration set, without the NIKI Valve. The pump will alarm fill set after 30 sec, or bad set when 15 ml are completed. NIKI V4 Operator’s Manual 44 Testing Procedures Power supply test Prepare the pump for operation according to operation instructions (pg. ). Separate front and rear housing according to Section 4.5. pg.52. Set a program of 200 ml/hr and VTBI 10ml. Use an oscilloscope and a digital testing device; connect the ground of the oscilloscope to the ground of the pump. Connect the oscilloscope probe to U12 P16. Check if the voltage is constant at a level between 4.9 to 5.1v. The maximal allowed ripple should be less than 50mV. Motor Test Prepare the pump for operation according to operation instructions pg. Separate front and rear housing according to Section 4.5. pg.52. Set a program of 8999 ml/hr and VTBI 50 ml. Use an oscilloscope and an analog testing device, connect the ground of the oscilloscope to the ground of the pump. Connect the oscilloscope probe to U12 P20. Check if the zero level detected while motor is in stop position is greater than 1 msec. If the zero level is lower the torque required is too high. Connect the analog tester to pump's ground. Measure the current between the collector and emitter of Q12 the main current should be less than 0.35 Amp. Watch Dog Test Prepare the pump for operation according to operation instructions pg. Separate front and rear housing according to section 4.5. pg.52. Initiate motor movements when switching the pump on, the w/d the processor will stop the motor movements by activating the w/d and display 'bad sys'. Set a program of 200 ml/hr and VTBI 30ml. Use an oscilloscope to perform this test. Connect the oscilloscope's ground to the pump's ground. Connect the common line C5 and C61 to ground. The pump's motor will stop. Immediately stop its function and audible alarm will occur and the display will show 'Err'. Check on the same point if frequency can be detected, if not, check U1 P29 the frequency output. NIKI V4 Operator’s Manual 45 Air Sensor Test Prepare the pump for operation according to operation instructions pg. Separate front and rear housing according to section 4.5. pg.52. Set a program of 999 ml/hr and VTBI 50 ml. Use an oscilloscope device, connect the oscilloscope's ground to the pump's ground. Set the pump to operate at a rate of 200 ml/hr and VTBI of 30 ml. Connect the oscilloscope to the collector of Q20 to detect the pulse from pick to pick. The minimum level should be 3.8v. Connect U11 to ground, the frequency detected should be smaller than 0.8v. Connect the same point (U11 P2) VCC the frequency should be 40 Hz. High pressure (occlusion) Alarm Test 1. Occlude the administration set. Press the RUN/HOLD key to start operation. 2. After few seconds HI PRESSURE alarm will activate. RATEVOL.- RATEVOL.- 3. Press RUN/HOLD key to silence the alarm. RATEVOL.- 4. HOLD appears on the display. Electrical Safety Test Test the device leakage current and ground impedance in accordance with UL 544. Leakage current should not exceed 100 microamps. Ground impedance should be measured on the pump's door. If the device fails to meet these requirements, remove it from service, troubleshoot it in accordance with section 6 and repair it in accordance with section 4.5. NIKI V4 Operator’s Manual 46 Battery Test 1. With a pump running, unplug the device. No change in pumping should occur, the display will start blinking within a few seconds and the Charging led is off. The battery requires changing when LO BATT is displayed, (the pump will show 'Low Battery' on display and about to finish on the battery capacity screen) the audible alarm or alert is activated. 2. Connect the pump to an AC outlet. 1. If the device operates satisfactorily on battery power, plug the device back. Operation should continue without interruptions and the data on the display should become stable. , WARNING If the device does not operate on battery power, troubleshoot in accordance with section 4.4 and repair in accordance with section 4.5. Air Detection Test The NIKI V4 pump is designed to detect air bubbles passing through the set. The air bubble size detection is adjustable through the configuration option and is factory set to 50 micro liter (section 6). If pump fails to detect air remove it from service and troubleshoot it in accordance with section 4.4 repair and recalibrate in accordance with section 4.5. 1. Prime and load a standard administration set with one Y-site above the device. 2. Using a precise syringe, introduce an air bubble into the administration set through the Y-site above the pump, 110 micro liters. 3. Close the door and start the pump. When the intact air bubble reaches the air sensor, the following should occur: a. Air is displayed in the Message Display. b. The audible alarm is activated. c. The pump stops. d. If the pump does not alarm, verify that the air bubble did not break up before reaching the sensor and repeat the test. NIKI V4 Operator’s Manual 47 Pressure Detection Test Each pump is designed to detect an occlusion downstream of the pump. If a pump fails to detect a downstream occlusion, the device should be removed from service and repaired. Perform the following steps at room temperature to ensure proper operation of the downstream occlusion sensor. 1.Load and prime an administration set. 2. Start the pump at a rate of 125 ml/hr and run for 1 minute. 3.Fold and pinch the tubing just below the pump. The "HI PRSS" message for HIGH PRESSURE should appear on the display, the audible alarm should sound and the pump should stop. , WARNING: If the pump does not respond as described, remove the device from service. Troubleshoot in accordance with section 4.4 and repair in accordance with section4.5. Upstream Occlusion Test The device is designed to detect an occluded administration set. Perform the following steps to ensure the performance of the upstream occlusion sensor. 1. 2. 3. 4. Load and prime an administration set. Pinch off the tubing with a set clamp above the pump head. Set rate of 125 ml/hr and start the pump. Within 3 minutes the following should occur: a. The pump stops. b. The message AIR appears on the display. c. The audible alarm is activated. , WARNING: If these indications do not occur, remove the device from service. Troubleshoot in accordance with section 4.4 and repair in accordance with section 4.5. Charge Indicator Test 1. Disconnect the power cord from the AC power outlet. 2. Verify that the CHARGE indicator is off. After one second the display starts flashing constantly to indicate that the pump is operating on battery power. 3. Connect the power cord to the AC power outlet. Verify that the CHARGE indicator is on, and the display has stopped flashing. NIKI V4 Operator’s Manual 48 4.5.Corrective Actions Disassembly and Calibration This section of the manual includes a list of tools and test equipment required for maintenance, procedures for removing and replacing subassemblies once the causes of a malfunction after component or circuit board replacement. Detailed exploded views of the device are provided in Section 4.2. Tools and Test Equipment The following tools and test equipment is required to perform the procedures contained in this section. Since all fasteners on this device are metric, ensure that all tools used are for metric fasteners. Tightening torque on certain screws is specified in kg-cm and in lbs for your convenience. The values in lbs are approximate. Test Equipment Tools Digital Voltmeter Razor blade Oscilloscope Phillips screwdriver, M3 Electronic Scale Normal screwdriver, M3 Electronic load device or a fixed 5 ohm, Allen key 2.5 mm. 20W resistor with variable load Antistatic mat Antistatic work surface When receiving a pump for maintaining: Check the last 10 alarms on the biomedical mode (can be accessed using code 10). NIKI V4 Operator’s Manual 49 List of Decisions When receiving a NIKI V4 pump for service the first decision should be made either it’s a user mistake or pump malfunction. Secondly decide if the failure was caused by the pump or by the administration set. Than decide if it's a mechanical or an electronic problem. If the malfunction is an electronic one, check if it's in one of the sensors (air, pressure or motor), if one of the sensors failed replace the sensor. If the main PCB failed replace it. Act according to instructions detailed in Section 4.5. Decision Action 1.User mistake or pump malfunction. A user mistake – Re-explain the operating manual. 2.Failure caused by the pump or by the Check the administration set. administration set. 3.Mechanical or Electronic problem. Mechanical: Electronic: Check the sensors and replace if necessary. Recording the configuration option setting It is necessary to record the configuration option setting before beginning maintenance procedures so that the device can be reconfigured properly when maintenance is completed. * Caution: When the battery, EPROM's or a circuit card assembly (CCA) is disconnected or replaced, or calibrations performed, all the configuration options must be rest. 1. Turn on the pump. Enter the biomedical mode. 2. Record then prior to any maintenance actions. Press Run again, the display will show the total full hours. The pump was in operation, press Run again, the pump will display the last 10 alarms. Make a note of those alarms and try to define the direction of the malfunction. Disassembly / Assembly Disassembly of the NIKI V4 Volumetric Infusion Pump is limited to the mechanical components and CCA. It is recommended that electrical problem be corrected by replacing entire CCA unless circumstances warrant component repair. Use only the replacement parts list in Section 10. Pls. read all steps in the procedure before beginning. The procedures are given in order of disassembly. Disassembly the device only as far as required to complete repair. All fastening components such as screws, washers and nuts used in the device are metric. Make sure to use metric tools and replace only with metric components. NIKI V4 Operator’s Manual 50 * Caution: The device is sensitive to electrostatic discharge damage (ESD). Always wear a grounded wrist strap when performing maintenance on the device to prevent damage to components. , Warning: Always make sure the device is unplugged and that the pump is turned OFF before disassembling. Failure to do so can result in personal injury and / or damage to the device. Separation of Front and Rear Housing 1. Turn the device OFF and place it face down on an antistatic mat or work surface. Be careful not to lay the device face down on components (such as screws) which could damage the front panel. 2. Remove the 4 mounting screws which secure the rear housing to the front housing. 3. Stand the device and separate the front and rear housing (like opening a book). 4. While the device is open, disconnect connector JP1 and unscrew ground connection on the pumping block, for full separation of the front and rear housing. 5. Now the front and rear housing completely separated. Reassemble the housing in the following order: 6. Reconnect connectors JP1. 7. Plug power cord into an AC outlet and check that the Charging Led is lit. If not check for proper connection of connector JP1 or AC cable. 8. Switch pump ON and check that the self test is performed correctly. 9. Make sure the front and rear housing surfaces are flush before tightening. Replace 4 mounting screws (Fig.2) and tighten them to 9 kg-cm (8 in lbs) with a toque screwdriver. Replacement of Pump's Door 1. 2. 3. 4. 5. Remove the pump's door label (NIKI V4 – Volumetric Infusion Pump). Open the security screws. Open the door completely. With a thin screwdriver, push the 2 pins to the center. Reassemble the pump's door in reverse order. Replacement of Pump Assembly 1. Remove the pump's door cover (NIKI V4 – Volumetric Infusion Pump). 2. Remove the safety screws (S11 and S12) in the middle of the door while the door is closed. ) NOTE Do not open the door when S11 or S12 are half screwed as since the front housing may be damaged. 3. Open the pump door and remove the two shafts P1 and P2 which are connecting the door to the pump assembly. To remove the shafts use a thin screwdriver. 4. Remove flow direction label. 5. Remove S4, S5, S6, S7, Those 4 screws connect the pump assembly to the front part of the pump. NIKI V4 Operator’s Manual 51 6. Press down the "ears" of the pump assembly to disconnect. 7. Disconnect the motor sensor connector (JP1 and JP4) from the front PCB and the motor connector JP from the main PCB. 8. Reassemble the pump head assembly in reverse order. ) NOTE Observe not to pinch wires and gasket between the front housing and the pump assembly when reinstalling the pump assembly. 9. The four screws S5 – S7 must be tighten at a torque of 7kg. 10. Perform the operation checkout procedure of section 4.2. Remove of the Pressure Sensor 1. 2. 3. 4. 5. Remove pump's door in accordance with section 4.5. Remove pump's assembly in accordance with section 4.5. Remove screws S8, S10, S11, Removing the pressure sensor cover. Install replacement sensor and reassemble in reverse order. Perform the operation checkout procedure of section 4.2. Replacement of the Air Sensor 1. Replace the Air sensor: Front housing sensor: a. Door Sensor: Separate the front and rear part of the pump in accordance with section 4.5. b. Disconnect the Air sensor connector (JP5). c. Press on both sides of the sensor to release connection to the front housing. a. Open S11. b. Disconnect the Air sensor wire from connector JP5. c. Pull out the sensor. 2. Install replacement sensor and reassemble in reverse order. 3. Perform the Operation Checkout procedure of Section 4.2. Replacement of Pump Motor 1. 2. 3. 4. 5. Separate the front and rear housing in accordance with Section 4.5. Remove pump's door in accordance with Section 4.5. Remove pump's assembly in accordance with Section 4.5. Carefully place the pump assembly in a position when the motor plugs are up. Remove the connecting pin from the pulley on the motor shaft using a needle 1mm thin. 6. Remove the pulley from the motor's shaft. 7. Remove screws S12, S13, S14 which connect the motor to the pump assembly. 8. Install a new one in reverse order. Replacement of Press Plate 1. 2. 3. 4. 5. 6. Remove the pump's door in accordance with Section 4.5. Remove the two door shafts. Remove the Press Plate. Replace 3 springs to their place on the door. Install the new Press Plate inserting door shafts. Press the Press Plate a few times from the inside of the door to ensure smooth operation. NIKI V4 Operator’s Manual 52 7. Install the pump's door in accordance to Section 4.5. 8. Perform the operation checkout procedure of Section 4.2. Replacement of Battery 1. 2. 3. 4. 5. Turn of the device and separate rear from the front part in accordance with Section 4.5. Remove S25 battery pack holder. Remove the battery from its compartment disconnect JP. Compare Battery pack with figure 5. Install replacement battery pack and reassemble in a reverse order. * Caution: Be careful with the polarity of the wires. Red wires (+) must be connected to the red marked (+) battery terminal. The wires must be routed in the battery compartment so that they run alongside the battery strap closet of the battery terminal and pinch wires between the compartment and the cover. Perform the operation checkout procedure of section 4.2. Replacement of PCB board 1. 2. 3. 4. 5. Separate front and rear housing in accordance with Section 4.5. Remove the PCB holding screws (S22, S23). Disconnect JP1 front and rear housing connector, motor sensor, JP2 motor JP5. Install a new PCB by performing this procedure in reverse order Perform the operation checkout procedure of Section 4.2. Replacement of PCB Transformer 1. 2. 3. 4. Separate front and rear housing in accordance with Section 4.5. Remove connecting screws of rear PCB S31, S32. Replace the new PCB in a reverse order. Perform the operation checkout procedure of Section 4.2. NIKI V4 Operator’s Manual 53 Maintenance Flowchart Receive with suspected problem Perform operation checkout of section 4.5 Does Device perform Operational checkout Satisfactorily ? No Troubleshoot in accordance with section 5 Repair in accordance with section 6 Recalibrate in accordance with section 4.4 NIKI V4 Operator’s Manual 54 Yes Place device in service