1
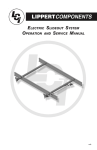
E������� ���� �����-��� ������
SERVICE MANUAL
Rev: 12.24.2014
Page 1
Electric Embedded Rack Slide-out System
TABLE OF CONTENTS
Safety Information
Product Information
Operation Extending Slide-Out Room
Retracting Slide-Out Room
Calibration and Programming
Instructions For Adjustment Of Room
Slide-Out Adjustment Diagram
Maintenance
Preventative Maintenance
Troubleshooting
Manual Operation
Troubleshooting Chart
Troubleshooting - Switch
Troubleshooting - Power Unit
Wiring Diagram
Embedded Rack Slide-out Assembly
Embedded Rack Slide-out Drive Components
Embedded Rack Slide-out Mechanical Components
Rev: 12.24.2014
Page 2
3
3
4
4
4
5
5
6
7
7
8
8
9
10
10
11
12
13
14
Electric Embedded Rack Slide-out System
Safety Information
Failure to act in accordance with the following may result in death or serious personal injury.
The Lippert Embedded Rack Slide-out System is intended for the sole purpose of extending and retracting
the slide-out room. Its function should not be used for any other purpose or reason than to actuate the
slide-out room. To use the system for any reason other than what it is designed for may result in death,
serious injury, or damage to the coach.
Before actuating the system, please keep these things in mind:
1.
2.
3.
4.
Parking locations should be clear of obstructions that may cause damage when the slide-out room is
actuated.
Be sure all persons are clear of the coach prior to the slide-out room actuation.
Keep hands and other body parts away from slide-out mechanisms during actuation. Death or severe
injury may result.
To optimize slide-out actuation, park coach on solid and level ground.
Product Information
The Lippert Embedded Rack Slide-out System is a rack and pinion style slide system. Utilizing a bidirectional electric motor to actuate the drive shaft, the slide-out room is extended and retracted from the
same source. The actuator has a built-in automatic clutching feature. The Lippert Embedded Rack Slide-out
System is designed as a negative or positive ground system.
Note: There are no serviceable parts within the electric motor. If the motor fails, it MUST be replaced.
Note: Disassembly of the motor voids the warranty.
Note: Mechanical portions of the slide-out system are replaceable. Contact Lippert Components, Inc. to
obtain replacement parts.
Rev: 12.24.2014
Page 3
Electric Embedded Rack Slide-out System
Operation
Failure to act in accordance with the following may result in death or serious personal injury.
Always make sure that the slide-out room path is clear of people and objects before and during
operation of the slide-out room.
Always keep away from the slide rails when the room is being operated. The gear assembly may
pinch or catch on loose clothing causing personal injury.
Install transit bars (if so equipped) on the slide-out room during storage and transportation.
Extending Slide-Out Room
1.
2.
3.
4.
5.
Level the unit.
Verify the battery is fully charged and hooked up to the electrical system.
Remove the transit bars (if so equipped).
Press and hold the IN/OUT switch (Fig. 1) in the OUT position (Fig. 1B) until the room is fully extended
and stops moving.
Release the switch, which will lock the room into position.
NOTE: If the slide-out switch is held after the room in fully extended, the control will sense that the room
has stopped and will shut off the motor after a few seconds.
Retracting Slide-Out Room
1.
2.
3.
Verify the battery is fully charged and hooked-up to the electrical system.
Press and hold the IN/OUT switch (Fig. 1) in the IN position (Fig. 1A) until the room is fully retracted and
stops moving.
Release the switch, which will lock the room into position.
NOTE: If the slide-out switch is held after the room in fully retracted, the control will sense that the room
has stopped and will shut off the motor after a few seconds.
4.
Install the transit bars (if so equipped).
Fig. 1
A
B
Rev: 12.24.2014
Page 4
Electric Embedded Rack Slide-out System
Calibration and Programming
Instructions For Adjustment Of Room
The Lippert Embedded Rack Slide-out System can be timed and fine-tuned for optimum performance. In the event
the travel of either side of this two-rail system should be out of time, follow this process for re-timing the slide-out
room.
Note: When addressing issues regarding your slide-out room, remember to relay the information from the
OUTSIDE of the coach. This note will help to standardize the information needed to be relayed to a
service station or technical service at LCI.
Timing Adapter - (Fig. 2A, next page)
1.
2.
3.
4.
5.
6.
7.
8.
9.
10.
Turn off engine (Class A and C motorhomes).
Disconnect battery or slide-out motor wire leads. (Only one of the motor leads need be disconnected.)
Remove nut (Fig. 2D) from bolt (Fig. 2B).
Remove bolt from Timing Adapter. This frees the Timing Adapter from the gear assembly drive shaft.
Rotate drive shaft towards outside of coach until the next set of holes on the Timing Adapter line-up.
Return bolt to Timing Adapter assembly in new location.
Return nut to bolt and snug firmly.
Reconnect motor wire or battery.
Draw room into coach.
Repeat process as needed.
Alignment Plate – (Fig. 2E, next page)
1.
2.
3.
4.
5.
6.
7.
8.
9.
Turn off engine (Class A and C motorhomes).
Disconnect battery or slide-out motor wire leads. (Only one of the motor leads need be disconnected.)
Loosen both nuts (Fig. 2D) from both bolts (Fig. 2C) on Alignment Plate.
This allows for a free rotation of Alignment Plate.
Rotate drive shaft towards inside of coach until room is in alignment from right to left.
Tighten nuts on bolts on Alignment Plate assembly in new location.
Reconnect motor wire or battery.
Draw room into coach.
Repeat process as needed.
During troubleshooting, remember that by changing, altering or adjusting one thing, it may affect
something else. Be sure any changes do not create a new problem.
Rev: 12.24.2014
Page 5
Electric Embedded Rack Slide-out System
Slide-Out Adjustment Diagram
Fig. 2
TIMING ADAPTER
1 / 4 - 20 - 1 5 / 16
A
B
1 / 4 - 20 - 3 / 4
DO NOT LOOSEN
D
B
C
E
D
ALIGNMENT PLATE
D
D
C
DO NOT LOOSEN
Rev: 12.24.2014
Page 6
Electric Embedded Rack Slide-out System
Maintenance
Preventative Maintenance
The Lippert Embedded Rack Slide-out System has been designed to require very little maintenance. To ensure the
long life of your slide-out system, read and follow these few simple procedures.
Do not work on your slide-out system unless the battery is disconnected. Failure to act in accordance
with the following may result in death or serious personal injury.
1.
2.
When the room is out, visually inspect the Inner (Fig. 3A) and Outer (Fig. 3B) Rail Assemblies. Check for
excess build-up of dirt or other foreign material; remove any debris that may be present.
If the system squeaks or makes any noises it is permissible to apply a coat of lightweight oil to the drive
shaft and roller areas but remove any excess oil so dirt and debris do not build-up. DO NOT use grease.
IF YOU HAVE ANY PROBLEMS OR QUESTIONS CONSULT YOUR LOCAL AUTHORIZED DEALER OR CALL
LIPPERT AT: (866) 524-7821.
Fig. 3
B
A
Rev: 12.24.2014
Page 7
Electric Embedded Rack Slide-out System
Troubleshooting
The Lippert Embedded Rack Slide-out System is only one of four inter-related slide-out room system components.
These four components are as follows: chassis, slide-out room, coach and Lippert Embedded Rack Slide-out System.
Each one needs to function correctly with the others or misalignment problems will occur.
Every coach has its own personality and what may work to fix one coach may not work on another, even if the
symptoms appear to be the same.
When something restricts room travel, system performances will be unpredictable. It is very important that slide
rails, inner and outer, be free of contamination and allowed to travel freely the full distance. Ice or mud build-up
during travel is an example of some types of contamination that may occur.
When beginning to troubleshoot the system, make sure the battery is fully charged, there are no visible signs of
external damage to the actuator, motor or rails, and that the motor is wired properly and all connections are secure.
If you have any problems or questions consult your local authorized dealer or call lippert at: (866) 524-7821.
Manual Operation
The gears can be stripped out if the room is manually retracted/extended to its fullest extent and the
operator continues to rotate manual override. Any damage due to misuse of the manual override
feature will disqualify any and all claims to the Limited Warranty.
Fig. 4
9 / 16" Manual Override Hex Coupler
1.
2.
3.
4.
Prior to Manual Operation, be sure to clear any obstruction from the slide-out area that may impede
the extension or retraction of the slide-out room, including any transit bars.
Locate Slide-out Motor under coach.
Fit a 9⁄16” socket and ratchet, 9⁄16” open end wrench or a 9⁄16” nut driver and power drill, on the manual
drive coupler (Fig. 4).
By rotating coupler in a clockwise direction, the slide-out room can be retracted. By rotating the
coupler in a counter-clockwise direction, the slide-out room can be extended.
NOTE: Remember to replace transit bars (if equipped) before moving the coach.
Page 8
Rev: 12.24.2014
Electric Embedded Rack Slide-out System
Troubleshooting Chart
What Is Happening?
Room doesn't move when
switch is pressed.
Power unit runs but room does
not move.
Power unit runs but room
moves slowly.
Why?
Restriction or obstruction inside
or outside of unit.
Low battery voltage, blown fuse,
defective wiring.
Excessive room drag.
Motor turns, room does not
move.
Broken gear on drive shaft.
Broken gear in gear box.
Bad motor or gearbox.
Low battery, poor ground,
extremely low temperature.
Room in bind.
Incorrect height adjustment.
Low battery voltage, blown fuse,
defective wiring.
Room starts to move and stops.
Obstruction of room inside or
outside.
Dirt or corrosion build up on
mechanism.
Teeth on gear drive broken or
Room chatters during operation. worn.
Teeth on inner rail broken.
What Should Be Done?
Check for and clear obstruction.
Check battery voltage and charge if
needed.
Find and check fuse and replace if blown.
Check battery terminals and wiring. Look
for loose, disconnected or corroded
connectors.
Check that transit bars are removed.
Gear key is broken or lost. Replace gear
drive assembly.
Replace gear drive assembly.
Replace motor/gearbox assembly.
Replace motor/gearbox assembly.
Charge battery, check ground wire.
Adjust to proper room setting.
Check for proper room height.
Check battery voltage and charge if
needed.
Find and check fuse, replace if blown.
Check battery terminals and wiring. Look
for loose, disconnected or corroded
connectors.
Check for and remove any obstruction.
Clean dirt or corrosion and coat LIGHTLY
with oil.
Replace gear drive assembly.
Replace inner rail assembly.
Note: If the slide-out room will not retract, there is a manual override that is located on the motor. Once
you have the room in the closed position take your unit to the closest dealer. See page 8 for
Manual Overide Instructions.
Rev: 12.24.2014
Page 9
Electric Embedded Rack Slide-out System
Troubleshooting - Switch
1.
2.
3.
If room moves opposite from what the switch plate indicates, reverse the motor wires on the back of
the switch (refer to the wiring diagram page 11). Wire size MUST be 10ga. min.
If a gear is stripped, the entire gearbox MUST be replaced.
If the room does not seal fully, refer to the Troubleshooting Chart.
Troubleshooting - Power Unit
Before attempting to troubleshoot the Power Unit, make sure an adequate power source is available. The unit
batteries should be fully charged or the unit should be plugged into to A/C service with batteries installed. Do not
attempt to troubleshoot the Power Unit without assuring a full 12V DC charge.
The following tests require only a DC voltmeter (or DC test light) and a jumper lead.
Step 1. Attach voltmeter (or test light) leads to the negative and positive switch terminals on back of wall
switch (See Fig. 5). Does the meter indicate 12V DC? If YES, see Step 2; if NO, see Step 3.
Step 2. If YES, at the motor, check the incoming leads to 12V DC (if necessary, disconnect leads at wire
splices). Does meter indicate 12V DC? If YES, Power Unit needs to be replaced. The motor is not
field serviceable. DO NOT ATTEMPT TO REPAIR. If NO, inspect all wires and connections between
the wall switch and the motor. Repair connections as necessary. Recheck as in Step 1.
Step 3. If NO, inspect all connections between battery and switch. Inspect 30A Auto-reset Circuit Breaker
(See Fig. 5 for location). Recheck as above in Step 1.
Since there are no field serviceable parts in the motor of the Power Unit, electrical troubleshooting and service is
limited to replacing only those components as previously outlined. Thorough inspection of wiring and connections
is the only other electrical service that can be performed.
Rev: 12.24.2014
Page 10
Electric Embedded Rack Slide-out System
Wiring Diagram
Fig. 5
BATTERY
MOTOR
30A AUTO RESET BREAKER
SWITCH
NOTE: 10 GAUGE WIRE MINIMUM
Rev: 12.24.2014
Page 11
Electric Embedded Rack Slide-out System
EMBEDDED RACK SLIDE-OUT ASSEMBLY
SLIDE-OUTS
Mechanical Stop Detail
Retract Stop
Outer Arm
Extend Stop
Cross Shaft
Motor Coupler
Inner
Arm
Extend Stop Assembly
Motor
Motor Mounting Plate
Timing Disk
Gear Pack Detail
Outer Arm
Wear Tab
Inner Arm
Retract Stop
Rear Roller
Cross
Shaft
Rev: 12.24.2014
Spur Gear
Page 12
Electric Embedded Rack Slide-out System
EMBEDDED RACK SLIDE-OUT DRIVE COMPONENTS
SLIDE-OUTS
B
A
C
D
E
G
F
Callout
A
B
C
D
E
F
G
Rev: 12.24.2014
Part #
173068
101258
117916
140418
166045
166046
115512
105481
Description
Venture Motor M-9600A
Motor Mounting Plate
¼" - 20 x ¾" Hex Flange Bolt (for Motor Mounting Plate)
Gear Pack Assembly
Cross Shaft Kit 35" / 32" (Includes F and G)
Cross Shaft Kit 40" / 38" (Includes F and G)
Timing Adjustment Coupler
Timing Adjustment Disk
Page 13
Electric Embedded Rack Slide-out System
EMBEDDED RACK SLIDE-OUT MECHANICAL COMPONENTS
SLIDE-OUTS
A
B
D
C
G
E
F
H
J
I
Callout
A
B
C
D
E
F
G
H
I
J
Rev: 12.24.2014
Part #
157649
157650
115634
100154
118151
119125
118647
104469
103480
100831
Description
Outer Arm
Inner Arm with Gear Rack
Extend Stop
Stop Block
Stop Bolt (3⁄8" - 16 x 4")
Stop Nut (3⁄8" - 16) (Also used with Front Stop Bolt)
Front Stop Bolt (3⁄8" - 16 x 2")
Rear Roller
Wear Tab
Wear Tab
Page 14
Electric Embedded Rack Slide-out System
The contents of this manual are proprietary and copyright protected by Lippert Components, Inc. (“LCI”). LCI prohibits the copying or dissemination of portions of this manual unless prior written consent from an
authorized LCI representative has been provided. Any unauthorized use shall void any applicable warranty. The information contained in this manual is subject to change without notice and at the sole discretion of LCI. Revised editions are available for free download from www.lci1.com.
Please recycle all obsolete materials.
For all concerns or questions, please contact
Lippert Components, Inc.
Ph: (574) 537-8900 | Web: www.lci1.com | Email: [email protected]
Rev: 12.24.2014
Page 15
Electric Embedded Rack Slide-out System