1
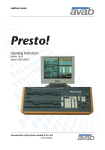
Technical Services Guide to Congo Service Manual Revision A C o p y r i g h t © 2 0 0 8 E le c tr o n i c T h e a t r e C o n t r o l s , I n c . All Rights reserved. P r o d u c t in f o r m a t i on a n d s p e c i f i c a t i o n s s u bj e c t t o c h a n g e . P a r t N u m b e r : None R e v A Released: May 2008 ET C ®, E m p h a s i s ™ , E x p r e s s i o n ®, I n s i g h t ™ , I ma g i n e ™ , F o c u s ™ , E x p r e s s ™ , U n i s o n ®, O b s e s s i o n ® I I, E T C N e t2 ™ , E D M X ™ , S o u r c e F ou r ®, R e v o l u ti o n ™ , S e n s o r ®, a n d W Y S I L i n k ™ a r e e i th e r r e g i s t e r e d tr a d e m a r k s o r t r ad e m a r k s o f E l e c t r o n i c T h e a t r e C o n t r o l s , I n c . i n t h e U n i t e d S ta t e s a n d o t h er c o u n t r i e s . T he n a m e W Y S I W Y G ™ i s a t r a d e m a r k of C A S T L i g h t i n g L im i t e d . M i c r o s o f t ® a n d W i n d o w s ® a r e r e g i s t e r e d t r a d e ma r k s o f M i c r o s o f t C o r p or a t i o n in t h e U n i t e d S t a t e s a n d ot h e r countries. D e l l ® i s a r e g i s t e r e d tr a d e m a r k o f D e l l C o m p u t e r C o r p o r a ti o n . H P a n d C o m p a q a n d t h e n a m e s o f H P a n d C o m p a q p r o d u c t s r e f e r e n c e d h er e i n a r e e i t h e r t r ad e m a r k s a n d / o r s e r v i c e m a r k s o r r e g i s te r e d t r a d e m a r k s a n d/ o r s e r v i c e m a r k s o f H P a n d / o r i t s s u b s i d i a r i e s . A u t o d e s k ® a n d A u t o C A D ® a r e r e g i s t e r e d t r a d e m a r k s o f A u t o d e s k , I n c . , i n t h e U n i t e d S t a t es a n d o t h e r c o u n t r i e s . A l l o t h e r t r a d em a r k s , b o t h m a r k e d a n d n o t m a r k e d , a r e th e p r o p e r t y o f t h e i r r e s p e c t i v e o w n e r s . Table of Contents How it fits into ETC . . . . . . . . . . . . . . . . . . . . 1 A brief history . . . . . . . . . . . . . . . . . . . . . . . . . . . . . . . . . . . . . . .1 So how does Congo fit in? . . . . . . . . . . . . . . . . . . . . . . . . . . . . .2 Hardware History . . . . . . . . . . . . . . . . . . . . . 3 Bottom Tray: . . . . . . . . . . . . . . . . . . . . . . . . . . . . . . . . . . . . . . . .3 Facepanel: . . . . . . . . . . . . . . . . . . . . . . . . . . . . . . . . . . . . . . . . . .5 Congo Power Supply Cable Upgrade Kit Service Note . . . . . . . .7 Congo Power Supply Configuration Service Note . . . . . . . . . . .13 Congo First Generation Processor Tray . . . . . . . . . . . . . . . . . .19 Congo First Generation Facel Panel PCBs . . . . . . . . . . . . . . . .20 Congo Hardware Notes . . . . . . . . . . . . . . . . . . . . . . . . . . . . . . .21 Software Releases . . . . . . . . . . . . . . . . . . . 23 Troubleshooting . . . . . . . . . . . . . . . . . . . . . 25 Congo Console: . . . . . . . . . . . . . . . . . . . . . . . . . . . . . . . . . . . . .25 Congo JR. . . . . . . . . . . . . . . . . . . . . . . . . . . . . . . . . . . . . . . . . .27 Universal Problems:. . . . . . . . . . . . . . . . . . . . . . . . . . . . . . . . . .28 Congo Tips and Tricks . . . . . . . . . . . . . . . . 29 Commonly Used Programming Commands . . . . . . . . . . . . . . .29 Congo 5.0 Local Serial Commands . . . . . . . . . . . . . . . . . . . . . .34 Congo 5.0 Network Serial Commands . . . . . . . . . . . . . . . . . . .35 Congo 5.0 Network Relay Commands . . . . . . . . . . . . . . . . . . .36 Congo - Receiving Relay Commands . . . . . . . . . . . . . . . . . . . .37 Congo – Facepanel Firmware Update. . . . . . . . . . . . . . . . . . . .38 Congo – Re-image HD Instructions . . . . . . . . . . . . . . . . . . . . . .40 Congo – Across a Routed Network . . . . . . . . . . . . . . . . . . . . . .43 i ii Technical Services Guide to Congo Chapter 1 How it fits into ETC At first glance many ETC customers said “What happened?” “Where did this come from?” “This is not the ETC I know.” When Congo came on the scene at ETC it was a mystery to many longtime ETC customers. Congo was also a lost mystery to many long time ETC employees. When Congo came on the scene, ETC was a mystery to many customers long steeped in using AVAB desks. What would ETC do now that it had acquired the AVAB brand and existing product range? Would they pollute the strong heritage of the AVAB desks in use all over Europe? It’s fair to say that neither the ETC heritage nor the AVAB heritage is the same today as it was “before” – both have grown as a result of the union. A brief history The AVAB range of controls was acquired by Transtechnik Licht systems in the early 1990’s when the manufacturing arm of AVAB was broken up and sold off. While TT had a successful range of controls products, they were focused primarily on the top end customers in German television, theatre and opera. Transtechnik saw the AVAB control line as a way to extend their range of high end controls equipment into a more broadly accepted pan-European product range. In the following years they introduced 2 new products – the Presto console and later the Pronto console. While these products were widely accepted alongside the already popular Safari control system, TT had struggled to fully fund the costs of such RD projects and lots of issues were uncovered with quality, time to market etc. For many years the brand struggled – while the user base, especially strong in France and Scandinavia, remained ever loyal, if not frustrated. When ETC acquired TT in 2003 the future of the AVAB product line remained unclear for some time. The decision to acquire Transtechnik had nothing at all to do with the AVAB products. A survey of the market and the “AVAB intellectual property” revealed that there was still substantial equity in the product line, the existing customer base and the heritage of the systems. This heritage included the AVAB controls concepts and software – as well as the lead AVAB software developer Anders Ekvall. The AVAB customer and dealer base were demanding a new range of products from ETC that were true to the AVAB style. Strong advocates like Jean Louis and Christian from ATF and Goran Boklund from AVAB Scandinavia made it clear that our choice was not whether or not to create the products – but how we would do it. “Longtime AVAB software developer Anders Ekvall – along with his creative team Ulf Sandstrom, a former AVAB employee now on his own, and a newer team member Bullen Lagerbielke were emphatic that they could design a new console that would meet the needs of the AVAB customers if ETC would fund the project properly, allow them to build a full team, and give them enough free reign to get it done. We decided to trust them and I am very glad we made that decision.” – David Lincecum The decision to build Congo was controversial at ETC. We were deep into the EOS development program already and that program was to be the base for a new range of ETC controls. We had a lot riding on the EOS development. Congo was initially seen as a way to retain the AVAB customer base and grow our sales in Europe. It’s no secret that control sales drive the sales of dimming, fixtures and networking equipment and we saw Congo as a way to attract more customers to the whole ETC line. That strategy is working – but we also gained far more from the project. 1 How it fits into ETC 1 Slowly but surely we allowed the progress the Congo team was making to infuse and change what we were doing in other areas. We adopted some Congo concepts for our existing Emphasis control line and eventually some made their way into EOS as well. We made another decision – not without some controversy within ETC – to introduce Congo into the North American ETC market. “Over time we recognized that our customers ideas about how lighting control was ‘supposed to work’ were actually more flexible than our own. It became clear to that the Congo concepts – while very different from the core ETC philosophies – would find a niche in North America and that has proven to be the case.” -David Lincecum In many senses the Congo project was more than just development of a new product. It marked the beginning of a change in ETC culture. The change included leading our employees and customers away from a “not invented here” syndrome, a terrible fog that permeates almost every company, and toward a message that says something like “look what we can accomplish when we open our thinking up to new ways.” It so happened that this was occurring at the same time as everyone at ETC was trying to deal with the ‘change management’ that occurs after an acquisition and I think that the Congo project helped the whole company through that change. Even as we kicked off Congo, Adam Bennette started development of the Smartfade console – using Anders from Sweden to do software development and Michael Lichter from our German office to do hardware development, again breaking the established norms at ETC. These events were only a small part of the whole integration to “The New ETC” but they were important catalysts. S o h o w d o e s C o n g o fi t i n ? ETC is now offering its customers a choice of how they will work. There are many significant differences in Congo and EOS – hardware, software and so on – but the biggest single difference is the syle with which the operator, designer and crew interface to the lighting control system. While both systems control everything from dimmers to media servers – they simply approach the challenges differently. This changes the sales process and the buying process. Some people gravitate naturally toward one platform while other customers have been surprised to find themselves “crossing over.” Our highest sales of Congo are in France – but a close second is the UK – which was unexpected. Much of that can be attributed to ETC Associate regional manager Jeremy Roberts who took an instant liking to the console and has done a great job of teaching his customers why he likes it. Congo and EOS make a powerful team for ETC and its customers. “I was approached by a customer at Plasa last year who was bemoaning the fact that he could not decide whether to buy a Congo or the EOS console. He said his production team was split over the 2 desks. For ETC that is a big win. The customer was not choosing between ETC and another manufacturer, but shopping inside of the ETC product line for the solution.” - David Lincecum The ETC mission statement says we should ‘give our customers more than they expect.’ This implies that we must give the ‘what they expect.’ To many traditional ETC customers, Congo, alongside EOS, is more than they would expect from ETC. To the newer ETC customers that may have been longtime AVAB customers, EOS alongside of Congo, may be more than they expect. 2 Technical Services Guide to Congo Chapter 2 Hardware History Since Congo started shipping in 2004, there have been 3 major hardware changes. All of these changes have had to do with the bottom tray. The face-panel has remained the same since the console’s inception, with exception to several key cap changes. Bottom Tray: 1 st G e n e r a t i o n B o t t o m T r a y D e s i g n : This design of the bottom tray includes a power supply at the far right as well as a battery backup. The battery backup is not intended to keep the console up and running indefinitely. It’s purpose is to keep the console up long enough for the software to recognize the power has been lost and for the show file to be saved internally on the Hard Drive to prevent the loss of show data. Old Power Switch: 2 nd G e n e r a t i o n B o t t o m T r a y D e s i g n : The second bottom tray design includes the power supply moved to the left side of the console eliminating the 20 pin ATX 30” custom cable that ran from the power supply on the right to the motherboard on the left. After the power supply was moved to the left side of the console, the Floppy disk drive was removed to make room for the power supply. Most Congo users at the time had moved away from floppy disk storage to USB external media storage. If a customer still wishes to use a floppy disk it is possible through the use of an external USB floppy disk drive. When moving to this design of bottom tray we also changed the power switch. The power toggle switch was removed and replaced by a momentary power button. This power button acts as a soft power button allowing the user to force the 2 Hardware History 3 console off if this button is depressed for about 5-8 seconds. New Power Switch: 3 rd G e n e r a t i o n B o t t o m T r ay D e s i g n : The third bottom tray design replaces the old power supply with a newer power supply that has a larger fan and provides much quieter operation. When this power supply was replaced, the decision was made to remove the battery backup. The battery backup was replaced with a DVD drive for re-imaging the hard drive. A DVD is provided in the console for re-imaging purposes. 4 Technical Services Guide to Congo Facepanel: There are 4 major components to the facepanel. The Upper Master Section Lower Master Section Moving Light Section Function/Navigation Section Upper Master Section: This section of the facepanel has control over 2 LCD Screens, the 5 pages of Direct Selects, and control over masters 21-40. Lower Master Section: This section of the facepanel has control over 2 LCD Screens, and the lower masters 1-20. 2 Hardware History 5 M o v i n g L i g h t S e c t i o n: This section of the facepanel has control over 1 LCD Screen, 4 encoder wheels, the independent section as well as the Grand Master function. Function/Navigation Section: This section of the facepanel has control over 2 small LCD screens, the numerical keypad, as well as main playback functions of the desk. 6 Technical Services Guide to Congo ETC® Service Note C o n g o ™ P ow e r S u p p l y C a b l e U p g r a d e K i t Overview Co ngo Power Supply Cable Upgrade Kit Ser vice Note The Congo™ Power Supply Cable Upgrade Kit provides a new set of power looms for reliable improvement to Congo’s operation. Upgrade Kit Contents Qty Description Part Number 1 Supply cable loom #1 (20 core) 7310B7003 1 Supply cable loom #2 (4 core) 7310B7004 1 Reset / LED cable loom (4 core) 7310B7005 2 Standoff M3 x 6mm HWM1257 1 Cable tie adhesive pad HW7166 15 Cable tie HW7174 1 Silicone n/a 1 Reset Label 7310A4024 1 Congo Power Supply Cable Upgrade Kit Service Note 7310M3300 1 Congo Power Supply Configuration Service Note 7310M3301 Tool Requirement The following tools may be required, but not supplied, for this Power Supply Cable Upgrade Kit. • pozi or philips screwdriver #1 • wire cutters • nut spinner (metric 7mm) or adjustable wrench Upgrade Procedure WARNING: Step 1: Disconnect mains power before opening the console! Open the Console for service. a: Quarter turn the two quick release latches on the bottom of the console. b: Lift the console facepanel. Corporate Headquarters 3031 Pleasant View Road, P.O. Box 620979, Middleton, Wisconsin 53562-0979 USA Tel +608 831 4116 Fax +608 836 1736 London, UK Unit 26-28, Victoria Industrial Estate, Victoria Road, London W3 6UU, UK Tel +44 (0)20 8896 1000 Fax +44 (0)20 8896 2000 Rome, IT Via Ennio Quirino Visconti, 11, 00193 Rome, Italy Tel +39 (06) 32 111 683 Fax +39 (06) 32 656 990 Holzkirchen, DE Ohmstrasse 3, 83607 Holzkirchen, Germany Tel +49 (80 24) 47 00-0 Fax +49 (80 24) 47 00-3 00 Hong Kong Room 605-606, Tower III Enterprise Square, 9 Sheung Yuet Road, Kowloon Bay, Kowloon, Hong Kong Tel +852 2799 1220 Fax +852 2799 9325 Service: (Americas) [email protected] (UK) [email protected] (DE) [email protected] (Asia) [email protected] Web: www.etcconnect.com Copyright © 2005 ETC. All Rights Reserved. Product information and specifications subject to change. 7310M3300 Rev B Released 12/2005 Con go ™ Power Supp ly Up gr ad e Kit Ser vi ce Not e Pa ge 7 of 12 El ect r on ic T he at r e Con t ro ls , I nc . ETC Service Note Congo™ Power Supply Cable Upgrade Kit Step 2: Open the EMC cage lid (open only the lid, do not remove the EMC cage). a: Utilizing the screwdriver, remove the 11 screws securing the EMC cage lid. Step 3: Unplug and remove the power supply cable looms. a: Remove only the cable ties securing the power supply cable looms in place. b: Remove the cable ties securing the Reset/LED cable loom in place. c: Remove the power supply cable looms from the enclosure. Unplug cable looms Step 4: Install the new power supply cable loom #1, provided in the Upgrade Kit. a: Connect the supply cable loom #1 between the power supply connector and the main board power connector. b: Route the cable loom through the opening of the EMC cage. Note: Be careful to retain the grommet in place around the metal edge of the EMC cage. Con go ™ Power Su pp ly Up gr ad e Kit Ser vi ce Not e Pa ge 8 of 12 El ect r on ic T he at r e Con tr o ls , I nc. ETC Service Note Congo™ Power Supply Cable Upgrade Kit Step 5: Install the new power supply cable loom #2, provided in the Upgrade Kit. male female 1 Hard Drive Power PC Supply female 2 ATX 12V Power EMC Cage female 3 VGA Card Power female 4 Floppy Disk a: Connect the power supply cable loom #2 to the power supply. b: Connect the first female connector to the hard-disk connector. c: Route the cable through the opening of the EMC cage. Note: Be careful to retain the grommet in place around the metal edge of the EMC cage. d: Connect the second connector to the main board 12V extension. e: Connect the third connector to the VGA card extension. f: Route the cable through the opening of the EMC cage. Note: Be careful to retain the grommet in place around the metal edge of the EMC cage. g: Connect the fourth female connector to the floppy disk drive. Step 6: Install the Reset / LED cable loom provided in the Upgrade Kit. a: Disconnect the existing Reset / LED cable loom connected between the transition board and the main processor board. Note: The Reset / LED loom is a 4 wire assembly (yellow/red/brown/orange). b: Connect the new Reset / LED cable loom to J11 of the transition board 4250B5008. This is the connector next to the USB ports. CAUTION: connect here Do not connect to the headers near the edge of the board, example J7 / J12. System damage will occur. Con go ™ Power Su pp ly Up gr ad e Kit Ser vi ce Not e Pa ge 9 of 12 El ect r on ic T he at r e Con tr o ls , I nc. ETC Service Note Congo™ Power Supply Cable Upgrade Kit c: Route the Reset / LED cable loom through the back hole of the EMC cage. step 6.c d: Mate connector A (yellow and orange cable) to pins 1 and 3 of connector “front panel”. The yellow cable should be on pin 1 (facing left as shown below). e: Mate connector B (red and brown cable) to pins 6 and 8 of connector “front panel”. The red cable should be on Pin 6 (facing left as shown below). f: Secure connector A and connector B in place with a drop of silicone. connector B connector A Step 7: Secure the power cable loom. a: Add the self adhesive cable tie pad near the power cable inlet of the EMC cage. b: Tie down the cable loom to this pad so that the cable is free of touching the memory module and all other internal components. Step 8: Secure the hard drive and floppy drive cable loom connectors with silicone. a: Add a strip of silicone on the hard drive and floppy drive cable connectors. Silicone here Con go ™ Power Su pp ly Up gr ad e Kit Ser vi ce Not e Pa ge 1 0 of 12 El ect r on ic T he at r e Con tr o ls , I nc. ETC Service Note Congo™ Power Supply Cable Upgrade Kit b: Add a strip of silicone at the hard- and floppy-drive cable connection, to secure the connectors in their sockets. Silicone here Step 9: Close the EMC cage lid and reinstall the 11 screws removed in Step 2. Step 10: Replace the two mounting screws located underside the facepanel with two M3 x 6mm standoffs. Standoff’s here Con go ™ Power Su pp ly Up gr ad e Kit Ser vi ce Not e Pa ge 1 1 of 12 El ect r on ic T he at r e Con tr o ls , I nc. ETC Service Note Congo™ Power Supply Cable Upgrade Kit Step 11: Un-mount the power supply by loosening the self locking nuts. a: Locate the connector of the user interface (facepanel) power. b: Unplug this connector and plug it into the direct power supply cable loom. Reference the graphic below for clarification. Self locking nuts I/O Board 5V / 12V User Interface (Face Panel) Move connector here! Power Supply 5V / 12V Transition Board (USB Hub) Central Processing Unit Step 12: Close the console facepanel and secure it with a quarter turn of the quick release latches. Note: The console should automatically boot when power is applied. In the unlikely event that a console does not start after mains supply is applied, it is possible to start the console by pressing the Reset button. The Reset button functions slightly different than before this upgrade. • To reset the console, hold the Reset button for more than 5 seconds. This will shut down the console. • To re-start the console after the above step, press the reset button once. This will power up the console again. Step 13: Locate the Reset label from the upgrade kit and place it on the rear panel of the Congo console in the location indicated in the graphic below. Place label here LABEL Step 14: Re-Configure the UPS service Power fail Options Configuration. a: Reference the “Congo Power Supply Configuration Service Note” for instructions. Con go ™ Power Su pp ly Up gr ad e Kit Ser vi ce Not e Pa ge 1 2 of 12 El ect r on ic T he at r e Con tr o ls , I nc. ETC® Service Note Congo Power Supply Configuration Overview Co ngo Power Supply Conf iguration Service Not e Currently the Congo power supply will start to shut down the system at any short power interruption. With the settings detailed below, the console will keep working for 2 minutes before it initiates the shutdown. Additionally it will not shut-down if power is re-applied within 2 minutes. Procedure Step 1: At the Congo logon disk, navigate to the "Settings" option with the arrow keys and press MODIFY. Step 2: In the system settings dialog, click the "advanced settings" button. Corporate Headquarters 3031 Pleasant View Road, P.O. Box 620979, Middleton, Wisconsin 53562-0979 USA Tel +608 831 4116 Fax +608 836 1736 London, UK Unit 26-28, Victoria Industrial Estate, Victoria Road, London W3 6UU, UK Tel +44 (0)20 8896 1000 Fax +44 (0)20 8896 2000 Rome, IT Via Ennio Quirino Visconti, 11, 00193 Rome, Italy Tel +39 (06) 32 111 683 Fax +39 (06) 32 656 990 Holzkirchen, DE Ohmstrasse 3, 83607 Holzkirchen, Germany Tel +49 (80 24) 47 00-0 Fax +49 (80 24) 47 00-3 00 Hong Kong Room 605-606, Tower III Enterprise Square, 9 Sheung Yuet Road, Kowloon Bay, Kowloon, Hong Kong Tel +852 2799 1220 Fax +852 2799 9325 Service: (Americas) [email protected] (UK) [email protected] (DE) [email protected] (Asia) [email protected] Web: www.etcconnect.com Copyright © 2005 ETC. All Rights Reserved. Product information and specifications subject to change. 7310M3301 Rev A Released 12/2005 Con go Po we r Su ppl y Con fi gu r at io n Ser vi ce No te Pa ge 1 3 of 18 El ect r on ic T he at r e Con t ro ls , I nc . ETC Service Note Congo Power Supply Configuration Service Note Step 3: In the Browser view, click the "up" icon. Step 4: In the Control panel view, double-click the Power Options icon. Con go Powe r Sup pl y Con fi gu r at io n Ser vi ce Not e Pa ge 1 4 of 18 El ect r on ic T he at r e Con tr o ls , I nc. ETC Service Note Congo Power Supply Configuration Service Note Step 5: Click the UPS tab. Step 6: Click the Select button Step 7: Click the Next button. Con go Powe r Sup pl y Con fi gu r at io n Ser vi ce Not e Pa ge 1 5 of 18 El ect r on ic T he at r e Con tr o ls , I nc. ETC Service Note Congo Power Supply Configuration Service Note Step 8: Step 9: Enable the Low Battery checkbox, and click the "Negative" radio button. Your configuration dialog settings should look like the ones in the picture. After all settings are correct, click on the "Finish" button. Step 10: Click the "Configure" button. Con go Powe r Sup pl y Con fi gu r at io n Ser vi ce Not e Pa ge 1 6 of 18 El ect r on ic T he at r e Con tr o ls , I nc. ETC Service Note Congo Power Supply Configuration Service Note Step 11: Enable the "Minutes on battery before critical alarm:" checkbox and set it to 2 minutes. Step 12: Click "OK" button once the UPS Configuration dialog looks similar to this one. Step 13: After all of the above steps are done, click on the "OK" button, close down the control panel and exit out of the Congo system settings dialog. Con go Powe r Sup pl y Con fi gu r at io n Ser vi ce Not e Pa ge 1 7 of 18 El ect r on ic T he at r e Con tr o ls , I nc. ETC Service Note Congo Power Supply Configuration Service Note Con go Powe r Sup pl y Con fi gu r at io n Ser vi ce Not e Pa ge 1 8 of 18 El ect r on ic T he at r e Con tr o ls , I nc. Congo Processor Tray Congo First Generation Processor Tray Congo First Generation Processor Tray - Page 19 Congo Face Panel PCBs Congo First Generation Facel Panel PCBs Congo First Generation Face Panel - Page 20 Congo Hardware Notes Hardware Notes Monitors: ¾ You must always have a monitor plugged into Port #1, Login screen, and the browser docks on only monitor #1. ¾ Monitor Arms can only support a 15” or smaller monitor. This arm uses the Industry standard mounting holes (Vesa Mount) IO & Indicators: ¾ 2 DMX outs. 2 led indicators indicate that there is dmx going out of the port (Sensing post driver chip indicating the chip is good) ¾ Spare DMX driver Chips? There are no spare chips. You can remove the driver chips from the RFU Line (2 chips just to the right of the DMX driver chips [75176]) ¾ Midi In/Out. LED indicators show that packets are being sent/received. ¾ Reset Button is for the PC motherboard. This button will not reset the transition, FP, and IO board. ¾ Each of the Main boards: IO Board, FP Board, & Transition Have a green heart beat LED. There is another LED indicator next to each USB port indicating there is a USB connection and they blink at least 3 times per second as an indication they are communicating with the Motherboard. ¾ The FP Board has an orange LED (VD3) that will blink when a button, slider, or knob has been moved. Test Applications: ¾ To enter test menus of the FP you will need to hold down the [?] button on boot. This will bring you to a SW version screen on the ML LCD Screen. To move on to each test you will need to press the [?] then to modify a test press [Modify] All that is needed to perform this test is 5v, Central processor is not needed. ¾ Testing applications: o SW indication o Speed wheel calibration o LED test o Character LCD Line test o Vertical line test o Horizontal line test o BMP test o Load Boot loader yes/no Updating Firmware: ¾ To load new code there are 3 ways to force each of the boards (FP CPU & IO CPU) into the code-loading mode. o On console boot enter the test menu and get to the load boot loader Yes/No menu. Press [modify] then [?] It will then listen for code for the next 1-2 min, then will time out and go back the test application. When loading the code for IO CPU removes the USB cable from the FP CPU. When loading code for the FP CPU removes the USB cable from the IO CPU. o Use the application Boot loader force application to send a packet to the FP CPU to say ”Listen now for Boot loader code.” After this application has been launched, open the code loader and wait for the connection and send the proper code. Do the same for the IO CPU. o Lastly, you can jumper pins 9 & 10 on the X22 connection to force the board to listen for code. ***Use this as a last resort*** Page 1 of 2 Congo Hardware Notes - Page 21 Congo Hardware Notes Rev C 9/06/05 Hardware Notes Peripherals: ¾ Expression 2 Style remote focus unit. ¾ Midi time code is not yet implemented. Midi show control follows the standard ¾ Ethernet connection w/ LED’s indicating a connection and a high speed connection ¾ 4 USB connections for flash drives, keyboards and mice. CDR/W drives & printers are not supported. Printing is to file that can be taken off to a USB drive, and printed externally. ¾ Phone remote o Console can be a telephone connected to an external switchboard o Console can also act as a switchboard with standard Analog style telephones connected to it. ¾ You will need to connect the console to the switchboard/telephones before the console is connected so the console can determine if it needs to supply power to the phones or if it is connected to an existing phone switchboard.(If its connected to an external phone switchboard it will not supply power) ¾ Remote Trigger uses the same pin-out as the Express Console: o Pin 1 – Macro + Go o Pin 2 – Macro - Go o Pin 3 – Macro + Back o Pin 4 – Macro – Back o Pin 5 – Macro + Pause o Pin 6 – Macro - Pause o Pin 7 – Macro + GM Trigger o Pin 8 – Macro – GM Trigger o Pin 9 - Remote Trigger Normally Closed (30V 1A max) o Pin 10 - Remote Trigger Normally Open (30V 1A max) o Pin 11 - Remote Trigger Common (30V 1A max) o Pin 12 - Ground o Pin 13 - Ground o Pin 14 - 12vDC o Pin 15 - 12vDC Hardware: ¾ To open the console, Pull front edge off table, there are 2 black ¼ turn screws under the console 1/4 turn counter clockwise. You will need to use a quarter or standard screwdriver to open the console. Then lift up on BOTH sides of the console. ¾ ***THIS CONSOLE USES ALL METRIC SCREWS AND NUTS*** ¾ Encoders 5.5mm nut driver. ¾ Do not remove a nut on the Moving light and control PCB’s, this hold an encoder trim board that is hard to calibrate; and is initially calibrated at the factory. ¾ Encoder wheels are one assembly. Do Not Disassemble! ¾ Hard drives are keyed to the processors; once they initially boot they key themselves to the central processor of the console. Hard drives are NOT swappable between Congos. Show-File Import Types: ¾ Safari ¾ Expert ¾ Pronto ¾ Presto ¾ Express ¾ Expression ¾ Strand 500 ¾ ASCII Page 2 of 2 Congo Hardware Notes - Page 22 Congo Hardware Notes Rev C 9/06/05 Chapter 3 Software Releases Since Congo started shipping in 2005 there have been 17 software releases. Below is a list of the Software versions along with significant changes indicated in the Notes column. Version Number 3 Date Notes 4.0.0 6/10/2005 4.0.1 4.0.2 4.0.3 4.0.4 4.0.5 4.0.6 6/21/2005 7/5/2005 7/8/2005 8/16/2005 9/30/2005 10/4/2005 4.1.0 4.1.1 4.1.2 1/26/2006 3/13/2006 5/8/2006 Initial release, IO Board (1.0) and Facepanel software 4.2.0 9/5/2006 4.2.1 11/8/2006 Installer Changes from .MSI to .EXE, Key Cap Change (7310K1003) Congo JR Hardware Support 4.3.0 4.3.1 4.3.2 4.3.3 4.3.4 3/28/2007 7/5/2007 8/29/2007 11/12/2007 4/21/2008 RFR Update Software Releases 23 24 Technical Services Guide to Congo Chapter 4 Troubleshooting This section will assist you in troubleshooting common problems found with Congo and Congo JR consoles. Congo Console: C o n s o l e w i l l n o t p o w e r u p w h e n t h e p o w e r b u t t o n i s f l i p p e d ( 1 st G e n e r a t i o n Consoles) • Console was shut down with the software however the power switch was not flipped into the off position after the console shut itself down. Flip the power switch into the off position for 10 seconds. Flip the power switch into the on position, the console should power up. If the console does not power up, press and hold the Reset button until the console powers up. (note: console power switch needs to be in the on position in order for the reset button to turn the console on.) • Ensure the fuse at the power input connection is good. • Open up the console and verify that the battery backup fuse is in place and has continuity. (note: this fuse looks like an automotive fuse) • Ensure the long 30” ATX power cable is 1 cable, not 5 ATX power extensions plugged into one another. If they are several power cables plugged into one another, ship customer the power loom replacement kit (7310K1001.) • If the console is still now powering up the customer may have a defective power supply. Replace the supply C o n s o l e p o w e r s u p f o r a b o u t 4 5 s e c o n d s t h e n s h u t s i t s e l f do w n . ( 1 st & 2 nd Generation Consoles) • Console power supply serial cable may have come loose from the mother board. Check the power supply serial cable so that it has connectivity to either the external motherboard serial port (1st Generation) or the internal serial port inside the motherboard cover (2nd Generation) • Verify that the Windows UPS settings are correct. Use serial port 1 for 1st generation consoles and serial port #2 for 2nd generation consoles. Follow the Congo Power configuration document for instructions on verifying these settings. (note:you will have about 20 seconds after the console reaches windows to make and save the changes in the control panel.) “ O S N o t F o u n d ” e r r o r m e s s a g e d i s p l a y e d o n m o n i t or # 1 . T h e c o n s o l e w i l l n ot f i n i s h booting if this message is displayed. 4 • The Hard Drive has either died or become disconnected. Check to make sure the Hard Drive connector is seated all the way into the hard drive. The Hard drive connector should be glued to the drive via a small strip of Silicone caulk. If no caulk is present the customer should get a small tube of 100% silicone and place a small bead along the edge of the connector. Re-seat the HD cable connector and cycle power to the console. • The Hard Drive may need to be re-imaged. Follow instructions on Re-imaging the Troubleshooting 25 Hard Drive via a USB stick (1st and 2nd Generation consoles, 3rd generation consoles can re-image via the included DVD disk) • After the HD Re-image if the error message is still displayed the Hard Drive will need to be replaced. Be sure that when replacing a hard drive from ETC, that it gets the HD image placed on it prior to shipment. Hard Drive part numbers do not include the image on the drive. Monitors are not working or monitors 2 & 3 are not functioning. • Verify that all 3 monitors have been connected to the console PRIOR to powering the console up. Congo uses Windows Embedded XP as the underlying operating system. Windows will not activate any monitors unless they are present at the initial console boot. Try cycling power on the console. • Open up the console and verify that the video card is fully seated into the AGP riser slot. Re-seat the video card riser and video card. This is located under the mother board hood. • If the video is still not being displayed on any of the monitors, remove the video card and power the console up with just 1 monitor connected directly to the motherboard. (monitor #1) If the console boots with just 1 monitor attached replace the video card. This video card can cause monitor 1 not to function as well as 2 & 3 if it’s not seated properly or is causing a short somewhere on the power pins of the AGP connector. Console Boots up in “offline” Does not offer server/backup/client as an option. • Early software versions (4.1) booted too quicly for windows to recognize the USB dongle inside the console. The application started prior to Windows loading the drivers for the dongle. Verify the customer is running a version of Congo that is at least 4.2.X and higher. If not, UPGRADE to a newer version of code. • If your customer is running a newer version of code the transition board that the dongle is plugged into may not be receiving power or a USB connection. Try rebooting the console before opening the console. • If the console is still not offering up Server/Backup/Client as an option open up the console and re-seat the power header on the Transition board. The USB dongle should light up. If it does not remove the dongle and plug it in directly to the mother board and reboot the console. If the USB dongle lights up and offers up Server/ Backup/Client as options, the transition board or associated cables are defective and need to be replaced. If the dongle does not light up and offer Server/Backup/ Client as options you will need to replace the dongle. (note: the dongle will need to be programmed to the appropriate output count before shipping to the customer.) Lines are displayed thru master LCD screens obstructing text displayed on the screen. (1 st G e n e r a t i o n & 2 nd G e n e r a t i o n C o n s o l e s ) • 26 Master LCD screens can start displaying lines thru the text over time. This is because of the type of LCD Screens used. Generally the screens need to be repaired. Lines occur because of the amount of flex on the console facepanel. This flex on the facepanel causes some of the pins to become de-soldered from the screen. 3rd generation consoles use a new type of screen eliminating pinmounted chips. Technical Services Guide to Congo Application Errors are displayed when “Server” is selected from the welcome screen. The error displayed will be a windows error displaying a Memory Exception error at a specific memory location. • Click cancel or ok to close the dialogue box. Open up the windows task manager and open up a Explorer window. Navigate to the C:\Congo folder. Locate the Recovery.asc and/or Saved.asc file and delete it. Close all open windows, shut the console down and restart. Once the welcome screen is displayed start the Congo application. When this error pops up it’s trying to access a recovery file that is corrupt. By deleting the file in windows the application can’t load the corrupt file and it starts over with a new play file. T r a c k b a l l i s n o t c o n t r o l l i n g t h e m o u s e w i t h i n t he C o n g o s o f t w a r e a p p l i c a t i o n . • - When trying to control the mouse within the Congo application it is possible for the facepanel trackball to become confused as to what it is controlling, as the trackball has 3 uses. To regain control over the trackball press the parameter button near the trackball then press cursor. The trackball will now control the mouse within the application. Congo JR Console will not power up. • Ensure that the Congo console had the Hard power switch (located on the power supply) switched to the on position. Press and hold the soft power switch for a few seconds. The console should power up. • If the console does not power up, open up the console and verify that there is continuity between the soft power switch leads and the mother board connector. There was a run of that soft power switch assembly that was heat shrunk to the switch but was not soldered. • If the soft power switch is ok then the power supply may need to be replaced. Monitors are not working when connected to the DVI splitter. • Congo supports 2 VGA or 2 DVI monitors or 1 of each connected to the DVI splitter that is included with the console. The VGA port on the motherboard is not active. It’s been de-activated within the BIOS. If monitors are not functioning verify that the DVI splitter is plugged into the DVI monitor port in the correct orientation. The 2 screws on either side of the splitter will screw in all the way if it’s orientation is correct. It is possible to insert the DVI splitter in the wrong orientation. This is the #1 cause of monitors not working. • If monitors are still not working, make sure that monitors were connected to the console PRIOR to powering up the console. . Congo JR uses Windows Embedded XP as the underlying operating system. Windows will not activate any monitors unless they are present at the initial console boot. Try cycling power on the console after the monitors have been connected. • If the monitors are still not working verify the video card is seated properly and replace if necessary. M I D I I N /O U T n o t w o r k i n g . 4 • When Congo JR started shipping it was shipped without firmware that allowed MIDI to function. If a customer has MIDI that is not working go to the Browser and select “About Congo.” The IO firmware software version will be displayed. This should be version 1.0.0.90.026 or later. Troubleshooting 27 • Follow Firmware upgrade instructions. Console LCD Screen is backlit but will not display text. • Sometimes the Congo JR console LCD screen will go blank. The screen will still be backlit but no text will be visible on the screen. This is due to a firmware problem on the console. The only workaround as of April 2008 is to turn off the power to the console and back on. Master LCD Screen is backlit but will not display text. • Sometimes a Congo JR master wing LCD screen will go blank. Typically only 1 of the 2. The screen will still be backlit but no text will be visible on the screen. This is due to a firmware problem on the console. The only workaround as of April 2008 is to turn off the power to the console and or external power supply and back on. Universal Problems: Upgrade Software button will not unlock within the System settings screen. 28 • When customers are upgrading from software version 4.2.0 and later they will need to manually install the application. To do this you will need to click advanced settings to get into windows. • Browse to the USB drive, double click the Congo.exe application. Follow the on screen instructions. The Console will reboot. • All versions past 4.2.1 will install software properly via the software update button. Technical Services Guide to Congo Chapter 5 Congo Tips and Tricks Commonly Used Programming Commands Power Scroll Lock a Tab Move a Tab Close all unlocked Tabs Split Screen (Toggles Vertical/Horizontal Split) Restore split screen Adjust Section Height of Tab Zoom Display Adjust Column Width Dock Area Setup Release Channel Selection Record a Group Record a Focus Palette Record a Beam Palette Record a Color Palette Record an “All” Palette Record a Preset Record Preset to Master Place existing Preset on a Master Place existing Group on a Master Place existing Focus palette on a Master Place existing Beam palette on a Master Place existing Color palette on a Master Place existing “All” Palette on a Master Place existing Sequence on the Main Playback Place existing Sequence on a Master Clear Master Content Record a Master Page Setup Default Go Time Setup Step Level Device Lamp Functions Open Parked Items List Park an Output Un-Park an Output Park a Channel Un-Park a Channel Edit a Master 5 Congo Tips and Tricks Arrow Key s + Level Wheel Setup + Tab Tab + Left Arrow, or Right Arrow C/Alt + Tab Tab + Down Arrow Tab + Up Arrow Tab + Level Wheel Format + Level Wheel Column + Level Wheel Setup + Browser C/Alt + Ch/ID Record + Group or # Record + Group Record + Focus or # Record + Focus Record + Beam or #Record + Beam Record + Color or # Record + Color Record + Palette or # Record + Palette Record or # Record Record + Master Key # Preset + Master Key # Group + Master Key # Focus + Master Key # Beam + Master Key # Color + Master Key # Palette + Master Key # Seq + Playback # Seq + Master Key C/Alt + Master Key Record + Page Setup + Go Setup + @ Level Enable + Lamp On, Lamp Off, or Idle Modify + Park # Output, set level, Park + Output # Output, Un-Park + Output # Channel, set level, Park + CH/ID # Channel, Un-Park + CH/ID Modify + Master Key 29 Patch 1 Output to 1 Channel - Output Editor (Software Prior to V5.0) Press [Output] to open the Output Editor. Press [Modify] 2 times to active patch mode # [Output] # [Modify] Confirm Patch by pressing [Modify] Patch 1 Output to 1 Channel - Output Editor (Software Post V5.0) Press [Output] to open the Output Editor. # [Output] # [Modify] Confirm Patch by pressing [Modify] Patch multiple Outputs to 1 Channel or Range - Output Editor (Software Prior V5.0) Press [Output] to open the Output Editor. Press [Modify] 2 times to active patch mode # [Output] # [Thru] # [Modify] Select all outputs to 1 channel or select range patch Confirm patch by pressing [Modify] Patch multiple Outputs to 1 Channel or Range - Output Editor (Software Post V5.0) Press [Output] to open the Output Editor. # [Output] # [Thru] # [Modify] Select all outputs to 1 channel or select range patch Confirm patch by pressing [Modify] Patch – Channel List: [Modify] + [CH/ID] to open the Channel List Press # [CH/ID] to jump to a specific Channel # Place selection box in the Dimmer Address column Option 1. #.# [Modify] to place 1 Ouput.Universe into the selected channel Option 2. Press [Modify] to open the Output Editor window #.# [Insert] to place 1 Ouput.Universe into the selected channel (Note:This can be done multiple times to insert multiple outputs into the same channel) Patch – Output List (Software Prior V5.0) Navigate to Browser -> Patching -> Output List ->Select Desired Universe to patch within [Modify] Place Selection Box over the output # to patch # [Modify] 30 Technical Services Guide to Congo Patch – Output List (Software Post V5.0) Navigate to Browser -> Patching -> Settings & Tools -> Output List ->Select Desired Universe to patch within [Modify] Place Selection Box over the output # to patch # [Modify] Saving Screen Layouts: Screen layouts will capture the tabs and the formats within each on the associated monitors for recalling at a later date. This is handy for saving screens in a specific location while programming and another location for playback. Many programmers have a least 2-6 screen layouts depending on how they are programming. To record save a screen layout: Select Screen from your Direct Select [Type] Press [TAB] + Direct Select Button Channel Timing: Channel timing on Congo is very handy to use and can eliminate the need for multi-part cues or numerous presets with wait and follow times. To set a channel time: Select the Channel # # (desired time) [CH/ID]+[Time] Channel timing is now applied to the preset. The channel timing is applied to the preset either the A or the B fader depending on your System Settings. (Setup->Crossfade Tab>Site times to A/B) Tap: Load Chase on to a Master Handle Run the Chase Press [TAP]+Master Key (Tap the tempo with the master button) Channel Chase: When creating this type of chase you are essentially creating a certain # of presets and placing them in a sequence and turning that sequence into a Chase. Select a Group of Channels to include in the chase. Set the Intensity Press [SEQ] Press [Wizard] Select the number of steps 5 Congo Tips and Tricks 31 Select # of Channels per step. Set Chase # Arrow down to Execute and press [Modify] Fetch: Fetch is a function of Congo that allows you to pull previously recorded attributes in a different preset into the Live state. It will bring in the desired attributes in a temporary stage for later recording or updating of the live state. Bring the preset you want to update into Live Select channel number(s) you want to apply new attributes to Select # of the preset you want to fetch attributes from Fetch + Focus, Color, Beam, or @ Level Update + Update Align: Align is a function that allows you to copy a fixtures attributes across a channel selection of the same fixture type. Example: There are 10 Martin Mac2K fixtures in your rig. You create a look with one of the 10 fixtures including a rotating gobo and a color spin. You can copy that fixtures attributes across the remaining 9 fixtures in your rig with the “Align” function. Select Channel to copy attributes from Add fixtures to the selection Align + Focus, Color, and/or Beam. Dimmer Check: # [Output] # [@Level] or Level Wheel Press +/- to step thru outputs sequentially Starting a Master Link: A master link is a function that allows you to link a particular sequence step to a master go command. You can specify the master link target level to a % within the master link editor. # [Seq] to open up the Sequence list you want to insert the Master link into. Scroll down to the step where the master link needs to be placed. Scroll over to the “MastLink” column Press [Modify] # [Insert] (# specified before [Insert] button is pressed should be the master number you want to link to) Target level should be set to 100 for the master to play its associated content 32 Technical Services Guide to Congo Stopping a Master Link: # [Seq] to open up the Sequence list you want to insert the Master link into. Scroll down to the step where the master link needs to be placed. Scroll over to the “MastLink” column - Press [Modify] # [Insert] (# specified before [Insert] button is pressed should be the master number you want to link to) Target level should be set to 0 for the master to stop playing its associated content 5 Congo Tips and Tricks 33 Congo 5.0 Local Serial Commands Receiving Local Serial Commands (Congo JR & Congo LightServer) Congo JR and Congo LightServer can be connected to a Serial device via the Com 1 Port (DB9 Connector) on the back of the Console/LightServer. Congo is capable of receiving serial strings as well as sending them back to a connected device to perform a pre-defined action. Congo receives serial commands and needs to be pre-defined in the Event List in order to execute a command. Congo can receive a mixed ASCII serial string as well as a HEX serial string. Below are examples of both. ASCII Syntax Structure: COM ee 0e 00 00 40 M a c r o 2 . E X E C 00 00 Note: When using ASCII characters in a serial string all “space” characters need to be replaced by 20. HEX Syntax Structure: COM ee 09 00 00 40 4d 61 63 72 6f 32 00 00 Example Serial Event List: The below listed trigger is selecting a local COM Port within the Trigger Type drop down menu. The Group # needs to remain 0 in order for the application to look for the incoming serial string on the local port as opposed to a network port (coming from a Net 3 I/O Gateway.) The Description is a free-form text field for notes about the selected event list. Once a Local COM-port is inserted you are now able to open the event list by pressing [MODIFY] on the selected list #. Within each of the event lists you can have multiple triggers to execute an associated action macro. The example below shows the 2 different types of triggers (ASCII & HEX) that execute a Main Playback GO as well as a Master 11, GO command at a target level of 100%. 34 Technical Services Guide to Congo Congo 5.0 Network Serial Commands Receiving Net work Commands (All versions of Congo) Congo can receive network serial commands via the Com port (DB9 Connector) on the back of the NET3 I/O Gateway. Congo is capable of receiving serial strings as well as sending them back to a connected device to perform a pre-defined action. Congo receives serial commands and needs to be pre-defined in the Event List in order to execute a command. Congo can receive a mixed ASCII serial string as well as a HEX serial string. Below are examples of both. ASCII Syntax Structure: COM ee 0e 00 00 40 M a c r o 2 . E X E C 00 00 Note: When using ASCII characters in a serial string all “space” characters need to be replaced by 20. HEX Syntax Structure: COM ee 09 00 00 40 4d 61 63 72 6f 32 00 00 Example Serial Event List: The below listed trigger is selecting a local COM Port within the Trigger Type drop down menu. The Group # needs to match the same Group # set in the Net 3 I/O gateway configuration. The gateway group# is set within the Gateway Configuration Editor (GCE.) The Description column is a free-form text field for notes about the selected event list. Once a Net 3 I/O Node:COM-port is inserted you are now able to open the event list by pressing [MODIFY] on the selected list #. Within each of the event lists you can have multiple triggers to execute an associated action macro. The example below shows the 2 different types of triggers (HEX & ASCII) that execute a Main Playback GO. 5 Congo Tips and Tricks 35 Congo 5.0 Network Relay Commands Sending Relay Commands Congo uses ACTION MACROS to Activate/Deactivate relays on the Net 3 I/O Gateway. The following table can be used as an example to Open/Close relays on a Gateway residing with Group#1 on the ACN network. Typically Action Macros are assigned to specific sequence steps within a sequence. Syntax Structure: RELAY GROUP#,RELAY#,ON/OFF Note: The Action Macro syntax is case and character specific. Please note the spacing and commas in the listed examples. Definitions: RELAY GROUP RELAY# ON/OFF Tells Congo that it is sending a trigger to a networked I/O Gateway Tells Congo which I/O Gateway to send the command to. This Group # must match the corresponding Node’s group #. This can be changed Thru GCE (Gateway Configuration Editor) Tells Congo Which Relay # on a specific node to send the command to Tells Congo to turn the Relay ON or OFF Example Action Macro: RELAY 1,6,ON Sends Relay #6 to the ON position on the I/O Gateway in Group 1. 36 Technical Services Guide to Congo Congo - Receivin g Relay Commands Congo also can receive commands from the I/O Gateway. This can be achieved by creating an EVENT LIST. Within the Event list you can select where the event is being triggered from. The Event in this instance is being received by a Net 3 I/O Gateway. This is selected within the Event List Window. Once the Event List is created, you can insert an Event. Insert the Relay command by pressing INSERT. Then Select the Input Number. Enter an Action Macro with the desired Action Macro in the Action Macro column. In this instance, when relay 14 is closed from the Gateway it will send that closure command to Congo. Congo will receive it and respond as programmed. I.e. if there is a GO PB command in the Event list's Action Macro column, when the relay is closed, Congo will execute a “GO” Command on the Main Playback. Example Event List: The below listed trigger is selecting an I/O Gateway on an ACN network within Group #1: Congo will execute a “Go” command on the Main Playback when Relay #14 is closed. 5 Congo Tips and Tricks 37 Congo – Facepanel Firmware Update The following procedure will outline how to update the firmware on a Congo console. There have been 2 released versions of Congo Firmware. 1.1.00 and 1.2.00. The firmware software version can always be found by opening the Browser and selecting “about Congo” Procedure: Step 1: Required Files Before starting the firmware update procedure, make sure the following files are located on a USB memory stick. • • Note: This application actually downloads the firmware) • • Step 2: - Firmware_Downloader.exe - Congo_I-O_1-X_Firmware.src Note: This is the actual firmware file. The X within the above mentioned file may be a different # as the software is updated. Reboot the Console in Firmware Test Mode Boot up the console while holding down [?] button. This will enter the Congo facepanel self test. Continue to press the [?] button to step thru each of the individual tests. The [Setup] button acts as the toggle button to toggle thru the Yes/No Options. When “Update Facepanel Firmware” is displayed on the screen, press [Setup] to toggle the option to “Yes” and press [?] The Facepanel will reboot. The Number Input LCD screens display Connect USB. When this is displayed you will have 3 min to complete steps 3-5. Step 3: Console Preparation In order to prepare the console for the firmware download, a windows file explorer session has to be started. (Note: An external USB Keyboard and mouse are needed to complete this step.) • - At the Congo Welcome screen Press [Ctrl]+[Alt]+[Delete]. The Security Manager will open up. • - From this screen select the “Task Manager” button with your mouse. • - Within the Task Manager Select “File” then “Ok.” • - In the open dialogue box type in “explorer” and press the “run” button. • - A file explorer window will open. • - Navigate to the proper directory on your memory stick (Note: an attached memory stick usually shows up as drive E). Step 4: Firmware upload After the facepanel is in firmware update mode, start the Firmware_Downloader.exe application. Within the Firmware downloader application a status line will be visible. • - Wait until the USB connection is established. This might take up to 30 seconds. • - After a successful connection, the "File" button at the lower right corner of the application will be enabled. • - Select the correct version of the *.src file, and press the “Download” button. After a successful completion of the download process, the facepanel board should boot straight to its normal operation. Step 5: Reboot After the firmware has been updated the facepanel board will not connect to the Congo 38 Technical Services Guide to Congo application until a reboot is completed. A console hard reboot is needed. Close all open windows. (Windows Explorer and Taskmanager) Shut the console down from the Welcome Screen using the external USB mouse to click on “Power Off” CAUTION: Do not turn off power to the console during the above operation (Steps 1-4). If power is lost in the middle of firmware upload, it is usually possible to re-start the upload from step 4 again. If this is not possible for some reason, the Facepanel Jumpers need to be placed into the firmware uploading position. New upload can be loaded if the pictured jumpers are set prior to a power cycle. 5 Congo Tips and Tricks 39 Congo – Re-image HD Instructions D e s c r i p ti o n o f i s s u e Occasionally Congo Hard drives may need to be re imaged due to file corruption or the improper installation/un-installation of drivers and or software. Note: Re-imaging a Hard drive will erase all show data. Be sure to save all play files to a USB stick prior to re-imaging the HD. Tools Required USB Keyboard USB Memory Stick (1 GB or larger) Procedure 40 Step 1: In order to re-image the Congo from a USB memory stick, it is necessary to prepare this stick and make it bootable. If you are using a Memory stick that has other files on it make a back up copy of the files. The HP USB disk storage format tool will re-format the USB stick. Extract the Bootable USB file to a temporary folder on your PC. Step 2: Install the HP USB disk storage utility on your PC. Step 3: Launch the HP USB disk storage utility program. Step 4: Format the USB Memory Stick with the HP disk storage program • Select the correct USB memory stick • Select FAT-32 • Select “Create a DOS startup disk” • Select the “using DOS system files located at” • Select the directory created in step 2. Technical Services Guide to Congo Step 5: Copy the remaining system files from the temporary directory created in step 1. Step 6: From the Backup DVD/CD, Copy the Ghost.exe and the Congo.gho files to the USB memory stick. In order to Re-Image the Congo Hard-Drive from the USB memory stick, the Congo console has to be prepared. This has mainly to do with changing the boot-order of the Congo console Bios. Step 7: Connect the USB Keyboard and the Memory stick to the available USB ports on the back of the console. Step 8: Start the console by turning on the power button in the back of the console. Step 9: Keep hitting the F2 key during the startup of the system, until the console has entered the BIOS settings. Step 10: Change the Boot order of the system from HD as first device to USB Memory Stick as first device. 5 • This can be done by using the right arrow until you get to the "Boot" option. Press enter. • Down arrow until you see your USB memory stick. • Use the +/- Buttons to move the USB stick to the top of the boot order. Congo Tips and Tricks 41 Step 11: These settings should be saved by hitting the F10 key. It will ask you to confirm the changes. Press enter. The console will reboot and boot from the USB Memory stick instead of the Hard Drive. Step 12: A menu should appear on screen that prompts you through the next steps of the process. Step 13: Select, if you want to re-image the entire drive (this includes the plays directory) or just the Operating System / Software partition. Step 14: The imaging program will start and it will take about 30 minutes for completion. Step 15: After the program is completed, remove the USB Memory Stick Step 16: Cycle power on the console and wait for another 10 minutes until the operating system has configured itself (wait until the Congo logon disk appears). The Congo desktop wallpaper will be shown quiet early in this process but it will still take several minutes until the process is completed. Step 17: Update the Congo software as necessary. 42 Technical Services Guide to Congo Congo – Across a Routed Network In order to use multiple Congo devices across a Routed Network the below listed registry settings must be made on all the Congo devices on the network. The multi-console information between Congo’s (JR and SR) as well as their accessories (Client PC's, Backup Consoles) use the multicast address 224.0.0.28 to distribute live state information. Multicast address 224.0.0.28 is not forwarded by multicast routers. This means that if Congo consoles are intended to operate in a Server/Backup/Client scenario, they must be on the same subnet. Their live state information will not pass thru the router until the Registry is edited. G e t t i n g t o a c o m m a nd p r o m p t From the Congo heart beat screen Press Control + Alt + Delete from an attached ASCII keyboard. This will bring upTask Manager Select ‘File’ from the pull down menu Select ‘New Task (Run…)’ At ‘Open’ type ‘regedit’, to bring up the Registry Editor [Version 5.00]. E d i t i n g t h e R e g i s t r y [ http://www.pctools.com/guides/article/id/1/page/1/] ‘Note: it is always a good idea to backup your registry before making any changes to it. It can be intimidating to a new user, and there is always the possibility of changing or deleting a critical setting causing you to have to reinstall the whole operating system. It's much better to be safe than sorry! The Registry has a hierarchal structure; although it looks complicated the structure is similar to the directory structure on your hard disk, with Regedit being similar to Windows Explorer. Must use a tool commonly known as a "Registry Editor" to make any changes The Registry Editor (REGEDIT.EXE) is included with most version of Windows (although you won't find it on the Start Menu) it enables you to view, search and edit the data within the Registry. There are several methods for starting the Registry Editor, the simplest is to click on the Start button, then select Run, and in the Open box type "regedit", and if the Registry Editor is installed it should now open Like Windows explorer, to expand a certain branch (see the structure of the registry section), click on the plus sign [+] to the left of any folder, or just double-click on the folder. To display the contents of a key (folder), just click the desired key, and look at the values listed on the right side. You can add a new key or value by selecting New from the Edit menu, or by right-clicking your mouse. And you can rename any value and almost any key 5 Congo Tips and Tricks 43 with the same method used to rename files; right-click on an object and click rename, or click on it twice (slowly), or just press F2 on the keyboard. Lastly, you can delete a key or value by clicking on it, and pressing Delete on the keyboard, or by right-clicking on it, and choosing Delete.’ Default Registry Setting The default multicast address for Congo is 224.0.0.28 The default Time to Live is 1 T h e R e g i s t r y w i l l b e e d i t e d i n t h e f o l l o w i n g l o c at i o n : HKEY_LOCAL_MACHINE\SOFTWARE\Avab\Congo\Networking The following Keys need to be included in the registry: New Multicast Address "AccessLayerPublicationMulticastAddress"="236.1.0.203" value] 44 [note: this is set as a string Technical Services Guide to Congo The Following Pop-up will appear: Change the Value data to: 236.1.0.203 Time to Live Setting “AccessLayerPublicationMulticastTTL”=”8” 5 Congo Tips and Tricks [note: this is set as a DWORD value] 45 T h e R e g i s t r y E d i t o r w o u l d t h e n l oo k a s f o l l o w s : Exit the Registry Editor 46 Technical Services Guide to Congo