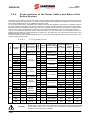
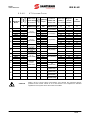
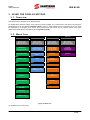
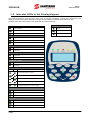
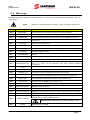
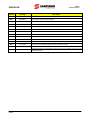
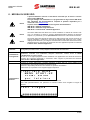
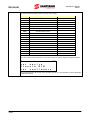
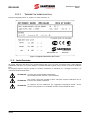
1
• 15V1102BA100 • IRIS BLUE Specific Drive for AC Three-Phase Induction Motors Water, Fan and Compressor Applications BASIC USER MANUAL MANUALE D’USO BASIC 10/03/15 R.00 English - Italiano • This manual is integrant and essential to the product. • Il presente manuale costituisce parte integrante ed Carefully read the instructions contained herein as they provide important hints for use and maintenance safety. essenziale del prodotto. Leggere attentamente le avvertenze contenute in esso in quanto forniscono importanti indicazioni riguardanti la sicurezza d'uso e di manutenzione. • This device is to be used only for the purposes it has been designed to. Other uses should be considered improper and dangerous. The manufacturer is not responsible for possible damages caused by improper, erroneous and irrational uses. • Elettronica Santerno is responsible for the device in its original setting. • Any changes to the structure or operating cycle of the device must be performed or authorized by the Engineering Department of Elettronica Santerno. • Elettronica Santerno assumes no responsibility for the consequences resulting by the use of non-original spare-parts. • Elettronica Santerno reserves the right to make any technical changes to this manual and to the device without prior notice. If printing errors or similar are detected, the corrections will be included in the new releases of the manual. • The information contained herein is the property of Elettronica Santerno and cannot be reproduced. Elettronica Santerno enforces its rights on the drawings and catalogues according to the law. • Questa macchina dovrà essere destinata al solo uso per il quale è stata espressamente concepita. Ogni altro uso è da considerarsi improprio e quindi pericoloso. Il Costruttore non può essere considerato responsabile per eventuali danni causati da usi impropri, erronei ed irragionevoli. • Elettronica Santerno si ritiene responsabile della macchina nella sua configurazione originale. • Qualsiasi intervento che alteri la struttura o il ciclo di funzionamento della macchina deve essere eseguito od autorizzato dall'Ufficio Tecnico Elettronica Santerno. • Elettronica Santerno non si ritiene responsabile delle conseguenze derivate dall'utilizzo di ricambi non originali. • Elettronica Santerno si riserva di apportare eventuali modifiche tecniche sul presente manuale e sulla macchina senza obbligo di preavviso. Qualora vengano rilevati errori tipografici o di altro genere, le correzioni saranno incluse nelle nuove versioni del manuale. • Proprietà riservata – Riproduzione vietata. Elettronica Santerno tutela i propri diritti sui disegni e sui cataloghi a termine di legge. Elettronica Santerno S.p.A. Via della Concia, 7 – 40023 Castel Guelfo (BO) Italy Tel. +39 0542 489711 – Fax +39 0542 489722 santerno.com [email protected] ENGLISH BASIC USER MANUAL 0. IRIS BLUE STARTUP NOTE 1) Inspection: 2) Installation and wiring: This manual covers basic installations of IRIS BLUE drives. Detailed information on how to install and program the IRIS BLUE drives is given in the product literature available for download from santerno.com. This manual refers to the following user manuals: 15P1102B100 IRIS BLUE – Installation Guide 15P1102B100 IRIS BLUE – Programming Guide 15W0102B300 IRIS BLUE – Safe Torque Off Function – Application Manual NOTE IRIS BLUE drives are factory set with the IFD control algorithm (V/f) allowing performing the first startup of the equipment. The default functions are given in this section, particularly in step 5) Start up. NOTE IRIS BLUE drives feature the Safe Torque Off function (called STO throughout this manual) certified as per standard EN 61800-5-2. For the correct application of this function and the drive integration into the safety chain of the system, please refer to the application notes given in the Safe Torque Off Function – Application Manual. Check if the size of the IRIS BLUE drive is greater than or equal to the size of the connected motor according to the drive nameplate. See the Delivery Check section. The IP rating of the IRIS BLUE drive is given in the Installing the Equipment section. Ensure that sufficient ventilation is provided to the drive. More details are given in the standard IRIS BLUE’s Installation Guide. If the STO function integrated into the drive is to be used, follow the instructions given in the Safe Torque Off Function – Application Manual. 3) Power on: Power on the drive; check if the keypad turns on. For easier startup of the IRIS BLUE drive, you can activate the Start-Up Menu. The Start-Up Menu is a wizard allowing programming the main parameters for the connected motor. This menu is available by pressing the START-UP button from the keypad. 4) Parameter setting: [ I DP ] S TAR P r e t o I T s s R I S BLUE - UP M E N U s ENTER t a r t Press Enter to enter the wizard. Before entering the control parameters, you are asked to choose a dialogue language: P 2 6 3 L a n g u a g e →@@@@@@@@@@@@@@@ 3/69 BASIC USER MANUAL IRIS BLUE Parameters included in the Start-Up menu: Parameter C013 Description Type of V/f pattern C015 Rated motor frequency C016 Rated motor rpm C017 Rated motor power C018 Rated motor current C019 Rated motor voltage C028 Min. motor speed Visibility [only if IFD is active] C029 Max. motor speed P009 Acceleration ramp time P010 Deceleration ramp time P018 Start acceleration time P019 End deceleration time P020 Speed threshold for start and end ramps C043 Current limit while accelerating [only if IFD is active] C044 Current limit at constant rpm [only if IFD is active] C045 Current limit while decelerating [only if IFD is active] C265 Motor thermal protection C267 Motor thermal time constant [only if protection is active] After setting the last parameter and moving the cursor forward, the following page will appear: P t D t r e s s U P A R R OW o qu i t OWN A R R OW o c o n t i n u e Press ▲ to quit the Start-up menu. The default page of the system will be displayed. 4/69 BASIC USER MANUAL IRIS BLUE i) Activate the ENABLE-A (terminal 15) and ENABLE-B (terminal S) inputs. ii) Activate the START input (terminal 14). iii) Send speed reference to REF: 0-10V input (terminals 1, 2 & 4) iv) The RUN LED and REF LED will come on and the motor will start. Make sure that the motor is rotating in the correct direction. If not, operate on parameter C014 or open the ENABLE-A, ENABLE-B, START terminals. Shut off the drive, wait at least 20 minutes and swap two of the motor phases. Control via keypad: 5) Startup: GROUND S000507 Control via terminal board: i) Activate the ENABLE-A (terminal 15) and ENABLE-B (terminal S) inputs. ii) Press the LOC/REM button on the keypad. iii) The L-CMD and L-REF LEDs will be lit. iv) Press the START button. v) Hold down the Up button to increase the speed reference. vi) The RUN LED and REF LED will come on and the motor will start. Make sure that the motor is rotating in the correct direction. CMA 0:10V REF 2 ÷ 10kohm -10VR +10VR 1 2 3 REFERENCE INPUT 0 -: 10 V 4 4 ÷ 20 mA AIN1+ 5 AIN1- 6 CMA 9 ANALOG INPUT 4 -: 20 mA GROUND GROUND ENABLE-B O S START (MDI1) 14 ENABLE-A (MDI2) 15 RESET (P/B) (MDI3) 16 MULTISPEED 0 (MDI4) 17 MULTISPEED 1 (MDI5) 18 SOURCE SELECTION (MDI6) 19 LOCAL / REMOTE (P/B) (MDI7) 20 CW / CCW (MDI8) 21 CMD 22 If not, operate on parameter C014 or open the ENABLE-A, ENABLE-B and START terminals, then press the STOP button. +24V 23 24V - 200mA GROUND Shut off the drive, wait at least 20 minutes and swap two of the motor phases. NOTE: The ENABLE-A and ENABLE-B inputs are allocated to the STO function. The control mode and control circuit of these signals must be accomplished according to the instructions given in the Safe Torque Off Function – Application Manual. That manual also includes a detailed validation procedure for the STO control configuration to be performed upon first start up of the equipment and also every 12 months. 6) Possible failures: If no failure occurred, go to the next step. Otherwise, check the drive connections paying particular attention to supply voltages, DC link and input reference. Also check if alarm messages are displayed. In the MEASURES MENU, check values in the Fault List for the reference speed (M000), the supply voltage to the drive (M030), the DC link voltage (M029), and the condition of control terminals (M033). Check to see if these readouts match with the measured values. 7) Additional parameter alterations: In BASIC user level, adjustments can be made to a limited number of parameters. The IRIS BLUE has a wide range of functions; to access these function, set the user level to ADVANCED or ENGINEERING by adjusting parameter P001 accordingly (refer to IRIS BLUE’s Programming Guide). 8) Reset: If an alarm trips, find the cause responsible for the alarm and reset the equipment. Enable the RESET input (terminal 16) or press the RESET key on the keypad. NOTE If the Safe Torque Off function is used, re-validation of the full functionality of the STO whenever the inverter application configuration is changed is required. Please consult the application notes given in the Safe Torque Off Function – Application Manual. 5/69 IRIS BLUE BASIC USER MANUAL 1. TABLE OF CONTENTS 1.1. Chapters 0. 1. 2. 3. 4. 5. STARTUP .................................................................................................................................................................. 3 TABLE OF CONTENTS ............................................................................................................................................ 6 1.1. Chapters .......................................................................................................................................................... 6 1.2. Figures ............................................................................................................................................................. 7 1.3. Tables .............................................................................................................................................................. 7 1.4. How to Use this Manual ................................................................................................................................... 8 1.4.1. Overview .................................................................................................................................................... 8 HARDWARE DESCRIPTION AND INSTALLATION ................................................................................................ 9 2.1. Caution Statements ......................................................................................................................................... 9 2.2. Delivery Check ............................................................................................................................................... 11 2.2.1. Nameplate ................................................................................................................................................ 12 2.3. Installing the Equipment................................................................................................................................. 12 2.3.1. Environmental Requirements for the Equipment Installation, Storage and Transport .................... 13 2.3.2. Dimensions, Weight and Dissipated Power.......................................................................................... 14 2.3.2.1. IP20 and IP00 Models 2T Class ...................................................................................................... 14 2.3.2.2. IP20 and IP00 Models 4T Class ...................................................................................................... 15 2.3.3. Power Terminals / Bars .......................................................................................................................... 16 2.3.4. Cross-sections of the Power Cables and Sizes of the Safety Devices............................................... 18 2.3.4.1. 2T Voltage Class ............................................................................................................................. 18 2.3.4.2. 4T Voltage Class ............................................................................................................................. 19 2.3.5. Inverter and Motor Earth Connection .................................................................................................... 20 USING THE DISPLAY/KEYPAD ............................................................................................................................. 21 3.1. Overview ........................................................................................................................................................ 21 3.2. Menu Tree ...................................................................................................................................................... 21 3.3. Navigation ...................................................................................................................................................... 22 3.4. Function Keys ................................................................................................................................................ 23 3.5. Indicator LEDs in the Display/Keypad ............................................................................................................ 24 WIRING ................................................................................................................................................................... 25 4.1. Wiring Diagram .............................................................................................................................................. 25 ALARMS AND WARNINGS .................................................................................................................................... 27 5.1. What Happens when a Protective Device Trips ............................................................................................. 27 5.2. What To Do when an Alarm Trips .................................................................................................................. 28 5.3. Alarm Code List ............................................................................................................................................. 29 5.4. Warnings........................................................................................................................................................ 33 5.5. State List ........................................................................................................................................................ 35 6/69 BASIC USER MANUAL IRIS BLUE 1.2. Figures Figure 1: Nameplate of the IRIS BLUE Drive .................................................................................................................... 12 Figure 2: Connection bars in S41 ..................................................................................................................................... 17 Figure 3: Menu Tree.......................................................................................................................................................... 21 Figure 4: Navigation example ........................................................................................................................................... 22 Figure 5: Wiring Diagram .................................................................................................................................................. 25 1.3. Tables Table 1: Alarm Code List .................................................................................................................................................. 32 Table 2: Warning list ......................................................................................................................................................... 34 Table 3: State List ............................................................................................................................................................. 35 7/69 BASIC USER MANUAL IRIS BLUE 1.4. How to Use this Manual 1.4.1. Overview This User Manual (Basic User Manual) provides information required to setup and monitor the drives of the IRIS BLUE series manufactured by Elettronica Santerno when used in the Basic mode. The section concerning the hardware description and installation covers basic wiring only. Refer to the Installation Guide to install additional options and/or to configure analogue/digital inputs and outputs. If the STO function is to be used within applications requiring high functional safety level, carefully follow the statements given in the Safe Torque Off Function – Application Manual. The IRIS BLUE is delivered in Basic mode, which provides a cut down parameter set and preset I/O settings. If additional adjustment is required, this may be achieved by setting the drive to Advanced or Engineering using parameter P001 (see the PASSWORD AND USER LEVEL MENU in the Programming Guide). Setup/monitoring may be obtained using one or both of the following options: 1) Display/keypad unit; 2) Serial link through RS485 standard port or ES822 optional board. For the instructions on how to use and remote the display/keypad unit, please refer to the Installation Guide. Any information sent to/from the drive through the display/keypad unit may be obtained also via serial link using the IrisControl software application provided by Elettronica Santerno. The RemoteDrive allows the following functions: image acquisition, keypad simulation, oscilloscope functions and multifunction tester, table compiler including operation data log, parameter setup and data reception-transmissionstorage from and to a calculator, scan function for the automatic detection of the connected drives (up to 247 drives may be connected). When used in Advanced or Engineering mode, many additional functions are available. These include the following: • • • • • • • • • • • • • • • • • • • • Customisation of Keypad navigation. Customisation of standard monitoring values. Selection of up to 2 acceleration and deceleration ramps. Customisation and scaling of analog input signals. Selection of up to 7 preset speeds. Configuration of 3 prohibit speeds. Tuning of VTC algorithm. Customisation of analog output signals. Allocation of internal timer functions to digital I/O. PID activation and tuning. Configuration of Digital output comparator and logic functions. Master/slave operation with torque control. Adjustment of current limit. Customisation of digital inputs. Setting of control source for start and speed commands. DC braking. Speed Search function. Autoreset. Motor thermal modelling and thermistor allocation. Serial and Fieldbus communication. If any of the above functions is required, use parameter P001 to access the Advanced or Engineering settings. 8/69 BASIC USER MANUAL IRIS BLUE 2. HARDWARE DESCRIPTION AND INSTALLATION 2.1. Caution Statements SYMBOLS: DANGER Indicates operating procedures that, if not correctly performed, may cause serious injury or death due to electrical shock. CAUTION Indicates operating procedures that, if not carried out, may cause serious equipment failure. NOTE Indicates important hints concerning the equipment operation. SAFETY STATEMENTS TO FOLLOW WHEN INSTALLING AND OPERATING THE EQUIPMENT: NOTE 1. 2. Always read this instruction manual before starting the equipment. The ground connection of the motor casing should follow a separate path to avoid possible interferences. 1. ALWAYS PROVIDE PROPER GROUNDING OF THE MOTOR CASING AND THE DRIVE FRAME. If a differential relay against electric shocks is intended to be used, this must be a “B-type” differential relay. The drive may generate an output frequency up to 1000 Hz; this may cause a motor rotation speed up to 20 (twenty) times the rated motor speed (for 50Hz motors): never use the motor at higher speed than the max. allowable speed stated on the motor nameplate. ELECTRICAL SHOCK HAZARD – Never touch the drive electrical parts when the drive is on; always wait at least 20 minutes after switching off the drive before operating on the drive. Never perform any operation on the motor when the drive is on. Do not perform electrical connections on the motor or the drive if the drive is on. Electrical shock hazard exists on output terminals (U,V,W) and terminals (+),( –), (B) (if present) even when the drive is disabled. Wait at least 20 minutes after switching off the drive before operating on the electrical connection of the motor or the drive. MECHANICAL MOTION – The drive determines mechanical motion. It is the operator's responsibility to ensure that this does not give rise to any dangerous situation. The STO function may be used to avoid mechanical motion under certain operating conditions. It is the operator’s responsibility to assess the machinery safety level and properly apply this function without exposing operators to mechanical hazard. EXPLOSION AND FIRE – Explosion and fire hazard exists if the equipment is installed in presence of flammable fumes. Do not install the drive in places exposed to explosion and fire hazard, even if the motor is installed there. 2. 3. 4. DANGER 5. 6. 7. 8. 9/69 BASIC USER MANUAL IRIS BLUE 1. 2. 3. 4. 5. 6. 7. 8. 9. 10. CAUTION 11. 12. 13. 14. 15. Do not connect supply voltages exceeding the equipment rated voltage to avoid damaging the internal circuits. If the drive is installed in environments exposed to flammable and/or explosive substances (AD zones according to IEC 64-2 standards), please refer to IEC 64-2, EN 60079-10 and related standards. Do not connect the equipment power supply to the output terminals (U,V,W), to the terminals (+), (-), (B) (if present) or to the control terminals. The equipment power supply must be connected to input terminals only (R, S, T). If present, do not short-circuit terminals (+) and (-) and terminals (+) and (B). Do not start or stop the connected motor using a contactor over the inverter power supply. Do not install any contactor between the inverter and the motor. Do not connect any power factor correction capacitor to the motor. Operate the inverter only if a proper grounding is provided. If an alarm trips, a comprehensive review of the ALARMS AND WARNINGS section is recommended; restart the equipment only after removing the cause responsible for the alarm trip. Do not perform any insulation test between the power terminals or the control terminals. Make sure that the fastening screws of the control terminal board and the power terminal board are properly tightened. Do not connect single-phase motors. Always use a motor thermal protection (use the inverter motor thermal model or a thermoswitch installed in the motor). Respect the environmental requirements for the equipment installation. The bearing surface of the drive must be capable of withstanding high temperatures (up to 90°C). The drive electronic boards contain components which may be affected by electrostatic discharges. Do not touch them unless it is strictly necessary. Always be very careful so as to prevent any damage caused by electrostatic discharges 16. Before programming and starting the inverter, make sure that the connected motor and all the controlled devices can be used for the whole speed range allowed by the converter. The inverter may be programmed to control the motor at higher or lower rpm in respect to the speed obtained by connecting the motor directly to the power supply line. 17. To exploit the Safe Torque Off (STO) function, it is necessary to ensure the correct application and integration of the IRIS BLUE drive into the safety chain of the system. Carefully follow the instructions given in the Safe Torque Off Function – Application Manual. 10/69 BASIC USER MANUAL IRIS BLUE 2.2. Delivery Check Make sure that the equipment is not damaged and that it complies with the equipment you ordered by referring to the nameplate located on the drive front part. The drive nameplate is described below. If the equipment is damaged, contact the supplier or the insurance company concerned. If the equipment does not comply with the one you ordered, please contact the supplier as soon as possible. If the equipment is stored before being started, make sure that the ambient conditions do not exceed the ratings mentioned in the Installing the Equipment section. The equipment guarantee covers any manufacturing defect. The manufacturer has no responsibility for possible damages occurred when shipping or unpacking the drive. The manufacturer is not responsible for possible damages or faults caused by improper and irrational uses; wrong installation; improper conditions of temperature, humidity, or the use of corrosive substances. The manufacturer is not responsible for possible faults due to the drive operation at values exceeding the drive ratings and is not responsible for consequential and accidental damages. The equipment is covered by a 3-year guarantee starting from the date of delivery. Product ID: IRIS BLUE 1 1 2 3 4 5 6 7 8 0005 2 4 3 T 4 X 5 A2 6 K 7 2 8 Product line Inverter model Supply voltage 2 = Power supply, 200÷240VAC 4 = Power supply, 380÷480VAC Type of power supply T = three-phase Braking module X = no internal braking chopper Type of EMC filter: A2 = integrated filter, EN 61800-3 issue 2 SECOND ENVIRONMENT Category C3 for <400A current values, category C4 for ≥400A current values, EN 55011 gr.2 cl. A for industrial users. I = no filter Control panel K = with control panel and back-lit, 16x4 character LCD display. Degree of protection for stand-alone drives: 0 = IP00 (Size S41) 2 = IP20 (up to Size S30) 5 = IP54 (available up to Size S30) 11/69 BASIC USER MANUAL IRIS BLUE 2.2.1. Nameplate Typical nameplate for 4T IRIS BLUE Drives: Figure 1: Nameplate of the IRIS BLUE Drive 2.3. Installing the Equipment The inverters of the IRIS BLUE series are Open Type Equipment – degree of protection IP00 and IP20 – that can be installed inside another enclosure. Only models with degree of protection IP54 may be wall-mounted. The drives must be installed vertically. The ambient conditions, the instructions for the mechanical assembly and the electrical connections of the drives are detailed in the sections below. 12/69 CAUTION Install the drive in an upright position. Do not install the drive horizontally or upside-down. CAUTION Do not mount any heat-sensitive components on top of the drive to prevent them from damaging due to hot exhaust air. CAUTION The drive rear wall may reach high temperatures; make sure that the drive bearing surface is not heat-sensitive. BASIC USER MANUAL 2.3.1. IRIS BLUE Environmental Requirements for the Equipment Installation, Storage and Transport Any electronic board installed in the inverters manufactured by Elettronica Santerno is tropicalised. This enhances electrical insulation between the tracks having different voltage ratings and ensures longer life of the components. It is however recommended that the prescriptions below be strictly followed: –10 to +55°C with no derating Based on the inverter model and the application category, it may be necessary to apply 2% derating of the rated current per degree beyond the given temperatures (see OPERATING TEMPERATURES in the Installation Guide). Maximum surrounding air temperature Ambient temperatures transport for storage and –25°C to 70°C Installation environment Pollution degree 2 or better (according to IEC 61800-5-1). Do not install in direct sunlight and in places exposed to conductive dust, corrosive gases, vibrations, water sprinkling or dripping (except for IP54 models); do not install in salty environments. Altitude Max. altitude for installation 2000 m a.s.l. For installation above 2000 m and up to 4000 m please contact Elettronica Santerno. Above 1000 m, derate the rated current by 1% every 100 m. Operating ambient humidity From 5% to 95%, from 1g/m to 29g/m , non condensing and non freezing (class 3k3 according to EN 50178) Storage ambient humidity From 5% to 95%, from 1g/m to 29g/m , non-condensing and nonfreezing (class 1k3 according to EN 50178) Ambient humidity during transport Max. 95%, up to 60g/m ; condensation may appear when the equipment is not running (class 2k3 according to EN 50178) Storage and operating atmospheric pressure From 86 to 106 kPa (classes 3k3 and 1k4 according to EN 50178) Atmospheric pressure during transport From 70 to 106 kPa (class 2k3 according to EN 50178). 3 3 3 3 3 CAUTION As ambient conditions strongly affect the drive life, do not install the equipment in places that do not have the above-mentioned ambient conditions. CAUTION Always transport the equipment within its original package. 13/69 BASIC USER MANUAL IRIS BLUE 2.3.2. Dimensions, Weight and Dissipated Power 2.3.2.1. Size S05 S12 S15 S20 S30 S41 14/69 IRIS BLUE MODEL 0007 0008 0010 0013 0015 0016 0020 0023 0033 0037 0040 0049 0060 0067 0074 0086 0113 0129 0150 0162 0180 0202 0217 0260 IP20 AND IP00 M OD E L S 2T C L A S S W H D mm mm mm 170 340 175 215 401 225 225 466 331 279 610 332 302 500 748 882 421 409 Power Weight dissipated at Inom kg W 160 7 170 7 220 7 220 7 230 7 290 7 320 7 390 11 500 12 560 12 820 22.5 950 22.5 950 33.2 1250 33.2 1350 36 1500 36 2150 51 2300 51 2450 51 2700 51 2550 117 3200 117 3450 121 3950 121 Noise level db(A) 46 57 H 48 58 61 D W 66 64 NOTE Degree of protection IP20 up to Size S30; IP00 for greater Sizes. NOTE Please refer to the Installation Guide for IP54 stand-alone models, box and cabinet models. BASIC USER MANUAL IRIS BLUE 2.3.2.2. Size S05 S12 S15 S20 S30 S41 IRIS BLUE MODEL 0005 0007 0009 0011 0014 0016 0017 0020 0025 0030 0034 0036 0040 0049 0060 0067 0074 0086 0113 0129 0150 0162 0180 0202 0217 0260 IP20 AND IP00 M OD E L S 4T C L A S S W H D mm mm mm 170 340 175 215 401 225 225 466 331 279 610 332 302 748 421 500 882 409 Power Weight Dissipated at Noise level Inom db(A) kg W 215 7 240 7 315 46 7 315 7 315 7 430 10.5 490 10.5 490 42 10.5 520 11.5 520 11.5 680 12.5 53 710 12.5 820 22.5 48 950 22.5 950 33.2 1250 33.2 57 1350 36 1500 36 2150 51 61 2300 51 2450 51 66 2700 51 2550 117 3200 117 63 3450 121 3950 121 H D W NOTE Degree of protection IP20 up to Size S30; IP00 for greater Sizes. NOTE Please refer to the Installation Guide for IP54 stand-alone models, box and cabinet models. 15/69 BASIC USER MANUAL IRIS BLUE 2.3.3. Power Terminals / Bars 41/R – 42/S – 43/T 44/U – 45/V – 46/W 47/+ 47/D 48/B 49/– 50/+ DESCRIPTION Inputs for three-phase supply (the phase sequence is not important). Three-phase motor outputs. Not used Not used Not used Not used Not used Terminal board S05 (4T): 41/R 42/S 43/T 44/U 45/V 46/W 47/+ 48/B 49/– Not used Not used Not used Terminal board S05 (2T): 41/R 42/S 43/T 44/U 45/V 46/W 47/+ 47/D 48/B 49/– Not used Not used Not used Not used Terminal board S15-S20: 41/R 42/S 43/T 44/U 45/V 46/W Terminal board S12 (2T-4T): 41/R 42/S 43/T 47/+ 47/D 48/B 49/– Not used Not used Not used Not used 44/U 45/V 46/W Terminal board S30: 41/R 16/69 42/S 43/T 44/U 45/V 46/W BASIC USER MANUAL IRIS BLUE Connections bars for S41: 44/U 45/V 46/W 41/R 42/S 43/T Figure 2: Connection bars in S41 17/69 BASIC USER MANUAL IRIS BLUE 2.3.4. Cross-sections of the Power Cables and Sizes of the Safety Devices The minimum requirements of the inverter cables and the protective devices needed to protect the system against shortcircuits are given in the tables below. It is however recommended that the applicable regulations in force be observed; also check if voltage drops occur for cable links longer than 100m. For the largest inverter sizes, special links with multiple conductors are provided for each phase. For example, 2x150 in 2 the column relating to the cable cross-section means that two 150mm parallel conductors are required for each phase. Multiple conductors shall have the same length and must run parallel to each other, thus ensuring even current delivery at any frequency value. Paths having the same length but a different shape deliver uneven current at high frequency. Also, do not exceed the tightening torque for the terminals to the bar connections. For connections to bars, the tightening torque relates to the bolt tightening the cable lug to the copper bar. The cross-section values given in the tables below apply to copper cables. The links between the motor and the IRIS BLUE drive must have the same lengths and must follow the same paths. Use 3-phase cables where possible. 2T V OL TA GE C L A S S Cable Crosssection Fitting the Terminal Cable Stripping IRIS BLUE Model Inverter Rated Current Size 2.3.4.1. Cable CrossFast Fuses Magnetic Tightening section to Mains (700V) + Circuit Torque and Motor Side Disc. Switch Breaker 2 A S05 S12 S15 S20 S30 S41 2 Nm A A A 16 16 20 20 25 32 16 16 25 25 25 32 25 25 25 25 25 45 50 50 45 63 63 60 12.5 15 17 19 23 27 0020 30 10 1.2-1.5 0023 38 18 2.5 10 (6AWG) 0033 51 18 2.5 16 (5AWG) 80 80 80 0037 0040 65 72 18 15 2.5 2.5 25 (4AWG) 80 100 80 100 80 100 0049 80 15 2.5 125 100 100 0060 0067 0074 88 103 120 24 24 24 6-8 6-8 6-8 125 125 160 125 125 160 125 125 145 0086 135 24 6-8 200 160 160 0113 0129 0150 180 195 215 30 30 30 10 10 10 250 250 315 200 250 400 250 250 275 0162 0180 240 30 10 400 400 275 300 Bus bar - 30 185 (400kcmils) 350 400 400 0202 345 Bus bar - 30 500 400 450 0217 375 Bus bar - 30 550 630 450 0260 425 Bus bar - 30 240 (500kcmils) 2x120 (2x4/0AWG) 2x120 (2x250kcmils) 630 630 500 0.5÷25 (20÷4AWG) 4÷25 (12÷4AWG) 25÷70 (3÷2/0AWG) 35÷185 (2AWG÷ 350kcmils) 1.2-1.5 1.2-1.5 1.2-1.5 1.2-1.5 1.2-1.5 1.2-1.5 mm (AWG/kcmils) 0007 0008 0010 0013 0015 0016 CAUTION 18/69 mm mm (AWG/kcmils) 10 10 10 0.5÷10 10 (20÷6AWG) 10 10 AC1 Contactor 2.5 (12AWG) 4 (10AWG) 8 (8AWG) 35 (2AWG) 50 (1/0AWG) 95 (4/0AWG) 120 (250kcmils) Always use the correct cable cross-sections and activate the protective devices provided for the inverter. Failure to do so will cause the non-compliance to standard regulations of the system where the inverter is installed. BASIC USER MANUAL IRIS BLUE 4T V OL TA GE C L A S S Cable Crosssection Fitting the Terminal Cable Stripping IRIS BLUE Model Inverter Rated Current Size 2.3.4.2. Cable CrossFast Fuses Magnetic section to Tightening (700V) + Circuit Mains and Torque Motor Side Disc. Switch Breaker 2 A S05 S12 0005 0007 0009 0011 0014 0016 0017 0020 0025 0030 0034 0036 10.5 12.5 16.5 16.5 16.5 27 30 30 41 41 57 60 0040 72 S15 S20 S30 mm mm (AWG/kcmils) 10 10 0.5÷10 10 (20÷6AWG) 10 10 10 10 0.5÷10 10 (20÷6AWG 10 10 18 0.5÷25 (20÷4AWG) 18 0.5÷25 15 (20÷4AWG) 4÷25 15 (12÷4AWG) 24 24 25÷70 (3÷2/0 AWG) 24 24 30 35÷185 30 (2AWG÷ 30 350kcmils) 30 2 Nm 1.2-1.5 1.2-1.5 1.2-1.5 1.2-1.5 1.2-1.5 1.2-1.5 1.2-1.5 1.2-1.5 1.2-1.5 1.2-1.5 2.5 2.5 mm (AWG/kcmils) 2.5 (12AWG) 4 (10AWG) 10 (6AWG) 16 (5AWG) 25 (4AWG) 2.5 A A A 16 16 25 25 32 40 40 40 63 63 100 100 16 16 25 25 32 40 40 40 63 63 100 100 25 25 25 25 30 45 45 45 55 60 100 100 100 100 100 125 100 100 125 125 160 200 250 250 315 350 125 125 160 160 200 250 400 400 125 125 145 160 250 250 275 275 400 400 400 500 400 450 550 630 450 630 630 500 25 (4AWG) 2.5 0049 80 0060 0067 0074 0086 0113 0129 0150 0162 88 103 120 135 180 195 215 240 0180 300 Bus bar - 30 0202 345 Bus bar - 30 0217 375 Bus bar - 30 0260 425 Bus bar - 30 6-8 6-8 6-8 6-8 10 10 10 10 S41 CAUTION AC1 Contactor 35 (2AWG) 50 (1/0AWG) 95 (4/0AWG) 120 (250kcmils) 185 (400kcmils) 240 (500kcmils) 2x120 (2x4/0AWG) 2x120 (2x250kcmils) Always use the correct cable cross-sections and activate the protective devices provided for the inverter. Failure to do so will cause the non-compliance to standard regulations of the system where the inverter is installed. 19/69 BASIC USER MANUAL IRIS BLUE 2.3.5. Inverter and Motor Earth Connection A bolted screw for the earthing of the inverter enclosure is located close to the power wiring terminals. The screw can be located by the symbol below: Always earth the inverter to a state-of-the-art mains. To reduce disturbance and radiated interference to a minimum, connect the motor earthing conductor directly to the inverter following a parallel path to the motor supply cables. DANGER Always connect the inverter earthing terminal to the grid earthing using a conductor complying with the safety regulations in force (see table below). Always connect the motor casing to the inverter earth to avoid dangerous voltage peaks and electrical shock hazard. Always provide proper earthing of the inverter frame and the motor casing. Protective earthing conductor cross-section (refer to EN 61800-5-1): Cross-sectional area of phase conductors Minimum cross-sectional area of the corresponding 2 2 of the inverter (mm ) protective earthing conductor (mm ) S ≤ 10 10 (*) 10 < S ≤ 16 S (*) 16 < S ≤ 35 16 35 < S S/2 NOTE The values in the table above are valid only if the protective earthing conductor is made of the same metal as the phase conductors. If this is not so, the cross-sectional area of the protective earthing conductor shall be determined in a manner which produces a conductance equivalent to that which results from the application of the table above. NOTE (*) In any case a cross-section of the protective earthing conductor of at least 10 mm Cu or 16 2 mm Al is required to maintain safety in case of damage to or disconnection of the protective earthing conductor (refer to EN 61800-5-1 about Touch current). 2 20/69 BASIC USER MANUAL IRIS BLUE 3. USING THE DISPLAY/KEYPAD 3.1. Overview This section covers navigation in the display/keypad. For details about particular settings of the keypad (contrast, backlight, etc.), please refer to the section concerning the display/keypad in the IRIS BLUE’s Installation Guide, whilst for details regarding custom navigation for the root page, the measures in the Keypad page and the Root page and the PID custom unit of measure, please refer to the DISPLAY/KEYPAD MENU in the IRIS BLUE’s Programming Guide. 3.2. Menu Tree MEASURES PARAMETERS CONFIGURATION PRODUCT IDENTIFICATION INVERTER OK M00=+0.00rpm M02=+ 0.00 rpm [MEA] PAR CF IDP INVERTER OK M00=+0.00rpm M02=+ 0.00 rpm MEA [PAR] CF IDP INVERTER OK M00=+0.00rpm M02=+ 0.00 rpm MEA PAR [CF] IDP INVERTER OK M00=+0.00rpm M02=+ 0.00 rpm MEA PAR CF [IDP] MEASURES MENU M Parameters Cannot be altered PARAMETERS MENU P Par. that can be altered when the motor is running CONFIGURATION MENU C-I-R Parameters Can be altered when motor OFF PRODUCT MENU Language Selection and Inverter Data [MEA] MOTOR MEASURES [PAR] PASSWORD AND USER LEVEL [CFG] [MEA] PID REGULATOR [PAR] [CFG] [MEA] DIGITAL INPUTS [PAR] [MEA] REFERENCES [PAR] SPEED LOOP AND CURRENT BALANCING (*) RAMPS MULTISPEED [IDP] AUTOTUNE PRODUCT MOTOR CONFIGURATION [CFG] MOTOR LIMITS [CFG] THERMAL PROTECTION [CFG] [MEA] OUTPUTS PID CONFIGURATION [MEA] AUTODIAGNOSTICS [CFG] [MEA] DIGITAL INPUT SETTINGS [CFG] MOTORS POWER EEPROM [MEA] FAULT LIST [MEA] POWER OFF LIST Figure 3: Menu Tree (*) Available for VTC control only. 21/69 BASIC USER MANUAL IRIS BLUE 3.3. Navigation Keypad Pages MENU INVERTER OK M00=+0.00rpm M02=+ 0.00 rpm [MEA] PAR CF IDP SAVE ENTER ESC MEASURES MENU M Parameters Cannot be altered INVERTER OK M00=+0.00rpm M02=+ 0.00 rpm MEA [PAR] CF IDP SAVE ENTER [PAR] PASSWORD AND USER LEVEL [MEA] PID REGULATOR ESC PARAMETERS MENU P Par. that can be altered when motor is running [MEA] MOTOR MEASURES INVERTER OK M00=+0.00rpm M02=+ 0.00 rpm MEA PAR [CF] IDP SAVE ENTER ESC CONFIGURATION M. C-I-R Parameters Can be altered when motor OFF [CFG] AUTOTUNE [PAR] INVERTER OK M00=+0.00rpm M02=+ 0.00 rpm MEA PAR CF [IDP] SAVE ENTER ESC PRODUCT MENU Language selection and inverter data [IDP] PRODUCT [CFG] RAMPS SAVE ENTER Accesso al menù Rampe MOTOR CONFIGURATION ESC P009 Accel. ramp 1 → 10.00s Navigazione all’interno del menù Rampe P010 Decel. ramp 1 → 10.00s SAVE ENTER Accesso alla modifica del parametro P010 P010 Decel. ramp 1 → █ 10.00s Modifica del parametro P010 P010 Decel. ramp 1 → █ 20.00s Figure 4: Navigation example If the ESC key is pressed to quit, the new parameter value will be acknowledged but not saved to non-volatile memory, and will therefore be lost at power off. Press SAVE/ENTER to confirm parameter alteration. 22/69 BASIC USER MANUAL IRIS BLUE 3.4. Function Keys Press the SAVE/ENTER key for parameter alteration; when a flashing cursor appears, press ▲ and ▼ to change the parameter value. Do one of the following to quit the editing mode: Press ESC → the parameter value that has been changed is used by the drive but is not stored to memory. It is lost when the drive is shut off. Press SAVE/ENTER → the parameter value is stored to non-volatile memory and is not deleted when the drive is shut off. Input values (Ixxx) cannot be saved to non-volatile memory; inputs are automatically set to their default values. Rxxx parameters become active only when the drive is next switched on or when the control board is reset by holding down the RESET key for a few seconds. Key ESC Functions Quits menus and sub-menus and confirms a new parameter value (when the editing mode is activated, the cursor starts flashing), which is not saved to non-volatile memory (the value is lost when the inverter is turned off). If the Operator mode is set up and the keypad is locked on the Keypad page, press ESC for at least 5 s to restart navigation. Down arrow; scrolls through the menus and submenus, the pages in a submenu or the parameters in descending order. While programming, it decrements the parameter value. Hold it down along with the increment key to access the next menu. Up arrow; scrolls through the menus and submenus, the pages in a submenu or the parameters in ascending order. While programming, it increments the parameter value. SAVE ENTER Accesses menus and submenus. In programming mode (cursor flashing) this key saves to non-volatile memory (EEPROM) the value of the parameter being altered. This prevents any parameter modification from being cleared in case of mains loss. If pressed when the Keypad page is displayed, the SAVE/ENTER key allows displaying the “Keypad Help” page, where the variables viewed in the previous page are detailed. MENU If pressed more than once, it scrolls through the menus: start page → access page for parameter alteration → ID SW page → keypad → start page, and so on. TX RX LOC REM RESET START STOP START UP Enters the pages for the parameter DOWNLOAD from the keypad to the inverter (TX) or allows parameter UPLOAD from the inverter to the keypad (RX); if pressed more than once, the TX|RX key allows selecting either operating mode. The active selection is highlighted by the page displayed; the relevant TX or RX LED starts flashing. To confirm Upload/Download, press the Save/Enter key when the wanted selection is active. If pressed once, reference and commands are forced via keypad; press it again to return to the prior configuration or to change the active reference in the Keypad page depending on the preset type of Keypad page (see the Display menu in the IRIS BLUE’s Programming Instruction manual). Resets the alarm tripped once the cause responsible for the alarm has disappeared. Press it for 8 seconds to reset the control board, thus allowing the microprocessors to be reinitialized and to activate R parameters with no need to shut off the inverter. If enabled, it starts the motor (at least one of the command sources is represented by the keypad). If enabled, it stops the motor (at least one of the command sources is represented by the keypad). The Start-Up Menu is a wizard allowing programming the main parameters for the connected motor . 23/69 BASIC USER MANUAL IRIS BLUE 3.5. Indicator LEDs in the Display/Keypad Nine LEDs are located on the keypad, along with a 4-line, 16-character LCD display, a buzzer and 11 function keys. The display shows parameter values, diagnostic messages and the variables processed by the IRIS BLUE drive. The figure below shows the location of the signal LEDs and their functionality. Key RUN LED – GREEN Motor not powered LED off Motor powered, but no torque (idle) LED flashing Motor powered and running LED on (fixed) REF LED – GREEN Reference for speed, frequency or torque = 0 Motor acceleration or deceleration Reference on ALARM LED – RED Inverter Ok Inverter alarm LIMIT LED – YELLOW No active limit Voltage or current limit active DEC-LIMIT LED – YELLOW Ordinary run Decelerating TX and RX LED – GREEN TX RX No parameter transfer in progress Download: waiting for confirmation Upload: waiting for confirmation Parameter downloading from keypad to inverter Parameter uploading from inverter to keypad L-CMD LED – GREEN Commands sent from sources other than keypad Commands sent both from keypad and terminal board Commands sent from keypad only L-REF – GREEN Reference sent from sources other than keypad Reference sent both from keypad and terminal board Reference sent from keypad only 24/69 BASIC USER MANUAL IRIS BLUE 4. WIRING 4.1. Wiring Diagram S000506 DO NOT USE (if present) AC POWER SUPPLY S EMC OUTPUT FILTER OUTPUT (OPTION) REACTOR (OPTION) B EMC FILTER T CIRCUIT BREAKER + D AC LINE REACTOR (OPTION) R GROUND GROUND CMA SPEED [*] REFERENCE SOURCE 1 2 ÷ 10kohm 0:10V REF -10VR +10VR AIN1+ [*] PID REFERENCE [*] PID FEEDBACK AIN1- 10 2 3 4 MOTOR [*] SPEED REFERENCE INPUT 10V [*] 0(4) : 20mA 5 DIFFERENTIAL ANALOG INPUT 1 10V 6 0(4) : 20mA [*] DIFFERENTIAL AIN2+/PTC1 7 ANALOG INPUT 2 10V AIN2-/PTC2 8 0(4) : 20mA [*] PTC CMA ANALOG OUTPUTS 10V [*] 0(4) : 20mA SW1 ENABLE-B [*] START START (MDI1) 14 ENABLE-A (MDI2) 15 [*] RESET (P/B) RESET (MDI3) 16 [*] MULTISPEED 1 MDI4 17 MDI5 18 [*] SOURCE SELECTION MDI6/ECHA/FINA 19 [*] LOCAL / REMOTE (P/B) MDI7/ECHB 20 FREE OPEN COLLECTOR DIGITAL OUTPUT DIGITAL INPUTS RELAY DIGITAL OUTPUTS MDI8/FINB 21 CMD 22 +24V 23 A03 CMA GROUND O ENABLE-A [*] MULTISPEED 0 13 SW2 PUSH-PULL DIGITAL OUTPUT S A02 SPEED [*] REFERENCE 12 9 ENABLE-B 11 MOTOR [*] CURRENT GROUND GROUND A01 1 24 +VMDO1 25 MDO1/FOUT 26 CMDO1 27 MDO2 28 CMDO2 29 MDO3-NC 30 MDO3-C 31 MDO3-NO 32 MDO4-NC 33 MDO4-C 34 MDO4-NO 48V - 50mA SPEED [*] > 50 RPM 48V - 50mA SPEED OK[*] 250Vac - 5A 30Vdc - 5A INVERTER [*] NO ALARM 250Vac - 5A 30Vdc - 5A INVERTER [*] RUN OK 24V - 200mA ISOLATED POWER SUPPLY GROUND [*] FACTORY DEFAULTS Figure 5: Wiring Diagram 25/69 BASIC USER MANUAL IRIS BLUE CAUTION In case of fuse line protection, always install the fuse failure detection device, that disables the drive, to avoid single-phase operation of the equipment. NOTE The wiring diagram relates to factory-setting. Please refer to section Power Terminals / Bars. [*] NOTE Factory settings can be changed by changing the configuration of the DIP switches and/or by changing the parameters pertaining to the terminals concerned (see IRIS BLUE’s Programming Guide). CAUTION NOTE 26/69 If present, terminals D and + must be short-circuited (factory setting). ENABLE-A and ENABLE-B inputs are allocated to the STO function. The control mode and the control circuit of these signals must be accomplished according to the instructions given in the Safe Torque Off Function – Application Manual. That manual also includes a detailed validation procedure for the STO control configuration to be performed upon first start up of the equipment and also at scheduled intervals. BASIC USER MANUAL IRIS BLUE 5. ALARMS AND WARNINGS CAUTION If a protection trips or the drive enters the emergency mode, the drive is locked and the motor idles! 5.1. What Happens when a Protective Device Trips NOTE Before operating the drive in emergency conditions, carefully read this section and the following section, What To Do When an Alarm Trips. The drive alarms are detailed below. When a protection / alarm trips: 1) the ALARM LED on the keypad comes on; 2) the page displayed on the keypad is the root page of the FAULT LIST; 3) the FAULT LIST is refreshed; In factory-setting, when the drive is switched on after an alarm has tripped—which has not been reset—it is kept in emergency condition. If the drive is in emergency mode when switched on, this could be due to an alarm tripped before the drive was reset. To avoid storing the alarms tripped before the drive is switched off, set parameter C257 in the Autoreset Menu. The drive stores the moment when an alarm trips to the FAULT LIST (supply time and operation time). The drive status when the alarm tripped and some measures sampled when the alarm tripped are also stored to the Fault List. The readout and storage of the fault list can be very useful to detect the cause responsible for the alarm and its possible solution (see also the Fault List Menu/Power Off List Menu in the IRIS BLUE’s Programming Guide). NOTE Alarms A001 to A039 relate to the main microcontroller (DSP Motorola) of the control board, which detected a fault on the control board itself. No fault list is available for Alarms A001 to A039 and no Reset command can be sent via serial link; alarms can be reset through the RESET terminal on the terminal board or the RESET key on the keypad. No software for the keypad interface is available; the drive parameters and measures cannot be accessed via serial link. Avoid resetting alarms A033 and A039, as they trip when the flash memory is not provided with its correct software. Alarms A033 and A039 can be reset only when proper software is downloaded for the drive flash memory. CAUTION Before resetting any alarm, open the ENABLE-A and ENABLE-B terminals to disable the drive and prevent the connected motor from running at uncontrolled speed. 27/69 BASIC USER MANUAL IRIS BLUE 5.2. What To Do when an Alarm Trips CAUTION Before resetting any alarm, open the ENABLE-A and ENABLE-B terminals to disable the drive and to prevent the connected motor from running at uncontrolled speed. Proceed as follows: 1. Open the ENABLE-A and ENABLE-B terminals to disable the drive and to lock the motor, unless parameter C181=1 (the Safety Start function is active): after resetting an alarm or after supplying the drive, this will start only if the ENABLE-A and ENABLE-B terminals are opened and closed again. 2. If the motor is idling, wait until it stops. Check the FAULT LIST carefully for any information about the alarm tripped, in order to find the cause responsible for the alarm and its possible solutions. Any information stored to the FAULT LIST is also required when contacting Elettronica Santerno’s Customer Service. 3. 4. 5. 6. 7. In the following sections, find the alarm code and follow the instructions given. Solve any external problems that may have been responsible for the protection trip. If the alarm tripped due to the entry of wrong parameter values, set new correct values and save them. Reset the alarm. If the alarm condition persists, please contact Elettronica Santerno’s Customer Service. A RESET command must be sent to reset the alarms tripped. Do one of the following: • Enable the RESET signal in MDI3 terminal in the hardware terminal board; • Press the RESET key on the keypad. 28/69 BASIC USER MANUAL IRIS BLUE 5.3. Alarm Code List Alarm Alarm Message Description A001 ÷ A032 A034 ÷ A038 … Control board failure A033 TEXAS VER KO A039 FLASH KO A040 User Fault A041 PWMA Fault A042 Illegal XMDI in DGI A043 … Control board failure A044 SW OverCurrent Software overcurrent A045 A046 A047 Bypass Circuit Fault Bypass Connector Fault UnderVoltage Incompatible Texas Software Version Texas Flash not programmed Alarm caused by the user General hardware fault from IGBT, side A Illegal configuration of XMDI in the Digital Inputs menu Precharge By-Pass fault Precharge By-Pass connector fault DC bus voltage lower than Vdc_min A048 OverVoltage DC bus voltage exceeding Vdc_max A049 … Control board failure A050 PWMA0 Fault Hardware Fault from IGBT converter, side A A051 PWMA1 Fault Hardware overcurrent, side A A052 Illegal XMDI in DGO A053 PWMA Not ON A054 Optional Board not in Illegal configuration of XMDI in the Digital Outputs menu Hardware failure, IGBT A power on impossible Failure in detecting preset option I/O board A055 PTC Alarm External PTC tripped What to do 1. 2. Reset the IRIS BLUE drive. Contact Elettronica Santerno’s Customer Service. 1. 2. Download the correct DSP Texas software version. Contact Elettronica Santerno’s Customer Service. Reset the IRIS BLUE drive. 1. Reset the IRIS BLUE drive. 2. Contact Elettronica Santerno’s Customer Service. 1. 2. Check setting in R023. Check settings in the Digital Inputs menu. 1. 2. 1. 2. 3. 4. 5. 6. Reset the IRIS BLUE drive. Contact Elettronica Santerno’s Customer Service. Check drive and motor ratings. Check output short circuit. Check for disturbance in control signal. Set a longer acceleration time. Set a longer deceleration time. Disconnect motor and change C010 to 0:IFD. 1. 2. Reset the IRIS BLUE drive. Contact Elettronica Santerno’s Customer Service. 1. 2. 3. 4. 5. 1. 2. 1. 2. 1. 2. 3. 4. 5. 6. Check supply voltage on terminals R, S, T. Check M030 (Supply voltage) and M029 (DC bus voltage). Check M030 and M029 in the Fault List. Contact Elettronica Santerno’s Customer Service. Check supply voltage on terminals R, S, T. Check M030 (Supply voltage) and M029 (DC bus voltage). Check M030 and M029 in the Fault List. Set a longer deceleration time. Contact Elettronica Santerno’s Customer Service. Reset the IRIS BLUE drive. Contact Elettronica Santerno’s Customer Service. Reset the IRIS BLUE drive. Contact Elettronica Santerno’s Customer Service. Check drive and motor ratings. Check output short circuit. Check disturbance in control signal. Set a longer acceleration time. Set a longer deceleration time. Disconnect motor and change C010 to 0:IFD. 1. 2. Check setting in R023. Check settings in the Digital Outputs menu. 1. 2. 1. 2. 1. 2. 3. Reset the IRIS BLUE drive. Contact Elettronica Santerno’s Customer Service. Check consistency of parameter R023. Contact Elettronica Santerno’s Customer Service. Allow motor to cool. Ensure that PTC is correctly connected to AIN2. Ensure that SW1 is correctly set up in the control board. 3. 4. 1. 2. 29/69 BASIC USER MANUAL IRIS BLUE Alarm Alarm Message Description A056 PTC Short Circuit External PTC in short circuit A057 Illegal XMDI in MPL Illegal configuration of XMDI in the Virtual Digital Outputs menu Ser WatchDog Watchdog tripped in serial link 0 (9-pole D connector) What to do 1. A061 A062 SR1 WatchDog Watchdog tripped in serial link 1 (RJ45) A063 … Control board failure A064 Mains Loss No power is supplied from the mains A065 AutoTune Fault A066 REF < 4mA A067 AIN1 < 4mA A068 AIN2 < 4mA A069 XAIN5 < 4mA A070 Fbs WatchDog A071 … A072 Parm Lost Chk A073 Parm Lost 1 COM A074 Inverter Overheated 30/69 Autotune failed 2. Make sure that the PTC is correctly connected to AIN2. Ensure that SW1 is correctly set up in the control board. 1. 2. Check setting in R023. Check setting in the MPL menu. 1. 2. Check serial link 0. Make sure that the master sends read/write queries with max. interval between queries lower than preset watchdog operation time. Set longer watchdog operation time (R005). Check serial link 1. Make sure that the master sends read/write queries with max. interval between queries lower than preset watchdog operation time. Set a longer watchdog operation time (R012). Reset the IRIS BLUE drive. Contact Elettronica Santerno’s Customer Service. Check supply voltage on terminals R, S, T. Check M030 (Supply voltage). Check M030 in the Fault List. Alarm may be disabled or delayed in Power down menu (Engineering user level required). Reset the IRIS BLUE drive. Check parameters in Motor Control Menu and perform a new autotune. Contact Elettronica Santerno’s Customer Service. 3. 1. 2. 3. 1. 2. 1. 2. 3. 4. 1. 2. 3. REF Current input (4÷20mA) lower than 4mA 1. Check setting of SW1 in the control board. AIN1 Current input 2. Check if signal cable is properly connected. (4÷20mA) lower than 4mA 3. Check the current signal source. AIN2 Current input (4÷20mA) lower than 4mA XAIN5 Current input 1. Check if signal cable is properly connected. (4÷20mA) lower than 4mA 2. Check the current signal source. 1. Check fieldbus connection. 2. Ensure master sends legal messages with max. time Fieldbus Watchdog tripped interval lower than preset watchdog time. 3. Set longer watchdog times (R016) 1. Reset the IRIS BLUE drive. Control board failure 2. Contact Elettronica Santerno’s Customer Service. Parameter download/upload error 1. Check keypad connection. 2. Reset the alarm and repeat Upload/Download. Parameter download/upload error 1. Check drive output current (M026) during normal Drive thermal protection operation. tripped 2. Check mechanical load of connected motor (locked shaft/overload). BASIC USER MANUAL Alarm IRIS BLUE Alarm Message Description Motor thermal protection tripped 1. 2. 1. 2. What to do Check mechanical conditions and load. Check parameters C265 and C267. Check if C031 is compatible with the connected motor. Check the torque reference in Slave mode (Advanced user level required). Reset the IRIS BLUE drive. Contact Elettronica Santerno’s Customer Service. Check keypad connection. Check settings for RJ45 serial link. A075 Motor Overheated A076 Speed Alarm Motor speed too high A078 … Control board failure A081 KeyPad WatchDog A083 External Alarm 1 Communication watchdog via keypad External alarm 1 A084 A085 External Alarm 2 External Alarm 3 External alarm 2 External alarm 3 A086 XAIN5 > 20mA XAIN5 Current input (4÷20mA or 0÷20mA) greater than 20mA 1. 2. Check if signal cable is properly connected. Check the current signal source. A088 … Control board failure 1. 2. Reset the IRIS BLUE drive. Contact Elettronica Santerno’s Customer Service A089 Parm Lost 2 COM Parameter download/upload error Parm Lost 3 COM Parameter download/upload error 1. 2. Check keypad connection. Reset the alarm and repeat Upload/Download. A090 A092 A093 A094 A095 A096 A097 A099 A102 A103 A104 A105 A106 A107 A108 A109 1. 2. 1. 2. Check external signal in allocated MDI. 1. Reset the IRIS BLUE drive. 2. Contact Elettronica Santerno’s Customer Service. 1. Check ambient temperature. Bypass Circuit Open By-Pass relay open 2. Check motor current. IGBT heatsink 3. Decrease carrier frequency (C001-C002). Heatsink Overheated temperature too high (Engineering user level required). 1. Make sure that the Drive Profile board is correctly Illegal Drive Profile Incorrect configuration configured for the IRIS BLUE drive. Board of Drive Profile board 2. Replace the Drive Profile board. Fan Fault Fault of the cooling fans Replace fans. 1. Check connections to U, V, W. Motor Not Motor not wired 2. Check motor parameters & perform new autotune for Connected VTC. 1. Reset the IRIS BLUE drive. 2nd Sensor Fault Fault of fan sensor 2 2. Contact Elettronica Santerno’s Customer Service. REF Current input REF>20mA (4÷20mA or 0÷20mA) greater than 20mA AIN1 Current input 1. Check setting of SW1 in the control board. AIN1>20mA (4÷20mA or 0÷20mA) 2. Check the current signal source. greater than 20mA AIN2 Current input AIN2>20mA (4÷20mA or 0÷20mA) greater than 20mA Hardware address out PT100 Channel 1 of measure range of the Fault drive Hardware address out PT100 Channel 2 of measure range of the Fault drive 1. Check setting of SW1 in ES847 (optional board). Hardware address out 2. Check the current signal source. PT100 Channel 3 of measure range of the Fault drive Hardware address out PT100 Channel 4 of measure range of the Fault drive 1. Open the cabinet and check its conditions. Also check Ambient measure M062. Amb.Overtemp. overtemperature 2. Reset the IRIS BLUE drive. 3. Contact Elettronica Santerno’s Customer Service. … Control board failure 31/69 BASIC USER MANUAL IRIS BLUE Alarm Alarm Message Description A110 ÷ A120 … Control board failure A121 DLX Master Not On A122 DLX Timeout A123 DLX Error A124 Master Conflict A125-A127 ... A129 No Output Phase A136 Dry-run A137 Press. loss A140 Torque Off not Safe What to do 1. 2. Reset the IRIS BLUE drive. Contact Elettronica Santerno’s Customer Service. General malfunctioning of the Master serial comms Timeout from serial comms 1. detected by the Master 2. Error from serial comms 3. detected by the Master Two drives acting as the Master at the same time Check serial communications and wiring Reset the IRIS BLUE drive. Contact Elettronica Santerno’s Customer Service 1. 2. Reset the IRIS BLUE drive. Contact Elettronica Santerno’s Customer Service. Control board failure Check circuitry continuity between the drive and the motor. 2. Contact Elettronica Santerno’s Customer Service. 1. The pump is running dry. 2. Check pump and correct operating conditions. Pump Dry-run 3. Check configuration of dry-run parameters in the “Dryrun Control” menu. 1. Pressure reference with PID control cannot be tracked due to too-high flow/power requested to the motor, e.g. due to pipe leakage or pump end-of-curve operation. Pressure loss 2. Check leakage in the hydraulic circuit and pump operating conditions. 3. Check configuration of parameters in the “Pressure Loss Control” menu. 1. Reset the inverter. 2. Contact Elettronica Santerno. Malfunctioning of ENABLE- NOTE: If alarm A140 persists, this means that the STO A and ENABLE-B inputs for function is faulty. In order to restore the application safety level, replace the drive or at least the control board. STO Consult the Safe Torque Off Function – Application Manual for the check and restoration procedures to follow. Output phase disconnection 1. Table 1: Alarm Code List 32/69 BASIC USER MANUAL IRIS BLUE 5.4. Warnings Warning messages are displayed on the display/keypad. They are flashing messages that usually appear in line 1 or 2 on the display. NOTE Warnings are neither protections nor alarms, and are not stored to the Fault list. Warning Message W03 SEARCHING… The user interface is searching the data of the next page to display. W04 DATA READ KO Software warnings concerning data reading. W06 HOME SAVED W07 DOWNLOADING W08 UPLOADING W09 DOWNLOAD OK W11 UPLOAD OK W12 UPLOAD KO W13 NO DOWNLOAD W16 PLEASE WAIT… W17 SAVE IMPOSSIBLE W18 PARAMETERS LOST W19 NO PARAMETERS LOAD W20 NOT NOW W21 CONTROL ON W23 DOWNLOAD VER. KO W24 VERIFY DATA W28 OPEN START W32 OPEN ENABLE W33 WRITE IMPOSSIBLE W34 ILLEGAL DATA W35 NO WRITE CONTROL W36 ILLEGAL ADDRESS Description The page displayed has been saved as the home page displayed at power on. The keypad is writing to the drive the WORK zone parameters saved to its own flash memory. The keypad is reading from the drive the WORK zone parameters that will be saved to its own flash memory. Parameters were successfully downloaded (written) from the keypad to the drive. Parameters were successfully uploaded (read) from the drive to the keypad. The keypad interrupted parameter upload to the drive. Parameter reading has failed. A Download procedure was queried, but no parameter is saved to the flash memory. Wait until the system completes the operation required. Parameter save is not allowed. The keypad interrupted parameter download to the drive. Parameter writing has failed. As a result, not all parameters have been updated (parameter inconsistency). UPLOAD impossible. The required function is not available at the moment. The required function is inhibited because the drive is running. Download failed because parameters saved to keypad memory relate to a SW version or product ID incompatible with the drive SW version or product ID. Download preliminary operation underway, the system is checking the integrity and compatibility of the parameters saved in the keypad memory. Open and close the START input to start the drive. Open and close the ENABLE-A and ENABLE-B inputs. Writing procedure impossible. Illegal value entered, operation failed. Writing procedure impossible because Control is active and the drive is running. Illegal address entered, operation failed. The drive is disabled and does not acknowledge the ENABLE-A and ENABLE-B inputs because it is writing a Cxxx parameter. W37 ENABLE LOCKED CAUTION The drive will start up as soon as writing is over!!! W38 LOCKED Editing mode cannot be accessed because parameter modification is disabled: P000 is different from P002. 33/69 BASIC USER MANUAL IRIS BLUE Warning Message Description W39 KEYPAD DISABLED W40 FAN FAULT W41 SW VERSION KO W42 IDP KO Download impossible because of different IDPs (Identification Products). W43 PIN KO Download impossible because of different PINs (Part Identification Numbers). W44 CURRENT CLASS KO Download impossible because of different current classes. W45 VOLTAGE CLASS KO Download impossible because of different voltage classes. W46 DOWNLOAD KO W47 SERIAL TIMEOUT W48 OT Time over The preset threshold for the drive Operation Time has been exceeded. W49 ST Time over The preset threshold for the drive Supply Time has been exceeded. W50 NTC Fault NTC sensor for heatsink temperature disconnected or faulty. W51 DRY-RUN Dry-run condition detected. W52 PRESSURE LOSS The editing mode cannot be accessed because the keypad is disabled. Fan locked or disconnected or faulty. Download impossible because of different SW Versions. Download impossible (generic cause). Master–Slave link loss in case of control via serial link. Pressure loss due to pump working under end-of-curve conditions or due to circuit leakage detection. Table 2: Warning list 34/69 BASIC USER MANUAL IRIS BLUE 5.5. State List Number State Description 0 ALARM!!! Alarm tripped 1 START UP The drive is starting up 2 MAINS LOSS 3 TUNING 4 SPEED SEARCHING 5 DCB at START DC Braking at start 6 DCB at STOP DC Braking at stop 7 DCB HOLDING DC current for Hold function 8 DCB MANUAL Manual DC Braking 9 LIMIT IN ACCEL. Current/torque limit while accelerating 10 LIMIT IN DECEL. Current/torque limit while decelerating 11 LIMIT IN CONSTANT RPM 12 BRAKING 13 CONSTANT RUN 14 IN ACCELERATION Drive running with motor in acceleration stage 15 IN DECELERATION Drive running with motor in deceleration stage 16 INVERTER OK 17 FLUXING 18 MOTOR FLUXED Motor fluxed 19 FIRE MODE RUN Constant rpm in Fire Mode 20 FIRE MODE ACCEL. Acceleration in Fire Mode 21 FIRE MODE DECEL. Deceleration in Fire Mode 22 INVERTER OK* 25 SPARE 27 WAIT NO ENABLE 28 WAIT NO START 29 PIDOUT min DISAB 30 REF min DISAB. 31 IFD WAIT REF. 32 IFD WAIT START 33 DISABLE NO START 34 MASTER NOT USED 35 REG. TIME OUT Mains loss The drive is tuning Searching for motor speed Current/torque limit at constant rpm Deceleration ramp extension Drive running at speed set point Drive on Stand-by with no alarms tripped Motor fluxing stage Drive on Stand-by with no alarms tripped, but void warranty due to alarm trip in Fire Mode Board in Spare mode Waiting for ENABLE-A and ENABLE-B inputs opening Waiting for START input opening Drive disabled due to PID output < Min (Sleep Mode). Drive disabled due to REF < Min. Drive enabled with IFD control waiting for reference in order to start Drive enabled with IFD control waiting for START in order to start When fluxing, the RUN command was not given within the max. time set in C183. The drive is kept disabled until the RUN command is given. Plant operating with Master drive not running. Plant stopped due to adjustment plant timeout (see Adjustment Timeout Menu) in the Programming Guide. Table 3: State List 35/69 ITALIANO MANUALE UTENTE BASIC IRIS BLUE 0. MESSA IN SERVIZIO NOTA 1) Verifica: 2) Installazione e Collegamenti: 3) Accensione: 4) Impostazione parametri: Il presente Manuale contiene le informazioni essenziali per la messa in servizio degli inverter IRIS BLUE. Per ogni dettaglio sull’installazione e la programmazione degli inverter IRIS BLUE fare riferimento alla documentazione completa di prodotto disponibile per il download al sito santerno.com. In questo manuale si fa riferimento alla seguente documentazione: IRIS BLUE – Guida all’Installazione IRIS BLUE – Guida alla Programmazione IRIS BLUE – Funzione STO – Manuale Applicativo NOTA Gli inverter della serie IRIS BLUE sono forniti di fabbrica col metodo di controllo “IFD” (V/f). La procedura di messa in servizio dell’apparecchiatura descritta nel presente capitolo e, in particolare, il punto 5) Avviamento si riferiscono a tale metodo di controllo. NOTA Gli inverter della serie IRIS BLUE dispongono della funzione Safe Torque Off (STO nel seguito) realizzata e certificata in accordo allo standard EN 61800-5-2. Per il corretto impiego di tale funzione e per integrare correttamente l’inverter nella catena di sicurezza dell’applicazione è necessario far riferimento alle note applicative riportate nel manuale Funzione STO – Manuale Applicativo. Verificare che la taglia dell’inverter sia maggiore o uguale a quella del motore facendo riferimento alla targhetta posta sull’inverter. Vedi il paragrafo Verifica all’atto del ricevimento. Per i collegamenti e per il grado di protezione IP dell’inverter fare riferimento al paragrafo Installazione. Garantire una ventilazione adeguata dell’inverter. Vedere anche la Guida all’Installazione per ulteriori dettagli. Nel caso in cui si voglia impiegare l’inverter nell’ambito di un’applicazione che sfrutta la funzione di sicurezza STO integrata nell’inverter è necessario anche seguire le prescrizioni del manuale Funzione STO – Manuale Applicativo. Alimentare l’inverter; verificare l’accensione del tastierino. La messa in servizio dell’inverter è facilitata utilizzando il ‘Menù Start Up’, menù guidato per la programmazione dei principali parametri di gestione motore. Tale menù è disponibile premendo il tasto START-UP presente sul tastierino. Il ‘Menù Start Up’ si presenta con la seguente pagina d’apertura: [ I DP ME P r p e ] I R I S BLUE NÙ S TART - UP em i ENTER r i n i z i a r e ed alla pressione del tasto ENTER l’utente entrerà nel menù wizard. Prima della parametrizzazione dei parametri di controllo l’utente dovrà scegliere la lingua da utilizzare: P 2 6 3 L i n g u a →@@@@@@@@@@@@@@@ 37/69 MANUALE UTENTE BASIC IRIS BLUE Una volta eseguita la scelta, si entra nel menù vero e proprio: Parametro C013 Significato Tipo di curva V/f del motore C015 Frequenza nominale del motore C016 Giri al minuto nominali del motore C017 Potenza nominale del motore C018 Corrente nominale motore C019 Tensione nominale del motore C028 Velocità minima motore C029 Velocità massima motore P009 Tempo rampa di accelerazione P010 Tempo rampa di decelerazione P018 Rampa di accelerazione iniziale P019 Rampa di accelerazione finale Visibilità [solo se IFD attivo] P020 Soglia velocità rampa iniziale/finale C043 Limite di corrente in accelerazione [solo se IFD attivo] C044 Limite di corrente a regime [solo se IFD attivo] C045 Limite di corrente in decelerazione [solo se IFD attivo] C265 Modalità prot. termica per il motore C267 Costante di tempo termica motore [solo se prot. attiva] Dopo aver settato l’ultimo parametro e scorrendo in avanti col cursore apparirà la seguente pagina: P p f p r e r e em i f r e c c i a SU r u s c i r e e c c i a G I Ù r c o n t i n u a r e Alla pressione del tasto ▲ l’utente uscirà dal menù di Start Up e la schermata si porterà alla pagina di default del sistema. 38/69 MANUALE UTENTE BASIC IRIS BLUE Controllo da morsettiera: 2. Attivare l’ingresso START (morsetto 14). 3. Inviare un riferimento di velocità all’ingresso REF: 0-10V (morsetti 1, 2 e 4). 4. Si accenderanno i LED RUN e REF e il motore si avvierà. Assicurarsi che il motore ruoti nella direzione desiderata. In caso contrario, agire sul parametro C014 o aprire i morsetti ENABLE-A, ENABLE-B e START. Disalimentare l’inverter e, dopo aver atteso almeno 20 minuti, scambiare tra loro due fasi del motore. Controllo da tastierino: 1. Attivare gli ingressi ENABLE-A (morsetto 15) ed ENABLE-B (morsetto S). 2. Premere il tasto LOC/REM del tastierino. 5) Avviamento: 3. Si accenderanno i LED L-CMD e L-REF. 4. Premere il tasto START. 5. Mantenere premuto il tasto “Freccia su” per incrementare il riferimento di velocità. 6. Si accenderanno i LED RUN e REF e il motore si avvierà. Assicurarsi che il motore ruoti nella direzione desiderata. In caso contrario, agire sul parametro C014 o aprire i morsetti ENABLE-A, ENABLE-B e START, e premere il pulsante STOP. GROUND S000507 1. Attivare gli ingressi ENABLE-A (morsetto 15) ed ENABLE-B (morsetto S). CMA 0:10V REF 2 ÷ 10kohm -10VR +10VR 1 2 3 REFERENCE INPUT 0 -: 10 V 4 4 ÷ 20 mA AIN1+ 5 AIN1- 6 CMA 9 ANALOG INPUT 4 -: 20 mA GROUND GROUND ENABLE-B O S START (MDI1) 14 ENABLE-A (MDI2) 15 RESET (P/B) (MDI3) 16 MULTISPEED 0 (MDI4) 17 MULTISPEED 1 (MDI5) 18 SOURCE SELECTION (MDI6) 19 LOCAL / REMOTE (P/B) (MDI7) 20 CW / CCW (MDI8) 21 CMD 22 +24V 23 24V - 200mA GROUND Disalimentare l’inverter e, dopo aver atteso almeno 20 minuti, scambiare tra loro due fasi del motore. NOTA: Gli ingressi ENABLE-A e ENABLE-B sono associati alla funzione STO. Nel caso in cui si intenda sfruttare questa funzionalità di sicurezza, la modalità di comando e il circuito di comando di questi segnali deve essere realizzato in accordo alle prescrizioni del manuale Funzione STO – Manuale Applicativo. Il manuale riporta anche una precisa procedura di validazione della configurazione di comando della funzione STO che deve essere effettuata al primo avviamento ed anche periodicamente ad intervalli annuali. 6) Possibili inconvenienti: Se non si sono registrati inconvenienti passare al punto successivo; in caso contrario, controllare i collegamenti verificando l’effettiva presenza delle tensioni di alimentazione, del circuito intermedio in continua e la presenza del riferimento in ingresso. Verificare anche la presenza di messaggi di allarme sul display. Nel MENÙ MISURE verificare i valori registrati nello Storico allarmi per la velocità di riferimento (M000), la tensione di alimentazione verso l’inverter (M030), la tensione del circuito intermedio in continua (M029) e lo stato dei morsetti di comando (M033). Verificare la congruenza di queste indicazioni con le misure effettuate. 7) Successive variazioni di parametri: Il livello di accesso BASIC consente di modificare un numero limitato di parametri. Per accedere alle numerose funzionalità offerte dal IRIS BLUE occorre impostare il livello di accesso ADVANCED o ENGINEERING agendo sul parametro P001 (vedi la Guida alla Programmazione). 8) Reset: Qualora si verifichi un allarme, individuare la causa che lo ha generato e resettare l’apparecchiatura attivando l’ingresso RESET (morsetto 16) o premendo il tasto RESET del tastierino. NOTA Qualora venga utilizzata la funzione Safe Torque Off, è necessario rivalidare la completa funzionalità della funzione di sicurezza ad ogni variazione della configurazione di impiego dell’inverter. Consultare a tal proposito le note applicative riportate nel manuale Funzione STO – Manuale Applicativo. 39/69 IRIS BLUE MANUALE UTENTE BASIC 1. SOMMARIO 1.1. Indice dei capitoli 0. 1. 2. 3. 4. 5. MESSA IN SERVIZIO.............................................................................................................................................. 37 SOMMARIO ............................................................................................................................................................ 40 1.1. Indice dei capitoli ........................................................................................................................................... 40 1.2. Indice delle figure ........................................................................................................................................... 41 1.3. Indice delle tabelle ......................................................................................................................................... 41 1.4. Come utilizzare questo manuale .................................................................................................................... 42 1.4.1. Procedure generali .................................................................................................................................. 42 DESCRIZIONE DELL’HARDWARE E INSTALLAZIONE ....................................................................................... 43 2.1. Avvertenze importanti per la sicurezza .......................................................................................................... 43 2.2. Verifica all’atto del ricevimento ...................................................................................................................... 45 2.2.1. Targhetta identificativa ........................................................................................................................... 46 2.3. Installazione ................................................................................................................................................... 46 2.3.1. Condizioni ambientali di installazione, immagazzinamento e trasporto ........................................... 47 2.3.2. Dimensioni, peso e potenza dissipata .................................................................................................. 48 2.3.2.1. Modelli IP20 e IP00 classe 2T ......................................................................................................... 48 2.3.2.2. Modelli IP20 e IP00 classe 4T ......................................................................................................... 49 2.3.3. Morsettiere / barre di potenza ................................................................................................................... 50 2.3.4. Sezioni cavi potenza e taglia organi di protezione .............................................................................. 52 2.3.4.1. Classe di tensione 2T ...................................................................................................................... 52 2.3.4.2. Classe di tensione 4T ...................................................................................................................... 53 2.3.5. Connessione a terra dell’inverter e del motore .................................................................................... 54 UTILIZZO DEL MODULO TASTIERA/DISPLAY .................................................................................................... 55 3.1. Descrizione .................................................................................................................................................... 55 3.2. Albero dei menù ............................................................................................................................................. 55 3.3. Modalità di navigazione ................................................................................................................................. 56 3.4. Tasti funzione ................................................................................................................................................. 57 3.5. LED di segnalazione del modulo tastiera/display .......................................................................................... 58 COLLEGAMENTI .................................................................................................................................................... 59 4.1. Schema dei collegamenti ............................................................................................................................... 59 ELENCO ALLARMI E WARNING ........................................................................................................................... 61 5.1. Cosa succede quando scatta una protezione ................................................................................................ 61 5.2. Cosa fare quando si è verificato un allarme................................................................................................... 62 5.3. Elenco dei codici di allarme ........................................................................................................................... 63 5.4. Warning ......................................................................................................................................................... 67 5.5. Elenco degli stati ............................................................................................................................................ 69 40/69 MANUALE UTENTE BASIC IRIS BLUE 1.2. Indice delle figure Figura 1: Targhetta identificativa dell’inverter ................................................................................................................... 46 Figura 2: Barre di collegamento S41 ................................................................................................................................ 51 Figura 3: Struttura ad albero dei menù ............................................................................................................................. 55 Figura 4: Esempio di navigazione ..................................................................................................................................... 56 Figura 5: Schema dei collegamenti................................................................................................................................... 59 1.3. Indice delle tabelle Tabella 1: Elenco dei codici di allarme.............................................................................................................................. 66 Tabella 2: Elenco dei warning ........................................................................................................................................... 68 Tabella 3: Elenco degli stati .............................................................................................................................................. 69 41/69 MANUALE UTENTE BASIC IRIS BLUE 1.4. Come utilizzare questo manuale 1.4.1. P ROCEDURE GENERALI Il presente Manuale d‘Uso (Basic) fornisce le informazioni essenziali necessarie alla messa in servizio e al monitoraggio degli inverter della serie IRIS BLUE fabbricati da Elettronica Santerno SpA. Il capitolo relativo alla descrizione hardware e all’installazione illustra soltanto i collegamenti di base dell’apparecchiatura. Per l’installazione di opzioni e/o la configurazione degli ingressi/uscite analogici e digitali si rimanda alla Guida all’Installazione dell’IRIS BLUE. Se si intende utilizzare la funzione STO dell’inverter nell’ambito di un’applicazione che richiede un elevato grado di sicurezza funzionale, consultare ed applicare scrupolosamente le prescrizioni presenti nel manuale Funzione STO – Manuale Applicativo. L’inverter IRIS BLUE è fornito nella modalità di programmazione Basic, che prevede l’attivazione dei soli parametri più comunemente usati e la preimpostazione degli ingressi e delle uscite. Per effettuare ulteriori regolazioni è necessario impostare il livello di accesso ai parametri su Advanced o Engineering mediante il parametro P001 (vedi il MENÙ PASSWORD E LIVELLO DI ACCESSO nella Guida alla Programmazione). Le operazioni di programmazione/monitoraggio possono essere effettuate (anche contemporaneamente): 1) tramite il modulo tastiera/display; 2) via seriale attraverso la porta RS485 standard oppure tramite la scheda opzionale ES822. Vedere la Guida all’Installazione per le informazioni relative all’utilizzo e alla remotazione della tastiera. Tutte le informazioni scambiate da e verso l’inverter tramite il modulo tastiera/display possono essere ottenute anche via seriale attraverso il pacchetto software IrisControl offerto da Elettronica Santerno. Tale software offre strumenti come cattura di immagini, emulazione tastiera, funzioni oscilloscopio e tester multifunzione, compilatore di tabelle contenente i dati storici di funzionamento, impostazione parametri e ricezionetrasmissione-salvataggio dati da e su PC, funzione scan per il riconoscimento automatico degli inverter collegati (fino a 247). I livelli di accesso Advanced e Engineering rendono disponibili numerose altre funzioni, tra le quali: • • • • • • • • • • • • • • • • • • • • Personalizzazione della navigazione nel modulo tastiera/display. Personalizzazione di valori di monitoraggio standard. Possibilità di selezionare fino a 2 rampe di accelerazione e decelerazione. Personalizzazione e messa in scala dei segnali analogici di ingresso. Possibilità di selezionare fino a 7 valori di velocità predefiniti. Configurazione di 3 velocità proibite. Regolazione degli algoritmi di controllo VTC. Personalizzazione dei segnali analogici di uscita. Allocazione di funzioni timer interni a I/O digitali. Attivazione e regolazione del PID. Configurazione di un comparatore di uscita digitale e funzioni logiche. Funzionamento Master/Slave con controllo di coppia. Regolazione della limitazione di corrente. Personalizzazione delle uscite digitali. Impostazione della sorgente dei comandi di avviamento e di velocità. Frenatura in corrente continua. Funzione Speed Searching. Funzione Autoreset. Protezione termica del motore e allocazione pastiglia termica. Comunicazione seriale e Fieldbus. Per accedere alle funzioni suddette, impostare il livello Advanced o Engineering mediante il parametro P001. 42/69 MANUALE UTENTE BASIC IRIS BLUE 2. DESCRIZIONE DELL’HARDWARE E INSTALLAZIONE 2.1. Avvertenze importanti per la sicurezza LEGENDA: PERICOLO Indica procedure operative che, se non eseguite correttamente, possono provocare infortuni o perdita della vita a causa di shock elettrici. ATTENZIONE Indica procedure operative che, se non eseguite, possono provocare gravi danni all’apparecchiatura. NOTA Indica informazioni importanti relative all’uso dell’apparecchiatura. RACCOMANDAZIONI RELATIVE ALLA SICUREZZA DA SEGUIRE NELL’USO E NELL’INSTALLAZIONE DELL’APPARECCHIATURA: 1. NOTA 2. 1. 2. 3. 4. 5. 6. PERICOLO 7. 8. Leggere sempre questo manuale di istruzione completamente prima di avviare l’apparecchiatura. Il collegamento di terra della carcassa del motore deve avere un percorso separato al fine di prevenire possibili disturbi. EFFETTUARE SEMPRE IL COLLEGAMENTO A TERRA DELL’INVOLUCRO DEL MOTORE E DELL’INVERTER. Nel caso in cui si utilizzi un relè differenziale per la protezione dagli shock elettrici, questo deve essere di tipo B. L’inverter può generare in uscita una frequenza fino a 1000Hz; ciò può provocare una velocità di rotazione del motore fino a 20 (venti) volte la nominale (per motore a 50Hz); non usare mai il motore oltre la velocità massima indicata dal costruttore. POSSIBILITÀ DI SHOCK ELETTRICI – Non toccare parti elettriche dell’inverter con questo alimentato e attendere sempre almeno 20 minuti dal momento in cui è stata tolta l’alimentazione prima di effettuare interventi sulle parti elettriche, poiché l’inverter accumula energia elettrica al suo interno. Non effettuare operazioni sul motore con l’inverter alimentato. Non effettuare collegamenti elettrici, né sull’inverter né sul motore, con l’inverter alimentato. Anche con l’inverter disabilitato sussiste pericolo di shock elettrici sui terminali di uscita (U, V, W) e sui terminali (+), (–), (B) (se presenti). Dopo aver disalimentato l’inverter, attendere almeno 20 minuti prima di operare sulle connessioni elettriche dell’inverter e del motore. MOVIMENTO MECCANICO – L’inverter causa il movimento meccanico. È responsabilità dell’utilizzatore assicurarsi che ciò non provochi condizioni di pericolo. La funzione di sicurezza STO dell’inverter può essere usata per impedire il movimento meccanico in alcune condizioni operative. È responsabilità dell’utilizzatore valutare il livello di sicurezza ed applicare correttamente questa funzione senza esporre gli operatori ai rischi meccanici. ESPLOSIONE E INCENDIO – Rischi di esplosione e incendio possono sussistere installando l’apparecchiatura in locali dove sono presenti vapori infiammabili. Montare l’apparecchiatura al di fuori di ambienti esposti a pericolo di esplosione e incendio anche se vi è installato il motore 43/69 MANUALE UTENTE BASIC IRIS BLUE 1. 2. 3. 4. 5. 6. 7. 8. 9. 10. 11. 12. ATTENZIONE 13. 14. 15. Non connettere tensioni di alimentazione superiori alla nominale. In caso venga applicata una tensione superiore alla nominale possono verificarsi guasti ai circuiti interni. In caso di applicazione in ambienti con possibile presenza di sostanze combustibili e/o esplosive (zone AD secondo la norma CEI 64-2), consultare le norme CEI 64-2, EN 60079-10 e correlate. Non collegare l’alimentazione ai terminali di uscita (U,V,W), ai terminali (+), (-), (B) (se presenti), ai morsetti di comando. Collegare l’alimentazione solo ai terminali di ingresso (R, S, T). Se presenti, non effettuare cortocircuiti tra i morsetti (+) e (–), tra (+) e (B). Non effettuare la marcia e l’arresto del motore utilizzando un contattore sull’alimentazione dell’inverter. Se si interpone un contattore tra inverter e motore assicurarsi di commutarlo solo ad inverter disabilitato. Non connettere condensatori di rifasamento sul motore. Non usare l’inverter senza collegamento di terra. In caso di allarme consultare il capitolo ELENCO ALLARMI E WARNING e riavviare l’apparecchiatura solo dopo aver individuato il problema ed eliminato l’inconveniente. Non effettuare test di isolamento tra i terminali di potenza o tra i terminali di comando. Assicurarsi di aver serrato correttamente le viti delle morsettiere di comando e di potenza. Non collegare motori monofase. Utilizzare sempre una protezione termica del motore (sia sfruttando quella interna all’inverter sia sfruttando una pastiglia termica inserita nel motore). Rispettare le condizioni ambientali di installazione. La superficie su cui viene installato l’inverter deve essere in grado di sopportare temperature fino a 90 °C. Le schede elettroniche contengono componenti sensibili alle cariche elettrostatiche. Non toccare le schede se non strettamente necessario. In tal caso utilizzare accorgimenti per la prevenzione dei danni provocati dalle scariche elettrostatiche. 16. Prima di programmare l’inverter e di metterlo in funzione assicurarsi che il motore e tutti i dispositivi comandati siano idonei per l’uso per tutto l’intervallo di velocità consentito dal convertitore stesso. L’inverter può essere programmato per azionare il motore a velocità superiori o inferiori alla velocità raggiunta collegando il motore direttamente alla linea elettrica. 17. Qualora si intenda sfruttare la funzione Safe Torque Off (STO), è necessario assicurare il corretto impiego e la corretta integrazione dell’inverter nella catena di sicurezza dell’applicazione. Per questo è necessario far riferimento e rispettare scrupolosamente le note applicative riportate nel manuale Funzione STO – Manuale Applicativo. 44/69 MANUALE UTENTE BASIC IRIS BLUE 2.2. Verifica all’atto del ricevimento All’atto del ricevimento dell’apparecchiatura accertarsi che essa non presenti segni di danneggiamento e che sia conforme a quanto richiesto, facendo riferimento alla targhetta posta sull’inverter, di cui di seguito si fornisce una descrizione. Nel caso di danni, rivolgersi alla compagnia assicurativa interessata o al fornitore. Se la fornitura non è conforme all’ordine, rivolgersi immediatamente al fornitore. Se l’apparecchiatura viene immagazzinata prima della messa in esercizio, accertarsi che le condizioni ambientali nel magazzino siano accettabili (vedi il paragrafo Installing the Equipment). La garanzia copre i difetti di fabbricazione. Il produttore non ha alcuna responsabilità per danni verificatisi durante il trasporto o il disimballaggio. In nessun caso e in nessuna circostanza il produttore sarà responsabile di danni o guasti dovuti a errato utilizzo, abuso, errata installazione o condizioni inadeguate di temperatura, umidità o sostanze corrosive nonché per guasti dovuti al funzionamento al di sopra dei valori nominali, e non sarà neppure responsabile di danni conseguenti e accidentali. La garanzia del produttore ha una durata di 3 anni a partire dalla data di consegna. Codifica del prodotto: IRIS BLUE 1 1 2 3 4 5 6 7 8 0005 2 4 3 T 4 X 5 A2 6 K 7 2 8 Linea di prodotto Modello inverter Tensione di alimentazione: 2 = alimentazione 200÷240Vac 4 = alimentazione 380÷480Vac Tipo di alimentazione: T = trifase Modulo di frenatura: X = nessun chopper di frenatura interno Tipo di filtro EMC: A2 = filtro integrato, EN 61800-3 edizione 2 SECONDO AMBIENTE Categoria C3 per correnti <400A, categoria C4 per correnti ≥400A; EN 55011 gr.2 cl. A per utenze industriali I = nessun filtro Pannello di programmazione: K = con pannello di programmazione remotabile, display LCD retroilluminato 16x4 caratteri Grado di protezione inverter stand-alone: 0 = IP00 (per S41) 2 = IP20 (fino Size S30) 5 = IP54 (possibile fino a Size S30) 45/69 MANUALE UTENTE BASIC IRIS BLUE 2.2.1. T ARGHETTA IDENTIFICATIVA Esempio di targhetta posta su un inverter con classe di tensione 4T: Figura 1: Targhetta identificativa dell’inverter 2.3. Installazione Gli inverter della linea IRIS BLUE sono apparecchiature Open Type con grado di protezione IP00 e IP20 adatti per l’installazione all’interno di un quadro elettrico. È possibile installare a parete solo le versioni con grado di protezione IP54. Nei paragrafi seguenti vengono riportate le condizioni ambientali, le indicazioni per il fissaggio meccanico e le connessioni elettriche dell’inverter. 46/69 ATTENZIONE L’inverter deve essere installato verticalmente. Non installare l'inverter capovolto o orizzontalmente. ATTENZIONE Non montare componenti sensibili al calore sulla parte superiore dell’inverter da cui fuoriesce l’aria calda di ventilazione. ATTENZIONE La superficie del retro dell'inverter può raggiungere temperature elevate; occorre pertanto che il pannello su cui è installato l’inverter non sia sensibile al calore. MANUALE UTENTE BASIC 2.3.1. IRIS BLUE Condizioni ambientali di installazione, immagazzinamento e trasporto Tutte le schede elettroniche installate negli inverter prodotti da Elettronica Santerno subiscono un trattamento di tropicalizzazione che rinforza l’isolamento elettrico tra piste a potenziale diverso e ne garantisce la durata nel tempo; tuttavia occorre rispettare scrupolosamente le prescrizioni di seguito riportate: Temperatura ambiente di funzionamento –10°C ÷ +55°C A seconda del modello di inverter e della classe di applicazione, può essere necessario applicare un derating del 2% della corrente nominale per ogni grado oltre le temperature riportate (vedi paragrafo TEMPERATURA D’IMPIEGO nella Guida all’Installazione). Temperatura ambiente di immagazzinamento e trasporto –25°C ÷ +70°C Luogo di installazione Grado di inquinamento 2 o migliore (secondo IEC 61800-5-1). Non installare esposto alla luce diretta del sole, in presenza di polveri conduttive, di gas corrosivi, di vibrazioni, di spruzzi o gocciolamenti d’acqua nel caso in cui il grado di protezione non lo consenta, in ambienti salini. Altitudine Max. altitudine di installazione 2000 m s.l.m. Per installazioni ad altitudini superiori e fino a 4000 m si prega di contattare Elettronica Santerno. Oltre i 1000 m, declassare dell’1% la corrente nominale per ogni 100m. Umidità ambiente di funzionamento Dal 5% a 95%, da 1g/m a 29g/m , senza condensa o formazione di ghiaccio (classe 3k3 secondo EN 50178). Umidità ambiente di immagazzinamento Dal 5% a 95%, da 1g/m a 29g/m , senza condensa o formazione di ghiaccio (classe 1k3 secondo EN 50178). Umidità ambiente durante il trasporto Massimo 95%, fino a 60g/m , una leggera formazione di condensa può verificarsi con l’apparecchiatura non in funzione (classe 2k3 secondo EN 50178). Pressione atmosferica di funzionamento e di stoccaggio Da 86 a 106 kPa (classi 3k3 e 1k4 secondo EN 50178). Pressione atmosferica durante il trasporto Da 70 a 106 kPa (classe 2k3 secondo EN 50178). 3 3 3 3 3 ATTENZIONE Poiché le condizioni ambientali influenzano pesantemente la vita prevista dell'inverter, non installare l'inverter in locali che non rispettino le condizioni ambientali riportate. ATTENZIONE Il trasporto dell’apparecchiatura va effettuato sempre con l’imballo originale. 47/69 MANUALE UTENTE BASIC IRIS BLUE 2.3.2. D IMENSIONI , 2.3.2.1. Size S05 S12 S15 S20 S30 S41 48/69 MODELLO IRIS BLUE 0007 0008 0010 0013 0015 0016 0020 0023 0033 0037 0040 0049 0060 0067 0074 0086 0113 0129 0150 0162 0180 0202 0217 0260 PESO E POTENZA DISSIPATA M OD E L L I IP20 E L H P mm mm mm 170 340 175 215 401 225 225 466 331 279 610 332 302 748 421 500 882 409 IP00 CLASSE 2T Potenza Rumorosità Peso dissipata alla Inom kg W db(A) 160 7 170 7 220 7 220 46 7 230 7 290 7 320 7 390 11 500 57 12 560 12 820 22.5 48 950 22.5 950 33.2 1250 33.2 58 1350 36 1500 36 2150 51 61 2300 51 2450 51 66 2700 51 2550 117 3200 117 64 3450 121 3950 121 A P NOTA Grado di protezione IP20 fino Size S30; IP00 per Size superiori. NOTA Per i modelli stand-alone IP54 si rimanda alla Guida all’Installazione. L MANUALE UTENTE BASIC 2.3.2.2. Size S05 S12 S15 S20 S30 S41 MODELLO IRIS BLUE 0005 0007 0009 0011 0014 0016 0017 0020 0025 0030 0034 0036 0040 0049 0060 0067 0074 0086 0113 0129 0150 0162 0180 0202 0217 0260 IRIS BLUE M OD E L L I IP20 E IP00 L H P Peso mm mm mm 170 340 175 kg 7 7 7 7 7 10.5 10.5 10.5 11.5 11.5 12.5 12.5 22.5 22.5 33.2 33.2 36 36 51 51 51 51 117 117 121 121 215 401 225 225 466 331 279 610 332 302 748 421 500 882 409 CLASSE 4T Potenza dissipata alla Rumorosità Inom W db(A) 215 240 315 46 315 315 430 490 490 42 520 520 680 53 710 820 48 950 950 1250 57 1350 1500 2150 61 2300 2450 66 2700 2550 3200 63 3450 3950 A P NOTA Grado di protezione IP20 fino Size S30; IP00 per Size superiori. NOTA Per i modelli stand-alone IP54 si rimanda alla Guida all’Installazione. L 49/69 MANUALE UTENTE BASIC IRIS BLUE 2.3.3. 41/R – 42/S – 43/T 44/U – 45/V – 46/W 47/+ 47/D 48/B 49/– 50/+ M ORSETTIERE / BARRE DI POTENZA LEGENDA Ingressi per alimentazione trifase (non è importante la sequenza fasi) Uscite motore elettrico trifase Non utilizzato Non utilizzato Non utilizzato Non utilizzato Non utilizzato Morsettiera S05 (4T): 41/R 42/S 43/T 44/U 45/V 46/W 47/+ 48/B 49/– Non utilizzato Non utilizzato Non utilizzato 47/+ 47/D 48/B 49/– Non utilizzato Non utilizzato Non Non utilizzato Morsettiera S05 (2T): 41/R 42/S 43/T 44/U 45/V 46/W utilizzato Morsettiera S15-S20: 41/R 42/S 43/T 44/U 45/V 46/W Morsettiera S12 (2T-4T): 41/R 42/S 43/T 47/+ 47/D 48/B 49/– Non utilizzato Non utilizzato Non utilizzato Non utilizzato 44/U 45/V 46/W Morsettiera S30: 41/R 50/69 42/S 43/T 44/U 45/V 46/W MANUALE UTENTE BASIC IRIS BLUE Barre di collegamento S41: 44/U 45/V 46/W 41/R 42/S 43/T Figura 2: Barre di collegamento S41 51/69 MANUALE UTENTE BASIC IRIS BLUE 2.3.4. Sezioni cavi potenza e taglia organi di protezione CLASSE Sezione cavo accettata dal morsetto D I TE N S I ON E 2T Coppia di serraggio Modello IRIS BLUE Corrente nominale inverter Size 2.3.4.1. Spelatura cavo Le tabelle seguenti indicano le caratteristiche minime raccomandate dei cavi di cablaggio dell’inverter e dei dispositivi di protezione che sono necessari per proteggere il sistema che utilizza l’inverter a seguito di eventuale cortocircuito. Va comunque verificato il rispetto delle normative applicabili e la caduta di tensione per collegamenti lunghi oltre 100m. In alcuni casi, soprattutto per le taglie più grandi di inverter, è previsto un cablaggio con conduttori multipli per una 2 stessa fase. Ad esempio la dicitura 2x150 sta a significare due conduttori da 150mm paralleli per fase. I conduttori multipli debbono essere sempre della stessa lunghezza ed effettuare percorsi paralleli. Solo in questo modo si ottiene la distribuzione uniforme della corrente a tutte le frequenze. Percorsi di uguale lunghezza, ma con diverso percorso, comportano una distribuzione non uniforme della corrente alle alte frequenze. È necessario anche rispettare la coppia di serraggio dei cavi nei morsetti sulle connessioni alle barre. Nel caso di connessione alle barre, la coppia di serraggio si riferisce ovviamente al bullone che stringe il capicorda del cavo alla barra in rame. Nelle tabelle, la sezione del cavo fa riferimento a cavi in rame. La connessione tra inverter e motore deve essere realizzata con cavi aventi stessa lunghezza e stesso percorso. Dove possibile utilizzare cavi trifase. Sezione cavo lato rete e motore Nm mm (AWG/kcmils) 2 A S05 S12 S15 S20 S30 S41 2 A A 16 16 20 20 25 32 16 16 25 25 25 32 25 25 25 25 25 45 50 50 45 12.5 15 17 19 23 27 0020 30 10 1.2-1.5 0023 38 18 2.5 10 (6AWG) 63 63 60 0033 51 18 2.5 16 (5AWG) 80 80 80 0037 0040 65 72 18 15 2.5 2.5 25 (4AWG) 80 100 80 100 80 100 0049 80 15 2.5 125 100 100 0060 0067 0074 88 103 120 24 24 24 6-8 6-8 6-8 125 125 160 125 125 160 125 125 145 0086 135 24 6-8 200 160 160 0113 0129 0150 180 195 215 30 30 30 10 10 10 250 250 315 200 250 400 250 250 275 0162 0180 240 30 10 400 400 275 300 Barra - 30 185 (400kcmils) 350 400 400 0202 345 Barra - 30 500 400 450 0217 375 Barra - 30 550 630 450 0260 425 Barra - 30 240 (500kcmils) 2x120 (2x4/0AWG) 2x120 (2x250kcmils) 630 630 500 0.5÷25 (20÷4AWG) 4÷25 (12÷4AWG) 25÷70 (3÷2/0AWG) 35÷185 (2AWG÷ 350kcmils) 1.2-1.5 1.2-1.5 1.2-1.5 1.2-1.5 1.2-1.5 1.2-1.5 A 0007 0008 0010 0013 0015 0016 ATTENZIONE 52/69 mm mm (AWG/kcmils) 10 10 10 0.5÷10 10 (20÷6AWG) 10 10 Fusibili Rapidi Interruttore Contattore (700V)+ Magnetico AC1 Sezionatori 2.5 (12AWG) 4 (10AWG) 8 (8AWG) 35 (2AWG) 50 (1/0AWG) 95 (4/0AWG) 120 (250kcmils) Rispettare sempre scrupolosamente le sezioni dei cavi e inserire i dispositivi di protezione prescritti sull’inverter. Non facendo ciò decade la conformità alle normative del sistema che fa uso dell’inverter come componente. MANUALE UTENTE BASIC IRIS BLUE D I TE N S I ON E Sezione cavo accettata dal morsetto Sezione cavo lato rete e motore Nm mm (AWG/kcmils) 2 A S05 S12 S15 S20 S30 S41 0005 0007 0009 0011 0014 0016 0017 0020 0025 0030 0034 0036 0040 10.5 12.5 16.5 16.5 16.5 27 30 30 41 41 57 60 72 0049 80 0060 0067 0074 0086 0113 0129 0150 0162 0180 0202 88 103 120 135 180 195 215 240 300 345 0217 375 0260 425 mm mm (AWG/kcmils) 10 10 0.5÷10 10 (20÷6AWG) 10 10 10 10 0.5÷10 10 (20÷6AWG 10 10 18 0.5÷25 18 (20÷4AWG) 15 4÷25 15 (12÷4AWG) 24 24 25÷70 (3÷2/0 AWG) 24 24 30 35÷185 30 (2AWG÷ 30 350kcmils) 30 Barra Barra Barra ATTENZIONE Barra - 4T Coppia di serraggio CLASSE Spelatura cavo Modello IRIS BLUE Corrente nominale inverter Size 2.3.4.2. Fusibili Rapidi Interruttore Contattore (700V)+ Magnetico AC1 Sezionatori 2 1.2-1.5 1.2-1.5 1.2-1.5 1.2-1.5 1.2-1.5 1.2-1.5 1.2-1.5 1.2-1.5 1.2-1.5 1.2-1.5 2.5 2.5 2.5 2.5 (12AWG) 4 (10AWG) 10 (6AWG) 16 (5AWG) 25 (4AWG) 2.5 6-8 6-8 6-8 6-8 10 10 10 10 30 30 30 30 35 (2AWG) 50 (1/0AWG) 95 (4/0AWG) 120 (250kcmils) 185 (400kcmils) 240 (500kcmils) 2x120 (2x4/0AWG) 2x120 (2x250kcmils) A A A 16 16 25 25 32 40 40 40 63 63 100 100 100 16 16 25 25 32 40 40 40 63 63 100 100 100 25 25 25 25 30 45 45 45 55 60 100 100 100 125 100 100 125 125 160 200 250 250 315 350 400 500 125 125 160 160 200 250 400 400 400 400 125 125 145 160 250 250 275 275 400 450 550 630 450 630 630 500 Rispettare sempre scrupolosamente le sezioni dei cavi e inserire i dispositivi di protezione prescritti sull’inverter. Non facendo ciò decade la conformità alle normative del sistema che fa uso dell’inverter come componente. 53/69 MANUALE UTENTE BASIC IRIS BLUE 2.3.5. Connessione a terra dell’inverter e del motore In prossimità delle morsettiere di cablaggio di potenza esiste una vite con dado per la messa a terra della massa metallica dell’inverter. La vite è individuata dal simbolo Connettere sempre l’inverter a una linea di terra realizzata secondo le normative vigenti. Per minimizzare i disturbi condotti e irradiati emessi dall’inverter, è preferibile collegare il conduttore di terra del motore direttamente all’inverter, con un percorso parallelo a quello dei cavi di alimentazione del motore. PERICOLO Connettere sempre il terminale di terra dell’inverter alla terra della linea di distribuzione elettrica con un conduttore conforme alle normative di sicurezza elettrica vigenti (vedi tabella sotto). Connettere sempre anche la carcassa del motore alla terra dell’inverter. Non facendo ciò sussiste il pericolo che la carcassa metallica dell’inverter e del motore possano essere soggette a tensioni pericolose con rischio di fulminazione. È responsabilità dell’utente provvedere a una messa a terra rispondente alle normative vigenti. Sezione del conduttore equipotenziale di protezione (vedi EN 61800-5-1): Sezione minima del conduttore equipotenziale di 2 Sezione dei conduttori di fase dell’inverter (mm ) 2 protezione corrispondente (mm ) S ≤ 10 10 (*) 10 < S ≤ 16 S (*) 16 < S ≤ 35 16 35 < S S/2 54/69 NOTA I valori della tabella sono validi solo se il conduttore equipotenziale di protezione è costituito dallo stesso metallo dei conduttori di fase. In caso contrario, la sezione del conduttore equipotenziale di protezione deve essere determinata in modo da produrre una conduttanza equivalente a quella risultante dall’applicazione della tabella. NOTA (*) In ogni caso si richiede una sezione del conduttore equipotenziale di protezione di almeno 2 2 10 mm se di rame, o 16 mm se di alluminio per mantenere la sicurezza in caso di danni o interruzione del conduttore equipotenziale di protezione o al suo sezionamento (vedi EN 61800-5-1 relativamente alla Corrente di contatto). MANUALE UTENTE BASIC IRIS BLUE 3. UTILIZZO DEL MODULO TASTIERA/DISPLAY 3.1. Descrizione In questo paragrafo verranno descritti alcuni esempi di navigazione nel modulo tastiera/display. Per dettagli su particolari settaggi del tastierino (contrasto, illuminazione, ecc…) fare riferimento al capitolo riguardante il modulo tastiera/display riportato nella Guida all’Installazione, mentre per i dettagli riguardanti la personalizzazione della modalità di navigazione della prima pagina, delle misure in pagina Keypad e pagina di Stato e l’unità di misura personalizzata del PID, fare riferimento al MENÙ TASTIERA/DISPLAY della Guida alla Programmazione. 3.2. Albero dei menù MISURE PARAMETRI CONFIGURAZIONE IDENTIFICATIVO PRODOTTO INVERTER OK M00=+0.00rpm M02=+ 0.00 rpm [MEA] PAR CF IDP INVERTER OK M00=+0.00rpm M02=+ 0.00 rpm MEA [PAR] CF IDP INVERTER OK M00=+0.00rpm M02=+ 0.00 rpm MEA PAR [CF] IDP INVERTER OK M00=+0.00rpm M02=+ 0.00 rpm MEA PAR CF [IDP] MENÙ MISURE Parametri di tipo M non modificabili MENÙ PARAMETRI Parametri tipo P modificabili con motore in marcia MENÙ CONFIGURAZIONE Parametri C-I-R modificabili con motore fermo [MEA] MISURE MOTORE [MEA] REGOLATORE PID [MEA] INGRESSI DIGITALI [MEA] RIFERIMENTI [PAR] PASSWORD E LIVELLO DI ACCESSO [CFG] AUTO TARATURA [PAR] [CFG] CONFIGURAZIONE MOTORE RAMPE [PAR] MULTIVELOCITÀ [CFG] [PAR] ANELLO VELOCITÀ E BILANCIAMENTO CORRENTI (*) [CFG] PROTEZIONE TERMICA [MEA] USCITE MENÙ PRODOTTO Selezione lingua e dati inverter [IDP] PRODOTTO LIMITAZIONE MOTORE [CFG] CONFIGURAZIONE PID [MEA] AUTODIAGNOSTICA [CFG] [MEA] PROGRAMMAZIONE INGRESSI DIGITALI [CFG] POTENZA MOTORI EEPROM [MEA] STORICO ALLARMI [MEA] STORICO MISURE ALLO SPEGNIMENTO Figura 3: Struttura ad albero dei menù (*) Disponibile solo per controllo VTC. 55/69 MANUALE UTENTE BASIC IRIS BLUE 3.3. Modalità di navigazione Pagine Keypad MENU INVERTER OK M00=+0.00rpm M02=+ 0.00 rpm [MEA] PAR CF IDP SAVE ENTER ESC INVERTER OK M00=+0.00rpm M02=+ 0.00 rpm MEA [PAR] CF IDP SAVE ENTER MENÙ MISURE Parametri di tipo M non modificabili MENÙ PARAMETRI Parametri tipo P modificabili con motore in marcia [MEA] MISURE MOTORE [PAR] PASSWORD E LIVELLO DI ACCESSO [MEA] REGOLATORE PID ESC SAVE ENTER M. CONFIGURAZIONE Parametri C-I-R modificabili con motore fermo ESC P010 Rampa di decelerazione 1 → 10.00s SAVE ENTER Accesso alla modifica del parametro P010 P010 Rampa di decelerazione 1 → █ 10.00s Modifica del parametro P010 P010 Rampa di decelerazione 1 → █ 20.00s Se si esce dalla modifica premendo ESC, il parametro modificato non viene salvato nella memoria non volatile e viene quindi perso allo spegnimento, contrariamente a quanto avviene confermando la modifica premendo SAVE/ENTER. Figura 4: Esempio di navigazione 56/69 [CFG] AUTO TARATURA P009 Rampa di accelerazione 1 → 10.00s Navigazione all’interno del menù Rampe ESC [CFG] CONFIGURAZIONE MOTORE RAMPE Accesso al menù Rampe INVERTER OK M00=+0.00rpm M02=+ 0.00 rpm MEA PAR [CF] IDP [PAR] SAVE ENTER INVERTER OK M00=+0.00rpm M02=+ 0.00 rpm MEA PAR CF [IDP] SAVE ENTER ESC MENÙ PRODOTTO Selezione lingua e dati inverter [IDP] PRODOTTO MANUALE UTENTE BASIC IRIS BLUE 3.4. Tasti funzione Premere il tasto SAVE/ENTER per modificare un parametro. Quando appare un cursore lampeggiante, è possibile modificare il valore del parametro con i tasti ▲ e ▼. Per uscire dalla modalità di modifica è possibile agire in uno dei modi seguenti: • premendo ESC → il valore del parametro modificato viene utilizzato dall'inverter, ma non salvato. Alla successiva riaccensione dell’inverter viene perso. • premendo SAVE/ENTER → il valore del parametro viene salvato nella memoria non volatile e viene mantenuto alla successiva riaccensione dell’inverter. Gli ingressi (Ixxx) non possono essere salvati nella memoria non volatile; al termine della propria funzione essi vengono automaticamente riportati al valore di default. I parametri identificati dall’acronimo Rxxx divengono attivi solo dopo aver resettato la scheda di controllo dell’inverter mantenendo premuto per alcuni secondi il tasto RESET oppure spegnendo l’inverter. Sigla tasto ESC SAVE ENTER MENU TX RX LOC REM RESET START STOP START UP Funzione Permette di uscire dai menù, dai sottomenù e di convalidare il valore di un parametro in fase di modifica, evidenziata dal cursore lampeggiante, senza eseguirne il salvataggio in memoria non volatile (valore che andrà perso allo spegnimento dell’inverter). Se è programmata la modalità Operatore, per la quale la tastiera è bloccata in pagina Keypad, una pressione di almeno 5 s del tasto ESC consente di riprendere la navigazione. Tasto di decremento; scorre i menù e i sottomenù o le pagine all’interno dei sottomenù oppure i parametri in ordine decrescente oppure, durante la programmazione, diminuisce il valore del parametro. Premuto assieme al tasto di incremento permette di passare al menù superiore. Tasto di incremento; scorre i menù e i sottomenù o le pagine all’interno dei sottomenù oppure i parametri in ordine crescente oppure, durante la programmazione, aumenta il valore del parametro. Permette di entrare nei menù e sottomenù, inoltre nel modo di programmazione (cursore lampeggiante) salva su memoria non volatile il valore del parametro modificato, per evitare che alla caduta dell’alimentazione vengano perse le modifiche effettuate. Se premuto in pagina Keypad permette di visualizzare la pagina “Keypad help” nella quale vengono specificate le grandezze visualizzate nella pagina precedente. Pressioni successive permettono di ciclare attraverso le seguenti pagine: pagina iniziale → sottomenù della pagina iniziale → pagina di stato → keypad e così via. Permette di entrare nelle pagine di selezione per DOWNLOAD parametri da tastiera a inverter (TX) oppure UPLOAD parametri da inverter a tastiera (RX); pressioni successive di TX|RX permettono di selezionare l’una o l’altra modalità, la selezione attiva viene evidenziata dal lampeggio del rispettivo LED TX od RX oltre che dalla pagina visualizzata sul Display. Per confermare l’operazione di Upload/Download occorre, a selezione attiva (LED lampeggianti), premere il tasto Save/Enter. La prima pressione forza comandi e riferimento da tastiera (keypad); una pressione successiva riporta la configurazione precedente (qualunque essa fosse) o cambia il riferimento attivo in pagina keypad a seconda del tipo di pagina keypad programmato (vedi menù Display nella Guida alla Programmazione). Permette il reset dell’allarme (una volta scomparsa la condizione che l’ha generato). Inoltre, una pressione prolungata di 8s consente il reset della scheda per il quale vengono reinizializzati i due microprocessori consentendo l’attivazione dei parametri tipo R senza dover spegnere l’inverter. Permette l’avvio del motore se abilitato - almeno una sorgente dei comandi è la tastiera (keypad). Permette l’arresto del motore se abilitato - almeno una sorgente dei comandi è la tastiera (keypad). Attiva il menù guidato per la programmazione dei principali parametri di gestione motore. 57/69 MANUALE UTENTE BASIC IRIS BLUE 3.5. LED di segnalazione del modulo tastiera/display Il modulo tastiera/display comprende 9 LED, il display a cristalli liquidi a quattro righe da sedici caratteri, un buzzer sonoro e 11 tasti. Il display visualizza il valore dei parametri, i messaggi diagnostici, il valore delle grandezze elaborate dall'inverter. Il significato dei LED di segnalazione è riassunto nella figura che segue, la quale consente di individuarne la posizione sul frontale del modulo tastiera/display. Legenda Led RUN – VERDE Motore non alimentato LED spento Motore alimentato ma coppia nulla (folle) LED lampeggiante Motore alimentato in marcia LED acceso fisso Led REF - VERDE Riferimento velocità, frequenza, coppia nullo Motore in accelerazione o decelerazione Riferimento presente Led ALARM - ROSSO Inverter OK Inverter in allarme Led LIMIT - GIALLO Nessuna limitazione attiva Limitazione tensione o corrente attiva Led DEC-LIMIT - GIALLO Marcia normale Decelerazione Led TX e RX - VERDI TX RX Nessun trasferimento parametri Download: attesa di conferma Upload: attesa di conferma È in corso un download dei parametri utente da tastiera a inverter È in corso un upload dei parametri utente da inverter a tastiera Led L-CMD - VERDE Nessuna delle sorgenti selezionate per i comandi è la tastiera I comandi provengono sia da tastiera che da morsettiera I comandi provengono sia da tastiera che da morsettiera Led L-REF - VERDE Il riferimento proviene esclusivamente dalla morsettiera Il riferimento proviene sia da tastiera che da morsettiera Il riferimento proviene esclusivamente dalla tastiera 58/69 MANUALE UTENTE BASIC IRIS BLUE 4. COLLEGAMENTI 4.1. Schema dei collegamenti S000506 DO NOT USE (if present) AC POWER SUPPLY S EMC OUTPUT FILTER OUTPUT (OPTION) REACTOR (OPTION) B EMC FILTER T CIRCUIT BREAKER + D AC LINE REACTOR (OPTION) R GROUND GROUND CMA SPEED [*] REFERENCE SOURCE 1 2 ÷ 10kohm 0:10V REF -10VR +10VR AIN1+ [*] PID REFERENCE [*] PID FEEDBACK AIN1- 10 2 3 4 MOTOR [*] SPEED REFERENCE INPUT 10V [*] 0(4) : 20mA 5 DIFFERENTIAL ANALOG INPUT 1 10V 6 0(4) : 20mA [*] DIFFERENTIAL AIN2+/PTC1 7 ANALOG INPUT 2 10V AIN2-/PTC2 8 0(4) : 20mA [*] PTC CMA ANALOG OUTPUTS 10V [*] 0(4) : 20mA SW1 ENABLE-B [*] START START (MDI1) 14 ENABLE-A (MDI2) 15 [*] RESET (P/B) RESET (MDI3) 16 [*] MULTISPEED 1 MDI4 17 MDI5 18 [*] SOURCE SELECTION MDI6/ECHA/FINA 19 [*] LOCAL / REMOTE (P/B) MDI7/ECHB 20 FREE OPEN COLLECTOR DIGITAL OUTPUT DIGITAL INPUTS RELAY DIGITAL OUTPUTS MDI8/FINB 21 CMD 22 +24V 23 A03 CMA GROUND O ENABLE-A [*] MULTISPEED 0 13 SW2 PUSH-PULL DIGITAL OUTPUT S A02 SPEED [*] REFERENCE 12 9 ENABLE-B 11 MOTOR [*] CURRENT GROUND GROUND A01 1 24 +VMDO1 25 MDO1/FOUT 26 CMDO1 27 MDO2 28 CMDO2 29 MDO3-NC 30 MDO3-C 31 MDO3-NO 32 MDO4-NC 33 MDO4-C 34 MDO4-NO 48V - 50mA SPEED [*] > 50 RPM 48V - 50mA SPEED OK[*] 250Vac - 5A 30Vdc - 5A INVERTER [*] NO ALARM 250Vac - 5A 30Vdc - 5A INVERTER [*] RUN OK 24V - 200mA ISOLATED POWER SUPPLY GROUND [*] FACTORY DEFAULTS Figura 5: Schema dei collegamenti 59/69 MANUALE UTENTE BASIC IRIS BLUE ATTENZIONE In caso di protezione della linea tramite fusibili, installare sempre il dispositivo di rilevamento fusibile guasto, che deve disabilitare l’inverter, per evitare il funzionamento monofase dell’apparecchiatura. NOTA Lo schema di collegamento fa riferimento alla configurazione di fabbrica. Per la numerazione dei morsetti di collegamento fare riferimento al paragrafo Morsettiere / barre di potenza. NOTA [*] Le impostazioni di fabbrica possono essere modificate agendo sui DIP switch e/o sui parametri di impostazione relativi ai morsetti interessati (vedi la Guida alla Programmazione). ATTENZIONE NOTA 60/69 Se presenti, mantenere i morsetti D e + cortocircuitati (configurazione di fabbrica). Gli ingressi ENABLE-A e ENABLE-B sono associati alla funzione STO. Nel caso in cui si intenda sfruttare questa funzionalità di sicurezza, la modalità di comando e il circuito di comando di questi segnali devono essere realizzati in accordo con le prescrizioni del manuale Funzione STO – Manuale Applicativo. Il manuale riporta anche una precisa procedura di validazione della configurazione di comando della funzione STO che deve essere effettuata al primo avviamento e anche periodicamente a intervalli predefiniti. MANUALE UTENTE BASIC IRIS BLUE 5. ELENCO ALLARMI E WARNING ATTENZIONE Se scatta una protezione o l’inverter è già in allarme, il funzionamento è impedito e il motore va in folle! 5.1. Cosa succede quando scatta una protezione NOTA Leggere attentamente questo paragrafo e, prima di agire sui comandi dell’inverter, leggere attentamente anche il paragrafo successivo: Cosa fare quando si è verificato un allarme. Nei paragrafi seguenti vengono descritti i codici di allarme che si possono verificare nell’inverter. Quando scatta una protezione o si verifica un allarme: 1. si accende il LED ALARM sul tastierino; 2. la pagina visualizzata sul display del tastierino diventa la prima dello STORICO ALLARMI; 3. lo STORICO ALLARMI viene aggiornato. Con l’impostazione di fabbrica, quando l’inverter viene alimentato rimane nella eventuale condizione di allarme presente nel momento dello spegnimento. Quindi se all’accensione l’inverter va subito in allarme ciò potrebbe essere dovuto ad un allarme verificatosi prima dello spegnimento dell’inverter non resettato. Quando si verifica un allarme l’inverter registra nella STORICO ALLARMI l’istante in cui l’allarme si è verificato (supply time e operation time), e lo stato dell’inverter nel momento in cui l’allarme si è verificato, oltre allo stato di alcune misure campionate nell’istante in cui l’allarme si è verificato. La lettura e la registrazione di questi dati della Fault List possono essere molto utili per diagnosticare la causa che ha determinato l’allarme e per cercare le soluzioni (vedi anche il MENÙ STORICO ALLARMI (FAULT LIST)/STORICO MISURE ALLO SPEGNIMENTO nella Guida alla Programmazione). NOTA Gli allarmi da A001 a A039 sono allarmi del microcontrollore principale (DSP Motorola) della scheda di controllo, che ha verificato un malfunzionamento della scheda stessa. Per questi allarmi non è disponibile la Fault List, non è possibile inviare comandi di Reset via seriale, ma solo tramite il morsetto RESET della morsettiera o tramite il tasto RESET sul tastierino; non è disponibile il software che realizza l’interfaccia utente sul tastierino, non sono accessibili i parametri e le misure dell’inverter via seriale. È inutile resettare gli allarmi A033 ed A039. Essendo infatti relativi alla mancanza di un software corretto sulla Flash, essi si risolvono soltanto eseguendo il download di un software corretto. ATTENZIONE Prima di resettare un allarme aprire i morsetti ENABLE-A ed ENABLE-B per disabilitare l’inverter ed evitare una partenza indesiderata del motore. 61/69 MANUALE UTENTE BASIC IRIS BLUE 5.2. Cosa fare quando si è verificato un allarme ATTENZIONE Prima di resettare un allarme aprire i morsetti ENABLE-A ed ENABLE-B per disabilitare l’inverter ed evitare una partenza indesiderata del motore. Procedura da seguire: 1. 2. Aprire i morsetti ENABLE-A ed ENABLE-B per disabilitare l’inverter ed evitare una partenza indesiderata del motore. Tale manovra non è necessaria se C181=1; in tal caso è infatti attiva la Sicurezza allo Start: dopo il reset di un allarme o un power–on, l’inverter non va in marcia se prima non vengono aperti e richiusi i morsetti ENABLE-A ed ENABLE-B. Se il motore è ancora in moto in folle, attendere l’arresto del motore. Leggere e prendere nota dei dati dello STORICO ALLARMI relativi all’allarme che si è verificato. Tali dati sono molto utili per diagnosticare correttamente la causa che ha generato l’allarme e le possibili soluzioni. Tali dati sono inoltre necessari nel momento in cui si decidesse di contattare il SERVIZIO TECNICO Elettronica Santerno. 1. 2. 3. 4. 5. Cercare, nelle pagine seguenti, il paragrafo relativo al codice di allarme che si è verificato e seguire le indicazioni specifiche. Rimuovere le cause esterne che possono aver provocato lo scatto della protezione. Se l’allarme si è verificato a causa di valori non corretti dei parametri, impostare i dati corretti dei parametri e salvare i parametri. Resettare l’allarme. Se l’allarme si ripresenta e non si riesce a trovare una soluzione, contattare il SERVIZIO TECNICO Elettronica Santerno. Per resettare un allarme occorre inviare un comando di RESET in una delle modalità seguenti: • attivare il segnale presente al morsetto RESET MDI3 della morsettiera fisica; • premere il tasto RESET sul tastierino. 62/69 MANUALE UTENTE BASIC IRIS BLUE 5.3. Elenco dei codici di allarme Allarme Visualizzazione A001 ÷ A032 A034 ÷ A038 … A033 TEXAS VER KO A039 FLASH KO A040 User Fault A041 PWMA Fault A042 Illegal XMDI in DGI A043 … A044 SW OverCurrent Sovracorrente software Bypass Circuit Fault Bypass Connector Fault Fault del By-Pass di precarica Connettore del By-Pass di precarica invertito A045 A046 A047 UnderVoltage A048 OverVoltage A049 … A050 PWMA0 Fault A051 PWMA1 Fault A052 Illegal XMDI in DGO A053 PWMA Not ON A054 Option Board not in A055 PTC Alarm Descrizione Malfunzionamento scheda di controllo Versione Software Texas incompatibile Texas Flash non programmata Allarme generato dall’utente Allarme Hardware generico IGBT lato A Configurazione illegale di XMDI nel menù Ingressi Digitali Malfunzionamento scheda di controllo Tensione del Bus-DC inferiore a Vdc_min Tensione del Bus-DC superiore a Vdc_max Soluzione 1. 2. Eseguire il reset dell’inverter. Contattare Elettronica Santerno. 1. 2. Eseguire il download della versione corretta. Contattare Elettronica Santerno. Eseguire il reset dell’inverter. 1. 2. Eseguire il reset dell’inverter. Contattare Elettronica Santerno. 1. 2. Verificare impostazione di R023. Verificare impostazioni del menù Ingressi digitali. 1. 2. 1. 2. 3. 4. 5. 6. Eseguire il reset dell’inverter. Contattare Elettronica Santerno. Verificare dati di targa dell’inverter e del motore. Verificare presenza di corto-circuiti in uscita. Verificare presenza di disturbi nei segnali di controllo. Aumentare il tempo di accelerazione. Aumentare il tempo di decelerazione. Scollegare il motore e impostare C010 su 0:IFD. 1. 2. Eseguire il reset dell’inverter. Contattare Elettronica Santerno. 1. 2. Verificare tensione di alimentazione ai morsetti R, S, T. Verificare M030 (Tensione di rete) e M029 (Tensione bus DC). Verificare M030 e M029 nello Storico allarmi. Contattare Elettronica Santerno. Verificare tensione di alimentazione ai morsetti R, S, T. Verificare M030 (Tensione di rete) e M029 (Tensione bus DC). Verificare M030 e M029 nello Storico allarmi. Aumentare il tempo di decelerazione. Contattare Elettronica Santerno. Eseguire il reset dell’inverter. Contattare Elettronica Santerno. Eseguire il reset dell’inverter. Contattare Elettronica Santerno. Verificare dati di targa dell’inverter e del motore. Verificare presenza di corto-circuiti in uscita. Verificare presenza di disturbi nei segnali di controllo. Aumentare il tempo di accelerazione. Aumentare il tempo di decelerazione. Scollegare il motore e impostare C010 su 0:IFD. 3. 4. 1. 2. 3. 4. 5. Malfunzionamento 1. scheda di controllo 2. Guasto hardware da 1. convertitore IGBT, lato A 2. 1. 2. Sovracorrente hardware, 3. 4. lato A 5. 6. Configurazione illegale di 1. XMDI nel menù Uscite 2. Digitali Guasto hardware, IGBT 1. A non si accende 2. Errore nel rilevamento 1. della scheda I/O 2. opzionale impostata 1. 2. Scattato PTC esterno 3. Verificare impostazione di R023. Verificare impostazioni del menù Uscite digitali. Eseguire il reset dell’inverter. Contattare Elettronica Santerno. Verificare impostazione di R023. Contattare Elettronica Santerno. Attendere il raffreddamento del motore. Verificare il collegamento corretto del PTC a AIN2. Verificare configurazione di SW1 su scheda di controllo. 63/69 MANUALE UTENTE BASIC IRIS BLUE Allarme Visualizzazione Descrizione A056 PTC Short Circuit PTC esterno in corto circuito A057 Illegal XMDI in MPL A061 A062 A063 A064 A065 Ser WatchDog SR1 WatchDog … Malfunzionamento scheda di controllo AutoTune Fault 1. 2. Configurazione illegale di 1. XMDI nel menù Uscite 2. Digitali Virtuali 1. 2. Scattato Watchdog Linea 0 (D9 poli) 3. Scattato Watchdog Linea 1 (RJ45) Mains Loss Soluzione Mancanza rete di alimentazione Autotaratura fallita 1. 2. 3. 1. 2. 1. 2. 3. 4. 1. 2. 3. A066 REF < 4mA A067 AIN1 < 4mA A068 AIN2 < 4mA A069 XAIN5 < 4mA A070 Fbs WatchDog Ingresso REF in corrente (4÷20mA) inferiore a 4mA Ingresso AIN1 in corrente (4÷20mA) inferiore a 4mA Ingresso AIN2 in corrente (4÷20mA) inferiore a 4mA Ingresso XAIN5 in corrente (4÷20mA) inferiore a 4mA Scattato Watchdog Field Bus A071 … A072 Parm Lost Chk A073 Parm Lost 1 COM Malfunzionamento scheda di controllo Errore durante download / upload parametri Errore durante download / upload parametri A074 Inverter OverHeated Scattata protezione termica dell’inverter 64/69 1. Verificare il collegamento corretto del PTC a AIN2. Verificare configurazione di SW1 su scheda di controllo. Verificare impostazione di R023. Verificare impostazioni del menù MPL. Verificare la linea seriale 0. Verificare che le interrogazioni di lettura/scrittura del master siano inviate con un intervallo max. inferiore al tempo di funzionamento predefinito del watchdog. Aumentare il tempo di funzionamento del watchdog (R005). Verificare la linea seriale 1. Verificare che le interrogazioni di lettura/scrittura del master siano inviate con un intervallo max. inferiore al tempo di funzionamento predefinito del watchdog. Aumentare il tempo di funzionamento del watchdog (R012). Eseguire il reset dell’inverter. Contattare Elettronica Santerno. Verificare tensione di alim. ai morsetti R, S, T. Verificare M030 (Tensione di rete). Verificare M030 nello Storico allarmi. L’allarme può essere disattivato o ritardato agendo nel menù Power down (livello di accesso Engineering). Eseguire il reset dell’inverter. Verificare parametri del Menù Controllo motore ed eseguire una nuova autotaratura. Contattare Elettronica Santerno. 2. 3. Verificare configurazione di SW1 sulla scheda di controllo. Verificare connessione corretta del cavo di segnale. Verificare sorgente del segnale di corrente. 1. 2. Verificare connessione corretta del cavo di segnale. Verificare sorgente del segnale di corrente. 1. 2. 2. Verificare collegamento del bus di campo. Verificare che il master invii messaggi validi con un intervallo max. inferiore al tempo di watchdog predefinito. Aumentare tempi di watchdog (R016). Eseguire il reset dell’inverter. Contattare Elettronica Santerno. 1. 2. Verificare collegamento del tastierino. Resettare l’allarme e ripetere Upload/Download. 1. Verificare corrente di uscita all’inverter (M026) durante il funzionamento normale. Verificare il carico meccanico del motore (albero bloccato/sovraccarico). 3. 1. 2. MANUALE UTENTE BASIC IRIS BLUE Allarme Visualizzazione Descrizione A075 Motor OverHeated Scattata protezione termica del motore A076 Speed Alarm Velocità del motore troppo elevata A078 … A081 KeyPad WatchDog A083 External Alarm 1 Malfunzionamento scheda di controllo Watchdog di comunicazione con tastiera Allarme esterno 1 A084 External Alarm 2 Allarme esterno 2 A085 External Alarm 3 A086 XAIN5 > 20mA A088 … Allarme esterno 3 Ingresso XAIN5 in corrente (4÷20mA o 0÷20mA) superiore a 20mA Malfunzionamento scheda di controllo Errore durante download / upload parametri Errore durante download / upload parametri Malfunzionamento scheda di controllo A089 A090 Parm Lost 2 COM Parm Lost 3 COM A092 … A093 Bypass Circuit Open A094 HeatSink Overheated A095 Illegal Drive Profile Board A096 Fan Fault A097 Motor Not Connected A099 2nd Sensor Fault A102 REF>20mA A103 AIN1>20mA A104 AIN2>20mA A105 A106 A107 A108 A109 PT100 Channel 1 Fault PT100 Channel 2 Fault PT100 Channel 3 Fault PT100 Channel 4 Fault Amb.Overtemp. Soluzione 1. 2. 1. 2. 1. 2. Verificare carico e condizioni meccaniche. Verificare parametri C265 e C267. Verificare compatibilità del motore di C031. In modalità Slave, verificare riferimento di coppia (livello di accesso: Advanced). Eseguire il reset dell’inverter. Contattare Elettronica Santerno. 1. 2. Verificare collegamento del tastierino. Verificare impostazioni linea seriale RJ45. Verificare segnale esterno nell’MDI relativo. 1. 2. Verificare connessione corretta del cavo di segnale. Verificare sorgente del segnale di corrente. 1. 2. Eseguire il reset dell’inverter. Contattare Elettronica Santerno. 1. 2. Verificare collegamento tastiera. Resettare l’allarme e ripetere Upload/Download. 1. Eseguire il reset dell’inverter. Contattare Elettronica Santerno. 1. Eseguire il reset dell’inverter. Relè di By-Pass aperto 2. Contattare Elettronica Santerno. 1. Verificare temperatura ambiente. Rilevata temperatura 2. Verificare corrente motore. dissipatore IGBT troppo 3. Ridurre frequenza di carrier (C001-C002) (livello di elevata accesso: Engineering). 1. Verificare che la scheda sia stata opportunamente Scheda Drive Profile non configurata per IRIS BLUE. configurata correttamente 2. Sostituire la scheda. Allarme ventole Sostituire ventole. 1. Verificare collegamenti a U, V, W. Motore non connesso 2. Verificare param. motore ed eseguire nuova autotaratura per VTC. Allarme secondo sensore 1. Eseguire il reset dell’inverter. ventole 2. Contattare Elettronica Santerno. Ingresso REF in corrente (4÷20mA o 0÷20mA) superiore a 20mA) Ingresso AIN1 in corrente 1. Verificare configurazione di SW1 sulla scheda di controllo. (4÷20mA o 0÷20mA) 2. Verificare sorgente del segnale di corrente. superiore a 20mA Ingresso AIN2 in corrente (4÷20mA o 0÷20mA) superiore a 20mA Ingresso fisico fuori dal range di misura Ingresso fisico fuori dal 1. Verificare impostazione di SW1 su scheda opzionale range di misura ES847. Ingresso fisico fuori dal 2. Verificare sorgente del segnale. range di misura Ingresso fisico fuori dal range di misura 1. Aprire il quadro e verificarne le condizioni e la misura Sovratemperatura M062 dell’inverter. Ambiente 2. Eseguire il reset dell’inverter. 3. Contattare Elettronica Santerno. 2. 65/69 MANUALE UTENTE BASIC IRIS BLUE Allarme Visualizzazione A110 ÷ A120 … A121 DLX Master Not On A122 A123 DLX Timeout DLX Error A124 Conflict Master A125 ÷ A127 … A129 No Output Phase A136 Dry-run Descrizione Malfunzionamento scheda di controllo Malfunzionamento generico della comunicazione seriale Master Timeout da comunicazione seriale rilevato dal Master Errore da comunicazione seriale rilevato dal Master Due inverter con SW Multipompa sono simultaneamente Master Malfunzionamento scheda di controllo Disconnessione fase in uscita Marcia della pompa a secco Soluzione 1. 2. 1. 2. 3. 1. 2. 1. 2. 1. 2. 3. 1. A137 Press. loss Perdita di pressione 2. 3. 1. 2. A140 Torque Off not Safe Malfunzionamento ingressi ENABLE-A ed ENABLE-B per STO Eseguire il reset dell’inverter. Contattare Elettronica Santerno. Verificare comunicazione seriale e relativi collegamenti. Eseguire il reset dell’inverter. Contattare Elettronica Santerno. Eseguire il reset dell’inverter. Contattare Elettronica Santerno. Verificare la continuità dei collegamenti tra inverter e motore. Contattare Elettronica Santerno. La pompa sta lavorando a secco. Verificare le condizioni di lavoro della pompa e del pozzo. Verificare la configurazione della funzione Marcia a Secco nel menù “Controllo Marcia a Secco” . Il riferimento di pressione con controllo PID non può essere rilevato per flusso troppo elevato/potenza eccessiva richiesta al motore (perdita nelle tubazioni o funzionamento fine curva). Verificare eventuali perdite nel circuito idraulico e condizioni di funzionamento della pompa Verificare la configurazione dei parametri nel menù “Controllo perdita pressione”. Eseguire il reset dell’inverter. Contattare Elettronica Santerno. NOTA: la permanenza di questo allarme denota un guasto a carico della funzione STO dell’inverter. Per ripristinare il livello di sicurezza della applicazione è necessario sostituire l’inverter o perlomeno la scheda di controllo. Fare riferimento al manuale Funzione STO – Manuale Applicativo per le procedure di verifica e ripristino da seguire in questo caso. Tabella 1: Elenco dei codici di allarme 66/69 MANUALE UTENTE BASIC IRIS BLUE 5.4. Warning I warning sono avvertimenti per l’utente visualizzati tramite messaggi lampeggianti che compaiono solitamente in una o due delle prime tre righe del modulo tastiera/display. NOTA I warning non sono protezioni né allarmi e non vengono registrati nello Storico allarmi. Warning Messaggio W03 SEARCHING… L’interfaccia utente sta cercando i dati della successiva pagina da visualizzare. W04 DATA READ KO Warning software su lettura dati. W06 HOME SAVED W07 DOWNLOADING W08 UPLOADING W09 DOWNLOAD OK W11 UPLOAD OK W12 UPLOAD KO W13 NO DOWNLOAD W16 PLEASE WAIT… W17 SAVE IMPOSSIBLE W18 PARAMETERS LOST W19 NO PARAMETERS LOAD W20 NOT NOW W21 CONTROL ON W23 DOWNLOAD VER. KO W24 VERIFY DATA W28 OPEN START W32 OPEN ENABLE W33 WRITE IMPOSSIBLE W34 ILLEGAL DATA W35 NO WRITE CONTROL W36 ILLEGAL ADDRESS W37 ENABLE LOCKED Descrizione La pagina attuale è stata memorizzata come pagina iniziale che compare alla successiva alimentazione dell’inverter. Il tastierino sta scrivendo sull’inverter i parametri di Area WORK salvati sulla propria Flash. Il tastierino sta leggendo dall’inverter i parametri di Area WORK che salverà nella propria Flash. Il tastierino ha correttamente completato la scrittura dei parametri sull’inverter. Il tastierino ha correttamente completato la lettura dei parametri dall’inverter. Il tastierino ha interrotto la lettura dei parametri dall’inverter. La procedura di upload è fallita. È stata richiesta una procedura di download, ma sulla Flash del tastierino non è presente alcun parametro salvato. Attendere il completamento della operazione richiesta. Salvataggio del parametro inibito. Il tastierino ha interrotto la scrittura dei parametri sull’inverter. La procedura di download è fallita. I parametri dell’inverter sono aggiornati solo in parte (parametri inconsistenti): occorre spegnere l’inverter o ripetere la procedura di download. Non è possibile eseguire la procedura di upload. Non è possibile eseguire l’operazione richiesta in questo momento. L’operazione è impedita dal fatto che l’inverter è in Marcia. Non è possibile eseguire la procedura di download richiesta perché i parametri salvati sul tastierino sono relativi a un software con versione o identificativo di prodotto non compatibile con quello dell’inverter. Sono iniziate le operazioni preliminari alla procedura di download richiesta, si sta verificando l’integrità e la compatibilità dei parametri salvati sul tastierino. Per partire occorre aprire e chiudere l’ingresso START. Per abilitare l’inverter occorre aprire e richiudere gli ingressi ENABLE-A ed ENABLE-B. È impossibile eseguire l’operazione di scrittura richiesta. Si è tentato di scrivere un valore illegale. È impossibile eseguire l’operazione di scrittura richiesta perché il Controllo è attivo (l’inverter è in Marcia). È impossibile eseguire l’operazione richiesta perché l’indirizzo è errato. L’inverter è disabilitato e non accetta gli ingressi ENABLE-A ed ENABLE-B perché si sta scrivendo un parametro di tipo Cxxx. ATTENZIONE L’inverter partirà immediatamente dell’operazione di scrittura!!! al termine 67/69 MANUALE UTENTE BASIC IRIS BLUE Warning Messaggio Descrizione W38 LOCKED Non è possibile entrare in Modifica perché non è stato abilitata la modifica dei parametri: P000 è diverso da P002. W40 FAN FAULT W41 SW VERSION KO W42 IDP KO Download impossibile a causa di differenti IDP (Identification Product). W43 PIN KO Download impossibile a causa di differenti PIN (Part Identification Number). Ventilatore rotto o disconnesso o bloccato. Download impossibile a causa di differenti versioni SW. W44 CURRENT CLASS KO Download impossibile a causa di differenti classi di corrente. W45 VOLTAGE CLASS KO Download impossibile a causa di differenti classi di tensione. W46 DOWNLOAD KO Download impossibile (causa generica). W47 SERIAL TIMEOUT W48 OT Time over È stata superata la soglia del tempo di operatività impostata. W49 ST Time over È stata superata la soglia del tempo di alimentazione impostata. W50 NTC Fault Sensore NTC temperatura dissipatore disconnesso o mal funzionante. W51 DRY RUN Rilevata condizione marcia a secco (dry-run). W52 PRESSURE LOSS Perdita di collegamento Master–Slave in caso di controllo tramite seriale Perdita di pressione per funzionamento fine curva o perdita nel circuito idraulico. Tabella 2: Elenco dei warning 68/69 MANUALE UTENTE BASIC IRIS BLUE 5.5. Elenco degli stati Numero Stato 0 ALARM!!! Inverter in allarme 1 START UP Inverter in accensione 2 MAINS LOSS 3 TUNING 4 SPEED SEARCHING 5 DCB at START Frenatura CC allo start 6 DCB at STOP Frenatura CC allo stop 7 DCB HOLDING Corrente CC di scaldiglia 8 DCB MANUAL Frenatura CC manuale 9 LIMIT IN ACCEL. Limite di corrente/coppia in accelerazione 10 LIMIT IN DECEL. Limite di corrente/coppia in decelerazione 11 Descrizione Mancanza rete Inverter in taratura Aggancio velocità del motore (Speed Searching) LIMIT IN CONSTANT RPM Limite di corrente/coppia a velocità di regime 12 BRAKING 13 CONSTANT RUN 14 IN ACCELERATION Inverter in marcia con motore in fase di accelerazione 15 IN DECELERATION Inverter in marcia con motore in fase di decelerazione 16 INVERTER OK 17 FLUXING 18 MOTOR FLUXED Motore flussato 19 FIRE MODE RUN Velocità di regime in Fire Mode 20 FIRE MODE ACCEL. 21 FIRE MODE DECEL. 22 INVERTER OK* 25 SPARE 27 WAIT NO ENABLE 28 WAIT NO START 29 PIDOUT min DISAB 30 REF min DISAB. 31 IFD WAIT REF. 32 IFD WAIT START 33 DISABLE NO START 34 MASTER NOT USED 35 REG. TIMEOUT Allungamento rampe di decelerazione Inverter in marcia con set point di velocità raggiunto Inverter in Stand-by senza allarmi Fase di flussaggio del motore Accelerazione in Fire Mode Decelerazione in Fire Mode Inverter in Stand by senza allarmi, ma garanzia scaduta per avvenuto allarme in Fire Mode Scheda in modalità Ricambio Attesa apertura degli ingressi ENABLE-A ed ENABLE-B Attesa apertura dell’ingresso START Inverter disabilitato per uscita PID < Minimo (Sleep Mode) Inverter disabilitato per REF < Minimo Inverter abilitato con controllo IFD in attesa di riferimento per poter partire Inverter abilitato con controllo IFD in attesa dello START per poter partire Durante il flussaggio non è stato dato il comando di marcia entro il tempo massimo programmato in C183. L’inverter è disabilitato fino a quando non viene dato il comando di marcia L’impianto è in funzione con l’Inverter Master non in run L’impianto è fermo perché si è verificato un timeout di regolazione (vedi Menù Timeout Regolazione) Tabella 3: Elenco degli stati 69/69