1
page 2
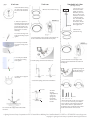
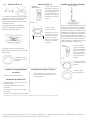
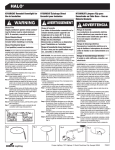
6 inch can
Standard 4 inch J-box
5 inch can
1. Reach inside the existing
can, and screw connector
into the socket inside the
can.
(Min Height: 2.125 inch)
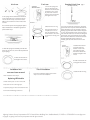
1. On the j-box, you
will need to make 2
pigtail connections.
The black j-box wire,
which is the hot wire,
should be connected
to the black pigtail
wire. The white j-box
wire, which is the
neutral wire, should
be connected to the
white pigtail wire.
1. Remove the outside trim ring.
2. There are 3 options in
attaching the green ground
wire to the 6 inch can. The
ground wire needs to be
positioned under the nut.
Please select one of the
following:
2.a. Use the existing screw
inside the housing and just
tighten.
2. Remove the
outside trim ring.
2. Loosen bracket screws enough so the bracket can
can be rotated and removed from the keyhole.
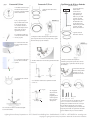
2.b. Put the provided #8
nut on the existing screw.
Tighten.
2.c. Put the provided #8
screw into the existing
hole. Tighten.
3. Pull the springs off of the tab marked “6.”
3. Loosen bracket screws enough so the
bracket can be rotated and removed from
the keyhole.
4. Pull the springs off
of the tab marked “6.”
Discard the springs.
3.a. Make sure to support
the fixture.
4.a. Place the springs onto the tab marked “5.”
Slanted side
Slanted side
3.b. Connect the orange male to the female
connector.
4.b. Make
sure the
angled(slanted)
side of the
springs face
toward the
center of the
bracket.
1 ½”
8-32
¾”
¾”
8-32 6-32
¾” pointed
#6
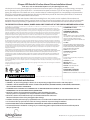
5. Fasten the bracket to the j-box using the
1 ½” or ¾” 8-32. If necessary, use a drill to
screw in tighter. Note that the #6 pointed
screws can be used as a replacement for
the bracket screws to help dig into surfaces
harder than sheetrock such as wood.
Lighting Science Group Corporation l 1227 S. Patrick Drive Building 2A l Satellite Beach, FL 32937 l t. 877.999.5742 l www.lsgc.com
Copyright © Lighting Science Group Corporation 2012 All rights reserved.