1
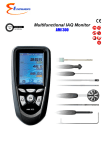
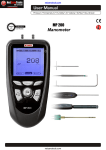
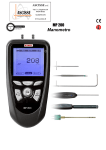
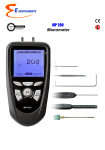
Manifold Electronic gauge
Model: KN 8316
Operation Manual
OVERVIEW
KN 8316 manifold electronic gauge determines the distance to the object through
electronic signals with high speed and visual display. The tool with built‑in
computer chip has the function of memory, and it can be used in continuous
integration measurement, automatic areas and volume counting. It is an ideal
tool for building and decoration industries (for example, land agent, upholstery
designer and craftsman, etc.)
The tool has the function of laser orientation and level bubble assistant locating
function. It will send out a line of highlighted red laser beam to make you aim at
the object easily when using. The automatic temperature compensation and key
indication function of the tool can make the measuring result more accurately,
and at the same time show the current environment temperature precisely.
KN 8316 manifold electronic gauge is the Class II laser tool conforming to EN
60825‑1 safety rule.
SAFETY INSTRUCTIONS
Failure to follow the instructions listed below may cause personal injury.
• Read and understand all instructions prior to any operation.
• Do not remove any label from the tool.
• Do not operate the tool with the presence of flammable/explosive gases.
• Do not operate .the laser tool around the children or allow children to operate
the laser tool, failure to do so will injure eyes of children.
• Do not stare into the laser beam.
• Do not project the laser beam directly into the eyes of others.
• Do not set up the tool at eye level or operate the tool on or near a reflective
surface, as the laser beam could be projected into your eyes or the eyes of others.
• Do not observe the laser beam
by using optical tools such as
binoculars and magnifying glass.
• Remove the battery when
storing the tool for an extended
period of time in case of
the deterioration of battery
and its damage to the tool.
Warning
DANGER
Class II Laser Product
Maximum Power Output< lmW
Wavelength: 630‑660nm
Do not stare into beam!
Avoid direct eye exposure!
This tool emits a laser radiation!
TOOL COMPONENTS
1. Ultrasonic sensor aperture
2. Laser pointer
3. Two row LCD‑‑‑the data of
upper line is the current
measuring result, and the
data of lower line is the
memory/computing result
1
2
4. ON/OFF ‑On/Off key.
5. MODE ‑‑‑Clear/function
select key: Softly press
the key to clear or select
length/area/volume
measurement computing
mode. Keep pressing the
key for 2 seconds to store
the length/area/volume
value.
6. FT/M ‑‑‑Unit conversion
key: Softly press the key to
unit as British measurement
(ft./in.) or metric system (m).
Press this key for 2 seconds,
the current environment
temperature will display on
the LCD.
7. +/= ‑‑‑Addition key: Softly
press the key to add the
measured length, area or
volume. Press the key for 2
seconds to read and display
the data which was stored
the last time.
8. READ ‑‑‑Read key: Press
the key to read the measured
distance, keep pressing the
key and move the tool to
read values dynamically.
9. Level bubbles
0.Measuring reference ‑‑‑
1
Distance measurement is
counted from end of the tool
3
4
5
8
6
9
10
7
ILLUSTRATION OF DISPLAY SCREEN
A. Plus
B. Length/area/volume mode display (L=length; W=width; H=height)
C. Memory
D. Memory, computing result
E. Current measuring result
F. Display when lack of electric quantity
G. Square foot
H. Cubic foot
I. Meter/square meter/cubic meter
OPERATION GUIDE
Battery installation (not included)
Open the battery compartment door on the back of the tool, and plug one 9
Volt block battery onto the battery connector and put the battery back to the
compartment and close the door.
Distance measurement
• Make the induction hole of the tool face against the measured object
(e.g. the wall). You can adjust the tool until the bubble is between
the two lines of the level bubble.
• Press the ON/OFF key to start the unit.
• Press the READ key to get the measured distance
and the laser beam indicates the measured surface;
• Keep pressing the READ key and move the tool to get the dynamical readings,
and the measured distance will be displayed on upper portion of the screen;
• Press ‑the FT/M key to select the measuring unit as British measurement
or metric system. (original measuring unit: Metric measurement ).
Tips:
A.The measured object must be with normatively hard surface and not be
blocked by any barriers;
B.Select a smooth hard surface with big area to measure for precise result;
C.If the measured surface is too small and irregular or with soft surface,
chipboard can be used on the surface of the measured object;
D.The tool cannot measure through glasses;
E.The tool should be over 50 cm (2 feet) away from the measured
object when measuring;
F.To ensure to get accurate value, the measurement should be operated
when the tool’s temperature is the same as the environment’s temperature.
G.The distance measurement should be counted from the end of the tool.
Addition (without using M+ memory)
• Press READ key for measurement and the
measured value is displayed on upper
portion of the screen;
• Press +/= key to enter the addition mode,
and the “+” icon will display on the LCD
and at the same time, the result is displayed
on the lower side of the LCD (press +/= key
again to clear and cancel the add operation);
• Press READ key again for second time
measurement, the measured value is
displayed on upper portion of the screen;
• Press +/= key again to display the sum
on the bottom of the screen;
• Repeat the steps above can continue accumulation.
Addition (using M+ memory)
• Keep pressing the MODE key for 2 seconds
to sore the first measured result, and the
“M+” will display on the LCD;
Addition (using M+ memory)
• Press the READ key for new measurement;
• Press the +/= key to enter the addition
mode, and the “+” will display on the LCD;
• Keep pressing the +/= key to recall previous
measurement for the addition (displayed on the
bottom of the display), and at the same time,
the “M+” icon will disappear and the stored
memories will be automatically eliminated;
• Press +/= key again, the sum is shown on
the bottom of the display.
Area
• Press MODE key to select measurement mode.
When “
” is displayed on the LCD,
the current measurement mode is area.
• The length character “L” on the display will blink
showing the length measurement you will be
firstly taking. Press READ key to take
length‑measurement that is displayed on upper
portion of the screen. (Step 1);
• The width character “W” on the display will blink
showing the next measurement to take. Press
READ key to take width measurement that is
displayed on upper portion of the screen (Step 2);
• Then the area is automatically displayed on
the lower portion of the screen;
Area
• Press the READ key again will toggle back and forth between the length and
width measurement on the upper portion of the screen;
• Press MODE key to clear and begin new area measurement and computation;
• Press MODE key again to select new measurement mode.
Tips:
Press the MODE key one by one will toggle back and forth between the length,
area, volume and length measurement. If there is datum on the display before
pressing MODE key, first pressing the MODE key will clear the current datum, and
the measurement mode will be invariable.
Addition of area under area mode:
• Keep pressing MODE key for 2 seconds to store
the calculated area of first time measurement, at
the same time, the “M+” icon will display on the
screen;
• Press MODE key to clear current data and begin
the second time area measurement and
computation (follow step 1 and step 2 under
the area section);
• After getting the desired area of the second time
computation, press +/= to enter the addition
mode. A “+” icon will display on LCD.
• Keep pressing the +/= key for 2 seconds to recall
the first calculated area for the addition.
The “M+” icon will disappear and the stored
memory will be automatically cleared;
• Press +/= key, the sum of both areas is shown
on the bottom;
• Repeat the steps above to keep adding
the measured area.
Volume
• Press MODE key to select measurement mode.
When “
” is displayed on the LCD,
the current measurement mode is volume.
• The length character “L” on the display will blink
showing the length measurement you will be
firstly taking. Press READ key to take length
measurement that is displayed on upper
portion of the screen. (Step 1);
• The width character “W” on the display will blink
showing the next measurement to take. Press
READ key to take width measurement that is
displayed on upper portion of the screen (Step 2);
• The height character “H” on the screen will blink
showing the next measurement to take. Press
READ key to take height measurement that is
displayed on upper portion of screen. (Step 3);
• Then the volume is automatically displayed
on the lower portion of the screen;
• Press the READ key again will toggle back
and forth between the length, width and height
measurement on the upper portion of the screen;
• Press MODE key to clear and begin new volume
measurement and computation;
• Press MODE key again to select new
measurement mode.
Tips:
Press the MODE key one by one will toggle back and forth between the length,
area, volume and length measurement. If there is datum on the display before
pressing MODE key, first pressing the MODE key will clear the current datum, and
the mode will be invariable.
Addition of volumes under volume mode:
• Keep pressing the MODE key for 2 seconds
to store the calculated volume of first time
measurement, and at the same time the “M+”
icon will display on LCD;
• Press the MODE key to clear current data and
begin the second time volume measurement and
computation(follow step 1, step 2 and step
3 under the volume section);
• After getting the desired volume of the second
time computation, press +/= to enter the addition
mode. A “+” icon would appear on LCD.
• Keep pressing the +/= key for 2 seconds to recall
the first calculated volume for the addition.
The “M+” icon will disappear and the stored
memory will be automatically cleared;
• Press +/= key, the sum of both volumes is shown
on the bottom;
• Repeat the steps above to keep adding
the measured volume.
Temperature display
Keep pressing the FT/M key for 2 seconds, the environment temperature will
display on the lower portion of screen (the unit is °C under the metric system,
while the unit is °F under British measurement). Press the READ key again to
return the measuring state.
OPERATION INSTRUCTION
Inaccurate measurement may result from the following:
• When the battery runs out: at this time, the “ ” icon
will continuously appear on LCD to remind you
to replace the battery.
• When the measured distance is out of the
specified range: the effective range is
(0.5~16m) 2’ ~ 53’
• When the calculated result is out of the specified
range: at this time, an error message “Err” will be
displayed on the lower line of the screen.
• When addition of different parameters (e.g. length plus area), the “+” will be
ignored. The screen will keep the same read as the unit was operated before.
• When another ultrasonic source or high frequency noise is nearby: leave or
shut down the noise resource when taking measurement.
• When barriers appear between the tool and the measured surface.
• When the measured surface is not smooth: the measured surface should be
smooth, hard and of homogeneity.
• When the measuring environment is not good: the temperature and humidity
will affect the accuracy of measurement, and take measurement under
environment of no wind, especially for long distance measuring (between l2 m
to 16m / 40’ to 53’ ), the relative humidity should be above 48%, and the
surface area of the target object is at least 3m x 3m. /lOft x lOft.
• When measuring, ultrasonic sensor aperture should straightly
face to the measured surface.
Cautions
• Handle with care and do not drop tool.
• To avoid failure do not disassemble the tool.
• Keep the tool dry and clean.
• Store the tool in the case when not in use.
• Avoid dust and water, which may stain the lens.
• Check battery regularly in case of deterioration.
• Remove the battery when not in use for an extended period of time.
TECHNICAL SPECIFICATIONS
Name
Type
Recommended use
Measurementrange
Measurement accuracy
Length
Calculation range Area Volume
Resolution
Wavelength of laser
Temperature range
Laser Class
Power supply
Power consumption
Automatic off
Operating temperature
Size
Weight
Manifold electronic gauge
KN 8316
Indoor
0.5~16 m (2’ to 53’ )
± 1%
9 999.99m (9,999’ 11 “ )
99 999.9m2 (99,999.9 sq ft)
999 999m3 (999,999 cu ft )
0.01 m
630~660 nm
0°C to +40°C
Class II
One 9 Vcc battery (not included)
<50mA
The tool will be automatically
off after 60 seconds disabling.
0° C to 40° C (32° F to 104° F )
155 mm x 72 mm x 41 mm
About 141 g (battery not included)
Medidor electrónico múltiple
Modelo: KN 8316
Manual de instrucciones
INTRODUCCIÓN
El medidor electrónico múltiple KN-8316 determina la distancia al objeto
a través de señales electrónicas de alta velocidad y despliegue visual. La
herramienta con chip incorporado tiene función de memoria, y puede ser usada
para medidas continuas integradas, así como para calcular áreas y volúmenes
automáticamente. Puede ser una herramienta ideal para sectores como la
construcción y la decoración, (por ejemplo, para administradores de terrenos,
diseñadores, artesanos, etc.).
La herramienta cuenta con la función de orientación láser y puesta en estación
con nivel de burbuja. Envía una línea de láser roja para apuntar fácilmente
al objetivo. La función de compensación de temperatura automática de la
herramienta puede hacer la medición más precisa, y al mismo tiempo muestra la
temperatura ambiente de forma precisa.
El medidor electrónico múltiple KN-8316, es una herramienta láser de Clase II
conforme a la normativa EN 60825-1 de seguridad internacional.
INSTRUCCIONES DE SEGURIDAD
No cumplir las instrucciones siguientes puede causar lesiones personales.
• Lea y comprenda todas las instrucciones antes de utilizar la herramienta.
• No quite ninguna etiqueta de la herramienta.
• No utilice la herramienta en lugares con gases inflamables/explosivos.
• No utilice la herramienta láser con niños alrededor o permita a los niños
utilizar la herramienta láser, podría provocar lesiones a los ojos de los niños.
• No mire fijamente en el haz del láser.
• No apunte el haz láser directamente a los ojos de otros.
• No ubique la herramienta a nivel de los ojos ni delante o cerca de una
superficie reflejante, ya que el haz láser pudiera proyectarse en sus ojos
o los ojos de otros.
• No observe el haz láser
usando herramientas ópticas
como lupas o binoculares.
•
Quite las baterías al guardar
la herramienta durante periodos
prolongados de tiempo, para
evitar dañar la herramienta por
el deterioro de las mismas.
ADVERTENCIA
PELIGRO
Producto Láser Clase 2
Potencia máxima de salida <1mW
Longitud de onda=630-660nm
¡No mirar fijamente el haz láser!
¡Evite el contacto directo con los ojos!
¡Esta herramienta emite radiación láser!
COMPONENTES DE LA HERRAMIENTAS
1. Abertura del sensor ultrasónico.
2. Puntero láser.
3. LCD de dos filas--- los datos de
la línea superior son el resultado
de la medición actual, y los
datos de la línea de abajo son el
resultado del cálculo/memoria.
1
2
4. Tecla ON/OFF de
encendido/apagado.
5. Tecla MODE de selección de
función. Presione suavemente
esta tecla para borrar o
seleccionar los modos de
medición de largo, área o
volumen. Mantenga la presión
durante 2 segundos para
guardar el valor del largo, área
o volumen.
6. Tecla FT/M --- Tecla de
conversión de pies y metros:
Presione suavemente esta tecla
para seleccionar la unidad de
medida británica (pies y
pulgadas) o el sistema métrico
europeo (metros). Mantenga la
presión durante 2 segundos
para mostrar la temperatura
ambiente actual en el LCD.
7. Tecla de suma +/= --- Presione
suavemente esta tecla para
sumar el largo, área o volumen
medidos. Mantenga la presión
durante 2 segundos para
mostrar la información
guardada la última vez.
3
4
5
8
6
7
9
10
8. Tecla READ de lectura --- Presione esta tecla para leer la distancia medida.
Manténgala presionada y mueva la herramienta para leer los valores de
forma dinámica.
9. Burbujas de nivel.
0. Referencia de medida--- La distancia que se mide se cuenta
1
desde el final de la herramienta.
ILUSTRACIÓN DE LA PANTALLA
A. Más
B. Modo de muestra de largo, área o volumen (L=largo; W=ancho; H=alto)
C. Memoria
D. Memoria, resultado del cálculo
E. Resultado actual del cálculo
F. Muestra la cantidad de batería
G. Pies cuadrados
H. Pies cúbicos
I. Metros cuadrados/ Metros cúbicos
INSTRUCCIONES DE USO
Instalación de la batería (no incluida).
Abra la puerta de la batería en la parte de atrás de la herramienta e inserte una
batería tipo cuadrada de 9 Vcc en el conector. Vuelva a poner la batería en el
compartimento y cierre la puerta.
Medida de distancia
• Ponga la abertura del sensor contra el objeto a medir (por ejemplo la pared).
Puede ajustar la herramienta hasta que la burbuja quede
entre las dos líneas del nivel.
• Presione la tecla ON/OFF para encender la unidad.
• Presione la tecla READ para calcular la distancia
a medir y el haz láser indicará la superficie a medir.
• Mantenga apretada la tecla READ y mueva la herramienta para obtener
lecturas dinámicas, y la distancia medida se mostrará en la parte superior
de la pantalla.
• Presione la tecla FT/M para seleccionar la unidad de medida británica
o el sistema métrico (la unidad de medida original es el sistema métrico).
Tips:
Consejos:
A. El objeto a medir debe ser una superficie dura y no debe estar
bloqueado por ningún objeto.
B. Seleccione una superficie dura y lisa en un área grande para
medir con mayor precisión.
C. Si la superficie a medir es demasiado pequeña e irregular o con una superficie
blanda, puede usarse madera aglomerada en la superficie del objeto a medir.
D. La herramienta no puede medir a través de vidrio.
E. La herramienta debe estar alejada al menos 50 cm del objeto a medir.
F. Para asegurarse de obtener un valor preciso, debe realizar la medición cuando
la herramienta tenga la misma temperatura que la temperatura ambiente.
G. La distancia medida debe de contarse desde el final de la herramienta.
Suma (sin usar memoria M+)
• Presione la tecla READ para la medida y el valor
medido se mostrará en la parte superior de la pantalla.
• Presione la tecla +/= para entrar en el modo de suma,
y el icono + aparecerá en la pantalla al mismo tiempo,
el resultado se mostrará en la parte de abajo de la
pantalla (presione la tecla +/= para cancelar la suma).
• Presione la tecla READ de nuevo para una segunda
medición, el valor de la medición se mostrará en
la parte superior de la pantalla.
• Presione +/= de nuevo para desplegar la suma
en la parte inferior de la pantalla.
• Repita los pasos para continuar la suma.
Suma (usando memoria M+)
• Presione la tecla MODE durante 2 segundos para
guardar la primera medición, y el icono M+
aparecerá en la pantalla.
Suma (usando memoria M+)
• Presione la tecla READ para una nueva medición.
• Presione la tecla +/= para entrar en el modo
de suma, y el icono + aparecerá en la pantalla.
• Presione la tecla +/= para ver la medida anterior a
la suma (mostrada abajo de la pantalla), y al mismo
tiempo, el icono M+ desaparece y las mediciones
guardadas se eliminarán automáticamente.
• Presione la tecla +/= la suma aparece
en la parte inferior de la pantalla.
Area
• Presione la tecla MODE para entrar en el modo de
medición. Cuando se muestra “
” en la
pantalla, el modo actual es el de área.
• El icono de longitud “L” en la pantalla parpadeará,
mostrando la medida de longitud que usted estará
tomando primero. Presione la tecla READ para
tomar la medida de longitud que se mostrará en la
parte superior de la pantalla. (Paso 1).
• El icono de ancho “W” en la pantalla parpadeará,
mostrando la próxima medida para tomar. Presione
la tecla READ para tomar la medida de ancho que
se mostrará en la parte superior de la pantalla.
(Paso 2).
• Después de estos dos pasos, el área se mostrará
automáticamente en la parte inferior de la pantalla.
Area
• Presione la tecla READ otra vez para cambiar entre la longitud y la anchura
en la parte superior de la pantalla.
• Presione la tecla READ de nuevo para borrar lo anterior y realizar
una nueva medida y cálculo de área.
• Presione la tecla READ para elegir un nuevo modo de medida.
Consejos:
Presionar la tecla MODE cambiará entre los modos de medida de longitud, área y
volúmen. Si hay datos en la pantalla, presionar la tecla MODE primero borrará los
datos actuales y el modo de medida no cambiará.
Suma de áreas en el modo de medición de área:
• Presione la tecla MODE durante 2 segundos para
guardar el área calculada de la primera medición, al
mismo tiempo, el icono de “M+” aparece en la pantalla.
• Presione la tecla MODE para borrar los datos
actuales y empezar la segunda medición y
cálculo (siga los pasos 1 y 2 en la sección del área).
• Después de conseguir el área deseada del segundo
cálculo, presione la tecla +/= para entrar en el modo
de suma. Un “+” aparecerá en la pantalla.
• Presione la tecla +/= por 2 segundos para ver la
primera área calculada para la suma. El icono
“M+” desaparecerá y la memoria guardada
se borrará automáticamente.
• Presione la tecla +/= y la suma de ambas áreas
se mostrará en la parte inferior.
• Repita los pasos para seguir sumando áreas medidas
Volumen
• Presione la tecla MODE para seleccionar el modo de
medida. Cuando se muestre el ícono “
” en la
pantalla, el modo actual es volumen.
• El icono de longitud “L” en la pantalla parpadeará
mostrando la medida de longitud que está tomando.
Presione la tecla READ para tomar la medida de
longitud que se mostrará en la parte superior de la
pantalla (Paso 1).
• El icono de ancho “W” en la pantalla parpadeará,
mostrando la próxima medida a tomar. Presione
la tecla READ para tomar la medida de ancho que
se mostrará en la parte superior de pantalla (Paso 2).
• El icono de altura “H” en la pantalla parpadeará,
mostrando la próxima medida a tomar. Presione
la tecla READ para tomar la medida de altura que
se mostrará en la parte superior de pantalla (Paso 3).
• El volumen se mostrará automáticamente en
la parte inferior de la pantalla.
• Presione la tecla READ para cambiar entre longitud,
ancho y altura en la parte superior de la pantalla.
• Presione la tecla READ de nuevo para una nueva
medida y cálculo de volumen.
• Presione la tecla READ para seleccionar
un nuevo modo de medida.
Consejos:
Presionar la tecla MODE cambiará entre los modos de medida de longitud, área y
volumen. Si hay datos en la pantalla, presionar la tecla MODE primero borrará los
datos actuales y el modo de medida no cambiará.
Suma de volúmenes en el modo volumen:
• Presione la tecla MODE durante 2 segundos
para guardar el volumen calculado la primera
vez, el icono “M+” aparecerá en la pantalla.
• Presione la tecla MODE para borrar los datos
actuales y empezar la segunda medición de
volumen (Siga los pasos 1 a 3 en la sección
de volumen).
• Después de conseguir el volumen del segundo
cálculo, presione la tecla +/= para entrar en
el modo de suma. Un ícono “+” aparecerá
en la pantalla.
• Presione la tecla +/= durante 2 segundos para
volver a ver el primer volumen calculado para la
suma. El icono de “M+” desaparecerá y la
memoria guardada se borrará automáticamente.
• Presione la tecla +/= y la suma de ambos
volúmenes se mostrará en la pantalla.
• Repita los pasos para seguir agregando
volúmenes para sumar.
Pantalla de temperatura
Mantenga presionada la tecla FT/M durante 2 segundos y la temperatura ambiente
aparecerá en la parte inferior de pantalla (aparecerá en C si la unidad de medida
es el sistema métrico, y en F si la unidad de medida es la británica). Presione la
tecla READ de nuevo para volver al modo de medición.
INSTRUCCIONES DE USO
Las siguientes pueden ser causa de mediciones inexactas:
• Batería Baja: En este momento, el icono “ ” aparecerá
continuamente en la pantalla para recordarle que
hay que reemplazar la batería.
• Cuando la distancia está fuera del rango
especificado: El rango eficaz es 0.5 a 16 m
• Cuando el resultado calculado está fuera del rango
especificado: En este momento, un mensaje de error
“Err” se mostrará en la parte inferior de la pantalla.
• Cuando la suma sea entre parámetros diferentes
(por ejemplo longitud más área), el “+” se ignorará
y la pantalla guardará la misma lectura como la unidad anterior.
• Cuando haya otra fuente ultrasónica o ruido de alta frecuencia en las
inmediaciones: Salga o apague el origen del ruido al tomar la medida.
• Cuando haya barreras entre la herramienta y la superficie medida.
• Cuando la superficie medida no es lisa: La superficie medida
debe ser lisa, dura y homogénea.
• Cuando el ambiente de la medición no es bueno: La temperatura y humedad afectarán
la exactitud de la medida, y le recomendamos realizar mediciones sin viento, sobre
todo para distancias largas (entre 12 m y 16 m), la humedad relativa debe ser superior
al 48%, y la superficie del objeto a medir al menos de 3 m por 3 m
• Al medir, la apertura del sensor ultrasónico debe dirigirse
en línea recta a la superficie medida.
PRECAUCIONES
• Utilizar con cuidado y no permitir que la herramienta caiga al suelo.
• No desarme la herramienta para evitar fallas.
• Mantenga la herramienta seca y limpia.
• Guarde la herramienta en la caja de herramientas cuando no la use.
• Evite cualquier contacto con el agua y polvo, que podría manchar el lente.
• Quite la batería cuándo no vaya a utilizarla en un período
prolongado de tiempo.
ESPECIFICACIONES TÉCNICAS
Nombre
Modelo
Uso recomendado
Rango de Medición
Presición en medidas
Longitud
Rango de
Area Cálculo de
Volumen
Resolución
Longitud de onda láser
Rango de temperatura
Clase de Láser
Batería
Consumo de Energía
Apagado Automático
Temperatura de uso
Tamaño
Peso
Medidor electrónico múltiple
KN 8316
Interior
0.5 a 16 m (2’ to 53’ )
± 1%
9 999.99m (9,999’ 11 “ )
99 999.9m2 (99,999.9 sq ft)
999 999m3 (999,999 cu ft )
0.01 m
630~660 nm
0°C to +40°C
Clase II
Una batería tipo cuadrada
de 9 Vcc (no incluida)
<50mA
La herramienta se apagará automáticamente
a los 60 segundos de no usarse
0° C to 40° C (32° F to 104° F )
155 mm x 72 mm x 41 mm
Alrededor de 141 g (sin batería)
www.knova.com.mx