1
621538-00 FW3000 MANUAL 1/5/04 11:02 AM Page 7
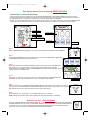
Step by step instruction to operate the INDOOR REMOTE:
A Quick Note before You Set Up the INDOOR REMOTE:
WARNING: For indoor use only. If the INDOOR REMOTE is exposed to rain or moisture, consult authorized service personnel.
12
3
4
13
14
1
6
7
8
16
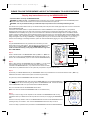
The numbers and colors on the INDOOR REMOTE's dial match the numbers and colors on the MESSENGER HUB
and LAMP RECEIVERS.
The colors on the dial for the Unit Code can be used to divide your home into zones with up to 3 dedicated Unit
Codes per color (except red which only has one Unit Code.) (eg. Green = Living Room)
9
15
11
3
10
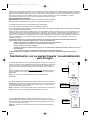
Open door to the INDOOR REMOTE to expose the colored dial shown in Figure 3.
2
ON
5
OFF
The numbers are used to differentiate one receiver from another in each color/zone.
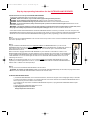
Reference Label Set Up
For your convenience, a blank reference label is located on the back of your INDOOR REMOTE. Write your own
customized applications on this blank key. Figure 4:
Example:
Red Unit Codes have been selected for the BULB RECEIVER in the Entrance
Gray Unit Codes have been selected for the RECEIVERS in the Dining Room
Green Unit Codes have been selected for the RECEIVER in the Living Room etc.
4
NOTE: The top button on the KEY CHAIN REMOTE will only activate UNIT CODE 1(RED). We recommend that
you control the lighting near your entrance way by UNIT CODE 1(Red ) so that it can be activated by your KEY
CHAIN REMOTE. See KEY CHAIN REMOTE instructions on page 11 for further instructions.
Step 1:
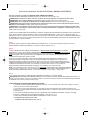
Set the dial on your INDOOR REMOTE to the same UNIT CODE (color) that you selected on the MESSENGER HUB in the previous section.
9
Step 2:
8
7
6
Gray 2 - Controlled by the top row, left switch
1
Gray 3 - Controlled by the top row, center switch
2
3
ON
OFF
ON
13
6
ON
3
4
14
1
Note: You may have to press and momentarily hold the button before it activates.
6
7
8
16
You should now be able to turn the lamp on and off with the corresponding button on the INDOOR REMOTE.
9
15
12
ON
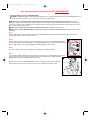
The small round ON button and OFF button shown in Figure 6 allow you to turn on or off all RECEIVERS set to
that color.
11
Gray 4 - Controlled by the top row, right switch.
5
4
10
Example:
5
16
Each of the 3 individual codes on that color can be turned on and off individually, using the 3 white ON/OFF buttons
located just below the dial as shown in Figure 5.
2
ON
ON
INDOOR REMOTE Battery Replacement
Open the battery compartment clip (located on the bottom of the back cover) with your fingernail and install a
CR2032 replacement lithium battery as shown in Figure 7. Note: Writing on battery must face back cover of
INDOOR REMOTE or INDOOR REMOTE will not operate.
Note: If indoor remote is without battery power, for more than 3 hours, the remote’s internal security code must be
reset. To do this, install new batteries, press and hold any button on the remote for 5 seconds, repeat step 4 on page
6 to synchronize remote with messenger hub.
7
7
ON
5
OFF
ON