1
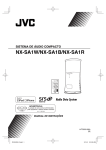
English
Français
COMPACT COMPONENT SYSTEM
SYSTEME DE COMPOSANTS COMPACT
NX-SA1B
INSTRUCTIONS
MANUEL D’INSTRUCTIONS
For Customer Use:
Enter below the Model No. and Serial
No. which are located either on the rear,
bottom or side of the cabinet. Retain this
information for future reference.
Model No.
Serial No.
LVT2353-001A
[J]
NX-SA1[J]_11.indd 1
12.5.15 9:58:29 AM
English
Introduction
Auto power save function
• When no operation is done in certain
situations for 30 minutes, the System turns
off automatically. This function is on at the
initial setting. For details, refer to page 11.
In this manual…
• The remote control buttons are used
for explaining the operations unless
mentioned otherwise. However, if the
unit has buttons with the same or similar
names, they can also be used for the
operations.
• In this manual, “iPod” means iPod, iPod
touch and iPhone device. When iPod touch
or iPhone device is specifically referred to,
“iPod touch” or “iPhone” is used.
• In this manual, “file“ and “track“ are used
interchangeably.
Caution: Proper Ventilation
To avoid risk of electric shock and fire, and
to prevent damage, locate the apparatus as
follows:
1 Front:
No obstructions and open spacing.
2 Sides/ Top/ Back:
No obstructions should be placed in the
areas indicated by the dimensions in the
illustration.
3 Bottom:
Place on a level surface. Maintain an
adequate air path for ventilation by placing
on a stand with a height of 10 cm (3-15/16”)
or more.
Front view
15 cm
(5-15/16”)
15 cm
(5-15/16”)
15 cm
(5-15/16”)
10 cm
(3-15/16”)
Side view
15 cm
(5-15/16”)
10 cm
(3-15/16”)
2
NX-SA1[J]_11.indd 2
12.5.15 9:58:31 AM
Contents
Listening to a USB device ....14
Basic connections .................. 5
Connecting a USB device ........................... 14
Playing back .................................................. 14
Programming the playing order —
Program Play .............................................. 15
Playing at random — Random Play ......... 16
Playing repeatedly — Repeat Play ........... 16
Connecting the FM antenna .........................5
Connecting the power cord ..........................5
Listening to FM ....................17
Part names ............................. 6
Searching for stations ................................. 17
Presetting stations....................................... 17
Unit Top/Front .................................................6
Unit Side/Rear..................................................7
Remote control................................................8
Listening to an external
device ..................................18
Basic operations .................... 9
Connecting an external device ................. 18
Listening to an external device ................. 18
Preparation ............................ 4
Accessories .......................................................4
Preparing the remote control .......................4
Getting started ................................................9
Turn on the power. .........................................................9
Select a source. ................................................................9
Adjust the volume. .........................................................9
Setting the clock .............................................9
Adjusting the sound effect ........................ 10
Adjusting the subwoofer volume ............. 10
Using the sound mode................................ 10
Changing the display information ........... 10
Changing the brightness of the
indications .................................................. 10
Activating/deactivating the Auto Power
Save (A.P.S.)................................................. 11
Connecting headphones ............................ 11
English
Introduction ........................... 2
Setting the timer .................19
Setting the Sleep Timer .............................. 19
Setting the Daily Timer ............................... 19
References ............................20
Compatible iPod .......................................... 20
Playable files ................................................. 20
Maintenance ................................................. 21
Trademarks ................................................... 21
Troubleshooting .......................................... 22
Specifications ............................................... 23
Listening to iPod ..................12
Connecting iPod........................................... 12
Playing back .................................................. 12
Viewing video/picture from iPod ............. 13
3
NX-SA1[J]_11.indd 3
12.5.15 9:58:31 AM
English
Preparation
• A rating label is placed on the bottom of the
System.
• Select a place which is level, dry and neither
too hot nor too cold–between 5˚C and 35˚C
(41˚F and 95˚F).
Accessories
Check that you have all the following items,
which are supplied for the System.
• Remote control (RM-SNXSA1BR) .......................1
• Lithium coin battery CR2025 ..............................1
The battery has been installed in the remote
control when shipped from the factory
• AC adaptor (AA-R2002) .........................................1
• AC power cord ..........................................................1
• FM antenna................................................................1
If any of these items are missing, contact your
dealer immediately.
Preparing the remote control
When you use the remote control for the first
time, pull out the insulation sheet.
If the range or effectiveness of the remote
control decreases, replace the battery.
To replace the battery in the remote control
Insert the battery into the remote control by
matching the polarities (+ and –) correctly.
Lithium coin battery
(product number: CR2025)
NOTE
• The included battery is for checking system
operation. Replace it with a new one as soon
as possible.
CAUTION
• Danger of explosion if battery is incorrectly
replaced.
• Replace only with the same or equivalent
type.
• Store the battery in a place where children
cannot reach. If a child accidentally swallows
the battery, consult a doctor immediately.
• To prevent the battery from overheating,
cracking, or starting a fire:
- Do not recharge, short, disassemble or heat
the battery, or dispose of it in a fire.
- Do not leave the battery with other metallic
materials.
- Wrap the battery with tape and insulate
when throwing away or saving it.
- Do not poke the battery with tweezers or
similar tools.
• Dispose of the battery in the proper manner,
according to federal, state, and local regulations.
4
NX-SA1[J]_11.indd 4
12.5.15 9:58:31 AM
Connecting the FM antenna
FM antenna
(supplied)
Do not connect the power cord until all
other connections have been made.
Connecting the power cord
Connect the supplied AC adaptor to the DC IN
jack on the System. Then connect the supplied
AC power cord to the AC adaptor, and plug it
into a wall outlet.
English
Basic connections
Extend the FM antenna when connecting so
that you can obtain the best reception.
NOTE
• Make sure the antenna conductors do not
touch any other terminals, connecting cords
or the power cord.
Also, keep the antennas away from metallic
parts of the main unit, connecting cords, and
the AC power cord. Otherwise, it could cause
poor reception.
• If you want to get a better reception,
disconnect the supplied FM antenna, and
connect to an outdoor FM antenna (not
supplied) using a 75 Ω wire with coaxial type
connector.
AC adaptor
(supplied)
CAUTION
AC power cord
(supplied)
AC outlet
• Disconnect the power cord before cleaning
or moving the System.
• To avoid the risk of fire and to prevent
damage,
- Do not use any AC adaptors other than the
one supplied.
- Do not use the supplied AC adaptor for
other equipment.
• Be sure to unplug the power cord from the
outlet when going out or when the System is
not in use for an extended period of time.
5
NX-SA1[J]_11.indd 5
12.5.15 9:58:32 AM
Part names
English
Unit Top/Front
~
!
@
#
$
1
=
2
-
3
4
0
5
6
1
2
3
4
5
6
7
8
9
0
=
%
STANDBY ON button
iPod 6 button
USB 6 button
AUDIO IN button
TUNER button
DIMMER button
(Sound Effect) button
4 button
¢ button
7 button
DISPLAY button
VOLUME +/– buttons
9
7
8
~
!
@
#
$
%
^
^
Remote control sensor
Display
STANDBY lamp
Illumination lamp
TIMER lamp
Dock for iPod
Subwoofer
6
NX-SA1[J]_11.indd 6
12.5.15 9:58:32 AM
English
Unit Side/Rear
&
*
)
_
+
(
& PHONES jack
* AUDIO IN jack
( USB MEMORY connector
) FM 75Ω COAXIAL terminal
_ DC IN jack
+ VIDEO OUT terminal
7
NX-SA1[J]_11.indd 7
12.5.15 9:58:32 AM
Part names
English
Remote control
fl
~
&
Ÿ
!
⁄
@
‡
*
°
(
·
)
‚
¤
#
‹
_
—
+
$
›
%
fi
±
`
^
~
Ÿ
!
⁄
@
¤
#
‹
$
›
%
fi
^
DIMMER
USB 6
iPod 6
AUDIO IN
SLEEP
CLOCK/TIMER
A.P.S.
REPEAT/TUNER MODE
SET
PLAY MODE
CANCEL
SOUND
(Sound Effect)
fl
&
‡
*
°
(
·
)
‚
_
—
+
±
`
DISPLAY
(STANDBY/ON)
TUNER
1
¡
7
UP
MENU
4
¢
DOWN
MUTING
SUB WOOFER +/–
VOLUME +/–
8
NX-SA1[J]_11.indd 8
12.5.15 9:58:32 AM
Basic operations
Getting started
Setting the clock
Turn on the power.
2
The STANDBY lamp goes off.
Select a source.
/
3
1
/
The hour indication flashes on the display.
AM
/
Adjust the volume.
Display the clock setting screen.
2
English
1
1 2.0 0
• If you have already set the clock before,
press CLOCK/TIMER repeatedly until the
hour indication flashes on the display.
Adjust the hour.
/
\
(Press repeatedly)
3
Adjust the minute.
• Adjustable range: MIN, 1 — 39, MAX
To turn off the System
/
\
(Press repeatedly)
Finish setting the clock.
The STANDBY lamp turns on.
To mute the volume temporarily
“MUTING” flashes.
To restore the sound, press MUTING or
VOLUME +.
To correct a misentry during the process,
press CANCEL.
You can return to the previous step.
NOTE
• The clock may gain or lose 1 to 2 minutes per
month. You may need to readjust the clock
periodically.
• If there is a power failure, the clock loses its
settings. You need to set the clock again.
9
NX-SA1[J]_11.indd 9
12.5.15 9:58:33 AM
Basic operations
English
Adjusting the sound effect
Changing the display information
You can enjoy dynamic and realistic sound
effects.
Press the button once to display the
current setting. Press it again to change
the setting.
WOW HD: Suitable for listening in front of the
System.
EH–1 (Normal Enhance Mode):
Widens the sound field in front of
the System.
EH–2 (High Enhance Mode):
Further widens the sound field in
front of the System.
OFF:
Cancels the sound effect.
Adjusting the subwoofer volume
Each time you press the button, the
information shown changes from the clock
to other information.
• The information shown on the display differs
depending on the source.
• Tag information can be shown on the display
while an MP3/WMA file is played back.
Ex.: Clock
PM
1 2.3 4
Ex.: When a USB device is played
10
Current track number
2.4 5
Elapsed playing time
Ex.: When a USB device is stopped
G12 T798
Total group number
Total track number
To display the clock while the System is on
standby, press 7.
Changing the brightness of the
indications
(Press repeatedly)
• Adjustable range: 1 — 5
Using the sound mode
To select the sound mode suitable for your
favorite music.
Each time you press the button, the setting
changes.
DIM 1
DIM 2
DIM OFF (Canceled)
• The setting is stored even if the power is
turned off.
Press the button once to display the
current setting. Press it again to change
the setting.
ROCK
CLASSIC
JAZZ
POP
FLAT (Canceled)
10
NX-SA1[J]_11.indd 10
12.5.15 9:58:34 AM
Press the button once to display the
current setting. Press it again to change
the setting.
APS ON
APS OFF (Canceled)
If no operation is performed for 30 minutes in
the following situations, the System turns off
automatically.
- The volume level is set to MIN or muting is
activated.
- “iPod” is selected as the source, and iPod is
not connected.
- “USB” is selected as the source, and
playback is stopped.
• During the 30-minute countdown, “APS” is
shown on the display every minute.
• Approximately 30 seconds before the power
is turned off, “APS” starts to blink.
• The 30-minute countdown restarts when
you perform button operations or connect/
disconnect a device.
• This function has priority over the Daily Timer
and Sleep Timer.
• This function is on at the initial setting.
Connecting headphones
Be sure to turn down the volume before
connecting or putting on the headphones.
English
Activating/deactivating the Auto
Power Save (A.P.S.)
Headphones
(not supplied)
• Connecting the headphones deactivates the
speakers.
• The sound effect and sound mode do not
affect the sound through the headphones.
NOTE
• If “iPod” is selected as the source, no sound is
heard from headphones.
11
NX-SA1[J]_11.indd 11
12.5.15 9:58:35 AM
Listening to iPod
English
Connecting iPod
You can operate iPod through the System.
• Do not connect or disconnect iPod when the
System is turned on.
1 Push PUSH OPEN to open the dock for
iPod.
2
Playing back
iPod is turned on and starts playing.
To pause
Insert iPod directly to the connector pins.
To cancel pause, press the button again.
To select a track
/
(Press repeatedly)
To fast forward/reverse
/
(Hold)
• iPod is charged through the dock when the
System is turned on.
• When not connecting iPod, press the dock
for iPod to store it. The dock for iPod cannot
be stored, even by pressing, unless it is
already fully open.
• Be careful not to pinch your fingers when
you store the dock for iPod.
Shuffle Playback
Each press switches the selection of iPod
shuffle songs.
Repeat Playback
CAUTION
• You cannot send any data to iPod from the
System.
• Take the protect case of iPod off before
connecting.
• Keep iPod in a straight position while
connecting/disconnecting it.
• Connect iPod firmly.
• Do not carry the System with iPod
connected. Doing so might cause damage to
the dock or you might drop iPod.
• Do not touch or hit the terminal pins of
iPod or connector pins in the dock for iPod
directly. Doing so might cause damage to
the connector pins.
Each press switches the selection of iPod
repeat songs.
To put iPod in sleep mode
(Hold)
12
NX-SA1[J]_11.indd 12
12.5.15 9:58:35 AM
1
Display the menu.
2
Select a menu item.
/
\
Viewing video/picture from iPod
You can view video/picture from iPod on an
external monitor.
• Before connecting a monitor display, turn off
the power of this System.
1 Connect a monitor display.
English
To operate the menu of iPod
(Press repeatedly)
To return to the previous menu, press MENU.
NOTE
• Depending on the type of iPod, iPod may
operate differently.
• Depending on the type of iPod, you can
operate the menu only on the screen of iPod.
• Operate iPhone or iPod touch itself in the
following cases:
– When operating the home button.
– When selecting application icons on the
home screen.
– When dragging the slider.
• For information on operating iPod, see the
instruction manual for iPod.
• Sound distortion may occur when playing
back audio sources with high recording
levels. If distortion occurs, it is recommended
to turn off the equalizer of iPod.
Composite video cord
(not supplied)
Monitor
(not supplied)
2
Set the video output of iPod.
• While the System is turned off...
(Hold)
Main unit
Press and hold the button once to display
the current setting. Press it again to
change the setting.
VOUT ON: Displays video/picture on the
connected monitor
VOUT OFF: Displays video/picture on iPod
3 Turn on the power of the System and
monitor, and play back iPod.
• Select the monitor input accordingly.
13
NX-SA1[J]_11.indd 13
12.5.15 9:58:36 AM
Listening to a USB device
English
Connecting a USB device
Playing back
To stop playback
USB memory
(not supplied)
USB cord
(not supplied)
• Disconnect the USB device after stopping
playback. Disconnecting the USB device
during playback may cause some problem of
the USB device and its files.
• The USB device is charged through the USB
MEMORY terminal when “USB” is selected as
the source.
• If you press USB 6 again after stopping,
the track which was being played is
played from the beginning (“Resume
Play”). Press 7 again while stopped to
cancel Resume Play.
To pause
CAUTION
• When connecting with a USB cable, use a
USB 2.0 cable less than 1 m in length.
• Do not use a USB hub.
• You cannot connect a computer to the USB
MEMORY terminal of the System.
• Electrostatic shock at connecting a USB
device may cause abnormal playback of
the device. In this case, disconnect the USB
device then reset this System and the USB
device.
To cancel pause, press the button again.
To select a track
/
(Press repeatedly)
To fast forward/reverse
• During playback...
/
(Hold)
or
/
Each time you press the button, the fastforward/reverse speed changes as follows:
x10
x1 (normal playback)
x5
To resume normal playback, press USB 6.
To select a group
• While stopped...
/
(Press repeatedly)
14
NX-SA1[J]_11.indd 14
12.5.15 9:58:36 AM
You can program up to 32 tracks on the USB
device in any desired order.
• You can only make a program when playback
is stopped.
• While making a program, you cannot specify
a group to select a track.
1 Stop playback.
2
To confirm the programmed tracks
• While stopped during or after program
playback...
English
Programming the playing order —
Program Play
/
(Press repeatedly)
The tracks in the program will successively
appears on the display in the programmed
order.
To add a track to the end of the program
Select “PROGRAM.”
Select the track to add.
• While stopped...
(Press repeatedly)
3
NORMAL (Canceled)
PROGRAM
Select the track to program.
/
\
(Press repeatedly)
4
Repeat step 3 to select other tracks for
the program.
5
Start playback.
/
\
(Press repeatedly)
To delete tracks in the program
• While stopped during or after program
playback...
Each time you press the button, the last
track in the program is erased.
To exit from Program Play, select “NORMAL”
in Step 2.
• Program Play is canceled in the following
cases:
- When the System is turned off.
- When the source is changed.
- When a USB device is disconnected.
15
NX-SA1[J]_11.indd 15
12.5.15 9:58:37 AM
Listening to a USB device
English
Playing at random — Random Play
You can play all the tracks on the USB device in
random order.
1 Start playback.
2
Playing repeatedly — Repeat Play
You can play a track or tracks repeatedly.
1 Select the repeat mode.
Select “RANDOM.”
(Press repeatedly)
NORMAL (Canceled)
RANDOM
• You cannot go back to the previous
tracks using 4 during Random Play.
To exit from Random Play, select “NORMAL”
in Step 2.
• Random Play is canceled in the following
cases:
- When the System is turned off.
- When the source is changed.
- When a USB device is disconnected.
- When REPEAT is pressed.
Press the button once to display the
current setting. Press it again to change
the setting.
RPT 1:
Repeats the current track
RPT GR: Repeats all tracks in the current
group
RPT ALL: Repeats all tracks
RPT OFF: Cancels Repeat Play
2 (While stopped) start playback.
To exit from Repeat Play, select “RPT OFF” in
Step 1.
• Repeat Play is canceled in the following
cases:
- When the System is turned off.
- When a USB device is disconnected.
NOTE
• If you select “RPT ALL” during Program Play,
the program is played repeatedly.
16
NX-SA1[J]_11.indd 16
12.5.15 9:58:37 AM
Listening to FM
1
Select “FM.”
Presetting stations
You can preset up to 40 FM stations manually.
1 Tune in to a station you want to preset.
2
2
Display the preset number.
Select the station.
English
Searching for stations
/
P-01
(Hold)
The unit starts searching for the stations
automatically, and the station search stops
when a station of sufficient signal strength
is found.
• When you press the button repeatedly,
the frequency changes.
To stop the search manually, press 4/¢
again.
3
• Finish the following steps while the
indication on the display is flashing.
Select a preset number to store.
/
(Press repeatedly)
4
Store the station.
To improve the FM reception
If an FM stereo broadcast is hard to listen to,
you can improve the reception by switching to
monaural mode.
To tune in to a preset station
/
(Press repeatedly)
Press the button once to display the
current setting. Press it again to change
the setting.
AUTO:
Stereo mode
MONO:
Monaural mode
NOTE
• When the monaural mode is activated, the
reception is improved. However, the stereo
effect is lost.
17
NX-SA1[J]_11.indd 17
12.5.15 9:58:37 AM
Listening to an external device
English
Connecting an external device
Listening to an external device
• Refer also to the instruction manual for the
external device.
1 Set the volume level of the System to
minimum.
1
Select ”AUDIO IN.”
2
2
3
Start playback of the external device.
Connect an external device to the AUDIO
IN jack.
Stereo mini plug cord
(not supplied)
External device
(not supplied)
Adjust the volume.
To adjust the audio input level
If the sound from the device connected to the
AUDIO IN jack is too quiet, you can change the
audio input level through the AUDIO IN jack
(without changing the volume level).
Each time you press the button, the setting
changes.
LEVEL1: Ordinary input level.
LEVEL2: Increases the input level.
LEVEL3: Increases the input level more than
“LEVEL2.”
18
NX-SA1[J]_11.indd 18
12.5.15 9:58:38 AM
Setting the timer
3
Set the timer contents.
/
Each time you press the button, the shutoff time (in minutes) changes as follows:
SLEEP 10
10
20
30
60
90
120
150
180
OFF
(back to the
beginning)
The System is now set to turn off after the
number of minutes you set have elapsed.
To deactivate the Sleep Timer, select “OFF.”
To check the remaining time until the
System shuts off, press SLEEP once.
Setting the Daily Timer
Using the Daily Timer, you can wake up with
your favorite music.
• Connect a USB device/iPod to the System,
and make sure that the source works
properly beforehand.
• Preset the desired FM station before setting
the Daily Timer.
1 Select “PLAY TMR.”
(Press repeatedly)
2
Select “ON.”
\
(Press repeatedly)
4
You can set the following items:
• Hour and minute for the on-time (ON)
• Hour and minute for the off-time (OFF)
• Playback source
- When you select “USB” as the source,
select a track number.
- When you select “FM” as the source,
select a preset station number.
• Volume
Once you have set the volume, “PLAY SET”
will be displayed and the setting contents
will be displayed in order.
Turn off the System.
English
Setting the Sleep Timer
The TIMER lamp lights up.
• While the Daily Timer is working, the
TIMER lamp blinks.
• Once set, the Daily Timer works every
day.
To correct a misentry during the process,
press CANCEL.
You can return to the previous step.
To deactivate the Daily Timer, press CANCEL
after performing Step 1.
“TIMEROFF” appears.
To set the Daily Timer again without
changing the contents, press SET after
performing Step 1.
“TIMER ON” and the setting contents
appear.
CAUTION
• The Daily Timer works only when the System
is on standby.
• Auto Power Save is effective even while the
Daily Timer is working.
19
NX-SA1[J]_11.indd 19
12.5.15 9:58:38 AM
References
Compatible iPod
English
Made for
iPod nano (6th generation)
Playable files
Audio Video
1
*
iPod nano (5th generation)
iPod nano (4th generation)
iPod nano (3rd generation)
iPod nano (2nd generation)
–
iPod touch (4th generation)
iPod touch (3rd generation)
iPod touch (2nd generation)
iPod touch *2
iPod classic
iPhone 4S
iPhone 4
iPhone 3GS
iPhone 3G
*1 Only for still pictures
*2 Only for software version 2.0.0 or later
• If iPod does not play correctly, update the
software of iPod to the latest version.
For details about updating iPod, check on the
Apple web site <http://www.apple.com/>.
• This System can play back MP3/WMA files
with the extension <.mp3> or <.wma>
(regardless of the letter case–upper/lower).
• This System can play back MP3/WMA
recorded at the following sampling
frequencies and bitrates.
Sampling frequency:
32/44.1/48 kHz
Bitrate:
MP3: 32 kbps – 320 kbps
WMA: 32 kbps – 320 kbps
• This System can recognize up to 300 folders
and 999 files on a USB device.
• DRM (Digital Rights Management) files
cannot be played back.
• This System cannot play back a file larger
than 2 Gigabytes.
• Some MP3/WMA files may not be played
back and will be skipped. This results from
their recording processes and conditions.
• Playing order of MP3/WMA files
– Folders are played back in order of the time
that the folders were created. In a folder,
files are played back in order of the time
that the files were recorded.
– The order of playback may differ depending
on the recording method.
– If you change a folder name or file name,
the order of playback may change.
• Tag information (version 1 and version 2) on
an MP3 or WMA file can be displayed.
20
NX-SA1[J]_11.indd 20
12.5.15 9:58:39 AM
Cleaning the System
• Stains should be wiped off with a soft cloth.
If the System is heavily stained, wipe it with
a cloth soaked in water-diluted neutral
detergent and wrung well, then wipe clean
with a dry cloth.
• Since the System may deteriorate in quality,
become damaged or get its paint peeled off,
be careful about the following:
– DO NOT wipe it hard.
– DO NOT wipe it with thinner or benzine.
– DO NOT apply any volatile substances such
as insecticides to it.
– DO NOT allow any rubber or plastic to
remain in contact for a long time.
Trademarks
• “Made for iPod” and “Made for iPhone”
mean that an electronic accessory has been
designed to connect specifically to iPod or
iPhone, respectively, and has been certified
by the developer to meet Apple performance
standards. Apple is not responsible for the
operation of this device or its compliance
with safety and regulatory standards. Please
note that the use of this accessory with iPod
or iPhone may affect wireless performance.
• iPhone, iPod, iPod classic, iPod nano and
iPod touch are trademarks of Apple Inc.,
registered in the U.S. and other countries.
• Microsoft and Windows Media are either
registered trademarks or trademarks of
Microsoft Corporation in the United States
and/or other countries.
•
English
Maintenance
is a trademark of SRS Labs, Inc.
• WOW HD technology is incorporated
under license from SRS Labs, Inc. WOW
HD™ significantly improves the playback
quality of audio, delivering a dynamic 3D
entertainment experience with deep, rich
bass and high frequency clarity for crisp
detail.
21
NX-SA1[J]_11.indd 21
12.5.15 9:58:40 AM
References
English
Troubleshooting
If you are having a problem with your System,
check this list for a possible solution before
calling for service.
General
Power does not come on.
\ Check the power cord connection.
The System turns off automatically.
\ Auto power save function (A.P.S.) is working.
Adjustments or settings are suddenly
canceled before you finish.
\ There is a time limit. Repeat the procedure.
Unable to operate the System from the
remote control.
\ The path between the remote control and
the remote sensor on the System is blocked.
\ The battery is exhausted.
No sound is heard.
\ Adjust the volume.
\ Headphones are connected.
iPod operations
iPod does not play.
\ The battery of iPod is low or exhausted.
Charge the battery of iPod.
USB device operations
The USB device does not play.
\ The USB device is not connected properly.
FM radio operations
Hard to listen to broadcasts because of
noise.
\ Antenna connection is incorrect or loose.
\ The FM antenna is not properly extended
and positioned.
\ Electrostatic discharge from your body may
cause noise. If this happens, turn the System
off then on again.
Timer operations
The Sleep Timer does not work.
\The Daily Timer is working. The Sleep Timer
can not be set when the Daily Timer is
working.
The Daily Timer does not work.
\ The System is turned on when the on-time
comes. The Daily Timer starts working only
when the System is turned off.
If the System does not work correctly after
these procedures...
The System works using a built-in
microprocessor. If buttons are not operative,
disconnect the AC power cord from the wall
outlet, wait for a while, then connect the cord
again.
JVC bears no responsibility for any loss of
data on iPod or the USB mass storage class
device while using this System.
MP3/WMA groups and tracks are not played
back as you expect.
\ Playing order was determined when the
groups and tracks are recorded. It depends
on the writing application.
The USB device sound is discontinuous.
\ MP3/WMA files have not been properly
copied onto the USB device.
\ Noise and static electricity may stop the sound.
In this case, disconnect and connect the USB
device again after turning off the System.
22
NX-SA1[J]_11.indd 22
12.5.15 9:58:40 AM
Speakers
Full range:
Subwoofer:
Output power:
5 cm (2”) cone x 4, 4 Ω
10 cm (3-15/16”) cone x 1, 8 Ω
5 W x 4 at 4 Ω + 20 W (Subwoofer) at 8 Ω (10% THD)
Tuner
FM tuning range:
Input/output terminals
iPod:
Output power:
USB MEMORY:
Output power:
USB specification:
Compatible device:
Compatible system:
Playable files:
AUDIO IN:
Stereo mini (ø 3.5 mm) x 1:
LEVEL 1:
LEVEL 2:
LEVEL 3:
PHONES:
VIDEO OUT:
English
Specifications
87.5 MHz – 108.0 MHz
DC 5 V
1A
DC 5 V 500 mA
Compatible with USB 2.0 Full Speed
Mass storage class
FAT16, FAT32
MP3, WMA
500 mV/47 kΩ
250 mV/47 kΩ
125 mV/47 kΩ
Stereo mini (ø 3.5 mm) x 1
Composite
General
Power supply:
AC adaptor (AA-R2002):
Input:
AC 100 V – 240 V , 50 Hz/60 Hz, 1 500 mA
Output:
DC 20 V 2 600 mA
Power consumption:
0.50 W or less (on standby)
Dimensions (approx.) (W x H x D):
162 mm x 329 mm x 162 mm (6-7/16” x 13” x 6-7/16”)
Mass (approx.):
2.7 kg (6.0 lbs)
Design and specifications are subject to change without notice.
23
NX-SA1[J]_11.indd 23
12.5.15 9:58:40 AM
Introduction
Français
La fonction d’économie d’énergie
automatique est en service
• Quand aucune opération n’est réalisé dans
certaines situations pendant 30 minutes,
l’appareil est mis hors tension
automatiquement. La fonction est en
service comme réglage initial. Pour plus de
détails référez-vous à la page 11.
Dans ce manuel...
• Sauf mention contraire, les touches de la
télécommande sont utilisées pour expliquer
les opérations. Toutefois, si l’appareil
comporte des touches avec des noms
identiques ou similaires, ils peuvent aussi
être utilisés pour le fonctionnement.
• Dans ce manuel, “iPod” est utilisé à la fois
pour iPod, iPod touch et pour iPhone.
Quand on fait référence en particulier à un
iPod touch ou à un iPhone, “iPod touch” ou
“iPhone” est utilisé.
• Dans ce manuel, les mots “fichier” et “plage”
sont utilisés de façon interchangeable.
Attention: Ventilation Correcte
Pour éviter tout risque de choc électrique et
d’incendie, et pour éviter tout dommage,
placez l’appareil en respectant ce qui suit:
1 Avant:
Rien ne doit gêner le dégagement.
2 Flancs/ Dessus/ Arrière:
Aucun obstacle ne doit être placé dans les
zones indiquées par les dimensions dans
l’illustration.
3 Dessous:
Poser l’appareil sur une surface plate.
Laissez suffisamment d’espace pour que la
ventilation puisse s’effectuer correctement
en plaçant l’appareil sur un socle d’une
hauteur de 10 cm (3-15/16 pouces) ou plus.
Vue avant
15 cm
(5-15/16”)
15 cm
(5-15/16”)
15 cm
(5-15/16”)
10 cm
(3-15/16”)
Vue latérale
15 cm
(5-15/16”)
10 cm
(3-15/16”)
2
FR_NX-SA1[J]_3.indd 2
5/18/12 6:06:54 PM
Table des matières
Préparations........................... 4
Écoute d’un périphérique
USB ......................................14
Connexion de l’antenne FM ..........................5
Connexion du cordon d’alimentation .........5
Connexion d’un périphérique USB........... 14
Lecture ........................................................... 14
Programmation de l’ordre de lecture —
Lecture programmée................................ 15
Lecture dans un ordre aléatoire —
Lecture aléatoire ....................................... 16
Répétition de la lecture — Lecture répétée ...16
Nom des pièces ...................... 6
Écoute des stations FM ........17
Dessus/avant de l’appareil ............................6
Coté/arrière de l’appareil ..............................7
Télécommande ................................................8
Recherche de stations ................................. 17
Préréglage des stations .............................. 17
Opérations de base ............... 9
Écoute d’un appareil
extérieur .............................18
Accessoires .......................................................4
Préparation de la télécommande ................4
Raccordements de base ........ 5
Pour commencer .............................................9
Mettez l’appareil sous tension. ..................................9
Choisissez une source. ..................................................9
Ajustez le volume. ..........................................................9
Réglage de l’horloge ......................................9
Ajustement d’effets sonores ...................... 10
Réglage du volume du caisson de grave ... 10
Utilisation du mode sonore ....................... 10
Changement des informations sur
l’affichage ................................................... 10
Modification de la luminosité des
affichages ................................................... 10
Mise en/hors service de la fonction d’économie
d’énergie automatique (A.P.S.) ......................11
Connexion d’un casque d’écoute.............. 11
Français
Introduction ........................... 2
Connexion d’un appareil extérieur .......... 18
Écoute d’un appareil extérieur .................. 18
Réglage de la minuterie ......19
Réglage de la minuterie d’arrêt ................ 19
Réglage de la minuterie quotidienne ...... 19
Références ............................20
iPod compatible ........................................... 20
Fichiers reproductibles ............................... 20
Entretien ........................................................ 21
Marques de commerce ............................... 21
Guide de dépannage................................... 22
Spécifications ............................................... 23
Écoute de iPod .....................12
Connexion de iPod ...................................... 12
Lecture ........................................................... 12
Affichage d’une séquence vidéo/image à
partir de l’iPod ........................................... 13
3
FR_NX-SA1[J]_3.indd 3
5/18/12 6:06:55 PM
Préparations
• Une plaque signalétique se trouve sous
l’appareil.
• Choisissez un endroit plat, sec, et ni trop
chaud, ni trop froid–entre 5˚C (41˚F) et 35˚C
(95˚F).
Français
Accessoires
Vérifiez que tous les éléments suivants sont bien
présents, et qu’ils sont fournis avec l’appareil.
• Télécommande (RM-SNXSA1BR) .......................1
• Pile bouton au lithium CR2025...........................1
La pile a été installée dans la télécommande
à l’expédition de l’usine
• Adaptateur secteur (AA-R2002) .........................1
• Cordon d’alimentation secteur ..........................1
• Antenne FM ...............................................................1
Si un de ces éléments est absent, contactez
immédiatement votre revendeur.
Préparation de la télécommande
Quand vous utilisez la télécommande pour la
première fois, retirez la feuille isolante.
Si la plage de fonctionnement de la
télécommande diminue, remplacez la pile.
Pour remplacer la pile dans de la télécommande
Insérez la pile dans la télécommande en
respectant les polarités (+ et –).
Pile bouton au lithium
(numéro du produit: CR2025)
REMARQUE
• La pile fournie est pour la vérification du
fonctionnement de l’appareil. Remplacez-la
par une neuve dés que possible.
ATTENTION
• Danger d’explosion si la pile est remplacée
de façon incorrecte.
• Remplacez-la uniquement avec le même
type de pile ou un type équivalent.
• Rangez la pile dans un endroit hors d’atteinte
des enfants. Si un enfant avale accidentellement
la pile, consultez immédiatement un médecin.
• Pour éviter que la pile ne chauffe, ne se
fissure ou cause un incendie:
- Ne rechargez pas, ne court-circuitez pas, ne
démontez pas, ne chauffer pas la pile ni ne
la jeter dans un feu.
- Ne laissez pas la pile avec d’autres objets
métalliques.
- Enveloppez la pile de ruban isolant avant
de la mettre au rebut ou de la ranger.
- Ne piquez pas la pile avec des ciseaux ou
d’autres objets similaires.
• Mettez de la pile au rebut correctement en
respectant la régulation fédérale, régionale
ou locale.
4
FR_NX-SA1[J]_3.indd 4
5/18/12 6:06:55 PM
Raccordements de base
Connexion de l’antenne FM
Antenne FM
(fournie)
Ne branchez pas le cordon d’alimentation secteur
avant d’avoir effectué toutes les autres connexions.
Connexion du cordon d’alimentation
Connectez l’adaptateur secteur fourni à la prise
DC IN de l’appareil. Puis, connectez le cordon
d’alimentation secteur fourni à l’adaptateur
secteur et branchez-le sur une prise murale.
Français
Étendez l’antenne FM quand vous la connectez
de façon à obtenir la meilleure réception
possible.
REMARQUE
• Assurez-vous que les conducteurs d’antenne
ne touchent aucunes autres prises, cordons
de connexion ou cordon d’alimentation.
De plus, gardez les antennes à l’écart des
parties métalliques de l’appareil principal,
des cordons de connexion et du cordon
d’alimentation secteur. Sinon, la réception
pourrait en être affectée.
• Si vous souhaitez obtenir une meilleure
réception, déconnectez l’antenne FM fournie
et connectez l’appareil à une antenne FM
extérieure (non fournie) en utilisant un câble
75 Ω muni d’un connecteur de type coaxial.
Adaptateur secteur
(fourni)
ATTENTION
Cordon
d’alimentation
secteur
(fourni)
Prise secteur
• Débranchez le cordon d’alimentation si vous
avez à nettoyer ou à déplacer l’appareil.
• Pour éviter tout risque d’incendie et pour
prévenir tout dommage,
- N’utilisez aucun autre adaptateur secteur
que l’adaptateur secteur fourni.
- N’utilisez pas l’adaptateur secteur fourni
d’un autre appareil.
• Débranchez toujours le cordon d’alimentation
de la prise secteur lorsque vous partez ou
que vous ne comptez pas utiliser l’appareil
pendant un certain temps.
5
FR_NX-SA1[J]_3.indd 5
5/18/12 6:06:55 PM
Nom des pièces
Dessus/avant de l’appareil
Français
~
!
@
#
$
1
=
2
-
3
4
0
5
6
1
2
3
4
5
6
7
8
9
0
=
%
STANDBY ON
Touche
Touche iPod 6
Touche USB 6
Touche AUDIO IN
Touche TUNER
Touche DIMMER
Touche
(effet sonore)
Touche 4
Touche ¢
Touche 7
Touche DISPLAY
Touches VOLUME +/–
9
7
8
~
!
@
#
$
%
^
^
Capteur de télécommande
Affichage
Témoin STANDBY
Témoin d’illumination
Témoin TIMER
Dock pour iPod
Caisson de grave
6
FR_NX-SA1[J]_3.indd 6
5/18/12 6:06:56 PM
Français
Coté/arrière de l’appareil
&
*
)
_
+
(
& Prise PHONES
* Prise AUDIO IN
( Connecteur USB MEMORY
) Prise FM 75Ω COAXIAL
_ Prise DC IN
+ Prise VIDEO OUT
7
FR_NX-SA1[J]_3.indd 7
5/18/12 6:06:56 PM
Nom des pièces
Télécommande
fl
~
&
Français
Ÿ
!
⁄
@
‡
*
°
(
·
)
‚
¤
#
‹
_
—
+
$
›
%
fi
±
`
^
~
Ÿ
!
⁄
@
¤
#
‹
$
›
%
fi
^
DIMMER
USB 6
iPod 6
AUDIO IN
SLEEP
CLOCK/TIMER
A.P.S.
REPEAT/TUNER MODE
SET
PLAY MODE
CANCEL
SOUND
(effet sonore)
fl
&
‡
*
°
(
·
)
‚
_
—
+
±
`
DISPLAY
(STANDBY/ON)
TUNER
1
¡
7
UP
MENU
4
¢
DOWN
MUTING
SUB WOOFER +/–
VOLUME + /–
8
FR_NX-SA1[J]_3.indd 8
5/18/12 6:06:56 PM
Opérations de base
Réglage de l’horloge
1
Mettez l’appareil sous tension.
2
Le témoin STANDBY s’éteint.
Choisissez une source.
/
3
/
1
Affichez l’écran de réglage de l’horloge.
L’indication de l’heure clignote sur
l’affichage.
AM
/
Ajustez le volume.
2
• Si vous avez déjà réglé l’horloge avant,
appuyez répétitivement sur CLOCK/TIMER
jusqu’à ce que l’indication de l’heure
clignote sur l’affichage.
Ajustez les heures.
/
• Plage d’ajustement: MIN, 1 — 39, MAX
Pour mettre l’appareil hors tension
1 2.0 0
Français
Pour commencer
\
(Appuyez répétitivement)
3
Ajustez les minutes.
/
\
(Appuyez répétitivement)
Le témoin STANDBY s’allume.
Pour couper le volume temporairement
“MUTING” clignote.
Pour rétablir le son, appuyez sur MUTING ou
VOLUME +.
Terminez le réglage de l’horloge.
Pour corriger une mauvaise entrée pendant
la procédure, appuyez sur CANCEL.
Vous pouvez retourner à l’étape
précédente.
REMARQUE
• L’horloge peut avancer ou retarder d’une
ou deux minutes par mois. Vous aurez
peut-être besoin de réajuster l’horloge
périodiquement.
• En cas de panne de courant, les réglages de
l’horloge sont perdus. Vous devez régler
l’horloge à nouveau.
9
FR_NX-SA1[J]_3.indd 9
5/18/12 6:06:57 PM
Opérations de base
Ajustement d’effets sonores
Français
Vous pouvez profiter d’effets sonores
dynamiques et réalistes.
Appuyez une fois sur la touche pour
afficher le réglage actuel. Appuyez-la de
nouveau pour changer le réglage.
WOW HD: Pour écouter le son quand vous
vous trouvez devant l’appareil.
EH–1 (Mode normal amélioré):
Étend le champ sonore à l’avant de
l’appareil.
EH–2 (Mode élevé amélioré):
Étend encore plus le champ sonore
à l’avant de l’appareil.
OFF:
Annule l’effet sonore.
Réglage du volume du caisson de
grave
Changement des informations sur
l’affichage
Chaque fois que vous appuyez sur la
touche, l’information affichée passe de
l’horloge à une autre information.
• Les informations qui apparaissent sur
l’affichage diffèrent en fonction de la source.
• Les informations de la balise peuvent être
affichées sur l’affichage pendant la lecture
d’une fichier MP3/WMA.
Ex.: Horloge
PM
1 2.3 4
Ex.: Quand un périphérique USB est reproduit
10
Numéro de la plage
actuelle
2.4 5
Durée de lecture
écoulée
Ex.: Quand un périphérique USB est arrêté
G12 T798
Nombre total de
groupes
Nombre total de plages
Pour afficher l’horloge pendant que
l’appareil est en veille, appuyez sur 7.
(Appuyez répétitivement)
• Plage d’ajustement: 1 — 5
Modification de la luminosité des
affichages
Utilisation du mode sonore
Pour choisir le mode sonore qui convient à
votre musique préférée.
Appuyez une fois sur la touche pour
afficher le réglage actuel. Appuyez-la de
nouveau pour changer le réglage.
ROCK
CLASSIC
JAZZ
POP
FLAT (Annulé)
Chaque fois que vous appuyez sur la
touche, le réglage change.
DIM 1
DIM 2
DIM OFF (Annulé)
• Le réglage est mémorisé même si l’appareil
est hors tension.
10
FR_NX-SA1[J]_3.indd 10
5/18/12 6:06:58 PM
Appuyez une fois sur la touche pour
afficher le réglage actuel. Appuyez-la de
nouveau pour changer le réglage.
APS ON
APS OFF (Annulé)
Si aucune opération n’est effectuée pendant
30 minutes dans les situations suivantes,
l’appareil se met hors tension
automatiquement.
- Le niveau de volume est réglé sur MIN ou la
sourdine est en service.
- “iPod” est choisi comme source, mais aucun
iPod n’est connecté.
- “USB” est choisi comme source, mais la
lecture est arrêtée.
• Pendant le compte à rebours de 30 minutes,
“APS” apparaît sur l’affichage chaque minute.
• Environ 30 secondes avant la mise hors
tension, “APS” se met à clignoter.
• Le compte à rebours de 30 minutes reprend
si vous touchez une touche ou connectez/
déconnectez un périphérique.
• Cette fonction a la priorité sur la minuterie
quotidienne et la minuterie d’arrêt.
• La fonction est en service comme réglage
initial.
Connexion d’un casque d’écoute
Assurez-vous de réduire le volume avant de
connecter un casque ou de vous le mettre sur
les oreilles.
Casque d’écoute
(non fourni)
Français
Mise en/hors service de la
fonction d’économie d’énergie
automatique (A.P.S.)
• Connecter un casque d’écoute met hors
service les enceintes.
• L’effet sonore et le mode sonore n’affecte pas
le son qui sort par le casque d’écoute.
REMARQUE
• Si “iPod” est choisi comme source, aucun son
ne sort du casque d’écoute.
11
FR_NX-SA1[J]_3.indd 11
5/18/12 6:06:58 PM
Écoute de iPod
Connexion de iPod
Vous pouvez commander un iPod à travers
l’appareil.
• Ne connectez ni ne déconnectez pas iPod
quand l’appareil est sous tension.
PUSH OPEN pour ouvrir le dock
1 Poussez
pour iPod.
iPod est sous tension et démarre la lecture.
Pour faire une pause
Insérez le iPod directement sur les
broches du connecteur.
Français
2
Lecture
Pour annuler la pause, appuyez de nouveau
sur la touche.
Pour choisir une plage
/
(Appuyez répétitivement)
Pour avance/retour rapide
/
(Maintenez pressée)
• L’iPod est chargé par le dock quand l’appareil
est sous tension.
• Si vous ne connectez pas d’iPod, poussez sur
le dock pour le ranger. Il n’est pas possible
de ranger le dock pour iPod même en le
poussant s’il n’est pas complètement ouvert.
• Faites attention de ne pas vous pincer les
doigts quand vous ranger le dock de l’iPod.
ATTENTION
• Vous ne pouvez envoyer aucunes données
sur iPod à partir de cet appareil.
• Retirez l’étui de protection de l’iPod avant de
le connecter.
• Tenez l’iPod bien droit quand vous le
connectez/déconnectez.
• Connectez l’iPod solidement.
• Ne transportez pas l’appareil avec iPod connecté.
Si vous essayez, cela pourrait endommager le
dock ou causer la chute de l’iPod.
• Ne touchez pas et ne heurtez pas les broches
de la prise de l’iPod, ni celles du connecteur
dans le dock pour iPod. Cela pourrait
endommager les broches du connecteur.
Lecture aléatoire
Chaque fois que vous appuyez sur la touche,
la sélection aléatoire des chansons de l’iPod
change.
Lecture répétée
Chaque fois que vous appuyez sur la touche,
la sélection des chansons répétées de l’iPod
change.
Pour mettre l’iPod en mode de veille
(Maintenez pressée)
12
FR_NX-SA1[J]_3.indd 12
5/18/12 6:06:59 PM
Pour utiliser le menu de l’iPod
1
2
Affichez le menu.
Choisissez un élément de menu.
/
\
Affichage d’une séquence vidéo/
image à partir de l’iPod
Vous pouvez voir une séquence vidéo/image
de l’iPod sur un moniteur extérieur.
• Avant de connecter un moniteur, mettez cet
appareil hors tension.
1 Connectez un moniteur.
Français
(Appuyez répétitivement)
Pour retourner au menu précédent, appuyez
sur MENU.
REMARQUE
• Selon le type d’iPod, le fonctionnement peut
varier.
• En fonction du type d’iPod, vous pouvez
utiliser les menu uniquement sur l’écran de
l’iPod.
• Utilisez l’iPhone ou l’iPod touch directement
dans les cas suivants:
– Quand vous souhaitez utiliser la touche
Home.
– Lors de la sélection d’icônes d’application
sur l’écran Home.
– Pour faire défiler le curseur.
• Pour les informations sur l’utilisation de iPod,
référez-vous au manuel d’instruction de iPod.
• Une déformation du son peut se produire
lors de la lecture des sources audio avec des
signaux enregistrés à des niveaux élevés. Si
une déformation se produit, il est recommande
de mettre hors service l’égaliseur de iPod.
Cordon vidéo composite
(non fourni)
Moniteur
(non fourni)
2
Réglez la sortie vidéo de l’iPod.
• Pendant que l’appareil est hors tension...
(Maintenez pressée)
Appareil principal
Maintenez enfoncée la touche une fois
pour afficher le réglage actuel. Appuyez-la
de nouveau pour changer le réglage.
VOUT ON: Affiche la séquence vidéo/image
sur le moniteur connecté
VOUT OFF: Affiche la séquence vidéo/image
sur l’iPod
3 Mettez l’appareil et le moniteur sous
tension et démarrez la lecture de l’iPod.
• Choisissez l’entrée du moniteur en
fonction.
13
FR_NX-SA1[J]_3.indd 13
5/18/12 6:06:59 PM
Écoute d’un périphérique USB
Connexion d’un périphérique USB
Lecture
Pour arrêter la lecture
Français
Mémoire USB
(non fournie)
Cordon USB
(non fourni)
• Déconnectez le périphérique USB après avoir
arrêté la lecture. Débrancher le périphérique
USB pendant la lecture peut provoquer un
problème sur périphérique USB et ses fichiers.
• Le périphériques USB est chargé par la prise
USB MEMORY quand “USB” est choisi comme
source.
• Si vous appuyez de nouveau sur USB 6
après l’arrêt, la plage qui était en cours de
lecture est lue à partir du début (“Reprise
de la lecture”). Appuyez de nouveau sur
7 pendant l’arrêt pour annuler la reprise
de la lecture.
Pour faire une pause
ATTENTION
• Lors de l’utilisation d’un câble USB pour la
connexion du périphérique, utilisez un câble
USB 2.0 de moins de 1 mètre.
• N’utilisez pas de nœud de raccordement USB.
• Vous ne pouvez pas connecter un ordinateur
à la prise USB MEMORY de cet appareil.
• Un choc électrostatique à la connexion
d’un périphérique USB peut causer une
lecture anormale du périphérique. Dans ce
cas, déconnectez le périphérique USB puis
réinitialiser cet appareil et le périphérique USB.
Pour annuler la pause, appuyez de nouveau
sur la touche.
Pour choisir une plage
/
(Appuyez répétitivement)
Pour avance/retour rapide
• Pendant la lecture...
/
(Maintenez pressée)
ou
/
Chaque fois que vous appuyez sur la
touche, la vitesse d’avance rapide/retour
rapide change comme suit:
x5
x10
x1 (lecture normale)
Pour reprendre la lecture normale, appuyez
sur USB 6.
Pour choisir un groupe
• À l’arrêt...
/
(Appuyez répétitivement)
14
FR_NX-SA1[J]_3.indd 14
5/18/12 6:07:00 PM
Vous pouvez programmer un maximum de
32 plages sur un périphérique USB dans l’ordre
que vous souhaitez.
• Vous pouvez réaliser un programme
uniquement quand la lecture est arrêtée.
• Lors de la réalisation d’un programme, vous ne
pouvez pas spécifier un groupe pour choisir
une plage.
1 Arrêtez la lecture.
2
Choisissez “PROGRAM”.
Pour confirmer les plages programmées
• Quand l’appareil est à l’arrêt pendant et
après une lecture programmée...
/
(Appuyez répétitivement)
Les plages du programme s’afficheront
successivement sur l’écran dans l’ordre
programmé.
Pour ajouter une plage à la fin du programme
Choisissez la plage à ajouter.
• À l’arrêt...
/
(Appuyez répétitivement)
3
\
(Appuyez répétitivement)
NORMAL (Annulé)
PROGRAM
Choisissez la plage à programmer.
/
Français
Programmation de l’ordre de
lecture — Lecture programmée
\
Pour supprimer des plages du programme
• Quand l’appareil est à l’arrêt pendant et
après une lecture programmée...
(Appuyez répétitivement)
4
Répétez l’étape 3 afin de choisir les autres
plages pour les programmer.
5
Démarrez la lecture.
Chaque fois que vous appuyez sur la touche,
la dernière plage du programme est effacée.
Pour quitter la lecture programmée,
choisissez “NORMAL” à l’étape 2.
• La lecture programmée est annulée dans
les cas suivants:
- Quand l’appareil est mis hors tension.
- Quand la source est changée.
- Quand un périphérique USB est
débranché.
15
FR_NX-SA1[J]_3.indd 15
5/18/12 6:07:00 PM
Écoute d’un périphérique USB
Lecture dans un ordre aléatoire —
Lecture aléatoire
Vous pouvez reproduire toutes les plages d’un
périphérique USB dans un ordre aléatoire.
1 Démarrez la lecture.
Français
2
Répétition de la lecture — Lecture
répétée
Vous pouvez reproduire une plage ou
plusieurs plages répétitivement.
1 Choisissez le mode de répétition.
Choisissez “RANDOM”.
(Appuyez répétitivement)
NORMAL (Annulé)
RANDOM
• Vous ne pouvez pas revenir aux plages
précédentes en utilisant 4 pendant la
lecture aléatoire.
Pour quitter la lecture aléatoire, choisissez
“NORMAL” à l’étape 2.
• La lecture aléatoire est annulée dans les
cas suivants:
- Quand l’appareil est mis hors tension.
- Quand la source est changée.
- Quand un périphérique USB est
débranché.
- Quand vous appuyez sur REPEAT.
Appuyez une fois sur la touche pour
afficher le réglage actuel. Appuyez-la de
nouveau pour changer le réglage.
RPT 1:
Répète la plage actuelle
RPT GR: Répète toutes les plages du groupe
actuel
RPT ALL: Répète toutes les plages
RPT OFF: Annule la lecture répétée
2 (Pendant l’arrêt) démarre la lecture.
Pour quitter la lecture répétée, choisissez
“RPT OFF” à l’étape 1.
• La lecture répétée est annulée dans les
cas suivants:
- Quand l’appareil est mis hors tension.
- Quand un périphérique USB est
débranché.
REMARQUE
• Si vous choisissez “RPT ALL” pendant la
lecture programmée, le programme est
reproduit répétitivement.
16
FR_NX-SA1[J]_3.indd 16
5/18/12 6:07:01 PM
Écoute des stations FM
Recherche de stations
Préréglage des stations
1
Choisissez “FM”.
Vous pouvez prérégler un maximum de
40 stations FM manuellement.
1 Accordez la station que vous souhaitez
prérégler.
2
Choisissez la station.
2
Affichez le numéro préréglé.
(Maintenez pressée)
L’appareil recherche les stations
automatiquement et la recherche de
station s’arrête quand une station de signal
suffisamment fort est trouvée.
• Si vous appuyez répétitivement sur la
touche, la fréquence change.
P-01
3
Pour arrêter la recherche manuelle, appuyez
de nouveau sur 4/¢.
Pour améliorer la réception FM
Si une émission FM stéréo est difficile à
écouter, vous pouvez améliorer la réception en
commutant sur le mode monaural.
• Terminez les étapes suivantes pendant
que l’indication clignote sur l’affichage.
Choisissez un numéro de préréglage à
mémoriser.
Français
/
/
(Appuyez répétitivement)
4
Mémorisez la station.
Pour accorder une station préréglée
Appuyez une fois sur la touche pour afficher
le réglage actuel. Appuyez-la de nouveau
pour changer le réglage.
AUTO:
Mode stéréo
MONO:
Mode monaural
/
(Appuyez répétitivement)
REMARQUE
• Quand le mode monaural est en service, la
réception est améliorée. Cependant, l’effet
stéréo est perdu.
17
FR_NX-SA1[J]_3.indd 17
5/18/12 6:07:01 PM
Écoute d’un appareil extérieur
Connexion d’un appareil extérieur
Écoute d’un appareil extérieur
• Référez-vous aussi au mode d’emploi d’un
appareil extérieur.
1 Réglez le niveau de volume de l’appareil
sur le minimum.
1
Choisissez “AUDIO IN”.
2
2
Démarrez la lecture d’un appareil
extérieur.
3
Ajustez le volume.
Connectez un appareil extérieur à la prise
AUDIO IN.
Français
Cordon à mini-fiche stéréo
(non fourni)
Pour ajuster le niveau d’entrée audio
Si le son de l’appareil connecté à la prise
AUDIO IN est trop faible, vous pouvez changer
le niveau d’entrée audio de la prise AUDIO IN
(sans changer le niveau du volume).
Appareil extérieur
(non fourni)
Chaque fois que vous appuyez sur la
touche, le réglage change.
LEVEL1: Niveau d’entrée normal.
LEVEL2: Augmente le niveau d’entrée.
LEVEL3: Augmente le niveau d’entrée
encore plus que “LEVEL2”.
18
FR_NX-SA1[J]_3.indd 18
5/18/12 6:07:01 PM
Réglage de la minuterie
3
Réglez le contenu de la minuterie.
/
Chaque fois que vous appuyez sur la
touche, l’heure d’arrêt (en minutes) change
comme suit:
SLEEP 10
10
20
30
60
90
120
150
180
OFF
(retour au début)
L’appareil est à présent prêt à s’éteindre
après que le nombre de minutes
programmé s’est écoulé.
Pour mettre hors service la minuterie
d’arrêt, choisissez “OFF”.
Pour vérifier la durée restante jusqu’à la
mise hors tension, appuyez une fois sur la
touche SLEEP.
\
(Appuyez répétitivement)
4
Vous pouvez régler les éléments suivants:
• Heures et minutes pour l’heure de début
de la minuterie (ON)
• Heures et minutes pour l’heure de fin de
la minuterie (OFF)
• Source de lecture
- Quand vous choisissez “USB” comme
source, choisissez un numéro de plage.
- Quand vous choisissez “FM” comme
source, choisissez un numéro de station
préréglée.
• Volume
Une fois que vous avez réglé le volume,
“PLAY SET” est affiché et le contenu du
réglage est affiché dans l’ordre.
Mettez l’appareil hors tension.
Français
Réglage de la minuterie d’arrêt
Réglage de la minuterie quotidienne
En utilisant la minuterie quotidienne, vous
pouvez vous réveiller au son de votre musique
préférée.
• Connectez un périphérique USB/iPod à
l’appareil et assurez-vous que la source
fonctionne correctement.
• Préréglez la station FM souhaitée avant de
paramétrer la minuterie quotidienne.
1 Choisissez “PLAY TMR”.
(Appuyez répétitivement)
2
Choisissez “ON”.
Le témoin TIMER s’allume.
• Quand la minuterie quotidienne est en
service, le témoin TIMER clignote.
• Une fois paramétrer, la minuterie
quotidienne fonctionne tous les jours.
Pour corriger une mauvaise entrée pendant
la procédure, appuyez sur CANCEL.
Vous pouvez retourner à l’étape précédente.
Pour annuler le minuterie quotidienne,
appuyez sur CANCEL après avoir réalisé l’étape 1.
“TIMEROFF” apparaît.
Pour mettre de nouveau en service la minuterie
quotidienne sans changer le contenu, appuyez
sur SET après avoir réalisé l’étape 1.
“TIMER ON” et le contenu du réglage
apparaissent.
ATTENTION
• La minuterie quotidienne fonctionne
uniquement quand l’appareil est en mode
d’attente.
• La fonction d’économie d’énergie
automatique fonctionne même pendant le
fonctionnement de la minuterie quotidienne.
19
FR_NX-SA1[J]_3.indd 19
5/18/12 6:07:02 PM
Références
iPod compatible
Fabriqué pour
iPod nano (6th generation)
Fichiers reproductibles
Audio Vidéo
1
*
iPod nano (5th generation)
iPod nano (4th generation)
iPod nano (3rd generation)
Français
iPod nano (2nd generation)
–
iPod touch (4th generation)
iPod touch (3rd generation)
iPod touch (2nd generation)
iPod touch *2
iPod classic
iPhone 4S
iPhone 4
iPhone 3GS
iPhone 3G
*1 Uniquement pour les images fixes
*2 Uniquement pour la version 2.0.0 ou
ultérieure du logiciel
• Si la lecture sur iPod ne se fait pas
correctement, mettez à jour le logiciel de
iPod à la dernière version.
Pour en savoir plus sur la mise à jour de iPod,
consultez le site Web de Apple
<http://www.apple.com/>.
• Cet appareil peut reproduire les fichiers
MP3/WMA portant le code d’extension
<.mp3> ou <.wma> (quel que soit la casse
des lettres).
• Cet appareil peut reproduire les fichiers
MP3/WMA enregistrés avec les fréquences
d’échantillonnage et les débits binaires
suivants.
Fréquence d’échantillonnage:
32/44,1/48 kHz
Débit binaire: MP3: 32 kbps – 320 kbps
WMA: 32 kbps – 320 kbps
• Cet appareil peut reconnaître un maximum
de 300 dossiers et 999 fichiers sur un
périphérique USB.
• Les fichiers DRM (Digital Rights Management)
ne peuvent pas être reproduits.
• Cet appareil ne peut pas reproduire un fichier
plus gros que 2 Gigaoctets.
• Certains fichiers MP3/WMA ne peuvent
pas être reproduits et sont sautés. Cela
provient des conditions et du processus
d’enregistrement.
• L’ordre de lecture des fichiers MP3/WMA
– Les dossiers sont reproduits dans l’ordre du
moment de la création des dossiers. Dans
un dossier, les fichiers sont reproduits dans
l’ordre du moment d’enregistrement des
fichiers.
– L’ordre de lecture peut différer en fonction
de la méthode d’enregistrement.
– Si vous changez le nom d’un dossier ou le
nom d’un fichier, l’ordre de lecture peut
changer.
• Les balises d’informations (version 1 et
version 2) d’un fichier MP3 ou WMA peuvent
être affichées.
20
FR_NX-SA1[J]_3.indd 20
5/18/12 6:07:03 PM
Nettoyage du système
• Les tâches doivent être frottées avec un
chiffon doux. Si l’appareil est très sale,
frottez-le avec un chiffon humidifié avec une
solution détergente neutre diluée dans de
l’eau, puis essuyez avec un chiffon sec.
• Faites attention au points suivants, sinon la
qualité de l’appareil pourrait être détériorée,
l’appareil pourrait être endommagée ou sa
peinture pourrait peler:
– Veillez à NE PAS l’essuyer en appuyant trop
fort.
– NE FROTTEZ PAS avec un diluant ou de la
benzine.
– Veillez à NE PAS appliquer de substance
volatile comme des insecticides.
– NE LAISSEZ PAS un objet en caoutchouc
ou en plastique en contact prolongé avec
l’appareil.
• “Made for iPod” and “Made for iPhone”
mean that an electronic accessory has been
designed to connect specifically to iPod or
iPhone, respectively, and has been certified
by the developer to meet Apple performance
standards. Apple is not responsible for the
operation of this device or its compliance
with safety and regulatory standards. Please
note that the use of this accessory with iPod
or iPhone may affect wireless performance.
• iPhone, iPod, iPod classic, iPod nano and
iPod touch are trademarks of Apple Inc.,
registered in the U.S. and other countries.
• Microsoft et Windows Media est une marque
déposée ou une marque de commerce de
Microsoft Corporation aux États-Unis et/ou
dans les autres pays.
Français
Marques de commerce
Entretien
est une marque de commerce de
SRS Labs, Inc.
• La technologie WOW HD est incorporée
dans la licence de SRS Labs, Inc. WOW
HD™ améliore de façon significative la
qualité de lecture du signal audio, offrant
une expérience dynamique 3D avec graves
profonds et riches et des hautes fréquences
claires avec des détails nets.
•
21
FR_NX-SA1[J]_3.indd 21
5/18/12 6:07:03 PM
Références
Guide de dépannage
Si vous avez des problèmes avec votre
appareil, cherchez d’abord une solution dans
cette liste avant d’appeler un réparateur.
Français
Général
L’alimentation n’arrive pas.
\ Vérifiez la connexion du cordon d’alimentation.
L’appareil s’éteint automatiquement.
\ La fonction économie d’énergie
automatique (A.P.S.) est activée.
Les ajustements ou les réglages sont
annulés soudainement avant la fin.
\ Il y a un temps limite. Répétez la procédure.
L’appareil ne peut pas être commandé avec
la télécommande.
\ Il y a un obstacle entre la télécommande et
le capteur de télécommande de l’appareil.
\ La pile est usée.
Aucun son n’est entendu.
\ Ajuster le volume.
\ Le casque d’écoute est connecté.
iPod
iPod ne peut pas lire.
\ La batterie de iPod est faible ou déchargée.
Chargez de la batterie de iPod.
Utilisation d’un périphérique USB
La lecture sur le périphérique USB n’est pas
possible.
\ Le périphérique USB n’est pas connecté
correctement.
Les groupes et les plages MP3/WMA ne sont
pas reproduites comme vous le souhaitez.
\ L’ordre de lecture est déterminé quand les
groupes et les fichiers sont enregistrés. Il
dépend du logiciel utilisé pour l’enregistrement.
Le son du périphérique USB est discontinu.
\ Les fichiers MP3/WMA n’ont pas été copiés
correctement sur le périphérique USB.
\ Des bruits et de l’électricité statique peuvent
perturber les sons. Dans ce cas, déconnectez
puis reconnectez le périphérique USB après
avoir mis l’appareil hors tension.
Radio FM
Trop de bruit pendant les émissions de
radio.
\ La connexion de l’antenne est incorrecte ou
lâche.
\ L’antenne FM n’est pas correctement
étendue et positionnée.
\ Une décharge électrostatique de votre
corps peut causer du bruit. Si cela se
produit, mettez l’appareil hors tension puis
de nouveau sous tension.
Minuterie
La minuterie d’arrêt ne fonctionne pas.
\La minuterie quotidienne est en service. La
minuterie d’arrêt ne peut pas être réglée
quand la minuterie quotidienne est en
service.
La minuterie quotidienne ne fonctionne
pas.
\ L’appareil est activé à l’heure prédéfinie.
La minuterie quotidienne fonctionne
uniquement quand l’appareil est hors
tension.
Si l’appareil ne fonctionne pas correctement
après ces procédures...
L’appareil fonctionne en utilisant un
microprocesseur intégré. Si les touches ne sont
pas opérationnelles, débranchez le cordon
d’alimentation de la prise murale, attendez un
moment, puis rebranchez le cordon.
JVC ne peut être tenu responsable pour
toute perte de données dans l’iPod ou le
périphérique USB à mémoire de grande
capacité lors de l’utilisation de cet appareil.
22
FR_NX-SA1[J]_3.indd 22
5/18/12 6:07:04 PM
Spécifications
4 cônes de 5 cm (2 pouces), 4 Ω
1 cône de 10 cm (3-15/16 pouces), 8 Ω
5 W x 4 à 4 Ω + 20 W (Caisson de grave) à 8 Ω (10% DHT)
Tuner
Plage d’accord FM:
Prises d’entrée/sortie
iPod:
Puissance de sortie:
USB MEMORY:
Puissance de sortie:
Spécifications USB:
Périphériques compatibles:
Système compatible:
Fichiers reproductibles:
AUDIO IN:
Mini stéréo (ø 3,5 mm) x 1:
LEVEL 1 :
LEVEL 2 :
LEVEL 3 :
PHONES:
VIDEO OUT:
87,5 MHz – 108,0 MHz
5 V CC
1A
Français
Enceintes
Haute fidélité:
Caisson de grave:
Puissance de sortie:
5 V CC 500 mA
Compatible avec USB 2.0 Full Speed
À mémoire de grande capacité
FAT16, FAT32
MP3, WMA
500 mV/47 kΩ
250 mV/47 kΩ
125 mV/47 kΩ
Mini stéréo (ø 3,5 mm) x 1
Composite
Général
Alimentation:
Adaptateur secteur (AA-R2002):
Entrée:
100 V − 240 V CA , 50 Hz/60 Hz, 1 500 mA
Sortie:
20 V CC 2 600 mA
Consommation:
0,50 W ou moins (en mode d’attente)
Dimensions (approx.) (L x H x P):
162 mm x 329 mm x 162 mm (6-7/16 x 13 x 6-7/16 pouces)
Masse (approx.):
2,7 kg (6,0 livres)
La conception et les spécifications sont sujettes à changement sans notification.
23
FR_NX-SA1[J]_3.indd 23
5/18/12 6:07:04 PM
NX-SA1
COMPACT COMPONENT SYSTEM
EN, FR
© 2012 JVC KENWOOD Corporation
NX-SA1[J]_11.indd 24
0512KMYMDWBET
12.5.15 9:58:40 AM