1
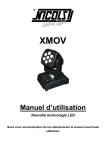
XMOV 2 Manuel d’utilisation Nouvelle technologie LED Nous vous recommandons de lire attentivement le manuel avant toute utilisation. Nous vous rappelons l’importance de la lecture de la notice d’utilisation et du respect des conseils de sécurité et d’utilisation afin d’éviter tout danger ou d’endommager l’appareil suite à une mauvaise manipulation. 1. Conseils de sécurité Conservez le présent manuel avec l'équipement pour référence ultérieure. En cas de vente de l'équipement à un autre utilisateur, il est important que le présent manuel soit joint à l'équipement afin que le nouvel utilisateur dispose des informations nécessaires à son utilisation et puisse prendre connaissance des mises en gardes relatives à la sécurité. Lors du déballage de l’appareil, assurez-vous que toutes les pièces sont présentes et que l’appareil n’a pas été endommagé pendant le transport. Assurez-vous que l’alimentation est compatible à la tension locale. Il est important que l’appareil soit relier à la prise de terre afin d’éviter tout choc électrique. L’appareil a été conçu que pour une utilisation en INTERIEUR et dans un endroit sec. L’appareil doit être utilisé dans une pièce bien ventilée et à au moins 50 cm des murs. Vérifiez que les ouïes de ventilation de l’appareil sont bien dégagées. Débranchez l’appareil du secteur avant le remplacement d’une pièce ou avant toute réparation ou entretien. Par sécurité, assurez-vous qu’aucun produit inflammable ne se trouve à côté de l’appareil lors de l’utilisation. Utilisez des élingues de sécurité pour la fixation de l’appareil. La température ambiante maximale est de 40°C. Ne jamais utiliser l’appareil si la température excède 40°C. Si vous rencontrez des problèmes à l’utilisation, éteignez immédiatement l’appareil. N’essayez pas de réparer l’appareil par vous même. L’appareil ne contient pas de pièces que puissiez remplacer par vous-mêmes. Les réparations effectuées par du personnel non qualifié peuvent engendrer des dommages. Il est important de contacter le revendeur pour toute réparation. Toujours utiliser des pièces de même type. Ne pas toucher les fils pendant que l’appareil fonctionne afin d’éviter tout choc électrique. Ne pas toucher le boitier à mains nues pendant le fonctionnement. Si le boitier de l’appareil est endommagé, veuillez le changer immédiatement. 1- Il est IMPERATIF de ne jamais regarder directement la source lumineuse sous risque de graves séquelles oculaires. ATTENTION aux émissions des LEDS qui pourraient blesser ou irriter l’œil. 2. Caractéristiques techniques Dimensions : 58*30*15.5cm Poids : 6.5kg Alimentation : AC 230V, 50HZ Consommation : 90W LED: 14*tri-3W Angle : 25° Programmes pré-enregistrés, Mode AUTO, DMX, Master/Slave et musical Canaux DMX : 12 / 14 Affichage LCD pour des operations plus faciles Design compact / Effets wash puissants 3. Fonctionnement de l’appareil BOUTONS MODE : Retour au menu précédent SET UP : Entrer dans le menu suivant UP : Pour augmenter la valeur DOWN : Pour diminuer la valeur MENU 0.Add ——D.001-512 (DMX address set up) 1.Range ——180 (scan angle 180) ——360(scan angle 360) 2.Black ——No ——Yes(when it moving according to eh X/Y axis,it will black) 3.InverP——InverP1——No ——Yes(first light X axis negative moving) InverP2——No ——Yes(second light X axis negative moving) 2- 4. InverT——InverT1—— No ——Yes(first light Y axis negative moving) InverT2—— No ——Yes(second light Y axis negative moving) 5.Channel——Mode1(DMX working Mode1:12 channel) ——Mode2(DMX working Mode2:14 channel ) 6.Run ——Dmx (working mode——DMX control) ——FOOT (working mode——foot switch control) ——Slave (working mode——slave mode) ——Auto1-10(working mode——Auto 1 1-10) ——Sound(working mode——Sound 1) 7.Sound ——0-31(sensitive for the sound active mode) 8. Info ——display——V1.0(display board program version No.) motor——V1.0(electrical machine program version No.) dimmer——V1.0(dimming program version No.) 9.Default ——No ——Yes(recover factory reset) Le menu se compose de 10 réglages : Assignation de l’adresse DMX ——0.Add 1) Appuyez sur le bouton “MODE” pour entrer dans le menu “0.Add” 2) Appuyez sur le bouton “SETUP” pour pouvoir régler l’adresse DMX “D.×××” 3) c “UP” et “DOWN” pour régler la valeur de votre choix d.001—d.512 Réglage de l’angle de l’axe X ——1.Range 1) Appuyez sur le bouton “MODE” pour entrer dans le menu “1.Range” 2) Appuyez sur le bouton “SETUP” et entrer dans le menu du choix des angles “180”/“360” 3) Appuyez sur les boutons “UP” et “DOWN” pour sélectionner votre choix Réglage du Blackout——2.Black 1) Appuyez sur le bouton “MODE” pour entrer dans le menu “2.Black” 2) Appuyez sur le bouton “SETUP” pour choisir le mode blackout : “no”/“yes” 3) Appuyez sur les boutons “UP” et “DOWN” pour sélectionner blackout activé ou 3- désactivé selon le mouvement de l’axe XY. Réglage du mouvement avant/arrière de l’axe X ——3.InverP 1) Appuyez sur le bouton “MODE” pour entrer dans le menu “3.InverP” 2) Appuyez sur le bouton “SETUP”, pour entrer dans le menu des réglages “InverP1”/“InverP2” InverP1 : Réglage des mouvements de l’appareil 1 InverP2 : Réglage des mouvements de l’appareil 2 3) Appuyez sur les boutons “UP” et “DOWN” pour choisir si la direction de l’axe X est inversée ou non. (NO/YES) Réglage du mouvement avant/arrière de l’axe Y——4.InverT 1) Appuyez sur le bouton “MODE” pour entrer dans le menu “4.InverT” 2) Appuyez sur le bouton “SETUP” pour entrer dans le menu des réglages “InverT1”/“InverT2” InverT1 : Réglage des mouvements de l’appareil 1 InverT2 : Réglage des mouvements de l’appareil 2 3) Appuyez sur les boutons “UP” et “DOWN” pour choisir si la direction de l’axe Y est inversée ou non. (NO/YES) Réglage des canaux DMX——5. Channel 1) Appuyez sur le bouton “MODE” pour entrer dans le menu “5. Channel” 2) Appuyez sur le bouton “SETUP” pour choisir entre “Mode1” ou “Mode2’’ 3) Appuyez sur les boutons “UP” et “DOWN” pour valider le mode “Mode1” 12 canaux“ ou le ‘’Mode2” 14 canaux. Veuillez-vous référer aux tableaux ci-dessous pour des informations plus détaillées. Réglage des modes de pilotage——6. Run 1) Appuyez sur le bouton “MODE” pour entrer dans le menu “6. Run” 2) Appuyez sur le bouton “SETUP” pour choisir entre “Dmx”/“FOOT ”“Slave”/ “Auto1-10”/” Sound” 3) Appuyez sur les boutons “UP” et “DOWN” pour sélectionner le mode DMX. “Dmx”——MODE DMX “FOOT”——Contrôleur au pied “Slave” ——MODE SLAVE “Auto1-10” ——MODE AUTO. Programmes de 1 à 10 ” Sound” ——MODE MUSICAL 4- Réglage de la sensibilité du son——7.Sound 1) Appuyez sur le bouton “MODE” pour entrer dans le menu “7.Sound” 2) Appuyez sur le bouton “SETUP” pour faire le réglage “×××” 3) Appuyez sur les boutons “UP” et “DOWN” pour régler la valeur de 0 à 31. La sensibilité est plus forte plus le chiffre est grand. Information sur le programme——8. Info 1) Appuyez sur le bouton “MODE” pour entrer dans le menu for the program version “8. Info” 2) Appuyez sur le bouton “SETUP” pour choisir “display”/ “motor”/ “dimmer” 3) Appuyez sur les boutons “UP” et “DOWN”. “display”, “motor” et “dimmer” s’affichent “display”——Indique la version du programme du display “motor”——Indique la version du programme du panneau de contrôle “dimmer”—— Indique la version du programme dimmer RESET——9.Default 1) Appuyez sur le bouton “MODE’’ pour avoir le menu “9.Default” 2) Appuyez sur le bouton “SETUP” pour choisir entre “No”/“Yes” 3) Appuyez sur les boutons “UP” et “DOWN” pour sélectionner “No ” : aucune fonction ou “Yes” : tous les menus retournent aux réglages par défaut. Mode DMX 1 : 12 canaux Channel Value Function CH1 Pan (0-255) X axis CH2 Pan fine (0-255) X axis fine tuning CH3 Tilt (0-255) Y axis CH4 Tilt fine (0-255) Y axis fine tuning CH5 Pan /Tilt Speed (0-255) X/Y axis speed CH6 Dimmer (0-255) Master dimming CH7 Red (0-255) Red dimming CH8 Green (0-255) Green dimming CH9 Blue (0-255) Blue dimming CH10 Strobe (0-255) 0-20HZ strobe 5- Color Static Choose 0-8 No Function sept-17 R(255) G(50) 18-26 R(255) G(150) 27-35 R(255) G(255) 36-44 R(200) G(255) 45-53 R(100) G(255) 54-62 R(40) G(255) 63-71 G(255) 72-80 G(255) B(50) 81-89 G(255) B(150) 90-98 G(255) B(255) 99-107 G(150) B(255) 108-116 G(50) B(255) 117-125 B(255) 126-134 R(50) B(255) 135-143 R(150) B(250) 144-152 R(255) B(255) 153-161 R(220) B(50) 162-170 R(150) G(50) B(100) 171-179 R(50) G(180) B(220) 180-188 R(50) G(220) B(100) 189-197 R(150) G(220) 198-206 R(150) B(220) 207-215 G(180) B(220) 216-224 G(220) B(50) 225-233 R(220) G(100) B(50) 234-242 R(220) G(200) B(100) 243-251 R(255) G(200) B(150) 252-255 R(255) G(255) B(255) 0-9 No Function different kind of static colors CH11 CH12 Control 6- 10-109 Auto1-10 110-209 Sound 210-255 Reset(response after 3 seconds) Mode DMX 2 : 14 canaux Channel Value Function CH1 Pan (0-255) X axis CH2 Tilt (0-255) Y axis CH3 Dimmer (0-255) Master Control the first light dimming CH4 Red (0-255) CH5 Green (0-255) Red dimming Green dimming CH6 Blue (0-255) Blue dimming CH7 Strobe (0-255) 0-20HZstrobe CH8 Pan (0-255) X axis CH9 Tilt (0-255) Y axis CH10 Dimmer (0-255) Master dimming Control the CH11 Red (0-255) CH12 Green (0-255) Red dimming second light Green dimming CH13 Blue (0-255) Blue dimming CH14 Strobe (0-255) 0-20HZ strobe 7- 1. Safety instructions Please read the instruction carefully which including important information about the installation, operation and maintenance. Please keep this User Manual for future consultation. If you sell the unit to another user, be sure that they also receive this instruction booklet. Unpack and check carefully there is no transportation damage before using the unit. Before operating, ensure that the voltage and frequency of power supply match the power requirements of the unit. It’s important to ground the yellow/green conductor to earth in order to avoid electric shock. The unit is for indoor use only and use only in a dry location. The unit must be installed in a location with adequate ventilation, at least 50cm from adjacent surfaces. Be sure that no ventilation slots are blocked. Disconnect mains power before fuse replacement or servicing. Make sure there are not flammable materials close to the unit while operating as it is fire hazard. Use safety cable when fixes this unit. Maximum ambient temperature is 40°C and don’t operate it where the temperature is higher than this. There are no user serviceable parts inside the fixture. Do not open the housing or attempt any repairs by yourself. In the unlikely event your fixture may require service, please contact the nearest authorized technical assistance center and always use the same type spare parts. The housing must be replaced if they are visibly damaged. Do not touch any wire during operation as high voltage may cause electric shock. Do not look directly at the LED light beam while the fixture is on. Do not look at the beam light directly to avoid any visual problems. Possibly hazardous optical radiation emitted from this product. 2. Technical specifications Size: 58*30*15.5cm Weight: 6.5kgs Voltage: AC 230V, 50HZ Power consumption: 90W 8- LEDs: 14*tri-3W Beam angle: 25 degree Built-in programs, auto run, DMX mode, M/S, sound active DMX channel: 12 / 14CH LCD display for easier operation Very compact design with such a powerful wash effects 3. How to operate the unit Button function Mode: return the last menu Setup: enter the next menu Up: plus Down: subtract MENU 0.Add ——D.001-512 (DMX address set up) 1.Range ——180 (scan angle 180) ——360(scan angle 360) 2.Black ——No ——Yes(when it moving according to eh X/Y axis,it will black) 3.InverP——InverP1——No ——Yes(first light X axis negative moving) InverP2——No ——Yes(second light X axis negative moving) 4. InverT——InverT1—— No ——Yes(first light Y axis negative moving) InverT2—— No ——Yes(second light Y axis negative moving) 5.Channel——Mode1(DMX working Mode1:12 channel) ——Mode2(DMX working Mode2:14 channel ) 6.Run ——Dmx (working mode——DMX control) ——FOOT (working mode——foot switch control) ——Slave (working mode——slave mode) 9- ——Auto1-10(working mode——Auto 1 1-10) ——Sound(working mode——Sound 1) 7.Sound ——0-31(sensitive for the sound active mode) 8. Info ——display——V1.0(display board program version No.) motor——V1.0(electrical machine program version No.) dimmer——V1.0(dimming program version No.) 9.Default ——No ——Yes(recover factory reset) There are 10 kinds of set up in this menu: DMX address set up ——0.Add 1) Press the “MODE”, enter the DMX address menu“0.Add” 2) Press the “SETUP”, enter the DMX address setting menu “D.×××” 3) Press the “UP” or “DOWN” to set up the DMX address value d.001—d.512 X axis scan angle settings——1.Range 1) Press the “MODE”, enter the scan angle set up menu“1.Range” 2) Press the “SETUP”, enter the scan angle menu“180”/“360” 3) Press the “UP” or “DOWN” to choose the scan angle“180”/“360”, 180:scan in the 180 degree range,360:scan in the 360 degree range Black set up——2.Black 1) Press the “MODE”, enter the black set up menu“2.Black” 2) Press the “SETUP”, enter the menu to set up the black “no”/“yes” 3) Press the “UP” or “DOWN” to choose whether black or not when moving according to the XY axis.“NO”it will not black when moving /“YES”it will have black when moving . X axis forward and reverse moving setting——3.InverP 1) Press the “MODE”,X axis forward and reverse moving set up menu“3.InverP” 2) Press the “SETUP”, enter the menu to set up the X axis forward and reverse moving“InverP1”/“InverP2” InverP1 : set up the directions for the first light whether forward moving or not. InverP2 : set up the directions for the second light whether forward moving or not . 3) Press the “UP” or “DOWN”, choose the X axis direction is opposite or 10- not.“NO”moving direction will not opposite /“YES”moving direction will opposite Y axis moving direction forward or reverse setting——4.InverT 1) Press the “MODE”, enter the menu to set up the Y axis moving directions forward or reverse“4.InverT” 2) Press the “SETUP”,Y axis moving direction forward or reverse setting menu“InverT1”/“InverT2” InverT1 : set up the directions for the first light whether forward moving or InverT2 : set up the directions for the second light whether forward moving or not. 3) Press the “UP” or “DOWN”, choose the Y axis direction is opposite turning or not. “NO”moving direction will not opposite/“YES”moving direction will opposite DMX channel setting——5. Channel 1) Press the “MODE”,DMX channel setting menu“5. Channel” 2) Press the “SETUP”, setting the DMX channel“Mode1”/“Mode2” 3) Press the “UP” or “DOWN” to choose the DMX channel.“Mode1” 12 channels/“Mode2”14 channels. More details for the channel, please check the form as below Working mode setting——6. Run 1) Press the “MODE”, enter the menu to setting the DMX channels “6. Run” 2) Press the “SETUP”, setting the DMX channel “Dmx”/“FOOT ”“Slave”/ “Auto1-10”/” Sound” 3) Press the “UP” or “DOWN” to choose the DMX channel. “Dmx”——DMX working mode “FOOT”——foot switch control mode “Slave” ——slave mode “Auto1-10” ——auto running mode , there are from 1-10 auto running programs ” Sound” ——sound active mode Sensitive of the sound active mode settings——7.Sound 1) Press the “MODE”, enter the menu for the sensitive of the sound active mode “7.Sound” 11- 2) Press the “SETUP”, enter the menu to setting the sensitive of the sound active mode “×××” 3) Press the “UP” or “DOWN” to set up the sensitive value 0-31. It will be more sensitive when the value is bigger. Local information for the program version——8. Info 1) Press the “MODE”, enter the menu to check the local information for the program version “8. Info” 2) Press the “SETUP”, enter the preview menu for the program version information of the local “display”、“motor”、“dimmer” 3) Press the “UP” or “DOWN”, it will show “display”、“motor”、“dimmer”version information “display”——display board program version No. “motor”——electrical control panel program Version No. “dimmer”——dimming control panel program version No. Recover factory reset——9.Default 1) Press the “MODE”, recover factory reset menu“9.Default” 2) Press the “SETUP”, recover factory reset menu “No”/“Yes” 3) Press the “UP” or “DOWN” to choose the recover factory reset.“No” no function “Yes” all of the menu will return back to the factory reset. DMX Working mode 1 : 12 channels Channel Value Function CH1 Pan (0-255) X axis CH2 Pan fine (0-255) X axis fine tuning CH3 Tilt (0-255) Y axis CH4 Tilt fine (0-255) Y axis fine tuning CH5 Pan /Tilt Speed (0-255) X/Y axis speed CH6 Dimmer (0-255) Master dimming CH7 Red (0-255) Red dimming CH8 Green (0-255) Green dimming CH9 Blue (0-255) Blue dimming CH10 Strobe (0-255) 0-20HZ strobe 12- Color Static Choose 0-8 No Function sept-17 R(255) G(50) 18-26 R(255) G(150) 27-35 R(255) G(255) 36-44 R(200) G(255) 45-53 R(100) G(255) 54-62 R(40) G(255) 63-71 G(255) 72-80 G(255) B(50) 81-89 G(255) B(150) 90-98 G(255) B(255) 99-107 G(150) B(255) 108-116 G(50) B(255) 117-125 B(255) 126-134 R(50) B(255) 135-143 R(150) B(250) 144-152 R(255) B(255) 153-161 R(220) B(50) 162-170 R(150) G(50) B(100) 171-179 R(50) G(180) B(220) 180-188 R(50) G(220) B(100) 189-197 R(150) G(220) 198-206 R(150) B(220) 207-215 G(180) B(220) 216-224 G(220) B(50) 225-233 R(220) G(100) B(50) 234-242 R(220) G(200) B(100) 243-251 R(255) G(200) B(150) 252-255 R(255) G(255) B(255) 0-9 No Function different kind of static colors CH11 CH12 Control 13- 10-109 Auto1-10 110-209 Sound 210-255 Reset(response after 3 seconds) DMX working mode 2 : 14 channels Channel Value Function CH1 Pan (0-255) X axis CH2 Tilt (0-255) Y axis CH3 Dimmer (0-255) Master Control the first light dimming CH4 Red (0-255) CH5 Green (0-255) Red dimming Green dimming CH6 Blue (0-255) Blue dimming CH7 Strobe (0-255) 0-20HZstrobe CH8 Pan (0-255) X axis CH9 Tilt (0-255) Y axis CH10 Dimmer (0-255) Master dimming Control the CH11 Red (0-255) CH12 Green (0-255) Red dimming second light Green dimming CH13 Blue (0-255) Blue dimming CH14 Strobe (0-255) 0-20HZ strobe 14-