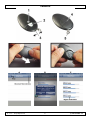
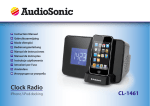
1
PAMSB10
IREMINDER FOR IPHONE® OR IPAD® – BLUETOOTH 4.0 BLE
IREMINDER VOOR IPHONE® OF IPAD® – BLUETOOTH 4.0 BLE
IREMINDER POUR IPHONE® OU IPAD® – BLUETOOTH 4.0 BLE
IREMINDER PARA IPHONE® O IPAD® – BLUETOOTH 4.0 BLE
IREMINDER FÜR IPHONE® ODER IPAD® – BLUETOOTH 4.0 BLE
IREMINDER PARA IPHONE® OU IPAD® – BLUETOOTH 4.0 BLE
IREMINDER DLA URZĄDZEŃ IPHONE® LUB IPAD® –
BLUETOOTH 4.0 BLE
USER MANUAL
GEBRUIKERSHANDLEIDING
MODE D'EMPLOI
MANUAL DEL USUARIO
BEDIENUNGSANLEITUNG
MANUAL DO UTILIZADOR
INSTRUKCJA OBSŁUGI
5
11
17
24
30
38
44
PAMSB10
A
V. 01 – 02/09/2013
B
C
2
©Velleman nv
PAMSB10
D
E
F
G
H
V. 01 – 02/09/2013
I
J
3
©Velleman nv
PAMSB10
K
V. 01 – 02/09/2013
L
M
4
©Velleman nv
PAMSB10
USER MANUAL
1.
Introduction
To all residents of the European Union
Important environmental information about this product
This symbol on the device or the package indicates that disposal of the
device after its lifecycle could harm the environment. Do not dispose of
the unit (or batteries) as unsorted municipal waste; it should be taken to
a specialized company for recycling. This device should be returned to
your distributor or to a local recycling service. Respect the local
environmental rules.
If in doubt, contact your local waste disposal authorities.
Thank you for choosing Velleman! Please read the manual thoroughly before
bringing this device into service. If the device was damaged in transit, don't install
or use it and contact your dealer.
2.
Safety Instructions
Keep this device away from children and unauthorized users.
Indoor use only. Keep this device away from rain, moisture, splashing
and dripping liquids. Never put objects filled with liquids on top of or close
to the device.
There are no user-serviceable parts inside the device. Refer to an
authorized dealer for service and/or spare parts.
Comply with the national and international flight safety regulations when
using the device during a flight trip.
3.
General Guidelines
Refer to the Velleman® Service and Quality Warranty on the last pages of this
manual.
Familiarise yourself with the functions of the device before actually using it.
All modifications of the device are forbidden for safety reasons. Damage caused
by user modifications to the device is not covered by the warranty.
Only use the device for its intended purpose. Using the device in an
unauthorised way will void the warranty.
Damage caused by disregard of certain guidelines in this manual is not covered
by the warranty and the dealer will not accept responsibility for any ensuing
defects or problems.
Keep this manual for future reference.
4.
Features
loss prevention: warning alarm prevents loss of BLE iPhone®/iPad®
two way FindMe: iReminder and BLE iPhone/iPad can instantly find each other
notification of incoming calls on your BLE iPhone
car locator: locate your car on a parking lot
HiProx Multi app freely available in the App StoreSM.
V. 01 – 02/09/2013
5
©Velleman nv
PAMSB10
5.
Overview
Refer to the illustrations on page 2 of this manual.
1
2
3
6.
LED
FindMe button
FindMe enable/disable switch
4
5
battery cover
key chain hook
Setup
Note: All sample screens and procedures are for iPhone. For iPad, the screens and
procedures are similar.
To set up the device and pair it with your iPhone/iPad, proceed as follows:
1. On your iPhone/iPad, download the HiProx Multi app from the App Store.
2. On your iPhone/iPad, enable Bluetooth: go to Settings > General > Enable
Bluetooth.
3. On the iReminder, open the battery cover [4] and insert a new CR2032 type
battery (incl.) with the + sign on the battery facing up.
Warning: Do not puncture batteries or throw them in fire as they may
explode. Dispose of batteries in accordance with local regulations. Keep
batteries away from children.
4. Place the battery cover back. The power turns on automatically and the device
enters pairing mode. The green LED blinks once every second to indicate that
the device is ready to pair with your iPhone/iPad.
5. On your iPhone/iPad, open the HiProx Multi app and tap the
button in the
upper right corner to search for available devices (fig. A). A pairing request
pops up for HiProx Multi (fig. B).
6. Tap “Pair” to pair the found device with your iPhone/iPad. The green LED on
the device blinks every 5 seconds when it is connected to your iPhone/iPad.
When the pairing process is completed, the device appears in the list of
available devices in the MainView screen (fig. C).
Note: You can pair up to 4 devices with your iPhone/iPad.
7.
Testing the System
To test the system, proceed as follows:
1. On your iPhone/iPad, in the MainView list of available devices, tap the device
that you want to test. The Find button
appears next to the device (fig. D).
2. Tap the Find button
. The iReminder beeps.
3. On the iReminder, enable the FindMe function by placing the switch [3] in the
left position (away from the key chain hook).
4. Press the FindMe button [2]. Your iPhone/iPad beeps.
5. Press the FindMe button [2] again to stop the FindMe function.
8.
Adjusting the Search Range
1. Test the search range as follows: place your iPhone/iPad in a fixed location.
Take the iReminder and walk away from the iPhone/iPad (fig. G). When you go
beyond the search range, the device starts to beep. Move back within range,
and the alarm stops.
V. 01 – 02/09/2013
6
©Velleman nv
PAMSB10
2. On the iPhone/iPad, adjust the search range as follows: in the MainView list of
available devices, tap the
button to enter the settings screen (SetView) for
the selected device. Move the “Range Alarm Threshold” slider to adjust the
search range (fig. E).
Note: See the Technical Specifications for the max. search range. The effective
search range depends on the obstacles (such as walls or other sources of
interference) between the device and the iPhone/iPad.
9.
FindMe Function
The FindMe function allows you to find your iPhone/iPad using the iReminder, or
vice versa.
Caution: Make sure that the FindMe function is enabled by placing the switch [3]
in the left position (away from the key chain hook).
To find your iPhone/iPad using the iReminder:
1. Press the FindMe button [2]. If your iPhone/iPad is within the search range
(see Adjusting the Search Range), it beeps continuously.
2. On the iPhone/iPad, tap the Find button
to stop the beeping.
3. Press the FindMe button [2] again to stop the FindMe function.
To find the iReminder using your iPhone/iPad:
1. On your iPhone/iPad, tap the Find button
to locate the iReminder. If the
iReminder is within the search range (see Adjusting the Search Range), it
beeps during 5 seconds.
2. If necessary, tap the Find button
again to continue searching.
Note: If you are not going to use the FindMe function, disable the function by
placing the switch [3] in the right-hand position (towards the key chain hook).
This will prevent that you accidentally put the device in sleep mode. In sleep
mode, the alarm does not function.
10. Map Location Mark
Note: This function uses the iPhone/iPad GPS function when outdoors. When
indoors, enable Wi-Fi to get an accurate location.
You can manually set a location mark on a map for your current position, or you
can let the app automatically set a location mark when an out-of-range alarm
occurs.
To set a location mark manually, go to the MainView list of available devices
and tap the
button to enter the SetView screen. Tap the View button (fig. H)
to go to MapView, then tap the Mark button and choose YES (fig. I). The app
places a red pin on the blue current location mark (fig. J).
To set a location mark automatically, go to the MainView list of available
devices and tap the
button to enter the SetView screen. Tap the View button
(fig. H) to go to MapView, then tap the Mark button. Remove the current mark
(if any), then enable the Map Location function. When an out-of-range alarm
occurs, the iPhone/iPad automatically places a red pin on the blue current
location mark (fig. J).
V. 01 – 02/09/2013
7
©Velleman nv
PAMSB10
11. Notification of Incoming Calls
You can let the device notify you when you have an incoming call on your iPhone.
The device will beep and blink to alert you of an incoming call.
1. In the MainView list of available devices, tap the
button to enter the the
SetView screen.
2. Set “Call Alert” to ON.
12. Airplane Mode
There are two ways to set the device in Airplane Mode:
First, you switch on the general Airplane Mode of your iPhone/iPad, then you
disconnect the iReminder.
First, you set the iReminder in sleep mode, then you switch on the general
Airplane Mode of your iPhone/iPad.
12.1 After Airplane Mode Is Switched On
When you switch on the Airplane Mode of your iPhone/iPad, its Bluetooth
connection is disabled. As a consequence, the iReminder beeps because it has lost
the link with the iPhone/iPad. Proceed as follows:
1. On the iReminder, press the FindMe button [2] to stop the alarm sound.
2. On the iPhone/iPad, go to the HiProx Multi app and tap Help > AirplaneMode >
YES to disconnect all the paired iReminder devices and exit the app.
3. To quit airplane mode and return to the normal working mode: first switch off
Airplane Mode in the general Settings screen on your iPhone/iPad. This enables
the Bluetooth connection (if not, switch it back on manually).
4. Next, go to the HiProx Multi app and tap Help > AirplaneMode > RECONNECT
to reconnect to all the paired iReminder devices and exit the app.
12.2 Before Airplane Mode Is Switched On
1. On the iReminder, press and hold the FindMe button [2] during ± 3 seconds.
The device beeps once and the status LED blinks once (red), indicating that the
device is now in sleep mode.
2. On the iPhone/iPad, go to the HiProx Multi app and tap Help > AirplaneMode >
YES to disconnect all the paired iReminder devices and exit the app.
3. Go to the general Settings screen of your iPhone/iPad and enable Airplane
Mode.
4. To quit airplane mode and return to the normal working mode: first switch off
Airplane Mode in the general Settings screen on your iPhone/iPad. This enables
the Bluetooth connection (if not, switch it back on manually).
5. On the iReminder, press the FindMe button [2] once to exit sleep mode.
6. Next, go to the HiProx Multi app and tap Help > AirplaneMode > RECONNECT
to reconnect to all the paired iReminder devices and exit the app.
Note: Reconnecting to devices in sleep mode may take up to 20 seconds.
If reconnecting fails, repeat the AirplaneMode disconnect/reconnect steps.
13. Stopping the Device
13.1 Stand-By Mode
To disconnect and go to stand-by mode, proceed as follows:
1. On the iPhone/iPad, go to the HiProx Multi app and tap Help > AirplaneMode >
YES to disconnect all the paired iReminder devices and exit the app.
V. 01 – 02/09/2013
8
©Velleman nv
PAMSB10
The iReminder enters stand-by mode after about 30 seconds. The green LED
blinks every 10 seconds to indicate stand-by mode.
2. To exit stand-by mode, go to the HiProx Multi app and tap Help >
AirplaneMode > RECONNECT to reconnect to all the paired iReminder devices
and exit the app.
13.2 Sleep Mode
To enter sleep mode, proceed as follows:
1. On the iReminder, press and hold the FindMe button [2] during ± 3 seconds.
The device beeps once and the status LED blinks once (red) and then goes out,
indicating that the device is now in sleep mode.
If the device is still connected to the iPhone/iPad, the iPhone/iPad displays an
alert message and it beeps.
2. If necessary, stop the alarm sound on the iPhone/iPad by tapping the alert
message.
3. To exit sleep mode, press the FindMe button [2] once. The connection with the
iPhone/iPad is restored automatically.
Note: If the connection is not restored automatically, run the AirplaneMode
disconnect/reconnect steps.
13.3 Remove a Device Pairing Permanently
To permanently stop using a device with your iPhone/iPad, proceed as follows:
1. In the MainView list of available devices, select the device and tap the
button to enter the SetView screen. Tap the Remove button and tap YES to
confirm (fig. K). Tap OK to confirm (fig. L).
2. Go to the general Settings menu of your iPhone/iPad and select Bluetooth.
The list of paired Bluetooth devices appears. Tap the device you want to
remove and choose “Forget this Device” (fig. M).
Note: You may have to shut down and restart your iPhone/iPad to remove the
pairing information completely.
13.4 Operating Modes
The table below shows an overview of the various operating modes:
Mode
Green LED
Pairing mode blinks once
per second
Connected
blinks every
mode
5 seconds
Sleep mode out
Stand-by
blinks every
mode
10 seconds
Description
The device can be paired with an iPhone/iPad.
The device is active. The alarm will go off if the
paired iPhone/iPad is out of range.
The device is not active. No alarms will go off.
The device is disconnected from the iPhone/iPad. No
alarms will go off.
14. Troubleshooting
You try to connect to a paired device but cannot find it
Cause: the existing pairing information is corrupt.
Solution: remove the existing pairing information from your iPhone/iPad and then
pair the device again.
1. In the HiProx Multi app, disconnect the device: tap Help > AirplaneMode >
YES.
V. 01 – 02/09/2013
9
©Velleman nv
PAMSB10
2. In the MainView list of available devices, select the device and tap the
button to enter the SetView screen. Tap the Remove button and tap YES to
confirm (fig. K). Tap OK to confirm (fig. L).
3. Go to the general Settings menu of your iPhone/iPad and select Bluetooth.
The list of paired Bluetooth devices appears. Tap the device you want to
remove and choose “Forget this Device” (fig. M).
Note: You may have to shut down and restart your iPhone/iPad to remove the
pairing information completely.
4. Remove the battery from the iReminder and put it back to start the pairing
process again. Refer to Setup for more information.
You get false out-of-range alarms
Possible cause: the battery is low. Solution: replace the battery.
Possible cause: interference by metal objects or high power signals used by
2.4 GHz band devices (such as Wi-Fi networks or microwave ovens).
Possible cause: interference by the human body. Solution: when carrying your
iPhone/iPad and the iReminder, carry them on the same side of your body.
The audible alarm becomes weak
Cause: the battery is low. Solution: replace the battery.
15. Technical Specifications
communication standard
frequency range
search range
alert range
battery type
battery life
weight
dimensions
working temperature
humidity
compatibility
Bluetooth® 4.0 Low Energy Wireless Technology (BLE)
2.4 GHz - 2.4835 GHz
20 m (65 ft) (distance will vary depending on terrain
and other factors)
± 2-9 m (± 7-30 ft), adjustable
1 x CR2032 (incl.)
3-6 months
9.5 g
61.5 x 36 x 11.6 mm (2.42 x 1.42 x 0.46")
5 °C to 40 °C
20 % - 80 %
iPhone® 4S, iPhone® 5S, iPad® 3, iPad® 4,
iPad® mini. iOS 6 or higher.
Use this device with original accessories only. Velleman nv cannot be held
responsible in the event of damage or injury resulting from (incorrect)
use of this device. For more info concerning this product and the latest
version of this manual, please visit our website www.velleman.eu. The
information in this manual is subject to change without prior notice.
© COPYRIGHT NOTICE – The copyright to this manual is owned by
Velleman nv. All worldwide rights reserved. No part of this manual may be
copied, reproduced, translated or reduced to any electronic medium or otherwise
without the prior written consent of the copyright holder.
V. 01 – 02/09/2013
10
©Velleman nv
PAMSB10
GEBRUIKERSHANDLEIDING
1.
Inleiding
Aan alle ingezetenen van de Europese Unie
Belangrijke milieu-informatie betreffende dit product
Dit symbool op het toestel of de verpakking geeft aan dat, als het na zijn
levenscyclus wordt weggeworpen, dit toestel schade kan toebrengen aan
het milieu. Gooi dit toestel (en eventuele batterijen) niet bij het gewone
huishoudelijke afval; het moet bij een gespecialiseerd bedrijf
terechtkomen voor recyclage. U moet dit toestel naar uw verdeler of
naar een lokaal recyclagepunt brengen. Respecteer de plaatselijke
milieuwetgeving.
Hebt u vragen, contacteer dan de plaatselijke autoriteiten betreffende de
verwijdering.
Dank u voor uw aankoop! Lees deze handleiding grondig voor u het toestel in
gebruik neemt. Werd het toestel beschadigd tijdens het transport, installeer of
gebruik het dan niet en raadpleeg uw dealer.
2.
Veiligheidsinstructies
Houd dit toestel buiten het bereik van kinderen en onbevoegden.
Gebruik het toestel enkel binnenshuis. Bescherm het toestel tegen
regen, vochtigheid en opspattende vloeistoffen. Plaats geen objecten
gevuld met vloeistof op of naast het toestel.
Er zijn geen door de gebruiker vervangbare onderdelen in dit toestel. Voor
onderhoud of reserveonderdelen, contacteer uw dealer.
Wanneer u het toestel aan boord gebruikt, moet u de nationale en
internationale veiligheidsverplichtingen respecteren.
3.
Algemene richtlijnen
Raadpleeg de Velleman® service- en kwaliteitsgarantie achteraan deze
handleiding.
Leer eerst de functies van het toestel kennen voor u het gaat gebruiken.
Om veiligheidsredenen mag u geen wijzigingen aanbrengen aan het toestel.
Schade door wijzigingen die de gebruiker heeft aangebracht aan het toestel,
valt niet onder de garantie.
Gebruik het toestel enkel waarvoor het gemaakt is. De garantie vervalt
automatisch bij ongeoorloofd gebruik.
De garantie geldt niet voor schade door het negeren van bepaalde richtlijnen in
deze handleiding en uw dealer zal de verantwoordelijkheid afwijzen voor
defecten of problemen die hier rechtstreeks verband mee houden.
Bewaar deze handleiding voor verdere raadpleging.
V. 01 – 02/09/2013
11
©Velleman nv
PAMSB10
4.
Eigenschappen
bescherming tegen verlies: alarm voorkomt verlies van BLE iPhone®/iPad®
tweewegs FindMe-functie: iReminder en BLE iPhone®/iPad® kunnen elkaar
onmiddellijk vinden
melding van binnenkomende oproepen op uw BLE iPhone®
car locator-app: bepaal de exacte positie van uw geparkeerde auto
HiProx Multi-app is gratis beschikbaar in de App StoreSM.
5.
Omschrijving
Raadpleeg de afbeeldingen op pagina 2 van deze handleiding.
1
2
3
6.
led
FindMe-knop
aan/uit-knop FindMe-functie
4
5
batterijklep
oogje voor sleutelhanger
Configuratie
Opmerking: Alle voorbeeldschermen en procedures zijn bedoeld voor iPhone. De
voorbeeldschermen en procedures zijn gelijkaardig voor iPad.
Om het toestel in te stellen en te koppelen met uw iPhone/iPad (pairing), gaat u
als volgt te werk:
1. Op uw iPhone/iPad, download de HiProx Multi-app van de App Store.
2. Op uw iPhone/iPad, activeer Bluetooth: ga naar Instellingen > Algemeen >
Bluetooth activeren.
3. Op de iReminder, open de batterijklep [4] en plaats een nieuwe CR2032batterij (meegelev.) met de positieve (+) pool naar boven gericht.
Waarschuwing: U mag batterijen nooit doorboren of in het vuur gooien
(explosiegevaar). Gooi batterijen weg volgens de plaatselijke
milieuwetgeving. Houd batterijen uit het bereik van kinderen.
4. Plaats de batterijklep terug. Het toestel schakelt automatisch in en gaat over
naar de koppelmodus (pairing). De groene led knippert iedere seconde om aan
te geven dat u het toestel met uw iPhone/iPad kunt koppelen.
5. Op uw iPhone/iPad, open de HiProx Multi-app en druk op
rechtsboven in
het scherm om naar beschikbare toestellen (fig. A) te zoeken. Een
koppelverzoek voor HiProx Multi verschijnt (fig. B).
6. Druk op "Pair" om het gevonden toestel met uw iPhone/iPad te koppelen. De
groene led op het toestel knippert om de 5 seconden wanneer het met uw
iPhone/iPad verbonden is. In het scherm "MainView" (fig. C), verschijnt na het
koppelen het toestel in de lijst met beschikbare toestellen.
Opmerking: Met uw iPhone/iPad kunt u tot 4 toestellen koppelen.
7.
Het systeem testen
Om het systeem te testen, gaat u als volgt te werk:
1. Op uw iPhone/iPad, in de lijst met beschikbare toestellen (MainView), druk op
het toestel dat u wil testen. De Find-knop
verschijnt naast het toestel
(fig. D).
2. Druk op de Find-knop.
. De iReminder laat een pieptoon horen.
V. 01 – 02/09/2013
12
©Velleman nv
PAMSB10
3. Op de iReminder, schuif de aan/uit-knop [3] naar links (weg van het oogje)
om de FindMe-functie te activeren.
4. Druk op de FindMe-knop [2]. Uw iPhone/iPad laat een pieptoon horen.
5. Druk nogmaals op de FindMe-knop [2] om de FindMe-functie te deactiveren.
8.
Het zoekbereik instellen
1. Test het zoekbereik als volgt: leg uw iPhone/iPhad op een effen oppervlak.
Neem de iReminder en stap weg van de iPhone/iPad (fig. G). Bevindt u zich
buiten het zoekbereik, dan laat het toestel een pieptoon horen. Keer terug
zodat u zich binnen het zoekbereik bevindt, en het alarm stopt.
2. Op de iPhone/iPad, stel het zoekbereik in als volgt: in de lijst met beschikbare
toestellen (MainView), druk op
om het instellingenscherm (SetView) te
openen voor het geselecteerde toestel. Gebruik de schuifknop "Range Alarm
Threshold" om het zoekbereik in te stellen (fig. E).
Opmerking: Zie Technische specificaties voor het max. zoekbereik. Het
effectieve zoekbereik is afhankelijk van de obstakels (zoals muren of andere
storingsbronnen) tussen het toestel en de iPhone/iPad.
9.
FindMe-functie
Dankzij de FindMe-functie kunnen uw iPhone/iPad en de iReminder elkaar vinden.
Opgelet: Schuif de aan/uit-knop [3] naar links (weg van het oogje) om de
FindMe-functie te activeren.
Uw iPhone/iPad vinden met de iReminder:
1. Druk op de FindMe-knop [2]. Bevindt uw iPhone/iPad zich binnen het
zoekbereik (zie Het zoekbereik instellen), dan blijft het toestel piepen.
2. Op de iPhone/iPad, druk op de Find-knop
om het alarm te stoppen.
3. Druk nogmaals op de FindMe-knop [2] om de FindMe-functie te deactiveren.
De iReminder vinden met uw iPhone/iPad:
4. Op uw iPhone/iPad, druk op de Find-knop
om de iReminder te lokaliseren.
Bevindt de iReminder zich binnen het zoekbereik (zie Het zoekbereik
instellen), dan laat deze gedurende 5 seconden een pieptoon horen.
5. Druk indien nodig nogmaals op de Find-knop
om verder te zoeken.
Opmerking: Gebruikt u de FindMe-functie niet, schuif dan de aan/uit-knop [3]
naar rechts (naar het oogje toe) om de functie te deactiveren. Hierdoor vermijdt u
dat u het toestel per ongeluk in slaapmodus zet. In slaapmodus functioneert het
alarm niet.
10. Map Location-functie
Opmerking: Hierbij wordt de GPS-functie van uw iPhone/iPad gebruikt wanneer u
zich buitenshuis bevindt. Bevindt u zich binnenshuis, activeer dan Wi-Fi voor het
verkrijgen van een exacte plaatsaanduiding.
U kunt uw huidige locatie manueel aanduiden op een kaart, of automatisch de app
een plaatsaanduiding laten weergeven bij een buitenbereikalarm.
Om een plaatsaanduiding manueel in te stellen, ga naar de lijst met
beschikbare toestellen (MainView) en druk op
om het scherm "SetView" te
openen. Druk op de knop "View" (fig. H) om MapView te openen. Druk daarna
V. 01 – 02/09/2013
13
©Velleman nv
PAMSB10
op de knop "Mark" en kies YES (fig. I). Een rode pin verschijnt op de huidige
locatie gemarkeerd in blauw (fig. J).
Om een plaatsaanduiding automatisch te laten weergeven, ga naar de lijst met
beschikbare toestellen (MainView) en druk op
om het scherm "SetView" te
openen. Druk op de knop "View" (fig. H) om MapView te openen, druk daarna
op de knop "Mark". Verwijder de huidige markering (indien ingesteld), en
deactiveer vervolgens de Map Location-functie. Bij een buitenbereikalarm
verschijnt automatisch een rode pin op de huidige locatie gemarkeerd in blauw
(fig. J).
11. Melding van binnenkomende oproepen
U kunt het toestel instellen om u te waarschuwen bij een inkomende oproep op uw
iPhone. Bij een binnenkomende oproep laat het toestel een pieptoon horen en
begint het te knipperen.
1. In de lijst met beschikbare toestellen (MainView), druk op
om het scherm
"SetView" te openen.
2. Stel "Call Alert" in op ON.
12. Vliegtuigmodus (airplane mode)
Er bestaan twee manieren om de vliegtuigmodus in te stellen op het toestel:
Schakel eerst de vliegtuigmodus van uw iPhone/iPad uit, en daarna de
iReminder.
Zet eerst de iReminder in slaapmodus, schakel daarna de vliegtuigmodus van
uw iPhone/iPad in.
12.1 Na het inschakelen van de vliegtuigmodus
Als u de vliegtuigmodus van uw iPhone/iPad inschakelt, dan wordt de Bluetoothverbinding uitgeschakeld. Bijgevolg laat de iReminder een pieptoon horen omdat
er geen verbinding meer is met de iPhone/iPad. Ga als volgt te werk:
1. Op de iReminder, druk op de FindMe-knop [2] om het alarm te stoppen.
2. Op de iPhone/iPad, ga naar de HiProx Multi-app en druk op Help >
AirplaneMode > YES om alle gekoppelde iReminder-toestellen te ontkoppelen
en de app te verlaten.
3. Om de vliegtuigmodus te verlaten en naar de normale werkingsmodus terug te
keren: schakel eerst de vliegtuigmodus uit in het algemene instellingenscherm
op uw iPhone/iPad. Hierdoor wordt de Bluetooth-verbinding ingeschakeld (is dit
niet geval, schakel deze dan manueel in).
4. Ga vervolgens naar de HiProx Multi-app en druk op Help > AirplaneMode >
RECONNECT om alle gekoppelde iReminder-toestellen opnieuw aan te sluiten
en de app te verlaten.
12.2 Voor het inschakelen van de vliegtuigmodus
1. Op de iReminder, houd de FindMe-knop [2] gedurende ± 3 seconden
ingedrukt. Het toestel laat 1 pieptoon horen en de statusled (rood) knippert
1 keer om aan te geven dat het toestel zich nu in slaapmodus bevindt.
2. Op de iPhone/iPad, ga naar de HiProx Multi-app en druk op Help >
AirplaneMode > YES om alle gekoppelde iReminder-toestellen te ontkoppelen
en de app te verlaten.
V. 01 – 02/09/2013
14
©Velleman nv
PAMSB10
3. Ga naar het algemene instellingenscherm van uw iPhone/iPad en schakel de
vliegtuigmodus in.
4. Om de vliegtuigmodus te verlaten en naar de normale werkingsmodus terug te
keren: schakel eerst de vliegtuigmodus uit in het algemene instellingenscherm
op uw iPhone/iPad. Hierdoor wordt de Bluetooth-verbinding ingeschakeld (is dit
niet geval, schakel deze dan manueel in).
5. Op de iReminder, druk eenmaal op de FindMe-knop [2] om de slaapmodus te
verlaten.
6. Ga vervolgens naar de HiProx Multi-app en druk op Help > AirplaneMode >
RECONNECT om alle gekoppelde iReminder-toestellen opnieuw aan te sluiten
en de app te verlaten.
Opmerking: Het opnieuw aansluiten van toestellen in slaapmodus duurt
ongeveer 20 seconden. Als dit niet lukt, herhaal dan de bovenstaande stappen
(Zie AirplaneMode disconnect/reconnect).
13. Het toestel uitschakelen
13.1 Standby-modus
Om het toestel te ontkoppelen en in standby-modus te zetten, gaat u als volgt te
werk:
1. Op de iPhone/iPad, ga naar de HiProx Multi-app en druk op Help >
AirplaneMode > YES om alle gekoppelde iReminder-toestellen te ontkoppelen
en de app te verlaten.
De iReminder gaat na ongeveer 30 seconden over in standby-modus. De
groene led knippert om de 10 seconden om aan te geven dat het toestel zich in
standby-modus bevindt.
2. Om de standby-modus te verlaten, ga naar de HiProx Multi-app en druk op
Help > AirplaneMode > RECONNECT om alle gekoppelde iReminder-toestellen
opnieuw aan te sluiten en de app te verlaten.
13.2 Slaapmodus
Om het toestel in slaapmodus te zetten, gaat u als volgt te werk:
1. Op de iReminder, houd de FindMe-knop [2] gedurende ± 3 seconden
ingedrukt. Het toestel laat 1 pieptoon horen en de statusled (rood) knippert
1 keer en gaat daarna uit om aan te geven dat het toestel zich nu in
slaapmodus bevindt.
Indien het toestel nog steeds met de iPhone/iPad verbonden is, verschijnt een
alarmbericht op de iPhone/iPad en hoort u een pieptoon.
2. Druk indien nodig op het alarmbericht op de iPhone/iPad om het alarm te
stoppen.
3. Druk eenmaal op de FindMe-knop [2] om de slaapmodus te verlaten. De
verbinding met de iPhone/iPad wordt automatisch hersteld.
Opmerking: Wordt de verbinding niet automatisch hersteld, herhaal dan de
bovenstaande stappen (AirplaneMode disconnect/reconnect)
V. 01 – 02/09/2013
15
©Velleman nv
PAMSB10
13.3 Een gekoppeld toestel permanent verwijderen
Om een toestel niet langer met uw iPhone/iPad te gebruiken, gaat u als volgt te
werk:
1. In de lijst met beschikbare toestellen (MainView), selecteer het toestel en druk
op
om het scherm "SetView" te openen. Druk op de knop "Remove" en
daarna op YES om te bevestigen (fig. K). Druk op OK om te bevestigen (fig. L).
2. Ga naar het algemeen instellingsmenu van uw iPhone/iPad en selecteer
Bluetooth. De lijst met gekoppelde Bluetooth-toestellen verschijnt. Druk op het
toestel dat u wil verwijderen en selecteer "Forget this Device” (fig. M).
Opmerking: Mogelijk moet u uw iPhone/iPad uitschakelen en opnieuw
inschakelen om de koppelgegevens volledig te verwijderen.
13.4 Modi
De tabel hieronder geeft de verschillende werkingsmodi weer:
Modus
Groene led
Omschrijving
Koppelmodus knippert 1 keer
Het toestel kan met een iPhone/iPad gekoppeld
per seconde
worden.
Aangesloten knippert om de 5 Het toestel is ingeschakeld. Het alarm gaat af als
modus
seconden
de gekoppelde iPhone/iPad zich buiten bereik
bevindt.
Slaapmodus uit
Het toestel is uitgeschakeld. Het alarm gaat niet
af.
Standbyknippert om de
Het toestel is niet met de iPhone/iPad verbonden.
modus
10 seconden
Het alarm gaat niet af.
14. Problemen en oplossingen
U probeert om een gekoppeld toestel aan te sluiten maar u kunt het niet
vinden
Oorzaak: de bestaande koppelgegevens zijn corrupt.
Oplossing: verwijder de bestaande koppelgegevens van uw iPhone/iPad en koppel
daarna het toestel opnieuw.
1. In de HiProx Multi-app, ontkoppel het toestel: druk op Help > AirplaneMode >
YES.
2. In de lijst met beschikbare toestellen (MainView), selecteer het toestel en druk
op
om het scherm "SetView" te openen. Druk op de knop "Remove" en
daarna op YES om te bevestigen (fig. K). Druk op OK om te bevestigen (fig. L).
3. Ga naar het algemene instellingsmenu van uw iPhone/iPad en selecteer
Bluetooth. De lijst met gekoppelde Bluetooth-toestellen verschijnt. Druk op het
toestel dat u wil verwijderen en selecteer “Forget this Device” (fig. M).
Opmerking: Mogelijk moet u uw iPhone/iPad uitschakelen en opnieuw
inschakelen om de koppelgegevens volledig te verwijderen.
4. Verwijder de batterij uit de iReminder en plaats deze terug om opnieuw te
koppelen. Zie Instellingen voor meer informatie.
U krijgt een vals buitenbereikalarm
Mogelijke oorzaak: De batterij is bijna leeg. Oplossing: vervang de batterij.
V. 01 – 02/09/2013
16
©Velleman nv
PAMSB10
Mogelijke oorzaak: storing veroorzaakt door metalen objecten of hoge
vermogensignalen gebruikt door 2.4 GHz-toestellen (bijv. Wi-Fi-netwerk of
microgolfoven).
Mogelijke oorzaak: storing door het menselijk lichaam. Oplossing: Draag de
iPhone/iPad en de iReminder aan dezelfde kant van uw lichaam.
Het alarmsignaal wordt zwakker
Oorzaak: De batterij is bijna leeg. Oplossing: vervang de batterij.
15. Technische specificaties
communicatie
frequentiebereik
zoekbereik
alarmbereik
batterijtype
levensduur batterij
gewicht
afmetingen
werktemperatuur
vochtigheidsgraad
compatibiliteit
Bluetooth® 4.0 Low Energy Wireless (BLE)
2.4 GHz - 2.4835 GHz
20 m (afhankelijk van obstakels en andere factoren)
± 2-9 m, instelbaar
1 x CR2032 (meegelev.)
3 tot 6 maanden
9.5 g
61.5 x 36 x 11.6 mm (2.42 x 1.42 x 0.46")
5 °C tot 40 °C
20 % - 80 %
iPhone® 4S, iPhone® 5S, iPad® 3, iPad® 4, iPad® mini.
iOS 6 of hoger.
Gebruik dit toestel enkel met originele accessoires. Velleman nv is niet
aansprakelijk voor schade of kwetsuren bij (verkeerd) gebruik van dit
toestel. Voor meer informatie over dit product en de laatste versie van
deze handleiding, zie www.velleman.eu. De informatie in deze handleiding
kan te allen tijde worden gewijzigd zonder voorafgaande kennisgeving.
© AUTEURSRECHT – Velleman nv heeft het auteursrecht voor deze
handleiding. Alle wereldwijde rechten voorbehouden. Het is niet toegestaan
om deze handleiding of gedeelten ervan over te nemen, te kopiëren, te vertalen,
te bewerken en op te slaan op een elektronisch medium zonder voorafgaande
schriftelijke toestemming van de rechthebbende.
MODE D'EMPLOI
1.
Introduction
Aux résidents de l'Union européenne
Informations environnementales importantes concernant ce produit
Ce symbole sur l'appareil ou l'emballage indique que l’élimination d’un
appareil en fin de vie peut polluer l'environnement. Ne pas jeter un
appareil électrique ou électronique (et des piles éventuelles) parmi les
déchets municipaux non sujets au tri sélectif ; une déchèterie traitera
l’appareil en question. Renvoyer cet appareil à votre fournisseur ou à un
service de recyclage local. Il convient de respecter la réglementation
V. 01 – 02/09/2013
17
©Velleman nv
PAMSB10
locale relative à la protection de l’environnement.
En cas de questions, contacter les autorités locales pour élimination.
Nous vous remercions de votre achat ! Lire la présente notice attentivement avant
la mise en service de l’appareil. Si l’appareil a été endommagé pendant le
transport, ne pas l’installer et consulter votre revendeur.
2.
Consignes de sécurité
Garder l'appareil hors de la portée des enfants et des personnes non
autorisées.
Utiliser cet appareil uniquement à l'intérieur. Protéger de la pluie, de
l’humidité et des projections d’eau. Ne jamais placer d’objet contenant un
liquide sur l’appareil.
Il n’y a aucune pièce réparable par l’utilisateur. Commander des pièces de
rechange éventuelles chez votre revendeur.
Respecter les réglementations nationales et internationales relatives à la
sécurité aérienne en utilisant l'appareil lors d'un vol.
3.
Directives générales
Se référer à la garantie de service et de qualité Velleman® en fin de notice.
Se familiariser avec le fonctionnement de l’appareil avant de l’utiliser.
Toute modification est interdite pour des raisons de sécurité. Les dommages
occasionnés par des modifications par le client ne tombent pas sous la garantie.
N’utiliser l'appareil qu’à sa fonction prévue. Un usage impropre annule d'office
la garantie.
La garantie ne s’applique pas aux dommages survenus en négligeant certaines
directives de cette notice et votre revendeur déclinera toute responsabilité pour
les problèmes et les défauts qui en résultent.
Garder ce mode d'emploi pour toute référence ultérieure.
4.
Caractéristiques
prévention de perte : signal d'alarme évite la perte du BLE iPhone®/iPad®
fonction FindMe bidirectionnelle iReminder et BLE iPhone®/iPad® peuvent se
retrouver immédiatement
notification d'un appel entrant sur votre BLE iPhone®
fonction pour localiser votre voiture localisez le stationnement de votre voiture
dans un parking
l'application HiProx Multi gratuite est disponible sur l'App Store SM.
5.
Description
Voir les illustrations en page 2 de ce mode d'emploi.
1
2
3
LED
bouton "FindMe"
bouton d'activation/désactivation de la
fonction FindMe
V. 01 – 02/09/2013
18
4
5
compartiment à pile
œillet porte-clés
©Velleman nv
PAMSB10
6.
Configuration
Remarque : Tous les exemples et processus sont pour iPhone. Pour l'iPad, les
exemples et processus sont similaires.
Pour configurer et jumeler l'appareil avec votre iPhone/iPad, procéder comme
suit :
1. Sur votre iPhone/iPad, télécharger l'application HiProx Multi de l'App Store.
2. Sur votre iPhone/iPad, activer Bluetooth : sélectionner Paramètres > Général
> Activer Bluetooth.
3. Sur l'iReminder, ouvrir le compartiment à pile [4] et insérer une nouvelle pile
type CR2032 (incl.) avec le symbole + de la pile dirigé vers le haut.
Avertissement : Ne jamais perforer les piles et ne pas les jeter au feu
(danger d’explosion). Se débarrasser des piles en respectant la
réglementation locale relative à la protection de l’environnement. Garder
les piles hors de la portée des enfants.
4. Remettre le couvercle du compartiment à pile en place. L'appareil s'allume
automatiquement et entre en mode de jumelage. La LED verte clignote une
fois par seconde pour indiquer que l'appareil peut être jumelé avec votre
iPhone/iPad.
5. Sur votre iPhone/iPad, ouvrir l'application HiProx Multi et appuyer sur
en
haut à droite de l'écran pour rechercher les appareils disponibles (fig. A). Une
demande de jumelage s'affiche pour HiProx Multi (fig. B).
6. Appuyer sur "Pair" pour jumeler l'appareil détecté avec votre iPhone/iPad. La
LED verte sur l'appareil clignote toutes les 5 secondes lorsque celui-ci est
connecté à votre iPhone/iPad. Après un jumelage réussi, l'appareil s'affiche
dans la liste d'appareils disponibles dans" MainView" (fig. C).
Remarque : Il est possible de jumeler jusqu'à 4 appareils avec votre iPhone/iPad.
7.
Tester le système
Pour tester le système, procéder comme suit :
1. Sur votre iPhone/iPad, dans la liste d'appareils disponibles dans "MainView",
appuyer sur l'appareil à tester. Le bouton "Find"
s'affiche à côté de
l'appareil (fig. D).
2. Appuyer sur le bouton "Find"
. L'iReminder émet un bip.
3. Sur l'iReminder, activer la fonction "FindMe" en glissant le bouton [3] vers la
gauche (dans la direction opposée de l'œillet).
4. Appuyer sur le bouton "FindMe" [2]. Votre iPhone/iPad émet un bip.
5. Appuyer de nouveau sur le bouton "FindMe" [2] pour désactiver la fonction
FindMe.
8.
Ajuster la plage de recherche
1. Tester la plage de recherche comme suit : poser votre iPhone/iPad sur une
surface fixe. Prendre l'iReminder et s'éloigner de l'iPhone/iPad (fig. G). Si hors
de portée, l'appareil émettra un bip. Retourner pour se trouver à portée, et
l'alarme s'arrêtera.
2. Sur l'iPhone/iPad, ajuster la plage de recherche comme suit : dans la liste
d'appareils disponibles dans "MainView", appuyer sur
pour accéder à
V. 01 – 02/09/2013
19
©Velleman nv
PAMSB10
l'écran de configuration (SetView) de l'appareil sélectionné. Régler la glissière
"Range Alarm Threshold" pour ajuster la plage de recherche (fig. E).
Remarque : Voir les Spécifications techniques pour la plage de recherche max.
La plage réelle dépend des obstacles (comme des murs ou d'autres sources
d'interférence) situés entre l'appareil et l'iPhone/iPad.
9.
Fonction FindMe
La fonction FindMe vous permet de repérer votre iPhone/iPad avec l'iReminder, ou
vice versa.
Attention : S'assurer que la fonction FindMe soit activée en glissant le bouton [3]
vers la gauche (dans la direction opposée de l'œillet).
Pour localiser votre iPhone/iPad avec l'iReminder :
1. Appuyer sur le bouton "FindMe" [2]. Si votre iPhone/iPad se trouve à portée
(voir Ajuster la plage de recherche), celui-ci émettra des bips en continu.
2. Sur l'iPhone/iPad, appuyer sur le bouton "Find"
pour arrêter l'alarme.
3. Appuyer de nouveau sur le bouton "FindMe" [2] pour désactiver la fonction
FindMe.
Pour localiser l'iReminder avec votre iPhone/iPad :
4. Sur votre iPhone/iPad, appuyer sur le bouton "Find"
pour localiser
l'iReminder. Si l'iReminder se trouve à portée (voir Ajuster la plage de
recherche, celui-ci émettra des bips toutes les 5 secondes.
5. Si nécessaire, appuyer de nouveau sur le bouton "Find"
pour continuer à
chercher.
Remarque : Si la fonction "FindMe" n'est pas utilisée, désactiver la fonction en
glissant le bouton [3] vers la droite (dans la direction de l'œillet). Cela évitera de
mettre involontairement l'appareil en mode veille. En mode veille, l'alarme ne
fonctionne pas.
10. Fonction Map Location
Remarque : La fonction de navigation sur l'iPhone/iPad est utilisée en cas d'usage
à l'extérieur. En cas d'usage à l'intérieur, activer Wi-Fi pour obtenir un
positionnement exact.
Il est possible d'afficher manuellement votre position actuelle sur un plan ou de
marquer automatiquement un repère en cas d'alarme hors de portée.
Pour marquer manuellement un repère, accéder à la liste d'appareils disponibles
dans "MainView", appuyer sur
pour ouvrir "SetView". Appuyer sur le bouton
"View" (fig. H) pour accéder à "MapView", puis appuyer sur le bouton "Mark" et
choisir "YES" (fig. I). Un repère rouge s'affiche sur la position actuelle, marquée
par un repère bleu (fig. J).
Pour faire afficher automatiquement un repère, accéder à la liste d'appareils
disponibles dans "MainView", appuyer sur
pour ouvrir l'écran "SetView".
Appuyer sur le bouton "View" (fig. H) pour accéder à MapView, puis appuyer sur
le bouton "Mark". Supprimer le repère actuel (le cas échéant), puis activer la
fonction "Map Location". En cas d'alarme hors de portée, l'iPhone/iPad affichera
automatiquement un repère rouge sur la position actuelle, marquée par un
repère bleu (fig. J).
V. 01 – 02/09/2013
20
©Velleman nv
PAMSB10
11. Notification d'appels entrants
Il est possible de recevoir une notification lors d'un appel entrant sur votre iPhone.
L'appareil émettra un bip et clignotera pour vous avertir d'un appel entrant.
1. Dans la liste d'appareils disponibles dans "MainView", appuyer sur
pour
ouvrir l'écran "SetView".
2. Régler "Call Alert" sur ON.
12. Mode avion (Airplane Mode)
Il existe deux manières de mettre l'appareil en mode avion :
D'abord, activer le mode avion de votre iPhone/iPad, puis éteindre l'iReminder.
D'abord, mettre l'iReminder en mode veille, puis activer le mode avion de votre
iPhone/iPad.
12.1 Après l'activation du mode avion
Lorsque le mode avion de votre iPhone/iPad est activé, la connexion Bluetooth est
désactivée. Par conséquent, l'iReminder émet un bip lorsque la connexion avec
l'iPhone/iPad est perdue. Procéder comme suit :
1. Sur l'iReminder, appuyer sur le bouton "FindMe" [2] pour arrêter l'alarme.
2. Sur l'iPhone/iPad, aller à l'application HiProx Multi et appuyer sur Help >
AirplaneMode > YES pour déconnecter tous les appareils iReminder jumelés et
pour quitter l'application.
3. Pour quitter le mode avion et pour revenir au mode de fonctionnement
normal : désactiver d'abord le mode avion dans l'écran de configuration
générale sur votre iPhone/iPad. Ainsi, la connexion Bluetooth sera activée (si
ce n'est pas le cas, réactiver manuellement).
4. Puis, aller à l'application HiProx Multi et appuyer sur Help > AirplaneMode >
RECONNECT pour reconnecter tous les appareils iReminder jumelés et pour
quitter l'application.
12.2 Avant l'activation du mode avion
1. Sur l'iReminder, maintenir enfoncé le bouton "FindMe" [2] durant
± 3 secondes. L'appareil émet un seul bip et la LED d'état (rouge) clignote une
fois pour indiquer que l'appareil se trouve maintenant en mode veille.
2. Sur l'iPhone/iPad, aller à l'application HiProx Multi et appuyer sur Help >
AirplaneMode > YES pour déconnecter tous les appareils iReminder jumelés et
pour quitter l'application.
3. Aller dans l'écran de configuration générale de votre iPhone/iPad et activer le
mode Avion.
4. Pour quitter le mode avion et pour revenir au mode de fonctionnement
normal : désactiver d'abord le mode avion dans l'écran de configuration
générale sur votre iPhone/iPad. Ainsi, la connexion Bluetooth sera activée (si
ce n'est pas le cas, réactiver manuellement).
5. Sur l'iReminder, appuyer une fois sur le bouton "FindMe" [2] pour quitter le
mode veille.
6. Puis, aller à l'application HiProx Multi et appuyer sur Help > AirplaneMode >
RECONNECT pour reconnecter tous les appareils iReminder jumelés et pour
quitter l'application.
Remarque : La reconnexion aux appareils en mode veille peut durer jusqu'à
V. 01 – 02/09/2013
21
©Velleman nv
PAMSB10
20 secondes. Si la reconnexion échoue, répéter les étapes ci-dessus (Voir
AirplaneMode disconnect/reconnect).
13. Eteindre l'appareil
13.1 Mode Veille
Pour déconnecter et accéder au mode veille, procéder comme suit :
1. Sur l'iPhone/iPad, aller à l'application HiProx Multi et appuyer sur Help >
AirplaneMode > YES pour déconnecter tous les appareils iReminder jumelés et
pour quitter l'application.
L'appareil se met en mode veille après environ 30 secondes. La LED verte
clignote toutes les 10 secondes pour indiquer que l'appareil se trouve en mode
veille.
2. Pour quitter le mode veille, aller à l'application HiProx Multi et appuyer sur Help
> AirplaneMode > RECONNECT pour reconnecter tous les appareils iReminder
jumelés et pour quitter l'application.
13.2 Mode sommeil
Pour accéder au mode sommeil, procéder comme suit :
1. Sur l'iReminder, maintenir enfoncé le bouton "FindMe" [2] durant
± 3 secondes. L'appareil émet un seul bip et la LED d'état (rouge) clignote une
fois et puis s'éteint pour indiquer que l'appareil se trouve maintenant en mode
sommeil.
Si l'appareil est toujours connecté à l'iPhone/iPad, celui-ci affiche un message
d'alarme et émet un bip.
2. Si nécessaire, appuyer sur le message d'alarme pour arrêter l'alarme.
3. Pour quitter le mode sommeil, appuyer une fois sur le bouton "FindMe" [2]. La
connexion avec l'iPhone/iPad se rétablie automatiquement.
Remarque : Si la connexion ne se rétablie pas automatiquement, parcourir les
étapes ci-dessus (Voir AirplaneMode disconnect/reconnect).
13.3 Supprimer définitivement un appareil jumelé
Pour ne plus utiliser un appareil avec votre iPhone/iPad, procéder comme suit :
1. Dans la liste d'appareils disponibles dans "MainView", sélectionner l'appareil et
appuyer sur
pour ouvrir l'écran "SetView". Appuyer sur le bouton "Remove"
et puis sur "YES" pour confirmer (fig. K). Appuyer sur OK pour confirmer
(fig. I).
2. Aller au menu de configuration générale de votre iPhone/iPad et sélectionner
"Bluetooth". La liste d'appareils Bluetooth jumelés s'affiche. Appuyer sur
l'appareil à supprimer et choisir “Forget this Device” (fig. M).
Remarque : Il est possible que vous deviez éteindre et rallumer votre
iPhone/iPad pour effacer complètement l'information de jumelage.
13.4 Modes de fonctionnement
Il existe plusieurs modes de fonctionnement (Voir la table ci-dessous) :
Mode
Mode
jumelage
Mode
connecté
LED verte
clignote une fois
par seconde
clignote toutes
les 5 secondes
V. 01 – 02/09/2013
Description
Il est possible de jumeler l'appareil avec un
iPhone/iPad.
L'appareil est allumé. L'alarme se déclenchera si
l'iPhone/iPad est hors de portée.
22
©Velleman nv
PAMSB10
Mode
Mode
sommeil
Mode veille
LED verte
éteint
clignote toutes
les 10 secondes
Description
L'appareil est éteint. L'alarme ne se déclenchera
pas.
L'appareil est déconnecté de l'iPhone/iPad.
L'alarme ne se déclenchera pas.
14. Problèmes et solutions
Vous essayez de connecter un appareil jumelé mais vous ne le trouvez pas
Cause : l'information de jumelage existante est corrompue.
Solution : effacer l'information de jumelage existante sur votre iPhone/iPad et puis
réessayer de jumeler l'appareil.
1. Dans l'application HiProx Multi, déconnecter l'appareil : appuyer sur Help >
AirplaneMode > YES.
2. Dans la liste d'appareils disponibles dans "MainView", sélectionner l'appareil et
appuyer sur
pour ouvrir l'écran "SetView". Appuyer sur le bouton "Remove"
et puis sur "YES" pour confirmer (fig. K). Appuyer sur "OK" pour confirmer
(fig. L).
3. Aller au menu de configuration générale de votre iPhone/iPad et sélectionner
Bluetooth. La liste d'appareils Bluetooth jumelés s'affiche . Appuyer sur
l'appareil à supprimer et choisir “Forget this Device” (fig. M).
Remarque : Il est possible que vous deviez éteindre et rallumer votre
iPhone/iPad pour supprimer définitivement l'information de jumelage.
4. Retirer la pile de l'iReminder et réinstaller pour recommencer le processus de
jumelage. Pour plus d'informations, voir Configuration.
Des fausses alarmes hors de portée surviennent
Cause éventuelle : la pile est faible. Solution : remplacer la pile.
Cause éventuelle : interférence causée par des objets métalliques ou par des
signaux à haute puissance utilisés par des appareils avec fréquence de bande
2.4 GHz (p.ex. réseau Wi-Fi ou four à micro-ondes).
Cause éventuelle : interférence causée par le corps humain. Solution : porter
votre iPhone/iPad et l'iReminder du même côté de votre corps.
L'alarme s'affaiblit
Cause : la pile est faible. Solution : remplacer la pile.
15. Spécifications techniques
communication
plage de fréquence
plage de recherche
plage d'alarme
type de pile
durée de vie de la pile
poids
dimensions
température de service
taux d'humidité
V. 01 – 02/09/2013
Bluetooth® 4.0 Low Energy Wireless (BLE)
2.4 GHz - 2.4835 GHz
20 m (dépend des obstacles et d'autres facteurs)
± 2-9 m, réglable
1 x CR2032 (incl.)
de 3 à 6 mois
9.5 g
61.5 x 36 x 11.6 mm (2.42 x 1.42 x 0.46")
de 5 °C à 40 °C
20 % - 80 %
23
©Velleman nv
PAMSB10
compatibilité
iPhone® 4S, iPhone® 5S, iPad® 3, iPad® 4,
iPad® mini. iOS 6 ou supérieur.
N’employer cet appareil qu’avec des accessoires d’origine. La SA Velleman
ne peut, dans la mesure conforme au droit applicable être tenue
responsable des dommages ou lésions (directs ou indirects) pouvant
résulter de l’utilisation de cet appareil. Pour plus d’informations
concernant cet article et la dernière version de cette notice, visiter notre
site web www.velleman.eu. Toutes les informations présentées dans cette
notice peuvent être modifiées sans notification préalable.
© DROITS D’AUTEUR – SA Velleman est l’ayant droit des droits d’auteur
pour cette notice. Tous droits mondiaux réservés. Toute reproduction,
traduction, copie ou diffusion, intégrale ou partielle, du contenu de cette notice par
quelque procédé ou sur tout support électronique que ce soit est interdite sans
l’accord préalable écrit de l’ayant droit.
MANUAL DEL USUARIO
1.
Introducción
A los ciudadanos de la Unión Europea
Importantes informaciones sobre el medio ambiente concerniente a este
producto
Este símbolo en este aparato o el embalaje indica que, si tira las
muestras inservibles, podrían dañar el medio ambiente. No tire este
aparato (ni las pilas, si las hubiera) en la basura doméstica; debe ir a
una empresa especializada en reciclaje. Devuelva este aparato a su
distribuidor o a la unidad de reciclaje local. Respete las leyes locales en
relación con el medio ambiente.
Si tiene dudas, contacte con las autoridades locales para residuos.
¡Gracias por elegir Velleman! Lea atentamente las instrucciones del manual antes
de usar el aparato. Si ha sufrido algún daño en el transporte no lo instale y
póngase en contacto con su distribuidor.
2.
Instrucciones de seguridad
Mantenga el aparato lejos del alcance de personas no capacitadas y niños.
Utilice el aparato sólo en interiores. No exponga este equipo a lluvia,
humedad ni a ningún tipo de salpicadura o goteo. Nunca ponga un objeto
con líquido en el aparato.
El usuario no habrá de efectuar el mantenimiento de ninguna pieza.
Contacte con su distribuidor si necesita piezas de recambio.
Cumple con las normas de seguridad nacionales e internacionales de vuelo
al utilizar el aparato durante el vuelo.
V. 01 – 02/09/2013
24
©Velleman nv
PAMSB10
3.
Normas generales
Véase la Garantía de servicio y calidad Velleman® al final de este manual del
usuario.
Familiarícese con el funcionamiento del aparato antes de utilizarlo.
Por razones de seguridad, las modificaciones no autorizadas del aparato están
prohibidas. Los daños causados por modificaciones no autorizadas, no están
cubiertos por la garantía.
Utilice sólo el aparato para las aplicaciones descritas en este manual Su uso
incorrecto anula la garantía completamente.
Los daños causados por descuido de las instrucciones de seguridad de este
manual invalidarán su garantía y su distribuidor no será responsable de ningún
daño u otros problemas resultantes.
Guarde este manual del usuario para cuando necesite consultarlo.
4.
Características
previene pérdidas alarma de aviso que previene la pérdida de su BLE
iPhone®/iPad®
función FindMe bidireccional iReminder y BLE iPhone®/iPad® pueden
encontrarse inmediatamente el uno al otro
le indicará cuando reciba llamadas
función para localizar su coche localiza su coche en un parking lleno
la aplicación 'HiProx Multi' gratuita está disponible en el App StoreSM.
5.
Descripción
Véase las figuras en la página 2 de este manual del usuario.
1
2
3
6.
LED
botón FindMe
botón de activación/desactivación
FindMe
4
5
tapa del compartimiento de pilas
gancho de llavero
Configuración
Observación: Todas las pantallas de ejemplo y todos los procedimientos son para
iPhone. Para iPad, las pantallas y los procedimientos son similares.
Para configurar y enlazar el aparato con el iPhone/iPad, proceda de la forma
siguiente:
1. En el iPhone/iPad, descargue la app “HiProx Multi” (App Store).
2. En el iPhone/iPad, active Bluetooth: diríjase a Settings > General > Enable
Bluetooth.
3. En el iReminder, abra la tapa del compartimiento de pilas [4] e introduzca una
pila del tipo CR2032 (incl.) con el símbolo + hacia arriba.
Advertencia: Nunca perfore las pilas y no las eche al fuego (peligro de
explosión). Respete las leyes locales en relación con el medio ambiente al
tirar las pilas. Mantenga las pilas lejos del alcance de niños.
4. Vuelva a poner la tapa del compartimiento de pilas. El aparato se activa
automáticamente y entra en el modo de enlace. El LED verde parpadea una
vez cada segundo para indicar que el aparato está listo para enlazarlo con el
iPhone/iPad.
V. 01 – 02/09/2013
25
©Velleman nv
PAMSB10
5. En el iPhone/iPad, abra la app “HiProx Multi” y pulse el botón
(parte
superior derecha) para buscar los aparatos disponibles (fig. A). Una solicitud
de enlace para HiProx Multi aparece en la pantalla (fig. B).
6. Pulse “Pair” para enlazar el aparato con el iPhone/iPad. El LED verde del
aparato parpadea cada 5 segundos si está conectado al iPhone/iPad. Después
de que se haya terminado el enlace, el aparato aparece en la lista de aparatos
disponibles en la pantalla MainView (fig. C).
Observación: Es posible enlazar hasta 4 aparatos con el iPhone/iPad.
7.
Probar el sistema
Para probar el sistema, proceda de la forma siguiente:
1. En el iPhone/iPad, pulse el aparato que quiere probar en la lista MainView de
aparatos disponibles. El botón Find
aparece al lado del aparato (fig. D).
2. Pulse el botón Find.
. El iReminder emite un sonido.
3. En el iReminder, active la función FindMe al poner el botón [3] en la posición
izquierda (alejada del gancho).
4. Pulse el botón FindMe [2]. El iPhone/iPad emite un sonido.
5. Vuelva a pulsar el botón FindMe [2] para desactivar la función FindMe.
8.
Ajustar el rango de búsqueda
1. Pruebe el rango de búsqueda de la siguiente manera: Ponga su iPohone/Ipad
en un lugar. Coja el iReminder y aléjese del iPhone/iPad (fig. G). El aparato
empieza a emitir un sonido en cuanto salga del rango de búsqueda. La alarma
se desactiva al volver a entrar en el rango.
2. En el iPhone/iPad, ajuste el rango de búsqueda de la siguiente manera: en la
lista MainView de los aparatos disponibles, pulse el botón
para abrir la
pantalla de configuración (SetView) del aparato seleccionado. Arastre el
regulador “Range Alarm Threshold” para ajustar el rango de búsqueda (fig. E).
Observación: Véase Especificaciones para el rango de búsqueda máx. El rango
de búsqueda efectivo depende de los obstáculos (p.ej. pared u otra fuente de
interferencias) entre el aparato y el iPhone/iPad.
9.
Función FindMe
La función FindMe permite encontrar el iPhone/iPad con el iReminder o viceversa.
Advertencia: Asegúrese de que la función FindMe esté activada al poner el botón
[3] en la posición izquierda (alejado del gancho del llavero).
Para encontrar el iPhone/iPad con el iReminder:
1. Pulse la función FindMe [2]. Si el iPhone/iPad se encuentra dentro del rango
(véase Ajustar el rango de búsqueda), emite un sonido continuo.
2. El el iPhone/iPad, pulse el botón Find
para desactivar el sonido.
3. Vuelva a pulsar el botón FindMe [2] para desactivar la función FindMe.
Para encontrar el iReminder con el iPhone/iPad:
4. En el iPhone/iPad, pulse el botón Find
para localizar el iReminder. Si el
iReminder se encuentra dentro del rango (véase Ajustar el rango de
búsqueda), emite un sonido durante 5 segundos.
5. Si fuera necesario, pulse el botón Find
para continuar a buscar.
V. 01 – 02/09/2013
26
©Velleman nv
PAMSB10
Observación: Si no va a utilizar la función FindMe, desactívela al poner el botón
[3] en la posición derecha (hacia el gancho de del llavero). Esto evitará que ponga
el aparato en el modo “sleep” por accidente. La alarma no funciona en el modo
“sleep”.
10. Map Location (marcar una ubicación en el mapa)
Observación: Esta función utiliza la función GPS del iPhone/iPad en exteriores. En
interiores, active el Wi-Fi para una ubicación exacta.
Es posible marcar su ubicación actual de manera manual o puede dejar que la app
pone un marcador automáticamente en caso de una alarma fuera del rango.
Para crear un marcador de ubicación de manera manual, diríjase a la lista
MainView de los aparatos disponibles y pulse el botón
para acceder a la
pantalla SetView. Pulse el botón View (fig. H) para ir a MapView. Luego, pulse el
marcador y seleccione YES (fig. I). La app pone un marcador rojo en el
marcador de ubicación actual azul (fig. J).
Para crear un marcador de ubicación automáticamente, diríjase a la lista
MainView de los aparatos disponibles y pulse el botón
para acceder a la
pantalla SetView. Pulse el botón View (fig. H) para ir a MapView. Luego, pulse el
marcador (fig. I). Quite el marcador actual (si existe uno). Luego, active la
función “Map Location”. En caso de una alarma fuera del rango, el iPhone/iPad
pone automáticamente un marcador rojo en el marcador de ubicación actual
azul (fig. J).
11. Notificación en caso de llamadas entrantes
El aparato puede avisarle de llamadas entrantes en el iPhone. El aparato emitirá
un sonido y parpadeará para avisarle de una llamada entrante.
1. En la lista MainView de aparatos disponibles, pulse
para acceder a la
pantalla SetView.
2. Ponga “Call Alert” en la posición ON.
12. Modo avión
Hay dos maneras para poner el aparato en el modo avión:
Primero, active el modo avión general del iPhone/iPad. Luego, desconecte el
iReminder.
Primero, pone el iReminder en el modo sleep. Luego, active el modo avión
general del iPhone/iPad.
12.1 Después de la activación del modo avión
La conexión Bluetooth se desactiva al activar el modo avión del iPhone/iPad. Por
tanto, el iReminder emite un sonido porque ha perdido la conexión con el
iPhone/iPad. Proceda de la forma siguiente:
1. En el iReminder, pulse el botón FindMe [2] para desactivar el sonido de
alarma.
2. En el iPhone/iPad, diríjase a la app HiProx Multi y pulse Help > AirplaneMode >
YES para desconectar todos los aparatos iReminder enlazados y salir de la app.
3. Para salir del modo avión y volver al modo de funcionamiento normal: primero,
desactive el modo avión en la pantalla de ajustes del iPhone/iPad. Esto activa
la conexión Bluetooth (si no fuera el caso, active la función de manera
manual).
V. 01 – 02/09/2013
27
©Velleman nv
PAMSB10
4. Luego, diríjase a la app HiProx Multi y pulse Help > AirplaneMode >
RECONNECT para volver a conectarse con todos los aparatos iReminder
enlazados y salir de la app.
12.2 Antes de la activación del modo avión
1. En el iReminder, pulse el botón FindMe [2] durante ± 3 segundos. El aparato
emite un solo sonido y el LED de estado parpadea una vez (rojo) para indicar
que ahora el aparato está en el modo sleep.
2. En el iPhone/iPad, diríjase a la app HiProx Multi y pulse Help > AirplaneMode >
YES para desconectar todos los aparatos iReminder enlazados y salir de la app.
3. Diríjase a la pantalla de ajustes generales del iPhone/iPad y active el modo
avión.
4. Para salir del modo avión y volver al modo de funcionamiento normal: primero,
desactive el modo avión en la pantalla de ajustes del iPhone/iPad. Esto activa
la conexión Bluetooth (si no fuera el caso, active la función de manera
manual).
5. En el iReminder, pulse el botón FindMe [2] una vez para salir del modo SLEEP.
6. Luego, diríjase a la app HiProx Multi y pulse Help > AirplaneMode >
RECONNECT para volver a conectarse a todos los aparatos iReminder
enlazados y salir de la app.
Observación: Puede tardar unos 20 segundos para reconectarse a aparatos
en el modo SLEEP. Si no consigue a reconectar, repita los pasos para
conectar/desconectar el modo avión.
13. Desactivar el aparato
13.1 Modo standby (espera)
Para desconectar y dirigirse al modo de espera, proceda de la forma siguiente:
1. En el iPhone/iPad, diríjase a la app HiProx Multi y pulse Help > AirplaneMode >
YES para desconectar todos los aparatos iReminder enlazados y salir de la app.
El iReminder entra en el modo standby después de aproximadamente 30
segundos. El LED verde parpadea cada 10 segundos para indicar el modo de
espera.
2. Para salir del modo de espera, diríjase a la app HiProx Multi y pulse Help >
AirplaneMode > RECONNECT para volver a conectarse a todos los aparatos
iReminder enlazados y salir de la app.
13.2 Modo Sleep (suspensión)
Para entrar en el modo Sleep, proceda de la forma siguiente:
1. En el iReminder, mantenga pulsado el botón FindMe [2] durante
± 3 segundos. El aparato emite un sonido y el LED de estado parpadea una
vez (rojo) y luego se apaga para indicar que el aparato está en el modo Sleep.
Si el aparato todavía está conectado al iPhone/iPad, el iPhone/iPad visualiza un
mensaje de alarma y emite un sonido.
2. Si fuera necesario, desactive la alarma del iPhone/iPad al pulsar el mensaje de
alarma.
3. Para salir del modo Sleep, pulse el botón FindMe [2] una vez. La conexión con
el iPhone/iPad se restablece automáticamente.
Observación: Si la conexión no se restablece automáticamente, ejecute los
pasos para conectar/desconectar el modo avión.
V. 01 – 02/09/2013
28
©Velleman nv
PAMSB10
13.3 Quitar un aparato enlazado definitivamente
Si quiere desenlazar un aparato, proceda de la forma siguiente:
1. En la lista MainView de los aparatos disponibles, seleccione el aparato y pulse
el botón
para acceder a la pantalla SetView. Pulse el botón REMOVE y pulse
YES para confirmar (fig. K). Pulse OK para confirmar (fig. L).
2. Diríjase al menú de ajustes del iPhone/iPad y seleccione Bluetooth. La lista con
los aparatos Bluetooth enlazados se visualiza. Pulse el aparato que quiere
desenlazar y seleccione “Forget this Device” (fig. M).
Observación: Es posible que deba desactivar y reinicializar el iPhone/iPad
para quitar la información de enlace completamente.
13.4 Modos de funcionamiento
La siguiente lista visualiza un resumen de los diferentes modos de funcionamiento:
Modo
LED verde
Modo de enlace parpadea una vez
por segundo
Modo
parpadea cada 5
“conectado”
segundos
Modo Sleep
desactivado
Modo Standby
(espera)
parpadea cada
10 segundos
Descripción
Es posible conectar el aparato con un
iPhone/iPad.
El aparato está activado. La alarma se activa si
el iPhone/iPad está fuera del rango.
El aparato no está activado. La alarma no se
activa.
El aparato no está conectado al iPhone/iPad. La
alarma no se activa.
14. Solución de problemas
Intenta conectarse a un aparato enlazado pero no puede encontrarlo
Causa: La información de enlace existente no es correcta.
Solución: desenlace el aparato y vuelva a enlazarlo con el iPhone/iPad.
1. En la app HiProx Multi, desconecte el aparato: pulse Help > AirplaneMode >
YES.
2. En la lista MainView de los aparatos disponibles, seleccione el aparato y pulse
para acceder a la pantalla SetView. Pulse el botón Remove y pulse YES
para confirmar (fig. K). Pulse OK para confirmar (fig. L).
3. Diríjase al menú de Ajustes del iPhone/iPad y seleccione Bluetooth. La lista con
los aparatos Bluetooth enlazados se visualiza. Pulse el aparato que quiere
desenlazar y seleccione “Forget this Device” (fig. M).
Observación: Es posible que deba desactivar y reinicializar el iPhone/iPad
para quitar la información de enlace completamente.
4. Saque la pila del iReminder y vuelva a introducirla para volver a enlazar el
aparato. Consulte Configuración para más información.
Recibe alarmas de fuera de rango falsas
Causa posible: pila agotada. Solución: Reemplace la pila.
Causa posible: interferencias causadas por objetos de metal o señales de alta
potencia (2.4 GHz, p.ej. red Wi-Fi o microondas).
Causa posible: interferencias causadas por el cuerpo humano Solución: Lleve
siempre el iPhone/iPad y el iReminder al mismo lado de su cuerpo.
V. 01 – 02/09/2013
29
©Velleman nv
PAMSB10
La alarma acústica se vuelve débil
Causa posible: pila agotada. Solución: Reemplace la pila.
15. Especificaciones
comunicación
rango de frecuencias
alcance
rango de la alarma
tipo de batería
duración de vida de la
batería
peso
dimensiones
temperatura de
funcionamiento
humedad
compatibilidad
Bluetooth® 4.0 Low Energy Wireless Technology (BLE)
2.4 GHz - 2.4835 GHz
20m (dependiendo de obstáculos y otros factores)
± 2-9 m, regulable
1 x CR2032 (incl.)
de 3 a 6 meses
9.5 g
61.5 x 36 x 11.6 mm
de 5 °C a 40 °C
20 % - 80 %
iPhone® 4S, iPhone® 5S, iPad® 3, iPad® 4,
iPad® mini. iOS 6 o superior.
Utilice este aparato sólo con los accesorios originales. Velleman NV no
será responsable de daños ni lesiones causados por un uso (indebido) de
este aparato. Para más información sobre este producto y la versión más
reciente de este manual del usuario, visite nuestra página
www.velleman.eu. Se pueden modificar las especificaciones y el contenido
de este manual sin previo aviso.
© DERECHOS DE AUTOR – Velleman NV dispone de los derechos de autor
para este manual del usuario. Todos los derechos mundiales reservados.
Está estrictamente prohibido reproducir, traducir, copiar, editar y guardar este
manual del usuario o partes de ello sin previo permiso escrito del derecho
habiente.
BEDIENUNGSANLEITUNG
1.
Einführung
An alle Einwohner der Europäischen Union
Wichtige Umweltinformationen über dieses Produkt
Dieses Symbol auf dem Produkt oder der Verpackung zeigt an, dass die
Entsorgung dieses Produktes nach seinem Lebenszyklus der Umwelt
Schaden zufügen kann. Entsorgen Sie die Einheit (oder verwendeten
Batterien) nicht als unsortiertes Hausmüll; die Einheit oder verwendeten
Batterien müssen von einer spezialisierten Firma zwecks Recycling
entsorgt werden. Diese Einheit muss an den Händler oder ein örtliches
Recycling-Unternehmen retourniert werden. Respektieren Sie die örtlichen
Umweltvorschriften.
V. 01 – 02/09/2013
30
©Velleman nv
PAMSB10
Falls Zweifel bestehen, wenden Sie sich für Entsorgungsrichtlinien an Ihre
örtliche Behörde.
Vielen Dank, dass Sie sich für Velleman entschieden haben! Lesen Sie diese
Bedienungsanleitung vor Inbetriebnahme sorgfältig durch. Überprüfen Sie, ob
Transportschäden vorliegen. Sollte dies der Fall sein, verwenden Sie das Gerät
nicht und wenden Sie sich an Ihren Händler.
2.
Sicherheitshinweise
Halten Sie Kinder und Unbefugte vom Gerät fern.
Verwenden Sie das Gerät nur im Innenbereich. Schützen Sie das
Gerät vor Regen und Feuchte. Setzen Sie das Gerät keiner Flüssigkeit wie
z.B. Tropf- oder Spritzwasser, aus. Stellen Sie keine mit Flüssigkeit
befüllten Gegenstände auf das Gerät.
Es gibt keine zu wartenden Teile. Bestellen Sie eventuelle Ersatzteile bei
Ihrem Fachhändler.
Entspricht den nationalen und internationalen Sicherheitsvorschriften bei
Gebrauch während eines Flugs.
3.
Allgemeine Richtlinien
Siehe Velleman® Service- und Qualitätsgarantie am Ende dieser
Bedienungsanleitung.
Nehmen Sie das Gerät erst in Betrieb, nachdem Sie sich mit seinen Funktionen
vertraut gemacht haben.
Eigenmächtige Veränderungen sind aus Sicherheitsgründen verboten. Bei
Schäden verursacht durch eigenmächtige Änderungen erlischt der
Garantieanspruch.
Verwenden Sie das Gerät nur für Anwendungen beschrieben in dieser
Bedienungsanleitung. Dies kann zu Schäden am Produkt führen und erlischt der
Garantieanspruch.
Bei Schäden, die durch Nichtbeachtung der Bedienungsanleitung verursacht
werden, erlischt der Garantieanspruch. Für daraus resultierende Folgeschäden
übernimmt der Hersteller keine Haftung.
Bewahren Sie diese Bedienungsanleitung für künftige Einsichtnahme auf.
4.
Eigenschaften
bietet Schutz vor Verlust: dank des hörbaren Alarms verlieren Sie Ihr BLE
iPhone®/iPad® nicht
2-Wege FindMe-Funktion: iReminder und BLE iPhone®/iPad® können einander
sofort finden
warnt bei eingehenden Gesprächen
Funktion um Ihr Auto zu finden: lokalisieren Sie Ihren Wagen in einem
Parkhaus
die gratis HiProx Multi-Applikation ist im App StoreSM.
V. 01 – 02/09/2013
31
©Velleman nv
PAMSB10
5.
Umschreibung
Siehe Abbildungen, Seite 2 dieser Bedienungsanleitung.
1
2
3
6.
LED
FindMe-Taste
FindMe EIN/AUS-Schalter
4
5
Batteriedeckel
Schlüsselanhänger-Haken
Konfiguration
Bemerkung: Alle Beispiele und das Verfahren sind für iPhone. Für iPad sind die
Beispielfenster und das Verfahren ähnlich.
Um das Gerät mit dem iPhone/iPad zu koppeln, gehen Sie wie folgt vor:
1. Auf dem iPhone/iPad, laden Sie die HiProx Multi-App (App Store) herunter.
2. Auf dem iPhone/iPad, aktivieren Sie Bluetooth: wählen Sie Settings > General
> Enable Bluetooth.
3. Auf dem iReminder, öffnen Sie den Batteriedeckel [4] und legen Sie eine
neuer CR2032-Batterie (mitgeliefert) mit dem +-Symbol nach oben ein.
Warnung: Durchbohren Sie nie die Batterien und werfen Sie diese nicht ins
Feuer (Explosionsgefahr). Respektieren Sie die örtlichen
Umweltvorschriften beim Entsorgen der Batterien. Halten Sie die Batterien
von Kindern fern.
4. Setzen Sie den Batteriedeckel wieder auf. Das Gerät wird automatisch
eingeschaltet und geht zum Koppel-Modus. Die grüne LED blinkt jede Sekunde
ein Mal, um anzuzeigen, dass das Gerät nun mit dem iPhone/iPad gekoppelt
werden kann.
5. Auf dem iPhone/iPad, öffnen Sie die HiProx Multi-App und tippen Sie auf
(oben rechts), um die verfügbaren Geräte zu suchen (Abb. A). Ein Antrag auf
Koppel für HiProx Multi erscheint auf dem Bildschirm (Abb. B).
6. Drücken Sie auf “Pair”, um das Gerät mit dem iPhone/iPad zu koppeln. Die
grüne LED auf dem Gerät blinkt alle 5 Sekunden, wenn es mit dem iPhone/iPad
verbunden ist. Nach dem Koppeln erscheint das Gerät in der Liste mit
verfügbaren Geräten im MainView-Fenster (Abb. C).
Bemerkung: Sie können bis zu 4 Geräte mit dem iPhone/iPad koppeln.
7.
Das System testen
Um das System zu testen, gehen Sie wie folgt vor:
1. Auf dem iPhone/iPad, tippen Sie in der MainView-Liste mit den verfügbaren
Geräten, auf das Gerät, das Sie testen möchten. Die Find-Taste
erscheint
neben dem Gerät (Abb. D).
2. Tippen Sie auf der Find-Taste
. Das Gerät piepst.
3. Auf dem iReminder, aktivieren Sie die FindMe-Funktion, indem Sie die Taste
[3] nach links schieben (weg vom Haken).
4. Tippen Sie auf der FindMe-Taste [2]. Das iPhone/iPad piepst.
5. Tippen Sie wieder auf der FindMe-Taste [2], um die FindMe-Funktion zu
stoppen.
V. 01 – 02/09/2013
32
©Velleman nv
PAMSB10
8.
Den Suchbereich einstellen
1. Zum Testen des Suchbereichs gehen Sie wie folgt vor: legen Sie das
iPhone/iPad auf eine feste Stelle. Nehmen Sie das iReminder und entfernen Sie
sich vom iPhone/iPad (Abb. G). Verlassen Sie den Suchbereich, dann piepst
das Gerät. Der Alarm stoppt wenn Sie sich wieder im Bereich befinden.
2. Auf dem iPhone/iPad, stellen Sie den Bereich wie folgt ein: in der MainViewListe mit den verfügbaren Geräten, tippen Sie auf
, um die
Konfigurationsseite (SetView) für das ausgewählten Gerät zu öffnen. Bewegen
Sie den “Range Alarm Threshold”-Schieberegler, um den Suchbereich
einzustellen (Abb. E).
Bemerkung: Siehe Technische Daten für einen max. Suchbereich. Der effektive
Suchbereich hängt von den Hindernissen (Mauer, andere Störquelle) zwischen dem
Gerät und dem iPhone/iPad ab.
9.
FindMe-Funktion
Dank der FindMe-Funktion können Sie das iPhone/iPad mit dem iReminder finden,
oder umgekehrt.
Achtung: Beachten Sie, dass die FindMe-Funktion eingeschaltet ist, indem Sie
Schalter [3] nach links schieben (weg vom Haken).
Um das iPhone/iPad mit dem iReminder zu finden:
1. Tippen Sie auf die FindMe-Taste [2]. Befindet sich das iPhone/iPad innerhalb
des Suchbereichs (siehe Den Suchbereich einstellen), dann piepst es
ständig.
2. Auf dem iPhone/iPad, tippen Sie auf die Find-Taste
, um das Piepsen zu
stoppen.
3. Tippen Sie wieder auf die FindMe-Tatste [2], um die FindMe-Funktion zu
stoppen.
Um das iReminder mit dem iPhone/iPad zu finden:
4. Auf dem iPhone/iPad, tippen Sie auf die Find-Taste
, um das iReminder zu
lokalisieren. Befindet sich der iReminder innerhalb des Suchbereichs (siehe
Den Suchbereich einstellen), dann piepst das Gerät 5 Sekunden.
5. Wenn nötig, tippen Sie wieder auf die Find-Taste
, um weiter zu suchen.
Bemerkung: Verwenden Sie die FindMe-Funktion nicht, dann schalten Sie diese
Funktion aus, indem Sie den Schalter [3] nach rechts schieben (in Richtung des
Hakens). So vermeiden Sie, dass Sie das Gerät versehentlich in den Sleep-Modus
stellen. Im Sleep-Modus funktioniert der Alarm nicht.
10. Map Location (Einen Standort auf einer Karte
markieren)
Bemerkung: Diese Funktion verwendet die iPhone/iPad GPS-Funktion, wenn Sie
sich im Außenbereich befinden. Befinden Sie sich im Innenbereich, so aktivieren
Sie Wi-Fi, um einen korrekten Standort zu bekommen.
Sie können Ihren aktuellen Standort manuell markieren oder Sie können die App
bei einem Außer-Bereich-Alarm automatisch einen Standort markieren lassen.
Um eine Markierung manuell einzustellen, gehen Sie zur MainView-Liste mit den
verfügbaren Geräten und tippen Sie auf
, um in den SetView-Fenster zu
V. 01 – 02/09/2013
33
©Velleman nv
PAMSB10
gelangen. Tippen Sie auf View (Abb. H), um zu MapView zu gehen. Tippen Sie
danach auf die Mark und wählen Sie YES (Abb. I). Die App platziert eine rote
Stecknadel auf der blauen aktuellen Standortmarkierung.
Um eine Standortmarkierung automatisch einzustellen, gehen Sie zur MainViewListe mit den verfügbaren Geräten und tippen Sie auf
, um das SetViewFenster zu öffnen. Tippen Sie auf View (Abb. H), um MapView zu öffnen. Tippen
Sie danach auf die Markierung. Entfernen Sie die aktuelle Markierung (wenn es
eine gibt). Aktivieren Sie danach die Map Location-Funktion. Bei einem AußenBereich-Alarm, platziert das iPhone/iPad automatisch eine rote Stecknadel auf
der blauen aktuellen Standortmarkierung (Abb. J).
11. Benachrichtigung bei eingehenden Anrufen
Das Gerät ist in der Lage, eingehende Anrufe auf dem iPhone zu melden. Das
Gerät piepst und blinkt, um eine einen eingehenden Anruf anzuzeigen.
1. In der MainView-Liste mit den verfügbaren Geräten, tippen Sie auf
, um das
SetView-Fenster zu öffnen.
2. Stellen Sie “Call Alert” auf ON.
12. Flugmodus
Es gibt zwei Arten und Weisen, um den Flugmodus einzuschalten:
Schalten Sie zuerst den allgemeinen Flugmodus auf dem iPhone/iPad ein.
Trennen Sie den iReminder danach.
Wählen Sie für das iReminder zuerst den Sleep-Modus aus. Schalten Sie danach
den allgemeinen Flugmodus auf dem iPhone/iPad ein.
12.1 Nach dem Einschalten des Flugmodus
Der Bluetooth-Anschluss ist ausgeschaltet, wenn Sie den Flugmodus auf dem
iPhone/iPad einschalten. Infolgedessen piepst das iReminder weil es die
Verbindung mit dem iPhone/iPad verloren hat. Gehen Sie wie folgt vor:
1. Auf dem iReminder, tippen Sie auf die FindMe-Taste [2], um den Piepston zu
stoppen.
2. Auf dem iPone/iPad, wählen Sie die HiProx Multi-App aus und tippen Sie auf
Help > AirplaneMode > YES, um alle gekoppelten iReminder zu trennen und
die App zu verlassen.
3. Um den Flugmodus zu verlassen und zum normalen Betriebsmodus
zurückzukehren: schalten Sie zuerst den Flugmodus auf dem iPhone/iPad
(siehe Einstellungen) aus. Dies aktiviert den Bluetooth-Anschluss (ist dies nicht
der Fall, schalten Sie diese Funktion manuell ein).
4. Wählen Sie danach die HiProx Multi-App aus und tippen Sie auf Help >
AirplaneMode > RECONNECT, um alle gekoppelten iReminder wieder
anzuschließen und die App zu verlassen.
12.2 Vor dem Einschalten des Flugmodus
1. Auf dem iReminder, tippen Sie auf die FindMe-Taste [2] und halten Sie diese
± 3 Sekunden gedrückt. Ein akustisches Signal ertönt ein Mal und die StatusLED leuchtet ein Mal rot, um anzuzeigen, dass das Gerät sich nun im SleepModus befindet.
V. 01 – 02/09/2013
34
©Velleman nv
PAMSB10
2. Auf dem iPhone/iPad, wählen Sie die HiProx Multi-App aus und tippen Sie auf
Help > AirplaneMode > YES, um alle gekoppelten iReminder zu trennen und
die App zu verlassen.
3. Auf dem iPhone/iPad, wählen Sie Einstellungen und schalten Sie den
Flugmodus ein.
4. Um den Flugmodus zu verlassen und zum normalen Betriebsmodus zu kehren:
schalten Sie zuerst den Flugmodus auf dem iPhone/iPad (siehe Einstellungen)
aus. Dies aktiviert den Bluetooth-Anschluss (ist dies nicht der Fall, schalten Sie
diese Funktion manuell ein).
5. Auf dem iReminder, tippen Sie ein Mal auf die FindMe-Taste [2], um den
Sleep-Modus zu verlassen.
6. Wählen Sie danach die HiProx Multi-App aus und tippen Sie auf Help >
AirplaneMode > RECONNECT, um alle gekoppelten iReminder wieder
anzuschließen und die App zu verlassen.
Bemerkung: Es kann bis zu 20 Sekunden dauern, um wieder eine Verbindung
mit Geräten im Sleep-Modus zu machen. Misslingt die Verbindung, dann
wiederholen Sie die Schritte, um den Flugmodus ein-/auszuschalten.
13. Das Gerät trennen
13.1 Standby-Modus
Um das Gerät zu trennen und zum Standby-Modus zu gehen, gehen Sie wie folgt
vor:
1. Auf dem iPhone/iPad, wählen Sie die HiProx Multi-App aus und tippen Sie auf
Help > AirplaneMode > YES, um alle gekoppelten iReminder zu trennen und
die App zu verlassen.
Das iReminder befindet sich nach etwa 30 Sekunden im Standby-Modus. Die
grüne LED blinkt alle 10 Sekunden, um anzuzeigen, dass das Gerät sich im
Standby-Modus befindet.
2. Um den Standby-Modus zu verlassen, wählen Sie die HiProx Multi-App aus und
tippen Sie auf Help > AirplaneMode > RECONNECT, um alle gekoppelten
iReminder wieder anzuschließen und die App zu verlassen.
13.2 Sleep-Modus
Um in den Sleep-Modus zu gelangen, gehen Sie wie folgt vor:
1. Auf dem iReminder, tippen Sie auf die FindMe-Taste [2] und halten Sie diese
± 3 Sekunden gedrückt. Ein akustisches Signal ertönt ein Mal und die StatusLED leuchtet ein Mal rot und erlischt danach, um anzuzeigen, dass das Gerät
sich nun im Sleep-Modus befindet.
Ist das Gerät noch mit dem iPhone/iPad verbunden, dann erscheint auf dem
iPhone/iPad eine Alarmmeldung und ertönt ein akustisches Signal.
2. Wenn nötig, schalten Sie das akustische Signal auf dem iPhone/iPad aus,
indem Sie auf die Alarmmeldung tippen.
3. Um den Sleep-Modus zu verlassen, tippen Sie ein Mal auf die FindMe-Taste
[2]. Die Verbindung mit dem iPhone/iPad wird automatische wieder
hergestellt.
Bemerkung: Wird die Verbindung nicht automatische wieder hergestellt, dann
starten Sie die Schritte, um den Flugmodus ein-/auszuschalten.
V. 01 – 02/09/2013
35
©Velleman nv
PAMSB10
13.3 Ein gekoppeltes Gerät definitiv trennen
Um ein Gerät vom iPhone/iPad zu trennen, gehen Sie wie folgt vor:
1. In der MainView-Liste mit den verfügbaren Geräten, wählen Sie das Gerät aus
und tippen Sie auf
, um das SetView-Fenster zu öffnen. Tippen Sie auf
Remove und dann auf YES, um zu bestätigen (Abb. K). Tippen Sie auf OK, um
zu bestätigen (Abb. L).
2. Gehen Sie auf dem iPhone/iPad zum Einstellungen-Menü und wählen Sie
Bluetooth aus. Die Liste mit den gekoppelten Bluetooth-Geräten erscheint.
Tippen Sie auf das Gerät, das Sie trennen möchten und wählen Sie “Forget this
Device” (Abb. M).
Bemerkung: Sie müssen gegebenenfalls das iPone/iPad ausschalten und
wieder starten, um das gekoppelte Geräte definitiv zu trennen.
13.4 Betriebsmodi
Folgende Liste zeigt eine Übersicht der verschiedenen Betriebsmodi:
Modus
Grüne LED
Kopplungsmodus blinkt ein Mal
pro Sekunde
Modus
blinkt alle 5
“verbunden”
Sekunden
Sleep-Modus
Standby-Modus
Beschreibung
Das Gerät kann mit einem iPhone/iPad gekoppelt
werden.
Das Gerät ist eingeschaltet. Der Alarm wird
eingeschaltet, wenn dass gekoppelte iPhone/iPad
sich außer Bereich befindet.
ausgeschaltet Das Gerät ist nicht eingeschaltet. Der Alarm wird
nicht eingeschaltet.
blinkt alle 10 Das Gerät ist vom iPhone/iPad getrennt. Der
Sekunden
Alarm wird nicht eingeschaltet.
14. Problemlösung
Sie versuchen eine Verbindung mit einem gekoppelten Gerät zu machen,
aber Sie finden es nicht.
Ursache: die Kopplungsinformation ist korrupt.
Lösung: entfernen Sie diese Information vom iPhone/iPad und koppeln Sie das
Gerät wieder.
1. In der HiProx Multi-App, trennen Sie das Gerät: tippen Sie auf Help >
AirplaneMode > YES.
2. In der MainView-Liste mit den verfügbaren Geräten, wählen Sie das Gerät aus
und tippen Sie auf
, um das SetView-Fenster zu öffnen. Tippen Sie auf
REMOVE und danach auf YES, um zu bestätigen (Abb. K). Tippen Sie auf OK,
um zu bestätigen (Abb. L).
3. Gehen Sie auf dem iPhone/iPad zum Einstellungen-Menü und wählen Sie
Bluetooth aus. Die Liste mit den gekoppelten Bluetooth-Geräten erscheint.
Tippen Sie auf das Gerät, das Sie trennen möchten und wählen Sie “Forget this
Device” (Abb. M).
Bemerkung: Sie müssen gegebenenfalls das iPone/iPad ausschalten und
wieder starten, um das gekoppelte Geräte definitiv zu trennen.
4. Entfernen Sie die Batterie vom iReminder und setzen Sie diese wieder ein, um
das Kopplungsverfahren wieder zu starten. Weitere Informationen finden Sie
unter Konfiguration.
V. 01 – 02/09/2013
36
©Velleman nv
PAMSB10
Der Außer-Bereich-Alarm ertönt fälschlicherweise
Mögliche Ursache: Die Batterie ist schwach. Lösung: Die Batterie ersetzen.
Mögliche Ursache: Interferenzen verursacht durch Metallgegenstände oder
Signale hoher Leistung (2.4 GHz, z.B. Wi-Fi-Netzwerk, Mikrowelle).
Mögliche Ursache: Interferenzen verursacht durch den menschlichen Körper.
Lösung: Tragen Sie das iPhone/iPad und das iReminder immer an derselben
Körperseite.
Das akustische Signal ertönt schwach
Ursache: Die Batterie ist schwach. Lösung: Die Batterie ersetzen.
15. Technische Daten
Kommunikation
Frequenzbereich
Bereich
Bluetooth® 4.0 Low Energy Wireless Technology (BLE)
2.4 GHz - 2.4835 GHz
20 m (abhängig von Hindernissen und anderen
Faktoren)
Alarmbereich
± 2-9 m, einstellbar
Batterietyp
1 x CR2032 (mitgeliefert)
Lebensdauer der Batterie 3 bis 6 Monate
Gewicht
9.5 g
Abmessungen
61.5 x 36 x 11.6 mm
Betriebstemperatur
5 °C bis 40 °C
Feuchte
20 % - 80 %
Kompatibilität
iPhone® 4S, iPhone® 5S, iPad® 3, iPad® 4,
iPad® mini. iOS 6 oder höher.
Verwenden Sie dieses Gerät nur mit originellen Zubehörteilen. Velleman
NV übernimmt keine Haftung für Schaden oder Verletzungen bei
(falscher) Anwendung dieses Gerätes.
Mehr Informationen zu diesem Produkt und die neueste Version dieser
Bedienungsanleitung finden Sie hier: www.velleman.eu.
Alle Änderungen ohne vorherige Ankündigung vorbehalten.
© URHEBERRECHT
Velleman NV besitzt das Urheberrecht für diese Bedienungsanleitung. Alle
weltweiten Rechte vorbehalten. Ohne vorherige schriftliche Genehmigung des
Urhebers ist es nicht gestattet, diese Bedienungsanleitung ganz oder in Teilen zu
reproduzieren, zu kopieren, zu übersetzen, zu bearbeiten oder zu speichern.
V. 01 – 02/09/2013
37
©Velleman nv
PAMSB10
MANUAL DO UTILIZADOR
1.
Introdução
Aos cidadãos da União Europeia
Importantes informações sobre o meio ambiente no que respeita a este
produto
Este símbolo no aparelho ou na embalagem indica que, enquanto
desperdícios, poderão causar danos no meio ambiente. Não deite o
aparelho (nem as pilhas, se as houver) no lixo doméstico; dirija-se a
uma empresa especializada em reciclagem. Devolva o aparelho ao seu
distribuidor ou ao posto de reciclagem local. Respeite a legislação local
relativa ao meio ambiente.
Em caso de dúvidas, contacte com as autoridades locais para os resíduos.
Agradecemos o facto de ter adquirido este aparelho. Leia atentamente as
instruções do manual antes de o usar. Caso o aparelho tenha sofrido algum dano
durante o transporte não o instale e entre em contacto com o seu distribuidor.
2.
Instruções de segurança
Mantenha o aparelho fora do alcance de crianças e pessoas não
qualificadas.
Usar apenas em espaços interiores. Proteger o aparelho contra a chuva
e humidade ou qualquer tipo de salpicos ou gotas. Nunca coloque
recipientes com líquidos em cima do aparelho.
O utilizador não terá de fazer a manutenção das peças. Contacte o seu
distribuidor caso necessite de peças de substituição.
Em conformidade com as normas nacionais e internacionais de segurança
de vôo ao utilizar o dispositivo durante uma viagem de avião.
3.
Normas gerais
Consulte a Garantia de serviço e qualidade Velleman® na parte final deste
manual do utilizador.
Familiarize-se com o funcionamento do aparelho antes de o utilizar.
Por razões de segurança, estão proibidas quaisquer modificações do aparelho
desde que não autorizadas. Os danos provocados por modificações não
autorizadas, não estão cobertos pela garantia.
Utilize o aparelho apenas para as aplicações descritas neste manual. Uma
utilização incorrecta anula a garantia completamente.
Danos causados pelo não cumprimento das normas de segurança referidas
neste manual anulam a garantia e o seu distribuidor não será responsável por
qualquer danos ou outros problemas daí resultantes.
Guarde este manual para que o possa consultar sempre que necessário.
4.
Características
evitar a perda: o alarme sonoro evita a perda do BLE iPhone®/iPad®
função FindMe: o iReminder e o BLE iPhone®/iPad® podem encontrar-se
automaticamente um ao outro
V. 01 – 02/09/2013
38
©Velleman nv
PAMSB10
notificação de entrada de chamadas no seu BLE iPhone
localizador de automóvel: encontre o seu carro num parque de estacionamento
aplicação HiProx Multi disponível gratuitamente em App StoreSM.
5.
Descrição
Ver as figuras da página 2 deste manual do utilizador.
1
2
3
6.
LED
botão EncontraMe
interruptor para ativar/desativar a
função EncontraMe
4
5
compartimento das pilhas
gancho do porta-chaves
Configuração
Observação: Todos os ecrãs de amostra e os procedimentos são para o iPhone.
Para o iPad, os ecrãs e os procedimentos são similares.
Para configurar o dispositivo e emparelhá-lo com o seu iPhone/iPad, proceda da
seguinte forma:
1. No seu iPhone/iPad, descarregue a aplicação HiProx Multi através da App
Store.
2. No seu iPhone/iPad, ative o Bluetooth: vá a Definições > Geral > Ativar
Bluetooth.
3. No iReminder, abra a tampa da bateria [4] e insira uma nova bateria do tipo
CR2032 (incl.) com o sinal + inscrito na bateria virado para cima.
Advertência: Nunca perfure as pilhas nem jogá-las no fogo, pois elas
podem explodir. Descarte as baterias de acordo com as regulamentações
locais. Mantenha as pilhas fora do alcance das crianças.
4. Volte a colocar a tampa da bateria. A alimentação é ligada automaticamente e
o dispositivo entra no modo de emparelhamento. O LED verde pisca a cada
segundo para indicar que o dispositivo está pronto a ser emparelhado com o
seu iPhone/iPad.
5. No seu iPhone/iPad, abra a aplicação HiProx Multi e carregue no botão
no
canto superior direito para procurar dispositivos disponíveis fig. A). É aberto
um pedido de emparelhamento para a HiProx Multi (fig. B).
6. Prima "Pair" (Emparelhar) para sincronizar o dispositivo encontrado com o seu
iPhone/iPad. O LED verde do dispositivo pisca a cada 5 segundos quando
estiver conectado com o seu iPhone/iPad. Quando o processo de
emparelhamento está concluído, o dispositivo passa a fazer parte da lista de
dispositivos disponíveis no ecrã de Visualização Principal (fig. C).
Observação: Pode emparelhar até 4 dispositivos com o seu iPhone/iPad.
7.
Testar o Sistema
Para testar o sistema proceda da seguinte forma:
1. No seu iPhone/iPad, na lista de Visualização Principal dos dispositivos
disponíveis, clique no dispositivo que pretende testar. O botão Localizar
aparece junto ao dispositivo (fig. D).
2. Carregue no botão Localizar
. Os toques do iReminder.
3. No iReminder, active a função EncontraMe colocando o interruptor [3] na
posição da esquerda (afastado do gancho do porta-chaves).
V. 01 – 02/09/2013
39
©Velleman nv
PAMSB10
4. Pressione o botão EncontraMe [2]. Os toque do seu iPhone/iPad.
5. Pressione o botão EncontraMe[2] novamente para desativar a função
EncontraMe.
8.
Ajustar o alcance da busca
1. Faça um teste ao alcance da busca da seguinte forma: coloque o seu
iPhone/iPad num local fixo. Pegue no iReminder e afaste-se do iPhone/iPad
(fig. G). Quando sai fora da área de alcance de busca, o dispositivo começa a
apitar. Regresse para dentro da área de alcance, e o alarme desliga.
2. No iPhone/iPad, ajuste a área de alcance da busca da seguinte forma: ao
visualizar a lista dos dispositivos disponíveis, carregue no botão
para entrar
nas definições para selecionar o dispositivo. Mova o regulador da "Faixa de
Limite do Alarme" para ajustar a área de alcance (fig. E).
Observação: Veja a Especificações Técnicas para saber qual o alcance máximo
de busca. A área efectiva de alcance da busca depende dos obstáculos (tais como
paredes ou outras fontes de interferência) entre o dispositivo e o iPhone/iPad.
9.
Função EncontraMe
A função FindMe permite-lhe encontrar o seu iPhone/iPad utilizando o iReminder,
ou vice-versa.
Atenção: Certifique-se que a função EncontraMe está ativa colocando o
interruptor [3] na posição da esquerda (afastado do gancho do porta-chaves).
Para encontrar o seu iPhone/iPad usando o iReminder:
1. Pressione o botão EncontraMe [2]. Se o seu iPhone/iPad estiver dentro da área
de alcance de busca (ver Ajustar a Área de Alcance da Busca), este toca de
forma contínua.
2. No seu iPhone/iPad, carregue no botão EncontraMe
.
3. Pressione o botão FindMe [2] novamente para desativar a função EncontraMe.
Encontrar o iReminder usando o iPhone/iPad.
4. No seu iPhone/iPad, carregue no botão Encontrar
para localizar o
iReminder. Se o iReminder estiver na área de alcance da busca (ver Ajustar a
Área de Alcance da Busca), este apita durante 5 segundos.
5. Se necessário, carregue no botão Encontrar
para continuar a busca.
Observação: Caso não pretenda utilizar a função EncontraMe, desative a função
colocando o interruptor [3] na posição da direita (na direcção do gancho do portachaves). Isto evita que, acidentalmente, coloque o dispositivo no modo de
descanso. No modo de descanso, o alarme não funciona.
10. Marca de localização no mapa
Observação: Esta função utiliza o GPS do iPhone/iPad sempre que estiver no
exterior. Em espaços interiores, ative o Wi-Fi para conseguir uma localização
precisa.
Pode colocar manualmente uma marca no mapa a indicar a sua posição atual, ou
pode deixar que a aplicação faça isso automaticamente sempre que ocorrer uma
alarme de falta de alcance.
Para colocar uma marca manualmente, aceda à lista de dispositivos disponíveis
e carregue no botão
para entrar no ecrã de Definições de Visualização.
V. 01 – 02/09/2013
40
©Velleman nv
PAMSB10
Carregue no botão Visualizar (fig. H) para visualizar o mapa e depois carregue
no botão Marcar e escolha SIM (fig. I). A aplicação coloca um pino vermelho na
marca azul correspondente à localização atual (fig. J).
Para colocar a marca de localização automaticamente, aceda à lista de
dispositivos disponíveis e carregue no botão
para entrar no ecrã de
Definições de Visualização. Carregue no botão Visualizar (fig. H.) para visualizar
o Mapa e depois carregue no botão Marca. Remova a marca atual (se existir), e
depois ative a função Localização no Mapa. Quando dispara o alarme de falta de
alcance de busca, o iPhone/iPad coloca automaticamente um pino vermelho na
marca azul correspondente à localização atual.
11. Notificação de entrada de chamadas
Pode permitir que o dispositivo lhe envie uma notificação sempre que houver
entrada de chamadas no seu iPhone. O dispositivo apita e pisca para alertar para a
entrada de uma chamada.
1. Na lista de dispositivos disponíveis, carregue no botão
para entrar no ecrã
de Definições de Visualização.
2. Coloque "Alerta de Chamada" na posição ON (LIGADO).
12. Modo de Vôo
Existem duas formas de colocar o dispositivo no Modo de Vôo:
Primeiro, ativa a opção Modo de Vôo do seu iPhone/iPad, em seguida desliga o
iReminder.
Primeiro, coloca o iReminder no modo de descanso, em seguida ativa a opção
Modo de Vôo do seu iPhone/iPad.
12.1 Após ter ativado Modo de Vôo
Sempre que ativa o Modo de Vôo do seu iPhone/iPad, a ligação Bluetooth é
desativada. Consequentemente, o iReminder apita porque perdeu a comunicação
com o iPhone/iPad. Proceda da seguinte forma:
1. No iReminder, pressione o botão EncontraMe [2] para desligar o alarme.
2. No iPhone/iPad, aceda à aplicação HiProx Multi e carregue em Ajuda >
MododeVôo > SIM para desligar todos os dispositivo do iReminder
emparelhados e sair da aplicação.
3. Para sair do modo de vôo e voltar ao modo de funcionamento normal: primeiro
desligue a opção Modo de Vôo nas Definições Gerais do seu iPhone/iPad. Isto
ativará a ligação Bluetooth (caso contrário, restabeleça a ligação
manualmente).
4. Em seguida, aceda à aplicação HiProx Multi e carregue em Ajuda > MododoVôo
> RELIGAÇÃO para voltar a ligar todos os dispositivos do iReminder
emparelhados e sair da aplicação.
12.2 Antes de o Modo de Vôo estar activo
1. No iReminder, mantenha o botão EncontraMe pressionado [2] durante
± 3 segundos. O dispositivo apita uma vez e o LED de estado pisca uma vez
(vermelho), indicando que o dispositivo se encontra agora no modo de
descanso.
V. 01 – 02/09/2013
41
©Velleman nv
PAMSB10
2. No iPhone/iPad, aceda à aplicação HiProx Multi e carregue em Ajuda >
MododoVôo > SIM para desligar todos os dispositivos iReminder emparelhados
e sair da aplicação.
3. Aceda ao ecrã das Definições Gerais no seu iPhone/iPad e active o Modo de
Vôo.
4. Para sair do modo de vôo e voltar ao modo de funcionamento normal: primeiro
desligue o MododeVôo no ecrã de Definições Gerais do seu iPhone/iPad. Isto
ligará o Bluetooth (caso contrário, ligue-o manualmente).
5. No iReminder, pressione o botão EncontraMe [2] uma vez para sair do modo
de descanso.
6. Em seguida, aceda à aplicação HiProx Multi e carregue em Ajuda > MododeVôo
> RELIGAR para restabelecer a ligação a todos os dispositivos iReminder
emparelhados e saia da aplicação.
Observação: Restabelecer a ligação com dispositivos no modo de descanso
pode demorar mais de 20 segundos. Se a religação falhar, repita os passos
para ligar/religar o MododeVôo.
13. Desligar o dispositivo
13.1 Modo de espera
Para desligar e entrar no modo de espera, proceda da seguinte forma.
1. No iPhone/iPad, aceda à aplicação HiProx Multi app e carregue em Ajuda >
MododeVôo > SIM para desligar todos os dispositivos iReminder emparelhados
e saia da aplicação.
O iReminder entra no modo stand-by após cerca de 30 segundos. O LED verde
pisca a cada 10 segundos para indicar que está no modo de espera.
2. Para sair do modo de espera, aceda à aplicação HiProx Multi e carregue em
Ajuda > ModoAvião > RELIGAR para restabelecer a ligação a todos os
dispositivos iReminder emparelhados e saia da aplicação.
13.2 Modo de repouso
Para entrar o modo de repouso, proceda da seguinte forma:
1. No iReminder, mantenha o botão EncontraMe pressionado [2] durante
± 3 segundos. O dispositivo toca uma vez e o LED de estado pisca também
uma vez (vermelho) e depois desliga, indicando que o dispositivo está agora
no modo repouso.
Se o dispositivo continuar conectado ao iPhone/iPad, este exibe uma
mensagem de alerta e emite um sinal sonoro.
2. Caso seja necessário, interrompa o som do alarme no iPhone/iPad carregando
na mensagem de alerta.
3. Para sair do modo de repouso, pressione o botão EncontraMe [2] uma vez. A
comunicação com o iPhone/iPad é restaurada automaticamente.
Observação: Se a comunicação não for restaurada automaticamente, siga os
passos para desligar/religar do ModoAvião.
13.3 Remover permanentemente um dispositivo emparelhado
Para deixar de utilizar permanentemente um dispositivo com o seu iPhone/iPad,
proceda da seguinte forma:
1. Na lista de VisualizaçãoPrincipal dos dispositivos disponíveis, selecione o
dispositivo e carregue no botão
para entrar no ecrã de DefinirVisualização.
V. 01 – 02/09/2013
42
©Velleman nv
PAMSB10
Carregue no botão remover e em SIM para confirmar (fig. K). Carregue em OK
para confirmar (fig. L).
2. Aceda ao menu de Definições Gerais do seu iPhone/iPad e selecione Bluetooth.
Aparece a lista de dispositivos Bluetooth emparelhados. Escolha o dispositivo
que pretende remover e escolha "Esquecer este Dispositivo" (fig. M).
Observação: Poderá ter de desligar e voltar a ligar o seu iPhone/iPad para
remover a informação de emparelhamento totalmente.
13.4 Modos de funcionamento
A tabela abaixo dá uma amostra dos vários modos de funcionamento.
Modo
Modo
emparelhamento
Modo ligado
Modo repouso
Modo espera
LED verde
pisca a cada
segundo
pisca a cada
5 segundos
ausente
Descrição
O dispositivo pode ser emparelhado com um
iPhone/iPad.
O dispositivo está activo. O alarme tocará se o
iPhone/iPad emparelhado estiver fora de rede.
O dispositivo não está activo Nenhum alarme
tocará.
pisca a cada O dispositivo está desligado do iPhone/iPad.
10 segundos Nenhum alarme tocará.
14. Resolução de problemas
Está a tentar ligar-se a um dispositivo emparelhado mas não consegue
encontrá-lo.
Causa: a informação de emparelhamento existente está corrompida.
Solução: remova a informação de emparelhamento existente no seu iPhone/iPad e
faça de novo o emparelhamento do dispositivo.
1. Na aplicação HiProx Multi, desligue o dispositivo: carregue em Ajuda >
MododeVôo > SIM.
2. Na lista de VisualizaçãoPrincipal dos dispositivos disponíveis, selecione o
dispositivo e carregue no botão
para entrar no ecrã de DefinirVisualização.
Carregue no botão remover e em SIM para confirmar (fig. K). Carregue em OK
para confirmar (fig. L).
3. Aceda ao menu de Definições Gerais do seu iPhone/iPad e selecione Bluetooth.
Aparece a lista de dispositivos Bluetooth emparelhados. Escolha o dispositivo
que pretende remover e escolha "Esquecer este Dispositivo" (fig. M).
Observação: Poderá ter de desligar e voltar a ligar o seu iPhone/iPad para
remover a informação de emparelhamento totalmente.
4. Retire a bateria do iReminder e volte a colocá-la iniciando novamente o
processo de emparelhamento. Consulte Configuração para mais informação.
Recebe alarmes de falta de rede falsos
Causa possível: bateria fraca. Solução: substituir a bateria.
Causa possível: interferência de objetos metálicos ou sinais de alta voltagem
usados por dispositivos de banda 2.4 GHz (tais como redes Wi-Fi ou
microondas).
Causa possível: interferência do corpo humano. Solução: quando transportar o
seu iPhone/iPad e o iReminder, leve-os todos do mesmo lado do seu corpo.
V. 01 – 02/09/2013
43
©Velleman nv
PAMSB10
O alarme sonoro torna-se fraco
Causa: bateria fraca Solução: substituir a bateria.
15. Especificações
padrão de comunicação
amplitude de frequência
área de alcance de busca
alcance do alarme de
alerta
tipo de bateria
duração da bateria
peso
dimensões
temperatura de
funcionamento
humidade
compatibilidade
Bluetooth® 4.0 Low Energy Wireless Technology
(tecnologia sem fios de baixa energia) (BLE)
2.4 GHz - 2.4835 GHz
20 m (65 ft) (a distância pode variar em função do tipo
de terreno e de outros factores)
± 2-9 m (± 7-30 ft), regulável
1 x CR2032 (incl.)
3 - 6 meses
9.5 g
61.5 x 36 x 11.6 mm (2.42 x 1.42 x 0.46")
de 5 °C a 40 °C
20 % - 80 %
iPhone® 4S, iPhone® 5S, iPad® 3, iPad® 4,
iPad® mini. iOS 6 ou superior.
Utilize este aparelho apenas com acessórios originais. A Velleman NV não
será responsável por quaisquer danos ou lesões causados pelo uso
(indevido) do aparelho. Para mais informação sobre este produto e para
aceder à versão mais recente deste manual do utilizador, visite a nossa
página www.velleman.eu. Podem alterar-se as especificações e o
conteúdo deste manual sem aviso prévio.
© DIREITOS DE AUTOR – A Velleman NV detém os direitos de autor deste
manual do utilizador. Todos os direitos mundiais reservados. É estritamente
proibido reproduzir, traduzir, copiar, editar e gravar este manual do utilizador ou
partes deste sem prévia autorização escrita por parte da detentora dos direitos.
INSTRUKCJA OBSŁUGI
1.
Wstęp
Przeznaczona dla mieszkańców Unii Europejskiej.
Ważne informacje dotyczące środowiska.
Ten symbol umieszczony na urządzeniu bądź opakowaniu wskazuje, że
wyrzucenie produktu może być szkodliwe dla środowiska. Nie wyrzucaj
urządzenia lub baterii do zbiorczego śmietnika, tylko do specjalnie
przeznaczonych do tego pojemników na urządzenia elektroniczne lub
skontaktuj się z firmą zajmującą się recyklingiem. Urządzenie możesz
oddać dystrybutorowi lub firmie zajmującej się recyklingiem. Postępuj
zgodnie z zasadami bezpieczeństwa dotyczącymi środowiska.
V. 01 – 02/09/2013
44
©Velleman nv
PAMSB10
Jeśli masz wątpliwości skontaktuj się z firmą zajmującą się utylizacją
odpadów.
Dziękujemy za wybór produktu firmy Velleman! Prosimy o dokładne zapoznanie się
z instrukcją obsługi przed użyciem. Jeśli urządzenie zostało uszkodzone podczas
transportu, prosimy o nie korzystanie z niego i skontaktowanie się ze sprzedawcą.
2.
Instrukcje bezpieczeństwa
Chronić urządzenie przed dziećmi i nieupoważnionymi użytkownikami.
Wyłącznie do użytku wewnątrz pomieszczeń. Chronić urządzenie
przed deszczem, wilgocią, rozpryskami i ściekającymi cieczami. Nigdy nie
stawiać przedmiotów wypełnionych cieczą na urządzeniu.
W urządzeniu nie występują części, które mogą być serwisowane przez
użytkownika. W celu uzyskania części serwisowych lub zamiennych należy
skontaktować się z autoryzowanym sprzedawcą.
Podczas użytkowania urządzenia w samolocie należy postępować zgodnie z
krajowymi i międzynarodowymi przepisami bezpieczeństwa lotniczego.
3.
Informacje ogólne
Proszę zapoznać się z informacjami w części Velleman® usługi i gwarancja
jakości na końcu niniejszej instrukcji.
Przed rozpoczęciem pracy z urządzeniem należy zapoznać się z jego funkcjami.
Wprowadzanie zmian w urządzeniu jest zabronione ze względów
bezpieczeństwa. Należy pamiętać, że uszkodzenia spowodowane przez zmiany
wprowadzone przez użytkownika nie są objęte gwarancją.
Urządzenie należy używać jedynie zgodnie z przeznaczeniem. Używanie
urządzenia niezgodnie z przeznaczeniem spowoduje unieważnienie gwarancji.
Gwarancja nie obejmuje uszkodzeń spowodowanych w wyniku
nieprzestrzegania niniejszej instrukcji, a sprzedawca nie ponosi
odpowiedzialności za wynikłe uszkodzenia lub problemy.
Zachowaj daną instrukcję na przyszłość.
4.
Cechy
zabezpieczenie przed utratą: alarm ostrzegawczy zapobiega utracie urządzenia
iPhone®/iPad® BLE
dwustronna technologia FindMe: Urządzenie iReminder oraz iPhone/iPad BLE są
w stanie natychmiastowo odnajdywać się nawzajem
powiadamianie o połączeniach przychodzących na iPhone BLE
lokalizator samochodu: możliwość odnalezienia samochodu na parkingu
aplikacja HiProx Multi dostępna za darmo w App StoreSM.
5.
Opis produktu
Patrz rysunki na stronie 2 niniejszej instrukcji.
1
2
3
LED
przycisk FindMe
Włącznik/wyłącznik funkcji FindMe
V. 01 – 02/09/2013
45
4
5
pokrywa baterii
zaczep na breloczek
©Velleman nv
PAMSB10
6.
Setup
Uwaga: Wszystkie przykładowe ekrany i procedury podane zostały dla iPhone’a.
W przypadku iPada są one podobne.
Aby zmienić ustawienia urządzenia i połączyć je z iPhone’em/iPadem, należy
postępować według poniższych instrukcji:
1. Pobrać aplikację HiProx Multi z App Store na iPhona/iPada.
2. Włączyć Bluetooth na iPhonie/iPadzie: przejść do Ustawienia > Ogólne > Włącz
Bluetooth.
3. Otworzyć pokrywę baterii [4] urządzenia iReminder i włożyć nową baterię
CR2032 (w zestawie), znakiem + do góry.
Uwaga: Nie przebijać i nie wrzucać baterii do ognia ponieważ mogą one
eksplodować. Nie ładować baterii, które nie są akumulatorkami (alkaliczne).
Trzymać baterie z dala od dzieci.
4. Z powrotem zamontować pokrywę baterii. Zasilanie włączy się automatycznie i
urządzenie przejdzie w tryb parowania. Zielona dioda zacznie migać co
sekunda, co oznacza, że urządzenie jest gotowe do sparowania z
iPhone’em/iPadem.
5. Otworzyć aplikację HiProx Multi na iPhonie/iPadzie, dotknąć
przycisku w
prawym górnym rogu, aby rozpocząć wyszukiwanie dostępnych urządzeń
(rys. A). Pojawi się żądanie parowania dla HiProx Multi (rys. B).
6. Dotknąć „Pair”, aby sparować odnalezione urządzenie z iPhone’em/iPadem.
Jeżeli urządzenie jest podłączone do iPhone’a/iPada, zielona dioda będzie
migać co 5 sekund. Po zakończeniu procesu parowania urządzenie pojawi się
na liście dostępnych urządzeń na ekranie głównym (MainView, rys. C).
Uwaga: Z iPhone’em/iPadem można sparować do 4 urządzeń.
7.
Testowanie systemu
Aby przetestować system, należy postępować według poniższych instrukcji:
1. Dotknąć urządzenia, które ma być przetestowane, na liście na ekranie
MainView w iPhonie/iPadzie. Obok urządzenia pojawi się przycisk Find
(rys. D).
2. Dotknąć przycisku Find
. Urządzenie iReminder wyemituje sygnał
dźwiękowy.
3. Uaktywnić funkcję FindMe na urządzeniu iReminder. przestawiając przełącznik
[3] w położenie po lewej stronie (w stronę przeciwną niż zaczep na breloczek).
4. Nacisnąć przycisk FindMe [2]. iPhone/iPad wyemituje sygnał dźwiękowy.
5. Aby wyłączyć funkcję FindMe, nacisnąć przycisk FindMe [2] ponownie.
8.
Regulacja zasięgu wyszukiwania
1. Zasięg wyszukiwania należy sprawdzać następująco: umieścić iPhone/iPad w
wybranej, nieruchomej lokalizacji. Wziąć urządzenie iReminder i rozpocząć
oddalanie od iPhone’a/iPada (rys. G). Po wyjściu poza zasięg wyszukiwania
urządzenie zacznie emitować sygnały dźwiękowe. Wrócić z powrotem w zasięg.
Alarm wyłączy się.
2. Zasięg wyszukiwania można wyregulować w iPhonie/iPadzie w następujący
sposób: na liście dostępnych urządzeń na ekranie głównym dotknąć przycisku
, aby przejść do ustawień (SetView) dla wybranego urządzenia. Aby
V. 01 – 02/09/2013
46
©Velleman nv
PAMSB10
dostosować zasięg wyszukiwania, przesunąć suwak „Range Alarm Threshold”
(rys. E).
Uwaga: Maksymalny zasięg wyszukiwania można sprawdzić w Specyfikacjach
technicznych. Efektywny zasięg wyszukiwania zależy od przeszkód (jak ściany i
inne źródła zakłóceń) pomiędzy urządzeniem a iPhone’em/iPadem.
9.
Funkcja FindMe
Funkcja FindMe pozwala na odszukanie iPhone’a/iPada za pomocą urządzenia
iReminder lub odwrotnie.
Uwaga: Upewnić się, że funkcja FindMe jest aktywna - przełącznik [3] jest
przesunięty w położenie z lewej strony (w stronę przeciwną niż zaczep na
breloczek).
Aby odnaleźć iPhone’a/iPada za pomocą urządzenia iReminder:
1. Nacisnąć przycisk FindMe [2]. Jeżeli iPhone/iPad jest w zasięgu wyszukiwania
(patrz Regulacja zasięgu wyszukiwania), będzie emitował ciągły sygnał
dźwiękowy.
2. Dotknąć przycisku Find
na iPhonie/iPadzie, aby wyłączyć sygnał.
3. Aby wyłączyć funkcję FindMe, ponownie nacisnąć przycisk FindMe [2].
Aby odnaleźć urządzenie iReminder za pomocą iPhone’a/iPada:
4. Dotknąć przycisku Find
na iPhonie/iPadzie, aby zlokalizować iReminder.
Jeżeli iReminder jest w zasięgu wyszukiwania (patrz Regulacja zasięgu
wyszukiwania), wyemituje 5-sekundowy sygnał dźwiękowy.
5. Jeżeli to konieczne, nacisnąć przycisk Find
ponownie w celu kontynuacji
wyszukiwania.
Uwaga: Jeżeli funkcja FindMe nie będzie używana, wyłączyć ją, przestawiając
przełącznik [3] w położenie z prawej strony (w kierunku zaczepu na breloczek).
Zapobiegnie to przypadkowemu wprowadzeniu urządzenia w tryb uśpienia. W
trybie uśpienia alarm nie działa.
10. Oznaczanie lokalizacji na mapie
Uwaga: Na zewnątrz budynków funkcja ta wykorzystuje funkcję GPS
iPhone’a/iPada. Aby uzyskać dokładną lokalizację wewnątrz budynków, należy
włączyć Wi-Fi.
Aktualną pozycję na mapie można oznaczyć ręcznie lub aplikacja może ją oznaczyć
automatycznie po uruchomieniu alarmu wyjścia poza zasięg.
Aby ręcznie oznaczyć lokalizację, należy przejść do listy dostępnych urządzeń
na ekranie głównym i dotknąć przycisku
w celu przejścia do ekranu ustawień
(SetView). Dotknąć przycisku View (rys. H) aby przejść do ekranu mapy
(MapView), następnie dotknąć przycisku Mark i wybrać YES (rys. I). Aplikacja
umieści czerwony znacznik na niebieskim oznakowaniu bieżącej lokalizacji.
Aby automatycznie oznaczyć lokalizację, należy przejść do listy dostępnych
urządzeń na ekranie głównym i dotknąć przycisku
w celu przejścia do
ekranu ustawień. Dotknąć przycisku View (rys. H), aby przejść do ekranu mapy
(MapView), następnie dotknąć przycisku Mark. Usunąć bieżące oznakowanie
(jeżeli jest), a następnie uruchomić funkcję Map Location (lokalizacja na
mapie). Po wystąpieniu alarmu wyjścia poza zasięg, iPhone/iPad automatycznie
umieści czerwony znacznik na niebieskim oznakowaniu lokalizacji.
V. 01 – 02/09/2013
47
©Velleman nv
PAMSB10
11. Powiadamianie o połączeniach przychodzących
Urządzenie może powiadamiać o połączeniach przychodzących na iPhonie.
Urządzenie ostrzega o przychodzącym połączeniu migając i emitując sygnały
dźwiękowe.
1. Na liście dostępnych urządzeń na ekranie głównym dotknąć przycisk
, aby
przejść do ustawień.
2. Ustawić „Call Alert” na ON (Wł).
12. Tryb samolotowy
Istnieją dwa sposoby na przełączenie urządzenia w tryb samolotowy:
Najpierw włączyć ogólny tryb samolotowy na iPhonie/iPadzie, a następnie
odłączyć iReminder.
Najpierw przełączyć iReminder w tryb uśpienia, a następnie włączyć ogólny tryb
samolotowy na iPhonie/iPadzie.
12.1 Po włączeniu trybu samolotowego
Po włączeniu trybu samolotowego w iPhonie/iPadzie połączenie przed Bluetooth
jest dezaktywowane. W związku z tym iReminder wyemituje sygnał dźwiękowy,
ponieważ utracił połączenie z iPhone’em/iPadem. Postępować według poniższych
instrukcji:
1. Nacisnąć przycisk FindMe [2] na urządzeniu iReminder, aby zatrzymać alarm.
2. Przejść do aplikacji HiProx Multi na iPhonie/iPadzie i dotknąć Help >
AirplaneMode> YES, aby odłączyć wszystkie sparowane urządzenia iReminder,
a następnie wyjść z aplikacji.
3. Aby wyjść z trybu samolotowego i przejść do normalnego trybu pracy:
najpierw wyłączyć tryb samolotowy w ustawieniach ogólnych na
iPhonie/iPadzie. Uaktywnia to połączenie Bluetooth (jeżeli połączenie nie
zostanie nawiązane, należy je uruchomić ręcznie).
4. Przejść do aplikacji HiProx Multi na iPhonie/iPadzie i dotknąć Help >
AirplaneMode > RECONNECT, aby z powrotem połączyć się ze wszystkimi
sparowanymi urządzeniami iReminder, a następnie wyjść z aplikacji.
12.2 Przed włączeniem trybu samolotowego
1. Nacisnąć przycisk FindMe [2] na urządzeniu iReminder i przytrzymać przez
około 3 sekundy. Urządzenie wyemituje pojedynczy sygnał dźwiękowy, a dioda
statusu mignie raz (na czerwono), sygnalizując, że urządzenie przeszło w tryb
uśpienia.
2. Przejść do aplikacji HiProx Multi na iPhonie/iPadzie i dotknąć Help >
AirplaneMode > YES, aby odłączyć wszystkie sparowane urządzenia iReminder,
a następnie wyjść z aplikacji.
3. Przejść do ustawień ogólnych iPhone’a/iPada i włączyć tryb samolotowy.
4. Aby wyjść z trybu samolotowego i przejść do normalnego trybu pracy:
najpierw wyłączyć tryb samolotowy w ustawieniach ogólnych na
iPhonie/iPadzie. Uaktywnia to połączenie Bluetooth (jeżeli połączenie nie
zostanie nawiązane, należy to zrobić ręcznie).
5. Nacisnąć jednokrotnie przycisk FindMe [2] na urządzeniu iReminder, aby wyjść
z trybu uśpienia.
6. Przejść do aplikacji HiProx Multi na iPhonie/iPadzie i dotknąć Help >
AirplaneMode > RECONNECT, aby z powrotem połączyć się ze wszystkimi
V. 01 – 02/09/2013
48
©Velleman nv
PAMSB10
sparowanymi urządzeniami iReminder, a następnie wyjść z aplikacji.
Uwaga: Ponowne łączenie z urządzeniami w trybie uśpienia może trwać do
20 sekund. Jeżeli ponowne połączenie się nie powiedzie, powtórzyć krok
włączania/wyłączania trybu samolotowego.
13. Wyłączanie urządzenia.
13.1 Tryb gotowości
Aby odłączyć urządzenie i przejść w tryb gotowości, należy postępować według
poniższych instrukcji:
1. Przejść do aplikacji HiProx Multi na iPhonie/iPadzie i dotknąć Help >
AirplaneMode > YES, aby odłączyć wszystkie sparowane urządzenia iReminder,
a następnie wyjść z aplikacji.
iReminder przejdzie w tryb gotowości po około 30 sekundach. Tryb gotowości
sygnalizowany jest przez zieloną diodę migającą co 10 sekund.
2. Aby wyjść z trybu gotowości, przejść do aplikacji HiProx Multi na
iPhonie/iPadzie i dotknąć Help > AirplaneMode > RECONNECT, aby z powrotem
połączyć się ze wszystkimi sparowanymi urządzeniami iReminder, a następnie
wyjść z aplikacji.
13.2 Tryb uśpienia
Aby wejść w tryb uśpienia, należy postępować według poniższych instrukcji:
1. Nacisnąć przycisk FindMe [2] na urządzeniu iReminder i przytrzymać przez
około 3 sekundy. Urządzenie wyemituje pojedynczy sygnał dźwiękowy, a dioda
statusu mignie raz (na czerwono), sygnalizując, że urządzenie przeszło w tryb
uśpienia.
Jeżeli urządzenie jest cały czas podłączone do iPhone’a/iPada, wyświetli on
ostrzeżenie i wyemituje sygnał dźwiękowy.
2. W razie konieczności wyłączyć sygnał alarmowy na iPhonie/iPadzie, dotykając
komunikatu ostrzegawczego.
3. Aby wyjść z trybu uśpienia, nacisnąć jednokrotnie przycisk FindMe [2].
Połączenie z iPhone’em/iPadem jest przywracane automatycznie.
Uwaga: Jeżeli połączenie nie zostanie przywrócone automatycznie, ponownie
włączyć/wyłączyć tryb samolotowy.
13.3 Permanentne kasowanie parowania
Aby całkowicie usunąć parowanie urządzenia z iPhone’em/iPadem, należy
postępować według poniższych instrukcji:
1. Na liście dostępnych urządzeń na ekranie głównym dotknąć przycisk
, aby
przejść do ustawień. Dotknąć przycisku Remove, a następnie YES, aby
potwierdzić (rys. K). Nacisnąć OK, aby potwierdzić (rys. L).
2. Przejść do ustawień ogólnych iPhone’a/iPada i wybrać Bluetooth. Pojawi się
lista sparowanych urządzeń Bluetooth. Dotknąć urządzenia, które ma być
usunięte i wybrać „Zapomnij to urządzenie” (rys. M).
Uwaga: Aby informacje o parowaniu zostały usunięte całkowicie, konieczne
może być wyłączenie i ponowne uruchomienie iPhone’a/iPada.
V. 01 – 02/09/2013
49
©Velleman nv
PAMSB10
13.4 Tryby pracy
Poniższa tabela przedstawia przegląd różnych trybów pracy:
Tryb
Tryb
parowania
Tryb
podłączenia
Zielona
dioda LED
miga raz na
sekundę
miga co 5
sekund
Tryb uśpienia out
Tryb
gotowości
miga co 10
sekund
Opis
Urządzenie może zostać sparowane z
iPhone'em/iPadem.
Urządzenie jest aktywne. Jeżeli sparowany
iPhone/iPad znajdzie się poza zasięgiem,
uruchomiony zostanie alarm.
Urządzenie jest nieaktywne. Nie będą uruchamiać się
żadne alarmy.
Urządzenie jest odłączone od iPhone’a/iPada. Nie
będą uruchamiać się żadne alarmy.
14. Wykrywanie i usuwanie usterek
Podejmowana jest próba połączenia ze sparowanym urządzeniem, ale nie
może ono zostać wyszukane.
Przyczyna: informacje o parowaniu uległy uszkodzeniu.
Rozwiązanie: usunąć informacje o parowaniu z iPhone’a/iPada i sparować
urządzenia ponownie.
1. Odłączyć urządzenie w aplikacji HiProx Multi: dotknąć Help > AirplaneMode >
YES.
2. Na liście dostępnych urządzeń na ekranie głównym dotknąć przycisk
, aby
przejść do ustawień. Dotknąć przycisku Remove, a następnie YES, aby
potwierdzić (rys. K). Nacisnąć OK, aby potwierdzić (rys. L).
3. Przejść do ustawień ogólnych iPhone’a/iPada i wybrać Bluetooth. Pojawi się
lista sparowanych urządzeń Bluetooth. Dotknąć urządzenia, które ma być
usunięte i wybrać „Zapomnij to urządzenie” (rys. M).
Uwaga: Aby informacje o parowaniu zostały całkowicie usunięte, konieczne
może być wyłączenie i ponowne uruchomienie iPhone’a/iPada.
4. Wyjąć baterię z urządzenia iReminder, a następnie włożyć z powrotem i
rozpocząć proces parowania ponownie. Więcej informacji w rozdz. Setup.
Uruchamiają się fałszywe alarmy wyjścia poza zasięg
Możliwa przyczyna: bateria jest wyczerpana. Rozwiązanie: wymienić baterię.
Możliwa przyczyna: zakłócenia spowodowane przez metalowe przedmioty lub
sygnały o wysokiej mocy w paśmie 2,4 GHz (np. sieci Wi-Fi lub kuchenki
mikrofalowe).
Możliwa przyczyna: zakłócenia spowodowane przez ciało ludzkie. Rozwiązanie:
iPhone’a/iPada i urządzenie iReminder należy nosić po tej samej stronie ciała.
Alarm dźwiękowy jest słaby
Przyczyna: bateria jest wyczerpana. Rozwiązanie: wymienić baterię.
15. Specyfikacja techniczna
standard komunikacji
zakres częstotliwości
V. 01 – 02/09/2013
Bluetooth® 4.0, technologia bezprzewodowa niskiej
energii (BLE)
2,4 GHz – 2,4835 GHz
50
©Velleman nv
PAMSB10
zasięg wyszukiwania
odległość alarmowa
typ baterii
żywotność baterii
waga
wymiary
temperatura robocza
wilgotność
kompatybilność
20 m (65 ft) (odległość może się wahać w zależności od
ukształtowania terenu i innych czynników)
± 2-9 m (± 7-30 ft), regulowana
1 x CR2032 (w zestawie)
3-6 miesięcy
9,5 g
61,5 x 36 x 11,6 mm (2,42 x 1,42 x 0,46")
5 °C do 40 °C
20 % - 80 %
iPhone® 4S, iPhone® 5S, iPad® 3, iPad® 4,
iPad® mini. iOS 6 lub nowszy.
Używaj tylko oryginalnych akcesoriów. Velleman NV nie może być
pociągnięty do odpowiedzialności w przypadku uszkodzenia lub szkody
wynikały z (błędne) korzystanie z tego urządzenia.
Aby uzyskać więcej informacji dotyczących tego produktu i najnowsza
wersja tej instrukcji, odwiedź naszą stronę internetową
www.velleman.eu.
Informacje zawarte w niniejszej instrukcji obsługi mogą ulec zmianie bez
wcześniejszego powiadomienia.
© INFORMACJA O PRAWACH WŁASNOŚCI
Instrukcja ta jest własnością firmy Velleman NV i jest chroniona prawami
autorskimi. Wszystkie prawa są zastrzeżone na całym świecie. Żadna część
tej instrukcji nie może być kopiowana, przedrukowywana, tłumaczona lub
konwertowana na wszelkie nośniki elektronicznych lub w inny sposób, bez
uprzedniej pisemnej zgody właściciela praw autorskich.
V. 01 – 02/09/2013
51
©Velleman nv
Legen Heirweg, 33
9890 Gavere
België
Vince Van Balberghe – Quality Manager
Authorised signatory for the company:
Gavere, 16/08/2013
Place and date of issue:
Technical data are available and can be obtained from the address above.
EN 60590-1: 2006 + A11:2009 A1:2010 + A12:2011
EN 300 328 V1.7.1
LVD:
R&TTE:
Vince Van Balberghe – Quality Manager
Bevoegde ondertekenaar voor de firma:
Gavere, 16/08/2013
Plaats en datum van uitgifte:
Technische gegevens zijn beschikbaar en kunnen worden aangevrraagd via bovenstaand
adres.
EN 60590-1: 2006 + A11:2009 A1:2010 + A12:2011
EN 300 328 V1.7.1
EN 301 489-1 V1.9.2
EN 301 489-17 V2.2.1
EMC:
EN 301 489-1 V1.9.2
EN 301 489-17 V2.2.1
EMC:
LVD:
R&TTE:
Het product voldoet aan de volgende normen:
The product is in conformity with the following standards:
dat het voorwerp uitmaakt van deze verklaring, voldoet aan de esse
entiële vereisten en
andere relevante bepalingen van de R&TTE Richtlijn (1999/5/EC).
constituting the subject of this declaration, conforms with the essential requirements and
other relevant stipulations of the R&TTE Directive (1999/5/EC).
VELLEMAN
iREMINDER VOOR IPHONE® OF IPAD® - BL
LUETOOTH 4.0 BLE
PAMSB10
verklaren op eigen verantwoordelijkheid dat het afgewerkte productt:
Merk:
Handelsnaam:
Type of model:
VELLEMAN
IREMINDER FOR IPHONE® or IPAD® - BL
LUETOOTH 4.0 BLE
PAMSB10
declare on our own responsibility that the finished product:
Brand:
Trade name:
Type or model:
Adres:
Wij, Velleman NV
Legen Heirweg, 33
9890 Gavere
Belgium
We, Velleman NV
Address:
R&TTE Verklaring van overeenstemming
R&TTE Declaration of Conformity
Ort und Datum der Ausstellung:
Gavere, 16/08/2013
Bevollmächtigte Person:
Vince Van Balberghe – Quality Manager
Gavere, 16/08/2013
Signataire autorisé(e) de la société :
Vince Van Balberghe – Quality Manager
EN 60590-1: 2006 + A11:2009 A1:2010 + A12:2011
EN 300 328 V1.7.1
LVD:
R&TTE:
Place et date d’émission :
EN 301 489-1 V1.9.2
EN 301 489-17 V2.2.1
EMC:
Das Produkt entspricht den folgenden Normen:
auf das sich diese Erklärung bezieht, den grundlegenden Anforderu
ungen und anderen
relevanten Vereinbarungen der R&TTE-Richtlinie (1999/5/EC) entspricht.
Die technische Dokumentation zu den oben gennanten Produkten wird
w bei oben erwähnter
Adresse geführt.
EN 60590-1: 2006 + A11:2009 A1:2010 + A12:2011
EN 300 328 V1.7.1
LVD:
R&TTE:
Legen Heirweg, 33
9890 Gavere
Belgien
VELLEMAN
iREMINDER FÜR IPHONE® ODER IPAD® - BLUETOOTH 4.0 BLE
PAMSB10
Adresse:
Les données techniques sont disponibles et peuvent être obtenues
s à l'adresse ci-dessus.
EN 301 489-1 V1.9.2
EN 301 489-17 V2.2.1
EMC:
Le produit est conforme aux normes suivantes :
faisant l’objet de la présente déclaration, satisfait aux exigences essentielles et toute autre
stipulation pertinente de la directive R&TTE Directive (1999/5/EC).
Type ou modèle :
erklären voll verantwortlich dass nachfolgendes Produkt:
Marke:
Markenname:
Typ oder Modell:
VELLEMAN
iREMINDER POUR IPHONE® OU IPAD® - BLUETOOTH
4.0 BLE
PAMSB10
déclarons sous notre propre responsabilité que le produit fini :
Marque :
Denomination commerciale :
Wir, Velleman NV
Legen Heirweg, 33
9890 Gavere
Belgique
Nous, Velleman NV
Adresse :
R&TTE Konformitätserklärung
Déclaration de conformité R&TTE
VELLEMAN
iREMINDER PARA IPHONE® O IP
PAD® - BLUETOOTH
4.0 BLE
PAMSB10
EN 60590-1: 2006 + A11:2009 A1:2010 + A12:2011
EN 300 328 V1.7.1
LVD:
R&TTE:
Vince Van Balberghe – Quality Manager
Responsable de la empresa:
Gavere, 16/08/2013
Lugar y fecha de emisión:
Los datos técnicos están disponibles y pueden ser solicitados a la dirección
d
de arriba.
EN 301 489-1 V1.9.2
EN 301 489-17 V2.2.1
EMC:
Es conforme a las siguientes normas:
cumple los requisitos esenciales y las otras estipulaciones relevanttes de la Directiva
R&TTE (1999/5/EC).
Tipo o modelo:
Marca:
Denominación comercial:
declaramos bajo nuestra sola responsabilidad que el producto men
ncionado a
continuación:
Legen Heirweg, 33
9890 Gavere
Bélgica
VELLEMAN
IREMINDER PARA IPHONE® OU IPAD®
I
- BLUETOOTH
4.0 BLE
PAMSB10
EN 60590-1: 2006 + A11:2009 A1:2010 + A12:2011
EN 300 328 V1.7.1
LVD:
R&TTE:
Vince Van Balberghe – Quality Manager
Responsável da empresa:
Gavere, 16/08/2013
Local e data de emissão:
Os dados técnicos estão disponíveis e podem ser solicitados através do endereço acima.
EN 301 489-1 V1.9.2
EN 301 489-17 V2.2.1
EMC:
Este produto está conforme a normas a seguir indicadas:
cumpre com os requisitos essenciais e quaisquer outras disposiçõe
es relevantes as
Directiva R&TTE (1999/5/EC).
Tipo ou modelo:
Marca:
Designação comercial:
declaramos a nossa responsabilidade relativamente ao produto aba
aixo mencionado:
Endereço:
Nós, Velleman NV
Legen Heirweg, 33
9890 Gavere
Bélgica
Nosotros, Velleman NV
Dirección:
Declaração de conformidade R&TTE
Declaración de conformidad R&TTE
Adres:
VELLEMAN
iREMINDER DO IPHONE® LUB IPAD® - BLUETOOTH
B
4.0 BLE
PAMSB10
Legen Heirweg, 33
9890 Gavere
Belgia
EN 60590-1: 2006 + A11:2009 A1:2010 + A12:2011
EN 300 328 V1.7.1
LVD:
R&TTE:
Vince Van Balberghe – Quality Manager
Osoba upowaĪniona do podpisu w imieniu firmy:
Gavere, 16/08/2013
Miejsce i data sporządzenia:
Dane techniczne są dostĊpne na Īyczenie pod adresem wymienion
nym powyĪej.
EN 301 489-1 V1.9.2
EN 301 489-17 V2.2.1
EMC:
Produkt jest zgodny z nastĊpującymi standardami:
stanowiącym przedmiot niniejszej deklaracji jest zgodny z zasadnic
czymi wymaganiami
oraz pozostaáymi stosownymi postanowieniami R&TTE (1999/5/EC
C).
Marka:
Nazwa produktu:
Typu lub modelu:
deklarujemy z peáną odpowiedzialnoĞcią, iĪ nastĊpujące produkty:
My, Velleman NV
R&TTE Deklaracja zgodnoĞci
Velleman® Service and Quality Warranty
Since its foundation in 1972, Velleman® acquired extensive
experience in the electronics world and currently distributes its
products in over 85 countries.
All our products fulfil strict quality requirements and legal
stipulations in the EU. In order to ensure the quality, our
products regularly go through an extra quality check, both by an
internal quality department and by specialized external
organisations. If, all precautionary measures notwithstanding,
problems should occur, please make appeal to our warranty
(see guarantee conditions).
General Warranty Conditions Concerning Consumer
Products (for EU):
• All consumer products are subject to a 24-month warranty on
production flaws and defective material as from the original
date of purchase.
• Velleman® can decide to replace an article with an equivalent
article, or to refund the retail value totally or partially when the
complaint is valid and a free repair or replacement of the article
is impossible, or if the expenses are out of proportion.
You will be delivered a replacing article or a refund at the value
of 100% of the purchase price in case of a flaw occurred in the
first year after the date of purchase and delivery, or a replacing
article at 50% of the purchase price or a refund at the value of
50% of the retail value in case of a flaw occurred in the second
year after the date of purchase and delivery.
• Not covered by warranty:
- all direct or indirect damage caused after delivery to the article
(e.g. by oxidation, shocks, falls, dust, dirt, humidity...), and by
the article, as well as its contents (e.g. data loss),
compensation for loss of profits;
- consumable goods, parts or accessories that are subject to an
aging process during normal use, such as batteries
(rechargeable, non-rechargeable, built-in or replaceable),
lamps, rubber parts, drive belts... (unlimited list);
- flaws resulting from fire, water damage, lightning, accident,
natural disaster, etc.…;
- flaws caused deliberately, negligently or resulting from
improper handling, negligent maintenance, abusive use or use
contrary to the manufacturer’s instructions;
- damage caused by a commercial, professional or collective
use of the article (the warranty validity will be reduced to six (6)
months when the article is used professionally);
- damage resulting from an inappropriate packing and shipping
of the article;
- all damage caused by modification, repair or alteration
performed by a third party without written permission by
Velleman®.
• Articles to be repaired must be delivered to your Velleman®
dealer, solidly packed (preferably in the original packaging),
and be completed with the original receipt of purchase and a
clear flaw description.
• Hint: In order to save on cost and time, please reread the
manual and check if the flaw is caused by obvious causes prior
to presenting the article for repair. Note that returning a nondefective article can also involve handling costs.
• Repairs occurring after warranty expiration are subject to
shipping costs.
• The above conditions are without prejudice to all commercial
warranties.
The above enumeration is subject to modification
according to the article (see article’s manual).
Velleman® service- en kwaliteitsgarantie
Velleman® heeft sinds zijn oprichting in 1972 een ruime
ervaring opgebouwd in de elektronicawereld en verdeelt op dit
moment producten in meer dan 85 landen. Al onze producten
beantwoorden aan strikte kwaliteitseisen en aan de wettelijke
bepalingen geldig in de EU. Om de kwaliteit te waarborgen,
ondergaan onze producten op regelmatige tijdstippen een extra
kwaliteitscontrole, zowel door onze eigen kwaliteitsafdeling als
door externe gespecialiseerde organisaties. Mocht er ondanks
deze voorzorgen toch een probleem optreden, dan kunt u
steeds een beroep doen op onze waarborg (zie
waarborgvoorwaarden).
Algemene waarborgvoorwaarden
consumentengoederen (voor Europese Unie):
• Op alle consumentengoederen geldt een garantieperiode van
24 maanden op productie- en materiaalfouten en dit vanaf de
oorspronkelijke aankoopdatum.
• Indien de klacht gegrond is en een gratis reparatie of
vervanging van een artikel onmogelijk is of indien de kosten
hiervoor buiten verhouding zijn, kan Velleman® beslissen het
desbetreffende artikel te vervangen door een gelijkwaardig
artikel of de aankoopsom van het artikel gedeeltelijk of volledig
terug te betalen. In dat geval krijgt u een vervangend product of
terugbetaling ter waarde van 100% van de aankoopsom bij
ontdekking van een gebrek tot één jaar na aankoop en levering,
of een vervangend product tegen 50% van de kostprijs of
terugbetaling van 50 % bij ontdekking na één jaar tot 2 jaar.
• Valt niet onder waarborg:
- alle rechtstreekse of onrechtstreekse schade na de levering
veroorzaakt aan het toestel (bv. door oxidatie, schokken, val,
stof, vuil, vocht...), en door het toestel, alsook zijn inhoud (bv.
verlies van data), vergoeding voor eventuele winstderving.
- verbruiksgoederen, onderdelen of hulpstukken die onderhevig
zijn aan veroudering door normaal gebruik zoals bv. batterijen
(zowel oplaadbare als niet-oplaadbare, ingebouwd of
vervangbaar), lampen, rubberen onderdelen, aandrijfriemen...
(onbeperkte lijst).
- defecten ten gevolge van brand, waterschade, bliksem,
ongevallen, natuurrampen, enz.
- defecten veroorzaakt door opzet, nalatigheid of door een
onoordeelkundige behandeling, slecht onderhoud of abnormaal
gebruik of gebruik van het toestel strijdig met de voorschriften
van de fabrikant.
- schade ten gevolge van een commercieel, professioneel of
collectief gebruik van het apparaat (bij professioneel gebruik
wordt de garantieperiode herleid tot 6 maand).
- schade veroorzaakt door onvoldoende bescherming bij
transport van het apparaat.
- alle schade door wijzigingen, reparaties of modificaties
uitgevoerd door derden zonder toestemming van Velleman®.
• Toestellen dienen ter reparatie aangeboden te worden bij uw
Velleman®-verdeler. Het toestel dient vergezeld te zijn van het
oorspronkelijke aankoopbewijs. Zorg voor een degelijke
verpakking (bij voorkeur de originele verpakking) en voeg een
duidelijke foutomschrijving bij.
• Tip: alvorens het toestel voor reparatie aan te bieden, kijk nog
eens na of er geen voor de hand liggende reden is waarom het
toestel niet naar behoren werkt (zie handleiding). Op deze wijze
kunt u kosten en tijd besparen. Denk eraan dat er ook voor nietdefecte toestellen een kost voor controle aangerekend kan
worden.
• Bij reparaties buiten de waarborgperiode zullen
transportkosten aangerekend worden.
• Elke commerciële garantie laat deze rechten onverminderd.
Bovenstaande opsomming kan eventueel aangepast
worden naargelang de aard van het product (zie
handleiding van het betreffende product).
Garantie de service et de qualité Velleman®
Depuis 1972, Velleman® a gagné une vaste expérience dans le
secteur de l’électronique et est actuellement distributeur dans
plus de 85 pays.
Tous nos produits répondent à des exigences de qualité
rigoureuses et à des dispositions légales en vigueur dans l’UE.
Afin de garantir la qualité, nous soumettons régulièrement nos
produits à des contrôles de qualité supplémentaires, tant par
notre propre service qualité que par un service qualité externe.
Dans le cas improbable d’un défaut malgré toutes les
précautions, il est possible d’invoquer notre garantie (voir les
conditions de garantie).
Conditions générales concernant la garantie sur les
produits grand public (pour l’UE) :
• tout produit grand public est garanti 24 mois contre tout vice
de production ou de matériaux à dater du jour d’acquisition
effective ;
• si la plainte est justifiée et que la réparation ou le
remplacement d’un article est jugé impossible, ou lorsque les
coûts s’avèrent disproportionnés, Velleman® s’autorise à
remplacer ledit article par un article équivalent ou à rembourser
la totalité ou une partie du prix d’achat. Le cas échéant, il vous
sera consenti un article de remplacement ou le remboursement
complet du prix d’achat lors d’un défaut dans un délai de 1 an
après l’achat et la livraison, ou un article de remplacement
moyennant 50% du prix d’achat ou le remboursement de 50%
du prix d’achat lors d’un défaut après 1 à 2 ans.
• sont par conséquent exclus :
- tout dommage direct ou indirect survenu à l’article après
livraison (p.ex. dommage lié à l’oxydation, choc, chute,
poussière, sable, impureté…) et provoqué par l’appareil, ainsi
que son contenu (p.ex. perte de données) et une indemnisation
éventuelle pour perte de revenus ;
- toute pièce ou accessoire nécessitant un remplacement causé
par un usage normal comme p.ex. piles (rechargeables comme
non rechargeables, intégrées ou remplaçables), ampoules,
pièces en caoutchouc, courroies… (liste illimitée) ;
- tout dommage qui résulte d’un incendie, de la foudre, d’un
accident, d’une catastrophe naturelle, etc. ;
- out dommage provoqué par une négligence, volontaire ou
non, une utilisation ou un entretien incorrect, ou une utilisation
de l’appareil contraire aux prescriptions du fabricant ;
- tout dommage à cause d’une utilisation commerciale,
professionnelle ou collective de l’appareil (la période de
garantie sera réduite à 6 mois lors d’une utilisation
professionnelle) ;
- tout dommage à l’appareil qui résulte d’une utilisation
incorrecte ou différente que celle pour laquelle il a été
initialement prévu comme décrit dans la notice ;
- tout dommage engendré par un retour de l’appareil emballé
dans un conditionnement non ou insuffisamment protégé.
- toute réparation ou modification effectuée par une tierce
personne sans l’autorisation explicite de SA Velleman® ; - frais
de transport de et vers Velleman® si l’appareil n’est plus
couvert sous la garantie.
• toute réparation sera fournie par l’endroit de l’achat. L’appareil
doit nécessairement être accompagné du bon d’achat d’origine
et être dûment conditionné (de préférence dans l’emballage
d’origine avec mention du défaut) ;
• tuyau : il est conseillé de consulter la notice et de contrôler
câbles, piles, etc. avant de retourner l’appareil. Un appareil
retourné jugé défectueux qui s’avère en bon état de marche
pourra faire l’objet d’une note de frais à charge du
consommateur ;
• une réparation effectuée en-dehors de la période de garantie
fera l’objet de frais de transport ;
• toute garantie commerciale ne porte pas atteinte aux
conditions susmentionnées.
La liste susmentionnée peut être sujette à une
complémentation selon le type de l’article et être
mentionnée dans la notice d’emploi.
Garantía de servicio y calidad Velleman®
Desde su fundación en 1972 Velleman® ha adquirido una
amplia experiencia como distribuidor en el sector de la
electrónica en más de 85 países. Todos nuestros productos
responden a normas de calidad rigurosas y disposiciones
legales vigentes en la UE. Para garantizar la calidad,
sometemos nuestros productos regularmente a controles de
calidad adicionales, tanto a través de nuestro propio servicio de
calidad como de un servicio de calidad externo. En el caso
improbable de que surgieran problemas a pesar de todas las
precauciones, es posible recurrir a nuestra garantía (véase las
condiciones de garantía).
Condiciones generales referentes a la garantía sobre
productos de venta al público (para la Unión
Europea):
• Todos los productos de venta al público tienen un perìodo de
garantía de 24 meses contra errores de producción o errores
en materiales desde la adquisición original;
• Si la queja está fundada y si la reparación o sustitución de un
artículo no es posible, o si los gastos son desproporcionados,
Velleman® autoriza reemplazar el artículo por un artículo
equivalente o reembolsar la totalidad o una parte del precio de
compra. En este caso, usted recibirá un artículo de recambio o
el reembolso completo del precio de compra si encuentra algún
fallo hasta un año después de la compra y entrega, o un
artículo de recambio al 50% del precio de compra o el
reembolso del 50% del precio de compra si encuentra un fallo
después de 1 año y hasta los 2 años después de la compra y
entrega.
Por consiguiente, están excluidos entre otras cosas:
- todos los daños causados directa o indirectamente al aparato
(p.ej. por oxidación, choques, caída,...) y a su contenido (p.ej.
pérdida de datos) después de la entrega y causados por el
aparato, y cualquier indemnización por posible pérdida de
ganancias;
- partes o accesorios, que estén expuestos al desgaste
causado por un uso normal, como por ejemplo baterías (tanto
recargables como no recargables, incorporadas o
reemplazables), bombillas, partes de goma, etc. (lista ilimitada);
- defectos causados por un incendio, daños causados por el
agua, rayos, accidentes, catástrofes naturales, etc.;
- defectos causados a conciencia, descuido o por malos tratos,
un mantenimiento inapropiado o un uso anormal del aparato
contrario a las instrucciones del fabricante;
- daños causados por un uso comercial, profesional o colectivo
del aparato (el período de garantía se reducirá a 6 meses con
uso profesional);
- daños causados por un uso incorrecto o un uso ajeno al que
está previsto el producto inicialmente como está descrito en el
manual del usuario;
- daños causados por una protección insuficiente al transportar
el aparato.
- daños causados por reparaciones o modificaciones
efectuadas por una tercera persona sin la autorización explícita
de Velleman®;
- se calcula gastos de transporte de y a Velleman® si el
aparato ya no está cubierto por la garantía.
• Cualquier artìculo que tenga que ser reparado tendrá que ser
devuelto a su distribuidor Velleman®. Devuelva el aparato con
la factura de compra original y transpórtelo en un embalaje
sólido (preferentemente el embalaje original). Incluya también
una buena descripción del fallo;
• Consejo: Lea el manual del usuario y controle los cables, las
pilas, etc. antes de devolver el aparato. Si no se encuentra un
defecto en el artículo los gastos podrían correr a cargo del
cliente;
• Los gastos de transporte correrán a carga del cliente para una
reparación efectuada fuera del período de garantía.
• Cualquier gesto comercial no disminuye estos derechos.
La lista previamente mencionada puede ser adaptada
según el tipo de artículo (véase el manual del usuario del
artículo en cuestión).
keinen auf de Hand liegenden Grund gibt, ehe Sie das Gerät
zur Reparatur zurückschicken. Stellt sich bei der Überprüfung
des Gerätes heraus, dass kein Geräteschaden vorliegt, könnte
dem Kunden eine Untersuchungspauschale berechnet.
• Für Reparaturen nach Ablauf der Garantiefrist werden
Transportkosten berechnet.
• Jede kommerzielle Garantie lässt diese Rechte unberührt.
Die oben stehende Aufzählung kann eventuell angepasst
werden gemäß der Art des Produktes (siehe
Bedienungsanleitung des Gerätes).
Velleman® Service- und Qualitätsgarantie
Seit der Gründung in 1972 hat Velleman® sehr viel Erfahrung
als Verteiler in der Elektronikwelt in über 85 Ländern aufgebaut.
Alle Produkte entsprechen den strengen Qualitätsforderungen
und gesetzlichen Anforderungen in der EU. Um die Qualität zu
gewährleisten werden unsere Produkte regelmäßig einer
zusätzlichen Qualitätskontrolle unterworfen, sowohl von
unserer eigenen Qualitätsabteilung als auch von externen
spezialisierten Organisationen. Sollten, trotz aller
Vorsichtsmaßnahmen, Probleme auftreten, nehmen Sie bitte
die Garantie in Anspruch (siehe Garantiebedingungen).
Allgemeine Garantiebedingungen in Bezug auf
Konsumgüter (für die Europäische Union):
• Alle Produkte haben für Material- oder Herstellungsfehler eine
Garantieperiode von 24 Monaten ab Verkaufsdatum.
• Wenn die Klage berechtigt ist und falls eine kostenlose
Reparatur oder ein Austausch des Gerätes unmöglich ist, oder
wenn die Kosten dafür unverhältnismäßig sind, kann
Velleman® sich darüber entscheiden, dieses Produkt durch ein
gleiches Produkt zu ersetzen oder die Kaufsumme ganz oder
teilweise zurückzuzahlen. In diesem Fall erhalten Sie ein
Ersatzprodukt oder eine Rückzahlung im Werte von 100% der
Kaufsumme im Falle eines Defektes bis zu 1 Jahr nach Kauf
oder Lieferung, oder Sie bekommen ein Ersatzprodukt im
Werte von 50% der Kaufsumme oder eine Rückzahlung im
Werte von 50 % im Falle eines Defektes im zweiten Jahr.
• Von der Garantie ausgeschlossen sind:
- alle direkten oder indirekten Schäden, die nach Lieferung am
Gerät und durch das Gerät verursacht werden (z.B. Oxidation,
Stöße, Fall, Staub, Schmutz, Feuchtigkeit, ...), sowie auch der
Inhalt (z.B. Datenverlust), Entschädigung für eventuellen
Gewinnausfall.
- Verbrauchsgüter, Teile oder Zubehörteile, die durch normalen
Gebrauch dem Verschleiß ausgesetzt sind, wie z.B. Batterien
(nicht nur aufladbare, sondern auch nicht aufladbare,
eingebaute oder ersetzbare), Lampen, Gummiteile,
Treibriemen, usw. (unbeschränkte Liste).
- Schäden verursacht durch Brandschaden, Wasserschaden,
Blitz, Unfälle, Naturkatastrophen, usw.
- Schäden verursacht durch absichtliche, nachlässige oder
unsachgemäße Anwendung, schlechte Wartung,
zweckentfremdete Anwendung oder Nichtbeachtung von
Benutzerhinweisen in der Bedienungsanleitung.
- Schäden infolge einer kommerziellen, professionellen oder
kollektiven Anwendung des Gerätes (bei gewerblicher
Anwendung wird die Garantieperiode auf 6 Monate
zurückgeführt).
- Schäden verursacht durch eine unsachgemäße Verpackung
und unsachgemäßen Transport des Gerätes.
- alle Schäden verursacht durch unautorisierte Änderungen,
Reparaturen oder Modifikationen, die von einem Dritten ohne
Erlaubnis von Velleman® vorgenommen werden.
• Im Fall einer Reparatur, wenden Sie sich an Ihren Velleman®Verteiler. Legen Sie das Produkt ordnungsgemäß verpackt
(vorzugsweise die Originalverpackung) und mit dem OriginalKaufbeleg vor. Fügen Sie eine deutliche Fehlerbeschreibung
hinzu.
• Hinweis: Um Kosten und Zeit zu sparen, lesen Sie die
Bedienungsanleitung nochmals und überprüfen Sie, ob es
Velleman ® usługi i gwarancja jakości
Od czasu założenia w 1972, Velleman® zdobył bogate
doświadczenie w dziedzinie światowej elektroniki. Obecnie
firma dystrybuuje swoje produkty w ponad 85 krajach.
Wszystkie nasze produkty spełniają surowe wymagania
jakościowe oraz wypełniają normy i dyrektywy obowiązujące w
krajach UE. W celu zapewnienia najwyższej jakości naszych
produktów, przechodzą one regularne oraz dodatkowo
wyrywkowe badania kontroli jakości, zarówno naszego
wewnętrznego działu jakości jak również wyspecjalizowanych
firm zewnętrznych. Pomimo dołożenia wszelkich starań czasem
mogą pojawić się problemy techniczne, prosimy odwołać się do
gwarancji (patrz warunki gwarancji).
Ogólne Warunki dotyczące gwarancji:
• Wszystkie produkty konsumenckie podlegają 24-miesięcznej
gwarancji na wady produkcyjne i materiałowe od daty zakupu.
• W przypadku, gdy usterka jest niemożliwa do usunięcia lub
koszt usunięcia jest nadmiernie wysoki Velleman ® może
zdecydować o wymianie artykułu na nowy, wolny od wad lub
zwrócić zapłaconą kwotę. Zwrot gotówki może jednak nastąpić
z uwzględnieniem poniższych warunków:
- zwrot 100% ceny zakupu w przypadku, gdy wada wystąpiła w
ciągu pierwszego roku od daty zakupu i dostawy
- wymiana wadliwego artykułu na nowy, wolny od wad z
odpłatnością 50% ceny detalicznej lub zwrot 50% kwoty ceny
nabycia w przypadku gdy wada wystąpiła w drugim roku od
daty zakupu i dostawy.
• Produkt nie podlega naprawie gwarancyjnej:
- gdy wszystkie bezpośrednie lub pośrednie szkody
spowodowane są działaniem czynników środowiskowych lub
losowych (np. przez utlenianie, wstrząsy, upadki, kurz, brud,
...), wilgotności;
- gwarant nie ponosi odpowiedzialności za szkody
wynikających z utraty danych;
- produkty konsumenckie, części zamienne lub akcesoria
podatne na process starzenia, wynikającego z normalnego
użytkowania, np: baterie (ładowalne, nieładowalne, wbudowane
lub wymienne), żarówki, paski napędowe, gumowe elementy
napędowe... (nieograniczona lista);
- usterka wynika z działania pożaru, zalania wszelkimi cieczami,
uderzenia pioruna, upadku lub klęski żywiołowej, itp.;
- usterka wynika z zaniedbań eksploatacyjnych tj. umyślne
bądź nieumyślne zaniechanie czyszczenia, konserwacji,
wymiany materiałów ekspolatacyjnych, niedbalstwa lub z
niewłaściwego obchodzenia się lub niezgodnego użytkowania z
instrukcją producenta;
- szkody wynikające z nadmiernego użytkowania gdy nie jest
do tego celu przeznaczony tj. działalność komerycjna,
zawodowa lub wspólne użytkowanie przez wiele osób - okres
obowiązywania gwarancji zostanie obniżony do 6 (sześć)
miesięcy;
- Szkody wynikające ze źle zabezpieczonej wysyłki produktu;
- Wszelkie szkody spowodowane przez nieautoryzowaną
naprawę, modyfikację, przeróbkę produktu przez osoby trzecie
jak również bez pisemnej zgody firmy Velleman ®.
• Uszkodzony produkt musi zostać dostarczony do sprzedawcy
® Velleman, solidnie zapakowany (najlepiej w oryginalnym
opakowaniu), wraz z wyposażeniem z jakim produkt został
sprzedany. W przypadku wysyłki towaru w opakowaniu innym
niż oryginalnym ryzyko usterki produktu oraz tego skutki
przechodzą na właściciela produktu. Wraz z niesprawnym
produktem należy dołączyć jasny i szczegółowy opis jego
usterki, wady;
• Wskazówka: Aby zaoszczędzić na kosztach i czasie, proszę
szczegółowo zapoznać się z instrukcja obsługi; czy przyczyną
wady są okoliczności techniczne czy też wynikaja wyłącznie z
nieznajomości obsługi produktu. W przypadku wysyłki
sprawnego produktu do serwisu nabywca może zostać
obciążony kosztmi obsługi oraz transportu.
• W przypadku napraw pogwarancyjnych lub odpłatnych klient
ponosi dodatkowo koszt wysyłki produktu do i z serwisu.
wymienione wyżej warunki są bez uszczerbku dla wszystkich
komercyjnych gwarancji.
Powyższe postanowienia mogą podlegać modyfikacji w
zależności od wyrobu (patrz art obsługi).
- todos os danos depois de uma devolução não embalada ou
mal protegida ao nível do acondicionamento.
- todas as reparações ou modificações efectuadas por terceiros
sem a autorização de SA Velleman®;
- despesas de transporte de e para Velleman® se o aparelho
não estiver coberto pela garantia.
• qualquer reparação será fornecida pelo local de compra. O
aparelho será obrigatoriamente acompanhado do talão ou
factura de origem e bem acondicionado (de preferência dentro
da embalagem de origem com indicação do defeito ou avaria);
• dica: aconselha-mos a consulta do manual e controlar cabos,
pilhas, etc. antes de devolver o aparelho. Um aparelho
devolvido que estiver em bom estado será cobrado despesas a
cargo do consumidor;
• uma reparação efectuada fora da garantia, será cobrado
despesas de transporte;
• qualquer garantia comercial não prevalece as condições aqui
mencionadas.
A lista pode ser sujeita a um complemento conforme o tipo de
artigo e estar mencionada no manual de utilização.
Garantia de serviço e de qualidade Velleman®
Desde a sua fundação em 1972 Velleman® tem adquirido uma
amplia experiencia no sector da eletrónica com uma
distribuição em mais de 85 países.
Todos os nossos produtos respondem a exigências rigorosas e
a disposições legais em vigor na UE. Para garantir a qualidade,
submetemos regularmente os nossos produtos a controles de
qualidade suplementares, com o nosso próprio serviço
qualidade como um serviço de qualidade externo. No caso
improvável de um defeito mesmo com as nossas precauções, é
possível invocar a nossa garantia. (ver as condições de
garantia).
Condições gerais com respeito a garantia sobre os produtos
grande público (para a UE):
• qualquer produto grande público é garantido 24 mês contra
qualquer vício de produção ou materiais a partir da data de
aquisição efectiva;
• no caso da reclamação ser justificada e que a reparação ou
substituição de um artigo é impossível, ou quando os custo são
desproporcionados, Velleman® autoriza-se a substituir o dito
artigo por um artigo equivalente ou a devolver a totalidade ou
parte do preço de compra. Em outro caso, será consentido um
artigo de substituição ou devolução completa do preço de
compra no caso de um defeito no prazo de 1 ano depois da
data de compra e entrega, ou um artigo de substituição
pagando o valor de 50% do preço de compra ou devolução de
50% do preço de compra para defeitos depois de 1 a 2 anos.
• estão por consequência excluídos:
- todos os danos directos ou indirectos depois da entrega do
artigo (p.ex. danos ligados a oxidação, choques, quedas,
poeiras, areias, impurezas…) e provocado pelo aparelho, como
o seu conteúdo (p.ex. perca de dados) e uma indemnização
eventual por perca de receitas;
- consumíveis, peças ou acessórios sujeitos a desgaste
causado por um uso normal, como p.ex. pilhas (recarregáveis,
não recarregáveis, incorporadas ou substituíveis), lâmpadas,
peças em borracha correias… (lista ilimitada);
- todos os danos que resultem de um incêndio, raios, de um
acidente, de una catastrophe natural, etc.;
- danos provocados por negligencia, voluntária ou não, uma
utilização ou manutenção incorrecta, ou uma utilização do
aparelho contrária as prescrições do fabricante;
- todos os danos por causa de uma utilização comercial,
profissional ou colectiva do aparelho ( o período de garantia
será reduzido a 6 meses para uma utilização profissional);
- todos os danos no aparelho resultando de uma utilização
incorrecta ou diferente daquela inicialmente prevista e descrita
no manual de utilização;
Made in Taiwan
Imported by Velleman nv
Legen Heirweg 33, 9890 Gavere, Belgium
www.velleman.eu