1
■保守・点検上の注意
安全上のご 注意
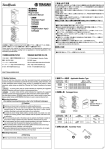
Innovators in Protection Technology
ノーヒュー ズブレ ー カ
取扱説明書
Instruction Manual for
Moulded Case Circuit
Breakers
形式 (Types)
・固定形(Fix Type)
S50-GF
S100-NF S100-GF H100-NF
L100-NF E225-NF S225-NF
S225-GF H225-NF L225-NF
・可調整形
(Adjustable Thermal Magnetic Type)
E125-NJ S125-NJ S125-GJ
H125-NJ L125-NJ
S160-NJ H160-NJ L160-NJ
E250-NJ S250-NJ S250-GJ
H250-NJ L250-NJ
・電子式(Electronic Type)
S225-GE S225-PE H225-NE
S250-PE H250-NE
本説明書は,
ご使用になる方のお手元で大切に保管して下さい。本書に述べていない取扱い,
及び誤った取扱いによって生じる損害に関して,
弊社は一切責任を負いません。
Please retain this manual for future reference.The Manufacturer assumes no
responsibility for damages resulting from non-application or incorrect application of the
instructions provided herein.
施工,
使用,
保守・点検の前に,
必ず本書とその他の付属書類をお読み頂き,
機器の知識,
安全の
情報,
及び注意事項の全てに習熟してからお取扱い下さい。この取扱説明書では,
安全注意事項
のランクを「危険」,
「注意」として区分してあります。
危険 :取扱いを誤った場合に,
危険な状況が起りえて,
死亡または重傷を受ける可能性が
想定される場合。
注意 :取扱いを誤った 場合に,
危険な状況が 起りえて,
中程度の 傷害や 軽傷を受ける
可能性が想定される場合。
なお, 注意 に記載した事項でも,
状況によっては重大な結果に結びつく場合があります。
いずれも重要な内容ですので必ず守って下さい。
■施工上の注意(施工に必要な各部の詳細寸法は主カタログを参照して下さい。)
注意
●電気工事は,
有資格者(電気工事士)が行って下さい。
●高温,
多湿,
過度の塵埃,
腐食性ガス,
振動,
衝撃など異常環境に設置しないで下さい。
火災の原因となったり,
正常に動作しないおそれがあります。
●ゴミ,
コンクリート粉,
鉄 粉などの異 物 及び雨 水などがブレーカ内 部に入らないように
施工して下さい。火災の原因となったり,
不動作のおそれがあります。
●施工作業は,
上位ブレーカなどを○(OFF )にし,
充電していないことを確認して行って
下さい。感電のおそれがあります。
●4極形ブレーカの場合,
3相4線式の中性線は必ずN極に接続して下さい。過電流で
動作せずに火災の原因となります。
●端子ねじは標準締付トルクで確実に締付けて下さい。火災の原因となります。
●端子ねじの締付け時及び接続後,
端子部に無理な力
絶縁チューブ
端子
または
が加わらないようにして下さい。端子部への過大な応力 バリア
絶縁テープ
は,
火災のおそれがあります。
●表面形ブレーカ電源側の裸導体間は,
ブレーカ端面
まで全て絶縁して下さい。端子バリアが同梱されている場合は必ず使用し,
絶縁テープ等で
端子バリアと重なるまで絶縁して下さい。不十分な絶縁は電源短絡するおそれがあります。
●アークガス排出口はふさがないでアークスペース
(絶縁距離)
を十分確保して下さい。遮断
できない場合があります。
■使用上の注意
危険
●端子部に触れないで下さい。感電のおそれがあります。
7-2-10 Kamihigashi, Hiranoku, Osaka
547-0002, Japan
TEL: 81-6-6791-9323/ FAX: 81-6-6791-9274
URL :www.terasaki.co.jp
E-mail :[email protected]
〒547‐0002 大阪市平野区加美東7…2…10
電話:06(6791)9320
ファックス:06(6791)9274
ホームページ:www.terasaki.co.jp
E-mail :[email protected]
2G 0331SAI ( KRB-0335 i )
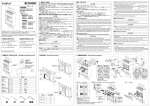
内容物一覧/必要となる工具 Packaged Items/Assembly Tools
書
説明
取扱 tion
uc
Instr
ブレーカ
Break er :1
Type1
50/100/125AF
数 S 50-GF S100
E125 S125
Qty
裏面形 (RC)
Rear
Connected
差込形 (PM)
Plugin Connected
埋込形 (F.P)
Flush Plate
Where
Applicable
a:
4
6
8
2
2
4
4
6
8
2
2
4
2
2
4
4
6
8
4
4
4
b:
a:M 8×16
b:M4×55
Type3
Type4
160/225/250AF
160/225/250AF
数 S160 E 225 S 225 数 H160 L160 H225
E 250 S 250
Qty
Qty L225 H250 L250
d:M8×20
6
8
2
4
b:M4×90
c:M 8×25
6
8
b:M4×55
Caution
●When the breaker trips open automatically, remove the cause, then return the
handle to the | ( ON ) position. Should a fault be interrupted, the breaker must be
inspected. Otherwise, a fire may result.
■Maintenance Precautions
Caution
●Service and/or inspection of the product must be done by persons having expert
knowledge.
●Before servicing or inspecting the product, open an upstream circuit breaker or the
like to isolate all sources of power. Otherwise, electric shock may result.
●Regularly check that the breaker terminal screws are tightened to torque values
shown within this manual, failure to do so may result in fire.
●Electrical work should only be undertaken by suitably qualified persons.
●Do not place the product in an area that is subject to high temperature, high humidity,
excessive dusty air, corrosive gas, strong vibration and shock, or other unusual
conditions. Mounting in such areas could cause a fire or malfunction.
●Be careful to prevent foreign objects (debris, concrete powder, iron powder, etc.) and
rainwater from entering product. These materials inside the product could cause a fire
or malfunction.
●Prior to commencing any work on the product, open an upstream circuit breaker or isolator
to ensure that no voltage is applied to the product. Otherwise, electrical shock may result.
●For 4-pole breakers, be sure to connect a neutral conductor to the N pole. Otherwise,
an over-current may hinder the product from tripping, thus resulting in a fire.
操作と動作 Operating Instructions
■Other Precautions
・Do not carry this product by accessory leads, as this may cause damage to the
product.
・Unauthorised opening of the breaker cover will invalidate product warranty.
・When installing the product, use wires or conductors, the cross sectional areas of
which accommodate the rated current of the product. Using wires or conductors with
inadequate cross sectional areas may cause false tripping and overheat.
内部付属品の着脱 Fitting Internal Accessories
補助スイッチ
M形 M Type
TRIPPED
T2AX00M
ハンドル
Handle
(ON )
電圧引外し
Shunt T rip
*
Auxiliar y Switch
B 形 B T ype
(OFF )
b:M4×55
2
4
b:M4×90
c:M 8×25
6
8
c:M 8×25
6
8
c:M 8×25
Type1
2
4
b:M4×90
2
4
b:M4×55
2
4
b:M4×90
(ON )
b:M4×80
4
4
b:M4×115
4
4
b:M4×80
4
4
b:M4×115
c:M 8×25
6
8
c:M 8×25
6
8
c:M 8×25
6
8
c:M 8×25
e:M 5×16
4
4
e:M 5×16
4
4
e:M 5×16
4
4
e:M 5×16
(OFF )
RESET
Type1
Type2
Type3
Type4
操作
Operation
○( OFF ) ⇒|( ON )
|( ON ) ⇒ ○( OFF )
TRIP ⇒ ○( OFF )
○( OFF ) ⇒|( ON )
|( ON ) ⇒ ○( OFF )
TRIP ⇒ ○( OFF )
ハンドル操作力
Operation effort
22N
28N
68N
25N
36N
76N
*
T2AL00B
不足電圧引外し
Under voltagie T rip
*
10mm
T2UV00
電線引き出し部の処理 Pull Out Leads on Load Side
Type2,Type3,Type4
(ON )
(OFF )
(OFF )
(ON )
(ON )
(OFF )
リングマーク Ring Mark
Alar m Switch
B 形 B T ype
*付属品の図記号
*Symbols of Accessories
組合せ Combination
e:
M形
M type
*
T2AX00B
*
T2SH00
トリップボタン
Trip Button
2
4
4 5 6
*
警報スイッチ
M形 M Type
d:M8×20
8 10
13 17
●Never touch terminals. Otherwise, electric shock may result.
Caution
d:M8×20
d:
Warning
■Mounting Precautions
(For detailed mounting dimensions, refer to the TemBreak2 catalogue.)
6
8
c:
■Handling Precautions
Safety Notices
Be sure to read these Instructions and other associated documents accompanying the
product thoroughly to be familiarize yourself with the product handling, safety information,
and all other precautions before mounting, using, servicing, or inspecting the product. In
these Instructions, safety notices are divided into "Warning" and "Caution" according to the
hazard level:
Warning : A warning notice with this symbol indicates that neglecting the suggested
procedure or practice could result in lethal or serious personal injury.
Caution : A caution notice with this symbol indicates that neglecting the suggested
procedure or practice could result in moderate or slight personal injury and/or property damage.
Note that failing to observe
Caution notices could result in serious results in some cases.
Because safety notices contain important information, be sure to read and observe them.
T2AL00M
形式 Type
6
8
・付属装置のリード線を持って持ち運びしないで下さい。故障の原因となります。
・ブレーカの本体のカバーは開けないで下さい。性能と品質を保証できません。
・ブレーカに接続する電線や 導体は定格電流に適した断面積のものを使用して下さい 。
断面積が小さいと,
不要動作及び過熱のおそれがあります。
M形 M Type
表面形 (FC)
Front
Connected
2P
3P
4P
2P
3P
4P
2P
3P
4P
2P
3P
4P
2P
3P
4P
2P
3P
4P
2P
3P
4P
■そ の 他の 注意
B形 B Type
接続/極数
Connections/Poles
●自動的にトリップ(遮断)
した場合は,
原因を取り除いてからハンドルを|(ON )にして
下さい。大 電 流( 短 絡 電 流 )を遮 断した場 合は,
ブレーカを点 検して下さい。火 災の
おそれがあります。
●保守・点検は,
専門知識を有する人が行って下さい。
●保守・点検は,
上位ブレーカなどを○
(OFF )
にし,
充電していないことを確認して行って下さい。
感電のおそれがあります。
●端子ねじは,
定期的に標準締付トルクで増し締めして下さい。火災の原因となります。
●When connecting cable or busbar to the product, tighten terminal screws to the torque
specified in this manual. Otherwise, a fire could result.
●Even when tightening the terminal screws and
insulating tubes
interpole
or
after conductor connection, do not apply
barriers
insulating tape
excessive force to the terminals. Otherwise, a fire
may result.
●For front-connected breakers, Insulate all bare conductors of the line side until the
breaker end. If interpole barriers are packed, be sure to use the barriers; moreover,
insulate all bare conductors by insulating tape or the like so that the tape overlaps with
the barriers. Insufficient insulation may result in short-circuit.
●Do not block the arc gas vents of the product to ensure adequate arc space. Blocking
these vents could result in failure of circuit interruption.
取扱説明書
(本書)
Instruction Man ual :1
(This document)
端子バリア(FCのみ)
Interpole Barr ier
(Only FC)
2P: 1
3P: 2
4P: 3
Type2
100/125AF
H100 L100
数
H125 L125
Qty
注意
注意
(OFF )
補助スイッチを一つ取付ける場合,
左側に
取付けて下さい。
In case of fitting only one auxiliary
switch, fit in left side slot.
f
g
h
i
f
g
h
i
裏面の溝に沿っ
て f,g,h,i のいず
れかを切 離して
下さい。
Cut off f,g,h,i along
the grooves carved
on the back.
・付属品取付け後,
必ず正常に動作することを確認してから,
使用下さい。
・After fitting, verify the function of the Accessory.
AX
AL
SH
UV
V
補助スイッチ
警報スイッチ
Auxiliary Switch
Alarm Switch
b接点
a接点
a接点
b接点
b contact
a contact
a contact b contact
11/AXc- 14/AXa 11/AXc- 12/AXb 91/ALc91/ALc92/ALb
21/AXc- 24/AXa 21/AXc- 22/AXb 94/ALa
電圧引外し電源
不足電圧引外し電源
Shunt Trip
Undervoltage Trip
power source
power source
D1-D2
C 1-C 2
取外し Removal
本体取付要領 埋込形 Breaker Mounting Procedure for F.P (Where Applicable)
本体取付要領
表面形・裏面形
Breaker Mounting
Procedure for FC/RC
導体接続要領 裏面形・埋込形
Conductor Connection Procedure for RC/F.P (Where Applicable)
13
方向設定 Arrengment Set(0°
,45°
,90°
)
L
ソルダレス端子導体接続要領 表面形
Solderless Terminals Mounting Procedure for FC
N
5
R2
ソルダーレス端子
Solderless Terminal
φM
T2FW 12S *(Type1)
L
T 2FW 12L*
O
板スタッド Flat Bar Stad
フラッシュプレート
Flush Plate
B
A
M4×55mm (E/S)
A M4×90mm (H/L)
1.7~2.2N・m
B
L
T2FP 25S* (Type3)
M
T2FP 25L* (Type2,Type4)
M5×16mm
3.6~4.4N・m
N
*:2,3 or4(極数 Poles )
導体接続要領 表面形 Conductor Connection Procedure for FC
J
φE
φI
O
P
Q
M6×20mm
7.8~11.8N・m
9mm
M8×25mm
11.8~18.6N・m
R
F
C
D
E
F
G
H
I
J
端子バー Flat Bar
T 2FB 12*B
J
Type2,Type3,Type4
≦16 mm
≦8 mm
8.4 mm
≦17 mm
≦8.5 mm
≦5 mm
9 mm
8
8
10
X
φV
φV
C
Type1
T2FW 25L*
≦20mm
≦120mm2
6 19N・m
M6×20mm
6.9~9.3N・m
導体接続要領 差込形
Conductor Connection
Procedure for PM
D
G
T2FW 12L*
≦20mm
≦70mm2
5 10N・m
M5×20mm
2.4~3.4N・m
補助回路端子
Auxiliary Circuit Terminals
K
Q R
T2FW 12S *
≦17mm
≦50mm2
4 6N・m
M5×15mm
2.4~3.4N・m
R2
差込取付台取付要領 差込形
Plug-in Mounting Block Mounting Procedure for PM
H
*:2,3 or4(極数 Poles )
P
*:2,3 or4(極数 Poles )
T2FP 12S*(Type1)
8
(Type2,Type4)
T2FW 25L*(Type3)
T2FR 12*S (Type1)
T2FR 25*S (Type3)
T2FR 25*L (Type2,Type4)
≦22 mm
≦11 mm
8.4 mm
≦25 mm
≦10 mm
≦7 mm
9 mm
K
(Type1)
T 2FB 25*B
(Type2,Type3,Type4)
*:2,3 or4(極数 Poles )
J
K
・電源側の裸導体間は,
ブレーカ端面まで全て絶縁して下さい。
・Insulate all bare conductors of the line side until the breaker end.
本体取付要領 差込形
Breaker Mounting Procedure for PM
端子バリアの取付要領
Interpole Barrier
Mounting Procedure
W
Type1
M8×16
4.9~6.9N・m
13 M8×25
11.8~18.6N・m
ON
Type2,Type3,Type4
6 M8×20
7.8~12.7N・m
17 M10×25
22.5~37.2N・m
S
S
端子カバー取付要領
Terminal Cover
Mounting Procedure
M5×20mm
2.2~3.5N・m
S2
2G 0331SAI ( KRB- 0335 i)
U
S2
O FF
ハンドルホルダ取付要領 Handle Holder Mounting Procedure
8
T
T
Type2,Type3,Type4
≦22 mm
≦15.5 mm
9 mm
≦15.5 mm
Type1
≦15 mm
≦10 mm
6.5 mm
-
T
U
V
W
Type1
M6
3.6~6.0N・m
10
X
Type2,Type3,Type4
13 M8
8.8~14.7N・m
可調整形・電子式
Adjustable Thermal Magnetic Type / Electronic Type
可調整形 Adjustable Thermal Magneticype
T
0.63
(OFF )
時
Holding (OFF )
0.8
1
8
10
6
12
I R ( xI n) I i( xI n)
ON
電子式 Electronic T ype
(ON )時
Holding (ON )
IR
IR
200 225
O FF
0.63
150
0.5
125
ハンドルホルダ
Handle Holder
Char .
0.8 0.9 0.95
175
4
1
5
6
3
7
(OFF )
2
0.4
1
A
B
T 2HH 25
or
・取外しは取付けの逆手順で行います。
・When removing, remove the items in reverse order of mounting.
(OFF )
・可調整形は海外向け仕様品です。
*
*
ハンドルロック取付要領 Handle Lock Mounting Procedure
配列 Arrengem ent
2
100AF 2P
C1
C2
D1
D2
3P,
AXa1 AXa2
AXb1 AXb2
AXc 1 AXc 2
端子バリア
Interpole Barrier
(ON )
*
T 2BA 12S * (Type1)
4P
ALa1 C1
ALb1
ALc 1 C2
AXa1 AXa2 ALa1 D1
AXb1 AXb2 ALb1
AXc 1 AXc 2 ALc 1 D2
AXa1 AXa2 ALa1
:電線引き出し口
3 AXb1 AXb2 ALb1 *
Wir ing holes
AXc 1 AXc 2 ALc 1
1)可調整形 Adjustable Thermal magnetic Type
T 2BA 25S * (Type3)
T 2BA 25L * (Type2,Type4)
*:2,3 or4(極数 Poles )
Z
・取外しは取付けの逆手順で行います。
・When removing, remove the items in reverse order of mounting.
M3.5
Y
1.2~1.4N・m
M4×80mm (E/S)
Z M4×115mm (H/L)
1.7~2.2N・m
接続
Connection
表面形
Front Connected
(FC)
裏面・差込形
Rear/Plug-in Connected
(RC/PM)
端子カバー
Terminal Cover
T2CF 12*S (Type1)
T2CF 25*S (Type3)
T2CF 25*L (Type2,Type4)
T2CR 12*S (Type1)
T2CR 25*S (Type2,Type3,Type4)
T2CS 12*S (Type1)
T2CS 25*S (Type2,Type3,Type4)
ソルダレス端子用
For Solderless Terminal
(FC)
*:2,3 or4(極数 Poles )
・取外しは取付けの逆手順で行います。
・When removing, remove the items in
reverse order of mounting.
・取外しは取付けの逆手順で行います。
・When removing, remove the items in
reverse order of mounting.
0.63 0.8 1
ハンドルロック
Handle Lock
2)電子式 Electronic Type
×I n
Adjustab le I R A:125,150,175,200,225〔A〕
x I n 〔A〕
B:0.4,0.5,0.63,0.8,0.9,0.95,1( )
T
端子カバーロック
Terminal Cover Lock
T 2CF 00L
*
1
下線部は標準設定です。Under bar is default setting.
Y
0.5 ~
0.75 ・2
動作特性曲線 Time/Current Characteristic Curves
T
10・
/R Adjustment Range
7
T 2HL 25
6
12 I n/125A
5
13 I n/250A
4
1
2
5,6,7
max
×3
(φ5)
・ハンドルロックは|( ON ) ,○( OFF ) 位置のいずれでも取り付けできます。
・Handle lock can be fitted in any position
( ONof|
) and ○( OFF ) .
・取外しは取付けの逆手順で行います。
・When removing, remove the items in reverse order of mounting.
/i Adjustment Range
0.2S
0.1S
3
1,2
6 8 10 12 13 x I n I
・可調整形は海外向け仕様品です。
2.5
3
5
4
10 14 x I R
I