1
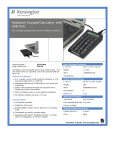
Funkey 61 Edition / Pro
Bedienungsanleitung
00038124/00038126/00038127/00038128
Version 11/2014
Funkey 61
Funktionsunterschiede
schwarz
weiß
MikrophonBuchse
Touch
Response
Buchse
Edition
00038126
Edition
00038124
ja
nein
ja
LED
Edition Pro
00038128
Edition Pro
00038127
ja
nein
ja
LCD
2
Display
MP3Buchse
ja
MIDI
Ausgang
Sicherheitshinweise
Sie sollten folgende Sicherheitshinweise beachten, um Verletzungen einer Person oder Schäden
am Gerät oder der Peripherie zu vermeiden:
Netzteil
• Bitte verwenden Sie ausschließlich beiliegendes Netzteil, um Schäden an Ihrer elektronischen
Orgel zu vermeiden.
• Legen Sie weder Netzteil noch Stromkabel in die Nähe von Heizkörpern oder anderen
Wärmequellen. Überdehnen Sie die Kabel nicht und stellen Sie keine schweren Gegenstände
darauf.
• Überprüfen Sie regelmäßig die Stecker und reinigen Sie sie gegebenenfalls. Ziehen Sie nie
einen Stecker mit feuchten Händen aus der Steckdose.
Öffnen sie nicht das Gehäuse
• Öffnen Sie keinesfalls das Gehäuse des Keyboards, bauen Sie es nicht auseinander und
nehmen Sie keine Änderungen daran vor.
• Sollten sich während des Gebrauchs ungewöhnliche Funktionen zeigen, schalten Sie
unverzüglich das Gerät aus und beauftragen Sie einen qualifizierten Techniker mit der Reparatur.
Aufstellung des Keyboards
• Stellen Sie die elektronische Orgel nicht in einer staubigen oder vibrierenden Umgebung auf und
setzen Sie sie keiner übermäßigen Kälte oder Wärme aus, wie z.B. direkter Sonneneinstrahlung
im Auto oder Heizkörpern, um Schäden am Gehäuse oder internen Bauteilen zu vermeiden.
• Stellen Sie sie nicht auf instabile Plätze um ein Herunterfallen zu vermeiden.
• Stellen Sie keine Gefäße mit Flüssigkeit auf die elektronischen Orgel. Durch Eindringen von
Flüssigkeit können gravierende Schäden an der elektronischen Orgel entstehen.
Reinigung
• Um Ihr Keyboard zu reinigen, wischen Sie es mit einem trockenen, weichen Tuch ab.
• Verwenden Sie keine scharfen Reinigungsmittel, organische Lösungsmittel oder chemisch
imprägnierte Tücher.
Anschluss peripherer Geräte
• Um Schäden an den Lautsprechern zu vermeiden, drehen Sie bitte die Lautstärke auf das
Minimum bevor Sie periphere Geräte an das Keyboard anschließen. Danach passen Sie die
Lautstärke wieder an.
Vorsicht beim Betrieb
• Betreiben Sie das Keyboard nicht auf maximaler Lautstärke, um eine Schädigung Ihres Gehörs
zu vermeiden.
• Stellen Sie keine schweren Gegenstände auf das Gerät und wenden Sie im Umgang mit der
elektronischen Orgel, der Tastatur oder den Steckern keine Gewalt an.
• Das Gerät sollte von Erwachsenen ausgepackt werden, da Teile enthalten sein können, die für
Kinder unter drei Jahren nicht geeignet sind. Bitte entsorgen sie das Verpackungsmaterial
fachgerecht.
Anmerkungen
• Spezifikationen können ohne vorherige Ankündigung geändert werden.
• Sollten einzelne Funktionen nicht detailliert genug erklärt sein oder Tippfehler auftauchen, bitten
wir um Entschuldigung.
3
Sicherheitshinweise
3
Bedienfelder und externe Anschlüsse
6
Bedienfeld mit LED-Display
6
Bedienfeld mit LCD-Display
6
Beschreibung der LCD-Anzeigen
7
Externe Anschlüsse
7
Vorbereitung
8
Stromversorgung
8
Netzteil
8
Batterien
8
Anschlüsse
8
Kopfhörer
8
MIDI-Ausgang
9
MP3-Funktion
9
Mikrophon
9
Grundlegende Bedienung
9
Einschalten
9
Lautstärke-Anpassung
9
Sound-Auswahl
10
Effekte
10
Sustain
10
Vibrato
10
Double Voice
10
Keyboard Split
11
Drum
11
Transpose
11
Beat
11
Tempo
11
Drum Pads
11
Rhythmus und Rhythmus-verwandte Funktionen
12
Rhythmus-Auswahl
12
Start/Stop-Funktion
12
Sync-Funktion
12
Fill In-Funktion
12
Intro / Ending
13
Lautstärke-Anpassung für den Rhythmus
13
4
Chord-Begleitung
13
Single Finger
13
Fingered
13
Chord Clear
13
Chord-Lautstärke
14
Aufnahme
14
Lernfunktion
14
Ruhezustand
14
Übersicht über die Sounds (Tones)
15
Übersicht über die Rhythmen
16
Übersicht über die Demo-Songs
17
Hilfe bei Störungen
17
Technische Spezifikationen
18
WEEE-Erklärung / Entsorgung
19
Herstellerangaben
19
5
Bedienfelder und externe Anschlüsse
Bedienfeld mit LED-Display
Bedienfeld mit LCD-Display
1 Einschaltknopf
7
Single Chord / Finger
Chord / Chord löschen
13 Percussion / MP3-Funktion
2 Lautstärke +, -
8
LED-Display
14 Transpose +, -
3 für Rhythmus +, -
9
Demo / Rhythmus / Tone
15 Beat
4 für Begleitung +, -
10
Nummern 0 bis 9 / +, -
16
5 Tempo +, -
11
Drum
17 Lautsprecher
6 Play / Record / Programm 12
Sustain, Vibrato, Double
Voice / Keyboard Split
6
Sync / Start / Stop / Fill In /
Intro / Ending / Teaching
18 Chord-Bereich
Beschreibung der LCD-Anzeigen
1 Single Chord
7
Demo
13 Sustain
2 Finger Chord
8
LCD Display
14 Tempo
3 Record
9
Demo / Rhythmus / Tone
15 Lautstärke, gesamt
4 Program
10 Zahlenfeld
16 Lautstärke Rhythmus
5 Play
11 Beat
17 Tasten
6 Tone
12 Vibrato
18 Lautstärke Chord
Externe Anschlüsse
1.
2.
3.
4.
5.
USB-Port
MIDI-Ausgang
Mikrophon-Eingang
Kopfhöreranschluss
Netzteil-Anschluss
7
Vorbereitung
Stromversorgung
Netzteil
Bitte benutzen Sie für die Stromversorgung Ihres Keyboards das mitgelieferte Netzteil: DC 12V,
500 mA, zentrale Anode. Schließen Sie zuerst
das eine Ende an der Rückseite der
elektronischen Orgel an und anschließend
das andere Ende an einer Steckdose. Bitte
vergewissern Sie sich, dass die Spannung der
Steckdose für den Adapter geeignet ist. Sie
können nun das Gerät einschalten und Ihr
Spiel beginnen.
Achtung: Wenn Sie die elektronische Orgel über einen längeren Zeitraum nicht benutzen, sollten
Sie sie von der Steckdose trennen. Dies beugt möglichen Problemen mit Bauteilen durch zu lange
Ladezeit vor.
Batterien
Öffnen Sie den Batterieschacht an der Unterseite der elektronischen Orgel und bestücken Sie ihn
mit sechs Batterien der Größe D mit 1,5 V. Bitten beachten sie die Polarität und legen Sie die
Batterien gemäß der Markierung auf der Abdeckung des Batterieschachts. Schließen Sie
anschließend den Batterieschacht sorgfältig.
Achtung: Wenn Sie die
Batterien austauschen
müssen, tauschen Sie bitte
stets alle auf einmal aus.
Benutzen Sie neue und alte
Batterien nicht zusammen.
Wenn Sie Ihre elektronisches
Keyboard über einen
längeren Zeitraum nicht
benutzen, entnehmen Sie
bitte die Batterien um
möglichen Schäden durch
auslaufende Batterieflüssigkeit vorzubeugen.
Anschlüsse
Kopfhörer
Schließen Sie den Stecker des Kopfhörers an der entsprechenden
Buchse (HEADPHONES) an der Rückseite des Gerätes an. Die
internen Lautsprecher des Keyboards werden dadurch stumm
geschaltet. Wenn Sie Kopfhörer benutzen wird niemand durch Ihr Spiel
beeinträchtigt, Sie können nachts üben und den Kopfhörer als
persönlichen Monitor benutzen.
8
Accessories ports
1.Headphone use
Insert headphone plug into [HEADPHONES] port in back of electron ic keyboard,Now,the interna l
speaker system of electron ic keyboard cuts off automatically,Using headphone doesn't intefere
with others during performance,it is special for personal monitor and exercising at night.
MIDI-Ausgang
Durch den Anschluss der MIDI Out-Buchse können Sie Daten von Ihrer elektronischen Orgel an
andere MIDI-kompatiblen Geräte senden. Sobald Sie eine Note spielen werden die
2.MIDI output
entsprechenden
Daten gesendet. Sie können auch andere Geräte steuern, indem Sie ProgrammDatenBy
übertragen.
linking MIDI line,you can connect MIDI OUT jack to another MIDI compatible device
to transfer MIDI data to the electronic keyboard.When play a note,the corresponding MIDI
data will be transferred.You may also control other MIDI devices by transferring program
changing data.
Another MIDI
compatible device
MIDI line
MIDI OUT
MIDI input jack
for another device
Notice:the additional device in above, you need to purchase by yourself ,not include
MP3-Funktion
by the keyboard,pls understand.
3.MP3
function
Das
Keyboard
unterstützt das Abspielen von MP3-Dateien über den USB-Port. Um die Funktion zu
Mp3 müssen
jack:the
support gemäß
USB play.you
may use
the usb
jack to play
aktivieren
Sie keyboard
die Tastenbelegung
unten stehender
Zeichnung
ändern:
Mp3 songs.to change the button as follow can adjust the Mp3 function.
Volume
Next
Previous
Play/Stop
Sound
Effect
MP3
Function
4.Use of microphone
Mikrophon
Insert the microphone can playing accompaniment.
Sie können an der Buchse MICROPHONE ein Mikrophon anschließen um eventuell eine
Begleitung aufzunehmen.
Grundlegende Bedienung
Einschalten
Nachdem Sie Netzteil oder Batterien sachgemäß installiert haben, drücken Sie bitte
den Knopf ON/OFF, um Ihr Keyboard einzuschalten. Drücken Sie den Knopf abermals,
um es wieder auszuschalten.
Lautstärke-Anpassung
Sie können die Lautstärke des Geräts in 9 Stufen (00-08) wählen. Beim
Einschalten des Geräts ist die Stufe 7 ausgewählt. Sie können mit Hilfe
der Tasten +/- die Lautstärke regulieren. Durch gleichzeitiges Drücken
der Tasten +/- wird die Lautstärke wieder auf die Werkseinstellung
zurückgesetzt.
9
Sound-Auswahl
Das Keyboard verfügt über 128 Sounds. Um einen Sound auszuwählen, drücken Sie bitte die
Taste TONES und geben Sie die gewünschte Nummer des Sounds ein. Sie können auch mit Hilfe
der Tasten +/- die Nummern der Sounds ändern.
Effekte
Sustain
Drücken Sie die Taste SUSTAIN um die Funktion zu aktivieren oder zu deaktivieren. Das Sustain
bewirkt einen längeren Klang der gespielten Noten.
Vibrato
Drücken Sie die Taste VIBRATO um die Funktion zu aktivieren oder zu deaktivieren. Die Funktion
bewirkt einen vibrieren Klang der gespielten Noten.
Double Voice
III.Basic operation method
D ouble voice
Press “ dual voice ” button to start dual voice function,the performed tone is the tone
Diese Funktion
erlaubt das Spielen mit zwei Sounds. Drücken Sie die Taste DUAL VOICE um die
that composed of two kinds of tone.Now the displaying tone name is the latter tone.
Funktion zu
aktivieren
zuthe
deaktivieren.
ist der Sound,
der vor
dem
The previous oder
tone is
tone beforeDer
you erste
pressSound
this button,press
this button
again
to Aufrufen
exist
the
dual
voice
function
der Funktion aktiv war, der Name des zweiten Sounds wird im Display angezeigt.
Sustain
Vibrato
Double
Voice
Keyboard
Split
Drum
Keyboard split
Press “dual keyboard” to start the dual keyboard function.The keyboard was separate
two keyboards from the 24th keys in left. Press the number button can adjust the right key.
10
Repress the “dual keyboard”will withdraw this function.
Sustain
Vibrato
Double
Voice
Keyboard
Split
Drum
III.Basic
method
that composed of two kinds of tone.Now the displaying tone name
is the latteroperation
tone.
The previous tone is the tone before you press this button,press this button again to
ouble
Dexist
thevoice
dual voice function
D ouble voice
III.Basic
method
Press “ dual voice ” button to start dual voice function,the
tone to
is start
theoperation
tone
Press “ dualperformed
voice ” button
dual voice function,the perform
that composed of two kinds of
tone. Now the
displaying
tone method
name is the latter tone.
III.Basic
operation
that
composed
Keyboard of two kinds of tone. Now the displaying tone na
The previous tone Sustain
is the tone Vibrato
before you Double
press
this
button,press
this
again to
ouble
DThe
voice
Voice
Split tone isDrum
previous
the button
tone before
you press this button,press
exist theDdual
voice
function
Press
button to start dual voice function,the performe
exist
the“ dual
dual voice
voice ”function
ouble
voice
Keyboard Split
of two kinds
of tone.
Now
the tone
displaying tone nam
Press “ dual voice ” button to startthat
dualcomposed
voice function,the
performed
tone
is the
The
previous
tone
is
the
tone
before
you
press
this button,press th
Double
Keyboard
that composed
of twoVibrato
kinds of tone. Now the displaying Drum
tone name is the latter
Doubletone. Keyboard
Sustain
Vibrato
Voice
Split voice function
Sustain
exist
thepress
dual
Voice to
The
previous
tone
is
the
tone
before
you
this
button,press
this
button
again
Drücken Sie die Taste DUAL KEYBOARD um die Funktion zu starten oder zu beenden. Sie erlaubt Split
Keyboard
split
the dual voice function
das Keyboard
zuexist
teilen
(24 Tasten
Siekeyboard
können den
Teilungspunkt
jedoch
durch
Eingabe
“dual keyboard”
Press
to von
startlinks).
the dual
function.The
keyboard
was separate
Double
Keyboard
Vibrato
Sustain
Dru
Voice
Split
einer anderen
Zahl nach
Ihrem
Belieben
two keyboards
from
the 24th
keys inverändern.
left. Press the Double
number button
can
adjust
the
right
key.
Keyboard
Vibrato
Sustain
Drum
Repress thesplit
“dual keyboard”will withdraw this function.
Voice
Split
Keyboard
Keyboard split
Press “dual keyboard” to start the dual Double
keyboard
function.The
keyboard
wasthe
separate
“dual keyboard”
Press
to start
dual keyboard function.The
Keyboard
Vibrato
Drum
Voicethe number
Splitbutton
two keyboards fromSustain
the 24th keys in left. Press
adjust
the right
key.
two keyboards
fromcan
the
24th keys
in left.
Press the number button ca
Repress the “dual keyboard”will withdraw thisKeyboard
function.
split
Repress the
“dual keyboard”will withdraw this function.
Press “dual keyboard” to start the dual keyboard function.The ke
Keyboard split
Double
Keyboard
Double
Keyboard
Vibrato
Sustain
Vibrato
two
keyboards
the
24th keys
in left. Press
the number
button can
Drum
Sustain
Voice
Split from
keyboard”
Press “dual
to start the
dual
keyboard
function.The
keyboard
wasVoice
separate
Split
the
“dual
keyboard”will
withdraw
this
function.
Drum two keyboards from the 24th keys in Repress
left. Press the number button can adjust the right key.
“ drum ” the
, at keyboard”will
Press
button
this time the withdraw
keyboard this
turnfunction.
to the percussion keyboard every
Repress
“dual
Double
Keyboard
Drum key instead
Vibrato
of one kind of percussion,repress the “drum” buttonSustain
again, the keyboard
turnVoice
to
Dru
Split
Double
Keyboard
regular.
Vibrato
Sustain
Drum
Drum
DrumVoice
Split
“ drumDRUM
” button ,um
at this
the keyboard
turn to“ drum
the percussion
every
” zu
, at keyboard
Press
button
this timeDer
theSound
keyboard
Drücken SiePress
die Taste
die time
Funktion
zu aktivieren
oder
deaktivieren.
desturn to the percus
Double
Keyboard
key instead of one kind
of percussion,repress
the
button
the
keyboard
turn
to
key“drum”
instead
of oneagain,
kind
of
percussion,repress
the
“drum” button aga
Vibrato
Sustain
Drum
gesamtenregular.
Keyboards wird durch Percussionsounds
Voice ersetzt.Split
regular.
Drum
Press “ drum ” button , at this time the keyboard turn to the percussi
Drum
Double
Double
Keyboard
key
instead
of turn
one kind
ofpercussion
percussion,repress
the
“drum”Keyboard
button again
, at this time
Press “Sustain
drum ” button
the
keyboard
toSustain
the
every
Vibratokeyboard
Vibrato
Drum
Voice
Split
Voice
Split
regular. the
key instead of one kind of percussion,repress
“drum” button again, the keyboard turn to
Transpose
regular.
Double
Keyboard
Press transpose “+/-” button,the corresponding musical scale
can goes Vibrato
up or goes down
Sustain
Dru
Voice
Split
for one note when you play with the black
and
white
keys.you
can
adjust
the
musical
scale
Double
Keyboard
Vibrato
Sustain
Drum
Split
for 6 levels upwards and downwards.Press “+”Transpose
and Voice
“-” together,the
system will recover the
Transpose
“+/-”
transpose
button,the
corresponding
musical scale ca
default
tone
automatically.
“+/-”
Presskeyboard
transpose
button,the correspondingPress
musical
scale can
goes
up or goes
down
for one
note when
play
with
the black
and white keys.you can ad
for one note when you play with the black and white
keys.you
can you
adjust
the
musical
scale
-Transpose+
for
upwards and
downwards.Press
Transpose
for 6 levels upwards and downwards.Press “+”
and6 levels
“-” together,the
system
will recover the“+” and “-” together,the
Transpose
default
keyboard
tone
automatically.
default keyboard
tone
automatically.
Press transpose “+/-” button,the corresponding musical scale can
Transpose
for one note when
you play
black
white
keys.you can adju
“+/-”
Press
transpose
button,the
corresponding
musical
scale
canthe
goes
up and
or
goes
down
-Transpose+
-Transpose+
Durch Drücken der Tasten TRANSPOSE+ und TRANSPOSEkönnen
Siewith
die
for 6 levels
upwards
and downwards.Press
“+”
and
“-” together,the sy
for one note when you play with the black
and white
keys.you
can adjust the
musical
scale
Program
Beat
Tonhöhe in
sechs
obenand
und
unten verändern.
Wenn
Sie
beide system
default “+”
keyboard
automatically.
forStufen
6 levelsnach
upwards
downwards.Press
and
“-”tone
together,the
will recover the
Press
“beat”
button
totone
start
metronome,theTonhöhe
tick-tock beat
sound
will be
Tasten gleichzeitig
drücken,
wird
die automatically.
ursprüngliche
wieder
hergestellt.
default
keyboard
-Transpose+
occur.There is 4 kinds of metronome to choose ,the beat effect will be added
Program
Beat
-Transpose+
Beat
when you perform.
Press beat
“beat”
button
start metronome,the
tick-tock beat sound
Beat
Press “beat” button to start metronome,the tick-tock
sound
willtobe
is 4 will
kinds
metronome to choose ,the beat effect will b
occur.There is 4 kinds of metronome to chooseoccur.There
,the beat effect
be of
added
when you perform.
when you perform.
Beat
TempoBeat
Beat
Beat
Press “beat” button to start metronome,theProgram
tick-tock beat sound w
occur.There
is 4 kinds
ofsound
metronome
Press “beat” button to start metronome,the
tick-tock
beat
will beto choose ,the beat effect will be
Press"+/-" can adjust the tempo of rhythm,beat,demo,the default value of the beat
you perform.
is 4 kinds of metronomewhen
to choose
,the beat effect will be added
Drücken Sie
die isoccur.There
Taste
BEAT
das Metronom
einoder
auszuschalten.
Das
tempo
120. And
theum
adjustment
area is 30-240.
Tempo
Tempo when you perform.
Beat
Press"
+
/
"
can
adjust
the tempo
of rhythm,beat,demo,the
de
Keyboard verfügt
über
4
verschiedene
Arten
von
Metronom.
Tempo
Press" + / - " can adjust the tempo of rhythm,beat,demo,the
default value
of the beat
tempo
is
120.
And
the
adjustment
area
is
30-240.
tempo is 120. And the adjustment area is 30-240.
Tempo
Tempo
Tempo
Tempo
Tempo
Press" + / - " can adjust the tempo of rhythm,beat,demo,the defa
Press" + / - " can adjust the tempo
of rhythm,beat,demo,the
default
value
of the beat
tempo
is 120. And the adjustment
area
is 30-240.
tempo is 120. And the adjustment area is 30-240.
Mit den Tasten + und - können Sie das Tempo von Rhythmus,
Metronom
Tempo
oder Demo im Bereich von 30 bis 240 einstellen. Ab Werk ist die Einstellung
120.
Tempo
Drum Pads
Das Keyboard verfügt über folgende 6 Arten von Drum- und Percussion Pads, die Sie bei Bedarf
auswählen können.
11
Rhythmus und Rhythmus-verwandte Funktionen
Rhythmus-Auswahl
Das Keyboard verfügt über 128 Rhythmen. Eine Übersicht über alle Rhythmen finden Sie im
Anhang dieser Bedienungsanleitung. Sie können den gewünschten Rhythmus direkt über das
numerische Pad eingeben oder die Rhythmus-Nummer mit den Tasten +/- ändern. Die Nummer
wird im Display angezeigt.
Start/Stop-Funktion
Drücken Sie die Taste START/STOP um das Abspielen eines Rhythmus zu starten oder zu
stoppen.
Sync-Funktion
Drücken Sie die Taste SYNC um die Funktion zu aktivieren. Drücken Sie anschließend eine
beliebige Taste im Bereich der ersten 19 Tasten von links um das Abspielen des Rhythmus zu
starten. Der Takt erscheint im Display und die Nummern zeigen den aktuellen Sound oder
Rhythmus an. Wenn die Chord-Funktion aktiv ist, drücken Sie eine der 19 linken Tasten um die
Begleitautomatik zu starten.
Fill In-Funktion
Wenn Sie die Taste FILL IN drücken während ein Rhythmus abgespielt wird, wir ein kurzes Fill In
eingefügt um dem Spiel einen interessanten Effekt zu verleihen.
12
/ending
III.Basic operation method
III.Basic operation method
Intro / Ending
5.Intro/ending
Drücken Sie
die Taste INTRO/ENDING um das 5.Intro/ending
Spiel mit einem Intro zu beginnen, gefolgt vom
Press
“Intro/ending”
button
to start
play the
Press “Intro/ending”
to start
play the
prelude,
then
to regular
rhythm
to prelude, then turn to
regulären Rhythmus.
Wenn Siebutton
die Taste
abermals
drücken
wird
einturn
Ending
eingeleitet.
continu.During the play of the rhythm, press the “Intro/ending” button
continu.During the play of the rhythm, press the “Intro/ending” button,tto start playing a
code for ending.
code for ending.
Sync
Intro/EndingStart/stopTeaching
Sync
Fill in
Start/stop
III.Basic operation
method
III.Basic operation method
III.Basic operation method
5.Intro/ending
Fill in
Intro/Ending
Teachin
III.Ba
Basic operation
s “Intro/ending” button to start play the Press
prelude,
then turn tobutton
regular
to the prelude, then turn to
“Intro/ending”
to rhythm
start play
regular
1.Turn
onrhythm
powerto
6.Rhythm
volume
6. Rhythm
volume
.During the play of the rhythm,
press
the
“Intro/ending”
button,tto
start
playing
a the “Intro/ending” button,tto start playing a
5.Intro/ending
continu.During
the
play of the
rhythm,
press
After
power
adapter
was pc
There
are 9 levels
for rhythm
volume,the
default rhythm
is 07.to
There arePress
9code
levels
forden
rhythm
volume,the
default
is 07.to
pressturn
the
“+/-”
button
r ending.
for
ending.
Lautstärke-Anpassung
für
Rhythmus
“Intro/ending”
button
to start
playrhythm
the prelude,
then
to regular
rhythm
to and press “
to
start
the
playing
to LCD
adjust
rhythm
and
LED
or LCD will be show it . Repre
to adjust continu.During
the
volume
the
or
willthe
be show
it .volume
Repress
thethe
“+/-”
button
Sync
Fill inrhythm Intro/Ending
Teaching
Start/stop
Intro/Ending button,tto
Sync press the
Fill in“Intro/ending”
Teachingstart playing a
Start/stop
the and
play
of LED
the rhythm,
the volume
keyboard
back to the default volume for the rhythm.
the keyboard will return back to the default
for will
the return
rhythm.
code for ending.
Beim Einschalten des Keyboard istStart/stop
die Lautstärke
Stufe
Rhythm
volume
Intro/Ending
Sync auf
Fill in7 eingestellt.
Teaching Rhythm volume
Insgesamt stehen 9 Stufen zur Lautstärke-Anpassung zur Verfügung. Mit
Hilfe der Tasten + und - können Sie die Lautstärke verändern. Die Änderung
thm volume
6.Rhythm
wird im Display
Durch volume
gleichzeitiges
Drücken
der chord
Tasten +/- wird
Auto angezeigt.
bass chord
Auto
bass
e are 9 levels for rhythm volume,the default
is 07.tofor
press
the “+/-”
button default rhythm is 07.to2.Master
volume
Thererhythm
are 9 levels
rhythm
volume,the
press the “+/-”
buttoncontrol
die
ursprüngliche
Einstellung
wieder
hergestellt.
st the rhythm volume and
the LED
orRhythm
LCD
will be
show
it . Repress
the
“+/-”
Single
chord
Single
chord
6.
volume
to adjust
the
rhythm
volume
and
thebutton
LED or LCD will be show it . Repress the “+/-” button
This keyboad has 9 level
board will return back to the
default
volume
the
rhythm.
when
theThere
rhythm
isfor
to return
press
the
tovolume
enter
the
chord
function.
when
the
rhythm
isrhythm
start,
to
press
the
chord”
to enter
the
the keyboard
will
back“single
to
the chord”
default
forsingle
the
rhythm.
are
9start,
levels
for
rhythm
volume,the
default
is 07.to
press
the “+/-”
button
07,“single
press
the
“+” and
“-”,the
At this time
,in
the
chord
area
(1-19key),press
any
key,
can
heared
different
chord
rhythm
At
this
time
,in
the
chord
area
(1-19key),press
any
key,
can
heared
diffe
to adjust
LCD volume
will be show it . Repress
the “+/-”
button with “-” the m
press
“+”together
Rhythm
volume the rhythm volume and the LED orRhythm
press the the
“start/stop”
to withdraw
function.
the “start/stop”
this function.
keyboard
will returnthis
back
topress
the default
volume to
forwithdraw
the rhythm.
bass chord
Chord-Begleitung
Single chord
Rhythm volume
Single chord
Auto bass chord
Tone
chord
chord
Single Finger
chord
Finger chord
Auto
bass
chord
n the rhythm is start,to press the “single
chord”
enter the
chord
function.
when
thetorhythm
is single
start, to
press
the “single chord” to enter the1.Tone
single chord
function.
selection
ime ,in the chord
area (1-19key),press
anythis
key,
can,in
heared
different
rhythm
At
time
the chord
area chord
(1-19key),press
any key, can heared different
rhythm
Single
Finger Single
chord
Thechord
keyboard
has 128 to
he “start/stop” to withdraw this function.
pressthe
the
“start/stop”
to withdraw
this
function.
when
rhythm
is start,
to press
the
“single chord”
to enter the single
chord can
function.
tones,you
press the 0~9
Chord
clear
Chord clear
At this time ,in the chord area
(1-19key),press any key, can heared different chord rhythm
Single chord
Single chord
press the “start/stop” to withdraw this function.Wenn der Style-Modus gestartet ist,
Demo
drücken Sie die Taste SINGLE
Finger chord
Chord clear
Finger chord
Finger chord
Single chord
Drücken
Sie nun
eine Taste
when the rhythm is start, to press
the “finger
to enter
finger
chord
function.
when chord”
the FINGER.
rhythm
is the
start,
to press
the
“finger
chord” to enter the f
Finger chord
At this time ,in the chord area (1-19key) ,press
any
key,
can
heared
different
chord
rhythm
(Tasten
1 bisany
19)
umcan heared diffe
At this time ,inim
theBegleitbereich
chord area (1-19key)
,press
key,
Rhythm
press the “start/stop” to withdraw this function.
press the “start/stop”
to withdraw thisAkkord
function.zu hören.
den entsprechenden
Single chord
Finger chord
Finger chord
DrückenSingle
Siechord
die Taste START/STOP
um die Funktion wieder auszuschalten.
Chord clear
Chord clear
Tone
Finger chord
chord
Finger chord
n the rhythm is start,to press the “fingerwhen
chord”
enter the
function.
thetorhythm
is finger
start, tochord
press
the “finger chord” to enter the finger chord function.
ime ,in the chord area (1-19key) ,press
any
key,
can
different
chord rhythm
At
this
time
,inheared
the chord
area (1-19key)
,press any key, can heared different chord rhythm
Finger
chord
Chord clear
Chord clear
he “start/stop” to withdraw this function.
press
the
“start/stop”
to
withdraw
this
function.
Effects
control
when the rhythm is start, to press the “finger chord” to enter the finger
chordand
function.
Fingered
Single chord
Single (1-19key)
chord
At this time ,in the chord area
,press any key, can heared different chord rhythm
1.Sustain function
press the “start/stop” to withdraw this function.
Single chord
Press “sustain” to start su
Single
chord
Wenn der Rhythmus startet, drücken
play with white and black keyb
Finger chord
Finger chord
Sie die Taste
FINGERED
um die AutoChord
clear
Chord clear
After
chord is Drücken
start,press the “chord clear”
button,the
rhythm the Finger
Bass-Funktion
zu the
aktivieren.
Sustain
chordclear” button,the
After the
chord ischord
start,press
“chord
chord rh
Finger
chord
is stop.
But the other
rhythm
is
still
play.is stop. But the other rhythm is still play.
Sie
die
Taste
START/STOP
um
die
Chord clear
Chord clear
Funktion wieder auszuschalten.
Chord clear
Chord clear
Single chord
chord
2.Vibrato Single
function
clear
Chord clear
Press
“vibrato” to start vib
Single chord
Chord
Clear
with white
and black key
the chord is start,press the “chord clear”
button,the
chord
rhythm
After
the chord
is start,press
the “chord
clear” button,the chord play
rhythm
Finger
chord
Finger chord
.But the other rhythm is still play.
is stop.
Chord
clearBut the other rhythm is still play.
After zu
thestoppen,
chord is während
start,pressder
theRhythmus
“chord clear”
button,the drücken
chord rhythm
Um die Chord-Begleitung
weiterspielt,
Sie
is stop. But the other rhythm is still Chord
play.clear
die Taste CHORD CLEAR.
Sustain
Finger chord
Chord clear
Chord clear
13
Chord-Lautstärke
Beim Einschalten des Keyboard ist die Lautstärke auf Stufe 7 eingestellt.
Insgesamt stehen 9 Stufen zur Lautstärke-Anpassung zur Verfügung. Mit Hilfe
der Tasten + und - können Sie die Lautstärke verändern. Die Änderung wird
im Display angezeigt. Durch gleichzeitiges Drücken der Tasten +/- wird die
ursprüngliche Einstellung wieder hergestellt.
Aufnahme
Drücken Sie RECORDING um den Aufnahmemodus zu aktivieren. Drücken Sie eine
beliebige Taste um die Aufnahme zu starten. Die maximale Aufnahmemenge beträgt 110
Noten. Wenn sie erreicht sind, erscheint im Display „full“. Eine weitere Aufnahme ist
nicht möglich. Drücken Sie die Taste erneut, um den Speicher zu leeren und eine neue
Aufnahme zu beginnen.
Drücken Sie die Taste PLAY um Ihre Aufnahme abzuspielen.
Drücken Sie die Taste PROGRAM um die Programmierfunktion zu starten. Sie können 8
Arten von Drum Pads oder das Keyboard benutzen um einen Rhythmus zu
programmieren. Der bearbeitete Rhythmus kann höchstens 32 Stücke an Percussion
Sounds aufnehmen. Drücken Sie die Taste PLAY um den neuen Rhythmus abzuspielen.
Drücken Sie die Tasten +/- um perfekte Effekte zu erhalten. Das Drücken dieser Taste
löscht den Speicher um eine neue Programmierung beginnen zu können.
Lernfunktion
Um die Lernfunktion an- oder abzuschalten drücken Sie die Taste TEACH. Drücken Sie die Taste
SONG um einen Song auszuwählen, den Sie üben möchten. Sie können den Song beliebig
wiederholen.
Ruhezustand
Wenn über einen Zeitraum von 5 Minuten keine Eingabe erfolgt, schaltet das Keyboard in den
Ruhezustand um. Durch Drücken einer beliebigen Taste wird der Ruhezustand beendet.
14
Übersicht über die Sounds (Tones)
Appendix I.Tone list
15
Übersicht über die Rhythmen
16
Übersicht über die Demo-Songs
1
Turkish March
6
Dream Wedding
2
Red River
7
Ballade Pour Adeline
3
American Patrol
8
Smile Polka
4
Oh, Susanna
9
Jingle Bells
5
Mozart Piano Sonatas
10
Radetzky March
Hilfe bei Störungen
Fehler
Abhilfe / Erklärung
Beim Einschalten des Keyboards ertönen
Geräusche.
Das ist normal und kein Grund zur Beunruhigung.
Nach dem Einschalten ist kein Sound zu
hören.
Überprüfen Sie die Lautstärke-Einstellung und
vergewissern Sie sich, dass kein Kopfhörer angeschlossen
ist.
Verzerrter Sound mit oder ohne
Unterbrechungen.
Kann vorkommen, wenn ein falsches Netzteil verwendet
wird oder die Batterieladung zu schwach ist. Bitte
benutzen Sie das mitgelieferte Netzteil, bzw. tauschen Sie
die Batterien aus.
Eine Note und ihr Timbre sind
unterschiedlich in einem Sound.
Das ist ein normales Phänomen, verursacht durch
unterschiedliche Samples.
Das Sustain verschiedener Sounds ist
unterschiedlich.
Das ist beabsichtigt, weil das Sustain für jeden Sound
bestmöglich angepasst wird.
Lautstärke insgesamt oder die Lautstärke
der Begleitung scheinen nicht normal.
Überprüfen Sie die Einstellungen für die Lautstärken.
Beim Benutzen des Netzteils erscheint
keine Anzeige im Display und kein Sound
ist zu hören.
Überprüfen Sie das Netzteil und die Stromversorgung und
Spannung der Steckdose.
Beim Gebrauch von Batterien erscheint
keine Anzeige im Display und kein Sound
ist zu hören.
Überprüfen Sie ob die Batterien korrekt eingelegt sind oder
eventuell ausgelaufen sind.
Die Tonhöhe is nicht korrekt.
Überprüfen Sie ob der Parameter „Transpose“ auf „00“
gestellt ist.
Unerklärliche Geräusche.
Bitte stellen Sie sicher, dass Mobiltelefone ausgeschaltet
sind oder sich in ausreichender Entfernung zum Keyboard
befinden um keine Interferenzen verursachen zu können.
17
Technische Spezifikationen
Standard
GB/8898-2011, GB13837-2012, GB17625.1-2012
Display
LED-Display / LED-Display
Sounds
128 Tones
Rhythmen
128 ausgewählte Rhythmen
Demosong
10
Effekte und Einstellungen
Sustain, Vibrato, Double Voice, Transpose,Metronom, TastaturSplit, Intro/Ending, Drum
Aufnahme
Record, Play, Program
Andere Funktionen
Drum Pads, MP3-Funktion
Regler Begleitung
Start/Stop, Sync, Fill In, Tempo
Begleitautomatik
Single, Fingered, Chord Clear, Lautstärke
Lernfunktion
Intelligente Lernfunktion, Teaching
Funktionen
Einschaltknopf, Lautstärkeregler für Gerät und Begleitung
Externe Anschlüsse
Strom, Kopfhörer, MIDI Out, Mikrophon, MP3
Diapason
C2-C7
Genauigkeit des Tunings
≤ 3 cents
Maße in mm
948 x 315 x 105
Gewicht in kg
5,0
Stromversorgung
AC 220 V, DC 12 V, 500 mA
DC In
DC 12 V
Ausgangsleistung
2x6W
Stromverbrauch im Ruhezustand
150 mA
Zubehör
Adapter, Notenständer, Bedienungsanleitung
18
WEEE-Erklärung / Entsorgung
Ihr Produkt wurde mit hochwertigen Materialien und Komponenten entworfen und
hergestellt, die recyclebar sind und wieder verwendet werden können. Dieses Symbol
bedeutet, dass elektrische und elektronische Geräte am Ende ihrer Nutzungsdauer
vom Hausmüll getrennt entsorgt werden müssen. Bitte entsorgen Sie dieses Gerät bei
Ihrer örtlichen kommunalen Sammelstelle oder im Recycling Center. Bitte helfen Sie
mit, die Umwelt, in der wir leben, zu erhalten.
!
Technische Änderungen und Änderungen im Erscheinungsbild vorbehalten. Alle Angaben
entsprechen dem Stand bei Drucklegung. Für die Richtigkeit und Vollständigkeit der enthaltenen
Beschreibungen, Abbildungen und Angaben übernimmt Musikhaus Kirstein GmbH keinerlei
Gewähr. Abgebildete Farben und Spezifikationen können geringfügig vom Produkt abweichen.
Musikhaus Kirstein GmbH - Produkte sind nur über autorisierte Händler erhältlich. Distributoren
und Händler sind keine Handlungsbevollmächtigten von Musikhaus Kirstein GmbH und haben
keinerlei Befugnis, die Musikhaus Kirstein GmbH in irgendeiner Weise, sei es ausdrücklich oder
durch schlüssiges Handeln, rechtlich zu binden. Diese Bedienungsanleitung ist urheberrechtlich
geschützt. Jede Vervielfältigung, bzw. jeder Nachdruck, auch auszugsweise, und jede Wiedergabe
der Abbildungen, auch in verändertem Zustand, ist nur mit schriftlicher Zustimmung der Firma
Musikhaus Kirstein GmbH gestattet.
!
Herstellerangaben
Musikhaus Kirstein GmbH
Bernbeurener Strasse 11
86956 Schongau
Telefon: 0049-909494-0
Telefax: 0049-909494-19
www.kirstein.de
!
19