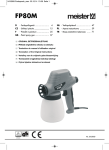
1
D Bedienungsanleitung Brotbackautomat GB Instruction Manual Automatic Bread Maker F Mode d’emploi de la machine à pain I Istruzioni per l’uso della macchina del pane CZ Návod k použití Domácí pekárna BHG 395 BHG 395 D Inhalt GB Contents Wichtige Sicherheitshinweise . . . . . . . . . . . . . . . 6 Hinweise zum Bedienfeld. . . . . . . . . . . . . . . . . . . . 7 Warmhaltefunktion. . . . . . . . . . . . . . . . . . . . . . . . . . 9 Speicherfunktion. . . . . . . . . . . . . . . . . . . . . . . . . . . . 9 Zeitphasen-Tabelle. . . . . . . . . . . . . . . . . . . . . . . . . . 10 Sperre des Bedienfelds. . . . . . . . . . . . . . . . . . . . . . 11 Umgebung. . . . . . . . . . . . . . . . . . . . . . . . . . . . . . . . . . 11 Warnhinweise . . . . . . . . . . . . . . . . . . . . . . . . . . . . . . . 11 So backen Sie Brot. . . . . . . . . . . . . . . . . . . . . . . . . . . 11 Spezielle Einweisung . . . . . . . . . . . . . . . . . . . . . . . . 12 Reinigung und Pflege . . . . . . . . . . . . . . . . . . . . . . . 13 Kleine Lebensmittelkunde . . . . . . . . . . . . . . . . . . 14 Fehlerbehebung. . . . . . . . . . . . . . . . . . . . . . . . . . . . . 16 Rezepte. . . . . . . . . . . . . . . . . . . . . . . . . . . . . . . . . . . . . . 19 Garantie . . . . . . . . . . . . . . . . . . . . . . . . . . . . . . . . . . . . . 22 Important safeguards. . . . . . . . . . . . . . . . . . . . . . . 23 Control Panel Guide. . . . . . . . . . . . . . . . . . . . . . . . . 24 Keep warm . . . . . . . . . . . . . . . . . . . . . . . . . . . . . . . . . . 26 Memory . . . . . . . . . . . . . . . . . . . . . . . . . . . . . . . . . . . . . 26 Time setting table. . . . . . . . . . . . . . . . . . . . . . . . . . . 27 Control panel lock function. . . . . . . . . . . . . . . . . . 28 Environment. . . . . . . . . . . . . . . . . . . . . . . . . . . . . . . . . 28 Warning display. . . . . . . . . . . . . . . . . . . . . . . . . . . . . 28 How to make bread. . . . . . . . . . . . . . . . . . . . . . . . . . 28 Special introduction. . . . . . . . . . . . . . . . . . . . . . . . . 29 Cleaning and maintenance. . . . . . . . . . . . . . . . . . 30 A little fool science . . . . . . . . . . . . . . . . . . . . . . . . . . 31 Troubleshooting guide. . . . . . . . . . . . . . . . . . . . . . 33 Recipes - Appropriate for the programs. . . . . 36 Guarantee. . . . . . . . . . . . . . . . . . . . . . . . . . . . . . . . . . . 39 F TABLE DES MATIERES I Contenuto Consignes de sécurité importantes . . . . . . . . . 40 Remarques sur le panneau de commande. . . . 41 Fonction de maintien au chaud . . . . . . . . . . . . . 43 Fonction memoire . . . . . . . . . . . . . . . . . . . . . . . . . . 43 Tableau des phases. . . . . . . . . . . . . . . . . . . . . . . . . . 44 Blocage du panneau de commande . . . . . . . . 45 Environnement . . . . . . . . . . . . . . . . . . . . . . . . . . . . . 45 Avertissement. . . . . . . . . . . . . . . . . . . . . . . . . . . . . . . 45 Voila comment faire cuire faire . . . . . . . . . . . . . . 45 Consignes speciales . . . . . . . . . . . . . . . . . . . . . . . . . 46 Nettoyage et entretien . . . . . . . . . . . . . . . . . . . . . . 47 Petite introduction aux aliments . . . . . . . . . . . . 47 Reparation des defaillances . . . . . . . . . . . . . . . . . 50 Recettes . . . . . . . . . . . . . . . . . . . . . . . . . . . . . . . . . . . . . 53 Garantie . . . . . . . . . . . . . . . . . . . . . . . . . . . . . . . . . . . . . 56 Avvertenze importanti per la sicurezza . . . . . 57 Indicazioni per il pannello comandi . . . . . . . . . 58 Funzione di mantenimento in caldo . . . . . . . . 60 Funzione di memoria. . . . . . . . . . . . . . . . . . . . . . . . 60 Tabella con le fasi di tempo . . . . . . . . . . . . . . . . . 61 Blocco del pannello comandi . . . . . . . . . . . . . . . 62 Ambiente. . . . . . . . . . . . . . . . . . . . . . . . . . . . . . . . . . . . 62 Avvertenze di pericolo . . . . . . . . . . . . . . . . . . . . . . 62 Così si fa il pane . . . . . . . . . . . . . . . . . . . . . . . . . . . . . 62 Funzioni speciali. . . . . . . . . . . . . . . . . . . . . . . . . . . . . 63 Pulizia e manutenzione . . . . . . . . . . . . . . . . . . . . . 64 Piccolo manuale di cucina . . . . . . . . . . . . . . . . . . . 64 Risoluzione dei problemi. . . . . . . . . . . . . . . . . . . . 67 Ricette. . . . . . . . . . . . . . . . . . . . . . . . . . . . . . . . . . . . . . . 70 Garanzia. . . . . . . . . . . . . . . . . . . . . . . . . . . . . . . . . . . . . 73 CZ Obsah Důležité bezpečnostní pokyny. . . . . . . . . . . . . . 74 Pokyny k ovládacímu panelu. . . . . . . . . . . . . . . . 75 Funkce udržování teploty. . . . . . . . . . . . . . . . . . . . 77 Paměťová funkce. . . . . . . . . . . . . . . . . . . . . . . . . . . . 77 Tabulka časového rozvržení jednotlivých fázi. . . 78 Zablokování ovládacího panelu. . . . . . . . . . . . . 79 Prostředí. . . . . . . . . . . . . . . . . . . . . . . . . . . . . . . . . . . . . 79 Výstražná doporučení. . . . . . . . . . . . . . . . . . . . . . . 79 Chléb upečete následujícím způsobem. . . . . 79 Speciální instrukce. . . . . . . . . . . . . . . . . . . . . . . . . . . 80 Čištění a údržba. . . . . . . . . . . . . . . . . . . . . . . . . . . . . . 81 Potraviny . . . . . . . . . . . . . . . . . . . . . . . . . . . . . . . . . . . . 81 Odstranění problémů. . . . . . . . . . . . . . . . . . . . . . . 84 Recepty. . . . . . . . . . . . . . . . . . . . . . . . . . . . . . . . . . . . . . 87 Zárucní list. . . . . . . . . . . . . . . . . . . . . . . . . . . . . . . . . . . 90 3 BHG 395 1 D 2 3 4 1Griff 2Deckel 3Sichtfenster 4Bedienfeld 5Gehäuse 6Backform 7Knethaken für Backform 8Doppelbackform 9 Knethaken für Doppelbackform 10Messbecher 11 Messlöffel 12Knethakenentferner 13Teigschaber BHG 395 I Änderungen vorbehalten. GB 5 6 7 1Handle 2Lid 3View Windows 4Control Panel 5Housing 6Bread Pan 7Kneading Blades 8 Double Bread Pan 9 Kneading Blades for Double Pan 10 Measuring Cup 11 Measuring Spoon 12Hook 13 Dough Scraper Product may be subject to change. 8 9 10 11 12 13 4 F 1Poignée 2Couvercle 3Lucarnes 4Panneau de commande 5Boîtier 6Moule à pain 7Crochets de pétrissage 8 Moule double 9 Crochets de pétrissagem 10 Verre gradué 11 Mesurette 12Retire-crochets 13Spatule Sous réserve de modification. 1Manico 2Coperchio 3Oblò 4Pannello comandi 5Corpo macchina 6Recipiente pane 7Lame impastatrici recipiente 8 Recipiente pane a due scomparti 9Lame impastatrici recipiente a due scomparti 10 Tazza graduata 11 Misurino 12 Gancio di estrazione lame 13Spatola D Anschlusswert: 230 V ~ 50 Hz / 815 W Maße (H x B x T): 305 x 400 x 255 mm Gewicht (brutto/netto): 11,2 kg / 8,8 kg GB Technical Details: Connected load: 230 V ~ 50 Hz / 815 W Measurements (h x w x d): 305 x 400 x 255 mm Weight (gross/net): 11,2 kg / 8,8 kg Il prodotto può essere soggetto a modifiche. CZ 1Úchyt 2Víko 3Průhledové okénko 4Ovládací panel 5Kryt 6 Velká forma na pečení 7 Hnětací hák pro velkou formu 8Dělená forma na pečení 9Hnětací hák pro dělenou formu 10 Velká odměrka 11 Malá odměrka 12 Háček na odstranění hnětače 13 Stěrka Změny vyhrazeny. Technische Daten: F DONNÉES TECHNIQUES : Alimentation: 230 V ~ 50 Hz / 815 W Dimensions (H x L x P): 305 x 400 x 255 mm Poids (brut/net): 11,2 kg / 8,8 kg I DATI TECNICI: Tipologia di connessione: 230 V ~ 50 Hz / 815 W Dimensioni (A x L x P): 305 x 400 x 255 mm Peso (lordo/netto): 11,2 kg / 8,8 kg CZ TECHNICKE UDAJE: Připojení: 230 V ~ 50 Hz / 815 W Rozměry (v x š x h): 305 x 400 x 255 mm Hmotnost (brutto/netto) 11,2 kg / 8,8 kg 5 D D Wichtig! Bitte lesen Sie die Gebrauchsanweisung vor der inbetriebnahme sorgfältig durch und bewahren Sie diese auf. Sicherheitshinweise Beim Gebrauch von Elektrogeräten sind zum Schutz gegen elektrischen Schlag, Verletzungsund Brandgefahr folgende grundsätzliche Sicherheitsmaßnahmen zu beachten. Dieses Gerät ist nur für den hauswirtschaft- lichen Gebrauch und nicht für den gewerblichen Einsatz geeignet. Überprüfen Sie vor Anschluss an die Strom versorgung, ob die Netzspannung mit der Angabe des Typenschildes auf dem Gerät über einstimmt. Dieses Gerät ist mit einem Schutzkontakt Vor dem ersten Gebrauch Oberseite der Backform, um das Brot zu entnehmen. Dies kann zur Beschädigung der Form führen. 1. Bitte überprüfen Sie, ob alle Teile und das Zubehör vollständig und schadenfrei sind. Um einen elektrischen Schlag zu vermeiden, 2. Reinigen Sie alle Teile wie im Abschnitt „Reinigung und Pflege“ angegeben. tauchen Sie niemals das Kabel, den Stecker oder das Gehäuse in Wasser oder andere Flüssigkeiten. Ziehen Sie nach jedem Gebrauch den Netz stecker. Ebenso bevor Sie Zubehör anbringen oder entfernen und ehe Sie es reinigen. Stoppen Sie alle laufenden Programme, bevor Sie den Netzstecker aus der Steckdose ziehen. Achten Sie darauf, dass das Anschlusskabel nicht von Tisch oder Arbeitsplatte herunterhängt. Schützen Sie das K abel vor heißen Flächen. 3. Stellen Sie den BACKEN-Modus ein und backen Sie ohne Inhalt etwa10 Minuten. Lassen Sie das Gerät abkühlen, entfernen die Teile und reinigen Sie die Teile erneut. 4. Trocknen Sie alle Teile gut ab und bauen diese wieder zusammen. Das Gerät ist nun zur Nutzung bereit. 14 Stellen Sie das Gerät nicht auf oder in die Nähe eines heißen Gas- oder Elektrokochers oder in einen aufgeheizten Backofen. Bringen Sie niemals Metallfolien oder andere Materialien in den Brotbackautomaten ein. Sie bergen das Risiko von Brand oder Kurzschluss. 15 Nutzen Sie das Gerät nur bestimmungsgemäß. Nutzen Sie das Gerät nicht im Freien. Das Gerät darf nicht mehr benutzt werden, Stellen Sie sicher, dass das Gerät nicht mit leicht 17 In diesen Fällen muss das Gerät dem Hersteller oder seinem Kundendienst zur Überprüfung, Reparatur oder Neueinstellung zurückgeschickt werden. Verwenden Sie nur das vom Hersteller emp- fohlene Zubehör. Die Benutzung von anderen Zubehörteilen kann Beschädigungen am Gerät oder gar Verletzungen verursachen. Starten Sie das Gerät niemals, solange die Back- form nicht korrekt eingesetzt und mit den notwendigen Zutaten gefüllt ist. entzündlichem Material (z. B. Vorhänge, Textilien, Wände, u. ä.) in Berührung kommt oder bedeckt wird. Können Hitze und Dampf des Backautomaten nicht frei abziehen, stellt dies eine Brandgefahr dar. 16 18 1. Normal 2. Vollkorn 3. Französisch 4. Schnell 5. SÜSS 6. Kuchen 7. Marmelade 8. Teig 9. Ultraschnell 10. Backen 11. Dessert 12. Hausgemacht 19 HELL MITTEL DUNKEL PAUSE 20 PROZESS Berühren Sie daher keine heißen Oberflächen, benutzen Sie nur Griffe und Schalter. ZEIT LICHT Berühren Sie niemals rotierende Teile. Transportieren Sie das Gerät nicht, wenn es GRÖSSE FARBE MENÜ START STOPP heiße Flüssigkeiten (z. B. Marmelade) enthält. sonen mit eingeschränkter geistiger / physischer Fähigkeit oder Kinder vorgesehen. Sie e rkennen die Gefahr nicht, die beim Umgang mit elektrischen Geräten entstehen kann. Deshalb lassen Sie nie Kinder unbeaufsichtigt mit dem Elektrogerät hantieren. Lassen Sie in Gegenwart von Kindern besondere Sorgfalt walten. START / STOPP Halten Sie, um das Programm wieder zu stoppen, die START / STOPP-Taste etwa 1,5 Sekunden lang gedrückt. Es ertönt ein Piepton der bestätigt, dass das Programm abgeschaltet ist. Diese Funktion sorgt dafür, eine ungewollte Unterbrechung des Backvorganges zu vermeiden. Wählen Sie das gewünschte Programm durch Drücken der MENÜ-Taste. Nach jedem Tastendruck (begleitet von einem akustischen Signal) ändert sich die Programmanzeige (17). Die Funktionen der 12 verschiedenen Programme (14) werden nachfolgend erklärt. 1. Normal: Einfaches Kneten, Aufgehen lassen und Backen von normalem Brot. Geben Sie Zutaten zur Geschmacksverbesserung bei. 18 Brotgröße 19 Programmdauer 20 Bräunungsgrad 2. Vollkorn: Kneten, Aufgehen lassen und Backen von Brot aus Vollkornmehl. Es ist nicht ratsam die Funktion der Zeitverzögerung zu nutzen, da das Ergebnis nicht allzu gut ist. * Der Hersteller behält sich vor, Änderungen am Bedienfeld ohne vorherige Ankündigung zu unternehmen. 3. Französisch: Kneten, Aufgehen lassen und Backen von Brot mit verlängerter Gehzeit. Das Brot hat eine knusprige Kruste und eine luftige Struktur. 14 wählbare Programme 15 Programmabschnitt 16 Tastensperre 17 gewähltes Programm Kinder sollten immer beaufsichtigt werden, um sicher zu stellen, dass sie das Gerät nicht als Spielzeug benutzen. Die Ziffer „1” zeigt das voreingestellte Programm (17) an. Das Gewicht von „1200 g” (18) und die Bräunungsstufe „MITTEL” (20) sind die ab Werk eingestellten Vorgaben. MENÜ Das Gerät erhitzt sich während des Betriebes. Das Gerät ist nicht für die Benutzung durch Per- Sobald Sie das Gerät mit der Stromversorgung verbinden, ertönt ein Piepton und „1 2:55, 1200 g, MITTEL” erscheint auf dem Display. Jedoch blinkt der Doppelpunkt zwischen den Ziffern „2” und „55” (19) nicht. Nach dem Programmstart sind keine anderen Tasten außer der START / STOPP-, LICHT- und PAUSE-Taste betriebsbereit. Kneten 1 AUFGEHEN 1 KneTEN 2 AUFGEHEN 2 AUFGEHEN 3 BaCkeN WarmHALTEN 1000g 1200g 1400g Nach dem Anschluss an das Stromnetz Anhand dieser Taste wird das gewählte Backprogramm an- oder ausgeschaltet. Um das Programm zu starten, halten Sie die START / STOPPTaste bitte 1,5 Sekunden lang gedrückt. Ein kurzer Piepton ist zu hören und die beiden Punkte der Zeitanzeige beginnen zu blinken – das Programm startet. Hinweise zum Bedienfeld * stecker ausgestattet und darf nur an eine vorschriftsmäßig installierte Schutzkontaktsteckdose angeschlossen werden. wenn: – dessen Netzanschlussleitung oder Stecker beschädigt ist, – das Gerät nicht einwandfrei funktioniert, – es heruntergefallen ist, – es irgendwelche Beschädigungen aufweist. 6 Schlagen Sie niemals auf die Ecken oder die 7 D D 6. Kuchen: Kneten, Aufgehen lassen und Backen. Die Gehphase wird von Backpulver oder Soda unterstützt. 7. Marmelade: Kochen von Marmelade und Konfitüre unter ständigem Rühren. Obst oder Gemüse muss zerkleinert werden, ehe es in die Backform hinein gegeben wird. 8. Teig: Kneten und Aufgehen lassen ohne Back vorgang. Entnehmen Sie den Teig und nutzen Sie ihn zur Herstellung von Pizza, Brötchen, Dampfnudeln usw. 9. Ultraschnell: Kneten, Aufgehen lassen und Backen in kürzester Zeit. Das erzeugte Brot ist von dichter Beschaffenheit. 10. Backen: Nur Backen, ohne Kneten oder Aufgehen lassen. Nutzen Sie diese Funktion auch zur Verlängerung der Backzeit von anderen Pro grammen. Die Backzeit stellen Sie durch Drücken der ZEITTaste ein. Halten Sie diese gedrückt, läuft die Zeit schneller ab. 11. Dessert: Kneten, Aufgehen lassen und Backen von Nachspeisen. 12. Hausgemacht: Hier können Sie Ihr eigenes Programm eingeben, indem Sie selbst die Zeit für jeden Schritt bestimmen. Sie können die untenangegebenen Zeiten für Kneten, Aufgehen lassen, B acken und Warmhalten einstellen, um Ihr persönliches Lieblingsbrot zu kreieren. Der Zeitbereich liegt bei jedem Programmab schnitt (15) wie folgt: 8 KNETEN 1 AUFGEHEN 1 KNETEN 2 AUFGEHEN 2 AUFGEHEN 3 BACKEN WARMHALTEN 6 – 14 Minuten 20 – 60 Minuten 5 – 20 Minuten 5 – 120 Minuten 0 – 120 Minuten 0 – 80 Minuten 0 – 60 Minuten Die GRÖSSE kann nur für folgende Programme gewählt werden: 1. NORMAL, 2. VOLLKORN, 3. FRAN ZÖSISCH, 4. SCHNELL, 5. SÜSS und 9. ULTRASCHNELL. 1. Drücken Sie die PROZESS-Taste einmal. Es erscheint KNETEN 1 (15) auf der LCD-Anzeige. Betätigen Sie anschließend die ZEIT-Taste, um die Zeit (19) in Minuten einzugeben. Die Zeit läuft schneller ab wenn Sie die ZEIT-Taste gedrückt halten. Drücken Sie die PROZESS-Taste, um Ihre Wahl für den ersten Schritt zu bestä tigen. Gewichtseinstellung 1400 g Tipps & Tricks 5. Süss: Kneten, Aufgehen lassen und Backen von süßem Gebäck. Sie können Zutaten hinzufügen, um das Aroma zu verbessern. Im Menü HAUSGEMACHT: 2. Betätigen Sie die PROZESS-Taste, um zum nächsten Schritt zu gelangen. AUFGEHEN 1 (15) erscheint auf der LCD Anzeige. Drücken Sie die ZEIT-Taste, um die Zeit (19) einzustellen und bestätigen Sie Ihre Wahl durch erneutes Drücken der PROZESS-Taste. Ein erneuter Tastendruck innerhalb einer Minute führt zum Erlöschen der Beleuchtung. Wird die Taste innerhalb einer Minute nicht betätigt, schaltet sich die Beleuchtung automatisch aus. FARBE Wählen Sie anhand dieser Taste den gewünschten Bräunungsgrad der Brotkruste: HELL, MITTEL oder DUNKEL (20). ZEIT Wenn Sie wünschen, dass das Gerät nicht sofort mit dem Backen beginnt, können Sie mithilfe dieser Taste die gewünschte Zeitverzögerung eingeben. GRÖSSE Drücken Sie diese Taste, um das Gewicht des Brotes einzustellen: 1000 g, 1200 g oder 1400 g. Ihre Wahl wird auf dem Display (18) angezeigt. Bitte beachten Sie, dass die Backzeit je nach Brotgewicht variiert. pelpunkt der Zeitanzeige beginnt zu blinken. Die ablaufende, restliche Zeit wird angezeigt. Beachten Sie bitte, dass die maximale Zeitver zögerung 13 Stunden beträgt. Nutzen Sie keine verderblichen Zutaten wie Eier, frische Milch, Früchte oder Zwiebeln im Verzögerungsmodus. PROZESS Mithilfe dieser Taste stellen Sie im Menü 12 (HAUSGEMACHT) Ihr persönliches Backprogramm ein. PAUSE Nach dem Beginn des Programms kann der Betrieb mittels der PAUSE-Taste jederzeit unterbrochen werden. Drücken Sie die Taste für ca. 1,5 Sekunden – das Programm wird unterbrochen, die Einstellungen bleiben jedoch gespeichert. Die restliche Betriebszeit wird blinkend auf dem D isplay angezeigt. Das Programm wird fortgesetzt sobald die PAUSETaste erneut betätigt wird. Warmhaltefunktion Das Brot kann automatisch bis zu einer Stunde nach dem Backen warm gehalten werden (15). Wenn Sie das Brot während des Warmhaltens herausnehmen wollen, schalten Sie das Programm mittels der START / STOPP-Taste aus. So stellen Sie die Zeitverzögerung ein: 1. Wählen Sie das gewünschte Programm (17), das Brotgewicht (18) und die Bräunung (20). Brotbackmischungen für 750 g-Brote Sollte Ihr Brot etwas zu dunkel werden, verringern Sie den Bräunungsgrad oder stoppen Sie das Programm ca. 5 – 10 Minuten vor Programmende durch Drücken der START / STOPP-Taste. Ist nach dem Backen noch Platz in der Form, können Sie die Menge schrittweise erhöhen. Wird diese Taste einmal betätigt, schaltet sich die Beleuchtung ein. Dies ist zweckmäßig zur Überprüfung des Backvorgangs. Hinweis: Die Einstellung wird für den nächsten Gebrauch gespeichert. Wenn Sie diese Brotbackmischungen verwenden, stellen Sie 1000 g (18) bei dem Brotbackautomaten ein. Mit dieser Einstellung gelingen Ihre Brote sicherlich! Durch die Aufgehphasen besteht vor allem bei stark aufgehenden Teigen (z. B. Weißbrot, süßes Brot) die Gefahr, dass der Teig über die Form läuft. LICHT 4. Betätigen Sie die START / STOPP-Taste erneut, um das Programm zu starten. Bitte testen Sie sich langsam an diese Füllmenge heran! Beginnen Sie Ihr Brotrezept bei einer Gesamtmenge von 1200 g zu testen. Vielen Dank für Ihr Verständnis! 3. Auf diese Weise stellen Sie bitte die verbliebenen Schritte ein. Drücken Sie START / STOPP, um den Programmiermodus zu verlassen. Tipps & Tricks 4. Schnell: Kneten, Aufgehen lassen und Backen von Brot in kürzerer Zeit als das NORMAL -Programm. Das fertige Brot ist n ormalerweise kleiner und dichter als das normale Brot. 2. Wählen Sie die Verzögerung aus, indem Sie die ZEIT-Taste betätigen. Die Zeitangabe am Display (19) schließt die Laufzeit des gewählten Programmes ein. Nehmen wir an, es ist nun 20:30 Uhr und Sie wünschen, dass Ihr Brot morgens, um 7 Uhr fertig gebacken ist. In diesem Fall beträgt die Gesamtzeit 10 Stunden und 30 Minuten. Drücken Sie die ZEIT-Taste bis 10:30 auf dem Display (19) erscheint. Die Zeitzunahme erfolgt in 10 Minuten Schritten. 3. Drücken Sie die START / STOPP-Taste, um das zeitverzögerte Programm zu starten. Der Dop- Speicherfunktion Wenn die Stromversorgung während der Brotherstellung unterbrochen wird, kann der Vorgang automatisch innerhalb von 10 Minuten fortgesetzt werden, auch ohne dass Sie die START / STOPP- Taste betätigen. Wenn die Unterbrechung mehr als 10 Minuten beträgt, kann der Automat das Programm nicht speichern. Entnehmen Sie die Z utaten aus der Backform, entsorgen diese und geben neue Zutaten hinein. Starten Sie den Automaten neu. War der Teig bei Stromausfall erst in der Knetphase und hat die Aufgehphase noch nicht erreicht, können Sie den START / STOPP-Knopf erneut drücken und das Programm von vorne starten. 9 D D 3 35 Min. 65 Min. 65 Min. 3:40 2:55 25 Min. 18 Min. 35 Min. 65 Min. 60 Min. 3:32 2:50 25 Min. 16 Min. 35 Min. 70 Min. 55 Min. 3:30 2:50 HELL, 18 Min. MITTEL, 16 Min. DUNKEL 13 Min. 40 Min. 22 Min. 30 Min. 50 Min. 2:40 20 Min. 15 Min. 20 Min. 12 Min. HELL, 10 Min. MITTEL, 8 Min. DUNKEL 8 Min. 70 Min. 3:50 3:40 2:35 40 Min. 17 Min. 30 Min. 50 Min. 60 Min. 3:30 2:30 10 Min. 10 Min. — 30 Min. 70 Min. 2:10 1:45 10 Min. 10 Min. — 30 Min. 65 Min. 2:05 1:40 1000 g HELL, 10 Min. MITTEL, 10 Min. DUNKEL 10 Min. 10 Min. 10 Min. — 1400 g 10 Min. 5 Min. 20 Min. 1400 g 1200 g 1000 g 6 HELL, MITTEL, 10 Min. DUNKEL 10 Min. 30 Min. 60 Min. 2:00 1:35 33 Min. 40 Min. 62 Min. 2:50 2:25 5 Min. 20 Min. 32 Min. 40 Min. 58 Min. 2:45 2:20 5 Min. 15 Min. 32 Min. 47 Min. 53 Min. 2:42 2:22 Warmhalten 25 Min. 20 Min. AUFGEHEN 3 2:13 AUFGEHEN 2 2:15 2:50 25 Min. 45 Min. 30 Min. 50 Min. 65 Min. 1200 g ✓ ✓ ✓ ✓ ✓ — HELL, MITTEL, DUNKEL 6 Min. 5 Min. 10 Min. 9 Min. — 80 Min. 1:50 1:34 ✓ 7 — — — 15 Min. — — 45 Min. 20 Min. 1:20 — — 8 — — 20 Min. — — — 1:30 — — 9 1400 g HELL, 10 Min. MITTEL, 10 Min. DUNKEL 10 Min. — 5 Min. — 33 Min. 60 Min. 1:48 1:38 — 5 Min. — 28 Min. 55 Min. 1:38 1:28 — 5 Min. — 28 Min. 52 Min. 1:35 1:25 — 10 Min. bis 60 Min. 0:10 bis 1:00 — 25 Min. 60 Min. 1:38 — 20 Min. 5 Min. 5 Min. 0 Min. 0 Min. bis bis bis bis bis 60 Min. 20 Min. 120 Min. 120 Min. 80 Min. 0:36 bis 7:54 während KNETEN 2 1200 g 1000 g 10 — HELL, MITTEL, DUNKEL — HELL, MITTEL, 13 Min. DUNKEL — HELL, 6 Min. MITTEL, bis DUNKEL 14 Min. 11 12 10 2:55 25 Min. 48 Min. 55 Min. 15 Min. 19 Min. 1000 g 5 25 Min. 45 Min. 60 Min. 20 Min. 40 Min. 1400 g 1200 g 4 Signal um Zutaten hinzuzugeben bei 1000 g Gesamtzeit des Programms 1200 g BACKEN 1400 g 2:20 KNETEN 2 2 3:00 AUFGEHEN 1 1200 g 1000 g 65 Min. HELL, 10 Min. MITTEL, 10 Min. DUNKEL 10 Min. KNETEN 1 Einstellungen GRÖSSE 1400 g Einstellungen FARBE Programm-Nr. 1 — auf die Antriebswelle. Fetten Sie vorher die Antriebswellen und die Knethaken z. B. mit Margarine, damit sich diese Teile leicht wieder lösen lassen. Sperre des Bedienfelds zeitphasen-Tabelle — — — — 30 Min. 40 Min. — — ✓ ✓ ✓ ✓ Das Bedienfeld kann zum Schutz vor ungewollter Bedienung mit einer Tastensperre (16) belegt werden. Betätigen Sie erst die PROZESS-Taste und dann die FARBE-Taste. Das Bedienfeld ist nun mit Ausnahme der PROZESS- und FARBE-Tasten gesperrt. Diese Funktion schützt vor ungewollten Programmunterbrechungen durch Betätigen der Tasten. Heben Sie die Tastensperre auf indem Sie erst die PROZESS-Taste und dann die FARBE-Taste drücken. Wenn Sie die Tastensperre nicht einschalten, werden die Bedientasten automatisch 5 Minuten nach Beginn eines Programms gesperrt. Die Tastensperre (16) muss aufgehoben werden, b evor Sie weitere Einstellungen am G erät vornehmen können. Umgebung Der Brotbackautomat kann bei unterschiedlichen Raumtemperaturen verwendet werden. Es können jedoch Unterschiede bei der Brotgröße auftreten, je nachdem ob es an einem warmen oder kalten Platz gebacken wurde. Wir empfehlen eine Raumtemperatur zwischen 15°C und 34°C. Warnhinweise Zeigt das Display (19) „H HH“ nach dem Star- ten des Programmes an, bedeutet das, dass ist die Temperatur im Backraum noch zu hoch ist. Das Programm muss beendet werden. Öffnen Sie den Deckel und lassen Sie das Gerät vollständig abkühlen (ca. 10 – 20 Minuten) bevor Sie es nutzen. Wenn das Display (19) „E E0” oder „E E1” an- zeigt, nachdem Sie „START / STOPP“ gedrückt haben, ist der Temperaturfühler beschädigt und muss von einem qualifizierten Kundendienst geprüft werden. So backen Sie Brot 1. Stellen Sie die Brotform (6 / 8) in die richtige Posi tion, drücken Sie diese nach unten bis sie hörbar einrastet. Stecken Sie die Knethaken (7 / 9) 2. Geben Sie die Zutaten in die Backform (6 / 8). Bitte beachten Sie hierzu die Reihenfolge, die im Rezept angegeben ist. Normalerweise geben Sie zuerst das Wasser oder eine andere Flüssigkeit in die Form, dann Zucker, Salz und Mehl. Geben Sie die Hefe oder das Backpulver immer erst als letzte Zutat hinzu. Hinweis: Bitte beachten Sie die Mengenangaben zu Treibmittel und Mehl im jeweiligen Rezept. 3. Drücken Sie mit den Fingern eine kleine Kuhle in das Mehl und geben Sie die Hefe hinein. Stellen Sie sicher, dass die Hefe nicht mit Flüssigkeiten oder Salz in Berührung kommt. Hefe oder Backpulver Trockene Zutaten Wasser oder andere Flüssigkeiten 4. Schließen Sie den Deckel (2) und stecken Sie den Stecker in die Steckdose. 5. Drücken Sie die MENÜ-Taste bis Sie das gewünschte Programm (17) ausgewählt haben. 6. Wählen Sie das gewünschte Gewicht (18) Ihres Brotes durch Drücken der GRÖSSE-Taste. 7. Um die gewünschte Krustenfärbung (20) einzustellen, drücken Sie die FARBE-Taste. 8. Stellen Sie die Zeitverzögerung (19) anhand der ZEIT-Taste ein. Sie können diesen Schritt überspringen, wenn Sie wünschen, dass der Brotautomat sofort anfängt zu arbeiten. 9. Halten Sie die START / STOPP-Taste 1,5 Sekunden lang gedrückt, um das Programm zu starten. 10.Wenn das Programm 1. NORMAL, 2. VOLL KORN, 3. FRANZÖSISCH, 4. SCHNELL, 5. SÜSS, 6. KUCHEN, 9. ULTRASCHNELL oder 12. HAUSGEMACHT eingestellt ist, ertönt während des Betriebs ein Signalton. Nun können weitere Zutaten hinzugefügt werden. Öffnen Sie den Deckel (2) und geben Sie die Zutaten hinein. 11 Tipps & Tricks D Bei kleineren Mengen kann sich der Teig oft nicht gleichmäßig in der Backform verteilen – sammelt sich also nur auf einer Seite an. Dies führt beim späteren Backvorgang zu einem ungleichmäßigen Ergebnis. Hinweis: Wir e mpfehlen, das Brot mit einem elektrischen Brotschneider oder einem gezahnten Messer zu schneiden. Nutzen Sie keine kleinen Küchenmesser! Diese sind ungeeignet und werden das Brot nur unregelmäßig abschneiden. Um einen schönen Brotlaib zu erhalten, ebnen Sie den Teig in der Backform mithilfe des Teigschabers (13) nach Abschluss der zweiten Knetphase (KNETEN 2) (15). 16.Wenn Sie nicht in der Nähe sind oder am Ende des Backvorganges nicht die START / STOPP- Taste gedrückt haben, wird das Brot automatisch eine Stunde lang warm gehalten. Das Ende der Warmhaltefunktion wird durch 10 Signaltöne angezeigt. Klebt der Teig stark am Teigschaber (13), tauchen Sie ihn kurz in Mehl. Tipp 11. Die Dauer des Backvorgangs ist vom gewählten Programm (17), der Laibgröße (18) und -bräunung (20) abhängig. Um den Backvorgang zu überprüfen, drücken Sie die LICHTTaste und sehen durch das Sichtfenster – öffnen Sie nicht den Deckel (2)! Hinweis: Es ist möglich, dass während des Backens Dampf durch die Ventilschlitze des Deckels nach außen dringt. Das ist normal. Sind Sie sich nicht sicher, ob Ihr Brot durchgebacken ist? Stechen Sie mit einem hölzernen Schaschlikstäbchen in das Brot. Bleibt kein Teig daran kleben, ist Ihr Brot fertig! 12.Wenn der Backvorgang beendet ist, hören Sie einen Piepton. Drücken Sie die START / STOPP-Taste ca. 1,5 Sekunden lang, um das Programm abzuschließen. Sie können nun das Brot entnehmen. Öffnen Sie hierzu den Deckel (2) mit Ofenhandschuhen und ziehen die Back form (6 / 8) nach oben aus dem Gerät. Achtung: Die Brotform und das Brot können sehr heiß sein. Seien Sie sehr vorsichtig. 13.Lassen Sie die Brotform (6 / 8) abkühlen bevor Sie das Brot herausnehmen. Nutzen Sie den Teigschaber (13), um das Brot an den Seiten vorsichtig zu lockern. Verwenden Sie dafür niemals ein Messer, die Antihaftbeschichtung der Backform würde beschädigt werden. 14.Drehen Sie die Brotform (6 / 8) auf den Kopf, halten Sie diese über einen Rost oder ein sauberes Backblech und schütteln die Form vorsichtig bis das Brot heraus fällt. 12 D 15.Lassen Sie das Brot ca. 20 Minuten abkühlen bevor Sie es in Scheiben schneiden. 17.Nach Verwendung oder bei Nichtgebrauch, trennen Sie das Gerät durch Ziehen des Netzsteckers von der Stromversorgung. Achtung: Bevor Sie den Laib in Scheiben schneiden, entfernen Sie bitte mit dem beiliegenden Knethakenentferner (12) die Knethaken (7 / 9) aus dem Brot. Diese stecken in der Unterseite des Brotes. Der Laib ist noch heiß, ziehen Sie bitte nicht mit den Fingern an den Haken. Hinweis: Wenn Sie das Brot nicht ganz aufessen, lagern Sie es bitte in einer verschlossenen Plastiktüte oder einem luftdicht verschließbaren Gefäß. Sie können das Brot ca. 3 Tage bei Raumtemperatur lagern. DAS ULTRASCHNELL-PROGRAMM (ULTRASCHNELL), Menü 9 Der Brotbackautomat kann mit dem ULTRA SCHNELL-Programm innerhalb einer Stunde und 38 Minuten, Brot backen. Bitte beachten Sie, dass die Wassertemperatur hierzu 48 – 50°C betragen muss, nutzen Sie bitte ein Thermometer, um die Temperatur genau zu messen. Der Einfluss der Temperatur ist wesentlich und wirkt sich stark auf das Backergebnis aus. Wenn die Wassertemperatur zu niedrig ist wird das Brot nicht aufgehen und nicht die gewünschte Größe erreichen. Wenn die Temperatur zu hoch ist wird der Hefepilz abgetötet, bevor der Gehprozess in Gang gesetzt wird. So wird das Brot ebenfalls nicht richtig aufgehen und das Backergebnis negativ beeinflusst. DIE DOPPELBACKFORM (8) Bitte beachten Sie bei der Einstellung der Brot größe das maximale Fassungsvermögen jeder Back formseite. Diese beträgt jeweils 500 g. Die Doppelbackform (8) kann für folgende zwei Zwecke genutzt werden: Wenn Sie das Brot länger aufbewahren möchten, packen Sie es in eine gut verschlossene Plastiktüte ein und lagern Sie es im Kühlschrank. So können Sie es bis zu 10 Tagen lagern. Zur Herstellung von zwei Broten der gleichen Da das selbst gemachte Brot keine Konservierungsstoffe enthält, ist die Haltbarkeit nicht länger als die der Brote vom Bäcker. Hinweis: Die Menüeinstellung der Brotgröße ist auf 1000 g zu setzten. Spezielle Einweisung SCHNELLE BROTE: MENÜ 4 (SCHNELL) UND MENÜ 9 (ULTRASCHNELL) Schnelle Brote werden mit Backpulver oder Soda hergestellt, die durch Flüssigkeit und Hitze aktiviert werden. Um gute Ergebnisse zu erzielen, geben Sie die Flüssigkeit zuerst in die Brotform (6 / 8), die trockenen Zutaten in den oberen Teil. In der ersten Knetphase kann es dazu kommen, dass die trockenen Zutaten sich in den Ecken der Brotform sammeln. Nun ist es nötig, nachzuhelfen und die Zutaten zu verrühren, um ein Verklumpen zu vermeiden. Verwenden Sie ausschließlich Küchengeräte aus Holz dafür und drücken Sie die PAUSE-Taste vor dem Öffnen des Deckels. Sorte zur gleichen Zeit. Zur gleichzeitigen Herstellung von zwei unterschiedlichen Broten mit einem Programm. beschädigen. Die Form (6 / 8) muss vollständig trocken sein bevor Sie diese wieder im Gerät einsetzen. Hinweis: Setzen Sie die Backform (6 / 8) ein, indem Sie diese leicht nach unten drücken bis sie in der korrekten Position sitzt. Wenn ein Herunterdrücken nicht möglich ist, ändern Sie die Position leicht bis sie genau sitzt und drücken Sie sie dann herunter. KNETHAKEN (7 / 9) Wenn die Knethaken (7 / 9) schwierig aus dem Brot zu entfernen sind, benutzen Sie bitte den beiliegenden Hakenentferner (12). Wischen Sie die Haken (7 / 9) vorsichtig mit einem feuchten Baumwolltuch ab. Benutzen Sie keine scharfen oder aggressiven Reiniger, um die Antihaftbeschichtung nicht zu beschädigen. Deckel (2) mit Sichtfenstern (3) Wischen Sie den Deckel (2) außen und innen vorsichtig mit einem feuchten Tuch ab. Nutzen Sie keine aggressiven Reiniger zur Reinigung, dies beschädigt die Hochglanzoberfläche. GEHÄUSE (5) Reinigung und Pflege Ziehen Sie vor der Ausführung von Reinigungsarbeiten den Netzstecker aus der Steckdose und lassen das Gerät vollständig abkühlen. Sowohl die Brotbackform (6 / 8) als auch die Knethaken (7 / 9) sind spülmaschinenfest. BACKFORM (6) UND DOPPELTE BACKFORM (8) Entnehmen Sie die Backform (6 / 8) durch Ziehen am Griff. Wischen Sie die Backform (6 / 8) von innen und außen mit einem feuchten Tuch ab. Benutzen Sie keine scharfen oder aggressiven Reiniger, um die Antihaftbeschichtung nicht zu Wischen Sie die Außenseite des Gehäuses (5) vorsichtig mit einem feuchten Tuch ab. Nutzen Sie keine aggressiven Reiniger zur Reinigung, dies beschädigt die Edelstahloberfläche des Automaten. Tauchen Sie das Gehäuse (5) zur Reinigung niemals in Wasser. VOR LÄNGERER AUFBEWAHRUNG DES AUTOMATEN Bevor der Brotbackautomat zur Aufbewahrung eingepackt wird, stellen Sie sicher, dass er komplett abgekühlt, sauber und trocken ist. Der Deckel (2) muss geschlossen sein. 13 D Kleine Lebensmittelkunde Mehl Mehl ist die wichtigste Grundzutat Ihres Brotes. Brotmehl, auch Glutenmehl oder Starkmehl genannt, ist wahrscheinlich aus Hartweizen gemahlen. Es hat einen hohen Anteil an Gluten (Klebereiweiß) und Proteinen. Diese natürlichen Mittel verleihen dem Teig die Fähigkeit die Form zu bewahren und das durch die Hefe produzierte Kohlendioxid zu erhalten. Somit ist dieses Mehl zum Backen von Brot besonders gut geeignet. Weißmehl besteht aus einer Mischung ausge- wählter Weich- und Hartweizensorten und ist für schnelles Backen oder Kekse geeignet. Vollkornmehl enthält alle Stoffe des eigent- lichen Getreidekorns – auch die Kleie, die feste äußere Haut des Weizens. Diese stellt eine ideale Quelle für Ballaststoffe dar. Sollten Sie dieses Mehl verwenden, achten Sie bitte darauf, dass es fein gemahlen ist. Die enthaltene Kleie verhindert die Abgabe von Gluten, sodass Brote aus dieser Art von Mehl kleiner und schwerer sind als solche aus Weißmehl. Daher wird dieses Mehl, um eine leichtere Beschaffenheit zu erzielen, oft mit anderen Mehlsorten gemischt. Dunkles Weizenmehl, auch Schwarzmehl oder grobes Mehl genannt, ist ein ballaststoffreiches Mehl. Es ist dem Vollkornmehl ähnlich. Um eine gute Laibgröße nach dem B acken zu erreichen, muss es mit großen Mengen anderer Mehlsorten gemischt werden. den Nährwert und verlängert die Haltbarkeit. Meist wird weißer Zucker verwendet. Brauner Zucker, Puderzucker, Sirup oder Honig können, je nach Geschmack, auch eingesetzt werden. Achtung: Verwenden Sie ausschließlich feinen Zucker. Grober Zucker kann die Antihaftschicht Ihrer Backform beschädigen Hinweis: Sie können Zucker auch weglassen. In diesem Fall geht das Brot weniger auf. Salz Natürlich trägt Salz zum Geschmack und der Krustenfärbung von Brot bei – es kann aber auch benutzt werden, um eine besonders aktive Hefe abzubremsen. Erhöhen Sie daher nicht die im Rezept angegebene Menge. Hinweis: Wird Salz aus Gesundheitsgründen ganz weggelassen, kann Ihr Brot höher als gewöhnlich aufgehen. Backpulver Trockene Zutaten Backpulver wird genutzt, um Brote und Kuchen im ULTRASCHNELL-Modus herzustellen. Es braucht keine Gehphase und erzeugt Gase, die in Form von kleinen Blasen die Textur des Brotes beeinflussen. Trockene Zutaten müssen locker in den Mess becher (10) gegeben werden. Die Zutaten d ürfen nicht angedrückt werden, da ein Zuviel – sei es auch noch so gering – die Ausgewogenheit des Rezeptes beeinflussen kann. Soda Wenn Sie nur kleine Mengen trockener Zutaten abmessen, nutzen Sie einen Messlöffel (11). Es handelt sich bei den Angaben um gestrichene, nicht gehäufte Löffel. Wasser und andere Flüssigkeiten Entspricht 1 Esslöffel Fett macht das Brot weich und verlängert die Haltbarkeit. Butter sollte geschmolzen oder in kleine Stücke gehackt werden bevor sie zugegeben wird. Wasser ist eine essentielle Zutat bei der Herstellung von Brot. Eine Temperatur von 20 – 25°C ist optimal. Das Wasser kann auch ersetzt werden, z. B. durch Frischmilch oder Wasser, das mit 2 % Milchpulver gemischt wurde. Dies verbessert das Aroma des Brotes und die Farbe der Kruste. EinigeRezepte verlangen auch Zitronen-, Apfeloder Orangensaft, um den Geschmack zu verbessern. Entspricht 1 Teelöffel Hefe Während der Gehphase setzt die Hefe Kohlen dioxid frei, welches das Brot aufgehen lässt und die innere Struktur weich macht. Die Hefe benötigt zum Aufgehen Zucker und Mehl als Nährstoff. 1 TL aktive Trockenhefe = ¾ TL Instanthefe 1,5 TL aktive Trockenhefe = 1 TL Instanthefe 2 TL aktive Trockenhefe = 1,5 TL Instanthefe Überprüfen Sie beim Kauf das Produktions- und Mindesthaltbarkeitsdatum der Hefe. Lagern Sie Hefe nach jedem Gebrauch so schnell wie möglich wieder im Kühlschrank. Zucker 4. Der entstandene Schaum sollte danach etwa eine Tasse ergeben, sonst ist die Hefe inaktiv. Messlöffel (11): Maismehl und Hafermehl werden aus Mais Zucker ist eine sehr wichtige Zutat. Er unterstützt die Hefe bei der Fermentierung. Zudem macht Zucker das Brot weicher im Geschmack, erhöht 3. Stellen Sie den Messbecher für 10 Minuten an einem warmen Ort. Rühren Sie nicht um. Abmessen von Flüssigkeiten Wasser, Frischmilch oder Milchpulverlösungen sollten mit einem Messbecher (10) abgemessen werden. Halten Sie den Becher gerade während Sie die Flüssigkeit abmessen. Wenn Sie Speiseöl oder andere Zutaten abmessen, reinigen Sie den Messbecher (10) nachher gründlich. Fett, Butter und pflanzliches Öl Frische Hefe muss im Kühlschrank gelagert werden, da der Hefepilz bei hohen Temperaturen abgetötet wird. bzw. Hafer gemahlen. Sie werden als Zusätze eingesetzt, um Schwarzbrot herzustellen. Hafermehl steigert den Geschmack und verbessert die Beschaffenheit Ihres Brotes. 2. Geben Sie einen Teelöffel weißen Zucker hinzu und rühren Sie um. Dann streuen Sie zwei Teelöffel Hefe über das Wasser. Soda ist dem Backpulver sehr ähnlich. Es kann auch in Kombination mit Backpulver verwendet werden. Mehl mit Backpulverzusatz enthält – wie der Name schon verrät – bereits Backpulver und eignet sich gut zur Herstellung von Kuchen. 14 D Hinweis: Geringes Aufgehen des Brotes lässt sich normalerweise auf schlechte Hefe zurückführen. So überprüfen Sie, ob die Hefe noch frisch ist: 1. Schütten Sie einen halben Becher warmes Wasser (45 – 50°C) in einen Messbecher. Eier Eier können die Beschaffenheit des Brotes verbessern, sie machen das Brot nahrhaft und größer. Die Eier müssen zunächst von der Schale befreit und dann gleichmäßig verrührt werden. Abmessen der Zutaten Der wichtigste Schritt bei der Verwendung desBrotbackautomaten ist das genaue Abmessen der einzelnen Zutaten mit Hilfe des Messbechers (10) und des Messlöffels (11). Messen Sie jede Flüssigkeit und auch die trockenen Zutaten sehr genau oder das Resultat Ihrer Bemühungen wird dürftig oder unannehmbar. Reihenfolge der Zutaten Die Reihenfolge, in der die Zutaten zugegeben werden sollen, muss eingehalten werden. Im Allgemeinen gilt diese Reihenfolge: Flüssige Zutat, Eier, Salz und Milchpulver usw. Das Mehl darf beim Zugeben nicht vollkommen von Flüssigkeit durchweicht werden. Die Hefe darf nur auf das trockene Mehl gegeben werden und darf nicht mit Salz in Berührung kommen. Nachdem der Teig einige Zeit geknetet wurde, ertönt ein Signal. Jetzt können Sie Früchte oder ähnliches dazu geben. Wenn Sie die Früchte zu früh hinzugeben, wird das Aroma und die Konsis tenz durch das lange Kneten beeinträchtigt. Wenn Sie die Zeitverzögerung nutzen, dürfen Sie niemals verderbliche Zutaten wie Eier oder Früchte hinzugeben. 15 D D Fehlerbehebung Nr. Störung 1 Rauch entweicht während des Backens aus der Lüftungsöffnung Nr. Störung Abhilfe 7 Die Tastensperre lässt sich plötzlich nicht mehr lösen durch Drücken der PROZESS-und anschließend der FARBE-Taste (während des Betriebs oder nach Ende des Backvorgangs). Technischer Fehler. Ziehen Sie den Netzstecker aus der Steckdose und stecken Sie ihn nach kurzer Wartezeit wieder ein. Ihr laufendes Programm wird nur kurz unterbrochen und fährt von selbst fort (vgl. Speicherfunktion). 8 Sie hören den Motor arbeiten aber der Teig wird nicht geknetet. Die Backform ist nicht gut befestigt oder die Teigmenge ist zu groß, um geknetet zu werden. Überprüfen Sie, ob die Backform gut befestigt ist. Stellen Sie sicher, dass der Teig laut Rezept hergestellt wurde und die Zutaten richtig dosiert wurden. 9 Das Brot ist so groß, dass es von unten gegen den Deckel drückt. Zuviel Hefe, Wasser oder Mehl. Es kann sein, dass die Um gebungstemperatur zu hoch ist (ideal: 15°C – 34°C). Überprüfen Sie die erwähnten Faktoren. Verringern Sie gegebenenfalls die Mengen. 10 Das Brot ist zu klein oder ist nicht aufgegangen. Keine oder zu wenig Hefe. Die Hefe kann auch alt und damit nicht mehr aktiv sein. Ein weiterer Grund können die zu hohe Wassertemperatur, zu geringe Umgebungstemperatur oder zuviel Salz sein. Überprüfen Sie die Menge und die Aktivität der Hefe. Erhöhen Sie gegebenenfalls die Umgebungs temperatur. Bei Fehlfunktionen kontaktieren Sie bitte die Servicestelle. 11 Der Teig ist so groß, dass er über den Rand der Form hinauswächst. Sie haben vielleicht zu viel Flüssigkeit verwendet, so dass der Teig zu flüssig ist. Eventuell haben Sie zu viel Hefe benutzt. Reduzieren Sie die Flüssigkeitsmenge und verbessern Sie die Konsistenz des Teiges. 12 Das Brot fällt in der Mitte zusammen wenn Sie es backen. Das Mehl ist nicht stark genug, um den Teig aufgehen zu lassen. Benutzen Sie Brotmehl oder Starkmehl. Grund Abhilfe Einige Zutaten haften an den Heizelementen oder befinden sich zu nah daran. Ziehen Sie den Stecker aus der Steckdose, lassen Sie das Gerät abkühlen und reinigen Sie die Heizelemente. Seien Sie vorsichtig, um Verbrennungen zu vermeiden. Wenn Sie das Gerät zum ersten Mal nutzen kann Öl an den Heizelementen haften. Wenn Sie das Gerät zum ersten Mal nutzen, lassen Sie es leer laufen und öffnen Sie den Deckel. 2 Die Kruste am Boden des Brotes ist zu dick Sie haben das Brot zu lange warm gehalten und zu lange in der Form gelassen, so dass der Wasserverlust zu hoch war. Entnehmen Sie das Brot frühest möglich und halten Sie es nicht warm. 3 Es ist sehr schwierig das Brot aus der Form zu lösen. Die Knethaken hängen an den Antriebswellen fest. Nachdem Sie das Brot entnommen haben, gießen Sie heißes Wasser in die Form, so dass die Knethaken bedeckt sind. Entnehmen Sie diese nach ca. 10 Min. und reinigen Sie sie. Fetten Sie vor der nächsten Verwendung die Antriebswelle. 4 Die Zutaten sind ungleich mäßig vermischt. 16 Grund Das gewählte Programm ist nicht geeignet. Wählen Sie das richtige Programm. Der Drehwiderstand ist zu hoch, so dass die Knethaken sich kaum drehen können. Überprüfen Sie den Sitz der Knethaken. Entnehmen Sie die Brotform und lassen Sie das Gerät leer laufen. 5 Nach dem Backen ist das Brot trocken und hat keine braune Kruste. Der Deckel wurde mehrmals geöffnet. Falsche Programmwahl. Öffnen Sie den Deckel nicht, während des Programm ablaufs. Informieren Sie sich über die richtige Programmwahl (S. 9). 6 Das Display zeigt „H HH“ an, nachdem Sie den START / STOPP-Knopf gedrückt haben. Die Temperatur im Brot automaten ist zu hoch, um Brot herzustellen. Drücken Sie erneut die START / STOPP-Taste und ziehen Sie den Stecker aus der Steckdose. Die Hefe wirkt zu schnell oder die Temperatur ist zu hoch. Verwenden Sie die Hefe bei Raumtemperatur. Entnehmen Sie die Backform und lassen Sie den Deckel solange offen bis der Automat abgekühlt ist. Zu viel Wasser macht den Teig zu schwer und zu flüssig. Passen Sie gegebenenfalls die Wassermenge an. 17 D D Grund Abhilfe 13 Das Brot ist sehr schwer und die Struktur dicht. Sie verwendeten zu viel Mehl und zu wenig Wasser. Nehmen Sie weniger Mehl oder mehr Wasser. Sie haben zu viele Früchte verwendet oder zu viel Vollkornmehl. Reduzieren Sie die Menge der genannten Zutaten und nehmen Sie mehr Hefe. Sie haben zu viel Wasser oder Hefe bzw. kein Salz ver wendet. Reduzieren Sie die Menge an Wasser und Hefe und verwenden Sie etwas Salz. 14 Die Mitte des Brotes ist hohl. 15 An der Oberfläche des Brotes hängt noch Pulver. 16 Die Kruste ist zu dick und die Farbe ist zu dunkel beim Backen von Kuchen oder Nahrungsmitteln mit viel Zucker. Die Wassertemperatur ist zu hoch. Überprüfen Sie die Wassertemperatur. Im Brot befinden sich sehr glutenhaltige Inhaltsstoffe. Geben Sie keine oder weniger stark glutenhaltigen Lebensmittel ins Brot. Das Brot konnte nicht ge nügend geknetet werden weil es zu wenig Wasser enthält. Überprüfen Sie die Wassermenge und die Mechanik des Brotbackautomaten. Die verschiedenen Rezepte haben großen Einfluss auf die Brotherstellung. Die Farbe wird sehr dunkel, wenn Sie viel Zucker verwenden. Wenn die Farbe für ein Rezept mit viel Zucker zu dunkel ist, unterbrechen Sie den Back vorgang 5 – 10 Minutenvor Ende, indem Sie die START / STOPP-Taste drücken. Bevor Sie den Kuchen oder das Brot entnehmen, lassen Sie den Deckel noch 20 Minuten geschlossen. Rezepte – PASSEND ZU DEN PROGRAMMEN Die Mengenangaben in den Rezepten für Brotmehl und Hefe entsprechen dem Maximum. 1 Tasse = 250 ml 1 EL = 3 TL Butter / Margarine: Sie können, je nach Tipps & Tricks Nr. Störung Geschmack, auch andere Fette verwenden: Olivenöl, Schmalz oder Schweinefett für Schlemmer usw. Milchpulver: Sie können Milchpulver auch durch frische Milch ersetzen. Verringern Sie in diesem Fall das Wasser um die gleiche Menge der hinzugefügten Milch. Wasser: Mineralwasser macht jedes Brot leichter und luftiger. Ideal bei schweren Mehl sorten. Bauernbrot 1 EL = 15 ml 1 TL = 5 ml Französisches Knusperbrot Brotgröße 1400 g / 1200 g / 1000 g / Zutat 3 LB 2,5 LB 2 LB Wasser 500 ml 460 ml 350 ml Butter / Margarine 3 EL 2 ¼ EL 1 ½ EL Milchpulver 2 EL 1 ½ EL 1 EL Zucker 3 ½ EL 3 EL 2 EL Salz 1 ¾ TL 1 ½ TL 1 TL Weißmehl 910 g 840 g 630 g Trockenhefe 1 ¾ TL 1 ½ TL 1 TL Programm: FRANZÖSISCH Schnelles Maisbrot Brotgröße 1400 g / 1200 g / 1000 g / Zutat 3 LB 2,5 LB 2 LB Buttermilch 530 ml 490 ml 370 ml Brotgröße 1400 g / 1200 g / 1000 g / Zutat 3 LB 2,5 LB 2 LB Milch 530 ml 490 ml 370 ml Butter / Margarine 1 ¾ EL 1 ½ EL 1 EL Butter / Margarine 3 ½ EL 3 EL 2 EL Salz 1 ¾ TL 1 ½ TL 1 TL Milchpulver 1 ¾ TL 1 ½ TL 1 TL Zucker 1 ¾ EL 1 ½ EL 1 EL Zucker 2 TL 1 ½ TL 1 TL Weißmehl 455 g 420 g 315 g Salz 2 TL 1 ½ TL 1 TL Vollroggenmehl 455 g 420 g 315 g Brotmehl 650 g 600 g 450 g Trockenhefe 1 ¾ TL 1 ½ TL 1 TL Maismehl 260 g 240 g 180 g Backpulver 8 TL 6 TL 4 TL Programm: NORMAL Programm: SCHNELL Vollkornbrot Korrekte Entsorgung dieses Produkts 18 Innerhalb der EU weist dieses Symbol darauf hin, dass dieses Produkt nicht über den Hausmüll entsorgt werden darf. Altgeräte enthalten wertvolle recyclingfähige Materialien, die einer Wiederverwertung zugeführt werden sollten, um der Umwelt bzw. der menschlichen Gesundheit nicht durch unkontrollierte Müllbeseitigung zu schaden. Bitte entsorgen Sie Altgeräte deshalb über geeignete Sammelsysteme oder senden Sie das Gerät zur Entsorgung an die Stelle, bei der Sie es gekauft haben. Diese wird dann das Gerät der stofflichen Verwertung zuführen. Kuchenbrot Brotgröße 1400 g / 1200 g / 1000 g / Zutat 3 LB 2,5 LB 2 LB Wasser 500 ml 460 ml 350 ml Brotgröße 1400 g / 1200 g / 1000 g / Zutat 3 LB 2,5 LB 2 LB Milch 530 ml 490 ml 370 ml Butter / Margarine 1 ¾ EL 1 ½ EL 1 EL Butter / Margarine 90 g 75 g Salz 1 ¾ TL 1 ½ TL 1 TL Eier 4 St 4 St 3 St Zucker 1 ¾ TL 1 ½ TL 1 TL Zucker 90 g 75 g 50 g 50 g Brotmehl 190 g 150 g 110 g Salz 1 ¾ TL 1 ½ TL 1 TL Multigetreidemehl 720 g 690 g 520 g Weißmehl 910 g 840 g 630 g Trockenhefe 3 ½ TL 3 TL 2 TL Trockenhefe 1 ¾ TL 1 ½ TL 1 TL Programm: VOLLKORN Programm: SÜSS 19 D D Kuchen Marmeladen Rührkuchen Orangengelee Zutaten Eier 3 St Zucker 125 g Butter / Margarine 125 g Vanillezucker Milch Weißmehl Backpulver 1 Päckchen bis ¼ Tasse 300 g 1 Päckchen 1. Geben Sie Eier, Butter Zucker und Vanillezucker in eine Schüssel und rühren die Mischung mit einem Handmixer schaumig. 2. Fügen Sie nun das Mehl und Backpulver zur Mischung und verrühren alles gleichmäßig. 3. Verfeinern Sie jetzt Ihren Teig mit etwas Milch. Ultraschnelles Weizenkeimbrot Zutaten Orangensaft 1L klein geschnittene Orange 1 St Zitronensaft 50 ml Gelierzucker (3 plus 1) 500 g Programm: MARMELADE 4. Geben Sie den Teig in die mit Butter oder Öl ausgeriebene Brotbackform und starten Sie das KUCHEN-Programm. Waldbeerenkonfitüre 5. Wollen Sie noch Schokostreußel, o. ä. hinzufügen? Dann geben Sie diese jetzt hinzu. Der Brotbackautomat rührt sie unter. Brotgröße 1400 g / 1200 g / 1000 g / Zutat 3 LB 2,5 LB 2 LB Wasser (48°C) 490 ml 450 ml 340 ml Kümmel 2 TL 1 ½ TL 1 TL Olivenöl 2 EL 1 ½ EL 1 EL Honig 2 EL 1 ½ EL 1 EL Salz 2 TL 1 ½ TL 1 TL Weizenkeime 100 g 90 g 70 g Weißmehl 810 g 750 g 560 g Trockenhefe 2 ½ TL 2 TL 1 ½ TL Programm: ULTRASCHNELL Zutaten zerdrückte Waldbeeren 1 kg Zitronensaft (bei sehr süßen Früchten) bis 100 ml Gelierzucker (2 plus 1) Rotweinkuchen Eier 3 St Zucker 150 g Butter / Margarine 250 g Weißmehl 250 g Backpulver Kakao Zimt 1 Päckchen 1 ½ EL 2 TL Salz 1 Prise Raspelschokolade 100 g Rotwein bis 1⁄8 L 2. Geben Sie anschließend Mehl, Backpulver, Kakao sowie Zimt zur Mischung und verrühren Sie die Zutaten gut miteinander. 3. Gießen Sie nun Rotwein hinhein, bis der Teig reißt. 4. Geben Sie den Teig in die mit Butter oder Öl ausgeriebene Brotbackform und verteilen Sie die Raspelschokolade auf der Mischung. Starten Sie nun das KUCHEN-Programm. Wollen Sie testen, wie stark Ihre Marme- lade, Konfitüre oder Gelee andickt? Entnehmen Sie etwas heiße Masse mit einem Löffel und geben Sie diese auf einen kalten Porzellanteller. Sie kühlt innerhalb weniger Minuten ab und Sie können die Festigkeit überprüfen. Ist die Marmelade, o. ä. zu flüssig? Geben Sie etwas Zitronensäure hinzu. Diese lässt die Masse stärker gelieren. Ist Ihre Marmelade, o. ä. zu dick? Geben Sie etwas Wasser oder Fruchtsaft hinzu. Somit wird das Geliermittel etwas verdünnt. Rumknusperkuchen Zutaten Eier Zucker Butter / Margarine Vanillezucker Salz Rum Weißmehl Backpulver gehackte Rumknusperschokolade 20 4 St 100 g 75 g 1 Päckchen 1 Prise 4 EL 150 g 1 Päckchen 50 g 1. Verrühren Sie in einer Schüssel Eier, Butter, Zucker, Vanillezucker und Salz mit einem Handmixer schaumig. 2. Fügen Sie nun das Mehl und Backpulver zur Mischung. Verrühren Sie alles gleichmäßig und gießen währenddessen den Rum hinzu. 3. Geben Sie den Teig in die mit Butter oder Öl ausgeriebene Brotbackform und verteilen Sie die gehackte Rumknusperschokolade auf der Mischung. Starten Sie nun das KUCHEN- Programm. Gewicht 1400 g / 1200 g / 1000 g / Zutat 3 LB 2,5 LB 2 LB Buttermilch 450 ml 420 ml 310 ml Eier 2 St 1 St 1 St Salz 2 TL 1 ½ TL 1 TL Vollweizenmehl 320 g 300 g 220 g Weißmehl 490 g 450 g 340 g 2 TL 1 ½ TL 1 TL Trockenhefe Zutaten mittelfest kochende Äpfel 6 St Zitronensaft 1 TL Eier 1 St brauner Zucker ½ Tasse Allzweckmehl 1 Tasse Haferflocken ¹⁄3 Tasse 3 ½ EL Butter / Margarine (weich) Programm: DESSERT Reispudding Zutaten leicht verrührte Eier Milch Buttermilchteig für Brötchen, o. ä. Programm: TEIG Dessert Apfelschnitte Programm: MARMELADE 1. Verrühren Sie in einer Schüssel Eier, Butter, Zucker, Vanillezucker und Salz mit einem Handmixer schaumig. Tipps & Tricks Zutaten 500 g 4 St 1 ¾ Tassen gekochter Reis 3 Tassen Zucker ½ Tasse Rosinen (optional) 1 Tasse Vanille 1 TL Zimt 2 TL Programm: DESSERT 21 D GB GARANTIE important! Für die am Verkaufstag beginnende Garantie gelten innerhalb der EU und der Schweiz folgende Bestimmungen: 1.Garantiedauer: 2 Jahre 2.Garantieleistungen: a) Nach unserer Wahl Reparatur oder Austausch von Teilen, die nach unserer Überprüfung Material- oder Fertigungsfehler aufweisen. b) Die Garantie wird nur bei Vorzeigen dieser Garantiekarte und der Verkaufsrechnung geleistet. Die Karte ist nur gültig, wenn sie am Verkaufstag vollständig ausgefüllt wurde. c) Die Garantieleistung gilt nur gegenüber dem Erstverbraucher. d) Durch die Reparatur oder den Austausch von Teilen innerhalb der Garantiedauer wird die ursprüngliche Garantiezeit weder verlängert noch erneuert. e) Transportkosten gehen zu Lasten des Käufers (gilt nicht für die ersten 6 Monate der Garantiezeit). f) Sofern der Schaden oder Mangel nicht beseitigt werden kann oder die Nachbesserung von uns abgelehnt oder unzumutbar verzögert wird, wird innerhalb von 6 Monaten ab Kauf- / Lieferdatum auf Wunsch des Endabnehmers entweder kostenfrei Ersatz geliefert oder der Minderwert vergütet oder das Gerät gegen Erstattung des Kaufpreises, jedoch nicht über den marktüblichen Preis hinaus, zurückgenommen. 3. Die Garantie gilt nicht: für Kratzer und Flecken am Gerät. für Beleuchtungs- und Kontrolllampen. IMPORTANT SAFEGUARDS für Motorbürsten. für leicht zerbrechliche Teile aus Bakelit, Glas, Plastik und so weiter, es sei denn, es handelt sich um Materialfehler, die von uns als solche anerkannt werden. Before using the appliance, the following basic precautions should always be followed: This appliance is designed for household use only and is not intended for commercial purposes. für Beschädigungen, die durch falsche Installation oder Befestigung verursacht wurden. wenn das Gerät an ein Stromnetz mit höherer Spannung, als auf dem Gerät angegeben, angeschlossen wird. bei falscher oder unsachgemäßer Bedienung. Before using, check that the power supply corresponds to the one shown on the rating plate. This appliance features a grounded plug. Please ensure the wall outlet in your house is well grounded. bei mangelnder Sorgfalt. bei ungenügender oder falscher Wartung. bei Fallenlassen des Gerätes oder einzelner Teile. bei unsachgemäßem Transport oder unsachgemäßer Verpackung für den Transport. Do not use the appliance for other than its intended use. Do not use outdoors. Do not operate any appliance: 4. Die Garantie erlischt: wenn das Gerät für andere als für Haushaltszwecke eingesetzt wird. wenn Personen, die nicht von unserer Firma dazu ermächtigt sind, Reparaturen oder Änderungen durchführen. Für dieses Gerät leisten wir 2 Jahre Garantie für Mängel, die auf Fertigungs- oder Materialfehler zurückzuführen sind. Die Garantiezeit beginnt mit dem Tag der Übergabe und wird nur bei Vorlage der Garantiekarte und der Verkaufsrechnung gewährt. Weitergehende Ansprüche bestehen nicht. Modell: PLEASE READ THE OPERATING INSTRUCTIONS CAREFULLY BEFORE USING THE APPLIANCE AND KEEP THEM FOR FUTURE REFERENCE. Wichtig! Bitte notieren Sie hier den auf dem Typenschild am Gerät befindlichen FD-Code: – with a damaged cord or plug, – after the appliance m alfunctions, – if it is dropped, – if it is damaged in any manner. Return the appliance to the manufacturer or the nearest authorized service agent for examination, repair or electrical or mechanical adjustment. Unplug the appliance when not in use, before inserting or removing parts and before cleaning. Turn all controls to OFF, and then remove the plug from the wall outlet. Do not let the cord hang over the edge of a table or a hot surface. Do not place on or near a hot gas or electric burner or in a heated oven. Metal foils or other materials must not be in- serted into the bread maker, as this can result in a risk of a fire or short circuit. Do not cover the bread maker with a towel or any other material; heat and steam must be able to escape freely. If the appliance is covered by or comes into contact with a combustible material, a fire may result. Do not touch hot surfaces. Use handles or knobs. Do not touch any moving or spinning parts of the machine when in operation. Extreme caution must be used when moving an appliance containing hot oil or other hot liquids. This appliance is not intended for use by per- sons with reduced physical sensory or mental capabilities, including children. Children are unaware of the possible dangers associated with electrical appliances. For this reason, never leave a child alone and unsupervised with the appliance, and exercise extra caution when using the appliance in the presence of children. The use of accessories not recommended by the appliance manufacturer may cause injuries. Do not turn the appliance on without first fill- ing the bread pans and then inserting them properly. Do not strike the bread pan on the top or edge to remove the bread; this may damage the bread pan. To protect against electric shock, never im22 Stempel und Unterschrift des Verkäufers Verkaufsdatum merse the appliance in water and protect the power cord from moisture. 23 GB GB After power-up 1. Check that all parts and accessories are complete and free of damage. As soon as the bread maker is plugged into the socket, a beep will be heard and “1 2:55, 1200 g, MITTEL (medium)” will appear on the display screen. However, the colon between “2” and “55” (19) will not blink. 2. Clean all parts as described in the „Cleaning and Maintenance” section. 3. Set the bread maker to BACKEN (bake) mode, and bake empty for about 10 minutes. Then, let it cool down and clean all the removable parts again. The “1” indicates the default program (17). The “1200 g” (18) and “MITTEL” (medium) (20) are the default settings. 4. Dry all parts thoroughly and assemble them. The appliance is now ready for use. START / STOPP (start / stop) The button is used for starting and stopping the baking program. CONTROL PANEL GUIDE* 14 15 16 1. Normal 2. Vollkorn 3. Französisch 4. Schnell 5. SÜSS 6. Kuchen 7. Marmelade 8. Teig 9. Ultraschnell 10. Backen 11. Dessert 12. Hausgemacht Kneten 1 AUFGEHEN 1 KneTEN 2 AUFGEHEN 2 AUFGEHEN 3 BaCkeN WarmHALTEN 17 18 To start a program, press the START / STOPP (start / stop) button for approximately 1.5 seconds. A short beep will be heard, the colon in the time display will begin to blink, and the program will start. Once a program has begun, all of the buttons are deactivated except START / STOPP (start / stop), LICHT (light) and PAUSE (break). 19 1000g 1200g 1400g PAUSE HELL MITTEL DUNKEL 20 To stop the program, press the START / STOPP (start / stop) button for approximately 1.5 seconds. A beeping sound indicates that the program has been switched off. This feature helps prevent any unintentional interruption of the program. PROZESS MENÜ (program) GRÖSSE FARBE Select the desired program by pressing the MENÜ (program) button. Each press of the button (accompanied by a beeping signal) changes the indicated program (17). The functions of 12 programs (14) are explained below. MENÜ START STOPP 1. NORMAL (basic): For kneading, rising and baking whole wheat bread. Use of the delay function is not advised, as it can produce poor results. ZEIT 14 selectable programs 15 program step 16 lock function 17 selected program LICHT 18 loaf size 19 operation time 20 crust colour ____________________________ 24 * The control panel may be subject to change without prior notice. 2. VOLLKORN (whole wheat): Kneading, rise and baking of whole wheat bread. It is not advised to use the delay function as this can produce poor results. 3. FRANZÖSISCH (french): For kneading, rising and baking with a longer rising time. This program yields breads with crisper crusts and loose textures. 4. SCHNELL (quick): For kneading, rising and baking loaves in less time than “NORMAL” breads need. Breads baked with this program are usually smaller and denser. 5. SÜSS (sweet): For kneading, rising and baking sweet bread. You may also add ingredients to increase flavour. 6. KUCHEN (cake): For kneading, rising and baking, but rising with soda or baking powder. 7. Marmelade (jam): For boiling jams and marmalades. The mixture is stirred throughout the cooking process. Fruits or vegetables must be chopped before putting them in the bread pan. 8. TEIG (dough): For kneading and rising, but without baking. Remove the dough and use to make bread rolls, pizza, steamed bread, etc. 9. Ultraschnell (ultra fast): For kneading, rising and baking loaves quickly; produces bread with a dense texture. 2. Press PROZESS (cycle) move to the next step. AUFGEHEN 1 (rise 1) (15) appear on LCD. Press the ZEIT (time) button to adjust the minutes (19). Hold the ZEIT (time) button down to change the time rapidly. Press PROZESS (cycle) again to confirm. 3. Use the same procedure to go through the remaining steps. When all of the setting have been selected, press START / STOPP (start / stop) button to exit the adjusting mode. 4. Press the START / STOPP (start / stop) button again to begin the program. Note: The settings will be stored for the next time you want to use this program. FARBE (colour) With the FARBE (colour) button you can set the crust colour to HELL (light), MITTEL (medium) or DUNKEL (dark) (20). 10. BACKEN (bake): For baking only, no kneading or rising. Also used to increase the baking time for selected programs. Press ZEIT (time) to adjust baking time. If you hold this button down, the time will increase rapidly. Press this button to select the size of the bread: 1000 g, 1200 g or 1400 g. The LCD (18) will display the corresponding sizes. 11. Dessert (dessert): For kneading, rising and baking desserts. Please note the program time may vary depending on the size of the loaf. 12. Hausgemacht (homemade): The user can set the time of kneading, rising, baking and keeping warm. The time range of each program (15) is as follows: KNETEN 1 AUFGEHEN 1 KNETEN 2 AUFGEHEN 2 AUFGEHEN 3 BACKEN WARMHALTEN (knead 1) 6 – 14 minutes (rise 1) 20 – 60 minutes (knead 2) 5 – 20 minutes (rise 2) 5 – 120 minutes (rise 3) 0 – 120 minutes (bake) 0 – 80 minutes (keep warm) 0 – 60 minutes Using HAUSGEMACHT (homemade) Program: 1. Press PROZESS (cycle) once. KNETEN 1 (knead 1) (15) will appear on LCD. Press the ZEIT (time) button to adjust the minutes (19). Press PROZESS (cycle) again to confirm the time for this step. GRÖSSE (loaf size) Please note the program time may vary depending on the size of the loaf: 1. NORMAL (basic), 2. VOLLKORN (whole wheat), 3. FRANZÖSISCH (french), 4. SCHNELL (quick), 5. SÜSS (sweet), and 9. ULTRASCHNELL (ultra fast). 750 g bread mix If you use a 750 g bread mix, select 1000 g (18) with the GRÖSSE (loaf size) button for a successful bread every time! If your bread is a bit too dark, reduce the colour adjustment by pressing FARBE (colour) or stop the program about 5 – 10 minutes before the program ends by pressing the START / STOPP (start / stop) button. Tips & Tricks FOR THE FIRST USE 25 GB Press the PAUSE (pause) button again to resume the program. 1200 g 1000 g 2 1400 g 1200 g 1000 g 3 LICHT (light) Press the button once to turn on the lamp and monitor the baking process. Press the button again to turn off the light. The light switches off automatically if you do not press the button within one minute. ZEIT (time) Use this button to set a later start time for the baking program. To set the delay time: 1. Select your program (17), loaf size (18) and crust colour (20). 2. Select your program (time) button. The delay time should include the operation time for the selected program. Example: It is 8:30 pm and you want the bread to be ready to serve at 7:00 am on the next day. You should set the delay time to 10 hours and 30 minutes by pressing the ZEIT (time) button until 10:30 appear on the display (19). The increment for each press is 10 minutes. 3. Press the START / STOPP (start / stop) button to activate this delay program. The colon in the time indicator will blink, and the LCD will count down the remaining time. 26 NOTE: The maximum delay time is 13 hours. Do not use any perishable ingredients (e.g. eggs, fresh milk, fruits, onions) when using the delay feature. 1200 g Keep Warm Bread can be automatically kept warm for 1 hour after baking. During this warming time, “WARMHALTEN” (15) will be shown on diplay. If you would like to remove the bread, switch the program off by pressing the START / STOPP (start / stop) button. 1400 g 1000 g 4 1400 g 1200 g 1000 g 5 1400 g 1200 g 1000 g 6 If the interruption time exceeds 10 minutes, the program will not resume, and you must discard the ingredients in the bread pan and add the ingredients again before restarting the program. However, if the dough has not entered the rising phase when the power supply is interrupted, you can press the START / STOPP (start / stop) button when the power comes back on to repeat the program from the beginning. 2:15 2:13 light, 10 min. 25 min. 20 min. 35 min. 65 min. 65 min. medium, 8 min. 25 min. 18 min. 35 min. 65 min. 60 min. dark 8 min. 25 min. 16 min. 35 min. 70 min. 55 min. 3:40 2:55 3:32 2:50 3:30 2:50 3:50 2:40 Keep Warm 2:55 2:50 BACKEN (bake) 2:20 AUFGEHEN 3 (rise 3) 3:00 ✓ ✓ 18 min. 40 min. 22 min. 30 min. 50 min. 70 min. light, medium, 16 min. 40 min. 19 min. 30 min. 50 min. 65 min. dark 13 min. 40 min. 17 min. 30 min. 50 min. 60 min. 3:40 2:35 3:30 2:30 light, 10 min. medium, 10 min. dark 10 min. 10 min. 10 min. — 30 min. 70 min. 2:10 1:45 10 min. 10 min. — 30 min. 65 min. 2:05 1:40 10 min. 10 min. — 30 min. 60 min. 2:00 1:35 light, 10 min. medium, 10 min. dark 10 min. 5 min. 20 min. 33 min. 40 min. 62 min. 2:50 2:25 5 min. 20 min. 32 min. 40 min. 58 min. 2:45 2:20 5 min. 15 min. 32 min. 47 min. 53 min. 2:42 2:22 80 min. 1:50 1:34 ✓ 45 min. 20 min. 1:20 — — 1:30 — — 1:38 ✓ ✓ ✓ — light, medium, dark 6 min. 5 min. 10 min. 9 min. 7 — — — 15 min. — — 8 — — 20 min. — — 9 1400 g light, 10 min. medium, 10 min. dark 10 min. — 5 min. — 33 min. 60 min. 1:48 — 5 min. — 28 min. 55 min. 1:38 1:28 — 5 min. — 28 min. 52 min. 1:35 1:25 — — — 10 min. to 60 min. 0:10 to 1:00 — ✓ — — — Memory If the power supply is interrupted while the program is running, bread-making program will resume automatically within 10 minutes, even without pressing the START / STOPP (start / stop) button. light, 10 min. 20 min. 15 min. 25 min. 45 min. 65 min. medium, 10 min. 20 min. 15 min. 25 min. 45 min. 60 min. dark 10 min. 20 min. 12 min. 25 min. 48 min. 55 min. AUFGEHEN 2 (rise 2) 1400 g KNETEN 2 (knead 2) 1 Signal for Adding Ingredients at Thank you for your understanding! When the program is running, you can press the PAUSE (pause) button for approximately 1.5 seconds at any time to interrupt the baking process. The program will be paused, but the setting will be memorized, and the remaining time will flash on the LCD. Total Program Time of Process If there is still space in the pan after baking, you can gradually increase the quantity of ingredients. PAUSE (pause) AUFGEHEN 1 (rise 1) Due to the rising process, there is a risk, particularly with doughs that rise significantly (e.g. white bread, sweet bread), that the dough will overflow the bread pan. TIME SETTING TABLE KNETEN 1 (knead 1) Please work your way slowly up to this size. Begin by testing bread recipes for 1200 g. Options FARBE (colour) PROZESS (cycle) Use this button to set up your own baking program for number 12 – HAUSGEMACHT (homemade). Options GRÖSSE (lof size) Loaf size 1400 g Program-No. Tips & Tricks GB 1200 g 1000 g 10 — 30 min. 40 min. — ✓ — light, medium, dark — light, medium, 13 min. dark 25 min. 60 min. 1:38 — ✓ — light, 6 min. 20 min. 5 min. 5 min. 0 min. 0 min. medium, to to to to to to dark 14 min. 60 min. 20 min. 120 min. 120 min. 80 min. 0:36 to 7:54 during KNETEN 2 (knead 2) ✓ 11 12 — — 27 Control Panel Lock Function You can lock the control panel by pressing the PROZESS (cycle) key and then pressing the FARBE (colour) key. When the control panel is locked (16), all of the control keys except PROZESS (cycle) and FARBE (colour) are inactive. This feature helps prevent unintentional disruption of the program and unsupervised use of the unit by children. You can unlock the control panel by pressing the PROZESS (cycle) key and then the FARBE (colour) key. If you do not set the control keys lock function, the control keys will be automatically locked after five minutes. You must unlock (16) the control panel to operate the bread maker. GB 2. Place the ingredients in the bread pan (6 / 8). Please follow the sequence described in the recipe. Usually, the water or liquid substance is added first, followed by sugar, salt and flour, and always finishing with the yeast or baking powder as the last ingredient. Note: See recipes for details on how much flour and rising agent to use. Tips & Tricks GB 3. Make a small indentation in the top of the flour with a finger and add the yeast in this indentation. Make sure it does not come into contact with the liquid or salt. 11.The length of the baking process depends on the program (17), loaf size (18) and colour (20). To check the baking process, press the LICHT (light) button and look through the view windows (3) – do not open the lid (2)! Yeast or soda Environment Warning Display If the display (19) shows “H HH” after the program has been started, the temperature inside is too high. The program must be stopped. Then open the lid and let the machine cool down for 10 to 20 minutes. If the display (19) shows “E E0” or “E E1” after you press START / STOPP (start / stop), the temperature sensor is malfunctioning. Please have the sensor checked by a qualified technician. HOW TO MAKE BREAD 28 1. Place the bread pans (6 / 8) in position and press down until they click into place. Attach the kneading blades (7 / 9) to the drive shaft. We recommend filling the hole with heat-resisting margarine prior to attaching the blades to prevent the dough from sticking. This also makes it easier to remove the bread. To get a beautiful loaf of bread, you should spread the dough into the pan with a dough scraper (13) after the completion of the second kneading process KNETEN 2 (knead 2) (15). If the dough sticks to the scraper (13), dip it briefly in flour. Dry ingredients Water or liquid 4. Close the lid (2) gently and insert the power plug into a wall outlet. 5. Press the MENÜ (menu) button to select your desired program (17). 6. Press the GRÖSSE (loaf) button to select the desired size (18). 7. Press the FARBE (colour) button to select the desired crust colour (20). 8. Set the delay time (19) by pressing ZEIT (time) button. Skip this step if you want the bread maker to start working immediately. 9. Press the START / STOPP (start / stop) button for approximately 1.5 seconds to start the program. 10.The unit will beep during the following programs to prompt you to add ingredients: 1. NORMAL (basic), 2. VOLLKORN (whole wheat), 3. FRANZÖSISCH (french), 4. SCHNELL (quick), 5. SÜSS (sweet), 6. KUCHEN (cake), 9. ULTRASCHNELL (ultra fast) and 12. HAUSGEMACHT (homemade). Open the lid (2) and add the necessary ingredients. Note: Steam may escape through the vent in the lid during baking. This is normal. Not sure if your bread is baked thoroughly? Tip The machine can function effectively in a wide range of temperatures, but temperature differences may cause variations in the loaf size. We recommend a room temperature between 15-34°C. With smaller quantities, the dough often cannot disperse evenly into the bread pan and builds up on one side, which results in an uneven baking process. Insert a wooden skewer into the bread. If the 16.If you are out of the room or if you do not press the START / STOPP (start / stop) button at the end of the program, the bread will be kept warm automatically for 1 hour. When WARMHALTEN (keep warm) is finished, the appliance will beep 10 times. 17.When the appliance is not in use, unplug the power cord. Note: Before slicing the loaf, use the hook (12) to remove the kneading blades (7 / 9) hidden on the bottom of loaf. The loaf is hot; never remove the kneading blade with your hands. Note: If bread has not been completely eaten up, advise you to store the remained bread in sealed plastic bag or vessel. Bread can be stored at room temperature for about three days. To store the bread for a longer time, put it in a sealed plastic bag or vessel and place it in the refrigerator (maximum storage time = 10 days). Since homemade bread contains no preservatives, the storage time is generally no longer than that of bakery bread. bread doesn’t stick to it, it is ready! 12.The bread maker will beep when the program is finished. Press the START / STOPP (start / stop) button for approximately 1.5 seconds to stop the process and take out the bread. Open the lid (2) and use oven mitts to remove the bread pan (6 / 8). Caution: The bread pan and bread may be very hot! Always handle with care. 13.Let the bread pan (6 / 8) cool down before removing the bread. Then, use the dough scraper (13) to gently loosen the sides of the bread from the pan. 14.Turn the bread pan (6 / 8) upside down over a wire cooling rack or clean cooking surface and shake gently until the bread falls out. 15.Let the bread cool for about 20 minutes before slicing. Note: It is recommended to slice the bread with an electric cutter; if you use a fruit knife or kitchen knife, the bread may be subject to deformation. SPECIAL INTRODUCTION For quick (4. SCHNELL) AND ULTRA FAST (9. ULTRASCHNELL) BREADS Quick breads are made with baking powder or baking soda that is activated by moisture and heat. For perfect quick breads, all liquids should be placed in the bottom of the bread pan (6 / 8), and dry ingredients should be placed on top. During the initial mixing of quick breads, dry ingredients may collect in the corners of the pan. It is necessary to help the machine mix in order to avoid flour clumps. About ultra fast program (9. ULTRASCHNELL) The bread maker can bake a loaf within 1 hour 38 minutes with the rapid program. Please note that it should be hot water of 48 – 50°C; you must use a cooking thermometer to measure the temperature. 29 GB GB Temperature has a critical influence on the baking performance. If the water temperature is too low, the bread will not rise to the expected size. If the water temperature is too high, the fungus in the yeast will be killed before rising, which will also affect the baking performance. To protect the non-stick coating, do not use any sharp or abrasive agents. Lid (2) and windows (3) Flour Clean the inside and outside of the lid (2) with a slightly damp cloth. Flour is the most important ingredient of your bread. For the double bread pan (8) To avoid damaging the highly polished surfaces, do not use any abrasive cleaner. Bread flour, also called high-gluten flour, has a Note: To achieve proper loaf size (18), the maximum capacity of each side of the bread pan is 500 g. The double bread pan (8) can be used in two different ways: Making two breads with the same flavour at the same time. Making two breads with different flavours on any one program at the same time. Note: Suggest loaf size setting = 1000 g. A LITTLE FOOD SCIENCE large amount of gluten and protein. It has good elasticity and can keep the bread from collapsing after it rises. Since the gluten content is higher than in common flour, it can be used to make large breads with better inner fibre. Bread flour is particularly suitable for making bread. Housing (5) Gently wipe the outer surface of the housing (5) with a damp cloth. To avoid damaging the stainless steel surfaces, do not use any abrasive cleaner. Never immerse the housing (5) To avoid damaging the stainless steel surfaces, do not use any abrasive cleaner. Never immerse the housing. Plain flour is a mixture of soft and durum wheat. It is suitable for making cookies or quick breads. Whole-wheat flour is ground from grain. It contains wheat skin and gluten. Whole-wheat flour is heavier and contains more nutrients than common flour. Before storage CLEANING AND MAINTENANCE Disconnect the appliance from the power outlet and let it cool down before cleaning. Both the bread pan (6 / 8) and kneading blades (7 / 9) are dishwasher safe components. Bread pan (6) and double bread pan (8) Since breads made with whole-wheat flour are usually smaller, many recipes combine wholewheat flour with bread flour to achieve the best result. Black wheat flour, also called “rough flour”, is a kind of high-fibre flour that is similar to wholewheat flour. To achieve large size after rising, it must be used in combination with a high amount of bread flour. Salt is necessary to improve the flavour and crust colour. However, salt can also inhibit the rising of the yeast. Never use too much salt in a recipe. Note: Breads made without salt would be larger. Grease, butter and vegetable oil Grease can make bread softer and extend storage life. Butter should be melted or chopped to small pieces before using. Yeast After the rising process, the yeast will produce carbon dioxide. The carbon dioxide expands the bread and makes the inner fibre soften. However, fast breeding yeast needs the carbohydrates in sugar and flour as nourishment. 1 tsp. active dry yeast = ¾ tsp. instant yeast 1.5 tsp. active dry yeast = 1 tsp. instant yeast 2 tsp. active dry yeast = 1.5 tsp. instant yeast Fresh yeast must be stored in the refrigerator, as the fungus in it will be killed at high temperature. Before using, check the production date and storage life of your yeast. Put it back in the refrigerator as soon as possible after each use. Note: When breads failt to rise, it is usually due to bad yeast. Remove the bread pan (6 / 8) by pulling the handle, wipeinside and outside of the pan with damp cloth. Self-rising flour contains baking powder. It is Follow the steps below to check if your yeast is fresh and active. Corn flour and oatmeal flour are ground from To protect the non-stick coating, do not use any sharp or abrasive agents. The pan (6 / 8) must be dried completely before installing. corn and oatmeal separately. These ingredients are added when making rough bread to enhance the flavour and texture. 1. Pour ½ cup warm water (45 – 50°C) into a measuring cup. Note: Insert the bread pan (6 / 8) and press down until it snaps into the correct position. If it cannot be inserted, realign the pan gently until it is in the correct position and can be pressed down. Kneading blades (7 / 9) If the kneading blades (7 / 9) are difficult to remove from the bread, use the hook (12). 30 Before the bread maker is packed for storage, ensure that it has completely cooled down, clean it and dry it. The lid (2) should be closed. Salt Wipe the blades (7 / 9) carefully with a dump cotton cloth. used to make cakes, in particular. Sugar Sugar is a very important ingredient that increases the sweet taste and colour of bread. It is also considered nourishment in yeast bread. White sugar is widely used. Brown sugar, powder sugar, cotton sugar, syrup or honey may be called for in special instances. Note: Use only fine sugar. Gross grained sugar can damage the anti-adhesive layer of your bread pan. Note: Breads made without sugar will be smaller. 2. Put 1 tsp. white sugar into the cup and stir; then sprinkle 2 tsp. yeast over the water. 3. Place the measuring cup in a warm place for about 10 min. Do not stir the water. 4. The mixture should foam up to 1 cup. Otherwise the yeast is dead or inactive. Baking powder Baking powder is used as a rising agent for ULTRASCHNELL (ultra fast) breads and cakes. It does not need rise time, and it can produce air. Due to chemical processes, the air forms bubbles that soften the texture of the bread. 31 GB GB BAKING SODA Measuring Spoon (11): It is similar to baking powder. It can also be used in combination with baking powder. Equals 1 Tablespoon No. Problem WATER AND OTHER LIQUIDS Water is an essential ingredient for making bread. Generally speaking, water between 20°C and 25°C is the best. The water may be substituted with fresh milk or water mixed with 2 % milk powder, which may enhance bread flavour and improve crust colour. Some recipes may call for juice to enhance the flavour (e. g. apple juice, orange juice, lemon juice). EggS Eggs can improve bread texture, make the bread more nourishing and increase the size. The egg must be cracked open and then stirred evenly. MEASURING INGREDIENTS The most important thing for making good bread is to use the proper amounts of ingredients. It is strongly recommended to use measuring cups (10) or measuring spoons (11) to obtain accurate amounts. Failure to use accurate amounts can have a significant influence on the quality of the bread. TROUBLESHOOTING GUIDE Generally speaking, the ingredients should be added as follows: Smoke from ventilation hole when baking. Some ingredients are sticking to the heater element or nearby. For the initial use, oil remained on the surface of heat element. Unplug the bread maker and clean the heater element, but be careful not to burn yourself! During the first use, dry -operating and open the lid. 2 Bread bottom crust is too thick. The warm bread is left in the pan for too long, and thereby loses too much water. Take bread out quickly, without using the warming function. 3 It is very difficult to remove the bread. Kneading blades sticking to the shaft in the bread pan. After removing the bread, put hot water into bread pan and -immerge kneading blade for 10 minutes. Then take it out and clean. 4 Ingredients not evenly stirred and bake poorly. Incorrect program selected. Select the correct program. Too much resistance, so kneading blades can’t rotate and stir adequately. Check kneading blades hole; then take bread pan out and operate without the pans. If not normal, contact an authorized service facility. 5 The bread ends up dry, with no brown crust colour. The cover was opened several times during operation. Don’t open cover during operation – especially during the final rise. 6 Display “H HH” after pressing START / STOPP (start / stop) button. The temperature in the bread maker is too high to make bread. Press START / STOPP (start / stop) button and unplug bread maker. Then, remove bread pan and open cover until the bread maker cools down. 7 The control panel cannot be unlocked by pressing PROZESS (cycle) and FARBE (colour) (during program or after finishing). Technical failure. Disconnect the machine from the power outlet, then plug the bread maker into the socket again. Your program will be interrupted for only a few seconds and will resume automatically (cf. Memory). Liquid ingredient, eggs, salt and milk powder etc. When adding the ingredients, do not completely wet the flour. The yeast can only be placed on the dry flour. And yeast should not come into contact with the salt. After the flour has been kneaded for some time, a beep will prompt you to put fruit ingredients into the mixture. If the fruit ingredients are added too early, the flavour will be diminished during the long mixing time. When you use the delay function for a long time, never add perishable ingredients (e.g. eggs, fruit). MEASURING LIQUID INGREDIENTS Water, fresh milk or milk powder solution should be measured with measuring cups (10). Check the level of the cup with your eyes on a horizontal plane to the surface of the liquid. When you measure cooking oil or other ingredients, clean the measuring cup (10) thoroughly. Dry measurements Dry measuring must be done by gently spooning ingredients into the measuring cup (10). When measuring small amounts of dry ingredients, use measuring spoons (11). 32 Measurements must be level and not heaped, as this small difference could throw off the critical balance of the recipe. Solution 1 Equals 1 Teaspoon SEQUENCE OF INGREDIENTS Cause 33 GB No. Problem 8 Hear the motor noise, but dough isn’t stirred. 9 Cause Solution No. Problem Cause Solution Bread pan is inserted improperly or dough is too large to be stirred. Check if bread pan is inserted properly. Also, check whether the dough has been made according to recipe and the ingredients have been accurately weighed. 14 Excessive water or yeast or no salt. Reduce water or yeast and check salt content. Water temperature is too high. Check water temperature. There are high-glutin ingredients in bread. Do not add strong glutinosity ingredients into bread. Inadequate stirring or not enough water. Check water and mechanical function of bread maker. Different recipes or ingredients have a significant impact on bread making. Baking colour will be very dark because of high sugar content. If baking colour is too dark for the recipe with excessive sugar, touch START / STOPP (start / stop) to interrupt the program 5 – 10 minutes before the planned completion time. Before removing, leave the bread or cake in bread pan for about 20 minutes with cover closed. Bread is so large that it forces the cover open. Too much yeast, flour or water. Ambient temperature is too high (ideal: 15°C – 34°C). Check these factors. Reduce the amounts to the correct levels. Bread size is too small or bread does not rise. No yeast or not enough yeast. Poor yeast activity because the water is too hot, the yeast has mixed with salt, or the ambient temperature is too low. Check the amount and perfor-mance of yeast; increase the ambient temperature if necessary. 11 Dough is so large it overflows the bread pan. Excessive liquids make dough soft and excessive yeast. Reduce the amount of liquids and improve dough rigidity. 12 Bread collapses in the middle during baking. Flour used is not strong enough to make dough rise. Use bread flour or strong powder. Yeast rate is too rapid or yeast temperature is too high. Yeast is used under room temperature. Excessive water makes dough too wet and soft. Based on the water absorption potential, adjust water prescribed by recipe. Too much flour or too little water. Reduce flour or increase water. Too many fruit ingredients or too much whole wheat flour. Reduce the amount of corresponding ingredients and add more yeast. 10 13 Bread is too heavy and dense. 34 GB 15 16 Middle is hollow when bread is cut. Bread surface sticks to dry powder. Crust is too thick and baking colour is too dark when making cakes or food with much sugar. ENVIRONMENTALLY FRIENDLY DISPOSAL We urge you to follow the correct disposal procedure for your product and packaging materials. This will help conserve natural recourses and ensure that it is recycled in a manner that protects health and the environment. When the product is no longer usable, the product and its accessories must be disposed of separately from household waste. The product and, if applicable, its batteries should be taken to your local collection point for recycling. Some collection points accept products free of charge. 35 GB GB Cakes RECIPES – APPROPRIATE FOR THE PROGRAMS The following recipes are only for reference. You may adjust them depending on ingredients, your own taste and experiments. 1 cup = 250 ml 1 tbsp = 3 tsp 1 tbsp = 15 ml 1 tsp = 5 ml French Crunch Bread Tips & Tricks Butter / Margarine: Depending on your t aste, you can also use other fats (e.g. olive oil, lard, pork fat). Dry milk: You can substitute dry milk in recipes with fresh milk. In this case, decrease the water added by the amount of milk that is added. Water: Sparkling mineral water makes breads lighter and airier. It’s ideal for heavy flour. Ingredient Water Loaf Size Butter / Margarine Dry Milk 1400 g / 1200 g / 1000 g / 3 LB 2,5 LB 2 LB 500 ml 460 ml 350 ml 3 tbsp 2 ¼ tbsp 1 ½ tbsp 2 tbsp 1 ½ tbsp 1 tbsp Sugar 3 ½ tbsp 3 tbsp 2 tbsp Salt 1 ¾ tsp 1 ½ tsp 1 tsp Plain Flour 910 g 840 g 630 g Dry Yeast 1 ¾ tsp 1 ½ tsp 1 tsp Program: FRANZÖSISCH (french) Farmhouse Bread Ingredient Buttermilk Loaf Size Butter / Margarine 1 ¾ tbsp 1 ½ tbsp 1 tbsp Salt 1 ¾ tsp 1 ½ tsp 1 tsp Sugar 1 ¾ tbsp 1 ½ tbsp 1 tbsp Plain Flour 455 g 420 g 315 g Whole Rye Flour 455 g 420 g 315 g Dry Yeast 1 ¾ tsp 1 ½ tsp 1 tsp Program: NORMAL (basic) Ingredient Milk Loaf Size Ingredients Eggs Sugar 3 125 g Butter / Margarine 125 g Vanilla Sugar Milk Plain Flour Baking Powder 1400 g / 1200 g / 1000 g / 3 LB 2,5 LB 2 LB 530 ml 490 ml 370 ml 1 package up to ¼ cup 300 g 1 package 1. Put eggs, butter, sugar and vanilla sugar in container and stir the mixture by hand mixer to produce foam. 2. Add flour and baking powder to the mixture and continue to stir. 3. Hone the dough with milk. 4. Pour dough into bread pan coated with butter or oil; use KUCHEN (cake) program to make cake. 5. If desired, add chocolate sprinkles or similar ingredients to the bread pan. The bread maker will stir them in. Red Wine Cake Ingredients Eggs Quick Corn Bread 1400 g / 1200 g / 1000 g / 3 LB 2,5 LB 2 LB 530 ml 490 ml 370 ml Pound Cake 3 Sugar 150 g Butter / Margarine 250 g Plain Flour 250 g Butter / Margarine 3 ½ tbsp 3 tbsp 2 tbsp Baking Powder 1 package Dry Milk 1 ¾ tsp 1 ½ tsp 1 tsp Cocoa 1 ½ tbsp Sugar 2 tsp 1 ½ tsp 1 tsp Cinnamon Salt 2 tsp 1 ½ tsp 1 tsp Salt Bread Flour 650 g 600 g 450 g Chocolate Sprinkles Corn Flour 260 g 240 g 180 g Red Wine Baking Powder 8 tsp 6 tsp 4 tsp 2 tsp 1. Mix eggs, butter, sugar, vanilla sugar and salt together in a contianer using a hand mixer. 2. Add flour, baking powder, cocoa and cinnamon and continue to stir. 3. Pour red wine into the mixture and stir evenly by hand. 4. Pour dough into bread pan coated with butter or oil and add chocolate sprinkles. Then use KUCHEN (cake) program to make cake. 1 pinch 100 g up to 1⁄8 l Program: SCHNELL (quick) Ingredient Water 1400 g / 1200 g / 1000 g / 3 LB 2,5 LB 2 LB 500 ml 460 ml 350 ml Ingredient Milk Loaf Size 1400 g / 1200 g / 1000 g / 3 LB 2,5 LB 2 LB 530 ml 490 ml 370 ml Ingredients Eggs Sugar 4 100 g Butter / Margarine 1 ¾ tbsp 1 ½ tbsp 1 tbsp Butter / Margarine 90 g 75 g 50 g Butter / Margarine Salt 1 ¾ tsp 1 ½ tsp 1 tsp Eggs 4 pcs 4 pcs 3 pcs Vanilla Sugar Sugar 1 ¾ tsp 1 ½ tsp 1 tsp Sugar 90 g 75 g 50 g Salt 1 pinch 4 tbsp Bread Flour 190 g 150 g 110 g Salt 1 ¾ tsp 1 ½ tsp 1 tsp Rum Multi Corn Flour 720 g 690 g 520 g Plain Flour 910 g 840 g 630 g Plain Flour 1 tsp Baking Powder Dry Yeast 36 Loaf Size Rum Crunch Cake Cake Bread Whole Wheat Bread 3 ½ tsp 3 tsp Program: VOLLKORN (whole wheat) 2 tsp Dry Yeast 1 ¾ tsp Program: SÜSS (sweet) 1 ½ tsp Chopped Rum Crunch Chocolate 75 g 1 package 150 g 1 package 1. Put eggs, butter, sugar, vanilla sugar and salt in container and stir the mixture with a hand mixer to produce foam. 2. Then add flour and baking powder to the mixture and continue stirring. During stirring, mix the rum into the dough. 3. Pour dough into bread pan coated with butter or oil and add chopped rum crunch chocolate. Then use KUCHEN (cake) program to make cake. 50 g 37 GB GB Jams Ultra Fast Wheat Germ Bread Orange Marmalade Ingredients Orange Juice 1l Cut Orange 1 pcs Lemon Juice 50 ml Preserving Sugar (3 plus 1) 500 g Program: MARMELADE (jam) Forest Berries Jam Caraway 2 tsp 1 ½ tsp 1 tsp Olive Oil 2 tbsp 1 ½ tbsp 1 tbsp Honey 2 tbsp 1 ½ tbsp 1 tbsp Salt 2 tsp 1 ½ tsp 1 tsp Wheat Germs 100 g 90 g 70 g Plain Flour 810 g 750 g 560 g Dry Yeast 2 ½ tsp 2 tsp 1 ½ tsp Program: ULTRASCHNELL (ultra fast) Ingredients Grated Forest Berries 1 kg Lemon Juice (only for very sweet fruits)up to 100 ml Preserving Sugar (2 plus 1) 500 g Program: MARMELADE (jam) Want to test the consistency of your mar- Tips & Tricks WARRANTY Loaf Size 1400 g / 1200 g / 1000 g / 3 LB 2,5 LB 2 LB Ingredient Water (48°C) 490 ml 450 ml 340 ml melade, jelly or jam? Remove some of the hot mass with a spoon and place it on a cold porcelain plate. This test amount will cool within a few minutes and you can check the consistency. Is your jam, etc. too liquid? Add some citric acid. This makes the mass more gelatinous. Is your jam, etc. too thick? Add some water or fruit juice to make it less gelatinous. Bake Unfortunately, we cannot offer you a recipe for the BACKEN (bake) program. Dessert Apple Crisp Ingredients Medium Cooking Apples 6 pcs Lemon Juice 1 tsp Egg Soft Sugar 1 ½ cup All-purpose Flour 1 cup Quick cooking Oats Butter / Margarine (softened) ¹⁄3 cup 3 ½ tbsp Program: DESSERT (dessert) Buttermilk Dough for Bread Rolls, etc. 38 Rice Pudding Size 1400 g / 1200 g / 1000 g / Ingredient 3 LB 2,5 LB 2 LB Buttermilk 450 ml 420 ml 310 ml Ingredients Slightly Beaten Eggs Milk Eggs 2 pcs 1 pcs 1 pcs Cooked Rice 3 cups Salt 2 tsp 1 ½ tsp 1 tsp Sugar ½ cup Whole Wheat Flour 320 g 300 g 220 g Raisin (optional) 1 cup Plain Flour 490 g 450 g 340 g Vanilla 1 tsp Dry Yeast 2 tsp 1 ½ tsp 1 tsp Cinnamon 2 tsp Program: TEIG (dough) Program: DESSERT (dessert) 4 1 ¾ cups In the EU and Switzerland, the following conditions apply for the warranty, which begins on the date of purchase of the product: 1. Warranty period: 2 years 2. Conditions of warranty: a) Parts which exhibit defects in material and/or workmanship after our inspection will either be repaired or replaced at our discretion. b) The warranty will only be honoured upon presentation of this warranty card and purchase receipt. This warranty is only valid if it is filled out on the date of sale and in a complete and appropriate manner. c) This warranty is only valid for the first owner of the device. d)No replacement or repair of parts performed within the warranty period shall provide grounds for any extension of the original warranty period. e) Any transportation costs shall be borne by the purchaser (this shall not apply during the first 6 months of the warranty). f) Within the first 6 months after the purchase/ delivery of the device, if the damage or defect cannot be eliminated, if we refuse to repair the defect, or in the event of a delay in our repairing of the device, then the end user can choose from one of three options: the device will be replaced free of charge, its value will be reimbursed, or the device will be taken back with a refund of the original purchase price which shall not exceed the usual market price. 3.The warranty does not apply to: spots and scratches on the device control lamps and lights motor brushes easily breakable parts (e. g. bakelite, plastic, glass), even in the case of defects in material as recognized by us damage due to improper installation or improper repair damage caused by an inappropriate voltage supply or an inappropriate electricity network improper or inappropriate use of the equipment unsatisfactory care damage caused by incompetent or insufficient maintenance damage caused by dropping the equipment or part thereof improper transportation or insufficient packaging during transportation 4.The warranty shall be deemed void: in the case of use or application of the device for something other than its intended use for household purposes. in the case of any servicing or repairing of the device performed by third parties that have not been authorized for such purpose by our company. A 2-year warranty is provided for damage caused by defects in material or workmanship. The warranty period shall begin on the day of delivery or on the day the buyer takes possession of the item, and the warranty will only be honoured upon presentation of the warranty card and the purchase receipt. No further claims shall be granted. Model: Stamp and signature of salesperson Important! Please write down the FD-code located on the rating plate here: Date of sale 39 F F IMPORTANTS! VEUILLEZ LIRE ATTENTIVEMENT LE MODE D‘EMPLOI AVANT DE METTRE L‘APPAREIL EN SERVICE. CONSERVEZ CE MODE D’EMPLOI. CONSIGNES DE SÉCURITÉ IMPORTANTES Lors de l‘utilisation d‘appareils électriques, il convient de respecter les mesures de sécurité suivantes, afin d‘éviter tout risque de décharge électrique, de blessure ou d‘incendie. Cet appareil convient uniquement pour une utilisation ménagère, et non pour une utilisation professionnelle. Avant de le brancher sur le secteur électrique, veuillez vous assurer que la tension du secteur correspond à celle indiquée sur la plaque signalétique de l‘appareil. Cet appareil est équipé d‘une fiche de prise de courant de sécurité, et ne doit être branché qu‘à une prise de courant de sécurité installée conformément aux consignes. N‘employez l‘appareil que pour les utilisations pour lesquelles il a été conçu. N‘employez pas l‘appareil à l‘extérieur. Ne plus employer l‘appareil si: – son câble de branchement au secteur ou sa prise sont endommagés, – il ne fonctionne pas correctement, – il est tombé, – il présente des détériorations. Dans les cas sus-mentionnés, il faut renvoyer l‘appareil au fabricant ou au SAV afin qu‘il soit soumis à un contrôle, à une réparation ou à ce qu‘il soit ajusté32. N‘utilisez que les accessoires conseillés par le fabricant. L‘utilisation d‘autres accessoires peut détériorer l‘appareil, voire même provoquer des blessures sur les personnes. Ne démarrez jamais l‘appareil avant que le moule ne soit correctement positionné et rempli des ingrédients nécessaires. Pour retirer le pain, ne frappez jamais sur les 40 angles ni sur la partie supérieure du moule. Cela risquerait de l‘abîmer. Afin d‘éviter toute décharge électrique, ne mettez jamais le câble, la prise ou le boîtier dans l‘eau ou dans tout autre liquide. Après chaque utilisation, débranchez l‘appareil. Faites-en de même avant d‘installer ou de retirer des accessoires, ou avant de nettoyer l‘appareil. Avant de débrancher l‘appareil, stoppez tous les programmes en cours. Veillez à ce que le câble ne pende pas de la ta- ble ou du plan de travail. Protégez le câble des surfaces chaudes. Ne posez pas le câble sur ou à proximité des plaques de cuisson ni sur un four chaud. Ne mettez jamais de films métalliques ou au- tres matériaux dans la machine à pain. Cela risquerait de provoquer un incendie ou un court-circuit. AVANT LA PREMIERE UTILISATION APRES LE BRANCHEMENT SUR LE SECTEUR 1. Assurez-vous que toutes les pièces et tous les accessoires sont complets et en bon état. Dès que vous branchez l‘appareil sur le secteur, un bip retentit, et il apparaît sur l‘écran „1 2:55, 1200g MITTEL (intermédiaire) “. Mais les deux points entre les chiffres „2“ et „55“ (19) ) ne clignote pas. 2. Nettoyez toutes les pièces comme décrit au paragraphe „Nettoyage et entretien“. 3. Mettez en mode cuisson BACKEN (cuisson), et préchauffez pendant environ 10 minutes. Laissez refroidir l‘appareil, retirez les pièces, et nettoyez-les à nouveau. 4. Séchez bien toutes les pièces, et replacez-les. L‘appareil est désormais prêt à l‘utilisation. REMARQUES SUR LE PANNEAU DE COMMANDE * 14 Assurez-vous que l‘appareil n‘entre pas en contact avec des matériaux facilement inflammables (par ex. rideaux, textiles, murs, etc.), et qu‘il ne soit pas recouvert. Si la chaleur et la vapeur générées par la machine à pain ne peuvent pas s‘évacuer correctement, il y a un risque d‘incendie. Pendant le fonctionnement, l‘appareil chauffe. 15 16 1. Normal 2. Vollkorn 3. Französisch 4. Schnell 5. SÜSS 6. Kuchen 7. Marmelade 8. Teig 9. Ultraschnell 10. Backen 11. Dessert 12. Hausgemacht 18 19 1000g 1200g 1400g HELL MITTEL DUNKEL START/SToPP (démarrage / fin) Cette touche permet de mettre en marche ou d‘arrêter le programme choisi. Pour démarrer le programme, laissez la touche START / STOPP (démarrage / fin) appuyée pendant 1,5 secondes. Retentit alors un bref bip, puis les deux points de l‘heure se mettent à clignoter : le programme se met en marche. Une fois que le programme a démarré, à part les touches START / STOPP (démarrage / fin), LICHT (lumière) et PAUSE (pause), aucune autre touche ne fonctionne. Kneten 1 AUFGEHEN 1 KneTEN 2 AUFGEHEN 2 AUFGEHEN 3 BaCkeN WarmHALTEN 17 Le chiffre „1“ indique le programme pré-réglé (17). Le poids de „1200 g“ (18) et le degré de brunisage „MITTEL (intermédiaire)“ (20) sont les valeurs réglées en usine. 20 Pour arrêter le programme, laissez la touche START / STOPP (démarrage / fin) appuyée pendant environ 1,5 secondes. Un bip confirme alors l‘arrêt du programme. Cette fonction permet d‘empêcher une interruption involontaire de la cuisson. Par conséquent, ne touchez pas les surfaces chaudes: utilisez des poignées et les interrupteurs. PAUSE Ne touchez jamais les parties rotatives. Ne transportez pas l‘appareil s‘il contient des ZEIT LICHT GRÖSSE FARBE Sélectionnez le programme souhaité en utilisant la touche MENÜ (menu). Après chaque pression sur les touches (accompagnée par un signal sonore), l‘affichage du programme change (17). Les fonctions des 12 différents programmes (14) sont expliquées ci-après. MENÜ START STOPP 1. Normal (normal): Pétrissage simple, laisser lever la pâte, et cuisson de pain normal. Pour améliorer le goût, ajoutez des ingrédients. PROZESS liquides chauds (par ex. de la confiture). L‘appareil ne doit pas être utilisé par des personnes dont les facultés mentales / physiques sont limitées, ni par les enfants. Ceux-ci ne sont pas conscients du danger existant lors de l‘utilisation d‘appareils électriques. C‘est pourquoi il est impératif de ne jamais laisser d‘enfants utiliser cet appareil électrique sans surveillance. En présence d‘enfants, veuillez faire preuve d‘une très grande vigilance. Il convient de toujours surveiller les enfants, afin de s‘assurer qu‘ils ne se servent pas de l‘appareil comme d‘un jouet. 14 Programmes au choix 18 Taille du pain 15 Partie de programme 19 Durée du programme 16 Blocage des touches 17 Programme sélectionné 20 Degré de brunissement * Le fabricant se réserve le droit de procéder à des modifications du panneau de commande, et ce sans notification préalable. MENÜ (menu) 2. VOLLKORN (pain complet): Pétrissage, laisser lever la pâte, et cuisson de pain à base de farine complète. Il n‘est pas conseillé d‘utiliser la fonction „Retarder“, car le résultat n‘est pas particulièrement bon. 3. FRANZÖSISCH (français): Pétrissage, laisser lever la pâte, et cuisson de pain avec durée prolongée. Le pain a une croûte croustillante et une structure légère. 41 F F 6. Kuchen (gateau): Pétrissage, laisser lever la pâte et cuisson. La phase de levage de la pâte se fait à l‘aide de levure ou de soda. 7. Marmelade (confiture): Faire bouillir de la confiture tout en remuant sans discontinuer. Avant de mettre des fruits ou des légumes dans le moule, il convient de les couper en petits morceaux. 3. Procédez de la même manière pour régler les étapes suivantes. Pour quitter le mode programmation, appuyez sur START / STOPP (démarrage / fin). 9. Ultraschnell (ultra-rapide): Pétrissage, laisser lever la pâte et faire cuire en un temps record. Le pain obtenu est épais. 4. Pour démarrer le programme, appuyez à nouveau sur la touche START / STOPP (démarrage / fin). 10. Backen (cuisson): Cuisson seule, sans pétrissage ni levage de la pâte. Utilisez cette fonction pour prolonger le temps de cuisson des autres programmes. Le temps de cuisson se règle en appuyant sur le bouton ZEIT (horloge). Si vous le maintenez appuyé, le temps s‘écoule plus rapidement. 11. Dessert (dessert): Pétrissage, laisser lever la pâte, et cuisson de desserts. GRÖSSE (taille) La durée possible pour chaque phase (15) est prévue comme suit: 42 2. Pour accéder à l‘étape suivante, appuyez sur la touche PROZESS (travailler). AUFGEHEN 1 (lever la pâte 1) (15) apparaît sur l‘écran. Appuyez sur la touche ZEIT (horloge) afin de (19) régler le temps, et confirmez votre choix en ré-appuyant sur la touche PROZESS (travail). 8. Teig (pate): Pétrissage et laisser lever la pâte sans cuisson. Retirez la pâte et utilisez-la pour faire des pizzas, des petits pains, des pâtes vapeur, etc. 12. Hausgemacht (fait maison): Ici, vous pouvez saisir votre propre programme, en saisissant vous-même le temps nécessaire à chaque étape. Vous pouvez définir vous-même les temps de pétrissage, de levage de la pâte, de cuisson et de maintient au chaud afin de créer votre pain préféré. KNETEN 1 (pétrissage 1) AUFGEHEN 1 (laisser lever la pâte 1) KNETEN 2 (pétrissage 2) AUFGEHEN 2 (laisser lever la pâte 2) AUFGEHEN 3 (laisser lever la pâte 3) BACKEN (cuisson) WARMHALTEN (maintenir au chaud) 6 – 14 min. 20 – 60 min. 5 – 20 min. 5 – 120 min. 0 – 120 min. 0 – 80 min. 0 – 60 min. La GRÖSSE (taille) ne peut être choisie que pour les programmes suivants: 1. NORMAL (normal), 2. VOLLKORN (complet), 3. FRANZÖSISCH (francais), 4. SCHNELL (rapide), 5. SÜSS (sucré et), 9. ULTRASCHNELL (ultra-rapide). CONSEILS ET ASTUCES 5. Süss (sucre): Pétrissage, laisser lever la pâte, et cuisson de biscuits sucrés. Pour améliorer l‘arôme, vous pouvez ajouter des ingrédients. Dans le menu HAUSGEMACHT (fait maison): 1. Appuyez une fois sur la touche PROZESS (travailler). Il apparaît KNETEN 1 (pétrir 1) (15) sur l‘écran. Activez ensuite la touche horloge pour saisir la durée (19) en minutes. Le temps passe plus vite si vous avez activé la touche ZEIT (horloge). Pour confirmer votre sélection pour la première étape, appuyez sur la touche PROZESS (travailler). FARBE (couleur) S‘il reste de la place après la cuisson, vous pourrez augmenter la quantité petit à petit. Merci de votre comprehension! ZEIT (durée) Si vous ne souhaitez pas que la cuisson commence immédiatement, cette touche vous permettra d‘indiquer l‘heure à laquelle vous souhaitez qu‘elle commence. de l‘horaire commencent alors à clignoter. Le temps indiqué est le temps restant. À noter : le décalage maximal est de 13 heures. N‘utilisez pas d‘ingrédients périssables tels que lait, œufs, fruits ou oignons en mode „début différé. PROZESS (travailler) Cette touche vous permet, sous le MENÜ (menu) 12 HAUSGEMACHT (fait maison), de régler votre propre programme de cuisson personnel. PAUSE (pause) Une fois que le programme a commencé, vous pouvez l‘interrompre à tout moment au moyen de la touche PAUSE (pause). Appuyez sur la touche pendant environ 1,5 secondes : le programme est stoppé, mais le réglage reste enregistré. Le temps restant clignote sur l‘écran. Le programme est poursuivi dès que vous appuyez à nouveau sur le bouton PAUSE (pause). FONCTION DE MAINTIEN AU CHAUD Le pain est maintenu au chaud automatiquement jusqu’à une heure après la cuisson (15). Si vous souhaitez retirer le pain pendant la phase de maintien au chaud, stoppez le programme au moyen de la touche START / STOPP (démarrage / fin). Voici comment régler le retardement: Appuyez sur cette touche pour définir le poids du pain: 1000 g, 1200 g ou 1400 g. votre choix apparaît sur (18) l‘écran. Veuillez garder à l‘esprit que le temps de cuisson varie selon le poids du pain. Si votre pain devient trop foncé, réduisez le degré de brunissage ou stoppez le programme env. 5 à 10 minutes avant la fin du programme, en appuyant sur la touche START / STOP (démarrage / fin). Lors des phases de levage, certaines pâtes (par ex. le pain blanc, le pain sucré) risquent de déborder du moule. En ré-appuyant sur la touche dans la minute qui suit, la lumière s‘éteint. Si vous n‘appuyez pas sur la touche dans la minute qui suit, la lumière s‘éteint automatiquement. Utilisez cette touche pour définir le degré de brunissement de la croûte du pain: HELL (clair); MITTEL (intermédiaire); ou DUNKEL (foncé) (20). Si vous utilisez ces farines, réglez votre machine à pain sur (18) 1000 g. Vos pains seront alors réussis à tous les coups! Testez la quantité petit à petit! Commencez à tester votre recette avec 1200 g. En activant cette touche, vous allumez l‘éclairage. C‘est pratique pour contrôler la cuisson. Remarque: Le réglage s‘enregistre pour la prochaine utilisation. Farines mixtes pour pains de 750 g Réglage du poids 1400 g LICHT (lumière) 1. Sélectionnez le programme souhaité (17), le poids du pain (18) et le brunissage (20). CONSEILS ET ASTUCES 4. SCHNELL (rapide): Pétrissage, laisser lever la pâte et cuisson de pain plus rapidement qu‘en programme NORMAL (normal). Le pain fabriqué ainsi est généralement plus petit et plus dense que le pain normal. 2. Vous définirez le temps de décalage en activant la touche ZEIT (horloge). L‘heure indiquée sur l‘écran (19) est celle de la fin du programme sélectionné. Supposons qu‘il est 20h30 et que vous voulez que votre pain soit prêt demain à 7 heures. Dans ce cas, la durée totale est de 10 heures et 30 minutes. Appuyez sur la touche ZEIT (horloge) jusqu‘à ce qu‘il apparaisse 10h30 (19) sur l‘écran. Le temps au choix augmente par tranches de 10 minutes. 3. Pour démarrer le programme de démarrage en différé, appuyez sur la touche START / STOPP (démarrage / fin). Les doubles points FONCTION MEMOIRE Si l‘alimentation électrique est interrompue pendant la cuisson du pain, la procédure peut être poursuivie dans les 10 minutes sans qu‘il soit nécessaire d‘activer la touche START / STOPP (démarrage / fin). Si l‘interruption dure plus de 10 minutes, la machine ne peut pas enregistrer le programme. Retirez les ingrédients du moule, jetez-les à la poubelle, et remplissez le moule de nouveaux ingrédients. Redémarrez la machine. Si, lors de la coupure d‘électricité, le pain était en phase de pétrissage et qu‘il n‘avait pas encore atteint la phase de levage, vous pouvez alors activer la touche START / STOPP (démarrage / fin) et redémarrer le programme. 43 F F 2 1400 g CLAIR; INTERMÉ- 1200 g DIARE; 1000 g SOMBRE 3 1400 g CLAIR; INTERMÉ- 1200 g DIARE; 1000 g SOMBRE 4 1400 g CLAIR; INTERMÉ1200 g DIARE; 1000 g SOMBRE 5 1400 g CLAIR; INTERMÉ- 1200 g DIARE; 1000 g SOMBRE 6 — 7 CLAIR; INTERMÉDIARE; SOMBRE 2:50 2:13 3:40 2:55 8 min. 25 min. 18 min. 35 min. 65 min. 60 min. 3:32 2:50 8 min. 25 min. 16 min. 35 min. 70 min. 55 min. 3:30 2:50 18 min. 40 min. 22 min. 30 min. 50 min. 70 min. 3:50 2:40 16 min. 40 min. 19 min. 30 min. 50 min. 65 min. 3:40 2:35 13 min. 40 min. 17 min. 3:30 2:30 2:10 1:45 10 min. 10 min. 10 min. — 30 min. 70 min. 10 min. 10 min. 10 min. — 30 min. 65 min. 2:05 1:40 — 30 min. 60 min. 2:00 1:35 mode maintient au chaud ✓ ✓ 20 min. 33 min. 40 min. 62 min. 2:50 2:25 5 min. 20 min. 32 min. 40 min. 58 min. 2:45 2:20 10 min. 5 min. 15 min. 32 min. 47 min. 53 min. 2:42 2:22 6 min. 5 min. 10 min. 9 min. 80 min. 1:50 1:34 ✓ — — 45 min. 20 min. 1:20 — — — — — 20 min. — — 10 min. — 5 min. 30 min. 40 min. — 1:30 — 33 min. 60 min. — 1:48 1:38 10 min. — 5 min. — 28 min. 55 min. 1:38 1:28 10 min. — 5 min. — 28 min. 52 min. 1:35 1:25 — — — — — 10 min. à 60 min. 0:10 à 1:00 — 25 min. 60 min. 1:38 — 0:36 bis 7:54 pendant — CLAIR; INTERMÉDIARE; SOMBRE — CLAIR; INTERMÉDIARE; SOMBRE 13 min. — CLAIR; INTERMÉDIARE; SOMBRE 6 min. 20 min. 5 min. 5 min. 0 min. 0 min. à à à à à bis 14 min. 60 min. 20 min. 120 min. 120 min. 80 à. 12 ✓ 5 min. 9 1400 g CLAIR; 11 ✓ 10 min. — — — — PÉTRISSAGE sur l‘arbre d‘entraînement. Au préalable, graissez les arbres d‘entraînement et les crochets de pétrissage, par ex. avec de la margarine, afin de pouvoir les détacher facilement. BLOCAGE DU PANNEAU DE COMMANDE 10 min. 15 min. 10 30 min. 50 min. 60 min. 10 min. 10 min. 10 min. — INTERMÉ- CUISSON 10 min. 20 min. 12 min. 25 min. 48 min. 55 min. 10 min. 25 min. 20 min. 35 min. 65 min. 65 min. — 1200 g DIARE; 1000 g SOMBRE LEVAGE DE LA PÂTE 3 2:15 LEVAGE DE LA PÂTE 2 2:20 2:55 PÉTRISSAGE 2 3:00 10 min. 20 min. 15 min. 25 min. 45 min. 60 min. LEVAGE DE LA PÂTE 1 10 min. 20 min. 15 min. 25 min. 45 min. 65 min. — 8 44 Signal pour ajouter des ingrédients en INTERMÉ- 1200 g DIARE; 1000 g SOMBRE Durée totale du programme 1 1400 g CLAIR; PÉTRISSAGE 1 Réglages COULEUR Réglages TAILLE N° de programme TABLEAU DES PHASES ✓ ✓ ✓ ✓ ✓ Afin d‘empêcher une utilisation involontaire, il est possible (16) de bloquer les touches du panneau de commande. Dans un premier temps, activez la touche PROZESS (travailler), puis la touche FARBE (couleur). Le panneau de commande est alors bloqué, à l‘exception des touches PROZESS (travailler) et FARBE (couleur). Cette fonction permet d‘empêcher les interruptions involontaires dues à une activation non voulue des touches. Annulez le blocage des touches en appuyant d‘abord sur la touche PROZESS (travailler), puis sur la touche FARBE (couleur). Si vous n‘activez pas le blocage des touches, celles-ci seront automatiquement bloquées 5 minutes après le début du programme. Le blocage des touches (16) doit être supprimé pour que vous puissiez procéder à d‘autres réglages de l‘appareil. ENVIRONNEMENT La machine à pain peut s‘employer à différentes températures ambiantes. Néanmoins, la taille du pain peut alors varier, selon qu‘il a été cuit dans un endroit plus ou moins chaud. Nous conseillons une température ambiante entre 15°C et 34°C. AVERTISSEMENT S‘il apparaît (19) „H HH“ après le début du programme, cela signifie que la température dans la chambre de cuisson est encore trop élevée. Stopper le programme. Ouvrez le couvercle et laissez l‘appareil entièrement refroidir (10 à 20 minutes) avant de l‘utiliser. S‘il apparaît (19) „E E0“ ou „E E1“ après que vous avez appuyé sur „START / STOPP (démarrage / fin)“, cela signifie que le capteur thermique est endommagé. Il faut alors qu‘il soit contrôlé par un SAV qualifié. VOILA COMMENT FAIRE CUIRE LE PAIN 1. Positionnez correctement le moule à pain (6 / 8) et pressez-le vers le bas jusqu‘à ce qu‘il s‘insère en faisant clic. Insérez les crochets de pétrissage (7 / 9) 2. Mettez les ingrédients dans le moule (6 / 8). Veillez à respecter l‘ordre indiqué dans la recette. Normalement, vous mettez d‘abord l‘eau ou les autres liquides, puis le sucre, le sel et la farine. Ajoutez toujours la levure en dernier. Remarque: Veuillez respecter les quantités indiquées pour le levain et la farine dans chaque recette. 3. Avec les doigts, faites un petit trou dans la farine, et ajoutez-y la levure. Assurez-vous que celle-ci n‘entre pas en contact avec des liquides ni du sel. Levure Ingrédients secs Eau ou autres liquides 4. Fermez le couvercle (2) et branchez l‘appareil. 5. Appuyez sur la touche MENÜ (menu) jusqu‘à avoir choisi (17) le programme souhaité. 6. Sélectionnez le poids souhaité pour votre pain (18) en activant la touche GRÖSSE (taille). 7. Pour définir la coloration de la croûte (20), appuyez sur la touche FARBE (couleur). 8. Réglez le démarrage en différé (19) au moyen de la touche ZEIT (horloge). Si vous voulez que la machine à pain démarre immédiatement, vous pouvez passer cette étape. 9. Pour démarrer le programme, maintenez appuyée la touche START / STOPP (démarrage / fin) pendant 1,5 secondes. 10.Si le programme 1. NORMAL (normal), 2. VOLLKORN (complet), 3. FRANZÖSISCH (francais), 4. SCHNELL (rapide), 5. SÜSS (sucré), 6. KUCHEN (gâteau), 9. ULTRASCHNELL (ultra-rapide) ou 12. HAUSGEMACHT (fait maison) est préprogrammé, un signal sonore retentit pendant la marche. Vous pouvez maintenant ajouter d‘autres ingrédients. Ouvrez le couvercle (2) et mettez les ingrédients. 45 CONSEILS ET ASTUCES F Lorsque les quantités sont faibles, il se peut que la pâte ne se répartisse pas uniformément dans le moule – mais qu‘elle s‘accumule au contraire d‘un seul côté. Cela provoque plus tard, lors de la cuisson, un résultat non homogène. Pour obtenir un pain de jolie forme, aplanissez la pâte dans le moule au moyen d‘une spatule (13) après la deuxième phase de pétrissage KNETEN 2 (pétrissage 2) (15). Si la pate colle beaucoup a la spatule, (13) mettez celle-ci brievement dans la farine. CONSEILS 11. La durée de la cuisson dépend du programme choisi (17), de la taille du pain (18) et de sa (20) coloration. Pour contrôler la cuisson, appuyez sur la touche LICHT (lumière) et regardez à travers la lucarne de contrôle. N‘ouvrez pas le couvercle (2)! Remarque: Il est possible que pendant la cuisson, de la vapeur s‘échappe par les rainures d‘aération du couvercle. C‘est normal. Vous ne savez pas si votre pain est bien cuit? Plantez une broche en bois dans le pain. S‘il n‘y a pas de pâte qui y reste collée, alors votre pain est prêt! 12.Une fois que la cuisson est terminée, un bip retentit. Appuyez sur la touche START / STOPP (démarrage / fin) pendant env. 1,5 secondes afin de terminer le programme. Vous pouvez alors retirer le pain. Pour ce faire, ouvrez le couverc (2) avec des gants de four, et retirez le moule en le (6 / 8) soulevant vers le haut. 46 F Remarque: Nous conseillons de couper le pain au moyen d‘un couteau électrique ou d‘un couteau à dents. N‘utilisez pas de petit couteau de cuisine ! Celui-ci ne convient pas et couperait le pain de manière irrégulière. 16.Si vous n‘êtes pas à côté ou qu‘à la fin de la cuisson vous n‘avez pas appuyé sur la touche START / STOPP (démarrage / fin), le pain sera automatiquement maintenu au chaud pendant une heure. La fin de la fonction de maintient au chaud est annoncée par 10 bips. 17.Après utilisation, ou en cas de non utilisation, débranchez l‘appareil. Attention: Avant de couper le pain en tranches, retirez du pain, au moyen de l‘outil joint (12) les crochets de pétrissage (7 / 9) Ceux-ci sont dans la partie inférieure du pain. Le pain est encore chaud, donc ne tirez pas sur les crochets avec vos doigts. Remarque: Si vous ne mangez pas le pain en entier, conservez-le dans une poche plastique hermétique ou dans tout autre récipient hermétique. Vous pouvez conserver le pain à température ambiante pendant env. 3 jours. Si vous souhaitez conserver le pain plus longtemps, emballez-le dans un sachet plastique hermétique et mettez-le au réfrigérateur. Vous pouvez le conserver pendant 10 jours. Étant donné que le pain fait maison ne contient pas de conservateurs, il ne se conserve pas plus longtemps que les pains achetés en boulangerie. CONSIGNES SPECIALES LE PROGRAMME ULTRASCHNELL (ultra-rapide), MENÜ 9 (menu 9) Avec le programme ultra-rapide, la machine à pain peut faire du pain en une heure et 38 minutes. Pour ce faire, il faut que la température de l‘eau soit de 48 à 50°C: pour bien la mesurer, utilisez un thermomètre. La température joue un rôle important et a une grande influence sur le résultat de la cuissons. Si la température de l‘eau est trop basse, le pain ne se lèvera pas et n‘atteindra pas la taille souhaitée. Si la température est trop élevée, la levure sera tuée avant qu‘elle ait eu le temps d‘agir. Le pain ne gonflera donc pas non plus, et le résultat sera médiocre. LE MOULE DOUBLE (8) CROCHETS DE PÉTRISSAGE (7 / 9) S‘il est difficile de retirer du pain les crochets de pétrissage (7 / 9) utilisez alors le retire-crochets (12). Essuyez les crochets (7 / 9) au moyen d‘un chiffon humide en coton. N‘utilisez pas de nettoyant coupant ou agressif, afin de ne pas abîmer le film anti-dérapant. COUVERCLE (2) A LUCARNES (3) Essuyez l‘intérieur et l‘extérieur du couvercle (2) avec un chiffon humide. Pour le réglage de la taille du pain, pensez à respecter la capacité maximale de chaque moule. Celle-ci est de 500 g. N‘utilisez pas de nettoyant coupant ou agressif, cela abîmerait la surface ultra-brillante. Le moule double (8) peut s‘employer pour les deux utilisations suivantes: BOÎTIER (5) Pour la fabrication simultanée de deux pains de la même sorte. Pour la fabrication simultanée de deux pains différents avec un programme. Remarque: La taille du pain doit être réglée à 1000 g. NETTOYAGE ET ENTRETIEN Avant le nettoyage, débranchez l‘appareil et laissez-le refroidir entièrement. Attention: Le moule et le pain peuvent être très chauds. Soyez prudent. PAINS RAPIDES MENÜ 4 (menu 4) SCHNELL (rapide) ET MENÜ 9 (menu 9) ULTRASCHNELL (ultra-rapide) Le moule (6 / 8) et les crochets de pétrissage (7 / 9) sont prévus pour un lavage en machine. 13.Laissez refroidir le moule (6 / 8) avant de retirer le pain. Pour détacher le pain sur les côtés, utilisez la spatule (13) Pour ce faire, n‘utilisez jamais de couteau, cela abîmerait le film antiadhésif du moulen. Les pains à fabrication rapide se préparent à base de levure ou de soda qui s‘activent au contact de liquides ou de chaleur. Pour obtenir de bons résultats, mettez en premier le liquide dans le moule (6 / 8), puis les ingrédients secs dans la partie supérieure. MOULE (6) ET MOULE DOUBLE (8) 14.Renversez le moule (6 / 8), tenez-le au-dessus d‘une grille ou d‘une plaque de four et agitez doucement le moule jusqu‘à ce que le pain en tombe. Pendant la première phase de pétrissage, il peut arriver que les ingrédients secs s‘accumulent dans les angles du moule. Il faut alors les mélanger, afin d‘éviter que cela ne forme des grumeaux. Utilisez pour cela uniquement des ustensiles en bois, et avant d‘ouvrir le couvercle, appuyez sur la touche PAUSE (pause). 15.Laissez refroidir le pain pendant env. 20 minutes avant de le couper en tranches. S‘il n‘est pas possible de le presser vers le bas, changez la position jusqu‘à ce qu‘il soit fixe, puis pressez vers le bas. Retirez le moule (6 / 8) en tirant sur la poignée. Essuyez l‘intérieur et l‘extérieur du moule (6 / 8) au moyen d‘un tissu humide. N‘utilisez pas de nettoyant coupant ou agressif, afin de ne pas abîmer le film anti-dérapant. Le moule (6 / 8) doit être entièrement sec avant d‘être replacédans la machine. Remarque: Pour insérer le moule (6 / 8), pressez-le légèrement vers le bas jusqu‘à ce qu‘il soit dans la bonne position. Essuyez la partie extérieure du boîtier (5) au moyen d‘un chiffon humide. N‘utilisez pas de nettoyant coupant ou agressif, cela abîmerait la surface en acier de la machine. Pour le nettoyer, ne mettez jamais le boîtier (5) dans l‘eau. AVANT DE RANGER LA MACHINE POUR LONGTEMPS Avant d‘emballer la machine pour la ranger, assurez-vous qu‘elle soit entièrement refroidie, propre et sèche. Le couvercle (2) doit être fermé. PETITE INTRODUCTION AUX ALIMENTS FARINE La farine est le principal ingrédient de votre pain. La farine pour pain, également nommée farine de gluten ou farine d‘amidon, est certainement moulue à partir de blé dur. Elle comporte une partie importante de gluten et de protéines. Ces produits naturels confèrent à la pâte la capacité de conserver leur forme et le dioxyde de carbone produit par la levure. Ainsi, cette farine convient tout à fait à la cuisson du pain. 47 F F La farine fine est un mélange de blés durs et de SEL La farine complète contient tous les compo- Bien entendu, le sel contribue à intensifier le goût et la coloration de la croûte du pain. Il peut également être employé pour freiner une levure particulièrement active. C‘est pourquoi il ne faut pas augmenter la quantité indiquée dans les recettes. blés mous, et convient bien pour une cuisson rapide ou pour des biscuits. sants du grain de blé: notamment le son, qui est la peau extérieure dure du blé. Celle-ci est une source idéale de fibres. Si vous utilisez cette farine, veillez à ce qu‘elle soit très fine. Le son contenu empêche la libération de gluten, de sorte que les pains fabriqués avec cette farine sont plus petits et plus lourds que ceux à base de farine blanche et fine. C‘est pourquoi, afin d‘obtenir pains plus légers, cette farine est souvent mélangée avec d‘autres sortes de farine. La farine de blé sombre, également nommée farine noire ou farine grosse, est riche en fibres. Elle est semblable à la farine complète. Pour obtenir une bonne taille après la cuisson, il faut qu‘elle soit mélangée avec de grandes quantités d‘autres sortes de farine. La farine avec levure contient déjà, comme son nom l‘indique, de la levure, et convient très bien pour la fabrication de gâteaux. L8a farine de mais et la farine d‘avoine sont à base de mais et d‘avoine. Elles s‘emploient comme additifs pour la fabrication du pain noir. La farine d‘avoine intensifie le goût et améliore la qualité de votre pain. SUCRE Le sucre est un ingrédient important. Il aide à la fermentation de la levure. De plus, le sucre donne un goût plus doux au pain, accroît les propriétés nutritives et prolonge sa durée de vie. On emploie généralement du sucre blanc. Selon les goûts, il est également possible d‘employer du sucre roux, du sucre en poudre, du sirop ou du miel. Attention: Utilisez uniquement du sucre en poudre. Du sucre en gros grains risquerait d‘abîmer le film anti-adhésif de votre moule Remarque: Mais vous pouvez également renoncer au sucre. Dans ce cas, le pain gonfle moins. Remarque: Si vous renoncez au sel pour des raisons de santé, il se peut que votre pain monte plus que d‘habitude. MATIERES GRASSES, BEURRE ET HUILE VEGETALE Les matières grasses ramollissent le pain tout en prolongeant sa durée de vie. Avant d‘ajouter le beurre, il faut le faire fondre ou le découper en morceaux. LEVURE Pendant la phase de levage, la levure libère du dioxyde de carbone, qui fait gonfler le pain et ramollit la structure interne. Pour gonfler, la levure a besoin de sucre et de farine. 1 cc de levure sèche active = ¾ cc de levure instantanée 1,5 TL cc de levure sèche active = 1 cc de levure instantanée 2 TL cc de levure sèche active = 2 TL cc de levure sèche active La levure fraîche doit être conservée au réfrigérateur, car le champignon meurt dès que la température est un peu élevée. Lors de l‘achat, vérifiez la date de production et la date de péremption de la levure. Après chaque utilisation, stockez la levure aussi vite que possible dans le réfrigérateur. LEVURE DE CUISSON La levure de cuisson s‘emploie pour fabriquer pains et gâteaux en mode ULTRASCHNELL (ultrarapide). Elle n‘a pas besoin de phase de levage et produit des gaz qui, sous forme de petites bulles, agissent sur la texture du pain. Soda Le soda est très proche de la levure de cuisson. Il peut également s‘employer en combinaison avec la levure de cuisson. L‘eau est un ingrédient essentiel lors de la fabrication du pain. Une température entre 20 et 25°C est optimale. Il est également possible de remplacer l‘eau, par ex. par du lait frais ou de l‘eau mélangée avec 2 % de lait en poudre. Cela permet d‘améliorer l‘arôme du pain et la couleur de la croûte. Pour améliorer le goût, certaines recettes emploient également du jus de citron, de pomme ou d‘orange. ŒUFS Les œufs peuvent améliorer la qualité du pain : ils le rendent nourrissant et plus gros. Dans un premier temps, il faut sortir les oeufs de leur coquille, puis les mélanger uniformément. MESURE DES INGREDIENTS Si le pain gonfle peu, c‘est généralement en raison d‘une levure de faible qualité: 1. Versez un demi-verre d‘eau chaude (45 - 50°C) dans une mesure. MESURE DES LIQUIDES Remarque: Si le pain gonfle peu, c‘est généralement en raison d‘une levure de faible qualité. 2. Ajoutez-y une cuillère à café de sucre blanc, et remuez. Puis versez deux cuillères à café de levure sur l‘eau. INGREDIENTS SECS Les ingrédients secs doivent être versés dans le verre gradué (10) sans être tassés. Les ingrédients ne doivent pas être pressés car un excès, aussi faible qu‘il soit, risquerait de modifier l‘équilibre de la recette. Si vous ne mesurez que de petites quantités des ingrédients secs, utilisez alors une mesurette (11). Les cuillères mesurettes indiquées sont graduées. Mesurette (11): correspond à 1 cuillère à soupe EAU ET AUTRES LIQUIDES La principale étape lors de l‘utilisation de la machine à pain est celle qui consiste à mesurer précisément chacun des ingrédients au moyen d‘un verre gradué (10) et d‘une mesurette (11). Mesurez très précisément chaque liquide ainsi que les ingrédients secs, faute de quoi le résultat de vos efforts sera difficilement acceptable. 3. Placez la mesure pendant 10 minutes dans un endroit chaud. Ne mélangez pas. 48 4. La mousse produite devrait alors donner environ une tasse, faute de quoi la levure est inactive. Il convient de mesurer l‘eau, le lait frais et les mélanges à base de lait en poudre au moyen d‘un verre gradué (10). Pendant que vous mesurez les liquides, tenez le verre droit. Si vous mesurez la quantité d‘huile alimentaire ou d‘autres aliments, après la mesure, nettoyez le verre gradué (10). correspond à 1 cuillère à café ORDRE DES INGREDIENTS Il est important de respecter l‘ordre d‘ajout des ingrédients. Voici l‘ordre qu‘il convient généralement de respecter: Ingrédient liquide, œufs, sel, lait en poudre, etc. Lorsque vous ajoutez la farine, il ne faut pas que celle-ci se mélange entièrement au liquide. La levure ne doit être ajoutée que sur la farine sèche, et ne doit pas entrer en contact avec le sel. Un signal retentit après le pétrissage de la pâte. Maintenant, vous pouvez ajouter les fruits ou autres. Si vous ajoutez les fruits trop tôt, le pétrissage nuira à l‘arôme et à la consistance. Si vous utilisez la fonction de démarrage différé, n‘utilisez jamais d‘ingrédients périssables tels qu‘oeufs ou fruits. 49 F F REPARATION DES DEFAILLANCES Nr. Panne 1 De la fumée fuit des ouvertures d‘aération pendant la cuisson. 3 Il est très difficile de détacher le pain du moule. 4 Les ingrédients ne sont pas uniformément mélangés. 50 Raison Solution Erreur technique. Débranchez l‘appareil, attendez quelques instants, et rebranchez-le. Le programme en cours est brièvement interrompu, puis se remet en marche tout seul. Raison Solution Certains ingrédients collent aux éléments de chauffe ou en sont trop près. Débranchez la machine, laissez refroidir l‘appareil et nettoyez les éléments chauffants. Pour éviter les brûlures, soyez prudent. 7 Le blocage des touches ne se débloque plus en appuyant sur les touches PROZESS (travailler) et FARBE (couleur) (pendant le fonctionnement ou après la cuisson). Si vous utilisez l‘appareil pour la première fois, laissez-le tourner à vide, et ouvrez le couvercle. 8 Vous entendez le moteur fonctionner mais la pâte n‘est pas pétrie Soit le moule n‘est pas bien fixé, soit la quantité de pâte est trop importante pour pouvoir être pétrie. Assurez-vous que le moule est bien fixé. Assurez-vous que la pâte a bien été préparée conformément à la recette, et que les ingrédients ont bien été dosés. 9 Le pain est si gros qu‘il appuie sur le couvercle. Trop de levure, d‘eau ou de farine. Il se peut que la température ambiante soit trop élevée (idéalement : 15°C – 34°C). Contrôlez les facteurs cités. Le cas échéant, réduisez les quantités. 10 Le pain est trop petit ou n‘a pas gonflé. Pas ou pas assez de levure. Il se peut que la levure soit vieille, et donc inactive. Un autre raison possible: l‘eau trop chaude, la température ambiante trop faible, ou trop de sel. Contrôlez la quantité et l‘activité de la levure. Le cas échéant, augmentez la température ambiante. 11 La pâte est si grosse qu‘elle déborde du moule. Vous avez peut-être employé trop de liquide, de sorte que la pâte est trop fluide. Il se peut que vous ayez employé trop de levure. Réduisez la quantité de liquide et améliorez la consistance de la pâte. 12 Lors de la cuisson, le pain s‘effondre en son milieu. La farine n‘est pas assez forte pour permettre à la pâte de gonfler. Utilisez de la farine pour pain, ou de la farine d‘amidon. La levure agit trop vite ou la température est trop élevée. Utilisez la levure à température ambiante. Trop d‘eau rend la pâte trop lourde et trop fluide. Si nécessaire, adaptez la quantité d‘eau. Si vous utilisez l‘appareil pour la première fois, il se peut que l‘huile colle aux éléments de chauffe. 2 La croûte se trouvant au bas du pain est trop épaisse. Nr. Panne Vous avez laissé le pain trop longtemps au chaud et trop longtemps dans le moule, et la perte d‘eau a été trop importante. Retirez le pain dès que possible et ne le maintenez pas au chaud. Les crochets de pétrissage sont accrochés à l‘arbre d‘entraînement. Une fois que vous avez retiré le pain, versez de l‘eau chaude dans le moule, de sorte que les crochets de pétrissage soient recouverts. Retirez-les au bout d‘environ 10 minutes, et nettoyez-les. Avant la prochaine utilisation, graissez l‘arbre d‘entraînement. Le programme sélectionné ne convient pas. Sélectionnez le bon programme. La résistance de rotation est trop importante, de sorte que les crochets de pétrissage peuvent difficilement tourner. Contrôlez la fixation des crochets de pétrissage. Retirez le moule et faites tourner l‘appareil à vide. En cas de dysfonctionnement, veuillez contacter le service d‘assistance. 5 Après la cuisson, le pain est sec et n‘a pas de croûte brune. Le couvercle a été ouvert plusieurs fois. Choix du mauvais programme. Pendant le fonctionnement, n‘ouvrez pas le couvercle. Renseignez-vous sur le bon programme à choisir (p. 9). 6 L‘écran indique „ H HH“ après que vous avez appuyé sur la touche START / STOPP (démarrage / fin). La température à l‘intérieur de la machine à pain est trop élevée pour pouvoir faire du pain. Appuyez à nouveau sur la touche START / STOPP (démarrage / fin) et débranchez l‘appareil. Retirez le moule et laissez le couvercle ouvert jusqu‘à ce que la machine soit refroidie. 51 F F Raison Solution 13 Le pain est très lourd, et sa structure très dense. Vous avez employé trop de farine et pas assez d‘eau. Utilisez moins de farine et plus d‘eau. Vous avez utilisé trop de fruits ou de farine complète. Réduisez la quantité des ingrédients cités, et prenez plus de levure. 14 Le centre du pain est creux. Vous avez utilisé trop d‘eau ou de levure, ou pas de sel. L‘eau est trop chaude. 15 Il y a encore de la poudre à la surface du pain. 16 La croûte est trop épaisse et la couleur trop sombre lors de la cuisson de gâteaux ou d‘aliments contenant beaucoup de sucre. Réduisez la quantité d‘eau et de levure, et ajoutez un peu de sel. Contrôlez la température de l‘eau. Le pain contient des ingrédients très riches en gluten. Mettez moins d‘ingrédients riches en gluten, ou pas du tout. Le pain a été insuffisamment pétri car il n‘y a pas assez d‘eau. Contrôlez la quantité d‘eau et le fonctionnement mécanique de la machine à pain. Les différentes recettes ont une grande influence sur la fabrication du pain. Lorsque vous mettez beaucoup de sucre, la couleur devient très sombre. Si, pour une recette avec beaucoup de sucre, la couleur est trop sombre, interrompez la cuisson 5 à 10 minutes avant la fin en appuyant sur la touche START / STOPP (démarrage / fin). Avant de retirer le gâteau ou le pain, laissez le couvercle encore fermé pendant 20 minutes. RECETTES - ADAPTÉES AUX PROGRAMMES Les quantités de farine de pain et de levure indiquées dans les recettes correspondent au maximum autorisé. 1 Tasse = 250 ml 1 CàS = 3 Càc Beurre / Margarine: Selon vos goûts, vous pouvez également employer d‘autres matières grasses : huile d‘olive, saindoux ou graisse de porc etc. Lait en poudre: Vous pouvez remplacer le lait en poudre par du lait frais. Dans ce cas, réduisez la quantité d‘eau à la quantité de lait. Eau: L‘eau minérale rend tous les pains plus léger et plus aérien. Idéal pour les farines lourdes. PAIN DE CAMPAGNE Babeurre 530 ml 490 ml 370 ml Beurre / Margarine 1 ¾ CàS 1 ½ CàS 1 CàS Sel 1 ¾ CàC 1 ½ CàC 1 CàC Sucre 1 ¾ CàS 1 ½ CàS 1 CàS Farine blanche fine 455 g 420 g 315 g Farine complète au seigle 455 g 420 g 315 g 1 ¾ CàC 1 ½ CàC 1 CàC Programme: NORMAL (normal) Taille 1400 g / 1200 g / 1000 g / du pain 3 LB 2,5 LB 2 LB Ingrédient 52 1 Càc = 5 ml Taille 1400 g / 1200 g / 1000 g / du pain 3 LB 2,5 LB 2 LB Ingrédient Eau Beurre / Margarine Lait en poudre 500 ml 460 ml 350 ml 3 CàS 2 ¼ CàS 1 ½ CàS 2 CàS 1 ½ CàS Sucre 3 ½ CàS 3 CàS 2 CàS Sel 1 ¾ CàC 1 ½ CàC 1 CàC 910 g 840 g 630 g 1 ¾ CàC 1 ½ CàC 1 CàC Farine blanche fine Levure sèche 1 CàS Programme: FRANZÖSISCH (francais) Taille 1400 g / 1200 g / 1000 g / du pain 3 LB 2,5 LB 2 LB Ingrédient Lait 530 ml 490 ml Beurre / Margarine 3 ½ CàS 3 CàS 2 CàS Lait en poudre 1 ¾ CàC 1 ½ CàC 1 CàC 2 CàC 1 ½ CàC 1 CàC Sel 2 CàC 1 ½ CàC 1 CàC Farine pour pain 650 g 600 g 450 g Farine de mais 260 g 240 g 180 g Levure de cuisson 8 CàC 6 CàC 4 CàC Sucre 370 ml Programme: SCHNELL (rapide) PAIN COMPLET Au sein de l‘UE, ce symbole signifie qu‘il est interdit de jeter ce produit aux ordures ménagères. Les appareils usagés contiennent des matériaux recyclables qu‘il convient de réutiliser afin de préserver l‘environnement et la santé humaine en évitant des déchets excessifs. C‘est pourquoi vous devez jeter les appareils usagés par le biais de systèmes de collecte appropriés, ou renvoyer l‘appareil à l‘endroit où vous l‘avez acheté. Le point de vente se chargera de son recyclage. PAIN AU MAIS RAPIDE Taille 1400 g / 1200 g / 1000 g / du pain 3 LB 2,5 LB 2 LB Ingrédient Levure sèche ÉLIMINATION CORRECTE DE CE PRODUIT 1 CàS = 15 ml PAIN FRANCAIS CROUSTILLANT CONSEILS ET ASTUCES Nr. Panne Eau 500 ml 460 ml 350 ml Beurre / Margarine 1 ¾ CàS 1 ½ CàS 1 CàS Sel 1 ¾ CàC 1 ½ CàC 1 CàC Sucre 1 ¾ CàC 1 ½ CàC 1 CàC Farine pour pain 190 g 150 g 110 g Farine multi-céréales 720 g 690 g 520 g Levure sèche 3 ½ CàC 3 CàC 2 CàC Programme: VOLLKORN (pain complet) PAIN POUR GÂTEAU Taille 1400 g / 1200 g / 1000 g / du pain 3 LB 2,5 LB 2 LB Ingrédient Lait 530 ml 490 ml 370 ml Beurre / Margarine 90 g 75 g 50 g Œufs 4 St 4 St 3 St Sucre 90 g 75 g 50 g 1 ¾ CàC 1 ½ CàC 1 CàC 910 g 840 g 630 g 1 ¾ CàC 1 ½ CàC 1 CàC Sel Farine blanche fine Levure sèche Programme: SÜSS (sucré et) 53 F F GÂTEAU Quatre-quarts CONFITURES Ingrédients Œufs 3 Pc Sucre 125 g Beurre / Margarine 125 g Sucre vanillé Lait 1 sachet max ¼ de tasse Farine blanche fine 300 g Levure de cuisson 1 sachet Ingrédients Jus d‘orange Beurre / Margarine 250 g Farine blanche fine 250 g Levure de cuisson 1 sachet Cacao 1 ½ CàS Vin rouge 2 CàC 1 pincée 100 g 54 340 ml Kummel 2 CàC 1 ½ CàC 1 CàC Huile d‘olive 2 CàS 1 ½ CàS 1 CàS 50 ml 3. Affinez votre pâte avec un peu de lait. Miel 2 CàS 1 ½ CàS 1 CàS Sucre gélifiant (3 + 1) 500 g Sel 2 CàC 1 ½ CàC 1 CàC Germes de blé 100 g 90 g 70 g Farine blanche fine 810 g 750 g 560 g 2 ½ CàC 2 CàC 1 ½ CàC 4. Mettez la pâte dans le moule graissé au beurre ou à l‘huile, et démarrez le programme KUCHEN (gateau). 1 Pc Programme: MARMELADE (confiture) Confiture aux fruits des bois Levure sèche Ingrédients fruits des bois écrasés 1 kg Œufs 4 Pc Sucre 100 g 75 g Sucre vanillé 1 sachet Sel 1 pincée Rhum 4 CàS Farine blanche fine 150 g Levure de cuisson 1 sachet 50 g Sucre gélifiant (2 + 1) 500 g 1. Dans un bol, mélangez œufs, beurre, sucre et sel au moyen d‘un mixeur, jusqu‘à obtenir une mousse. Programme: MARMELADE (confiture) 2. Ensuite, ajoutez farine, levure de cuisson, cacao et cannelle, et mélangez bien le tout. Vous souhaitez voir à quel point votre 3. Ajoutez ensuite du vin rouge, jusqu‘à ce que la pâte se déchire. 4. Mettez la pâte dans le moule graissé au beurre ou à l‘huile, et répandez les copeaux de chocolat sur le mélange. Démarrez alors le programme KUCHEN (gateau). max 1⁄8 L Ingrédients Copeaux de chocolat 450 ml Jus de citron Gâteau croustillant au rhum Beurre / Margarine 490 ml orange coupée en petits morceaux 1. Dans un bol, mélangez œufs, beurre, sucre, sucre vanillé et sel au moyen d‘un mixeur, jusqu‘à obtenir une mousse. 2. Ajoutez ensuite la farine et la levure de cuisson au mélange. Mélangez le tout uniformément et en y ajoutant du rhum petit à petit. 3. Mettez la pâte dans le moule graissé au beurre ou à l‘huile, et répandez les copeaux de chocolat sur le mélange. Démarrez le programme KUCHEN (gateau). CONSEILS ET ASTUCES 3 Pc 150 g Copeaux de chocolat Eau (48°C) Programme: ULTRASCHNELL (ultra-rapide) jus de citron (pour des fruits très sucrés)max 100 ml Sucre Sel 1L 2. Ajoutez ensuite la farine et la levure de cuisson au mélange, et remuez le tout jusqu’à obtenir un mélange uniforme. Gâteau au vin rouge Cannelle Taille 1400 g / 1200 g / 1000 g / du pain 3 LB 2,5 LB 2 LB Ingrédient Gelée d‘orange 1. Mettez des œufs, du beurre, du sucre et du sucre vanillé dans un bol et mélangez avec un mixeur jusqu‘à obtenir de la mousse. 5. Mettez la pâte dans le moule graissé au beurre ou à l‘huile, et démarrez le programme. Ingrédients Œufs PAIN ULTRA-RAPIDE AUX GERMES DE BLÉ Dessert Tranches de pomme confiture ou votre gelée s‘épaissit? Retirez un peu de pâte chaude au moyen d‘une cuillère, et posez-la sur une assiette froide en porcelaine. La pâte refroidit en quelques minutes, vous pouvez alors en contrôler la fermeté. La confiture ou autre est-elle trop fluide? Ajoutez un peu d‘acide citrique. Celui-ci fera s‘épaissir un peu plus la pâte. La confiture ou autre est-elle trop Ingrédients Pommes demi-dures Jus de citron Œufs 1 CàC 1 Pc Sucre roux ½ Tasse Farine universelle 1 Tasse Flocons d‘avoine ¹⁄3 Tasse 3 ½ CàS Beurre / Margarine (molle) Programme: DESSERT (dessert) épaisse? Ajoutez un peu d‘eau ou de jus de fruit. Cela permet de diluer le gélifiant. Pudding au riz PATE AU BABEURRE pour petits pains ou Ingrédients Œufs brouillés autres. 6 Pc Lait 4 Pc 1 ¾ tasse Poids 1400 g / 1200 g / 1000 g / 3 LB 2,5 LB Ingrédients 2 LB Babeurre 450 ml 420 ml 310 ml Riz bouilli 3 Tasses Sucre ½ Tasse Œufs 2 Pc 1 Pc 1 Pc Raisins secs (facultatif) 1 Tasse Sel 2 CàC 1 ½ CàC 1 CàC Vanille 1 CàC Farine de blé complet 320 g 300 g 220 g Cannelle 2 CàC Farine blanche fine 490 g 450 g 340 g Levure sèche 2 CàC 1 ½ CàC 1 CàC Programme: TEIG (pate) Programme: DESSERT (dessert) 55 F I GARANTIE Pour la garantie prenant effet le jour de l'achat, sur les territoires de l’UE et de la Suisse, s'appliquent les conditions suivantes. 1. Durée de la garantie: 2 ans 2. Prestations de garantie: a) A notre discrétion, réparation ou échange de pièces qui présentent un défaut de matériau ou de fabrication après vérification par nos soins. b) La garantie ne sera effectuée que sur présentation de cette carte de garantie et de la facture de l’achat. La carte n’est valable que si elle a été remplie intégralement au jour de l’achat. 3.La garantie n’est pas applicable: aux rayures et taches sur l’appareil. aux parties fragiles en bakélite, verre, plastique, etc. à moins qu’il ne s’agisse d’un défaut dans le matériau et qu’il ait été reconnu en tant que tel par nos soins. aux dommages qui ont été causés par une installation ou une fixation inappropriée. d) La période initiale de garantie n’est ni prolongée ni renouvelée du fait de la réparation ou de l’échange de pièce pendant la durée de la garantie. en cas de mauvaise utilisation ou d’usage inap- trique dont la tension est supérieure à celle indiquée sur l’appareil. proprié. en cas d’absence de soins. en cas d’entretien insuffisant ou inapproprié. en cas de chute de l’appareil ou de pièces individuelles. en cas de transport inapproprié ou d’emballage insuffisant en cas de transport. In caso di uso di apparecchiature elettriche bisogna osservare le seguenti misure di sicurezza fondamentali per prevenire scosse elettriche, incendi ed incidenti. Quest’apparecchio è destinato al solo uso domestico e non per scopi commerciali. Prima di collegare l’apparecchio, verificare che la tensione di rete utilizzata corrisponda a quella indicata sulla targhetta dell’apparecchio. Prima di collegare l’apparecchio, verifica- Important! Veuillez noter ici le code FD se trouvant sur le panneau de type de l’appareil: togliere gli accessori e prima di procedere alla pulizia. Fermare tutti i programmi in corso, prima di Evitare che il cavo resti appeso al bordo di un tavolo o di un banco e che venga a contatto con superfici molto calde. Tenere l‘apparecchio lontano da fornelli sia a gas che elettrici e da forni. Non introdurre mai fogli di metallo o altro materiale nella macchina del pane. Pericolo d’incendio o cortocircuito. Assicurarsi che l’apparecchio non venga a contatto o sia coperto da materiali facilmente infiammabili (per es. tende, stoffa, pareti e altro). Se il calore e il vapore non escono liberamente dall’apparecchio, possono verificarsi incendi. La macchina si riscalda durante il funzionamen- Utilizzare l’apparecchio unicamente per l’uso Non toccare mai le parti rotanti. Non trasportare l’apparecchio se contiene liqui- previsto nelle presenti istruzioni. Non usare l’apparecchio all’aperto. Non utilizzare un apparecchio che: – presenti un cavo difettoso o danneggiato, – presenti anomalie di funzionamento, – sia caduto, – presenti qualsiasi altro difetto. qu’un usage domestique. agréées par notre entreprise exécutent des réparations ou des modifications sur l’appareil. Scollegare l’apparecchio prima di inserire o re che la tensione di rete utilizzata corrisponda a quella indicata sulla targhetta dell’apparecchio. lorsque l’appareil a été utilisé à d’autres fins Nous accordons une garantie de 2 ans sur cet appareil pour les défauts découlant de défauts dans la fabrication ou les matériaux. La durée de la garantie commence au jour de la remise et elle n’est applicable que sur présentation de la carte de garantie et de la facture de l’achat. Toute autre prétention complémentaire est nulle. Modèle: AVVERTENZE IMPORTANTI PER LA SICUREZZA 4.La garantie est caduque: lorsque des personnes qui n’ont pas été mai il cavo, la spina o il corpo dell’apparecchio nell’acqua o in altri liquidi. staccare la spina dalla presa. aux brosses motorisées. lorsque l’appareil est raccordé à un réseau élec- f) Dans la mesure où le dommage ou le défaut ne peut pas être supprimé ou si l’amélioration a été refusée par nos soins ou si elle est retardée de manière non raisonnable, il sera procédé dans les 6 mois à partir de la date de l’achat/de livraison à un remplacement gratuit où la valeur minimale sera remboursée ou l’appareil sera repris contre remboursement du prix d’achat, mais toutefois à hauteur du prix courant du marché au maximum. PRIMA DI UTILIZZARE L’ APPARECCHIO LEGGERE ATTENTAMENTE LE SEGUENTI ISTRUZIONI E CONSERVARLE PER OGNI ULTERIORE CONSULTAZIONE. aux lampes d’éclairage et de contrôle. c) La prestation de garantie n’est applicable qu’au premier utilisateur. e)Les frais de transport sont à la charge de l’acheteur (ne s’applique pas pendant les 6 premiers mois de la garantie). IMPORTANTE! In ciascuno dei casi elencati, restituirlo al centro assistenza autorizzato più vicino per controlli, riparazioni o regolazioni meccaniche o elettriche. to. Non toccare quindi le superfici calde, usare soltanto manici e interruttori. di caldi (per es. marmellata). Non consentire l’uso dell’apparecchio a perso- ne con ridotte capacità psico-fisico-sensoriali o ai bambini. Questi non riconoscono i pericoli che possono derivare dalle apparecchiature elettriche. Non lasciare quindi che i bambini maneggino l’apparecchio elettrico senza sorveglianza e fare molta attenzione alla loro presenza. È opportuno sorvegliare i bambini per assicurarsi che non giochino con l’apparecchio. Utilizzare solo accessori consigliati dal produt- tore. L’uso di altri accessori può provocare danni all’apparecchio o incidenti. Non avviare mai l’apparecchio finché il recipiente del pane non sia stato collocato correttamente e vi siano stati introdotti gli ingredienti necessari. Non forzare mai gli angoli o il bordo del recipi- ente per estrarre il pane, ciò potrebbe danneggiarlo. 56 Timbre et signature du vendeur Date de la vente Per evitare scosse elettriche, non immergere 57 I I 1. Verificare che tutte le parti e gli accessori siano integri e non presentino difetti. 2. Lavare tutte le parti come indicato nel paragrafo „Pulizia e manutenzione”. 3. Selezionare il programma BACKEN (cottura) ed eseguire una cottura a vuoto per ca. 10 minuti. Lasciare raffreddare l’apparecchio, estrarne le parti e pulirle nuovamente. 4. Asciugare bene tutte le parti e rimontarle. L’apparecchio adesso è pronto per l’uso. 15 16 1. Normal 2. Vollkorn 3. Französisch 4. Schnell 5. SÜSS 6. Kuchen 18 19 HELL MITTEL DUNKEL PAUSE PROZESS ZEIT LICHT GRÖSSE FARBE MENÜ START STOPP 14 Programmi a scelta 15 Fase in cui si trova il programma avviato 16 Blocco tasti 17 Numero del programma scelto 58 Dopo l’avvio del programma sono in funzione solamente i tasti START / STOPP (start / stop), LICHT (luce) e PAUSE (pausa). Kneten 1 AUFGEHEN 1 KneTEN 2 AUFGEHEN 2 AUFGEHEN 3 BaCkeN WarmHALTEN 1000g 1200g 1400g La cifra “1” indica il numero del programma preselezionato (17). Il peso di „1200 g” (18) e il grado di doratura della crosta „MITTEL (media)” (20) sono i valori impostati di fabbrica. Con questo tasto si può avviare o fermare il programma di cottura scelto. Premere per 1,5 secondi il tasto START / STOPP (start / stop) per avviare il programma. Dopo un breve segnale acustico, i due punti lampeggiano – il programma è avviato. 7. Marmelade 8. Teig 9. Ultraschnell 10. Backen 11. Dessert 12. Hausgemacht 17 Non appena l’apparecchio è collegato alla rete elettrica, emette un segnale acustico e sul display compare la scritta „1 2:55, 1200 g, MITTEL (media)”. Tuttavia non lampeggia il doppio punto tra le cifre „2” e „55” (19). START / STOPP (start/stop) INDICAZIONI PER IL PANNELLO COMANDI * 14 DOPO LA CONNESSIONE ALLA RETE ELETTRICA 20 18 Peso della pagnotta 19 Durata del programma 20 Grado di doratura della crosta * Il produttore si riserva il diritto di apportare modifiche al pannello comandi senza previo avviso. Per fermare il programma premere nuovamente il tasto START / STOPP (start / stop) per ca. 1,5 secondi. Dopo un segnale acustico, il programma si spegne. Questa funzione serve a evitare un’interruzione involontaria del processo di cottura. MENÜ (menu) Questo pulsante consente di scegliere uno dei programmi da 1 a 12. A ogni pressione del tasto (accompagnata da un segnale acustico) la cifra che indica il numero di programma (17) avanza di un’unità. Le funzioni dei dodici programmi (14) sono spiegate qui di seguito. 1. Normal (classico): impasto semplice, lievitazione e cottura di pane classico. Aggiungere gli ingredienti per migliorarne il sapore. 2. Vollkorn (integrale): impasto, lievitazione e cottura di pane integrale. In questo caso, si sconsiglia di utilizzare il timer di ritardo, in quanto può dare risultati insoddisfacenti. 3. Französisch (francese): impasto, lievitazione e cottura di pane con tempi più lunghi di lievitazione. Il pane ottenuto ha una crosta più croccante e una consistenza soffice. 4. Schnell (veloce): impasto, lievitazione e cottura di pane in tempi più brevi rispetto al programma NORMAL (classico). Il pane preparato con questa impostazione è solitamente più piccolo e presenta una consistenza densa. 5. Süss (pane dolce): impasto, lievitazione e cottura di pane dolce. Si possono aggiungere degli ingredienti per migliorare l’aroma. 6. Kuchen (dolci e torte): impasto, lievitazione e cottura. Si presta alla preparazione di dolci e torte con l’aggiunta di lievito chimico o bicarbonato di sodio. 7. Marmelade (marmellata): consente di preparare marmellate e confetture mescolandole di continuo. Tagliare la frutta o la verdura a pezzettini prima di inserirle nel recipiente. 8. Teig (impasto): impasto e lievitazione senza cottura. L’impasto ottenuto è adatto ad essere modellato per ottenere pizza, panini, brioche al vapore, ecc. 9. Ultraschnell (ultraveloce): impasto e cottura in tempi molto brevi. Il pane ottenuto ha una consistenza densa. 10. Backen (cottura): Solo cottura, niente impasto o lievitazione. Questa funzione si presta anche a prolungare il tempo di cottura di altri programmi. E’ possibile modificare il tempo di cottura con il tasto ZEIT (tempo). Tenerlo premuto per fare scorrere i minuti più velocemente. 11. Dessert (dessert): impasto, lievitazione e cottura di dolci. 12. Hausgemacht (personalizzato): con questa funzione è possibile impostare un programma di cottura personalizzato, stabilendone i tempi di ogni fase. I margini di tempo per ogni fase di programma (15) - impasto, lievitazione, cottura e mantenimento in caldo - per creare il proprio pane preferito, sono indicati qui di seguito: KNETEN 1 (impasto 1) 6 – 14 min. AUFGEHEN 1 (lievitazione 1) 20 – 60 min. KNETEN 2 (impasto 2) 5 – 20 min. AUFGEHEN 2 (lievitazione 2) 5 – 120 min. AUFGEHEN 3 (lievitazione 3) 0 – 120 min. BACKEN (cottura) 0 – 80 min. WARMHALTEN (mantenimento in caldo) 0 – 60 min. Nel menu HAUSGEMACHT (personalizzato): 1. Premere il tasto PROZESS (procedimento). Sull’indicatore LCD compare la fase K NETEN 1 (impasto 1) (15). Premere quindi il tasto ZEIT (tempo) e impostare il tempo in minuti (19). Tenere premuto il tasto ZEIT (tempo) per fare scorrere i minuti più velocemente. Premere di nuovo il tasto PROZESS (procedimento) per confermare la scelta del primo passo. 2. Premere nuovamente il tasto PROZESS (procedimento) per passare alla seconda fase. Sull’indicatore LCD compare AUFGEHEN 1 (lievitazione 1) (15). Premere il tasto ZEIT (tempo) per impostare il tempo (19), quindi confermare la propria scelta, premendo un’altra volta il tasto PROZESS (procedimento). 3. Con lo stesso procedimento impostare le fasi seguenti. Premere il tasto START / STOPP (start / stop) per salvare le impostazioni e abbandonare la modalità di programma. 4. Premere nuovamente il tasto START / STOPP (start / stop) per avviare il programma. Avvertenza: L’impostazione rimane memorizzata per il prossimo uso. FARBE (doratura) Con questo tasto è possibile scegliere il grado di doratura della crosta: HELL (chiara), MITTEL (media) o DUNKEL (scura) (20). GRÖSSE (peso / dimensione) Premere questo tasto per impostare il peso e quindi la grandezza del pane: 1000 g, 1200 g oder 1400 g. La scelta è indicata sul display (18). Si prega di osservare che il tempo di cottura varia in base al peso del pane. Miscele per pagnotte da 750 g Se si utilizzano queste miscele per pane già pronte, selezionare l’impostazione 1000 g (18). Con questa impostazione le vostre pagnotte riescono senz’altro! Se il pane diventa troppo scuro, diminuire il grado di doratura della crosta oppure fermare il programma 5 – 10 prima della fine premendo il tasto START / STOPP (start / stop). TRUCCHI & SUGGERIMENTI PRIMA DEL PRIMO UTILIZZO 59 I Si ringrazia per la comprensione! LICHT (luce) Azionando questo tasto si accende la luce all’interno della macchina per controllare il processo di cottura del pane. Per lo spegnimento manuale premere nuovamente il tasto. La luce si spegne automaticamente dopo un minuto. ZEIT (tempo) Se non si vuole avviare la macchina immediatamente e si vuole posticipare la cottura del pane, è possibile farlo con la funzione di partenza ritardata. Impostare la partenza ritardata come segue: 1. Selezionare il programma desiderato (17), Selezionare il programma desiderato (18) e la doratura (20). 2. Selezionare il ritardo, premendo il tasto ZEIT (tempo). Il tempo che compare sul display (19) comprende anche la durata necessaria per realizzare il programma selezionaton. 60 Ammettiamo che adesso sono le ore 20:30 e desiderate che il pane sia pronto alle ore 7 del mattino. In questo caso la durata intera è di 10 ore e 30 minuti. Premere il tasto ZEIT (tempo) fino a far comparire sul display 10:30 (19). tempo incrementa o diminuisce di 10 minuti. 3. Premere il tasto START / STOPP (start / stop) per Per ripristinare il programma premere di nuovo PAUSE (pausa). 1000 g 3 1400 g 1200 g 1000 g 4 1400 g 1200 g 1000 g FUNZIONE DI MANTENIMENTO IN CALDO Il pane è mantenuto in caldo automaticamente fino ad un’ora dopo la cottura (15). Se si vuole estrarre il pane durante la fase del mantenimento in caldo, basta spegnere il programma premendo START / STOPP (start / stop). FUNZIONE DI MEMORIA Se l’alimentazione elettrica viene interrotta durante il funzionamento della macchina del pane, la macchina conserverà la memoria per 10 minuti e riprenderà il processo in corso una volta ripristinata la corrente, anche senza premere il tasto START / STOPP (start / stop). Se l’interruzione ha una durata superiore ai 10 minuti, la macchina non riesce a tenere in memoria il programma in corso. Bisogna gettare gli ingredienti, dopo averli estratti dalla teglia, e ricominciare daccapo. Se il pane si trova non oltre la prima fase d’impasto e la lievitazione non è ancora cominciata, si può semplicemente riprendere il ciclo dall’inizio premendo START / STOPP (start / stop). 5 1400 g 1200 g 1000 g 6 CHIARA, 18 min. 40 min. 22 min. MEDIA, 16 min. 40 min. 19 min. SCURA 13 min. 40 min. 17 min. 25 min. 45 min. 65 min. 3:00 2:20 25 min. 45 min. 60 min. 2:55 2:15 25 min. 48 min. 55 min. 2:50 2:13 35 min. 65 min. 65 min. 3:40 2:55 35 min. 65 min. 60 min. 3:32 2:50 35 min. 70 min. 55 min. 3:30 2:50 2:40 30 min. 50 min. 70 min. 3:50 30 min. 50 min. 65 min. 3:40 2:35 30 min. 50 min. 60 min. 3:30 2:30 CHIARA, 10 min. MEDIA, 10 min. SCURA 10 min. 10 min. 10 min. — 30 min. 70 min. 2:10 1:45 10 min. 10 min. — 30 min. 65 min. 2:05 1:40 10 min. 10 min. — 30 min. 60 min. 2:00 1:35 CHIARA, 10 min. MEDIA, 10 min. SCURA 10 min. 5 min. 20 min. 33 min. 40 min. 62 min. 2:50 2:25 5 min. 20 min. 32 min. 40 min. 58 min. 2:45 2:20 5 min. 15 min. 32 min. 47 min. 53 min. 2:42 2:22 Mantenimento in caldo IMPASTO 2 LIEVITAZIONE 1 CHIARA, 10 min. 25 min. 20 min. MEDIA, 8 min. 25 min. 18 min. SCURA 8 min. 25 min. 16 min. Segnale per inserire gli ingredienti 1200 g PAUSE (pausa) Dopo aver avviato un programma, è possibile sospenderlo premendo questo pulsante per 1,5 secondi – il programma s’interrompe, le impostazioni vengono salvate. Il tempo rimanente lampeggerà sul display. 1400 g Durata intera del programma 2 CHIARA, 10 min. 20 min. 15 min. MEDIA, 10 min. 20 min. 15 min. SCURA 10 min. 20 min. 12 min. COTTURA 1200 g 1000 g IMPASTO 1 1400 g LIEVITAZIONE 3 Se dopo la fase di cottura nella teglia rimane ancora spazio, è possibile aumentare a poco a poco la quantità. Con l’aiuto di questo tasto nel Menu 12 (Personalizzato) è possibile impostare il proprio programma di cottura del pane. 1 LIEVITAZIONE 2 Durante la fase di lievitazione c’è il pericolo, soprattutto per impasti che lievitano molto (per es. pane bianco, pane dolce) che l’impasto non trovi più spazio nella teglia. PROZESS (procedimento) Impostazioni DORATURA Si prega di testare questa quantità progressivamente! Iniziare a testare la propria ricetta di pane con 1200 g. Si prega di osservare che il ritardo massimo consentito è di 13 ore. Non utilizzare questa funzione con le ricette che impiegano ingredienti deperibili come uova, latte fresco, frutta o cipolle. TABELLA CON LE FASI DI TEMPO Impostazioni PESO Impostazione di peso 1400 g avviare il programma di partenza ritardata. I due punti del timer lampeggiano. Inizia il conto alla rovescia, il pane sarà pronto nelle ore e nei minuti visualizzati. N. di programma TRUCCHI & SUGGERIMENTI L’opzione GRÖSSE (peso / dimensione) è disponibile solo per i seguenti programmi: 1. NORMAL (classico), 2. VOLLKORN (integrale), 3. FRANZÖSISCH (francese), 4. SCHELL (veloce), 5. SÜSS (pane dolce) e 9. ULTRASCHNELL (ultraveloce). I ✓ ✓ ✓ ✓ ✓ — CHIARA, MEDIA, SCURA 6 min. 5 min. 10 min. 9 min. — 80 min. 1:50 1:34 ✓ 7 — — — 15 min. — — 45 min. 20 min. 1:20 — — 8 — — 20 min. — — 30 min. 40 min. — 1:30 — — 9 1400 g CHIARA, 10 min. MEDIA, 10 min. SCURA 10 min. — 5 min. — 33 min. 60 min. 1:48 1:38 — 5 min. — 28 min. 55 min. 1:38 1:28 — 5 min. — 28 min. 52 min. 1:35 1:25 — — — — 10 min. fino 60 min. 0:10 fino 1:00 — ✓ — — — 25 min. ✓ 1200 g 1000 g 10 — CHIARA, MEDIA, SCURA — CHIARA, MEDIA, 13 min. SCURA 60 min. 1:38 — CHIARA, 6 min. 20 min. 5 min. 5 min. 0 min. 0 min. MEDIA, fino fino fino fino fino fino SCURA 14 min. 60 min. 20 min. 120 min. 120 min. 80 min. 0:36 fino 7:54 durante — 11 12 — IMPASTO 2 ✓ ✓ 61 Per evitare di selezionare comandi involontariamente, il pannello controlli è dotato di un sistema di blocco-tasti (16). Premere prima il tasto PROZESS (procedimento) e poi FARBE (doratura). Il pannello controlli ad eccezione dei tasti PROZESS (procedimento) e FARBE (doratura) è adesso bloccato. Per disattivare il blocco-tasti premere il tasto PROZESS (procedimento) e poi FARBE (doratura). Il blocco- tasti funziona anche automaticamente e si attiva 5 minuti dopo l’inizio di ogni programma. Bisogna disattivare il blocco-tasti (16), prima di inserire nuove impostazioni nell’apparecchio. AMBIENTE La macchina del pane può essere utilizzata a differenti temperature. Tuttavia in base alla temperatura può variare la grandezza del pane. Consigliamo una temperatura ambiente tra i 15°C e i 34°C. AVVERTENZE DI PERICOLO Se una volta avviato un programma sul dis- play (19) appare la scritta „H HH“, significa che la temperatura all’interno della macchina è troppo elevata. Spegnere la macchina, aprire il coperchio e lasciare raffreddare l’apparecchio per 10 – 20 minuti. Se una volta premuto il tasto START / STOPP (start / stop) sul display (19) appare la scritta „E E0” o „E E1”, significa che il sensore di misurazione della temperatura è danneggiato, in tal caso è opportuno far controllare la macchina da un tecnico autorizzato. COSÌ SI FA IL PANE 1. Collocare il recipiente per il pane (6 / 8) nella camera di cottura, pressandola fino a bloccarla nella corretta posizione. Fissare le lame impastatrici (7 / 9) sugli alberi girevoli. Ungere gli alberi e le lame per esempio con margarina, in modo che poi si stacchino facilmente. 62 2. Aggiungere gli ingredienti richiesti nel recipiente (6 / 8), seguendo l’ordine indicato. In genere si comincia con l’acqua o un altro liquido, si aggiungono poi zucchero, sale e farina. Il lievito sia quello naturale che quello chimico in polvere va aggiunto sempre per ultimo. Avvertenza: Si prega di fare attenzione alle quantità delle sostanze fermentanti e della farina indicate di volta in volta nelle ricette. 3. Creare con le dita un solco al centro della farina ed infilarvi il lievito. Assicurarsi che non entri a contatto con i liquidi o con il sale. Lievito o Lievito in polvere Ingredienti solidi Acqua o altri liquidi 4. Chiudere il coperchio (2) ed infilare la spina nella presa di corrente. 5. Premere il tasto MENÜ (menu) fino a scegliere il programma desiderato (17). 6. Premere il tasto GRÖSSE (peso / dimensione) (18) per scegliere il peso della propria pagnotta. 7. Scegliere il grado di doratura desiderato per la crosta (20) premendo il tasto FARBE (doratura). 8. Impostare la partenza ritardata (19) con il tasto ZEIT (tempo), se si desidera che il pane sia pronto più tardi. Saltare questo passo se si vuole mettere subito in funzione la macchina del pane. 9. Premere per 1,5 secondi il tasto START / STOPP (start / stop) per avviare il programma. 10.Se è stato impostato uno sei seguenti programmi 1. NORMAL (classico), 2. VOLLKORN (integrale), 3. FRANZÖSISCH (francese), 4. SCHNELL (veloce), 5. SÜSS (pane dolce), 6. KUCHEN (dolci e torte), 9. ULTRASCHNELL (ultraveloce) o 12. HAUSGEMACHT (personalizzato), vengono emessi alcuni segnali acustici che avvertono che è possibile aggiungere altri ingredienti. Aprire il coperchio (2) e aggiungerli. In caso di piccole dosi la pasta spesso non si distribuisce in modo uniforme all’interno della teglia – si accumula solo da una parte. Ciò porta ad un risultato di cottura irregolare. Avvertenza: Consigliamo di tagliare il pane con un coltello elettrico o dentellato. Evitare i coltelli da cucina! Non sono adatti e tagliano il pane in maniera irregolare. Per ottenere una bella pagnotta, livellare la pasta all’interno della teglia con l’aiuto della spatola (13) alla fine della seconda fase d’impasto KNETEN 2 (impasto 2) (15). 16.Se non siete vicini alla macchina o alla fine del ciclo di cottura non premete il tasto START / STOPP (start / stop), il pane si mantiene in caldo per un’ora. Al termine della fase di mantenimento in caldo, verranno emessi 10 beep. Se la pasta si attacca troppo alla spatola (15), immergerla brevemente nella farina. 17.Se dopo l’uso l’apparecchio non serve più, spegnerlo staccando la spina dalla presa di corrente elettrica. 11. La durata del processo di cottura dipende dal programma scelto (17), dalla grandezza della pagnotta (18) e dalla doratura (20). Per controllare il processo di cottura, premere il tasto LICHT (luce) e guardare attraverso l’oblò – non aprire il coperchio (2)! Avvertenza: Durante la cottura può esservi una fuoriuscita di vapore dalle aperture di aerazione del coperchio, fenomeno del tutto normale. TRUCCHI BLOCCO DEL PANNELLO COMANDI I TRUCCHI & SUGGERIMENTI I Non siete sicuri che il vostro pane sia cotto al punto giusto? Infilate nel pane uno stecchino di legno. Se esce asciutto il pane è pronto! 12.Quando il programma è stato completato e il pane è cotto, viene emesso un segnale acustico. Premere il tasto START / STOPP (start / stop) per ca. 1,5 secondi per arrestare il programma. Adesso si può prendere il pane. Aprire il coperchio (2) e con delle presine isolanti estrarre il recipiente (6 / 8) dalla camera di cottura, sollevandolo. Attenzione: il recipiente e il pane possono essere molto caldi. Fare quindi molta attenzione. 13.Lasciare raffreddare il recipiente (6 / 8) prima di estrarre il pane. Se necessario, usare la spatola di plastica (13) per staccare delicatamente il pane dai lati del recipiente. Non utilizzare mai un coltello, perché potrebbe danneggiarne lo strato antiaderente. 14.Capovolgere il recipiente (6 / 8), tenerlo su una griglia o una teglia da forno e scuoterlo delicatamente finché esce il pane. 15.Fate raffreddare il pane per ca. 20 minuti prima di tagliarlo a fette. Attenzione: Prima di tagliare la pagnotta a fette, rimuovere le lame impastatrici (7 / 9) dal pane con il gancio (12). La pagnotta è ancora calda, evitare quindi di tirare le lame con le dita. Avvertenza: Se non si mangia tutto il pane, conservarlo in una busta di plastica chiusa o in un contenitore ermetico richiudibile. Il pane si mantiene per ca. 3 giorni a temperatura ambiente. Se si vuole conservare il pane più a lungo, metterlo in una busta di plastica e tenerlo in frigorifero. Così si conserverà fino a 10 giorni. Il pane fatto in casa non contiene conservanti e per questo motivo non si mantiene fresco più a lungo di quello del panettiere. FUNZIONI SPECIALI PANINI VELOCI: MENÜ 4 (menu 4) SCHNELL (veloce) E MENÜ 9 (menu 9) ULTRASCHNELL (ultraveloce) Panini veloci sono prodotti con lievito in polvere o bicarbonato di sodio, attivati tramite liquido e calore. Per ottenere dei buoni risultati inserire nel recipiente prima il liquido (6 / 8), poi gli ingredienti solidi. Nella prima fase d’impasto può accadere che gli ingredienti solidi si raccolgono agli angoli del recipiente. Adesso è necessario, aiutare gli ingredienti ad amalgamarsi per evitare che si creino dei grumi. Utilizzare esclusivamente utensili da cucina di legno e premere il tasto PAUSE prima di aprire il coperchio. IL PROGRAMMA ULTRAVELOCE, MENU 9 Con il programma ULTRASCHNELL (ultraveloce) la macchina del pane può preparare una pagnotta 63 I in un’ora e 38 minuti. Si prega di osservare che in questo caso la temperatura dell’acqua deve essere di 48 – 50°C, si prega di utilizzare un termometro per misurare esattamente la temperatura. L’influsso della temperatura è fondamentale per il buon risultato della cottura. Se la temperatura dell’acqua è troppo bassa, il pane non lievita e non si raggiunge la grandezza desiderata. Se la temperatura è troppo alta, il lievito è messo fuori uso, prima ancora che cominci il processo di lievitazione. Anche in questo caso il pane non lieviterà in modo corretto e il risultato della cottura sarà negativo. IL RECIPIENTE DEL PANE A DUE SCOMPARTI (8) Si prega di osservare nell’impostazione del peso che la capacità dei recipienti è di 500 g ciascuno. Il recipiente del pane a due scomparti (8) può essere adoperato per i seguenti due scopi: I nella corretta posizione. Se non trova subito l’alloggio, variare leggermente la posizione finché non trova quella giusta e poi pressare. LAME IMPASTRATRICI (7 / 9) Se le lame impastatrici (7 / 9) non si rimuovono facilmente dal pane utilizzare il gancio (12). Avvertenza: Eliminando il sale per motivi si salute, il pane lieviterà di più. Farina integrale, contiene tutte le sostanze del GRASSI, BURRO E OLI VEGETALI tenero e grano duro, adatta per una cottura rapida del pane o per fare biscotti. chicco di grano originale – anche la crusca, il rivestimento duro del grano che è fonte ideale di fibre. Evitare prodotti di pulizia corrosivi o aggressivi per non danneggiare lo strato antiaderente. Si tratta di una farina macinata molto finemente. La crusca contenuta impedisce la produzione di glutine, per cui il pane prodotto con questo tipo di farina è più piccolo e più pesante. Per ottenere una consistenza più leggera viene spesso miscelata con altre varietà di farina. COPERCHIO (2) CON OBLO’ (3) Farina scura di frumento, chiamata anche fa- Pulire le lame (7 / 9) con attenzione con un panno di cotone umido. Pulire il coperchio (2) all’esterno e all’interno con un panno umido. Evitare prodotti di pulizia aggressivi per non danneggiare le superfici lucide. rina nera o farina grezza, è una farina ricca di fibre, simile alla farina integrale. Per ottenere una buona pagnotta dopo la cottura, deve essere miscelata a grosse quantità di altre varietà di farina. Farina con aggiunta di lievito in polvere con- Per preparare contemporaneamente due pag- CORPO MACCHINA (5) Per preparare contemporaneamente due pag- Pulire l’esterno del corpo della macchina (5) con un panno umido. Avvertenza: Scegliere l’impostazione di peso 1000 g. Evitare prodotti di pulizia aggressivi per non danneggiare le superfici di acciaio inossidabile della macchina. Non immergere mai il corpo della macchina (5) per pulirlo in acqua. Farina di granoturco e farina di avena maci- Stoccaggio ZUCCHERO Prima di riporre l’apparecchio, assicurarsi che si sia completamente raffreddato, pulito e asciutto. Tenere il coperchio chiuso (2). Lo zucchero è un ingrediente molto importante. Aiuta il lievito a fermentare. Dà inoltre al pane un sapore più morbido, ne aumenta il valore nutrizionale e ne prolunga la conservabilità. Di solito si utilizza zucchero bianco, ma si possono utilizzare anche zucchero bruno, zucchero a velo, sciroppo o miele. notte dello stesso tipo. notte di diverso tipo con un solo programma. PULIZIA E MANUTENZIONE Prima di pulire l’apparecchio, staccare la spina dalla presa e lasciarlo raffreddare completamente. Sia il recipiente (6 / 8) che le lame impastatrici (7 / 9) sono resistenti alla lavastoviglie. PICCOLO MANUALE DI CUCINA RECIPIENTE (6) E RECIPIENTE A DOPPIO SCOMPARTO (8) Estrarre il recipiente (6 / 8) tirandolo dal manico. Pulire il recipiente (6 / 8) all’interno e all’esterno con un panno umido. Evitare prodotti di pulizia corrosivi o aggressivi per non danneggiare lo strato antiaderente. La teglia (6 / 8) deve essere completamente asciutta prima di essere rimessa nell’apparecchio. 64 Farina bianca, è una miscela di varietà di grano Avvertenza: Collocare la teglia del pane (6 / 8) nella camera di cottura, pressandola fino a bloccarla FARINA La farina è l’ingrediente base più importante del pane. Farina per pane, detta anche di glutine o fari- na forte, è prodotta dalla macinazione di grano duro. Presenta un alto contenuto di glutine e proteine, agenti naturali che conferiscono alla pasta la sua capacità di conservare la forma e di mantenere l’anidride carbonica, prodotta dal lievito. Per questo motivo è molto adatta a fare il pane. tiene – come si evince facilmente dal nome lievito in polvere molto adatto alla produzione di torte e dolci. nate da granoturco e avena. Aggiunte per produrre pane nero. La farina di avena, aumenta il sapore e migliora la consistenza del pane. Attenzione: Usare esclusivamente zucchero fine. Lo zucchero grossolano può danneggiare la superficie antiaderente della teglia. Avvertenza: Si può evitare l’uso di zucchero. In questo caso il pane lievita di meno. SALE Il sale insaporisce il pane e contribuisce alla doratura della crosta – regola inoltre l’attività del lievito. In quantità eccessive però ostacola la lievitazione, va dosato quindi correttamente. Il grasso rende il pane morbido e ne prolunga la durata. Il burro va sciolto o tagliato a pezzettini prima di essere aggiunto. LIEVITO Durante la fermentazione il lievito libera anidride carbonica che permette all’impasto di crescere, rendendo morbida la struttura interna del pane. Per fermentare il lievito ha bisogno di alimentarsi di sostanze nutritive come lo zucchero e la farina. 1 ts di lievito secco attivo = ¾ ts di lievito istantaneo 1,5 ts di lievito secco attivo = 1 ts di lievito istantaneo 2 ts di lievito secco attivo = 1,5 ts di lievito istantaneo (tbs = cucchiaio, ts = cucchiaino) Il lievito fresco va conservato in frigorifero, perché il microorganismo ad alte temperature muore. Acquistando il lievito controllare la data di produzione e di scadenza. Riporre immediatamente il lievito in frigorifero dopo averlo usato. Avvertenza: Se il lievito non è più fresco, il pane non lievita bene. Con una semplice operazione è possibile verificare se il lievito è ancora fresco: 1. Versare mezzo bicchiere di acqua calda (45 – 50°C) nella tazza graduata. 2. Aggiungervi un cucchiaino di zucchero bianco e mescolare. Sciogliere due cucchiaini di lievito nell’acqua. 3. Mettere la tazza per 10 minuti in un luogo caldo. Non mescolare. 4. La schiuma che si viene a formare dovrebbe corrispondere ad una tazza, in caso contrario il lievito non è più attivo. 65 I I LIEVITO IN POLVERE INGREDIENTI SOLIDI Il lievito in polvere è utilizzato per pane e torte o dolci nel ciclo di cottura ULTRASCHNELL (ultraveloce). Non ha bisogno di fermentare e produce gas che in forma di piccole bolle influenza la consistenza del pane. Gli ingredienti solidi vanno misurati nel bicchiere (10) senza essere pressati, poiché un “troppo” anche se si tratta di poca cosa, può influenzare l’equilibrio della ricetta. Soda Il bicarbonato di sodio è molto simile al lievito in polvere. Può essere utilizzato anche in combinazione con il lievito in polvere. Per misurare piccole quantità utilizzare il misurino (11). Si tratta sempre di cucchiai rasi. UOVA Le uova possono migliorare la consistenza del pane, accrescerne il valore nutrizionale e la grandezza. Liberarle subito dal guscio e sbatterle in maniera uniforme. DOSAGGIO DEGLI INGREDIENTI Il passo più importante nell’uso della macchina del pane consiste nel pesare esattamente i singoli ingredienti con l’aiuto del bicchiere graduato (10) e del misurino (11). Ogni ingrediente sia liquido che solido va misurato esattamente oppure il risultato del vostro sforzo sarà misero e inaccettabile. DOSAGGIO DI LIQUIDI Acqua, latticello o latte in polvere vanno misurati con il bicchiere graduato (10). Tenere il bicchiere diritto mentre si misura il liquido. Per misurare olio o altri ingredienti pulire a fondo il bicchiere graduato (10). 66 n. Problema 1 Durante la cottura fuoriesce fumo dalle griglie di aerazione. Causa Soluzione Residui di ingredienti si sono accumulati sulla resistenza o vicino a questa. Staccare la spina dalla presa di corrente. Lasciare raffreddare l’apparecchio e pulire la resistenza. Fare attenzione per evitare ustioni. Quando utilizzate l’apparecchio per la prima volta dell’olio può aderire alla resistenza. Misurino (11): corrisponde a un cucchiaio da tavola ACQUA E ALTRI INGREDIENTI LIQUIDI L’acqua è un ingrediente essenziale per fare il pane. Ottimale è una temperatura di 20 – 25°C. Si può sostituire l’acqua con latte fresco oppure si può mescolare all’acqua un 2 % di latte in polvere. Serve a migliorare l’aroma del pane e il colore della crosta. Alcune ricette richiedono anche succo di limone, mela o arancia per migliorare il sapore. RISOLUZIONE DEI PROBLEMI 2 La crosta nel fondo del pane è troppo spessa. Il pane è stato mantenuto in caldo nel recipiente per troppo tempo, la perdita d’acqua è stata quindi troppo elevata. Estrarre il pane il più presto possibile e non tenerlo in caldo. 3 E’ difficile estrarre il pane dal recipiente. Le lame impastatrici sono attaccate all’albero. Dopo aver estratto il pane, versare dell’acqua calda nel recipiente, in modo che le lame impastatrici siano coperte. Estrarle dopo ca. 10 min. e pulirle. Prima del prossimo uso della macchina ungere l’albero girevole. 4 Gli ingredienti sono miscelati in maniera non uniforme. Il programma scelto non è adatto. Selezionare il programma giusto. La resistenza è troppo forte così che le lame non riescono a girare. Controllare l’alloggio delle lame. Estrarre il recipiente e avviare l’apparecchio a vuoto. corrisponde a un cucchiaino ORDINE DEGLI INGREDIENTI L’ordine in cui vanno aggiunti gli ingredienti deve essere mantenuto scrupolosamente. In linea di massima l’ordine è il seguente: Ingrediente liquido, uova, sale e latte in polvere, ecc. La farina, quando è aggiunta, non deve essere del tutto immersa nel liquido. Il lievito va messo solo sulla farina asciutta e non deve entrare direttamente in contatto con il sale. Dopo che la massa è stata impastata per un po’, la macchina emette un segnale acustico. Adesso è possibile aggiungere frutta o simili. Se la frutta si aggiunge troppo presto, l’aroma e la consistenza si perdono a causa della lunga operazione d’impasto. In caso di partenza ritardata, non si devono mai utilizzate ingredienti deperibili come uova o frutta. Quando si usa l’apparecchio per la prima volta, farlo funzionare a vuoto e aprire il coperchio. In caso di funzionamento difettoso rivolgersi al centro di assistenza. 5 Dopo la cottura, il pane è asciutto e non ha una crosta dorata. Il coperchio è stato aperto più volte. Il programma è sbagliato. Non aprire il coperchio quando il programma è in funzione. Leggere le istruzioni sui programmi. 6 Il display mostra „H HH“ dopo aver premuto il tasto START / -STOPP (start / stop). La temperatura della macchina del pane è troppo elevata. Premere il tasto START /STOPP (start / stop) e staccare la spina dalla presa di corrente. Estrarre il recipiente e lasciare il coperchio aperto fino a quando la macchina non si sia raffreddata. 67 I n. I Problema 7 Il blocco tasti non si sblocca premendo PROZESS e poi FARBE (durante il processo e alla fine). 8 Si sente che il motore lavora, ma la macchina non impasta il pane. Soluzione n. Difetti tecnici. Staccare la spina dalla presa, attendere un po’, quindi’ riattaccarla. Il programma in corso viene interrotto per pochi minuti, quindi riprende automaticamente (vedi “Funzione di memoria”). 13 Il pane è troppo pesante e la consistenza troppo densa. Il recipiente non è fissato bene o la quantità d’impasto è troppo grande. Verificare se il recipiente è fissato bene nell’alloggio. Assicurarsi che l’impasto sia stato prodotto seguendo la ricetta e che gli ingredienti siano stati dosati correttamente. Troppo lievito, acqua o farina. E’ anche possibile che l’ambiente circostante sia troppo caldo (ideale: dai 15°C ai 34°C). Verificare i fattori menzionati. Diminuire le quantità. 10 Il pane è troppo piccolo e non è lievitato. Niente lievito o troppo poco. Il lievito può anche essere vecchio e quindi non più attivo. Altre cause possono essere: acqua a temperatura troppo elevata, temperatura ambiente troppo fredda oppure troppo sale. Verificare la quantità e l’attività del lievito. Casomai aumentare la temperatura dell’ambienter. 11 L’impasto è talmente grande che fuoriesce dal bordo del recipiente. E’ stata usata troppa acqua, così che l’impasto è troppo liquido. Eventualmente è stato usato troppo lievito. Ridurre la quantità di liquido e migliorare la consistenza dell’impasto. 12 Il pane si spezza a metà durante la fase di cottura. La farina non è abbastanza forte da far lievitare l’impasto. Utilizzare farina per pane o farina forte. Il lievito agisce troppo presto o la temperatura è troppo elevata. Utilizzare il lievito a temperatura ambiente. Troppa acqua rende l’impasto troppo pesante e troppo liquido. Adattare la quantità di acqua. 9 La pagnotta è talmente grossa che preme contro il coperchio. 68 Causa Problema 14 Il centro del pane è vuoto. 15 Sulla superficie del pane è attaccata ancora polvere. 16 La crosta è troppo spessa e il colore troppo scuro quando si fanno torte o alimenti con molto zucchero. Causa Soluzione Troppa farina e troppo poca acqua. Usare meno farina o più acqua. Troppa frutta o troppa farina integrale. Ridurre la quantità degli ingredienti nominati e prendere più lievito. Troppa acqua o lievito e/o niente sale. Ridurre la quantità di acqua e lievito e usare più sale. La temperatura dell’acqua è troppo elevata. Verificare la temperatura dell’acqua. Nel pane sono contenute molte sostanze che contengono glucosio. Mettere nel pane nessuna o poche sostanze che contengono glucosio. Il pane è stato impastato abbastanza perché conteneva poca acqua. Verificare la quantità di acqua e la meccanica della macchina. Le diverse ricette hanno grande influsso nella fabbricazione del pane. Il colore è molto scuro se si usa molto zucchero. Se il colore per una ricetta con molto zucchero è troppo scuro, interrompere il ciclo di cottura 5 – 10 prima della fine, premendo il tasto START / STOPP (start / stop). Prima di estrarre il dolce o il pane, lasciare il coperchio chiuso ancora per 20 minuti. CORRETTO SMALTIMENTO DEL PRODOTTO Il simbolo qui riportato indica all’interno dell’Unione europea che il prodotto non deve essere considerato come un normale rifiuto domestico, ma deve essere portato nel punto di raccolta appropriato per il riciclaggio di apparecchiature elettriche ed elettroniche. Provvedendo a smaltire questo prodotto in modo appropriato, si contribuisce ad evitare potenziali conseguenze negative per l‘ambiente e per la salute, che potrebbero derivare da uno smaltimento inadeguato del prodotto. Per informazioni più dettagliate sul riciclaggio di questo prodotto, contattare l‘amministrazione comunale, il servizio locale di smaltimento rifiuti o il negozio in cui è stato acquistato il prodotto. 69 I I DOLCI RICETTE - ADATTE AI PROGRAMMI Quattro Quarti Le quantità di farina e lievito indicate nelle ricette corrispondono al massimo. 1 tazza = 250 ml 1 tbs = 3 ts 1 tbs = 15 ml Ingredienti 1 ts = 5 ml (tbs = cucchiaio, ts = cucchiaino) TRUCCHI & SUGGERIMENTI PANE FRANCESE CROCCANTE Burro / Margarina: a piacere si possono utilizzare anche altri grassi: olio d’oliva, strutto, lardo, ecc. Latte in polvere: si può sostituire il latte in polvere con il latte fresco. In questo caso diminuire la quantità di acqua in modo proporzionale al latte aggiunto. Acqua: l’acqua minerale rende il pane più leggero e più soffice. Ideale con varietà di farina pesanti. PANE CONTADINO Peso 1400 g / 1200 g / 1000 g / Ingrediente 3 LB 2,5 LB 2 LB Latticello 530 ml 490 ml 370 ml Burro /Margarina 1 ¾ tbs 1 ½ tbs 1 tbs Sale 1 ¾ ts 1 ½ ts 1 ts Zucchero 1 ¾ tbs 1 ½ tbs 1 tbs Farina bianca 455 g 420 g 315 g Farina intera di segale 455 g 420 g 315 g Lievito secco 1 ¾ ts 1 ½ ts 1 ts Programma: NORMAL (normale) Peso 1400 g / 1200 g / Ingredienti 3 LB 2,5 LB Acqua 500 ml 460 ml 1000 g / 2 LB Burro / Margarina 3 tbs 2 ¼ tbs 1 ½ tbs Latte in polvere 2 tbs 1 ½ tbs 1 tbs 350 ml Zucchero 3 ½ tbs 3 tbs 2 tbs Sale 1 ¾ ts 1 ½ ts 1 ts Farina bianca 910 g 840 g 630 g Lievito secco 1 ¾ ts 1 ½ ts 1 ts Programma: FRANZÖSISCH (francese) 3 pz 125 g Burro / Margarina 125 g Zucchero vanigliato Latte Farina bianca Lievito in polvere Ingredienti Uova 1 bustina 3 pz 1000 g / 2 LB 150 g Burro / Margarina 250 g 370 ml Farina bianca 3 ½ tbs 3 tbs 2 tbs Latte in polvere 1 ¾ ts 1 ½ ts 1 ts Cacao 2 ts 1 ½ ts 1 ts Cannella 2 ts 1 ½ ts 1 ts Sala 650 g 600 g 450 g Scaglie di cioccolato Vino rosso Farina per pane 300 g Zucchero Burro / Margarina Sale fino ¼ di tazza 2. Inserire farina e lievito in polvere alla massa e mescolare in maniera uniforme. 3. Migliorare l’impasto con un po’ di latte. 4. Mettere l’impasto nel recipiente della macchina del pane dopo averlo unto con burro o olio e avviare il programma KUCHEN (dolci e torte). 5. Volete aggiungere codette di cioccolata o altro? Fatelo adesso. La macchina del pane le mescola insieme al tutto. Lievito in polvere Zucchero 1 bustina Dolce al vino rosso PANE VELOCE DI FARINA DI GRANOTURCO Peso 1400 g / 1200 g / Ingredienti 3 LB 2,5 LB Latte 530 ml 490 ml Uova Zucchero 1. Mettere uova, burro, zucchero e zucchero vanigliato in una terrina e sbattere il tutto con una frusta elettrica fino a formare una massa schiumosa. Farina di granoturco 260 g 240 g 180 g Lievito in polvere 8 ts 6 ts 4 ts 250 g 1. Mettere uova, burro, zucchero e sale in una terrina e sbattere il tutto con una frusta elettrica fino a formare una massa schiumosa. 2. Aggiungere farina, lievito in polvere, cacao e cannella alla massa e mescolare gli ingredienti in maniera uniforme. 1 bustina 3. Versarvi il vino rosso e amalgamarlo al tutto. 1 ½ tbs 4. Mettere l’impasto nel recipiente della macchina unto con burro o olio e mescolarvi le scaglie di cioccolato. Avviare il programma KUCHEN (dolci e torte). 2 ts 1 pizzico 100 g fino 1⁄8 l Programma: SCHNELL (veloce) PANE INTEGRALE Peso 1400 g / 1200 g / Ingrediente 3 LB 2,5 LB Acqua 500 ml 460 ml 70 Dolce croccante al rum PANETTO DOLCE 1000 g / 2 LB 350 ml Burro /Margarina 1 ¾ tbs 1 ½ tbs 1 tbs Sale 1 ¾ ts 1 ½ ts 1 ts Zucchero 1 ¾ ts 1 ½ ts 1 ts Farina per pane 190 g 150 g 110 g Farina multi cereali 720 g 690 g 520 g Lievito secco 3 ½ ts 3 ts 2 ts Programma: VOLLKORN (integrale) Peso 1400 g / 1200 g / Ingredienti 3 LB 2,5 LB Latte 530 ml 490 ml Burro / Margarina 90 g 75 g 1000 g / 2 LB 370 ml Ingredienti Uova Zucchero Burro / Margarina 4 pz 100 g 75 g 50 g Zucchero vanigliato 1 bustina Uova 4 St 4 St 3 St Sala 1 pizzico Zucchero 90 g 75 g 50 g Rum 4 tbs Sale 1 ¾ ts 1 ½ ts 1 ts Farina bianca Farina bianca 910 g 840 g 630 g Lievito secco 1 ¾ ts 1 ½ ts 1 ts Programma: SÜSS (pane dolce) Lievito in polvere Scaglie di cioccolato 150 g 1 bustina 50 g 1. Mettere uova, burro, zucchero, zucchero vanigliato e sale in una terrina e sbattere il tutto con una frusta elettrica fino a formare una massa schiumosa. 2. Aggiungere farina e lievito in polvere alla massa. Mescolare il tutto in maniera uniforme e man mano versare il rum. 3. Mettere l’impasto nel recipiente della macchina unto con burro o olio e mescolarvi dentro le scaglie di cioccolato. Avviare il programma KUCHEN (dolci e torte). 71 I I MARMELLATA PANE ULTRAVELOCE AI GERMI DI GRANO Gelatina d’arancia Ingredienti Succo d’arancia 1l Piccola arancia tagliata 1 pz Succo di limone 50 ml Gelatina (3 più 1) 500 g Programma: MARMELADE (marmellata) Confettura di frutti di bosco Ingredienti Frutti di bosco schiacciati 1 kg Peso 1400 g / 1200 g / Ingredienti 3 LB 2,5 LB Acqua (48°C) 490 ml 450 ml 1000 g / 2 LB 340 ml 500 g TRUCCHI & SUGGERIMENTI Programma: MARMELADE (marmellata) 2 ts 1 ½ ts 1 ts 1. Periodo di garanzia: 2 anni Olio d’oliva 2 tbs 1 ½ tbs 1 tbs Miele 2 tbs 1 ½ tbs 1 tbs 2. Prestazioni di garanzia: Sale 2 ts 1 ½ ts 1 ts Germe di grano 100 g 90 g 70 g Farina bianca 810 g 750 g 560 g Lievito secco 2 ½ ts 2 ts 1 ½ ts Programma: ULTRASCHNELL (ultraveloce) gelatine si sono addensate al punto giusto: Prendere un po’ della massa calda con un cucchiaio e metterla su un piatto caldo di porcellana. Si raffredda nel giro di pochi minuti e così è possibile verificare se sono dense al punto giusto. La marmellata è troppo liquida? Aggiun- gere un po’ di acido citrico. Serve a far addensare la massa. La marmella è troppo densa? Aggiungere acqua o succo di frutta. In questo modo la gelatina si diluisce. 6 pz Succo di limone 1 ts ½ tazza Farina per tutti gli usi 1 tazza Fiocchi di avena ¹⁄3 tazza 3 ½ tbs Programma: DESSERT (dessert) Budino di riso Ingredienti Uova leggermente sbattute Latte Uova Sale 72 2 pz 1 pz 3 tazze 1000 g / 2 LB Zucchero ½ tazza Uva sultanina (opzione) 1 tazza 310 ml Vaniglia 1 ts 1 pz Cannella 2 ts 2 ts 1 ½ ts 1 ts Farina di frumento integrale 320 g 300 g 220 g Farina bianca 490 g 450 g 340 g Lievito secco 2 ts 1 ½ ts 1 ts Programma: TEIG (impasto) e) I costi di trasporto sono a carico dell’acquirente (non vale per i primi 6 mesi di garanzia). f) In caso di guasto o difetto irreparabile, qualora la riparazione venisse da noi respinta o gli interventi necessari non fossero eseguiti entro un termine adeguato, si provvederà - a scelta dell’utente entro 6 mesi dalla data di acquisto/fornitura - alla sostituzione gratuita dell’apparecchio o al rimborso del valore minimo o alla riconsegna dell’apparecchio dietro rimborso del prezzo d’acquisto, tuttavia non del prezzo corrente sul mercato. 4 pz 1 ¾ tazza Riso cotto IMPASTO DI LATTICELLO per panini e simili Peso 1400 g / 1200 g / Ingredienti 3 LB 2,5 LB Latticello 450 ml 420 ml 1 pz Zucchero bruno Burro / Margarina (molle) b) La garanzia è valida solo su presentazione di questo certificato di garanzia, che a sua volta è valido solo se compilato in ogni sua parte nel giorno dell’acquisto. d) Il periodo di garanzia non sarà rinnovato o prolungato a seguito di successiva riparazione o sostituzione di pezzi. Ingredienti Mele cotte Uova a) Riparazione o sostituzione, a nostro esclusivo giudizio e dopo accurata verifica, di pezzi che presentano difetti di materiale o di fabbricazione. c) La garanzia è valida solo per il primo utente. Dessert Dolce alla mela Per sapere se marmellate, confetture o Le seguenti disposizioni di garanzia decorrono dalla data di acquisto e sono valide all’interno dell’UE e della Svizzera. Carvi Succo di limone (per frutti molto dolci) fino a 100 ml Zucchero gelificante (2 più 1) GARANZIA 3.La garanzia non è valida: per graffi o macchie sull’apparecchio. per graffi o macchie sull’apparecchio. per le spazzole del motore. per parti leggermente fragili in bachelite, vetro, plastica e simili, eccetto che si tratti di difetti di costruzione riconosciuti da noi come tali. per danni causati da errata installazione o fissaggio. se l’apparecchio è collegato ad una rete elet- trica di tensione maggiore rispetto a quella indicata sull’apparecchio. in caso di uso errato o inadeguato. in caso di scarsa cura. in caso di manutenzione errata o insufficiente. in caso di manutenzione errata o insufficiente. in caso di trasporto inadeguato o di imballaggio inadeguato per il trasporto. 4.La garanzia decade: se l’apparecchio è utilizzato per scopi diversi da quelli domestici. se le riparazioni e le modifiche sono eseguite da personale non autorizzato dalla nostra azienda. Garantiamo questo apparecchio per un periodo di 2 anni per guasti dovuti a difetti di materiale o di fabbricazione. La garanzia decorre dal giorno della fornitura del prodotto ed è valida solo su presentazione del certificato di garanzia e della ricevuta fiscale di pagamento. Ulteriori pretese di garanzia sono escluse. Modello: Programma: DESSERT (dessert) Timbro e firma del Rivenditore Importante! Si prega di annotare l’FD- Code apposto sulla targhetta dell’apparecchio: Data dell’acquisto 73 CZ DŮLEŽITÉ! NEŽ ZAČNETE PŘÍSTROJ POUŽÍVAT, DŮKLADNĚ SI PŘEČTĚTE TENTO NÁVOD K POUŽITÍ A PEČLIVĚ HO USCHOVEJTE. DŮLEŽITÉ BEZPEČNOSTNÍ POKYNY Při používání elektrických spotřebičů je nutné dodržovat následující bezpečnostní opatření. Tento přístroj je určený pouze pro domácí účely, není vhodný pro účely podnikatelské. Před připojením k elektrické síti zkontrolujte, jestli síťové napětí souhlasí s údajem na typovém štítku přístroje. Tento přístroj je vybaven vidlicí s ochranným kontaktem a může být připojen pouze k zásuvce s ochranným kontaktem přesně podle předpisu. Přístroj používejte pouze k účelům tomu určeným. Nepoužívejte přístroj venku. Přístroj nesmí být používán, pokud: – je poškozen síťový přívod nebo zástrčka, – dokonale nefunguje, – spadl na zem, – vykazuje nějaká poškození. V těchto případech musí být přístroj vrácen výrobci nebo příslušné servisní službě k přezkoušení, opravě nebo novému nastavení. Používejte pouze příslušenství doporučené výrobcem, jinak může dojít k poškození přístroje nebo dokonce i ke zranění. Nikdy přístroj nezapínejte, dokud není pečící forma dokonale nasazena a naplněna správnými přísadami. Když chcete chleb vyklopit z formy, nikdy neklepejte na její rohy nebo svrchní stranu, mohlo by dojít k jejímu poškození. Nenamáčejte kabel, zástrčku nebo kryt pekárny do vody nebo jiné tekutiny. Předejdete tím úrazu elektrickým proudem. 74 CZ PŘED PRVNÍM POUŽITÍM PO PŘIPOJENÍ K SÍTI každém použití, když připevňujete, nebo vyndaváte jeho části, nebo když ho čistíte. 1. Zkontrolujte prosím, jestli jsou všechny části a příslušenství přístroje úplné a nepoškozené. Dbejte na to, aby přívodní kabel nevisel z 2. Vyčistěte všechny části, jak je uvedeno v článku „Čištění a údržba“. Jakmile přístroj zapojíte do sítě, zazní signál a na displeji se objeví „1 2:55, 1200g, MITTEL (střední)“. Ale dvojtečka mezi čísly „2“ a „55“ (19) nebliká. 3. Nastavte režim BACKEN (pečení) a pečte naprázdno asi 10 minut. Nechte přístroj vychladnout, jednotlivé části vyndejte a znovu je vyčistěte. Číslo „1“ ukazuje nastavený program (17). Hmotnost „1200 g“ (18) a stupeň zbarvení kůrky „MITTEL“ (střední) (20) jsou údaje již nastavené z výroby. Přístroj vypněte a vytáhněte ze zásuvky po pracovní plochy nebo ze stolu dolů. Chraňte ho před kontaktem s horkými plochami. Nestavte přístroj na horký plynový nebo elektrický sporák (nebo do jejich blízkosti) a do rozpálené trouby. Do pekárny nedávejte hliníkové folie nebo jiné materiály. Předejdete riziku požáru nebo elektrického zkratu. Přístroj by neměl přijít do kontaktu s lehce vznětlivými materiály (např. se závěsy, textiliemi, stěnami aj.) Pokud nemůže pára a horký vzduch volně unikat, vzniká nebezpečí požáru. Během pečení se přístroj rozpálí. Nedotýkejte se horkých povrchů, použijte jen úchyty a vypínače. Nikdy se nedotýkejte rotujících částí. Pokud přístroj obsahuje horký olej nebo jiné horké tekutiny, přepravujte ho se zvýšenou opatrností. 4. Všechny části dobře osušte a znovu je sestavte. Přístroj je nyní připraven. POKYNY K OVLÁDACÍMU PANELU * 14 15 16 1. Normal 2. Vollkorn 3. Französisch 4. Schnell 5. SÜSS 6. Kuchen 7. Marmelade 8. Teig 9. Ultraschnell 10. Backen 11. Dessert 12. Hausgemacht 18 Po spuštění programu nejsou žádná jiná tlačítka kromě tlačítek START / STOPP (start / stop), LICHT (osvětlení) a PAUSE (přestávka) provozuschopná. Kneten 1 AUFGEHEN 1 KneTEN 2 AUFGEHEN 2 AUFGEHEN 3 BaCkeN WarmHALTEN 17 19 1000g 1200g 1400g HELL MITTEL DUNKEL PAUSE PROZESS schopnostmi (psychickými / duševními) nebo dětem. Nerozpoznají nebezpečí, které při zacházení s elektrickými přístroji může vzniknout. Proto nikdy nenechávejte děti manipulovat s přístrojem bez dozoru. V dnešní době věnujte dětem mimořádnou pozornost. ZEIT LICHT GRÖSSE FARBE Děti by měly být stále pod vaším dohledem, MENÜ START STOPP START / STOPP (start / stop) Tímto tlačítkem se zapne nebo vypne zvolený program. Když chcete program spustit, stiskněte tlačítko asi na 1,5 sekundy. Uslyšíte signál a oba body časového údaje začnou blikat – program startuje. 20 Přístroj není určen osobám s omezenými aby zjistily, že si s přístrojem nemohou hrát. 14 volitelné programy 18 velikost chleba 15 část programu 19 trvání programu 16 blokovací mechanismus 20 zvolený program tlačítek 17 zvolený program * Výrobce si vyhrazuje provést změny na kontrolním poli bez předchozího oznámení. Když chcete program zastavit, stiskněte asi na 1,5 sekundy tlačítko START / STOPP (start / stop). Zazní signál, který potvrzuje, že je program vypnutý. Tato funkce slouží k tom, aby se předešlo neúmyslnému přerušení celého procesu pečení. MENÜ (menu) Tlačítkem MENÜ (menu) si můžete vybrat program. Po každém zmáčknutí tlačítka (je doprovázené akustickým signálem) se mění číselné zobrazení programu (17). Funkce všech 12 programů (14) jsou vysvětleny níže. 1. Normal (normální): Jednoduché hnětení, kynutí a pečení normálního chleba. Pro zlepšení chuti můžete přidat další přísady. 2. Vollkorn (celozrnný): Jednoduché hnětení, kynutí a pečení normálního chleba. Pro zlepšení chuti můžete přidat další přísady. 3. Französisch (francouzský): Hnětení, kynutí a pečení chleba s delší dobou kynutí. Chléb má křupavou kůrku a vzdušnou strukturu. 4. Schnell (rychlý): Hnětení, kynutí a pečení chleba v kratší době než v normálním (¬NORMAL) programu. Hotový chléb je většinou menší a hutnější než normální chléb. 75 CZ CZ 7. Marmelade (marmeláda): Vaření marmelády nebo džemu za stálého míchání. Než vložíte ovoce nebo zeleninu do formy, musí se nakrájet na malé kousky. 8. Teig (těsto): Hnětení a kynutí bez pečení. Hotové těsto vyndejte z formy a udělejte z něj pizzu, housky, nudle atd. 3. Stejným způsobem postupujte u zbývajících kroků. Až budete chtít opustit režim programování, stiskněte tlačítko START / STOPP (start / stop). Upozornění: Nastavení zůstane uloženo až do dalšího použití. 10. Backen (pečení): Pouze pečení, bez hnětení a kynutí. Tuto funkci můžete také využít k prodloužení doby pečení u některých programů. FARBE (zbarvení) 11. Dessert (deserty): Hnětení, kynutí a pečení zákusků. 12. HausgemachT (vlastní chléb): Zde můžete zadat svůj vlastní program, ve kterém si určíte dobu pro každý krok sami. Můžete nastavit níže uvedené údaje pro hnětení, kynutí, pečení a udržení teplého chleba tak, abyste si upekli váš oblíbený chléb. Časový rozsah jednotlivých fází programu (15): KNETEN 1 (hnětení 1) AUFGEHEN 1 (kynutí 1) KNETEN 2 (hnětení 2) AUFGEHEN 2 (kynutí 2) AUFGEHEN 3 (kynutí 3) BACKEN(pečení) WARMHALTEN (udržení teploty) 6 – 14 minut 20 – 60 minut 5 – 20 minut 5 – 120 minut 0 – 120 minut 0 – 80 minut 0 – 60 minut Menu HAUSGEMACHT (vlastní chléb): 1. Stiskněte jednou tlačítko PROZESS (proces). Na displeji se objeví KNETEN 1 (hnětení) (15). Stiskněte tlačítko ZEIT (čas), tím nastavíte dobu (19) v minutách. Čas ubíhá rychleji, když tlačítko ZEIT (čas) podržíte. Pak stiskněte tla- Nastavení hmotnosti 1400 g PROZESS (proces) Vyzkoušejte si prosím tento objem náplně! Začněte testovat svůj recept při celkové hmotnosti 1200g. Pomocí tohoto tlačítka si můžete naprogramovat svoje osobní menu – menu 12 HAUS GEMACHT (vlastní chléb). U rychle kynoucích těst (např. bílý chléb, sladký chléb) může dojít k tomu, že v době kynutí může těsto vyběhnout z formy. Pokud je po fázi pečení ve formě ještě místo, můžete množství postupně zvyšovat. Děkujeme za pochopení! 4. Program zahájíte tak, že znovu stisknete tlačítko START / STOPP (start / stop). 9. Ultraschnell (velmi rychlý): Hnětení, kynutí a pečení v co nejkratší době. Hotový chléb je velmi hutný. Pro nastavení doby pečení stiskněte tlačítko ZEIT (čas). Když jej podržíte, proběhne čas rychleji. 76 2. Pro další krok znovu stiskněte tlačítko PROZESS (proces). Na displeji se objeví AUFGEHEN 1 (kynutí 1) (15). Stiskněte tlačítko ZEIT (čas), abyste nastavili dobu (19), a potvrďte svoji volbu opětovným stisknutím tlačítka PROZESS (proces). Tipy & Triky 6. Kuchen (koláče): Hnětení, kynutí a pečení. Těsto kyne pomocí prášku do pečiva nebo sody. čítko PROZESS (proces), tím potvrdíte svoji volbu prvního kroku. LICHT (osvětlení) Pokud do jedné minuty stisknete tlačítko znovu, světlo zhasnete. Když tlačítko do minuty nezmáčknete, světlo se automaticky vypne. Tímto tlačítkem zvolíte stupeň zbarvení kůrky: HELL (světlý), MITTEL (střední) nebo DUNKEL (tmavý) (20). ZEIT (čas) Když si budete přát, aby přístroj nezačal ihned péct, můžete pomocí tohoto tlačítka zadat časový posun začátku pečení. GRÖSSE (velikost) Stiskněte tlačítko GRÖSSE (velikost) a nastavíte si tak velikost chleba: 1000 g, 1200g nebo 1400g. Vaše volba se objeví na displeji (18). Mějte prosím na paměti, že doba pečení se mění s různými velikostmi chleba. Takto nastavíte časové posunutí: 1. Zvolte menu (17), velikost (18) a zbarvení kůrky (20). Tato funkce platí pro následující programy: 1. NORMAL (normální), 2. VOLLKORN (celozrnný), 3. FRANZÖSISCH (francouzský), 4. SCHNELL (rychlý), 5. SÜSS (sladký) a 9. ULTRASCHNELL (velmi r ychlý). 2. Zvolte si časové posunutí tím, že zmáčknete tlačítko ZEIT (čas). Posunutá doba zapnutí by měla zahrnout dobu pečení požadovaného menu. Chlebové směsi na chléb o hmotnosti 750 g Pokud tyto směsi používáte, nastavte si na pekárně hmotnost 1000g (18). S tímto nastavením se vám chléb jistě povede! Když se vám chléb upekl moc, snižte stupeň zbarvení nebo program zastavte 5 – 10 minut před dopečením pomocí tlačítka START/ STOPP (start / stop). PAUSE (přerušení) Po zahájení programu může být proces pečení kdykoli přerušen, a to pomocí tlačítka PAUSE (přerušení). Stiskněte tlačítko asi na 1,5 sekundy – program se zastaví, původní nastavení zůstane a na displeji bude blikat zbývající čas do konce pečení. Program bude pokračovat, jakmile opět stisknete tlačítko PAUSE (přestávka). Pokud stisknete toto tlačítko, světlo se rozsvítí. To slouží ke kontrole průběhu pečení. Tipy & Triky 5. Süss (sladký): Hnětení, kynutí a pečení sladkého pečiva. Když chcete zlepšit aroma, můžete přidat různé přísady. Představte si, že je právě 20:30 hodin a vy si přejete mít čerstvě upečený chléb ráno v 7 hodin. V tomto případě činí posunutá doba 10 hodin a 30 minut. Mačkejte tlačítko ZEIT (čas) tak dlouho, dokud se na displeji (19) neobjeví 10:30. Čas přidáváte v desetiminutových intervalech. funkce udržování teploty Chléb lze udržet až hodinu teplý (WARM HALTEN) (15). Pokud chleb během této doby chcete vyndat, vypněte program pomocí tlačítka START / STOPP (start / stop). PAMĚŤOVÁ FUNKCE Pokud se stane, že během pečení bude přerušena dodávka elektrického proudu, může program po dobu deseti minut pokračovat dál, aniž byste museli zmáčknout tlačítko START / STOPP (start / stop). Když trvá přerušení déle než 10 minut, automat nemůže program uložit do paměti. Vyndejte přísady ven z formy, zlikvidujte a do formy d ejte nové. Znovu automat zapněte. Jestliže bylo těsto při výpadku proudu teprve ve fázi h nětení a fáze kynutí ještě nezačala, můžete znovu stisknout tlačítko START / STOPP (start / stop) a program běží od začátku. 3. Stiskněte tlačítko START / STOPP (start / stop), tak zapnete posunutý program. Dvojtečka časového údaje začne blikat. Na displeji se bude zobrazovat zbývající čas. Dbejte na to, aby maximální časové posunutí činilo 13 hodin. Nepoužívejte žádné rychle se kazící potraviny (vejce, čerstvé mléko, ovoce nebo cibuli). 77 CZ CZ Signál pro přidání dalších přísad 3:40 2:55 3:32 2:50 3:30 2:50 1400 g 1200 g 1000 g 3 1400 g 1200 g 1000 g 4 5 SVĚTLÉ, 18 min. 40 min. 22 min. 30 min. 50 min. 70 min. STŘEDNÍ, 16 min. 40 min. 19 min. 30 min. 50 min. 65 min. TMAVÉ 13 min. 40 min. 17 min. 30 min. 50 60 min. 3:50 2:40 3:40 2:35 3:30 2:30 2:10 1:45 SVĚTLÉ, 10 min. 1200 g STŘEDNÍ, 10 min. 1000 g TMAVÉ 10 min. 10 min. 10 min. — 30 min. 70 min. 10 min. 10 min. — 30 min. 65 min. 2:05 1:40 10 min. 10 min. — 30 min. 60 min. 2:00 1:35 SVĚTLÉ, 10 min. STŘEDNÍ, 10 min. TMAVÉ 10 min. 5 min. 20 min. 33 min. 40 min. 62 min. 2:50 2:25 5 min. 20 min. 32 min. 40 min. 58 min. 2:45 2:20 5 min. 15 min. 32 min. 47 min. 53 min. 2:42 2:22 5 min. 10 min. 9 min. 1:50 1:34 1400 g 1400 g 1200 g 1000 g 6 — SVĚTLÉ, STŘEDNÍ, TMAVÉ 6 min. — — — 80 min. Udržení teploty Celková doba trvání programu SVĚTLÉ, 10 min. 25 min. 20 min. 35 min. 65 min. 65 min. STŘEDNÍ, 8 min. 25 min. 18 min. 35 min. 65 min. 60 min. TMAVÉ 8 min. 25 min. 16 min. 35 min. 70 min. 55 min. 2 BACKEN (pečení) 2:13 AUFGEHEN 3 (kynutí 3) 2:15 2:50 AUFGEHEN 2 (kynutí 2) 2:20 2:55 KNETEN 2 (hnětení 2) SVĚTLÉ, 10 min. 20 min. 15 min. 25 min. 45 min. 65 min. STŘEDNÍ, 10 min. 20 min. 15 min. 25 min. 45 min. 60 min. 1000 g TMAVÉ 10 min. 20 min. 12 min. 25 min. 48 min. 55 min. 3:00 1200 g AUFGEHEN 1 (kynutí 1) 1400 g KNETEN 1 (hnětení 1) Nastavení GRÖSSE (velikosti) 1 Nastavení FARBE (zbarvení) Program č. TABULKA ČASOVÉHO ROZVRŽENÍ JEDNOTLIVÝCH FÁZÍ ✓ ✓ ✓ ✓ ✓ ✓ 7 — 15 min. — — 45 min. 20 min. 1:20 — — 8 — 9 1400 g 1200 g 1000 g 10 20 min. — — 30 min. 40 min. SVĚTLÉ, 10 min. STŘEDNÍ, 10 min. TMAVÉ 10 min. — 5 min. — — 5 min. — — 5 min. — — — 1:30 — 33 min. 60 min. 1:48 1:38 28 min. 55 min. 1:38 1:28 28 min. 52 min. 1:35 1:25 10 min. až 60 min. 0:10 až 1:00 — — — — SVĚTLÉ, STŘEDNÍ, 13 min. TMAVÉ 25 min. 60 min. 1:38 — ✓ — SVĚTLÉ, 6 min. 20 min. 5 min. 5 min. 0 min. 0 min. STŘEDNÍ, až až až až až až TMAVÉ 14 min. 60 min. 20 min. 120 min. 120 min. 80 min. 0:36 až 7:54 během KNETEN 2 (hnětení 2) ✓ 12 — — — — — — — Ovládací panel můžete chránit před nechtěnou manipulací pomocí blokovacího mechanismu tlačítek (16). Nejprve stiskněte tlačítko PROZESS (proces) a potom tlačítko FARBE (zbarvení). S výjimkou těchto dvou tlačítek je celý ovládací panel zablokován. Tato funkce slouží k tomu, aby se předešlo nechtěnému přerušení programu zmáčknutím některých tlačítek. Zablokování tlačítek zrušíte tím, že zmáčknete tlačítko PROZESS (proces) a potom tlačítko FARBE (zbarvení). Pokud blokovací mechanismus nezapnete sami, jsou tlačítka pět minut po začátku programu automaticky zablokována. Než budete chtít nastavit nový program, musí být blokovací mechanismus (16) tlačítek zrušen. PROSTŘEDÍ Pekárna chleba pracuje v širokém rozpětí teplot. Mohou se ale vyskytnout rozdíly ve velikosti chleba podle toho, jestli jej pečete na chladném, nebo teplém místě. Doporučujeme teplotu v místnosti mezi 15 °C a 34 °C. VÝSTRAŽNÁ DOPORUČENÍ Ukazuje-li displej (19) po začátku progra- mu „H HH“, je teplota ve formě na pečení ještě příliš vysoká. Program musí být ukončen. Otevřete víko a nechte přístroj úplně vychladnout (ca. 15 – 20 minut). Pak ho teprve můžete použít znovu. Ukazuje-li displej (19) po zmáčknutí tlačít- ✓ SVĚTLÉ, STŘEDNÍ, TMAVÉ 11 78 — ZABLOKOVÁNÍ OVLÁDACÍHO PANELU ✓ ka START / STOPP (start / stop) „E E0“ nebo „E E1“, je snímač teploty poškozen a musí být z kontrolován v kvalifikovaném servisu. CHLÉB UPEČETE NÁSLEDUJÍCÍM ZPŮSOBEM 1. Dejte formu na pečení (6 / 8) do správné polohy, zatlačte ji směrem dolů, až slyšitelně zaklapne.Nasaďte hnětací hák (7 / 9) na hnací hřídel. Namažte hnětací hák a hnací hřídel margarínem, aby tam nezůstaly zbytky těsta. 2. Vložte přísady do formy (6 / 8). Respektujte prosím jejich pořadí tak, jak je uvedeno v receptu. Normálně dejte do formy nejprve vodu nebo jinou tekutinu, potom, cukr, sůl a mouku. Droždí nebo prášek do pečiva přidávejte vždy až poslední. Upozornění: věnujte v příslušném receptu pozornost údajům množství hlavně u mouky, droždí a prášku do pečiva. 3. V mouce udělejte malý důlek a do něj dejte droždí. Dbejte na to, aby droždí nepřišlo do styku s tekutinami nebo solí. Droždí nebo prášek do pečiva Sypké přísady Voda nebo jiné tekutiny 4. Zavřete víko (2) a zapojte přístroj do zásuvky. 5. Opakovaně tiskněte tlačítko MENÜ (menu), dokud nevyberete požadovaný program (17). 6. Tlačítkem GRÖSSE (velikost) zvolte hmotnost (18) vašeho chleba. 7. Pomocí tlačítka FARBE (zbarvení) nastavíte zbarvení kůrky (20). 8. Nastavte časové posunutí (19) tlačítkem ZEIT (čas). Tento krok můžete vynechat, jestliže si přejete, aby pekárna začala pracovat ihned. 9. Tlačítko START / STOPP (start / stop) podržte 1,5 sekundy, aby program začal pracovat. 10.Když je nastaven program 1. NOMRAL (normalní), 2. VOLLKORN (celozrnný), 3. FRAN ZÖSISCH (francouzský), 4. SCHNELL (rychlý), 5. SÜSS (sladký), 6. KUCHEN (koláče), 9. ULTRA SCHNELL (velmi rychlý) nebo 12. HAUSGE MACHT (vlastní chléb), zazní během pečení signál. Poté můžete přidat další přísady. Otevřete víko (2) a vložte přísady dovnitř. 79 Tipy & Triky CZ Při menším množství se těsto ne vždy rovnoměrně rozprostře ve formě – nahromadí se pouze na jedné straně. To může později vést při pečení k nestejnoměrnému výsledku. Abyste dosáhli pravidelného bochníku, urovnejte těsto po ukončení druhé hnětací fáze KNETEN 2 (hnětení 2) (15) stěrkou (13). Pokud se těsto na stěrku (13) lepí, ponořte ji krátce do mouky. 11.Délka pečení závisí na zvoleném programu (17), velikosti bochníku (18) a stupni zbarvení (20). Pokud byste chtěli zkontrolovat průběh pečení, stiskněte tlačítko LICHT (osvětlení) a podívejte se dovnitř průhledovým okénkem – víko (12) ale neotvírejte! Tip Upozornění: Je možné, že během pečení uniká ventilovou štěrbinou pára. To je normální. Nejste si jistí, jestli je chléb propečený? Píchněte do chleba dřevěnou špejlí. Když se na ni nenalepí žádné těsto, je váš chléb hotový! 12.Stisknete tlačítko START / STOPP (start / stop), na ca. 1,5 sekundy, abyste ukončili program. Nyní můžete chléb vyndat. Otevřete chňapkou víko (2) a vytáhněte formu (6 / 8) z přístroje ven. Pozor: Forma na pečení i chléb mohou být horké. Buďte proto velmi opatrní! 13.Nechte formu (6 / 8) vychladnout, pak teprve bochník vytáhněte. Použijte stěrku (13), abyste bochník po stranách opatrně uvolnili. Nikdy nepoužívejte nůž. Poškodili byste tím nepřilnavý povrch formy na pečení. 14.Formu otočte dnem vzhůru, držte ji nad roštem nebo nad čistým plechem na pečení, opatrně s ní zatřeste, až chléb vypadne ven. 15.Než chléb budete krájet, nechte ho asi 20 minut vychladnout. 80 CZ Upozornění: Doporučujeme krájet chléb na elektrickém kráječi nebo zubatým nožem. Nepoužívejte malé kuchyňské nože. Jsou nevhodné a chleba ukrojí nesymetricky. 16.Když nejste nablízku nebo na konci pečení nezmáčknete tlačítko START / STOPP (start / stop), chléb se automaticky udrží hodinu teplý. Konec funkce udržování teploty je signalizován deseti tóny. 17.Bezprostředně po ukončení pečení nebo když pekárnu nepoužíváte, vytáhněte zástrčku ze zásuvky. Pozor: Dříve než bochník rozkrájíte na plátky, odstraňte přiloženým háčkem (12) z chleba hnětací hák (7 / 9). Ten zůstal ve spodní části chleba. Bochník je ještě horký, proto se hnětacího háku nedotýkejte ru kama. Upozornění: Když chleba nesníte celý, uschovejte ho v uzavřeném plastikovém sáčku nebo vzduchotěsné uzavíratelné nádobě. Chléb můžete uchovat 3 dny při pokojové teplotě. Pokud chcete chléb uskladnit na delší dobu, zabalte jej do plastikového sáčku a uložte do ledničky. Tak ho můžete uchovat až 10 dní. Doma upečený chleba neobsahuje žádné konzervační látky, proto jeho trvanlivost není delší než u chleba od pekaře. SPECIÁLNÍ INSTRUKCE RYCHLÉ (4. SCHNELL) A VELMI RYCHLÝ (9. ULTRASCHNELL) CHLEBY Rychlé chleby jsou vyráběny pomocí prášku do pečiva nebo sody, které jsou aktivovány tekutinou a teplem. Aby bylo dosaženo dobrého výsledku, dejte do formy na pečení (6 / 8) nejprve tekutinu a pak teprve sypké přísady do vrchní části. V první hnětací fázi může dojít k tomu, že se sypké přísady nahromadí v rozích formy. Je proto nutné jim pomoci a promíchat je, aby se zabránilo hrudkovitosti. Používejte pouze kuchyňské nářadí ze dřeva a stiskněte tlačítko PAUSE (přestávka) než otevřete víko. prostředky, aby se nepoškodila nepřilnavá vrstva. Než formu vložíte zpátky do přístroje, musí být úplně suchá. VELMI RYCHLÝ PROGRAM (9. ULTRASCHNELL) Upozornění: Formu (6 / 8) nasadíte tak, že ji stlačíte lehce směrem dolů, až bude dokonale sedět ve správné pozici. Pekárna upeče pomocí tohoto programu chleba za jednu hodinu a 38 minut. Dbejte prosím na to, aby teplota vody činila 48 – 50°C. Použijte prosím teploměr, musíte změřit teplotu přesně. Vliv teploty je podstatný a projeví se pak na výsledku pečení. Když nebude možné stlačení směrem dolů, lehce změňte polohu, až bude dokonale sedět a stiskněte ji dolů. Když je teplota vody příliš nízká, chleba nevykyne a nedosáhne požadované velikosti. Když je teplota příliš vysoká, zničí se kvasinky ještě před fází kynutí. Pak chleba správně nevykyne a negativně ovlivní výsledek pečení. Když nejdou hnětací háky z upečeného chleba odstranit, použijte přiložený háček (12). DĚLENÁ FORMA NA PEČENÍ (8) Při nastavování velikosti chleba dávejte prosím pozor na maximální obsahové možnosti každé z částí formy. To činí nejvýše 500g. Dělená forma na pečení (8) může být použita jen k následujícím dvěma účelům: K pečení dvou chlebů stejného druhu ve stejném čase. K současnému pečení dvou rozdílných chlebů pomocí jednoho programu. Upozornění: Velikost chleba je třeba v MENU nastavit na 1000g. ČIŠTĚNÍ A ÚDRŽBA Před čištěním pekárny vytáhněte zástrčku ze zásuvky a nechte nechte pekárnu úplně vychladnout. Formu na pečení (7) i hnětací hák (6) můžete mýt v myčce. VELKÁ FORMA NA PEČENÍ (6) A DĚLENÁ FORMA NA PEČENÍ (8) Vyndejte formu (6 / 8) za úchyt. Vytřete vnitřní i vnější stranu formy (6 / 8) vlhkým hadrem. Nepoužívejte žádné ostré, ani agresivní čistící HNĚTACÍ HÁKY (7 / 9) Opatrně je (7 / 9) otřete vlhkou bavlněnou utěrkou. Nepoužívejte žádné ostré, ani agresivní čistící prostředky, aby se nepoškodila nepřilnavá vrstva. VÍKO (2) S PRŮHLEDOVÝMI OKÉNKY (3) Otřete víko z vnitřní i vnější strany vlhkým hadrem. Nepoužívejte agresivní čistící prostředky, poškodily by vysoce lesklý povrch. KRYT (5) Otřete opatrně vnější stranu krytu (5) vlhkým hadrem. Nepoužívejte agresivní čistící prostředky, poškodily by povrch přístroje z ušlechtilé oceli. Nikdy ho neponořujte do vody. PŘED DELŠÍM USKLADNĚNÍM Před uskladněním pekárny se přesvědčte, že je úplně vychladlý, čistý a suchý. Víko (2) musí být zavřené. POTRAVINY MOUKA Mouka je nejdůležitější základní ingredience vašeho chleba. 81 CZ Chlebová mouka, nazývaná též lepková či silná, je semletá pravděpodobně z tvrdé pšenice. Má vysoký podíl lepku (lepková bílkovina) a bílkovin. Tyto přírodní prostředky propůjčují těstu zachovat tvar a kysličník uhličitý vznikající při kvašení. Proto je tato mouka obzvláště vhodná pro pečení chleba. SŮL Sůl přispívá k chuti a zbarvení kůrky. Je možné ho také použít ke zpomalení příliš aktivního droždí. Proto nezvyšujte její množství uvedené v receptu. Bílá mouka se skládá ze směsi vybraných Upozornění: Pokud musíte např. ze zdravotních důvodů sůl vynechat, může chleba více vykynout než normálně.. Celozrnná mouka obsahuje všechny látky TUK, MÁSLO A ROSTLINNÝ OLEJ druhů měkké a tvrdé pšenice a je vhodná pro rychlé pečení nebo pečení keksů. 4. Vzniklá pěna by měla zaplnit asi jeden šálek, jinak je droždí neaktivní. PRÁŠEK DO PEČIVA Prášek do pečiva se používá, když se peče chleba nebo koláče ve ULTRASCHNELL (velmi rychlém) režimu. Nepotřebuje fázi kynutí, produkuje plyny, které ve formě malých dutinek ovlivňují texturu chleba. Soda obilného zrna- také otruby, pevnou vnější slupku pšenice. Ta představuje ideální zdroj pro balastní látky. Tuk chleba změkčuje a prodlužuje trvanlivost. Máslo by mělo být rozpuštěné nebo nakrájené na malé kousky, pak ho teprve můžete přidat. Pokud používáte tuto mouku, dbejte na to, aby byla jemně semletá. V ní obsažené otruby zabraňují odvodu lepku, takže chleby z tohoto druhu mouky jsou menší a těžší než chleby z bílé mouky. Proto se tato mouka často míchá s jinými druhy mouky, aby bylo dosaženo lehčí struktury. Soda je velmi podobná prášku do pečiva. Může být použita i v kombinaci s práškem do pečiva. DROŽDÍ VODA A OSTATNÍ TEKUTINY Během kynutí uvolňuje droždí kysličník uhličitý, který podporuje kynutí a změkčuje vnitřní strukturu. Droždí potřebuje ke kynutí jako živinu cukr a mouku. Tmavá pšeničná mouka, také nazývaná čer- 1 KL aktivního = ¾ KL instantního sušeného droždí droždí 1½ KL aktivního = 1 KL instantního sušeného droždí droždí Voda je hlavní přísada při výrobě chleba. Její optimální teplota je 20º – 25ºC. Vodu lze nahradit i jinou tekutinou, např. čerstvým mlékem nebo vodou, která je smíchána se 2% mléčného prášku. To zlepšuje vůni chleba a barvu kůrky. Některé recepty vyžadují také citrónovou, jablečnou nebo pomerančovou šťávu, tím se chuť chleba vylepší. Mouka s přídavkem prášku do pečiva ob- 2 KL aktivního = 1½ KL instantního sušeného droždí droždí VEJCE (KL = kávová lžička) Kukuřičná a ovesná mouka je umletá z ku- Čerstvé droždí musí být uloženo v ledničce, protože kvasinky by se při vysokých teplotách zničily. ná nebo hrubá mouka, je bohatá na balastní látky. Je podobná celozrnné mouce. Pokud chceme upéci velký bochník chleba, musí se smíchat s velkým množstvím jiného druhu mouky. sahuje – jak už vyplývá z názvu – prášek do pečiva a je vhodná k pečení koláčů. kuřice, popř.ovsa. Přidávají se do těsta, pokud pečeme černý chleba. Ovesná mouka zvýrazňuje chuť a zlepšuje strukturu vašeho chleba. CUKR Cukr je důležitá přísada. Podporuje kvašení. Kromě toho zjemňuje chuť chleba, zvyšuje jeho nutriční hodnotu a prodlužuje trvanlivost. Většinou se používá bílý cukr. Podle chuti se také může přidávat hnědý nebo moučkový cukr, sirup nebo med. 82 CZ Při nákupu droždí vždy zkontrolujte datum výroby a minimální trvanlivosti. Po každém použití droždí co nejrychleji uložte do ledničky. Upozornění: Nedostatečné vykynutí může způsobit špatná kvalita droždí. Jak zjistíte, že droždí není čerstvé: 1. Nalijte do odměrky půl kelímku teplé vody (45° – 50°C) Pozor: Používejte výhradně jemný cukr. Hrubý krystalový cukr by mohl poškodit povrch formy na pečení. 2. Přidejte kávovou lžičku bílého cukru a pro míchejte. Pak na to rozmělněte dvě kávové lžičky droždí. Upozornění: Můžete také cukr úplně vynechat. V tomto případě chleba méně vykyne. 3. Odměrku nechte stát asi 10 minut na teplém místě. Nemíchejte. Vejce mohou také vylepšit vlastnosti chleba, je pak výživný a větší. Vejce se musí rozklepnout do hrnku a pak stejnoměrně rozmíchat. ODMĚŘENÍ PŘÍSAD SYPKÉ PŘÍSADY Tyto přísady se musí lehce nasypat do velké měrky (10). Nesmí se stlačit, protože jejich množství může ovlivnit vyváženost receptu. Pokud odměřujete jen malé množství sypkých přísad, použijte malou odměrku (11). V údajích na receptu se jedná o zarovnanou lžíci, ne o vrchovatou. Malá odměrka (11): Odpovídá 1 polévkové lžíci Odpovídá 1 kávové lžičce POŘADÍ PŘÍSAD Pořadí, ve které mají být přidávány přísady, musí být dodržováno. Obecně platí toto pořadí: tekutá přísada, vejce, sůl a sušené mléko atd. Moukou nesmí úplně prosáknout tekutina. Droždí se přidává pouze na suchou mouku a nesmí přijít do styku se solí. Po chvíli, kdy se těsto mísí, zazní signál. Nyní můžete přidat např. ovoce. Kdybyste přidali ovoce příliš brzy,naruší se dlouhým hnětením vůně i konsistence Pokud používáte časové posunutí, nesmíte nikdy přidávat rychle se kazící přísady, např. vejce nebo ovoce. Nejdůležitější krok při používání pekárny chleba je přesné odměřování jednotlivých přísad pomocí velké (10) a malé odměrky (11). Vždy odměřujte každou tekutinu i sypké přísady velmi přesně, jinak bude výsledek vašeho snažení nedostatečný. ODMĚŘENÍ TEKUTIN Voda, čerstvé mléko nebo rozpuštěné sušené mléko by se měly odměřit pomocí velké odměrky (10). Držte ji během nalévání rovně a tekutinu odměřte. Když odměřujete olej nebo jiné přísady, odměrku (10) důkladně vyčistěte. 83 CZ CZ ODSTRANĚNÍ PROBLÉMŮ č. Problém / porucha Příčina Pomoc Některé přísady se přichytily na topných tělesech nebo se nachází příliš blízko. Když používáte přístroj poprvé, může se na topných tělesech olej přichytit. Vytáhněte zástrčku ze zásuvky , nechte přístroj vychladnout a vyčistěte topná tělesa. Buďte ale opatrní, jen tak se vyvarujete spálenin. Když používáte přístroj poprvé, nechte ho běžet naprázdno a otevřete víko. 2 Kůrka ve spodní části chleba je moc silná. Udržovali jste chleba příliš dlouho teplý a nechali jste ho dlouho ve formě, a tak ztráta vlhkosti byla velká. Chleba vyndejte co nejdříve a neudržujte ho teplý. 3 Chléb jde velmi obtížně vyklopit z formy. Hnětací hák drží pevně na hnětací hřídeli . Po vyklopení chleba nalijte do formy horkou vodu, tak aby hnětací háky byly ponořeny. Vytáhněte je po 10 minutách a vyčistěte je. Před příštím pečením namažte hnětací hřídel např. margarínem. 1 Během pečení uniká z větracího otvoru kouř. 4 Přísady jsou nerovnoměrně promíchané. 5 Po upečení je chleba vysušený a nemá hnědou kůrku. 84 č. Zvolený program není vhodný. Zvolte správný program. Otočný odpor je příliš vysoký, takže hnětací hák se nemůže točit. Zkontrolujte otvor, ve kterém je hnětací hák upevněn. Vyndejte formu ven z přístroje a nechte ho běžet naprázdno. Při chybné funkci kontaktujte servisní službu. Víko bylo několikrát otevřeno. Nevhodný program. Během pečení víko neotvírejte. Zvolte správný program (str. 45). Problém / porucha Příčina Pomoc 6 Po stisknutí tlačítka START / STOPP (start / stop) ukazuje displej „H HH“. Teplota uvnitř pekárny je na pečení chleba příliš vysoká. Stiskněte znovu tlačítko START / STOPP (start / stop) a vytáhněte zástrčku ze zásuvky. Vyndejte formu z pekárny ven a nechte víko otevřené, dokud pekárna nevychladne. 7 Blokovací mechanismus kláves se už nedá zrušit (během nebo na konci pečení). Technická chyba. Vytáhněte zástrčku ze zásuvky, po krátké chvíli ji zastrčte zase zpátky. Váš program bude jen nakrátko přerušen a sám začne pracovat znovu (srovnej paměťová funkce). 8 Motor slyšíte běžet, ale těsto není proděláváno. Forma na pečení není dobře upevněna nebo je množství těsta příliš veliké a nelze ho prodělávat. Zkontrolujte, zda je forma řádně upevněná. Ujistěte se, že se těsto dělá podle receptu a obsahuje správné množství přísad. 9 Chléb je tak velký, že odspodu tlačí na víko. Příliš mnoho droždí, vody nebo moukyTeplota v místnosti může být příliš vysoká (ideální: 15º – 34ºC) Zkontrolujte zde zmíněné faktory. Popřípadě snižte množství. 10 Chléb je malý a není vykynutý. Žádné nebo málo droždí. Droždí může být také staré, a tím i neúčinné. Dalším důvodem může být vysoká teplota vody, nízká teplota v místnosti nebo příliš mnoho soli. Zkontrolujte množství a účinnost droždí. Případně zvyšte teplotu v místnosti. 11 Těsto je tak objemné, že přetéká přes okraj formy. Možná jste použili příliš mnoho tekutiny, takže je těsto řídké. Eventuelně jste přidali mnoho droždí. Snižte množství tekutin a zlepšíte tím hutnost těsta. 85 CZ Problém / porucha 12 Při pečení se chléb ve středu propadá. 13 Chléb je velmi těžký a struktura hutná. 14 Střed chleba je dutý. 15 Na povrchu chleba je ještě trochu prášku. 16 Kůrka je příliš silná a tmavá, při pečení koláčů nebo jiných potravin s vysokým obsahem cukru. Příčina Pomoc Mouka není dost silná, aby nechala těsto vykynout. Použijte chlebovou nebo silnou mouku. Droždí působí příliš rychle nebo je teplota vysoká. Droždí používejte při pokojové teplotě. Těsto je těžké a moc řídké, obsahuje moc vody. V daném případě upravte množství vody. Použili jste mnoho mouky a málo vody. Vezměte méně mouky nebo více vody. Použili jste mnoho ovoce nebo mnoho celozrnné mouky. Snižte množství jmenovaných přísad a vezměte více droždí. Použili jste moc vody nebo droždí, popř. žádnou sůl. Snižte množství vody a droždí a použijte trochu soli. Teplota vody je vysoká, Zkontrolujte teplotu vody. V chlebu se nachází mnoho látek obsahujících lepek. Nedávejte žádné nebo méně látek obsahujících lepek. Chléb nemohl být dostatečně prodělán, protože obsahuje málo vody. Zkontrolujte množství vody a mechaniku pekárny. Různé recepty mají velký vliv na pečení chleba. Barva je velmi tmavá, použijete-li mnoho cukru. Pokud je barva chleba tmavá (pro recept s větším množstvím cukru), přerušte pečení 5 – 10 minut před koncem stisknutím tlačítka START/ STOPP (start / stop). Než koláč nebo chleba vyndáte, nechte víko ještě 20 minut zavřené. EKOLOGICKY VHODNÁ LIKVIDACE Uvnitř EU odkazuje tento symbol na to, že přístroj nesmí být vyhozen do domácího odpadu. Staré přístroje obsahují cenné materiály vhodné k recyklaci, které by měly být k recyklaci dodány, aby nekontrolovanou likvidací neškodily životnímu prostředí, popř. lidskému zdraví. Odstraňujte prosím staré přístroje prostřednictvím vhodných sběrných systémů, nebo pošlete přístroj k likvidaci na místo, kde jste jej koupili. Tam jej pak dopraví k materiálnímu využití. 86 RECEPTY – VHODNÉ K JEDNOTLIVÝM PROGRAMŮM Údaje množství v receptech pro chlebovou mouku a droždí odpovídají maximu. 1 šálek = 250 ml 1 PL = 3 KL Máslo / Margarín: Podle chuti můžete po- Tipy & Triky č. CZ užít i jiné tuky: olivový olej, margarín nebo vepřové sádlo pro labužníky atd. Sušené mléko: Sušené mléko můžete nahradit čerstvým. V tom případě snižte množství vody o stejné množství přidávaného mléka. Voda: Minerální voda každý chléb zlehčuje a provzdušní. Ideální u těžkých druhů mouky. 1 PL = 15 ml 1 KL = 5 ml FRANCOUZSKÝ KŘUPAVÝ CHLÉB Velikost 1400 g / 1200 g / 1000 g / Surovinychleba 3 LB 2,5 LB 2 LB Voda 500 ml 460 ml 350 ml Máslo / Margarín 3 PL 2 ¼ PL 1 ½ PL Sušené mléko 2 PL 1 ½ PL 1 PL Cukr 3 ½ PL 3 PL 2 PL Sůl 1 ¾ KL 1 ½ KL 1 KL Bílá mouka 910 g 840 g 630 g Sušené droždí 1 ¾ KL 1 ½ KL 1 KL Program: FRANZÖSISCH (francouzský) SELSKÝ CHLÉB Velikost 1400 g / 1200 g / 1000 g / Surovinychleba 3 LB 2,5 LB 2 LB Podmáslí 530 ml 490 ml 370 ml RYCHLÝ KUKUŘIČNÝ CHLÉB Máslo / Margarín 1 ¾ PL 1 ½ PL 1 PL Velikost 1400 g / 1200 g / 1000 g / Surovinychleba 3 LB 2,5 LB 2 LB Mléko 530 ml 490 ml 370 ml Sůl 1 ¾ KL 1 ½ KL 1 KL Máslo / Margarín 3 ½ PL 3 PL 2 PL Cukr 1 ¾ PL 1 ½ PL 1 PL Sušené mléko 1 ¾ KL 1 ½ KL 1 KL Bílá mouka 455 g 420 g 315 g Cukr 2 KL 1 ½ KL 1 KL Celozrnná žitná mouka 455 g 420 g 315 g Sůl 2 KL 1 ½ KL 1 KL Sušené droždí 1 ¾ KL Chlebová mouka 650 g 600 g 450 g Kukuřičná mouka 260 g 240 g 180 g Prášek do pečiva 8 KL 6 KL 4 KL 1 ½ KL 1 KL Program: NORMAL (normální) Program: SCHNELL (rychlý) CELOZRNNÝ CHLÉB Velikost 1400 g / 1200 g / 1000 g / Surovinychleba 3 LB 2,5 LB 2 LB Voda 500 ml 460 ml 350 ml KOLÁČOVÝ CHLÉB Máslo / Margarín 1 ¾ PL 1 ½ PL 1 PL Velikost 1400 g / 1200 g / 1000 g / Surovinychleba 3 LB 2,5 LB 2 LB Mléko 530 ml 490 ml 370 ml Sůl 1 ¾ KL 1 ½ KL 1 KL Máslo / Margarín 90 g 75 g 1 KL Vejce 4 Ks 4 Ks 3 Ks 90 g 75 g 50 g Cukr 1 ¾ KL 1 ½ KL 50 g Chlebová mouka 190 g 150 g 110 g Cukr Vícezrnná žitná mouka 720 g 690 g 520 g Sůl 1 ¾ KL 1 ½ KL 1 KL Bílá mouka 910 g 840 g 630 g Sušené droždí 3 ½ KL Sušené droždí 1 ¾ KL 1 ½ KL 1 KL 3 KL Program: VOLLKORN (celozrnný) 2 KL Program: SÜSS (sladký) 87 CZ CZ KOLÁČE MARMELÁDY Třený koláč Pomerančové želé Přísady Vejce 3 ks Cukr 125 g Máslo / Margarín 125 g Vanilkový cukr Mléko Bílá mouka Prášek do pečiva 1 balíček až ¼ šálku 300 g 1 balíček 1. Do mísy dejte vejce, máslo, cukr a vanilkový cukr a vymíchejte ručním mixerem do pěny. 2. Smíchejte mouku s práškem do pečiva a zamíchejte do vaječné směsi. 3. Zjemněte těsto trochou mléka. 4. Formu na pečení vymažte máslem nebo olejem, vlijte těsto a zapněte program KUCHEN (koláče). VELMI RYCHLÝ CHLÉB S PŠENIČNÝMI KLÍČKY Přísady Pomerančová šťáva 1 litr Na kousky nakrájený pomeranč 1 ks Citrónová šťáva 50 ml Želírovací cukr (3 plus 1) 500 g Program: MARMELADE (marmelády) 5. Chcete přidat strouhanou čokoládu? Pak ji tedy přidejte. Pekárna ji zamíchá do těsta. Džem z lesního ovoce 3 ks 150 g Máslo / Margarín 250 g Bílá mouka 250 g Kakao Skořice Sůl Strouhaná čokoláda Červené víno 1 balíček 1 ½ PL 2 KL 1 špetka Želírovací cukr (2 plus 1) 1. V míse vymíchejte vejce, máslo, cukr, vanilkový cukr a sůl ručním šlehačem do pěny. 2. Pak přidejte mouku, prášek do pečiva, kakao, skořici a všechno smíchejte dohromady. 3. Přilévejte červené víno až se těsto začne trhat. 4. Formu na pečení vymažte máslem nebo olejem, vlijte těsto a posypejte strouhanou čokoládou. Zapněte program KUCHEN (koláče). 100 g až 100 ml 500 g Program: MARMELADE (marmelády) Chcete vyzkoušet, jak vaše marmelá- Tipy & Triky Vejce Cukr Prášek do pečiva 1 kg Citrónová šťáva (u velmi sladkého ovoce) Přísady da, džem nebo želé zhoustly? Odeberte lžící trochu horké hmoty na studený porcelánový talíř. Během pár minut vychladne a pak můžete pevnost zkusit. Je marmeláda řídká? Přidejte trochu kyseliny citrónové. Hmota lépe želíruje. Je marmeláda hustá? Přidejte trochu vody nebo ovocné šťávy. Hmota je pak řidší. až 1⁄8 litru Kmín 2 KL 1 ½ KL 1 KL Olivový olej 2 PL 1 ½ PL 1 PL Med 2 PL 1 ½ PL 1 PL Sůl 2 KL 1 ½ KL 1 KL Pšeničné klíčky 100 g 90 g 70 g Bíla mouka 810 g 750 g 560 g Sušené droždí 2 ½ KL 2 KL 1 ½ KL Program: ULTRASCHNELL (velmi rychlý) Přísady Rozmačkané lesní plody Koláč s červeným vínem Velikost 1400 g / 1200 g / 1000 g / Surovinychleba 3 LB 2,5 LB 2 LB Voda (48°C) 490 ml 450 ml 340 ml BACKEN (pečení) K tomuto programu vám bohužel nemůžeme nabídnout žádné návrhy receptů. DEZERTY Jablkové řezy Přísady Bílá mouka 6 Ks Citrónová šťáva 1 KL Vejce ½ šálku Mouka 1 šálek Ovesné vločky ¹⁄3 šálek 3 ½ PL Máslo / Margarín (změklý) Program: DESSERT (dezerty) Křupavý rumový koláč Přísady Vejce 4 ks Cukr 100 g Máslo / Margarín Vanilkový cukr Sůl Rum Bílá mouka Prášek do pečiva Nasekaná rumová čokoláda 88 1 Ks Hnědý cukr 75 g 1 balíček 1 Prise 4 PL 150 g 1 balíček 50 g 1. V míse vymíchejte vejce, máslo, cukr, vanilkový cukr a sůl ručním šlehačem do pěny. 2. Smíchejte mouku s práškem do pečiva. Vše stejnoměrně promíchejte a zároveň nalijte do směsi rum. 3. Formu na pečení vymažte máslem nebo olejem, vlijte těsto a posypejte nasekanou čokoládou. Zapněte program KUCHEN (koláče). PODMÁSLOVÉ TĚSTO na housky Hmotnost 1400 g / 1200 g / 1000 g / Suroviny 3 LB 2,5 LB 2 LB Podmáslí 450 ml 420 ml 310 ml Vejce 2 Ks 1 Ks 1 Ks Sůl 2 KL 1 ½ KL 1 KL Celozrnná pšeničná mouka 320 g 300 g Bíla mouka 490 g 2 KL Sušené droždí Program: TEIG (těsto) Rýžový pudink Přísady Lehce rozmíchaná vejce Mléko 4 Ks 1 ¾ šálku Uvařená rýže 3 šálky 220 g Cukr ½ šálku Rozinky (opce) 1 šálek 450 g 340 g Vanilka 1 KL 1 ½ KL 1 KL Skořice 2 KL Program: DESSERT (dezerty) 89 CZ BHG 395 ZÁRUČNÍ LIST D Notizen GB Notes F Notes I Note CZ Poznámky Pro záruku začínající dnem prodeje spotřebiče platí pro země EU (i Českou republiku) a Švýcarsko tyto podmínky: 1.Trvání záruky: 2 roky 3. Záruka se nevztahuje na případy: 2. Poskytování záruky: poškrábání nebo fleky na spotřebiči a na světelné kontrolky nebo žárovky a na motorové kartáče. a) záruční opravu provedeme podle našeho zvážení opravou nebo výměnou vadných dílů, jestliže tyto závady vznikly prokazatelně vadou materiálu nebo chybou při výrobě. b)záruční oprava bude provedena jen při předložení tohoto záručního listu a dokladu o zaplacení. c) záruku mohou uplatnit pouze první majitelé spotřebiče. na lehce rozbitné díly z bakelitu, skla, plastů apod., pokud se nejedná o chybu materiálu. poškození jako následek chybné instalace nebo upevnění. kdy je spotřebič zapojen do sítě s vyšším napětím než je na spotřebiči uvedeno. chybného nebo neodpovídajícího použití. d)jestliže dojde k opravě nebo výměně spotřebiče v záruční době, záruční doba se prodlouží. nedbalosti při používání. e) poplatky za dopravu hradí kupující. nevhodného transportu nebo nedostatečného zabalení. f) v případě, že se závada nebo škoda nedá odstranit, nebo se překročí doba servisního zásahu (30 dnů), bude spotřebič vyměněn za nový, nebo vráceny peníze v prodejně, kde byl spotřebič zakoupen. upadnutí spotřebiče nebo jeho jednotlivých částí. 4. Záruka zaniká: při použití spotřebiče jinak než v domácnosti. při provádění opravy nebo změny na spotřebiči osobou jinou než pověřenou naším servisem. Na tento spotřebič poskytujeme 2 roky záruku na nedostatky, které jsou označeny jako výrobní chyby nebo chyby materiálu. Záruční doba začíná dnem prodeje a je uznána po předložení záručního listu a dokladu o zaplacení. Jiné nároky neuznáváme. Model: 90 razítko a podpis prodávajícího Důležité ! Prosím, napište si FD kód, který je umístěný na štítku: datum prodeje 91 Bielmeier Hausgeräte GmbH Gnaglbergstraße 6 D-94267 Prackenbach Bielmeier Hausgeräte s.r.o. Bořice 25 CZ-34401 Domažlice Tel.: +49 (0) 9942 94 88 93-0 Fax: +49 (0) 9942 94 88 93-22 E-Mail:[email protected] Internet:www.bielmeier-hausgeraete.com Tel.: +420 - 379 768 010 Fax: +420 - 379 768 020 E-Mail:[email protected] Internet:www.bielmeier.cz