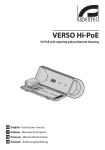
Download VERSO Hi-PoE IPM
Transcript
VERSO Hi-PoE IPM
Polycarbonate housing with IPM technology for IP cameras
EN English - Instructions manual
IT Italiano - Manuale di istruzioni
FR Français - Manuel d’instructions
DE Deutsch - Bedienungslanleitung
VERSO Hi-PoE IPM
Polycarbonate housing with IPM technology for IP cameras
EN English - Instructions manual
Contents
ENGLISH
1 About this manual.......................................................................................................... 3
1.1 Typographical conventions................................................................................................................................... 3
2 Notes on copyright and information on trademarks................................................... 3
3 Safety rules..................................................................................................................... 3
4 Identification................................................................................................................... 4
4.1 Product description and type designation..................................................................................................... 4
4.2 Product markings..................................................................................................................................................... 4
5 Preparing the product for use....................................................................................... 4
5.1 Unpacking and contents........................................................................................................................................ 4
5.1.1 Unpacking................................................................................................................................................................................... 4
5.1.2 Contents....................................................................................................................................................................................... 4
5.2 Safely disposing of packaging material............................................................................................................ 4
6 Assembling and installing............................................................................................. 5
6.1 Installation................................................................................................................................................................... 5
6.1.1 How to open the housing...................................................................................................................................................... 5
6.1.2 Removal of the slide................................................................................................................................................................ 5
6.1.3 Installation of the cable glands........................................................................................................................................... 5
6.1.4 Installation of the GEKO IRH illuminator (optional)...................................................................................................... 5
6.1.5 Brackets and adaptors............................................................................................................................................................ 6
6.1.1 Installation of the version with double filter for air renewal..................................................................................... 6
6.1.2 Ethernet cable installation.................................................................................................................................................... 6
6.1.3 How to install the camera...................................................................................................................................................... 7
6.1.4 Connection of the GEKO IRH illuminator (optional).................................................................................................... 7
6.1.5 PoE cable connection.............................................................................................................................................................. 8
6.1.6 Connection of the blower with double filter for air renewal (optional)............................................................... 8
7 Configuration.................................................................................................................. 8
8 Switching on................................................................................................................... 9
9 Maintaining and cleaning............................................................................................ 10
9.1 Maintaining...............................................................................................................................................................10
9.1.1 Kit for upgrading of the systems.......................................................................................................................................10
9.2 Cleaning.....................................................................................................................................................................10
9.2.1 Window and plastic cover cleaning (PC)........................................................................................................................10
10 Disposal of waste materials....................................................................................... 11
11 Technical data............................................................................................................. 11
11.1 General.....................................................................................................................................................................11
11.2 Mechanical..............................................................................................................................................................11
11.1 Electrical..................................................................................................................................................................11
11.2 Environment..........................................................................................................................................................11
11.3 Certifications..........................................................................................................................................................11
12 Technical drawings..................................................................................................... 12
1 About this manual
1.1 Typographical conventions
DANGER!
Explosion hazard.
Read carefully to avoid danger of explosion.
DANGER!
High level hazard.
Risk of electric shock. Disconnect the
power supply before proceeding with any
operation, unless indicated otherwise.
WARNING!
Medium level hazard.
This operation is very important for the
system to function properly. Please read
the procedure described very carefully and
carry it out as instructed.
INFO
Description of system specifications.
We recommend reading this part carefully
in order to understand the subsequent
stages.
The manufacturer declines all responsibility
for any damage caused by an improper use
of the appliances mentioned in this manual.
Furthermore, the manufacturer reserves
the right to modify its contents without any
prior notice. The documentation contained
in this manual has been collected with great
care, the manufacturer, however, cannot
take any liability for its use. The same thing
can be said for any person or company
involved in the creation and production of
this manual.
• The device must be installed only and exclusively
by qualified technical personnel.
• Before any technical work on the appliance,
disconnect the power supply.
• Do not use power supply cables that seem worn
or old.
• Never, under any circumstances, make any
changes or connections that are not shown in
this handbook. Improper use of the appliance
can cause serious hazards, risking the safety of
personnel and of the installation.
• Use only original spare parts. Non-original spare
parts could cause fire, electrical discharge or other
hazards.
2 Notes on copyright and
information on trademarks
• Before proceeding with installation check the
supplied material to make sure it corresponds
to the order specification by examining the
identification labels (4.2 Product markings, page 4).
The quoted names of products or companies are
trademarks or registered trademarks.
• Power supply to the product must be exclusively
provided by the PoE cable (Power over Ethernet).
• This device was designed to be permanently
installed on a building or on a suitable structure.
• When installing the device, comply with all the
national standards.
• Any device which could be installed inside the
product must comply with the current safety
standards.
3
Instructions manual - English - EN
Before installing and using this unit, please read this
manual carefully. Be sure to keep it handy for later
reference.
3 Safety rules
EN - English - Instructions manual • If the installation is NEMA TYPE 4X, the installer
must replace the cable glands of the product with
NEMA TYPE 4X cable glands.
• For all connections, use cables that are able to
withstand temperatures of at least 75°C (167°F).
• The product is designed to house only cameras
that are properly certified.
5 Preparing the product for
use
Any change that is not expressly approved
by the manufacturer will invalidate the
guarantee.
4 Identification
5.1 Unpacking and contents
4.1 Product description and type
designation
5.1.1 Unpacking
The VERSO Hi-PoE IPM housing exploits in an optimal
way the POE and Hi-POE technology, using the power
supplied by the Ethernet cable as the sole source of
power for all the devices connected, thus ensuring
the maximum efficiency and flexibility of the
network system as well as user-friendly installation
and low costs.
When the product is delivered, make sure that the
package is intact and that there are no signs that it
has been dropped or scratched.
If there are obvious signs of damage, contact the
supplier immediately.
Keep the packaging in case you need to send the
product for repairs.
5.1.2 Contents
The innovative IPM (Intelligent Power Management)
system enables extremely quick and easy installation
with the use of a single Ethernet connecting cable.
Check the contents to make sure they correspond
with the list of materials as below:
The Hi-POE IPM system automatically detects all
the options, like heating, fan and illuminator and
then autonomously balances the power to ensure
suitable distribution of the same to the connected
devices. This guarantees the optimal operation of the
IP camera between -30°C (-22°F) and +60°C (140°F),
with heat regulation and cold start (activation at low
temperature).
• RJ45 wiring
The analog system, with previously installed camera
housings, can be retrofitted on IPM system simply
by changing the slide and the internal electronics.
This enables the digital conversion, speeding up
the installation and thereby minimizing costs and
environmental impact.
Very easy to install thanks to the side opening system
that allows the full access to the camera, lenses and
all internal connections.
4.2 Product markings
See the label attached to the product.
4
• Housing
• Housing equipment:
• Allen wrench
• Spacers
• Cable glands gaskets
• Cable glands (x3)
• Bolts and screws
• Screws for camera
• Instructions manual
5.2 Safely disposing of packaging
material
The packaging material can all be recycled. The
installer technician will be responsible for separating
the material for disposal, and in any case for
compliance with the legislation in force where the
device is to be used.
When returning a faulty product we recommend
using the original packaging for shipping.
6 Assembling and installing
6.1.3 Installation of the cable glands
The product may be interfaced with
devices not manufactured by VIDEOTEC.
VIDEOTEC recommends a test prior to
installation. VIDEOTEC will not be liable for
any installation costs or lost revenues in the
event a compatibility problem will occur.
6.1 Installation
Inside the supply are 3 cable glands that must be
installed at the bottom of the housing as shown
in figure. The cable glands that are not used must
be sealed with the cap to avoid water entering the
housing.
6.1.1 How to open the housing
Loosen the 2 screws on the side, turn the cover and
the upper half of the body about the opening hinge
axis.
Fig. 1
Fig. 3
6.1.2 Removal of the slide
6.1.4 Installation of the GEKO IRH
illuminator (optional)
To remove the slide it is necessary to unscrew the
fixing screws as shown in figure.
Maximum power of the illuminator must
not exceed 6W.
To install the illuminator it is necessary to
use the illuminator bracket (OSUPPIR). The
kit must be bought separately.
Use the cable glands or the smallest sealing ring to
avoid water entering the housing.
Fig. 2
For installation information on the illuminator on
housing refer to the product's use and installation
manual.
For further details on configuration and use refer to
the relative chapter (6.1.4 Connection of the GEKO
IRH illuminator (optional), page 7).
5
Instructions manual - English - EN
For the internal cable routing brackets
it is necessary to use the sealing ring kit
(OWBIP). The reduced space does not allow
the use of the supplied cable glands. The kit
must be bought separately.
The assembly and installation must be
performed only by skilled personnel.
6.1.2 Ethernet cable installation
The product cannot be fixed to a bracket or adaptor.
For further information refer to the product's
technical data sheet or directly contact VIDEOTEC.
Insert the Ethernet cable in the gasket and block it as
shown in figure.
6.1.1 Installation of the version with
double filter for air renewal
Special attention must be paid to the position of the
air intake filter fins when installing the housing.
Fig. 6
Fit the gasket (01) to the cable gland M20 (02). Fasten
the cable gland to the bottom of the housing (03)
using the M20 nut (04).
Pay attention to the fixing. Tightening
torque: 7Nm max.
Pass the cable with connector RJ45 (05) through the
M20 cable gland (02). Tighten the cable gland plug
(06).
Fig. 4
04
Depending on the inclination of the housing, the
direction of the fins must be such to prevent water
entering in case of rain.
45°
45°
6
Maximal rotation on the transversal axis: 0°.
Maximal inclination on the longitudinal axis: +/- 45˚.
02
06
03
Fig. 7
Fig. 5
01
05
To guarantee the IP44 weatherproof, install the
housing on the support following the inclination
limits as shown in the picture.
0˚
EN - English - Instructions manual 6.1.5 Brackets and adaptors
6.1.3 How to install the camera
Connect the illuminator to the J6 terminal as
described in the diagram below.
1
It is possible to install only PoE type
cameras.
2
3
Instructions manual - English - EN
The correct device working, in the stated
temperature range, is guaranteed with the
use of camera and lens with temperature
from -10°C up to +60°C.
6.1.4 Connection of the GEKO IRH
illuminator (optional)
4
Mount the camera using the supplied screws (01) and
spacers (02).
Apply at least one spacer to guarantee electrical
isolation between the slide and the camera.
Position the camera lens close to the glass to avoid
visual interference or optical reflections.
Connect the camera to the J2 connector (PoE OUT)
with the supplied cable (03).
Fig. 10
Connection of the GEKO IRH illuminator
03
02
01
Illuminator
Terminal J6
Brown (telemetry)
1
Blue (telemetry)
2
White (supply)
3
Black (supply)
4
Tab. 1
To adjust the lighting threshold of the illuminator
refer to the product's use and installation manual.
Fig. 8
Refit the slide in its housing and fix the screws and
washers previously removed.
Fig. 9
7
6.1.5 PoE cable connection
EN - English - Instructions manual Connect the PoE cable from the Power Injector to the
J1 connector.
7 Configuration
Before powering the device, you must set the
maximum power consumption of the housing
operating on dip switch SW1.
Fig. 11
Before powering the device, you must set the
maximum power consumption of the housing
operating on dip switch SW1 (7 Configuration, page 8).
6.1.6 Connection of the blower with
double filter for air renewal (optional)
Connect the fan cable to the J4 connector.
Fig. 13
Absorbed power configuration
SW1
Maximum power
OFF
PoE class 3 (13W max)
ON
Hi-PoE class 4 (25W max)
Tab. 2
According to the absorbed power, the system can
supply the options described in the table (Tab. 3,
page 9).
Fig. 12
8
VERSO Hi PoE IPM Available models and features
Injector
Camera
Demisting
system
Illuminator
Heating
Fan with double
air filter
-10°C / +60°C
(14°F / 140°F)
PoE classe 3
(13W)
PoE max. class
2 (7W)
p
–
–
p
Hi-PoE class 4
(25W)
PoE max. class 3
(13W)
p
p
–
p
PoE classe 3
(13W)
PoE max. class
2 (7W)
p
–
–
–
Hi-PoE class 4
(25W)
PoE max. class 3
(13W)
p
p
–
–
Hi-PoE class 4
(25W)
PoE max. class 3
(13W)
p
–
p
–
-10°C / +50°C
(14°F / 122 F°)
-30°C / +50°C
(-22°F / +122°F)
Tab. 3
8 Switching on
The 6 LEDs shown in the figure allow to check the
product's operating status.
The automatic pre-heating (de-ice) process
could be started whenever the device is
switched on and the air temperature is
below 0°C. This process is used to ensure
that the device works properly even at
low temperatures. The duration ranges
between 60 and 120 minutes, depending
on conditions.
During the lighting phase the device reads the
status of the dip switch and automatically detects
all the connected options for the correct energy
management of the housing.
Fig. 14
Refer to the table to identify the operating status.
9
Instructions manual - English - EN
Operating
temperature
Operating status
LED
LED Status
EN - English - Instructions manual LD1 (Power) Off
LD2 (Camera)
LD3 (Demist)
LD4 (Heater)
LD5 (IR)
LD6 (Cold
Start)
Tab. 4
Apparatus Status
The device is not powered
On
The device is correctly powered
Off
The camera is not connected or
Cold Start is active
On
The camera is correctly powered
1 flashing
The camera has a low identification resistance
2 flashings
The camera has a high identification resistance
5 flashings
The camera has an excessive
energy consumption
9 flashings
The camera requires more energy
than the available
Off
Demisting was not correctly
detected
1 flashing
Standard demisting is inactive
2 flashings
The anti-ice system (optional) is
inactive
On
Demisting, or anti-ice system, is
in function
Off
Heating is not available or power
available is not sufficient
1 flashing
Heating is inactive
On
Heating is active
Off
The illuminator (optional) is not
detected or the available power is
not sufficient
1 flashing
The illuminator is correctly
powered (illuminator activation is
controlled by its photocell)
Off
Heating is not available
1 flashing
The pre-heating procedure is
inactive
On
The pre-heating procedure is
underway
9 Maintaining and cleaning
9.1 Maintaining
9.1.1 Kit for upgrading of the systems
Remove the slide (01), the electronic board (02) and
the heating (03).
01
02
03
Fig. 15
If the housing is provided with blower with double
filter for air renewal it is also necessary to replace the
blower with those equipped in the kit.
Fig. 16
For kit installation information refer to chapter 6
Assembling and installing, page 5.
9.2 Cleaning
9.2.1 Window and plastic cover cleaning
(PC)
Avoid ethyl alcohol, solvents, hydrogenated
hydrocarbide, strong acid and alkali. Such
products may irreparably damage the
surface.
Surface dirt should be rinsed away with water and
then the window cleaned with a neutral soap diluted
with water, or specific products for spectacle lens
cleaning. These should be applied with a soft cloth.
10
This symbol mark and recycle system
are applied only to EU countries and not
applied to the countries in the other area of
the world.
Your product is designed and manufactured with
high quality materials and components which can be
recycled and reused.
This symbol means that electrical and electronic
equipment, at their end-of-life, should be disposed of
separately from your household waste.
Please dispose of this equipment at your local
Community waste collection or Recycling centre.
In the European Union there are separate collection
systems for used electrical and electronic products.
11 Technical data
11.1 General
Entirely made of technopolymer (polycarbonate),
RAL9002 colour
Sunshield in ABS
11.1 Electrical
Power absorbed in input: PoE class 3 (13W) or Hi-PoE
class 4 (25W) selectable with dip switch
Available power for camera (PoE IN class 3): PoE classe
2 (7W)
Available power for camera (Hi-PoE IN class 4): PoE
class 3 (13W) with Ton -10°C ±2°C “cold start” function
Data line: 10/100Base-T
Illuminator GEKO IRH, low power: 6W
Heating: 8W, electronically controlled, Ton 20°C±2°C
(68°F±4°F), Toff 23°C±2°C (73.4°F±4°F)
Fan with thermostat for camera cooling for versions
with double air filter: Ton 35°C±2°C (95°F±4°F), Toff
32°C±2°C (89.6°F±4°F)
Demisting with forced hot air: 5W
Compatible with IEEE 802.3af, IEEE 802.3at/PoE Plus
Compatible with the Power Injector (OHEPOWINJ:
VIDEOTEC optional accessory)
11.2 Environment
Indoor/Outdoor
Maximum temperature range : -30°C/+60°C (140°F)
(refer to the table: Available models and features)
Stainless steel external screws
The correct functioning of the device, within the recommended
temperature range, is ensured using camera and lens with a
temperature range from -10°C (14°F) to +60°C (140°F)
11.2 Mechanical
Resistant to salty fog until 1000 hours (according to
ISO9227)
Cable glands: 1xM12, 1xM16, 1xM20
11.3 Certifications
Epoxypolyester powder painting, RAL9002 colour
Polycarbonate window (WxH): 105x64mm (4.1x2.5in)
Internal usable area (WxHxL): 70x70x230mm
(2.7x2.7x9.0in)
Unit weight: 1.6kg (3.5lb)
CE EN61000-6-4, EN60950-1, EN50130-4
IP66/IP67, EN60529 (with cable glands)
IP66/IP67, EN60529 (with special gaskets and bracket
with internal cable channel)
IP55, EN60529 (with bracket with internal cable
channel)
IP44, EN60529 (for models with double filter for
ventilation)
11
Instructions manual - English - EN
10 Disposal of waste
materials
12 Technical drawings
230
70
USABLE AREA
USABLE
AREA
A-A
B-B
466
156
113
141
B
101
A
129
B
70
The dimensions of the drawings are in millimetres.
A
70
171
73
70
62
70
40
422
Fig. 17
156
VERSO Hi-PoE IPM.
Headquarters Italy Videotec S.p.A.
UK Representative office
Via Friuli, 6 - I-36015 - Schio (VI) Italy
Tel. +39 0445 697411 - Fax +39 0445 697414
Email: [email protected]
Tel./Fax +44 01353 775438 (Sales)
Tel. +44 0113 815 0047 (Technical support)
Tel. +44 0113 815 0031 (Orders/Shipping dept.)
Email: [email protected]
France Videotec France S.à.r.l.
Asia Pacific Videotec (HK) Ltd
Voie du Futur, Zac des Portes - 27100 - Val-de-Reuil, France
Tel. +33 2 32094900 - Fax +33 2 32094901
Email: [email protected]
Unit C 24 Floor - Gold King Industrial Building
35-41, Tai Lin Pai Road - Kwai Chung, NT, Hong Kong
Tel. +852 2333 0601 - Fax +852 2311 0026
Email: [email protected]
Americas Videotec Security, Inc.
35 Gateway Drive, Suite 100 - Plattsburgh, NY 12901 - U.S.A.
Tel. +1 518 825 0020 - Fax +1 518 825 0022
Email: [email protected] - www.videotec.us
www.videotec.com
MNVCHPVHPOE_1331_EN
VERSO Hi-PoE IPM
Custodia in policarbonato con tecnologia IPM per telecamere IP
IT Italiano - Manuale di istruzioni
Sommario
ITALIANO
1 Informazioni sul presente manuale.............................................................................. 3
1.1 Convenzioni tipografiche...................................................................................................................................... 3
2 Note sul copyright e informazioni sui marchi commerciali......................................... 3
3 Norme di sicurezza......................................................................................................... 3
4 Identificazione................................................................................................................ 4
4.1 Descrizione e designazione del prodotto........................................................................................................ 4
4.2 Marcatura del prodotto.......................................................................................................................................... 4
5 Preparazione del prodotto per l'utilizzo....................................................................... 4
5.1 Disimballaggio e contenuto................................................................................................................................. 4
5.1.1 Disimballaggio........................................................................................................................................................................... 4
5.1.2 Contenuto................................................................................................................................................................................... 4
5.2 Smaltimento in sicurezza dei materiali di imballaggio............................................................................... 4
6 Assemblaggio e installazione........................................................................................ 5
6.1 Installazione................................................................................................................................................................ 5
6.1.1 Apertura della custodia.......................................................................................................................................................... 5
6.1.2 Rimozione della slitta.............................................................................................................................................................. 5
6.1.3 Installazione dei pressacavi.................................................................................................................................................. 5
6.1.4 Installazione dell'illuminatore GEKO IRH (opzionale).................................................................................................. 5
6.1.5 Supporti e adattatori............................................................................................................................................................... 6
6.1.1 Installazione della versione con doppio filtro per ricambio dell'aria..................................................................... 6
6.1.2 Installazione del cavo Ethernet........................................................................................................................................... 6
6.1.3 Installazione della telecamera............................................................................................................................................. 7
6.1.4 Collegamento dell'illuminatore GEKO IRH (opzionale)............................................................................................... 7
6.1.5 Collegamento del cavo PoE.................................................................................................................................................. 8
6.1.6 Collegamento del ventilatore con doppio filtro per il ricambio dell'aria (opzionale)..................................... 8
7 Configurazione............................................................................................................... 8
8 Accensione...................................................................................................................... 9
9 Manutenzione e pulizia................................................................................................ 10
9.1 Manutenzione..........................................................................................................................................................10
9.1.1 Kit per ammodernamento degli impianti......................................................................................................................10
9.2 Pulizia..........................................................................................................................................................................10
9.2.1 Pulizia del vetro e delle parti in plastica (PC)................................................................................................................10
10 Smaltimento dei rifiuti............................................................................................... 11
11 Dati tecnici.................................................................................................................. 11
11.1 Generale..................................................................................................................................................................11
11.2 Meccanica...............................................................................................................................................................11
11.1 Elettrico....................................................................................................................................................................11
11.2 Ambiente.................................................................................................................................................................11
11.3 Certificazioni..........................................................................................................................................................11
12 Disegni tecnici............................................................................................................ 12
1 Informazioni sul presente
manuale
1.1 Convenzioni tipografiche
PERICOLO!
Pericolo di esplosione.
Leggere attentamente per evitare pericoli
di esplosione.
PERICOLO!
Pericolosità elevata.
Rischio di scosse elettriche. Prima di
eseguire qualsiasi operazione assicurarsi di
togliere tensione al prodotto, salvo diversa
indicazione.
ATTENZIONE!
Pericolosità media.
L'operazione è molto importante per il
corretto funzionamento del sistema. Si
prega di leggere attentamente la procedura
indicata e di eseguirla secondo le modalità
previste.
INFO
Descrizione delle caratteristiche del
sistema.
Si consiglia di leggere attentamente per
comprendere le fasi successive.
2 Note sul copyright e
informazioni sui marchi
commerciali
I nomi di prodotto o di aziende citati sono marchi
commerciali o marchi commerciali registrati
appartenenti alle rispettive società.
Il produttore declina ogni responsabilità
per eventuali danni derivanti da un
uso improprio delle apparecchiature
menzionate in questo manuale. Si
riserva inoltre il diritto di modificarne il
contenuto senza preavviso. Ogni cura è
stata posta nella raccolta e nella verifica
della documentazione contenuta in questo
manuale, tuttavia il produttore non può
assumersi alcuna responsabilità derivante
dall'utilizzo della stessa. Lo stesso dicasi
per ogni persona o società coinvolta nella
creazione e nella produzione di questo
manuale.
• L'installazione e la manutenzione del dispositivo
deve essere eseguita solo da personale tecnico
qualificato.
• Prima di effettuare interventi tecnici
sull'apparecchio togliere l'alimentazione elettrica.
• Non utilizzare cavi di alimentazione con segni di
usura o invecchiamento.
• Non effettuare per nessun motivo alterazioni o
collegamenti non previsti in questo manuale.
L'uso di apparecchi non idonei può portare a
gravi pericoli per la sicurezza del personale e
dell'impianto.
• Utilizzare solo parti di ricambio originali. Pezzi di
ricambio non originali potrebbero causare incendi,
scariche elettriche o altri pericoli.
• Prima di procedere con l'installazione controllare
che il materiale fornito corrisponda alle specifiche
richieste esaminando le etichette di marcatura (4.2
Marcatura del prodotto, pagina 4).
• L'alimentazione del prodotto deve essere fornita
esclusivamente dal cavo PoE (Power over Ethernet).
• Questo dispositivo è stato progettato per essere
installato in maniera permanente su un edificio o
su una struttura adeguata.
• Si devono rispettare le normative nazionali per
l'installazione del dispositivo.
• Ogni dispositivo che può essere installato
all’interno del prodotto deve essere conforme alle
norme di sicurezza attuali.
3
Manuale di istruzioni - Italiano - IT
Prima di installare e utilizzare questa unità, leggere
attentamente questo manuale. Conservare questo
manuale a portata di mano come riferimento futuro.
3 Norme di sicurezza
• Se l'installazione deve essere di tipo NEMA TYPE
4X, l'installatore deve sostituire i pressacavi del
prodotto con dei pressacavi di tipo NEMA TYPE 4X.
IT - Italiano - Manuale di istruzioni • Per tutte le connessioni, utilizzare cavi idonei a
sopportare temperature di almeno 75°C.
• Il prodotto è progettato per alloggiare solo
telecamere opportunamente certificate.
5 Preparazione del
prodotto per l'utilizzo
Qualsiasi cambiamento non espressamente
approvato dal costruttore fa decadere la
garanzia.
4 Identificazione
5.1 Disimballaggio e contenuto
4.1 Descrizione e designazione
del prodotto
5.1.1 Disimballaggio
La custodia VERSO Hi-PoE IPM sfrutta in maniera
ottimale la tecnologia POE e Hi-POE, utilizzando la
potenza resa disponibilie dal cavo Ethernet come
unica fonte di alimentazione per tutti i dispositivi
gestiti e ottenere così una maggiore affidabilità
e flessibilità dell’impianto network oltre alla
semplificazione nelle operazioni d’installazione e
riduzione dei costi.
Grazie all’innovativo sistema IPM (Intelligent
Power Management), si semplifica e si riducono
sensibilmente i tempi di installazione con l’utilizzo di
un unico cavo Ethernet per il collegamento.
In automatico il sistema Hi-POE IPM rileva tutte le
opzioni presenti, come riscaldamento, ventilatore e
illuminatore, per poi effettuare autonomamente un
bilanciamento della potenza e quindi un’adeguata
distribuzione della stessa ai dispositivi collegati. Viene
così assicurato un funzionamento ottimale della
telecamera IP da -30°C a +60°C, con termoregolazione
e cold start (avvio a basse temperature).
Il sistema IPM offre la possibilità di retrofit su
impianti analogici con custodie già installate, con
il semplice cambio di alloggiamento ed elettronica
interna. Questo permette la conversione in digitale,
ottimizzando i tempi di realizzo dell’installazione
con conseguente riduzione dei costi e dell’impatto
ambientale.
Estremamente semplice da installare, l’apertura
laterale facilita ampiamente l’accesso alla telecamera,
alle ottiche ed a tutte le connessioni interne.
4.2 Marcatura del prodotto
Vedere l’etichetta posta sul prodotto.
4
Alla consegna del prodotto verificare che l'imballo
sia integro e non abbia segni evidenti di cadute o
abrasioni.
In caso di evidenti segni di danno all'imballo
contattare immediatamente il fornitore.
Conservare l'imballo nel caso sia necessario inviare il
prodotto in riparazione.
5.1.2 Contenuto
Controllare che il contenuto sia corrispondente alla
lista del materiale sotto elencata:
• Custodia
• Cablaggio RJ45
• Dotazione per custodia:
• Chiave a brugola
• Distanziali
• Guarnizioni per pressacavi
• Pressacavi (x3)
• Viteria
• Viti per telecamera
• Manuale di istruzioni
5.2 Smaltimento in sicurezza dei
materiali di imballaggio
I materiali d'imballo sono costituiti interamente da
materiale riciclabile. Sarà cura del tecnico installatore
smaltirli secondo le modalità di raccolta differenziata
o comunque secondo le norme vigenti nel Paese di
utilizzo.
In caso di restituzione del prodotto
malfunzionamente è consigliato l'utilizzo
dell'imballaggio originale per il trasporto.
6 Assemblaggio e
installazione
6.1.3 Installazione dei pressacavi
L'assemblaggio e l'installazione vanno
eseguiti solo da personale qualificato.
Il prodotto può essere interfacciato con
dispositivi non prodotti da VIDEOTEC.
VIDEOTEC suggerisce un test prima di
qualsiasi installazione. VIDEOTEC non è
responsabile di qualsiasi ulteriore costo
d’installazione nel caso di problemi di
compatibilità.
All’interno della dotazione sono presenti 3 pressacavi
che devono essere installati sul fondo della custodia
come illustrato in figura. I pressacavi non utilizzati
devono essere sigillati con il tappo di chiusura per
evitare l’ingresso di acqua nella custodia.
6.1 Installazione
6.1.1 Apertura della custodia
Svitare le 2 viti poste sul fianco, far ruotare tettuccio
e corpo superiore attorno all’asse delle cerniere di
apertura.
Fig. 3
Fig. 1
6.1.2 Rimozione della slitta
Per la rimozione della slitta è necessario svitare le viti
di fissaggio come illustrato in figura.
6.1.4 Installazione dell'illuminatore
GEKO IRH (opzionale)
La potenza massima dell'illuminatore non
deve superare i 6W.
Per l’installazione dell’illuminatore è
necessario l’utilizzo del supporto per
illuminatore (OSUPPIR). Il kit deve essere
acquistato separatamente.
Utilizzare il pressacavo o l’anello di tenuta più piccolo
per evitare l’ingresso di acqua nella custodia.
Fig. 2
Per l'installazione dell'illuminatore su custodia fare
riferimento al manuale d’uso ed installazione del
prodotto.
Per ulteriori dettagli sulla configurazione e
l’utilizzo fare riferimento al relativo capitolo (6.1.4
Collegamento dell'illuminatore GEKO IRH (opzionale),
pagina 7).
5
Manuale di istruzioni - Italiano - IT
Con i supporti per passaggio cavi interno
è necessario l’utilizzo del kit di anelli di
tenuta (OWBIP). Lo spazio ridotto non
permette l’utilizzo dei pressacavi forniti
in dotazione. Il kit deve essere acquistato
separatamente.
6.1.2 Installazione del cavo Ethernet
Il prodotto può essere fissato ad un supporto o
adattatore. Per maggiori informazioni fare riferimento
alla scheda tecnica del prodotto o contattare
direttamente VIDEOTEC.
Inserire il cavo Ethernet nella guarnizione e bloccare il
tutto come illustrato in figura.
6.1.1 Installazione della versione con
doppio filtro per ricambio dell'aria
È importante prestare attenzione alla disposizione
delle alette del filtro d’ingresso aria nel momento
dell’installazione.
Fig. 6
Assemblare la guarnizione (01) al pressacavo M20
(02). Fissare il pressacavo al fondo custodia (03)
tramite il dado M20 (04).
Prestare attenzione durante il fissaggio.
Coppia di serraggio: 7Nm max.
Far passare il cavo con connettore RJ45 (05)
attraverso il pressacavo M20 (02). Avvitare il tappo del
pressacavo (06).
04
Fig. 4
01
Il loro orientamento, in funzione dell’angolo di
inclinazione della custodia, deve prevenire la
penetrazione dell’acqua in caso di pioggia.
06
03
Fig. 7
45°
45°
Fig. 5
6
Massima rotazione sull'asse trasversale: 0°.
Massima inclinazione sull'asse longitudinale: +/- 45˚.
02
05
Al fine di garantire il grado di protezione IP44,
installare la custodia al supporto rispettando i limiti di
inclinazione riportati in figura.
0˚
IT - Italiano - Manuale di istruzioni 6.1.5 Supporti e adattatori
6.1.3 Installazione della telecamera
Collegare l’illuminatore al morsetto J6 come descritto
nello schema sottostante.
1
È possibile installare solo telecamere di tipo
PoE.
2
3
Manuale di istruzioni - Italiano - IT
Il corretto funzionamento
dell’apparecchiatura, nel range
temperatura indicato, é garantito con
l’utilizzo di telecamera e ottica con
temperatura da -10° a +60°C.
6.1.4 Collegamento dell'illuminatore
GEKO IRH (opzionale)
4
Fissare la telecamera utilizzando le viti (01) e i
distanziali (02) forniti in dotazione.
Applicare almeno un distanziale per garantire
l’isolamento elettrico tra la slitta e la telecamera.
Posizionare la lente della telecamera a ridosso del
vetro per evitare interferenza visiva o riflessi ottici.
Collegare la telecamera al connettore J2 (PoE OUT)
con il cavo fornito in dotazione (03).
Fig. 10
Collegamento illuminatore GEKO IRH
Illuminatore
03
Morsetto J6
Marrone (telemetria)
1
Blu (telemetria)
2
Bianco (alimentazione)
3
Nero (alimentazione)
4
Tab. 1
02
01
Per la regolazione della soglia di accensione
dell’illuminatore fare riferimento al manuale d’uso ed
installazione del prodotto.
Fig. 8
Riposizionare la slitta nel proprio alloggiamento e
fissare le viti e rondelle precedentemente rimosse.
Fig. 9
7
6.1.5 Collegamento del cavo PoE
7 Configurazione
Prima di alimentare il dispositivo è necessario
impostare la potenza massima assorbita dalla
custodia agendo sul dip-switch SW1.
IT - Italiano - Manuale di istruzioni Collegare il cavo PoE proveniente dal Power Injector
al connettore J1.
Fig. 11
Prima di alimentare il dispositivo è necessario
impostare la potenza massima assorbita
dalla custodia agendo sul dip-switch SW1 (7
Configurazione, pagina 8).
6.1.6 Collegamento del ventilatore con
doppio filtro per il ricambio dell'aria
(opzionale)
Collegare il cavo del ventilatore al connettore J4.
Fig. 12
8
Fig. 13
Configurazione potenza assorbita
SW1
Potenza massima
OFF
PoE classe 3 (13W max)
ON
Hi-PoE classe 4 (25W max)
Tab. 2
In base alla potenza assorbita il sistema può
alimentare le opzioni descritte in tabella (Tab. 3,
pagina 9).
VERSO Hi PoE IPM Modelli disponibili e caratteristiche
Injector
Telecamera
Disappannatore
Illuminatore
Riscaldamento
Ventilatore con
doppio filtro
aria
-10°C / +60°C
PoE classe 3
(13W)
PoE max. classe
2 (7W)
p
–
–
p
Hi-PoE classe 4
(25W)
PoE max. classe
3 (13W)
p
p
–
p
PoE classe 3
(13W)
PoE max. classe
2 (7W)
p
–
–
–
Hi-PoE classe 4
(25W)
PoE max. classe
3 (13W)
p
p
–
–
Hi-PoE classe 4
(25W)
PoE max. classe
3 (13W)
p
–
p
–
-10°C / +50°C
-30°C / +50°C
Manuale di istruzioni - Italiano - IT
Temperatura
d'esercizio
Tab. 3
8 Accensione
La procedura di preriscaldamento
automatico (De-Ice) si potrebbe attivare
tutte le volte che il dispositivo viene acceso
ad una temperatura ambiente inferiore
ai 0°C. La procedura serve a garantire la
corretta funzionalità del dispositivo anche
alle basse temperature. La durata varia tra
60 e 120 minuti a seconda delle condizioni.
I 6 LED illustrati in figura permettono in qualsiasi
momento di verificare lo stato di funzionamento del
prodotto.
Durante la fase di accensione il dispositivo legge
lo stato del dip-switch e rileva in modo automatico
tutte le opzioni collegate per la corretta gestione
energetica della custodia.
Fig. 14
Fare riferimento alla tabella per identificare lo stato di
funzionamento.
9
Stato di funzionamento
LED
Stato LED
IT - Italiano - Manuale di istruzioni LD1 (Power) Spento
LD2 (Camera)
LD3 (Demist)
LD4 (Heater)
LD5 (IR)
LD6 (Cold
Start)
Tab. 4
Stato Apparato
Il dispositivo non è alimentato
Acceso
Il dispositivo è alimentato correttamente
Spento
La telecamera non è connessa o è
attivo il Cold Start
Acceso
La telecamera è alimentata in
modo corretto
1 lampeggio
La telecamera ha una resistenza
di identificazione bassa
2 lampeggi
La telecamera ha una resistenza
di identificazione alta
5 lampeggi
La telecamera ha un consumo
eccessivo
9 lampeggi
La telecamera richiede più potenza di quella disponibile
Spento
Il disappannamento non è stato
rilevato correttamente
1 lampeggio
Il disappannamento standard è
inattivo
2 lampeggi
Il sistema anti-ghiaccio (opzionale) è inattivo
Acceso
Il disappannamento o sistema
anti-ghiaccio è in funzione
Spento
Il riscaldamento non è disponibile
o la potenza disponibile non è
sufficiente
1 lampeggio
Il riscaldamento è inattivo
Acceso
Il riscaldamento è attivo
Spento
L'illuminatore (opzionale) non è
stato rilevato o la potenza disponibile non è sufficiente
1 lampeggio
L'illuminatore è alimentato
correttamente (l'attivazione
dell'illuminatore viene controllata
dalla fotocellula dello stesso)
Spento
Il riscaldamento non è disponibile
1 lampeggio
La procedura di pre-riscaldamento è inattiva
Acceso
La procedura di pre-riscaldamento è in funzione
9 Manutenzione e pulizia
9.1 Manutenzione
9.1.1 Kit per ammodernamento degli
impianti
Rimuovere la slitta (01), la scheda elettronica (02) e il
riscaldamento (03).
01
02
03
Fig. 15
Se la custodia è provvista di ventilatore con doppio
filtro per il ricambio dell'aria è necessario sostituire
anche il ventilatore con quello fornito nel kit.
Fig. 16
Per l’installazione del kit fare riferimento al capitolo 6
Assemblaggio e installazione, pagina 5.
9.2 Pulizia
9.2.1 Pulizia del vetro e delle parti in
plastica (PC)
Evitare alcool etilico, solventi, idrocarburi
idrogenati, acidi forti e alcali. L’utilizzo
di detti prodotti danneggia in modo
irreparabile la superficie trattata.
Si consigliano saponi neutri diluiti con acqua o
prodotti specifici per la pulizia delle lenti degli
occhiali con l’utilizzo di un panno morbido.
10
10 Smaltimento dei rifiuti
Il vostro prodotto è costruito con materiali e
componenti di alta qualità, che sono riutilizzabili o
riciclabili.
Prodotti elettrici ed elettronici che portano questo
simbolo alla fine dell'uso devono essere smaltiti
separatamente dai rifiuti casalinghi.
Potenza assorbita in ingresso: PoE classe 3 (13W)
oppure Hi-PoE classe 4 (25W) selezionabile da dipswitch
Potenza disponibile per telecamera (PoE IN classe 3):
PoE classe 2 (7W)
Potenza disponibile per telecamera (Hi-PoE IN classe
4): PoE classe 3 (13W) con funzione "cold start" Ton
-10°C ±2°C
Linea dati: 10/100Base-T
Illuminatore GEKO IRH a bassa potenza: 6W
Vi preghiamo di smaltire questo apparecchio in un
Centro di raccolta o in un'Ecostazione.
Riscaldamento: 8W, controllato elettronicamente, Ton
20°C±2°C, Toff 23°C±2°C
Nell'Unione Europea esistono sistemi di raccolta
differenziata per prodotti elettrici ed elettronici.
Ventilatore termostatato per raffreddamento della
telecamera per versioni con doppio filtro: Ton
35°C±2°C, Toff 32°C±2°C
11 Dati tecnici
11.1 Generale
Costruita in resistente tecnopolimero (policarbonato),
colore RAL9002
Tettuccio in ABS
Verniciatura a polveri di epossipoliestere, colore
RAL9002
Viteria esterna in acciaio inox
11.2 Meccanica
Pressacavi: 1xM12, 1xM16, 1xM20
Finestra in policarbonato (WxH): 105x64mm
Dimensioni utili interne (WxHxL): 70x70x230mm
Peso unitario: 1.6kg
Disappannamento ad aria calda forzata: 5W
Compatibile con IEEE 802.3af, IEEE 802.3at/PoE Plus
Compatibile con Power Injector (OHEPOWINJ:
accessorio opzionale VIDEOTEC)
11.2 Ambiente
Interno/Esterno
Range massimo di temperatura : -30°C/+60°C
(fare riferimento alla tabella: Modelli disponibili e
caratteristiche)
Il corretto funzionamento dell’apparecchiatura, nel range
temperatura indicato, é garantito con l’utilizzo di telecamera e ottica
con range di temperatura da -10° a +60°C.
Resistente alle nebbie saline fino a 1000 ore (secondo
norma ISO9227)
11.3 Certificazioni
CE EN61000-6-4, EN60950-1, EN50130-4
IP66/IP67, EN60529 (con pressacavi)
IP66/IP67, EN60529 (con passaggio interno cavi con
anelli di tenuta)
IP55, EN60529 (con supporto con passaggio interno
cavi)
IP44, EN60529 (per modelli con doppio filtro per
ventilazione)
11
Manuale di istruzioni - Italiano - IT
Questo simbolo e il sistema di riciclaggio
sono validi solo nei paesi dell'EU e non
trovano applicazione in altri paesi del
mondo.
11.1 Elettrico
12 Disegni tecnici
230
70
AREA UTILE
AREA
UTILE
A-A
B-B
466
156
113
141
B
101
A
129
B
70
Le dimensioni dei disegni sono espresse in millimetri.
A
70
171
73
70
62
70
40
422
Fig. 17
156
VERSO Hi-PoE IPM.
Headquarters Italy Videotec S.p.A.
UK Representative office
Via Friuli, 6 - I-36015 - Schio (VI) Italy
Tel. +39 0445 697411 - Fax +39 0445 697414
Email: [email protected]
Tel./Fax +44 01353 775438 (Sales)
Tel. +44 0113 815 0047 (Technical support)
Tel. +44 0113 815 0031 (Orders/Shipping dept.)
Email: [email protected]
France Videotec France S.à.r.l.
Asia Pacific Videotec (HK) Ltd
Voie du Futur, Zac des Portes - 27100 - Val-de-Reuil, France
Tel. +33 2 32094900 - Fax +33 2 32094901
Email: [email protected]
Unit C 24 Floor - Gold King Industrial Building
35-41, Tai Lin Pai Road - Kwai Chung, NT, Hong Kong
Tel. +852 2333 0601 - Fax +852 2311 0026
Email: [email protected]
Americas Videotec Security, Inc.
35 Gateway Drive, Suite 100 - Plattsburgh, NY 12901 - U.S.A.
Tel. +1 518 825 0020 - Fax +1 518 825 0022
Email: [email protected] - www.videotec.us
www.videotec.com
MNVCHPVHPOE_1331_IT
VERSO Hi-PoE IPM
Caisson en polycarbonate avec technologie IPM pour caméras IP
FR Français - Manuel d’instructions
Sommaire
FRANÇAIS
1 À propos de ce mode d’emploi...................................................................................... 3
1.1 Conventions typographiques.............................................................................................................................. 3
2 Notes sur le copyright et informations sur les marques de commerce...................... 3
3 Normes de securité......................................................................................................... 3
4 Identification................................................................................................................... 4
4.1 Description et désignation du produit............................................................................................................. 4
4.2 Marquage du produit.............................................................................................................................................. 4
5 Préparation du produit en vue de l’utilisation............................................................. 4
5.1 Déballage et contenu.............................................................................................................................................. 4
5.1.1 Déballage.................................................................................................................................................................................... 4
5.1.2 Contenu....................................................................................................................................................................................... 4
5.2 Élimination sans danger des matériaux d’emballage.................................................................................. 4
6 Assemblage et installation............................................................................................ 5
6.1 Installation................................................................................................................................................................... 5
6.1.1 Ouverture du caisson.............................................................................................................................................................. 5
6.1.2 Retrait de la glissière................................................................................................................................................................ 5
6.1.3 Installation des presse-étoupes.......................................................................................................................................... 5
6.1.4 Installation du projecteur GEKO IRH (en option).......................................................................................................... 5
6.1.5 Supports et adaptateurs........................................................................................................................................................ 6
6.1.1 Installation de la version avec double filtre pour le changement d'air................................................................. 6
6.1.2 Installation du câble Ethernet.............................................................................................................................................. 6
6.1.3 Installation de la caméra........................................................................................................................................................ 7
6.1.4 Branchement du projecteur GEKO IRH (en option)...................................................................................................... 7
6.1.5 Branchement du câble PoE................................................................................................................................................... 8
6.1.6 Branchement du ventilateur avec double filtre pour le changement d'air (en option).................................. 8
7 Configuration.................................................................................................................. 8
8 Allumage......................................................................................................................... 9
9 Entretien et nettoyage................................................................................................. 10
9.1 Entretien.....................................................................................................................................................................10
9.1.1 Kit pour modernisation des systèmes.............................................................................................................................10
9.2 Nettoyage..................................................................................................................................................................10
9.2.1 Entretiens de la vitre et des parties en plastique (PC)...............................................................................................10
10 Élimination des déchets............................................................................................. 11
11 Données techniques................................................................................................... 11
11.1 Généralités..............................................................................................................................................................11
11.2 Mécanique..............................................................................................................................................................11
11.1 Électrique................................................................................................................................................................11
11.2 Environnement.....................................................................................................................................................11
11.3 Certifications..........................................................................................................................................................11
12 Dessins techniques..................................................................................................... 12
1 À propos de ce mode
d’emploi
Avant d’installer et d’utiliser cet appareil, veuillez
lire attentivement ce mode d’emploi. Conservez-le à
portée de main pour pouvoir vous y reporter en cas
de besoin.
DANGER!
Danger d’explosion.
Lire avec attention pour éviter tout risque
d’explosion.
DANGER!
Risque élevé.
Risque de choc électrique. Sauf indication
contraire, sectionner l'alimentation avant
de procéder à toute opération.
ATTENTION!
Risque moyen.
Opération extrêmement importante en vue
d’un fonctionnement correct du système;
lire avec attention les opérations indiquées
et s’y conformer rigoureusement.
REMARQUE
Description des caractéristiques du
système.
Il est conseillé de procéder à une
lecture attentive pour une meilleure
compréhension des phases suivantes.
2 Notes sur le copyright
et informations sur les
marques de commerce
Les noms de produit ou de sociétés cités sont des
marques de commerce ou des marques de commerce
enregistrées.
Le producteur décline toute responsabilité
pour les dommages éventuels dus à une
utilisation non appropriée des appareils
mentionnés dans ce manuel. On réserve
en outre le droit d’en modifier le contenu
sans préavis. La documentation contenue
dans ce manuel a été rassemblée et vérifiée
avec le plus grand soin, cependant, le
producteur ne peut pas s’assumer aucune
responsabilité dérivante de l’emploi de
celle là. La même chose vaut pour chaque
personne ou société impliquées dans la
création et la production de ce manuel.
• L’installation et l’entretien du dispositif doivent
être exclusivement être effectués par un personnel
technique qualifié.
• Sectionner l’alimentation électrique avant toute
intervention technique sur l’appareil.
• Ne pas utiliser de câbles d’alimentation usés ou
endommagés.
• Ne procéder sous aucun prétexte à des
modifications ou des connexions non prévues
dans ce manuel. L'utilisation d’appareils non
adéquats peut comporter des dangers graves pour
la sécurité du personnel et de l’installation.
• Utiliser uniquement des pièces de rechange
d’origine. Les pièces non d’origine peuvent être
source d’incendies, de choc électrique ou autres.
• Avant de procéder à l’installation, contrôler que
le matériel fourni correspond à la commande
et examiner les étiquettes de marquage (4.2
Marquage du produit, page 4).
• L'alimentation du produit doit être fournie
exclusivement par le câble PoE (Power over
Ethernet).
• Cette appareil est conçu pour une installation
permanente sur un bâtiment ou une structure
adéquate.
• Il faut respecter les législations nationales pour
l'installation du dispositif.
• Chaque appareils pouvant être installés à l'intérieur
du produit doivent être conformes aux normes de
sécurité en vigueur.
3
Manuel d'instructions - Français - FR
1.1 Conventions typographiques
3 Normes de securité
• Si l'installation doit être de type NEMA TYPE 4X,
l'installateur devra remplacer les presse-étoupes
du produit avec des presse-étoupes de type NEMA
TYPE 4X.
FR - Français - Manuel d'instructions • Pour tous les branchements, utiliser les câbles
spécifiques pouvant résister à des températures
d'au moins 75°C.
5 Préparation du produit en
vue de l’utilisation
Toute modification non approuvée
expressément par le fabricant entraînera
l’annulation de la garantie.
• Le projet a été conçu pour ne loger que des
caméras dûment certifiées.
5.1 Déballage et contenu
4 Identification
5.1.1 Déballage
4.1 Description et désignation du
produit
Le caisson VERSO Hi-PoE IPM exploite de manière
optimale la technologie POE et Hi-POE, en utilisant
la puissance de sortie disponible à travers le câble
Ethernet comme unique source d'alimentation pour
tous les dispositifs gérés de manière à obtenir une
plus grande fiabilité et flexibilité de l'installation
network, en plus de la simplification des opérations
d'installation et de la réduction des coûts.
Grâce au système innovant IPM (Intelligent Power
Management), les temps d'installation sont réduits
sensiblement par l'utilisation d'un câble Ethernet
unique pour le raccordement.
Le système Hi-POE IPM détecte automatiquement
toutes les options présentes, comme le chauffage,
le ventilateur et le projecteur, pour effectuer
ensuite de manière autonome un équilibrage de la
puissance, et donc une distribution adéquate de
celle-ci aux dispositifs raccordés. Cela garantit un
fonctionnement optimal des caméras IP de -30°c à +
60°C, avec régulation thermique et cold start (mise en
marche à basse température).
Le système IPM offre la possibilité de retrofit sur
les installations analogiques avec des caissons
déjà installés, grâce au simple changement de la
glissière et d'électronique interne. Ceci permet la
conversion au format numérique, optimisant ainsi
les temps de réalisation de l'installation, avec une
réduction conséquente des coûts et de l'impact
environnemental.
Très simple à installer, l'ouverture latérale facilite
largement l'accès à la caméra, aux optiques et à
toutes les connexions internes.
4.2 Marquage du produit
Voir l'étiquette positionné sur le produit.
4
Lors de la livraison du produit, vérifier que
l’emballage est en bon état et l’absence de tout signe
évident de chute ou d’abrasion.
En cas de dommages évidents, contacter
immédiatement le fournisseur.
Conserver l’emballage en cas de nécessité
d’expédition du produit pour réparation.
5.1.2 Contenu
Contrôler que le contenu correspond à la liste
matériel indiquée ci-dessous:
• Caisson
• Câblage RJ45
• Dotation pour caisson:
• Clé Allen
• Entretoises
• Joints pour presse-étoupes
• Presse-étoupes (x3)
• Vis
• Vis pour caméra
• Manuel d'instructions
5.2 Élimination sans danger des
matériaux d’emballage
Le matériel d’emballage est entièrement composé
de matériaux recyclables. Le technicien chargé de
l’installation est tenu de l’éliminer conformément aux
dispositions en matière de collecte sélective et selon
les normes en vigueur dans le pays d’utilisation.
En cas de retour du produit défectueux, il est
conseillé d'utiliser l'emballage original pour le
transport.
6 Assemblage et
installation
6.1.3 Installation des presse-étoupes
Avec les supports pour passage des câbles
interne, vous devez utiliser le kit de bagues
d'étanchéité (OWBIP). L'espace réduit ne
permet pas d'utiliser les presse-étoupes
fournis avec l'équipement. Le kit doit être
acheté séparément.
L’assemblage et l’installation doivent être
effectués par un personnel qualifié.
Dans les équipements, 3 presse-étoupes sont
présents; ils doivent être installés au fond du caisson
comme illustré en figure. Les presse-étoupes non
utilisés doivent être scellés à l'aide du bouchon de
fermeture afin d'éviter que de l'eau puisse rentrer
dans le caisson.
Manuel d'instructions - Français - FR
Le produit peut être interfacée avec
dispositifs pas manufacturé par VIDEOTEC.
VIDEOTEC conseille par conséquent de
procéder à un essai avant toute installation.
VIDEOTEC décline toute responsabilité
en cas de coûts d’installations
supplémentaires entraînés par des
problèmes de compatibilité.
6.1 Installation
6.1.1 Ouverture du caisson
Dévisser les 2 vis placées sur le côté, faire tourner le
toit pare-soleil et le corps supérieur autour de l’axe
des charnières d’ouverture.
Fig. 3
Fig. 1
6.1.2 Retrait de la glissière
Pour retirer la glissière, il faut dévisser les vis de fixage
comme illustré en figure.
6.1.4 Installation du projecteur GEKO
IRH (en option)
La puissance maximale du projecteur ne
doit pas dépasser les 6W.
Pour l'installation du projecteur, il faut
utiliser le support pour projecteur
(OSUPPIR). Le kit doit être acheté
séparément.
Utiliser le presse-étoupe ou la bague d'étanchéité la
plus petite afin d'éviter que de l'eau puisse rentrer
dans le caisson.
Fig. 2
Pour l'installation du projecteur sur le caisson, se
référer au manuel d'utilisation et installation du
produit.
Pour de plus amples informations quant à la
configuration et l'utilisation, consulter le chapitre
spécifique (6.1.4 Branchement du projecteur GEKO
IRH (en option), page 7).
5
6.1.5 Supports et adaptateurs
6.1.2 Installation du câble Ethernet
Le produit peut être fixé à un support ou adaptateur.
Pour de plus amples informations, se référer à la
fiche technique du produit ou contacter directement
VIDEOTEC.
Insérer le câble Ethernet dans le joint de protection et
les bloquer comme illustré en figure.
Il est important contrôler la disposition des ailettes
du filtre d’entrée d’air lors de l’installation.
Fig. 6
Assembler la garniture (01) au presse-étoupe M20
(02). Fixer le presse-étoupe au fond du caisson (03)
via l'écrou M20 (04).
Faire attention pendant la fixation. Couple
de serrage: 7Nm max.
Faire passer le câble avec connecteur RJ45 (05) à
travers le presse-étoupe M20 (02). Serrer le bouchon
du presse-étoupe (06).
Fig. 4
04
01
L’orientation des ailettes en fonction de l’angle
d’inclinaison du caisson doit empêcher toute entrée
d’eau en cas de pluie.
06
03
Fig. 7
45°
45°
Fig. 5
6
Rotation maxi sur l’axe transversal: 0°.
Inclination maximal sul l’axe longitudinal: +/- 45˚.
02
05
Pour garantir un degré de protection IP44, installer
le caisson au support en respectant les limites
d'inclinaison selon la figure.
0˚
FR - Français - Manuel d'instructions 6.1.1 Installation de la version avec
double filtre pour le changement d'air
6.1.3 Installation de la caméra
Le fonctionnement correct, dans la gamme
de température indiquée, est assuré avec
l’utilisation de caméra et optique avec
température de -10°C jusqu’à +60°C.
6.1.4 Branchement du projecteur GEKO
IRH (en option)
Brancher le projecteur à la borne J6 comme décrit
dans le schéma ci-dessous.
1
Vous ne pouvez installer que des caméras
de type PoE.
2
3
4
Manuel d'instructions - Français - FR
Fixer la caméra en utilisant les vis (01) et les
entretoises (02) fournies avec l'équipement.
Appliquer au moins une entretoise afin de garantir
l'isolement électrique entre la glissière et la caméra.
Placer la lentille de la caméra à l'abri du verre pour
éviter toute interférence visuelle ou des reflets
optiques.
Brancher la caméra au connecteur J2 (PoE OUT) à
l'aide du câble fourni avec l'équipement (03).
03
Fig. 10
Branchement projecteur GEKO IRH
Projecteur
Borne J6
Marron (télémétrie)
1
Bleue (télémétrie)
2
Blanc (alimentation)
3
Noir (alimentation)
4
Tab. 1
02
01
Pour le réglage du seuil d'allumage du projecteur,
se référer au manuel d'utilisation et installation du
produit.
Fig. 8
Replacer la glissière dans son emplacement et fixer
les vis et rondelles enlevé précédemment.
Fig. 9
7
6.1.5 Branchement du câble PoE
FR - Français - Manuel d'instructions Brancher le câble PoE provenant de Power Injector au
collecteur J1.
7 Configuration
Avant d'alimenter le dispositif, il faut régler la
puissance maximale absorbée par le caisson en
agissant sur le dip-switch SW1.
Fig. 11
Avant d'alimenter le dispositif, il faut régler la
puissance maximale absorbée par le caisson en
agissant sur le dip-switch SW1 (7 Configuration, page 8).
6.1.6 Branchement du ventilateur avec
double filtre pour le changement d'air
(en option)
Brancher le câble du ventilateur au connecteur J4.
Fig. 12
8
Fig. 13
Configuration puissance absorbée
SW1
Puissance maximale
OFF
PoE classe 3 (13W max)
ON
Hi-PoE classe 4 (25W max)
Tab. 2
En fonction de la puissance absorbée, le système
peut alimenter les options décrites dans le tableau (
Tab. 3, page 9).
VERSO Hi PoE IPM Modèles disponibles et caractéristiques
Injector
Caméra
Désembueur
Projecteur
Chauffage
Ventilateur
avec double
filtre à air
-10°C / +60°C
PoE classe 3
(13W)
PoE max. classe
2 (7W)
p
–
–
p
Hi-PoE classe 4
(25W)
PoE max. classe
3 (13W)
p
p
–
p
PoE classe 3
(13W)
PoE max. classe
2 (7W)
p
–
–
–
Hi-PoE classe 4
(25W)
PoE max. classe
3 (13W)
p
p
–
–
Hi-PoE classe 4
(25W)
PoE max. classe
3 (13W)
p
–
p
–
-10°C / +50°C
-30°C / +50°C
Manuel d'instructions - Français - FR
Température
de fonctionnement:
Tab. 3
8 Allumage
La procédure de préchauffage automatique
(De-Ice) peut être activée chaque fois
que le dispositif est mis en fonction à
une température ambiante inférieure
à 0°C. La procédure permet de garantir
un fonctionnement correct du dispositif
également à basse température. La durée
varie entre 60 et 120 minutes en fonction
des conditions.
Les 6 LED illustrés sur la figure permettent à tout
moment de vérifier l'état de fonctionnement du
produit.
Lors de l'allumage, le dispositif lit l'état du dip-switch
et relève automatiquement toutes les options reliées
pour la bonne gestion énergétique du caisson.
Fig. 14
Se référer au tableau afin d'identifier l'état de
fonctionnement.
9
État de fonctionnement
LED
État LED
LD1 (Power) Éteint
FR - Français - Manuel d'instructions LD2 (Camera)
LD3 (Demist)
LD4 (Heater)
LD5 (IR)
LD6 (Cold
Start)
Tab. 4
État Appareil
Le dispositif n'est pas alimenté
Allumé
Le dispositif est alimenté correctement
Éteint
La caméra n'est pas branchée ou
le Cold Start est actif
Allumé
La caméra est alimentée correctement
1 clignotement
La caméra a une résistance
d'identification basse
2 clignotements
La caméra a une résistance
d'identification haute
5 clignotements
La caméra consomme de manière
excessive
9 clignotements
La caméra demande plus de
puissance par rapport à celle
disponible
Éteint
Le désembuage n'a pas été
détecté correctement
1 clignotement
Le désembuage standard est
inactif
2 clignotements
Le système antigivrant (en
option) est inactif
Allumé
Le désembuage ou système
antigivrant est en marche
Éteint
Le chauffage n'est pas disponible
ou la puissance disponible est
insuffisante
1 clignotement
Le chauffage est inactif
Allumé
Le chauffage est actif
Éteint
Le projecteur (en option) n'a
pas été détecté ou la puissance
disponible est insuffisante
1 clignotement
Le projecteur est alimenté
correctement (l'activation du
projecteur est contrôlée par sa
photocellule)
Éteint
Le chauffage n'est pas disponible
1 clignotement
La procédure de préchauffage
est inactive
Allumé
La procédure de préchauffage est
en marche
9 Entretien et nettoyage
9.1 Entretien
9.1.1 Kit pour modernisation des
systèmes
Retirer la glissière (01), la fiche électronique (02) et le
chauffage (03).
01
02
03
Fig. 15
Si le caisson est équipé de ventilateur avec double
filtre, il faut remplacer le ventilateur par celui fourni
dans le kit.
Fig. 16
Pour l'installation du kit, se référer au chapitre 6
Assemblage et installation, page 5.
9.2 Nettoyage
9.2.1 Entretiens de la vitre et des parties
en plastique (PC)
On doit éviter alcool éthylique, solvants,
hydrocarbures hydro-génés, acides forts
et alcali. L’emploi de ce type de produits
abîme d’une façon irréparable la surface
traitée.
Nous conseillons l’emploi, avec un chiffon souple,
de savons neutres dilués avec de l’eau ou bien de
produits spécifiques pour le nettoyage des vitres de
lunettes.
10
10 Élimination des déchets
Ce symbole et le système de recyclage ne
sont appliqués que dans les pays UE et non
dans les autres pays du monde.
Ce symbole signifie que les équipements électriques
et électroniques en fin de vie doivent être éliminés
séparément des ordures ménagères.
Puissance absorbée en entrée.: PoE classe 3 (13W) ou
Hi-PoE classe 4 (25W) sélectionnable par dip switch
Puissance disponible pour caméra (PoE IN classe 3):
PoE classe 2 (7W)
Puissance disponible pour caméra (Hi-PoE IN classe
4): PoE classe 3 (13 W) avec fonction « cold start » Ton
-10°C ±2°C
Ligne données: 10/100Base-T
Projecteur GEKO IRH basse puissance: 6W
Nous vous prions donc de confier cet équipement à
votre Centre local de collecte ou Recyclage.
Chauffage: 8W, contrôlé électroniquement, Ton
20°C±2°C, Toff 23°C±2°C
Dans l’Union Européenne, il existe des systèmes
sélectifs de collecte pour les produits électriques et
électroniques usagés.
Ventilateur avec thermostat pour le refroidissement
de la caméra pour les versions avec double filtre: Ton
35°C±2°C, Toff 32°C±2°C
11 Données techniques
Désembuage à air chaud forcé: 5W
Compatible avec IEEE 802.3af, IEEE 802.3at/PoE Plus
11.1 Généralités
Compatible avec le Power Injector à PoE
(OHEPOWINJ: accessoire VIDEOTEC en option)
Construction en technopolymère (polycarbonate),
couleur RAL9002
11.2 Environnement
Double toit en ABS
Intérieur/Extérieur
Vernissage avec poudres époxypolyester, couleur
RAL9002
Plage de température maximale : -30°C/+60°C
(se reporter au tableau: Modèles disponibles et
caractéristiques)
Visserie extérieure en acier inox
11.2 Mécanique
Presse-étoupes: 1xM12, 1xM16, 1xM20
Fenêtre en polycarbonate (WxH): 105x64mm
Surface intérieure utile (WxHxL): 70x70x230mm
Poids net: 1.6kg
Le fonctionnement correct de l'appareil, dans la plage de température
indiquée, est garanti par l'utilisation d'une caméra et d'une optique
caractérisées par une plage de température allant de -10° à +60°C.
Résistant aux brumes salines jusqu’à 1000 heures
(selon la norme ISO9227)
11.3 Certifications
CE EN61000-6-4, EN60950-1, EN50130-4
IP66/IP67, EN60529 (avec presse-étoupes)
IP66/IP67, EN60529 (avec support avec passage
interne des câbles et avec anneaux d’étanchéité)
IP55, EN60529 (avec support avec passage interne
des câbles)
IP44, EN60529 (pour modèle avec double filtre pour
ventilation)
11
Manuel d'instructions - Français - FR
Votre produit est conçu et fabriqué avec des matèriels
et des composants de qualité supérieure qui peuvent
être recyclés et réutilisés.
11.1 Électrique
12 Dessins techniques
230
70
SURFACE UTILE
SURFACE
UTILE
A-A
B-B
466
156
113
141
B
101
A
129
B
70
Les dimensions des dessins sont exprimées en millimètres.
A
70
171
73
70
62
70
40
422
Fig. 17
156
VERSO Hi-PoE IPM.
Headquarters Italy Videotec S.p.A.
UK Representative office
Via Friuli, 6 - I-36015 - Schio (VI) Italy
Tel. +39 0445 697411 - Fax +39 0445 697414
Email: [email protected]
Tel./Fax +44 01353 775438 (Sales)
Tel. +44 0113 815 0047 (Technical support)
Tel. +44 0113 815 0031 (Orders/Shipping dept.)
Email: [email protected]
France Videotec France S.à.r.l.
Asia Pacific Videotec (HK) Ltd
Voie du Futur, Zac des Portes - 27100 - Val-de-Reuil, France
Tel. +33 2 32094900 - Fax +33 2 32094901
Email: [email protected]
Unit C 24 Floor - Gold King Industrial Building
35-41, Tai Lin Pai Road - Kwai Chung, NT, Hong Kong
Tel. +852 2333 0601 - Fax +852 2311 0026
Email: [email protected]
Americas Videotec Security, Inc.
35 Gateway Drive, Suite 100 - Plattsburgh, NY 12901 - U.S.A.
Tel. +1 518 825 0020 - Fax +1 518 825 0022
Email: [email protected] - www.videotec.us
www.videotec.com
MNVCHPVHPOE_1331_FR
VERSO Hi-PoE IPM
Polykarbonat-Gehäuse mit IPM-Technologie für IP-Videokameras
DE Deutsch - Bedienungslanleitung
Inhaltsverzeichnis
DEUTSCH
1 Allgemeines.................................................................................................................... 3
1.1 Schreibweisen............................................................................................................................................................ 3
2 Anmerkungen zum Copyright und Informationen zu den Handelsmarken.............. 3
3 Sicherheitsnormen......................................................................................................... 3
4 Identifizierung................................................................................................................ 4
4.1 Beschreibung und Bezeichnung des Produktes............................................................................................ 4
4.2 Kennzeichnung des Produkts.............................................................................................................................. 4
5 Vorbereitung des Produktes auf den Gebrauch........................................................... 4
5.1 Entfernen der Verpackung und Inhalt............................................................................................................... 4
5.1.1 Entfernen der Verpackung.................................................................................................................................................... 4
5.1.2 Inhalt............................................................................................................................................................................................. 4
5.2 Sichere Entsorgung der Verpackungsmaterialien........................................................................................ 4
6 Zusammenbau und Installation.................................................................................... 5
6.1 Installation................................................................................................................................................................... 5
6.1.1 Öffnung des Schutzgehause................................................................................................................................................ 5
6.1.2 Entfernen des Schlittens........................................................................................................................................................ 5
6.1.3 Installation der Kabelschellen.............................................................................................................................................. 5
6.1.4 Installation des Scheinwerfers GEKO IRH (optional).................................................................................................... 5
6.1.5 Halterungen und Adaptermodule..................................................................................................................................... 6
6.1.1 Installation der Version mit Doppelfilter für den Luftaustausch............................................................................. 6
6.1.2 Installation des Ethernet-Kabels......................................................................................................................................... 6
6.1.3 Installation der Kamera.......................................................................................................................................................... 7
6.1.4 Anschluss des Scheinwerfers GEKO IRH (Sonderausstattung)................................................................................. 7
6.1.5 Anschluss des PoE-Kabels..................................................................................................................................................... 8
6.1.6 Anschluss des Lüfters mit Doppelfilter für den Luftaustausch (Sonderausstattung)...................................... 8
7 Konfiguration.................................................................................................................. 8
8 Einschaltung................................................................................................................... 9
9 Wartung und Reinigung............................................................................................... 10
9.1 Wartung......................................................................................................................................................................10
9.1.1 Bausatz für die Modernisierung der Anlagen..............................................................................................................10
9.2 Reinigung..................................................................................................................................................................10
9.2.1 Reinigung des Glases und der Kunststoffteile (PC)....................................................................................................10
10 Müllentsorgungsstellen............................................................................................. 11
11 Technische Daten........................................................................................................ 11
11.1 Allgemeines............................................................................................................................................................11
11.2 Mechanik.................................................................................................................................................................11
11.1 Elektrik......................................................................................................................................................................11
11.2 Umgebung.............................................................................................................................................................11
11.3 Zertifizierungen....................................................................................................................................................11
12 Technische Zeichnungen........................................................................................... 12
1 Allgemeines
Lesen Sie bitte vor dem Installieren und dem
Verwenden dieses Gerätes die Bedienungsanleitung
sorgfältig durch. Bewahren Sie sie zum späteren
Nachschlagen auf.
1.1 Schreibweisen
GEFAHR!
Erhöhte Gefährdung.
Stromschlaggefahr. Falls nichts anderes
angegeben, unterbrechen Sie die
Stromversorgung, bevor die beschriebenen
Arbeiten durchgeführt werden.
ACHTUNG!
Mittlere Gefährdung.
Der genannte Vorgang hat große
Bedeutung für den einwandfreien Betrieb
des Systems: es wird gebeten, sich die
Verfahrensweise anzulesen und zu
befolgen.
ANMERKUNG
Beschreibung der Systemmerkmale.
Eine sorgfältige Lektüre wird empfohlen,
um das Verständnis der folgenden Phasen
zu gewährleisten.
2 Anmerkungen
zum Copyright und
Informationen zu den
Handelsmarken
Die angeführten Produkt- oder Firmennamen sind
Handelsmarken oder eingetragene Handelsmarken.
Der Hersteller lehnt jede Haftung für
eventuelle Schäden ab, die aufgrund
unsachgemäßer Anwendung der in diesem
Handbuch erwähnten Geräte entstanden
ist. Ferner behält er sich das Recht vor, den
Inhalt ohne Vorkündigung abzuändern.
Die Dokumentation in diesem Handbuch
wurde sorgfältig ausgeführt und überprüft,
dennoch kann der Hersteller keine Haftung
für die Verwendung übernehmen. Dasselbe
gilt für jede Person oder Gesellschaft, die
bei der Schaffung oder Produktion von
diesem Handbuch miteinbezogen ist.
• Die Installation und Wartung der Vorrichtung ist
technischen Fachleuten vorbehalten.
• Vor technischen Eingriffen am Gerät muss die
Stromversorgung unterbrochen werden.
• Es dürfen keine Versorgungskabel mit Verschleißoder Alterungsspuren verwendet werden.
• Unter keinen Umständen dürfen Veränderungen
oder Anschlüsse vorgenommen werden, die
in diesem Handbuch nicht genannt sind. Der
Gebrauch ungeeigneten Geräts kann die Sicherheit
des Personals und der Anlage schwer gefährden.
• Es dürfen nur Original-Ersatzteile verwendet
werden. Nicht originale Ersatzteile können zu
Bränden, elektrischen Entladungen oder anderen
Gefahren führen.
• Vor der Installation ist anhand des
Kennzeichnungsschildes nachzuprüfen, ob das
gelieferte Material die gewünschten Eigenschaften
(4.2 Kennzeichnung des Produkts, Seite 4).
• Die Stromversorgung des Produkts darf
ausschließlich über das PoE-Kabel erfolgen. (Power
over Ethernet).
• Die Einrichtung ist für den dauerhaften Einbau in
ein Gebäude oder eine andere geeignete Struktur
konzipiert.
• Die nationalen Vorschriften für die Installation der
Einrichtung sind einzuhalten.
• Jede Art in das Produkt installierbares Gerät muss
den geltenden Sichereitsnormen genügen.
3
Bedienungslanleitung - Deutsch - DE
GEFAHR!
Explosionsgefahr.
Aufmerksam durchlesen, um
Explosionsrisiken zu vermeiden.
3 Sicherheitsnormen
• Bei einer Installation vom Typ NEMA TYPE 4X
müssen die Kabelschellen des Produkts durch
Kabelschellen vom Typ NEMA TYPE 4X ersetzt
werden.
• Benutzen Sie für alle Verbindungen Kabel, die bis
mindestens 75°C hitzebeständig sind.
• Das Produkt kann nur für entsprechend zertifizierte
Kameras benutzt werden.
DE - Deutsch - Bedienungslanleitung 4 Identifizierung
4.1 Beschreibung und
Bezeichnung des Produktes
Das Gehäuse VERSO Hi-PoE IPM nützt die PoE und HiPoE-Technologie optimal aus, da es die vom EthernetKabel, das als einzige Versorgungsquelle für alle
gesteuerten Vorrichtungen vorgesehen ist, gelieferte
Leistung verwendet und somit, abgesehen von einer
Vereinfachung der Installationstätigkeiten und einer
Kostenreduzierung, auch eine höhere Zuverlässigkeit
und Flexibilität der Netzwerk-Anlage erreicht werden
kann.
Dank des innovativen IPM-Systems (Intelligent
Power Management), können die Installationszeiten
deutlich verringert werden, da für die Verbindung nur
ein einziges Ethernet-Kabel benötigt wird.
Das Hi-PoE IPM-System erfasst automatisch alle
vorhandenen Optionen, wie Heizung, Lüfter und
Scheinwerfer und sorgt dann selbständig für einen
Leistungsausgleich, d.h für eine angemessene
Leistungsverteilung auf die verbundenen
Vorrichtungen. Dadurch kann ein optimaler Betrieb
der IP-Videokamera von -30 °C bis +60 °C mit
Temperaturregelung und Cold Start (Inbetriebnahme
bei niedrigen Temperaturen) gewährleistet werden.
Das IPM-System kann für analoge Anlagen mit
bereits installierten Gehäusen nachgerüstet werden.
Dafür sind einfach nur das Gehäuse und die interne
Elektronik auszutauschen. Dadurch wird eine
Umstellung auf Digitalbetrieb ermöglicht, wodurch
die Installationszeiten optimiert und in Folge sowohl
die Kosten, als auch die Umweltauswirkungen
reduziert werden können.
Äußerst einfache Installation, durch die seitliche
Öffnung wird der Zugang zur Videokamera, den
Optiken und allen innenliegenden Anschlüssen
erleichtert.
4.2 Kennzeichnung des Produkts
Siehe die Etikett auf dem Produkt.
4
5 Vorbereitung des
Produktes auf den
Gebrauch
Jede vom Hersteller nicht ausdrücklich
genehmigte Veränderung führt zum Verfall
der Gewährleistungsrechte.
5.1 Entfernen der Verpackung
und Inhalt
5.1.1 Entfernen der Verpackung
Bei der Lieferung des Produktes ist zu prüfen, ob die
Verpackung intakt ist oder offensichtliche Anzeichen
von Stürzen oder Abrieb aufweist.
Bei offensichtlichen Schadensspuren an der
Verpackung muss umgehend der Lieferant
verständigt werden.
Bewahren Sie die Verpackung auf für den Fall, dass
das Produkt zur Reparatur eingesendet werden muss.
5.1.2 Inhalt
Prüfen Sie, ob der Inhalt mit der nachstehenden
Materialliste übereinstimmt:
• Gehäuse
• RJ45 Verkabelung
• Innensechskantschlüssel:
• Innensechskantschlüssel
• Abstandsstücke
• Dichtungen für Kabelschelle
• Kabelschellen (x3)
• Schrauben
• Schrauben für Kamera
• Bedienungslanleitung
5.2 Sichere Entsorgung der
Verpackungsmaterialien
Die Verpackungsmaterialien sind vollständig
wiederverwertbar. Es ist Sache des
Installationstechnikers, sie getrennt, auf jeden
Fall aber nach den geltenden Vorschriften des
Anwendungslandes zu entsorgen.
Im Falle der Rückgabe des nicht korrekt
funktionierenden Produktes empfiehlt sich die
Verwendung der Originalverpackung für den
Transport.
6 Zusammenbau und
Installation
6.1.3 Installation der Kabelschellen
Zusammen mit den Halterungen für die
interne Kabeldurchführung muss der
Satz Dichtungsringe (OWBIP) verwendet
werden. Der begrenzte Platz mach
die Verwendung der mitgelieferten
Kabelschellen unmöglich. Der Bausatz muss
getrennt gekauft werden.
Zusammenbau und Installation sind
qualifizierten Fachleuten vorbehalten.
6.1 Installation
Im Lieferumfang sind 3 Kabelschellen enthalten, die
am Boden des Gehäuses installiert werden müssen,
wie in der Abbildung gezeigt. Die nicht verwendeten
Kabelschellen müssen mit dem Verschlussdeckel
versiegelt werden, um das Eindringen von Wasser ins
Gehäuse zu vermeiden.
6.1.1 Öffnung des Schutzgehause
Die beiden an der Flanke befindlichen Schrauben
abdrehen, nun die Haube und den oberen Korpus um
die Achse der Öffnungsscharniere drehen.
Abb. 1
6.1.2 Entfernen des Schlittens
Für die Entfernung des Schlittens müssen die
Befestigungsschrauben gelöst werden, wie in der
Abbildung gezeigt.
Abb. 3
6.1.4 Installation des Scheinwerfers
GEKO IRH (optional)
Die maximale Leistung des Scheinwerfers
darf 6W nicht überschreiten.
Für die Installation des Scheinwerfers muss
die Halterung für Scheinwerfer verwendet
werden (OSUPPIR). Der Bausatz muss
getrennt gekauft werden.
Die kleinste Kabelschelle oder Dichtring verwenden,
um das Eindringen von Wasser in das Gehäuse zu
vermeiden.
Abb. 2
Für die Installation des Scheinwerfers auf Gehäuse,
siehe das Betriebs- und Installationshandbuch des
Produkts.
Für weitere Details zur Konfiguration und zum
Gebrauch beachten Sie bitte das entsprechende
Kapitel. (6.1.4 Anschluss des Scheinwerfers GEKO IRH
(Sonderausstattung), Seite 7).
5
Bedienungslanleitung - Deutsch - DE
Die Einheit kann über Schnittstellen mit
Produkten verbunden werden, die nicht
von VIDEOTEC produziert sind. Deshalb
empfiehlt VIDEOTEC vor jeder Installation
einen Test. VIDEOTEC lehnt die Haftung
für etwaige Installationskosten bei
Kompatibilitätsprobleme ab.
6.1.5 Halterungen und Adaptermodule
6.1.2 Installation des Ethernet-Kabels
Das Produkt kann an einer Halterung oder
an einem Adapter befestigt werden. Weitere
Informationen entnehmen Sie bitte dem technischen
Produktdatenblatt oder wenden Sie sich direkt an
VIDEOTEC.
Das Ethernet Kabel in die Dichtung in einsetzen und
alles blockieren, wie in der Abbildung gezeigt.
6.1.1 Installation der Version mit
Doppelfilter für den Luftaustausch
DE - Deutsch - Bedienungslanleitung Es ist wichtig, bei der Installation auf die
Rippenanordnung des Lufteintrittsfilters zu achten.
Abb. 6
Die Dichtung (01) an der M20-Kabelschelle (02)
montieren. Die Kabelschelle mit der Mutter M20 (04)
unten am Gehäuse (03) befestigen.
Auf die Befestigung achten.
Anzugsdrehmoment: 7Nm max.
Das Kabel mit dem Verbinder RJ45 (05) durch die
M20 Kabelschelle (02) führen. Den Stopfen der
Kabelschelle zuschrauben (06).
04
Abb. 4
01
Die Rippen sind in Abhängigkeit vom
Neigungswinkel des Gehäuses so auszurichten, daß
bei Regen kein Wasser eintritt.
05
06
Das Gehäuse auf der Halterung gemäß den
Neigungsbegrenzungen des Bildes installieren, um
den IP44- Schutzgrad zu garantieren.
03
Abb. 7
45°
0˚
45°
Abb. 5
6
Maximale Drehung auf der Querachse: 0°.
Maximale Neigung auf der Längsachse: +/- 45˚.
02
6.1.3 Installation der Kamera
Der richtige Anlagebetrieb ist, im
angegebenen Temperaturbereich, nur mit
der kamera- und Optik- Benutzung mit
Temperatur bei -10° bis zu +60°C garantiert.
6.1.4 Anschluss des Scheinwerfers GEKO
IRH (Sonderausstattung)
Den Scheinwerfer an die Klemme J6 anschließen, wie
im Schema unten beschrieben.
1
Es können nur Kameras vom Typ PoE
installiert werden.
2
3
4
Die Kamera mithilfe der mitgelieferten Schrauben
(01) und Abstandsstücke (02) befestigen.
Bedienungslanleitung - Deutsch - DE
Mindestens ein Abstandsstück anbringen, um die
elektrische Isolation zwischen Schlitten und Kamera
zu gewährleisten.
Die Kameralinse vor dem Glas positionieren, um
Sichtstörung oder optische Reflexe zu vermeiden.
Die Kamera an den Verbinder J2 (PoE OUT)
anschließen, mit dem im Lieferumfang enthaltenen
Kabel (03).
03
Abb. 10
Anschluss Scheinwerfer GEKO IRH
Scheinwerfer
Klemme J6
Braun (Telemetrie)
1
Blau (Telemetrie)
2
Weiß (Stromversorgung)
3
Schwarz (Stromversorgung)
4
Tab. 1
02
Für die Einstellung der Einschaltgrenze
des Scheinwerfers, siehe das Betriebs- und
Installationshandbuch des Produkts.
01
Abb. 8
Den Schlitten wieder in seiner Aufnahme
positionieren und die zuvor entfernten Schrauben
festziehen.
Abb. 9
7
6.1.5 Anschluss des PoE-Kabels
DE - Deutsch - Bedienungslanleitung Verbinden Sie das vom Power Injector kommende
PoE-Kabel mit dem Verbinder J1.
7 Konfiguration
Bevor das Gerät mit Strom versorgt wird, muss
die maximale Leistungsaufnahme vom Gehäuse
eingestellt werden, indem der Dip-Schalter SW1
betätigt wird.
Abb. 11
Bevor das Gerät mit Strom versorgt wird, muss
die maximale Leistungsaufnahme vom Gehäuse
eingestellt werden, indem der Dip-Schalter SW1
betätigt wird (7 Konfiguration, Seite 8).
6.1.6 Anschluss des Lüfters mit
Doppelfilter für den Luftaustausch
(Sonderausstattung)
Das Kabel des Lüfters an den Verbinder J4
anschließen.
Abb. 12
8
Abb. 13
Konfiguration Leistungsaufnahme
SW1
Maximale Leistung
OFF
PoE Klasse 3 (13W max)
ON
Hi-PoE Klasse 4 (25W max)
Tab. 2
In Abhängigkeit der Leistungsaufnahme kann das
System die in der Tabelle beschriebenen Optionen
versorgen (Tab. 3, Seite 9).
VERSO Hi PoE IPM Verfügbare Modelle und Merkmale
Betriebstempe- Injector
ratur
Kamera
Beschlagentfer- Scheinwerfer
nung
-10°C / +60°C
PoE Klasse 3
(13W)
PoE max. Klasse
2 (7W)
p
Hi-PoE Klasse 4
(25W)
PoE max. Klasse
3 (13W)
PoE Klasse 3
(13W)
-10°C / +50°C
Lüfter mit
doppeltem
Luftfilter
–
–
p
p
p
–
p
PoE max. Klasse
2 (7W)
p
–
–
–
Hi-PoE Klasse 4
(25W)
PoE max. Klasse
3 (13W)
p
p
–
–
Hi-PoE Klasse 4
(25W)
PoE max. Klasse
3 (13W)
p
–
p
–
Bedienungslanleitung - Deutsch - DE
-30°C / +50°C
Heizung
Tab. 3
8 Einschaltung
Mithilfe der 6 LEDs aus der Abbildung kann jederzeit
der Betriebszustand des Produkts überprüft werden.
Der automatische Vorheizvorgang (de-ice)
könnte immer dann aktiviert werden, wenn
das Gerät bei einer Umgebungstemperatur
von unter 0°C in Betrieb genommen wird.
Dieser Vorgang dient dazu, auch bei
niedrigen Temperaturen den einwandfreien
Betrieb der Einrichtungen sicherzustellen.
Die Dauer liegt je nach Bedingungen
zwischen 60 und 120 Minuten.
Während der Einschaltphase liest das Gerät den
Zustand des Dip-Schalters und erfasst automatisch
alle verbundenen Optionen, für eine korrekte
Energiesteuerung des Gehäuses.
Abb. 14
Nehmen Sie Bezug auf die Tabelle, um den
Betriebszustand zu erkennen.
9
Betriebszustand
LED
LEDZustand
LD1 (Power) Aus
DE - Deutsch - Bedienungslanleitung LD2 (Camera)
LD3 (Demist)
LD4 (Heater)
LD5 (IR)
Tab. 4
10
Das Gerät wird nicht versorgt
9 Wartung und Reinigung
9.1 Wartung
Auf
Das Gerät wird ordnungsgemäß
versorgt
9.1.1 Bausatz für die Modernisierung
der Anlagen
Aus
Die Kamera ist nicht angeschlossen oder der Cold Start ist
aktiviert
Den Schlitten (01), die Elektronikkarte (02) und die
Heizung (03) entfernen.
Auf
Die Kamera wird ordnungsgemäß
versorgt
1-mal
Blinken
Die Kamera hat einen niedrigen
Identifikationswiderstand
2-mal
Blinken
Die Kamera hat einen hohen
Identifikationswiderstand
5-mal
Blinken
Die Kamera hat einen zu hohen
Verbrauch
9-mal
Blinken
Die Kamera benötigt mehr
Leistung als verfügbar
Aus
Die Beschlagentfernung wurde
nicht ordnungsgemäß erfasst
1-mal
Blinken
Die Standard-Beschlagentfernung ist nicht in Betrieb
2-mal
Blinken
Die Frostschutzanlage (Optional)
ist nicht in Betrieb
Auf
Die Beschlagentfernung oder
diFrostschutzanlage ist in Betrieb
Aus
Die Heizung ist nicht verfügbar
oder die verfügbare Leistung ist
nicht ausreichend
1-mal
Blinken
Die Heizung ist nicht in Betrieb
01
02
03
Abb. 15
Ist das Gehäuse eines mit Doppelfilterlüter, soll auch
dieser letzte mit dem mitgelieferten Lüfter ersetzt
werden.
Auf
Die Heizung ist in Betrieb
Aus
Der Scheinwerfer (optional)
wurde nicht erfasst oder die
verfügbare Leistung ist nicht
ausreichend
Abb. 16
Der Scheinwerfer wird
ordnungsgemäß versorgt
(seine Aktivierung wird von
einer Fotozelle am Scheinwerfer
kontrolliert)
9.2 Reinigung
1-mal
Blinken
LD6 (Cold
Start)
Gerätezustand
Aus
Die Heizung ist nicht verfügbar
1-mal
Blinken
Das Vorheizverfahren ist nicht
in Betrieb
Auf
Das Vorheizverfahren ist in
Betrieb
Für die Installation des Bausatzes siehe Kapitel 6
Zusammenbau und Installation, Seite 5.
9.2.1 Reinigung des Glases und der
Kunststoffteile (PC)
Zu vermeiden sind Äthylalkohol,
Lösungsmittel, hydrierte
Kohlenwasserstoffe, starke Säuren
und Alkali. Diese Produkte können die
behandelte Oberfläche beschädigen.
Es werden empfohlen verwässerte neutrale Seifen
oder spezifische Produkte zur Reinigung der
Brillenlinsen zusammen mit einem weichen Tuch.
10 Müllentsorgungsstellen
Dieses Symbol und das entsprechende
Recycling-System gelten nur für EULänder
und finden in den anderen Ländern der
Welt keine Anwendung.
Ihr Produkt wurde entworfen und hergestellt
mit qualitativ hochwertigen Materialien und
Komponenten, die recycelt und wiederverwendet
werden können.
Bitte entsorgen Sie dieses Gerät bei Ihrer örtlichen
Sammelstelle oder im Recycling Centre.
In der Europäischen Union gibt es unterschiedliche
Sammelsysteme für Elektrik- und Elektronikgeräte.
11 Technische Daten
Leistungsaufnahme am Eingang: PoE Klasse 3 (13
W) oder Hi-PoE Klasse 4 (25 W) wählbar über DIPSchalter
Verfügbare Leistung für Kamera (PoE IN Klasse 3): PoE
Klasse 2 (7W)
Verfügbare Leistung für Kamera (Hi-PoE IN Klasse 4):
PoE Klasse 3 (13 W) mit „Cold Start”-Funktion Ton -10
°C ± 2 °C
Datenleitung: 10/100Base-T
GEKO IRH Scheinwerfer, niedrige Leistung: 6W
Heizung: 8W, elektronisch gesteuert, Ton 20°C±2°C,
Toff 23°C±2°C
Mit Thermostat versehener Lüfter zur Kühlung der
Videokamera für Ausführungen mit doppeltem Filter:
Ton 35°C±2°C, Toff 32°C±2°C
Beschlagentfernung Warmluftgebläse: 5W
Kompatibel mit IEEE 802.3af, IEEE 802.3at/PoE Plus
11.1 Allgemeines
Kompatibel mit Power Injector 1 Kanal (OHEPOWINJ:
VIDEOTEC wahlfreies Zubehör)
Hergestellt aus Technopolymer (Polykarbonat), Farbe
RAL9002
11.2 Umgebung
Sonnenschutzdach aus ABS
Innen/Äußere Installationen
Pulverlackierung mit Epoxydpolyester, Farbe RAL9002
Maximaler Temperaturbereich : -30°C/+60°C (siehe
die Tabelle: Verfügbare Modelle und Merkmale)
Externe Schrauben aus rostfreiem Stahl
11.2 Mechanik
Kabelschellen: 1xM12, 1xM16, 1xM20
Polykarbonat-Fenster (WxH): 105x64mm
Der einwandfreie Betrieb des Geräts im angegebenen
Temperaturbereich wird durch die Verwendung einer Videokamera
und einer Optik mit einem Temperaturbereich von -10 °C bis +60 °C
gewährleistet.
Innere Nutzabmessungen (WxHxL): 70x70x230mm
Salznebelbeständig bis zu 1000 Stunden (gemäß der
Norm ISO9227)
Einheitsgewicht: 1.6kg
11.3 Zertifizierungen
CE EN61000-6-4, EN60950-1, EN50130-4
IP66/IP67, EN60529 (mit Kabelschellen)
IP66/IP67, EN60529 (mit innerer Kabelführung und
Dichtungsringen)
IP55, EN60529 (mit Halterung mit innerer
Kabelführung)
IP44, EN60529 (für Modelle mit Doppelfilter für die
Lüftung)
11
Bedienungslanleitung - Deutsch - DE
Dieses Symbol bedeutet, daß elektrische und
elektronische Geräte am Ende ihrer Nutzungsdauer
von Hausmüll getrennt entsorgt werden sollen.
11.1 Elektrik
12 Technische Zeichnungen
230
70
NUTZFLÄCHE
NUTZFLÄCHE
A-A
B-B
466
156
113
141
B
101
A
129
B
70
Die Abmessungen der Zeichnungen sind in Millimeter angegeben.
A
70
171
73
70
62
70
40
422
156
Abb. 17 VERSO Hi-PoE IPM.
Headquarters Italy Videotec S.p.A.
UK Representative office
Via Friuli, 6 - I-36015 - Schio (VI) Italy
Tel. +39 0445 697411 - Fax +39 0445 697414
Email: [email protected]
Tel./Fax +44 01353 775438 (Sales)
Tel. +44 0113 815 0047 (Technical support)
Tel. +44 0113 815 0031 (Orders/Shipping dept.)
Email: [email protected]
France Videotec France S.à.r.l.
Asia Pacific Videotec (HK) Ltd
Voie du Futur, Zac des Portes - 27100 - Val-de-Reuil, France
Tel. +33 2 32094900 - Fax +33 2 32094901
Email: [email protected]
Unit C 24 Floor - Gold King Industrial Building
35-41, Tai Lin Pai Road - Kwai Chung, NT, Hong Kong
Tel. +852 2333 0601 - Fax +852 2311 0026
Email: [email protected]
Americas Videotec Security, Inc.
35 Gateway Drive, Suite 100 - Plattsburgh, NY 12901 - U.S.A.
Tel. +1 518 825 0020 - Fax +1 518 825 0022
Email: [email protected] - www.videotec.us
www.videotec.com
MNVCHPVHPOE_1331_DE
Headquarters Italy Videotec S.p.A.
UK Representative office
Via Friuli, 6 - I-36015 - Schio (VI) Italy
Tel. +39 0445 697411 - Fax +39 0445 697414
Email: [email protected]
Tel./Fax +44 01353 775438 (Sales)
Tel. +44 0113 815 0047 (Technical support)
Tel. +44 0113 815 0031 (Orders/Shipping dept.)
Email: [email protected]
France Videotec France S.à.r.l.
Asia Pacific Videotec (HK) Ltd
Voie du Futur, Zac des Portes - 27100 - Val-de-Reuil, France
Tel. +33 2 32094900 - Fax +33 2 32094901
Email: [email protected]
Unit C 24 Floor - Gold King Industrial Building
35-41, Tai Lin Pai Road - Kwai Chung, NT, Hong Kong
Tel. +852 2333 0601 - Fax +852 2311 0026
Email: [email protected]
Americas Videotec Security, Inc.
35 Gateway Drive, Suite 100 - Plattsburgh, NY 12901 - U.S.A.
Tel. +1 518 825 0020 - Fax +1 518 825 0022
Email: [email protected] - www.videotec.us
www.videotec.com
MNVCHPVHPOE_1331


