1
D2ed1 IT/UK - installazione
6-09-2004
10:30
Pagina 5
DIN rail mounting
temperature controller
with current transformer input
E
ASCON spa
D2 line
R
I
E
S
c
Installa tion manual • M.I. D2-1/04.05 • Cod. J30-658-1AD2 IE
C e r t i f i e d
Table of contents
- General description
- Model code
- Electric safety
- Installation kit
- Removing/inserting the module in
its housing
- Installation
- Electrical connections
E
D2 line
ISO 9 0 0 1
Installation
manual
S
ASCON spa
20021 Bollate
(Milano) Italy
Tel. +39 02 333 371
Fax +39 02 350 4243
http://www.ascon.it
e-mail [email protected]
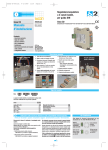
General description
Simplified assembly and
connection
5
10
4
1 DIN-rail, EN60022
2 Sping loaded slide for rail fastening
3 Side connector, build-in, to connect
one instrument to another (up to 31)
4 5-pole male connector, with screw
terminals, for power supply and
serial communications bus
5 Four quick polarised connectors with
4 screw terminals for I/O
6 Female connector, with termination
resistor for serial communications
7 Four Output status leds (red)
8 Green Status led:
- ON: power on
- flashing: serial communications
in progress
9 Couple of connector protections
10 Wiring label
11 Model identification label
Common power supply
Withdrawable
7
8
4
Easy to replace even if
powered
9
6 11
3
1
2
Model code
Mod.
D 2
5 B C 0 - 0 F 0 0
Line
Basic
Accessories
The product code indicates the specific hardware configuration of
the instrument, that can be modified by specialized engineers only.
Line
OP1-OP2 outputs
Relay - Relay
Relay - SSR drive
SSR drive - SSR drive
SSR - SSR
SSR - SSR drive
c
D 2
B
1
2
3
4
5
Serial communications
CanBus
RS485 Modbus/Jbus SLAVE
C
3
5
Installation kit
Notes on electric safety and electromagnetic compatibility
Please, read carefully these instructions before proceeding with the installation of the controller
It is important to understand that it’s responsibility of the
Class II instrument, rear panel mounting.
installer to ensure the compliance of the regulations on safeThis instrument has been designed in compliance with:
ty requirements and EMC.
Regulations on electrical apparatus:
This controller has no user serviceable parts and requires special
according to regulations on the essential protection
equipment and specialised engineers. Therefore, a repair can be
requirements in electrical apparatus EN 61010-1
hardly carried on directly by the user. For this purpose, the manuRegulations on Electromagnetic Compatibility:
facturer provides technical assistance and the repair service for its
according to:
Customers.
- Regulations on RF emissions:
Please, contact your nearest Agent for further information.
EN61000-6-4 industrial environments;
All the information and warnings about safety and electro- Regulation on RF immunity:
magnetic compatibility are marked with the B sign, at
EN61000-6-2
industrial equipment and system. the side of the note.
1
F
0
1
2
3
User manual
Italian/English (std)
French/English
German/English
Spanish/English
Each set of interconnected controllers requires one
model AD3-KIT/BA.RT.PC.CD kit:
Power supply and
serial comm.s
connector
code AD3/BA
Connector with
termination
resistor for serial
communications
code AD3/RT
5
4
3
2
1
Couple of connectors protections code
AD3/PC
CD Rom with
configuration
software tool
code AD3/CD
D2ed1 IT/UK - installazione
6-09-2004
10:30
Pagina 6
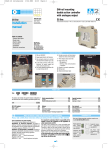
Installation
Remove/insert the module from/in its housing
Dimensions
How to remove the module from the housing
22.5 mm
1 Insert the blade of a negative
screwdriver under the I/O
polarised connectors;
0.89 in
99 mm
2 Moving the screwdriver as
indicated, unplug the connector from the module;
3.9 in
114.5 mm
4.5 in
3 Remove the connector and
repeat these steps in order to
unplug all the external connections;
6.3 mm
4 With the blade of the screwdriver, press the two slots (at
the top and bottom of the
module) in order to free the
I/O module from the housing;
0.25 in
B
Environmental condition
Operating
conditions
Special
conditions
Forbidden
condition
T
3
Suggestion
Temperature 0...50 °C
%Rh Relative humidity 5...95% Rh non-condensing
T
%Rh
P
C
Temperature > 50 °C
Use forced ventilation
> 95% RH
Warm up
Conducting atmosphere
Use filter
E
Corrosive atmosphere
5 Firmly grip the front panel in
the terminal block area and
pull the module outside the
housing.
Explosive atmosphere
Mounting on DIN rail (EN60022)
5
Mounting
1 Clip the upper part of the instrument on the rail;
CLICK
2
1
2 Rotate the instrument downwards
until the click.
When 2 or more instruments are
installed on the same DIN rail, connect
the communications/ power bus sliding the instruments side by side as
explained in the following paragraphs.
How to re-insert the I/O module in the housing
1 In order to correctly re-insert
the module in its housing,
invert the previous extracting
sequence, paying particular
attention in inserting the printed circuit board in the slots
present at the top and bottom
of the case.
Disassembly
Switch the instrument off
When 2 or more instruments are
installed on the same DIN rail, disconnect the communications/power
bus separating the selected instrument from the others;
1 Lower the spring slide by inserting a
flat-blade screwdriver as indicated;
1
2
2 Turn and lift the instrument
upwards.
Mounting several instruments (up to 31) side by side
1
5
2
2
6
3
7
4
8
1
5
1
OP1
OP2
OP2
OP4
PWR
COM
50 mm
50 mm
4
2
6
3
7
D2
4
8
1
5
2
6
3
7
4
8
D2
50 mm
1
5
2
6
3
7
4
8
D2
OP1
OP1
OP2
OP2
OP3
OP3
OP4
OP4
OP4
PWR
COM
PWR
COM
PWR
COM
9 10 11 12
9 10 11 12
13 14 15 16 13 14 15 16
1,969 in
3
9 10 11 12
13 14 15 16
1
5
4 When assembled insert the connectors protection on both sides.
4
8
OP3
OP4
PWR
COM
9 10 11 12
13 14 15 16
1,969 in
3 Wire the 5-pole male power supply
and serial communications connector and insert it in the corresponding female connector;
3
7
OP1
OP3
2 After mounting all the instruments
side by side insert the female 5pole connector with the termination resistor of the serial communications into the corresponding
male connector;
2
6
D2
D2
1,969 in
1 After the mounting of instruments
on the rail, put them side by side
so that the male side connector
fits into the corresponding female
connector;
OP1
OP2
OP3
3
9 10 11 12
13 14 15 16
connectors protection
22.5 x N + 53 mm
2
D2ed1 IT/UK - installazione
6-09-2004
10:30
Pagina 7
B
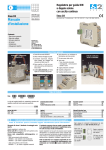
Electrical connections
Terminal connectors and plugs
OP1
B
B
1
2
6
5
3
7
4
1
2
IC
NO
OP3
5
6
B
D2
D
OP2
B
b
TC1
OP4
PWR
COM
9 10 11 12
13 14 15 16
Male connector for
power supply and
serial communications
bus
Features
N 2
L 1
A
DI
RTD2
A
RTD1
0.2...2.5 mm2
(AWG24...AWG12)
0.08...1.5 mm2
(AWG28...AWG16)
Negative
0.6 x 3.5 mm
screwdriver
D
4
NC 3
Power supply and
communications connector
Stripped wire 7 mm - 0.28 in
L
8
Terminal connectors
A-B-C-D
Flexible cable section:
C
7
5
13 14 15 16
OP3
Female plug with
termination resistor for
serial communications
bus
b
TC2
OP1
NO IC
OP4
10 11 12
C 9
8
4
3
RS 485
A
A
OP2
24 V ~
4 terminal connectors
7 mm - 0.28 in
0.4 x 2.5 mm
0.4...0.5 Nm
Tightening torque 0.5...0.6 Nm
Input
Isolated PV inputs: L-J-K-S-R-T-B-N-E-W thermocouple type
C
9
10
11
D
12
13
14
15
Isolated PV inputs: in continua mA, mV
C
16
• Respect the polarity shown;
• To extend the connection, use always
compensation cable of the correct
type for the thermocouple used;
• When present the shield must be connected to a proper earth (at only one end).
Line 150Ω max.
Pt100
C
9
B
10
b
11
D
12
13
B
A
14
15
b
16
A
R1+R2<320Ω
9
10
11 12
D
13
14
15
16
NPN o.c.
IL1
Isolated
contact
TTL o.c.
11
D
12
13
14
15
External
shunt
mA
2.5Ω
mV
16
External
shunt
2.5Ω
• Respect the polarity shown.
Isolated PV inputs: Pt100 resistance thermometer for ∆T
measures (2 x Pt100) special
• If a 3 wires system is used, always
use cables of the same section (1mm2
min.)(max. resistance 20Ω/line);
• When using a 2 wires system, always
use cables of the same section (1.5mm2
min.) and put a jumper between terminals 13 and 14;
A When the distance between the controller and the sensor is 15 m, the
use of a 1.5 mm2 section cable produces a 1°C (1.8°F) measure error.
∆T (2 x Pt100)
∆T (2 x Pt100)
C
9
10
A
11
B
D
12
13
14
R2
R1
16
15
B
A
A
R2
Digital input for external commands
C
10
mA
mV
Isolated PV inputs: Pt100 resistance thermometer
Pt100
9
A
R1
Digital inputs
• ON
The input is active when the
logic state is ON, corresponding
to the contact closed;
• OFF
The input is inactive when the
logic state is OFF, corresponding
to the contact open
NPN o.c.
NPN o.c.
Isolated
contact
OP3
Isolated
contact
OP4
B
3
5
6
7
8
A When terminals 5, 6 and 7, 8
are not configured as OP3 and
OP4 outputs, they can be used
as voltage or isolated contact
inputs.
D2ed1 IT/UK - installazione
6-09-2004
10:30
Pagina 8
B
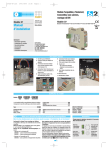
Electrical connections
B
Precautions
A
1 Make sure that the power supply voltage is
the same indicated on the instrument.
V~
All the wiring must comply with the local
regulations.
Fuse
TC
A
1
2
3
LOOP 2
~
Female plug
with termination
resistor for serial
communications
bus
V
Avoid to use electromagnetic contactors, power
relays and high power motors nearby.
Avoid power units nearby, especially if controlled in phase angle.
4
2 Switch on the power supply only after all the electrical connections have been completed.
Configuration
and Supervision
OP2
OP1
The supply wiring should be routed away from
the power cables.
3 In accordance with the safety regulations,
the power supply switch shall bring the
identification of the relevant instrument.
The power supply switch shall be easily
accessible from the operator.
Power supply and
serial communications
bus male connector
B
5
6
7
8
RS485
5
Fuse
Keep the input low voltage sensor wires away
from the power lines and the output cables.
If this is not achievable, use shielded cables on
the sensor input, with one end of the shield
connected to earth.
B
Notes
Example of wiring diagram (dual loop control)
4 The instrument is PTC protected.
In case of failure it is suggested to return the
instrument to the manufacturer for repair.
4
NC
LOOP 1
3
N
2
C
9 10 11 12
D
13 14 15 16
24 V~
1
L
Power supply
switch
TC
IL
5 To protect the instrument internal circuits use:
2 AT at 250 Vac (4 AT at 120 Vac) fuses for
relay outputs or 1 A~T for SSR outputs.
6 Relay contacts are already protected with varistors.
Commands
Only in case of 24 V~ inductive
loads, use model A51-065-30D7
varistors (on request).
~
V
OP1 - OP2 - OP3 - OP4 ouptuts
OP1-OP2-OP3-OP4 output characteristics
Output
Type
For resistive load or auxiliary circuit breaker
OP1 - OP2
Relay
SPST Relay N.O., 2A/250 Vca (4A/120Vac) External fuse 2A~T at 250Vac (4A~T at 120Vac)
OP1 - OP2
SSR
1A/250 Vac External fuse 1A~T
OP1 - OP2
SSR drive
Not isolated: 0...5 Vdc, ±20% 30 mA max.
OP4
Digital
Not isolated: 0...5 Vdc, ±20% 30 mA max.
A
1
2
A
4
OP1
1
2
3
V~
Fuse
Load AL2
Fuse
Load AL1
Load
Fuse
3
Alarms
Single action LOOP2
Relay (SSR or SSR drive)
Fuse
Load
Single action LOOP1
Relay (SSR or SSR drive)
4
OP2
A
1
2
3
OP1
4
OP2
A OP1 and OP2 outputs can be used
as alarm outputs only if they are
not used as control outputs
Digital outputs
SSR drives
Power supply bus and serial communication RS485
B
5
RS485
4
NC
3
2
B
5
6
OP3
7
8
B
5
6
7
8
OP4
1
A When terminals 5, 6 and 7, 8
N
Power supply: Switching type with double
insulation with incorporated PTC (resettable fuse).
Rated voltage:
24 V~
L
Power consumption:3 W max.
Protection:
are not configured as OP3 and
OP4 outputs, they can be used
as voltage or isolated contact
inputs.
24 Vac(-25...+12%) 50/60 Hz;
24 Vdc (-15...+25%).
PTC protected.
Serial communications: Passive and galvanically
isolated interface 500 Vac/1 min.
Conforms to standard EIA RS 485, Modbus/Jbus protocol.
4