1
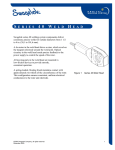
www.swagelok.com Weld Head User’s Manual Series 5 Weld Head User’s Manual Contents Weld Head . . . . . . . . . . . . . . . . . . . . . . . . . . . 1 Fixture Block . . . . . . . . . . . . . . . . . . . . . . . . . . 1 Unpacking the Weld Head Components . . . . . . . . . . . 2 Installing the Weld Head . . . . . . . . . . . . . . . . . . . 3 Installing the Electrode in the Weld Head . . . . . . . . . . 4 Calculating Arc Gap Gage Settings . . . . . . . . . . . . . 6 Setting the Arc Gap . . . . . . . . . . . . . . . . . . . . . . 7 Fixturing the Work . . . . . . . . . . . . . . . . . . . . . . 12 Installing the Collets in a Tube Fixture Block . . . . . . . 13 Maintenance . . . . . . . . . . . . . . . . . . . . . . . . . 22 Parts Drawings . . . . . . . . . . . . . . . . . . . . . . . . 31 Series 5 Weld Head User’s Manual Weld Head The Series 5 Swagelok Welding System (SWS) weld head delivers consistent, precise welds for outside diameters from 1/8 to 5/8 in. and 3 to 17.3 mm. A DC motor in the weld head drives a rotor, which carries the tungsten electrode around the weld joint. Optical circuitry in the weld head sends precise feedback to the power supply to control the speed of the rotor. All moving parts in the weld head are mounted in low-friction devices to provide smooth, consistent operation. A spring-loaded, floating brush continuously contacts approximately one-third of the circumference of the rotor. This configuration ensures consistent, uniform electrical conductance to the rotor and electrode. Figure 1 Series 5 Weld head Fixture Block The Series 5 SWS fixture block accurately aligns and holds tubing, fittings, and valve bodies. The modular design allows you to select different side plates and create the configuration needed for the job. The fixture block is separate from the weld head, allowing work pieces to be easily aligned and fixtured before welding. Using multiple fixture blocks can increase productivity. Each fixture block is designed to accommodate a range of work piece sizes. A Universal Collet Insert (UCI) fits into the fixture block to match the diameter of the work piece. The collet design firmly holds tubing and fittings that vary ± 0.005 in. (0.13 mm) from nominal outside diameter. The collets exchange quickly, making the fixture block very adaptable to changing work requirements. Figure 2 Series 5 Fixture Block 1 2 Series 5 Weld Head User’s Manual Unpacking the Weld Head Components The following weld head components are packaged in a foam-lined shipping container: • weld head • arc gap gage • electrode package • tool package. Perform the following steps when your Swagelok Series 5 weld head arrives: 1. Inspect the container for damage. 2. Remove the components from the container. 3. Check the items for any damage. 4. Verify that the weld head serial number matches the serial number on the shipping container. 5. Record the model and serial numbers, and the delivery dates on the Registration Information page of your power supply user’s manual. Series 5 Weld Head User’s Manual Installing the Weld Head Weld Head Electrode The weld head has four connectors that plug into the power supply. Work The four connectors on the cable are: • weld head Weld Head Shielding Gas • electrode (red) • work (green) • weld head shielding gas. Figure 3 Weld Head Connect the four connectors to the side panel of the power supply by performing the following steps (see Figure 4): 1. Locate the weld head. 2. Align the notch on the one-quarter turn connector with the small tab in the mating socket on the side panel labeled WELD HEAD. Insert the connector in the socket. Turn the connector sleeve clockwise by hand until it is tight. This connection provides the control signals to drive the weld head. 3. Insert and fully seat the red connector into the socket on the side panel labeled ELECTRODE. Twist the connector 1/4‑turn clockwise to lock it into place. This connection is the negative (-) terminal of the weld head. 4. Insert the green connector into the socket on the side panel labeled WORK. Twist the connector 1/4-turn clockwise to lock it into place. This connection is the positive (+) terminal of the weld head. 5. Insert the weld head shielding gas connector into the Swagelok Quick-Connect stem labeled TO WELD HEAD. Ensure that the connector is firmly attached. This connection provides shielding gas to the weld head through a mass flow controller (MFC) in the power supply. Figure 4 Weld Head Connectors Caution! Ensure that the weld head connector is fully seated in the mating socket and the threaded sleeve is tight. Note: The weld head shielding gas connector must be a single-end shut-off (SESO) Swagelok Quick-Connect stem (SS-QC4-S-400). 3 4 Series 5 Weld Head User’s Manual Installing the Electrode in the Weld Head This Swagelok weld head comes with a selection of electrodes. The following instructions show how to properly install an electrode in the weld head. Selecting the Proper Electrode Electrode length and diameter depend on your weld head model and the outside diameter of the work piece being welded. To select the correct electrode, use the Electrode Selection Table. The M200 will generate the appropriate electrode when using the Auto Create feature. Figure 5 Table 1 Electrode Selection Table Electrode Part No. CWS-C.040.705-P CWS-C.040-.605-P CWS-C.040-.555-P CWS-C.040-.450-P CWS-C.040-.405-P Component OD 1/8 in. 3/16 in. 3 mm 1/4 in. 5/16 in. 6 mm 8 mm 3/8 in. 1/2 in. 10 mm 12 mm 5/8 in. 15 mm 16 mm 17.3 mm Electrode Length (L) in. (mm) Electrode Diameter (D) in. (mm) 0.705 0.040 (17,90) (1,02) 0.605 0.040 (15,37) (1,02) 0.555 0.040 (14,10) (1,02) 0.450 0.040 (11,43) (1,02) 0.405 0.040 (10,29) (1,02) Electrode Dimensions Series 5 Weld Head User’s Manual Electrode Geometry This illustration shows the electrode shape Swagelok suggests. Properly ground electrodes provide consistent, repeatable welds. Pre-ground electrodes are available from your Swagelok representative. See your parts list for ordering information. The electrode part numbers are assigned as follows: CWS–X. ###– #.###– P Package Designator Electrode Diameter Material Designator C = Ceriated Electrode Diameter The ceriated electrode material type is a mixture of 98 % tungsten and 2 % cerium and is commonly referred to as “2 % ceriated.” This electrode type has demonstrated improved arc starting performance over the 2 % thoriated type, particularly when using purified shielding gas. Figure 6 Tungsten Electrode 5 6 Series 5 Weld Head User’s Manual Calculating Arc Gap Gage Settings To determine the arc gap gage setting for a specific arc gap, use the formula below. Where A = largest OD on the weld end of the tubing or fitting (welding diameter). B = Arc gap gage diameter C = desired arc gap Figure 7 Arc Gap Gage Setting Formula Example No. 1: (Series 5 Weld Head) 1/4 to 1/4 in. tube butt weld— Largest outside diameter A = 0.253 in. Arc gap gage diameter B = 1.244 in. Desired arc gap C = 0.028 in. 0.253 in.+ 1.244 + 22 0.028 in. = 0.777 in. Example No. 2: (Series 5 Weld Head) 6 to 6 mm tube butt weld— Largest outside diameter A = 6,081 mm Arc gap gage diameter B = 31,60 mm Desired arc gap C = 0,71 mm 6,081 mm+ 31,60 mm + 22 0,71 mm = 19,551 mm Series 5 Weld Head User’s Manual Setting the Arc Gap The proper arc gap setting facilitates control of the weld and improves consistency. The following steps cover how to set the arc gap. The arc gap is set by using the arc gap gage provided with the weld head. The gage is adjusted for the desired arc gap and then installed in the rotor aperture. With the gage in place, the electrode can be positioned with reasonable accuracy. Setting the Arc Gap Gage 1. Measure the outside diameters of the work pieces being welded using a caliper or micrometer. See Figure 8(A). The M200 will calculate the arc gap gage setting when using the Auto Create feature. 2. Refer to the tables on page 8 for your nominal OD. Find the “actual” outside diameter nearest to your measurement. 3. Adjust the arc gap gage to match the setting from the tables on page 8. See Figure 8(B). Figure 8 Setting the Arc Gap Gage 7 8 Series 5 Weld Head User’s Manual Table 2 SWS-5H Arc Gap Gage Dia. 1.244 in. Setting for 0.030 in. Arc Gap in. Setting for 0.035 in. Arc Gap in. Setting for 0.040 in. Arc Gap in. Setting for 0.045 in. Arc Gap in. Setting for 0.050 in. Arc Gap in. Setting for 0,51 mm Arc Gap mm Setting for 0,64 mm Arc Gap mm Setting for 0,89 mm Arc Gap mm Setting for 1,02 mm Arc Gap mm Nominal OD in. Actual OD in. Setting for 0.025 in. Arc Gap in. 1/8 0.125 0.710 0.715 0.720 0.725 0.730 0.735 17,91 18,04 18,29 18,42 1/4 0.250 0.772 0.777 0.782 0.787 0.792 0.797 19,48 19,61 19,86 19,99 3/8 0.375 0.835 0.840 0.845 0.850 0.855 0.860 21,08 21,21 21,46 21,59 1/2 0.500 0.897 0.902 0.907 0.912 0.917 0.922 22,66 22,79 23,04 23,17 5/8 0.625 0.960 0.965 0.970 0.975 0.980 0.985 24,25 24,38 24,63 24,76 Table 3 SWS-5H Arc Gap Gage Dia. 31,60 mm Setting for 0,64 mm Arc Gap mm Setting for 0,76 mm Arc Gap mm Setting for 1,02 mm Arc Gap mm Setting for 1,14 mm Arc Gap mm Nominal OD mm Actual OD mm Setting for 0.50 in. Arc Gap mm 3 3,00 17,80 17,94 18,06 18,19 18,32 6 6,00 19,30 19,44 19,56 19,69 19,82 8 8,00 20,30 20,44 20,56 20,69 20,82 10 10,00 21,30 21,44 21,56 21,69 21,82 12 12,00 22,30 22,44 22,56 22,69 22,82 Table 4 SWS-5H ATW Arc Gap Gage Dia. 1.244 in. (31,60 mm) ATW Size Cuff OD Setting for 0.035 in. (0,89 mm) Arc Gap 1/4 in. 0.29 in. 0.801 in. 3/8 in. 0.41 in. 0.863 in. 1/2 in. 0.55 in. 0.931 in. 6 mm 7 mm 20,19 mm 8 mm 9 mm 21,20 mm 10 mm 11 mm 22,20 mm 12 mm 13,2 mm 23,32 mm Series 5 Weld Head User’s Manual 9 Inserting the Electrode into a Rotor 1. Without the fixture block attached, press ELECTRODE CHANGE on the power supply. The electrode will move to the position shown in Figure 9. 2. Loosen the two electrode clamping screws. If you are replacing the electrode, remove the electrode. 3. Insert the new electrode, with the sharp tip pointing out. Tighten the electrode clamping screws slightly to hold it in place temporarily. 4. Set the proper arc gap with the arc gap gage. Electrode Clamping Screws Figure 9 Electrode Installation WARNING! Do not press START while touching the electrode. Caution! Do not jog or move the rotor unless the electrode is clamped in place. Caution! The rotor will move when ELECTRODE CHANGE is pressed. The rotor is a potential pinch point. 10 Series 5 Weld Head User’s Manual Setting the Arc Gap 1. Use JOG or ELECTRODE CHANGE to position the rotor. This allows access to the electrode clamping screws. 2. Insert the arc gap gage into the rotor. See Figure 10(A). 3. Tilt the weld head upward. Loosen the electrode screw allowing the electrode to drop onto the gage surface. See Figure 10(B). 4. Tighten the electrode clamping screws just enough to secure the electrode. Remove the arc gap gage. 5. Press HOME or ELECTRODE CHANGE to return the rotor to the home position. Figure 10 Setting the Arc Gap Caution! Do not jog or move the rotor unless the electrode is clamped in place. Caution! The rotor will move when JOG, ELECTRODE CHANGE, or HOME is pressed. The rotor is a potential pinch point. Series 5 Weld Head User’s Manual Preparing the Work It is important to prepare the tube pieces properly before welding. Refer to Figure 11. Tubing must be square and burr-free to ensure repeatable, high-quality autogenous fusion welds. Cut the tubing to length with a hacksaw or tube cutter. Face the tube ends with a lathe or a portable facing tool. Deburr the ends, making sure that both the inside and outside diameters are square and burr-free. Clean the tube ends using an appropriate solvent. Minimize the chance of a poor quality weld by following these guidelines: • Tube ends must be square. • Tube ends must not have a wall thickness variation exceeding ± 15 % of nominal. • Tube ends must be burr-free. • Tube ends must be free of any rust, grease, oil, paint, or other surface contaminants. MethodResults Burrs in Flow Path Burrs Hack Saw Cut Gap End Rolled by Cutter, Blade and Roller Irregular Tube Diameter Tube Cutter Burrs Face Perpendicular to Axis Reduced Flow Area Smooth Transition at Wall Faces Tube Facing Tool No Gaps Square Corners Figure 11 Tube Preparation 11 12 Series 5 Weld Head User’s Manual Fixturing the Work Select or configure the appropriate fixture block. Select the collets to match the work outside diameter. Selecting the Fixture Block and Collets 1. S elect the fixture block that accepts the outside diameter of the tube to be welded. Table 5 —Fixture Block Model OD Capacity CWS-5TFB 1/8 to 5/8 in., 3 to 17.3 mm CWS-5FSP1 1/4 in. Used when welding VCR® or VCO® fittings with captured male or female nuts with extension lengths of less than 3/4 in., 19 mm SWS-5FSP1-EX 1/2 in. Used when welding VCR fittings with captured male nuts with overall fitting length less than 1.79 in., 45.5 mm or with captured female nuts with overall fitting length less than 1.12 in., 28.4 mm CWS-5FSP2 1/8 to 1/2 in., 6 to 12 mm Used to hold Micro-Fit® fittings with an extension length of 1/4 in., 6 mm 1/8 to 1/2 in., 3 to 12 mm Used to hold certain valves with an extension length of 1/2 in., 12 mm 1/4 to 3/8 in., 6 to 9 mm Used to hold Swagelok valves BN, Dl, DS, HD, DA, and DP with an extension length of 1/4 in., 6 mm SWS-5FSP3L SWS-5FSP3R SWS-5FSP4L SWS-5FSP4V Minimum Weld Extension Length 3/4 in., 19 mm 2. Select the proper collets for the diameter of the parts being welded. Table 6 —Collets Model OD Capacity CWS-5UCI-X➀ 1/8 to 5/8 in., 3 to 17.3 mm CWS-5UFCI-.95 n/a CWS-5UFCI-X➀ 1/8 to 5/8 in., 3 to 16 mm SWS-5UFCI-EX-.95 n/a Fixture collets to hold adapter inserts used for 1/4 in. and smaller VCR or VCO fittings for SWS-5FSP1-EX side plate CWS-5MWCI-04 1/8 and 1/4 in., 6 mm Used to hold certain valves with an extension length of 1/2 in., 12 mm CWS-5MWCI-06 3/8 in., 8 and 10 mm For Micro-Fit fittings CWS-5MWCI-08 1/2 in., 12 mm For Micro-Fit fittings SWS-5F3UCI-X➀ Comments Tubing Add “mm” suffix for metric sizes. Fixture collets to hold adapter inserts for CWS‑5FSP1 side plate Tube collet for 5FSP1 and 5FSP2 1/8 to 1/2 in., For valves 6, 8, and 10 mm ➀ Where X identifies the collet size in 1/16ths or metric (mm suffix) Series 5 Weld Head User’s Manual Installing the Collets in a Tube Fixture Block 1. Release both levers and open the tube fixture block. See Figure 12. 2. Install the collet halves in both the top and bottom side plates and tighten the collet screws. Make sure the collet shoulder is flush against the fixture side plate. See Figure 13(B). Figure 12 Opening the Fixture Block Figure 13 Installing Collets 13 14 Series 5 Weld Head User’s Manual Aligning the Work Pieces in the Tube Fixture Block 1. Place the centering gage in one side of the tube fixture block. The centering gage must span the width of the collet. See Figure 14. 2. Butt one work piece against the centering gage. See Figure 15(A). 3. Lock down the top side plate. See Figure 15(B). 4. Remove the centering gage. Figure 14 Place the Centering Gage Note: When welding a Swagelok ATW fitting to tubing, butt the tubing against the centering gage first. Figure 15 Place First Work Piece in the Fixture Block Series 5 Weld Head User’s Manual 15 5. Butt the second work piece against the first work piece, and lock down the top side plate. See Figure 16. 6. Inspect 360° around the weld joint for fit and alignment. If alignment is not correct proceed to the next section. Figure 16 Placing Second Work Piece Adjusting the Fixture Block The modular design of the Series 5 Fixture block allows you to assemble the block to meet a variety of welding requirements. In order to maintain precise alignment of the work pieces in the fixture block, the side plates must be periodically aligned. This section covers: • Tube-to-tube • Micro-Fit fitting-to-tube • Micro-Fit fitting-to-Micro-Fit fitting Tube-to-Tube Fixture Block Plenum To align the fixture block, follow these steps: 1. Turn the fixture block over and locate the directional arrows on the plenum. The arrows point to the appropriate side plate. See Figure 17. 2. Using the provided 3/32 in. hex wrench, unscrew the four cap screws in the appropriate side plate just enough to loosen it from the plenum. See Figure 17 to locate the appropriate side plate. Directional Arrows Cap Screws Side Plate 3. Turn the fixture block upright and release both levers and open both sides of the fixture block. Figure 17 Loosening the Side Plate 16 Series 5 Weld Head User’s Manual 4. Place a straight length of tubing (minimum length 1.50 in [38.1 mm]) in the collets such that it rests across both side plates. 5. Close and lock the side plate that is not adjustable. See Figure 18. 6. Lock down the top of the loosened side plate. 7. Tighten the four cap screws in the loosened side plate. Take care to tighten the screws evenly to prevent the side plate from slipping. 8. Open the side plates and remove the tubing. Figure 18 Micro-Fit Fitting-to-Tube Fixture Block CWS-5FSP2 To align the fixture block, follow these steps: 1. Turn the fixture block over and locate the directional arrows on the plenum. The arrows point to the appropriate side plate. See Figure 19. 2. Using the provided 3/32 in. hex wrench, unscrew the four cap screws in the appropriate side plate just enough to loosen it from the plenum. See Figure 19 to locate the appropriate side plate. Placing the Tubing Plenum Directional arrows Cap screws 3. Turn the fixture block upright and release the lever and open the top of the tube side plate. 4. C hoose and install a collet that holds tubing that matches the outside diameter of the Micro-Fit fitting. Side plate Figure 19 Loosening the Side Plate Series 5 Weld Head User’s Manual 17 5. Unlatch and remove the top of the CWS-5FSP2 Side Plate. See Figure 20. 6. Using the centering gage, place a straight length of tubing (minimum length 0.75 in. [19.1 mm]) in the tube side plate and lock down the top of the plate. Side plate Centering gage Figure 20 Removing the Top of the Side Plate 7. Place the Micro-Fit fitting in the fitting side plate and close and latch the top. Allign Fitting with Tubing 8. Align the Micro-Fit fitting with the tubing. See Figure 21. 9. While maintaining the fitting-to-tubing alignment, tighten the four cap screws in the adjustable side plate. Take care to tighten the screws evenly to prevent the side plate from slipping. Figure 21 Aligning the Micro-Fit Fitting With the Tubing 18 Series 5 Weld Head User’s Manual Micro-Fit Fitting to Micro-Fit Fitting Fixture Block To align the fixture block, follow these steps: 1. T urn the fixture block over and locate the directional arrows on the plenum. The arrows point to the appropriate side plate. See Figure 22. 2. Using the provided 3/32 in. hex wrench, unscrew the four cap screws in the appropriate side plate just enough to loosen it from the plenum. See Figure 22 to locate the appropriate side plate. Plenum Directional arrows Cap screws Side plate Figure 22 Loosening the Side Plate 3. T urn the fixture block upright and remove the tops of the CWS-5FSP2 Side Plates. See Figure 23. 4. Using the centering gage, place one Micro-Fit fitting in one of the side plates. 5. Reinstall that side plate top. 6. Insert the second Micro-Fit fitting into the other side plate and close its top. Side plate Centering gage Figure 23 Removing the Top of the Side Plate Series 5 Weld Head User’s Manual 7. Align the two Micro-Fit fittings by adjusting the side plate that is loose. See Figure 24. 19 Allign fitting with fitting 8. While maintaining the fitting-to-fitting alignment, tighten the four cap screws in the adjustable side plate. Take care to tighten the screws evenly to prevent the side plate from slipping. Figure 24 Aligning the Micro-Fit Fittings 20 Series 5 Weld Head User’s Manual Mating the Weld Head to the Fixture Block 1. Rotate the locking lever on the weld head counterclockwise until it stops. See Figure 25. 2. Insert the weld head into the fixture block. See Figure 26(A). 3. Rotate the locking lever clockwise to secure the weld head. See Figure 26(B). Figure 25 Releasing the Locking Lever Figure 26 Mating the Weld Head to the Fixture Block Series 5 Weld Head User’s Manual Operating the Weld Head Operate the weld head using the following parameters: Shield Gas Flow Rate std ft3/hr (std L/min) 10 to 20 ➀ (4.7 to 9.5) Prepurge and Postpurge Minimum Time in Seconds 20 ➁ Maximum Recommended Average Amps 55 Amps at 50 % Duty Cycle ➂ 70 Amps at 35 % Duty Cycle ➀ Set flow to higher rates when welding at high current rates. ➁F low should be continuous for cooling when welding at hight current rates. ➂O utput amps may be reduced when using optional weld head extension cables. 21 22 Series 5 Weld Head User’s Manual Maintenance To ensure your Swagelok Welding System (SWS) equipment is always in proper working order, you must perform periodic maintenance on the system components. This section describes the procedures necessary for maintaining the fixture blocks and weld head. For detailed part drawings and information, refer to the Part Drawings at the end of this manual. Perform fixture block maintenance daily and after every 1,000 to 1,200 welds. Depending on usage and wear, maintenance may be performed before the 1,000-weld mark. Note: If you experience problems while performing the procedures in this section, refer to the Troubleshooting section in the power supply user manual or contact your authorized Swagelok representative. Note: Replace any defective parts. Service replacement parts are available through your authorized Swagelok representative. Series 5 Weld Head User’s Manual 23 Fixture Block Daily Maintenance At the start of each workday: 1. Inspect the fixture block for cleanliness, wear and damage. See Figure 27. 2. Remove dirt, carbon, and vapor deposits from the fixture block with a clean, soft cloth. A solvent such as alcohol or acetone can be used. Remove heavier deposits with a finegrit abrasive pad. At the end of each workday, clean and then store the fixture block in a dry place. Fixture Block Periodic Maintenance Every 1,000 to 1,200 welds: 1. Inspect and clean the collets. See Figure 27(A). 2. Check for scratches and dents. 3. Remove dirt and oxides from all surfaces of the collet with a soft stainless steel wire brush. 4. Remove any oxides from the non-anodized mating surfaces of the side plates with a fine-grit abrasive pad. See Figure 27(B). Figure 27 Cleaning the Collets and Collet Mounting Surfaces 5. Remove any dirt and oxides from the inside surfaces of the side plates with a clean, soft cloth. See Figure 27(C). Remove heavier deposits with a fine-grit abrasive pad. 6. Check the lever cam and latch for smooth operation. See Figure 28. a.Remove lever cam by removing the set screw from the latch and pulling the lever cam from the fixture block. b. Clean the lever cam and lightly lubricate if necessary. c.Replace the set screw and verify that it is locked tightly in position. 7. Verify the fixture block will properly secure the work piece. a. Install collets into one side of the fixture block. b.Insert nominal sized tubing and close the fixture block using the lever cams. c. Verify the tubing does not rotate in the collets. d.Verify the tubing does not slide side-to-side in the collets. e.Verify the tubing does not move up and down or left to right in the collets. f. Repeat for the other side of the fixture block. Contact your authorized Swagelok representative to return the fixture block for service. Figure 28 Lever Cam and Latch Note: If any wear or damage is found or the fixture block is not properly securing the work piece, the fixture block should not be used. 24 Series 5 Weld Head User’s Manual Weld Head Daily Maintenance Perform weld head maintenance daily and every 1,000 to 1,200 welds. Depending on usage and wear, maintenance may be performed before the 1,000-weld mark. At the start of each work day: 1. Inspect the weld head for cleanliness. Pay close attention to the rotor area. WARNING! Disconnect the WORK and ELECTRODE cables from the power supply before performing the adjustment or maintenance. 2. P ress JOG. Check the rotor for smooth rotation. Press JOG to stop the rotor motion. If the rotation is erratic or noisy, disassemble the weld head and clean the rotor, gears, and brush. See Weld Head Disassembly and Cleaning. 3. Press HOME to return the rotor to the HOME position. At the end of each work day: 1. Remove dirt, carbon, and vapor deposits from the weld head with a clean, soft cloth and a solvent such as isopropyl alcohol. 2. Store the weld head in a clean, dry place. Rotor area Figure 29 Inspect Exposed Surfaces of the Weld Head Caution! Do not use lubricants inside the weld head. Caution! The rotor will move when JOG or HOME is pressed. The rotor is a potential pinch point. Series 5 Weld Head User’s Manual Weld Head Disassembly and Cleaning Screws This section describes how to disassemble the weld head and rotor. Weld Head 25 Locking Ring Plate Locking Ring To disassemble the weld head, follow these steps: 1. Blow any loose material from the weld head assembly with clean, low-pressure air. 2. Remove the four screws, locking ring, and locking ring plate. See Figure 30. Figure 30 Removing the Locking Ring and Locking Ring Plate Work Extension Screw Lock Washer Work Extension 3. Remove the work extension screw with the lock washer, and the work extension. Inspect the work extension for pitting, wear, or damage. See Figure 31. 4. Replace work extension if necessary. Refer to the Parts Drawings at the end of this manual for part ordering information. Figure 31 Removing the Work Extension 26 Series 5 Weld Head User’s Manual Housing Screws 5. Remove the weld head housing screws from the housing. Using a slight rocking motion, carefully separate the locking ring half of the weld head housing from the motor half. See Figure 32. 6. Carefully separate the weld head housing halves so that internal components are not damaged. See Figure 32. 7. Remove the rotor from the motor half of the weld head housing. See Figure 33. Weld Head Housing (Work side) 8. Carefully lift the power block subassembly out of the motor half of the weld head housing. See Figure 34. Weld Head Housing (Motor side) Figure 32 Removing the Locking Ring Half of the Weld Head Housing Rotor Figure 33 Removing the Rotor Power Block Subassembly Weld Head Housing (Motor side) Figure 34 Removing the Power Block Subassembly Series 5 Weld Head User’s Manual 27 9. Examine the brush. See Figure 35. Inspect and clean the brush using the following steps: a. Check the brush for excessive wear. b. Ensure the brush has a groove. Replace the brush if the groove is not present. Refer to Parts Drawings for part ordering information. c. Remove any oxidation from the brush with a fine-grit abrasive pad. 10.Blow any loose material from the power block assembly with clean, low-pressure air. Figure 35 Inspecting the Brush 11.Ensure that the two power strap screws are tight. See Figure 36. 12.Ensure that the work plate screw is tight and free from excessive oxidation. See Figure 37. Clean the work plate with a fine-grit abrasive pad if necessary. 13.Inspect the gears for wear and replace if damaged. Refer to Parts Drawings for part ordering information. Figure 36 Inspecting the Power Strap Screws Figure 37 Separating the Gear Ring from the Brush Ring 28 Series 5 Weld Head User’s Manual Rotor To disassemble the rotor, follow these steps: 1. Remove the rotor screws and the electrode clamping plate screws from the rotor. Remove the electrode from the ceramic insert. See Figure 38. 2. Place the rotor on a clean, dry surface with the rotor opening facing up. Separate the gear ring from the brush ring enough to clear the two rotor pins. See Figure 39. 3. Completely separate the gear ring from the brush ring as shown in Figure 40. Lay the rings flat on the work surface. 4. Remove the ball bearings from the gear and brush rings. 5. Inspect the ball bearings for wear and damage. Replace if necessary. 6. If the ball bearings are dirty, clean them with isopropyl alcohol or cleaning solution. Dry the ball bearings thoroughly. Figure 38 Removing the Rotor and Electrode Clamping Plate Screws Figure 39 Placing the Rotor on the Work Surface Figure 40 Separating the Gear Ring from the Brush Ring Series 5 Weld Head User’s Manual 7. Remove the ceramic insert. See Figure 41. 8. Inspect the ceramic insert. If it has carbon or other deposits, clean it with a fine-grit abrasive pad or soft nylon brush. 9. Remove the electrode clamping plate. Clean it with a finegrit abrasive pad. See Figure 42. 10.Inspect the brush and gear rings for dirt or other deposits. Clean the rings with a fine-grit abrasive pad or soft stainless steel wire brush. 11.Dry all parts with clean, low-pressure air before reassembly. Figure 41 Removing the Ceramic Insert Figure 42 Removing the Electrode Clamping Weld Head Assembly Assembly of the weld head and rotor is the reverse of the disassembly procedures. To assemble the weld head, follow these steps: Caution! Do not pinch any internal wiring during reassembly. 1. Complete the steps in reverse order in Rotor. 2. Complete the steps in reverse order in Weld Head Disassembly and Cleaning. 3. Verify proper rotor position. See Figure 43. Correct Figure 43 Rotor Position Wrong 29 30 Series 5 Weld Head User’s Manual Series 5 Weld Head User’s Manual Parts Drawings This section includes exploded assembly drawings and associated parts lists. These drawings are provided as a guide to identifying part names. For specific part ordering information, contact your authorized Swagelok representative. The parts identified in this section include: • SWS-5H Weld Head • SWS-5H Rotor Assembly • SWS-5H Motor and Power Block Assembly • CWS-5TFB Tube Fixture Block • CWS-5FSP1 Special Purpose Fixture Block • SWS-5FSP1-EX Special Purpose Fixture Block • CWS-5FSP2 Special Purpose Fixture Block • SWS-5FSP3L Side Plate • SWS-5FSP3R Side Plate • SWS-5FSP4L Side Plate • SWS-5FSP4R Side Plate 31 32 Series 5 Weld Head User’s Manual 1 18 17 2 1 2 16 3 15 4 14 13 12 11 10 5 6 7 8 9 Figure 44 SWS-5H Weld Head 2 Series 5 Weld Head User’s Manual Table 7 SWS-5H Weld Head Parts List Reference No. Description Ordering Number Minimum Order Quantity 1 Motor Cover SWS-WH-MT-CVR 1 2 Dowel Pin * * 3 Dowel Pin * * 4 SS Socket Head Cap Screw, 6-32 × 1.000 in. 188-SCSA-138-32-1000 10 5 SS Socket Head Cap Screw, 4-40 × 1.250 in. 13162 10 6 Dowel Pin 7 Locking Ring 8 Locking Ring Plate 9 Plastic Socket Head Cap Screw, 6-32 × 0.437 in. 10 SS Button Head Screw 4-40 × 0.250 in. 11 12 13 * * 21065 1 SWS-WH-LK-RNG-PLT 1 13105 10 188-21066-RCEU 10 Split Lock Washer 13208 10 Work (+) Extension Bar 21093 1 SS Socket Head Cap Screw, 4-40 × 0.260 in., modified 13182 10 SWS-5H-D-WSH 1 * * 14 Housing (Work Side) 15 Motor Assembly 16 Rotor Assembly 17 Housing (Motor Side) 18 Weld Head Motor Cover Extender For ordering information, contact your authorized Swagelok representative. * Not available as a field replacement spare part. SWS-5H-RTR 1 SWS-5H-D-MSH 1 SWS-WH-MT-CVR-EXT 1 33 34 Series 5 Weld Head User’s Manual Figure 45 SWS-5H Rotor Assembly Series 5 Weld Head User’s Manual Table 8 SWS-5H Rotor Assembly Parts List Reference No. Description 1 Rotor Gear Ring 2 Dowel Pins 3 Plastic Ball Bearing, 0.187 in. 4 Rotor Brush Ring 5 SS Socket Head Cap Screw, 2-56 × 0.187 in. Ordering Number Minimum Order Quantity SWS-5H-RTR-GEAR 1 * * 11153 10 SWS-5H-RTR-BRUSH 1 13111 10 6 SS Socket Head Cap Screw, 2-56 × 0.125 in. 13110 10 7 Electrode Clamping Plate 11108 1 8 See Electrode Table (page 4) - - 9 Ceramic Insert 11132 1 For ordering information, contact your authorized Swagelok representative. * Not available as a field replacement spare part. 35 36 Series 5 Weld Head User’s Manual Figure 46 SWS-5H Motor and Power Block Assembly Series 5 Weld Head User’s Manual Table 9 SWS-5H Motor and Power Block Assembly Parts List Reference No. Description Ordering Number Minimum Order Quantity 1 Encoder Circuit Board 10708-A-RCEU 1 2 Sleeve Sensor Mount * * 3 Encoder Wheel * * 4 Motor 5 Home Sensor Mount Shim * * 11126 1 6 Home Sensor 10709-RCEU 1 7 Home Sensor Mount 11125 1 8 SS Socket Head Cap Screw, 2-56 × 0.375 in. 13145 10 9 Power Block (Motor Side) 21126 1 10 Dowel Pin * * 11 Work (+) Post 12 Drive Gear 13 Retaining Washer * * SWS-5H-DR-GR 1 SWS-WH-DR-RET-WSHR 1 14 SS Button Head Cap Screw, 4-40 × 0.250 in. 13167 10 15 Brush Springs MW-CSC-180-014-310-SG 10 16 Purge Bayonet B-BN4-K62 1 17 SS Socket Head Cap Screw, 4-40 × 0.500 in. Work Plate 13163 10 11053-A 1 18 19 20 21 SS Round Head Screw, 6-32 × 0.250 in. SS #6 Internal Tooth Lock Washer 22 SS Pan head Screw, 4-40 × 0.250 in. SS #4 External Star Washer 23 Power Strap 24 Power Block (Work Side) 25 Brush 188-13124-RCEU 10 410-13251-RCEU 10 188-21066-RCEU 10 13171 10 11117-RCEU 1 21207 1 SWS-5H-BRUSH 1 26 Power Post * * 27 Gear Assembly 10009-4 1 28 Gear Assembly 10009-3 1 29 SS Dowel Pin, 0.093 × 0.125 in. Drive Coupler 13133 10 * * * * 30 31 Drive Coupler Pin 32 Drive Coupler Pin Sleeve * * 33 SS Socket Head Cap Screw, 6-32 × 0.250 in. 13174 10 34 SS Socket Head Cap Screw, 2-56 × 0.187 in. 13111 10 For ordering information, contact your authorized Swagelok representative. * Not available as a field replacement spare part. 37 38 Series 5 Weld Head User’s Manual 1 2 3 4 5 13 6 5 4 8 6 14 7 8 15 13 7 8 13 14 16 11 13 9 21 22 10 12 20 11 19 18 17 Figure 47 CWS-5TFB Tube Fixture Block Series 5 Weld Head User’s Manual Table 10 CWS-5TFB Tube Fixture Block Parts List Reference No. Description Ordering Number Minimum Order Quantity 1 SS Socket Head Cap Screw, 4-40 × 0.250 in. 13112 10 2 Locking Tab 12134 1 3 Bottom Side Plate (left) 4 Lever Cam Assembly 5 6 CWS-5TSPL 1 12130-2 1 SS Set Screw, 4-40 × 0.125 in. 12132 10 Latch 12131 1 7 SS Socket Head Cap Screw, 4-40 × 0.250 in. 13112 10 8 See Collet Tables (in Orbital Welding System, Series 5, MS-02-129) - - 9 Top Side Plate (left) CWS-5TSPL 1 10 Plenum Assembly CWS-5PLEN 1 11 SS Socket Head Cap Screw, 4-40 × 0.563 in. 12 Top Side Plate (right) 13 14 15 Bottom Side Plate (right) 16 Dowel Pin 17 SS Socket Head Cap Screw, 4-40 × 0.187 in. 18 SS #4 External Star Washer 19 6 in. lanyard 20 Centering Gauge 21 22 13115 10 CWS-5TSPR 1 Dowel Pin * * Hinge * * CWS-5TSPR 1 * * 13207 10 13171 10 410-003 1 CWS-5CG 1 SS Socket Head Cap Screw, 4-40 × 0.250 in. 13112 10 SS #4 External Star Washer 13171 10 For ordering information, contact your authorized Swagelok representative. * Not available as a field replacement spare part. 39 40 Series 5 Weld Head User’s Manual 5 Figure 48 CWS-5FSP1 Special Purpose Fixture Block Series 5 Weld Head User’s Manual Table 11 CWS-5FSP1 Special Purpose Fixture Block Parts List Reference No. Description Minimum Ordering Number Order Quantity 1 Locking Tab 12134 1 2 SS Socket Head Cap Screw, 4-40 × 0.250 in. 13112 10 3 SS Socket Head Cap Screw, 4-40 × 0.250 in. 13112 10 4 Plastic Spacer 13245 10 5 Bellville Spring Washer 13244 10 6 Top Side Plate 7 Cam Pin CWS-5FSP1-TOP 1 12160-A 1 8 Right Latch Cam 12159 1 9 SS Set Screw, 10-32 × 0.420 in., modified 13224 1 10 SS Socket Head Cap Screw, 4-40 × 0.563 in. 13115 10 11 Bottom Side Plate 12162 1 12 Left Latch Cam 12158 1 For ordering information, contact your authorized Swagelok representative. 41 42 Series 5 Weld Head User’s Manual 1 2 5 4 7 3 6 4 5 5 6 7 8 9 Figure 49 SWS-5FSP1-EX Special Purpose Fixture Block 5 Series 5 Weld Head User’s Manual Table 12 SWS-5FSP1-EX Special Purpose Fixture Block Part List Reference No. 1 Description SS Socket Head Cap Screw, 4-40 x 0.125 in. Ordering Number Minimum Order Quantity 188-SCSA-112-40-125 10 2 Locking Tab 12134 1 3 Top Side Plate SWS-5FSP1-EX-TOP 1 4 Button Keeper 13300 10 5 SS Flat Head Screw, 4-40 x 0.375 in. 13108 10 6 Dowel Pin * * 7 Latch 8 Bottom Side Plate 9 SS Socket Head Cap Screw, 4-40 x 0.563 in. 11520 1 SWS-5FSP1-EX-BTM 1 13115 10 For ordering information, contact your authorized Swagelok representative. * Not available as a field replacement spare part. 43 44 Series 5 Weld Head User’s Manual Figure 50 CWS-5FSP2 Special Purpose Fixture Block Series 5 Weld Head User’s Manual Table 13 CWS-5FSP2 Special Purpose Fixture Block Part List Reference No. Description Ordering Number Minimum Order Quantity 10 1 SS Socket Head Cap Screw, 4-40 × 0.250 in. 13112 2 Locking Tab 12134 1 3 Plastic Screw Retainer 12169 10 4 Top Side Plate CWS-5FSP2-TOP 1 5 Dowel Pin * * 6 Locator Pin 12168 1 7 SS Set Screw, 4-40 × 0.125 in. 12132 10 8 Bottom Side Plate 12166 1 9 Latch 10 Lever Cam Assembly 12167 1 12130-2 1 11 SS Socket Head Cap Screw, 4-40 × 0.250 in. 13112 10 12 SS Socket Head Cap Screw, 4-40 × 0.563 in. 13115 10 For ordering information, contact your authorized Swagelok representative. * Not available as a field replacement spare part. 45 46 Series 5 Weld Head User’s Manual Figure 51 SWS-5FSP3L Side Plate Series 5 Weld Head User’s Manual Table 14 SWS-5FSP3L Side Plate Parts List Reference No. Description Ordering Number Minimum Order Quantity 1 Bottom Side Plate * * 2 Top Side Plate * * 3 Hinge * * 4 Lever 21030 1 12134 1 * * 5 Locking Tab 6 Dowel Pin 7 SS Set Screw, 4-40 × 0.495 in., modified 13226 10 8 SS Socket Head Shoulder Screw, 4-40 × 0.125 × 0.375 in. 13248 10 9 Catch 12122 1 10 Ball Plunger 5-40 × 0.250 in. 13246 10 11 Bellville Spring Washer 13247 10 12 Spring MW-CSC-180-014-380-SG 10 13 Dowel Pin 14 SS Socket Head Cap Screw, 4-40 × 0.187 in. For ordering information, contact your authorized Swagelok representative. * Not available as a field replacement spare part. * * 13207 10 47 48 Series 5 Weld Head User’s Manual Figure 52 SWS-5FSP3R Side Plate Series 5 Weld Head User’s Manual Table 15 SWS-5FSP3R Side Plate Parts List Reference No. Description Ordering Number Minimum Order Quantity 1 Bottom Side Plate * * 2 Top Side Plate * * 3 Hinge * * 4 SS Set Screw 10-32 × 0.495 in., modified 13226 10 5 Ball Plunger, 5-40 × 0.250 in. 13246 10 6 Dowel Pin * * 7 Dowel Pin 8 SS Socket Head Shoulder Screw, 4-40 × 0.125 × 0.375 in. * * 13248 10 9 Spring MW-CSC-180-014-380-SG 10 10 Catch 12122 1 11 Bellville Spring Washer 13247 10 12 Lever 21030 1 For ordering information, contact your authorized Swagelok representative. * Not available as a field replacement spare part. 49 50 Series 5 Weld Head User’s Manual 6 7 5 4 3 2 1 Figure 53 SWS-5FSP4L-XX Side Plate Series 5 Weld Head User’s Manual Table 16 SWS-5FSP4L-XX Side Plate Parts List Reference No. Description Ordering Number Minimum Order Quantity 1 5FSP4L-XX Bottom * * 2 Dowel Pin * * 3 5FSP4L-XX Top * * 4 SS Socket Head Cap Screw, 4-40 × 0.500 in. 13163 10 5 Screw Retainer 12114 10 6 SS Socket Head Cap Screw, 4-40 × 0.187 in. 13207 10 7 Locking Tab 12134 1 For ordering information, contact your authorized Swagelok representative. * Not available as a field replacement spare part. 51 52 Series 5 Weld Head User’s Manual 5 4 6 3 2 7 1 Figure 54 SWS-5FSP4R-XX Side Plate Series 5 Weld Head User’s Manual Table 17 SWS-5FSP4R-XX Side Plate Parts List Reference No. Description Minimum Ordering Number Order Quantity 1 5FSP4R-XX Bottom * * 2 5FSP4R-XX Top * * 3 Locking Tab 12134 1 4 SS Socket Head Cap Screw, 4-40 × 0.187 in. 13207 10 5 Screw Retainer 12114 10 6 SS Socket Head Cap Screw, 4-40 × 0.500 in. 13163 10 7 Dowel Pin * * For ordering information, contact your authorized Swagelok representative. * Not available as a field replacement spare part. 53 Warranty Information Swagelok products are backed by The Swagelok Limited Lifetime Warranty. For a copy, visit swagelok.com or contact your authorized Swagelok representative. Swagelok—TM Swagelok Company © 2001, 2004, 2010, 2011 Swagelok Company Printed in U.S.A. May 2011, R2 MS-13-203