1
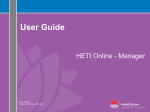
College Partner Portal
User Guide
Login
Login at: www.ocas.ca
Click on ‘PARTNER PORTAL’ and then the green ‘LOGIN’ button.
Login (cont’d)
Login using the username and password provided in the Partner Portal registration email.
Note: Log in information is CaSe SensitiVe.
! Follow password criteria when creating a new password. (No previously used password accepted.)
Manage your account access with the Forgot User Name/Password links.
Home (default) Screen
Click on the menu bar to access the functions to which you have been granted access. Note: Not all users may have access to all portal functionality.
Home (default) Screen (cont’d)
Edit Access Account – used to change password. Search Applicants – Home (default) screen. Allows you to view applicants to your college. System Applicant Search – Allows you to list all applicants that have applied to all colleges.
Manage Program Cycles – Select an application cycle to display and manage your college’s program offerings.
Search Programs – Search and manage a specific program offering.
Search Offers – View applicants who have received offer to your college only. College Information – Information displayed to the applicant during the offer process.
Document Access – Access to application supporting documents.
eTMS – Access to the Electronic Transcript Management System.
Change Password
Click ‘Edit Access Account’ to access the ‘Change Password’ screen.
No previously used password accepted.
Search Applicants Screen
To locate applicants to YOUR college.
Select the current or previous application cycle to limit search results. Leave the default “All” to see all students.
Enter search criteria in at least one field (e.g. partial student name) and click ‘Search’ to locate an applicant record. Click the ‘+’ to view additional search criteria fields. Note: ‘String search’ is used (e.g. entering ‘tes’ will result in any record containing the ‘tes’ characters).
Search Applicants Results
Note applicant payment status. (This is the only screen which provides this information.)
Click on the Last Name hyperlink to view applicant details. Search results are displayed sorted alphabetically by last name. Click on any column heading hyperlink to reorder the records in either ascending (default) or descending (optional) order.
Note: If only one record matches search criteria, you will be taken directly to that applicant’s dashboard.
Applicant Dashboard
View all applicant information relating to your college from the applicant Dashboard screen (see exceptions noted below).
Personal Information – basic demographic info, including legal name, date of birth, etc.
Contact Information – applicant street address, email address, telephone numbers (college user may update)
Authorized Users – not available for view
Citizenship & Residency – Citizenship, residency status in Canada, country of birth (college user may update)
Education – high school, postsecondary or international education information
Financial Support – agency sponsorship; this does not include OSAP
Experience – area of study‐related employment or volunteer experience, test scores
Program Choices – programs selected at your college by applicant
Basis of Admission – confirmation of high school attendance or graduation
Transcript Request – high school and/or college transcript requests via eTMS
Payment summary – not available for view View Offers – not available for view
Email Communications
(not available for view)
With the introduction of Canadian Anti‐Spam Legislation (CASL) on July 1, 2014, we are now required to collect consent from applicants in order to send commercial emails. On first login only, applicants are presented with this Email Communications page, containing two options for receiving commercial emails.
The first option collects consent for ontariocolleges.ca to send commercial emails. The second collects permission to establish a one‐time referral between the applicant and their college choices, which allows the colleges to reach out and collect their own consent.
Both of these boxes are optional. Once applicants have selected their options (or chosen not to), they can click ‘Submit’ to proceed to their application. They will not see this page again and will be unable to opt in to commercial emails at a later time. However, it is always possible to unsubscribe from commercial emails using a link in the email’s footer or calling our Customer Contact Centre. Regardless of preferences for commercial communications, applicants will receive transactional emails relating to their application activity, such as payment notifications, password resets, etc.
System Applicant Search
To locate applicants who have applied to ANY college.
Enter search criteria (e.g. partial student name) and click ‘Search’ to locate an applicant who has applied to any college.
Note: ‘String search’ is used (e.g. entering ‘tes’ will result in any record containing the ‘tes’ characters).
Click the ‘+’ to view additional search criteria fields. System Applicant Search Results
Search results are displayed sorted alphabetically by last name. Click on any column heading hyperlink to reorder the records in either ascending (default) or descending (optional) order.
! Results are VIEW ONLY and are used only to identify if an individual has an existing application on file at ontariocolleges.ca/OCAS.
System Applicant Search Results
(cont’d)
Application Status: Paid – application processing fee has already been paid at OCAS
Unpaid – application is not active and a payment of the application processing fee is required
Pending Payment – application is not active; check with OCAS as to the required fees to be paid
Updating Program Offerings
The ‘Manage Program Cycles’ and ‘Search Programs’ menu options provide similar functionality. Both can be used to update program offerings at your college.
Program offering information can be updated based on established business rules.
Whenever a change is made to an application cycle, program code, campus code or start date, it is considered a new program addition.
Manage Program Cycles
Display all of your college’s program offerings.
Click on a program cycle hyperlink
to display all your college programs within a published application cycle.
Programs as displayed in alpha order of program title. Click on any of the column heading hyperlinks
to resort.
Export program information to Excel: Program Code, Program Title, College, Campus
Manage Program Cycles —
Search / Add New
Use the Campus pick list and/or Program Code / Program Title fields to refine search results OR click on any program code/title hyperlink to view program details.
Click on ‘Add New Program’ to add a program offering to the selected application cycle.
Note: A new program can only be added from this screen. (New campuses and start dates can be added from both the Manage Program Cycles and Search Program menu options.) Manage Programs —
Add New / Edit
Use the pick lists and free form fields to add program details.
If the MCU Code is not known or to view a list of all available MCU codes, use the ‘Find’ function.
Manage Programs —
Add New / Edit (cont’d)
! Program categories are used in ‘Find a Program’ search results. (1 main category and 1 sub‐category is mandatory)
Click ‘Save’ when complete or ‘Clear’ to begin again.
Manage Programs —
Add Program Start Date
Click on ‘Add Program Start Date’ to access start date information.
Use the pick lists and free form fields to add required information.
Click ‘Add Program Start Date’ to add additional intake dates.
Click ‘Save’ when complete. Manage Programs —
Program Availability
Program Availability
Open – Applications are considered for admission. (Seats available.)
Closed – Applications are not considered for admission. (Program is full for that specific start date.)
Waitlisted – Applications will still be processed. (Seats may still become available.)
Program Availability Updates
Changes are reflected immediately within the Partner Portal and within an hour (approximately) in the online Find a Program utility. Manage Programs —
Program Status
Program Status
Active – Normal processing of applications to the program.
Inactive – Program was put on system but is no longer being offered and cannot be deleted because applications are attached to it. Cancelled – Program may not be offered again during the application cycle. Applications received to this program are transmitted to the college. Suspended – Program is not currently offered, but may be in future (including this application cycle). Manage Programs —
Expiry Date & Expiry Action
Expiry
Expiry Date – Date that the program availability will be set to ‘Closed’ or ‘Waitlisted’. (e.g. for a highly competitive program after the equal consideration date has passed.)
Expiry Action – Program availability change (‘Closed’ or ‘Waitlisted’) on Expiry Date.
Manage Programs —
Action
Action
Delete – Click ‘Delete’ hyperlink to remove a specific start date. Start date will only be removed after the ‘Save’ button is clicked. A program start date can only be deleted if no applicants have applied.
View Applicants – Click on ‘View Applicants’ to list all applicants that have applied to the specific program start date.
Manage Programs —
Save / Clear / Clone
Save – Save current information. Actions program start date delete.
Clear – Clears all current information.
Clone Program – Copies existing program information. Can only be used to add the program offering at an additional campus.
Search Programs
Search for a specific program offering at your college. (similar functionality to the ‘Manage Program Cycles’ menu option)
Be sure to select the correct application cycle.
Enter specific search criteria to locate a specific program.
OR
click ‘Search’ to display all program offerings.
Search Offers
Enter the application number and click ‘Search’.
Click ‘Edit Offer’ to make changes to an individual offer.
Update Offer
Make changes to individual offers as required. Click ‘Save’ when finished making updates or ‘Cancel’ to exit without saving changes.
New offers and mass updates should be sent to OCAS in the next offer file.
To prevent confirmation of an offer file, update the hard expiry date to the current date to expire the offer.
To change a program code, campus code, program start date, attendance status or entry level, revoke the existing offer and insert the new offer in the next OCAS offer file.
Update Offer (cont’d)
Confirmation Status
No Response – No offers processed for applicant.
CCY – Applicant has confirmed to this offer. Confirmed offers cannot be deleted.
CCN – Applicant has confirmed another offer or declined all offers. Offer State
Active – Offer is active and available for the applicant to select.
Deleted – Offer deleted by college (e.g. issued in error); applicant cannot view or select.
Revoked – Valid offer withdrawn by college, viewable by applicant but cannot be selected OR valid offer made to applicant who has not satisfied the conditions of the offer.
Program Suspended – Offer withdrawn by college due to program being cancelled. Viewable but cannot be selected by applicant.
Update Offer (cont’d)
Sequence Number – Sequence number of the offer.
Date Offer Posted – Field contains OFFER_ACTIVE_DATE from the offer file. Date must be prior to the soft and hard expiry dates. Offer becomes active and visible to the application at 12:01 a.m. on the date specified.
Soft Expiry Date – Field contains OFFER_EXPIRY_DATE_ SOFT from the offer file. Date can be the same or prior to the hard expiry date. Soft expiry dates are viewable by applicant as ‘Date of Expiry’ for that offer. Applicants are able to select offers beyond the soft expiry date.
Hard Expiry Date – Field contains OFFER_EXPIRY_DATE_HARD from the offer file. Applicants are not able to select offers beyond the hard expiry date. Offers expire at 11:59 p.m. on the date specified.
Late Admit –
NO: indicates regular offer
YES: indicates a late admit offer. OCAS will identify this offer as a late admit and will hold it until the OCAS application has been received and processed.
Term Identifier – Term for which offer is being made. (FA = Fall / WI = Winter / SU = Spring/Summer)
College Information
Displays the functionality to update information that is displayed to the applicant during the offer process. Click ‘Save’ when finished making updates or ‘Clear’ to exit without saving changes.
Revoked Info URL – URL link for applicant if the offer is revoked.
Suspended Info URL – URL link for applicant if the offer is suspended.
Phone Number for Revoked Offers – Phone number for applicant to contact college if offer is revoked or suspended.
College Website URL – URL link to college website.
Audit Report Email Address – Email address for receipt of audit reports. Separate individual email addresses by a comma.
Welcome Message – Message for applicant after offer of admission is accepted. College Logo – College logo displayed to applicants. Changes to college logos must be submitted to OCAS. (.gif files, 100 x 100 px, 72 dpi)
Document Access
See separate User Guide for complete Document Access information at: www.ocas.ca > E‐Materials > College Staff
eTMS
See separate User Guide for complete eTMS information at: www.ocas.ca > E‐Materials > College Staff