1
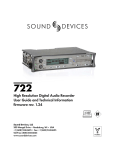
702 User Guide and Technical Information
Front Panel Descriptions
All 702 settings can be accessed and monitored through the front panel LCD and navigation buttons.
This allows the unit to be placed in a production bag along with field mixers, wireless transmitters,
and wireless receivers.
1
2
3
4
5
6
7
9
8
10
11
12
29
702
28
27
26
25
24
1)
23
22
21
20
19
18
17
Digital Input LEDs
Indicates the presence of AES or SPDIFdigital signal on the respective input.
When flashing, indicates that digital input is selected but no valid digital word
clock signal is present.
2)
3)
v. 2.54
5)
6)
13
LCD Display
Tone Oscillator
Press and hold to activate the tone
oscillator. Tone frequency, tone level,
and routing are controlled in the Setup
Menu. Tone must be pressed before entering recording to lay tone to the head
of a sound file. Tone level and frequency
are menu-controlled.
7)
Input 2 Gain
8)
MENU Button
14
Primary display of the 702. The LCD is
backlit using the LCD backlight control
(#15).
Controls the analog gain (input trim) of
the channel 1 input. Normal mic input
range is from 25 dB to 70 dB, low gain
mic range is from 10 dB to 55 dB, line
input range is from −6 dB to 18 dB. For
line-level inputs, this control can be defeated for setup-menu-controlled gain. If
the LCD display shows “locked” when
the control is rotated, gain control of
the line-level input is menu-controlled.
When inputs are linked as a stereo pair,
Input 1 Gain controls the gain of both
inputs.
Used to access all 702 Setup Menu selections. When in menu mode, used to
move up through the menu selections.
6
15
Input 1 Gain
Controls input 2 gain, as in #2 above.
When inputs are linked as a stereo pair,
Input 2 Gain adjusts left-to-right balance.
4)
16
Input-to-Track Matrix LEDs
Blue LEDs indicate inputs (1 and 2)
enabled for recording to tracks (A and
B). A solid blue LED indicates an input
is routed to a track. A flashing LED during “custom” routing mode shows the
selected input/track combination.
INPUT Select Button
Pressing the INPUT button brings up
the input muting and routing menu.
Hold down the INPUT button and press
one of the indicated soft buttons to mute
inputs. Pressing the STOP button and
the INPUT select button cycles through
the four factory preset input-to-track
routing combinations plus the custom
routing menu. In the custom routing
menu any input can be routed to any
track. See Input-to-Track Routing.
Features and specifications are subject to change. Visit www.sounddevices.com for the latest documentation.