Download User Manual for Scratch Match (Alpha Prototype)
Transcript
User Manual for Scratch Match (Alpha Prototype)
Introduction
Welcome to the world of the disc jockey (DJ). The role of a DJ is to
control the flow of music so that transitions between songs appear as
smooth as possible. In addition, you are putting on a show and your
creativity will get you noticed. Weaving different pieces of music together
can create a musical experience that is unique and greater than the sum
of its parts. Our program is here to allow you to play with and practice
several of the essential skills required to DJ effectively.
Installation (Windows Only)
Software needed: Apple Quicktime (full installation)
http://www.apple.com/quicktime/download/
The full installation is required.
Max/MSP Runtime (free, [5mb])
http://www.cycling74.com/download/maxmspruntime463.zip
Unzip and run the install script (.msi file) with default options. This program
allows you to interact with, but not edit, Scratch-Match.
GlovePIE 0.29(free, [1.61mb])
http://carl.kenner.googlepages.com/glovepie_download
Unzip anywhere in the computer. This program runs a script file that converts
the rotating LED lights on the record into a speed of rotation. Do NOT use
version 0.30.
IVT Bluesoleil 2.3 (trial, [27mb])
http://www.bluesoleil.com/download/index.asp?topic=bluesoleil_edr
Unzip and install. Being a trial, it will only let you transmit 5mb of data per
session (which translates into about an hour). Restart as necessary.
Scratch-Match (free, [135mb])
http://www.cim.mcgill.ca/~alvinlaw/sm/docs/alpha/SM_alpha.zip
The zip file includes the program, PIE script, along with all the songs it uses.
Unzip everything to the same folder anywhere.
Hardware needed: Audio Separation Adapter
[1 1/8” male stereo] splitter to 2x [1/8” female mono]. Provided by the SM
group.
Computer
Any WindowsXP or higher computer with a headphone out jack and a usb port
will be sufficient.
Wiimote + Nunchuk
A Nintendo Wiimote and its attachment is necessary. 2xAA batteries too of
course.
Turntable + slipmat
Any old turntable will do. Our system only uses the spinning platter so even if
the needle or arm is broken, it will still work. The slipmat is essential for
scratching.
Vinyl disc + IR LEDs
This disc is custom made from an old record, IR LEDs and hearing aid batteries.
Details on how to make your own is also in this manual.
Headphones
Any set of headphones or ear-buds will work although we recommend DJ
monitor style headphones (where each cup can rotate outwards).
Computer speakers
Any powered speakers with a 1/8” male connector will work.
Stereo Splitter Adapter (optional)
[1 1/8” male stereo] splitter to 2x [1/8” female stereo]. Provided by the SM
group.
Haptic Floor (optional)
Provided by the SM group. Not aware of any haptic floors on the market.
**The optional hardware is not vital to the enjoyment of DJ’ing but may help
facilitate faster and more natural beatmatching.
How to setup the Hardware
1. Setup a record player on a desk.
Keep it to the left (if you are right handed) of where you expect to sit. Plug it in.
2. Place vinyl with LEDs on platter. Vinyl MUST be spinning for tracks to play.
Make sure the slipmat is between the vinyl and the platter.
3. Attach a Wiimote to a shelf such that the camera is facing down towards 4.
the turntable (~30cm above).
Tip: If you leave the battery cover off, there is a nice indent with which to hold the Wiimote up. Our
implementation was a simple computer expansion slot cover and duct-tape. How you attach your
Wiimote is entirely up to you.
4. Place the nunchuk to the right of the turntable and sandwich it in place
with something like a heavy book.
Or in our case, a roll od duct-tape. We have not found a really good way of securing it. It is also up
to you if you want to hold it in mid-air. We find it easier and faster not to use our thumb to cut the
sounds.
5. Setup the haptic floor under the desk.
The haptic floor includes both the vibrating tiles and the amplifier(which also acts as a low-pass filter).
We amplify the bass so that you feel the beat and soften the treble so that it is not audible to the
audience.
6. Connect the stereo splitter into the audio-out of the computer.
One channel is for the haptic floor, one channel is for the channel splitter.
7. Plug the computer speakers into the L-channel of the splitter and
headphones into the R-channel.
8. Turn on the computer and plug in the Bluetooth adapter.
How to start Scratch-Match
1.
Setting up Bluesoleil 2.3
a. Start IVT Bluesoleil software.
b. Click on the orange sphere to search for Bluetooth devices.
c. Press 1+2 on the Wiimote. The blue lights should flash.
d. Double-click on the Wiimote while the lights are flashing.
e. When the mouse icon has a square around it, click it to connect.
f. You should see a line connecting the Wiimote to the orange sphere.
2. Setting up GlovePIE 0.29
a. Start the GlovePIE program by double-clicking the GlovePIE.exe file
in the folder you unzipped it to.
b. File >> Open, choose the file SM_rotation.PIE from the ScratchMatch zip package.
c. Click the ‘Run’ button.
d. Look at the values in the debug output. Rotate the disc around and
check that they change. If they do not, try restarting GlovePIE and
check the Bluetooth connection. It is not your fault, this is happens
sometimes.
3. Start Scratch-Match in Max/MSP 4.6 Runtime
a. Start the Max/MSP Runtime program.
b. File >> Open, then choose the file named SM_alpha.pat from the
Scratch-Match zip package.
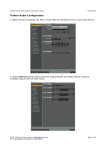
c. Maximize both windows and recenter the interface so that it looks
like this:
You are done! Now you can try to figure out how to DJ or read our
short guide for some pointers. *Remember to start the turntable.*
How to Start Playing a Song
Using the mouse:
1. Select a song from the library.
2. Click the ‘Load’ button to load the song onto whichever deck you want.
Let’s start off with Deck A.
3. Click the ‘Cue’ button to play the song through the headphones.
If you don’t hear anything, check that the record is spinning. If not, make it spin by pressing the
‘on’ button. The physical record now controls the track. You can fast-foward or rewind by using
your hand to turn the record. If you press down on the record, the track will pause.
4. Click the ‘Play’ button to play the song through the speakers.
You should not hear anything at this point.
5. Move the volume slider up.
You (along with your audience) will start to hear the music.
How to Mix in a New Song
This is very much like how to start playing a song.
While the live song is playing:
Using the mouse:
1. Set the volume on deck B to zero(if not already set).
This is so that the audience does not hear a sudden jump in of a song. Songs should be first
beat-matched, then faded in slowly.
2. Select a song from the library.
3. Click the ‘Load’ button to load the track to deck B.
4. Click the ‘Cue’ button to preview the song.
The song will play through your headphones so use your free hand to hold one side of the
headphones to your ear. The physical record now controls deck B.
5. Beatmatch using the pitch shifter.
You should be able to hear both the live track and the cue track, since only one ear is listening to
the headphones. Judging by what you hear, use the pitch shifter of deck B to either speed up or
slow down the cue track. It may be challenging at first but it will come with practice. We want
the beat frequencies to match.
After you find the appropriate frequency, we need to adjust for phase. We do this by first noting
the position of the pitch that matches. Then move pitch slightly higher for 1 sec, and then back
down again. Repeat until the beats line up. This skill is challenging so don’t be discouraged if
you don’t get it the first few times! You could also try using your hands to speed up or slow
down the physical record for a split second.
6. Click the ‘Play B’ button to play the song through the speakers.
The music will stop playing through the headphones and play through the speakers. Again you
should hear nothing as the volume button is set to zero.
7. Slowly fade in the new song.
The beat frequencies should still be matched and there will be a period where both songs are
overlayed on one another. If it sounds good, hold this mix for long. If not, fade out the old song.
It’s entirely up to you.
8. Slowly fade out the old song.
Be sure to fade out the old song before the track finishes playing.
8b. You can also use the cross-fader.
And that’s all there is to it! To continue mixing just repeat the above steps
but switching B with A and then vice versa. Happy mixing!
How to Scratch
Scratching is very much an art and there is no real rules that prevent you
from exploring different kinds of sounds you can make.
One very popular method is the use one hand to move the vinyl back and
forth and to use your other hand to tap the cross-fader to mute and unmute
the sound. This is known as cutting.
Instead of the cross-fader, we are using the nunchuk joystick. Moving the
joystick to the left or right will mute the sound.
Try moving the record with one hand and rapidly cutting the sound with
nunchuk. You will get some very unique sounding noises!
Scratching speech over music usually makes for good results so try this:
Load a music heavy track onto a deck and have it play live.
Load a track with lots of singing or speaking on the other deck and
scratch the vocals on top of the live track.
The Scratch indicator on top of each deck indicates which deck is connected
to the hardware. You can click the ‘switch’ button to swap control to the
other deck for more advance disc juggling moves!
How to make a Vinyl with IR lights
Since we are using digital sound files, the vinyl is only for control and its
content is never heard. We recommend the cheapest vinyl you can find
because scratching the vinyl will create many smudge marks.
You will need: 2 IR leds
Hearing aid batteries ( usually 1.4V )
Old vinyl disc
Tape
Soldering Iron and solder
We want the IR sources to be bright for the Wiimote to see yet light so that it
does not change the dynamics of the record. Because of the spinning nature
of the vinyl, batteries are necessary. This also means that they must be
replaced periodically. Luckily, hearing aid batteries are cheap and last for
many hours.
The most secure method is to solder the batteries directly into the leads of
the LED. Use a digital camera to check for the correct orientation and be
careful not to short the battery in the process. If you are uncomfortable with
soldering, using a small clamp may work but be sure to insulate the clamp if
it is metal.
Since you do not want the LEDs to be permanent (you will need to change
the battery), tape is the way to secure the LEDs. Bend the head so that it
faces upwards and tape the LED/battery unit down with small strips of
tape(we used duct-tape). We recommend close to the edge of the record
label so that it does not get in the way when scratching. Try to line the two
LEDs up with the center of rotation as much as possible.
And there you have it!
Tips
**Many DJs squeeze the monitor headphones in between their ear and their
shoulder to keep both hands free to do other things.


