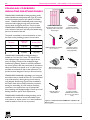
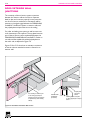
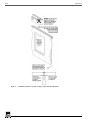
1
FOAMULAR® CodeBord™ Air Barrier System Installation Manual CODEBORD AIR BARRIER SYSTEM TM OWENS CORNING CANADA LP 70% Lower 3450 McNicoll Avenue Global Warming Scarborough, ON M1V 1Z5 1-800-GET-PINK® www.owenscorning.ca OWENS CORNING CANADA LP 3450 McNicoll Avenue, Scarborough, ON M1V 1Z5 1-800-GET-PINK® www.owenscorning.ca Potential Than Previous Formulation Pub. No. 300494. THE PINK PANTHER™ & © 1964–2011 Metro-Goldwyn-Mayer Studios Inc. All Rights Reserved. The colour PINK is a registered trademark of Owens Corning. © 2011 Owens Corning. † The insulation is manufactured with a blowing agent with 70% less global warming potential as compared to Owens Corning previous blowing agents. GREENGUARD Children & SchoolsSM Mark is a registered certification mark used under license through the GREENGUARD Environmental Institute. THE PINK PANTHER™ & © 1964-2012 Metro-Goldwyn-Mayer Studios Inc. All Rights Reserved. The colour PINK is a registered trademark of Owens Corning. © 2012 Owens Corning. Pub. No. 300494. Acknowledgements Owens Corning wishes to express its appreciation to those members of the building industry who have contributed to the development of this manual. This includes the numerous builders, building officials, design professionals; and not least, the Owens Corning staff members, Salvatore Ciarlo and Andy Goyda, who aided in the development and demonstration of the FOAMULAR® CodeBord™ Air Barrier System. Steering Committee Owens Corning gratefully acknowledges the extensive technical support and commitment provided by the following steering committee members. Without their aid and guidance this manual would not have been possible. Ed Barbison City of Mississauga Tony BoykoTown of Markham Frank GarceaMonarch Corporation Mike MemmeMountainview Homes Andy OdingReid’s Heritage Homes Doug OverholtCity of Vaughan Jason ShapardanisEmpire Communities Paul SmithMattamy Homes Janelle DayLio & Associates Michael LioLio & Associates Candice LuckLio & Associates © 2011 Owens Corning All Rights Reserved Printed in Canada. All rights reserved. No part of the work contained herein as covered by this copyright may be reproduced or used in any form, or any means - graphic, electronic or mechanical, including photocopying, recording, taping or information storage or retrieval systems - without the written permission of Owens Corning Canada LP. Pub. No. 300494. Additional copies of this publication may be obtained by visiting www.owenscorning.ca or calling toll free 1-800-GET-PINK® (1-800-438-7465). DISCLAIMER The procedures presented in this manual are intended as a guideline only, to provide a basic understanding of the concepts involved in the proper and effective installation of the Owens Corning FOAMULAR® CodeBord™ Air Barrier System. It remains the responsibility of the air barrier system installer and/or builder to ensure that all work performed conforms to applicable building code and labour safety regulations governing the construction. While care has been taken to ensure accuracy, and convey proper construction practices, Owens Corning does not assume responsibility for consequential loss, errors or oversights resulting from the information contained herein. Our liability is expressly limited to replacement of defective goods. Any claim shall be deemed waived unless made to us in writing within thirty(30) days from the date when the basis for it was, or reasonably should have been, discovered. Table of Contents FOAMULAR® CodeBord™ Air Barrier System 1-1 What is an Air Barrier System? Effective Air Barrier Systems What is the FOAMULAR® CodeBord™ Air Barrier System? The FOAMULAR® CodeBord™ Air Barrier System Concept FOAMULAR® CodeBord™ Air Barrier System Benefits 1-2 1-2 1-2 1-5 1-6 Getting Started 2-1 Tips For Success Basic Installation Sequence Suggested Practices 2-2 2-2 2-6 FOAMULAR® CODEBORD™ Air Barrier System Components 3-1 FOAMULAR® CodeBord® Extruded Polystyrene Rigid Insulation FoamSealR™ Sealing Gaskets Owens Corning Foam Sealant Polyethylene Air/Vapour Barrier Mechanical Fasteners Owens Corning Acrylic Seam and Flashing Tape Caulking Sealant EcoTouch™ PINK™ FIBERGLAS® Insulation Estimating Quantities 3-2 3-3 3-3 3-3 3-3 3-3 3-3 3-3 3-3 Installing System Components 4-1 Application of FoamSealR™ Gaskets FOAMULAR® CodeBord® Insulating Sheathing Application Nailing Attachment of Polyethylene Air/Vapour Barrier Owens Corning Foam Sealant Taping and Caulking 4-2 4-4 4-4 4-5 4-5 4-5 Assembly Details and Planning 5-1 Planning the Installation Sequence Floor Headers Exterior Walls Roof/Exterior Wall Junctions Ceiling Air/Vapour Barriers Windows, Doors and Other Penetrations Flashing Exposed Floors Special Cases 5-4 5-5 5-7 5-10 5-15 5-16 5-18 5-25 5-26 Alternative Details 6-1 Repairs 7-1 Frequently Asked Questions 8-1 Appendix 9-1 1 FOAMULAR® CODEbord™ air barrier system FOAMULAR® CodeBord™ Air Barrier System 1-1 The FOAMULAR® CodeBord™ Air Barrier System for houses and small buildings can provide clear advantages to you and your customers. The system provides a cost effective means of achieving air leakage control for your building projects. Owens Corning’s simple and easy-tounderstand installation procedures will make this the only air barrier system you use in your houses. For your customers, Owens Corning’s innovation means a more comfortable home with reduced drafts and a better control over temperature and relative humidity. The home is quieter because reduced air leakage means there are fewer paths for airborne noise penetration. The building is more durable because of reduced potential for moisture damage due to condensation caused by air leakage. And the improvement in energy efficiency, resulting in reduced heating and cooling energy costs, is an important bonus that costs virtually nothing extra. The FOAMULAR® CodeBord™ Air Barrier System is an external air barrier system which assures continuity of the air barrier and effectively minimizes air leakage. It has been used successfully on numerous houses of varying complexity. The system is easy to assemble, weather resistant, cost competitive and durable. This manual will help you to successfully install the system on your next building project. Remember there is no substitute for doing the job properly from the outset. Attending to installation details will save you time and money and enhance your reputation with your clients. Enforcement procedures may vary from municipality to municipality. Be sure to check with your local building official on the enforcement of specific code requirements in your area before you build. Key Points The FOAMULAR® CodeBord™ Air Barrier System is cost effective, easy to assemble and durable. Attention to detail is the key to successful air barrier systems. Check with your local building official regarding Building Code requirements. FOAMULAR™ CodeBord® air barrier system installation manual FOAMULAR® CODEbord™ air barrier system 1-2 What is an air barrier system? WHAT IS THE FOAMULAR® CodeBord™ Air Barrier An air barrier system controls the amount of air that System? moves through the building envelope (inwards or outwards). To provide this control, the air barrier system must: Extend across the intersection where interior walls meet an exterior wall, ceiling, floor or roof; Block leakage openings where an interior wall extends to become an exterior wall; Block leakage openings where an interior floor extends through an exterior wall to become an exposed or overhanging floor; Be sealed around openings and penetrations such as those that result from the installation of doors, windows, electrical wiring, electrical boxes, piping or ductwork; and Extend across attic access hatches. The FOAMULAR® CodeBord® extruded polystyrene rigid insulation (principal component); FoamSealR™ closed cell polyethylene sealing gasket; and Owens Corning Foam Sealant (if unavailable, a compatible low expansion foam sealant can be used as an alternative). As the name suggests, the FOAMULAR® CodeBord™ Air Barrier System is a system and not a single product. It is intended primarily for residential wood-frame construction applications. The system is applied to the outside of the building frame and uses conventional and readily available construction products to control air leakage. In all cases, the connections are the key to providing air barrier continuity and control of air leakage. EFFECTIVE AIR BARRIER SYSTEMS To be effective, an air barrier system must satisfy the following requirements: The air barrier must be continuous. Special attention is required at all joints and penetrations; The air barrier assembly must have sufficient structural strength to resist wind loads. Wind pressures should not cause the air barrier to tear, fracture or detach itself from the building structure; The air barrier system must be constructed using materials and components that are airtight (air impermeable). This not only includes flexible sheet and rigid board type materials, but also their sealing components; and The air barrier system must be durable and last at least as long as the building. Air barrier materials must not deteriorate. The FOAMULAR® CodeBord™ Air Barrier System consists of three primary components: The FOAMULAR® CodeBord™ Air Barrier System uses a compression-type seal to achieve extraordinary levels of airtightness, and durability. Walls utilizing this system have been tested to a pressure of 1,200 Pa (which is comparable to pressures exerted by hurricane force winds), meeting and surpassing the structural and airtightness requirements as established by the National Research Council of Canada. An insulating panel and gasket system on the outside of the building frame helps to control the leakage of air. Openings around windows and doors, and at other penetrations in the envelope, are sealed with foam, Owens Corning Acrylic Seam and Flashing Tape or caulking to provide the continuous airtightness. The FOAMULAR® CodeBord™ Air Barrier System also makes use of conventional air barrier technologies (e.g. polyethylene, housewrap, tape, caulking etc.) as required in some cases to provide continuity across all building assemblies. See Figure 1.2. If the air barrier system does not address ALL of these requirements, then the house may experience moisture damage, cold drafts, high energy bills and gradual deterioration overtime. See Figure 1.1. FOAMULAR® CodeBord™ air barrier system installation manual 1-3 FOAMULAR® CODEbord™ air barrier system NOTE: Pay attention to details in these areas of connections of materials and assemblies to maintain air barrier continuity. An air barrier provides continuous protection against air leakage by eliminating all holes, gaps or cracks over the entire building envelope. Air barrier continuity provided by building materials such as CodeBord®, concrete, glass, wall sheathing or polyethylene. FOAMULAR™ CodeBord™ Air Barrier System. EFFECTIVE AIR BARRIER SYSTEMS To be effective, an air barrier system must satisfy the following requirements: The air barrier must be continuous. Special attention is required at all joints and penetrations; The air barrier assembly must have sufficient structural strength to resist wind loads. Wind pressures should not cause the air barrier to tear, fracture or detach itself from the building structure; The air barrier system must be constructed using materials which do not leak (air impermeable); and The air barrier system must be durable and last at least as long as the building. Air barrier materials and components must not deteriorate over time. If the air barrier system does not address ALL of these requirements, then the house may experience moisture damage, cold drafts, high energy bills and gradual deterioration over time. Figure 1.1 Air Barrier Systems FOAMULAR® CodeBord™ air barrier system installation manual FOAMULAR® CODEbord™ air barrier system 1-4 Owens Corning recommended details for chimneys, ducts, pipes, outlets, wiring and penetrations make air sealing faster and easier than ever. Polyethylene air/vapour barrier is installed according to contractor’s preferred method. Penetrations for windows and doors are sealed with Owens Corning Foam Sealant FoamSealR™ Gaskets are applied over exterior framing members at joints between boards, corners, outside edges, and around openings. CodeBord® sheathing is securely fastened to outside of wood framing, to provide airtight seals at all joints and outside edges. FoamSealR™ Gaskets are installed under the sill plates. Air sealing details for basements and crawlspaces have been specially developed to work together with the CodeBord™ system. Polyethylene FOAMULAR® CodeBord® FoamSealR™ Gasket Figure 1.2 FOAMULAR™ CodeBord™ Air Barrier System FOAMULAR® CodeBord™ air barrier system installation manual 1-5 FOAMULAR® CODEbord™ air barrier system The FOAMULAR® CodeBord™ Air Barrier System Concept The FOAMULAR® CodeBord™ Air Barrier System is a fully engineered and tested approach to achieving airtightness. It represents added value by intelligently taking advantage of FOAMULAR® CodeBord® insulation and FoamSealR™ Gaskets to not only improve energy efficiency, but to eliminate drafts and air leakage. Most important, it is a complete system that helps builders save time and money, delivers durable, dependable comfort and energy efficiency to homeowners (see Figure 1.3). The system has a Canadian Construction Materials Centre (CCMC) evaluation report (No. 12935-R) and a positive ruling from the Ontario Ministry of Municipal Affairs and Housing’s Building Code Commission (BCC Ruling No. 09-39-237). See the Appendix for these documents. The full FOAMULAR® CodeBord™ Air Barrier System has been evaluated by CCMC and deemed in compliance with the National Building Code. The full system is not only an approved air barrier system but also an effective weather barrier. By taping all butt-edge joints with the Owens Corning Acrylic Seam and Flashing Tape, the full FOAMULAR® CodeBord™ Air Barrier System becomes an effective weather barrier as well and the sheathing membrane may be omitted. The Owens Corning Acrylic Seam and Flashing Tape is currently undergoing CCMC review and approval is pending for the use of the Tape as flashing tape and to adhere normal flashing to the foam. While approval is pending, builders may choose to use another CCMC approved tape or separate moisture barrier for rain shedding. Chapter 5 of this manual illustrates all the technical details for the full air barrier system. For those who would want to take advantage of the improved air tightness of the full system but is not prepared to accept the full installation practices detailed in Chapter 5, they may look to Chapter 6 for some alternative details. In these alternatives, caulking and taping can substitute for the gasket requirements. The alternative details shown in Chapter 6 are currently undergoing CCMC review and approval is pending. Please consult with the local municipality before implementing any of the alternative details in place of the FOAMULAR® CodeBord™ air barrier system installation manual Structural strength and durability are achieved by an engineered fastening system. Figure 1.3 Insulation and Airtightness in a Single Application Key Concepts FOAMULAR® CodeBord® insulation is an effective air barrier when edges are sealed with FoamSealR™ Gaskets. Penetrations, such as windows and doors, are effectively sealed using Owens Corning Foam Sealant. The ceiling polyethylene air/vapour barrier is installed according to the contractor’s preferred methods. Additional installation details and procedures for basements, pipes, ducts and chimneys have been developed to work together with the FOAMULAR® CodeBord™ Air Barrier System. Builder tried and tested, Owens Corning’s innovation allows builders to deliver an airtight envelope with excellent comfort and energy efficiency, without having to change current building practices. Owens Corning provides builders and framers with field assistance and technical support. 1-6 approved full system details. FOAMULAR® CodeBord™ Air Barrier System BENEFITS Quieter and healthier indoor environment. Cold drafts are virtually eliminated in houses using the system. Occupants will enjoy a quieter indoor environment with less dust and pollen. Durability and envelope integrity. Owens Corning has engineered and tested an excellent air barrier system. Independent laboratory testing shows that the FOAMULAR® CodeBord™ Air Barrier System can withstand over 1,200 Pascals of pressure, which is comparable to pressures exerted by hurricane force winds. This helps ensure that the air barrier system will prove effective over the life of the house and remain unaffected by extreme weather conditions. Reduced heating and cooling bills. The insulating properties of the FOAMULAR® CodeBord® insulating sheathing reduces heat loss through the wood structure (i.e. reduces thermal bridges) and saves energy at the same time. By eliminating cold spots on walls and reducing air leakage impacts, the potential for condensation is reduced and with it the potential for harmful mold growth. Efficient mechanical ventilation possible. The FOAMULAR® CodeBord™ Air Barrier System provides long term performance by using a mechanical seal to reduce the incidence of moisture-laden air leaking into insulated envelope cavities. When coupled to an efficient mechanical ventilation system, the FOAMULAR® CodeBord™ Air Barrier System improves indoor air quality. Easy, cost effective installation. Owens Corning Foam Sealant can be used to maintain continuity of the air barrier plane around window and door openings. Owens Corning Foam Sealant may also be used to seal penetrations caused by piping and wiring and to seal gaps between assemblies. No more caulking, wrapping and stapling headaches. FOAMULAR® CodeBord™ Air Barrier System and perimeter seal with Owens Corning Foam Sealant. No need to teach your favourite trades new tricks. In fact, with Owens Corning's suggested details for areas like basements, ducts and chimneys, the job of achieving an effective air barrier system is more builder friendly than ever before. 10 Benefits for the builder include: 1. Ease of installation. 2. Fewer penetrations to seal compared to sealed polyethylene or airtight drywall (i.e., warm side air barrier systems). 3. Where the FOAMULAR® CodeBord® is the air barrier system, the polyethylene vapour barrier need not be sealed. 4. Can be assembled in any weather. 5. Is an effective weather barrier and a sheathing membrane (e.g. building paper) may be omitted. 6. Makes use of commonly available materials such as extruded polystyrene wall insulating sheathing (FOAMULAR® CodeBord® 4' x 8' or 4' x 9' sheets), polyethylene, sill plate gasketing (FoamSeaIR™), and Owens Corning Foam Sealant (or other compatible foam sealant) 7. Results in a better performing wall assembly at a cost equal to or lower than that of a conventional assembly. 8. Is a feature that can differentiate you from the competition. 9. Is backed by one of North America’s more respected building products manufacturers. 10. Third party certified (Canadian Construction Materials Centre and the Ontario Building Code Commission). In other areas of the house, like ceilings, builders can continue to use their preferred methods for installing the air/vapour barrier protection. An alternative method to seal the ceilings, as opposed to using polyethylene, is to use the FOAMULAR® CodeBord® with taped joints FOAMULAR® CodeBord™air barrier system installation manual 2 GETTING STARTED Getting Started 2-1 Installing an air barrier system properly requires that attention be paid to all of the building details. Good air barrier systems need not be costly or difficult to build. They do require special care in ensuring that the right materials are used and that the system is continuous. The FOAMULAR® CodeBord™ Air Barrier System provides you with the flexibility you need to do the job right. The key point to remember is that all joints in panels need to be sealed with FoamSealR™ Gaskets. Caulking, foam sealant, air barrier housewrap, and polyethylene can be used where gaskets are not practical. FoamSealR™ Gaskets are placed on top of the foundation wall beneath the sill plate and under all joints of the FOAMULAR® CodeBord® sheathing panels. All of the vertical and horizontal joints between FOAMULAR® CodeBord® sheathing panels, whether these are shiplapped or butt edge, are sealed with FoamSealR™ Gaskets. All the wall sheathing panel edges must be supported by solid backing using framing such as studs, bottom or top plates, and lintels or blocking. Gasket strips are also installed where there are changes in direction such as at corners, at overhanging or recessed elements, and on the outer edges of openings for windows and doors. FOAMULAR® CodeBord® exterior insulation panels are installed preferably in the vertical position, that is, with the 4' width in the horizontal direction and the 8' or 9' length in the vertical direction. The panels are nailed to the framing using nails with plastic or metal caps or washers. Nails are spaced 6" o.c. on the perimeter and 8" o.c. in the field to obtain maximum compression of the sealing gasket. Installing nails further apart could reduce level of airtightness but may yield an acceptable level of performance verified by an on site blower door test. Nails should be driven solidly without breaking the surface of the insulating panel. Key Points Understand how the air barrier system works. Explain it clearly to your subtrades. Plan ahead for a successful installation. Supervise the work to guarantee quality. Pay attention to detail. FOAMULAR® CodeBord™ air barrier system installation manual Getting Started 2-2 Remember that understanding the air barrier system is the first step towards success. Communicating your intentions carefully to your subtrades will also save you time, money, and aggravation. The pages that follow will help you to master this new approach to air leakage protection. Tips For Success The tips below have been compiled from the experiences of other successful builders. Review them as you begin considering integrating the FOAMULAR™ CodeBord® Air Barrier System in your houses: 1. Plan Ahead: Before starting construction, review the house plans with your crew(s). Take the time to discuss the air barrier system to resolve difficult details. Use a planning checklist (see Chapter 5) to help you keep track of the air barrier system installation. 2. Framing: Plan stud positions ahead of time, particularly for corners that are not at 90°. 3. FoamSealR™ Gaskets: Improper gasket installation reduces the effectiveness of the air barrier system (avoid stretching, overlapping, or improper butting of gaskets). 4. FOAMULAR® CodeBord®: All joints (butt and shiplapped) between sheathing panels must be supported by framing with FoamSealR™ Gaskets beneath the joint. Cut insulating sheathing panels to provide a close fit. Avoid creating large gaps between panels. All edges of the rigid insulation panels should be supported by framing. Blocking should be used between vertical framing members behind unsupported horizontal joints in the exterior sheathing. Gasketing needs to be installed over the blocking to control air leakage through the joint. 5. Nailing: Ensure nail washers do not extend beyond the sheathing panel edges where washers might become an obstruction or get caught on something during the erection of other walls (see Chapter 4). Be careful particularly at the top edge of walls or edges of window openings. Ensure that corners of sheathing panels are well fastened by locating nails well into panel corners. 6. Foam Sealant: Around windows and doors, install Owens Corning Foam Sealant or equivalent along the joint formed between the exterior insulating sheathing and the FoamSealR™ Gasket. Be careful not to fill the cavity between the window frame and the rough opening with too much foam. This can cause the window frame to bow making window operation difficult or impossible. When foaming of the gaps is not possible because of space limitations, use caulking. Before applying the foam sealant, caulk all corners of rough openings. 7. Inspection: Once the air barrier system is in place, an inspection to identify gaps and openings in the system is advised. During the inspection look for any areas that require repair; for example, nail holes, damaged sheathing, areas left unsealed, and areas that have missing FoamSealR™ Gaskets (see Chapter 7 for Repairs). Plan for another inspection after the plumbing and electrical work is completed and before the cavity insulation and interior finishing has begun. BASIC INSTALLATION SEQUENCE For most houses, the installation sequence that is typically recommended follows the 10 simple steps shown on the following pages. Tips to Remember Plan ahead. Attend to the details. Inspect all of the work. Carefully seal all leaks and openings. FOAMULAR® CodeBord™ air barrier system installation manual Getting Started 2-3 Step 1: Build the foundation walls normally and install FoamSealR™ Gaskets at the top of the foundation wall beneath the sill plate. Install the sill plate. Note: When the top of the foundation wall is rough or uneven, two layers of sill plate FoamSealR™ Gasket may be required to achieve a proper seal. NOTE: Install bracing at 45 or a slightly steeper angle. O Step 2: Build the floor structure and apply the floor sheathing. Step 3: Frame the wall structure, make square and apply lateral bracing (optional but recommended for long walls). FOAMULAR® CodeBord™ air barrier system installation manual 2-4 IMPORTANT NOTE: For flashing installation details and techniques, refer ahead to Chapter 5 for Flashing Details. Always install FoamSealR™ Gastes over bracing to maintain proper seal. Getting Started Step 4: Apply a FoamSealR™ Gasket to the outside of the sill plate over the joint at the header. On the outside edge of the floor header, mark where the panel joints on the wall system exist. Then install the FoamSealR™ Gaskets vertically at these marks. Vertical gaskets should terminate at the top of the subfloor. Step 5: Install the FoamSealR™ Gasket to the outside of the wall frame at each panel joint. At the top of the wall, leave a flap to allow it to lap over the second top plate and second floor header joint. See Chapter 5. Step 6: Fasten insulating sheathing to the wall frame using appropriate ring nails and washers. Nails must be spaced no more than 6" o.c. on the perimeter and 8" o.c. midboard and intermediate framing members sheathed with FOAMULAR® CodeBord® FOAMULAR® CodeBord™ air barrier system installation manual Getting Started 2-5 Step 7: Erect the wall and temporarily brace it securely. Complete nailing the FOAMULAR® CodeBord® insulating sheathing to the floor header. Review the installation and ensure it is correct before proceeding. Step 8: After all of the ground floor walls are erected, repeat the procedure for second floor walls, if applicable. Step 9: Build the roof structure and install polyethylene air/vapour barrier at the roof/ceiling. Acoustical caulking may be used to seal the polyethylene. Step 10: Ensure all exposed floors are properly sealed. Seal around all windows, doors, other penetrations, and all the unintentional openings in the building envelope. Seal all other openings in the air barrier system (e.g. in the basement, at projections and other locations). FOAMULAR® CodeBord™ air barrier system installation manual Getting Started 2-6 Suggested Practices Construction Insight As you construct the air barrier system, you will need to consider a number of related items that are important ingredients to your overall success. Consider each of these good practice suggestions carefully as you set about to assemble the FOAMULAR® CodeBord™ Air Barrier System. Studies indicate that most contractors lose time and money due to improper planning and lack of organization on the construction site. Starting up each morning is made much easier by simply planning the work before going home at the end of the day. This is a time when your memory is fresh, and any problems or material requirements can be cleared up with your workers. Temporary Bracing: Temporary bracing is recommended for exterior walls (verify applicable building code requirements and details). Let-in T-bracing or corner bracing can be used to provide the necessary racking resistance. Neat, well organized construction sites are safer, with fewer obstacles to doing the job right. Why pay workers to waste time looking for tools and materials, when this should have been organized from the beginning of the project? Sheathing Membrane: Sheathing membrane (e.g. building paper) is not required over XPS foam insulating sheathing with shiplapped or sealed joints. Check with your local building official for compliance. Where the sheathing membrane is not used, all flashing details should be reviewed to ensure a proper lap exists that permits water to be shed easily to the outdoors (see Chapter 5 for Flashing details). Finally, most problems with product installations are due to a failure to read manufacturer’s instructions. In today’s world of engineered products and systems, if something is not going together easily, chances are it is not being done right. Airtight Electrical Boxes: Although your air barrier system is on the outside of the structure, airtight electrical boxes on the inside wall finish may be used as well, if desired, but are not required. The keys to success are planning, organization, and when all else fails, read the instructions. Clamp Polyethylene Vapour Barriers: It is not necessary to seal the interior wall polyethylene vapour barrier; however, ensure the polyethylene sheet provides coverage as it controls the diffusion of water vapour. Fasten Windows: When installing windows, use shims as necessary. Shim and fasten the windows to the rough frame at their midpoint on all sides of the frame, in addition to the corner attachments. Fireplaces: The outside air barrier system must extend across all elements including masonry fireplaces. Fireplaces and their chimneys should preferably be constructed on the inside of the shell of the building. FOAMULAR® CodeBord™ air barrier system installation manual 3 FOAMULAR® CODEbord™ air barrier system components FOAMULAR® CodeBord™ Air Barrier System Components 3-1 The principal components of the FOAMULAR® CodeBord™ Air Barrier System have been engineered to work best together. Every component has been designed to provide the type of long term performance you have come to expect from Owens Corning products. Do not accept any substitutes. The principal system components include: FOAMULAR® CodeBord® Insulating Sheathing Panels FoamSealR™ Polyethylene Sealing Gasket Owens Corning Foam Sealant Mechanical Fasteners Owens Corning Acrylic Seam and Flashing Tape Ecotouch™ PINK™ FIBERGLAS® insulation Problems with Components? Some of the components shown in Figure 3.1 are not Owens Corning products. If you are unsure or unable to find the right components to go along with our products, contact your Owens Corning representative for a list of suggested manufacturers. FOAMULAR® CodeBord™ air barrier system installation manual FOAMULAR® CODEbord™ air barrier system components 3-2 FOAMULAR® Codebord® Insulating Sheathing Panels CodeBord FOAMULAR® CodeBord® insulating sheathing panels, made of durable extruded polystyrene (Type 3), provide increased insulation levels for the coldest of Canadian winters. FOAMULAR® CodeBord® panels save energy, reduce thermal bridging through studs, and increase comfort levels throughout the house. Four foot wide FOAMULAR® CodeBord® panels go up fast. Installed on the outside of the frame wall, they save valuable living space on the inside of the wall. FOAMULAR® CodeBord® Extruded Polystyrene Insulating Sheathing (4’x8’ or 4’x9’) with shiplap edges FoamSealR™ Polyethylene Sealing Gaskets (3-1/2" or 5-1/2") The panels are available in various thicknesses to meet the needs of every building project as shown below. Thickness Sheets per Bundle R-Value (RSI) 1" 15 Sheets 5 (0.88) 1.5" 10 Sheets 7.5 (1.32) 2" 8 Sheets 10 (1.76) Owens Corning Foam Sealant (12 oz. or 20 oz.) FOAMULAR® CodeBord® insulating sheathing is available in 4' x 8' and 4' x 9' sizes. The boards come with shiplapped edges which provide a tight fit at the joints. No taping is required over shiplapped edges, installed over gasketing. Panels are normally installed in the vertical position with the printed side to the exterior. Handy stud finder lines spaced at 16" o.c. (400 mm) are provided on the boards to help in their placement. The product has been designed to save you time and money. FOAMULAR® CodeBord® is lightweight, yet strong and that makes it easy to handle and trim. It is recommended to provide temporary bracing during construction by using diagonal wind bracing. Gypsum board installed as the interior finish will normally provide the permanent bracing for the building. In some instances, sheathing membrane is not required over top of hydrophobic foam sheathing with shiplapped edges. Consult your local building official for specific local requirements. FOAMULAR® CodeBord® insulating sheathing can be installed on the outside of wood framed walls as part of an exterior air barrier system. It is recommended to install the exterior finish as soon as practical. Owens Corning Acrylic Seam and Flashing Tape Nails with Plastic or Metal Washers Polyethylene Vapour Barrier (air barrier for ceiling application) Caulking Sealant EcoTouch™ PINK™ FIBERGLAS® Insulation (R-12, R-14, R-20, R-22 or R-24) Figure 3.1 Components of the FOAMULAR™ CodeBord™ Air Barrier System FOAMULAR® CodeBord™air barrier system installation manual FOAMULAR® CODEbord™ air barrier system components 3-3 FoamSealR™ Sealing Gaskets Caulking Sealant FoamSealR™ is Owens Corning’s flat profile sealing gasket. The closed cell polyethylene strip gasket is durable and moisture resistant and will remain intact for years of energy saving performance. FoamSealR™ is available in 82 ft length rolls of 3.5" or 5.5" widths. The FoamSealR™ Gasket is easy to install, requiring no special tools. It is able to fill gaps between the sill plate and the top of the foundation wall and between all panel joints. It seals out air and keeps out insects. Owens Corning Foam Sealant Owens Corning Foam Sealant is used in locations where air leakage might occur and can be applied both on the interior and on the exterior of the building. Polyethylene Air/Vapour barrier Sealed Polyethylene can be used to assure the continuity of the air barrier plane for insulated ceilings. Mechanical Fasteners To fasten FOAMULAR® CodeBord® insulating sheathing panels, use steel wire or spiral nails with either steel or plastic washer caps (minimum 1" diameter ). FoamSealR™ gaskets are attached to wood framing with ½" crown (12.7 mm) steel wire staples. Used to seal polyethylene air/vapour barrier for insulated ceilings and to seal small holes in the FOAMULAR® CodeBord® insulating sheathing panels. EcoTouch™ PINK™ FIBERGLAS® Insulation EcoTouch™ PINK™ FIBERGLAS® insulation is manufactured using PureFiber™ technology. Ecotouch™ glass fiber insulation is GREENGUARD Children & Schools CertifiedSM and validated to be formaldehydefree. The insulation blankets are designed for friction-fit installation in frame cavities. It contains a minimum of 73% recycled content. Ecotouch batts are available in R-12, R-14, R-20, R-22, or R-24 (Refer to table 3.1 on the next page). ESTIMATING QUANTITIES Estimating the quantity of material that you will need to complete the project need not be a complex task. Remember that you will no longer need to purchase caulking sealant to seal the polyethylene air/vapour barrier for the wall areas. The guideline below will help you to order the right amount of material to get the job done. OWENS CORNING ACRYLIC SEAM AND FLASHING TAPE Owens Corning Acrylic Seam and Flashing Tape is a self-adhering tape compatible with FOAMULAR® CodeBord® sheathing. It is recommended for use in residential applications for sealing around doors and windows as well as sealing other detail areas against water and air penetration. GUIDELINE FOR ESTIMATING QUANTITIES Number of 4' x 9' CodeBord® panels for each storey = Number of Nails and Washers Number = of Panels x Number of FoamSealR™ Gasket Rolls = where A Owens Corning Acrylic Seam and Flashing Tape is 11 mils thick and is supplied in rolls 90 feet (27.4 m) long. Available roll widths include: 3.5", 4", 6", or 9" (89, 102, 152, 229 mm) widths. FOAMULAR® CodeBord™ air barrier system installation manual Building Perimeter ] Building Perimeter = 6.25 9.5 12.75 ÷ x 4 75 A Perimeter of ] + all doors and ÷ 82 windows for 1 storey house for 2 storey house for 3 storey house A typical house will need approximately: (24) 12 oz. or (12) 20 oz. cans of Owens Corning Foam Sealant 6 Rolls of Owens Corning Acrylic Seam and Flashing Tape FOAMULAR® CODEbord™ air barrier system components 3-4 Table 3.1 Typical Physical Properties and Coverage for Non-Combustible EcoTouch™ PINK™ FIBERGLAS® Insulation for Wood Stud Walls Thermal Resistance R 12 14 RSI 2.11 2.46 20/19** 3.5/3.34** Thickness U value 0.47 0.41 0.29/ 0.30** in. 3.5 3.5 6 mm 89 89 152 22 3.87 0.26 5.5 140 24 4.23 0.24 5.5 140 Width Length Coverage per Bag in. mm in. mm sq. ft. sq. m 15 381 47 1194 97.9* 9.10* 15 381 48 1219 90.0 8.36 23 584 47 1194 150.1* 13.95* 23 584 48 1219 138.0 12.82 15 381 47 1194 78.3* 7.28* 23 584 47 1194 120.1* 11.16* 15 381 47 1194 78.3* 7.28* 15 381 48 1219 80.0* 7.43* 19 483 47 1194 99.2* 9.22* 23 584 47 1194 120.1* 11.16* 23 584 48 1219 122.7* 11.40* 15 381 47 1194 49.1 4.55 23 584 47 1194 75.1 6.97 14.75 375 47 1194 33.7 3.13 22.75 578 47 1194 52.0 4.83 *Coverage based on SpaceSaver® packaging format. **Thermal resistance at 5.5 in/140 mm FOAMULAR® CodeBord™air barrier system installation manual 4 Installing System Components Installing System Components 4-1 The proper installation of all air barrier systems requires particular attention to detail for optimal performance. The FOAMULAR® CodeBord™ Air Barrier System requires the same care and attention. Understanding the basic installation procedures is essential. The performance of the FOAMULAR® CodeBord™ Air Barrier System was engineered and then tested across many new homes. The techniques proven in the field must be followed to obtain the superior performance that the FOAMULAR® CodeBord™ Air Barrier System can offer. Key Points Follow the recommended installation techniques. Only use recommended products which are compatible with Owens Corning’s air barrier materials. Accuracy before speed - take time the first time to get it right, productivity is sure to follow. Have any questions? Call Owens Corning’s Technical Services at 1-800-504-8294 . FOAMULAR® CodeBord™air barrier system installation manual Installing System Components 4-2 APPLICATION OF FOAMSEALR™ GASKETS The proper application of FoamSealR™ Gaskets is key to the success of the FOAMULAR® CodeBord™ Air Barrier System. Improper installation will let air in through the panel joint. Following some simple suggestions will help to ensure the air barrier system is effective. Avoid overlapping the FoamSealR™ Gasket or cutting it short as pieces butt together. Ensure that gaskets are butted together properly. Avoid stretching or overlapping the gasket (see Figure 4.1). Make sure it is not kinked. Gaskets with a consistent thickness leave no gaps to let in air. Remember that improper gasket installation could reduce air barrier system effectiveness. See Figures 4.2 and 4.3. In some cases, a FoamSealR™ Gasket flap is needed at the edge of an assembly to span across another assembly. Care should be taken that these flaps are not damaged as construction proceeds. An example of this is the gasket flap at the top of the first storey wall of a two storey house. The flap is intended to bridge the joint between the second floor header and the wall below. Use a single FoamSealR™ Gasket and wrap it around the corner. OR Staples are normally used to secure pieces of FoamSealR™ Gasket until the FOAMULAR® CodeBord® insulating sheathing is applied. Avoid using too many staples since they can overly compress and compromise the seal that the gasket provides. NEVER stretch FoamSealR™ Gaskets. This changes the thickness of the gasket causing an uneven compression air seal. Apply gaskets flat, and secure with staples. Overlap FoamSealR™ Gasket flush at corner intersections. DO NOT extend beyond to form a flap as this will lead to a leak in the fold. Figure 4.2 Applications of FoamSealR™ Sill Gaskets at Intersections Figure 4.1 Stretching of FoamSealR™ Sill Gaskets FOAMULAR® CodeBord™air barrier system installation manual 4-3 Installing System Components NEVER overlap FoamSealR™ Gaskets This will cause leakage at the gap. Wall Framing Gasket Header Strip Header Gasket FoamSealR™ Gaskets must be cut straight and square. The horizontal header gasket overlaps the edge of the sill plate gasket. The header strips end at the top of the subfloor. The gaskets over wall framing are cut flush with the bottom plate. Overlapped FoamSealR™ Gaskets cause gaps behind the sheathing which can reduce the effectiveness of the air barrier system. Figure 4.3 Applications of FoamSealR™ Sill Gaskets FOAMULAR® CodeBord™air barrier system installation manual Sill Gasket 4-4 FOAMULAR® CODEBORD® INSULATING SHEATHING APPLICATION FOAMULAR® CodeBord® insulating sheathing is the principal air barrier component of the air barrier system. Follow these simple steps to ensure optimal performance: 1. All panel edges should be straight and tight fitting. Poorly fitting boards can allow air to leak. 2. Ensure a FoamSealR™ Gasket is located beneath all panel joints. The gasket seals leakage at the joints. 3. Locate all FOAMULAR® CodeBord® panel joints over studs or other framing lumber. Centre the panel joint over the framing lumber support. It is important that the FoamSealR™ Gasket under each joint is under compression between the panel and framing. 4. When nailing the FOAMULAR® CodeBord® insulating sheathing to the frame, use a piece of lumber to kneel on. This will avoid accidentally breaking the insulating sheathing between the framing members. 5. Repair or replace all damaged or broken panels. Refer to Chapter 7 for repair instructions. 6. Seal all penetrations with foam, caulking or tape. Refer Chapter 5 for installation details. Nailing The nails and washers fulfill a number of important functions. These fasteners must: Installing System Components into the corner framing. Take care to not damage the panel by breaking the surface of the board. Damaged panels can cause air leakage. Nail washers that extend beyond the sheathing can get caught on components as walls are erected. Be careful to avoid these obstructions, particularly at the top edge of walls and edges of window openings. See Figure 4.4. Spiral nail with plastic or metal washers are the only approved means of fastening the sheathing. FoamSealR™ Gaskets are required behind ALL joints between panels. Minimum depth of penetration 1" (25 mm) Nails are required at all outside edges, all edges around openings, along all panel joints, and all intermediate framing members. Maximum 6 inches (150 mm) centre to centre 1. Hold all of the panels in place; 2. Compress the FoamSealR™ Gasket to provide the seal; and 3. Help the air barrier to resist strong wind pressures, ensuring long term performance. Always maintain the required nail spacing and ensure that all nails penetrate into solid lumber or structural backing. Nails should be spaced no more than 6 inches (150 mm) on centre along the edges of the panel and at 8" (203 mm) at intermediate framing (alternate nail spacings can be used to achieve desired performance if verified on site with a blower door test). The corners of sheathing panels should be well fastened. These are sometimes overlooked. Drive the nail solidly Nailing at Butt Edge Joints: NEVER set nails so that washers overlap the edges of the sheathing. This prevents proper joining of boards. Figure 4.4 FOAMULAR® CodeBord® Sheathing Application FOAMULAR® CodeBord™air barrier system installation manual 4-5 Installing System Components ATTACHMENT OF POLYETHYLENE Owens Corning FOAM SEALANT AIR/VAPOUR BARRIER Polyethylene used as the air/vapour barrier at insulated ceilings or roofs needs to meet all applicable material standards. Standards will often specify material characteristics and minimum material thickness. Polyethylene that is used as the principal air barrier material must be sealed to provide a continuous barrier to air leakage. See Figure 4.5. Polyethylene used only as a vapour barrier does not need to be sealed. It should, however, be lapped at least 4 inches over framing members. Remember never to install polyethylene on the cold side of the insulation in winter. Vapour barriers like polyethylene are prone to condensation if they are permitted to become too cold. Care needs to be used in applying foam sealant. Unlike caulking, foam will expand to fill voids and gaps that will eliminate air leakage. Not being careful in the application of the foam sealant can result in overfilling of gaps, that can cause problems as filled spaces try to accommodate the volume of expanding foam. In some cases, this can pose real problems for building components like doors and windows. As the frame deflects, the operation of the door or window can become difficult. PVC windows are particularly prone to bowing. Try to use more than one pass to fill in gaps. Temporary bracing can also be used to provide restraint. Similarly, window frames can be fastened to the rough stud opening at corners and at the centre span. As a rule of thumb, make rough openings for windows and doors 1" (25 mm) larger than the window or door frame size. If sufficient space is not provided, it is difficult to insert the nozzle of the foam sealant to the end of the gap around the rough opening. Make sure that window and door frames are shimmed and secured at the midpoints to prevent the expanding foam from warping the frame assembly. See Figure 4.6. TAPING AND CAULKING CodeBord® (air barrier) Taping and caulking should be used as necessary to repair obvious openings, to repair damage and to seal gaps that cannot otherwise be sealed. Taping and caulking will typically be required for areas that cannot be sealed effectively with a FoamSealR™ Gasket and a FOAMULAR® CodeBord® panel. Polyethylene air/vapour barrier Polyethylene vapour barrier The use of a polyethylene air/vapour barrier for ceilings is recommended. Install it to lap over the wall vapour retarder and extend down the top plates. Apply acoustical caulking before clamping the polyethylene in place. In all cases, the polyethylene must be clamped by the drywall against a supporting framing member. Figure 4.5 Attachment of Polyethylene Air/Vapour Barrier FOAMULAR® CodeBord™air barrier system installation manual Always select the right materials that do the job properly and prepare the surface before application. The Owens Corning Acrylic Seam and Flashing Tape should be applied to clean surfaces. Taping over dusty, greasy or dirty surfaces will prevent the tape from adhering properly. Caulking should be water based and compatible with polystyrene insulating sheathing if it is used on the panels. Normally, a latex or silicone caulking is acceptable. Non-hardening caulking like acoustical sealant should be used for sealing polyethylene or for those applications where the caulking needs to stay flexible. When sealing polyethylene, make sure that the sheet is appropriately lapped and stapled through the caulking. Installing System Components 4-6 IMPORTANT NOTE: To avoid bowing of window frames, do not completely fill rough opening during first pass with foam sealant. As a rule of thumb, make rough openings for windows and doors 1 inch (25 mm) larger than the window or door frame size. If sufficient space is not provided, it is difficult to insert the nozzle of the foam sealant to the end of the gap around the rough opening. Make sure that window and door frames are shimmed and secured at the mid-points to prevent the expanding foam from warping the frame assembly. Recommended 1/2" (12mm) Minimum 3/8"(9 mm) Avoid applying the Owens Corning Foam Sealant in a single pass around window and door openings. Instead, apply the first pass to seal the outer edge of the window opening to the sheathing. After the foam has fully cured, you may complete filling the gap. Caulking (optional) Foam sealant can form a water tight barrier. It is recommended to caulk all four edges. Figure 4.6 Owens Corning Foam Sealant FOAMULAR® CodeBord™air barrier system installation manual 5 Assembly Details and Planning Assembly Details and Planning 5-1 The installation of the FOAMULAR® CodeBord™ Air Barrier System is quite simple. The installation checklist on the next page can be used to keep track of the work and to review construction sequencing. Remember to have the appropriate tools and materials on-site. There is no substitute to doing the job right the first time. It will save you time and money in the long run. Review the installation checklist and see the full details ahead. This chapter will provide the details that will help the system perform as expected. Answering the questions below may help you to organize your approach to installing an air barrier system that is complete. 1. How will you seal around chimneys and flues as they penetrate the air barrier? Will insulation extend around masonry chimneys? How will air barrier continuity be maintained if no insulation is provided? 2. How will the garage be separated from the house? 3. Will the floor framing system that has been chosen affect the installation of the air barrier system? 4. How will penetrations from recessed lighting be sealed in the ceiling? 5. How will penetrations generally be sealed? 6. Are there unusual details that will require special air sealing attention? Key Points Have the right tools and materials on hand. Review all air barrier details before starting. Review the installation sequence as part of job planning. FOAMULAR® CodeBord™air barrier system installation manual Assembly Details and Planning 5-2 INSTALLATION CHECKLIST TOP OF FOUNDATION WALL • Take care to ensure that top of foundation wall is level. • Interior walls that penetrate ceiling or roof and become exterior walls are sealed to the ceiling or roof air barrier. CEILING/ROOF AIR BARRIERS • Take care to ensure sill plate gasket installed under the sill plate. • Ceiling and roof structure constructed. Polyethylene air/vapour barrier sealed to inside face of top plate with acoustical caulking. SEALING HEADERS • All penetrations through ceiling air barrier sealed. • Location of panel joints marked on outside of floor header. EXPOSED FLOORS • FoamSealR™ Gasket applied to outside of sill plate and covering over the joint in the header. • All exposed floors sealed including underside of unheated garage ceilings, floors over crawlspaces and cantilevered floors. • Vertical FoamSealR™ Gasket applied at marks from sill to top of subfloor. DOORS, WINDOWS AND OTHER PENETRATIONS WALL ASSEMBLY • Wall assembled with FoamSealR™ Gasket and FOAMULAR® CoreBord® insulating panels and lifted into place. All panel joints supported by gasketed framing lumber. • FOAMULAR® CoreBord® insulating panel nailed to sill plate, to bottom plate, and at studs where panels butt together with appropriate nail spacing. • FoamSealR™ Gasket installed at interior corners where one exterior wall butts another exterior wall. • All openings around windows and door sealed with Owens Corning Foam Sealant and/or caulking. • All gaps in the air barrier around penetrations must be sealed (with Owens Corning Acrylic Seam and Flashing Tape or Owens Corning Foam Sealant). BASEMENT AIR BARRIER DETAILS • Ensure continuity of exterior insulated sheathing to the foundation wall. • Basement floor slab sealed to foundation walls. • Second storey floor system placed on first storey walls ensuring FoamSealR™ Gasket flap from main floor walls laps the header. • Floor drain includes trap seal. • Second floor walls assembled on second floor platform with all FoamSealR™ Gaskets and FOAMULAR® CoreBord® panels in place. OTHER AIR BARRIER DETAILS • Second floor wall lifted into place and panels nailed at header, to top plate and at all panel joints to the supporting stud or blocking. • Electrical service penetration sealed. • Sump pit sealed. • Beam pockets sealed. • Cable and telephone penetrations sealed. FOAMULAR® CodeBord™air barrier system installation manual 5-3 Assembly Details and Planning GUIDE TO AIR BARRIER SYSTEM DETAILS Imagine being able to visualize the house framing before construction starts. It would give you an opportunity to plan ahead and avoid problems. Fortunately, most Canadian houses are similiar in construction, so you can use this handy guide to quickly reference key details of the FOAMULAR™ CodeBord™ Air Barrier System when planning your next project. For typical construction sequence see Basic Installation Sequence, in Chapter 2 For basic methods, see Installing System Components, in Chapter 4 The example house below contains a number of features that can become quite challenging unless you have planned for them. Bay windows, interior walls that extend to the outdoors, and exposed floors over garages, these can all be easily dealt with provided you have taken the time to consider all of the air barrier implications. Roof/ Exterior Wall Junction See Page 5-11 Ceiling Air/Vapour Barrier Details See Page 5-15 Second Floor Header See Page 5-7 Exterior Walls See Page 5-8 Ground Floor Header See Page 5-6 Basement Details See Page 5-31 Windows and Doors See Page 5-16 Angled Walls (Bay Windows) See Page 5-10 Floor Over Garage & Bay Window Floor See Pages 5-25 FOAMULAR® CodeBord™air barrier system installation manual For Flashing Details of Windows and Headers See Page 5-18 Assembly Details and Planning 5-4 Planning the installation sequence Planning the installation of the FOAMULAR® CodeBord™ Air Barrier System is an important first step that should never be forgotten. By considering the details before construction begins, the work will go smoother, and the quality of construction and productivity will improve. Always consider the relationship of construction sequence to the air barrier system details. Minor adjustments to the construction sequence can significantly simplify the installation of the air barrier system. Planning should consider: the installation of a FoamSealR™Gasket at all panel joints; the installation of a FoamSealR™ Gasket that is expected to span from one panel on one assembly to another panel on another assembly (e.g. panels on adjacent storeys); the construction of outside corners to avoid the use of scaffolding or ladders to provide a seal; the construction of inside corners to allow for proper sealing. WALL FRAMING SEQUENCE An important key to a successful air barrier system installation is the sequence of wall framing and erection. See Figure 5.1. Sequence A indicates one means of planning the wall framing. Other factors such as access to materials and special fixtures (e.g., one-piece tub/ shower units), must also be considered. Note that inside corners are best assembled when the two parallel walls are erected first. In Sequence B, another approach has been taken to framing the exterior walls. Common to both sequences is how the bay window walls are assembled. Installation is sequential, in either direction. The sequence reduces the need to put boards up or to tape from the outside with scaffolds or ladders. The sequence allows the last board to be slid in with the panel junctions that are interlocked from the platform. For both cases, attention must be paid to FoamSealR™ Gasket placement and the final sections of FOAMULAR® CodeBord® which must be installed after the walls are erected. The discussion on the pages that follow will deal in detail with each of these considerations. 4 6 7 8 9 5 8 7 6 4 3 5 1 10 2 10 3 2 1 SEQUENCE A 9 SEQUENCE B Figure 5.1 Framing Sequence FOAMULAR® CodeBord™air barrier system installation manual 5-5 Assembly Details and Planning Floor Headers Two approaches exist to sealing floor headers. The most common involves using 4' x 9' FOAMULAR® CodeBord® panels that extend over the header area, while the alternative uses 4 'x 8' panels over the walls with a header panel installed after the walls are erected. The foundation walls are built with FoamSealR™ Gaskets installed at the top of the foundation wall beneath the sill plate. Where large gaps exist between the sill plate and the top of the foundation wall, a double layer of gaskets can be used. If a double layer of gasket under the sill plate is still inadequate, use a single gasket layer under the sill plate and from the interior seal the joint between the sill plate and the foundation wall with Owens Corning Foam Sealant. After the sill plate is installed, the floor system can be built and placed onto the foundation. The wall system can be assembled on the floor platform with 4' x 8' or 4' x 9' FOAMULAR® CodeBord® panels. A FoamSealR™ Gasket is applied over the outside face of the sill plate around the entire perimeter of the building. If 4' x 9' panels are used on the wall, the wall panel will extend to this gasket. If 4' x 8' panels are used, a FoamSealR™ Gasket will need to be placed over the header, extending downward from the top of the subfloor. As well, a gasket should be placed under the bottom plate of the 4' x 8' panel clad wall. On the outside edge of the floor header, mark the panel joints of the wall. Vertical FoamSealR™ gaskets will need to be installed at these marks to seal the gap between the wall and header gaskets. The vertical gasket will be compressed by the 4' x 9' panel that extends downward from the wall or by a separate panel applied directly to the header when 4' x 8' sheets are used. See Figure 5.2. Where engineered floor systems are used and the header is too deep to be covered by a 4' x 9' panel, using 4' x 8' panels on the wall and sheathing the header separately is often the best approach. See Figure 5.3. Second floor headers are sealed by a FoamSealR™ gasket that bridges the joint between the top plate of the main floor wall and the second floor header. The gasket is intended to seal the joint between the main floor wall panel and the panel applied over the header. The header panel can be a 4' x 9' sheet that extends over the header from the second floor walls; or alternatively, the header panel can be a separate FOAMULAR® CodeBord® sheet if 4' x 8' panels are used. See Figure 5.4. Look ahead to Flashing on page 5-18. Always trim FoamSealR™ Gaskets straight and square. Cut sheathing 1/4 inch short to prevent damage when erecting the wall Figure 5.2 Ground Floor Header Joist FOAMULAR® CodeBord™air barrier system installation manual This is the most common method for joist-type floor headers. A 4' x 9' FOAMULAR® CodeBord® sheathing panel is required to cover the header in a single application. Assembly Details and Planning 5-6 When a header panel is used, a horizontal gasket is installed behind the joint between the FOAMULAR® CodeBord® panels. Header Panel Header Panel When a 9 foot sheet of sheathing is too short, a header panel is used. It is installed after the wall has been erected. Make sure to line up the vertical joints, or install extra header FoamSealR™ Gaskets where required. This FOAMULAR® CodeBord® panel is installed after the wall is erected. Extend sill FoamSealR™ Gasket beneath header. Figure 5.3 Header Panel with Engineered Wood Floor System Upper Wall Panel Header Panel Lower Wall Panel Owens Corning Acrylic Seam and Flashing Tape This is the way to detail an upper storey floor header when using 4'x9' FOAMULAR® CodeBord® sheathing panels. Precise alignment of the panels is necessary to ensure a snug fit. Always cut panels using a straight edge. FoamSealR™ Gasket applied to lower wall top plate with flap to extend past header joint. Figure 5.4 Header Panel at Second Floor FOAMULAR® CodeBord™air barrier system installation manual 5-7 Assembly Details and Planning Exterior walls FOAMULAR® CodeBord™ Air Barrier System requires all exterior walls be clad with FOAMULAR® CodeBord® panels with all of their joints sealed by a FoamSealR™ Gasket. The insulating sheathing is fastened to the wall frame using appropriate ring nails and washers. Once completed, the wall can be lifted and secured in place. In erecting the walls, pay particular attention to the order in which the walls are lifted into place. In some cases sealing corners is easier when the order is carefully considered. When the walls are assembled, remember to leave a FoamSealR™ Gasket flap at the top of the wall to extend over the second floor header. Assembling corners can become challenging unless you apply some forethought to the process. Two alternatives are available for framing outside corners; that is, normal corners that meet at 90°: 1. At the corner the wall is framed with a piece of FOAMULAR® CodeBord® panel that extends beyond the edge of the wall. The panel extension is intended to cover the end of the abutting wall. The extension should be as wide as the abutting wall is thick (i.e., framing and CodeBord® sheathing). The wall is assembled and tilted up. The abutting wall is sheathed normally; however, a FoamSealR™ Gasket is attached to its end to seal the panel extension of the opposing wall. 2. Walls are sheathed normally as part of the second alternative. The extension left off and sheathed after the wall is tilted up. This second approach may require the use of ladders or scaffolding to add the final corner panel. See Figure 5.5. 3. Alternate corner sealing approach. See Figure 5.6. Trim panels straight and square. Always use a straight edge on cuts. Nails spaced at 6" (152 mm) o.c. Owens Corning Acrylic Seam and Flashing Tape The figure below shows vertical FoamSealR™ Gasket placement at the outside corner and behind vertical joints in the FOAMULAR® CodeBord® sheathing panels. NOTE: A single FoamSealR™ Gasket may also be used to wrap the entire corner. See Figure 4.2 Owens Corning Acrylic Seam and Flashing Tape Figure 5.5 Outside Corner of Exterior Wall Owens Corning Seam and Flashing Tape Joint covered with building paper for moisture Figure 5.6 Corner Air Seal FOAMULAR® CodeBord™air barrier system installation manual Gaskets between 2 corners or spray foam from interior Assembly Details and Planning 5-8 The assembly of inside corners is straightforward provided the order of erection is considered. Again, one wall will be required to butt up against another wall with a FoamSealR™ Gasket applied to the end of the abutting wall. The main wall is assembled with an additional stud on the flat attached to the two stud corner. The additional stud is intended to support a FoamSealR™ gasket that will seal the end of the panel of the abutting wall. Two gaskets adjacent to one another are applied at the corner: one over the two corner stud and one over the additional stud. The wall is clad with FOAMULAR® CodeBord® sheathing; however, the sheathing must not extend to the end of the wall. At the inside corner, the sheathing should be cut short by a distance that corresponds to the thickness of the abutting wall (i.e. framing and CodeBord® sheathing). The abutting wall can be tilted into place with the inside face flush with the inside face of the end of the main wall. See Figure 5.7. When irregular walls (i.e. walls that meet at an angle more than 90°) form a part of the air barrier plane, a FoamSealR™ Gasket must be installed over the corner studs at the intersection of the two wall planes. See Figure 5.8. The gasket should bridge from one adjoining wall to the other. The detail can be constructed by building one wall with the gasket flap and the other with no end panel. After the walls are lifted into place, the end panel can be installed over the corner gasket. A bead of Owens Corning Foam Sealant should be used to seal the corner from the interior or exterior. Builders are advised to construct irregular walls according to their preferences, but also urged to plan ahead carefully as these are trickier than regular, squareangled walls. Flashing can be installed over the wall panel with a sheathing membrane (e.g. building paper) over top. Where a sheathing membrane is omitted when using the FOAMULAR® CodeBord™ Air Barrier System, the flashing should be installed under the CodeBord® panel or adhered to the foam with approved tape (see Flashing starting on Page 5-18). Be sure to check with your local building official before you begin construction. Omitting the sheathing membrane may not be accepted in your area. Nails spaced at 6". Owens Corning Acrylic Seam and Flashing Tape Provide a 1/4" allowance in the length of the wall to accommodate FoamSealR™ Gasket Owens Corning Foam Sealant First, construct this wall, then erect and brace. Second, construct wall with corner studs, then carefully erect and attach to first wall. Owens Corning Acrylic Seam and Flashing Tape OR Owens Corning Foam Sealant 5 ½'' Owens Corning Acrylic Seam and Flashing Tape Use one 5 ½'' FoamSealR™ Gasket as an alternative Figure 5.7 Inside Corner of Exterior Wall FOAMULAR® CodeBord™air barrier system installation manual 5-9 Assembly Details and Planning Angled walls may be assembled using a header panel instead of a single 4' x 9' panel. It may even be necessary to apply the FOAMULAR® CodeBord® after the walls are standing. Owens Corning Acrylic Seam and Flashing Tape Apply Owens Corning Foam Sealant later when sealing window and door openings. Owens Corning Acrylic Seam and Flashing Tape Figure 5.8 Exterior Walls Other than 90° FOAMULAR® CodeBord™air barrier system installation manual Assembly Details and Planning 5-10 ROOF/EXTERIOR WALL JUNCTIONS The continuity of the air barrier system at junctions between the exterior walls and roof is an important detail to plan and construct properly. In many cases, the use of an air barrier membrane, or housewrap, will be necessary to bridge the gap between the FOAMULAR® CodeBord™ Air Barrier System on exterior walls, and the polyethylene air/vapour barrier on the ceiling. For rafter and ceiling joist systems, as well as most truss roofs, housewrap is not required. The top plate becomes part of the air barrier system, sandwiched between the FOAMULAR® CodeBord® and FoamSealR™ Gasket on one side, and the stapled and caulked polyethylene on the other side, as depicted in Figure 5.9. Figures 5.10 to 5.12 show how to maintain a continuous air barrier when an attached structure is framed in an exterior wall. Use caulking to seal the joint in the ceiling polyethylene air/vapour barrier (Or clamped as permitted by local building official). FOAMULAR® CodeBord® (air barrier) Polyethylene air/vapour barrier Caulking used to seal joint in ceiling polyethylene vapour barrier Figure 5.9 Roof Rafter and Exterior Wall Junction FOAMULAR® CodeBord™air barrier system installation manual 5-11 Assembly Details and Planning SECTION - TOP VIEW Cut and fit FOAMULAR® CodeBord® above the ledger board. Use a straight edge for all cuts, and avoid cutting the CodeBord® in place to prevent slicing the air barrier membrane. Polyethylene vapour barrier Caulked polyethylene acting as air/vapour barrier FOAMULAR® CodeBord® air barrier FOAMULAR® CodeBord® acting as insulation only Path of continuous air barrier Seal polyethylene with caulking to the studs forming the perimeter of the gasketed area where the porch structure ties into the wall structure, to transition the air barrier from the polyethylene air/vapor barrier through the studs to the gasket to the FOAMULAR® CodeBord®. Polyethylene Air/Vapour Barrier Ledger Board Attached Structure ALTERNATIVE - SURFACE MOUNTED LEDGER BOARD Interior polyethylene as vapour barrier only Air barrier membrane clamped to sealing gaskets Path of continuous air barrier FOAMULAR® CodeBord® air barrier Ledger board surface mounted and bolted to studs Figure 5.10 Exterior Walls Projecting Past Attached Structure FOAMULAR® CodeBord™air barrier system installation manual Ledger Board Assembly Details and Planning 5-12 Shingle Flashing Detail Option A Use caulking to seal the joint in the ceiling polyethylene Owens Corning Acrylic Seam and Flashing Tape over metal flashing sealed to FOAMULAR® CodeBord® Metal Roof Flashing Polyethylene air/vapour barrier Shingles RAFTER Ledger Board heated space unheated space Transition to interior polyethylene air/vapour barrier heated space FoamSealR™ Gasket Owens Corning Acrylic Seam and Flashing Tape FoamSealR™ Gasket FOAMULAR® CodeBord® as air barrier Figure 5.11 Exterior Walls Projecting Past Attached Structure (Shingle Flashing Detail Option A) FOAMULAR® CodeBord™air barrier system installation manual 5-13 Assembly Details and Planning Shingle Flashing Detail Option B Use caulking to seal the joint in the ceiling polyethylene Owens Corning Acrylic Seam and Flashing Tape Metal Roof Flashing Polyethylene air/vapour barrier Shingles RAFTER Ledger Board heated space Transition to interior polyethylene air/vapour barrier Owens Corning Acrylic Seam and Flashing Tape FoamSealR™ Gasket FOAMULAR® CodeBord® as air barrier Figure 5.12 Exterior Walls Projecting Past Attached Structure (Shingle Flashing Detail Option B) FOAMULAR® CodeBord™air barrier system installation manual unheated space heated space Assembly Details and Planning 5-14 Cathedral ceilings are treated the same as typical ceilings when rafters or trusses are used for framing. In the case of flat cathedral ceilings, like the one depicted in Figure 5.13, where the FOAMULAR® CodeBord® and FoamSealR™ Gasket is on the outside, caulked polyethylene is stapled on the inside of the top plate is normally sufficient. FoamSealR™ Gasket FOAMULAR® Codebord® In the case of sloped cathedral ceilings, the proper fitting and placement of FoamSealR™ Gaskets to prevent air leakage requires care, both in planning and workmanship. See Figure 5.14. Caulked (or clamped) to join to ceiling polyethylene air/vapour barrier Caulked (or clamped) to join to ceiling polyethylene air/vapour barrier FoamSealR™ Gasket Wall Polyethylene vapour barrier Figure 5.13 Flat Cathedral Ceilings FOAMULAR® Codebord® Polyethylene Wall vapour barrier Figure 5.14 Sloped Cathedral Ceilings FOAMULAR® CodeBord™air barrier system installation manual 5-15 Assembly Details and Planning CEILING AIR/VAPOUR BARRIERS For polyethylene air/vapour barriers, all penetrations at the ceiling must be sealed. These will include openings in the air barrier system created by lights, ducts, electrical wiring, pipes, and attic hatches etc. Polyethylene flaps should be installed between plates of interior partitions. The flaps will be used to make the ceiling air/vapour barrier continuous across the partition. Alternatively, apply and seal the ceiling polyethylene air/ vapour barrier before framing interior wall partitions. Similarly, at the end of partition walls, polyethylene flaps should be installed to provide full vapour barrier coverage. These, of course, need not be sealed since the polyethylene on the walls only acts as a vapour barrier, not an air barrier. See Figure 5.15 for some air/vapour details in ceiling penetrations. Wood Panel Neoprene Rubber Gasket Plywood Collar Sealant Trim Weatherstripping Attic Hatch Frame Plumbing Stack Electrical Wire Poly Box Sealant Polyethylene Flap FoamSealR™ Gasket Caulking Figure 5.15 Ceiling Air/Vapour Barrier Details FOAMULAR® CodeBord™air barrier system installation manual Sealant Sheet Air Barrier (polyethylene) 5-16 windows, doors and other penetrations Sealing windows and doors is quick and easy using the FOAMULAR® CodeBord™ Air Barrier System. At window openings follow these simple steps: Assembly Details and Planning Window and door openings must have FoamSealR™ Gasket applied around the entire perimeter. See the Flashing section ahead for important details and techniques. 1. Seal the corners of the rough stud opening with caulking before the window is installed. Corners can leak air even after the window is foamed in place. 2. All around the opening install the FoamSealR™ Gasket. 3. Install the FOAMULAR® CodeBord® over the gasket. 4. Install the window normally into the rough stud opening. 5. Seal the perimeter of all doors and windows with Owens Corning Foam Sealant. Avoid overfilling the space between the rough opening and the window or door frame with foam. Too much foam can cause the frame to bow, and the door or window to stick. 6. Install required window flashing. See Figure 5.16 IMPORTANT NOTE: Caulk all 4 corners of rough opening before installing window and applying Owens Corning Foam Sealant. FOAMULAR® CodeBord® FoamSealR™ Gasket Owens Corning Foam Sealant Figure 5.16 Doors and Windows FOAMULAR® CodeBord™air barrier system installation manual 5-17 Assembly Details and Planning Exterior electrical boxes will require attention, since these will need to be sealed to prevent air leakage. Where brick veneer is used and where the electrical box does not puncture the FOAMULAR® CodeBord® panel, only the space around the electrical wire from inside of the house needs to be sealed. Where the box penetrates through the panel, it needs to be secured to framing. The interior stud, a furring strip or a nailer board can be used to support the box. The perimeter of the electrical box must be sealed to the outside of the CodeBord® panel with Owens Corning Foam Sealant. Locate electrical box adjacent to stud framing member, and cut a hole in the FOAMULAR® CodeBord®. Apply Foam SealR™ gasket to stud and attach stud support for electrical box. Screw the airtight outdoor electrical box to stud support. Seal around the electrical box with Owens Corning Foam Sealant. Seal the opening for the electrical wires. Caulk the box cap to the siding. An inspection of the air barrier system after all of the walls are in place is recommended. All unnecessary holes in the insulating sheathing should be sealed with a water-based caulking and Owens Corning Acrylic Seam & Flashing Tape. Large holes should be foamed or replaced with new pieces of FOAMULAR® CodeBord®. The installation of outdoor electrical boxes for receptacles and lights depends on the type of exterior finish, and the thickness of FOAMULAR® CodeBord® used. Details for siding are illustrated below. In the case of brick veneer, only the wire penetration in the CodeBord® needs to be sealed. See Figure 5.17. Stud Support Owens Corning Foam Sealant FoamSealR™ Gasket Siding Electric Wires in Metal Conduit Airtight Outdoor Electrical Box Caulking Cap Figure 5.17 Outdoor Electrical Box FOAMULAR® CodeBord™air barrier system installation manual Owens Corning Foam Sealant Assembly Details and Planning 5-18 flashing FLASHING WITH SIDING Flashing is required around all window and door openings to prevent water penetration. Figures 5.18 to 5.20 illustrate typical flashing details when metal, wood or vinyl siding is used as an exterior finish. Always refer to the siding manufacturer’s installation instructions for correct siding installation procedures. Flashing is also required where exterior walls meet foundation walls to shed water away from the floor header assembly. The pages which follow illustrate the various flashing techniques recommended for use with the FOAMULAR® CodeBord™ Air Barrier System with and without the use of a sheathing membrane (building paper). FLASHING DETAILS The flashing details depicted on the following pages represent typical cases. Flashing can be installed behind the foam boards or face sealed using approved flashing and sheathing tape such as Owens Corning Acrylic Seam & Flashing Tape. Carefully review your exterior wall construction and adjust these flashing details as required. FLASHING WITH BRICK Figures 5.21 to 5.24 illustrate typical flashing details when brick or masonry veneer is used as an exterior finish. Always check for the correct length of fastener needed for brick ties, which corresponds to the thickness of FOAMULAR® CodeBord® being installed. Key Points Follow the recommended flashing procedures outlined in this section when FOAMULAR® CodeBord® is used without a sheathing membrane. FOAMULAR® CodeBord™air barrier system installation manual 5-19 Assembly Details and Planning This typical detail can also be applied to wood siding.The position of the flashing is important for effective protection against water penetration. Furring Strip (optional depending on local building code requirements) Owens Corning Acrylic Seam and Flashing Tape Flashing FoamSealR™ Gasket Siding Starter Strip FoamSealR™ Gasket Flashing Cap Figure 5.18 Siding - Flashing Detail with Owens Corning Acrylic Seam and Flashing Tape This typical detail can also be applied to wood siding. The position of the flashing is important for effective protection against water penetration. FoamSealRTM Gasket (required if using separate header foam insert) Furring Strip (optional depending on local building code requirements) Flashing installed behind FOAMULAR® CodeBord® FoamSealR™ Gasket Siding Starter Strip Flashing Cap Figure 5.19 Siding - Flashing Detail with Flashing Behind FOAMULAR® CodeBord™ FOAMULAR® CodeBord™air barrier system installation manual FoamSealR™ Gasket Assembly Details and Planning 5-20 This typical detail can also be applied to wood siding. The position of the flashing is important for effective protection against water penetration. FoamSealRTM Gasket (required is using separate header foam insert) Furring Strip (optional depending on local building code requirements) Sheathing Membrane (building paper) Flashing FoamSealRTM Gasket FoamSealRTM Gasket Siding Starter Strip Flashing Cap Figure 5.20 Siding - Flashing Detail with Sheathing Membrane Owens Corning Acrylic Seam and Flashing Tape Flashing FoamSealRTM Gasket FoamSealRTM Gasket Weephole 9" Figure 5.21 Brick - Flashing Detail with Owens Corning Acrylic Seam and Flashing Tape FOAMULAR® CodeBord™air barrier system installation manual 5-21 Assembly Details and Planning FoamSealRTM Gasket (required if using separate header foam insert) Flashing installed behind FOAMULAR® CodeBord® FoamSealR™ Gasket FoamSealR™ Gasket Weephole 9" Figure 5.22 Brick - Flashing Detail with Flashing Behind FOAMULAR® CodeBord™ FoamSealRTM Gasket (required if using separate header foam insert) Sheathing Membrane (building paper) Flashing FoamSealR™ Gasket FoamSealR™ Gasket Weephole Figure 5.23 Brick - Flashing Detail with Sheathing Membrane FOAMULAR® CodeBord™air barrier system installation manual 9" Assembly Details and Planning 5-22 FoamSealR™ Gasket Polyethylene vapour barrier Air barrier material (header wrap) Sheathing Membrane (building paper) Squash Blocks 16” o.c. FoamSealR™ Gasket Weephole Air barrier material (header wrap) caulked to concrete foundation wall Flashing 8" Figure 5.24 Brick - Flashing Detail with Counter Flashed Partial Sheathing Membrane FLASHING AROUND WINDOWS WITH SIDING AND BRICK Figures 5.25 and 5.26 illustrate the flashing details around windows for siding and brick exterior finishes. Continuous polyethylene flashing must be installed around the window opening prior to the application of the FoamSealR™ Gasket and FOAMULAR® CodeBord® insulating sheathing. Flashing can be installed behind the foam boards or face sealed using approved flashing and sheathing tape. The Owens Corning Acrylic Seam and Flashing Tape is currently undergoing CCMC review and approval is pending for the use of the Tape as flashing tape and to adhere flashing to the foam. While approval is pending, builders may be required to install the flashing behind the foam. Please consult with the local municipality. FOAMULAR® CodeBord™air barrier system installation manual 5-23 Assembly Details and Planning Furring Strip (optional depending on local building code requirements) Owens Corning Acrylic Seam and Flashing Tape FoamSealR™ Gasket J-Trim Head Flashing Owens Corning Foam Sealant (ensure extension to outer lintel) Sill Pan Owens Corning Acrylic Seam and Flashing Tape FoamSealR™ Gasket Furring Strip Polyethylene Vapour Barrier TOP VIEW Figure 5.25 Flashing Around Windows - Gasketing FOAMULAR® CodeBord™air barrier system installation manual Assembly Details and Planning 5-24 In this typical detail, the sealing of the Owens Corning Seam and Flashing Tape, and the clear passage of water to the weepholes are critical. Polyethylene Vapour Barrier Owens Corning Acrylic Seam and Flashing Tape FoamSealR™ Gasket Weephole Head Flashing Brick Lintel Owens Corning Foam Sealant (ensure extension to outer lintel) Jointed Masonry sill FoamSealR™ Gasket Mortar Owens Corning Acrylic Seam and Flashing Tape Weephole Sill Flashing TOP VIEW Caulking Figure 5.26 Flashing Around Windows - FoamSealR™ Gasketing FOAMULAR® CodeBord™air barrier system installation manual Assembly Details and Planning EXPOSED FLOORS When floors are exposed to outdoor temperature they will require air barrier protection. These typically will include cantilevered floors such as those under bay windows, floors over unheated garages or over unheated crawlspaces. In all of these cases, the FOAMULAR® CordBord™ Air Barrier System is applied to the underside of the exposed floor. Exposed cantilever floors are easily sealed by installing a FoamSealR™ Gasket at the edge of the floor system beneath the header joist and rim joist(s). A second gasket is installed at the intersection of the horizontal panel installed on the underside of the exposed floor and vertical FOAMULAR® CodeBord® panel on the face of the wall below. In assembling the system and prior to fastening, make sure that the horizontal insulating sheathing panel is tightly pressed against the vertical panel, compressing the foam gasket at the joint. An alternative method is to seal the joint between the horizontal and vertical panels using the Owens Corning Acrylic Seam and Flashing Tape. Where garages are attached to a house, care must be taken to prevent fumes and exhaust from the garage from getting into the house. This is especially true where rooms are located above. Install the air barrier system on the exterior walls normally. FOAMULAR® CodeBord™air barrier system installation manual 5-25 Where the floor system sits on a masonry wall, install a FoamSealR™ Gasket along the perimeter of the sill plate. If the floor system sits on a frame wall, install a gasket over the FOAMULAR® CodeBord® panel along the inside perimeter at the top of the wall. Jamb a horizontal CodeBord® panel tightly against the gasket at the sill plate or at the top of the wall and fasten the panel to the underside of the floor system. The joints between the insulation panels can be sealed by: 1. Placing a FoamSealR™ Gasket behind the joint and using Owens Corning Foam Sealant or caulking to seal the joint; or 2. Use Owens Corning Acrylic Seam and Flashing Tape. Installing the air barrier system on the exposed floor over an unheated crawlspace is similar to the installation over an unheated garage. In all cases, remember to provide vapour barrier protection on the warm side of the insulated floor system. Figures 5.27 to 5.32 illustrate different scenarios where exposed floors may occur and how the maintain the air barrier continuity of the FOAMULAR® CodeBord™ Air Barrier System. Assembly Details and Planning 5-26 Projecting or cantilevered floors require attention to detail and care in the handling of gaskets. Care is needed as the work proceeds to avoid damaging gaskets. Insulate floor as required. FoamSealR™ Gasket Owens Corning Acrylic Seam and Flashing Tape Check all seals and then close in underneath of floor assembly as the final step. Figure 5.27 Projected Cantilevered Floor SECOND FLOOR FoamSealR™ Gaskets Spray Foam (air barrier) FLOOR JOIST FOAMULAR® CodeBord® FoamSealR™ Gaskets FIRST FLOOR FOAMULAR® CodeBord® Figure 5.28 Large Overhang Wall Above Continuity Wall FOAMULAR® CodeBord™air barrier system installation manual 5-27 Assembly Details and Planning When floors project over a beam, the beam must be gasketed prior to the installation of floor joists. FoamSealR™ Gaskets It may be easier to use a header panel when constructing irregular angled walls. Figure 5.29 Projecting Floor Over Beam Living Space FoamSealR™ Gaskets OR seal with Owens Corning Foam Sealant, or Owens Corning Acrylic Seam and Flashing Tape OR seal with Owens Corning Foam Sealant, or Owens Corning Acrylic Seam and Flashing Tape Garage or Crawlspace Owens Corning Acrylic Seam and Flashing Tape Figure 5.30 Exposed Floor (Garage or Crawlspace) FOAMULAR® CodeBord™air barrier system installation manual Assembly Details and Planning 5-28 Living Space Consult the Building Code for minimum insulation requirments applying to floors over unheated spaces. FoamSealR™ Gasket Owens Corning Acrylic Seam and Flashing Tape Garage or Crawlspace The insulation and air sealing of floors over unheated spaces are equally important for comfort. The FOAMULAR™CodeBord™ Air Barrier System approach provides both in an easy application. Plan your framing to provide blocking behind joints perpendicular to the floor joists. to the floor joists. Figure 5.31 Exposed Floor Over Unheated Space FoamSealR™ Gasket INTERIOR HOUSE FOAMULAR® CodeBord® FoamSealR™ Gasket FoamSealR™ Gasket Polyethylene vapour barrier Owens Corning Acrylic Seam and Flashing Tape Caulking, or Owens Corning Foam Sealant, or Owens Corning Acrylic Seam and Flashing Tape GARAGE Owens Corning Acrylic Seam and Flashing Tape FoamSealR™ Gasket FoamSealR™ Gasket Owens Corning Acrylic Seam and Flashing Tape PLAN VIEW Caulking, or Owens Corning Foam Sealant, or Owens Corning Acrylic Seam and Flashing Tape Figure 5.32 PLAN VIEW - Garage Wall to House Wall Junction Continuity Detail FOAMULAR® CodeBord™air barrier system installation manual 5-29 Assembly Details and Planning SPECIAL CASES By now it should be clear that planning ahead will save you time and aggravation later. Review all of your details and think about the construction before you start. A number of special cases will likely require your attention as you attempt to build in the continuity of the air barrier system. Wood and gas fireplaces and stoves can penetrate the air barrier, where they vent and sometimes where they are installed. Wood frame walls should extend around all of these appliances including around their chimneys and vents. This will provide a number of advantages beyond simplifying the air barrier system installation. The thermal insulation of the building is substantially improved with the insulated house frame wail extending around the appliance. This will result in energy savings. In addition, the approach will keep the flue for the appliance warm, improving durability and venting for those appliances which rely on natural draft. FOAMULAR® CodeBord™air barrier system installation manual Beam pockets should be sealed with Owens Corning Foam Sealant. These can be very leaky areas of the envelope and can compromise the entire air barrier system. Figures 5.33 to 5.37 illustrate how to maintain air barrier continuity for special cases such as: knee walls; great walls (tall walls); and ceiling bay windows and projections. Invariably, there will be details that this manual has not covered. To deal with these, think about the way air leaks in and out of the building. Developing new details can be challenging but not insurmountable, particularly when you understand the fundamental way that air is kept from moving in or out of the house. Assembly Details and Planning 5-30 FOAMULAR® CodeBord® Sheathing sealed with FoamSealR™ Gaskets Top & bottom of wall Owens Corning Acrylic Seam & Flashing Tape 1" FOAMULAR® CodeBord® edges sealed with FoamSealR™ Gaskets 1/2" FOAMULAR® CodeBord® edges sealed with FoamSealR™ Gaskets Owens Corning Acrylic Seam & Flashing Tape 1/2" OSB edges sealed with FoamSealR™ Gaskets Owens Corning Acrylic Seam and Flashing Tape FoamSealR™ Gasket seal between 2 wall sections Figure 5.34 Great Wall Air Barrier Continuity with Sheathing FoamSealR™ Gaskets NOTE: Look back at the Flashing section for important details and techniques. 1" FOAMULAR® CodeBord® edges sealed with FoamSealR™Gaskets Owens Corning Acrylic Seam and Flasing Tape Air Barrier link through stud Foundation wall Figure 5.33 Knee Wall Detail Caulk polyethylene to stud to seal air/vapour barrier Polyethylene (air/vapour barrier) sheathing membrane OSB FoamSealR™ Gasket Unsealed polyethylene (vapour barrier only) Figure 5.35 Great Wall Air Barrier Continuity with Polyethylene 1" FOAMULAR® Codeboard® edges sealed with FoamSealR™ Gaskets OSB Air Barrier Membrane Air Barrier Membrane clamped behind FOAMULAR® Codeboard® and FoamSealR™ Gasket Unsealed polyethylene (vapour barrier) Figure 5.36 Great Wall Air Barrier Continuity with Membrane FOAMULAR® CodeBord™air barrier system installation manual 5-31 Assembly Details and Planning Alternative to sheathing paper is to face seal metal flashing to the FOAMULAR® CodeBord® with Owens Corning Acrylic Seam and Flashing Tape. Owens Corning Acrylic Seam and Flashing Tape or Sheathing Paper Weephole Metal Counter Flashing Flashing Gypsum board Polyethylene vapour barrier FOAMULAR® CodeBord® as air barrier Batt Insulation Batt Insulation FoamSealR™ Gasket 1/2" Plywood Polyethylene clamped or sealed Caulking FoamSealR™ Gasket Polyethylene sheet lapped min. 4" to ceiling air/vapour barrier and clamped to solid blocking with gypsum board Gypsum board FOAMULAR® CodeBord® as air barrier Polyethylene vapour barrier Figure 5.37 Interior Air Barrier Ceiling Bay Window/Projections FOAMULAR® CodeBord™air barrier system installation manual Polyethylene air/vapour barrier Polyethylene sealed or clamped to ceiling air/vapour barrier 6 Alternative Details Alternative Details 6-1 For those who would want to take advantage of the improved air tightness that is available with the FOAMULAR® CodeBord™ Air Barrier System but is not prepared to accept the full installation practices detailed in the previous chapter, some alternative details are available. In these alternatives, caulking and taping can substitute for the gasket requirements. The alternative details shown in this chapter are currently undergoing CCMC review and approval is pending. Please consult with the local municipality before implementing any of the alternative details in place of the approved full system details. The Owens Corning Acrylic Seam and Flashing Tape is currently undergoing CCMC review and approval is pending for the use of the Tape as flashing tape and to adhere flashing to the foam. While approval is pending, builders may be required to install the flashing behind the foam or cover the flashing tape joint with a sheathing membrane (building paper). Please consult with the local municipality. While the performance that is reasonably anticipated may not match the standard approach, a modified method using some or all of the alternative details can provide significant air tightness well beyond the levels achieved using Code minimum practices. Alternative details have been identified for the following four areas where taping and/or caulking can be used in place of gasketing: header over the foundation (Figure 6.1); around windows (Figure 6.2 or a modified gasket and tape approach seen in Figures 6.3 and 6.4); and taping of joints (Figure 6.5). FOAMULAR® CodeBord™air barrier system installation manual Alternative Details 6-2 In these typical details, the sealing of the Owens Corning Acrylic Seam and Flashing Tape, and the clear passage of water to the weepholes are critical. Polyethylene Vapour Barrier Owens Corning Acrylic Seam and Flashing Tape Flashing Weephole Air Barrier Membrane Air Barrier Membrane Caulked to Concrete Foundation Wall 9" Polyethylene Vapour Barrier Owens Corning Acrylic Seam Seam and Flashing Tape in place of gasketing Owens Corning Acrylic Seam and Flashing Tape Flashing Squash Blocks 16” o.c. Weephole Air Barrier Membrane Air Barrier Membrane Caulked to Concrete Foundation Wall 8" Figure 6.1 8" and 9" Foundation Wall Header Detail - Owens Corning Acrylic Seam and Flashing Tape and no FoamSealR™ Gaskets FOAMULAR® CodeBord™air barrier system installation manual Alternative Details 6-3 Box Window Detail: Brick Veneer/Vinyl Siding Caulking and Backer Rod or Spray Foam (all sides) 1 2 Owens Corning Acrylic Seam and FlashingTape (top and sides only) 3 Owens Corning Acrylic Seam and Flashing Tape Owens Corning Acrylic Seam and Flashing Tape used in 3 ways: 1 Sealing rough opening to FOAMULAR® CodeBord® panel Head Flashing 2 Sealing window frame to FOAMULAR® CodeBord® panel 3 Sealing head flashing to FOAMULAR® CodeBord® panel 1 2 Owens Corning Acrylic Seam and Flashing Tape 2 Owens Corning Acrylic Seam and Flashing Tape (top and sides only) 3 IMPORTANT NOTE: All 4 corners of rough opening (before installing window) are sealed with 3 strips of Owens Corning Acrylic Seam and Flashing Tape. 1 1 NOTE: Sill flashing (not shown) must be installed. Figure 6.2 Flashing Around Windows - Owens Corning Acrylic Seam and Flashing Tape with No FoamSealR™ Gaskets FOAMULAR® CodeBord™air barrier system installation manual Alternative Details 6-4 Caulking and Backer Rod or Owens Corning Foam Sealant (continuous on all sides) Box Window Detail: Brick Veneer/Vinyl Siding 2 FoamSealR™ Gasket 3 Owens Corning Acrylic Seam and Flashing Tape (top and sides only) Owens Corning Acrylic Seam and Flashing Tape Owens Corning Acrylic Seam and Flashing Tape used in 3 ways: 1 Sealing rough opening to FOAMULAR® CodeBord® panel Head Flashing 2 Sealing window frame to FOAMULAR® CodeBord® panel 3 Sealing head flashing to FOAMULAR® CodeBord® panel 2 Owens Corning Acrylic Seam and Flashing Tape 3 2 IMPORTANT NOTE: All 4 corners of rough opening (before installing window) are sealed with 3 strips of Owens Corning Acrylic Seam and Flashing Tape. 12" 1 NOTE: Sill flashing (not shown) must be installed. Owens Corning Acrylic Seam and Flashing Tape (corners and bottom of opening, 12" up each side) Figure 6.3 Flashing Around Windows - Owens Corning Acrylic Seam and Flashing Tape with FoamSealR™ Gaskets FOAMULAR® CodeBord™air barrier system installation manual 6-5 Alternative Details Flange Window Detail Caulking and Backer Rod or Spray Foam 2 FoamSealR™ Gasket Owens Corning Acrylic Seam and Flashing Tape (top and sides only) Owens Corning Acrylic Seam and Flashing Tape used in 3 ways: 1 Sealing rough opening to FOAMULAR® CodeBord® panel 2 Sealing window frame to FOAMULAR® CodeBord® panel 3 Sealing head flashing to FOAMULAR® CodeBord® panel 3 2 IMPORTANT NOTE: All 4 corners of rough opening (before installing window) are sealed with 3 strips of Owens Corning Acrylic Seam and Flashing Tape. 12" 1 NOTE: Sill flashing (not shown) must be installed. Owens Corning Acrylic Seam and Flashing Tape (corners and bottom of opening, 12" up each side) Figure 6.4 Flashing Around Flange Windows - Owens Corning Acrylic Seam and Flashing Tape with FoamSealR™ Gaskets FOAMULAR® CodeBord™air barrier system installation manual 6-6 Alternative Details Sill gaskets must be used on upper most top plates and first bottom plate. All other joints can be taped using Owens Corning Acrylic Seam and Flashing Tape in place of gasketing over the studs Figure 6.5 Taping of Joints FOAMULAR® CodeBord™air barrier system installation manual 7 Repairs Repairs 7-1 Mishaps and errors happen. There are, however, easy ways to correct them to maintain air barrier continuity and control air leakage. Holes in the air barrier system have to be sealed to ensure optimal performance of the system and of the wall assembly. Small diameter holes, such as those caused by nails, can be sealed with caulking that is compatible with polystyrene. Latex-based or silicone caulking is acceptable. For larger holes or where a broken piece of panel cannot be simply reinserted, the damage can be repaired by filling the gap with Owens Corning Foam Sealant. It may be necessary to cover the opening on one side of the FOAMULAR® CodeBord® sheathing with a compatible sheathing tape, such as Owens Corning Acrylic Seam & Flashing Tape, to provide a surface to which the foam sealant can adhere to. For damaged sheathing, where the damage is not extensive, broken pieces can be taped back into place. If possible, use Owens Corning Acrylic Seam & Flashing Tape to tape both the front and back of the broken piece to the main board. Use a double width of tape, overlapping tape strips. Where the damage is too extensive, replace the damaged panel with a new one. See Figure 7.1. Small holes can be caulked. Use Owens Corning Acrylic Seam & Flashing Tape to patch small cracks. Larger holes can be sealed with Owens Corning Foam Sealant. Figure 7.1 Minor Repairs FOAMULAR® CodeBord™air barrier system installation manual Tape broken pieces back together from both sides using Owens Corning Acrylic Seam & Flashing Tape. Repairs 7-2 MAJOR REPAIRS Where holes are too large to be sealed with caulking material or Owens Corning Foam Sealant and the broken pieces cannot be reinserted, a new piece can be cut to fit into the space needing to be filled. The space in the main sheet receiving the new replacement piece should be cut to match. Fix the new replacement piece to the main sheet in the same way you would a broken piece. If the fit between the broken or replacement piece and the space in the sheathing results in gaps, fill and seal them. From the exterior attach the sheathing filler piece to the main sheet using Owens Corning Acrylic Seam & Flashing Tape. From the inside of the wall cavity fill the gap between the filler piece and the main sheet with Owens Corning Foam Sealant. See Figure 7.2. WHO AND WHERE TO CALL FOR ASSISTANCE For assistance, call Technical Services at Owens Corning Canada LP toll free at: 1-800-504-8294 2 1 3 For Major damage, such as large holes, it may be necessary to replace the whole sheet. Otherwise the repair procedure outlined below is recommended for larger holes. OR 3 REPAIR SEQUENCE Cut out damaged area and use cut out piece to trace out replacement piece. Cut out replacement piece, then bevel edges. Fit piece from outside and tape over joint. Foam gap around replacement piece, and trim flush after foam has set dry. OR Tape over joint from inside. Figure 7.2 Major Repairs FOAMULAR® CodeBord™air barrier system installation manual 8 Frequently Asked Questions Frequently Asked Questions 8-1 General Questions 1. Can I install FOAMULAR® CodeBord® panels in direct contact with the foundation dampproofing coating? Using a water based dampproofing material should not present any problems. However, when using a solvent based dampproofing material, the extruded polystyrene panels should not be installed in contact with the dampproofing coat until it has dried. Once a solvent based dampproofing material is no longer tacky or sticky to the touch, the FOAMULAR® CodeBord® panels can be installed in contact with the dampproofed surface. 2. What type of adhesive should I use with FOAMULAR® CodeBord® panels? Use an adhesive developed specifically for rigid foam plastic thermal insulation panels (latex based). Construction adhesives typically contain solvents that will dissolve the foam plastic material. 3. Will exposure to the sun damage FOAMULAR® CodeBord® panels? Prolonged exposure to direct sunlight will cause a discolouration of the surface of FOAMULAR® CodeBord® exterior sheathing panels. Alteration of the panel will be limited to the exposed surface (i.e. the core will remain unaffected) as long as the deteriorated surface remains undisturbed. It is recommended to apply the exterior finish as soon as practical. 4. Do I have to install corner braces when using FOAMULAR® CodeBord® panels? FOAMULAR® CodeBord® exterior sheathing is not a structural sheathing material. Corner bracing for structural framing may be required to resist construction or service loads. For OBC Part 9 buildings, the National and provincial building codes do not require bracing where exterior walls will have one of the following interior finishes: FOAMULAR® CodeBord™air barrier system installation manual gypsum board with taped joints plywood hardboard insulating fibreboard particleboard waferboard strandboard Frequently Asked Questions 8-2 5. Must building paper or a sheathing membrane be installed over FOAMULAR® CodeBord® exterior polystyrene rigid insulating sheathing? Because FOAMULAR® CodeBord® insulating sheathing panels are provided with a shiplap edge on all four panel edges, it is not necessary to install a sheathing membrane (e.g. building paper) over FOAMULAR® CodeBord® sheathing in low-rise OBC Part 9 buildings. However, where butt joints occur (e.g. at building corners) or where shiplap joints have been cut (i.e. removed), building codes require that such joints be sealed with compatible and approved sheathing tape, such as Owens Corning Acrylic Seam & Flashing Tape or caulking or covered with a sheathing membrane. FoamSealR™ Sealing Gaskets installed at butt and/or corner joints will serve the function to seal non-shiplap joints to maintain the continuity of the air barrier plane through the sealing gaskets. Where sheathing paper will not be installed, it is important to install the FOAMULAR® CodeBord® panels such that the shiplap joints are oriented to shed water to the exterior of the assembly. 6. How far apart should nails be spaced? The nail spacing for the FOAMULAR® CodeBord™ Air Barrier System differs slightly from the spacing used when the FOAMULAR® CodeBord® panels are used as exterior sheathing only. See table below for guidance. Spacing of Nails FOAMULAR® CodeBord® Insulating Sheathing As sheathing and As sheathing air barrier system only (recommended) component Along Edges with Sealing Gasket At intermediate supports 6 in. (150 mm) 8 in. (203 mm) 8 in. (203 mm) 12 in. (305 mm) 7. What type of nails should I use? Use steel wire or spiral nails with either steel or plastic washer caps (1" min.). Depending on time of year, some nail washers may have a better resistance to the impact of hammer blows. 8. Can I install FOAMULAR® CodeBord® panels horizontally? FOAMULAR® CodeBord® insulating sheathing panels should preferably be installed vertically. All edges of a sheathing panel need to be supported by a structural framing member (e.g. stud, plate) in order to obtain good compression of the FoamSealR™ Sealing Gaskets between the framing and the FOAMULAR® CodeBord® insulating sheathing. If FOAMULAR® CodeBord® panels are installed horizontally, blocking is necessary between vertical studs behind the horizontal joint to provide backing for the board edge. 9. What width of FoamSealR™ gasket should I use? For 2 x 4" and 2 x 6" stud walls, use 3.5" (89 mm) wide FoamSealR™ Sealing Gaskets. The wider 5.5"(140 mm) FoamSealR™ Sealing Gaskets could be used at corners as a single piece or beneath 2 x 6" sill plates. 10. How do I seal the gap between the sill plate and the foundation wall when this gap is greater than the thickness of the gasket? Where large gaps occur between the sill plate and the top of the foundation wall, due to variations or a rough surface, a double layer of FoamSealR™ Sealing Gaskets can be used. If a double layer of gaskets under the sill plate is still inadequate to seal spaces between the sill plate and foundation wall, install a single FoamSealR™ gasket layer under the sill plate and, from the interior, seal the joint between the sill plate and the foundation wall with Owens Corning Foam Sealant. 11. Is it necessary to seal nail holes in the FOAMULAR® CodeBord® insulating sheathing? All nail holes through the FOAMULAR® CodeBord® insulating sheathing should be sealed to be airtight; for example, when a stud is missed and the nail is pulled out from the sheathing. Although foam sealant can be used to seal nail holes, sheathing tape and caulking are better suited for this type of repair. Sealing all holes will help improve the system performance and yield a better final air tightness result. FOAMULAR® CodeBord™air barrier system installation manual Frequently Asked Questions 8-3 12. Is it necessary to seal the interior polyethylene vapour barrier? 15. How is window flashing installed within the FOAMULAR® CodeBord™ Air Barrier System? With the FOAMULAR® CodeBord™ Air Barrier System it is not necessary to seal the interior polyethylene wall vapour barrier to be airtight, such as with acoustical caulking. The required continuity of the air barrier plane is achieved on the exterior side of the wall with the FOAMULAR® CodeBord™ Air Barrier System. The polyethylene on the interior side in this instance only acts as a vapor barrier and hence does not require to be sealed. However, the ceiling polyethylene should be detailed to be airtight if it is intended to fulfill the functions of the vapour barrier and of the air barrier. The polyethylene sheets should always overlap generously (minimum 4"(100 mm)) at seams for both wall and ceiling installations regardless of the seams being sealed or not. Where it has been decided to adopt the FOAMULAR® CodeBord™ Air Barrier System and the local building code allows the use of insulating sheathings in lieu of sheathing membranes, window and wall flashing should be detailed and installed as shown in Chapter 5 and 6. Flashing can be installed behind the foam boards or face sealed using approved flashing and sheathing tape such as Owens Corning Acrylic Seam & Flashing Tape. 13. Is it necessary to seal the interior electrical boxes? As with the interior wall polyethylene vapour barrier it is not necessary to air seal interior electrical boxes (i.e. outlets, light switches) when the FOAMULAR® CodeBord™ Air Barrier System is used. Note that it is necessary to seal around air tight electrical boxes and other penetrations passing through the FOAMULAR® CodeBord™ Air Barrier System. 14. Must I use polyethylene sheets as the interior vapour barrier when the FOAMULAR® CodeBord™ Air Barrier System is used on the outside? It may be possible to replace the traditional polyethylene vapour barrier in exterior walls with a vapour retarder paint applied to the interior gypsum board finish. This should be discussed with your local building official(s) in order to facilitate the approvals process. FOAMULAR® CodeBord™air barrier system installation manual 16. How should Owens Corning Foam Sealant be stored and installed? Prevent the foam sealant from freezing and follow instructions on the can to ensure proper installation and storage. 8-4 Frequently Asked Questions FOAMULAR® CodeBord™air barrier system installation manual 9 Appendix Appendix Ministers ruling for ontario CCMC Evaluation Report FOAMULAR® CodeBord™air barrier system installation manual 9-1 9-2 Appendix FOAMULAR® CodeBord™air barrier system installation manual Appendix 9-3 Ruling of the Minister Ministry of Municipal Affairs and Housing 777 Bay Street, 2nd Floor Toronto, ON, M5G 2E5 T: F: W: 416 585-4234 416 585-7531 www.ontario.ca/buildingcode Ministère des Affaires municipales et du Logement 777, rue Bay, 2e étage Toronto, ON, M5G 2E5 T: F: W: 416 585-4234 416 585-7531 www.ontario.ca/buildingcode RULING OF THE MINISTER OF MUNICIPAL AFFAIRS AND HOUSING Pursuant to Section 29(1)(a) of the Building Code Act, 1992, the Director of the Building and Development Branch, as delegate of the Minister of Municipal Affairs and Housing (the AMinister@), hereby approves the use of CodeBord® Air Barrier System subject to the following terms and conditions: Minister Ruling Number: 09-39-237 (12935-R) File No: 09-23 Issued on December 30, 2009 1. MANUFACTURER 2. Owens-Corning Canada Inc. 3450 McNicoll Avenue Scarborough, ON M1V 1Z5 MANUFACTURING FACILITIES Scarborough, ON Tel: 800 988-5269 Fax: 800 989-8298 Web: www.owenscorning.ca 3. SPECIFIC CONDITIONS (a) The use of CodeBord® Air Barrier System is approved for use as an air barrier system in respect of the requirements of Subsection 5.4.1. and 9.25.3. of Division B, of Ontario’s 2006 Building Code, Ontario Regulation 350/06 (the ABuilding Code@); (b) CodeBord® Air Barrier System shall comply with the Building Code Act, 1992; and except as specifically provided otherwise in this Ruling, with the Building Code; (c) the use of the CodeBord® Air Barrier System must be in accordance with Canadian Construction Materials Centre (the @CCMC@) Evaluation Report No. CCMC 12935-R (the AEvaluation Report@) issued on January 24, 2000 and re-evaluated on April 21, 2009; provided that the references in that report to the model National Building Code of Canada, 2005 including those listed in column 1 below, shall be deemed references to Ontario’s Building Code listed in column 2 below, as described in the following table; Minister Ruling No: 09-39-237 (12935-R) CodeBord® Air Barrier System FOAMULAR® CodeBord™air barrier system installation manual Page 1 of 3 Issued on December 30, 2009 Appendix 9-4 model National 2005 Building Code References Ontario’s 2006 Building Code References Division A, 1.2.1.1.(1)(b) Division B, 5.4.1. Division B, 9.25.3. Table A-9.25.1.2.A. Appendix C NBC 2005 Division A, 1.2.1.1.(1)(b) Division B, 5.4.1. Division B, 9.25.3. Table A-9.25.1.2.A. Supplementary Stardard SB-1 Building Code column 1 column 2 (d) A copy of this Ruling shall be attached to the application for a building permit, and (e) This Ruling is valid only for products manufactured at the facilities outlined in Section 2. (Manufacturing Facilities) of this Ruling. 4. GENERAL CONDITIONS The Minister or his/her delegate may amend or revoke this Ruling if: (a) the Evaluation Report is amended by the CCMC; (b) the Evaluation Report expires in accordance with the CCMC's General Conditions for Evaluation Reports; (c) the Evaluation Report is rendered void in accordance with the CCMC's General Conditions for Evaluation Reports by reason of alterations to the product or relocation of manufacturing facilities, described in the Evaluation Report, without prior agreement by the CCMC; (d) the Evaluation Report is withdrawn by the CCMC in accordance with the CCMC's General Conditions for Evaluation Reports where, in the opinion of the CCMC: (i) the level of performance, in-situ, of the product described in the evaluation Report is unsatisfactory; (ii) the proponent of such product fails to fulfil its obligations as set out in the CCMC's General Conditions for Evaluation Reports; or (iii) such product may pose any danger to the health or safety of the user of such product: Minister Ruling No: 09-39-237 (12935-R) CodeBord® Air Barrier System Page 2 of 3 Issued on December 30, 2009 FOAMULAR® CodeBord™air barrier system installation manual Appendix 9-5 (e) the Minister or his/her delegate determines that the use of the material, system or building design authorized by this Ruling: (i) will not comply with the Building Code Act, 1992 or any relevant law as they may be amended or re-enacted from time to time; or (ii) provides an unsatisfactory level of performance, in situ; or (f) any provision of the Building Code relevant to this Ruling is amended or remade. Dated at Toronto This 30th Day of December 2009. ________________________________________ David Brezer, P.Eng, MBA Director, Building and Development Branch Minister Ruling No: 09-39-237 (12935-R) CodeBord® Air Barrier System FOAMULAR® CodeBord™air barrier system installation manual Page 3 of 3 Issued on December 30, 2009 Appendix 9-6 FOAMULAR® CodeBord™air barrier system installation manual Appendix 9-7 FOAMULAR® CodeBord™air barrier system installation manual Appendix 9-8 Δ ≤ Δ FOAMULAR® CodeBord™air barrier system installation manual Appendix 9-9 ≤ ≤ ≤ ≥ ≤Δ FOAMULAR® CodeBord™air barrier system installation manual 9-10 Appendix FOAMULAR® CodeBord™air barrier system installation manual Appendix 9-11 FOAMULAR® CodeBord™air barrier system installation manual Appendix 9-12 FOAMULAR® CodeBord™air barrier system installation manual Appendix 9-13 FOAMULAR® CodeBord™air barrier system installation manual