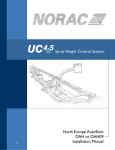
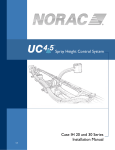
1
Spray Height Controller UC5 SERVICE MANUAL AGCO North America Printed in Canada Copyright 2013 by NORAC Systems International Inc. Reorder P/N: UC5 SERVICE MANUAL AGCO NA Rev A NOTICE: NORAC Systems International Inc. reserves the right to improve products and their specifications without notice and without the requirement to update products sold previously. Every effort has been made to ensure the accuracy of the information contained in this manual. The technical information in this manual was reviewed at the time of approval for publication. Contents 1 GETTING STARTED ................................................................................................. 1 1.1 1.2 1.3 1.4 1.5 2 Safety Precautions ................................................................................................................................ 1 Technical Specifications ....................................................................................................................... 2 Related Documents ............................................................................................................................. 3 How to Use This Manual .................................................................................................................... 3 Initial Troubleshooting ........................................................................................................................ 4 SYMPTOMS ................................................................................................................. 5 2.1 2.2 2.3 2.4 2.5 2.6 3 General Operation ............................................................................................................................... 5 Operational Messages.......................................................................................................................... 6 Communication .................................................................................................................................... 7 Hydraulics............................................................................................................................................... 8 Performance .......................................................................................................................................... 9 Automatic Setup or Retune Problems...........................................................................................11 TEST PROCEDURES ............................................................................................... 14 3.1 3.2 3.3 3.4 3.5 3.6 3.7 3.8 3.9 3.10 3.11 4 Height Sensor Test ............................................................................................................................14 Roll Sensor Test .................................................................................................................................17 Temperature Sensor Test ................................................................................................................22 Power Supply Test .............................................................................................................................23 Communication Test .........................................................................................................................24 Boom Functions Test ........................................................................................................................31 Manual Valve Override Test ............................................................................................................33 Valve Module Driver Test ................................................................................................................35 Boom Speed Test ...............................................................................................................................37 Checking Mechanical Components ................................................................................................38 Checking Settings ...............................................................................................................................39 REFERENCE .............................................................................................................. 43 4.1 4.2 4.3 4.4 4.5 4.6 4.7 4.8 4.9 4.10 4.11 Menu Structure Map ..........................................................................................................................43 Automatic System Setup ...................................................................................................................44 Retune ...................................................................................................................................................47 Height Sensor Mounting ...................................................................................................................49 Roll Sensor Mounting (Passive Roll) ...............................................................................................52 Roll Sensor Mounting (Active Roll™) ...........................................................................................53 Replacing Components .....................................................................................................................55 Height Sensor Setup ..........................................................................................................................58 Roll Sensor Setup (Passive Roll) ......................................................................................................59 Roll Sensor Setup (Active Roll™) ..................................................................................................60 Output Channel (Valve) Setup ........................................................................................................61 4.12 4.13 4.14 4.15 4.16 Boom Geometry Calibration ...........................................................................................................64 Error Indicators ..................................................................................................................................65 Locking and Unlocking the Setup and Advanced Menu .............................................................67 Updating the Firmware .....................................................................................................................68 Maintenance .........................................................................................................................................71 1 Getting Started 1.1 Safety Precautions The UC5™ Spray Height Control system will greatly improve your spraying height accuracy and protect the boom against damage in a wide variety of field conditions. However, under some circumstances performance may be limited. The operator of the sprayer must remain alert at all times and override the automatic control when necessary. Under no circumstances should any service work be performed on the machinery while the UC5™ Spray Height Control system is in Automatic Mode. Always ensure that the UC5™ Spray Height Control system is powered down or in Manual Mode: Before leaving the operator’s seat. When transporting the machine. Before working on any part of the booms: Set the UC5™ system to Manual Mode. Turn the sprayer engine off. Do not operate this system before: Reading and understanding the operator’s manual. Thoroughly understanding the machine operation. 1 1.2 Technical Specifications CAN ICES-3(A)/NMB-3(A) This device complies with part 15 of the FCC Rules. Operation is subject to the following two conditions: (1) This device may not cause harmful interference, and (2) this device must accept any interference received, including interference that may cause undesired operation. This equipment has been tested and found to comply with the limits for a Class A digital device, pursuant to part 15 of the FCC Rules. These limits are designed to provide reasonable protection against harmful interference when the equipment is operated in a commercial environment. This equipment generates, uses, and can radiate radio frequency energy and, if not installed and used in accordance with the instruction manual, may cause harmful interference to radio communications. Operation of this equipment in a residential area is likely to cause harmful interference in which case the user will be required to correct the interference at their own expense. This Class A digital apparatus complies with Canadian ICES-003. Pursuant to EMC Directive – Article 9, this product is not intended for residential use. Supply Voltage (rated) Supply Current (rated) Hydraulic Pressure (maximum) Baud Rate Clock Frequency (maximum) Solenoid Valve PWM Frequency Ultrasonic Sensor Transmit Frequency Operating Temperature Range 12VDC 5A 3300 psi 250 kbps 96 MHz 300 Hz 50 kHz 0°C to 80°C Figure 1: System Specifications 2 1.3 Related Documents The following documents should be used for reference in addition to this service manual. UC5™ Operator Manual UC5™ Cable Guide UC5™ Installation Manual (for your sprayer type) UC5™ Display Kit (for your type of display) 1.4 How to Use This Manual This manual is designed to assist technicians with troubleshooting the UC5™ Height Control System. To use this guide follow these steps: 1. Gather some initial information (Section 1.5). 2. Identify the symptom (Section 2). 3. Follow the list of actions under the symptom until you have found and solved the problem. Figure 2: Troubleshooting Flowchart 3 1.5 Initial Troubleshooting Before troubleshooting the problem, gather some basic information about the problem and the sprayer. 4 What is the sprayer make and model? Is it Passive Roll or Active Roll™? Customer information: name and location. What is the firmware version and serial number of the Control Module? Which display is installed with the system? Is this a new installation? Are there any error messages? What is the perceived problem? Can you recreate the problem? Is it intermittent? Has anything changed since the system was working? Have any settings changed or has an Automatic Setup or Retune been attempted? 2 Symptoms 2.1 General Operation The system will not go into automatic mode. Possible Cause The Automatic System Setup has not been completed. Action If you have not completed an Automatic Setup then complete it now. Section 4.2 The Height Sensors are out of range. Lower the booms to normal working height. N/A Poor Height Sensor readings. Test the Height Sensors. 3.1 The system resets when a valve is turned on. Possible Cause Poor power or ground connection. Action Check the power supply. Section 3.4 Action Check the power supply. Section 3.4 The system will not power up. Possible Cause Poor power or ground connection. The system intermittently goes into manual mode. Possible Cause The Height Sensors are reading “No Data” or “NR”. Action Test the Height Sensors. Section 3.1 5 2.2 Operational Messages “No Communication” Possible Cause Failed sensor or CANbus Action Test the communication If you have recently updated the firmware, the sensors may be stuck in programming mode. The sensor will “tick” very slowly if it is in programming mode. Send the update file again. Section 3.5 4.15 “No Data” or “NR” Possible Cause This message may be displayed if the Height Sensor or Roll Sensor is not communicating. Action Check if the sensor also has a no communication error. Height Sensor is reporting “No Data” or “NR”. It is normal to see this message occasionally for Height Sensors. If you are seeing this message all the time the Height Sensor may be having difficulty obtaining a proper reading. Test the Height Sensors. 6 Section 3.5 3.1 2.3 Communication One or more of the sensors or modules on the Norac bus is not communicating. Possible Cause Failed sensor or CANbus Action Test the communication If you have recently updated the firmware, the sensors may be stuck in programming mode. The sensor will “tick” very slowly if it is in programming mode. Send the update file again. Section 3.5 4.15 The UC5™ Control Module is not communicating. Possible Cause There is no power to the module. Action Test the power supply. Section 3.4 The display interface cable may be damaged or incorrectly installed. Check the display interface cable. Refer to your display kit installation manual. N/A Failed Control Module. Replace the Control Module. 4.7 7 2.4 Hydraulics The boom will not raise or lower. Possible Cause The hydraulics or electrical outputs are not functioning or not installed correctly. Action Perform the Boom Function Test. Section 3.6 The boom will raise when it should lower, or vice versa. Possible Cause The raise and lower lines to the tilt cylinders may be reversed. Action Ensure the raise lines are connected to the “B” ports and the lower lines are connected to the “A” ports. Perform the Boom Function Test. Section N/A 3.6 The boom will creep up or down in Manual Mode. Possible Cause The raise and lower lines to the tilt cylinders may be reversed. Action Ensure the raise lines are connected to the “B” ports and the lower lines are connected to the “A” ports. There may be an internal problem with the NORAC valve block. Some possible causes are; a sticky valve, worn valve, faulty check valves or a foreign object stuck in the valve block. If possible try removing any foreign objects in the valve. The valve block may also need to be repaired or replaced. N/A This may be caused by a problem with the sprayer’s hydraulic system. Check the sprayer hydraulics. Check if the tilt cylinders are leaking and replace the seals if needed. N/A 8 Section N/A 2.5 Performance The boom is unstable, erratic or sluggish in Automatic Mode. Possible Cause Incorrect settings. Action Check the settings. Section 3.11 Poor Height Sensor readings. Test the Height Sensors. 3.1 Poor Roll Sensor readings. Test the Roll Sensors. 3.2 Failed Temperature Sensor. Test the Temperature Sensor. 3.3 There may be a problem with the mechanics of the sprayer. Check the sprayer mechanical components. 3.10 Communication problems. Check if the modules and sensors are communicating. 3.5 Incorrect Roll Sensor mounting. Check the Roll Sensor mounting as shown in the installation manual for your kit. 4.5 Incorrect Height Sensor mounting. Check the Height Sensor mounting as shown in the installation manual for your kit. 4.4 The system may not be driving a boom function, or driving the wrong boom function. Perform the Boom Function Test. 3.6 Low or inconsistent boom speeds. Test the boom speeds. 3.9 The boom does not appear to be level in Automatic Mode. Possible Cause The sensitivity setting may be too low. Action Check the sensor height readings from the run screen, if it differs from the target height then try turning up the sensitivity. The default tolerance for a sensitivity setting of 5 is ± 6 cm (2.5 inches). The Deadzone setting may be calibrated incorrectly. Check the Deadzone settings. The sensor offset heights may be incorrect. Test the Height Sensors. Section N/A 3.11.1 3.1 9 The boom moves all the way to the top in Crop Mode. Possible Cause The sensors may be reading off of the boom in Crop Mode. Action Ensure the sensors are aligned and mounted correctly. Poor Height Sensor readings. Test the Height Sensors. 10 Section 4.4 3.1 2.6 Automatic Setup or Retune Problems When performing an Automatic Setup or Retune: The sprayer must be over level bare dirt or gravel. Do not perform the auto setup over vegetation, concrete, water or snow. The hydraulic system should be under a normal load and at a normal working temperature. The oil should be warm and the sprayer’s engine should be normal working RPM. Start the solution pump if possible. For Retune problems only, follow Section 2.6.4 and Section 2.6.5 below. 2.6.1 Starting the Automatic Setup Ensure you have selected the correct sprayer make and model. A list of connected modules and sensors will be displayed. Ensure the list matches the modules and sensors included in your system. Automatic Setup does not show all the correct modules/sensors are connected. Possible Cause Action Exit the install, cycle power and retry the Automatic Setup. Communication problems. Test the communication. Section N/A 3.5 2.6.2 Switch Setup When you press the sprayer’s switches during the switch setup the system will assign the switch input to that location. If you press the wrong switch, the system will not let you know and it will assign the wrong switch input to the location. The system does not detect switch presses or indicates it’s assigned. Possible Cause The switch has already been assigned to a function. Action Perform the Automatic Setup again and ensure you are not pressing the same switch twice. Section 4.1 Note: Not all sprayer types will perform the Switch Setup. 11 2.6.3 Sensor Detect During this test the system will set the sensors height at 35 inches (90 cm) and then move the booms and determine which sensors are located where on the sprayer. The left or right wing does not move during the sensor detect test. Possible Cause The hydraulics are not functioning or not installed correctly. Action Perform a boom function test. Section 3.6 The electrical outputs to the valves are not functioning or are installed incorrectly. The left and right wings move up but the sensor detect test does not finish or gives an error. Possible Cause Poor Height Sensor readings. Action Test the Height Sensors. The left and right wings will move down after the sensor detect test. If the test times out or stalls after the right wing moves up, then the down functions may not be functioning correctly. Perform a boom function test. Section 3.1 3.6 2.6.4 Boom Geometry Calibration When calibrating the boom geometry, push the boom down approximately 2 – 3 feet (50 – 100 cm) and then let go of the boom. Do not push the boom tip into the ground when performing this test. The boom geometry calibration fails, does not finish or finishes before the boom is pushed. Possible Cause Incorrect Roll Sensor mounting. Action Check the Roll Sensor mounting as shown in the installation manual for your kit. Poor Height Sensor readings. Test the Height Sensors. 3.1 Poor Roll Sensor readings. Test the Roll Sensors. 3.2 The boom may not be pivoting freely. Check the sprayer mechanical components. 3.10 12 Section 4.5 2.6.5 Hydraulic Calibration The hydraulic calibration “times out” or gives an error. Possible Cause Poor calibration target. Action Ensure you are performing the calibration over bare level gravel or soil. Section N/A If the system “hangs up” during the Automatic Setup, release the “Check” button and move the booms to normal working height and/or move the sprayer forward or backward a little. Press and hold the “Check” button to resume. N/A Poor Height Sensor readings. Test the Height Sensors. 3.1 Poor Height Sensor mounting. Check the Height Sensor mounting. 4.4 Poor Roll Sensor readings. Test the Roll Sensors. 3.2 Poor Roll Sensor mounting. Check the Roll Sensor mounting. 4.5 Excessively windy conditions. If you are trying to calibrate in excessively windy conditions, the boom may always be moving due to the wind and the system will not be able to calibrate correctly. Calibrate the system in less windy conditions. N/A Problem with the sprayer mechanics. Check the sprayer mechanics. 3.10 The sensors went out of range during the calibration. If the system “hangs up” during the Automatic Setup, release the “Auto” switch and move the booms to normal working height. Press and hold the “Auto” switch to resume. N/A The boom was not set close to 35” (90 cm) during the Sensor Detect. Restart the Automatic Setup and ensure the boom is at 35” (90 cm) for the Sensor Detect. N/A 13 3 Test Procedures 3.1 Height Sensor Test Before testing the Height Sensors, perform a visual check of the sensors to look for any physical damage or improper mounting. Refer to Section 4.4 for proper Height Sensor mounting. 1. Ensure the system has previously completed an Automatic Setup. If the system has not passed the Sensor Detect portion of the Automatic Setup then the sensors may not be configured to the correct locations. 2. Perform this test over level bare soil or gravel. The system must be in Manual and Soil mode. 3. Level the booms and adjust the main lift to 10 inches (25 cm) above the ground or to the bottom of the stroke. 4. Navigate to the height readings screen (Run Screen -> Settings -> More -> Diagnostics -> Sensors). 5. Check the height readings of all the Height Sensors while raising the center section manually. Check each height reading up to 80 inches (200 cm). 6. You should see a continuous and accurate height reading from 10 inches (25 cm) to 80 inches (200 cm). 7. Repeat steps 2 to 6 in Crop Mode. Refer to the following sections for troubleshooting if you experience any of the following errors: Error message: “No Data” or “NR” Page 15 Error message: “No Comm” Page 16 Inaccurate height reading Page 16 14 Error message: “No Data” or “NR”. Possible Cause This message may be displayed if the Height Sensor is not communicating. Action Check the communication status of the sensor. Section 3.5.2 The sensor may be saturated with water. If the sensors get saturated with rain water, unfold the booms so the sensors point towards the ground and allow the sensors to dry out. You can also remove the sensor foams, squeeze the water out of them and reinstall them into the sensors. The system can be left running while the sensors dry out. N/A The sensor may be covered in mud or debris. The sensor foams are designed to keep mud and debris off of the sensor transducer. If the sensor foams become dirty you can replace them or remove them from the sensor, clean them and reinstall them into the sensors. If the transducer becomes dirty you can gently wash it out with clean water. Do not use any high pressure water or chemicals on the transducer. N/A The sensor may be reading off a poor target such as snow, water, ice or concrete. When testing the sensors always test over level bare soil or gravel. N/A The sensor may be reading off the boom. Try moving the sensor to a different location and repeat the sensor test. Check the Height Sensor mounting. 4.4 If the sensor is still reporting “No Data” errors then it may be a faulty transducer or sensor. Replace the sensor or send it to your local Norac service center for repair. 4.7.1 15 Error message: “No Comm”. Possible Cause Failed sensor or CANbus Action Test the communication If you have recently updated the firmware, the sensors may be stuck in programming mode. The sensor will “tick” very slowly if it is in programming mode. Send the update file again. Section 3.5 4.15 Inaccurate height reading. Possible Cause The sensor may be reading off the boom. Action Section Check the sensor mounting. Try 4.4 moving the sensor to a different location and repeat the sensor test. Reading off the boom may be more apparent when the system is in crop mode. The sensor offset height has not been set correctly. Set the sensor heights. 4.8.2 The Height Sensor serial numbers are not mapped to the correct locations. Ensure the Height Sensors are properly configured. 4.8.1 16 3.2 Roll Sensor Test Perform the applicable Roll Sensor Test for your system: Passive Roll (Section 3.2.1) Active Roll™ (Section 3.2.2) 3.2.1 Passive Roll 1. Perform a visual check of the sensors to look for any physical damage or improper mounting. Refer to Section 4.5 for proper Roll Sensor mounting techniques. 2. Navigate to the Roll Sensor reading of the BF and IF Roll Sensors (Run Screen -> Settings -> More -> Setup -> Sensors->Roll Sensors). 3. When the boom is stable, the BF and IF readings should be stable within a maximum of 10 points. 4. While viewing the BF reading, with an assistant, push down on either boom tip, hold for a second and let go. You should see a continuous change in the BF reading. Note: If you do not have someone else to help you push the boom down you can try manually lifting one boom to force the center section to roll slightly. Refer to the following sections for troubleshooting if you experience any of the following errors: Error message: “No Comm”, “No Data” or “NR” Page 18 Erratic Roll Sensor reading Page 18 BF Roll Sensor reading does not change. Page 18 17 Error message: “No Comm”, “No Data” or “NR”. Possible Cause Failed sensor or CANbus Action Test the communication Section 3.5 Action Ensure the Roll Sensors are mounted correctly. Section 4.5 Erratic Roll Sensor reading. Possible Cause The Roll Sensor reading is erratic and not stable when the boom is stable. Replace the Roll Sensor. 4.7.2 BF Roll Sensor reading does not change. Possible Cause If the BF Roll Sensor is not mounted correctly to the boom frame you will not see any change in the BF roll value when the boom rolls over. Action Ensure the Roll Sensors are mounted correctly. Section 4.5 The Roll Sensor serial numbers are not mapped to the correct locations. Ensure the correct serial number is entered for each Roll Sensor location. 4.9 Faulty Roll Sensor. Replace the Roll Sensor. 18 4.7.2 3.2.2 Active Roll™ 1. Perform a visual check of the sensors to look for any physical damage or improper mounting. Refer to Section 4.5 for proper Roll Sensor mounting techniques. 2. Ensure the sprayer and center section of the boom is level. 3. Navigate to the Roll Sensor reading of the BF and IF Roll Sensors (Run Screen -> Settings -> More -> Setup -> Sensors->Roll Sensors). 4. When the sprayer and boom are level the BF and IF readings should be zero and should be stable within a maximum of 10 points. If they are not zero, then zero the roll readings. 5. While viewing the BF reading, press the roll CW switch on the sprayer to manually roll the boom over to one side. You should see a continuous change in the BF reading without any “No Data” errors. Note: At the very extreme roll position the roll sensor might display some “No Data” errors, this is normal. 6. Manually roll the boom over to the other side. You should see a continuous change in the BF reading without any “No Data” errors. Refer to the following sections for troubleshooting if you experience any of the following errors: Error message: “No Data” Page 20 Error message: “No Comm” Page 21 Inaccurate or erratic roll reading Page 21 19 Error message: “No Data” Possible Cause This message may be displayed if the height or Roll Sensor is not communicating. Action Check the communication status of the sensor. Section 3.5.2 The sensor may be saturated with water. Allow the sensors to dry out. You can also remove the sensor foams, squeeze the water out of them and reinstall them into the sensors. The system can be left running while the sensors dry out. N/A The sensor may be covered in mud or debris. The sensor foams are designed to keep mud and debris off of the sensor transducer. If the sensor foams become dirty you can replace them or remove them from the sensor, clean them and reinstall them into the sensors. If the transducer becomes dirty you can gently wash it out with clean water. Do not use any high pressure water or chemicals on the transducer. N/A The rods may not be aligned correctly. Check the Active Roll™ Sensor mounting. 4.6 If the sensor is still reporting “No Data” errors then it may be a faulty transducer or sensor. Replace the sensor or send it to Norac for repair. 20 4.7.3 Error message: “No Comm” Possible Cause Failed sensor or CANbus Action Test the communication If you have recently updated the firmware, the sensors may be stuck in programming mode. The sensor will “tick” very slowly if it is in programming mode. Send the update file again. Section 3.5 4.15 Inaccurate or erratic roll reading Possible Cause The Active Roll™ Sensor may not be configured or calibrated correctly. Action When the sprayer and boom center section are level the BF and IF readings should be zero. Check the Roll Sensor configuration and calibration. The rods may not be aligned correctly. Check the Active Roll™ Sensor mounting. Faulty sensor. Replace the Roll Sensor. Section 4.10 4.6 4.7.3 21 3.3 Temperature Sensor Test Note: On firmware versions prior to 4.2.0.0 there is no menu screen available to view the valve block temperature. 1. Check the valve block temperature sensor reading. (Run Screen->Settings->More>Diagnostics->Hydraulics->More->More). 2. The temperature reading is the surface temperature of the valve block. It should be reasonably close to the hydraulic oil temperature and should change as the sprayer warms up. Incorrect temperature reading Possible Cause The temperature sensor is not mounted correctly Action The temperature probe is the black cable extending from the valve module with a ring terminal on the end of it. It must be mounted to the surface of the Norac valve block as outlined in the installation manual. This cable is not a ground connection. Section N/A The Valve Module is not communicating. Check the communication status of the Valve Module. 3.5.2 Faulty Valve Module. Replace the Valve Module. 4.7.4 22 3.4 Power Supply Test The UC5™ system can be powered using different configurations. Refer to your height control installation manual and display kit installation manual for a description of how your system is powered. The Control Module LED will be illuminated (green, amber or red) if there is system power. To properly check the power supply you should measure the voltage as described below. Figure 3: ECU and signal power on Norac bus 1. Measure the voltage between pins 2 and 5 on the battery cable. The reading should be approximately +12 VDC (system voltage). 2. Measure the voltage between pins 1 and 6 on the battery cable. The reading should be approximately +12 VDC (system voltage). 23 3.5 Communication Test 3.5.1 Troubleshooting the CANbus Check Communication Status (Section 3.5.2) Perform a Visual Check (Section 3.5.3) # of Sensors / Modules Not Communicating? Only One Move the Sensor to a New Location (Section 3.5.4) More Than One Perform an Ohm Test (Section 3.5.5) Perform a Voltage Test (Section 3.5.6) Reconnect Sensors to the CANbus (Section 3.5.7) Note: Section 3.5.8 contains schematics and an overview of the CANbus system. 24 3.5.2 Checking Communication Status Check the versions menu to determine if you have any sensors or modules that are not communicating. If you determine that there are communication problems then start testing the CANbus as described in Section 3.5.3. You must ensure that the sensors have all been configured in the system by previously going through an Auto Setup or Quick Setup. If they have not been initially configured they will not show up on the CANbus. To view the current status of each module or sensor: 1. Navigate to the firmware versions menu (Run Screen->Settings->More->Diagnostics>Versions). 2. Select a module or sensor from the drop down list. 3. The hardware version and firmware version will be displayed for the selected module or sensor. 4. If the sensor or module has lost communication, it will not appear in the version list or the firmware version will appear as “00.00.00.00” or “255.255.255.255”. Note: Electronic modules on the CANbus that are non-NORAC devices may also show the firmware version as “00.00.00.00” or “255.255.255.255”. This is normal for non-NORAC devices and does not indicate a communication problem. 3.5.3 Visual Check Before diagnosing any communication problems, start by performing a quick visual check of all the CANbus cabling. Many communication problems can be attributed to damaged cabling. 1. Look for any pinched or stretched cables especially near the boom pivot points such as the main lift and fold points. 2. Ensure all the connectors are free of corrosion, clean and plugged in. 3. Dielectric grease must never be used on the pins of any CANbus connections. 3.5.4 Moving the Sensor to a New Location If there is only one sensor or module that is not communicating, you can try removing the sensor or module from its current location and plugging it into another CANbus connector. This step is not required; however it is useful to quickly diagnose a problem if only one sensor or module is not communicating. 1. Power down the system. 2. Unplug the non-communicating sensor or module from the CANbus. 3. Plug the sensor into a connector that previously had a known communicating sensor. 4. Turn on the power. 25 5. Check if the sensor or module is now communicating. Note: The sensor will still be assigned to its previous location. For example, if you moved the left outer sensor to the right outer location, the left outer sensor will still show up as the left outer sensor. The controller will not know that you have moved the sensor. 6. If the sensor or module now communicates then it would indicate that there is a problem with the cable that it was previously connected to. 7. If the sensor or module still does not communicate then it would indicate a problem with the sensor or module itself. 3.5.5 Ohm Test 1. The following test will check for any short circuits in the cabling. 2. Disconnect all the height sensors, modules and roll sensors from the CANbus. The Display Bus can be left connected. Note: If you are also removing the sensors from their mounting brackets, ensure you write down the serial number and location of each sensor so it can be installed back in its previous location. 3. For most systems, disconnecting the Valve Module will also create a break in the CANbus system. You can replace the module with a two-way coupler to ensure the CANbus remains continuous from front to back. There are two termination couplers located at the end of each wing tip that can be removed and used in place of the Valve Module. 4. Locate the network cable (C01) that plugs into the Control Module. Disconnect the cable from the Control Module (Figure 4). The Ohm test will be performed on this connector. Figure 4: Typical Control Module Installation Figure 5: Connector Pin Out 26 5. Test the resistance of every pin combination with an ohm meter, on the Norac CANbus (Test Point 1, TP1 - Figure 10). You may need to remove the wedge lock on the connector to get a good connection from the meter probe to the pin. The following table lists the values for each pin combination. The Norac bus must not have power connected to it when performing this test. Pin # 1 Pin # 2 Value Open Circuit 1 3 Open Circuit 1 4 Open Circuit 1 5 Open Circuit 1 6 Open Circuit 2 3 Open Circuit 2 4 Open Circuit 2 5 Open Circuit 2 6 Open Circuit 3 4 75 Ω ± 10 Ω 3 5 Open Circuit 3 6 Open Circuit 4 5 Open Circuit 4 6 Open Circuit 5 6 Open Circuit Figure 6: Typical Norac Bus Ohm Test Values 6. If you measured differently than the values in Figure 6, continue by testing at the next connection towards the rear of the sprayer (Test Point 2, 3, 4, etc - Figure 10) until you isolate the problem cable. 27 3.5.6 Voltage Test 1. The following test will check for continuity in the cabling. 2. Ensure the height sensors, roll sensors and modules are still disconnected from the CANbus. 3. Reconnect cable C01 to the Control Module. (Figure 4). Ensure the power is connected to the Control Module and the Display Bus is connected. 4. Using a voltmeter, measure the voltage of the following pin combinations at each of the sensor connections (Test Point 7, 8 and 9 - Figure 10). Pin # 1 Pin # 3 Value 0.5 to 6 VDC 1 4 0.5 to 6 VDC 1 6 12 ± 3 VDC 2 5 12 ± 3 VDC Figure 7: Typical Norac Bus Voltages 5. If you measured differently than the values in Figure 7, continue by testing at the next connection towards the front of the sprayer (Test Point 6, 5, 4 etc. - Figure 10) until you isolate the problem cable. 3.5.7 Reconnect Sensors to the CANbus Once you have confirmed the CANbus cabling is ok by performing the Ohm Test and Voltage Test, you can start reconnecting the sensors and modules (Starting with the Valve Module) one at a time to the CANbus to ensure each sensor is communicating. If you were using the termination couplers to replace a module, ensure it is put back in its original location when the module is connected back to the CANbus. 1. Reconnect one sensor or module to the CANbus. 2. Check if the sensor or module is communicating. 3. If the sensor or module is not communicating then remove it from the CANbus and set it aside to be replaced. 4. If the sensor or module is communicating then leave it connected to the CANbus. 5. Repeat steps 1 to 4 for each of the sensors until they are all connected to the CANbus. Replace any sensors that do not communicate. 28 3.5.8 CANbus Overview The NORAC UC5 CANbus consists of six wires that are connected to all of the sensors and modules in the system (ECU Ground, ECU Power, Signal Ground, Signal Power, CAN High and CAN Low). The sensors and modules all communicate with each other via the CANbus. The controller knows where each sensor is located by its serial number and not by the physical location that it is plugged into. Figure 8 shows a simplified schematic of the network cable. Figure 8: Simplified Network Schematic The CANbus has two 150 Ω termination resistors incorporated into the coupler (E20) that connects the outer height sensors to the CANbus at the wing tips (Figure 9). The two termination resistors are in parallel for a total termination resistance of 75 Ω. Figure 9: Location of Termination Resistors 29 Figure 10 shows a typical system layout with test points labeled for troubleshooting as described earlier in this section. Please refer to the installation manual for your sprayer type for your exact system layout. Figure 10: Test Point (TP) Examples 30 3.6 Boom Functions Test Important: While performing this test the boom functions will move. Ensure the sprayer booms have full range of movement. By performing the following boom functions test you will confirm that the UC5™ system is able to drive the corresponding boom functions. This will confirm that the electrical and hydraulic portions of the UC5™ boom function outputs are operating correctly. Typically the proportional functions; left tilt, right tilt, Active Roll™ and sometimes main lift are driven by the UC5™ Valve Module. 1. Navigate to the “Boom Movements” screen in the diagnostic menu (Run Screen-> Settings>More->Diagnostics->Boom Movements). 2. Press and hold the “Left Up” boom function on the display. 3. Ensure the “Left Up” boom function operates. 4. Repeat steps 1 to 3 for all the other boom functions: “Left Down”, “Right Up”, “Right Down”, “Roll Clockwise” and “Roll Counter Clockwise”. Note: Not all sprayer types will have all the functions listed above. Refer to the UC5™ installation manual for your sprayer type to determine which functions your system supports. Refer to the following sections for troubleshooting if you experience any of the following errors: The wrong boom function moves. Page 32 One of the proportional boom functions does not operate. Page 32 31 The wrong boom function moves. Possible Cause The outputs may not be correctly configured. Action Check the valve outputs and ensure they are correctly configured in the UC5™ software. Section 4.11.1 For proportional functions; the Valve Module and valve cables may not be correctly installed. Check the Valve Module installation. Refer to your installation manual. NA Test the Valve Module drivers. 3.8 For proportional functions; the raise and Check the hydraulics installation. The lower lines from the Norac valve block raise lines must be connected to the “B” may not be correctly installed. ports and the lower lines must be connected to the “A” ports. Perform a manual valve override test. N/A 3.7 One of the proportional boom functions does not operate. Possible Cause The outputs may not be correctly configured. Action Check the valve outputs and ensure they are correctly configured in the UC5™ software. The Valve Module or valve cable may have failed. Test the Valve Module. 3.8 The coil may have failed. Try swapping valve coils with another valve that is known to work correctly. If this solves the problem then replace the failed coil. N/A The hydraulics may have failed. Perform the manual valve override test. 3.7 32 Section 4.11.1 3.7 Manual Valve Override Test Important: While performing this test the boom functions will move. Ensure that you are located in a safe position as to not get injured from any boom movements. The manual valve override test is useful for determining if the hydraulics are operating correctly on the Norac valve block. 1. Perform the manual override test for each proportional function by pushing in the pin with a small screwdriver or awl in the center of the coil as shown below. 2. The corresponding boom function should move when you perform this test. Down Up Push pin to test Figure 11: Manual Valve Override Test Refer to the following sections for troubleshooting if you experience any of the following errors: The wrong boom function moves. Page 34 One or more of the boom functions do not operate. Page 34 33 The wrong boom function moves. Possible Cause For proportional functions; the raise and lower lines from the Norac valve block may be incorrectly installed. Action Check the tilt cylinder hose installation. The raise lines must be connected to the “B” ports and the lower lines must be connected to the “A” ports. Refer to your installation manual for correct hydraulic installation. Section N/A One or more of the boom functions do not operate. Possible Cause Debris in the valve or valve block. Action Check the valve and valve block for debris. Section N/A The pressure and tank lines may not be installed correctly. Check the pressure and tank lines. Refer to your installation manual for correct installation. N/A 34 3.8 Valve Module Driver Test Figure 12 shows the default Valve Module outputs. The output numbers listed correspond to the output numbers printed on the Valve Module. Output Number 1 2 3 4 7 8 Normal Function Left Up Left Down Right Up Right Down Roll CCW1 Roll CW1 Figure 12: Default Valve Module Outputs Note 1: Not all sprayer types will have the functions listed in the table in Figure 12. These are generally used for proportional functions driven from the Norac valve block. 1. Disconnect each cable C10 from each coil. 2. Attach a test light or voltmeter to the C10 cable connected to the “Left Up” function (Output 1). You may need to remove the wedge lock on the connector to attach your probe to the pin. 3. Navigate to the boom movements screen (Run Screen-> Settings->More->Diagnostics>Boom Movements). 4. Press the “Left Up” function. You should get a +12 VDC reading on your voltmeter. 5. Repeat steps 1 to 3 for the “Left Down”, “Right Up” and “Right Down” functions. 6. If your system has Active Roll™, repeat Steps 1 to 3 for the “Roll CW” and “Roll CCW” functions. Refer to the following sections for troubleshooting if you experience any of the following errors: One of the functions does not operate. Page 36 More than one boom function does not operate. Page 36 35 One of the functions does not operate. Possible Cause The outputs may not be correctly configured. Action Check the valve outputs and ensure they are correctly configured in the UC5™ software. Section 4.11.1 Damaged valve cable. Test the continuity of the valve output cable (C10). N/A Failed Valve Module. Replace the Valve Module 4.7.4 More than one boom function does not operate. Possible Cause The outputs may not be correctly configured. Action Check the valve outputs and ensure they are correctly configured in the UC5™ software. The Valve Module may not be communicating. Check if the Valve Module is communicating. 3.5.2 Failed Valve Module. Replace the Valve Module 4.7.4 36 Section 4.11.1 3.9 Boom Speed Test Important: While performing this test the boom functions will move at 100% speed for 1 second. Ensure the sprayer booms have full range of movement. 1. Ensure the sprayer is at operating temperature and RPM. Turn on the solution pump if possible. 2. Navigate to the valve setup screen (Run Screen-> Settings->More->Setup->Valves). 3. Select the “Left Up” function. 4. Press the gain button. 5. Press and hold the manual “M” button. 6. The controller will drive the selected function for 1 second at 100% and report the distance travelled. This is the boom speed. 7. Repeat this test a few times to get an average boom speed reading. 8. Repeat Steps 3 to 7 for the “Left Down”, “Right UP” and “Right Down” functions. Function Left Up Right Up Left Down Right Down Min 20 Units inches 500 mm 20 inches 500 mm 10 inches 250 mm 10 inches 250 mm Figure 13: Typical Booms Speeds The boom speed is outside of the specified range. Possible Cause The orifices in the Norac valve block may have been installed backwards or may not be seated correctly. Action Check the orifice installation in the “A” and “B” ports. Ensure they have been installed with the correct orientation. Refer to your installation manual. There may be air in the hydraulic lines. Cycle the wings up and down several times to remove the air out of the hydraulic system. Section N/A N/A 37 3.10 Checking Mechanical Components The following list describes several mechanical items to check on your sprayer. For optimum performance these recommendations should be followed. Please note that this list does not apply to all sprayer types. Please follow the recommendations that apply to your sprayer. Friction Pads: Ensure the boom pivots freely. If there are friction pads on the boom, ensure they are well greased or clean and free from debris. The friction pads must be adjusted properly to allow the boom to pivot freely and not stick or bind as the boom rolls. Main Lift: If there is substantial wear in the mast-style main lift the boom will be too loose. Install shims or adjust the mast-style main lift if possible. Accumulators: If the sprayer has accumulators on the wing tilt cylinders, they should have orifices (restrictors) installed between the accumulator and the hydraulic circuit. The orifices are used to restrict the amount of effect the accumulators have on the hydraulic circuit. NORAC recommends 1mm to 1.5 mm restrictors. All Accumulators (main lift and tilt) must be charged to their recommended setting. Boom Suspension: Ensure the sprayer’s boom suspension is operating correctly and moving freely. If the suspension is sticking or too loose, the boom will be unstable. If the boom is unstable in manual mode, the height control system will not make it more stable. For optimal performance the boom suspension should be “critically damped”. Figure 14 illustrates how to check if the boom is critically damped. Figure 14: Critically Damped Boom If the boom is not critically damped then check the boom damper shocks and replace them if they are worn. If the suspension is adjustable then adjust it so the boom is critically damped. 38 3.11 Checking Settings The following section describes how to check the most common settings on the UC5™ system. If you have not yet completed an Automatic Setup then perform it now before continuing. 3.11.1 Deadzones 1. Navigate to the hydraulics diagnostics screen. (run screen-> settings->more->diagnostics>hydraulics) Left Up Deadzone Right Up Deadzone To Main Lift and Roll Deadzones Left Down Deadzone Right Down Deadzone Figure 15: Viewing the Deadzone Values 2. The deadzone value relates to the smallest amount of boom movement the valve can produce. Typical deadzone values for UC5™ are as follows: Function Wings Valve Type Proportional Typical 20 Min 15 Max 30 Units % Main Lift On / Off N/A 10 1000 ms Roll Proportional 18 10 50 % Figure 16: Typical Deadzone Values If the deadzone value is outside of the specified range or to confirm if it has been calibrated correctly, calibrate the deadzone as described in Section 4.11.2. 39 3.11.2 Gains 1. Navigate to the hydraulics diagnostics screen (Run Screen->Settings->More->Diagnostics>Hydraulics). Right Up Gain Left Up Gain To Main Lift and Roll Gains Right Down Gain Left Down Gain Figure 17: Viewing the Gain Values 2. The gain value relates to the maximum speed of the boom. This value is dependent on the sprayer type and therefore can be quite different for each sprayer type. 3. When checking gain values the left up and right up gain value should be close (within 20). The left down and right down values should also be close (within 20) and are typically half of the up value for most sprayer types. Generally the faster the boom speed the lower the gain value. Function Wings (up) Valve Type Proportional Typical 70 Min 10 Max 200 Wings (down) Proportional 35 5 150 Main Lift All N/A N/A N/A Roll Proportional N/A N/A N/A Figure 18: Typical Gain Values If the gain value is outside of the specified range or to confirm if it has been calibrated correctly, calibrate the gain as described in Section 4.11.3. 40 3.11.3 Boom Geometry Values 1. Navigate to the geometry diagnostics screen (Run Screen-> Settings->More->Diagnostics>Hydraulics). Figure 19: Viewing the Boom Geometry Values 2. The boom geometry values relate to the position of the Roll Sensors, boom type and position of the Height Sensors. 3. When checking the boom geometry values the LWSF and RWSF should be within 3 points of each other. Boom Type Center Pivot LWSF (Typical) 20 RWSF (Typical) 20 Min 10 Max 30 Roll Sensor Type Passive Roll Orientation Cables facing right hand side BF Polarity POS IF Polarity POS Passive Roll Cables facing left hand side NEG NEG Active Roll™ (LRC) Right hand side of boom NEG NEG Active Roll™ (LRC) Left hand side of boom POS POS Figure 20: Typical Boom Geometry Values If the boom geometry values are incorrect or to confirm if they have been calibrated correctly, calibrate the boom geometry as described in Section 4.12. 41 3.11.4 Sensitivity 1. Navigate to the settings screen (Run Screen->Settings). 2. The sensitivity can be adjusted from 1 to 10, with 5 being the default setting. A lower number will reduce the system sensitivity and improve stability. Higher settings will speed up the response and also create a greater demand on the hydraulics. 3. For testing purposes the sensitivity should be set at the default value of 5. Once you are confident the system is working well then you can test the system at higher sensitivities. Some sprayer types may be unstable at higher sensitivities. 3.11.5 Crop and Soil Mode 1. Navigate to the settings screen (Run Screen->Settings). 2. The “Mode” button allows the system to be changed between Soil Mode and Crop Mode. Soil Mode allows the sensors to read a height from the spray nozzles to the ground; whereas Crop Mode will read the height from the spray nozzles to the top of the crop canopy. 3. For testing purposes the mode should initially be set to “Soil”. Once you are confident the system is working well in Soil Mode then you can test the system in Crop Mode. For more information on Crop and Soil Mode refer to the UC5™ Operator Manual. 42 4 Reference 4.1 Menu Structure Map 43 4.2 Automatic System Setup The following section describes how to perform the Automatic System Setup. troubleshooting Automatic Setup problems, please refer to Section 2.6. For Note: Defaulting the Control Module is not required before performing an Automatic Setup. Preparation: Unfold the sprayer in a location that is relatively level and where the sensors are over bare soil or gravel. Do not conduct the system setup or retune procedures over standing crop, weeds/grass, wet concrete, water or snow. Ensure the boom roll suspension system is functioning properly and smoothly. For best results, the hydraulic system should be under a normal load and at a normal working temperature. Start the solution pump and run the sprayer’s engine at a normal working RPM for the entire setup. Cycle all boom sections up and down manually for five minutes to warm the oil. For trailed sprayers, ensure any hydraulic flow controls are adjusted for normal field operation. Changing the hydraulic flow controls after or during the system setup will affect the performance. For Active Roll systems, ensure the sprayers is level and the boom is completely centered and level before starting the Automatic Setup. Starting the Automatic System Setup: 1. Navigate to the Automatic System Setup (Run Screen->Settings->More->Setup->Automatic Setup). 2. Select the sprayer make and model from the drop down lists, and then select the "Check Mark" button. The system will now erase the previous settings and load the default settings for your sprayer type. 3. A list of precautions will be displayed on the display. Once you have read and followed the list of precautions, select the "Check Mark" button. 4. A list of connected modules and sensors will be displayed (Echo™ display only) or the system will say “Proper UC5 Components Connected”. Make sure the modules and sensors match your system and then press the "Check Mark" button. 44 Switch Setup: 5. The system will instruct you to press the boom function switches on the sprayer controls. Press each switch momentarily as instructed on the terminal. 6. When you press the sprayer’s switches the system will assign the switch input to that location. If you press the wrong switch, the system will not let you know and it will not assign the correct switch input to the location. When the switch setup is complete select the "Check Mark" button to continue. Note: If you wish to bypass the Switch Setup press the "Check Mark" button before you press any switches. Some sprayer types do not require this step. If you do not see any of the messages in this step, simply continue as prompted by the panel. Sensor Detect: 7. You will be instructed to place your booms so the nozzles are 35” (90cm) from the ground. When the measured distance is 35” (90cm) select the "Check Mark" button. At this point the system will calibrate the height of each sensor to 35” (90cm). 8. If you are not able to get the height to exactly 35”, you can adjust the offset height after the Automatic Setup (Section 4.8.2). You must get the booms reasonably close to 35” or the Automatic Setup may encounter problems. 9. Press and hold "Check Mark" button to begin the sensor detect procedure. During the procedure you must hold the "Check Mark" button. 10. If the "Check Mark" button is released, simply press and hold it again to continue. 11. The system will now move the left boom and then the right boom to detect and assign the Height Sensor to the correct locations. The display will show an arrow to indicate which boom is in motion. Boom Geometry Calibration: 12. Press and hold the "Check Mark" button. The system will move the booms into position for the boom geometry test. 13. The system will then instruct you to exit the cab and pull the boom tip down towards the ground, and then release the boom. 14. When performing the Boom Geometry Calibration, push the boom down approximately 2 – 3 feet (50 – 100 cm) and then let go of the boom. Do not push the boom tip into the ground when performing this test. Ensure you stay a minimum of 3 feet (1m) away from any of the Height Sensors. Note: If you wish to bypass the Boom Geometry Calibration press the "Check" button before you push the boom. The Boom Geometry Calibration may not be applicable for all sprayer types. 45 Hydraulic Calibration: 15. Hold the Check button and continue holding it until you are instructed to release it. The system will now calibrate the hydraulics. 16. All boom sections will move. If you accidentally release the button, select and hold the Check button to resume. 17. When the setup is finished the terminal will instruct you to select check to complete the Automatic Setup. Your NORAC UC5™ system is now configured and ready for operation. 46 4.3 Retune The following section describes how to perform the Retune. For troubleshooting Retune problems, please refer to Section 2.6. Preparation: Unfold the sprayer in a location that is relatively level and where the sensors are over bare soil or gravel. Do not conduct the Retune over standing crop, weeds/grass, wet concrete, water or snow. Ensure the boom roll suspension system is functioning properly and smoothly. For best results, the hydraulic system should be under a normal load and at a normal working temperature. Start the solution pump and run the sprayer’s engine at a normal working RPM for the entire setup. Cycle all boom sections up and down manually for five minutes to warm the oil. For trailed sprayers, ensure any hydraulic flow controls are adjusted for normal field operation. Changing the hydraulic flow controls after or during the system setup will affect the performance. Starting the Retune: 1. Navigate to the Retune (Run Screen->Settings->More->Setup->Retune). 2. A list of precautions will be displayed on the display. Once you have read and followed the precautions, select the "Check Mark" button. 3. A list of connected modules and sensors will be displayed (Echo™ display only). Make sure the modules sensors match your system and then press the "Check Mark" button. Boom Geometry Calibration: 1. Press and hold the "Check Mark" button. The system will move the booms into position for the boom geometry test. 2. The system will then instruct you to exit the cab and pull the boom tip down towards the ground, and then release the boom. 3. When performing the Boom Geometry Test, push the boom down approximately 2 – 3 feet (50 – 100 cm) and then let go of the boom. Do not push the boom tip into the ground when performing this test. Ensure you stay a minimum of 3 feet (1m) away from any of the Height Sensors. 47 Hydraulic Calibration: 1. Hold the Check button and continue holding it until you are instructed to release it. The system will now calibrate the hydraulics. 2. All boom sections will move. If you accidentally release the button, select and hold the Check button to resume. 3. When the setup is finished the terminal will instruct you to select check to complete the Automatic Setup. Your NORAC UC5™ system is now configured and ready for operation. 48 4.4 Height Sensor Mounting Height Sensors can be mounted several different ways depending on the sprayer and boom type. The following mounting instructions are intended for general reference only. Your installation manual may contain specific Height Sensor mounting instructions. Note: By default the controller assigns the serial numbers in order from left to right lowest to highest. If the serial numbers are not in the correct order the controller will reassign them during the Automatic Setup. It is recommended to install the sensors in order for troubleshooting purposes, however it is not necessary. Height Sensor Mounting Guidelines: The following rules should be followed for both the wing sensors and the main lift (middle) sensor. 1. In its lowest position, the sensor must be 9 inches (23 cm) or more from the ground (A). 2. The centerline of the acoustic cone should be approximately vertical at normal operating heights (A). 3. The bottom of the sensor must be at least 9 inches in front of the spray nozzles and boom structure (B). This does not apply for the main lift sensor. 4. The bottom of the sensor must be at least 9 inches above the spray nozzles (C). 5. Ensure there are no other obstructions with a 12 inch (23 cm) diameter circle projected directly below the sensor (D). Figure 21: Height Sensor Mounting Guidelines 49 4.4.1 Wing Sensor Installation 1. The sensor bracket should be oriented forward (ahead of the boom). 2. Typically the best mounting location for the outer wing sensor brackets will be near the end of the boom tips, approximately two feet (60cm) from the end. 3. Mount the inner wing sensor brackets approximately half-way between the chassis and the outer wing sensors. Insert the spacers (B12) between the sensor bracket and the boom when mounting the inner wing sensor brackets as shown in Figure 22. This may not be necessary depending on the boom type. 4. Mount the ultrasonic sensor into the sensor bracket and run the sensor cable through the sensor tube. Figure 22: Inner Wing Sensor Bracket with Spacer Figure 23: Example Mounting of Outer Wing Sensor Bracket 50 4.4.2 Main Lift Sensor Installation 1. There are a variety of ways to mount the main lift bracket on most sprayers. The bracket should position the sensor approximately in the center of the sprayer, forward of the boom. Figure 24: Example Mounting of the Main Lift Bracket 51 4.5 Roll Sensor Mounting (Passive Roll) 1. When mounting the roll sensors, mount one to the boom frame and one to the chassis (non-pivoting portion of the sprayer). 2. Both roll sensor cables should be pointing towards the right hand wing of the sprayer. 3. Ensure both roll sensor cables provide enough slack to allow sufficient boom roll. Boom Frame Chassis Figure 25: Roll Sensor Mounting (Viewed from the rear of sprayer) 52 4.6 Roll Sensor Mounting (Active Roll™) 1. Before installing the linear roll cylinder, the factory springs, dampers and rubber bumpers must be removed from the sprayer (Figure 26). Rubber Bumpers to be Removed (x2) Figure 26: AGCO Factory Spring / Damper and Rubber Bumper Location 2. If replacing or mounting the Linear Roll Cylinder be careful not to move the shaft of the cylinder because doing so will push oil out and suck air in. Bolts should be tightened to 500 ft-lbs (Figure 27). Spring Washer Spacers Spring Washer Figure 27: Top Mount (Top View) Spacers Bottom Mount 53 3. Mount the sensor bracket to the damper end. A straight edge can be used to line up the spring target with the center of the hole on the sensor mounting bracket. The mount should be facing as far forward as possible, but be sure it will not contact the catwalk when the boom is raised to the top. 4. Mount the cylinder target to the cylinder end. Align the cylinder target so that it is 5/8” to the side of the spring target (Figure 28). Top View Damper End Side View Sensor Mount Spring Target Cylinder Target Cylinder End Figure 28: Linear Roll Cylinder Target Alignment 54 4.7 Replacing Components The sensors and modules are connected to the UC5™ system using one common CANbus. The controller knows where each Height Sensor and Roll Sensor is located by its serial number, and not by where it is physically connected to the CANbus cable. Each sensor serial number is assigned to its location during the Automatic Setup or by manually assigning it in the setup menu. If you move a Height Sensor or Roll Sensor to a new location on the sprayer, the controller will not know that you have moved the sensor. It will still report the sensor as being in the previous location until you have changed the serial number location in the setup menu. 4.7.1 Height Sensors Moving the Sensor to a Different Location: The following instructions are for moving a Height Sensor from one location to another. For example, moving the existing left outer sensor to the right outer location. This can be useful when troubleshooting communication problems. 1. Turn off the system power. 2. Move the sensor to its new location. 3. Turn on the power. At this point the controller does not know the sensor is in a new location. 4. Un-assign each serial number from its previous location (Section 4.8.1). 5. Assign each serial number to the new location (Section 4.8.1). 6. The previous calibration value for the new location will be used. An Automatic Setup, Retune or further calibration is not required for moving the sensor. Replacing the Sensor with a New Sensor: 1. Turn off the system power. 2. Remove the old sensor from the sprayer and install the new sensor in the same location. 3. Turn on the power. The controller will recognize that it is missing a sensor serial number and will see that there is a new sensor serial number on the CANbus. It will automatically assign the new serial number into the old serial number's location. 4. The previous calibration values will be used for the new sensor. An Automatic Setup, Retune or further calibration is not required for replacing the sensor. 55 4.7.2 Roll Sensors (Passive Roll) Replacing the Roll Sensor with a New Sensor: 1. Turn off the system power. 2. Remove the old Roll Sensor from the sprayer and install the new sensor in the same location. 3. Turn on the power. The controller will recognize that it is missing a sensor serial number and will see that there is a new sensor serial number on the CANbus. It will automatically assign the new serial number into the old serial number's location. 4. The previous calibration values will be used for the new sensor. An Automatic Setup, Retune or further calibration is not required for replacing the Roll Sensor. 4.7.3 Roll Sensors (Active Roll™) Moving the Ultrasonic Roll Sensor to a Different Location: If you are moving the Active Roll™ Sensor to a new location or moving a Height Sensor to the Active Roll™ location, you will be required to perform a new Automatic Setup. Replacing the Ultrasonic Roll Sensor with a New Sensor: 1. Turn off the system power. 2. Remove the sensor from the sprayer and install the new sensor in the same location. 3. Turn on the power. The controller will recognize that it is missing a sensor serial number and will see that there is a new sensor serial number on the CANbus. It will automatically assign the new serial number into the old serial number's location. 4. The previous calibration values will be used for the new sensor. An Automatic Setup, Retune or further calibration is not required for replacing the sensor. 56 4.7.4 Valve Module, VT or Echo™ Display 1. Turn off the system power. 2. Remove the module from the sprayer and install the new module. 3. Turn on the power. The controller will recognize that it is missing a module serial number and it will see that there is a new module serial number on the CANbus. It will automatically assign the new serial number into the old serial number's location. 4. The previous calibration values will be used for the new module. An Automatic Setup, Retune or further calibration is not required for replacing the module. 4.7.5 Control Module Note: Replacing the Control Module will clear all the previous settings and require you to perform a new Automatic Setup. Note: Product warranty is recorded using the Control Module serial number. If you are replacing a Control Module, please report the change in serial number and owner information to Norac at [email protected] to update the warranty. 1. Turn off the system power. 2. Remove the module from the sprayer and install the new module. 3. Turn on the power. 4. Perform an Automatic System Setup (Section 4.2). 57 4.8 Height Sensor Setup 4.8.1 Configuring the Sensors Before beginning, write down the serial number and location for each of the sensors. The serial number is located on the bottom of the sensor housing, beside the foam disc. Note: Older versions of sensors have the serial number located on the side of the housing so it may be necessary to remove the sensor from the bracket to view the serial number. Figure 29: Sensor Serial Number Figure 30: Height Sensor Setup Screen 1. Navigate to the Sensor Setup screen (Settings->More->Setup->Sensors). 2. Select the sensor location. 3. Select the appropriate serial number from the selection box. Note: If the sensor serial number is already allocated to another location it will not show up in the drop down list. You will need to remove the serial number from the other location before it shows up in the current list. 4.8.2 Calibrating the Sensor Height 1. Navigate to the Sensor Setup screen (Settings->More->Setup->Sensors). 2. Select the sensor location. 3. To set the sensor height, measure from the ground to the bottom of the nearest sprayer nozzle tip (closest to the sensor location you selected). 4. Enter the value into the height field as shown in Figure 30. 58 4.9 Roll Sensor Setup (Passive Roll) 4.9.1 Configuring the Sensors 1. Navigate to the Roll Sensor Setup screen (Settings->More->Setup->Sensors->Roll Sensor). Measured Roll Figure 31: Roll Sensor Setup Screen 2. Select the Boom Frame Roll Sensor. 3. Select the appropriate serial number from the selection box. 4. Repeat for the Intermediate Frame Roll Sensor. Note: If the sensor serial number is already allocated to another location it will not show up in the drop down list. You will need to remove the serial number from the other location before it shows up in the current list. 4.9.2 Calibrating the Sensors The Passive Roll Sensors are calibrated during the Automatic Setup and do not need further calibration unless your system also has slant control enabled. If your system has the slant function enabled (on/off valve for roll) then the BF and IF roll sensor values must be zero when the sprayer chassis and boom are level. The following instructions explain how to zero the readings. 1. Ensure the sprayer chassis and boom is level. 2. Navigate to the Roll Sensor Setup screen (Settings->More->Setup->Sensors->Roll Sensor). 3. Select the Boom Frame Roll Sensor. 4. Press the zero adjust button (Figure 31). 5. Repeat for the Intermediate Frame Roll Sensor (IF). 59 4.10 Roll Sensor Setup (Active Roll™) 4.10.1 Configuring the Sensor The Active Roll™ Sensor is automatically configured during the Automatic Setup and should not be configured manually. 4.10.2 Calibrating the Sensor 1. Ensure the sprayer chassis and boom is level. 2. Navigate to the BF Roll Sensor Setup screen (Settings->More->Setup->Sensors->Roll Sensor). 3. When the boom and chassis are exactly level, press the “ZERO” to zero the roll reading. 4. Repeat for the IF Roll Sensor. Figure 32: Active Roll™ Sensor Setup Screen 60 4.11 Output Channel (Valve) Setup 4.11.1 Configuring the Valves 1. Navigate to the valve setup menu (Run Screen->Settings->More->Setup->Valves). 2. Select the valve you want to configure. 3. The drop down box shows the serial number of the module and the channel number it is currently configured to. 4. There are two modules that can drive valves, the Input Module and Valve Module. The Valve Module typically drives the proportional valves on the Norac valve block. The Input Module drives on/off valves on the sprayer valve block by teeing into the existing wiring. 5. You must choose the correct module and correct output for the valves to operate correctly. A list with the default output channels is shown in Figure 33. Note: If the channel number is already allocated to another function it will not show up in the drop down list. You will need to remove the channel number from the other function before it shows up in the current list. Note: By performing an Automatic Setup the valves are automatically configured for the sprayer type you selected. Normally the valves should not have to be configured to a channel different than the default setting. Function Left Up Left Down Right Up Right Down Main Down Main Up Roll CCW Roll CW Main Down Main Up Aux 1 (Bypass) Aux 2 (Slant CW) Aux 3 (Slant CCW) Aux 4 Valve Type Proportional Proportional Proportional Proportional Proportional Proportional Proportional Proportional On / Off On / Off On / Off On / Off On / Off On / Off Module Valve Module Valve Module Valve Module Valve Module Valve Module Valve Module Valve Module Valve Module Input Module Input Module Input Module Input Module Input Module Input Module Output Channel 1 2 3 4 5 6 7 8 1 2 3 4 5 6 Figure 33: Default Output Channels 61 4.11.2 Calibrating the Deadzone 1. Ensure you are in a location that is relatively level and where the sensors are over bare soil or gravel. Do not conduct the calibration over standing crop, weeds/grass, wet concrete, water or snow. 2. Ensure the sprayer is at operating temperature and RPM. Turn on the solution pump if possible. 3. Navigate to the valve setup screen. (Run Screen-> Settings->More->Setup->Valves) 4. Select the boom function you wish to calibrate. 5. Press the deadzone button. 6. Press and hold the manual “M” button. 7. Continue to hold it until the boom stops moving and the live reading of the distance travelled stabilizes. 8. When properly tuned, the distance travelled should be 1-2 inches (2-5cm). Adjust the deadzone value until the distance travelled is within the range. 9. Alternatively, you can press and hold the automatic “A” button to automatically calibrate the deadzone. 10. Typical deadzone values are shown in Section 3.11.1. Note: If you get very inconsistent deadzone values each time you perform this test it may be an indication that there is air in the hydraulic lines or the wing accumulators do not have orifices installed. 62 4.11.3 Calibrating the Gain 1. The Gain calibration is dependent on the Deadzone value. Before calibrating the Gain, you must calibrate the Deadzone value first for the same channel. 2. Ensure you are in a location that is relatively level and where the sensors are over bare soil or gravel. Do not conduct the calibration over standing crop, weeds/grass, wet concrete, water or snow. 3. Ensure the sprayer is at operating temperature and RPM. Turn on the solution pump if possible. 4. Navigate to the valve setup screen (Run Screen-> Settings->More->Setup->Valves). 5. Select the boom function you wish to calibrate. 6. Press the gain button. 7. Press and hold the automatic “A” button. 8. Continue to hold it until the display says “Test Complete”. 9. Typical gain values are shown in Section 3.11.2. Note: The manual gain test “M” is not intended for calibrating the gain setting. The manual gain test will only drive the specified valve at 100% for one second and report the boom speed. The boom speed does not change if the gain value is changed. Note: The gain values for the roll (proportional) functions are typically defaulted during the Automatic Setup and should not be calibrated using the automatic gain test. 63 4.12 Boom Geometry Calibration The following steps will automatically calibrate the boom geometry values. 1. Ensure you are in a location that is relatively level and where the sensors are over bare soil or gravel. Do not conduct the calibration over standing crop, weeds/grass, wet concrete, water or snow. 2. Navigate to the boom geometry test (Run Screen->Settings->More->Setup->Boom Geometry Test). Figure 34: Boom Geometry Test 3. After selecting this button, the booms will be moved into position and then the display will prompt you to exit the cab and manually push either boom tip down. 4. Do not walk near the sensors when approaching the boom. Stay at least 3 feet from the sensor to not induce a measurement error. 5. Push either boom tip down 1 – 3 feet (30 – 90 cm) for a moment and then let go. Do not push the boom to the ground. 6. Typical boom geometry values are shown in Section 3.11.3. 64 4.13 Error Indicators If an error is detected in the system, the error button will appear in the upper left corner of the screen as shown in Figure 35. The system will report “No Comm” errors for sensors and modules, and “No Data” error for sensors. Selecting the error button allows all active system errors to be viewed (Figure 36). To navigate between multiple errors, use the Next and Previous arrow buttons. Figure 35: Error Indicator Figure 36: Sample Error Viewing Screen For Height Sensors: The boom with the error will go into its Manual state with the ‘M’ or ‘A’ on the display flashing depending on whether the system is in Auto or Manual mode. The sensor underneath the boom on the display will change color depending on the type of error. If the sensor turns red, it indicates that the sensor has lost communication with system. If the sensor turns orange, it indicates that there is no data for that sensor. 65 Diagnostic LED status lights: The following table describes the different states of the LED status light on the modules. This can be useful for diagnosing communication problems. Count the number of times that the LED flashes and refer to the following table for diagnostic information. The LED will flash quickly followed by a three second delay, after which the flash pattern will be repeated. Number of Flashes Off Solid (No Flash) Description No power or failed module. Everything is ok. 1 No devices connected on the Display Bus. 1 2 No devices connected on the NORAC Bus. 5 CANbus warnings on Display Bus – the CANbus is still functioning; the LED will flash until the power is cycled. 1 6 CANbus warnings on NORAC Bus – the CANbus is still functioning; the LED will flash until the power is cycled. 7 CANbus errors on Display Bus – there have been too many CANbus warnings, the CANbus chip will restart itself. 1 8 CANbus errors on NORAC Bus – there have been too many CANbus warnings, the CANbus chip will restart itself. Note 1: Display Bus errors are only valid on the Control Module. 66 4.14 Locking and Unlocking the Setup and Advanced Menu Unlocking the setup menu: By default some sprayer types lock out the end user from the setup menu to prevent any unintended changes to the settings. The password to unlock the setup menu is 20. The setup menu will remain unlocked until the power is cycled. Once the power is cycled you will be required to enter the password again to access the setup screens. Locking the setup menu: If you wish to lock the setup screens to prevent any unwanted setup changes, you can change the following setting in the advanced settings menu. 1. Navigate to the advanced settings menu (Run Screen->Settings->More->Advanced Settings). 2. Navigate to the “Lock Settings” page (Next Page->Next Page). 3. Select the “Lock Settings” option. 4. Press the “Home” button to return to the run screen. Figure 37: Lock Settings Screen Unlocking the advanced settings menu: To access the advanced settings menu: 1. Navigate to the advanced settings menu (Run Screen->Settings->More->Advanced Settings). 2. Enter the password for the advanced settings menu: 10. The advanced setting menu will remain unlocked until the power is cycled. Once the power has been cycled you will be required to enter the password again to enter the advanced settings menu. 67 4.15 Updating the Firmware This section applies to the Echo™ display only. Systems with a virtual terminal will require and Echo™ display to update the firmware. The UC5™ module software can be updated through the update menu. The latest version of software can be downloaded from the NORAC web site (www.norac.ca). The downloaded file is a self extracting “.exe” file. The file must be extracted before proceeding. Note: Do not turn off the power while updating software. It may cause fatal damage to the modules or display. 1. Copy the update software to the root directory onto an SD memory card. The Echo™ firmware will have a ".nor" extension and the Control Module firmware will have an ".fw2" extension. 2. Insert the card into ECHO™ memory card slot. 3. Navigate to the Update menu (Run Screen->Settings->More->Update). 4. Select “Update Modules” to update the modules and sensors, or select “Update Display” to update the ECHO™ display. Figure 38: Update Menu 5. An update file name in the SD memory card or USB flash drive will be displayed in the Compatible Files window. Select the file name. 6. Select the “Check” button to start the update. 7. If you are updating the modules: When the update has completed select the “Check” button to exit. 8. If you are updating the ECHO™ display: When the update has completed the system will automatically restart. 68 4.16 Maintenance The NORAC Spray Height Control system requires very little maintenance, but there are a few procedures that will ensure the system continues to work correctly for many years. Before each day: It is highly recommended that the sprayer friction pads are greased. To ensure optimum performance this should be done daily. This will ensure the boom is pivoting separately from the sprayer. It is very important to keep the friction pads greased on Active Roll™ systems. Ensure the height sensor breakaway brackets are functioning correctly. Apply grease to the moving parts if necessary, to ensure they return to center after a break-away occurs. Ensure there is a clean, dry foam disc inserted in each sensor. If it is clogged with dust or other debris, clean it as described below. At the end of the season: Replace the oil filter in the NORAC hydraulic manifold annually (NORAC P/N 106285). Cleaning Ultrasonic Height Sensors: Remove the foam disc from the sensor and wash it with clean water. Squeeze out excess water and allow the foam disc to dry. The sensor can be used if the foam is wet, however you may not get a valid height reading until it has completely dried out. If the transducer inside the sensor is also dirty, wash it using clean water. Remove the sensor from the bracket and rinse debris from the transducer by pouring water across the face of the sensor. Do not submerge or pressure-wash the sensor. A soft bristle brush can also be used to gently clean the transducer if the water alone is not sufficient. Use caution not to scratch or tear the transducer as it is fragile. The sensor should be left to dry with the transducer facing downwards. The sensor can be used if it is wet, however you may not get a valid height reading until it has completely dried out. Leaving the control system powered on with the sensor connected and facing down will speed the process of drying the sensor. Chemicals or compressed air should never be used to clean the sensor. 69 AGCO - North America 1-877-525-4384 NORAC Systems International Inc. Phone: (+1) 306 664 6711 Toll Free: 1 800 667 3921 3702 Kinnear Place Saskatoon, SK Canada S7P 0A6 NORAC, Inc. Phone: (+1) 763 786 3080 Toll Free: 1 866 306 6722 6667 West Old Shakopee Road, Suite 111 Bloomington, MN United States 55438 NORAC Europe Phone: (+33) 426 470 442 Shipping Address: Rue de l’hermitage 01090 Guereins France www.norac.ca




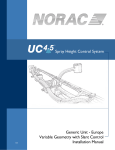
![[User manual (English) - v1.6] 1.7 MB](http://vs1.manualzilla.com/store/data/005855357_1-51a3ddd110ebec5d1eef2b5791ba3868-150x150.png)