1
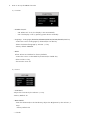
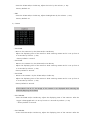
– Press the SCAN and/or CA.SEL Key, adjust the Color by the Volume -/+ Key.
*Factory Default: 50
• TINT
– Press the SCAN and/or CA.SEL Key, adjust the Brightness by the Volume -/+ Key.
*Factory Default: 50
3) Camera
• CA1 SCAN
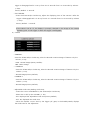
- Move to the camera 1 by the SCAN and/or CA.SEL Key.
- Adjust the displaying time of the camera 1 while scanning camera and it is set up from 0
to 9 seconds by Volume -/+ Key.
* Factory Default: 3 second.
• CA2 SCAN
- Move to the camera 2 by the SCAN and/or CA.SEL Key.
- Adjust the displaying time of the camera 2 while scanning camera and it is set up from 0
to 9 seconds by Volume -/+ Key.
* Factory Default: 3 seconds
• CA3 SCAN
–
Move to the camera 3 by the SCAN and/or CA.SEL Key.
- Adjust the displaying time of the camera 3 while scanning camera and it is set up from 0
to 9 seconds by Volume -/+ Key.
* Factory Default: 3 seconds
*If the value is set at “0”, the image of the camera is not displayed while scanning the
channels (Skipping the channel).
• CA1 TRIGGER
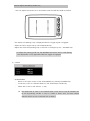
- Press the SCAN and/or CA.SEL Key, adjust the displaying time of the camera 1 after the
trigger is disengaged and it is set up from 0 to 9 seconds by Volume -/+ Key
.* Factory Default: 3 seconds
• CA2 TRIGGER
– Press the SCAN and/or CA.SEL Key, adjust the displaying time of the camera 2 after the