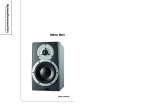
1
AE VarioMatch™ Match
Network, VM 1000/1500 Platform
User Manual
October 2009
57020080-00D
User Manual
AE VarioMatch™ Match Network, VM
1000/1500 Platform
57020080-00D
Advanced Energy®
COPYRIGHT
This manual and the information contained herein is the proprietary property of
Advanced Energy Industries, Inc.
No part of this manual may be reproduced or copied without the express written
permission of Advanced Energy Industries, Inc. Any unauthorized use of this manual
or its contents is strictly prohibited. Copyright© 2007–2009 Advanced Energy
Industries, Inc. All Rights Reserved.
DISCLAIMER AND LIMITATION OF LIABILITY
The information contained in this manual is subject to change by Advanced Energy
Industries, Inc. without prior notice. Advanced Energy Industries, Inc. makes no
warranty of any kind whatsoever, either expressed or implied, with respect to the
information contained herein. Advanced Energy Industries, Inc. shall not be liable in
damages, of whatever kind, as a result of the reliance on or use of the information
contained herein.
PRODUCT USAGE STATEMENT
Read this entire manual and all other publications pertaining to the work
to be performed before you install, operate, or maintain this equipment.
Practice all plant and product safety instructions and precautions.
Failure to follow instructions can cause personal injury and/or property
damage. If the equipment is used in a manner not specified by the
manufacturer, the protection provided by the equipment may be
impaired. All personnel who work with or who are exposed to this
equipment must take precautions to protect themselves against serious
or possibly fatal bodily injury.
Advanced Energy Industries, Inc., (AE) provides information on its
products and associated hazards, but it assumes no responsibility for
the after-sale operation of the equipment or the safety practices of the
owner or user. NEVER DEFEAT INTERLOCKS OR GROUNDS.
iv
57020080-00D
AE VarioMatch™ Match Network, VM 1000/1500 Platform
TRADEMARKS
®
is a registered trademark of Advanced Energy Industries,
Inc.
Advanced Energy® is a registered trademark of Advanced Energy Industries,
Inc.
Cesar® is a registered trademark of Advanced Energy Industries, Inc.
Dressler® is a registered trademark of Advanced Energy Industries, Inc.
SERTO® is a registered trademark of SERTO Ltd.
Siemens® is a registered trademark of Siemens AG.
Smith ®The Smith® chart shown is produced under a copyright license from
Analog Instruments Company, New Providence, New Jersey 07974.
VarioMatch™ is a trademark of Advanced Energy Industries, Inc.
Windows NT® is a registered trademark of the Microsoft Corporation.
Windows® is a registered trademark of the Microsoft Corporation.
CUSTOMER FEEDBACK
Advanced Energy’s technical writing staff has carefully developed this manual using
research-based document design principles. However, improvement is ongoing, and
the writing staff welcomes and appreciates customer feedback. Please send any
comments on the content, organization, or format of this user manual to:
• [email protected]
To order a manual, please contact Technical Support:
• [email protected]
57020080-00D
v
Advanced Energy®
vi
57020080-00D
AE VarioMatch™ Match Network, VM 1000/1500 Platform
Table of Contents
Chapter 1. Safety and Product Compliance Guidelines
Important Safety Information . . . . . . . . . . . . . . . . . . . . . . . . . . . . . . . . . . . . . . . . . 1-1
Danger, Warning, and Caution Boxes in the Manual . . . . . . . . . . . . . . . . . . . . . . . 1-1
Safety Guidelines . . . . . . . . . . . . . . . . . . . . . . . . . . . . . . . . . . . . . . . . . . . . . . . . . . 1-2
Rules for Safe Installation and Operation . . . . . . . . . . . . . . . . . . . . . . . . . . . . 1-2
Interpreting Product Labels . . . . . . . . . . . . . . . . . . . . . . . . . . . . . . . . . . . . . . . 1-2
Product Compliance . . . . . . . . . . . . . . . . . . . . . . . . . . . . . . . . . . . . . . . . . . . . . . . . 1-3
Product Certification . . . . . . . . . . . . . . . . . . . . . . . . . . . . . . . . . . . . . . . . . . . . 1-3
Safety and Compliance Directives and Standards . . . . . . . . . . . . . . . . . . . . . 1-4
Electromagnetic Compatibility (EMC) Directives and Standards . . . . . . . 1-4
Safety Directives and Standards . . . . . . . . . . . . . . . . . . . . . . . . . . . . . . . 1-4
Industry Guidelines . . . . . . . . . . . . . . . . . . . . . . . . . . . . . . . . . . . . . . . . . 1-5
Conditions of Use . . . . . . . . . . . . . . . . . . . . . . . . . . . . . . . . . . . . . . . . . . . . . . 1-5
Interlocks and Limits . . . . . . . . . . . . . . . . . . . . . . . . . . . . . . . . . . . . . . . . . . . . . . . 1-6
Chapter 2. Product Overview and Theory
Product Description . . . . . . . . . . . . . . . . . . . . . . . . . . . . . . . . . . . . . . . . . . . . . . . . 2-1
Operating Modes . . . . . . . . . . . . . . . . . . . . . . . . . . . . . . . . . . . . . . . . . . . . . . . . . . 2-2
Theory of Operation . . . . . . . . . . . . . . . . . . . . . . . . . . . . . . . . . . . . . . . . . . . . . . . . 2-3
Topologies . . . . . . . . . . . . . . . . . . . . . . . . . . . . . . . . . . . . . . . . . . . . . . . . . . . . . . . 2-4
L Match Topology . . . . . . . . . . . . . . . . . . . . . . . . . . . . . . . . . . . . . . . . . . . . . . 2-5
Gamma Topology . . . . . . . . . . . . . . . . . . . . . . . . . . . . . . . . . . . . . . . . . . . . . . 2-6
Chapter 3. Specifications
Physical Specifications . . . . . . . . . . . . . . . . . . . . . . . . . . . . . . . . . . . . . . . . . . . . . 3-1
Unit Dimensions . . . . . . . . . . . . . . . . . . . . . . . . . . . . . . . . . . . . . . . . . . . . . . . 3-1
Spacing Requirements . . . . . . . . . . . . . . . . . . . . . . . . . . . . . . . . . . . . . . . . . . 3-5
Front Panel Connections . . . . . . . . . . . . . . . . . . . . . . . . . . . . . . . . . . . . . 3-6
PLASMA/LOAD Connection . . . . . . . . . . . . . . . . . . . . . . . . . . . . . . . . . . 3-6
Cooling . . . . . . . . . . . . . . . . . . . . . . . . . . . . . . . . . . . . . . . . . . . . . . . . . . . 3-6
Physical Specifications Table . . . . . . . . . . . . . . . . . . . . . . . . . . . . . . . . . . . . . 3-7
Electrical Specifications . . . . . . . . . . . . . . . . . . . . . . . . . . . . . . . . . . . . . . . . . . . . 3-10
VM 300 Series . . . . . . . . . . . . . . . . . . . . . . . . . . . . . . . . . . . . . . . . . . . . . . . 3-11
VM 700 Series . . . . . . . . . . . . . . . . . . . . . . . . . . . . . . . . . . . . . . . . . . . . . . . 3-11
VM1000 Series . . . . . . . . . . . . . . . . . . . . . . . . . . . . . . . . . . . . . . . . . . . . . . . 3-12
VM 1500 Series . . . . . . . . . . . . . . . . . . . . . . . . . . . . . . . . . . . . . . . . . . . . . . 3-13
Cooling Specifications . . . . . . . . . . . . . . . . . . . . . . . . . . . . . . . . . . . . . . . . . . . . . 3-14
Environmental Specifications . . . . . . . . . . . . . . . . . . . . . . . . . . . . . . . . . . . . . . . . 3-17
57020080-00D
Table of Contents
vii
Advanced Energy®
Chapter 4. Communication Interfaces and Controls
15-Pin VarioMatch Match Interface . . . . . . . . . . . . . . . . . . . . . . . . . . . . . . . . . . . . 4-1
INTERFACE Connector . . . . . . . . . . . . . . . . . . . . . . . . . . . . . . . . . . . . . . . . . 4-1
Match Interface Cabling Requirements . . . . . . . . . . . . . . . . . . . . . . . . . . . . . 4-2
Pin Descriptions . . . . . . . . . . . . . . . . . . . . . . . . . . . . . . . . . . . . . . . . . . . . . . . 4-2
Wiring Diagrams . . . . . . . . . . . . . . . . . . . . . . . . . . . . . . . . . . . . . . . . . . . . . . . 4-4
Match INTERFACE Using Switches . . . . . . . . . . . . . . . . . . . . . . . . . . . . . . . . 4-7
Chapter 5. Installation, Setup, and Operation
Preparing to Install the VarioMatch Match Network . . . . . . . . . . . . . . . . . . . . . . . . 5-1
Spacing Requirements . . . . . . . . . . . . . . . . . . . . . . . . . . . . . . . . . . . . . . . . . . 5-1
Installation Requirements . . . . . . . . . . . . . . . . . . . . . . . . . . . . . . . . . . . . . . . . 5-1
Cooling Requirements . . . . . . . . . . . . . . . . . . . . . . . . . . . . . . . . . . . . . . . 5-2
Tools Required for Installation . . . . . . . . . . . . . . . . . . . . . . . . . . . . . . . . . . . . 5-2
Unpacking . . . . . . . . . . . . . . . . . . . . . . . . . . . . . . . . . . . . . . . . . . . . . . . . . . . . 5-2
Cable Requirements . . . . . . . . . . . . . . . . . . . . . . . . . . . . . . . . . . . . . . . . . . . . 5-3
General Cabling Considerations for PLASMA/LOAD . . . . . . . . . . . . . . . 5-3
Shielding the RF Connections . . . . . . . . . . . . . . . . . . . . . . . . . . . . . . . . . 5-4
Installing the VarioMatch Match Network . . . . . . . . . . . . . . . . . . . . . . . . . . . . . . . 5-4
Mounting the Unit . . . . . . . . . . . . . . . . . . . . . . . . . . . . . . . . . . . . . . . . . . . . . . 5-5
General Mounting Instructions . . . . . . . . . . . . . . . . . . . . . . . . . . . . . . . . . 5-5
Grounding the Unit . . . . . . . . . . . . . . . . . . . . . . . . . . . . . . . . . . . . . . . . . . 5-5
Mounting the VarioMatch Match Network . . . . . . . . . . . . . . . . . . . . . . . . 5-6
Connecting the Match INTERFACE (Optional) . . . . . . . . . . . . . . . . . . . . . . . . 5-7
Connecting the Cooling Water . . . . . . . . . . . . . . . . . . . . . . . . . . . . . . . . . . . . 5-7
Connecting RF Input From a Generator . . . . . . . . . . . . . . . . . . . . . . . . . . . . . 5-8
Connecting to the Load . . . . . . . . . . . . . . . . . . . . . . . . . . . . . . . . . . . . . . . . . . 5-9
Connecting the VarioMatch Match Network to the Load . . . . . . . . . . . . 5-11
Connecting AC Input (Mains) Power . . . . . . . . . . . . . . . . . . . . . . . . . . . . . . 5-11
First-Time Operation . . . . . . . . . . . . . . . . . . . . . . . . . . . . . . . . . . . . . . . . . . . . . . 5-12
Normal Operation . . . . . . . . . . . . . . . . . . . . . . . . . . . . . . . . . . . . . . . . . . . . . . . . 5-14
Automatic Tune Mode . . . . . . . . . . . . . . . . . . . . . . . . . . . . . . . . . . . . . . . . . . 5-14
Manual Tune Mode . . . . . . . . . . . . . . . . . . . . . . . . . . . . . . . . . . . . . . . . . . . . 5-15
Interaction With a Cesar Generator . . . . . . . . . . . . . . . . . . . . . . . . . . . . . . . 5-16
Importance of Igniting Plasma . . . . . . . . . . . . . . . . . . . . . . . . . . . . . . . . . . . 5-16
Set Up the Match for Your Load . . . . . . . . . . . . . . . . . . . . . . . . . . . . . . . . . . . . . 5-16
Selecting the Correct Tap Setting for the Tune Coil . . . . . . . . . . . . . . . . . . . 5-18
Setting Tune Coil Taps . . . . . . . . . . . . . . . . . . . . . . . . . . . . . . . . . . . . . 5-18
Selecting the Correct Tap Setting for the Load Coil . . . . . . . . . . . . . . . . . . . 5-22
Changing the Configuration Between the L match and the Gamma Topology . . .
5-27
Tools Required to Change the Interconnection . . . . . . . . . . . . . . . . . . . 5-28
Disconnecting Power and RF, and Removing the Cover . . . . . . . . . . . 5-28
Changing the Interconnector . . . . . . . . . . . . . . . . . . . . . . . . . . . . . . . . . 5-29
Changing the Jumpers . . . . . . . . . . . . . . . . . . . . . . . . . . . . . . . . . . . . . . 5-32
viii
Table of Contents
57020080-00D
AE VarioMatch™ Match Network, VM 1000/1500 Platform
Reattaching the Top Cover and Reconnecting Power and RF . . . . . . . 5-35
Changing the Fixed Capacitor Setting (Model 0415 2 MHz Units Only) . . . . 5-36
Disconnecting Water and Draining the VarioMatch Match Network . . . . . . . . . . 5-38
Chapter 6. Troubleshooting and Global Services
Troubleshooting Overview . . . . . . . . . . . . . . . . . . . . . . . . . . . . . . . . . . . . . . . . . . . 6-1
Troubleshooting Checklists . . . . . . . . . . . . . . . . . . . . . . . . . . . . . . . . . . . . . . . . . . 6-2
Checks With the Power Off . . . . . . . . . . . . . . . . . . . . . . . . . . . . . . . . . . . . . . . 6-2
Checks With the AC Power On . . . . . . . . . . . . . . . . . . . . . . . . . . . . . . . . . . . . 6-2
Troubleshooting Unit Output . . . . . . . . . . . . . . . . . . . . . . . . . . . . . . . . . . . . . . . . . 6-3
External Load Checks - Open/Short RF Output Path . . . . . . . . . . . . . . . . . . . 6-3
Contacting AE Global Services . . . . . . . . . . . . . . . . . . . . . . . . . . . . . . . . . . . . . . . 6-4
Advanced Energy World Headquarters, 24 x 7 Technical Support . . . . . . . . . 6-4
Returning Units for Repair . . . . . . . . . . . . . . . . . . . . . . . . . . . . . . . . . . . . . . . . . . . 6-5
Chapter 7. VarioMatch Match Network Tuning Ranges
14-turn Tune (Series) Coil . . . . . . . . . . . . . . . . . . . . . . . . . . . . . . . . . . . . . . . . . . . 7-1
Schematic . . . . . . . . . . . . . . . . . . . . . . . . . . . . . . . . . . . . . . . . . . . . . . . . . . . . 7-1
Smith Charts . . . . . . . . . . . . . . . . . . . . . . . . . . . . . . . . . . . . . . . . . . . . . . . . . . 7-2
6-turn Tune (Series) Coil . . . . . . . . . . . . . . . . . . . . . . . . . . . . . . . . . . . . . . . . . . . 7-21
Schematic . . . . . . . . . . . . . . . . . . . . . . . . . . . . . . . . . . . . . . . . . . . . . . . . . . . 7-21
Smith Charts . . . . . . . . . . . . . . . . . . . . . . . . . . . . . . . . . . . . . . . . . . . . . . . . . 7-21
27 mHz Units . . . . . . . . . . . . . . . . . . . . . . . . . . . . . . . . . . . . . . . . . . . . . 7-22
40 mHz Units . . . . . . . . . . . . . . . . . . . . . . . . . . . . . . . . . . . . . . . . . . . . . 7-28
VM 0415 . . . . . . . . . . . . . . . . . . . . . . . . . . . . . . . . . . . . . . . . . . . . . . . . . . . . . . . . 7-33
Schematic . . . . . . . . . . . . . . . . . . . . . . . . . . . . . . . . . . . . . . . . . . . . . . . . . . . 7-33
Smith Charts . . . . . . . . . . . . . . . . . . . . . . . . . . . . . . . . . . . . . . . . . . . . . . . . . 7-34
2 mHz Units . . . . . . . . . . . . . . . . . . . . . . . . . . . . . . . . . . . . . . . . . . . . . . 7-34
4 mHz Units . . . . . . . . . . . . . . . . . . . . . . . . . . . . . . . . . . . . . . . . . . . . . . 7-40
ICP . . . . . . . . . . . . . . . . . . . . . . . . . . . . . . . . . . . . . . . . . . . . . . . . . . . . . . . . . . . . 7-71
Schematics . . . . . . . . . . . . . . . . . . . . . . . . . . . . . . . . . . . . . . . . . . . . . . . . . . 7-71
Smith Charts . . . . . . . . . . . . . . . . . . . . . . . . . . . . . . . . . . . . . . . . . . . . . . . . . 7-72
Delta Match . . . . . . . . . . . . . . . . . . . . . . . . . . . . . . . . . . . . . . . . . . . . . . . . . . . . . 7-75
Schematic . . . . . . . . . . . . . . . . . . . . . . . . . . . . . . . . . . . . . . . . . . . . . . . . . . . 7-75
Smith Chart . . . . . . . . . . . . . . . . . . . . . . . . . . . . . . . . . . . . . . . . . . . . . . . . . . 7-76
VM PN 69000082 . . . . . . . . . . . . . . . . . . . . . . . . . . . . . . . . . . . . . . . . . . . . . . . . . 7-76
VM 700 . . . . . . . . . . . . . . . . . . . . . . . . . . . . . . . . . . . . . . . . . . . . . . . . . . . . . . . . . 7-77
Schematic . . . . . . . . . . . . . . . . . . . . . . . . . . . . . . . . . . . . . . . . . . . . . . . . . . . 7-77
Smith Chart . . . . . . . . . . . . . . . . . . . . . . . . . . . . . . . . . . . . . . . . . . . . . . . . . . 7-77
57020080-00D
Table of Contents
ix
Advanced Energy®
x
Table of Contents
57020080-00D
AE VarioMatch™ Match Network, VM 1000/1500 Platform
List of Tables
Table 2-1. Theory of operation description . . . . . . . . . . . . . . . . . . . . . . . . . . . . . . . . . . 2-3
Table 2-2. Load capacitor capacity by load . . . . . . . . . . . . . . . . . . . . . . . . . . . . . . . . . . 2-6
Table 3-1. Physical specifications . . . . . . . . . . . . . . . . . . . . . . . . . . . . . . . . . . . . . . . . . 3-7
Table 3-2. Electrical specifications for VM 300 series . . . . . . . . . . . . . . . . . . . . . . . . . 3-11
Table 3-3. Electrical specifications for VM 700 series . . . . . . . . . . . . . . . . . . . . . . . . . 3-11
Table 3-4. Electrical specifications for VM 1000 series . . . . . . . . . . . . . . . . . . . . . . . . 3-12
Table 3-5. Electrical specifications for VM 1500 series . . . . . . . . . . . . . . . . . . . . . . . . 3-13
Table 3-6. Cooling specifications . . . . . . . . . . . . . . . . . . . . . . . . . . . . . . . . . . . . . . . . 3-15
Table 3-7. Climatic specifications (per EN50178) . . . . . . . . . . . . . . . . . . . . . . . . . . . . 3-17
Table 3-8. Environmental specifications . . . . . . . . . . . . . . . . . . . . . . . . . . . . . . . . . . . 3-17
Table 4-1. VarioMatch match INTERFACE connector pin description . . . . . . . . . . . . . 4-2
Table 4-2. Match INTERFACE switch descriptions . . . . . . . . . . . . . . . . . . . . . . . . . . . . 4-7
Table 5-1. RF input connector pin descriptions . . . . . . . . . . . . . . . . . . . . . . . . . . . . . . . 5-9
Table 5-2. Input connector pin description . . . . . . . . . . . . . . . . . . . . . . . . . . . . . . . . . 5-12
Table 5-3. Capacitance due to jumper settings on circuit board . . . . . . . . . . . . . . . . . 5-37
Table 6-1. AE Global Services contact information . . . . . . . . . . . . . . . . . . . . . . . . . . . . 6-4
Table 7-1. Location of Smith chart illustrations for 14-turn tune coil . . . . . . . . . . . . . . . 7-2
Table 7-2. Location of Smith chart illustrations for 6-turn tune coil . . . . . . . . . . . . . . . 7-21
Table 7-3. Location of Smith chart illustrations for 2 MHz VM 0415 . . . . . . . . . . . . . . 7-34
Table 7-4. Location of Smith for 4 MHz VM 0415 . . . . . . . . . . . . . . . . . . . . . . . . . . . . 7-40
Table 7-5. Location of Smith chart illustrations for VM 700 . . . . . . . . . . . . . . . . . . . . . 7-77
57020080-00D
List of Tables
xi
Advanced Energy®
xii
List of Tables
57020080-00D
AE VarioMatch™ Match Network, VM 1000/1500 Platform
List of Figures
Figure 2-1. Theory of operation . . . . . . . . . . . . . . . . . . . . . . . . . . . . . . . . . . . . . . . . . . . 2-3
Figure 2-2. L match network circuit . . . . . . . . . . . . . . . . . . . . . . . . . . . . . . . . . . . . . . . . 2-5
Figure 2-3. VarioMatch L match network circuit . . . . . . . . . . . . . . . . . . . . . . . . . . . . . . 2-5
Figure 2-4. Gamma topology . . . . . . . . . . . . . . . . . . . . . . . . . . . . . . . . . . . . . . . . . . . . 2-7
Figure 2-5. L match topology . . . . . . . . . . . . . . . . . . . . . . . . . . . . . . . . . . . . . . . . . . . . 2-7
Figure 3-1. VM 1000/1500 platform front panel . . . . . . . . . . . . . . . . . . . . . . . . . . . . . . 3-1
Figure 3-2. VM 1000/1500 platform left side panel . . . . . . . . . . . . . . . . . . . . . . . . . . . . 3-2
Figure 3-3. VM 1000/1500 platform rear panel . . . . . . . . . . . . . . . . . . . . . . . . . . . . . . . 3-3
Figure 3-4. VM 1000/1500 platform bottom panel . . . . . . . . . . . . . . . . . . . . . . . . . . . . . 3-4
Figure 3-5. VM 1000/1500 platform top panel . . . . . . . . . . . . . . . . . . . . . . . . . . . . . . . . 3-5
Figure 4-1. VarioMatch match INTERFACE connector . . . . . . . . . . . . . . . . . . . . . . . . . 4-1
Figure 4-2. Pins 2, 3, 4, 5, 8 . . . . . . . . . . . . . . . . . . . . . . . . . . . . . . . . . . . . . . . . . . . . . 4-4
Figure 4-3. Pin 10 . . . . . . . . . . . . . . . . . . . . . . . . . . . . . . . . . . . . . . . . . . . . . . . . . . . . . 4-5
Figure 4-4. Pin 11 . . . . . . . . . . . . . . . . . . . . . . . . . . . . . . . . . . . . . . . . . . . . . . . . . . . . . 4-5
Figure 4-5. Pin 12 . . . . . . . . . . . . . . . . . . . . . . . . . . . . . . . . . . . . . . . . . . . . . . . . . . . . . 4-6
Figure 4-6. Pins 13, 14 . . . . . . . . . . . . . . . . . . . . . . . . . . . . . . . . . . . . . . . . . . . . . . . . . 4-6
Figure 4-7. Pin 15 . . . . . . . . . . . . . . . . . . . . . . . . . . . . . . . . . . . . . . . . . . . . . . . . . . . . . 4-7
Figure 5-1. Installing the VarioMatch match network to a mounting plate . . . . . . . . . . 5-7
Figure 5-2. Water fitting for plastic hose with 6 mm OD / 4 mm ID (0.24" OD / 0.16" ID) .
5-8
Figure 5-3. N-type connector . . . . . . . . . . . . . . . . . . . . . . . . . . . . . . . . . . . . . . . . . . . . 5-9
Figure 5-4. 7/16 DIN female connector . . . . . . . . . . . . . . . . . . . . . . . . . . . . . . . . . . . . 5-10
Figure 5-5. MC6 connector . . . . . . . . . . . . . . . . . . . . . . . . . . . . . . . . . . . . . . . . . . . . . 5-10
Figure 5-6. MC6 plug . . . . . . . . . . . . . . . . . . . . . . . . . . . . . . . . . . . . . . . . . . . . . . . . . 5-10
Figure 5-7. 6 mm brass tube fitting . . . . . . . . . . . . . . . . . . . . . . . . . . . . . . . . . . . . . . . 5-11
Figure 5-8. Input (Mains) connector . . . . . . . . . . . . . . . . . . . . . . . . . . . . . . . . . . . . . . 5-12
Figure 5-9. Tapping of the tune coil for small capacitive load . . . . . . . . . . . . . . . . . . . 5-20
Figure 5-10. Tapping of the tune coil for medium capacitive load . . . . . . . . . . . . . . . . 5-21
Figure 5-11. Tapping of the tune coil for high capacitive load . . . . . . . . . . . . . . . . . . . 5-22
Figure 5-12. Tap position for small loads . . . . . . . . . . . . . . . . . . . . . . . . . . . . . . . . . . 5-24
Figure 5-13. Tap position for medium loads . . . . . . . . . . . . . . . . . . . . . . . . . . . . . . . . 5-25
Figure 5-14. Tap position for large loads . . . . . . . . . . . . . . . . . . . . . . . . . . . . . . . . . . 5-26
Figure 5-15. Alternate interconnector and bridge . . . . . . . . . . . . . . . . . . . . . . . . . . . . 5-29
Figure 5-16. Disconnect the original interconnection . . . . . . . . . . . . . . . . . . . . . . . . . 5-30
Figure 5-17. Attach the new interconnector . . . . . . . . . . . . . . . . . . . . . . . . . . . . . . . . 5-31
Figure 5-18. Remove the front panel . . . . . . . . . . . . . . . . . . . . . . . . . . . . . . . . . . . . . 5-32
Figure 5-19. Remove solder joints . . . . . . . . . . . . . . . . . . . . . . . . . . . . . . . . . . . . . . . 5-33
Figure 5-20. Jumper setting for L match topology . . . . . . . . . . . . . . . . . . . . . . . . . . . . 5-34
Figure 5-21. Jumper setting for Gamma topology . . . . . . . . . . . . . . . . . . . . . . . . . . . . 5-35
Figure 5-22. Location of capacitor bank with three jumpers . . . . . . . . . . . . . . . . . . . . 5-37
Figure 7-1. Models 300, 1000, and 1500 coil and inductor schematic; 14 turn tune coil .
7-1
57020080-00D
List of Figures
xiii
Advanced Energy®
Figure 7-2. Tune coil, 14 turns: tap 1; Load coil, 3 turns: tap A . . . . . . . . . . . . . . . . . . 7-3
Figure 7-3. Tune coil, 14 turns: tap 2; Load coil, 3 turns: tap A . . . . . . . . . . . . . . . . . . 7-4
Figure 7-4. Tune coil, 14 turns: tap 3; Load coil, 3 turns: tap A . . . . . . . . . . . . . . . . . . 7-5
Figure 7-5. Tune coil, 14 turns: tap 4; Load coil, 3 turns: tap A . . . . . . . . . . . . . . . . . . 7-6
Figure 7-6. Tune coil, 14 turns: tap 5; Load coil, 3 turns: tap A . . . . . . . . . . . . . . . . . . 7-7
Figure 7-7. Tune coil, 14 turns: tap 6; Load coil, 3 turns: tap A . . . . . . . . . . . . . . . . . . 7-8
Figure 7-8. Tune coil, 14 turns: tap 1; Load coil, 3 turns: tap B . . . . . . . . . . . . . . . . . . 7-9
Figure 7-9. Tune coil, 14 turns: tap 2; Load coil, 3 turns: tap B . . . . . . . . . . . . . . . . . 7-10
Figure 7-10. Tune coil, 14 turns: tap 3; Load coil, 3 turns: tap B . . . . . . . . . . . . . . . . 7-11
Figure 7-11. Tune coil, 14 turns: tap 4; Load coil, 3 turns: tap B . . . . . . . . . . . . . . . . 7-12
Figure 7-12. Tune coil, 14 turns: tap 5; Load coil, 3 turns: tap B . . . . . . . . . . . . . . . . 7-13
Figure 7-13. Tune coil, 14 turns: tap 6; Load coil, 3 turns: tap B . . . . . . . . . . . . . . . . 7-14
Figure 7-14. Tune coil, 14 turns: tap 1; Load coil, 3 turns: tap C . . . . . . . . . . . . . . . . 7-15
Figure 7-15. Tune coil, 14 turns: tap 2; Load coil, 3 turns: tap C . . . . . . . . . . . . . . . . 7-16
Figure 7-16. Tune coil, 14 turns: tap 3; Load coil, 3 turns: tap C . . . . . . . . . . . . . . . . 7-17
Figure 7-17. Tune coil, 14 turns: tap 4; Load coil, 3 turns: tap C . . . . . . . . . . . . . . . . 7-18
Figure 7-18. Tune coil, 14 turns: tap 5; Load coil, 3 turns: tap C . . . . . . . . . . . . . . . . 7-19
Figure 7-19. Tune coil, 14 turns: tap 6; Load coil, 3 turns: tap C . . . . . . . . . . . . . . . . 7-20
Figure 7-20. Models 1000 and 1500 coil and inductor schematic, 6 turn coil . . . . . . 7-21
Figure 7-21. 27 MHz; Tune coil, 6 turns: tap 1; . . . . . . . . . . . . . . . . . . . . . . . . . . . . . . 7-22
Figure 7-22. 27 MHz; Tune coil, 6 turns: tap 2 . . . . . . . . . . . . . . . . . . . . . . . . . . . . . . 7-23
Figure 7-23. 27 MHz; Tune coil, 6 turns: tap 3 . . . . . . . . . . . . . . . . . . . . . . . . . . . . . . 7-24
Figure 7-24. 27 MHz; Tune coil, 6 turns: tap 4 . . . . . . . . . . . . . . . . . . . . . . . . . . . . . . 7-25
Figure 7-25. 27 MHz; Tune coil, 6 turns: tap 5 . . . . . . . . . . . . . . . . . . . . . . . . . . . . . . 7-26
Figure 7-26. 27 MHz; Tune coil, 6 turns: tap 6 . . . . . . . . . . . . . . . . . . . . . . . . . . . . . . 7-27
Figure 7-27. 40 MHz; Tune coil, 6 turns: tap 1 . . . . . . . . . . . . . . . . . . . . . . . . . . . . . . 7-28
Figure 7-28. 40 MHz; Tune coil, 6 turns: tap 2 . . . . . . . . . . . . . . . . . . . . . . . . . . . . . . 7-29
Figure 7-29. 40 MHz; Tune coil, 6 turns: tap 3 . . . . . . . . . . . . . . . . . . . . . . . . . . . . . . 7-30
Figure 7-30. 40 MHz; Tune coil, 6 turns: tap 4 . . . . . . . . . . . . . . . . . . . . . . . . . . . . . . 7-31
Figure 7-31. 40 MHz; Tune coil, 6 turns: tap 5 . . . . . . . . . . . . . . . . . . . . . . . . . . . . . . 7-32
Figure 7-32. 40 MHz; Tune coil, 6 turns: tap 6; . . . . . . . . . . . . . . . . . . . . . . . . . . . . . . 7-33
Figure 7-33. VM 0415 coil and inductor schematic . . . . . . . . . . . . . . . . . . . . . . . . . . . 7-34
Figure 7-34. 2 MHz; Tune coil, 6; Load coil, E; 0 pF . . . . . . . . . . . . . . . . . . . . . . . . . . 7-35
Figure 7-35. 2 MHz; Tune coil, 6; Load coil, E; 680 pF . . . . . . . . . . . . . . . . . . . . . . . . 7-36
Figure 7-36. 2 MHz; Tune coil, 6; Load coil, E; 1360 pF . . . . . . . . . . . . . . . . . . . . . . . 7-37
Figure 7-37. 2 MHz; Tune coil, 6; Load coil, E; 2040 pF . . . . . . . . . . . . . . . . . . . . . . . 7-38
Figure 7-38. 2 MHz; Tune coil, 6; Load coil, E; 2720 pF . . . . . . . . . . . . . . . . . . . . . . . 7-39
Figure 7-39. 2 MHz; Tune coil, 6; Load coil, E; 3400 pF . . . . . . . . . . . . . . . . . . . . . . . 7-40
Figure 7-40. 4 MHz; Tune coil, 25 turns: tap 1; Load coil, 4 turns: tap A . . . . . . . . . . 7-41
Figure 7-41. 4 MHz; Tune coil, 25 turns: tap 2; Load coil, 4 turns: tap A . . . . . . . . . . 7-42
Figure 7-42. 4 MHz; Tune coil, 25 turns: tap 3; Load coil, 4 turns: tap A . . . . . . . . . . 7-43
Figure 7-43. 4 MHz; Tune coil, 25 turns: tap 4; Load coil, 4 turns: tap A . . . . . . . . . . 7-44
Figure 7-44. 4 MHz; Tune coil, 25 turns: tap 5; Load coil, 4 turns: tap A . . . . . . . . . . 7-45
Figure 7-45. 4 MHz; Tune coil, 25 turns: tap 6; Load coil, 4 turns: tap A . . . . . . . . . . 7-46
Figure 7-46. 4 MHz; Tune coil, 25 turns: tap 1; Load coil, 4 turns: tap B . . . . . . . . . . 7-47
Figure 7-47. 4 MHz; Tune coil, 25 turns: tap 2; Load coil, 4 turns: tap B . . . . . . . . . . 7-48
Figure 7-48. 4 MHz; Tune coil, 25 turns: tap 3; Load coil, 4 turns: tap B . . . . . . . . . . 7-49
xiv
List of Figures
57020080-00D
AE VarioMatch™ Match Network, VM 1000/1500 Platform
Figure 7-49. 4 MHz; Tune coil, 25 turns: tap 4; Load coil, 4 turns: tap B . . . . . . . . . . 7-50
Figure 7-50. 4 MHz; Tune coil, 25 turns: tap 5; Load coil, 4 turns: tap B . . . . . . . . . . 7-51
Figure 7-51. 4 MHz; Tune coil, 25 turns: tap 6; Load coil, 4 turns: tap B . . . . . . . . . . 7-52
Figure 7-52. 4 MHz; Tune coil, 25 turns: tap 1; Load coil, 4 turns: tap C . . . . . . . . . . 7-53
Figure 7-53. 4 MHz; Tune coil, 25 turns: tap 2; Load coil, 4 turns: tap C . . . . . . . . . . 7-54
Figure 7-54. 4 MHz; Tune coil, 25 turns: tap 3; Load coil, 4 turns: tap C . . . . . . . . . . 7-55
Figure 7-55. 4 MHz; Tune coil, 25 turns: tap 4; Load coil, 4 turns: tap C . . . . . . . . . . 7-56
Figure 7-56. 4 MHz; Tune coil, 25 turns: tap 5; Load coil, 4 turns: tap C . . . . . . . . . . 7-57
Figure 7-57. 4 MHz; Tune coil, 25 turns: tap 6; Load coil, 4 turns: tap C . . . . . . . . . . 7-58
Figure 7-58. 4 MHz; Tune coil, 25 turns: tap 1; Load coil, 4 turns: tap D . . . . . . . . . . 7-59
Figure 7-59. 4 MHz; Tune coil, 25 turns: tap 2; Load coil, 4 turns: tap D . . . . . . . . . . 7-60
Figure 7-60. 4 MHz; Tune coil, 25 turns: tap 3; Load coil, 4 turns: tap D . . . . . . . . . . 7-61
Figure 7-61. 4 MHz; Tune coil, 25 turns: tap 4; Load coil, 4 turns: tap D . . . . . . . . . . 7-62
Figure 7-62. 4 MHz; Tune coil, 25 turns: tap 5; Load coil, 4 turns: tap D . . . . . . . . . . 7-63
Figure 7-63. 4 MHz; Tune coil, 25 turns: tap 6; Load coil, 4 turns: tap D . . . . . . . . . . 7-64
Figure 7-64. 4 MHz; Tune coil, 25 turns: tap 1; Load coil, 4 turns: tap E . . . . . . . . . . 7-65
Figure 7-65. 4 MHz; Tune coil, 25 turns: tap 2; Load coil, 4 turns: tap E . . . . . . . . . . 7-66
Figure 7-66. 4 MHz; Tune coil, 25 turns: tap 3; Load coil, 4 turns: tap E . . . . . . . . . . 7-67
Figure 7-67. 4 MHz; Tune coil, 25 turns: tap 4; Load coil, 4 turns: tap E . . . . . . . . . . 7-68
Figure 7-68. 4 MHz; Tune coil, 25 turns: tap 5; Load coil, 4 turns: tap E . . . . . . . . . . 7-69
Figure 7-69. 4 MHz; Tune coil, 25 turns: tap 6; Load coil, 4 turns: tap E . . . . . . . . . . 7-70
Figure 7-70. ICP coil and inductor schematic, Gamma . . . . . . . . . . . . . . . . . . . . . . . . 7-71
Figure 7-71. ICP coil and inductor schematic, L match . . . . . . . . . . . . . . . . . . . . . . . . 7-71
Figure 7-72. VM 1500, Gamma . . . . . . . . . . . . . . . . . . . . . . . . . . . . . . . . . . . . . . . . . . 7-72
Figure 7-73. VM 1500, L match . . . . . . . . . . . . . . . . . . . . . . . . . . . . . . . . . . . . . . . . . . 7-73
Figure 7-74. VM 4015, Gamma . . . . . . . . . . . . . . . . . . . . . . . . . . . . . . . . . . . . . . . . . . 7-74
Figure 7-75. Delta match coil and inductor schematic . . . . . . . . . . . . . . . . . . . . . . . . 7-75
Figure 7-76. Tune coil, 2.5 turns . . . . . . . . . . . . . . . . . . . . . . . . . . . . . . . . . . . . . . . . . 7-76
Figure 7-77. VM 700 coil and inductor schematic . . . . . . . . . . . . . . . . . . . . . . . . . . . . 7-77
Figure 7-78. Tune coil, 10 turns: tap 1; Load coil, 3 turns: tap A . . . . . . . . . . . . . . . . 7-78
Figure 7-79. Tune coil, 10 turns: tap 2; Load coil, 3 turns: tap A . . . . . . . . . . . . . . . . 7-79
Figure 7-80. Tune coil, 10 turns: tap 3; Load coil, 3 turns: tap A . . . . . . . . . . . . . . . . 7-80
Figure 7-81. Tune coil, 10 turns: tap 4; Load coil, 3 turns: tap A . . . . . . . . . . . . . . . . 7-81
Figure 7-82. Tune coil, 10 turns: tap 5; Load coil, 3 turns: tap A . . . . . . . . . . . . . . . . 7-82
Figure 7-83. Tune coil, 10 turns: tap 6; Load coil, 3 turns: tap A . . . . . . . . . . . . . . . . 7-83
Figure 7-84. Tune coil, 10 turns: tap 7; Load coil, 3 turns: tap A . . . . . . . . . . . . . . . . 7-84
Figure 7-85. Tune coil, 10 turns: tap 8; Load coil, 3 turns: tap A . . . . . . . . . . . . . . . . 7-85
Figure 7-86. Tune coil, 10 turns: tap 9; Load coil, 3 turns: tap A . . . . . . . . . . . . . . . . 7-86
Figure 7-87. Tune coil, 10 turns: tap 10; Load coil, 3 turns: tap A . . . . . . . . . . . . . . . 7-87
57020080-00D
1-xv
Advanced Energy®
1-xvi
57020080-00D
AE VarioMatch™ Match Network, VM 1000/1500 Platform
Chapter
1
Safety and Product Compliance
Guidelines
IMPORTANT SAFETY INFORMATION
To ensure safe installation and operation of the Advanced Energy® VarioMatch match
network, read and understand this manual before attempting to install and operate this
unit. At a minimum, read and follow the safety instructions and practices documented
under “Safety Guidelines” on page 1-2.
DANGER, WARNING, AND CAUTION BOXES
IN THE MANUAL
This symbol represents important notes concerning potential harm to people, this unit,
or associated equipment. Advanced Energy® includes this symbol in Danger,
Warning, and Caution boxes to identify specific levels of hazard seriousness.
DANGER indicates an imminently hazardous situation that, if not
avoided, will result in death or serious injury. DANGER is limited to the
most extreme situations.
WARNING indicates a potentially hazardous situation that, if not
avoided, could result in death or serious injury, and/or property damage.
57020080-00D
Safety and Product Compliance Guidelines
1-1
Advanced Energy®
CAUTION indicates a potentially hazardous situation that, if not avoided,
could result in minor or moderate injury, and/or damage to property.
CAUTION is also used for property-damage-only accidents.
SAFETY GUIDELINES
Review the following information before attempting to install and operate the product.
Rules for Safe Installation and Operation
Please note the following rules:
• Do not attempt to install or operate this equipment without proper training.
• Ensure that this unit is properly grounded (see also “Grounding the Unit” on
page 5-5).
• Ensure that all cables are properly connected.
• Verify that input line voltage and current capacity are within specifications before
turning on the power supplies (see “Electrical Specifications” on page 3-10).
• Use proper electrostatic discharge (ESD) precautions.
• Always be careful around this equipment.
Interpreting Product Labels
The following labels may appear on your unit:
1-2
Safety and Product Compliance Guidelines
57020080-00D
AE VarioMatch™ Match Network, VM 1000/1500 Platform
CE label
Protective Earth Ground
Further information found
in this guide.
High voltage
PRODUCT COMPLIANCE
The following sections include information about unit compliance and certification,
including the conditions of use required to be in compliance with the standards and
directives.
Product Certification
Certain options of this product may be certified by:
• CE Marking – Self-declaration, assessed by AE Corporate Compliance
• EMC measurements – Verified by the AE Corporate Compliance Lab and/or an
accredited third party lab
For more information, refer to the Certificate or Letter of Conformity (US) or
Declaration of Conformity (EU) accompanying the product.
57020080-00D
Safety and Product Compliance Guidelines
1-3
Advanced Energy®
Safety and Compliance Directives and Standards
Certain options of this unit have been tested for and comply with the following
electromagnetic compatibility (EMC) and safety directives and standards and industry
guidelines.
Note: This device must be installed and used only in compliance with the directives
and standards listed in addition to EN 60204 (IEC 60204) and applicable
requirements.
Note: This equipment must be installed and used in accordance with the Conditions of
Use described in this manual. If this equipment is expanded, modified, or
installed into a larger system, the user is responsible to guarantee the
compliance of the overall system. If this equipment is used with external
components, the user must ensure that the Safety and EMC requirements are
not violated.
ELECTROMAGNETIC COMPATIBILITY (EMC) DIRECTIVES
AND STANDARDS
• 89/336/EEC
EC Council directive on the approximation of the laws of the Member States
relating to electromagnetic compatibility (EMC Directive)
• EN 55011
Limits and methods of measurement of radio disturbance characteristics of
industrial, scientific, medical (ISM) radio frequency equipment (Class A, Group
2) (CISPR 11)
• EN 61000-6-2
Electromagnetic Compatibility (generic immunity standard— industrial)
• 47 CFR Part 18
Code of Federal Regulations—Limits and methods of measurement of radio
interference characteristics of industrial, scientific, and medical equipment
SAFETY DIRECTIVES AND STANDARDS
• 2006/95/EC
EC Council directive on the harmonization of the laws of the Member States
relating to electrical equipment designed for use within certain voltage limits
(LVD - Low Voltage Directive)
• IEC/EN 61010-1
1-4
Safety and Product Compliance Guidelines
57020080-00D
AE VarioMatch™ Match Network, VM 1000/1500 Platform
Safety requirements for electrical equipment for measurement, control, and
laboratory use
INDUSTRY GUIDELINES
• SEMI S2-0706
Environmental, Health, and Safety Guidelines for Semiconductor Manufacturing
Equipment
Conditions of Use
To comply with the stated directives and standards, you must meet the following
conditions of use:
• Before making any other connection to this device, either connect the unit to
ground through mounting to a grounded tool or connect the secondary Protective
Earth (ground) terminal to a local earth (ground) terminal with a copper wire that
is sized according to the applicable requirements.
• Install and operate this device only in accordance with the listed safety guidelines
and all other applicable directives and standards specific to your process and
application.
• Install and operate this device in an overvoltage category II installation only.
• Install and operate this device only with an RF generator which is installed in an
overvoltage category II or better environment.
• Install and operate this device only in a pollution degree 2 or better environment,
which means an indoor location such as a computer room, office, or factory floor
where only nonconductive pollution occurs during operation. Occasionally,
condensation causes temporary conductivity when the device is not operating.
• Operate this device under the ambient temperature and water specifications
declared in the specification.
• To prevent against condensation, install and operate this device with an external
water solenoid valve so that water flow is interrupted when the device is not
operating.
• Use only shielded cables on the remote control INTERFACE port connector.
• Install this device so that the output power connection is inaccessible to the user.
• Dispose of this product as directed by applicable laws and regulations.
57020080-00D
Safety and Product Compliance Guidelines
1-5
Advanced Energy®
INTERLOCKS AND LIMITS
Advanced Energy® products only include interlocks when required by
product specification. Interlocks in AE products are not intended to meet
or satisfy safety requirements. Where interlocks exist, you must still
meet and satisfy safety requirements. The presence of interlocks does
not imply operator protection.
The VarioMatch match network does not have an interlock. Ensure that you meed
your local safety standards.
1-6
Safety and Product Compliance Guidelines
57020080-00D
AE VarioMatch™ Match Network, VM 1000/1500 Platform
Chapter
2
Product Overview and Theory
This chapter describes the AE VarioMatch™ Match Network, VM 1000/1500
Platform, including its theory of operation.
PRODUCT DESCRIPTION
A match network transforms the impedance of the load to 50 Ω to avoid reflected
power and to ensure that the generator's full power is delivered to the load.
The VarioMatch match network provides rapid, accurate, and reliable impedance
matching across a defined load range. Most VarioMatch match networks use a basic
L-type match topology. This configuration allows a very wide tuning range.
The VarioMatch match network matches a load to an RF power generator with its
nominal output impedance of 50 Ω. The load is typically a plasma chamber or CO2laser system.
Most VarioMatch match networks are optimized for capacitively coupled plasma and
CO2-laser loads, VarioMatch match networks have an excellent ability to match even
low impedances (real part). Typical applications include CVD, PVD, sputtering, RIE,
and CO2-laser excitation. Some VarioMatch match networks (ICP options) have been
optimized for inductive loads.
Employing vacuum variable capacitors for tuning ensures greater resistance to high
voltage breakdown (which often occurs with air gap capacitors) and large RF current
carrying capability (up to a 67 A rating). In addition, the vacuum variable capacitors
permit a much finer tuning resolution, allowing faster and more accurate matching
than air gap capacitors and resulting in the lowest possible reflected power levels.
To achieve the quickest and most reliable matching, VarioMatch match networks use
phase and magnitude detection. This is faster than trial-and-error matching and can
typically achieve a matched condition between ½ second and 5 seconds from the start
of tuning. The match network accurately and reliably tunes with RF levels as little as
1% of the maximum transfer power (see Chapter 3, “Specifications”).
VarioMatch match networks are designed for operation under the demanding
conditions presented by low resistance plasma loads with their resultant high RF
currents. All components and connections inside the network are designed to
withstand very large RF currents and high current pulses.
57020080-00D
Product Overview and Theory
2-1
Advanced Energy®
A DC bias measurement circuit (available on most units) permits the DC self bias
voltage created in the load to be monitored. The bias voltage is scaled down by a
factor of 1:400 (if not otherwise stated) to a safe, convenient value. The DC bias test
voltage delivered by the VarioMatch match network always is positive, even if the
actual self bias voltage in the chamber is negative.
VarioMatch match networks are completely self contained and require no additional
external components; all that is required for operation is an AC MAINS connection.
No additional controller is required if the network is operated in conjunction with an
AE RF generator; manual controls for the network are incorporated in the generator
itself. An additional controller is necessary only if manual operation without an AE
RF generator is desired.
OPERATING MODES
The match network can operate in the following modes:
• Automatic tune mode
AE recommends automatic tune mode for standard operation. In automatic tune
mode, a fast analog control signal measures amplitude and phase, and
automatically drives the capacitors to transform the impedance of the chamber to
the impedance that the generator requires.
Automatic tune mode requires no user interface.
• Manual tune mode
In manual tune mode, the automatic tuning feature is disabled, and the capacitor
positions are controlled only through the INTERFACE port.
2-2
Product Overview and Theory
57020080-00D
AE VarioMatch™ Match Network, VM 1000/1500 Platform
THEORY OF OPERATION
Figure 2-1 describes the VarioMatch match network’s theory of operation.
Figure 2-1. Theory of operation
Table 2-1. Theory of operation description
Section
Description
AC In
The VarioMatch match network converts 100 VAC to 240 VAC,
single-phase, to the DC voltages used in the match. The 45 W SMPS
(switched mode power supply) supplies ±15 VDC and +5 VDC. The
cooling fan is powered from the +15 V supply.
Phase/Magnitude
Detector
The RF power enters the VarioMatch match network via the RFGENERATOR connector mounted directly on the Phase/Magnitude
detector module. The Phase/Magnitude module provides the phase
and magnitude signals to the Motor Control section. The magnitude
signal controls the load capacitor, while the phase signal controls the
tune capacitor.
57020080-00D
Product Overview and Theory
2-3
Advanced Energy®
Table 2-1. Theory of operation description
Section
Description
Motor Control
The Motor Control section generates the signals needed to drive the
capacitor motors using the phase and magnitude signals, and
provides for the manual control interface. The motors are DC motors
and use potentiometers to provide feedback as to the capacitor
positions. To keep the capacitors and the feedback potentiometers
from reaching their mechanical limits, the motors automatically
reverse directions before the mechanical limits are reached.
DC Bias
DC Bias voltage feedback is provided by the DC bias PCB and the
motor driver control board. The DC bias board provides the voltage
divider, whereas the motor driver board buffers and rectifies the DC
bias voltage so that the DC bias voltage at the interface port is always
positive.
Load and Tune
The VarioMatch match network uses either the L match topology or
Gamma topology (see “Topologies” on page 2-4).
The tuning elements may consist of:
•
•
•
•
Variable load capacitor
Variable tune capacitor
Load coil
Tune coil
Tapped or replacable coils are used to produce the impedance range
desired.
TOPOLOGIES
The VarioMatch match network uses one of the following topologies:
• L match topology (some ICP units and most non-ICP units)
• Gamma topology (most ICP units and some non-ICP units)
If you purchased an ICP unit, see Chapter 3, “Specifications” to see the topology for
your unit.
2-4
Product Overview and Theory
57020080-00D
AE VarioMatch™ Match Network, VM 1000/1500 Platform
L Match Topology
Figure 2-1 shows a basic L match network circuit.
Figure 2-2. L match network circuit
The L match network received its name because of the configuration of the capacitor
and coil used. The L match network is simple, and requires only two tuning
elements—a series (or tune) coil and a shunt (or load) capacitor.
In practice a quality variable coil cannot be economically constructed because a
sliding tap to the coil cannot withstand a high RF current. The typical 5 A RF rating
for a highly variable coil isn't suitable for plasma loads with their high associated RF
currents.
As a result of these limitations, the traditional L match network is modified by the
installation of a variable capacitor connected in series with a fixed or tapped coil.
Figure 2-1 shows a typical VarioMatch L match network circuit.
Figure 2-3. VarioMatch L match network circuit
In principle, the L match network is a good choice when the load impedance is not
known and must be determined by experimentation. If the match network uses
inductors and capacitors with very wide tuning range, nearly any impedance can be
properly matched.
The tune coil is connected in series with the wiring to the load. The inductance of the
wire connecting the match network to the load must be considered to be a part of the
tune coil. Because of this, ensure that this wiring is as short as possible and low
inductance. Short connection leads will help to reduce EMI. The VarioMatch match
network must be well grounded to the load.
57020080-00D
Product Overview and Theory
2-5
Advanced Energy®
The major practical problem of the L match network is the need for very large tuning
capacitors when matching low impedances – a typical situation with plasma
chambers. The following table provides an idea of the load capacitor’s capacity. The
load capacitor must provide for different load resistances:
Table 2-2. Load capacitor capacity by load
Rload
Load capacitor
0.5 Ω
2335 pF
1.0 Ω
1640 pF
2.0 Ω
1150 pF
3.0 Ω
929 pF
4.0 Ω
796 pF
5.0 Ω
704 pF
6.0 Ω
635 pF
7.0 Ω
581 pF
8.0 Ω
537 pF
At load resistances lower than 3 Ω a capacity of larger than 900 pF is required.
The VarioMatch match network uses a load coil to extend the capacitance range of the
load capacitor without the negative side effects described above. For more
information, see “Set Up the Match for Your Load” on page 5-16.
Gamma Topology
In addition to the L match topology, AE produces match networks that use the Gamma
topology. Gamma topology matches allow loads of very low impedances to be
matched. This can be advantageous for ICP loads.
Some VarioMatch match network ICP units can be operated in two different
configurations, which allow two different load impedance ranges. Other VarioMatch
match networks use only Gamma topology. See Chapter 3, “Specifications”.
2-6
Product Overview and Theory
57020080-00D
AE VarioMatch™ Match Network, VM 1000/1500 Platform
In configuration A (Gamma topology) the tune (series) capacitor comes first from the
generator’s point of view while in configuration B (L match topology) the load (shunt)
capacitor comes first.
Figure 2-4. Gamma topology
Figure 2-5. L match topology
57020080-00D
Product Overview and Theory
2-7
Advanced Energy®
2-8
Product Overview and Theory
57020080-00D
AE VarioMatch™ Match Network, VM 1000/1500 Platform
Chapter
3
Specifications
This chapter lists specifications for the VarioMatch match network.
PHYSICAL SPECIFICATIONS
Unit Dimensions
Figure 3-1 through Figure 3-4 illustrate the physical dimensions.
The PLASMA/LOAD connector can be located on either the rear panel or the bottom
panel, depending on your model.
Figure 3-1. VM 1000/1500 platform front panel
57020080-00D
Specifications
3-1
Advanced Energy®
Figure 3-2. VM 1000/1500 platform left side panel
3-2
Specifications
57020080-00D
AE VarioMatch™ Match Network, VM 1000/1500 Platform
Figure 3-3. VM 1000/1500 platform rear panel
57020080-00D
Specifications
3-3
Advanced Energy®
Holes for
mounting the unit
and for ground
connection
Figure 3-4. VM 1000/1500 platform bottom panel
3-4
Specifications
57020080-00D
AE VarioMatch™ Match Network, VM 1000/1500 Platform
Figure 3-5. VM 1000/1500 platform top panel
Spacing Requirements
The following sections describe the space needed to provide room for connections and
to meet cooling requirements.
57020080-00D
Specifications
3-5
Advanced Energy®
FRONT PANEL CONNECTIONS
For front panel RF Input and other connections:
• 200 mm (7.9″) required for the RF Input connector when using a straight
connector
• 100 mm (3.9″) required for the RF Input connector when using an angled
connector
PLASMA/LOAD CONNECTION
• For units with the PLASMA/LOAD connection on the bottom panel:
4 200 mm (7.9″) required for 7/16 connector when using a straight connector
4 70 mm (2.8″) required for 7/16 connector when using an angled connector
• For units with the PLASMA/LOAD connection on the rear panel:
4 200 mm (7.9″) required for 7/16 connector when using a straight connector
4 80 mm (3.1″) required for 7/16 connector when using an angled connector (to
also accommodate proper airflow)
No spacing recommendations are available from AE for other PLASMA/LOAD
connections.
COOLING
For proper airflow, allow 80 mm (3.1″) above the top and rear of the unit.
For connection to water, 100 mm (3.9″) is required on the left side of the unit. If your
unit is water-cooled you will see a W or AW after the model number on the product
label.
3-6
Specifications
57020080-00D
AE VarioMatch™ Match Network, VM 1000/1500 Platform
Physical Specifications Table
Table 3-1 describes the physical specifications of the VarioMatch match network.
Table 3-1. Physical specifications
Description
Specification
Mounting
Directly onto the load or onto a mounting plate. See
“Installing the VarioMatch Match Network” on
page 5-4.
Size
375 mm x 245 mm x 150 mm
(14.75" x 5.9" x 9.65")
Note: Additional space required for air flow and
connections. See “Spacing Requirements” on
page 3-5.
(See also Figure 3-1 through Figure 3-4.)
Weight
6.5 kg (14.3 lb)
Clearance
See “Spacing Requirements” on page 3-5.
(See also Figure 3-1 through Figure 3-4.)
Connector/cable specifications
Match INTERFACE
connector
15-pin subminiature-D female. For pinout and
functional description see Table 4-1 on page 4-2.
RF-GENERATOR input
connector
50 Ω N-type
57020080-00D
Specifications
3-7
Advanced Energy®
Table 3-1. Physical specifications (Continued)
Description
PLASMA/LOAD
connector
Specification
Varies by VarioMatch product PN
PNs 69002206, 69002207, 69002208: 6 mm brass tube
fittings
PNs 69000004, 69000018, 69000022, 69000024,
69000032, 69000033, 69000037, 69000041, 69000046,
69000062, 69000070, 69000080, 69000114, 69000116,
69000226, 69000227, 69000228, 69000229, 69000230,
69001214: 7/16 DIN socket
PN 69000001: M6 bolt
PNs 69000007, 69000023, 69000025, 69000034,
69000036, 69000115, 69000214, 69001207: MC B6N
(female 6 mm)
PN 69000082: Customer-supplied
The connection is located on the rear, side, or bottom
panel of the unit.
AC power input (ACMAINS) connector
IEC 320 connector
Coolant connectors
Brass water fittings for water tubing 6 mm OD /
4 mm ID (0.24" OD / 0.16" ID)
Internal coil specifications
3-8
Specifications
57020080-00D
AE VarioMatch™ Match Network, VM 1000/1500 Platform
Table 3-1. Physical specifications (Continued)
Description
Tune coil
Specification
The tune coil varies by part number on the number of
turns, the number of possible taps, and the default tap
setting from the factory.
PN 69000001: 2.5 turns, fixed coil
PN 69000036, 69000116: 14 turns, taps at 4, 6, 8, 10,
12, 14 turns, default tap setting on 1
PN 69000033, 69000037, 69000228: 14 turns, taps at 4,
6, 8, 10, 12, 14 turns, default tap setting on 2
PN 69000032, 69000080: 14 turns, taps at 4, 6, 8, 10,
12, 14 turns, default tap setting on 3
PNs 69000004, 69000018, 69000022, 69000023,
69000024, 69000025, 69000034, 69000046, 69000114,
69000115, 69000230, 69000227, 69000229, 69001207,
69001214: 14 turns, taps at 4, 6, 8, 10, 12, 14 turns,
default tap setting on 4
PN 69000007, 69000041: 25 turns, taps at 10, 13, 16,
19, 22, and 25 turns, default tap setting on 4
PN 69000062, 69000226: 6 turns, taps at every turn,
default tap setting on 6
PN 69000070: 6 turns, taps at every turn, default tap
setting on 2
PN 69000214: 26.5 turns, taps at 1 through 10, default
tap setting on 3
PN 69000082: 5 turns, fixed
PN 69002206, 69002207, 69002208: no tune coil on
these ICP units
57020080-00D
Specifications
3-9
Advanced Energy®
Table 3-1. Physical specifications (Continued)
Description
Load coil
Specification
The load coil varies by VarioMatch product part
number on the number of turns, the number of possible
taps, and the default tap setting from the factory (A, B,
or C).
PN 69000001, 69000062, 69000226, 69002206,
69002207, 69002208: No load coil
PN 69000004, 69000018, 69000022, 69000023,
69000024, 69000025, 69000046, 69000114, 69000115,
69000214, 69000230, 69000227, 69000229, 69000032,
69000034, 69001207, 69001214: 2 turns, 3 taps,
default: B
PN 6900003, 69000036, 69000037, 69000080,
69000082, 69000116, 69000228: 2 turns, 3 taps,
default: C
PN 69000007, 69000041: 4 turns. 5 taps. default: B
Topology
Varies by VarioMatch product PN
PN 69002206, 69002207, 69002208: L match or
Gamma (Default: Gamma)
PN 69000001: Gamma
All other PNs: L match
ELECTRICAL SPECIFICATIONS
This section includes electrical specifications for VM 300, VM 700, VM 1000, and
VM 1500 products.
3-10
Specifications
57020080-00D
AE VarioMatch™ Match Network, VM 1000/1500 Platform
VM 300 Series
Table 3-2 describes the VM 300 series electrical specifications.
Table 3-2. Electrical specifications for VM 300 series
Description
Specification
Frequency
13.56 MHz
AC line voltage
100 VAC to 240 VAC, single φ
AC line frequency
50 Hz to 60 Hz
AC line current (maximum)
1.0 A to 0.7 A
Maximum transfer power
300 W
Maximum reactive power
88,000 W
Maximum RF load current
22 A
Maximum RF load voltage
4000 Vpeak
Input impedance to generator
50 Ω
Maximum load DC self bias
voltage
0 VDC to 10 VDC
Runtime from start point to end
point
3 seconds
Tuning range
To reach appropriate resistance and reactance values,
you may need to change load and/or tune coil settings.
See “Set Up the Match for Your Load” on page 5-16.
For details on tuning ranges possible for your unit, see
Chapter 7, “VarioMatch Match Network Tuning
Ranges”.
VM 700 Series
Table 3-3 describes the VM 700 series electrical specifications.
Table 3-3. Electrical specifications for VM 700 series
Description
Specification
Frequency
13.56 MHz
AC line voltage
100 VAC to 240 VAC, single φ
AC line frequency
50 Hz to 60 Hz
AC line current (maximum)
1.0 A to 0.7 A
Maximum transfer power
700 W
Maximum reactive power
60,000 W
57020080-00D
Specifications
3-11
Advanced Energy®
Table 3-3. Electrical specifications for VM 700 series (Continued)
Description
Specification
Maximum RF load current
15 A
Maximum RF load voltage
4000 Vpeak
Input impedance to generator
50 Ω
Maximum load DC self bias
voltage
0 VDC to 4000 VDC
DC selfbias monitor voltage
0 V to 10 V
Runtime from start point to end
point
3 seconds
Tuning range
To reach appropriate resistance and reactance values, you
may need to change load and series coil settings. See “Set
Up the Match for Your Load” on page 5-16.
For details on tuning ranges possible for your unit, see
Chapter 7, “VarioMatch Match Network Tuning Ranges”.
VM1000 Series
Table 3-2 describes the VM 1000 series electrical specifications.
Table 3-4. Electrical specifications for VM 1000 series
Description
Specification
Frequency
13.56 MHz
AC line voltage
100 VAC to 240 VAC, single φ
AC line frequency
50 Hz to 60 Hz
AC line current (maximum)
1.0 A to 0.7 A
Maximum transfer power
1000 W
Maximum reactive power
Varies by VarioMatch product part number:
PN 69000023, 69000115: 100,000 W
All other PNs: 88,000 W
Maximum RF load current
Varies by part number:
PN 69000023, 69000115: 25 A
All other PNs: 22 A
Maximum RF load voltage
4000 Vpeak
Input impedance to generator
50 Ω
3-12
Specifications
57020080-00D
AE VarioMatch™ Match Network, VM 1000/1500 Platform
Table 3-4. Electrical specifications for VM 1000 series (Continued)
Description
Specification
Maximum load DC self bias
voltage
0 VDC to 4000 VDC
DC selfbias monitor voltage
0 V to 10 V
Runtime from start point to end
point
3 seconds
Tuning range
To reach appropriate resistance and reactance values,
you may need to change load and/or tune coil settings.
See “Set Up the Match for Your Load” on page 5-16.
For details on tuning ranges possible for your unit, see
Chapter 7, “VarioMatch Match Network Tuning
Ranges”.
VM 1500 Series
Table 3-5 describes the VM 1500 series electrical specifications.
Table 3-5. Electrical specifications for VM 1500 series
Description
Frequency
Specification
Varies by VarioMatch product part number.
PN 69000001, 69000024, 69000025, 69000229,
69001207, 69001214, 69002207: 13.56 MHz
PN 69000007, 69000041: 2.00 MHz or 4.00 MHz, set at
the factory
PN 69000062, 69000226: 27.12 MHz
PN 69000070, 69002208: 40.68 MHz
AC line voltage
100 VAC to 240 VAC, single φ
AC line frequency
50 Hz to 60 Hz
AC line current (maximum)
1.0 A to 0.7 A
Maximum transfer power
1500 W
57020080-00D
Specifications
3-13
Advanced Energy®
Table 3-5. Electrical specifications for VM 1500 series (Continued)
Description
Maximum reactive power
Specification
Varies by VarioMatch product part number:
PN 69000070, 69000226: 80,000 W
PN 69000062: 100,000 W
PN 69000001, 69000024, 69000025, 69000229,
69001207, 69001214, 69002207, 69002208: 140,000 W
PN 69000007, 69000041: 220,000 W
Maximum RF load current
Varies by VarioMatch product part number:
PN 69000070, 69000226: 20 A
PN 69000062: 25 A
PN 69000001, 69000024, 69000025, 69000229,
69001207, 69001214, 69002207, 69002208: 35 A
PN 69000007, 69000041: 55 A
Maximum RF load voltage
4000 Vpeak
Input impedance to generator
50 Ω
Maximum load DC self bias
voltage
0 VDC to 4000 VDC
DC selfbias monitor voltage
0 V to 10 V
Runtime from start point to end
point
3 seconds
Tuning range
To reach appropriate resistance and reactance values,
you may need to change load and series coil settings.
See “Set Up the Match for Your Load” on page 5-16.
For details on tuning ranges possible for your unit, see
Chapter 7, “VarioMatch Match Network Tuning
Ranges”.
COOLING SPECIFICATIONS
Table 3-6 lists the cooling specifications for the match network. Table 3-7 describes
the environmental and climatic specifications.
3-14
Specifications
57020080-00D
AE VarioMatch™ Match Network, VM 1000/1500 Platform
Do not use de-ionized water for cooling purposes. De-ionized water
causes both corrosion and erosion of cooling manifolds.
Table 3-6. Cooling specifications
Description
Specification
Cooling medium
Air-cooled (for units that show only "A" after the model
name or Air- and Water-cooled (for units that show "W" or
"AW" after the model name)
Minimum water flow
1 lpm (0.26 gpm)
Water pressure
0.5 bar (7.25 psi) differential as required to achieve
minimum flow rate.
Maximum water pressure 4 bar (58 psi), maximum inlet,
not recommended for operation.
Cooling water temperature
57020080-00D
20ºC to 35ºC. Cooling water temperature must always be
higher than ambient temperature to avoid condensation.
Specifications
3-15
Advanced Energy®
Table 3-6. Cooling specifications (Continued)
Description
Contaminates
Specification
AE recommends the following specifications for the water
used to cool the Navigator match network:
• pH between 7 and 9
• total chlorine <20 ppm
• total nitrate <10 ppm
• total sulfate <100 ppm
• total dissolved solids <250 ppm
• total hardness expressed as calcium carbonate
equivalent maximum 250 ppm
• <250 ppm
• specific resistivity of 2500 Ω/cm or higher at 25ºC
• total dissolved solids (TDS) as estimated by the
following:
TDS ≤ 640,000/specific resistivity (in Ω/cm)
Note: Do not use deionized water for cooling purposes in
order to prevent corrosion and erosion of cooling
manifolds
Minimum air flow
3-16
120 m3/h
Specifications
57020080-00D
AE VarioMatch™ Match Network, VM 1000/1500 Platform
ENVIRONMENTAL SPECIFICATIONS
Table 3-7 and Table 3-8 describe the environmental specifications of the VarioMatch
match network.
Table 3-7. Climatic specifications (per EN50178)
Temperature
Operating
Storage
Transportation
Note 1
Relative Humidity
Note 1
Air Pressure
78 kPa to 106 kPa
+5ºC to +40ºC
+41ºF to 104ºF
5% to 85%
+1 g/m3 to +25 g/m3
788 mbar to 1060 mbar
Equivalent altitude:
2000 m to -500 m
(6562 ft to -1640 ft)
-25ºC to +55ºC
5% to 95%
78 kPa to 106 kPa
-13ºF to +131ºF
+1 g/m3 to +29 g/m3
788 mbar to 1060 mbar
Equivalent altitude:
2000 m to -500 m
(6562 ft to -1640 ft)
-25ºC to +70ºC
95%Note 2
65.6 kPa to 106 kPa
-13ºF to +158ºF
+60 g/m3 Note 3
656 mbar to 1060 mbar
Equivalent altitude:
3500 m to -500 m
(11480 ft to -1640 ft)
Noncondensing, no formation of ice
Note 2 Maximum relative humidity when the unit temperature slowly increases, or when the unit
temperature directly increases from -25ºC to +30ºC
Note 3
Maximum absolute humidity when the unit temperature directly decreases from +70ºC to
+15ºC
Table 3-8. Environmental specifications
Description
Specification
Overvoltage
Category II
Pollution degree
2
57020080-00D
Specifications
3-17
Advanced Energy®
3-18
Specifications
57020080-00D
AE VarioMatch™ Match Network, VM 1000/1500 Platform
Chapter
4
Communication Interfaces and
Controls
This chapter describes the VarioMatch match network’s communication interface.
15-PIN VARIOMATCH MATCH INTERFACE
The 15-pin match INTERFACE on the VarioMatch match network provides analog
and digital signals for controlling and monitoring the unit. This interface allows
manual tune, preset, and monitoring functionality for a VarioMatch match network by
an AE generator, such as a CESAR. It can also be used by an external controller.
Table 4-1 on page 4-2 describes each pin used in the match INTERFACE.
Alternatively, you can control the VarioMatch match network using five switches (see
“Match INTERFACE Using Switches” on page 4-7).
INTERFACE Connector
The match INTERFACE connector is a 15-pin, shielded, female, subminiature-D
connector (see Figure 4-1).
Figure 4-1. VarioMatch match INTERFACE connector
57020080-00D
Communication Interfaces and Controls
4-1
Advanced Energy®
Match Interface Cabling Requirements
Connect the VarioMatch match network’s 15-pin INTERFACE port to the generator
with a shielded, 15-wire I/O cable. Minimize signal losses by keeping the cable as
short as possible. The maximum recommended cable length between the VarioMatch
match network and the controller is 10 meters (33 feet), although this may vary by
installation. Minimize interference from adjacent electrical equipment by terminating
the EMI shield in the cable to the metal shells of the cable’s connectors. Additionally,
you must tie the chassis of the VarioMatch match network to a local earth ground
through an adequately sized copper grounding strap.
Note: Grounding the INTERFACE port at the VarioMatch match network reduces
noise interference. To avoid ground loop problems, you should typically ground
only one end of the INTERFACE port cable.
Pin Descriptions
Unless otherwise specified, all analog signals are 0 V to 10 V. Digital signals are
referenced to ground. All inputs need to be switched to ground to activate, all outputs
are open-collector.
Table 4-1. VarioMatch match INTERFACE connector pin description
Pin
Return
Pin
1
GND
GROUND
Gnd
Connect to the shield of the cable (for example
RC cable).
2
1 or 9
DECREASE
CLoad
Input
Connect this +15 V input to ground to turn
motor load counterclockwise and thus decrease
CLoad. Interrupt the connection to ground when
the desired position for CLoad is reached.
3
1 or 9
INCREASE
CLoad
Input
Connect this +15 V input to ground to turn
motor load clockwise and thus increase CLoad.
Interrupt the connection to ground when the
desired position for CLoad is reached.
4
1 or 9
DECREASE
CTune
Input
Connect this +15 V input to ground to turn
motor load counterclockwise and thus decrease
CTune. Interrupt the connection to ground when
the desired position for CTune is reached.
5
1 or 9
INCREASE
CTune
Input
Connect this +15 V input to ground to turn
motor load clockwise and thus increase CTune.
Interrupt the connection to ground when the
desired position for CTune is reached.
4-2
Name
Signal
Type
Description
Communication Interfaces and Controls
57020080-00D
AE VarioMatch™ Match Network, VM 1000/1500 Platform
Table 4-1. VarioMatch match INTERFACE connector pin description
Pin
Return
Pin
Name
6
GND
7
N/A
8
1 or 9
MANUAL
MODE
Input
Connect this +15 V input to ground to set the
VarioMatch match network into manual mode.
9
GND
GROUND
Gnd
Ground connect to the cable shield.
10
1 or 9
+5V SUPPLY
Output
+5 Volts DC from internal DC supply.
GROUND
Signal
Type
Gnd
Description
Reference ground for DC Bias and capacitor
position signals.
Reserved
For external use. Maximum current draw
100 mA.
11
12
13
1 or 9
6
6
57020080-00D
+15V
SUPPLY
Output
DCSELFBIAS
MONITOR
Output
CTune
POSITION
MONITOR
Output
+15 V DC from internal DC supply.
For external use. Maximum current draw
100 mA.
DC self bias test voltage.
Provides a test voltage to monitor the DC self
bias of the plasma electrode in the vacuum
chamber. The output voltage is scaled down
400:1 (400 V of DC bias results in 1 V output).
The instrument used to measure the bias voltage
should have an input impedance of at least
10 kΩ.
Series (tune) capacitor position signal.
The voltage at this output is directly
proportional to the position of the capacitor
CTune. The minimum voltage is approximately
0.3 V representing the minimum capacity of
CTune. The maximum voltage is approximately
9.7 V representing the maximum capacity of
CTune.
Communication Interfaces and Controls
4-3
Advanced Energy®
Table 4-1. VarioMatch match INTERFACE connector pin description
Pin
Return
Pin
14
6
15
1 or 9
Name
Signal
Type
CLoad
POSITION
MONITOR
Output
MATCHING
ACTIVITY
STATUS
Output
Description
Shunt (load) capacitor position signal.
The voltage at this output is directly
proportional to the position of the capacitor
CLoad. The minimum voltage is approximately
0.3 V representing the minimum capacity of
CLoad. The maximum voltage is approximately
9.7 V representing the maximum capacity of
CLoad.
This open collector output is pulled low when
the VarioMatch match network is active (the
motors are running) and floats when the
matching is done (the motors are not running).
30 V maximum, 20 mA maximum.
Wiring Diagrams
User-supplied circuitry
may vary
Internal circuitry
+15 V
10 k
10 k
CD 4011 B
(NAND Gate)
N
G
Gnd
3439
Figure 4-2. Pins 2, 3, 4, 5, 8
4-4
Communication Interfaces and Controls
57020080-00D
AE VarioMatch™ Match Network, VM 1000/1500 Platform
Figure 4-3. Pin 10
Figure 4-4. Pin 11
57020080-00D
Communication Interfaces and Controls
4-5
Advanced Energy®
Figure 4-5. Pin 12
Figure 4-6. Pins 13, 14
4-6
Communication Interfaces and Controls
57020080-00D
AE VarioMatch™ Match Network, VM 1000/1500 Platform
Internal circuitry
User-supplied circuitry
may vary
15
CD 4001 B
(NOR Gate)
9
4.7 k
Gnd
LED
3444
Figure 4-7. Pin 15
Match INTERFACE Using Switches
To construct a simple manual control, wire four normally open momentary switches
for the motor drive and one on/off switch for auto/manual mode selection as described
below.
Table 4-2. Match INTERFACE switch descriptions
Momentary
switch
Motor
drive
Results
Common connection of all 5 switches (Ground)
Connect to
INTERFACE
Pin #
1
Switch 1
motor 1
run clockwise
decrease CTune
2
Switch 2
motor 1
run counter
clockwise
increase CTune
3
Switch 3
motor 2
run clockwise
decrease CLoad
4
Switch 4
motor 2
run counter
clockwise
increase CLoad
5
Switch 5 (on/
off)
Manual/
Auto
Selects Manual or Auto mode
8
Connect the switch box to the match INTERFACE using a shielded cable. The shield
should be connected to ground at pin 1 of the D-connector. To avoid a ground loop,
which could result in erratic operation of the remote control, do not connect the cable
shield to any other ground in the system.
57020080-00D
Communication Interfaces and Controls
4-7
Advanced Energy®
4-8
Communication Interfaces and Controls
57020080-00D
AE VarioMatch™ Match Network, VM 1000/1500 Platform
Chapter
5
Installation, Setup, and
Operation
PREPARING TO INSTALL THE VARIOMATCH
MATCH NETWORK
The following sections provide information that you need to understand before
installing the VarioMatch match network.
Spacing Requirements
See “Physical Specifications” on page 3-1 for the unit dimensions and clearance.
Installation Requirements
Install this unit according to the following requirements.
Maintenance personnel must receive proper training before installing,
troubleshooting, or maintaining high-energy electrical equipment.
Potentially lethal voltages could cause death, serious personal injury, or
damage to the equipment. Ensure that all appropriate safety precautions
are taken.
RISK OF DEATH OR BODILY INJURY. Disconnect and lockout/tagout all
sources of input power before working on this unit or anything
connected to it.
57020080-00D
Installation, Setup, and Operation
5-1
Advanced Energy®
COOLING REQUIREMENTS
Ensure that exhausted air does not circulate back into the unit and become input air.
Also, ensure that all cooling requirements are within specification. See “Cooling
Specifications” on page 3-14.
Tools Required for Installation
AE supplies the following equipment:
• Two AC MAINS cables. Use the cable appropriate to your location.
• If the PLASMA/LOAD connector on your VarioMatch match network is MC6 or
6 mm brass tube fittings, AE supplies the matching plug. See the “Physical
Specifications” on page 3-1 to see which PLASMA/LOAD connector your unit
uses.
For successful installation, you will need to supply the following additional
equipment:
• Four M6 mounting screws (preferably brass) and an appropriate screwdriver.
• If the PLASMA/LOAD connector on your VarioMatch match network is a strap
connection, you need to supply the strap connector and the ground strap. See the
“Physical Specifications” on page 3-1 to see which PLASMA/LOAD connector
your unit uses.
• For water-cooled units: Plastic hose 6 mm OD / 4 mm ID (0.24" OD / 0.16" ID)
(see “Connecting the Cooling Water” on page 5-7).
• Cables (see also “Connector/Cable specifications” on page 3-3):
4 Shielded 50 Ω coaxial cable for RF input from the generator
4 RF cabling to connect the unit to a generator. See “Cable Requirements” on
page 5-3.
4 Communication interface cable if you will use remote control of the unit.
• If you purchased an ICP unit, you must supply the tune coil. See the “Physical
Specifications” on page 3-1 to see if your unit is ICP.
Unpacking
Unpack and inspect the unit carefully, looking for obvious physical damage. If no
damage is apparent, proceed with the installation. If you do see signs of shipping
damage, contact Advanced Energy® and the carrier immediately (see “Contacting AE
Global Services” on page 6-4). Save the shipping container for submitting necessary
claims to the carrier.
5-2
Installation, Setup, and Operation
57020080-00D
AE VarioMatch™ Match Network, VM 1000/1500 Platform
Cable Requirements
GENERAL CABLING CONSIDERATIONS FOR PLASMA/LOAD
The main objective of an RF delivery system is to provide as much of the generator's
output power to the load as possible. However, losses occur in the coaxial cable, the
match network, and in the lead between the match network and load. These losses
should be kept as low as possible.
Guidelines to Minimize Losses
Use the following guidelines to minimize losses:
• Keep RF cabling between matching network and load as short as possible.
• Ensure proper shielding of all RF leads.
• Ensure a proper RF return path (ground). Remember that RF can only run on the
surface, but not through material.
• All RF conductive parts should consist of silver plated copper, electrolytic copper,
aluminium, or stainless steel.
• Do not use regular steel because it is a bad RF conductor. It will cause high losses
and eventually burn away.
Guidelines for PLASMA/LOAD Cables and Connectors
The proper connection of the VarioMatch match network to the load influences
operation of the whole RF system. The following is important information for
connecting to PLASMA/LOAD.
There will be a high RF current flowing between the VarioMatch match network and
the load. The RF output (PLASMA/LOAD) is much higher than RF input (RFGENERATOR). High currents are common because the real part of a load
impedance is typically between 1 Ω and 10 Ω. This results in a relatively high current
even at low RF power levels.
Due to skin effects, the RF current will flow only on the surface of the conductor,
reaching a depth of only 10 micrometers to 20 micrometers, depending on the
conductor material and the frequency. To reduce the conductive losses as well
unwanted voltages drops across the lead, always try to optimize the surface area of a
lead.
The large RF current flowing through the lead to the load will cause losses in power as
well as RF radiation. For optimum results, minimize the lead length and maximize the
lead surface area. If you don't use a coaxial cable as the PLASMA/LOAD connection
(coaxial cable should not be used at power levels exceeding approximately 1.5 kW),
you must ensure adequate RF shielding of the connection to prevent RF radiation
which can cause malfunctions in nearby instrumentation and electronic equipment.
57020080-00D
Installation, Setup, and Operation
5-3
Advanced Energy®
If your unit uses a coaxial connector, then wire the coaxial connector to the load using
the shortest possible length of cable. For power levels greater than 1 kW cable length
should not exceed one meter. Use a coaxial cable with high voltage capability and
good thermal immunity. AE recommends RG 393/U, a coaxial cable with Teflon
insulation. Compared to conventional coaxial cable capable of operating at 80°C
maximum, this cable can run at up to 200°C without any damage. This consideration
is important, as the heat generated by the losses of the connection plus the heat
transferred from the load is considerable.
If your VarioMatch match network uses a female 6 mm multi-contact high-current
connector or an M6 bolt, connect the PLASMA/LOAD connector to the load with
wiring of the lowest possible impedance. A flat copper strip 30 to 50 mm or more
wide is much better suited for this connection than a thick wire.
See the “Physical Specifications” on page 3-1 to see which connector your unit uses.
SHIELDING THE RF CONNECTIONS
Shield all RF connections to prevent RF radiation and to minimize safety hazards.
Shielding is also important to communication, as excessive noise can corrupt the data
packet and cause errors. If you are using a copper strap, arrange a good, wellgrounded shield around the copper strap (as you would with a coaxial cable) to
prevent RF radiation.
INSTALLING THE VARIOMATCH MATCH
NETWORK
Maintenance personnel must receive proper training before installing,
troubleshooting, or maintaining high-energy electrical equipment.
Potentially lethal voltages could cause death, serious personal injury, or
damage to the equipment. Ensure that all appropriate safety precautions
are taken.
The following sections explain how to install the unit.
1. “Mounting the Unit” on page 5-5
4 “General Mounting Instructions” on page 5-5
4 “Grounding the Unit” on page 5-5
4 “Mounting the VarioMatch Match Network” on page 5-6
5-4
Installation, Setup, and Operation
57020080-00D
AE VarioMatch™ Match Network, VM 1000/1500 Platform
2. “Connecting the Match INTERFACE (Optional)” on page 5-7
3. “Connecting the Cooling Water” on page 5-7
4. “Connecting RF Input From a Generator” on page 5-8
5. “Connecting to the Load” on page 5-9
6. “Connecting AC Input (Mains) Power” on page 5-11
Mounting the Unit
GENERAL MOUNTING INSTRUCTIONS
Do not mount on hot tool; excessive temperatures can cause
components to overheat and fail.
When mounting the VarioMatch match network, keep in mind the following:
• Mount the VarioMatch match network as close as possible to the load, leaving
room to access all connectors and to open the top panel. See “Physical
Specifications” on page 3-1 for dimensions and spacing requirements.
• Ensure the unit will remain within the specified operating temperatures. See
“Cooling Specifications” on page 3-14.
• Ensure that exhausted air does not circulate back into the unit to become input air.
• Install the VarioMatch match network so that the cooling fan is facing up.
• Position the unit so that it is easy to unplug the AC input power cord, unless you
install another suitable disconnecting device that complies with the accessibility
and other applicable requirements of EN 61010-1.
• Ensure proper grounding (see “Grounding the Unit” on page 5-5).
• Mount the VarioMatch match network (see “Mounting the VarioMatch Match
Network” on page 5-6).
GROUNDING THE UNIT
Do not attempt to turn on power until the VarioMatch match network is
grounded.
57020080-00D
Installation, Setup, and Operation
5-5
Advanced Energy®
A good ground connection is essential to achieve the best possible RF connection
between the match network and the ground of the load. The VarioMatch match
network chassis must be intimately grounded to the plasma chamber
The ground lead must provide a low impedance RF path. If a proper RF ground is not
achieved, the RF current flowing through the ground leads will cause ground
bouncing. The RF current flowing through a poor ground connection will result into a
voltage across that ground lead. In this situation, the load and the match network will
have a different voltage potential and the ground can no longer be regarded as a good
and common ground, which can result in the following:
• RF radiation
• Malfunction of match controllers or other devices
• Electrical shock from the VarioMatch match network cabinet
To Properly Ground the VarioMatch Match Network:
Mount the unit as described in “Mounting the VarioMatch Match Network” on
page 5-6. RF grounding is achieved via mounting the unit to the mounting plate.
Note: Use the GROUND connectors on the rear of the unit only if you cannot mount
the VarioMatch match network as described.
MOUNTING THE VARIOMATCH MATCH NETWORK
Note: VM 69000082: see your company's internal documentation for mounting
instructions.
Use these instructions for mounting the VarioMatch match network to a mounting
plate attached to the load. The mounting plate acts as ground for the VarioMatch
match network.
There is no need to open the VarioMatch match network cover. You can secure the
unit to the mounting plate using the four M6 mounting threads on the bottom panel.
For the location of the screw holes, see “Unit Dimensions” on page 3-1.
5-6
Installation, Setup, and Operation
57020080-00D
AE VarioMatch™ Match Network, VM 1000/1500 Platform
When selecting the mounting hardware, choose screws that will not extend into the
unit cabinet more than 10 mm. Brass fasteners are recommended.
Mounting plate (acts as ground)
Figure 5-1. Installing the VarioMatch match network to a mounting plate
To Mount the VarioMatch Match Network:
1. Ensure AC MAINS, PLASMA/LOAD, and RF-GENERATOR are all
disconnected.
2. If the PLASMA/LOAD connector is on the bottom of the unit, ensure you have
an opening in the mounting plate that lines up with the connector.
3. Attach the VarioMatch match network cabinet to the mounting plate with four M6
screws.
Connecting the Match INTERFACE (Optional)
The 15-pin female subminiature-D connector on the front panel lets you connect the
VarioMatch match network to an external remote controller (like the AE RMC-1 or a
homemade controller) or to an AE RF generator.
To Connect the Match INTERFACE:
Connect the cable between the controlling device and the INTERFACE connection
on the VarioMatch match network. For specific information on the interface
connection, including pin descriptions and communication protocols, see Chapter 4,
“Communication Interfaces and Controls”.
Connecting the Cooling Water
Do not use de-ionized water for cooling purposes. De-ionized water
causes both corrosion and erosion of cooling manifolds.
57020080-00D
Installation, Setup, and Operation
5-7
Advanced Energy®
When fastening the water hose, be sure the bullkhead does not rotate;
this could cause internal damage to the unit.
If your unit is not water-cooled, skip this section.
The Water In and Water Out connectors are brass hose connectors on the side panel
of the VarioMatch match network. The VarioMatch match network includes the water
fitting (see Figure 5-2) for plastic hoses with 6 mm OD / 4 mm ID (0.24" OD / 0.16"
ID). The VarioMatch match network water cooling system does not include water
solenoid, water flow meter, or humidity sensor. You must take external measures to
protect the unit and the environment.
To Connect Cooling Water:
1. Install the user-supplied water lines to WATER IN and WATER OUT. See the
SERTO® documentation for instructions on properly connecting the water lines
to the water fitting.
2. Ensure you meet all cooling requirements (see “Cooling Requirements” on
page 5-2).
3. Leak-check the water connections.
Figure 5-2. Water fitting for plastic hose with 6 mm OD / 4 mm ID (0.24" OD /
0.16" ID)
Connecting RF Input From a Generator
Connect the user-supplied coaxial cable from the generator’s RF output to the RFGENERATOR connector on the match network.
The RF-GENERATOR connector is a 50 Ω N-type connector. Figure 5-3 shows the
RF-GENERATOR connector, and Table 5-1 describes the input connector pins.
5-8
Installation, Setup, and Operation
57020080-00D
AE VarioMatch™ Match Network, VM 1000/1500 Platform
Figure 5-3. N-type connector
Table 5-1. RF input connector pin descriptions
Pin
Description
Center
RF input
Outer
Ground
Connecting to the Load
Note: VM 69000082: The RF output connector is customer supplied. See your
company’s internal documentation for information.
The VarioMatch match network uses one of the following RF Output (PLASMA/
LOAD) connectors, located on the rear, side, or bottom panel of your unit (See the
“Physical Specifications” on page 3-1 to see which connector your unit uses.):
57020080-00D
Installation, Setup, and Operation
5-9
Advanced Energy®
• 7/16 DIN socket (Figure 5-4 on page 5-10)
• MC6 (Figure 5-5 and Figure 5-6 on page 5-10)
• 6 mm brass tube fitting (Figure 5-7 on page 5-11)
Figure 5-4. 7/16 DIN female connector
Figure 5-5. MC6 connector
Figure 5-6. MC6 plug
5-10
Installation, Setup, and Operation
57020080-00D
AE VarioMatch™ Match Network, VM 1000/1500 Platform
Figure 5-7. 6 mm brass tube fitting
CONNECTING THE VARIOMATCH MATCH NETWORK TO
THE LOAD
To Connect the VarioMatch Match Network to the Load:
1. Review the cabling requirements in “Cable Requirements” on page 5-3.
2. Locate the PLASMA/LOAD connector or opening on the bottom or side of your
unit.
4 For units with 7/16 DIN socket: Connect one end of a user-supplied coaxial
cable to the PLASMA/LOAD output connector on the match network. Attach
the other end of the coaxial cable to the load.
4 For units with MC6 connector: Attach the AE-supplied MC6 plug to one end
of a user-supplied cable or copper strap. Attach the plug to the MC6 PLASMA/
LOAD output connector. Attach the other end of the cable or copper strap to
the load.
4 For units with 6 mm brass fittings: AE supplies the®brass ferrule and
compression nut for this fitting. Attach the SERTO compression nut and
ferrule directly to the user-supplied coil. See the SERTO® documentation for
instructions on properly connecting the plug. Attach the plug to the 6 mm brass
PLASMA/LOAD output connector.
Connecting AC Input (Mains) Power
RISK OF DEATH OR BODILY INJURY. Disconnect and lockout/tagout all
sources of input power before working on this unit or anything
connected to it.
57020080-00D
Installation, Setup, and Operation
5-11
Advanced Energy®
The AC input (Mains) connector is an IEC 320 connector. Figure 5-8 shows the input
power connector, and Table 5-2 describes each pin.
1
2
3
Figure 5-8. Input (Mains) connector
Table 5-2. Input connector pin description
Pin
Description
1
Phase (or neutral if pin 2 is
phase)
2
Neutral (or phase if pin 1 is
neutral)
3
Ground
To Connect the AC Input Power:
Connect the VarioMatch match network to the power mains by connecting the AC
MAINS cord with your input power source (see Chapter 3, “Specifications” for the
input voltage for your unit).
Note: The VarioMatch match network does not contain an on/off power switch. To
turn off the unit you must completely disconnect the Mains.
FIRST-TIME OPERATION
Maintenance personnel must receive proper training before installing,
troubleshooting, or maintaining high-energy electrical equipment.
Potentially lethal voltages could cause death, serious personal injury, or
damage to the equipment. Ensure that all appropriate safety precautions
are taken.
5-12
Installation, Setup, and Operation
57020080-00D
AE VarioMatch™ Match Network, VM 1000/1500 Platform
RISK OF DEATH OR BODILY INJURY. Disconnect and lockout/tagout all
sources of input power before working on this unit or anything
connected to it.
Leaving on the RF power after turning off the input power to the match
network may damage the unit.
AE recommends that you operate the unit in automatic mode for first-time operation.
To Operate the VarioMatch match network:
1. Turn on the system by connecting AC MAINS.
2. Turn on the RF generator and adjust it to 100 W.
A substantial amount of RF power is necessary for proper operation of the
automatic detection circuitry and the control circuitry within the VarioMatch
match network.
Allow 5 to 10 seconds for the unit to tune automatically.
If you are testing the unit with a dummy load, use the minimum power to start
(the minimum amount of power to ensure operation is 25 W.)
3. Check to see that you have a correct and appropriate response from your load.
For example, if you are using a plasma chamber, look for the following:
a. Is the plasma lit? If not, you may have a faulty connector or too little input
power. Check your match process and check that the full system is properly
designed and installed.
b. Is the plasma stable (that is, is there a constant glow)? If not, switch to manual
tune mode and experiment to see if you can get it stable. Once it is stable in
manual mode, look at the positions of the capacitors. Minimally, the capacitors
should be in the tuning range of 20 to 80%; ideally between 30 to 80%. If the
capacitors are outside this range, change the coil tappings (see “Set Up the
Match for Your Load” on page 5-16).
c. Did the capacitors begin to move? If not, check if AC MAINS is properly
connected, then switch to manual tune mode. If the capacitors move in manual
tune mode but not in automatic tune mode, verify that you have RF coming into
the match network from the generator. If not, the matching motors won’t move
in automatic tune mode. If the capacitors still do not move, contact AE Global
57020080-00D
Installation, Setup, and Operation
5-13
Advanced Energy®
Services (see Chapter 6, “Troubleshooting and Global Services”).
d. Did reflected power decrease to within specifications? If not, ensure the
capacitors are within the tuning range of 30 to 80%.
e. Did the motors stop moving? If the motors do not stop moving, ensure the
capacitors are within the tuning range of 30 to 80%.
4. Vary the chamber conditions according to your process requirements, and verify
that the VarioMatch match network can cover the required load impedance range.
NORMAL OPERATION
The VarioMatch Match Network operates in the following modes:
• “Automatic Tune Mode” on page 5-14
• “Manual Tune Mode” on page 5-15
When connected to the AC power MAINS, the VarioMatch match network will
immediately turn on in the automatic tune mode. To manually tune the capacitors, use
a match controller or an AE Cesar RF generator (see “Interaction With a Cesar
Generator” on page 5-16).
To allow easy incorporation of the VarioMatch match network into most any load
system, the unit does not use an on/off switch. To turn on the unit, connect the
VarioMatch match network to the AC MAINS connector. Use the AC MAINS cable
appropriate for your installation (100 V to 240 V at 50 Hz to 60 Hz).
Also read the information in “Importance of Igniting Plasma” on page 5-16.
Automatic Tune Mode
AE recommends using automatic tune mode for normal operation. In automatic tune
mode, the VarioMatch match network controls the impedance functions internally.
Automatic tune mode requires no user interface. Whenever the VarioMatch match
network detects RF power, the unit automatically moves the capacitors to optimum
positions and minimizes the reflected power.
A minimum RF input power is necessary to allow the electronic circuit to work
properly and accurately and to automatically tune the network for minimum reflected
power. This minimum input power is approximately 1% of the maximum transfer
power (see Chapter 3, “Specifications”).
The magnitude (amplitude) detector checks the RF voltage and RF current present on
the 50 Ω line between RF generator and VarioMatch match network, and then
compares this with 50 Ω. The magnitude detector drives the load variable capacitor.
5-14
Installation, Setup, and Operation
57020080-00D
AE VarioMatch™ Match Network, VM 1000/1500 Platform
The second sensor is the phase detector, which measures the phase change compared
to a perfect 50 Ω resistive load. This sensor drives the tune variable capacitor which is
in series with the coil.
Both magnitude and phase information are fed to the motor drive electronics which
immediately drive the electric motors in the correct direction.
To Operate the VarioMatch Match Network in Automatic Tune Mode:
• With the VarioMatch match network connected to a generator, connect the
VarioMatch match network to AC power and it will turn on in automatic mode.
Note: To operate the VarioMatch match network in automatic tune mode when
connected to a CESAR generator, refer to the CESAR user manual.
If the matching quality isn't acceptable and the reflected power cannot be reduced
below approximately 1% of maximum transfer power, the automatic mode will be
unable to match properly and the motors will never stop. This condition indicates that
the VarioMatch match network isn't set up correctly for the load (see “Set Up the
Match for Your Load” on page 5-16).
Manual Tune Mode
In addition to the automatic mode, all VarioMatch match network models can be
controlled manually by means of an external controller. This controller can be the AE
RMC-1 Match Network Controller, an AE Cesar RF Generator, or an arrangement of
five switches.
Manual control is useful when the load isn't known and you must find the most
suitable match. Manual tune mode lets you determine whether matching is possible as
configured and if the match is achieved near the limits of one or both of the variable
capacitors.
In manual tune mode, the automatic tune feature is disabled and the capacitor
positions are controlled through the INTERFACE port on the VarioMatch match
network. When the interface signal MANUAL MODE is pulled high, the capacitor
positions follow the signals present on the match INTERFACE.
To Operate the VarioMatch Match Network in Manual Tune Mode:
• If the VarioMatch match network is connected to a CESAR generator, see
“Interaction With a Cesar Generator” and Chapter 4, “Communication Interfaces
and Controls”.
• If the VarioMatch match network is connected to a set of five switches, see
Chapter 4, “Communication Interfaces and Controls”.
57020080-00D
Installation, Setup, and Operation
5-15
Advanced Energy®
Interaction With a Cesar Generator
You can control the VarioMatch match network in either manual mode or automatic
mode using a Cesar generator. When the VarioMatch match network is connected to a
Cesar generator via the MATCHING interface, you can control the VarioMatch
match network using either of the following two methods:
• Front Panel Display
The front panel display on the CESAR generator will show the position of the
capacitors, the mode (automatic or manual), the measured DC bias, and whether
the match network is active or not. It also allows you to change the mode
(automatic or manual) via buttons and to move the capacitors manually. The
information of the match network is shown on the Cesar front panel as soon as
the Cesar generator detects a connection to the match INTERFACE.
• Host Port
You can use the Cesar generator Host Port to control the VarioMatch match
network.
See the Cesar generator user manual for additional information.
Importance of Igniting Plasma
A matching optimization can be done only when the load is consuming energy,
meaning that there exists a resistive part to which all the energy is transferred. Purely
reactive components do not dissipate any energy.
When the load is plasma, this means you need to ignite the plasma. After the plasma
ignites, it is then possible to optimize the components in the match network for the
best tuning.
If, while experimenting with the match, the plasma does not ignite, the match
components cannot be optimized because there is no load in which to dissipate the RF
energy.
SET UP THE MATCH FOR YOUR LOAD
See Chapter 7, “VarioMatch Match Network Tuning Ranges” to check the tune range
for your VarioMatch match network.
5-16
Installation, Setup, and Operation
57020080-00D
AE VarioMatch™ Match Network, VM 1000/1500 Platform
Maintenance personnel must receive proper training before installing,
troubleshooting, or maintaining high-energy electrical equipment.
Potentially lethal voltages could cause death, serious personal injury, or
damage to the equipment. Ensure that all appropriate safety precautions
are taken.
RISK OF DEATH OR BODILY INJURY. Disconnect and lockout/tagout all
sources of input power before working on this unit or anything
connected to it.
Leaving on the RF power after turning off the input power to the match
network may damage the unit.
The ability of the VarioMatch match network to properly match your load will be
determined by two major match components:
• The variable capacitors
The variable capacitors are determined by the VarioMatch match network model
you purchased. The capacitors use motors to match the load.
• The coils (and the number of turns on the coils)
The number of turns on the coil is determined by the part number of the
VarioMatch match network model you purchased (see “Physical Specifications
Table” on page 3-7). The following sections describe the two coils and describe
how to select the taps for the coils:
4 “Selecting the Correct Tap Setting for the Tune Coil” on page 5-18
4 “Selecting the Correct Tap Setting for the Load Coil” on page 5-22
If you purchased an ICP unit:
• The ICP units have no main (tune) coil. Some units have a shunt (load) coil. See
“Physical Specifications Table” on page 3-7 for a listing of tune and load coil
specifications by part number.
57020080-00D
Installation, Setup, and Operation
5-17
Advanced Energy®
• You can configure some ICP units to use either the Gamma or the L match
topology. See “Changing the Configuration Between the L match and the Gamma
Topology” on page 5-27.
If you purchased a unit with 2 MHz frequency, you can change additional fixed
capacitors. See “Changing the Fixed Capacitor Setting (Model 0415 2 MHz Units
Only)” on page 5-36.
Selecting the Correct Tap Setting for the Tune Coil
The VarioMatch match network is equipped with a tune coil. This design enables the
taps to be effective for large RF currents. The transformation step is determined
mostly by the tune coil, represented by the tune capacitor in series with the coil. To
compensate and correct the phase for optimum matching quality, a load capacitor and
coil are also used. Both tuning elements interact somewhat, and are used together to
obtain the best possible match.
Depending on your unit, you may be able to set taps to match your load (see “Setting
Tune Coil Taps” on page 5-18). See “Physical Specifications Table” on page 3-7 for
your unit’s internal coil specifications.
SETTING TUNE COIL TAPS
The number of turns and available taps enables the VarioMatch match network to be
flexible enough to match nearly all load systems. The number of turns and available
taps varies based on the model you purchased (see “Physical Specifications” on
page 3-1).
The following guidelines will help to determine the optimum component values for a
particular load system:
• The match network should be configured to allow matching with the tune
capacitor set between 20 and 80% of its capacitance range to avoid extreme RF
stress. Always try to achieve a tuning position with both capacitors in the range of
20 to 80%.
• Increase the number of active coils if the tune capacitor is at the upper end of its
tuning range (greater than 80%).
• Decrease the number of active coils if the tune capacitor is at the lower end of its
tuning range (less than 20%).
• Large and highly capacitive loads require, for example, 4 to 6 turns on a coil with
14 turns.
• Medium capacity loads require, for example 6 to 10 turns on a coil with 14 turns.
• Small area loads (for example, etching diodes), for example 10 to 14 turns on a
coil with 14 turns.
5-18
Installation, Setup, and Operation
57020080-00D
AE VarioMatch™ Match Network, VM 1000/1500 Platform
For specific recommendations, contact Global Services for a technical bulletin for
your model.
To Change the Tap Settings on the Tune Coil:
1. Turn off RF from the generator.
2. Disconnect AC MAINS.
3. Disconnect RF in (from the RF-GENERATOR).
4. Disconnect RF out (to PLASMA/LOAD).
5. Remove the top cover, being careful to not damage the plug leading to the fan:
a. Remove the large top cover (with the fan) from the VarioMatch match network
by unscrewing the twelve screws on the cover. Leave the small top and side
covers in place.
b. Disconnect the plug leading from top lid to the fan.
6. Using a 7 mm wrench, unscrew the tap from its current position.
Tabs are silver soldered to the coil. The metal interconnect ribbon is attached to
the tab of the selected turn using a threaded bar and two bolts.
7. Move the tap setting to the desired turn on the coil (for examples, see Figure 5-9
through Figure 5-11). It is possible that you will also need to move the other end
of the ribbon to a new position so the ribbon will reach the chosen tap.
57020080-00D
Installation, Setup, and Operation
5-19
Advanced Energy®
8. Using the wrench, screw the tap to the selected turn on the coil.
Tune coil, tap position for small capacitive load
PLASMA/LOAD
Figure 5-9. Tapping of the tune coil for small capacitive load
5-20
Installation, Setup, and Operation
57020080-00D
AE VarioMatch™ Match Network, VM 1000/1500 Platform
Tune coil, tap position for medium capacitive load
PLASMA/LOAD
Figure 5-10. Tapping of the tune coil for medium capacitive load
57020080-00D
Installation, Setup, and Operation
5-21
Advanced Energy®
Tune coil, tap position for high capacitive load
PLASMA/LOAD
Figure 5-11. Tapping of the tune coil for high capacitive load
9. Reattach the top cover:
a. Plug in the fan
b. Attach the top cover using the twelve screws you removed in step 2.
10. Reconnect PLASMA/LOAD, RF-GENERATOR, and AC MAINS as
described in “Installing the VarioMatch Match Network” on page 5-4.
Selecting the Correct Tap Setting for the Load Coil
See “Physical Specifications Table” on page 3-7 for your unit’s internal coil
specifications.
The other device in the match network that affects the range of the match capability is
the load capacitor. Depending upon the load resistance (the real part of the load
impedance) this load capacitor needs to be more or less capacitive. A small tapped coil
at the input of the VarioMatch match network enables the effective value of the load
capacitor to be increased to several times its actual value.
5-22
Installation, Setup, and Operation
57020080-00D
AE VarioMatch™ Match Network, VM 1000/1500 Platform
By changing the tap position on this coil, you can adjust the match range for the size
of the load. The more coils that are active between the tap and the load capacitor, the
higher the resulting capacitance. The ideal position of the tap on the load coil depends
on the real part of the load impedance. For example, lower load impedance requires
more capacitance of load capacitor, which requires more active coils.
The number of turns on the load coil depends on your unit. For example, if you unit
contains a load coil with 3 tapped positions:
• Use the position closest to the load capacitor for small loads.
• Use the center position for medium size loads.
• Use the position furthest from the load capacitor for large loads.
For specific recommendations, contact Global Services.
To Change the Tap Settings on the Load Coil:
1. Turn off RF from the generator.
2. Disconnect AC MAINS.
3. Disconnect RF in (from the RF-GENERATOR).
4. Disconnect RF out (PLASMA/LOAD).
5. Remove the top cover, being careful to not damage the plug leading to the fan:
a. Remove the large top cover (with the fan) from the VarioMatch match network
by unscrewing the twelve screws on the cover. Leave the small top and side
covers in place.
b. Disconnect the plug leading from top lid to the fan.
6. Using a flathead screwdriver, unscrew the bolt from the current tap setting.
7. Move the lugged tap wire to the desired coil and screw the bolt into the tab (for
examples, see Figure 5-12, Figure 5-13, Figure 5-14).
57020080-00D
Installation, Setup, and Operation
5-23
Advanced Energy®
RF GENERATOR
connection
Load capacitor
Load coil, tap position
A for small loads
Figure 5-12. Tap position for small loads
5-24
Installation, Setup, and Operation
57020080-00D
AE VarioMatch™ Match Network, VM 1000/1500 Platform
RF GENERATOR
connection
Load capacitor
Load coil, tap position
B for medium loads
Figure 5-13. Tap position for medium loads
57020080-00D
Installation, Setup, and Operation
5-25
Advanced Energy®
RF GENERATOR
connection
Load capacitor
Load coil, tap position
C for large loads
Figure 5-14. Tap position for large loads
8. Reattach the top cover:
a. Plug in the fan
b. Attach the top cover using the twelve screws you removed in step 2.
9. Reconnect PLASMA/LOAD, RF-GENERATOR, and AC MAINS as
described in “Installing the VarioMatch Match Network” on page 5-4.
5-26
Installation, Setup, and Operation
57020080-00D
AE VarioMatch™ Match Network, VM 1000/1500 Platform
Changing the Configuration Between the L match and the
Gamma Topology
Maintenance personnel must receive proper training before installing,
troubleshooting, or maintaining high-energy electrical equipment.
Potentially lethal voltages could cause death, serious personal injury, or
damage to the equipment. Ensure that all appropriate safety precautions
are taken.
RISK OF DEATH OR BODILY INJURY. Disconnect and lockout/tagout all
sources of input power before working on this unit or anything
connected to it.
Leaving on the RF power after turning off the input power to the match
network may damage the unit.
Some ICP units can be operated using either the L match or the Gamma topology,
which allow two different load impedance ranges. By changing the capacitor’s
interconnection, you can change the topology of the VarioMatch match network. See
Chapter 3, “Specifications”for a list of part numbers that support this. See
“Topologies” on page 2-4 for information about the L Match and Gamma topologies.
If your IPC VarioMatch match network supports changing between L Match and
Gamma topologies:
• The default topology, as shipped from the factory, is Gamma (Configuration A).
• Use the instructions in this section to change from Gamma to L match topology.
• The load impedance ranges for each configuration are shown in the Smith® charts
in the Technical Bulletin for your unit. Contact Global Services to obtain the
correct Technical Bulletin.
To change topology, perform the tasks documented in the following sections:
• “Tools Required to Change the Interconnection” on page 5-28
• “Disconnecting Power and RF, and Removing the Cover” on page 5-28
57020080-00D
Installation, Setup, and Operation
5-27
Advanced Energy®
• “Changing the Interconnector” on page 5-29
• “Changing the Jumpers” on page 5-32
• “Reattaching the Top Cover and Reconnecting Power and RF” on page 5-35
• Also see “Interaction With a Cesar Generator” on page 5-16 for information on
using a CESAR generator to control the VarioMatch match network
TOOLS REQUIRED TO CHANGE THE INTERCONNECTION
AE supplies the following equipment:
• Interconnector
• Bridge, to hold the water tubing in place once you remove the original
interconnector
You will need to supply the following additional equipment:
• 7 mm wrench
• 12 mm wrench
• 14 mm wrench
DISCONNECTING POWER AND RF, AND REMOVING THE
COVER
To Disconnect Power and RF and to Remove the Cover:
1. Turn off RF from the generator.
2. Disconnect AC MAINS.
3. Disconnect RF in (RF-GENERATOR).
4. Disconnect RF out (PLASMA/LOAD).
5. Remove the top cover, being careful to not damage the plug leading to the fan:
a. Remove the large top cover (with the fan) from the VarioMatch match network
by unscrewing the twelve screws on the cover. Leave the small top and side
covers in place.
b. Disconnect the plug leading from top lid to the fan.
5-28
Installation, Setup, and Operation
57020080-00D
AE VarioMatch™ Match Network, VM 1000/1500 Platform
CHANGING THE INTERCONNECTOR
To Change the Interconnector:
1. Locate the alternate interconnector and bridge. These two pieces were attached to
the unit when shipped from the factory.
Interconnector
Bridge
Figure 5-15. Alternate interconnector and bridge
2. Disconnect water and drain the unit. See “Disconnecting Water and Draining the
VarioMatch Match Network” on page 5-38.
3. Using a 12 mm wrench, disconnect the compression nut on the copper tube, so
that the tube is loose.
4. Using the 14 mm wrench, unscrew the nut on the copper tube side.
5. Pull the brass tube through the hole. The plastic tube will stay connected.
57020080-00D
Installation, Setup, and Operation
5-29
Advanced Energy®
6. Using a 7 mm wrench, unscrew the interconnection from it’s current position.
Step 4
water line
Step 6
interconnector
Step 3
Figure 5-16. Disconnect the original interconnection
7. Attach the bridge by screwing it onto the bracket with two 7 mm bolts.
8. Feed the brass water tube through the hole in the bridge.
9. Replace the nut from the copper tube.
10. Replace the compression nut from the copper tube.
11. Attach the new interconnector. The new interconnector attaches:
a. On the non-water-supported side
b. On the same screw hole as the feed line from the phase magnitude detector.
In both places, the interconnection is placed on the inner side of the screw hole.
You need to first disconnect the screw holding the feed line, then reattach.
5-30
Installation, Setup, and Operation
57020080-00D
AE VarioMatch™ Match Network, VM 1000/1500 Platform
Step 8
Step 9
Step 11.a
Step 10
New
interconnector
Step 11.b
bridge
Step 7
Figure 5-17. Attach the new interconnector
57020080-00D
Installation, Setup, and Operation
5-31
Advanced Energy®
CHANGING THE JUMPERS
To Change the Jumpers:
1. Remove the front panel by unscrewing the eleven screws as shown, then remove
the front panel.
Screws
Figure 5-18. Remove the front panel
5-32
Installation, Setup, and Operation
57020080-00D
AE VarioMatch™ Match Network, VM 1000/1500 Platform
2. Carefully remove the three solder joints on the left box as shown, and remove the
top of the box.
Solder locations
Figure 5-19. Remove solder joints
57020080-00D
Installation, Setup, and Operation
5-33
Advanced Energy®
3. Move the jumpers as needed for the desired configuration (see Figure 5-20 on
page 5-34 and Figure 5-21 on page 5-35).
Two jumpers on the left two posts for L-topology
Figure 5-20. Jumper setting for L match topology
5-34
Installation, Setup, and Operation
57020080-00D
AE VarioMatch™ Match Network, VM 1000/1500 Platform
Two jumpers on the right two posts for Gamma-topology
Figure 5-21. Jumper setting for Gamma topology
4. Replace the top cover of the metal box, carefully resoldering in place.
5. Replace the front panel by replacing the eleven screws.
REATTACHING THE TOP COVER AND RECONNECTING
POWER AND RF
To Reattach the Top Cover and Reconnect Power and RF:
1. Reattach the top cover:
a. Plug in the fan
b. Attach the top cover using the twelve screws you removed earlier.
2. Reconnect PLASMA/LOAD, RF-GENERATOR, and AC MAINS as
described in “Installing the VarioMatch Match Network” on page 5-4.
57020080-00D
Installation, Setup, and Operation
5-35
Advanced Energy®
Changing the Fixed Capacitor Setting (Model 0415 2 MHz
Units Only)
The VarioMatch match network Model 0415 2 MHz unit is equipped with a circuit
board containing additional fixed capacitors You can switch these capacitors in
parallel to the load capacitor to increase the capacitance.
To Change the Capacitor Settings:
1. Turn off RF from the generator.
2. Disconnect AC MAINS.
3. Disconnect RF in (from the RF-GENERATOR).
4. Disconnect RF out (PLASMA/LOAD).
5. Remove the top cover, being careful to not damage the plug leading to the fan:
a. Remove the large top cover (with the fan) from the VarioMatch match network
by unscrewing the twelve screws on the cover. Leave the small top and side
covers in place.
b. Disconnect the plug leading from top lid to the fan.
6. Using an appropriate wrench, open or close the jumper bridge to set the desired
capacitance. This circuit board is located in the RF-section of the VarioMatch
match network on the inner side of the cabinet close to CLOAD. The following
5-36
Installation, Setup, and Operation
57020080-00D
AE VarioMatch™ Match Network, VM 1000/1500 Platform
table shows the additional capacitance as a consequence of the jumper settings.
Figure 5-22 shows the location of the circuit board and jumpers.
Table 5-3. Capacitance due to jumper settings on circuit board
Bridge
Capacitance
J1
J2
J3
–
–
–
0 pF
–
X
–
680 pF
–
–
X
1360 pF
–
X
X
2040 pF
X
–
X
2720 pF
X
X
X
3400 pF
J1
J2
J3
Figure 5-22. Location of capacitor bank with three jumpers
7. Reattach the top cover:
a. Plug in the fan
57020080-00D
Installation, Setup, and Operation
5-37
Advanced Energy®
b. Attach the top cover using the twelve screws you removed in step 2.
8. Reconnect PLASMA/LOAD, RF-GENERATOR, and AC MAINS as
described in “Installing the VarioMatch Match Network” on page 5-4
DISCONNECTING WATER AND DRAINING
THE VARIOMATCH MATCH NETWORK
Use this procedure when you need to purge the VarioMatch match network of cooling
water for maintenance, moving, or storing. When moving or storing the unit, use
special care to ensure that the cooling system is properly drained. If water freezes in
the cooling system during storage, it could damage the unit.
Be sure to purge all water from the generator before shipping. Failure to
do so can result in damage to the unit during shipping.
Note: You must evacuate the water from both the rack and from individual CESAR
generators in the rack.
The following steps are listed in the order they are to be performed when preparing the
unit for moving or storage.
Note: These recommended steps are not meant to supersede your organization’s
safety regulations. Observe proper electrical safety precautions and observe
your local safety regulations.
To Prepare the Unit for Moving or Storage:
1. Turn the power supply off.
Lockout/tagout all sources of input power to the VarioMatch match network.
RISK OF DEATH OR BODILY INJURY. Disconnect and lockout/tagout all
sources of input power before working on this unit or anything
connected to it.
2. Disconnect the input power cable.
5-38
Installation, Setup, and Operation
57020080-00D
AE VarioMatch™ Match Network, VM 1000/1500 Platform
For information to assist you in disconnecting the input power cable, see
“Connecting AC Input (Mains) Power” on page 5-11.
3. Disconnect the RF input connector.
For information to assist you in this procedure, see “Connecting RF Input From a
Generator” on page 5-8.
4. Disconnect the PLASMA/LOAD connector.
For information to assist you in this procedure, see “Connecting to the Load” on
page 5-9.
5. Disconnect the cooling hoses.
For information to assist you in this procedure see “Connecting the Cooling
Water” on page 5-7.
6. Drain the water.
Blow the lines out with compressed air. Clean dry air, CDA, is preferred.
Once you complete the above process, the VarioMatch match network is ready for
moving, storing, or other tasks requiring that the unit is purged of water.
57020080-00D
Installation, Setup, and Operation
5-39
Advanced Energy®
5-40
Installation, Setup, and Operation
57020080-00D
AE VarioMatch™ Match Network, VM 1000/1500 Platform
Chapter
6
Troubleshooting and Global
Services
This chapter contains basic troubleshooting information, as well as procedures for
returning a unit for repair.
TROUBLESHOOTING OVERVIEW
Before calling AE Global Services, consult the following sections and perform
recommended checks and troubleshooting procedures. If you are still unable to
resolve faults or warnings and resume normal operation after following these checks
and procedures, contact AE Global Services.
• “Troubleshooting Checklists” on page 6-2: Use these checklists to begin
troubleshooting your unit at the system level.
• “Troubleshooting Unit Output” on page 6-3: Use this advanced troubleshooting
section to evaluate unit output.
• “Contacting AE Global Services” on page 6-4: Use this section to look up phone
numbers and addresses for AE support centers around the world. You can also
find warranty and return information in this section.
57020080-00D
Troubleshooting and Global Services
6-1
Advanced Energy®
TROUBLESHOOTING CHECKLISTS
Use troubleshooting checklists to begin troubleshooting your unit.
RISK OF DEATH OR BODILY INJURY. Disconnect all sources of input
power before working on this unit or anything connected to it.
Operating and maintenance personnel must have the correct training
before setting up, maintaining, or troubleshooting high-energy electrical
equipment. Potentially lethal voltages may cause serious personal injury
or damage to equipment. Ensure that proper safety precautions are
taken.
Checks With the Power Off
With Power Off, Complete the Following Checks:
1. Ensure the power to the unit is off.
2. Check for visible damage to the unit, cables, and connectors.
3. Ensure all unit connectors are installed correctly and are fastened tightly.
4. Ensure ground connections are adequate and secure.
Checks With the AC Power On
After you have performed checks with the unit power off, follow this checklist.
With Power On, Complete the Following Checks:
1. Follow the procedures for first-time operation. See “First-Time Operation” on
page 5-12.
2. Ensure that the proper power is being supplied to the unit’s input power
connection. See “Electrical Specifications” on page 3-10 for requirements.
6-2
Troubleshooting and Global Services
57020080-00D
AE VarioMatch™ Match Network, VM 1000/1500 Platform
TROUBLESHOOTING UNIT OUTPUT
Use extreme caution as this section involves troubleshooting the output of the unit.
RISK OF DEATH OR BODILY INJURY. Disconnect all sources of input
power before working on this unit or anything connected to it.
Operating and maintenance personnel must have the correct training
before setting up, maintaining, or troubleshooting high-energy electrical
equipment. Potentially lethal voltages may cause serious personal injury
or damage to equipment. Ensure that proper safety precautions are
taken.
External Load Checks - Open/Short RF Output Path
There are three basic components that could impede the RF path: the VarioMatch
match network output connector, the output cable or lead, or the chamber. Follow the
steps below.
1. Disconnect AC MAINS from both the generator and the VarioMatch match
network to ensure that there is no RF power at the output of the unit.
2. For the unit output connector:
a. Remove the output cable and visually inspect the output connector for signs of
arcing or heat stress.
b. Verify an open is measured between the center conductor and outer shield.
c. Make sure the output connector is mounted firmly to the VarioMatch match
network chassis.
3. For the output cable:
a. Visually make sure there is a good connection between the output cable and
end connectors on both sides of the output cable.
b. Swap cables if possible and retry operating the VarioMatch match network.
4. For the tuner and the chamber:
4 Swap the VarioMatch match network with another known good unit.
Also consider these questions:
57020080-00D
Troubleshooting and Global Services
6-3
Advanced Energy®
1. Are you currently setting up a new chamber system?
2. Has any work been done recently on the chamber?
3. Have there been any changes in your process recently?
If you answered yes to any one of the previous questions, the unit is probably working
properly and it may be reacting to an external load condition. You may want to consult
your process engineer or system manufacturer to troubleshoot chamber related issues.
CONTACTING AE GLOBAL SERVICES
Please contact AE Global Services if you have questions or problems that cannot be
resolved by working through the provided troubleshooting procedures.
When you call Global Services, make sure to have the unit serial number and part
number. These numbers are available on unit labels.
Advanced Energy World Headquarters, 24 x 7 Technical
Support
Table 6-1. AE Global Services contact information
Office
AE, World Headquarters
1625 Sharp Point Drive
Fort Collins, CO 80525 USA
Contact
Phone (24 hrs/day, 7 days/week):
800.446.9167 or
+ 1.970.221.0108
Fax (M–F, 7:00 am – 5:30 pm MST):
+ 1.970.407.5981
Email: [email protected]
We will respond to email by the next
business day.
For Aera flow product support, call
800.MFC.AERA (800.632.2372)
For Sekidenko thermal product support,
contact [email protected]
If you would prefer to contact a local or regional sales or service office, visit the
Advanced Energy web site for current contact information:
• http://www.advanced-energy.com and click on Sales & Support
6-4
Troubleshooting and Global Services
57020080-00D
AE VarioMatch™ Match Network, VM 1000/1500 Platform
RETURNING UNITS FOR REPAIR
Before returning any product for repair and/or adjustment, first follow all
troubleshooting procedures. If, after following these procedures, you still have a
problem, or if the procedure instructs you to, contact AE Global Services and discuss
the problem with a representative. Be prepared to give them the model number and
serial number of the unit as well as the reason for the proposed return. This
consultation call will allow Global Services to determine if the unit must actually be
returned for the problem to be corrected. Such technical consultation is always
available at no charge.
57020080-00D
Troubleshooting and Global Services
6-5
Advanced Energy®
6-6
Troubleshooting and Global Services
57020080-00D
AE VarioMatch™ Match Network, VM 1000/1500 Platform
Chapter
7
VarioMatch Match Network
Tuning Ranges
This chapter shows the VarioMatch match network’s tuning ranges, using Smith
charts. The figure captions include the number of turns and tap settings for the Smith
chart shown in the illustration. To find the number of turns and tap settings of the load
and tune coils of your unit, see “Physical Specifications Table” on page 3-7.
14-TURN TUNE (SERIES) COIL
Schematic
The tune (series) coil has taps at 4, 6, 8, 10, 12, and 14 turns. These are labeled 1
through 6 in the schematic. The load (shunt) coil has 3 turns, labeled A, B, and C.
These labels are used in the Smith charts.
Figure 7-1. Models 300, 1000, and 1500 coil and inductor schematic; 14 turn
tune coil
57020080-00D
VarioMatch Match Network Tuning Ranges
7-1
Advanced Energy®
Smith Charts
Table 7-1. Location of Smith chart illustrations for 14-turn tune coil
Tune Coil
Tap Setting
7-2
Load Coil Tap Setting
A
B
C
1
Figure 7-2
Figure 7-8
Figure 7-14
2
Figure 7-3
Figure 7-9
Figure 7-15
3
Figure 7-4
Figure 7-10
Figure 7-16
4
Figure 7-5
Figure 7-11
Figure 7-17
5
Figure 7-6
Figure 7-12
Figure 7-18
6
Figure 7-7
Figure 7-13
Figure 7-19
VarioMatch Match Network Tuning Ranges
57020080-00D
AE VarioMatch™ Match Network, VM 1000/1500 Platform
Figure 7-2. Tune coil, 14 turns: tap 1; Load coil, 3 turns: tap A
57020080-00D
VarioMatch Match Network Tuning Ranges
7-3
Advanced Energy®
Figure 7-3. Tune coil, 14 turns: tap 2; Load coil, 3 turns: tap A
7-4
VarioMatch Match Network Tuning Ranges
57020080-00D
AE VarioMatch™ Match Network, VM 1000/1500 Platform
Figure 7-4. Tune coil, 14 turns: tap 3; Load coil, 3 turns: tap A
57020080-00D
VarioMatch Match Network Tuning Ranges
7-5
Advanced Energy®
Figure 7-5. Tune coil, 14 turns: tap 4; Load coil, 3 turns: tap A
7-6
VarioMatch Match Network Tuning Ranges
57020080-00D
AE VarioMatch™ Match Network, VM 1000/1500 Platform
Figure 7-6. Tune coil, 14 turns: tap 5; Load coil, 3 turns: tap A
57020080-00D
VarioMatch Match Network Tuning Ranges
7-7
Advanced Energy®
Figure 7-7. Tune coil, 14 turns: tap 6; Load coil, 3 turns: tap A
7-8
VarioMatch Match Network Tuning Ranges
57020080-00D
AE VarioMatch™ Match Network, VM 1000/1500 Platform
Figure 7-8. Tune coil, 14 turns: tap 1; Load coil, 3 turns: tap B
57020080-00D
VarioMatch Match Network Tuning Ranges
7-9
Advanced Energy®
Figure 7-9. Tune coil, 14 turns: tap 2; Load coil, 3 turns: tap B
7-10
VarioMatch Match Network Tuning Ranges
57020080-00D
AE VarioMatch™ Match Network, VM 1000/1500 Platform
Figure 7-10. Tune coil, 14 turns: tap 3; Load coil, 3 turns: tap B
57020080-00D
VarioMatch Match Network Tuning Ranges
7-11
Advanced Energy®
Figure 7-11. Tune coil, 14 turns: tap 4; Load coil, 3 turns: tap B
7-12
VarioMatch Match Network Tuning Ranges
57020080-00D
AE VarioMatch™ Match Network, VM 1000/1500 Platform
Figure 7-12. Tune coil, 14 turns: tap 5; Load coil, 3 turns: tap B
57020080-00D
VarioMatch Match Network Tuning Ranges
7-13
Advanced Energy®
Figure 7-13. Tune coil, 14 turns: tap 6; Load coil, 3 turns: tap B
7-14
VarioMatch Match Network Tuning Ranges
57020080-00D
AE VarioMatch™ Match Network, VM 1000/1500 Platform
Figure 7-14. Tune coil, 14 turns: tap 1; Load coil, 3 turns: tap C
57020080-00D
VarioMatch Match Network Tuning Ranges
7-15
Advanced Energy®
Figure 7-15. Tune coil, 14 turns: tap 2; Load coil, 3 turns: tap C
7-16
VarioMatch Match Network Tuning Ranges
57020080-00D
AE VarioMatch™ Match Network, VM 1000/1500 Platform
Figure 7-16. Tune coil, 14 turns: tap 3; Load coil, 3 turns: tap C
57020080-00D
VarioMatch Match Network Tuning Ranges
7-17
Advanced Energy®
Figure 7-17. Tune coil, 14 turns: tap 4; Load coil, 3 turns: tap C
7-18
VarioMatch Match Network Tuning Ranges
57020080-00D
AE VarioMatch™ Match Network, VM 1000/1500 Platform
Figure 7-18. Tune coil, 14 turns: tap 5; Load coil, 3 turns: tap C
57020080-00D
VarioMatch Match Network Tuning Ranges
7-19
Advanced Energy®
Figure 7-19. Tune coil, 14 turns: tap 6; Load coil, 3 turns: tap C
7-20
VarioMatch Match Network Tuning Ranges
57020080-00D
AE VarioMatch™ Match Network, VM 1000/1500 Platform
6-TURN TUNE (SERIES) COIL
Schematic
Figure 7-20. Models 1000 and 1500 coil and inductor schematic, 6 turn coil
Smith Charts
Table 7-2. Location of Smith chart illustrations for 6-turn tune coil
Tune Coil
Tap Setting
57020080-00D
VarioMatch Frequency
27 MHz
40 MHz
1
Figure 7-21
Figure 7-27
2
Figure 7-22
Figure 7-28
3
Figure 7-23
Figure 7-29
4
Figure 7-24
Figure 7-30
5
Figure 7-25
Figure 7-31
6
Figure 7-26
Figure 7-32
VarioMatch Match Network Tuning Ranges
7-21
Advanced Energy®
27 MHZ UNITS
Figure 7-21. 27 MHz; Tune coil, 6 turns: tap 1;
7-22
VarioMatch Match Network Tuning Ranges
57020080-00D
AE VarioMatch™ Match Network, VM 1000/1500 Platform
Figure 7-22. 27 MHz; Tune coil, 6 turns: tap 2
57020080-00D
VarioMatch Match Network Tuning Ranges
7-23
Advanced Energy®
Figure 7-23. 27 MHz; Tune coil, 6 turns: tap 3
7-24
VarioMatch Match Network Tuning Ranges
57020080-00D
AE VarioMatch™ Match Network, VM 1000/1500 Platform
Figure 7-24. 27 MHz; Tune coil, 6 turns: tap 4
57020080-00D
VarioMatch Match Network Tuning Ranges
7-25
Advanced Energy®
Figure 7-25. 27 MHz; Tune coil, 6 turns: tap 5
7-26
VarioMatch Match Network Tuning Ranges
57020080-00D
AE VarioMatch™ Match Network, VM 1000/1500 Platform
Figure 7-26. 27 MHz; Tune coil, 6 turns: tap 6
57020080-00D
VarioMatch Match Network Tuning Ranges
7-27
Advanced Energy®
40 MHZ UNITS
Figure 7-27. 40 MHz; Tune coil, 6 turns: tap 1
7-28
VarioMatch Match Network Tuning Ranges
57020080-00D
AE VarioMatch™ Match Network, VM 1000/1500 Platform
Figure 7-28. 40 MHz; Tune coil, 6 turns: tap 2
57020080-00D
VarioMatch Match Network Tuning Ranges
7-29
Advanced Energy®
Figure 7-29. 40 MHz; Tune coil, 6 turns: tap 3
7-30
VarioMatch Match Network Tuning Ranges
57020080-00D
AE VarioMatch™ Match Network, VM 1000/1500 Platform
Figure 7-30. 40 MHz; Tune coil, 6 turns: tap 4
57020080-00D
VarioMatch Match Network Tuning Ranges
7-31
Advanced Energy®
Figure 7-31. 40 MHz; Tune coil, 6 turns: tap 5
7-32
VarioMatch Match Network Tuning Ranges
57020080-00D
AE VarioMatch™ Match Network, VM 1000/1500 Platform
Figure 7-32. 40 MHz; Tune coil, 6 turns: tap 6;
VM 0415
Schematic
The tune (series) coil has taps at taps at 10, 13, 16, 19, 22, and 25 turns. These are
labeled 1 through 6 in the schematic. The load (shunt) coil has 4 turns with 5 taps,
labeled A, B, C, D, and E. These labels are used in the Smith charts.
57020080-00D
VarioMatch Match Network Tuning Ranges
7-33
Advanced Energy®
Figure 7-33. VM 0415 coil and inductor schematic
Smith Charts
2 MHZ UNITS
The Smith charts for the 2 MHz VM 4015 show the tuning range with tune coil tap set
at 6, load coil tap set at E. The tune range varies by capacitance setting.
Table 7-3. Location of Smith chart illustrations for 2 MHz VM 0415
Capacitance
Setting
7-34
Smith
Chart
0 pF
Figure 7-34
680 pF
Figure 7-35
1360 pF
Figure 7-36
2040 pF
Figure 7-37
2720 pF
Figure 7-38
3400 pF
Figure 7-39
VarioMatch Match Network Tuning Ranges
57020080-00D
AE VarioMatch™ Match Network, VM 1000/1500 Platform
Figure 7-34. 2 MHz; Tune coil, 6; Load coil, E; 0 pF
57020080-00D
VarioMatch Match Network Tuning Ranges
7-35
Advanced Energy®
Figure 7-35. 2 MHz; Tune coil, 6; Load coil, E; 680 pF
7-36
VarioMatch Match Network Tuning Ranges
57020080-00D
AE VarioMatch™ Match Network, VM 1000/1500 Platform
Figure 7-36. 2 MHz; Tune coil, 6; Load coil, E; 1360 pF
57020080-00D
VarioMatch Match Network Tuning Ranges
7-37
Advanced Energy®
Figure 7-37. 2 MHz; Tune coil, 6; Load coil, E; 2040 pF
7-38
VarioMatch Match Network Tuning Ranges
57020080-00D
AE VarioMatch™ Match Network, VM 1000/1500 Platform
Figure 7-38. 2 MHz; Tune coil, 6; Load coil, E; 2720 pF
57020080-00D
VarioMatch Match Network Tuning Ranges
7-39
Advanced Energy®
Figure 7-39. 2 MHz; Tune coil, 6; Load coil, E; 3400 pF
4 MHZ UNITS
The Smith charts for the 4 MHz VM 4015 show the tuning range at each tune and load
coil tap setting. AE does not recommend varying the additional capacitance setting.
Table 7-4. Location of Smith for 4 MHz VM 0415
Tune Coil
Tap Setting
7-40
Load Coil Tap Setting
A
B
C
D
E
1
Figure 7-40
Figure 7-46
Figure 7-52
Figure 7-58
Figure 7-64
2
Figure 7-41
Figure 7-47
Figure 7-53
Figure 7-59
Figure 7-65
VarioMatch Match Network Tuning Ranges
57020080-00D
AE VarioMatch™ Match Network, VM 1000/1500 Platform
Table 7-4. Location of Smith for 4 MHz VM 0415
Tune Coil
Tap Setting
Load Coil Tap Setting
A
B
C
D
E
3
Figure 7-42
Figure 7-48
Figure 7-54
Figure 7-60
Figure 7-66
4
Figure 7-43
Figure 7-49
Figure 7-55
Figure 7-61
Figure 7-67
5
Figure 7-44
Figure 7-50
Figure 7-56
Figure 7-62
Figure 7-68
6
Figure 7-45
Figure 7-51
Figure 7-57
Figure 7-63
Figure 7-69
Figure 7-40. 4 MHz; Tune coil, 25 turns: tap 1; Load coil, 4 turns: tap A
57020080-00D
VarioMatch Match Network Tuning Ranges
7-41
Advanced Energy®
Figure 7-41. 4 MHz; Tune coil, 25 turns: tap 2; Load coil, 4 turns: tap A
7-42
VarioMatch Match Network Tuning Ranges
57020080-00D
AE VarioMatch™ Match Network, VM 1000/1500 Platform
Figure 7-42. 4 MHz; Tune coil, 25 turns: tap 3; Load coil, 4 turns: tap A
57020080-00D
VarioMatch Match Network Tuning Ranges
7-43
Advanced Energy®
Figure 7-43. 4 MHz; Tune coil, 25 turns: tap 4; Load coil, 4 turns: tap A
7-44
VarioMatch Match Network Tuning Ranges
57020080-00D
AE VarioMatch™ Match Network, VM 1000/1500 Platform
Figure 7-44. 4 MHz; Tune coil, 25 turns: tap 5; Load coil, 4 turns: tap A
57020080-00D
VarioMatch Match Network Tuning Ranges
7-45
Advanced Energy®
Figure 7-45. 4 MHz; Tune coil, 25 turns: tap 6; Load coil, 4 turns: tap A
7-46
VarioMatch Match Network Tuning Ranges
57020080-00D
AE VarioMatch™ Match Network, VM 1000/1500 Platform
Figure 7-46. 4 MHz; Tune coil, 25 turns: tap 1; Load coil, 4 turns: tap B
57020080-00D
VarioMatch Match Network Tuning Ranges
7-47
Advanced Energy®
Figure 7-47. 4 MHz; Tune coil, 25 turns: tap 2; Load coil, 4 turns: tap B
7-48
VarioMatch Match Network Tuning Ranges
57020080-00D
AE VarioMatch™ Match Network, VM 1000/1500 Platform
Figure 7-48. 4 MHz; Tune coil, 25 turns: tap 3; Load coil, 4 turns: tap B
57020080-00D
VarioMatch Match Network Tuning Ranges
7-49
Advanced Energy®
Figure 7-49. 4 MHz; Tune coil, 25 turns: tap 4; Load coil, 4 turns: tap B
7-50
VarioMatch Match Network Tuning Ranges
57020080-00D
AE VarioMatch™ Match Network, VM 1000/1500 Platform
Figure 7-50. 4 MHz; Tune coil, 25 turns: tap 5; Load coil, 4 turns: tap B
57020080-00D
VarioMatch Match Network Tuning Ranges
7-51
Advanced Energy®
Figure 7-51. 4 MHz; Tune coil, 25 turns: tap 6; Load coil, 4 turns: tap B
7-52
VarioMatch Match Network Tuning Ranges
57020080-00D
AE VarioMatch™ Match Network, VM 1000/1500 Platform
Figure 7-52. 4 MHz; Tune coil, 25 turns: tap 1; Load coil, 4 turns: tap C
57020080-00D
VarioMatch Match Network Tuning Ranges
7-53
Advanced Energy®
Figure 7-53. 4 MHz; Tune coil, 25 turns: tap 2; Load coil, 4 turns: tap C
7-54
VarioMatch Match Network Tuning Ranges
57020080-00D
AE VarioMatch™ Match Network, VM 1000/1500 Platform
Figure 7-54. 4 MHz; Tune coil, 25 turns: tap 3; Load coil, 4 turns: tap C
57020080-00D
VarioMatch Match Network Tuning Ranges
7-55
Advanced Energy®
Figure 7-55. 4 MHz; Tune coil, 25 turns: tap 4; Load coil, 4 turns: tap C
7-56
VarioMatch Match Network Tuning Ranges
57020080-00D
AE VarioMatch™ Match Network, VM 1000/1500 Platform
Figure 7-56. 4 MHz; Tune coil, 25 turns: tap 5; Load coil, 4 turns: tap C
57020080-00D
VarioMatch Match Network Tuning Ranges
7-57
Advanced Energy®
Figure 7-57. 4 MHz; Tune coil, 25 turns: tap 6; Load coil, 4 turns: tap C
7-58
VarioMatch Match Network Tuning Ranges
57020080-00D
AE VarioMatch™ Match Network, VM 1000/1500 Platform
Figure 7-58. 4 MHz; Tune coil, 25 turns: tap 1; Load coil, 4 turns: tap D
57020080-00D
VarioMatch Match Network Tuning Ranges
7-59
Advanced Energy®
Figure 7-59. 4 MHz; Tune coil, 25 turns: tap 2; Load coil, 4 turns: tap D
7-60
VarioMatch Match Network Tuning Ranges
57020080-00D
AE VarioMatch™ Match Network, VM 1000/1500 Platform
Figure 7-60. 4 MHz; Tune coil, 25 turns: tap 3; Load coil, 4 turns: tap D
57020080-00D
VarioMatch Match Network Tuning Ranges
7-61
Advanced Energy®
Figure 7-61. 4 MHz; Tune coil, 25 turns: tap 4; Load coil, 4 turns: tap D
7-62
VarioMatch Match Network Tuning Ranges
57020080-00D
AE VarioMatch™ Match Network, VM 1000/1500 Platform
Figure 7-62. 4 MHz; Tune coil, 25 turns: tap 5; Load coil, 4 turns: tap D
57020080-00D
VarioMatch Match Network Tuning Ranges
7-63
Advanced Energy®
Figure 7-63. 4 MHz; Tune coil, 25 turns: tap 6; Load coil, 4 turns: tap D
7-64
VarioMatch Match Network Tuning Ranges
57020080-00D
AE VarioMatch™ Match Network, VM 1000/1500 Platform
Figure 7-64. 4 MHz; Tune coil, 25 turns: tap 1; Load coil, 4 turns: tap E
57020080-00D
VarioMatch Match Network Tuning Ranges
7-65
Advanced Energy®
Figure 7-65. 4 MHz; Tune coil, 25 turns: tap 2; Load coil, 4 turns: tap E
7-66
VarioMatch Match Network Tuning Ranges
57020080-00D
AE VarioMatch™ Match Network, VM 1000/1500 Platform
Figure 7-66. 4 MHz; Tune coil, 25 turns: tap 3; Load coil, 4 turns: tap E
57020080-00D
VarioMatch Match Network Tuning Ranges
7-67
Advanced Energy®
Figure 7-67. 4 MHz; Tune coil, 25 turns: tap 4; Load coil, 4 turns: tap E
7-68
VarioMatch Match Network Tuning Ranges
57020080-00D
AE VarioMatch™ Match Network, VM 1000/1500 Platform
Figure 7-68. 4 MHz; Tune coil, 25 turns: tap 5; Load coil, 4 turns: tap E
57020080-00D
VarioMatch Match Network Tuning Ranges
7-69
Advanced Energy®
Figure 7-69. 4 MHz; Tune coil, 25 turns: tap 6; Load coil, 4 turns: tap E
7-70
VarioMatch Match Network Tuning Ranges
57020080-00D
AE VarioMatch™ Match Network, VM 1000/1500 Platform
ICP
Schematics
Figure 7-70. ICP coil and inductor schematic, Gamma
Figure 7-71. ICP coil and inductor schematic, L match
57020080-00D
VarioMatch Match Network Tuning Ranges
7-71
Advanced Energy®
Smith Charts
Figure 7-72. VM 1500, Gamma
7-72
VarioMatch Match Network Tuning Ranges
57020080-00D
AE VarioMatch™ Match Network, VM 1000/1500 Platform
Figure 7-73. VM 1500, L match
57020080-00D
VarioMatch Match Network Tuning Ranges
7-73
Advanced Energy®
Figure 7-74. VM 4015, Gamma
7-74
VarioMatch Match Network Tuning Ranges
57020080-00D
AE VarioMatch™ Match Network, VM 1000/1500 Platform
DELTA MATCH
Schematic
Lin
(wire)
Cseries
Lout
RF OUT
RF IN
Cshunt
Figure 7-75. Delta match coil and inductor schematic
57020080-00D
VarioMatch Match Network Tuning Ranges
7-75
Advanced Energy®
Smith Chart
Figure 7-76. Tune coil, 2.5 turns
VM PN 69000082
Schematic and Smith charts are not available.
7-76
VarioMatch Match Network Tuning Ranges
57020080-00D
AE VarioMatch™ Match Network, VM 1000/1500 Platform
VM 700
Schematic
These units have one 10-turn tapped tune (series) coil and one 26.5-turn fixed coil.
The tapped coil has taps on every turn, labeled 1 through 10 in the schematic. The load
(shunt) coil has 3 turns, with taps labeled A, B, and C.
Figure 7-77. VM 700 coil and inductor schematic
Smith Chart
The Smith charts in this manual show the tuning only at tap A on the load coil.
Although the tuning differs for tap B and C, the range would not be apparent given the
resolution of the Smith charts in this manual.
Table 7-5. Location of Smith chart illustrations for VM 700
Tune Coil
Tap Setting
Load Coil
Tap Setting
A
57020080-00D
1
Figure 7-78
2
Figure 7-79
3
Figure 7-80
4
Figure 7-81
5
Figure 7-82
6
Figure 7-83
VarioMatch Match Network Tuning Ranges
7-77
Advanced Energy®
Table 7-5. Location of Smith chart illustrations for VM 700
Tune Coil
Tap Setting
Load Coil
Tap Setting
A
7
Figure 7-84
8
Figure 7-85
9
Figure 7-86
10
Figure 7-87
Figure 7-78. Tune coil, 10 turns: tap 1; Load coil, 3 turns: tap A
7-78
VarioMatch Match Network Tuning Ranges
57020080-00D
AE VarioMatch™ Match Network, VM 1000/1500 Platform
Figure 7-79. Tune coil, 10 turns: tap 2; Load coil, 3 turns: tap A
57020080-00D
VarioMatch Match Network Tuning Ranges
7-79
Advanced Energy®
Figure 7-80. Tune coil, 10 turns: tap 3; Load coil, 3 turns: tap A
7-80
VarioMatch Match Network Tuning Ranges
57020080-00D
AE VarioMatch™ Match Network, VM 1000/1500 Platform
Figure 7-81. Tune coil, 10 turns: tap 4; Load coil, 3 turns: tap A
57020080-00D
VarioMatch Match Network Tuning Ranges
7-81
Advanced Energy®
Figure 7-82. Tune coil, 10 turns: tap 5; Load coil, 3 turns: tap A
7-82
VarioMatch Match Network Tuning Ranges
57020080-00D
AE VarioMatch™ Match Network, VM 1000/1500 Platform
Figure 7-83. Tune coil, 10 turns: tap 6; Load coil, 3 turns: tap A
57020080-00D
VarioMatch Match Network Tuning Ranges
7-83
Advanced Energy®
Figure 7-84. Tune coil, 10 turns: tap 7; Load coil, 3 turns: tap A
7-84
VarioMatch Match Network Tuning Ranges
57020080-00D
AE VarioMatch™ Match Network, VM 1000/1500 Platform
Figure 7-85. Tune coil, 10 turns: tap 8; Load coil, 3 turns: tap A
57020080-00D
VarioMatch Match Network Tuning Ranges
7-85
Advanced Energy®
Figure 7-86. Tune coil, 10 turns: tap 9; Load coil, 3 turns: tap A
7-86
VarioMatch Match Network Tuning Ranges
57020080-00D
AE VarioMatch™ Match Network, VM 1000/1500 Platform
Figure 7-87. Tune coil, 10 turns: tap 10; Load coil, 3 turns: tap A
57020080-00D
VarioMatch Match Network Tuning Ranges
7-87
Advanced Energy®
7-88
VarioMatch Match Network Tuning Ranges
57020080-00D
AE VarioMatch™ Match Network, VM 1000/1500 Platform
Index
A
AC input 5-12
connecting 5-11
connector pin description 5-12
connector specifications 3-8
current specifications 3-11, 3-12, 3-13
frequency specifications 3-11, 3-12, 3-13
voltage specifications 3-11, 3-12, 3-13
air flow
requirements 5-2
specification 3-16
authorized returns 6-5
automatic mode
first-time operation 5-13
match INTERFACE 4-1
operation 5-14
automatic tuning mode
C
cables
see also connectors
guidelines 5-3
match INTERFACE 4-2
requirements 5-3
RF input 5-2
specifications 3-7
VarioMatch host port requirements 4-2
CE marking 1-3
certification 1-3
CESAR generator
connecting 4-1, 5-16
interacting 5-15
interaction 4-1, 5-15
clearance 3-7
climatic specifications 3-17
coil
load 2-4, 2-5, 3-10
specifications 3-8, 3-9, 3-10
tune 2-4, 2-5
compliance
directives and standards 1-4
unit 1-3
conditions of use 1-5
connecting
AC input 5-11
57020080-00D
CESAR generator 4-1
cooling water 5-7
ground 5-5
match INTERFACE 5-7
PLASMA/LOAD 5-9
RF input from generator 5-8
to CESAR generator 5-16
to the load 5-11
connectors
AC input 3-8, 5-11, 5-12
coolant 3-8
for strap connection 5-2
INTERFACE 3-7, 4-1
INTERFACE, using switches 4-7
PLASMA/LOAD 3-8, 5-2, 5-9
RF input 5-8
RF-GENERATOR 3-7
specifications 3-7
cooling
requirements 5-2
specifications 3-14
current
AC input line specifications 3-11, 3-12,
3-13
customer support
contacting 6-4
D
DC selfbias monitor voltage 3-12, 3-13, 3-14
description, general 2-1
dimensions 3-7
directives 1-4
E
electrical specifications 3-10
electromagnetic compatability (EMC)
directives and standards 1-4
environmental specifications 3-15, 3-17
F
first-time operation 5-12
frequency
specifications 3-11, 3-12, 3-13
Index
i
Advanced Energy®
G
M
Gamma topology 2-6
general description 2-1
ground 4-2, 5-5
guidelines
safety 1-2
SEMI 1-5
MAINS
see also AC input
connector 3-8, 5-12
manual tuning mode 5-15
marking, CE 1-3
maximum load DC selfbias voltage 3-11, 3-12,
3-13, 3-14
maximum reactive power 3-11, 3-12, 3-14
maximum RF load current 3-11, 3-12, 3-14
maximum RF load voltage 3-11, 3-12, 3-14
maximum transfer power 3-11, 3-12, 3-13
modes, see tuning modes
mounting 3-7, 5-5, 5-6
I
icons
in user manual 1-1
on unit 1-2
industry guidelines, compliance with 1-5
input connector, see RF input connector
input impedance to generator 3-11, 3-12, 3-14
installation
how to 5-4
requirements 5-1
safety guidelines 1-2
tools required 5-2
INTERFACE
15-pin match 4-1
automatic mode 4-1
cabling requirements 4-2
connecting 5-7
connector 3-7, 4-1
grounding 4-2
interacting with CESAR generator 5-15
pin descriptions 4-2
using switches 4-7
interlock 1-6
see also limits
L
L match network 2-5
labels on unit 1-2
limits 1-6
load
coil and capacitor in L match network 2-5
coil specifications 3-10
coil, theory 2-5
definition 2-1
igniting plasma 5-16
load capacitor 2-4
load coil 2-4
load coil tap settings 5-22
set up the match 5-16
load checks
troubleshooting 6-3
ii
N
normal operation 5-14
O
operation
automatic tuning mode 2-2, 5-14
first time 5-12
manual tuning mode 2-2, 5-15
normal operation 5-14
safety guidelines 1-2
theory of operation 2-3
overvoltage category specifications 3-17
P
physical specifications 3-1, 3-7
pin descriptions
AC input connector 5-12
match INTERFACE 4-2
plasma, see load
PLASMA/LOAD
connector 3-8, 5-2, 5-9
connector and strap 5-2
pollution degree specifications 3-17
product
certification 1-3
compliance 1-3
R
returns
authorized 6-5
RF input connector
connecting from generator 5-8
from generator 5-8
pin descriptions 5-9
specifications 3-7
Index
57020080-00D
AE VarioMatch™ Match Network, VM 1000/1500 Platform
RF input, cabling specifications 5-2
RF, shielding 5-4
runtime from startpoint to endpoint 3-11, 3-12,
3-13, 3-14
S
safety
conditions of use 1-5
directives and standards 1-4
guidelines 1-2
rules for installation 1-2
rules for operation 1-2
SEMI guidelines, compliance with 1-5
size 3-7
spacing requirements 3-5, 5-1
specifications
AC input line current 3-11, 3-12, 3-13
AC input line frequency 3-11, 3-12, 3-13
AC input line voltage 3-11, 3-12, 3-13
AC input power connector 3-8
air flow 3-16
clearance 3-7
climatic 3-17
coil 3-8
connector and cable 3-7
coolant connectors 3-8
cooling 3-14
DC selfbias monitor voltage 3-12, 3-13,
3-14
electrical 3-10
environmental 3-15, 3-17
frequency 3-11, 3-12, 3-13
input impedance to generator 3-11, 3-12,
3-14
load coil 3-10
maximum load DC selfbias voltage 3-11,
3-12, 3-13, 3-14
maximum reactive power 3-11, 3-12, 3-14
maximum RF load current 3-11, 3-12, 3-14
maximum RF load voltage 3-11, 3-12, 3-14
maximum transfer power 3-11, 3-12, 3-13
mounting 3-7
overvoltage category 3-17
physical 3-1, 3-7
PLASMA/LOAD connector 3-8
pollution degree 3-17
RF input connector 3-7
runtime 3-11, 3-12, 3-13, 3-14
size 3-7
spacing requirements 3-5
tune coil 3-9
57020080-00D
tuning range 3-11, 3-12, 3-13, 3-14
water contaminates 3-16
water flow 3-15
water pressure 3-15
water temperature 3-15
weight 3-7
standards 1-4
symbols
in user manual 1-1
on unit 1-2
T
theory of operation 2-3
topology 2-4, 2-5, 2-6, 3-10
troubleshooting
checklists 6-2
checks with power off 6-2
checks with power on 6-2
contacting customer support 6-4
overview 6-1
system level 6-2
unit output 6-3
troubleshooting procedures
external load checks 6-3
open/short RF output path 6-3
tune
coil and capacitor in L match network 2-5
coil specifications 3-9
coil, theory 2-5
tune capacitor 2-4
tune coil 2-4
tune coil tap setting 5-18
tuning elements 2-4
tuning modes
automatic 5-14
automatic mode
automatic mode for first-time operation
5-13
controlling with match INTERFACE 4-1
manual 5-15
manual mode
tuning range 3-11, 3-12, 3-13, 3-14
U
unit
icons and symbols used 1-2
unit output
troubleshooting 6-3
unpacking 5-2
user manual
symbols and icons used 1-1
Index
iii
Advanced Energy®
V
voltage
AC input line specifications 3-11, 3-12,
3-13
W
warranty
authorized returns 6-5
water
connecting 5-7
connectors 3-8
contaminants specification 3-16
flow specification 3-15
hose specificatinos 5-2
pressure specification 3-15
temperature specification 3-15
weight 3-7
iv
Index
57020080-00D