1
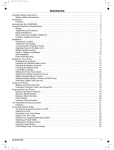
e-Link First Time User Guide PART 1 z System Overview SYSTEM REQUIREMENT....................................................pg 3 Software Specification……………………………………..…...pg 3 Demo Kit ………………………………………………….……..pg 4 Hardware Pre-setup………………………………………….....pg 5 PART 2 z SOFTWARE INSTALLATION & SETUP Install the software…………………………………………..…..pg 6~9 By Passing Firewall……………………….……………....….…pg 10~12 Setting Up Server’s IP Address ………….…………….……...pg 13~15 In Windows XP………………………….………………...pg 13~14 In Windows Vista…………………………………………..pg 15 Setting Up EC Server Agent………………………………..…..pg 16~18 Set Daylight Saving Time rules ………………….……….….…pg 19~20 Initialize Programmer………………………….………….……...pg 21~22 PART 3 z SETUP WALL CONTROLLER & WALL READER 1 Issue Door No. card…………………………………………….…pg 23~24 Hardware setup……………………………………………….…...pg 25~27 Back to Menu www.waferlock.com e-Link First Time User Guide Setup IP & Timezone data for controller………………………pg 28~29 Create User Card………………………………………………..pg 30~31 Setup User Timezone……………………………………………pg 32 Setup Locking Plan………………………………………………pg 33~35 z SETUP THE LOCK Creating Locks………………………………………………….…pg 36~37 Setup lock’s Locking Plan………………………………………..pg 38 Write Settings from PC to Programmer…………………………pg 39 Write Settings from Programmer to the lock……………………pg 40~41 PART 4 z Updating settings through Wall Reader by User Card Testing the lock with User Card…………………………….…….pg 42 Checking Audit Trail Report………………………………….……pg 43 PART 5 z Frequent Asked Questions………………………………….....pg 44~50 2 About Controller About Wall Reader About Software About Programmer About Cylinder Back to Menu www.waferlock.com e-Link First Time User Guide Part 1: System Overview System Requirement Software Specification z z z z z z z z z z OS: Microsoft Windows 2000/XP/Vista/7 CPU: Intel Pentium 1.0 GHz+ or AMD Athlon 1000+ RAM: 512MB Hardisk space: 100MB CD-ROM or DVD-ROM Resolution: 1024*768 Minimum USB Port: 1 Ethernet Card (for connection between PC and Wall Controller) Ethernet connection is a requirement z z z z z z z z z z z 3 Back to Menu Supports up to 64,000 doors / 64,000 users. Support Daylight Saving Time. Time zone: 200 time zones, each time zone consists of 12 periods. Setup User & Door Locking Plan Easily Setup User and Visitor profile. Locks can be easily programmed or updated by both Programmer tools or User Cards. Events & Audit Trail report Low power warning when battery is low for the lock. Calendar function Day Light Saving function Authorization of System User Management Import & Export function www.waferlock.com e-Link First Time User Guide Demo Kit 4 Inside the kit box, you will find the following parts list: If you have purchased the e-Link demo kit from WaferLock. The demo z 1 Controller kit on your hand should be look like this in the following. Please note the z 1 Wall Reader power adaptor (DC12v) does not include in the demo kit. z 2 cylinders z 1 programmer z 1 blue RJ-45 crossover ethernet cable. z 1 black USB cable, 1 white USB cable. z 6 LR-1 cylinder batteries, 3 AAA programmer batteries. z 5 Mifare Card z 1 External power supply z 2 cylinder screw, 2 hexagan screw driver. Back to Menu www.waferlock.com e-Link First Time User Guide Hardware Pre-setup 1. Please have the controller connected with a DC12v power adaptor. (The black cable in the example below is the adaptor) 2. Connect the blue ethernet cable we provided from the demo kit with Controller and another end to the computer. 3. Please note the computer you choose to work with e-Link system must have a RJ-45 connector in order to work with the controller. Note: when the ethernet cable is disconnect from computer to controller, the EC Server Agent will not be able to start up the EC Server service when computer starts up. Once the system is setup, please always have the computer connected with the controller with the ethernet cable. 5 Back to Menu www.waferlock.com e-Link First Time User Guide Part 2 Software Installation & Setup Install the software: Please insert the e-Link CD to your CD-ROM. The installation screen should be poped up. If you have the e-Link file downloaded from internet, please double click on the setup file to begin the following installation. Install Procedure: 1. Select the installing language for your own working environment. 6 Back to Menu www.waferlock.com e-Link First Time User Guide 2. Click Next to proceed. 3. Choose Full Installation or Only Main Program Files, then click Next to proceed. *If you are installing the e-Link system the first time, please choose Full Installation. 7 Back to Menu www.waferlock.com e-Link First Time User Guide 4. Choose the path for the installation, then click Install. 8 Back to Menu 5. Wait until the program finishes installation. www.waferlock.com e-Link First Time User Guide 6. Click Finish icon to complete the Setup Wizard. 7. When finishing setup e-Link software, EC Server Agent will boot up automatically. Please minimize this program first, and follow the procedure below to continue. Please use the login ID: admin , password: admin to login the software after finished installation. www.waferlock.com 9 Back to Menu e-Link First Time User Guide Bypassing the Firewall: The protocol of communication for e-Link is based on TCP/IP network. In order to avoid any firewall blocking to the system, it is necessary to add e-Link Networking System into the firewall Exceptions list. Please note there are many different kinds of firewall softwares available in the market, if your anti-virus program contains functions of firewall, please make sure to add e-Link programs into its exception list. For Windows Firewall, please follow the procedure to bypass the e-Link software. In Windows XP Setting 1. Open up Windows Firewall from the Control Panel. www.waferlock.com 10 Back to Menu e-Link First Time User Guide 2. Click Exceptions tab, and click Add Program. 3. Go to C:\Program Files\Waferlock\e-Link, and select ECSvr and ENSMAIN then Click open.. 11 Back to Menu www.waferlock.com e-Link First Time User Guide 4. Make sure ECSvr and ENSMAIN is included in the list and checked, then click OK. * please note ENSMAIN display as "e-Link Networking System" in Windows Firewall. 12 Back to Menu www.waferlock.com e-Link First Time User Guide Setting Up Server's IP addres In Windows XP Setting 1. In Control Panel, open up Network Connections. 13 Back to Menu 2. Open Local Area Connection. www.waferlock.com e-Link First Time User Guide 3. Choose Internet Protocol (TCP/IP), and click Properties 4. According to your network setup, enter the IP for your computer. (Following example IP address & Subnet mask is for reference only) Click OK to finish IP setup. 14 Back to Menu www.waferlock.com e-Link First Time User Guide In Windows Vista setting: IP setting: Turn off UAC control: 1. Click Start button, click Control Panel, click Network and Sharing Center, 1. Open User Accounts by clicking the Start button Picture of the Start button, and then clicking Manage network connections. clicking Control Panel, clicking User Accounts and Family Safety (or clicking User Accounts, if you are connected to a network domain), and then clicking User 2. Right-click on Local Area Nettwork and then click Properties. Accounts. Administrator permission is required if you are prompted for an administrator password or confirmation, type the password to provide confirmation. 2. Click Turn User Account Control on or off. Administrator permission required If you are prompted for an administrator password or confirmation, type the 3. Click the Networking tab. Click Internet Protocol Version 4 (TCP/IPv4) password or provide confirmation. and then click Properties. 3. Select the Use User Account Control (UAC) to help protect your computer 4. To specify IP address settings, do the following: • check box to clear the check box to turn off UAC, and then click OK. To specify an IP address, click Use the following IP address, and then enter the IP address (192.168.1.100) Subnet mask (255.255.255.0). Leave the Default Gateway blank. 5. After setting up the IP and Subnet mask, click OK to finish. Please note the IP address specified above is only for the purpose of this document. The network environment for most actual installation will not be the same. 15 Back to Menu www.waferlock.com e-Link First Time User Guide Setting Up EC Server Agent: 1. Open up EC Server Agent from bottom right corner of your Windows 2. Click IP Config. or go to Start > Program Files > e-Link > EC Server Agent to open it up. 16 Back to Menu www.waferlock.com e-Link First Time User Guide 3. Select the IP from the list. The IP has to be the server's IP which 4. If the IP address and Port is correct, click Start to run the agent. you have setup before. Enter the Port according to your network Once the EC Server Agent is start to run, the server will be ready to environment. (Following IP address and Port are example for receive and send data with the Wall Controller. reference only) Click OK to finish. Click here if there’s no IP can be seen from this list. 17 Back to Menu www.waferlock.com e-Link First Time User Guide Note: If EC Server Agent can not be running, please check: z Check if there's any other firewall program that is blocking the ECSvr or ENSMAIN file and double check the IP + Port that you are using is correct. z If you are working from a workstation computer rather than the server computer, please check if the Server PC you are connecting is not blocking the request. z If you would like to keep EC Server Agent to load automatically, click on "Load on System Startup" in System Setting menu. z The EC Server services will start automatically if the EC Server Agent is running in “Start” mode. Unless EC Server Agent is put to “Stop” mode, the EC server services will still be running even the EC Server Agent is not opened. z Please note in network knowledge terms, the IP address “127.0.0.1” means redirect back to the PC you are using. DB Server Setting: If the database is stored in remote Server PC, this menu is to enter the remote IP so that the database can be saved in the right PC. Test: Test button is to test if the connection is well between the computer you are connecting. Save: To save the IP address, when next time boot up e-Link system, the agent will be connecting to the saved IP directly. If problem occurs in this chapter, please click here for Database Connection Setup FAQ section. 18 Back to Menu www.waferlock.com e-Link First Time User Guide Setting Up “Daylight Saving Time” rule in the software. 1. Go to “Time > Daylight Saving Time” 2. Click “Enable Daylight Saving Time” 3. Click “using DST rule” 4. Click “Change” 19 Back to Menu 6. Set the month which DST starts (ie April, Last Sunday, 0) Please note Hour means “which hour” to begin DST rule. 7. Set the month which DST ends. (ie October Last Sunday, 0) Please note Hour means “which hour” to end DST rule. www.waferlock.com e-Link First Time User Guide 8. Click “Save” and make sure again the DST rules you set is correct. (result of set the date wrong will make the lock work in wrong DST time zone, thus the Audit Trail time will not be correct) 20 Back to Menu www.waferlock.com e-Link First Time User Guide Initialize the Programmer 1. Load 3pc of AAA 1.5v batteries to the back of the Programmer, 2. Go to “Programmer > Programmer Tools” in the software menu. then connect the White USB cable to the back of the Programmer, 3. Choose “Initialization” and the other end to the PC USB port. 4. Choose “Current System Code” 5. Click “Start” button to begin initialization for Programmer. 21 Back to Menu www.waferlock.com e-Link First Time User Guide 6. Make sure the status message is “Initialization successful”, and keep the Programmer connected to PC. Click here if the programmer can not be initialized sucessfully. 22 Back to Menu www.waferlock.com e-Link First Time User Guide Part 3: SETUP WALL CONTROLLER & WALL READER Issue Door No. Card 1. Go to “Door > Doors” menu 2. Click “New”, then type a name for “Door Name” 5. Place a unused Mifare classic card to top of the Programmer. 3. Select “Controller” to YES. 4. Click “Save” to finish 23 Back to Menu www.waferlock.com e-Link First Time User Guide 6. Click “Write Card” at bottom right side, a little window will pop up. 8. Once the card is successfully issued, the little window will disappear 7. Click “Start” from the poped up window. and the “Update Status” at the bottom will be “Initialized Required” and the color of the Door Name will be Red. Keep this Door No. card you just issued with you and follow Part 3. Part 3 Setting Up Wall Controller and Wall Reader. The purose of issuing door no. card is to write the door ID into the card (blue circle below), and later on we will present this card to the reader, so the reader knows which ID it is. (In this example, the door ID is #2, in real case it will not be the same) Click here if the card can not be issued. 24 Back to Menu www.waferlock.com e-Link First Time User Guide Hardware setup 2. Please prepare an adptor (DC12v) and plug into the 1. If you have purchased e-Link demo kit from WaferLock, please take out power jack from controller. Then, connect the blue the plastic set which holds the e-Link Wall Controller and the e-Link Wall crossover ethernet cable to controller and PC. Please note Reader. when connect the power to the controller, the “D10” LED will keep flashing. 25 Back to Menu www.waferlock.com e-Link First Time User Guide 3. Press “Reader 1” bottom on the controller. 4. Use the Door No. Card which you have issued and induct to the reader. (note the Reader 1 LED lid up, and Wall Reader LED also lid up) This way you will set this reader as Reader 1. (note the LED will be OFF on the reader once the card approached it.) 26 Back to Menu www.waferlock.com e-Link First Time User Guide 5. Press “Set ID” button on the controller, and the LED will lid up. 6. Present the Door No. card to the reader, and note all LED will be ON. This way the door no. card which carry (ID #2) will be written to the reader. Set up IP & Timezone Data for Wall Controller 27 Back to Menu www.waferlock.com e-Link First Time User Guide Setup IP & Timezone data for controller 1. Go to “Door > Entrance Controller” 2. Click “Edit” 3. In this example picture, we are going to set the IP address as 192.168.1.101. 4. Click “Save” to save the settings. 28 Back to Menu 5. Click “Apply to the controller” With this operation done, it will apply the Controller and Server’s IP address, Mac address, and Submask into Controller memory. So the controller will know what IP it is and what IP the server is. www.waferlock.com e-Link First Time User Guide 6. If applying is succeeded, the message will say “Apply setting suceessful” Click here if Apply to the controller is failed. 29 Back to Menu www.waferlock.com e-Link First Time User Guide Create User Card 1. Go to “User > Users” 6. Place an unused card on top of the Programmer. 2. Click “New” 3. Give a name to First Name. (the example will just use User 1) 4. Remain all other settings as default setting (no need to change). 5. Click “Save” 30 Back to Menu www.waferlock.com e-Link First Time User Guide 7. Click “Write Card” at the bottom. 8. A little window will pop up, and starts writing User Card. If the card is written sucessfully, the little window will hide and return the screen back to User menu. 31 Back to Menu Click me if failed to issue User Card. www.waferlock.com e-Link First Time User Guide Setup User Timezones 1. Go to “Time > User Timezones” 6. In this example, we are going to create another time zone, please 2. Double click on left menu #1, then “Timezone 1” will pop up double click on #2, give a color to this time zone, and give time period from automatically. 08:00 to 18:00, then select Tu, Th, Sa. 3. Select a color in “Color” area. 4. For this example below, we are going to give a time period, please 7. Click “Save” after done. type 08:00 to 18:00 and select Mo, We, Fr (please note in reality case this can be altered according to your need) 5. Click “Save” after done. z 32 Back to Menu The purpose of selecting color is to view each time zone easily. www.waferlock.com e-Link First Time User Guide Setup Locking Plan 1. Go to “Setting” , select “Locking Plan” 3. Select the cell box with left mouse click. 2. Double click on the cell box. You will enter Edit Mode 4. Right click on right mouse on anywhere in this screen to pop up the shortcut automatically. functions menu. 5. Left Click “A. Always Open” in this shortcut menu. 33 Back to Menu www.waferlock.com e-Link First Time User Guide 6. Right click again then select “Save” from the shortcut list. 7. Go back to “Door > Entrance Controllers” 8. Click “Update to the controller” and select “Yes” to update Locking Plan to the controller. 34 Back to Menu www.waferlock.com e-Link First Time User Guide 9. Once “Write Locking Plan Successful” and the color of the Door Note: Name become “green”, it means everything is updated to the z controller and ready to use. Please note: when the controller is online with the server computer, the e-Link software will update everything (all command) to the controller automatically every 5 minutes. This is to prevent when the controller is disconnected with the server computer, the controller can still use its ` database stored inside its memory and function normally. z When the controller is in offline mode, it can memorize 1024 events, after 1024 it will overwrite the 1st event. As soon as the network is back online, these events will be transferred back to the server computer, and it can be searched in Report menu. 35 Back to Menu www.waferlock.com e-Link First Time User Guide Setup the lock Creating the locks: 1. Go to “Door > Doors” 2. Place an unused card on top of the programmer, then click “Write Card” on bottom right, then click “Start” to write a Door No. Card. 2. Click “New” then type a door name in the blank. 3. Click “Save” to finish the setting. 36 Back to Menu www.waferlock.com e-Link First Time User Guide 3. After successfully written the card, please induct it to the cylinder or lock you need to setup. Once hear a “beep” and “green LED” flash one time. That means the lock is set with a door number. 37 Back to Menu www.waferlock.com e-Link First Time User Guide Setup lock’s Locking Plan 1. Go to “Setting > Locking Plan” 4. Right Click again and select “Save” to save the setting. 2. Left double click the cell box, then right click to pop out the short cut menu. 3. Left click to select “Always Open” from the list. 38 Back to Menu www.waferlock.com e-Link First Time User Guide Write Settings from PC to Programmer 1. Go to “Programmer > Wrting” 4. When writing is done, the Message will display “Writing sucessful” and the 2. The locks need to be written with Programmer will be selected status of the lock will be written as “OK” automatically to the right side window, and displayed as red color. 3. Make sure Programmer is connected to the PC, click “Start” to begin writing door settings to it. 39 Back to Menu www.waferlock.com e-Link First Time User Guide Write Settings from Programmer to the lock 1. Make sure the programmer is installed with 3pc of AAA alkline batteries, then unplug the “White USB” cable away from the 3. In the other end, plug in the black USB cable to the USB connector of the lock. programmer. 2. plug in the “Black USB” cable to the programmer. Note when plugging the USB hole, the lock will beep for 2 seconds. dd 40 Back to Menu www.waferlock.com e-Link First Time User Guide 4. Press “Write” button on the Programmer. 5. If written sucessfully to the lock, the Programmer will lid in blue LED and buzz a long beep. Note: It will take few seconds for completing the Writing progress from Programmer to Cylinder. If the lock has already Write with programmer before, the next time will only update the lock’s time when pressing Write again . 41 Back to Menu www.waferlock.com e-Link First Time User Guide Part 4 Updating settings through Wall Reader by User Card 2. Take again the User Card, and approach to the wall reader, make sure Testing the locks with User Card put the User Card onto the reader until hearing 1 long beep, Approach the card to the lock few more times to play around the reader. 1. Take the User Card which you created earlier, and approach the reader from the lock once, if the User Card is valid, the lock will respond 1 flash of green LED and beep 1 time. Approach the card to the lock few more times to play around the lock. Please read me if the user card does 42 Back to Menu not work on wall reader. (Please read About Wall reader section.) www.waferlock.com e-Link First Time User Guide Checking Audit Trail Report 1. Go to “Report > Entrance Controller Log” 3. Go to “Door Events”, this menu will display all the events that the user 2. In this menu, you will see each event that the the user have access a lock. It will also display the lock’s battery status, if the lock is in accessed the controller door. The events can be sorted according to low battery status, it will show “Low” to remind the operator. your need. (ie. If you wanted to sort by Event Time, click “Event Time” to do so) 43 Back to Menu www.waferlock.com e-Link First Time User Guide Part 5 Frequent Asked Questions About Controller Q1: If there’s error message when Apply to the controller, please double check the following: A1: When applying IP is failed or timed out, please check: Check if the IP address and subnet mask you have input to the controller is correct. (check if the IP you input is in the same network segment as the server PC) Check if the ethernet cable is well connected between PC and the controller. Check if the controller have been setup already with a “Set Door Card” (see Part 3 Setting Up Wall Controller and Wall Reader.) Check if the fire wall setting have been setup as the manual instructed. (see Part 2 By Passing Firewall) If you have turned off any 3rd party firewall program while adjusting the firewall setting, please reboot after you have closed the firewall program in order to take a complete effect. 44 Back to Menu www.waferlock.com e-Link First Time User Guide About Wall Reader Q1. The wall reader flash in quick red LED. What does it mean? A1. It means the controller is disconnected with the server PC, so the wall reader is flashing red LED to remind operator to check the connection. Please note during disconnection, the controller can still memorize 1024 events, and once the connection is back, the controller will send back the events to the server PC to update the database. The wall reader can still function normally during offline mode. Q2. The wall reader does not accept the User Card, and flash red + warning buzzer, what does it mean? A2. If the user card you are holding is not accepted by the wall reader, please check the following: The user card doesn’t have access right to the reader. Please check Locking Plan in the software. The user card is deleted from the software, please double check User > Users menu. The card’s system code is different from the wall reader’s system code. Please double check what was the software’s sytem code in Tool menu > System Security menu. And try use “Apply to the controller” function in Door > Entrance Controller menu to update the system code again to the controller. (Once the Apply to the controller function is done, the controller will write system code to the wall reader). If after using “Apply to the controller” , the user card still can not access the wall reader, that means the card’s system code is different and can not access unless the card get its system code update by Programmer again. (please use Programmer Tool > Card Tools > Change system code function to update the card’s system code). 45 Back to Menu www.waferlock.com e-Link First Time User Guide About Software Q1. Database Connection Setup when computer restarts A1: When the Windows is loading during computer restarts, sometimes the Database Connection Setup window would appear, it is because the network function is still loading during startup of the Windows, as if the EC Server Agent have already loaded before the network started up, the Database Connection Setup would appear to ask user where to connect. You could follow this way to double check: a. Check the ethernet cable is well connected from PC to the Controller. b. If using switch hub or router, make sure these devices are powered on and working fine. c. Make sure there is no software or hardware firewall blocking. d. Make sure the PC server computer is started up, and the EC Server services is started in the server computer. e. Make sure the Server IP and port is correct to use for e-Link system. f. Press Test see if you could connect to the server, if OK, please click Save to save the setting. If with above ways you still could not connect to the server computer, please ask your IT or local distributor for help. 46 Back to Menu www.waferlock.com e-Link First Time User Guide Q2. I can not see the IP from EC Server Agent’s “IP Setting”, what can I check? A2. Please check the following for this problem: z Check if the Server is started up and online. z Check if the server computer is installed well with the e-Link software. (EC Server must be installed into the Server PC) z Check if there’s any other firewall program blocking. 47 Back to Menu www.waferlock.com e-Link First Time User Guide Q3. I have placed a card on the Programmer, but I keep getting error message when trying to issue Set Door Card ? A3: a) If you are getting the following message while writing a Set Door Card, please note the card’s system code is different than the e-Link software. Please double check what was the card’s system code, or try use a blank Mifare Card to issue Set Door Card. b) If you are still fail to issue card, please try reset the card in Programmer Tool > Card Tool > Card Resetting. 48 Back to Menu www.waferlock.com e-Link First Time User Guide Q4. I am trying to issue a user, but the following error message keep coming out? A4: a) 1. Failed to initialize this card or This card can not be used for this system: With this message, it means the card which you are going to write as User Card has a different system code than the software. Please double check the card’s system code before writing, or use a blank card to issue the user card. 2. Please use Programemr tool > Card Tool > Card Reset function to reset the card first if this card was belong to somenone else and needs to be re-write to another user. b) This card isn’t for user xxxxx, please check: this means the card you are issuing is belong to someone else’s card. If needed, please use Programmer Tool > Card tool > Card Reading to read out the User Card’s name. 49 Back to Menu www.waferlock.com e-Link First Time User Guide About Programmer Q1: The software can not detect the Programmer, what can I do? A1: Please check the following: z Disconnect and Reconnect the White USB cable from Programmer. z Disconnect and Reconnect the White USB cable from PC. z Try with another USB port to see if the software could detect the Programmer. If all not working with above, please try with another computer to double check, or contact your distributor for help. About Cylinder Q1: The lock does not react to any User Card, what can I check? A1: There are many ways to check for such problem, please try each of the following: Software side: z Please make sure the system code in the software is match with the lock’s system code. If you have forgot what was the lock’s sytem code, contact your local distributor for help. Hardware side: z Make sure the cylinder still have battery power. z Use another existing user card to approach the lock, see if the lock can work with that card. If Yes, change a new card for the user. (The problem may be a defect card/tag.) If Not, the lock’s sytem code may be different with the card you are issuing. 50 Back to Menu www.waferlock.com