1
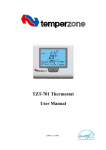
SAT-2 Thermostat
COOL FAN DRY HEAT AUTO SLEEP SWING
AUTO
ZONE
SUN MON TUE WED THU FRI SAT
ON
OFF
HEATER
ERR
UNIT
USER'S OPERATING
INSTRUCTIONS
CONTENTS
Page
Introduction·························································3
Features Summary ·············································3
Display ·······························································4
Operation····························································5
Remote Control (option) ·····································9
Error Code Display ···········································10
Troubleshooting················································11
Contact for Service
back page
Introduction
Your temperzone air conditioner is supplied with a SAT-2 wall thermostat. This
thermostat has been designed to maintain a high level of comfort for room
occupants. Emphasis has been placed on providing controls that are easy to use
despite the sophisticated microprocessor system that runs it. Use of the Auto and
Timer function settings allows you “to set it and forget it”.
Features Summary
●Cool/Fan modes.
●Heat/Auto modes (Reverse Cycle Systems only).
●Backlighting display with different colour indicating different mode of operations.
●Auto/High/Medium/Low fan speed selection.
●Temperature setting range from 16ºC to 30ºC.
●Room temperature display.
●Real time clock.
●7 days programmable (Start/Stop) timer that programs the unit to two start/stop
sessions per day.
●Bypass function enables user to bypass the on/off button and any user
programmed times for immediate operation of the air conditioner.
●Battery backup. In the event of a power failure a backup battery will maintain the
real time clock and the integrity of the control’s data. When power is resumed
(returned/switched on again), the unit will automatically restart using the last
settings.
●Key lock function prevents unauthorized personnel from changing the settings
of the wall thermostat.
●Sleep function.
●Air swing function.
●Zone control (option).
●Buzzer beeping to acknowledge valid key entry or wireless remote handset
reception.
●Infra red remote controller (option).
Page 3
Display
Temperature display area
Operation display
Display set or room temperature
Fan speed display
Auto fan
Day display area
Display day of week
SUN Sunday MON Monday TUE Tuesday
Medium
High
Low
Error display area
WED Wednesday THU Thursday FRI Friday
Display error code
SAT Saturday
Infra red reception
COOL FAN DRY HEAT AUTO SLEEP SWING
To receive wireless handset signal
SUN MON TUE WED THU FRI SAT
HEATER
ON
OFF
Timer display area
Dislay on/off timer or real time clock, RTC
Error display
AUTO
ZONE
Key lock
ERR
On/Off button
ERR
UNIT
Press once to start operation
Press again to stop operation
ON On timer
Room temperature
setting button
OFF Off timer
Fan speed button
Day button
To select day of week, Sunday to Saturday
Or used in weekly on/off timer programming
to select day of week
Press to select low, medium,
high or auto fan speed
DAY
Swing button
Timer cancel button
TIME
Timer button
To cancel on/off timer setting in
timer programming mode
Press to activate on/off
timer programming mode
Time setting button
Mode button
To adjust the RTC setting or used in on/off
timer programming to adjust timer setting
Press to select cool,
fan, heat or auto
operation mode
Page 4
Sleep button
Press once to select sleep mode
Press again to cancel sleep mode
Operation
On/Off
Starting Operation
When the unit is turned off, press the
button. The backlight and the system
are turned on.
Bypass Operation
To activate the air conditioner outside any pre-set times, follow the instructions in
page 7.
Stopping Operation
When the unit is turned on, press the
button. The system is turned off.
Room Temperature Adjustment
Normally the display will show the current room temperature (not the preset
temperature). Set the temperature of your choice by pressing the
buttons. The preset temperature will appear.
Each push will change the temperature by 1ºC.
Temperature can set within the range 16ºC ─ 30ºC.
During Fan mode, the temperature can not be set.
or
Mode Selection
MODE
Press the
button to switch operation between Cool, Fan, Heat and Auto.
The display shows which mode is selected at any one time.
Cool ─ If the room temperature is too warm, the air conditioner cools the room until
it reaches the set temperature.
Heat ─ If the room temperature is too cool, the air conditioner warms the room until
it reaches the set temperature (reverse cycle systems only).
Auto ─ The air conditioner will automatically cool or heat the room until it reaches
the set temperature (reverse cycle systems only).
Fan ─ If the atmosphere in the room is stale, use this mode to circulate the air in
the room, without changing the overall room temperature.
Fan Speed Selection
FAN
Press
button to select Auto, High, Medium or Low speed.
Auto ─ The SAT-2 will automatically select the most suitable fan speed to maintain
set temperature.
High, Medium, Low ─ A choice of three manually selected fan speeds are available.
Swing Activation
This function is only applicable to systems with underceiling indoor units.
Page 5
button to activate the air louvre sweep function, or to set the louvre at
Press
a preferred angle.
Time Functions
Setting Clock
TIME
a)
b)
Press
flashes.
or TIME
button to enter clock set mode, clock symbol
TIME
Press
or TIME button to increase or decrease the clock setting in 1
minute. Hold down the button to change the setting at a faster speed.
D AY
c) Press
button to change the set day.
Setting 7 Day Timer
The timer can be set to turn on and off, two sessions per day, and one regular
session per week.
On or Off Timer Setting
a)
TIMER
Press
button to select on timer or off timer. If on timer is selected,
ON symbol and set day flashing. If off timer is selected, OFF symbol and set
day flashing.
b)
There are 2 sessions of on or off timer available per day. Press
or
button to select session 1 (P1) or session 2 (P2). The selected session is
indicated on the temperature display area as P1 or P2.
c)
d)
Press
button to change the set day of the on or off timer.
If the selected timer for the set day is empty, timer display area shows
D AY
, otherwise the on or off timer setting will be shown.
TIME
e)
Press
or TIME button to change the on or off timer setting. Hold down the
button to change the setting at a faster speed.
f)
Symbol
g)
h)
i)
j)
Press
lights up to indicate there is on or off timer being set.
CANCEL
key to cancel the current on or off timer being set, timer display
area shows
.
Repeat step a) to e) until the desired timer for each session and each day
have been set.
System will save and exit timer settings 6 seconds after last key press.
CANCEL
In non timer set mode, hold down
key for 5 seconds will cancel all the
on or off or override timer being set.
Page 6
Example:
Two sessions of on and off timer per day being set as follow:
P1 on timer 0800
P1 off timer 1200
P2 on timer 1300
P2 off timer 1700
If current time is 0730 hrs, it will remain as last state. At 0800 hrs, it will turn on the
unit using P1 on timer. At 1200 hrs, it will turn off the unit using P1 off timer. At 1300
hrs, it will turn on the unit using P2 on timer. At 1700 hrs, it will turn off the unit using
P2 off timer.
Pressing on/off button to on/off the unit will bypass the control of current event. The
second event will take over upon expiry of current event.
Example: If user turns off the unit at 1000 hrs, it will remain off until 1300 hrs, at
which time control is taken over by timer P2.
Sleep Activation
SLEEP
Press
button to activate the sleep option. This option saves energy by
altering the set temperature over a two hours period.
Example uses:
In Summer, before going to bed at night with the cool mode set, pressing the
SLEEP
button gradually raises the set temperature by 2 degrees to compensate for
a person’s lower metabolism when sleeping.
SLEEP
In Winter, with the heat mode set, pressing the
button gradually lower the
set temperature by 3 degrees to compensate for heavier winter bedding.
The sleep option is only available for Cool, Heat and Auto modes.
Zone Control (option)
If your air conditioning installation has zones installed (i.e. dampers), select the
zones to be turned on using the appropriate Zone button. Zone 1 is always assigned
as master zone. Each zone can be individually turned on or off. However, zone 1
can only be turned off provided there are two other zones turned on.
Key Lock
This feature protects the control being tampered with by children or unauthorized
persons.
To activate, hold down TIME and
MODE
buttons for 3 seconds, key lock
will light up.
symbol
When the key lock is active,
a)
button can be used to on or off the system.
b)
c)
d)
button can be used to program the Bypass timer (refer below).
CANCEL
can be used to cancel the Bypass timer.
Other buttons are ignored.
Page 7
To cancel the key lock, hold down
symbol
TIME
and
MODE
buttons for 3 seconds, key lock
will no longer be displayed.
Bypass
This feature provides a quick ‘on demand’ alternative to the ‘pre-programmed’ type
of use. Bypass operation permits the user to start the air conditioner immediately,
bypassing the
button and any programmed session times.
Bypass is initiated by,
a)
Hold down
button for 3 seconds,
will be shown at the temperature
display area. Letter “H” indicates hour setting.
b)
button once for one operation, twice for 2 hours and 3 times for 4
Press
hours operation. Further key press will revert to 1 hour, 2 hours, 4 hours and
repeats.
c) Press CANCEL button will cancel the bypass timer setting.
d) System will exit from bypass setting 3 seconds after last key press.
If Bypass timer is set, the display will alternate between temperature and number of
countdown hours left, e.g. 2H and the room temperature. Upon Bypass timer
countdown reaching zero:
a) If the On or Off timer settings are nil, system will switch off
b) If there is On or Off timer available, the unit will continue to operate if the time
span of the On or Off timer allows it to be on. At an undefined region or off time
span, the unit will switch off.
To terminate the bypass timer before chosen time has finished, press
to cancel the setting and turn off the air conditioner.
button
Buzzer
Buzzer beeps in response to a valid button press or wireless signal reception. It
beeps twice when the system is turned on, otherwise beeps once to all other valid
acknowledgements.
Backlight
Backlight colour changes according to the operating mode setting.
Operating Mode Backlight Colour
Cool
Blue
Fan
Yellow
Heat
Reddish orange
Auto
Light violet
a)
The colour changes to red whenever there is system fault. Whenever the
fault is cleared, backlight colour will return to original.
b)
c)
If the unit is on, backlight will turn off 30 seconds after the last button press.
If the unit is off, any button press will turn on the backlight and the screen
display. The backlight will turn off 10 seconds after last button press. Once
the backlight is turned on, setting can be done the same way as when the
system is on.
Page 8
Remote Control (option)
Operation
A beep will sound when the wall plaque receives a signal from the hand held infra
red remote control. The IR remote control must be pointed directly at the SAT-2 wall
thermostat plaque in order for its signal to be received.
Cool
Fan
Heat Signal
Fan Speed
Sleep
Set Temperature
Swing
Clock
On/Off
Press to switch on or off
the air conditioner.
Sleep
Press to activate the energy
saving Sleep function which
automatically adjusts the
temperature to provide a
more confortable sleep, ie
for use in bedrooms.
Adjust Set Temperature
Press down or up button to
decrease or increase the desired
room temperature.
Note: A temperature can not be
set in Fan mode.
Swing
Press to activate or deactivate
the air louver sweep function.
(NB This function is only
applicable to systems with
under ceiling indoor units).
Mode
Press this button will advance the
mode in the following sequence:
Cool→ Fan→ Heat→ Auto
Fan
Press this button will advance
the fan speed as follows:
Auto→ Low → Medium → High
Clock
Press down or up button for
2 seconds to activate. The
current clock setting will
decrease or increase at 1
minute intervals on each
press.
The speed of interval
updating increases after 4
seconds of continuous key
press. It will update at high
speed after 6 seconds of
continuous key press.
Under Fan mode, only low,
medium and high are available.
Page 9
Error Code Display
1.
Should there be any fault happen with the main board, the relevant error code
will be shown on the error display area and symbol ERR
will light up.
2. If there are multiple faults happening at the same time, the error codes will be
shown one after another.
3. The error codes are:
Fault
Error
Remarks
code
Room sensor #1 failure
1
Main board AD3
Room sensor #2 /LST sensor #2 failure
2
Main board AD4
Room sensor #3 /Indoor coil sensor #2 failure
3
Main board AD5
Room sensor #4 /Discharge sensor #1 failure
4
Main board AD6
#1 indoor coil sensor failure
5
Main board AD1
#1 LST sensor failure
6
Main board AD2
#1 insufficient of refrigerant
7
#1 compressor overload
8
low pressure failure
9
high pressure failure
10
Room sensor #5 failure
11
At wallpad B
Room sensor #6 failure
12
At wallpad A
All room sensor failure
13
Float switch failure
14
#1 Low safety thermostat failure
15
Communication failure
16
Hydronic pump switch failure
17
#2 insufficient of refrigerant
18
#2 compressor overload
19
#2 Low safety thermostat failure
20
Discharge sensor 1 failure
21
Discharge sensor 2 failure
22
Discharge temp 1 failure
23
Discharge temp 2 failure
24
Page 10
Troubleshooting
Air Conditioner Doesn’t Operate
1. Check there is power to the air conditioner. There is no power if the SAT-2’s
screen is blank.
2. Check the SAT-2 is on, i.e. the LCD display is on.
3. Check if symbol
is displayed. If so, checked that you are in the ‘switch on’
period, or alter the timer settings (refer to page 6).
Reduced Cooling or Heating
1.
2.
3.
4.
Check the SAT-2 is not in the SLEEP mode (refer to page 6).
Check to see if the air filter (if any) requires cleaning.
Check if any doors or windows are opened.
Check that there are no obstacles in front of the outdoor unit.
No Cooling or Heating
Check that the correct operating mode has been selected (Auto, Cool, Heat). The
preset temperature may have been set too high or too low. If the set temperature
appears okay, call for service.
Not Correctly Triggered
Check the clock is set to the right time (day light saving?) and the timer has been
correctly programmed.
Loss of Settings
If the SAT-2 fails to retain the preset timer settings when the power supply is off
then check the battery to see if it needs replacing. If the battery is flat, low or
missing, the LCD display will still operate, however the clock will reset to 0:00, SUN
settings.
The battery is located at the rear of the SAT-2. Separate the thermostat body from
the wall mounting plate by removing the screw attaching both pieces as picture
below.
Use screw driver to
remove the locking
screw
Remove the back cover
Insert the battery into the
battery holder
Remove and check the battery. If necessary, replace with a lithium CR2032 cell
battery.
Page 11
Keypad Will Not Respond
Check to see if key lock symbol
procedure.
is displayed. Refer to page 7 for unlocking
Remote Control Doesn’t Operate
1.
2.
3.
Check the batteries in the remote control aren’t flat.
The infra red remote control must be pointed directly at the SAT-2 wall
thermostat plaque in order for its signal to be received.
If there is no light or beep from the wall plaque when the remote controls
buttons are pressed, consult your installer to ensure the wall plaque has been
set up correctly for remote control use.
Page 12
AUCKLAND
Temperzone Ltd
Phone 0-9-279 5250
Fax 0-9-275 5637
SYDNEY
Temperzone Australia Pty Ltd
Phone (02) 8822 5700
Fax (02) 8822 5711
SINGAPORE
Phone SNG 6733 4292
Fax SNG 6235 7180
Your local service agent is:
2782 01/08
Page 13