1
Appendix G - Additional Keypad Information
(cont.)
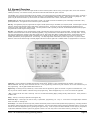
KEYPAD INTERNAL TEMPERATURE SENSOR
Every standard M1KP has a built-in temperature sensor, which detects the surrounding ambient temperature. The sensor
temperature may be displayed on the LCD, and read from another keypad or the telephone remote control. It may also be
used with the Ness-RP Whenever/And/Then Rules to automatically cause an action or control something. i.e., a fan, pump,
light, etc.
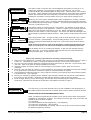
Viewing a Keypad temperature sensor reading
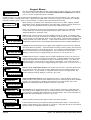
1. To view a keypad temperature sensor press the ELK key once (enter code if prompted), then press the RIGHT arrow to
select the View/Control Automation menu.
2. Press the 5 key (or scroll up) to display: 4-Keypad Temperature, then press the RIGHT arrow key.
3. The first Keypad (Keypad 01 will be displayed along with its Name, Keypad Number, and Temperature.
4. Additional Keypad Temperature sensors (if any) may be displayed by entering the 2 digit Keypad number OR by scrolling
with the UP or DOWN arrow keys. To exit from this menu press the * key.
Using a Keypad temperature reading in a Rule to create an action or output
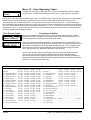
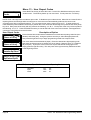
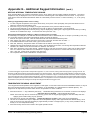
The following is an example of an Ness-RP Whenever/And/Then Rule to automatically turn on Output 3 (controlling a Fan, etc.)
for 10 minutes whenever the Keypad temperature reading exceeds 90 degrees.
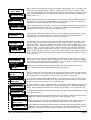
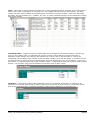
1. Start RP and open an account. Click the Automation tab and the Rules tab followed by New.
2. Click Trigger, then point to Time Occurrence, then Every X Seconds, and then click to select. **
3. In the block beside the words Fixed Value, type in 30 and click OK.
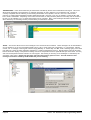
4. Click And, follwed by Temperature which is located near the bottom of the drop down list.
5. Highlight the Keypad temperature sensor (by name), click the Greater than button, and change the temperature selection
number to 90. Make sure the button beside F is selected, and click OK.
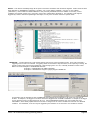
6. Click Then, followed by Turn Output On/Off. Highlight Output 3 (use the scroll down arrow), make sure the button beside
Turn on is selected, then select the box labeled For. Highlight the hrs:mins:secs window and enter 00:10:00 (10 minutes). Click OK. Double check everything and click Done.
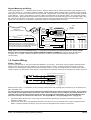
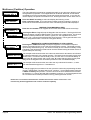
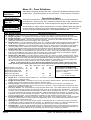
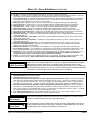
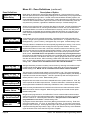
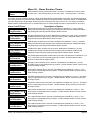
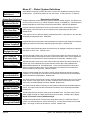
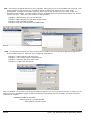
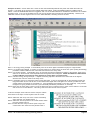
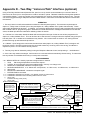
7. The completed Rule should resemble the example below.
** Numerous triggers may be used for a temperature type rule, i.e., time occurence, arming of the security system, opening of a zone, etc.
However, the M1 does not allow a temperature reading to be used as a trigger. This helps prevent a false activation "runaway" that could
occur simple because the temperature has fluctuated by a degree or fraction of a degree. Instead, the AND command is used to compare or
"test" a temperature sensor reading against a target value, each time the trigger occurs. The target value is programmable and the compare
options are "Equal to, Not equal to, Less than, and Greater than". The "Equal to" is not recommended as a compare opton because it may be
impossible for a temperature reading to be exactly at the target value when the trigger occurs.
TEMPERATURE READING ADJUSTMENT
If the Keypad internal temperature sensor appears to read higher or lower than other room thermostats/thermometers, it may be
due to the Keypad mounting location, the room conditions, or the installation of a optional Mini Prox Reader (M1PR). The
Keypad has an adjustment procedure which allows compensation for these conditions.
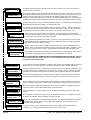
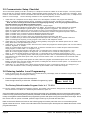
1. Press and hold the " * " key, followed by the F5 key . HOLD BOTH keys pressed for 5-10 seconds or until the LCD displays
Exit when done. F1 Set Addr. (This is Keypad setup mode)
NOTE: This mode may also be accessed by removing power from the keypad (unplugging the data bus cable) and then
applying power while holding any key pressed.
2. Press the F2 key and the LCD will display: Temperature Degrees F = XX.X (This is the current temperature)
3. Use the UP or DOWN arrow keys to adjust the current temperature display until it approximates the desired setting. Each
press of the arrow keys changes the setting by approximately 3 tenths of a degree (00.3) It may not be possible to end up
exactly on an even temperature setting.
4. Press the Exit key twice do return back to the regular operation mode.
NESS - M1 Installation and Programming Manual
Page 69