1
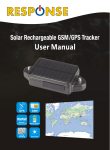
Quick Guide 1. Insert a SIM card (not included) into the SIM card slot located in the battery compartment of the tracker. Note: 4G SIM cards are acceptable to use with this device however the unit only operates on a 2G band. This unit requires data to be activated on your pre-paid or contract SIM card. 2. Connect the wiring loom to the tracker and the bare ended wires to the accessories, ground, engine immobiliser and external SOS button. Red Wire – Accessories 12/24V + Black Wire – Ground (Car or truck chassis) Yellow Wire – Engine Immobiliser White Wire – External SOS button 3. Once the unit has been wired up correctly, turn the unit on by pressing the power button until the green LED remains turned on. 4. Contact your mobile service provider to obtain the APN “name” in order to view the location on the tracking website. APN’s vary depending on your SIM card’s plan (i.e. pre-paid or contract) 5. Enter the following command via SMS on your the tracker to set the APN “name”: Send SMS “APN*123456*apnname” (123456 refers to the default password) For example: Plan: Vodafone Pre Paid APN “Name”: live.vodafone.com Send SMS: APN*123456*live.vodafone.com If the APN “Name” has been entered correctly, you will receive a SMS stating “APN:live.vodafone.com”(example) Note: The APN “name” needs to be entered correctly otherwise the location may show up in China, Africa, etc. 6. Login to the tracking website (www.responsegps.com) using the last 7 digits of the serial number for the username and password which is located in the battery compartment of the tracker. For example: Serial number: CW9999C00039342 Username: 0039342 Password: 0039342 7. Free “Response GPS” app is available on iTunes® and Google Play to easily view the current tracking location on your iOS® or Android smart phone or tablet. App name: Response GPS Box Contents: 1 x GPS tracker, 1 x Wiring Loom, 1 x External SOS button ON/OFF Button SOS Button Wiring Loom External SOS Button Before Installation: 1. Installing the SIM card (not included) Note: 1. this tracker uses a 2G GSM network, and it uploads tracking only through GPRS. It will not work on a CDMA or 3G network. (Some 4G SIM cards can use 2G GSM networks) 2. Please co nfirm the GPRS function is enabled, and the APN has been set, some network also need set the GPRS user name & password. (Call your service provider to confirm) 3. Before installing or uninstalling the SIM card, please power off the tracker Remove the battery cover by following the indication of the red arrow below and remove the battery. Lift up the SIM card socket cover and slide the SIM card in sideways by leaving the metal contact faced down. Close the SIM card cover and lock the SIM card according to the diagram below. Then restore the battery and slide the cover back on. 2. Powering the unit ON / OFF: To switch ON the power, press and hold the “ON/OFF” button until the GREEN LED is ON. To switch OFF the power, press and hold the “ON/OFF” button until the GREEN LED flashes and then it will turn off. 3. LED Indicator: GREEN LED Flashes once : GSM & GPS are working correctly GREEN LED Flashes twice : GSM working correctly, no GPS signal GREEN LED Flashes three times : GSM & GPS working correctly, battery low GREEN LED Flashes four times : GSM working correctly, battery low and no GPS signal GREEN LED ON continuously : GSM searching for networks GREEN LED OFF continuously : Powered off GREEN LED Flashes fast : Incoming call or sending a SMS RED LED Flashes once : Uploading current tracking location RED LED Flashes twice : Unable to upload tracking information 4. Power Supply: The tracker operates on 9-28VDC, so do not use any other voltage exceeding these limitis otherwise it may damage the unit. When the backup battery is full, the built-in recharge circuit will stop recharging. If the tracker is not moving, then the tracker will go into standby mode. Red Wire – Accessories 12/24V + Black Wire – Ground (Car or truck body) Yellow Wire – Engine Immobiliser White Wire – External SOS button 5. Resetting to default: (Factory configuration) Turn off the power of the tracker first, Press and Hold the ON/OFF button to connect the power wire to the car battery. This will make the tracker power on automatically and in a few seconds later the GREEN LED will flash 10 times and switch ON continuously, and then release the “ON/OFF” button, the tracker is back to default configuration. Notes: After back to default set, all IP / APN / GPRS / TIME ZONE setting are deleted and back to default, all preset phone number are deleted and password change to 123456, all the alarm setting is canceled, if the IP/APN/GPRS name& password/TIMEZONE are changed, and you need set these again by sending SMS. 6. ANTENNA The Antenna of GSM and GPS are built in the tracker. Pleas leave the tracker away from metal surfaces, which will reduce the GSM and GPS signal. 7. Shock Sensor Control GPS ON/OFF and Power Saving This tracker has a built-in shock sensor, it defaults to SHOCKCONTROL mode. The tracker will turn on the GPS and upload location automatically when it begins to move. It will turn off GPS & GPRS automatically (Stop uploading location) when it stops moving for more than 2 minutes. This can significantly reduce the power consumption and save GPRS data. 8. Using Condition The operating temperature for this product is from -20 0C to 60 0C. The storage temperature is from -40 0C to 80 0C. Operating Instructions: 1. 2G GSM phone SIM card will be needed for this product. This also needs SMS service and incoming caller ID display, and GPRS function. Please disable the PIN code of the SIM card. The SIM card phone number is the tracker number and the number for all other operations (calling and sending SMS) to the tracker. 2. After install the SIM card in the tracker, turn on the tracker and send a SMS to the tracker to set the APN name and GPRS user name & password first. Some mobile phone service providers do not required setting the APN or GPRS user name & password. So please confirm this with your service provider when purchasing the SIM card. 3. Please confirm the tracker can receive the GPS signal and GSM signal (the Green LED will flash once every 4 seconds to indicate the GSM and GPS signal are working), when the tracker begin to move, the tracker will upload the location to the platform: www.responsegps.com 4. Platform user name and password is the last 6 digital number of the S/N number printed on the back of the device. You can send SMS “ID*password” (Tracker default password is 123456) to the tracker to check the ID number, the user can also change the password. The current location of the tracker can be viewed on Google map after login to the website, and it can also display the tracking history in the specific dates and time. 5. You could also use Smartphone to visit website: www.999gps.mobi with the vehicle name and check password (defined in the Terminal management), the last location information & location map will display on your phone. 6. You could also have the tracker to send back the location in text description or google map website link by SMS (Send TEXTLOCATE*123456 or MAPLOCATE8123456 or LINKLOCATE*123456 to tracker). 7. The data & time of the tracker upload to the website is GMT time (Greenwich Mean Time, add or minus a fixed digit is your local time), you can send a SMS to the tracker to change the time to your local time, (“TIMEZONE*123456*XXX”, XXX is from -12 to +12, for example: New York is -05, Paris is +01, Sydney is +10). SMS Instruction Description Check Tracker ID Number: The tracker ID is printed on the S/N number label. If the label is somehow missing, SMS “ID*123456” to tracker, in which, “ID” is the fixed command and “123456” as the password. When it is done correctly, the track will SMS back “ID: CW0800C12345678901”, in which, “CW0800C12345678901” is the ID and every tracker has its unique ID number. The last 6 digit numbers of the tracker ID is the user name and password of the tracker on the platform, for example if the tracker ID is CW0800C12345678901, then the user name for the platform of this tracker is 678901 and the platform password for this user name is also 678901. The password can be changed after logging in. Set the Time Zone of Local Time: The data & time of the tracker uploading to the website is preset to GMT time (Greenwich Mean Time, add or minus a fixed digit is your local time). You can send a SMS to the tracker to change your upload time from GMT to your local time. Send “TIMEZONE*123456*XXX” to the tracker, in which, the “TIMEZONE” is the fixed command, “123456” is the password and XXX is the time zone of your local time. The format is from -12 to +12, for example: New York time is -05, Paris is +01, and Sydney is +10. Notice: if the time zone is not set, the tracker will upload tracking according to GMT time (Greenwich Mean Time). Set Website Server IP: Send SMS “IP*123456*58.64.155.133,8011” to the tracker, in which, “IP” is the fixed command, “123456” is the password and “58.64.155.133,8011” is your IP address of the server. However, the IP address may be changed with the upgrade of the firmware. Notice: The tracker has default IP address is: “58.64.155.133,8011”, it is not necessary to set again, unless our IP address has been changed or you change the setting. Set APN name: For some mobile phone service providers, the APN name has to be entered before get through the internet via GPRS. Send SMS “APN*123456*apnname” to the tracker, in which, “APN” is the fixed command, “123456” is the password and “apnname” is the APN name of a mobile phone service provider. Notice: Some mobile service providers are not necessary to set APN or GPRS user name & password, please confirm this, or get APN and GPRS user name & password before setting up the tracker. Set GPRS User Name & Password: Send SMS “USERNAME*123456*username*password” to the tracker, “USERNAME” is a command, “123456” is the password of the tracker; “username” is the mobile company GPRS user name, “password” is the mobile company GPRS password, if the operation is successful, the tracker will send back the information “Username:username, Password:password”, please call the mobile phone service provider for the GPRS username and password, some mobile company do not need set the GPRS username and password. If the password is not correct, then the tracker will send back a message as “Wrong Password” Note: before upload the tracking user needs set IP, APN, GPRS user name & password (2G GSM network APN, GPRS name &password, 3G network is not suit for this tracker), these only need set once, and will be saved in the tracker. But if the tracker is back to default, then these setting need be lost. Add / Delete / Check preset number: The preset phone number is for receiving alarm information by SMS, or use mobile phone to locate the tracker without platform, if the preset phone number is not set, then the alarm information can not send to user by SMS (battery low, SOS, etc). 1. Add preset phone number by SMS Send SMS“ADDPHONE*123456*A*number”(Not including the quotation marks, Number means the telephone number you want to preset, the following is same) to tracker is OK, “ADDPHONE” is a command; “123456” is password; “A” is preset number location, every tracker have 3 preset phone number locations, A and B, and C, so you can preset 3 phone numbers, if the add operation is success, the tracker will send back the information ”Add Preset Phone OK”. If the password is not right, the operation was unsuccessful; the tracker will send back information “Wrong Password”. 2. Delete preset phone number by SMS Send SMS “DELETEPHONE*123456*A” to the tracker, “DELETEPHONE” is a command; “123456” is password; “A” is preset phone number location, there are 3 locations “A” and “B” and “C”; if the delete operation is success, the tracker will send back the information”Delete Preset Phone OK”, if the password is not right, the operation is fault, the tracker will send back information “Wrong Password”. 3. Check preset phone number by SMS Send SMS “CHECKPHONE*123456” to tracker, “CHECKPHONE” is a command; “123456” is password; if the operation is successful, the tracker will send back the information “Preset Phone A: 13912345678; B:13812345678;C:13712345678, the phone number is just an example. If the password is not right, the operation is unsuccessful; the tracker will send back information as “Wrong Password”. Change / Check Password 1. Change tracker password Send SMS “CHANGEPASSWORD*123456*888888” to tracker, “CHANGEPASSWORD” is a command; “123456” is old password; “888888” is new password; if the operation is success, the tracker will send the information “ New Password:888888” to every preset phone number, if the password is not right, the operation is unsuccessful; the tracker will send back information as “Wrong Password”. Note: Only the preset phone numbers can change the password. 2. Check tracker password Send SMS “CHECKPASSWORD” to the tracker, “CHECKPASSWORD” is a command, if the operation is successful, the tracker will send back the information “Password:888888”; “888888” is an example. Note: Only preset phone numbers can check the password. Locate the tracker by calling: Using preset phone call the tracker, after ring 3 times, the tracker will hang up the call automatically and locate immediately, 10 seconds later, the tracker will send back the SMS location information (map website link) of current location to the caller. User use mobile phone to click the website link to visit website, and the location on map will display on the mobile phone (the SIM card needs to enable the GPRS function). If the tracker does not have preset numbers, any phone call can trigger the tracker to locate immediately, if the tracker has preset numbers, then it can only be trigger by the preset phone calls. The SMS information sample is as follow: http://www.followmegps.mobi/map.aspx?lat=40.756441&lng=-73.986378&l=en Battery: 91% After click the above link to visit website, The right map will display on your mobile phone. Send a SMS to trigger tracker sending back map link by SMS Send SMS “LINKLOCATE*123456” or “MAPLOCATE*123456”to the tracker, “LINKLOCATE” or “MAPLOCATE” is a command, “123456” is password; the tracker will locate immediately and send back the location information (map website link) of current location to the caller. Use mobile phone to click the website link to visit internet, and the location will display on the map on your phone (the smart phone SIM card need enable the GPRS function), if the password is not right, the operation is unsuccessful, the tracker will send back information as “Wrong Password. Send a SMS to trigger tracker sending back text description location by SMS Send SMS “TEXTLOCATE*123456” to the tracker, “TEXTLOCATE” is a command, “123456” is password; the tracker will locate immediately and visit internet to get location in text description, and then send back the location information in text description to the operator. The SMS information sample is as follow: Trigger the car immobilizer (Remotely Turn off the Car Engine) Send SMS “STOPENGINE*123456” to tracker, “STOPENGINE” is a command, “123456” is password, the car engine will be turned off immediately. The tracker will send back information “Car Engine turn off”, if the password is not right, the operation is unsuccessful, and the tracker will send back information as “Wrong Password”. Attention: Turning off engine is very dangerous when the car is on the road. This may cause an accident. Monitor sound around tracker Send SMS “MONITOR*123456” to tracker to listen sound around the tracker, “MONITOR” is a command, “123456” is password, the tracker will call back, answer the call and then you could hear the sound around the tracker. Keep Tracker Online All the Time Send SMS “KEEPONLINE*123456” to tracker can make the tracker keep online all the time, “KEEPONLINE” is a command, “123456” is password, the tracker will not go to standby mode after the tracker stop moving, it means the tracker will be transmitting all the time. This mode will cost some GPRS data and running time of the battery. This mode can be cancelled by the SMS command “CANCELALARM”. Cancel All Alarm Setting Send SMS “CANCELALARM*123456” to tracker can cancel all the alarm setting, the “STOPENGINE” command can be cancelled by this SMS, “CANCELALARM” is a command, “123456” is password, the tracker will send back information “All Alarm Cancel”, and cancel all the shock alarm setting in the tracker. If the password is not right, the operation is unsuccessful; the tracker will send back information as “Wrong Password”. Power down Alarm: When the tracker’s power supply is disconnected or cut, the tracker will automatically send power down information to the first preset phone number and the platform. This means maybe your tracker is removed from your car or has some problems; please confirm your car is safety. Low Battery Alarm: When the tracker battery voltage is low, the GREEN LED light will flash 3 or 4 times, and then the tracker will automatically send battery low information to the first preset phone number. the battery life can last about 1-2 days according the different using condition (LA9011 standby time is 2 days, uploading time is 8 hours under the condition of perfect signal coverage of the GPRS and GSM.) “SOS” Emergency Press the “SOS” button 6 seconds, first the LED will flash fast, then the LED will turn OFF, release the button, the tracker will send SOS help information to all 3 preset phones. HELP!! ! Battery: 91% Please note that the SOS button must be pressed. The SOS function need installing the external SOS button, install the external SOS button in a hidden place that only the driver can press the button; connect one wire of the SOS button to GND (car body), another wire of the SOS button to tracker SOS wire. Instruction List Function SMS Instruction Note Reply Note Set Time Zone TIMEZONE*123456 *XXX Any mobile phone can set Time Zone is XXX Reply to operation phone Set IP address IP*123456*58.64.15 5.133,8011 Any mobile phone can set IP: 58.64.155.133,8011 Reply to operation phone Set APN name APN*123456*apnna me Any mobile phone can set APN:apnname Reply to operation phone Set GPRS user name & password USERNAME*12345 6*username*passwo rd Any mobile phone can set Username:username, Password:password Reply to operation phone Check tracker ID Number ID*123456 Any mobile phone can set ID:CW0810C1234567 8901 Reply to operation phone Add phone number ADDPHONE*12345 6*A*13322990033 Any mobile phone can set Add Preset Phone OK Reply to the operation phone Delete phone number DELETEPHONE*12 3456*A Any mobile phone can delete Delete Preset Phone OK Reply to the operation phone Check preset phone number CHECKPHONE*123 456 Any mobile phone can check A:13912345678; B:13812345678; C:13712345678; Reply to the operation phone Change password CHANGEPASSWO RD*123456*888888 Only preset phone can change New Password: 888888 Reply to operation preset phone Check password CHECKPASSWOR D Only preset phone can check Password: 888888 Reply to operation preset phone Send SMS trigger map link report location LINKLOCATE*1234 56 Any mobile phone can set Current location map website link Reply to operation phone Listen & Monitor sound MONITOR*123456 Any mobile phone can set Call back and pick up the calling can listen Call back to operation phone Remote turn off car engine STOPENGINE*1234 56 Only preset phone can set Car Engine Turn Off Reply to operation phone Keep Tracker Online Continuously CANCELALARM*12 3456 Any mobile phone can set All Alarm Cancel Reply to operation phone Cancel All Alarm Setting CANCELALARM*12 3456 Any mobile phone can set All Alarm Cancel Reply to operation phone Auto Re-power on & Reset tracker RESET*123456 Any mobile phone can set Tracker Re-power on and cancel all alarm setting Reply to operation phone SOS Emergency Press SOS button until the GREEN LED turn off HELP + location information 1.The default password is 123456, you can change the password. Send SOS HELP information to all preset phone 2.All the SMS information is in English word, “*” is the star key, “” is not including in the SMS information, it is just used to indicate the information. Notes & Trouble Shooting 1. This tracker uses 2G GSM network, and it upload tracking only through 2G GPRS, it can not work in CDMA network or 3G (WCDMA or CDMA2000) network. Please confirm that the SIM card PIN code has been disabled. If the tracker can not find GSM network, the Green LED will stay ON. 2. The antenna of GSM and GPS is built-in with the unit. Please make sure that the location where the tracker was installed is able to receive the GPS signal. Please leave away the tracker from metal panels, and keep away from the magnetic materials. 3. The tracker has a built-in high capacity Lithium battery, which can run about 1-2 days (standby mode) once fully charged. You can also connect the tracker to the car battery and this will keep the tracker running continuously. 4. The GPS will take 10 to 200 seconds to locate its position. When the GSM signal is weak or the network is very busy, the SMS may be delayed. 5. Please confirm the tracker has enough power, and try to recharge it when the power is running low and confirm the adapter is working well (When charging the RED LED is on, the LED colour will turn to GREEN when it’s fully charged. the charging process will take over 3 hours). 6. If the tracker work well the Green LED will flash once every 4 seconds. Please make sure the SIM card is installed properly if otherwise. 7. If the tracker cannot upload its location to the website, please confirm the SIM card has GPRS function, and has set the APN or GPRS username & password. 8. If the tracker can not send back information by SMS, please confirm the SIM card has ID caller display function and SMS service function, and please read the SMS information of the tracker sending back, and check the instruction & if the password is correct . 9. When calling the tracker, and it does not hang up the call. Please check if the preset phone number has been set and use the preset phone or delete the preset phone number or let the tracker back to default is OK. 10. The tracking records may get lost when going through poor signal areas. Specification: GSM Module SIMCOM 900 or 900A Locate precision 10-20 Meters GSM Frequency 4 band GPS Hot Start Time 1 second GPS channel 32 channels Uploading Current <200mA / 5V GPS Cold Start Time 36 seconds Working Temperature -20 C to +55 C GSM / GPS Antenna Built in Storage Temperature -40 C to +80 C Battery 800mAh Absolute Temperature -35 C to +70 C Standby Current < 10 mA 0 0 0 0 0 0 Warranty We strongly recommend you to have this system installed by professional. There is a one year warranty on this product except: 1. The unit was damaged due to the improper installation. 2. The unit has been modified. 3. Any damaged done due to the improper use of the device. Warning: this device is just an auxiliary product that applying the location of current objects, we do not take any responsibilities if you have damage or lost in using this tracker. Website Tracking Platform Operation Guide This software is web based system, for users to logon with given user name & password to locate the tracker’s current location, play back the history tracking with specified date & time, remote turn off car engine, listen the sound in car, and set over speed alarm etc. This system uses the Google map and support all the explore software, such as Microsoft IE, Google Chrome, Firefox, Apple Safari, Opera etc. Apps are also available for iOS iPhone & Android App. Please visit http://d.999gps.net to download the app & manual and user guide. Scan the QR code on the login page www.responsegps.com , can also download the app & manual. This device can be used to track cars, company vehicles, buses, taxis, trucks, and other vehicles. Tracking Platform Operation Every tracker has a unique user name and password. The default user name is the last 7 digits of the S/N or ID or IMEI number which is printed on the label that sticks on the back of the tracker or under the battery. You could also check the tracker ID by sending a SMS (ID*123456 or check#) to tracker to check ID and the default password is the same with user name. For example if the tracker’s S/N is: CC0800C01234567, then the default user name on the platform of this tracker is: 1234567, and the default platform password is :1234567. Users can change the password and user information (Such as car number plate numbers and phone numbers). But the user name cannot be changed. Note: In the following words, “Click” means the action of clicking the left button of your mouse once. 9. Platform Login: Visit www.responsegps.com , select the langue version, the login page will display as follow, click the picture or link in the page can visit the proper page to download app or user manual, also scan the QR code with mobile phone can visit: Platform User name User password Click “Login” to login Select Language iPhone App Download Android App Download Wap visit Locate WeChat Locate Manual Download After Login Page Running, alarm, Report Fleet and user Car status window Name & status Tracking Map window 10. Display current car location: Every time after you login, the following window will display. The bottom left window will display the current fleet car name and status (online or offline), click the car name, the car detail location and status will display. For the sub-fleet car, click the sub-fleet name, the sub-fleet car name will display in the left bottom window, also click the car name, the car location will display on map (For Example click sub-fleet TEST1, the car T1 will display, click T1, T1 location will display). 11. Change User Password: The default password is same as the user name. We recommend the users to change the password before using. Click the menu “More” on the top right, and then click “Change password”, the change password page will display, input the current and new password. 12. Change User Account Information: Click the menu “More” on the top right, and then click “My account”. The account information page will display, please set the user contact information, and select local timezone (upload time is GMT time, not your local time,after selecting local timezone, it is not necessary to set local time by sending SMS to tracker again). The contact information is very important. 13. Change target Information (Car Name / SIM card number etc.) Click the car name in the bottom left window. The pop up windows will display the car status and click the menu “More” in the pop up window. Another window will pop up, click the “target info”, the target info window will pop up. The IMEI number / expired date / Type / Active date cam not be changed by user, the target Name is the car name that display in the bottom left window, SIM card number is the sim card number in the tracker(this can avoid you forget the sim card number in the future), License Plate No is the car plate number that can be used to login the platform (Select IMEI or Car Plate, password is the same), the over speed (Km/h) is the alarm speed, and the Contacts is your name, and Fuel /100km is the average fuel consume every 100km (used for calculate about how many fuel will be exhaust), and the display car icon on the map can be selected. Click “Save” to save the changing of the setting. 14. Car Status: To save vehicle or object power battery and gprs data, after the object stop moving for 2 minutes, the tracker will turn off GPS and GPRS, and go to sleep mode. The car status will change to offline mode, and when the vehicle started moving again, the tracker will turn on the GPS and GPRS to upload the location to server again. If you need keep the tracker online all the time, please send SMS to change the setting of the tracker, the detail SMS command please see the tracker manual for details. 15. History Track Playback: Click the car name in the left bottom window, the pop up windows will display the car status, and click the menu “Playback” in the pop up window or below the car name. A new playback page will pop up, click the “From” and “To” to select the start and end playback time, and then Click “OK”. And then Click “Play”, the system will load the history tracking and playback automatically, you can slide the blue “█” button to slow to make the playback speed slower, and the right bottom window will display the event recoding (Stop time and period etc.), the server will keep the tracking data for 6-12 months. 16. Real Time Tracking: Click the car name, the car’s latest location will display on the map, and every 30 seconds the location will be updated from the server on the map, it is not necessary to do any operation when tracking the vehicle on the web, just keep the explorer open. 17. Set Break Geo-fence Alarm(In out Area Alarm): Click the car name in the left bottom window, the pop up windows will display the car status, and click the menu “Geo-fence” in the pop up window or below the car name “More” and “Geo-fence”, the menu is the same location on the screen with the above, an new “Geo-fence” page will pop up, click the “Add” menu to define a new geo-fence. Click and hold the mouse button to drag the circle bigger or smaller, and click and hold the center point of the circle can move the circle to your demand place on the map. Give a name of this geo-fence, and click “Save” to save the geo-fence, later when the object is out of the area, the alarm information will be record in the server, you can check and export the alarm list any time. 18. Over Speed Alarm: The over speed alarm is set in the “target Info”, please see the above to set the speed. the alarm can be check and export from the “Statistics” menu. 19. Listening or Monitor Sound Around Tracker This function is operated by the tracker, send SMS to tracker to listen the sound or talk to the driver, the detail operation please see the tracker manual. 20. Cut Oil Power (Remote Turn Off Car Engine) This function needs to be used with caution, and it is only operated by sending SMS to tracker, the detail operations please see the tracker manual. A relay is necessary to install to turn off the car engine, and also a diode is necessary to add to protect the tracker driving wire, the diagram is as follow: Attention: Turning off car engine is very dangerous when the car is moving, so we recommend install the relay to cut the start motor wire, this will make you can not remotely turn off the car engine, but you can make the car engine can not be started. 21. WAP Visit to Locate Object on Mobile Phone: Use mobile phone visit website: http://wap.999gps.net, login with the same user name & password with the website login, the latest location will display on the map. Note: The wap locate only can locate latest location on map, can not playback history tracking or do other operation. 22. iOS iPhone App Locate: IPhone App is available for locating car with current location and playing back history back, it is more easy and convenient to use. Use mobile phone visit website: http://d.999gps.net, click the “iPhone App Download”, it will link to the apple app store, you can download and install the iPhone software on apple app store, it is free, and it is not necessary to do the IOS Jailbreaking, you just need register an apple ID with email and verify it on the app store https://appleid.apple.com is OK, the following is app store website link to download and install the app on iPhone : https://itunes.apple.com/us/app/gpstrack1/id717568884?ls=1&mt=8 Also Scan the following QR code can visit the above app store website page to download and install the app. Also open app store on iPhone, Search “GPStrack1” app, the above app will display, click the “Free” and “Install”, and input your apple ID and password, the app will be downloaded and installed on the iPhone automatically. Note: before running the GPStrack1 app, the “Location Services” need be enabled, please set as the following: Setting→Location Services, or: Settings→Privacy→Location Services, Enable the “Location Services”, and please confirm the the selection of the GPStrack1 list in the program also have been enabled to “On”. The following is the process of downloading and installing. Note: iPhone & Android App locate will cost GPRS data, Before using mobile phone app to locate, you need enable GPRS service or enable WLAN and connect to available wifi, if use app under non-wifi condition, user need pay GPRS data charge of mobile phone, if the app will be used very often, we recommend order a GPRS data package to save money, please call your mobile phone company to select and order a GPRS data package. And also, after using the app, please exit the app to avoid using GPRS data in the back ground. 23. Android phone App Locate: Also android app is available for locating car with current location and playing back history back on android mobile phone, it is easy and convenient to use. For Android mobile phone, security setting need change before installation, click menu “Settings -- Security -- Device administration -- Unknown sources (Allow installation of non-Market apps)”, Click to select this option (V change to Green ), this means the mobile phone can allow installing the download apps, after installation, you can change the above setting back to disable status. Note: before running the GPStrack app, the “Location Services” need be enabled, please set as the following: Setting→Location Services, Enable the “Google location service” and “GPS satellites” (click the selection frame and appear a green V can enable the selection). Use mobile phone visit website: http://d.999gps.net, click the “Android App Download”, it will link to Android App Download Website: http://d.999gps.net/d/gpstrack_en.apk Click “OK” to download the app, After downloading, the system will install the app automatically, Click “Install” to begin the installing, after the installation click “Open” or “Done” is OK. Press the app icon and hold can move the app icon to main screen, and then later, it is easy to find and run the app. Also Scan the following QR code can visit the above app store website page to download and install the app. Some company android system mobile phone, the “GoogleServicesFramework” are removed by the manufacture from the android system, and the GPStrack app will use this service, so this will make the installation been terminated by the system, so you need download and install the standard “GoogleServicesFramework” from internet, and update the android os system and re-power on the mobile phone, and then the GPStrack app can be installed on the mobile phone, the detail information for how to update the android please search on internet. Note: iPhone & Android App locate will cost GPRS data, Before using mobile phone app to locate, you need enable GPRS service or enable WLAN and connect to available wifi, if use app under non-wifi condition, user need pay GPRS data charge of mobile phone, if the app will be used very often, we recommend order a GPRS data package to save money, please call your mobile phone company to select and order a GPRS data package. And also, after using the app, please exit the app to avoid using GPRS data in the back ground. 24. WeChat Locate on Smart Phone:(iPhone/Android/Windows/Blackberry/Symbian) 1. WeChat is a online live connecting software by text,voice or video through internet, it can be used for iPhone / Android / Windows / BlackBerry / Symbian mobile phone, just follow our official account GPStracker, and then send “platformloginname#password” to the account GPStracker to link your personal WeChat account and your tracker login name together, then your personal wechat account is your tracker authorized wechat account, and later just send 123 to GPStracker, WeChat will reply you the current location with text description & Google map, it is easy and convenient. For how to download, install and register WeChat please visit: http://www.wechat.com or http://weixin.qq.com . 2. Follow the GPStracker official accounts by Search: After login WeChat click the “Contacts”at the bottom of the screen, and then click “+” on the top right corner of the screen, and then click “Official Accounts”, and then input”gpstracker” in the key words search area, Click “Search”, the GPStracker official account will display, Click GPStracker official account, and click “Follow”, and then GPStracker official account is been followed by your personal WeChat account. 3. Follow the GPStracker official accounts by Scan QR Code: After login WeChat click the “Discover”at the bottom of the screen, and then click “Scan QR Code” on the screen, and then the scan QR code window will display, scan the QR cose in the following QR code picture, the GPStracker official account will display, the following process is same with the above “Search” process, click “Follow”, and then GPStracker official account is been followed by your personal WeChat account, later you can find this official in the “Official Accounts”- “Service Accounts”, click the account, the dialogue window will pop up, and then you can send text to the official to locate. 4. Set your personal WeChat account as authorization account: After login WeChat click the “Chats”at the bottom of the screen, and then input”gpstracker” in the search area, the GPStracker official account will display, Click GPStracker official account, the dialog interface will display, input text “platformloginname#password” in the dialog input area, and click “Send”, a few seconds later the system will reply add authorization account success. The platform login name is same and password is same with the GPS tracking platform web login on PC (normally platform user name is the last 7 digital of the SN or ID or IMEI, for example ID is 1451217388, the default login name and password all are 1217388, you can change password on the platform yourself). For example, demo account login name and password are 123456; Send “123456#123456” to GPStracker can set your personal WeChat account as the authorization account of the GPS platform user 123456. 5. Located by WeChat: After login WeChat click the “Chats”at the bottom of the screen, and then input ”gpstracker” in the search area, the GPStracker official account will display, Click GPStracker official account, the dialog interface will display, input text “123” in the dialog input area, and click “Send”, a few seconds later the system will reply the tracker current location with map and text, click the reply message, the system will display current location on the Google Map. Later just do the step 5 is OK, the step 1-4 only need set once. 25. Wap Visit Locate by Mobile Phone: Just visit http://wap.999gps.net website with mobile phone explorer, input the user name and password (user name and password is same with the PC website login), click “OK”, the latest location will display on your mobile phone with Google map, the wap locating is only an auxiliary way to locate car with non-smart phone, and it only can display latest location, and can not play back history tracking. 26. Map Link Locate by calling or send SMS: Calling the tracker or sending SMS (linklocate*123456 or URL# or 123#) to the tracker can trigger the tracker send back the SMS location information (map website link) to caller. User click the website link to visit internet by phone, and the location on map will display on the mobile phone (the mobile phone need enable the GPRS function, and every display will cost 10K byte GPRS data). The detail using methods please refer the manual of the tracker. The SMS information sample is as follow: https://maps.google.com/maps?q=22.67680N,114.15188E Battery: 91% Trouble Shooting 1. The history tracking data on our server will keep up to 6-12 months, the old data will be deleted. 2. If the car status is kept offline when the object is moving, and the location did not change, please confirm the SIM card in the tracker has been enabled GPRS function and has enough call credit in it, and the APN has been set by your tracker SIM card mobile phone using guide, and please keep the tracker outside to receive the GPS signal and GSM signal, if the tracker is moving, it will upload location to server, but if the tracker stop moving, it will not upload tracking to the server and go to offline status. If the tracker Green LED keep ON, it means no GSM network, if the Green LED flashes twice, it means GPS signal weak. 3. If the tracker can not reply SMS, please confirm the SIM card in tracker has been enabled caller ID display & SMS function and have enough money, also please confirm the command and password is right. 4. The tracker is not online all the time, this is normal, the tracker built in shock sensor to control GPS and uploading, if the tracker stop moving 2 minutes, the tracker will turn off GPS and go to standby mode, this can save car battery power & GPRS data charge, if the tracker begin moving, it will upload location to server immediately, and the status will change to online immediately. 5. If you forget your login password or user name, or can not login the platform any more, please confirm your service date is not expired, if still can not login, please contact your dealer or distributor to reset password or recharging for the platform service. 6. Can not logon the platform, sending SMS (ID*123456 or check# ) to tracker to check tracker’s ID, the user name is the last 7 digit of the ID, and the password is same with user name, if still can not logon, please contact dealer or us. For example the ID is : 1451217388, then the user name is :1217388, and password is : 1217388. 7. In some place, GPS signal & GSM signal maybe not very good, in the transmit process, some tracking point maybe lost, this is normal, but this will not happen very often. 8. The mileage in the vehicle running report is calculated from GPS data, and the precision is not very high, maybe it has some difference with the mileage meter. APN FAQ: The following will provide an understanding on the set up process for the LA9011 relating to the APN requirements. Question: How do I know if my APN is set or not? Answer: The simplest way of learning if your APN is set or not, once logged on to the tracking website, your location on the map will show a default place somewhere in China, Africa, etc. When these locations are shown, this means your APN is not set. Question: Page 3 & 15 of the user manual states; “some mobile service providers it is not necessary to set an APN or GPRS user name & password” How will I know if my SIM card and service provider falls under this statement? Answer: Once logged on the Tracking Website, if your location show’s somewhere near China, Africa, etc, this means your APN is not set and therefore your SIM card and service provider does NOT fall under this statement. Question: Page 13 of the user manual states; “please contact your mobile service provider to confirm if a APN name is required. It will not connect properly if this is not set” I had contacted my mobile service provider, they advised it will not be required. However my location still shows somewhere in China, Africa, etc. Answer: Your mobile service provider may have advised you that your APN is active, or that your APN is not required. However, you will need to still set your SIM card’s APN “name” to set on the LA-9011 tracker. Without knowing your APN “name”, you will not be able to complete the set-up process for online tracking. Question: Page 13 of the user manual states I need to set my APN “name”, what is my APN “name’? Answer: APN’s vary depending on your SIM card’s plan (i.e. pre-paid, post-paid or contract) with your service provider. An example of what an APN look’s like; Plan: Vodaphone Post Paid APN: live.vodaphone.com A simple way of learning the APN “name” for your SIM card is by contacting your service provider. Advise them of your SIM card plan you have with them and request they provide you with the APN “name”. Question: I have my APN “name” now. How do I set the APN? Answer: Send SMS using the following text: APN*123456*apn name NOTE: The “APN” part of the text MUST be in CAPITALS, MUST be followed by an asterisk (*) The “123456” MUST follow, MUST be followed by an asterisk (*) The “apn name” MUST be your APN “name” from your service provider you have for your SIM card in use with the LA-9011 So in the case your SIM card’s plan is Vodafone Post Paid, setting your APN should look like the following: APN*123456*live.vodafone.com Question: I sent the APN text and I received a confirmation back that my APN has been set. However once I log in to view my tracking, it still shows my location to be somewhere in China, Africa, etc? Answer: The APN “name” used is wrong. The APN settings on the LA9011 tracker will save even if the wrong APN name had been used. This is why you are not able to track your unit. Your service provider may have provided you with the incorrect APN “name”, as some SIM card deals are similar and can be mixed when requesting your APN “name”. Please contact your service provider again and request you receive the correct APN “name”. Question: Sometimes my LA9011 tracker gets delayed or completely drops out in signal when uploading to the tracking website? Why does this happen? Answer: The LA9011 tracker uses your SIM card like a mobile phone would. Delays occur when the signal strength is weak, drop out’s occur because when no signal can be located. Much like using internet data on your mobile phone. When a webpage loads slowly due to poor signal or when the signal bar shows no signal. Placing your LA9011 tracker somewhere near the window or the dash will help your chances of receiving better signal. List of Australian APN Names: 3 – Post-Paid 3netaccess 3 – Pre-Paid 3services ALDI Mobile mdata.net.au Amaysim (prepaid and postpaid mobile) internet or yesinternet Apex Telecom APN: splns357 Huawei Dongle Code: 357I4 Beagle APN: splns357 Huawei Dongle Code: 357I4 BLiNK (services after 04/08/09) splns888a1 BLiNK (services prior to 04/08/09) connect Bigpond (For Telstra services see below) telstra.bigpond – Username and Password required Crazy John's & GRL & Lebara & GoTalk purtona.net ClubTelco mwb Dodo – Post-Paid WirelessBroadband Dodo – Pre-Paid DODOLNS1 Dodo – Pre-Paid Mobile internet Escape Net APN: splns357 Huawei Dongle Code: 357I4 Exetel Exetel (Optus Based HSPA plans) exetel1 Exetel (Optus Based CAP Plans) For handsets (but not iPhones) being used on the Exetel (via Optus) network: INTERNET or OPTUSWAP For iPhones being used on the Exetel (via Optus) network: YesINTERNET Exetel (Vodafone Based) vfinternet.au Exetel (Newer Optus Based HSPA plans) connect Highway1 APN: splns357 Huawei Dongle Code: 357I4 iiNet If you are using an Apple iPhone, the setting is “yesinternet”. For other devices it is “internet Internode (services after 26/08/09) internode Internode (services prior to 26/08/09) splns333a1 iPrimus primuslns1 Macquarie Telecom • • Phones: telstra.wap Datacards: mdata.net.au Optus Post-Paid Mobile Broadband Plans • • • • • • • BYO Plans – connectme iPad Plans – connectme Mobile Broadband Cap Plans – connectcap Power Pack Plans – connectcap Data Cap – connectcap & mms Data Cap Plus – connectcap & mms Data Cap Plus Voice – connectcap & mms • • Business Plan – yesbusiness Any other Post-Paid Plan – connect Pre-Paid Mobile Broadband Plans • • • BYO Plans – connectme iPad Plans – connectme Any other Pre-Paid Plan – preconnect Pacnet – Optus pacnet / internet Penntytel – Optus connect Pennytel – Vodafone live.vodafone.com vfinternet.au Red Bull Mobile Vodafone MVNO Pre-paid APN: purtona.wap (Yes, even if not using WAP) RivalFree APN: splns357 Simtronic Technologies APN: MWB Huawei Dongle Code: Smelly Black Dog Business and Postpaid Accounts APN: MWB Huawei Dongle Code: Prepaid Accounts APN: splns357 Huawei Dongle Code: 357I4 Telstra (all services except Bigpond, see above) telstra.internet Note: There are various options for Telstra Next G USIMs to enhance or limit mobile service capabilities. These options can only applied by Telstra and are not user settable. All normal USIMs have access to the Internet using APNs telstra.internet, telstra.wap so they don't have to be defined explicitly. All normal USIMs have access to Telstra picture messaging using APN telstra.mms so it does not have to be defined explicitly. The codes below may assist your discussions with Telstra. • GPTCOMB3 – Explicitly allows access to the Internet using APN telstra.internet • GPWAPB3 – Explicitly allows access to Telstra WAP portal and the Internet using APN telstra.wap • GPMMSB3 – Explicitly allows access to Telstra picture messaging using APN * telstra.mms GPPCPAC3 – Allows access to Internet using APN telstra.pcpack which has a 15 min idle timeout. • GPDPACK3 – Allows access to Internet using APN telstra.datapack which has a 2 hour idle timeout. • GPTEXB3 – Allows access to Internet using APN telstra.extranet which assigns a dynamic real IP • GPCORPB3 – Allows access to Telstra Wireless IP WAN using APN telstra.corp address. TPG Mobile (Optus) internet TPG Mobile Broadband SIM in Android phone (data only) Name: TPG; APN: TPG; MCC: 505; MNC: 02; Authentication type: PAP; All other fields: <not set> Virgin – <b>Mobile VirginInternet Virgin – Pre-Paid and Post-Paid Mobile Broadband VirginBroadband Vodafone – Post-Paid live.vodafone.com Vodafone – Pre-Paid live.vodafone.com Vodafone – Mobile Broadband – Post-Paid live.vodafone.com Vodafone – Mobile Broadband – Pre-Paid live.vodafone.com Vodafone – iPad 4G live.vodafone.com Vodafone – iPad 3G – Post-Paid live.vodafone.com Vodafone – iPad 3G – Pre-Paid vfprepaymbb WestNet splns555a1 List of New Zealand APN Names: Vodafone APN name: www.vodafone.net.nz [edit]2Degrees APN name: internet [edit]Black+White MVNO/ESP. Operates in Vodafone network. APN name: www.m2.net.nz [edit]CallPlus APN name: www.callplus.net.nz [edit]Digital Island APN name: internet.telecom.co.nz [edit]Orcon APN name: www.orcon.net.nz Distributed by: TechBrands Electus Distribution Pty. Ltd. 320 Victoria Rd, Rydalmere NSW 2116 Australia Ph: 1300 738 555 Int’l: +61 2 8832 3200 Fax: 1300 738 500 www.techbrands.com