1
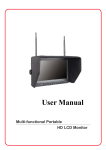
Multi-function Portable
HD LCD Monitor
User Manual
Product description:
Multi-Function Portable HD LCD Monitor is integrated circuit, high-grade
LCD Panel and high-capacitive built-in battery! It features video output,
special features, widely used, small、size, easy Operation, portable!
Application for ground station, CCTV security, baby monitor, on-camera
field monitor, construction site video surveillance, advertising and other
venues.
This monitor is built–in lipobttery; external battery plate and DC power
adapter are optional!
To insure best use of the unit, please read the user’s
manual carefully.
CAUTION
1. Do not use any damaged or leaking battery and please replace the
Battery immediately if it’s working life becomes short significantly
2. Do not expose this product to direct sunlight, heat or humid
conditions
3. Keep away from strong light while using this product so as to obtain
the clearest and the most colorful picture. Please use sun shade for
the outdoor necessary
4. Please avoid heavy impact or drop on the ground.
5. Do not use chemical solutions to clean this unit. Please simply wipe
with a clean soft cloth to keep the brightness of the surface.
6. Without adjustable component in the unit, please do not take apart or
repair the unit by yourself, to avoid damage the product.
1
Product feature:
●High brightness, contrast, anti-glare screen with a sun
Shade, sun clearly visible
●With VIDEO input, output, HDMI input, suitable for a
Variety of sources. Can be used as video, photography
Viewfinder, advertising machine.
●Color Control Systems support, enter the menu to manually
Select the appropriate format, and adaptable
●Front head phone monitor playback audio effects
●Build-in battery and rear battery plate, can be equipped with
A variety of battery, No power to facilitate use of the site in
country
●With VIDEO signal output function, can be used as video
Playback DVR host, connecting multiple monitors.
●Check Field
●Picture Screen Markers and Center Marker
2
CONTENTS
1. Product description ------------------------------ 3
2. Operation instruction ---------------------------- 5
3. Sun shade installation and remove ------- 9
4. Power Supply ---------------------------------------- 11
5. Parameters -------------------------------------------- 14
6. Trouble shooting ----------------------------------- 15
1.Product description:
1.1 Front panel instruction:
1、 Power/Battery indicator
2、 POWER:Standby button
3、 MODE: Input Signal selection button
3
4、 UP:
UP button, up an option
5、 DOWN:Down button, down one option
6、 MENU:Menu key
7、RIGHT: Volume up, press this key to increase the volume control,
Menu item selection for settings adjustment
8、LEFT: Center Marker or volume down, Press this button to on/off
center marker; if want to turn down the volume, press “RIGHT”
firstly and then use “LEFT” to be adjusted. Menu item selection for
settings adjustment
9、
SCALE: SCALE on and settings
10、CAMERA: CAMERA mode on/off
11、FOCUS: FOCUS on/off
12、
:Stereo earphone jack
13、LED screen
1.2 Rear battery plate instruction:
1. VIDEO OUT: Composite video signal output
4
2. HDMI: HD HDMI signal input
3. VIDEO IN: Composite video signal input
4. USB data ungraded port
5. AUDIO IN: Audio signal input
6. Power switch “
”Indicates that the power is turned,“○”means
Disconnect the power
7. Power input jack
8. Battery Pack
9. Speaker
10、11:it is a screw hole for battery plate,when you use battery
external,10 is“+”,11 is“-”,Copper Screw size:M3×9.5mm
A:Battery plate locking screw hole,4 holes,Copper Screw
size:M3×5.0mm
B: 75×75mm VESA,Screw size:M4×5.0mm
2. Operation instruction:
2.1 Operation instruction:
POWER
MODE
UP
Standby button
Input Signal switch button
button, up an option
DOWN
button, down one option
MENU
key
RIGHT
Volume up, press this key to increase the volume
control, Menu item selection for settings adjustment
LEFT
Center Marker or volume down, Press this button to
on/off center marker; if want to turn down the volume,
5
press “RIGHT” firstly and then use “LEFT” to be adjusted.
Menu item selection for settings adjustment
SCALE
on and settings
CAMERA
FOCUS
mode on/off
on/off
2、2 Menu instructions
Press “MENU” to enter the menu, use the “DOWN” or “UP” button to
select color, Menu, function, volume, press the “MENU” to confirm, then it
will enter next operation, use the “DOWN” or “up” to select optional
press the “MENU” to confirm again, use the “DOWN” or “UP” to adjust or
select the parameter. Press the “MENU” to confirm after you finish the
setting. Press the “MENU” to exit the OSD menu
COLOR
※ Brightness: To adjust the image's brightness.
※ Contrast: To adjust the brightest and darkest ratio of the image,
please note the sense of picture when adjust, proportion too
large or small, will make the picture lose the color of showy.
6
※ Hue: On NTSC Video mode, the image color tint difference is
Adjustable by tint.
※ Saturation: To adjust color concentration
※Check Field: Switch on/off Check Field (Red、Green、Blue
Monochromatic and Color)
OSD
※ Language:
Languages for OSD as below:
English、简体中文、François、Italia no、Deutsch
Español、日本語、
한국의、
Pycc、Portuguesa
※ H Position:To adjust the OSD position in horizontal.
※ V Position:To adjust the OSD position in vertical.
※ OSD Timeout:To adjust the clock.
※ Transparent:To adjust the level of transparent.
7
Function
※ Reset:Back to original setting.
※ System:To adjust color video format.
※ Display Ratio:To change the display ratio 16:9/4:3.
※ Screen Markers:To adjust screen marker(off,96%,93%,
90%,85%,80%)
※ Centre Markers: To set centre mark (cross mark) display
※ Camera : Use the Canon 5 d II or similar camera, the monitor
video has real-time images. NO black screen, NO delay,
perfect without distortion.
8
Sound
※ Volume: To adjust the volume.
※ Focus : As an auxiliary functions (in HDMI mode ) when used
as the camera viewfinder.
※ Ver.1.0:Software version number
3. Sun shade installation and remove
3.1 Installation: Positive parallel alignment of the sun shade and
monitor, the projection of the sun shade hanging claw at the monitor sun
shade slot (see the monitor front view marked 17), pay attention to the
position should be aligned around inserted balanced slide down.
①
②
9
●Sun shade installation view
① the sun shade’s hanging claw and the monitor’s sun shade slot should
be aligned around inserted balanced to slide down.
② By equilibrium of sliding down to match up the sun shade and monitor.
③ Please follow steps, otherwise will damage the cover, please do not
press the L/R panel of the sun shade, if not, unable open the cover.
③
3.2 Remove: When you want to shade cover is removed from the monitor,
hands were clenched monitor and the sun shade, drag up shade cover
from monitor that separates the sun shade from the monitor.
● Remove sun shade view:
①
②
③
10
①In accordance with the instructions below steps, close the sun
shade in sequence
② Drag up sun shade balanced to separates the sun shade from
the monitor.
③ Remove the sun shade
4. Power Supply
There are three versions for power supply:
4.1 Supply by city electricity with power adapter
When the monitor connect the electricity by DC power adapter, red
light is illuminated, means is charging, after fully charged, then switch
to green light.
When the power switch is on “
”, the monitor is in operation mode,
green light is illuminated. If the built-in battery is not fully charged ,
it still continue to charge the battery, until the battery is full.
To use power adapter supply , it can choose the power
adapter(optional) , which matches to the monitor. If the customer need
to use the other power adapter, please use the qualified power supply
in DC9-18V, ≧1.5A.
4.2 Built-in Battery Power Supply
This model is built-in Li-ion battery capacity: 7.4V-2200mA/h
(2Hours),after fully-charged, it lasts to work 2 hours.
4.3 External Battery Plate to install battery
When no electricity, in order to longer the battery working hour, the
user can install the external battery plate (optional) with battery to
supply the monitor power.
11
When install the external battery plate, please follow“1.2
rearview”Please use the M3×9.5mm copper screw to fasten the two
power output cables into NO.12.13 at the back of monitor.When
screwing, please pay attention to the polarity, 12 is +; 13 is -.Then
match the 4 screw holes of plates to A point at the back of monitor,And
use M3×5.0mm copper screw to fasten the plate and monitor.
4.4 Battery Plate:
F970
LP-E6
D28
According to the different requirements of battery for the customers
attached different battery plate slots. NO requirements, the factory
defaults assembly F970 battery plate.
● F970 battery slot for battery of Sony DV
Sony F970 F960 F950 T930 F770 T750 F730 F570 F550 F530
QM91D QM91 QM90D QM90 QM71D QM71 QM70D QM70
QM51D QM51 FM71 FM70 series
● LP-E6 battery slot for battery of Canon DV
Canon LP-E6
● D28 battery slot for battery of Panasonic DV
Panasonic D55 D54S D54SE D40 D35 D33 D32 D28 D25 D22
series
12
● Three types of batteries corresponding to the upper three slots
F970
LP-E6
D28
Different specifications of the battery, capability is different. The
working time for the monitor will be different. Higher capability
(working time) will be longer.
4.5 Li-ion Battery
● The working temperature of Li-ion battery is -20~60℃, please
don’t use battery in the place with temperature too low or to high. The
power of battery will be reduce if it is working in low temperature
environment. Please don’t use the battery in high temperature
environment, may cause battery swell then fire. Please check the
temperature of battery when it working in high temperature
environment.
●Over- charge and over- discharge, it will cause permanent damage to
the positive pole and negative pole of batteries.
No need over discharge then rechargeable every time.
● Period of time to do a deep charge and discharge the battery under
the protection circuit control to correct the consumption statistics, but it
will not improve your battery's actual capacity
13
● Please be placed in a cool place to weaken the passivation speed of
battery, if you don’t use the battery for long time.
●Please charge power stored in the battery to prevent self-discharge of
excessive lead to excessive discharge damage if you don’t use the
battery for long time.
5、Parameters
Panel size
TFT LCD 7.0inch
Panel type
TFT LCD
Resolution
1024×600×RGB =1843200 Pixels
Backlight
LED
Dot pitch
0.05(W) x 0.15 (H)
Display ratio
16:9
Brightness
450 cd/㎡
Contrast ratio
700:1
Response time
10ms
Viewing angle
75°/75°(L/R) 70°/75°(U/D)
Input signal
Video/Audio/RF/HDMI
Output signal
Video
Video color system
PAL-4.43 / NTSC-3.58
HDMI support format
480i /480p /576i /576p
720p /1080i /1080p (50/60Hz)
Headphone output
stereo 3.5mm
Input voltage
DC:9~15V
Power consumption
≦13W
Unit size
189(L)x144(W)x37(H)mm
14
Weight
540g (Including the Li-ion battery,but without battery
plate)
Built-in battery
Li-ion 7.4V/2200 mA/h
1. "1/4"-20 Thread mounting socket,
Install Way
2.75×75mm VESA
Working Temperature
-20~50℃
storage Temperature
-30~65℃
6. Trouble shooting
6.1 Only black and white or monochrome picture
① Please check saturation、brightness & contrast adjustment.
② Please check monitor’s "color" from the menu "monochrome" is
in black and white or monochrome image or other condition.
6.2 NO picture after put on the power
① Check signal cable contact are in good condition, a monitor is
synchronized with the input signal, and can press the
"SOURCE/EXIT" give it a try. If in the RF channel, please check to
see if the transmitter has been work.
② Check signal cable connecting, and make sure use the standard
adapter connect the monitor. If power supply by battery, please check
the battery whether fully charged.
6.3 Images are not synchronized
① can enter the monitor "function" menu, and select the right video
format in the "format" option.
15
6.4 No sound
① Check if the volume is on or try to turn up the volume throught
“RIGHT” button
② Check the Audio input
■ Remark: If there are still other problems, please contact with our
Related deals.
★ if there are changes without prior notice.
16