1
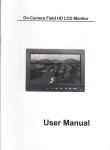
7Inch On-Camera Field HD Monitor
Operation Manual
1
Dear users:
Thank you for purchasing our On-Camera Field HD Monitor Kit.
This 7" Pro HD Monitor is designed to be used as an external video display,
allowing you to step back from the camera while still being able to frame and
capture the action without having to look through the cameras built-in
viewfinder. This monitor is light weight, low power consumption and low cost
make it ideal to use with any Pro Video Camera, DSLR, DV and HD Video
Camera. With high resolution 1024*600pixel, 700:1 High Contrast Ratio,
HDMI, Component, Composite Video, Audio Input and HDMI Output
(Optional).
Whether mounted on your camera with a shoe mount, on your tripod with an
arm and clamp or near the camera with the included stand, it will provide you
with instant playback of your footage wherever you are.
is product
To ensure the best use of th
this
product,, please read this manual carefully
beforehand
beforehand.
CAUTION
1. Please use the adapter attached in the accessory, if necessary, please use
qualified adapter.
2. Please do NOT expose this product to direct sunlight, heat, or humid
conditions.
3. Please keep away from strong light while using this product to ensure the
image effect and long-term use.
4. Please avoid heavy impact or drop onto the ground.
5. Please do NOT use chemical solutions to clean this product. Please wipe
with a clean soft cloth to maintain the brightness of the surface.
6. Without adjustable component in the unit, please do not take apart or repair
the unit by yourself, to avoid damage the product.
2
CONTENTS
...
1. Product description .…………………………………
…………………………………...
..... 4
.......
8
2. Power input way ……………………………………
…………………………………….......
.......8
ing instruction
s ……………………
.........
........
3. Operat
Operating
instructions
…………………….........
.................
..........10
....
....
10
● Panel shourcut button function instruction
instruction....
........
....1
ng instruction
…………………
..........
11
● Menu operati
operating
instruction…………………
…………………..........
..........1
.............
15
4. Technical parameters ……………………
……………………..……
…….............
.............15
5. Accessories ………………………………………………
………………………………………………..16
…………………………………
............
17
6. Trouble shooting
shooting…………………………………
…………………………………............
............17
......
………
....................
17
7. Remark .…………………………
…………………………......
......………
………....................
....................17
3
1.Product description
�
Front view
1. Power indicator light:Light turns red when powered
2. MODE : To switch VIDEO、HDMI、YPbPr input signal
3. B/W: Check Field, Press to switch the image monochrome (red、green、blue、
monochromatic and color)
4. CAMERA : Click to switch ON/ OFF 5D-Ⅱ mode
5. MARKER
ARKER:: Click to switch ON/ OFF Screen Markers mode
6. FOCUS: Click to switch ON/ OFF Peaking Filter(Focus Assist)mode
T EMP :Color temperature value option adjustment
7 .COLOR.
OLOR.T
8. 4:3/16:9: Use to switch between 4:3 and 16:9 aspect ratios
9. MENU:To activate OSD (on-screen display) menu
10. ▶: Function confirmation or value up while using menu setting functions
11. ▼: Menu item value down adjustment button
12. ▲: Menu item value up adjustment button. No Menu State to cycle adjust the 5
level brightness
13. ◀:Function confirmation or value down while using menu setting functions
14.
: 3.5mm Earphone Jack
15. Display screen
4
� Back view
view:
Y-IN
1.Y-IN
Y-IN:Y signal input
VIDEO-IN
2.VIDEO-IN
VIDEO-IN:Video signal input
Pb-IN
3.Pb-IN
Pb-IN: Pb signal input
VIDEO-OUT: Video signal output
4.VIDEO-OUT:
Pr-IN
5.Pr-IN
Pr-IN: Pr signal input
AUDIO-IN
6.AUDIO-IN
AUDIO-IN: Audio signal input
Power :ON/OFF
ON/OFF Switch
7.Power
HDMI-IN: HDMI(High Definition Multimedia Interface) signal input
8.HDMI-IN:
9. HDMI-OUT
HDMI-OUT: HDMI(High Definition Multimedia Interface) signal output(Optional)
10. Battery Plate slot
11.4-pin XLR DC power input
12.DC power input interface :
5
●
¼inch Mounting Hole
Use the ¼inch mounting hole to attach the monitor to a camera or variety of
mounting devices.
6
Battery Plate slot
slot:
●
F970
LP-E6
D28
According to the different requirements of battery for the customers, attached
different batteries plate slot..
Sony F970 battery slot for battery of Panasonic DV:
F970/F960 F950 T930 F770 T750 F730 F570 F550 F530 QM91D OM91
QM90D QM90 QM71D QM71 QM70D QM70 QM51D QM51 FM71 FM70
serial
Canon LP-E6 battery slot for battery of Canon DV:
Canon LP-06
Panasonic D28 battery slot for battery of Panasonic DV
DV::
D55 554S D54SE D40 D35 D33 D32 D28 D25 D22 serial
F970
LP-E6
D28
s
Picture: Three types of batteries corresponding to the upper three slot
slots
7
Power input way
2.P
There are some ways to supply the power of the monitor.
● The power supply by the adapter. 12V/1.0A is optional DC voltage
changer, insert DC power input interface directly. It can be choosed qualified
adapter which current with output voltage DC 6 ~ 15V, output capacity >10W
by customers
Please use the adapter attached in the accessories. If necessary to use
other specifications adapter, please note to provide the qualified adapter which
power supply should be not less than 10W (DC6V-24V)
● Another option of power source is using batteries. The product back
case including battery slots are available for three types of batteries.
Customers can choose different battery slots according to their needs.
Battery install way as below picture
Suggestion: Better remove the battery for long-term NO use this product.
Different specifications of the battery, capability is different. The working time
for the monitor will be different. Higher capability (working time) will be longer.
Without design charging circuit for the monitor, please remove the
battery to the battery charger for charge
charge.
8
● This product also can be by 4-Pin XLD interface to use the power
supplied from camera.
ing instruction
When operati
ng
the monitor should be power on
Operat
Operating
instruction(When
operating
ng,the
in the working state)
9
Operat
ing instruction
s
3.
3.Operat
Operating
instructions
● . Panel shortcut button function operation
VIDEO
MODE
B/ W
CAMERA
MARKER
ARKER::
input signal selection
HDMI
YPbPr
color
Image color/
black and white
Monochrome
Monochrome selection
(R/G/B)
Canon 5D
5DⅡserial
camera real time display
press this button to
real time shooting the camera
Select safety frame ratio
safety frame ratio
80%、85%、90%
93%
95%
off
selection
93%、95%
95%、off
Shortcut button
Image the edges of
objects appear white
FOCUS
crispening focus assist
c rispening this time to
adjust the focal length of the video equipment, view the c rispening
for the focus function
TEMP
C OLOR.
OLOR.T
color
lection
temperature selection
6500K
7500K
9300K
User
4︰33
4:3/16:9
MENU
▲
image frame
selection
menu function
operation
brightness adjust
shortcut button
16︰9
color
menu
function
sound
6level brightness
cycle adjust
◀
volume adjust button
volume down
▶
volume adjust button
volume up
10
ng instruction
s
● . Menu operati
operating
instructions
Before setting the menu functions, please make sure the device is
connected correctly. Power switch(lower right corner of the unit) dial to ON
position. The monitor enter into working state. Please dial to OFF position
when need to close the unit. After enter into working state, press the "mode"
button on the unit, according to the input video signal to switch"HDMI、YPbPr、
VIDEO" (under NO menu state, using the shortcut button on the panel to
operate). Press "
" button on the unit, then enter into OSD menu operation.
Operate “▲”or“▼”on the unit to select or adjust the needed optionals.
(color);
(menu);
(function);
(sound); After select optionals, press
“▶”or“◀”on the unit to confirm, then using ▲”or“▼”to select or adjust the
value of Analog Data. After confirm the needed adjust parameters, using
“▶”or“◀”to adjust. If need to exit OSD menu, repress “
●
” button.
color
(color
color)
Enter into "Color" OSD, press “◀ ”or“▶”button to confirm, then enter to
adjust the color parameters, use ““▲”or“▼”to select adjustment item, then
use“◀ ”or“▶” adjust the parameters.
※ Brightness: To adjust the image's brightness.
※ Contrast: To adjust the brightest and darkest ratio of the image, please
note the sense of picture when adjust, proportion too large or small, will make
the picture lose the color of showy.
11
※Tint: On NTSC Video mode, the image color tint difference is adjustable
by tint.
※ Saturation: To adjust color concentration
※ Color temperature: Enter into
(color)menu, press “ ◀”or“▶”on the
unit to confirm, press “▲”or“▼” to select the form of color temperature, then
press
◀”or“▶” on the unit to confirm, then use “▲”or“▼” to select color
temperature such as: 9300 K, 7500K, 6500K or USER.(the monitor leave the
factory defalts 6500K)
When select "USER", use “▲”or“▼” to select color R、G、B,
then
use “◀ ”or“▶” to adjust the value of Analog Data, to make sure the
color of picture meets need.
12
●
OSD
(OSD
OSD)
After select "OSD" function, press “◀ ”or“▶” button to confirm,
then enter into parameters adjust. Using “▲”or“▼” button to select
optional items, then using “◀ ”or“▶” button to adjust the parameters.
※ Language: Languages for OSD as below:
English
简体中文
Italians
Francois
Deutsch
ñol
Espa
Españ
繁体中文
Japanese
※ H Position:To adjust the OSD position in horizontal,
※ V Position:To adjust the OSD position in vertical.
※ OSD Timeout:To adjust the clock.
※ Transparent:To adjust the level of transparent.
13
Pycc
●
Function
(Function
Function)
After select "function", press “◀ ”or“▶” button to confirm, then
enter into parameters adjust. Using ▲”or“▼” button to select
adjustable items, then using “◀ ”or“▶” button to adjust the
parameters.
※ Reset:Back to original setting.
※ Display Ratio:To change the display ratio,16:9/4:3.
※ Finder Frame:Safety frame setting
●
Sound
(Sound
Sound))
After select "function", press “◀ ”or“▶” button to confirm, then enter into
parameters adjust. Using ▲”or“▼” button to select adjustable items,
※ Volume: To adjust the volume.
14
4. Parameters
Display panel size
TFT LCD 7.0inch 1843200 Pixels
Panel type
TFT LCD
Backlight
LED
Max resolution
1920×1440
Horizontal frequency range
30-60kHz
Field frequency range
60Hz ~ 75Hz
Distance
0.05(W) x 0.15 (H)mm
Display ratio
16:9
Brightness
250 cd/㎡
Contrast
700:1
Response time
10ms
Viewing angle
75°/75°(L/R),70°/75° (U/D)
Resolution
1024×600
Input signal
HDMI、YPbPr、VIDEO、AUDIO
Signal output
VIDEO ,
HDMI & YPbPr supported format
480i、480p、576i、576p、720p、1080i、1080p
Video color system
PAL-4.43; NTSC-3.58
Speaker output power
≥1W/8Ω
Input power voltage range
DC6-24V
Power consumption
≤6w
Standby current
≤50mA
Unit size(LWH)
188mm X 134mm X 42mm
Weight
446g
Working temperature
-20~55℃
Storage temperature
-30~65℃
15
HDMI (optional)
5. Accessories
1.Standard
HDMI cable(HDMI to Mini HDMI)
1pcs
Sun shade
1pcs
Antonbauer tap
1pcs
User manual
1pcs
2.Optional
Battery
1pcs
BNC to RCA adapter
6pcs
BNC cable
6pcs
DC 12V power adapter
1pcs
HDMI cable
Power adapter
(optional)
Antonbauer tap
Sun shade
BNC to RCA adapter
(optional)
16
User manual
BNC cable
Battery
(optional)
(optional)
6. Trouble shooting
1. Only black and white or monochrome picture.
Please check saturation、brightness & contrast adjustment.
Confirm B/W button whether in black and white or monochrome state.
2. NO picture after put on the power.
Check signal cable connecting, make sure use the standard adapter
connect the monitor. If power supply by battery, please check the battery
whether fully charged.
3. The image color distortion or abnormal, eg. lack some color.
Please check signal cable whether connect correctly or not. The cable
damage or loose will cause poor transfer, then above malfunction will
happen.
Check "color" function menu "color temperature" adjustment, whether
adjustment misconduct under the "user" state
4. If there exists an abnormal phenomenon, please try to enter into OSD
menu select "reset" to reset.
■ Remark:
If there are still other problems, please contact with our related deals.
* If there are changes without prior notice.
17