Download GEBRUIKERSHANDLEIDING - USER GUIDE
Transcript
GEBRUIKERSHANDLEIDING - USER GUIDE - MANUEL UTILISATEUR
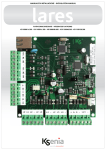
Centrales - Integrated Panels - Centrale Integrée
KSI1000016.300 - KSI1100016.300 - KSI1000048.300 - KSI1100048.300 - KSI1100128.300
www.kseniasecurity.com
INHOUD
Introductie.......................................................................................................................6
Werking van de toetsen ................................................................................................7
Opdrachten in stand-by stand.....................................................................................7
Informatieweergave in stand-by stand .......................................................................8
Bedienen met PIN-code..............................................................................................10
Gebruikersmenu ...........................................................................................................11
Extra opties....................................................................................................................12
Bedienen met een tag ................................................................................................14
Bedienen via spraakmenu ..........................................................................................14
Bedienen via SMS-berichten.......................................................................................15
Bedienen op afstand via mobieletelefoon/computer ...........................................16
INDEX
Introduction .................................................................................................................. 17
Keyboard operations................................................................................................... 18
Actions in stand-by mode ........................................................................................... 18
Display information in stand-by mode ...................................................................... 19
Login by user pin .......................................................................................................... 21
Main menu .................................................................................................................... 22
Advanced menu ......................................................................................................... 23
Operations with key ..................................................................................................... 24
Remote vocal menu.................................................................................................... 25
Remote operations via sms......................................................................................... 26
Remote control via web browser............................................................................... 27
TABLE DES MATIERÈS
Introduction .................................................................................................................. 28
Operations au clavier .................................................................................................. 29
Actions sur clavier en attente ..................................................................................... 29
Affichage de l’information en mode d’attente (stand-by).................................... 30
Login via code ............................................................................................................. 32
Menu principal ............................................................................................................. 33
Options avancées ....................................................................................................... 34
Operations avec badge /smartphone ..................................................................... 35
Menu vocal a distance ............................................................................................... 36
Operations a distance via sms ................................................................................... 37
Controle a distance via web browser ....................................................................... 38
2
lares
HOE EEN OPDRACHT UIT TE VOEREN
HOW TO PERFORM THE OPERATIONS
COMMENT EFFECTUER LES OPÉRATIONS
DRUK PIN-CODE IN - INSERT CODES - INSÉRER LES CODES
Enter PIN
xxxxxx
=
ESC
SCROLL DOOR MENU - SCROLL THE MENU - FAIRE DÉFILER LE MENU
Programming
Zones
=
ESC
lares
3
BEVESTIG DE OPDRACHT - TOETS “ENTER”
CONFIRM THE OPERATION - “ENTER” KEY
CONFIRMER LES OPÉRATIONS - TOUCHE “ENTRER”
Programming
Partition
ENTER
=
ESC
ANNULEER DE OPDRACHT - TOETS “ESC”
EXIT FROM THE OPERATIONS - “ESC” KEY
SORTIE DE PROGRAMMATION - TOUCHE “ESC”
SYSTEM OK
12:30
01/01/12
ESC
=
ESC
4
lares
HOUDT DE TAG VOOR HET BEDIENDEEL
APPROACH THE TAG TO THE KEYPAD
APPROCHER LE BADGE DU CLAVIER
SYSTEM OK
12:30
01/01/12
ESC
HOUDT DE TAG VOOR DE KAARTLEZER volo
APPROACH THE KEY TO THE volo OUTDOOR READER
APPROCHER LE BADGE DU LECTEUR DE PROXIMITÉ volo
lares
5
INTRODUCTIE
NL
lares is een beveiligingscentrale & Home Automation systeem dat zowel
bediend kan worden door een ergo LCD bediendeel, als op afstand
via de telefoon. Deze handleiding beschrijft alle opdrachten die u kunt
uitvoeren.
De installatie van deze systemen dient strikt in overeenstemming met de instructies worden
uitgevoerd zoals beschreven in deze handleiding, en in overeenstemming met de lokale
wetten en reglementen die van kracht zijn. Deze apparaten zijn ontworpen en gemaakt met
de hoogste normen van kwaliteit en prestaties door Ksenia Security. Het is aanbevolen om
het geïnstalleerde systeem volledig ten minste eenmaal per maand te testen. Testprocedures
zijn afhankelijk van de systeemconfiguratie. Vraag aan de installateur voor de te volgen
procedures. Ksenia Beveiliging srl is niet aansprakelijk voor schade als gevolg van onjuiste
installatie of onderhoud door onbevoegd personeel. De inhoud van deze handleiding kan
zonder voorafgaande kennisgeving van KSENIA SECURITY veranderen ..
Informatie voor gebruikers: Verwijdering (RAEE - WEEE Directive)
Waarschuwing ! Gebruik geen gewone vuilnisbak voor de verwijdering van deze apparatuur .
Afgedankte elektrische en elektronische apparatuur moet gescheiden worden behandeld ,
in overeenstemming met de relatieve wetgeving die de juiste behandeling , terugwinning en
recycling van afgedankte elektrische en elektronische apparatuur vereist .
Na de implementatie van richtlijnen in de lidstaten , mogen particuliere huishoudens in de
Europese Unie hun afgedankte elektrische en elektronische apparatuur inleveren bij speciale
inzamelpunten gratis * . Lokale winkeliers kunnen ook de gebruikte producten gratis terugnemen
als een soortgelijk product wordt gekocht van hen.
Als elektrische of elektronische apparatuur batterijen of accu’s hebben, dan moeten deze
afzonderlijk worden afgevoerd volgens de lokale voorschriften .
Correcte verwijdering van dit product garandeert dat het de noodzakelijke behandeling ,
terugwinning en recycling ondergaat . Dit voorkomt eventuele negatieve effecten op het milieu
en de volksgezondheid die zich kunnen voordoen in geval van verkeerde afvalbehandeling.
* Neem contact op met uw gemeente voor meer informatie.
Technische specificaties, vormgeving, functionaliteit en andere product
eigenschappen kunnen wijzigen zonder kennisgeving.
6
lares
WERKING VAN DE TOETSEN
Raadpleeg de bediendeel installatiehandleiding voor het gebruik
van de ergo capsense bediendeel en om vertrouwd te raken met de
functies van de toetsen en het scroll wheel1.
NL
OPDRACHTEN IN STAND-BY STAND
Zes functies kunnen worden uitgevoerd als het systeem in de stand-by
stand is:
1. Gedetailleerde lijst met informatie (door de Enter toets in te drukken)
2. Partitie status bekijken (door de # toets in te drukken)
3. Zones status bekijken (door de toets in te drukken)
4. Activering van een schakelstand (door het corresponderende cijfer
voor 3 seconden in te drukken)
5. Ingave van de PIN-code (standaard PIN-code is 147258)
6. Toetsenbord tijdelijk buiten werking zetten voor schoonmaken:
hou de ESC toets voor 3 seconden ingedrukt
In de stand-by stand kan de volgende informatie weergegeven worden
door het intoetsen van de ENTER toets:
- Bij alarm is het dan mogelijk om te zien welke zone in alarm staat
- Lijst met ingeschakelde partities (als systeem status optie is
geactiveerd door de installateur)
- Lijst met open zones (als de zone statusoptie is geactiveerd door de
installateur)
- Informatie van de installateur
Gebruik het scroll wheel om door de menu’s te stappen.
Om een schakelstand te activeren (macro) zonder een PIN-code dient
de het overeenkomstige cijfer ingedrukt te worden voor 3 seconden.
Deze optie van sneltoets moet ingesteld worden door de installateur.
Als het toetsenbord niet in het systeem is geconfigureerd, wordt niet alle informatie geod
weergegeven en gebruikers PIN-codes worden uitgeschakeld. In deze staat heeft alleen de
installateur PIN-code toegang tot het systeem.
1
lares
7
INFORMATIEWEERGAVE IN STAND-BY STAND
NL
8
In de stand-by stand geeft de bovenste lijn van het display de systeem
status weer. De informatie wordt weergegeven in de volgende
volgorde van prioriteit :
ONDERHOUD
Onderhoud door de installateur. In dit geval zal er geen
inbraak- of sabotage alarm geactiveerd worden.
SABOTAGE
Er is sabotage in één van de partities die het bediendeel
kan weergeven.
ALARM!
Er is alarm in één van de partities die het bediendeel kan
weergeven.
MODULE
ONTBREEKT.
Er wordt een module (bediendeel, zone-uitbreiding, etc)
vermist in het systeem.
SAB. GEHEUGEN
Er staat een sabotage in het geheugen in één van de
partities die het bediendeel kan weergeven.
ALARM
GEHEUGEN
Er staat een alarm in het geheugen in één van de partities
die het bediendeel kan weergeven.
SYSTEEM STORING
Het systeem heeft minstens 1 storing in het systeem
STORINGLIJSTI
In het geheugen staan nog storingen.
AANKOMSTVERTR.
De aankomsttijd is actief in één van de partities die het
bediendeel kan weergeven
VERTREKVERTR.
De vertrektijd is actief in één van de partities die het
bediendeel kan weergeven
WAARSCHUWING
De waarschuwingstijd dat er door een tijdklok ingeschakeld
gaat worden is actief voor één van de partities die het
bediendeel kan weergeven.
BELLEN ACTIEF
De PSTN kiezer stuurt een melding door.
USB VERBINDING
De inbraakbeveiligingscentrale is verbonden aan een PC
via de USB aansluiting.
UP/DOWNLOAD
Up/download is geactiveerd
ZONE
BLK/TEST
Tenminste één zone is in test of is handmatig geblokkeerd
(tijdelijk buiten werking geplaatst)
INLUISTEREN
Het op afstand inluisteren vanaf het bediendeel is actief.
SYSTEEM OK
Het systeem is in rust.
lares
INFORMATIE WEERGEVEN IN STAND-BY STAND
In de programmering van de centrale is in te stellen dat de systeem
status niet wordt weergegeven in de stand-by stand. Als dat zo
geprogrammeerd is moet altijd eerst een PIN-code ingevoerd worden
om de systeemstatus te kunnen bekijken. Tevens zal in de eerste
lijn van het display dan de tekst “wachtrij waarschuwingslijst” of de
installateurstekst afhankelijk of er meldingen zijn of niet Als het systeem
is ingeschakeld dan zal altijd de installateurstekst zichtbaar zijn bij deze
programmering.
NL
De onderste lijn van het display geeft de tekst weer die ingesteld kan
worden door de installateur op elk bediendeel:
1. Datum en tijd
2. Status van het systeem (in- of uitgeschakeld)
3. Buitentemperatuur
(hiervoor moet een buitensirene imago BUS aangesloten zijn)
4. Binnentemperatuur
(hiervoor moet een binnensirene radius BUS aangesloten zijn)
5. GSM provider (hiervoor moet een gemino BUS aangesloten zijn)
6. De realtime status weergave van een zone
NOOT: Het gebruikersmenu zal automatisch na 30 seconden verlaten worden als er geen toets
wordt ingedrukt.
lares
9
Het gebruikersmenu kan doorgelopen worden door te draaien aan het
scroll wheel. De volgende items worden dan weergegeven:
NL
BEDIENEN MET PIN-CODE
Als de PIN-code (6 cijfers) ingetoetst wordt dan verschijnt in het display
de eerste schakelstand (dit is de schakelstand die het meest gebruikt
wordt) bijv. UITSCHAKELEN. Via het scroll wheel is nu de mogelijkheid
om naar andere schakelstanden te gaan of naar het gebruikersmenu.
Stel dat er 2 schakelstanden geprogrammeerd zijn door de
installateur : UITSCHAKELEN (ook toegekend aan toets 0) en
INSCHAKELEN (ook toegekend aan toets 1). Het bediendeel laat eerst
zien UITSCHAKELEN en door te draaien aan het scroll wheel kunt u
INSCHAKELEN selecteren.
Heeft u de keuze gemaakt en u toetst voor 3 seconden niks in dan zal
de schakelstand die dan in het display staat worden uitgevoerd.
U kunt ook na het intoetsen van de PIN-code meteen de 0 of 1 intoetsen
waardoor de schakelstanden ook worden uitgevoerd.
SNELTOETSEN
Door een toets voor 3 seconde ingedrukt te houden kan ook de
schakelfunctie uitgevoerd worden (bijv. toets 1 voor INSCHAKELEN).
10
lares
GEBRUIKERSMENU
RESET ALARM
Druk de ENTER toets in om alle actieve alarmen te herstellen en het
alarmgeheugen te wissen.
NL
PARTITIE STATUS
Druk de ENTER toets in om de actuele status van de partities te zien
(in- of uitgeschakeld).
ZONE STATUS
Druk de ENTER toets in om de actuele status van de zones te zien. Tevens
is het mogelijk om de zone tijdelijk te blokkeren/deblokkeren.
WIJZIG CODE
Druk de ENTER toets in om de eigen PIN-code te wijzigen.
BEDIENDEELOPTIES
Druk de ENTER toets in om de eigenschappen van het bediendeel te
wijzigen, o.a. bediendeel backlight, volume, de deurbelfunctie en de
gevoeligheid van de touch bediening.
EXTRA OPTIES
Druk de ENTER toets in om toegang te krijgen naar de extra opties. Deze
staan beschreven in de volgende paragraaf.
OVERWERK VERZOEK
Druk de ENTER toets in om een overwerk verzoek te activeren.
Programmeer hier met hoeveel minuten de automatische inschakeling
aangepast moet worden.
STORINGLIJST
Druk de ENTER toets in om de huidige storingen in het systeem weer te
geven. M.b.v. het scroll wheel is door de storingen heen te lopen. De
eventuele storingen in het systeemgeheugen worden hiermee gewist.
lares
11
GEBRUIKERSMENU
NL
GSM STATUS
Druk de ENTER toets in om de GSM provider, signaalsterkte,
overgebleven beltegoed en de einddatum van de SIM te zien. Dit item
is alleen zichtbaar wanneer de module gemino BUS is aangesloten op
het systeem.
STOP BELLEN
Druk de ENTER toets in om de meldingen (naar telefoon, SMS en e-mail)
die de telefoonkiezer wil uitsturen stop te zetten.
EXTRA OPTIES
Het menu Extra Opties bevat de volgende items die m.b.v. het scroll
wheel te doorlopen zijn.
Dit gedeelte is alleen te bekijken met de master PIN-code.
LOGBOEK
Weergave van de gebeurtenissen. Druk de ENTER toets in om de
gebeurtenis weer te geven. M.b.v. het scroll wheel naar links te
draaien kan door de gebeurtenissen heen gelopen worden. De
eerste gebeurtenis die wordt weeggegeven is het laatst gebeurd.
Door nogmaals op de ENTER toets te drukken worden extra gegevens
weergegeven van de gebeurtenis.
ROOSTER
Met dit item is het mogelijk om het rooster te activeren of te deactiveren.
INSTALL. TOEGANG
Met dit menu kunt u de installateur toestemming geven om in de
programmeerstand van het product te komen. Als deze optie uit staat
dan is dit niet mogelijk voor de installateur.
EXTERNE ASS.
In dit menu is externe ass. voor up/download programmering via GPRS
te activeren.
12
lares
EXTRA OPTIES
TEST GEBEURTENIS
Door ENTER in te drukken zal er een Auto test melding verstuurd worden
naar de meldkamer.
NL
TELEFOONBOEK
In dit menu is het mogelijk om telefoonnummers in te voeren die gebeld
moeten worden bij een alarm.
TIJD EN DATUM
Hiermee is de tijde en datum te veranderen d.m.v. het scroll wheel. Als
voor 3 seconden niks wordt ingedrukt dan wordt er naar het volgende
invoerveld gesprongen.
SPRAAKMENU
In dit menu is het mogelijk om het spraakmenu aan te zetten waardoor
het systeem te bedienen door de telefoon (via GSM met de gemino BUS
of via PSTN). Zie volgende paragraaf voor de mogelijke functies.
CODE BEHEER
In dit menu is het mogelijk om PIN-codes te wijzigen en aan te maken
voor dezelfde partities als de code waarmee in het menu gekomen is.
TAG BEHEER
In dit menu is het mogelijk om de Tag te activeren/deactiveren.
KEYFOB BEHEER
In dit menu is het mogelijk om een keyfob te activeren/deactiveren.
LED ALARM DRAADL.
In dit menu is het mogelijk om de led in de draadloze detectors aan te
zetten. Is deze optie aan dan gaat de led aan iedere keer als door de
detector gelopen wordt. Na 10 minuten vervalt deze optie automatisch
en zal de led niet meer oplichten.
VERVANG LEXAN
Door deze optie te activeren is het lexan te vervangen voor een andere
kleur zonder dat de sabotage geactiveerd wordt bij het openen.
lares
13
BEDIENEN MET EEN TAG
NL
Een Tag kan gebruikt worden i.p.v. een PIN-code voor het bedienen
van het systeem. Breng de tag in de buurt van het Ksenia logo op
het bediendeel en als de tag is ingeleerd ziet u dat de schakelstand
verschijnen in het display.
BEDIENEN VIA SPRAAKMENU
Indien een telefoonkiezer of een gsm module is geïnstalleerd dan is het
mogelijk om via een spraakmenu de volgende opties uit te voeren:
1. Inluisteren via de microfoon in het bediendeel
2. Informatie opvragen over de zonestatus en eventueel deze tijdelijk
buiten werking zetten (blokkeren).
3. Informatie opvragen over partitie status
4. Activeren van functies (uitgangen activeren en in/uitschakelen van
partities).
Het menu gaat geheel gesproken doorlopen en er wordt aangegeven
hoe de functies moeten worden uitgevoerd. In het algemeen geldt dat
de functies bevestigd moeten worden met de # toets en annuleren
met de * toets op de telefoon.
Er zijn 3 manieren om in het spraakmenu te komen:
1. Opbellen van het SIM-kaart telefoonnummer welke in de GSMmodule zit. Hiervoor moet dit wel in de programmering geactiveerd
zijn.
2. Opbellen van het PSTN telefoonnummer.
3. Het indrukken van de # toets als het beveiligingssysteem een melding
maakt naar uw telefoontoestel.
14
lares
BEDIENEN VIA SMS-BERICHTEN
Als een GSM module geïnstalleerd is dan is het mogelijk commando’s
uit te voeren door SMS berichten te versturen naar de module.
De volgende opties zijn dan uit te voeren:
1. Activeren van schakelstanden
2. Controleren van beltegoed SIM-kaart
3. Activering van remote assistentie
4. Generazione dell’evento riconosciuto codice
NL
SCHAKELEN VIA SMS
Het is mogelijk om de 10 schakelstanden te activeren via een SMS:
<PIN-code>s<nummer schakelstand>
of
<PIN-code>spatie<nummer schakelstand><;>
Bijvoorbeeld als u schakelstand 1 (inschakelen) wilt schakelen met de
standaard PIN-code (147258).
De SMS die u dan moet versturen is dan :
147258s1 of 147258 inschakelen;
Het is mogelijk om 8 verschillende telefoonnummers te programmeren
om de bevestigings SMS te ontvangen van het inschakelen.
CONTROLEREN BELTEGOED SIM-KAART
Voor het opvragen van het beltegoed moet het volgende ingevoerd
te worden:
<PIN-code>c
Bijv:
147258c
Binnen een paar minuten wordt dan de informatie verzonden.
lares
15
BEDIENEN VIA SMS-BERICHTEN
REMOTE ASSISTENTIE
NL
Het SMS bericht dat verstuurd moet worden is:
<PIN-code>m<0/1>
Bijv.:
147258m1
Indien geprogrammeerd dan stuurt het systeem naar de installateur het
IP-adres van de centrale.
Het uitzetten van Remote assisentie gaat als volgt :
147258m0
HERKEN PIN-CODE GEBEURTENIS
Het SMS bericht dat verstuurd moet worden is:
<PIN-code>n
Bijv.:
147258n
De SMS zal door het systeem herkend worden en de gebeurtenissen
die gekoppeld zijn aan de PIN-code uitvoeren (bijv. schakelen van een
uitgang).
BEDIENEN OP AFSTAND VIA MOBIELE TELEFOON/COMPUTER
De beveiligingscentrales lares 16-IP, lares 48-IP en lares 128-IP hebben een
geïntegreerde webserver welke via het internet te benaderen is. Met
behulp van de webserver is het systeem te bedienen via bijv. de smart
mobiele telefoon (ieder merk) of computer. Het is ook mogelijk om via
de webserver camerabeelden op te vragen. Voor de juiste instellingen
in de programmatuur en de werking dient u advies te vragen aan uw
installateur.
16
lares
INTRODUCTION
lares is a burglar alarm & Home Automation system that can be
controlled by means of an ergo LCD keyboard, as well as remotely by
telephone, and even via the Internet through a built-in WEB server. This
manual describes the operations that can be performed by the end
user.
EN
Installation of these systems must be carried out strictly in accordance with the instructions
described in this manual, and in compliance with the local laws and bylaws in force. These
devices hare been designed and made with the highest standards of quality and performance
adopted by Ksenia Security. Is recommended that the installed system should be completely
tested at least once a month. Test procedures depends on the system configuration. Ask to
the installer for the procedures to be followed. Ksenia Security srl shall not be responsible for
damage arising from improper installation or maintenance by unauthorized personnel. The
content of this guide can change without prior notice from KSENIA SECURITY.
Information for users: Disposal (RAEE - WEEE Directive)
Warning! Do not use an ordinary dustbin to dispose of this equipment.
Used electrical and electronic equipment must be treated separately, in accordance with
the relative legislation which requires the proper treatment, recovery and recycling of used
electrical and electronic equipment.
Following the implementation of directives in member states, private households within the EU
may return their used electrical and electronic equipment to designated collection facilities
free of charge*. Local retailers may also accept used products free of charge if a similar
product is purchased from them.
If used electrical or electronic equipment has batteries or accumulators, these must be disposed
of separately according to local provisions.
Correct disposal of this product guarantees it undergoes the necessary treatment, recovery
and recycling. This prevents any potential negative effects on both the environment and public
health which may arise through the inappropriate handling of waste.
* Please contact your local authority for further details.
Technical specification, appearance, functionally and other product
charateristics may change without notice.
lares
17
KEYBOARD OPERATIONS
Refer to the keyboard manual to use the ergo capsense keyboard and
get familiar with the functions of its keys and circular scroll1.
ACTIONS IN STAND-BY MODE
EN
Six operations can be performed while the system is in stand-by mode:
1. Detailed list of information (by pressing the Enter key)
2. Partitions status (by pressing the # key)
3. Zones status (by pressing the key)
4. Activation of a function (by holding down the corresponding numeric
key for 3 seconds)
5. Entering the PIN (default PIN is 147258)
6. Keyboard lock for cleaning: hold the ESC key pressed for 3 seconds
In stand-by mode, the following informations can be displayed by
pressing the ENTER key:
- If an alarm occurs, it is possible to see which zone is in alarm (if the
notices “without PIN display” is enabled)
- List of armed (if the system activation status display is enabled)
- List of open zones (if open zones real time display is enabled)
- Information about the installer
Use the circular scroll to browse through these lines.
To activate a function (macro) without entering the PIN, keep the
corresponding numeric key pressed for seconds. This function must be
enabled by the installer.
1
If the keyboard is not configured in the system, the keyboard display does not show any
information, and the user PIN is disabled. In this way, login is permitted only through the installer
PIN.
18
lares
DISPLAY INFORMATION IN STAND-BY MODE
In stand-by mode the upper line of the display shows the system status.
The informations are displayed in the following order of priority:
MAINTENANCE
maintenance by the installator. In this case no intrusion
alarm nor tamper alarm will go off.
TAMPER
tamper condition on at least one of the partitions enabled
for the keypad
ALARM!
an alarm is active on at least one of the partitions enabled
for the keypad
MISSING PERIPH.
at least one KS-BUS peripheral is missing
TAMPER
MEMORY
tamper memory on at least one of the partitions enabled for
the keypad
ALARM MEMORY
alarm memory on at least one of the partitions enabled for
the keypad
SYSTEM FAULTS
the system has at least one fault
FAULT MEMORY
there is a fault in memory
ENTRY TIME
entry time is active on at least one of the partitions enabled
for the keypad
EXIT TIME
exit time is active on at least one of the partitions enabled
for the keypad
WARNING TIME
warning time is active on the partitions enabled for the
keypad
PHONE CALL
ACTIVE
a telephone call is in progress
USB
CONNECTION
the panel is connected to the pc by USB port or a flash USB
key is connected to the panel
REMOTE ASS.
remote assistancee is enable on the panel
ZONE BYP/TEST
at least one zone is in test or manually bypassed
REMOTE
LISTENING
the remote listening from the keypad microphone is active
SYSTEM OK
there are no faults
lares
EN
19
DISPLAY INFORMATION IN STAND-BY MODE
EN
During programming it is possible to disable the system status display
on the first row when the keypad is in stand-by. In this case, to display
the status of the system, you must enter a valid user PIN or approach a
programmed key to the keypad. with this setting, when the system is
disarmed, on the first row it displays the strings ‘Alerts queued’ or ‘Ksenia
security’ depending of whether there are or there are not anomalies.
When the system is armed it always displays the string ‘Ksenia Security’.
The lower line of the display shows pieces of information that can be
tailored by the installer on each keyboard:
1. Date and time
2. System activation status (On or Off)
3. Outdoor temperature (requires at least an imago BUS outdoor siren)
4. Indoor temperature (requires at least a radius BUS indoor siren)
5. GSM operator (requires a gemino BUS link)
6. Real-time indication of open zones
NOTE: in the user menu, if no key is pressed within 30 seconds, the keyboard will automatically
return to the stand-by mode.
20
lares
In the user menu you can browse through the following items using the
circular scroll.
LOGIN BY USER PIN / SCENARIOS
After the user digit user PIN, that is always 6 digit long, the keypad
will show the enabled functions (starting from the most used one,
depending on the enabled choices2) and access is granted to the first
level of the menu.
Let’s assume, for example, that two functions are enabled on the
keyboard, assigned to key 0 (system off) and to key 1 (system on)
respectively; the keyboard shows the function to be applied, or the
most frequently used one; if you don’t press any key within 3 seconds,
the function shown on the display is performed automatically and the
keyboard returns to the stand-by mode3.
EN
SHORTCUTS
Press a numeric key to activate the corresponding function, or press the
# key to go into the main menu.
SEQUENTIAL EXECUTION OF MULTIPLE SCENARIOS
To execute multiple scenarios in sequential mode, simply press the enter
key after the first scenario without having to re-enter user code.
2 On
basis step on Bus Peripherals / ergo x / Macro Functions
3
If the proposed function is not to be applied, use the circular scroll to move to the desired
action and confirm it using the Enter key
lares
21
MAIN MENU
EN
22
RESET ALARM
Press the Enter key to reset any active alarm and delete the alarm
record.
PARTITION STATUS
Press the Enter key to display the activation status (on/off) of all partitions.
ZONE STATUS
Press the Enter key to display the real time activation status (on/off) of
all zones.
CHANGE PIN
Press the Enter key to change the access PIN.
ERGO OPTIONS
Press the Enter key to modify the settings of the keyboard you are
operating on, namely display backlight, loudspeaker volume, the
acoustic signal when a ‘Chime’ zone is violated. and touch sensitivity.
ADVANCED OPTION
Press the Enter key to gain access to the advanced functions. Please,
refer to the next paragraph.
OVERTIME REQUEST
Press the Enter key to do an overtime request and delay the arming of
the system.
FAULTS STATUS
Press the Enter key to display the detected faults; you can browse
through them using the circular scroll. Any failure in the system memory
will be erased showing fault status.
STOP CALLS
Press the Enter key to stop any actions of the telephone dialer in
consequence of an alarm (calls, SMS or e-mail).
OVERTIME REQUEST
Press the Enter key to do an overtime request and delay the arming of
the system.
FAULTS STATUS
Press the Enter key to display the detected faults; you can browse
through them using the circular scroll. Any failure in the system memory
will be erased showing fault status.
lares
MAIN MENU
GEMINO STATUS
Press the Enter key to display the GSM operator, signal strength, your
remaining credit and the expiry of the SIM. This item is available only if
there is a configured gemino BUS into the system.
STOP CALLS
Press the Enter key to stop any actions of the telephone dialer in
consequence of an alarm (calls, SMS or e-mail).
EN
ADVANCED MENU
The advanced browsing menu consists of the following items, which
can be browsed using the circular scroll. This menu is available only if
the entered PIN has been programmed with the ‘Main Code’ parameter
enabled.
EVENT LOGGER
Event record display. Press Enter to display the record; you can browse
through the events starting from the last recorded one. For additional
details of the event, press the Enter key again.
SCHEDULER
In this menu it is possible to enable/disable the autoarming feature
ENABLE MAINT.
In this menu you can enable the installer to log in for system maintenance.
If this option is set to OFF, the installer will have no access to the system
for any operation whatsoever.
REMOTE ASS.
In this menu it is possible to enable/disable the remote assistance
TEST EVENT
Press Enter to generate the ‘Periodic Test’ event
PHONE BOOK
In this menu it is possible to program the phone numbers to call.
DATE & TIME
After pressing the Enter key on this item, you will be able to change the
system’s date and time simply by operating the circular scroll. To skip
from one field to the other, do not to press any key for 3 seconds.
lares
23
ADVANCED MENU
EN
VOICE MENU
In this menu you can enable the voice menu, which enables the system
to be managed remotely by telephone. For the functions available in
this section, see next paragraph.
MANAGE CODES
In this menu you can modify the enable function and the user PIN codes
enabled in the same partitions as login code.
MANAGE KEYS
In this menu it is possible to modify the enable function of keys enabled
in the same partition as login code.
MANAGE REMOTE COMMANDS
In this menu it is possible to modify the enable function of remote commands enabled in the same partition as login code.
WLS ALARM LED
This menu allows to enable the signalisation LED present on wireless
devices. If enabled, the LED turns on any time the detector is violeted.
By this way, the user can check the detectors status in any moment. This
optical signalisation is automatically disabled after 10 min.
REPLACE LEXAN
This menu allows the colour lexan layer of the keyboard to be replaced
without triggering a tampering alarm. To open and close the cover, you
should follow the instructions provided in the keyboard manual.
OPERATIONS WITH KEY
The transponder key or your own NFC telephone can be used instead
of the keyboard keys to activate the codes: to access the user menu,
bring a valid key near the reading zone of the keyboard (located at
top right).
24
lares
REMOTE VOCAL MENU
In the case that a gemino BUS or a pontis communication interface is
configured in the system, it is possible to use a vocally guided remote
menu which affords the following operations:
EN
1. Listening to the monitored environment from the keyboard panel
microphone
2. Getting information on the status of the zones and inclusion / exclusion
of them
3. Getting information on the status of the partitions
4. Activating functions (output and/or arming/disarming panel)
The menu is completely voice-guided and the keys to be pressed
are shown for every operation. Generally, any operation is confirmed
by pressing the # key and cancelled by pressing the * key on your
telephone. There are three different ways to gain access to the vocally
guided remote menu:
1. Calling the phone number of the SIM installed on the gemino BUS, if
the responder is enabled
2. Calling the PSTN number the pontis interface is connected to
3. Press the # key during an incoming call received from the system
lares
25
REMOTE OPERATIONS VIA SMS
If the panel is connected to a gemino BUS communicator some
operations can be done remotely sending SMS to the panel. Following
operation can be performed:
EN
1. Scenarios activation
2. Pay-as-you-go balance on prepaid SIM card
3. Remote assistance
4. Generating ‘Recognized Code’ event
SCENARIOS ACTIVATION VIA SMS
It is possible to activate up to 10 different scenarios simple sending an
SMS to the panel. The SMS format must follow this directives:
<user code>s<scenario number>
or
<user code>space<scenario name><;>
For example let’s suppose that we want scenario number 1 (arming)to
be turned on by default user PIN (147258). The SMS that should be sent
to the panel will be:
147258s1 or 147258 arming;
It is possible to program up to 8 different numbers that the system could
send back an SMS of acknowledge to, after the arming is executed.
PAY-AS-YOU-GO BALANCE ON PREPAID SIM CARD
The SMS format must follow this directives:
<user code>c
For example with the default user PIN (147258). The SMS that should be
sent to the panel will be:
147258c
Within few minutes the device will send the required information.
26
lares
REMOTE OPERATIONS VIA SMS
REMOTE ASSISTANCE
The SMS format must follow this directives:
<user code>m<0/1>
For example with the default user PIN (147258) to enable the remote
assistance the SMS that should be sent to the panel will be:
147258m1
If programmed the panel will send to the installer the IP address received
from the network. For example with the default user PIN (147258) to
disable the remote assistance the SMS that should be sent to the panel
will be:
147258m0
EN
RECOGNIZED CODE EVENT
The SMS format must follow this directives:
<user code>n
Example: with the default user PIN (147258) in order to generate the
‘Recognized Code’ event the SMS that should be sent to the panel will
be:
147258n
The SMS will generate the ‘Recognized Code’ event and, if
programmed, you will perform the actions associated with this event.
This feature is very useful if you want to diversify actions (for example to
activate outputs) that can be performed by different users.
REMOTE CONTROL VIA WEB BROWSER
lares integrated panels (model lares 16-IP, lares 48-IP, lares 128-IP) integrate
a web-browser for remote management of the system via Internet.
Installer should program the panel and enable the service, moreover,
if a static IP address is not available, the system support dynamic IP
address service protocol (DynDNS) that allows to communicate with
the panel from any Internet point.
For security reasons to gain access to web-server service an additional
login via a username and a password is required.
lares
27
INTRODUCTION
FR
lares est un système d’alarme et système de domotique qui peut être
contrôlé sur place au moyen du clavier LCD ergo, ainsi qu’à distance
par téléphone, et même via Internet par le biais d’un serveur WEB
intégré. Ce manuel décrit les opérations qui peuvent être effectuées
par l’utilisateur final.
L’installation de ces systèmes doit être effectuée de manière stricte, en respectant les
descriptions du présent manuel et en accord avec les lois locales et règlements en vigueur.
Ces dispositifs ont eté conçus et fabriqués avec les plus hauts standards de qualité et de
performance adoptés par Ksenia Security. Il est recommandé de tester le système une fois
installé et au moins une fois par mois. Les procédures de test dépendent de la configuration
du système. Demandez à votre installateur de suivre les procédures. Ksenia Security srl ne sera
responsable d’aucun dommage, de quelque ordre qu’il soit, provenant d’une installation ou
d’un entretien réalisé de manière impropre ou par un personnel non autorisé ou formé à le faire.
Le contenu du présent guide d’installation peut être modifié à tout moment et sans préavis par
KSENIA SECURITY.
Informations pour les utilisateurs: Evacuation (Directive RAEE - WEEE)
Attention! Ne pas utiliser une poubelle ordinaire pour se débarrasser de cet équipement.
Les appareils électriques et électroniques usagés doivent être traités séparément,
conformément à la législation relative qui nécessite le traitement, la valorisation et le recyclage
des équipements électriques et électroniques usagés.
Suite à la mise en œuvre des directives dans les Etats membres, les ménages résidant au sein
de l’UE peuvent remettre gratuitement leurs équipements électriques et électroniques usagés
aux centres de collecte désignés gratuitement *. Les détaillants locaux peuvent également
accepter des produits usagés gratuitement, si un produit similaire est acheté chez eux. En
cas d’utilisation d’équipements électriques ou électroniques qui comportent des piles ou des
accumulateurs, ceux-ci doivent être jetés séparément, conformément aux dispositions locales.
La mise au rebut de ce produit garantit qu’il subit le traitement nécessaire, la récupération et
le recyclage. Cela permet d’éviter les éventuels effets négatifs sur l’environnement et la santé
publique qui peuvent résulter de la manipulation inappropriée des déchets.
* Veuillez contacter les autorités locales pour plus de détails
Spécifications techniques, l’apparence, la fonctionnalité et les autres
caractéristiques du produit peuvent changer sas préavis
28
lares
OPERATIONS AU CLAVIER
Reportez-vous au manuel d’utilisation du clavier ergo et familiarisez-vous
avec les fonctions de ses touches et du défilement circulaire1.
ACTIONS SUR CLAVIER EN ATTENTE
FR
Six opérations peuvent être effectuées pendant que le système est en
mode attente (stand-by):
1. Une liste détaillée des informations (en effleurant la touche ENTER)
2. Etat des partitions (en appuyant sur la touche #)
3. Etat des zones (en appuyant sur la touche *)
4. L’activation d’une fonction (en gardant le doigt sur la touche
appropriée pendant 3 sec.)
5. Entrer le code (le code par défaut est 147258)
6. Verrouillage du clavier pour le nettoyer: gardez le doigt sur la touche
ESC pendant 3 secondes
En mode d’attente (stand-by), vous pouvez accéder à l’information
suivante si vous effleurez la touche Enter:
- Si l’alarme déclenche, il est possible de connaître la zone qui est en
alarme (si la notification “sans code PIN” est activée)
- Liste des zones armées (si l’état d’activation du système est activé)
- Liste des zones ouvertes (si l’affichage des zones en temps réel est
activé)
- De l’information à propos de l’installateur
Utilisez la zone de défilement circulaire pour naviguer entre les lignes.
Pour activer une fonction macro sans entrer de code, gardez le doigt
sur la touche correspondant à la macro pendant 3 secondes. Cette
fonction doit être activée par l’installateur.
1
Si le clavier n’est pas configuré dans le système, l’écran du clavier n’affichera aucune
information et le code utilisateur est désactivé. Le login sera donc autorisé via le code
installateur.
lares
29
AFFICHAGE DE L’INFORMATION EN MODE D’ATTENTE (STAND-BY)
En mode d’attente, la ligne supérieure du clavier affiche le statut du
système. Les informations sont affichées dans l’ordre prioritaire suivant:
ENTRETIEN
Entretien par l’installateur. Dans ce cas, ni l’alarme intrusion
ni l’alarme d’autoprotection ne déclenchera
SABOTAGE
Sabotage sur une des partitions assignées au clavier
ALARME!
Une alarme est en cours sur au moins une des partitions
assignées au clavier
PERIPH. ABSENT
Au moins un périphérique du KS-Bus est absent
MEMOIRE SABOT.
Mémoire de sabotage sur au moins une des partitions
assignées au clavier
MEMOIRE
D’ALARME
Mémoire d’alarme sur au moins une des partitions assignées
au clavier
DEFAUT SYSTEME
Le système est en défaut
ERREUR EN
MEMOIRE
il y a une erreur en mémoire
DELAI D’ENTREE
Délai d’entrée sur au moins une des partitions assignées au
clavier
DELAI DE SORTIE
Délai de sortie sur au moins une des partitions assignées au
clavier
DELAI AVERTISS.
Le délai d’avertissement est actif sur au moins une des
partitions assignées au clavier
APPEL TEL. EN
COURS
Un appel téléphonique est en cours
CONNECTION
USB
La centrale est connectée au PC par le port USB, ou une clé
USB est branchée sur la centrale
ASS. A DIST.
L’assistance à distance est active sur le clavier
EXCL./ TEST ZONE
Au moins une zone est en test ou exclue manuellement
ECOUTE A
DISTANCE
L’écoute à distance depuis le micro du clavier est actif
SYSTEME OK
Il n’y a pas de défaut
FR
30
lares
AFFICHAGE DE L’INFORMATION EN MODE D’ATTENTE (STAND-BY)
Pendant la programmation et lorsque le clavier est en stand-by, il
vous est possible de désactiver l’état du système. Par contre, si vous
souhaitez l’afficher, vous devez entrer un code PIN valide ou approcher
un badge programmé du clavier. Avec cette programmation, et
lorsque le système est désarmé, les mentions “Alarmes en mémoire” ou
“Ksenia Security” s’afficheront. Qu’il y ait ou non des anomalies. Lorsque
le système est armé, le système affiche toujours “Ksenia Security” à
l’écran du clavier.
FR
La ligne du bas de l’écran affiche l’information que l’installateur peut
modifier à sa guise sur chaque clavier:
1. Date et heure
2. Etat d’activation du système (ON/OFF)
3. Température extérieure (sirène imago BUS requise)
4. Température intérieure (sirène radius BUS requise)
5. Opérateur GSM (requiert un lien vers le gemino BUS)
6. Indication des zones ouvertes en temps réel
NOTE: Si vous êtes dans le menu utilisateur et qu’aucune touche n’est effleurée pendant 30
secondes, le clavier retournera en mode d’attente.
lares
31
Dans le menu utilisateur, vous pouvez naviguer au travers des
différents sujets en utilisant le menu déroulant sur la partie tactile
circulaire du clavier.
LOGIN VIA CODE / SCENARIOS
FR
Après avoir entré le code au clavier (toujours 6 chiffres), celui-ci
affichera les fonctions autorisées (en démarrant par celle qui est la
plus utilisée, et dépendant des choix possibles) et vous aurez accès au
premier niveau du menu.
Exemple : deux fonctions peuvent être assignées respectivement à
la touche 0 (désarmement du système) et à la touche 1 (armement
du système). Après avoir bien entendu entré votre code, le clavier va
vous montrer la fonction que vous utilisez le plus. Si vous n’effleurez plus
aucune touche pendant 3 secondes (ni 0, ni 1) la fonction affichée sera
mise en oeuvre automatiquement et le clavier retournera en mode
d’attente2.
RACCOURCIS
appuyez sur une touche pour activer la fonction correspondante ou
effleurez la touche # pour entrer dans le menu principal.
EXECUTION SEQUENTIELLE DE MULTIPLES SCENARIOS
Pour effectuer de multiples scénarios en mode séquentiel, appuyez sur
la touche “entrée” après le premier scénario, sans avoir à entrer un
nouveau code utilisateur.
2Si
la fonction proposée n’est pas celle souhaitée, utilisez le défilement circulaire afin d’aller
jusqu’à l’action désirée et confirmez-la par la touche Enter
32
lares
MENU PRINCIPAL
MISE A ZERO
Appuyez sur la touche Enter pour remettre à zéro toute alarme en
cours et effacer l’enregistrement de l’alarme. Pour le un sabotage,
l’installateur doit valider la mise à zéro de l’alarme.
STATUT DES PART.
Appuyez sur la touche Enter pour afficher le statut de l’activation (On/
Off) de toutes les partitions.
STATUT DES ZONES
Appuyez sur la touche Enter pour afficher le statut d’activation (On/Off)
de toutes les zones en temps réel.
CHANGER CODE
Appuyez sur la touche Enter pour changer le code d’accès.
OPTIONS CLAVIER
Appuyez sur la touche ENTER pour modifier les paramètres du clavier:
rétroéclairage de l’écran, le volume du haut-parleur, le signal sonore
quand une zone ‘carillon’ est transgressée et la sensibilité du clavier.
OPTIONS AVANCÉES
Appuyez sur la touche Enter pour accéder aux fonctions avancées.
Veuillez vous référer au paragraphe suivant.
RET.ARM.AUTOM
Appuyez sur la touche Enter pour retarder l’armement automatique
du système. Par défaut, la prolongation est de 10 minutes mais vous
pouvez la paramétrer.
ETAT DES ERREURS
Appuyez sur la touche Entrée pour afficher les erreurs détectées ; vous
pouvez naviguer au travers de celles-ci grâce au menu circulaire.
Toutes les erreurs dans la mémoire du système seront effacées par
l’affichage de l’état des erreurs.
ETAT DU GEMINO
Appuyez sur la touche Entrée pour afficher le nom de l’opérateur GSM,
le crédit résiduel et l’expiration de la carte SIM. Cette fonction est
accessible uniquement si un gemino BUS est configuré sur le système.
FR
ARRÊT. APPELS
Appuyez sur la touche Enter pour arrêter la transmission à la suite d’une
alarme (appels, SMS ou e-mail).
lares
33
OPTIONS AVANCÉES
FR
Le menu de navigation avancé se compose des éléments suivants, qui
peuvent être parcourus à l’aide du défilement circulaire.
Ce menu n’est disponible que si le code saisi a été programmé avec le
paramètre ‘code principal’ activé.
MÉMOIRE D’ÉVÉNEMENTS
affichage de l’enregistrement des événement(s). Appuyez sur Enter
pour afficher l’enregistrement, vous pouvez naviguer à travers les
événements à partir du dernier enregistré. Pour plus de détails sur
l’événement, appuyez à nouveau sur la touche Enter.
CALENDRIER
Dans ce menu, il est possible d’activer / désactiver la fonction autoarmement
ACT. DE L’ENTRET.
Dans ce menu vous pouvez activer la fonction requise afin que
l’installateur puisse se connecter pour la maintenance du système. Si
cette option est réglée sur OFF, l’installateur n’a pas accès au système
pour quelque opération que ce soit.
ASSISTANCE À DISTANCE
Dans ce menu, il est possible d’activer / désactiver l’assistance à
distance.
ANNUAIRE
In questo menu è possibile programmare la rubrica della centrale.
TESTS PERIODIQUES
Appuyez sur la touche Entrée pour générer un événement de test
périodique
DATE ET HEURE
À ce stade et après avoir appuyé sur la touche Enter, vous serez en
mesure de changer la date du système et l’heure en actionnant tout
simplement le défilement circulaire. Pour sauter d’un champ à l’autre,
ne pas appuyer de touche pendant 3 secondes.
MENU VOCAL
Cette fonction vous permet d’activer le menu vocal, afin d’être géré
à distance par téléphone. Pour les fonctions disponibles dans cette
section, voir le paragraphe suivant.
34
lares
OPTIONS AVANCÉES
CODES
Dans ce menu, vous pouvez modifier la fonction et valider les codes des
utilisateurs dans les partitions pour lesquelles le code maître est valable
GESTION DES BADGES
Dans ce menu, il est possible de modifier la fonction de validation des
badges (minitags).
COMMANDES À DISTANCE
Dans ce menu, il est possible de modifier la fonction de validation des
commandes à distance.
CHANG.COUL.CLAV.
Ce menu permet à l’utilisateur de changer la couleur de la face
avant du clavier sans provoquer de sabotage. Pour ouvrir et fermer le
couvercle, vous devez suivre les instructions fournies dans le manuel du
clavier.
FR
OPERATIONS AVEC BADGE / SMARTPHONE
Votre badge ou votre téléphone muni de la technologie NFC peut
être utilisée à la place des touches du clavier pour activer les codes:
pour accéder au menu utilisateur, placez votre badge valide ou votre
smartphone à proximité de la zone de lecture du clavier (située en haut
à droite).
lares
35
MENU VOCAL A DISTANCE
FR
Dans le cas où un gemino BUS ou un transmetteur RTC/PSTN pontis est
configuré dans le système, on peut utiliser un menu vocal à distance qui
permet les opérations suivantes:
1. L’écoute de l’environnement contrôlé à partir du micro du clavier
2. Obtenir des informations sur l’état des zones ainsi que l’inclusion ou
l’exclusion de celles-ci
3. Obtenir des informations sur l’état des partitions
4. Activer des fonctions (sorties et/ou armement/désarmement de la
centrale)
Le guide vocal vous mènera au travers du menu et les touches à
appuyer vous seront indiquées pour chaque opération. En règle
générale, toute opération est confirmée en appuyant sur la touche #
et annulée en appuyant sur la touche * de votre téléphone.
Il y a trois façons différentes pour avoir accès au menu vocal à distance:
1. Appeler le numéro de téléphone de la carte SIM installée sur le
gemino BUS, si le répondeur est activé
2. Appeler le numéro du transmetteur pontis RTC/PSTN.
3. Appuyez sur la touche # pendant un appel entrant reçu par le
système.
36
lares
OPERATIONS A DISTANCE VIA SMS
Si la centrale est connectée à un transmetteur gemino BUS, certaines
opérations peuvent être effectuées à distance en envoyant des SMS à
la centrale comme:
1. L’activation de scénarios
2. Connaître le crédit actuel sur la carte SIM prépayée
3. L’assistance à distance
4. Générer un événement “Code Reconnu”
FR
ACTIVATION DE SCENARIOS VIA SMS
10 scénarios peuvent être activés en envoyant des SMS à la centrale.
Le format du SMS doit répondre aux exigences suivantes:
<code utilisateur>s<numéro du scénario>
ou
<code utilisateur>espace<numéro du scénario><;>
Exemple: vous souhaitez activer le scénario n°1 (armer à distance) par
le code 147258. Le SMS qui doit être transmis sera:
147258s1 ou 147258 armer;
Vous pouvez programmer 8 n° de téléphones afin de leur transmettre
l’acquis d’armement.
CONNAÎTRE LE CRÉDIT RÉSIDUEL SUR LA CARTE SIM PRÉPAYÉE
Le format du SMS doit répondre aux exigences suivantes:
<code utilisateur>c
Exemple: avec le code par défaut 147258, le SMS à transmettre sera à
la centrale sera:
147258c
Dans quelques minutes, la centrale vous communiquera le crédit
actuel.
lares
37
OPERATIONS A DISTANCE VIA SMS
FR
L’ASSISTANCE À DISTANCE
Le format du SMS doit répondre aux exigences suivantes:
<code utilisateur>m<0/1>
Exemple: avec le code par défaut 147258, afin d’autoriser l’assistance
à distance, le SMS qui devrait être envoyé à la centrale est le suivant:
147258m1
Pour désactiver la fonction d’assistance à distance, le SMS qui devrait
être envoyé sera:
147258m0
EVENEMENT CODE RECONNU
Le SMS doit avoir la forme suivante :
<Code utilisateur>n
Exemple: si nous utilisons le code PIN 147258 pour générer un «Code
Reconnu», le SMS qui doit être envoyé à la centrale est le suivant:
147258n
Le SMS va générer l’événement “Code Reconnu” (si programmé) et
va effectuer les actions associées à cet événement. Cette fonction est
très pratique si vous souhaitez diversifier des actions (activer des sorties
par exemple) qui pourraient être effectuées par différents utilisateurs.
CONTROLE A DISTANCE VIA WEB BROWSER
Les centrales lares (modèles lares 16-IP, lares 48-IP, lares 128-IP) disposent
d’un navigateur web pour la gestion du système à distance par
l’intermédiaire d’Internet. L’installateur doit programmer la centrale
pour activer le service. En outre, si une adresse IP statique n’est pas
disponible, le système autorise l’emploi d’adresse IP dynamique
(protocole (DynDNS) qui permet de communiquer avec la centrale
depuis n’importe où, si une connexion internet est possible. Pour des
raisons de sécurité, l’accès au Webserver de la centrale est soumis à un
login additionnel via un nom d’utilisateur et un mot de passe.
38
lares
CERTIFICAAT - CERTIFICATIONS - CERTIFICATIONS
T 014 / 1th Edition 2003 + A1:2002 + A2:2003 + A3:2005
EN50131-3 • EN50131-6 • EN50136-1-1
ENTE CERTIFICATORE:
IMQ - Sistemi di Sicurezza
GRADO 3 • CLASSE II
4 / 3 / 2014
RMX0300005.100
www.kseniasecurity.com


