1
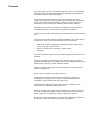
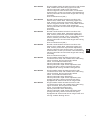
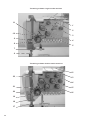
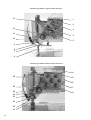
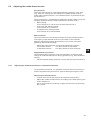
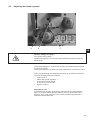
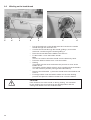
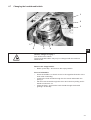
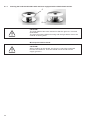
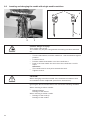
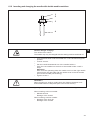
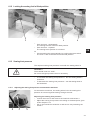
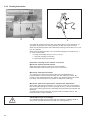
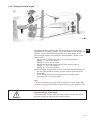
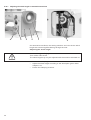
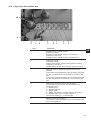
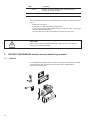
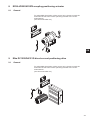
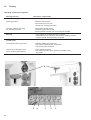
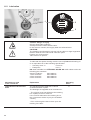
6.2
Adjusting the needle-thread tension
Pre-tensioner
When the main tensioner 2 and supplementary tensioner 3 are open
(e.g. when the sewing feet are raised) the needle thread must be
under slight residual tension. This residual tension is produced by the
pre-tensioner 1.
The pre-tensioner 1 simultaneously affects the length of the end of the
severed needle thread (the starting thread for the next seam).
– Basic setting:
Turn knurled nut 4 until its front is flush with the bolt 5.
– To shorten the starting thread:
Turn knurled nut 4 clockwise.
– To lengthen the starting thread:
Turn knurled nut 4 anticlockwise.
Main tensioner
The main tensioner 2 should be set to the minimum possible tension.
The looping of the threads must be in the center of the material.
With thin material excessive thread tension can cause unwanted
gathering and thread breakage.
– Adjust the main tensioner 2 so that the stitches are uniform.
To increase tension turn the knurled nut clockwise
To decrease tension turn the knurled nut anti-clockwise
GB
Supplementary tensioner
The supplementary tensioner 3 can be switched in to effect a rapid
change in needle-thread tension during operation (e.g. with thickened
seams).
– Set the supplementary tensioner 3 lower than the main tensioner 2.
6.2.1
Adjusting the needle-thread tension on automotive machines
On automotive machines, it is possible to secure the main tensioner 2
and the supplementary tensioner 3 against altering through the user.
Adjusting the thread tension
– Loosen the screw 6 and remove the interlock mechanism 7.
– Adjust the needle-thread tension according to the description given
under chapter 6.2.
– Put on the interlock mechanism 7 again and secure it by fastening
the screw 6.
25