1
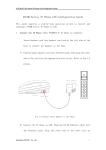
Professional VoIP Phone
VPPH01
User Manual
Table of Contents
Page
1.0
Introduction
3
2.0
Functions and features
3
2.1
Standard and Protocol
4
2.2
Function Keys
4
3.0
Installation
4
4.0
Configuration
5
4.1
Phone Keypad set
5
4.2
Configured by WEB
6
5.0
Upgrade your phone
15
6.0
View Records
15
7.0
Usage of the phone
16
E-Tech VPPH01 Manual
2
1.0 Introduction
Congratulations on your purchase of this high-quality E-Tech product! This product has been extensively tested by ETech’s technical experts. Should you experience any problems with this product, you are covered by a five-year ETech warranty. Please keep this manual and the receipt in a safe place.
2.0 Functions and features
With this VOIP telephone, anyone can dial free or at low cost to any telephone on the world. With large LCD display
showing calling or dialing number.
Professional model large adjustable swifel display.
2x UTP network inputs. The 2nd UTP connection can be used to connect your pc to the network. In this way, only 1
wall-contact is required to connect both the telephone and the PC to the network.
•
•
•
•
•
•
•
•
•
•
•
•
•
•
•
•
•
•
•
•
•
•
•
•
•
•
•
•
•
•
•
•
•
•
•
•
•
•
Support H.323 v4,compatible with most H.323 v1-v4 system and devices
SIP compatible
Built in H.323 proxy support to pass NAT
Support MGCP RFC2705
Support SIP RFC3261
Support Net2phone private protocol
Fast start and H.245 tunneling
Outband DTMF transmit by H.245 user input or Q.931 keypad
IEEE 802.3 /802.3 u 10 Base T / 100Base TX
Major G.7XX and gsm610 audio codec
Caller ID send and receive by Q.931
Provide direct IP address to IP address call mode, direct PSTN call by a voice gateway ,E.164 phone number call
under the mode of GK
Automatically gatekeeper discovery in LAN
DHCP support for automatically assign IP address and others relevant parameters
PPPoE support for ADSL or Cable modem
Upgrade program by FTP mode
Dynamic voice detection; Echo cancellation; Comfort noise generation
Dynamic voice jitter buffer which minimize effect to the voice caused by the audio delay and jitter and as a result
the quality of voice is high
Tone generation and Local DTMF generation and detection according with ITU-T
E.164 dial plan and customized dial rules
80 entries each for missed call, answered call and dialed call
112 entries for quick dial
16 entries for voice message
Working status indicating Lamps
Independently digit adjust the volume of handset ¡shand free
14 function keys for operating and setting phone besides standard keys 0-9,#
Speed dialing
Adjustable volume for both handset and speaker
16 function keys, background LED and states indicating lights
Settings by HTTP web browser (IE6.0)
Advanced settings by Telnet
Voice prompt
Upgrade by TFTP
Network interface:1 RJ-45 Ethernet Connect
Application Network environment: 10Base-T/100Base-T
Echo cancellation:G165 16ms
Store quick dial number: 100
Record phone number of missed call:80
E-Tech VPPH01 Manual
3
2.1 Standard and Protocols
•
•
•
•
•
•
•
•
•
•
•
•
•
•
•
•
•
•
•
•
•
•
•
H.323 V4 calling signal protocol
MGCP RFC2705
SIP RFC3261
Net2phone IAX2,WP private protocol
IEEE 802.3 10Base-T/100Base-TX RJ-45 port
Major G.7XX and gsm610 audio codec
Audio codec algorithm include G.711A,G.711u,G.723.1(5.3k/6.3k) and G.729
Quick dial setting and user-defined dial plan setting
TCP/IP: Internet Transport and Control Protocol
RTP: Real-time transport Protocol
RTCP: Real-time Transport Control Protocol
G.723.1ˇG729 VAD/CNG economical bandwidth
G165 16ms Echo cancellation
DTMF: Tone Detection and Generation
DHCP: Dynamic Host Configuration Protocol
PPPoE: Point to Point Protocol Over Ethernet
DNS: Domain Name Service
NTS: Network Time service
Telnet: Remote Host log on Protocol
FTP: File Transfer Protocol
HTTP: Hyper Text transfer Protocol
Build in H.323 proxy support
Auto search proxy
2.2 Function Keys
Missed
Answered
Local Num
Dialed
Redial
Speak
Volume+
VolumeKeypad
Press this key to review missed number.
Press this key to review received number.
Press this key to get phone number.
Press this key to review dialed number.
While reviewing missed, received or dialed number, press this key to dial.
current number.
Press this key to have a call without lifting the handset.
Increase the volumes of handset or speaker; turn over the record backward.
Decrease the volumes of handset or speaker; turn over the record forward.
With handset picked or pressing speaker, press this key to dial number.
3.0 Installation
•
•
•
•
•
•
•
Connect handset to base: insert handset cord into handset cord jack at the left side of the base.
Connect Phone and Power.
Place the phone next to Power socket. Plug the power adapter into the Power Jack.
Plug the other end of the power cord adapter into the appropriate power.
Connect IP phone to Internet: Plug the RJ-45 Ethernet cable into the Ethernet Jack.
Plug the other end of the cable into HUB or router.
Power on the phone. Turn on the phone by pulling the switch to ON. Verify that yellow, green and red
lights are on together, and then red light is off; green light blinks or is off; yellow light blinks or is on which behalf
the success of starting phone and phone enter into normal standby.
E-Tech VPPH01 Manual
4
4.0 Configuration
4.1 Phone Keypad set (Note: Default password is 1234.)
1. Function Keys Introduction:
While using keypad and LCD to configure the setting of IP phone, following keys will be used:
Press key Function
Spk /Hand free Enter into submenu of the current menu ;Acknowledge to modification
Volume/+ Scroll menu forward
Volume/- Scroll menu backward
Local IP Enter into modification status
Redial Cancel current setting ; restore to its father catalogue
Back Space Backspace during the setting
Number keypad Input updating content according to require. Please see
appendix for character represented by each key
2. Configuration operation:
•
Enter setting mode: use the dial pad to enter the password of the phone (when debug is not
set as 0[disable], default password is 1234; when debug is set as 0[disable], please use super password 19750407),
and then press # , till password: is displayed. Then enter the password again and press Spk to let the phone enter
setting mode.
•
We take enabling eTalk prepaid card and setting the ID and pin as an example to explain
how to change setting:
Enter setting mode
Use the keypad to input the password of the phone (when debug is not set as 0[disable], default password is 1234;
when debug is set as 0[disable], please use super password 19750407), and then press #, till password is displayed.
Then enter the password again and press Spk to let the phone enter setting mode.
Enable eTalk
Once the phone enter setting mode, Network settings will be seen, then press Vol/+ to turn over the menu, until
protocol settings is displayed. Please press Spk to enter submenu and then continually press Vol/+ to turn over the
menu until Servicetype 0 [Normal] is displayed on the screen. Please press Local IP to enter change mode, then you
will see a cursor flashing at the beginning of the second line. It indicates that you can change the setting of this item.
Then press 2 to enable eTalk and then press Spk to confirm.
Set eTalk account (0117ETNS)
press Vol/+ to turn over the menu , once account is displayed on the screen, please press Local IP to enter change
mode, then you will see a cursor flashing at the beginning of the second line. It indicates that you can change the
setting of this item. Then press 0117 keys once respectively, 3 key thrice, 8 key twice, 6 key thrice and 7 key quintic.
Then press Spk to confirm. After above operation, the account 0117ETNS will be displayed on the LCD.
Set eTalk pin (409466193597)
press Vol/+ to turn over the menu, once pin is displayed on the screen, please press Local IP to enter change mode,
then you will see a cursor flashing at the beginning of the second line. It indicates that you can change the setting of
this item. Then press 409466193597 keys once respectively to input the password, and then press Spk to confirm.
After above operation, pin 409466193597 will be displayed on the LCD.
E-Tech VPPH01 Manual
5
Save setting and exit setting
continually press Redial to reach save setting menu. Then please press Spk key to confirm the change. When the
menu (Save, are u sure?) is displayed on the LCD, press Spk again to confirm. Once the IP phone restart
successfully, the new setting is effective.
•
Appendix
The following chart indicates the digital letter and mark according to the times the corresponding character key is
pressed in the setting mode. Press key Press once
4.2 Configured by WEB
On a PC connecting with the phone or at the same segment of the phone, double click the Internet Explorer icon to
open the IE browser. Input the IP address of the phone (192.168.1.100) into the address bar and input password of
the phone into the following page.
From version 1.24, there are two passwords for the IP phone: ordinary password and super password. Default
password 1234 is ordinary password and super password is 19750407 (the super pin for some PINGHE phone is not
19750407, please ask for the provider of the IP phone). With Debug set 0[disable], please input super password; while
Debug is not set as 0[disable], please input ordinary password. Then click button. The following configured pages will
popup.
E-Tech VPPH01 Manual
6
•
Network Setting
iptype: Set how IP phone gets relevant network parameters by selecting corresponding item from drop down list.
- static ip: Select this item to authorize users set IP address, subnet mask and router IP address of IP phone
manually.
- dhcp: Select this item to enable DHCP mode. With this system, your LAN or router automatically assigns all the
required network parameters to any device connected to it when the device log on. The E-Tech VPPH01 IP phone is
shipped from the factory with DHCP on. So, if your LAN or router is configured to use DHCP addressing, the IP
phone’s LAN parameters will automatically be configured as soon as it is connected to the LAN or router and
powered up.
- pppoe: Those ADSL and Cable Modem users please select this item for it is a protocol
especially designed for them. With this system, ADSL ISP automatically assigns all the
required IP parameters to any device connected to it when the device log on.
- modem: If the IP phone used with modem, please select this item to get relevant network
parameters auto. Then please fill ID and pin into ppp id and ppppin fields.
ppp id: With pppoe or modem selected in iptype drop down list, please enter the user name here.
E-Tech VPPH01 Manual
7
ppp pin: With pppoe or modem selected in iptype drop down list, please enter the password here.
local ip: With static ip selected in iptype drop down list, please enter IP address of IP phone here.
subnet mask: With static ip selected in iptype drop down list, please enter subnet mask of IP phone here.
router ip: With static ip selected in iptype drop down list, please enter router IP address of IP phone here.
dns: With static ip selected in iptype drop down list, please enter IP address of DNS server here.
dns 2: With static ip selected in iptype drop down list, please enter IP address of backup DNS server here.
mac: MAC address is the physical address supplied by the Ethernet NIC. The E-Tech VPPH01 phone is shipped from
the factory with a unique algorism MAC address printed on the back of the base.
•
protocol settings
protocol: Select an item from dropdown list to set the protocol used by the phone.
- h323: Select this item to set the phone use H323 protocol.
- Sip: Select this item to set the phone use SIP protocol.
- Mgcp: Select this item to set the phone use MGCP protocol.
- n2p: Select this item to set the phone use Net2phone private system.
- iax2: Select this item to set the phone use IAX2 private system.
- wp: Select this item to set the phone use WP private system
Note With Net2phone selected here, please set other necessary parameters: check use service option, and then
fill IP address or domain name of designated server into service addr field; then set service port as 6801; fill account
and password of Net2phone card into account and pin fields.
use service: Enable/disable service by checking/unchecking this box. Different service responses different protocol
as follows:
- With H323 protocol used, the protocol service refers to the gatekeeper searching the address. To let IP phone call
each other by E.164 number, please check this box and then fill the IP address or domain name of corresponding
gatekeeper into service addr field. Without this check box being selected, the phone can call by gateway or just by
dialing IP address of other IP phone or H323 device (such as Netmeeting) at the same network
segment.
- With MGCP protocol used, the protocol service refers to Call Agent. Please check this box according to system, and
then fill service addr field with Call Agent IP address or domain name.
- With SIP protocol used, the protocol service refers to SIP Proxy Server. Check this box according to system, and
then fill service addr field with SIP Proxy Server IP address or domain name.
- With Net2phone protocol used, the protocol service refers to designated server. Please check this box, and then fill
the designated IP address or domain name into service addr field.
Note: Designated Net2phone Server IP addresses are: 216.53.3.52; 4.43.114.39; 4.43.114.38 or
205.228.245.8.Domain names are: call1.net2phone.com; call2.net2phone.com; skip1.net2phone.com;
skip2.net2phone.com; skip1.f8g9h0.net or skip2.f8g9h0.net.
E-Tech VPPH01 Manual
8
Service type: This option is used to accommodate the miscellaneous requirements of the system providers. When IP
phone is connected to these systems, please select the corresponding service type.
- Common: no special requirements
- etalk: Use eTalk prepaid card by selecting this item. With eTalk selected here, please
select dialnum in dial plan drop down list and then fill 00 into dial number field.
Note When connected with Auvtech’s system, please select “auvtech” from the “nat traversal” list box, select
“account” from the “local type” list box.
- subcentrex: Use subcentrex servcie by selecting this item.
- ringtec: Use Ringtec service by selecting this item. With this service used, please select dialnum in use dial plan
drop down list and then fill account of Ringtec into dial number field.
- smartcon: Use smartcon service by selecting this item.
- dda: Use dda service by selecting this item.
- vida: Use Vida service by selecting this item.
- citron: Use citron service by selecting this item.
- asiasoft: Use asiasoft service by selecting this item
- Uptech: Use Uptech’s MGCP system
- Zte: Use Zte’s MGCP system
- Huawei: Use Huawei’s MGCP or H.323 system
- Kaimen: Use Kaimen’s MGCP system
- Voipack: Use Voipack’s MGCP system
- Lucent: Use Lucent’s H.323 system
- Harbor: Use Harbor’s MGCP system
- IPN: Use IPN’s H.323 system
- Yiyang: Use Yiyang’s H.323 system
- Thinker: Use Thinker’s H.323 system
- Suntek: Use Suntek’s H.323 system
- Sipphone: Free SIP service on internet.
- Inphonex: Free SIP service on internet
- Fwd: Free SIP service on internet
- Net2phone: Use Net2phone private protocol system.
- service addr, service id: Please put the URI (domain name/IP address : service port) of the server into “service
addr”. When the default service port is used, “: service port” can be omitted. “service id” is filled according to the
protocol used.
- H.323: If “use service” is checked, please put the URI of gatekeeper into “service addr” .The default service port is
1719. If the gatekeeper has a GKID, please put it into “service id”.
If “use service” is not checked, to make calls through gateway, please put the URI of the gateway into “service addr”.
To make IP-to-IP call, please clear this field. In both cases, the default service port is 1720.
- MGCP: Please put the URI of Call Agent into “service addr”. The default service port is 2727. Leave “service id”
empty.
- SIP: If “use service” is checked, please put the URI of the SIP proxy server into “service addr”. Put the domain name
of the SIP proxy server into “service id” or leave “service id” empty. If the system has an Outbound Proxy¯please put
the URI of the Outbound proxy into “service addr” and put the domain name of SIP proxy server into “service id”. The
default service port is 5060. If “use service” is not checked, please clear “service addr” and “service id”. Net2phone:
Please put the URI of the Net2phone server into “service addr”¨The default service port is 6801. Leave “service id”
empty. Net2phone usually use the following servers: call1.net2phone.com, call2.net2phone.com, kip1.net2phone.com,
skip2.net2phone.com, skip1.net2phone.net,skip2.net2phone.net.
nat traversal: When the IP phone with private IP address need communicate with other IP phones in a different LAN
or on Internet, please select an item from dropdown list to set the proxy used by the phone.
- disable: Select this item when the log in server and IP phone in the same LAN, or the log in system supports the IP
phone working behind the LAN.
E-Tech VPPH01 Manual
9
- enable: When the system does not support IP phone working behind the LAN, please select this item to search
public IP address of the NAT device. With this item selected, “nat addr” field will be activated. Besides, port mapping
(port forwarding) needs to be properly set up on NAT device.
- citron: With Citron private protocol used, select this item to fit into the GnuGK system transferring the voice and
signal by router.
- auvtech: Select this item with Auvtech private system used.
- stun: Select this item with SIP protocol used according to requirement of system. With this item selected, nat addr
field is activated.
- vida: Select this item with Vida private system used.
- aivgr: Select this item with aivgr private system used.
nat addr: When “nat traversal” is set to “enable”, please put the domain name of the servers ( These web server
helps to find out the public IP of the IP phone) into “nat addr”, such as www.whatismyip.com.
When “nat traversal” is set to “stun”, please put the URI of the stun server into “nat addr”, in the format as “domain
name/IP address : service port”. The default service port for stun is 3478.
nat ttl: When IP phone sit behind a NAT device, it will send packets to server every “nat ttl” seconds to keep the port
mapping on the NAT device alive. “nat ttl” is an integer between 10 and 60, default value is 20.
phone number: The local phone number or username of this phone, usually is allocated
by system.
account: With H323 protocol used, while calling card is set, please type the account of chosen card into this field;
while md5 account item selected in local type dropdown list, enter ID here; while account is selected in local type
dropdown list, enter H323 ID here. While prefix item selected in use dialplan dropdown list, enter language indicating
number, card number and # here, such as 14589653185. With SIP system which requires authentication, please put
the username/account into this field. With MGCP protocol used, please enter local endpoint id (eg., aaln/0) here. With
Net2phone system used, enter account of Net2phone card here.
pin: With H323 protocol used, while calling card is set, please type the password of chosen card into this field; while
md5 account item selected in local type dropdown list, enter password here. While prefix item selected in use dialplan
dropdown list, enter password and # here, such as 3185. With SIP system which requires authentication, please put
the password into this field. With MGCP protocol used, please enter domain name here. With Net2phone system
used, enter password of Net2phone card here.
Note WhenMGCP protocol is used, some system requires adding “[ ]” outside the domain name. So please fill the
domain name with “[]” into pin fields, such as voiptest.com.
rtp tos: Fill TOS segment of IP head package in RTP digital follow here.
register port: The local UDP port registered with server to accept incoming handshaking messages. The default port
number for MGCP protocol is 2427. The default port number for SIP protocol is 5060. For H.323 or Net2phone, any
number between 1024 and 65535 is acceptable.
signal port: With H323 protocol used, signal port is Q.931 port using TCP protocol, can be any number between
1024 and 65535.
control port: With H323 protocol used, this port is H.245 port using TCP protocol, can be any number between 1024
and 65535.
register ttl : With H323 or SIP protocol, IP phone will send a keep-alive registration message to H323 gatekeeper or
SIP proxy server every “register ttl” seconds. The minimum value is 10, maximum value is 255. Default is 60.
Rtp tos: Set the TOS field of the IP header of the RTP packets. The bigger this value is, the higher priority the packet
is.
E-Tech VPPH01 Manual
10
rtp port: RTP port is the port transferring and receiving voice packets using UDP protocol. This is an even number
between 1024 and 65535, can’t be the same as “register port”.
local type: With H323 protocol used, this parameter refers to how IP phone authenticate itself to the gatekeeper. The
meaning of each item is as follow:
- Phone number: Use phone number as E.164 and H323 ID to login the GK.
- Account: Use phone number as E.164 and designated H323 ID filled in account field as H323 ID to login GK.
- auto: Use MD5 or CAT encryption by the mode of auto negotiation, on the condition of H.235 Encryption protocol .
- MD5 account: Use H235 encrypted username and password to login the gatekeeper
- CAT account: Use Cisco access token
- sha1: Use SHA1(Secure Hash Algorithm v1) encryption mode
- cnc auth: Use CNC(China Network Communication) system auth.
Call type: Set call type by selecting the items in drop down list.
- normal: Call out in normal way by selecting this item.
- faststart: Call out in faststart way by selecting this item.
- advanced: Call out in faststart and tunneling way by selecting this item. It is a recommended way with H323 protocol
used.
dtmf: Set DTMF signal sending way by selecting control string, inband audio, signal keypad or rfc 2833 from
dropdown list.
•
Phone settings:
fwd number: Enter receiving forwarded calls phone number into this field; If the IP phone used with modem, with
modem item selected in iptype list box, and then fill ISP number into this field.
fwd poweroff: Forward calls if power off by checking this box. Please enter receiving forwarded calls phone number
into fwd number field.
fwd always: Forward all calls by checking this box. Please enter receiving forwarded calls phone number into fwd
number field.
fwd busy: Forward calls if busy by checking this box. Please enter receiving forwarded calls phone number into fwd
number field.
fwd noanswer: Forward calls without replying by checking this box. Please enter receiving forwarded calls phone
number into fwd number field.
use dialplan: Set whether use dial plan or use dial number by selecting the corresponding item in drop down list.
- disable: Do not use dial plan or dial number by selecting this item.
- enable: Use dial plan by selecting this item.
- dialnum: Use dial number by selecting this item. With this item selected, please enter the dial prefix into dial number
field.
- prefix: Use 179XX service by selecting this item.
E-Tech VPPH01 Manual
11
- Hotline: Use Hotline function by selecting this item. With this item selected, please enter the hotline number into dial
number field.
Note With 179xx service used, please set as follows: fill call prefix into dial number field, such as 17930;
type ;language indicating number, card number and # into account field; fill password and # into pin field.
dial number: With dialnum selected in use dialplan drop down list, please enter the dial prefix into this field according
to requirement of log in server. For example, with eTalk card used, enter 00 here.
ddd code: With enable or dialnum selected in use dialplan drop down list, set area code according to E.164 dial rule.
For example, Beiing 10; Shanghai 21.
idd code: With enable or dialnum selected in use dialplan drop down list, set country code according to E.164 dial
rule. For example, China 86; U.S.A.1.
idd prefix: With enable or dialnum selected in use dialplan drop down list, set international call prefix according to
E.164 dial rule, such as 00.
ddd prefix: With enable or dialnum selected in use dialplan drop down list, set long distance call prefix according to
E.164 dial rule, such as 0.
Note With dialnum seletcted in use dialplan drop down list, you can also set dddcode, iddcode, iddprefix
and dddprefix according to requirement of system.
innerline: Enable/disable multi-settings by selecting corresponding items from dropdown list.
The VPPH01 IP phone allows saving 5 settings totally.
- disable: Disable multi-settings by selecting this item, then the phone will call out using current setting.
- enable: Use designated system to place calls by selecting this item.
- switch: Enable multi-settings by selecting this item. Then please fill the prefix switching to backup setting 1 and
backup setting2 into local prefix and nonlocal prefix fields.
Note To modify the parameters of backup settings, please use Telnet commands.
local prefix: With enable or switch selected in innerline dropdown list, please fill the number switching to backup
setting 1 here, such as 56.
nonlocal prefix: With enable or switch selected in innerline dropdown list, please fill the number switching to backup
setting 2 here, such as 57.
use digitmap: Enable/disable digitmap by checking/unchecking the box.
ring type: Set ring type by selecting corresponding item from drop down list.
- dtmf 0-9: Set ring as ordinary rings in different frequency
- not disturb: Set the phone do not ring by selecting this item.
- pcmring: Set ring as music shipped from factory by selecting this item.
- user define~Set ring as music saved by user by selecting this item.
answer: Enter a number from 0 through 60 to set the entries of the seconds before the phone answer the call auto or
forward the calls. To disable auto answer function, please set this parameter as 0.
predial time: Set time limit from picking up the speaker to dialing the first the number.
interdial time: Set time limit between dialing two numbers.
postdial time: Set time limit from dialing the last number to placing a call. If the next number is not dialed within the
post dial time limit, then the phone will call the dialed number auto.
E-Tech VPPH01 Manual
12
•
Audio settings:
audio type: Set audio type of the phone by selecting item from drop down list. The options
are g729¯g7231¯g711u¯g711a and auto. “auto” is suggested, since when “auto” is selected, IP
phone will negotiate with system about which algorithm to use and be able to communicate with
more terminals and systems.
audio frame: Set audio frames in RTP package. With G723 audio codec used, set it as 1; with G729 audio codes
used, set it as 2. Minimum is 1 and maximum is 8.
g.723.1 high rate: With g.723.1 selected in audio type dropdown list, enable/disable g.723.1 high rate by checking/
unchecking this option.
vad: Enable/disable VAD (voice activity detection) by checking/ unchecking this box.
agc: Enable/disable AGC by checking/unchecking this box.
aec: Enable/disable VEC by checking/unchecking this box.
handset in: Drag the slider to adjust the volume of handset input. Drag it to the left to reduce the volume; while drag it
to the right to increase the volume.
handset out: Drag the slider to adjust the volume of handset output. Drag it to the left to reduce the volume; while
drag it to the right to increase the volume.
speaker out: Drag the slider to adjust the volume of handfree output. Drag it to the left to
reduce the volume; while drag it to the right to increase the volume.
•
Other settings:
password: Set the password of the phone. (Default password is 1234).
debug: Set the debug level of the phone.
disable: Disable output the bug message by selecting this item.
output: Output the operation information to the window, such as register, input by selecting this
item.
output all: Output all bug information and data in test window by selecting this item. remote debug: Save the bug
information in SDRAM of IP phone by selecting this item.
no check: Disable checks the mark by selecting this item.
E-Tech VPPH01 Manual
13
upgrade addr: Enter IP address or domain name obtained by ISP of FTP server supplying updated program here.
nts ip: Fill IP address of time server here.
use daylight: Enable/disable daylight by checking/unchecking this box.
timezone: Select correct time zone in dropdown list. When debug set as 0[disable], if input ordinary password (default
one is 1234), then following page will pop up after clicking login. And only those parameters can be modified.
Update: Click this button to save the configuration and restart the phone. Once the phone
restarts successfully, the new configuration is effective.
Note After entering set page, if Update button is not clicked within 5 seconds, then when you click it again, the index
page asking for pin will pop up again. Then please input the password again to enter the set page and then click
Update button to confirm the modification.
Phone Book: Click this button to open the speed dial settings page. In this page, you can set and save the speed dial
number by typing the name into the Name field and then entering the corresponding number following the name. For
example, input Jack in Name field following 001, and then input 5989426454 into Phone number field. Then Jack’s
number 5989426454 is saved in phone book. Then please click Save/Back button. In normal state, you can
use speed dial to call numbers saved in phone book.
Note With H323 protocol used, if the phone dose not login Gatekeeper or Gateway; or with SIP protocol used, the
phone dose not login Server Proxy, you can save IP address of other phone into phone number field. Please use
“*”instead of “.”. For example, save IP address 192.168.1.221, please input 192*168*1*221.
E-Tech VPPH01 Manual
14
Upgrade Program: Click this button to update the program of IP phone. Before updating, please fill IP address of
FTP server into upgrade addr field, and then click this button. Then the phone will read the corresponding bin files
from the server and then load into the phone.
Update Digitmap: Click this button to update the digitmap of the phone. Before updating, please fill IP address of
FTP server into upgrade addr field, and then click this button. Then the phone will read the corresponding map files
from the server and then load into the phone.
Upgrade Program: Click this button to update the program of IP phone. Before updating, please fill IP address of FTP
server into upgrade addr field, and then click this button. Then the phone will read the corresponding bin files from the
server and Update Digitmap: Click this button to update the digitmap of the phone. Before updating, please fill IP
address of FTP server into upgrade addr field, and then click this button. Then the phone will read the corresponding
map files from the server.
Note: Please refer to PalmTool User Guide to learn how to write digitmap or just download TXT file from our site.
Then please save it as “phone type. map” file, such as the VPPH01 map.
5.0 Upgrade your phone
Set FTP server
FTP server can be supplied by the server provider as well as setup by the users in LAN.
Please set the IP address of FTP server.
Prepare Updated program
You can ask the server provider for the latest version of program or visit our web site to download the latest version.
Operation
If you have got the IP address of the FTP server from ISP, please do as follows:
a) Use keypad to enter setting mode
b) Use keypad to input the IP address of FTP server
c) Press . Local IP, then No19 light will blink twice a second. Once the phone restarts successfully, the new program
is effective.
Note Please do not change the name of the upgraded program, or the operation will be failed.
6.0 View Records
View missed calls
Click missed call keypad then you will hear the record of missed call. Click Vol/+ keypad to turn the numbers orderly;
click Vol/- to turn the numbers reservedly. If there is no record, you will hear nothing. View answered call
Click answered call¯then you will hear the record of the received call. Click Vol/+ to turn the number orderly; click Vol/to turn the numbers reservedly. If there is no record, you will hear nothing. View dialed number Click dialed call then
you will hear the record of the dialed call. Click Vol/+ Local IP to turn the number orderly; click Vol/- to turn the
numbers reservedly. If there is no record, you will hear nothing. When you hear the number you want to dial, please
press “#” or “call” key to place a call directly.
E-Tech VPPH01 Manual
15
Note The E-Tech VPPH01 IP phone supports saving 127 entries unanswered call, dialed call and received call
ranged from 0-126 at best.When the entries arrives 127, the latest record will cover the first one. The record will be
lost when the phone restarts or turned on.
7.0 Usage of the phone
Receiving calls:
The E-Tech VPPH01 phone can receive incoming calls from other VPPH01 phone and devices that support the H.323
protocol. It works just like an ordinary phone for incoming calls. When it rings, you can receive the call by following
methods:
1. Use handset: Lift the handset and begin speaking. When the call is over, put the handset back.
2. Handset to hand free: While receiving call with handset, press speaker on the keypad and then put down the
handset. When the call is over, press speaker again.
3. Hand free: Press speaker to speak to the other party. When the call is over, press .again.
4. Hand free to handset: While receiving the call with speaker pressed, pick up the handset to continue the call. When
the call is over, put back the handset.
Note When you communicate with the other party without lifting the handset, please do not exceed 40 CM
from speaker.
Place a call
Call another VPPH01 phones under the same Gatekeeper:
Handset: Pick up the handset and listen for the Internet dial tone. Then dial the phone number you wish to call and
press # or Call to end the dialing. Once the call connection has been established and the ring tone has sounded, wait
for the other party to answer. When the other party answers, you can begin speaking. When the call is over, put back
the handset. The
dialed number has been saved into the buffer.
Hand free: Press Hand free and listen for the Internet dial tone. Then input the phone number you wish to call and
press # or Call to end the dialing. Once the call connection has been established and the ring tone has sounded, wait
for the other party to answer. When the other party answers, you can begin speaking. When the call is over, Press
Hand free again. The dialed number has been saved into the buffer.
Blind dialing: Use the keypad to enter the phone number you wish to call and then press # or Call to make the call.
Once the call connection has been established and the ring tone has sounded, wait for the other party to answer.
When the other party answers, you can begin speaking. When the call is over, Press Hand free again. The dialed
number has been saved into the buffer.
Place a call without login the Gatekeeper
If The E-Tech VPPH01 IP phone does not login the Gatekeeper, you can place a call by lifting the handset or pressing
Hand free and then inputting the IP address of the other party, and then pressing # or Call
Place a call through Gateway
If The E-Tech VPPH01 IP phone does not login the Gatekeeper, you can place a call through Gateway directly by
lifting the handset or pressing Hand free and then inputting the IP address of the other party, and then pressing # or
Call
Note When you place a call without Gatekeeper or with Gateway, please log off Gatekeeper. To get the
detailed operation please refer to Configuration chapter.
View Records
View missed calls
Click missed call keypad ¯then you will hear the record of missed call. Click Vol/+ keypad to turn the numbers orderly;
click Vol/- to turn the numbers reservedly. If there is no record, you will hear nothing.
View answered call
Click answered call¯then you will hear the record of the received call. Click Vol/+ to turn the number orderly; click Vol/to turn the numbers reservedly. If there is no record, you will hear nothing.
E-Tech VPPH01 Manual
16
View dialed number
Click dialed call ¯then you will hear the record of the dialed call. Click Vol/+ to turn the number orderly; click Vol/- to
turn the numbers reservedly. If there is no record, you will hear nothing. When you hear the number you want to dial,
please press “#” or “call” key to place a call directly.
Note: The E-Tech VPPH01 phone supports saving 127 entries unanswered call, dialed call and received call ranged
from 0-126 at best. When the entries arrives 127, the latest record will cover the first one. The record will be lost when
the phone restarts or turned on. Appendix Table~VPPH01 number keypads stand for under the setting or changing
mode.
Appendix table
E-Tech VPPH01 Manual
17