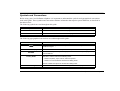
1
. . SeaBeam Stick Softphone User Guide (Sea Softswitch Ver 3.0) The information contained in this document is proprietary and is subject to all relevant copyright, patent and other laws protecting intellectual property, as well as any specific agreement protecting TADIRAN TELECOM LTD.’s (herein referred to as the “Manufacturer”) rights in the aforesaid information. Neither this document nor the information contained herein may be published, reproduced or disclosed to third parties, in whole or in part, without the express, prior, written permission of the Manufacturer. In addition, any use of this document or the information contained herein for any purposes other than those for which it was disclosed is strictly forbidden. The Manufacturer reserves the right, without prior notice or liability, to make changes in equipment design or specifications. Information supplied by the Manufacturer is believed to be accurate and reliable. However, no responsibility is assumed by the Manufacturer for the use thereof nor for the rights of third parties which may be effected in any way by the use thereof. Any representation(s) in this document concerning performance of the Manufacturer’s product(s) are for informational purposes only and are not warranties of future performance, either express or implied. The Manufacturer’s standard limited warranty, stated in its sales contract or order confirmation form, is the only warranty offered by the Manufacturer in relation thereto. This document may contain flaws, omissions or typesetting errors; no warranty is granted nor liability assumed in relation thereto unless specifically undertaken in the Manufacturer’s sales contract or order confirmation. Information contained herein is periodically updated and changes will be incorporated into subsequent editions. If you have encountered an error, please notify the Manufacturer. All specifications are subject to change without prior notice. © Copyright by TADIRAN TELECOM LTD., 2008. All rights reserved worldwide. Protected by U.S. Patents 6,594,255; 6,598,098; 6,608,895; 6,615,404 All trademarks contained herein are the property of their respective holders. Table of Contents Introduction ..................................................... i List of Feature Codes .............................................iv Hold.......................................................... 73 Phone Overview ............................................ 1 Last Number Redial.................................... 75 Operating the softphone ................................ 6 Login / Logout ........................................... 76 Station Features .......................................... 52 Messages .................................................. 77 Activation Code ..........................................53 Mobility: Call-through, Callback ................... 78 Auto Answer ..............................................54 Mobility: Reach Me Anywhere ..................... 82 Call Forward ..............................................55 Mute Microphone ....................................... 83 Call Groups ................................................59 Page Queue............................................... 84 Caller ID Control ........................................60 Pickup: Group, Directed.............................. 85 Camp-On / Call Back...................................61 Receiving Calls / Answering Calls ................ 86 Cancellation Code.......................................63 Recording Calls .......................................... 87 Conference Calls: .......................................64 Method 1 ................................................65 Method 2 ................................................67 Method 3 ................................................68 Multi-Party ..............................................69 Send ......................................................... 88 Do Not Disturb (DND).................................70 Flash .........................................................72 Table of Contents Hot Line (Immediate)................................. 74 Speed Dial Using Private and Public Libraries 89 Transfer .................................................... 90 Voice Page (To Single Keyset)..................... 92 Waiting Calls — Receiving........................... 93 Appendix A - Glossary ................................A-1 TOC-1 Coral SeaBeam Stick User Guide (Coral Sea Softswitch) Appendix B - Tones ....................................B-1 Appendix C - Application Hot Keys ............ C-1 Appendix D - Contact List Headings .......... D-1 Appendix E - Basic Configuration Options ..E-1 Appendix F - Minimum Requirements ........F-1 Table of Contents TOC-2 Coral SeaBeam Stick User Guide (Coral Sea Softswitch) Introduction Welcome to the Coral SeaBeam softphone, a co-brand of CounterPath’s eyeBeam 1.5. The Coral SeaBeam stick is a USB Flash memory storage device which houses the SeaBeam softphone. Coral SeaBeam is an advanced SIP softphone that supports voice, video, and much more. Coral SeaBeam runs on Microsoft Windows and functions as a terminal on Coral Sea Softswitch systems. Connection to the Coral Sea Softswitch is possible via a Tadiran SIP Terminal license. Coral SeaBeam lets you integrate your telephony experience with your desktop and mobile computer solutions. Coral SeaBeam is conveniently activated from your desktop, making this phone flexible and easy to use. With the click of a button or the tap on the keyboard you can dial, answer, or choose how you want to personally manage your calls and availability. This guide provides a full description of the capabilities and operation of the softphone when connected to the Coral Sea Softswitch system. Although the features provided by the Coral Sea Softswitch are large in number, their operation is straightforward and user-friendly. In addition to the many Coral features, this guide also describes the softphone’s internally programmed features. This document is intended for Coral SeaBeam softphone users. It provides a full description of the capabilities and operation of the softphone when connected to the Coral Sea Softswitch system. Many of the Coral Sea Softswitch features, which have been assigned during initial installation, are provided on an individual alias (station extension) basis. Feature allocation may also be changed to suit a changing working environment. Not every feature code in this guide is likely to have been installed in your system or alias. Check with your system administrator for a list of the features actually installed. This guide also provides a full description of the capabilities and operation of the Coral SeaBeam softphone, which is based on Session Initiation Protocol (SIP). A phone overview is presented describing the softphones’ user relevant internal software. The next section includes a detailed description of all the Coral Sea Softswitch features that can be operated with Coral SeaBeam, in alphabetical order. The Table of Contents also doubles as an index to the various features that the Coral Sea Softswitch supports for Coral SeaBeam. Introduction i Coral SeaBeam Stick User Guide (Coral Sea Softswitch) The appendices, located at the end of this guide, give basic explanations of special terms and operations used throughout the guide, and are useful when a more detailed description of telephony terms is required. The last two appendices describe basic configuration options available on your softphone and list the minimum PC requirements to run SeaBeam on your computer. Introduction ii Coral SeaBeam Stick User Guide (Coral Sea Softswitch) Symbols and Conventions Before using your Coral SeaBeam softphone it is important to understand the symbols and typographical conventions used in this guide. These symbols and conventions indicate information that requires special attention, as described in the tables below: The following symbols are used throughout this guide. Symbols Description Activation Code, see Activation Code on page 53. Cancellation Code, see Cancellation Code on page 63. The following typographical conventions are used throughout this guide. Convention Description Fixed key figures might be used to represent the actual fixed keys on the Coral SeaBeam keypad. Station Features on page 52 RECORD Privacy Rules References to items in this book (or other books) are indicated in italics type. Fixed function keys and keyboard keys (such as F1 and CTRL+1) are displayed in narrow Bold text. Bold text is used to indicate the following items: • Names of buttons, icons, menus, and menu options • Names of Coral SeaBeam windows and dialog boxes Names of fields and options in windows and dialog boxes Initializing... Introduction Text in a bold Courier font indicates a message on the Call Display. iii Coral SeaBeam Stick User Guide (Coral Sea Softswitch) Related Documentation Refer to the following documentation, as required, for information regarding the operation of your Coral SeaBeam softphone. • Coral Sea Softswitch Configuration Guide for End Users • Coral SeaMail Quick Reference Card • Coral SeaMail User Guide • Coral Sea Softswitch Administration Manual Introduction iv Coral SeaBeam Stick User Guide (Coral Sea Softswitch) List of Feature Codes The following feature codes are the default feature codes for all Coral Sea Softswitch systems. Your system may employ different feature codes. See your system administrator for the correct feature codes. An arrow (→) between two sets of numbers indicates a range of code numbers available for operating that particular feature, for example 7060→7069. Feature Code No. Feature Method 2 ..................... CONF fixed key (AA off / AC on) Method 3 ..................... CONF fixed key (AA on / AC on) Conference (Audio only): Multiparty .........................................................no default Do Not Disturb (DND) .......................145 or DND fixed key Flash ........................................................FLASH fixed key Last Number Redial ...................... or REDIAL fixed key Login / Logout ...............................................................123 Message Waiting Indictor (Turn Off) .............................175 Mute (Microphone).................................... MUTE fixed key Page _Q..........................................................7060→7069 Record (Call)........................................ RECORD fixed key Transfer...................................................... XFER fixed key Voice Page................................................................... 191 Activation Code .......................................................... 11 Auto Answer ...................................................AA fixed key Call Forward: All Calls......................................................................141 Busy...........................................................................140 No Answer .................................................................142 On Logoff ......................................................... no default Call Hold ................................................... HOLD fixed key Call Pickup: Directed .......................................................................77 Group...........................................................................76 Caller ID Control: Allow ......................................................................14440 Restrict...................................................................14441 Camp-On Call Back: Idle .............................................................................176 Busy...........................................................................177 Cancellation Code ...................................................... 10 Conference (Audio/Video): Method 1......................CONF fixed key (AA off / AC off) List of Feature Codes Code No. iv Coral SeaBeam Stick User Guide (Coral Sea Softswitch) Phone Overview The following pages provide a general overview of the Coral SeaBeam softphone’s options. See the Station Features section, beginning on page 52 for a complete list of the softphone’s station features. SOFTPHONE OPTIONS ......................................................PAGE CORAL SEABEAM ONSCREEN SOFTPHONE ..................2 PHONE COMPONENT DESCRIPTIONS ............................3 GETTING STARTED ............................................................4 CALL DISPLAY ....................................................................7 USING THE FIXED FUNCTION KEYS ................................10 VIDEO DRAWER .................................................................15 CALLS & CONTACTS DRAWER .........................................18 MAKING CALLS ...................................................................42 RECEIVING CALLS .............................................................49 ENDING CALLS ...................................................................51 Phone Overview 1 Coral SeaBeam Stick User Guide (Coral Sea Softswitch) Coral SeaBeam Onscreen Softphone Minimize softphone Open SeaBeam menu Hide softphone Call Display area Open Video drawer Open Calls & Contacts drawer Six line keys XFER HOLD RECORD AA FLASH Dial (Make call) AC DND CONF REDIAL Hang up (End call) Microphone control Speaker control MUTE SPEAKER PHONE CLEAR Mute Speakerphone Clear Phone Overview Coral SeaBeam Onscreen Softphone Dial pad 2 Coral SeaBeam Stick User Guide (Coral Sea Softswitch) Phone Component Descriptions The following table describes the main components of Coral SeaBeam. Table 1: Coral SeaBeam Components Component Description Show Coral SeaBeam menu Button used for opening the Coral SeaBeam menu, which is used to configure Coral SeaBeam, view log files, access the Help file, and exit Coral SeaBeam. See Coral SeaBeam Menu on page 8. Hide Coral SeaBeam Button used for hiding Coral SeaBeam. Click Minimize Coral SeaBeam Button used to minimize Coral SeaBeam. Click the Tadiran Coral SeaBeam button in the taskbar to display Coral SeaBeam again. Call Display Displays relevant icons and calling information, based on the softphone status (e.g., idle, busy, dialing...). See Call Display on page 7. Open Video drawer Button used to expand the softphone to display the Video drawer (see Video Drawer on page 15). Open Contacts drawer Button used to expand the softphone to display the Calls & Contacts drawer (see Calls & Contacts Drawer on page 18). Line keys Six keys used for line selection. See Table 3 on page 11 and Table 4 on page 13. Fixed function keys Fourteen basic fixed function keys are available: XFER, HOLD, RECORD, AA, AC, DND, CONF, which appear below the line keys, and DIAL, FLASH, REDIAL, HANG UP, MUTE, CLEAR, SPEAKER PHONE, which appear on the bottom half of the softphone (see Table 3 on page 11). Dial pad Number buttons used for dialing and entering codes, passwords, names, etc. Microphone Control Slider to the left of the dial pad used to adjust microphone volume (i.e., the volume of your voice heard by callers). Speaker Control Slider to the right of the dial pad used to adjust the speaker volume (i.e., the volume of the sound you hear from the headset). Phone Overview Phone Component Descriptions 3 in the system tray to display Coral SeaBeam again. Coral SeaBeam Stick User Guide (Coral Sea Softswitch) Getting Started Before using your SeaBeam stick, ensure that: • Your computer meets the minimum requirements (see “Appendix F - Minimum Requirements” on page F-1) • You are connected to your organization’s IP network • You are configured for IP connectivity To use your Coral SeaBeam stick for the first time: Note:The next time you want to use your SeaBeam stick on this computer, just insert it into a USB port. 1. Open the package and carefully remove the SeaBeam stick (USB Flash Drive) from its protective plastic casing. 2. Remove the keychain from the package and attach the keychain clip to the hole at the top of the stick’s cap. 3. Pull up and then rotate the SeaBeam stick cap 180° until the USB connector is exposed (see figure on following page). 4. Remove the earset from the package and insert it into the SeaBeam stick (see figure on following page). 5. Insert the SeaBeam stick into a USB port on your computer; wait while Windows configures your SeaBeam softphone. 6. Once Windows has finished installing your SeaBeam, you may be prompted to restart your computer. Close all programs and click Yes to restart your computer. 7. After your computer restarts, SeaBeam is launched and appears on your desktop. Note: If SeaBeam does not appear, click My Computer, and then double-click the Tadiran drive to run SeaBeam. 8. When SeaBeam appears on your screen, right-click on the softphone and click Help for instructions on registering, configuring, and using your SeaBeam. Phone Overview Getting Started 4 Coral SeaBeam Stick User Guide (Coral Sea Softswitch) up the SeaBeam 1 Pull stick cap. Rotate cap 180° 2 Rotate the cap 180°. USB connector Earset connector LED indicator the keychain 3 Attach clip to the hole at the top of the cap. Keychain clip the earset plug 4 Insert into the earset Earset plug connector. Phone Overview Getting Started 5 Coral SeaBeam Stick User Guide (Coral Sea Softswitch) Operating the softphone The following pages describe how to operate your softphone: CALL DISPLAY ....................................................................7 USING THE FIXED FUNCTION KEYS ................................10 VIDEO DRAWER .................................................................15 CALLS & CONTACTS DRAWER .........................................18 MAKING CALLS ...................................................................42 RECEIVING CALLS .............................................................49 ENDING CALLS ...................................................................51 Operating the softphone Getting Started 6 Coral SeaBeam Stick User Guide (Coral Sea Softswitch) Call Display Depending on your call status, various text information and icons appear in the Call Display area. For example, during an established call, the following information is displayed: name / number of calling party and the duration of the call. Note: Call Display information is automatically refreshed when the next call is established. To clear the display information of the last call when the phone is idle, click the CLEAR button below the dial pad. The figure on the left shows typical information that is displayed on the Call Display when your softphone rings; the figure on the right shows information that is displayed on the Call Display when the call is successfully established. Typical Call Display when Coral SeaBeam rings Operating the softphone Call Display Typical Call Display during an established call 7 Coral SeaBeam Stick User Guide (Coral Sea Softswitch) Table 2: Call Display Buttons Button Function/Indication Ignore Call Send to Voicemail Description Click to ignore an incoming call; the phone stops ringing. Click to immediately send an incoming call to voicemail. If this button does not appear, contact your system administrator . The envelope indicates you have one or more new messages waiting for you. Click to access your messages. Message(s) Waiting If clicking this icon does not connect to voicemail, contact your system administrator. For more information about voicemail, refer to the Coral SeaMail User Guide. New Missed Call(s) The red telephone indicates there are one or more unacknowledged calls. Click to clear; the Calls & Contacts drawer opens on the Calls tab, displaying the Missed Calls list. For more information about call lists, see the Calls Tab on page 31. Displayed during a call, indicating that your voice is being transmitted. Displayed during a call, indicating that you are currently not speaking. Call-In-Progress Displayed when mute mode is activated by clicking the Mute button. During mute mode, your voice is not transmitted because your microphone is muted. Add Caller Operating the softphone Call Display Displayed during a call, indicating that this caller is not on your contacts list. Click to add this caller; the Add Contact dialog box appears (see page 34). 8 Coral SeaBeam Stick User Guide (Coral Sea Softswitch) Table 2: Call Display Buttons Button Function/Indication Description Displayed when the current call has signaling and media encryption. Security Operating the softphone Call Display Displayed when the current call has signaling but no media encryption. 9 Coral SeaBeam Stick User Guide (Coral Sea Softswitch) Using the Fixed Function Keys Your phone is equipped with fixed function and line keys that allow you to activate features quickly (see Table 3 on page 11) from your keypad phone panel. XFER HOLD RECORD AA FLASH DND CONF REDIAL MUTE CLEAR Operating the softphone Using the Fixed Function Keys AC 10 SPEAKER PHONE Coral SeaBeam Stick User Guide (Coral Sea Softswitch) Table 3: Keypad Line and Function Key Descriptions Feature Icon Feature Name Line Keys Description Six line keys used for making and receiving calls. Selecting another line does not hang up the current call; it puts the call on hold. Clicking the line during a call also puts the call on hold. See: Line Key Icon Statuses on page 13 You can move the pointer over this icon to view call information. Call information can include call status (such as ‘on hold’), current codecs used, and the name or number of the caller. Transfer Used for transferring calls. Hold Used to hold calls when necessary. To resume a call that is on hold, Hold on page 73 click the line. Record Used to record conversations. Recording Calls on page 87 Auto Answer Used to automatically answer calls as they come in. Auto Answer on page 54 Auto Conference Used to establish a conference call in Auto Conference mode. Conference on page 67 Do Not Disturb Depending on system configuration, sends all incoming calls to voicemail or causes the caller to hear a busy tone. Do Not Disturb (DND) on page 70 Conference Used to create conference calls. To learn about conference calls, see page 64 Operating the softphone Using the Fixed Function Keys Transfer on page 90 11 Coral SeaBeam Stick User Guide (Coral Sea Softswitch) Table 3: Keypad Line and Function Key Descriptions Feature Icon Feature Name Description See: Dial After entering digits from the dial pad, used to send the digits and thereby complete the call. You can also press ENTER on the keyboard to place the call. Flash Used to pick up incomng calls. If you are already on an active call or Flash on page 72 if a line is on hold, clicking FLASH will provide a new line. Redial Used to dial the last called number. You can move the pointer over this icon to view the number in the tooltip. Hang Up Used to end the call. Details of the call remain on the Call Display. You can also right-click the Tadiran Coral SeaBeam icon Send on page 88 Last Number Redial on page 75 in the system tray, and then select End Call. Mute Used to mute your voice while in conversation with another party (or parties during a conference call). Clear Used to clear dial digits and call information on the Call Display area. You can also press BACKSPACE on the keyboard to clear digits and call information. on page 83 NOTE: The Call Display cannot be cleared while engaged in an active call. Speaker Phone Operating the softphone Using the Fixed Function Keys Used to put the caller (or callers during a conference call) on the speaker phone. You must have a speakerphone (sound card or USB) device. 12 Coral SeaBeam Stick User Guide (Coral Sea Softswitch) Table 4: Line Key Icon Statuses Icon Color Indicates Black An available line Yellow Incoming call Red Call on hold Blue Line to be transferred when activating the transfer feature Green Line selected or call in progress Table 5: Coral SeaBeam Icon Statuses (appear in your computer’s system tray) Icon Color Indicates Green Coral SeaBeam is running Green/Red Dial or call in progress Green/White Coral SeaBeam is running but inactive ( to modify the Auto-detect idleness setting, see page E-14) White/Red You are not connected to the network Green/Red/White DND feature has been activated Operating the softphone Using the Fixed Function Keys 13 Coral SeaBeam Stick User Guide (Coral Sea Softswitch) Showing and Hiding the Coral SeaBeam Softphone Click to hide Coral SeaBeam. Click the Tadiran Coral SeaBeam icon in the computer’s system tray to display Coral SeaBeam again. Click to minimize the softphone. Click the Tadiran Coral SeaBeam icon in the system tray or in the taskbar to display Coral SeaBeam again. You can still receive calls when the phone is hidden or minimized. Click and then Exit to close Coral SeaBeam. To reopen Coral SeaBeam, click My Computer, and then double-click the Tadiran drive. If you exit when Coral SeaBeam is hidden or minimized, Coral SeaBeam will start next time as hidden or minimized. You can set up Coral SeaBeam so that when the softphone is completely or partially covered, hidden, or minimized, you will be notified when a call comes in. See “Options > General > Alerts and Sounds” on page E-12. Operating the softphone Using the Fixed Function Keys 14 Coral SeaBeam Stick User Guide (Coral Sea Softswitch) Video Drawer The Video drawer is used for video conferencing. The drawer is comprised of an upper and lower pane. The upper pane is used to display the other party’s video transmission; the lower pane for transmitting your video transmission to the other party. (The other party sees your video in the upper pane of their video drawer.) Both sides must have camera devices to successfully engage in video conferencing. Click Start to start video; click Stop to stop video. Operating the softphone Video Drawer 15 Coral SeaBeam Stick User Guide (Coral Sea Softswitch) Table 6: Video Drawer Description Feature Icon Feature Name Description Open Video Drawer Located to the left of the Call Display area, used to expand the softphone to display the video drawer You can open (display) the video drawer at any time Close Video Drawer Located to the left of the video drawer area, used to hide the video drawer You can close (hide) the video drawer at any time Comment Video Settings Click to display a standard window for viewing / See figure on the next page adjusting camera properties Detach Video Drawer Click to detach the video drawer from the softphone Reattach Video Click to reattach the video drawer to the softphone Drawer You can detach and reattach the video drawer at any time Click to minimize the detached video drawer. Click in the taskbar to display the drawer again. Click to close the video drawer. Start Sending Video During an established call, the Start button appears Not Sending Video appears to the left of this in green if the other party has video enabled on their button side. Click to start a video conference. Stop Sending Video During an established video conference, the Stop button appears. Click to stop the video conference. Operating the softphone Video Drawer 16 Sending Video appears to the left of this button Coral SeaBeam Stick User Guide (Coral Sea Softswitch) Operating the softphone Video Drawer 17 Coral SeaBeam Stick User Guide (Coral Sea Softswitch) Calls & Contacts Drawer The Calls & Contacts drawer displays your contacts list and lists of recent calls, and availability information for you and your contacts. To display the Calls & Contacts drawer, click the black button to the right of the Call Display. Operating the softphone Calls & Contacts Drawer 18 Coral SeaBeam Stick User Guide (Coral Sea Softswitch) Table 7: Calls & Contacts Drawer Description Feature Icon Feature Name Description Comment Located to the right of the Call Display area, used to You can open (display) the calls & contacts Open Calls & Contacts Drawer expand the softphone to display the calls & contacts drawer at any time drawer Located to the right of the calls & contacts drawer Close Calls & Contacts Drawer area, used to hide the calls & contacts drawer You can close (hide) the calls & contacts drawer at any time Click to detach the calls & contacts drawer from the Detach Calls & Contacts Drawer softphone You can detach and reattach the calls & contacts drawer at any time Reattach Video Drawer Click to reattach the calls & contacts drawer to the softphone Click to minimize the detached calls & contacts drawer. Click in the taskbar to display the drawer again. Click to close the calls & contacts drawer. Available Availability indicator drop-down list. See Availability on page 35 Contacts Tab Click to display the contacts tab. See Contacts Tab on page 20 Calls Tab Click to display the calls tab. See Calls Tab on page 31 Operating the softphone Calls & Contacts Drawer 19 Coral SeaBeam Stick User Guide (Coral Sea Softswitch) Contacts Tab The Contacts tab displays your Coral SeaBeam contacts. In addition to making calls, the Contacts tab allows you to: • Manage contacts - see page 26 to page 30 • Manage contact groups - see page 24 • Change the Contacts tab view - see page 30 Contacts menu Contact search Contact sort (per group) Contact groups Calls tab Resize Contacts tab Operating the softphone Calls & Contacts Drawer 20 Coral SeaBeam Stick User Guide (Coral Sea Softswitch) Table 8: Contacts Tab Description Feature Icon Feature Name Description Contacts Menu Contacts tab menu. Contact Search If your contacts list is long, use this field to To show all contacts again, clear the field or filter the contacts that are displayed. click . Sort by Name Click to sort by contact name in descending / ascending order within each group. indicates that contacts are sorted in ascending order by name; indicates that contacts are sorted in descending order. Sort by Primary Contact Method Click to sort by primary contact method in descending / ascending order within each group. indicates that contacts are sorted in ascending order by primary contact method; indicates that contacts are sorted in descending order. Comment: See Table 9. Indicates a group with contacts. Click to display the list of contacts. Contact Groups There are three built-in groups: Friends, Home, and Work. Contacts not associated with any group appear under (No Group). You Indicates a group with contacts displayed. can add new groups as required. For more Click to hide the list of contacts. information, see Managing Contact Groups Indicates a group that does not contain any on page 24 contacts. Calls Tab Click to display the calls tab. See Calls Tab on page 31 Resize tab Drag to resize the Contacts tab. Only appears when tab is detached. Operating the softphone Calls & Contacts Drawer 21 Coral SeaBeam Stick User Guide (Coral Sea Softswitch) Table 9: Contacts Menu Options Option Description See: Add Contact Click to add a new contact. The Contact Properties See Contact Properties Dialog Box on page 26. dialog box appears Manage Groups Click to manage contact groups Show Groups Click to display contacts in their respective groups; click again to display all contacts in one list. Show Contacts • All - to display all your contacts See Managing Contact Groups on page 24. • Show online contacts only - to display only contacts that are available (for future use only) Sort By Select your preferred sorting method Import Contacts Click to import a contact list See Importing Contacts on page 29. Export Contacts Click to export a contact list See Exporting Contacts on page 30. Note: Additional options appear when you select a contact within a contact list before opening the Contacts menu. See Table 10 on page 22. Table 10: Contacts Tab Actions Action Call a contact Procedure Comments • Double-click or drag the contact to the Call Display. OR • Right-click the contact, and then click Call. OR • Select the contact. Then, from the Contacts menu, click Call. Operating the softphone Calls & Contacts Drawer 22 • Used to dial the contact’s primary number. • If more than one number has been defined for this contact, click the required number. Coral SeaBeam Stick User Guide (Coral Sea Softswitch) Table 10: Contacts Tab Actions Action Procedure Comments Add to Conference • Right-click the contact, and then select Add to Conference OR Available during an established call. To learn about conference calls, see page 64. • Select the contact. Then, from the Contacts menu, click Add to Conference. Email a contact • Right-click the contact, and then select Send E-mail OR Available for contacts with defined email addresses. • Select the contact. Then, from the Contacts menu, click Send E-mail. Edit information of • Right-click the contact, and then select Edit. an existing contact OR The Contact Properties dialog box appears (see page 26). • Select the contact. Then, from the Contacts menu, click Edit. Delete a contact • Right-click the contact, and then select Delete. OR The contact is deleted from your contacts list. • Select the contact. Then, from the Contacts menu, click Delete. Watch contacts’ availability Operating the softphone Calls & Contacts Drawer You can watch the availability of contacts with SIP addresses (softphones) and availability defined. 23 See Table 18 on page 40 for the meaning of the availability icons. See Availability on page 35 for information about obtaining availability information. Coral SeaBeam Stick User Guide (Coral Sea Softswitch) Managing Contact Groups Contacts are typically organized into groups. To manage these groups, click the Contacts menu, and then select Manage Groups. The Manage Groups dialog box appears. The Manage Groups dialog box allows you to add, delete, and rename contact groups. To create a new contact group: In addition to the three built-in groups (Friends, Home, and Work), you can add more groups: • Click New Group, type a name, and then click OK. Operating the softphone Calls & Contacts Drawer 24 Coral SeaBeam Stick User Guide (Coral Sea Softswitch) To rename a contact group: • Double-click the group so that only the text is selected. Type the new text, and then click OK. To delete a contact group: • Select the group, and then click Remove. The group is deleted. Note: Contacts that are not associated with any group are moved to No Group. You can also manage a group from the Contacts tab by right-clicking the group: Table 11: Group Options Option Description See: Add Contact Click to add a new contact to this group. The Contact Properties dialog box appears. See Contact Properties Dialog Box on page 26. Manage Groups Click to manage contact groups. See Managing Contact Groups on page 24. Delete Group Click to delete this group. Contacts associated with this group are also deleted. Delete all contacts in this group Deletes all contacts associated with this group without deleting the group itself. To associate a contact with a different group: • Select the contact and drag it to the new group. Contacts can be associated with more than one group. Operating the softphone Calls & Contacts Drawer 25 Coral SeaBeam Stick User Guide (Coral Sea Softswitch) Contact Properties Dialog Box The Contact Properties dialog box allows you to add / edit contact details. To define a new contact, click the Contacts menu, and then select Add Contact; to change details of an existing contact, right-click the contact, and then select Edit; the Contact Properties dialog box appears. Operating the softphone Calls & Contacts Drawer 26 Coral SeaBeam Stick User Guide (Coral Sea Softswitch) Table 12: Contact Properties dialog box Field Description Name Complete as required. Display as Required. This is the name that will appear in the Call Display and the Call Alert when this person phones you. Groups Either: • Select one group. • Click Select More and select several groups. The contact will be added to each group. • Create a new group by clearing the field and typing in a new name. The new contact will be added to this new group. • Clear the displayed group to add the contact to No Group. Contact Methods Specify one or more contact methods for each contact. E-mail and SIP (softphone) entries must be in the following format: <name>@<domain> Identify one of these methods as the primary contact method by selecting the Primary option in the relevant row. Note: In order for the availability feature to function, you must select Softphone from the Type drop-down list and enter a valid SIP address in the adjacent Phone / Address field. Operating the softphone Calls & Contacts Drawer 27 Coral SeaBeam Stick User Guide (Coral Sea Softswitch) Table 12: Contact Properties dialog box Field Show this Contact’s Availability Description Select to obtain this contact’s availability and display it on the contacts list. This check box is only enabled when the contact Type is defined as Softphone (see note above). This contact will have a beside their name in the contacts list. Initially this icon will be gray, later its color will change to indicate the current availability. For details about availability, see Availability on page 35. Details tab Complete as required. To add or edit a contact: 1. Enter the required information on the two tabs. 2. When you click OK, the contact is added to the specified group or groups, with the specified primary contact method displayed in the list. Operating the softphone Calls & Contacts Drawer 28 Coral SeaBeam Stick User Guide (Coral Sea Softswitch) Importing Contacts You can import a contacts list from: • A comma-separated file. Use this method to import from a Microsoft® Excel ® file. You will first have to set up the file; see below. • A Microsoft® Outlook® or Microsoft® Exchange contacts list (a *.pst file). • A vCard file (*.vcf file). A vCard is an electronic business card that is often attached to an email. • An XML file. The new contacts will be added to the existing contacts. To import a contacts list: 1. Click the Contacts menu, and then select Import Contacts. The Import Contacts wizard starts. 2. After clicking Finish on the wizard, the Contacts tab is updated to show the imported entries. Note: None of the entries are set up with Availability turned on; in order to view availability of contacts, you must modify the appropriate entries by selecting the Show this contact’s Availability check box. See page 28 for details. To set up an Excel file for import: 1. Remove any introductory text or headings from the top of the file. (You can keep text at the end of the file; it will be ignored during the import.) 2. Insert a blank row as the first row, then insert the headings that Coral SeaBeam will use to interpret the meaning of each column. The columns can be in any order. The most commonly used headings are: display-name, entry_id, given_name, surname, and postal_address. For a complete listing, see Appendix D - Contact List Headings. 3. Save the file as *.csv. Operating the softphone Calls & Contacts Drawer 29 Coral SeaBeam Stick User Guide (Coral Sea Softswitch) Exporting Contacts You can export a contacts list to a comma-separated file, a pst file or a vcf file. To export a contacts list: 1. Click the Contacts menu, and then select Export Contacts. The Export Contacts wizard starts. 2. When you click Next, the export starts. A file of the specified type is created. The result is: • For an Outlook export, the existing .pst file is updated to include the entries from the Coral SeaBeam contacts list. If Outlook is open, the entries immediately appear in the contacts list. • All information in the Coral SeaBeam contacts list is exported to Microsoft Outlook. Only information that can be displayed in Outlook actually appears in the Outlook Contacts window. Typically this means that all SIP addresses are exported (and stored in custom fields) but not displayed in Outlook. • For other formats, a new file of the specified type is created. Using Remote Storage A contacts list can be stored remotely for retrieval using XCap or WebDAV. The contacts list must be formatted for the chosen protocol. Your system administrator specifies the remote location in the Accounts window, Storage tab. Each time Coral SeaBeam is started, the contacts list is retrieved from the remote storage. Each time a contact is added to the contacts list, it is immediately copied to remote storage. Changing the Contacts Tab View • To display the drawer in a resizeable window, detach the Calls & Contacts drawer by clicking Detach. • To show contacts organized into groups, click the Contacts menu, and then select Show Groups. • To show only the contacts who are set up for Available and who are currently online, click the Contacts menu, select Show Contacts, and then select Show Online Contacts Only. • To sort contacts, click the Contacts menu and select the required sort rules. Operating the softphone Calls & Contacts Drawer 30 Coral SeaBeam Stick User Guide (Coral Sea Softswitch) Calls Tab The Calls tab displays calls you made and received. Calls menu Contacts tab Call groups Resize Calls tab Operating the softphone Calls & Contacts Drawer 31 Coral SeaBeam Stick User Guide (Coral Sea Softswitch) Table 13: Calls Tab Description Feature Icon Feature Name Description Calls Menu Calls tab menu. Comment: • Delete All Calls - to delete all the calls you made and received You can also right-click a specific list, and then click Delete All Calls to delete all entries from that list. Missed Calls Click to display the list of incoming calls that you missed. Received Calls Click to display the list of incoming calls that See Table 14 for the meaning of all the you answered. Call icons. Click to display the list of both answered and unanswered outgoing calls and calls that were hung up. Dialed Calls Call Groups Click to display the list of calls that you blocked. An incoming call is blocked (rejected) if it is from a person you banned (“Privacy Rules” on page E-20) or if it does not match the security option specified by your system administrator in the Account Properties - Security tab. Calls Tab Click to display the Contacts tab. See Contacts Tab on page 20 Resize tab Drag to resize the Calls tab. Only appears when tab is detached. Blocked Operating the softphone Calls & Contacts Drawer 32 Coral SeaBeam Stick User Guide (Coral Sea Softswitch) Managing the Lists of Calls The following table describes the meaning of each Call icon: Table 14: Call Icons Icon Meaning This group is currently empty. There are entries in this group. Click the icon to expand the list. There are entries in the Missed Calls group. Click the icon to expand the list. This group is currently expanded to show the contents. Click the icon to collapse the list. The Missed Calls group is currently expanded to show the contents. Click the icon to collapse the list. This call was answered or blocked. This call was missed (unanswered). You can move the pointer over an entry in any list to view details about the call: Table 15: Call Entry Details Option Description Name The display name of the other party. Number The user name/number of the other party. Account Your SIP address Operating the softphone Calls & Contacts Drawer 33 Coral SeaBeam Stick User Guide (Coral Sea Softswitch) Table 15: Call Entry Details Option Description Time The date and time the call was established. Comment Status comment about the call (for missed and unanswered calls). Duration Duration of the call (for received and answered calls). You can right-click an entry in any list to: Table 16: Call Entry Options Option Description Call Call this person. You can also drag the contact to the Call Display. Add to Conference Call and add this person to an active conference call. For more information about conference calls, see page 64. Instant Message For future use only. Ban this Person This person will not be able to send you phone calls. To change these privacy rules at any time, see page 20. Add to Contacts The Add Contact dialog box appears (see below). Delete Call Remove the call from the group. Operating the softphone Calls & Contacts Drawer 34 Coral SeaBeam Stick User Guide (Coral Sea Softswitch) To add / edit a contact from the Calls tab: 1. Right-click an entry in any Calls list. 2. Select Add to Contacts. The Add Contact dialog box appears. 3. Complete the dialog box, and then click OK. Tip: Click More Contact Info to add more contact details. The Contact Properties dialog box appears (see page 26). Availability Availability refers to the ability to see the availability status (online, on phone, busy, and so on) of other SIP softphone users. Availability information is displayed in the Calls & Contacts drawer. You can publish your availability to contacts who have SIP addresses, and you can set up Coral SeaBeam to view the availability of other contacts who have SIP addresses. Operating the softphone Calls & Contacts Drawer 35 Coral SeaBeam Stick User Guide (Coral Sea Softswitch) Availability of other people Your availability Monitoring the Availability of your SeaBeam Contacts To be able to see the availability of another SIP softphone user, either add that person to the contacts list with the Show this contact’s Availability check box selected, or modify the existing contact information so that this check box is selected. For more information about managaing contacts, see page 24. As soon as the person is set up in this way in your contacts list, Coral SeaBeam sends them a notification request. The request asks that you be able to see that person’s availability. If the person consents to this request, the icon beside their name (in your contacts lists) becomes color-coded , so that you can determine their availability status. Operating the softphone Calls & Contacts Drawer 36 Coral SeaBeam Stick User Guide (Coral Sea Softswitch) Allowing Other SeaBeam Contacts to Monitor your Availability (Publishing your Availability) When the other person consents to the notification request, your name is added to their contacts list. As soon as you are added to their list, a request is sent back to you requesting that that they be able to monitor your availability status. Reply to this request to complete the sharing loop. The following chart illustrates how the sharing of availability occurs. Note:If you have multiple accounts set up, icons might remain gray when you expect them to be color-coded. David Mike David adds Mike to his contact list with “Show this contact’s Availability” checked Availability icon is added for Mike, colored gray David’s SeaBeam sends a “let me see you” notification request to Mike Mike receives a notification request and responds by clicking “Allow and add” David is added to Mike’s contact list Privacy rule is created for David with “allow” and “show” Availability icon is added for David, colored gray “Allow” response sent Mike’s availability icon turns green Now that David is in Mike’s contact list, Mike’s SeaBeam sends “Let me see you” notification request to David David receives a notification request and responds “Allow” Response sent David’s availability icon turns green Operating the softphone Calls & Contacts Drawer 37 Coral SeaBeam Stick User Guide (Coral Sea Softswitch) Receiving a Contact Request You receive a new contact request when you add a contact to your list (when the Show this contact’s Availability check box is selected) or when another person adds you as a contact at their end. The request is handled in one of two ways: • If you set up a privacy rule before this person has a chance to contact you, you will never see this request. Coral SeaBeam will automatically reply to the request according to the rule. See Privacy Rules on page 20. • If you do not yet have a privacy rule set up for this person, this request appears to you as a new contact request. Respond to the request in one of the following ways: Table 17: New Contact Request Options Button Allow Next Action Result Not applicable Operating the softphone Calls & Contacts Drawer The other person will be able to see your availability. and will be added to your privacy rules with “Show my Availability” set to Yes. 38 Coral SeaBeam Stick User Guide (Coral Sea Softswitch) Button Allow and add to my Contact list Next Action Result This button appears only if the other person is not already on your contacts list. The other person will be able to see your availability. The other person will be added to your contacts list. The other person will be added to your privacy rules with “Show my Availability” set to Yes. (You can later change this rule; see Table 18 on page 40). When you click Allow and add, the Add Contact dialog box appears. Complete the dialog box and click OK. For more information about the fields, see Contact Properties Dialog Box on page 26 . In the future, you will not receive this request from this person, because you have set up a rule to allow or ban that person from seeing your availability. In addition, this same request will be sent to the other person, so that you can see their availability. Deny Not applicable The other person will not be able to see your availability. The other person will be added to your privacy rules with “Show my Availability” set to No. Close the window Not applicable The other person will not be able to see your availability. The other person will not be added to your privacy rules. Changing your Availability Click the down arrow to the left of the availability indicator, and select the required availability option (see table below). When your availability changes, the new availability is sent to everyone who has permission to monitor your availability. Setting up Availability Indicators You can create custom availability indicators, or edit or delete custom or built-in indicators. In the Calls & Contacts drawer, click the down arrow to the left of your availability icon, and select Availability Settings. See Options > General > Availability on page 14 for details. Operating the softphone Calls & Contacts Drawer 39 Coral SeaBeam Stick User Guide (Coral Sea Softswitch) Table 18: Availability Indicators Indicator Name Auto-Detect Meaning for your Availability The availability will automatically be set according to your current status: Meaning for Others’ Availability Not applicable • Available - You are logged on but not on the phone or idle. • On the phone - As soon as you start or answer a call. • Idle - You have not moved or clicked the mouse or pressed a keyboard key for the Idle period. To set the Idle period see Options > General > Availability on page 14. Always Available • You have set your availability to this status. Not applicable OR • You have set your availability to Auto-Detect and Coral SeaBeam has determined that you are logged on but not on the phone or idle. Busy You have set your availability to this status. Not applicable On the Phone • You have set your availability to this status. Not applicable OR • You have set your availability to Auto-Detect and you are on a call. Operating the softphone Calls & Contacts Drawer 40 Coral SeaBeam Stick User Guide (Coral Sea Softswitch) Indicator Name Idle Meaning for your Availability Meaning for Others’ Availability • You have set your availability to this status. Not applicable OR • You have set your availability to Auto-Detect and you have not moved or clicked the mouse or pressed a keyboard key for the Idle period. To set the Idle period see Options > General > Availability on page 14. Away Offline You have set your availability to this status. Not applicable Not applicable The contact is either not logged on or else is not set up for availability. Not applicable You are not watching this contact’s availability. To start watching, see Monitoring the Availability of your SeaBeam Contacts on page 36. No icon Operating the softphone Calls & Contacts Drawer 41 Coral SeaBeam Stick User Guide (Coral Sea Softswitch) Making Calls When making calls, you dial phone numbers as you would with any other phone. As with most IP phones, after dialing the digits, you must choose one of the following methods in order to indicate to the system to send the digits and thereby complete the call. Send Digits Options: • Click the Dial button on the Coral SeaBeam keypad. Note:Before you dial, you can delete the last digit(s) or all the digits. Use Clear to delete the last digit(s) or the Hang Up • button to clear all digits. Press ENTER on your keyboard. Dialing Methods Different dialing methods, based on whether certain phone features are operated, give you a greater array of dialing methods. These methods are listed in Table 19. Notes: 1) If required, add line access code when dialing external numbers. 2) Some systems might be programmed with a limit on duration of outgoing external calls. Once the pre-defined limit is reached, the call is automatically disconnected. Table 19: Phone Dialing Methods Dialing Method Dial a number Procedure Comments 1. Dial each number in sequence from the Coral SeaBeam dial pad. 2. Click Dial or press ENTER to send the digits. • Includes internal, external dial numbers, as well as Coral Private and Public Dial numbers. • For Private Libraries, See page 89. Operating the softphone Making Calls 42 Coral SeaBeam Stick User Guide (Coral Sea Softswitch) Table 19: Phone Dialing Methods Dialing Method Procedure Comments Dial a name Same as above, but use your computer keyboard to enter the If you start to enter a name and the Lettersletters into the Coral SeaBeam Call Display. to-digits feature is on, these letters are converted to numbers. Press CLEAR, then press SPACEBAR and try again. See Options > General > Application on page 10 for details about the Letters-to-digits feature. Call a SIP address Same as above, but enter the SIP address into the Coral SeaBeam Call Display using the numpad on your computer keyboard. Enter the SIP address in the following format: name/number@domain. For example, [email protected] NOTE: Press SPACEBAR to switch between numeric and other characters (ie., ‘@’ and ‘.’) Partial dialing When dialing an entry, a suggestion for completing the entry might appear on the Call Display: 1. Press TAB to accept the suggestion. 2. Click Dial or press ENTER to send the digits. Drag-and-drop Drag an entry from the Contacts tab or any list in the Calls tab to the Call Display; the call is automatically placed. • If the contacts list contains many contacts, use the field to filter the list. • To learn more about the Calls & Contacts drawer, see page 18. Operating the softphone Making Calls 43 Coral SeaBeam Stick User Guide (Coral Sea Softswitch) Table 19: Phone Dialing Methods Dialing Method Right-clicking Procedure Comments Right-click an entry on the Contacts tab or any list in the • If the contacts list contains many contacts, Calls tab, and select Call. You can also double-click an entry; use the field to filter the list. the call is automatically placed. • To learn more about the Calls & Contacts drawer, see page 18. Redialing Redial the last number. See Last Number Redial on page 75 Which Account is Used If you have more than one account enabled, the account that is used for the call depends on the following: • If you enter the account prefix before the number (for example, #1) then that account is used. • Otherwise, the rules of the dial plan determine which account is used. If you have not modified the dial plan, the dial plan will always select the default account. The outgoing call might be encrypted, depending on your security settings. For information about the current security settings, contact your system administrator. • If an encrypted call is established, the icon appears on the Call Display. This icon indicates that the call is guaranteed to be secure between you and your proxy, and might or might not be secure beyond that first hop. See your system administrator for more details about how encryption works. • If an unencrypted call is established, the unencrypted icon • If the call cannot be established with the specified security, the call will fail. appears. Response messages during calling states During and after you place a call, you may be offered any one of the following relevant display messages options. These messages are listed in Table 20. The response messages indicate the current condition of this request. The status code Operating the softphone Making Calls 44 Coral SeaBeam Stick User Guide (Coral Sea Softswitch) values are divided into six general categories. Most messages are for system administrators and technicians and will not be seen during normal operation. If a message returns frequently notify system administrator. Table 20: SIP Phone Response Messages Status Code 100—199 Response Type Provisional Informational Description The result of the call cannot be determined because the call process did not finish yet. • 100 Trying • 180 Ringing • 181 Call is being forwarded • 182 Queued • 183 Session progress 200—299 Succesful The call was processed successfully and accepted. • 200 OK • 202 Accepted 300—399 Redirected The call must be redirected to be completed sucessfully. You are prompted to redirect the call to another location or use an alternative service. • 300 Multiple choices • 301 Moved permanently • 302 Moved temporarily • 305 Use proxy • 380 Alternative service Operating the softphone Making Calls 45 Coral SeaBeam Stick User Guide (Coral Sea Softswitch) Table 20: SIP Phone Response Messages Status Code 400—499 Response Type Failure Description The call was not processed successfully and was therfore rejected by the switch. Try another number. • 400 Bad request • 401 Unauthorized : Used only by registrars. Proxys should use proxy authorization 407 • 402 Payment required • 403 Forbidden • 404 Not found : User not found • 405 Method not allowed • 406 Not acceptable • 407 Proxy authentication required • 408 Request time-out : Couldn't find the user in time • 409 Conflict • 410 Gone : The user existed once, but is not available here any more. • 411 Length required • 413 Request entity too large • 414 Request-URI too large • 415 Unsupported media type • 416 Unsupported URI Scheme • 420 Bad Extension: Bad SIP Protocol Extension used, not understood by the server • 421 Extension Required • 423 Interval Too Brief Operating the softphone Making Calls 46 Coral SeaBeam Stick User Guide (Coral Sea Softswitch) Table 20: SIP Phone Response Messages Status Code 400—499 Response Type Failure (cont.) Description The call was not processed successfully and was therfore rejected by the switch. Try another number. • 480 Temporarily Unavailable • 481 Call/Transaction Does Not Exist • 482 Loop Detected • 483 Too Many Hops • 484 Address Incomplete • 485 Ambiguous • 486 Busy Here • 487 Request Terminated • 488 Not Acceptable Here • 491 Request Pending • 493 Undecipherable: Could not decrypt S/MIME body part 500—599 Switch Error You dialed a valid number but the switch failed to complete the call. Try the number again. • 500 Server Internal Error • 501 Not Implemented: The SIP request method is not implemented here • 502 Bad Gateway • 503 Service Unavailable • 504 Gateway/Server Time-out • 505 SIP Version Not Supported: The server does not support this version of the SIP protocol • 513 Message Too Large Operating the softphone Making Calls 47 Coral SeaBeam Stick User Guide (Coral Sea Softswitch) Table 20: SIP Phone Response Messages Status Code 600—699 Response Type Global Failure Description The call cannot be processed under any circumstances. Try another number. • 600 Busy Everywhere • 603 Decline • 604 Does Not Exist Anywhere • 606 Not Acceptable Operating the softphone Making Calls 48 Coral SeaBeam Stick User Guide (Coral Sea Softswitch) Receiving Calls In order to answer incoming calls, Coral SeaBeam must be running; When your softphone rings, the line of the incoming call is lit (in yellow). If you have Call Alerts on, the Call Alert box might appear. If you have the popup phone feature on, the phone comes to the front. For information about call alerts and the popup phone feature, see “Options > General > Alerts and Sounds” on page E-12. When your phone rings, you can answer the call in the following ways: • Click on the softphone • Click Answer on the Call Alert box • Click the lit (yellow) line number on the softphone. • Press ENTER (on the keyboard) if the softphone is the active application. Note: See also Waiting Calls — Receiving on page 93. Ignoring Calls You can ignore a call in any of the following ways: • Click on the Call Display; a message appears to the caller advising that the call could not be made. The phone stops ringing. The call is added to the Received Calls list. • Click on the Call Display to send the call immediately to voicemail. Information on voicemail is provided by SeaMail; it is not part of Coral SeaBeam. Operating the softphone Receiving Calls 49 Coral SeaBeam Stick User Guide (Coral Sea Softswitch) • Click Ignore on the Call Alert box • Leave the call and allow it to eventually go to voicemail (see Coral Sea Softswitch Call Forwarding on page 57). Banning a Call You can block incoming calls from specified numbers. To permanently ban a caller: 1. Click on the Call Display; the call is added to the Missed Calls list. 2. In the Missed Calls list, select the entry, right-click, and select Ban this Person. Operating the softphone Receiving Calls 50 Coral SeaBeam Stick User Guide (Coral Sea Softswitch) Ending Calls After you have finished your conversation, you may end the call and return to idle state using any of the following methods: • Click on the Call Display • Right-click the Tadiran Coral SeaBeam icon in the system tray, and then select End Call. Tip: Details of the call remain on the Call Display. To clear the Call Display, click Clear. Note:Selecting another line does not hang up the current call; it puts the call on hold. Operating the softphone Ending Calls 51 Coral SeaBeam Stick User Guide (Coral Sea Softswitch) Station Features The following pages list the features that are available from your softphone. Some features may be restricted by your system administrator, require a later Coral Sea Softswitch software version, or depend on available licenses. In these cases, a reorder tone is heard on your softphone and you will not be able to activate these features. In addition, the feature codes listed in this section are the default feature codes and may differ in your system. Ask your system administrator for a list of the specific features installed and the corresponding feature codes. This section is organized alphabetically, on a feature-by-feature basis. Station Features 52 Coral SeaBeam Stick User Guide (Coral Sea Softswitch) Activation Code 11 Use the Activation code (default code: 11) as required when programming features. The following symbol in this guide indicates an activation code: See your system administrator, as to which activation code is used in your system. Activation Code 53 Coral SeaBeam Stick User Guide (Coral Sea Softswitch) Auto Answer Auto Answer can be used to enable your softphone to automatically answer all incoming calls. To turn Auto Answer on: • Click . To turn Auto Answer off: • Click . CAUTION ! Leaving your softphone while Auto Answer is activated will cause your station to answer an incoming call. All conversations in the room can be heard. A trunk call trapped in Auto Answer could lock up the trunk until released by the system. Auto Answer 54 Coral SeaBeam Stick User Guide (Coral Sea Softswitch) Call Forward See Table 1 Calls arriving at your station can be forwarded to ring at various destinations, depending on the state of the terminal (all, busy, no answer, logoff). The Call Forward All, Call Forward Busy, Call Forward No Answer, and Call Forward on Logoff options can be programmed using the following methods. When more than one of these Call Forwarding options are defined, the call forward destination defined by using the Sea Softswitch Feature codes is used: • Sea Softswitch Feature codes (see Table 1 on page 56) • Call Forwarding from the phone’s Configuration options (see Call Forwarding Using the Phone’s Configuration options on page 58) • Sea Softswitch portal Note: The Sea Softswitch User’s portal can also be used for configuring Call Forwarding for when your user presence is DND. In addition, you can also configure Call Forwarding to reject or forward calls from specific users via the portal. To learn more about the portal, refer to the Coral Sea Softswitch Configuration Guide for End Users. Call Forward 55 Coral SeaBeam Stick User Guide (Coral Sea Softswitch) Call Forward Sea Softswitch Call Forwarding Options • All: Forwards all your incoming calls to a designated destination. The destination can call back or return calls to your softphone, and you can still place outgoing calls from your softphone. • Busy: Forwards your incoming calls to another destination when your softphone is busy. • No Answer: Forwards your incoming calls to another destination when you do not answer within a system-wide defined period. You can edit the number of seconds via your softphone’s Sea Softswitch portal. • On logoff: Forwards your incoming calls to another destination when you are logged out of the system. Table 1: Sea Softswitch Call Forward Codes Sea Softswitch Call Forward Type Internal and External Calls All 141 Busy 140 No Answera 142 On Logoffb a. Your phone’s Call Forward No Answer Timer must be set to a larger value than the timer value set in the Sea Softswitch’s Call Forward No Answer Timer. For more information, contact your system administrator. b. Contact your system administrator for the code used in your system. Call Forward 56 Coral SeaBeam Stick User Guide (Coral Sea Softswitch) Call Forward Coral Sea Softswitch Call Forwarding To set Sea Softswitch Call Forward: Dial the entire procedure in a single block sequence. 1. Dial the required Sea Softswitch Call Forward feature code (see Table 1 on page 56). 2. Dial the destination number where calls are to be forwarded. 3. Click the Dial button. 4. Listen for the confirmation tone. 5. Click the Hang Up button. To cancel Sea Softswitch Call Forward: Dial the entire procedure in a single block sequence. 1. Dial the required Sea Softswitch Call Forward feature code (see Table 1 on page 56). 2. Dial the cancellation code . 3. Click the Dial button. 4. Listen for the confirmation tone. 5. Click the Hang Up button. Note: If you hear a Reorder Tone, Call Forward is denied at your station (as defined by your system administrator). Call Forward 57 Coral SeaBeam Stick User Guide (Coral Sea Softswitch) Call Forward Call Forwarding Using the Phone’s Configuration options You can enable or disable forwarding using your softphone’s configuration options. When forwarding is enabled, every call that comes in will be forwarded to another phone number, depending on system configuration. Note: Although Call Forwarding can be configured via your softphone, it is recommended that you use the Sea Softswitch Call Forwarding features instead (see Coral Sea Softswitch Call Forwarding on page 57). The phone allows you to define the following Call Forward types: • Always forward to this address: Immediately forwards all incoming calls. • Forward to this address when busy: Forwards all calls when the phone is in a busy state (i.e. engaged in conversation). To define the Call Forward address: 1. Click at the top of the softphone, select SIP Account Settings, and then click Properties for the required SIP account; the Properties of Account window appears. 2. Select the Voicemail tab. 3. In the Forwarding area, select the required forwarding option and enter the Call Forward address in the adjacent field. 4. Click OK. Call Forward 58 Coral SeaBeam Stick User Guide (Coral Sea Softswitch) Call Groups A call group includes several users and/or user groups under a dedicated alias number. When this number is called, the phones of all members belonging to the call group ring until one of them answers the call. In the current version, call group members do not share a common line appearance. Note: To find out if you are a member of one or more call groups, contact your system administrator. Calling a Call Group: Dial the Call Group number. Receiving a Call Group call: Anwser the call. Call Groups 59 Coral SeaBeam Stick User Guide (Coral Sea Softswitch) Caller ID Control 14440 / 14441 The Caller ID Control feature allows you to show or hide your telephone number to the called party. Your telephone is preset in the system to either restrict or display your Caller ID to the called party. You can use this feature to override this setting on a per-call basis, if permitted by your system administrator. To dial using Caller ID Control: Dial the entire procedure in a single block sequence. 1. Dial the required Caller ID Control feature code (show default: 14440 / hide default: 14441). 2. Dial the number of the call destination. 3. Click the Caller ID Control Dial button. 60 Coral SeaBeam Stick User Guide (Coral Sea Softswitch) Camp-On / Call Back 176 or 177 When a station or a network destination is busy or does not answer, or when an outside line is busy, you can request that the system automatically call you back when the required destination number or outside line is available. There are two Camp-On features available from idle: • Camp-On Idle (176) - starts ringing as soon as the non-answering party indicates it is available by being first busy and then idle again. Use this Camp-On feature when you know that the other party is out of the office and cannot get back to you right away. • Camp-On Busy (177) - informs you that the called busy number has become idle. Use this Camp-On feature when you know that the other party is in the office and can get back to you shortly. Note:If the camped-on party has DND activated, Camp-On is automatically activated once the camped on party cancels DND. To Camp-On to a destination from an idle station: Dial the entire procedure in a single block sequence. 1. Dial one of the following: • Camp-On Call Back feature code 176 to camp-on to an idle party. • Camp-On Call Back feature code 177 to camp-on to a busy party. 2. Dial destination number. 3. Click the Dial button. 4. Listen for the confirmation tone. 5. Click the Hang Up button. Your softphone will ring after the camped-on port is available. Camp-On / Call Back 61 Coral SeaBeam Stick User Guide (Coral Sea Softswitch) Camp-On / Call Back To cancel Camp-On before you are called back: Dial the entire procedure in a single block sequence. 1. Dial the required Camp-On Call Back feature code (176 or 177). 2. Dial cancellation code . 3. Click the Dial button. 4. Listen for the confirmation tone. 5. Click the Hang Up button. Notes: 1) If you have camped on to a number of destinations, the oldest number camped on is cancelled. Repeat the procedure as many times as required to cancel the next oldest camped on number each time. 2) Camp-On is automatically cancelled after a system-wide defined period after activation. When your softphone rings (destination station now idle): Answer Call. Camp-On / Call Back 62 Coral SeaBeam Stick User Guide (Coral Sea Softswitch) Cancellation Code 10 Use the Cancellation code (default code: 10) as required when programming features. The following symbol indicates a cancellation code: See your system administrator, as to which cancellation code is used in your system. Cancellation Code 63 Coral SeaBeam Stick User Guide (Coral Sea Softswitch) Conference Calls Conference calls can be set up one of two ways: • Audio Only Multi-Party Conference Calls (see page 69) - This type of conference call allows up to 6 or 15 participants to join a multi-party conversation, depending on the system hardware assigned to the conference call. • Audio/Video Multi-Party Conference Call options - There are three ways to set up an audio/video conference call using Coral SeaBeam fixed keys (see page 65 to page 68). Video conference calls can include up to four people. Audio conference calls can include up to seven individuals—the conference host and a participant on each of the six lines. You can establish multiple conference hosts in order to “daisy chain” together a conference call with more than seven participants. For example, one person can host six other parties (to occupy all of the available lines) with one of those parties being a conference of their own containing five other parties. This would bring the total number in the aggregate conference call to 12. Note: Coral SeaBeam will automatically switch to the best codecs available, as required (as participants are added). To activate the video feature during a conference, click Start on the Video drawer to send video to the other parties. You will see the other parties in the top video panel (each in a separate tile) if they have enabled video at their end. Use the speaker adjustment (to the right of the dial pad) to adjust volume of the sound you are hearing. The following Conference Call methods and features are available: AUDIO/VIDEO (MULTI-PARTY) CONFERENCE CALLS ...PAGE METHOD 1 .............................................................................. 65 METHOD 2 .............................................................................. 67 METHOD 3 .............................................................................. 68 AUDIO ONLY CONFERENCE CALLS................................PAGE MULTI-PARTY ........................................................................ 69 Conference Calls 64 Coral SeaBeam Stick User Guide (Coral Sea Softswitch) Conference: Method 1 CONF (AA off and AC off) You can host a conference by calling the other parties involved, or by allowing them to arrange the call themselves. Note: When using this method, ensure that the and buttons are turned off. While the conference call is in progress, you can change to any of the other methods (see page 67 and page 68) by enabling the required combination of AA and AC. Coral SeaBeam will start handling the conference in the relevant way. To establish a conference using method 1: 1. With one active call on one of the lines, place the call on hold by either: • selecting another line and dialing a third party • accepting an incoming call 2. Click to conference all calls. All lines will be part of the conference – both the lines on and the line you are speaking to (if any). 3. To suspend the conference, click one another. again to place all other parties on hold. The other participants cannot speak to You can talk privately to one line by clicking the relevant line. If another call comes in while the conference is on hold, you can choose to answer this line. If you then click again, all lines (including the new line) will be added to the conference. 4. Click again to restart the conference call. Note: You can be the host even if you did not initiate the call to the first person. For example, one person can call you, then you can place and accept other calls, and establish the conference. To add a party to an active conference: 1. Click to place the conference on hold. 2. Invite another party to the conference by either: Conference Calls Method 1 65 Coral SeaBeam Stick User Guide (Coral Sea Softswitch) Conference Calls Method 1 • Selecting the line of an incoming call • Selecting an available line to initiate a call to an outside party • Right-clicking a name in the Calls & Contacts tab You can speak to this new party while the conference is on hold. 3. To conference in all lines, including the newcomer, click . To release a party during an active conference: 1. Click to suspend the conference. 2. Select the line of the participant who will be leaving the conference, and then click the 3. Click Hang Up button. to re-establish the conference. Note: A party can also leave a conference on their own by simply hanging up. To release all parties during an active conference: 1. Click the Conference Calls Method 1 Hang Up button to hang up on all parties; the conference is ended. 66 Coral SeaBeam Stick User Guide (Coral Sea Softswitch) Conference: Method 2 AA off and AC on You answer calls manually and Coral SeaBeam adds each to the conference automatically. Note: When using this method, ensure that the button is turned off. While the conference call is in progress, you can change to any of the other methods (see page 65 and page 68) by enabling the required combination of AA and AC. Coral SeaBeam will start handling the conference in the relevant way. To establish a conference using method 2: 1. Click on. 2. Manually answer the first call. There is no need to put the call on hold. 3. When the next call comes in, on another line, answer the call. As soon as you answer the call, a conference will be set up among the three parties. • The conference is established even if you had another line on hold. • All lines are included in the conference call, including all those that are on hold. Notes: 1) If another call comes in while the conference is in progress, the call will automatically be added to the conference as soon as you answer it. 2) If the conference was on hold, it will automatically be re-established with all lines, both those on hold and those that are active. 3) To release a party or all parties during an active conference, see page 66. Conference Calls Method 2 67 Coral SeaBeam Stick User Guide (Coral Sea Softswitch) Conference: Method 3 AA on and AC on Using this method, Coral SeaBeam acts as a fully-automated conference server. To establish a conference call using method 3: 1. Click and on. 2. When the first call comes in, Coral SeaBeam will automatically answer. You can speak to this person. 3. As new calls come in, Coral SeaBeam will automatically answer it and add it to the conference call. 4. If you put the conference on hold and a new call comes in, it will automatically be added. Note: To release a party or all parties during an active conference, see page 66. Conference Calls Method 3 68 Coral SeaBeam Stick User Guide (Coral Sea Softswitch) Conference: Multi-Party Coral Sea Softswitch Conference calls allow several users to join a multi-party (Meet-Me Conference) conversation. Up to 6 or 15 participants are permitted depending on the system hardware assigned to the conference call. The participants decide on a particular time for commencing the conference. At the designated time, all participants dial the assigned conference number allowing each one to join the conference. To join a Meet-me Conference (at the assigned hour): Dial the entire procedure in a single block sequence. 1. Dial assigned conference number (contact your system administrator if you do not know the number). 2. Click the Dial button. A warning tone is heard by all participants. To leave a conference: Click the Conference Calls Multi-Party Hang Up button or see Ending Calls on page 51. 69 Coral SeaBeam Stick User Guide (Coral Sea Softswitch) Do Not Disturb (DND) 145 or This feature enables you to block incoming calls to your station. Via your Sea Softswitch portal, you can configure all incoming calls to be forwarded to another number or user when your user presence is DND. Similarly, you can configure specific incoming calls to be forwarded, rejected or accepted as well. For more information, refer to the Sea Softswitch Configuration Guide for End Users. When activating this feature, you can still place outgoing calls and any call forwarding to your softphone. Your station can be placed in Do Not Disturb (DND) mode using one of the following methods: • Coral Sea Softswitch DND • DND using Coral SeaBeam fixed key Note: Regardless of which method is used, calling parties will be disconnected after receiving a message on their display panel indicating that the call cannot be placed. The message might vary depending on which system or device the person is calling you from. Coral Sea Softswitch DND To activate Coral Sea Softswitch DND: Dial the entire procedure in a single block sequence. 1. Dial Do Not Disturb feature code 145. 2. Dial activation code 3. Click the . Dial button. 4. Listen for the confirmation tone. 5. Click the Hang Up button. CAUTION ! When Coral Sea Softswitch DND is activated at your station, no indicators are displayed on your phone’s screen to remind you that you are in DND mode. Do Not Disturb (DND) 70 Coral SeaBeam Stick User Guide (Coral Sea Softswitch) Do Not Disturb (DND) To cancel Coral Sea Softswitch DND: Dial the entire procedure in a single block sequence. 1. Dial Do Not Disturb feature code 145. 2. Dial cancellation code . 3. Click the Dial button. 4. Listen for the confirmation tone. 5. Click the Hang Up button. DND using Coral SeaBeam fixed key: To activate DND using the softphone’s fixed key: • Click . The Do-not-disturb enabled message appears on your Call Display indicating that DND has been activated at your station. To cancel DND using the softphone’s fixed key: • Click . The Do-not-disturb disabled message appears on your Call Display indicating that DND has been deactivated at your station. Do Not Disturb (DND) 71 Coral SeaBeam Stick User Guide (Coral Sea Softswitch) Flash The Flash button on Coral SeaBeam works the same way as Flash or Link works on a traditional telephone. Depending on your call status, behaves in the following ways: • If you are on an active call, clicking • If a call is coming in, clicking • If a line is on hold, clicking Flash will provide a new line. The active call is put on hold. will pick up the call. will pick up the line. 72 Coral SeaBeam Stick User Guide (Coral Sea Softswitch) Hold A calling party can be placed on Hold while another call is made. The held party hears music while waiting. To place a call on Hold: Note: To dial another line (i.e. receive dial tone) while the first call is being held, press the down navigator key. , the active line, or another line. Click The Call placed on hold message appears on your Call Display. To return a call placed on Hold: Click again. The Call taken off hold message appears on your Call Display. To end a call placed on Hold: Click the Hang Up. Note: The held calls are returned in First In/First Out order. Hold 73 Coral SeaBeam Stick User Guide (Coral Sea Softswitch) Hot Line (Immediate) If your phone is configured and enabled as a Hot Station via your Sea Softswitch portal, the Hot Station provides a direct connection to a predefined destination. Immediately upon dialing any number your softphone may be automatically routed to a pre-defined destination. This feature cannot be defined at your softphone, but is typically defined by your system administrator. In addition, the system administrator can cancel the feature or set up Hot Line Immediate for other destinations. To activate Hot Line Immediate (when defined at your softphone): 1. Dial any number. 2. Click the Dial button. 3. The hot line destination phone rings immediately. 4. Wait for answer. Hot Line (Immediate) 74 Coral SeaBeam Stick User Guide (Coral Sea Softswitch) Last Number Redial or The last number dialed over outgoing trunk or internal extension is automatically stored in memory. To activate Last Number Redial: 1. Press and then click the 2. Click the Last Number Redial Dial button or Redial button. 75 Coral SeaBeam Stick User Guide (Coral Sea Softswitch) Login / Logout 123 This toggle feature allows you to: • Log in to a phone with your individual user settings • Log out from your phone (or another phone to which you are logged in) Note: In order to use this feature, a PIN code must be defined in your Sea Softswitch portal. If you are not sure what your PIN code is, contact your system administrator. To log in to a phone: Dial the entire procedure in a single block sequence. 1. Dial Login/Logout feature code 123. 2. Dial your extension number. 3. Dial your PIN code. 4. Dial activation code 5. Click the 6. Click the . Dial button. Hang Up button. 7. Your settings are displayed on the phone. To log out of a phone: Dial the entire procedure in a single block sequence. 1. Dial Login/Logout feature code 123. 2. Dial cancellation code . 3. Click the Login / Logout Dial button. 76 Coral SeaBeam Stick User Guide (Coral Sea Softswitch) Messages 175 Messages can be left for you by a station caller or voicemail. When you receive a message, an envelope icon on the Call Display. appears To remove the Message Waiting Indicator (MWI) from the Call Display: Dial the entire procedure in a single block sequence. 1. Dial Turn Off MWI feature code 175. 2. Dial activation code 3. Click the . Dial button on the Coral SeaBeam keypad. 4. Listen for the confirmation tone. 5. Click the Messages Hang Up button. 77 Coral SeaBeam Stick User Guide (Coral Sea Softswitch) Mobility: Call-through, Callback The Mobility feature allows you to connect off-site phones, such as your home or mobile phone, to the Sea Softswitch via a dedicated Mobility number. Once connected, you can make calls from within the system and activate Sea Softswitch features (see table on page 81). The off-site phone operates as a virtual station in the Sea Softswitch. Mobility services are based on your dedicated alais numbers, call access parameters, rules and announcements managed by your system administrator via the Sea Softswitch portal. An authentication process is employed based on a combination of your off-site caller ID (ANI) number, dedicated system-wide Mobility number, and your PIN code. There are two types of mobility services – Call-through and Callback. You can be provided with both services on the same off-site phone if your system administrator has assigned separate dedicated Mobility numbers for each service: • Call-through—you call a dedicated Mobility number and receive a dial tone after successfully passing the authentication process. The off-site phone must provide an ANI number or you must enter a valid PIN code (if prompted). • Callback—you call a dedicated Mobility number. The Sea Softswitch identifies you, disconnects the call, and calls you back at a predefined callback number. Upon answering the call, you receive a dial tone. Use the table below to record your Mobility numbers: Mobility Number Call-through Callback Mobility: Call-through, Callback 78 Coral SeaBeam Stick User Guide (Coral Sea Softswitch) Mobility: Call-through, Callback To place a Call-through Mobility call from an off-site phone: 1. Place a call to your dedicated Mobility number. Note: If your ANI number is not recognized or you do not have a PIN code defined in the system you will hear an announcement indicating that you are not authorized to use this Mobility service. 2. Listen for dial tone. 3. Dial your PIN code (if required by your authentication rules or if your phone does not present your ANI number). Note: If you enter an invalid PIN code you will hear an announcement to enter the correct PIN code. If you are not sure what your PIN code is, contact your system administrator. 4. Press #, and then listen for the dial tone. 5. Place a call to the required destination number. Notes: 1) If your destination is an external number, it should be preceded by an external line access code. 2) Depending on your settings, your off-site phone ANI or alias is displayed to the party receiving the call. 6. Listen for the ringback tone. 7. Wait for an answer. 8. Once in an established Call-through call, you can activate one of the options described in the table on page 81. Mobility: Call-through, Callback 79 Coral SeaBeam Stick User Guide (Coral Sea Softswitch) Mobility: Call-through, Callback To place a Callback Mobility call from an off-site phone: 1. Place a call to your dedicated Mobility number. 2. Listen for dial tone if your authentication rule requires a PIN code; otherwise, wait for ringback tone and proceed to Step 5. 3. Dial your PIN code. Note: If you enter an invalid PIN code you will hear an announcement to enter the correct PIN code. If you are not sure what your PIN code is, contact your system administrator. 4. Press #. The call is disconnected. 5. Wait for the system to call you back. Note: You can receive another call before the system calls you back; in this case, the system will continually attempt to establish the Callback call according to a pre-defined Reattempt rule. 6. Answer the call from your Callback phone, as defined by your system administrator. 7. Listen for the distinctive dial tone. 8. Place a call to the required destination number. Notes: 1) If your destination is an external number, it should be preceded by an external line access code. 2) Depending on your settings, your off-site phone ANI or alias is displayed to the party receiving the call. 9. Listen for the ringback tone. 10. Wait for an answer. 11. Once in an established Callback call, you can activate one of the options described in the table on page 81. Mobility: Call-through, Callback 80 Coral SeaBeam Stick User Guide (Coral Sea Softswitch) Mobility: Call-through, Callback Options available while in an established Mobility call During a mobility call, a touch-tone based interactive subscriber’s menu allows you to activate the following basic call features by pressing keys on the phone dial pad: To Place a new call Dial 1 Description Listen for a dial tone indicating that you can place a call to a new contact. Your original conversing party is disconnected. Dialing 1 allows you to continue using the Mobility service without redialing the Mobility number for a number of sequential calls. If you exceed the number of allowed sequential calls, you will hear an announcement indicating that you cannot place the call. Note: Instead of dialing DTMF tones ignored by Sea Softswitch Transfer call to your desk phone 7 2 1, you can also wait for the other party to hang up first. Changes the DTMF to transparent mode, allowing you to dial to voicemail, answering machines, and any other service outside the Sea Softswitch system requiring DTMF tones. Note: Once you change the DTMF mode, you will not be able to use the other options in this table for the current call. A dial tone prompts you to enter your desk phone number (your internal device, as defined in your user profile). You are disconnected and the conversing party is transferred to your desk phone. Note: Your desk phone number is not displayed on the transferred party’s display. Mobility: Call-through, Callback 81 Coral SeaBeam Stick User Guide (Coral Sea Softswitch) Mobility: Reach Me Anywhere You can be reached anywhere from any of your devices at any location, including internal Sea Softswitch phones as well as off-site phones, such as your cellular and home phones. Incoming calls ring simultaneously (or with a ring delay) on all of your specified devices until you answer the call on one of the phones. If the answering phone is an off-site phone, the call automatically becomes an authorized mobility call. In this case, you can transfer the call to your internal Sea Softswitch device (see table on page 81). The following diagram illustrates how you can be reached on your internal, cellular and home phones. Note:In the current release, multiple off-site devices can be defined for you, but only one internal phone. Internal phone (alias) Incoming call Coral Sea Softswitch You answer one of your phones [Office] [Home] External phones FCN ON/OFF ENTER 1 2 3 4 5 6 7 8 9 0 [Cellular] All your phones ring simultaneously or with preset ring delays Mobility: Reach Me Anywhere 82 Coral SeaBeam Stick User Guide (Coral Sea Softswitch) Mute Microphone MUTE During a conversation you may need to temporarily turn off the microphone on your softtelephone (handset and speakerphone). This will prevent the other party from hearing that portion of your conversation. The MUTE key button is an on/off switch and can be pressed as many times as necessary. Mute The mute feature deactivates the microphone for your speakerphone and handset or headset. Press the toggle key again to reactivate the microphone. The key lights red when Mute is activated. The icon appears on the Call Display when Mute is activated. When you mute, you might also want to stop video feed, if any. To turn off the microphone during a call: Press MUTE.Click the Mute button. Party cannot hear your side of the conversation. The key lights red. The icon appears on the Call Display. To return to 2-way conversation: Press the lit MUTE.Click the Mute button again. 83 Coral SeaBeam Stick User Guide (Coral Sea Softswitch) 7060→7069 Page Queue You can pick up calls placed in a Page Queue destination. To pick-up a call placed in Page_Q: Dial the entire procedure in a single block sequence. 1. Dial assigned Page_Q number 7060-7069. 2. Click the Dial button. 3. Answer the call or Voice Page (see page 92) to announce the call for pick up. Make sure to include both the name of the person being notified and the relevant Page_Q number. Note: If the call is not picked up within a predetermined time, it automatically returns to the originating station from which Page_Q was placed. Page Queue 84 Coral SeaBeam Stick User Guide (Coral Sea Softswitch) Pickup: Group, Directed 76 or 77 You can answer other ringing system stations either by using a Group Pickup or Directed Pickup code. Group Pickup Allows you to pick up any softphone that rings within your pre-programmed pickup group, by dialing the Group Pickup feature code. To answer a call within your Pickup group: Dial the entire procedure in a single block sequence. 1. Dial Group Call Pickup feature code 76. 2. Dial activation code 3. Click the . Dial button. 4. Answer the call. Directed Pickup Allows you to pick up any ringing softphone in the system, by dialing the Directed Pickup feature code and the required softphone number. To answer any call within the system: Dial the entire procedure in a single block sequence. 1. Dial Directed Call Pickup feature code 77. 2. Dial activation code . 3. Dial the number of the ringing phone. 4. Click the Dial button. 5. Answer the call. Pickup: Group, Directed 85 Coral SeaBeam Stick User Guide (Coral Sea Softswitch) Receiving Calls / Answering Calls See Receiving Calls on page 49 . Receiving Calls / Answering Calls 86 Coral SeaBeam Stick User Guide (Coral Sea Softswitch) Recording Calls This feature allows you to start recording while in conversation with a second party, 3-way or multi-party conference. It is operated while the current call is in progress, without disrupting the call. Recordings are saved on your PC as WAV files (Waveform audio format is an audio file format standard for storing audio on PCs). They are saved in the location specified in the Options window (see Options > General > Application on page 10). Note: The WAV files are saved in the location specified in the Options window (see “Options > General > Application” on page E-10). You can change the path in the Recorded Calls Location field under the Application tab. Activating Call Recording (while in conversation): 1. Click the Record button any time during a call. 2. Continue current call. Stop Call Recording (while in conversation): • Click the Recording Calls Record button again. 87 Coral SeaBeam Stick User Guide (Coral Sea Softswitch) Send This feature enables you to notify the system that dialing has been completed. You can send a signal to the system indicating the end of a stream of dialed digits. In response to your command the system sends your call immediately towards the destination. When you have finished dialing: • Click the Send Dial button or press ENTER on your keyboard to send the digits. 88 Coral SeaBeam Stick User Guide (Coral Sea Softswitch) Speed Dial Using Private and Public Libraries Speed dialing using a Private Library or system Public Library number is basically the same, therefore the process is described generally for both dialing systems. If Public Speed Dialing is available on your system, consult your company directory for library numbers. Note: You can also make calls to numbers in your contact lists (see Contacts Tab on page 20). To dial a Public or Private Speed dial number: 1. Dial speed call library number (Private or Public). 2. Click the Dial button. Note: In some cases the Speed Dialing number must be followed by a Forced Account code. When Forced Account code is required the distinctive dial tone is heard after dialing the speed call library number. Speed Dial Using Private and Public Libraries 89 Coral SeaBeam Stick User Guide (Coral Sea Softswitch) Transfer You can transfer both internal and external calls to other users within your system. A call can be screened or unscreened. • Screened Transfer (Consultation Transfer): You announce the call before transferring. • Unscreened Transfer (Direct transfer, Blind transfer, Unsupervised transfer or Cold transfer): You can transfer the call without a prior announcement or without notifying the recipient. Note: Screened Transfer cannot be activated when Call Forward No Answer or Divert is invoked by the transfer destination. To perform attended(screened) transfer of an established outgoing call: 1. During an established call that you initiated, click another available line. The original call is automatically put on hold. 2. Dial the Transfer destination number. 3. Click the Dial button. 4. Hear ringback tone. Notes: 1) If the third party is busy, you do not hear a ringback tone.You will not be able to proceed with the transfer unless the transfer destination is defined with multi-appearance. 2) If the Transfer destination is defined with multi-appearance, then you hear a busy tone and may decide to end the call and continue to dial another transfer destination. 5. Wait for answer. 6. Announce the call, then click the party is blue. Transfer button. The line of the original call is now red and the line of the third 7. Select the original line (the line that is red). The transfer is made and the lines on your softphone are now free (black). Transfer 90 Coral SeaBeam Stick User Guide (Coral Sea Softswitch) Transfer To perform attended (screened) transfer of an established incoming call: 1. During an established call that the other side initiated, click another available line. The original call is automatically put on hold. 2. Dial the Transfer destination number. 3. Click the Dial button. 4. Wait for answer. 5. Announce the call, then click the original line. The third party line is automatically put on hold. 6. Click the Transfer button. The line of the original call is now blue and the line of the third party is red. 7. Select the third party line (the line that is red). The transfer is made and the lines on your softphone are now free (black). To perform an unattended (unscreened) transfer of an established call: 1. Click the Transfer button. The line of the original call is now blue. 2. Dial the Transfer destination number. 3. Click the Transfer button again. The message Requesting basic transfer appears. At this point, the call is no longer under you control; you cannot cancel the transfer. Transfer 91 Coral SeaBeam Stick User Guide (Coral Sea Softswitch) Voice Page (To Single Keyset) 191 You can voice page an idle or busy keyset (FlexSet, DKT, T207M, T208M, T207M/NP or T208M/BL). To voice page (from idle): Dial the entire procedure in a single block sequence. 1. Dial Voice Page feature code 191 followed by the keyset dial number. or Dial a Keyset Voice Page number. 2. Click the Dial button. 3. Listen for the Voice Page tone. 4. Begin paging when tone stops. 5. Click the Hang Up button. Note: Each Keyset has a unique Voice Page number, which is defined through the Coral Sea Softswitch system. Voice Page (To Single Keyset) 92 Coral SeaBeam Stick User Guide (Coral Sea Softswitch) Waiting Calls — Receiving A waiting call tone heard during a conversation indicates that an additional call is waiting for you to answer. When you hear this tone you can do one of the following: • Continue with your current call and ignore the waiting call. • Terminate the current call, wait for a ring and then answer the waiting call. • Put the current call on hold (see Hold on page 73) and answer the waiting call • Select the line of the incoming call (the line that is yellow); the original call is put on hold. Note: Some phones might not be configured for Waiting Calls and the calling party hears a Busy tone. Waiting Calls — Receiving 93 Coral SeaBeam Stick User Guide (Coral Sea Softswitch) Appendix A - Glossary Access Code Number A series of digits, which must be dialed to gain access to an outside line or a Coral feature. AEC Acoustic Echo Cancelation. Processing of the audio or video signal to reduce the echo effect that can arise with a speakerphone or that can arise if the sound from the speakerphone or headphone leaks into the microphone. AGC Automatic Gain Control. Processing of the audio or video signal to adjust the microphone volume level so that the other party does not hear the distortion that might be caused by too high a microphone input or too low a volume (due to too low input level). AVI Audio Video Interleaved. A multimedia container format. AVI files contain both audio and video data in a standard container that allows simultaneous playback. Broadband Broad or wide bandwidth. In data transmssion, the wider the band, the more data it is possible to transmit in a given time span. A cable, DSL and ADSL connection to the network provide broadband for data transmission. A dialup or ISDN connection typically provide a narrow bandwidth for data transmission. Central Office (CO) Area switching facility serving customers in a defined geographical location. Codec The format by which audio or video streams are compressed for transmission over networks. Coral An enterprise PBX that provides a VoIP service, allowing a user to connect to the Internet in order to make VoIP phone calls using Coral SeaBeam. Coral sets up a SIP account for the user. Appendix A - Glossary A-1 Coral SeaBeam Stick User Guide (Coral Sea Softswitch) Appendix A - Glossary (cont.) Database The memory in which the ‘flexible database system information’ is stored. The programming of the database is usually carried out during installation, however, it is field or remotely modifiable. Default Account The SIP account that will be used when placing an outgoing call, if Coral SeaBeam does not determine that another account should be used. Coral SeaBeam uses the dialing plan to determine the account to use. You can mark one account as the default account. Dial For the purposes of this guide “Dial” means entering the relevant digits that operate a feature or sends a call to a destination. Dialing Plan The rules that Coral SeaBeam follows in order to interpret the SIP address or phone number that the user has entered and to modify the number or address, as required, to ensure that the call will be placed successfully. Digitized Voice DVMS is the utility that provides the means for embedding prerecorded Message System announcements into the system. Recorded messages can be informative, for (DVMS) example: transfer messages, or advertisements. Enter In this Guide, “Enter” means entering a password or other alphanumeric characters. Forced Account Code A feature that forces the station user to dial an account code before accessing an outside line. After dialing the account code, the user will be able to continue dialing the required number. Idle A station or extension that is not ringing or busy, therefore available for use. Appendix A - Glossary A-2 Coral SeaBeam Stick User Guide (Coral Sea Softswitch) Appendix A - Glossary (cont.) Intercept If you misdial or dial an unauthorized code (restricted to you), you will receive reorder tone or will be routed directly to the operator/master extension/attendant, as defined in your system. IP Internet Protocol. A data-oriented protocol used for communicating data across a network. IP is the most common protocol used on the Internet. IP Address A unique number that devices use in order to identify and communicate with each other on a computer network using the IP standard. Key Set Digital or electronic key telephone set. The key set proprietary telephone is a general name for the FlexSet, FlexSet-IP, DKT, DST, T207M, T208M, T207M/NP, T208M/BL, T207S, T208S, T207S/NP, T208S/BL, etc., or any telephone having several buttons, display unit, loudspeaker, microphone, etc. Media In a VoIP phone call, the audio and video portion of the information in a call. Compare with “Signaling” below. MWI Message Waiting Indicator. An indicator that there is a message waiting or a voicemail message for the owner of an account. Narrowband In data transmssion, the wider the band, the more data it is possible to transmit in a given time span. A cable, DSL and ADSL connection to the network provide broadband for data transmission. A dialup or ISDN connection typically provide a narrow bandwidth for data transmission. Operator/Attendant The operator is responsible for answering incoming calls and connecting them to their required destination. The attendant also attends to trunk, system and station feature controls. Appendix A - Glossary A-3 Coral SeaBeam Stick User Guide (Coral Sea Softswitch) Appendix A - Glossary (cont.) Outside Line Access A series of digits which must be keyed in order to gain access to a trunk or trunk Code group. Port Provides access to a device, station or trunk from within the system. Proxy See “SIP account” below. PSTN Public Switch Telephone Network. The traditional land-line phone network. Recall-Automatic The call that you have transferred to another extension that is busy or that does not answer or that you have put on ‘hold’, which has returned to you after a predetermined time-out period. RTP Real-time Transport Protocol. A protocol for delivering the media portion of a data transmission over an IP network. “SRTP” (see below) is another media protocol. Send After digits are dialed in a SIP phone, the digits must be sent to the server. If express dialing is defined for your phone, the digits are sent automatically. Otherwise you must click or press ENTER to send the digits. Signaling In a VoIP phone call, the information in a call that deals with establishing and controling the connection, and managing the network. The non-signaling portion of the call is the Media. SIP Session Initiation Protocol. The signaling protocol used by Coral SeaBeam for handling phone calls. SIP account An account that provides the user with the ability to make VoIP phone calls. The account encapsulates the rules and functions the user can access. Appendix A - Glossary A-4 Coral SeaBeam Stick User Guide (Coral Sea Softswitch) Appendix A - Glossary (cont.) SIP address The address used to connect to a SIP endpoint. In other words, the “phone number” used in a VoIP phone call. For example, sip:[email protected]. SRTP Secure Real-time Transport Protocol. A protocol for delivering the media portion of a data transmission over an IP network. SRTP is a secure protocol, which means that the media is encrypted. “RTP” (see above) is another media protocol. Station/Extension Each Coral internal telephone is called a station/extension and it performs many activities dealing with input and output along the communications system. Station Group A number of stations linked together (members) for a common function, such as Hunt group or Boss group. A station can be defined as a member of many Hunt groups and/or Boss groups. TCP Transmission Control Protocol. A transport protocol for delivering data over an IP network. Other transport protocols are “TLS” (see below) and “UDP” (see below). TLS Transport Layer Security. A transport protocol for delivering data over an IP network. TLS is a secure transport protocol, which means that all the data being transmitted (signaling and media) is encrypted. Other transport protocols are “TCP” and “UDP”. Time-Out A predetermined period of time allowed to complete a specific function. If the function is not completed, for example dialing, the caller is dropped. See also “Recall-Automatic”. Trunk An outside line from the telephone company that terminates at the customer’s location. Appendix A - Glossary A-5 Coral SeaBeam Stick User Guide (Coral Sea Softswitch) Trunk Group A number of trunks linked together (members) for a common outgoing function. Trunk Number (Coral) The access code number that is dialed by station users to gain access to a specific outside line. Trunk Number, CO Usually referred to as CO Trunk Number. This is the number dialed by an outside telephone user from the public network (through the Central Office) in order to call an internal station. (Number listed in the local telephone directory.) UDP User Datagram Protocol. A transport protocol for delivering data over an IP network. Other transport protocols are“TCP” and “TLS”. URI Uniform Resource Identifier. A name or address that identifies a location on the world wide web. A SIP address is a type of URI. URL Uniform Resource Locator. A URI that both identifies a name or address and indicates how to locate it. USB device Universal Serial Bus device. A device that follows a specific communications standard. A headset can be a “USB type” of headset. VAD Voice Activity Detection. A technology that detects if audio is a human voice or background noise. Coral SeaBeam includes a feature (Preserve bandwidth on the Network tab of the Options window) that controls whether audio is transmitted when VAD determines that no one is actually speaking. Vcard An electronic business card that is often attached to an email. It often appears as a “signature” block that identifies the person, their title, and their business. Appendix A - Glossary A-6 Coral SeaBeam Stick User Guide (Coral Sea Softswitch) Verified Forced A feature that forces the station user to dial a secret authorization account code Account Code (VFAC) before accessing an outside line. Before dialing is allowed, VFAC verifies the presence of the account code in the system. If the code is not found, dialing is blocked; when the code is found, dialing is allowed. Each code can have specific dialing restrictions. VoIP Voice over Internet Protocol. A variation of IP used for sending voice data (that is, making phone calls) over the Internet. WAV Or WAVE. A file format standard for storing audio on PCs. Appendix A - Glossary A-7 Coral SeaBeam Stick User Guide (Coral Sea Softswitch) Appendix B - Tones While using the Coral communication system, many different tones are heard. These tones may vary for different locations as each system is customized during installation. Therefore, the sound of the tones are not described; instead, their general use is listed below. In order to familiarize yourself with these tones, try accessing various features and listen to the resultant tone signals. The most frequently heard tones are: Break-In/Break-Out Tone Warning tone received by a station user indicating that a third party has broken into or is leaving (breaking out) an existing conversation. Break-In Warning Tone Background tone heard during the entire break-in period. Indicates that a third party is listening. (Not used in North America.) Busy (Engaged) Tone When the destination you have dialed (extension or trunk) is busy. Call Waiting Tone Tone heard while engaged on a call indicating that another call is waiting to be answered. Confirmation Tone Tone heard when you have successfully accessed or activated a feature (for example Camp-On, or Call Forward). Outside Dial Tone When connected to an external (trunk) line. Reorder Tone A tone heard when you try to access a denied feature or when you misdial, etc., or: • You have stayed off-hook too long before dialing. On-hook and start again, or: • The station you have called has not answered in time. On-hook and call later, or: • The handset is not correctly on-hooked. Replace handset on the cradle, or: • The station you have called is in Do Not Disturb mode. Ringback Tone A tone heard when the destination you have dialed is ringing. Second Ringback Tone Indicates that the destination you have dialed is busy, and your call is waiting to be answered. Appendix B - Tones B-1 Coral SeaBeam Stick User Guide (Coral Sea Softswitch) Speaker Tone IndicatesAppendix that the secondBconversing keyset is in speakerphone mode. - Tonesparty's (cont.) Stutter A tone heard when the handset is lifted indicating there is a message waiting for you. Tick Tone A tone indicating that you may continue dialing. Voice Paging Tone A warbling tone when using the paging facility. Whisper Page Tone A tone heard while engaged in a conversation, indicating a third party wants to break into the conversation with a whisper. The second conversing party does not hear the tone. Appendix B - Tones B-2 Coral SeaBeam Stick User Guide (Coral Sea Softswitch) Appendix C - Application Hot Keys The following table provides a list of the Coral SeaBeam keyboard shortcuts: Feature Key board Shortcut Select Line 1 F1 or CTRL+1 Select Line 2 F2 or CTRL+2 Select Line 3 F3 or CTRL+3 Select Line 4 F4 or CTRL+4 Select Line 5 F5 or CTRL+5 Select Line 6 F6 or CTRL+6 Options window F8 or CTRL+8 View Diagnostic File (if diagnostic logging enabled) F9 or Ctrl + 9 Clear BACKSPACE Dial ENTER Display Help CTRL+F1 Turn Auto-Answer (AA) on/off CTRL+A Open Calls & Contacts drawer CTRL+B Turn Do Not Disturb (DND) on/off CTRL+D Turn Auto-Conference (AC) on/off CTRL+F Hang up CTRL+H or ESC Appendix C - Application Hot Keys C-1 Coral SeaBeam Stick User Guide (Coral Sea Softswitch) Appendix C - Application Hot Keys Feature Key board Shortcut Ignore incoming call CTRL+I Mute CTRL+M Hold CTRL+O Display SIP Account Status window CTRL+P Exit Coral SeaBeam CTRL+Q Redial the last number CTRL+R Send to voicemail CTRL+S Transfer CTRL+T Paste CTRL+V Display voice statistics notification balloon CTRL+F9 Increase/Decrease Speaker Volume UP/DOWN ARROW keys Increase/Decrease Microphone Volume RIGHT/LEFT ARROW keys Appendix C - Application Hot Keys C-2 Coral SeaBeam Stick User Guide (Coral Sea Softswitch) Appendix D - Contact List Headings Following is a list of all the headings that are used in the Coral SeaBeam contacts list. This list can be useful when formatting a contacts list to import it into Coral SeaBeam. For details, see “Importing Contacts”, page 29. uri business_number sms_addresss display-name business_number2 sms_address2 entry_id business_number3 sms_address3 given_name business_number4 sms_address4 surname business_number5 sms_address5 email_address business_number6 sms_address6 email_address2 mobile_number custom_fields email_address3 mobile_number2 custom_fields2 email_address4 mobile_number3 custom_fields3 email_address5 mobile_number4 custom_fields4 email_address6 mobile_number5 pres_subscription sip_address mobile_number6 sip_address2 fax_number sip_address3 fax_number2 sip_address4 fax_number3 sip_address5 fax_number4 sip_address6 fax_number5 Appendix D - Contact List Headings D-1 Coral SeaBeam Stick User Guide (Coral Sea Softswitch) Appendix D - Contact List Headings home_number fax_number6 home_number2 groups home_number3 comment home_number4 postal_address home_number5 default_address home_number6 default_address_type Appendix D - Contact List Headings D-2 Coral SeaBeam Stick User Guide (Coral Sea Softswitch) Appendix E - Basic Configuration Options Before you Configure your Coral SeaBeam Use the right column of the following table to record important information about your Coral SeaBeam. You can obtain this information from your system administrator: Table 1: Information form about your Coral SeaBeam User Details Meaning Fill in your Coral SeaBeam data User name The prefix of your SIP account number (in [email protected], the user name is “Mike_Sip”) Password Your SIP account password (provided by your system administrator) Authorization user name Your SIP account authorization user name (provided by your system administrator) Domain The suffix of your SIP account number (in [email protected], the domain is “172.50.5.28”) Proxy address and port (might not be required) The domain name (for example, domain.com) or IP address (for example, 123.456.789.012) of the outbound proxy Dial number The phone number other people dial to call you. For example, 6789 (internal) and 456-6789 (external) Appendix E - Basic Configuration Options E-1 Coral SeaBeam Stick User Guide (Coral Sea Softswitch) Appendix E - Basic Configuration Options To configure Coral SeaBeam for the first time: After installing Coral SeaBeam, you must set up and enable at least one (default) SIP account. 1. If no SIP accounts have been set up and enabled, the No SIP accounts are enabled message and SIP Accounts window appear, indicating that Coral SeaBeam has yet to be configured. Appendix E - Basic Configuration Options E-2 Coral SeaBeam Stick User Guide (Coral Sea Softswitch) Appendix E - Basic Configuration Options 2. Click Add to set up a SIP account. The Properties of Account window appears. Appendix E - Basic Configuration Options E-3 Coral SeaBeam Stick User Guide (Coral Sea Softswitch) Appendix E - Basic Configuration Options Appendix E - Basic Configuration Options E-4 Coral SeaBeam Stick User Guide (Coral Sea Softswitch) Appendix E - Basic Configuration Options 3. In the Account tab, complete the User Details area (see Table 1). 4. For the remaining tabs, accept the default settings. If you want to make other changes, contact your system administrator. 5. After you finish setting all the parameters of the SIP account, click OK. The SIP Accounts window appear again, with the details of your default SIP account. Ensure that the Enabled check box is selected. Note: You can enable more than one account at a time. Each time you start Coral SeaBeam, you are automatically logged into every enabled account. For more information about enabling accounts, contact your system administrator. 6. Click Close. Your user name and the Ready message appear on the Call Display. 7. Coral SeaBeam is now connected to a network and ready for use. Tip: To view details about the status of your SIP accounts, click CTRL+P. The SIP Account Status dialog box appears. Appendix E - Basic Configuration Options E-5 Coral SeaBeam Stick User Guide (Coral Sea Softswitch) Appendix E - Basic Configuration Options Appendix E - Basic Configuration Options E-6 Coral SeaBeam Stick User Guide (Coral Sea Softswitch) Appendix E - Basic Configuration Options Setting Up a Contacts List Use of a contacts list is optional, but is the most efficent way to make calls. You can set up contacts in several ways: • During a call that you place or receive, you can add the other party to your contacts list (see • You can add contacts to the contacts list one by one. See “Contact Properties Dialog Box” on page 26. • You can import a contacts list from a file or from another application. See “Importing Contacts” on page 29. • You can retrieve a remotely stored contacts list using WebDAV or XCap. See “Using Remote Storage” on page 30. • For general information about contacts, see “Contacts Tab” on page 20. Appendix E - Basic Configuration Options E-7 on page 8). Coral SeaBeam Stick User Guide (Coral Sea Softswitch) Appendix E - Basic Configuration Options Coral SeaBeam Menu Access the Coral SeaBeam menu by clicking following options: above the Call Display. The Coral SeaBeam menu includes the Table 2: Coral SeaBeam menu options Option Options Description See: Controls the way that you work with Coral SeaBeam. Options apply to all accounts. NOTE: Options is comprised of a General and Advanced pane. Tabs under the Advanced pane are intended for system administrators only and are not described in this guide. Changing settings inappropriately could cause the Coral SeaBeam to malfunction. “Options > General > Application” on page 10 SIP Account Settings These settings are set by your system administrator. They determine how Coral SeaBeam interacts with the Coral PBX, and are set individually for each account. Privacy Rules Rules for determining the contacts you want to allow or ban from contacting you. Open Diagnostic Log Customer support might ask you to open this log if you are experiencing problems with Coral SeaBeam. Open Diagnostic Folder Customer support might ask you to open the diagnostics log if you are experiencing problems with Coral SeaBeam. Help Link to Tadiran Telecom’s support website - http://www.tadirantele.com Appendix E - Basic Configuration Options E-8 “Privacy Rules” on page 20 Coral SeaBeam Stick User Guide (Coral Sea Softswitch) Appendix E - Basic Configuration Options Table 2: Coral SeaBeam menu options Option Description See: About Displays information about Coral SeaBeam, including license, version, and build numbers. Exit Opens the Confirm to Quit dialog box. Click OK to exit Coral SeaBeam. NOTE: You can also exit Coral SeaBeam by pressing CTRL+Q when the softphone is in focus. Appendix E - Basic Configuration Options E-9 Coral SeaBeam Stick User Guide (Coral Sea Softswitch) Appendix E - Basic Configuration Options Options Options > General > Application . Appendix E - Basic Configuration Options E-10 Coral SeaBeam Stick User Guide (Coral Sea Softswitch) Appendix E - Basic Configuration Options Table 3: General pane, Application tab Area Field Description Always on top of other applications Launch when Windows starts Select or clear, according to your preference. Basic Options Confirm before closing application Turn letters into digits when typing into the phone Select or clear, according to your preference. Recent Calls Number of calls in each list Enter number, according to your preference. Contact List Double clicking on a contact Select the option, according to your preference. You can also turn this toggle feature on and off by pressing the SPACEBAR. Enable Zero Touch bandwidth When selected, Coral SeaBeam detects the speed of your network connection and the potential bandwidth. If you move your computer to a different IP address, detection Coral SeaBeam automatically detects the new speed. When cleared, you must specify the network connection. The recommended setting is On. Zero Touch Configuration See “Options > General > Devices” on page 15. Enable status bar messages When selected, messages relating to zero touch configuration will appear in a notification balloon at the lower right corner of the screen, whenever the configuration automatically changes. NOTE: Notification balloons are supported in newer versions of Windows. Recorded Recorded calls location Calls Location Appendix E - Basic Configuration Options Specify a location for saving files when you record your conversations. E-11 Coral SeaBeam Stick User Guide (Coral Sea Softswitch) Appendix E - Basic Configuration Options Options > General > Alerts and Sounds Appendix E - Basic Configuration Options E-12 Coral SeaBeam Stick User Guide (Coral Sea Softswitch) Appendix E - Basic Configuration Options Table 4: General pane, Alerts and Sounds tab Area Ringtones Field Ringtones Description Use this area to Import, play, activate and clear ringtones. Ringtones are saved in wav file format. Pop up the phone Select to automatically bring the softphone to the front when an incoming call is received. if it is not in focus Call Notification Show a ‘Call Alert’ Select to display the Call Alert box (page 49) when an incoming call is received and the softphone is not in focus. Keep showing during a call Select to continue displaying the Call Alert box during the call. NOTE: The Show a ‘Call Alert’ option must also be selected. For future use only. Instant Message Play alert sound when IM window is not active Appendix E - Basic Configuration Options E-13 Coral SeaBeam Stick User Guide (Coral Sea Softswitch) Appendix E - Basic Configuration Options Options > General > Availability The Availability tab allows you to add status indicators to the standard Availability indicators built into Coral SeaBeam. At the bottom of this tab you can modify the Auto-detect idleness period. Appendix E - Basic Configuration Options E-14 Coral SeaBeam Stick User Guide (Coral Sea Softswitch) Appendix E - Basic Configuration Options Options > General > Devices . Appendix E - Basic Configuration Options E-15 Coral SeaBeam Stick User Guide (Coral Sea Softswitch) Appendix E - Basic Configuration Options The Devices tab allows you to specify the devices you are using and then enable features for those devices. There are two ways to specify devices: • Automatically - Coral SeaBeam automatically detects the devices attached to your computer and chooses which ones to use for audio and video, according to the options set in this tab. • Manually - You can override the options in this tab. Note: The Speakerphone option is not relevant for the stick version. Appendix E - Basic Configuration Options E-16 Coral SeaBeam Stick User Guide (Coral Sea Softswitch) Appendix E - Basic Configuration Options Table 5: General pane, Devices tab Area Field Speaker device Microphone device Description Change these fields only if you want to override the devices that Coral SeaBeam automatically selected. In both these fields, select the headset you are using. The headset is the device that is usually used for audio out (the sound you hear) and audio in (recording your voice). The only case in which the headset is not used is when the SPEAKER PHONE button on the keypad is activated. Therefore, unless you will always be using Coral SeaBeam in speakerphone mode, you must make a selection here. Headset Use acoustic echo cancellation (AEC) Reduces the echo effect that can arise with a speakerphone or that can arise if the sound from the speakerphone or headphone leaks into the microphone. Turning this feature on improves sound quality. The recommended setting is On. Use auto gain control (AGC) Automatically adjusts the microphone volume level so that the other party does not hear the distortion that might be caused by too high a microphone input or too low volume (due to too low input level). The recommended setting is On. Use noise reduction Automatically attempts to remove background noise. Typically Off for the headset. Appendix E - Basic Configuration Options E-17 Coral SeaBeam Stick User Guide (Coral Sea Softswitch) Appendix E - Basic Configuration Options Table 5: General pane, Devices tab Area Field Speaker device Description Change this field only if you want to override the devices that Coral SeaBeam automatically selected. • Select the device that you want to use for audio out (the sound you hear) when SPEAKER PHONE is activated. Ensure you select a speaker device (not headset). • Select None if you do not have a speaker phone. SPEAKER PHONE on the keypad is disabled. Microphone device Change this field only if you want to override the devices that Coral SeaBeam automatically selected. • Select the device that you want to use for audio in (recording your voice) when the SPEAKER PHONE button on the keypad is activated. Speaker-phone (not relevant for stick version) • It can be any microphone: it does not have to be the microphone on the device you specified as the speaker device (e.g., it can be the microphone on your camera). • Select None if you do not have a speaker phone. SPEAKER PHONE is disabled. Use acoustic echo cancellation (AEC) Reduces the echo effect that can arise with a speakerphone or that can arise if the sound from the speakerphone or headphone leaks into the microphone. Turning this feature on might improve the sound quality of the speakerphone. However, this uses more processing power, which might slow down other applications. The recommended setting is On. Use auto gain control (AGC) Automatically adjusts the microphone volume level so that the other party does not hear the distortion that might be caused by too high a microphone input or too low volume (due to too low input level). The recommended setting is On. Use noise reduction Automatically attempts to remove background noise. Typically On for speakerphone. Appendix E - Basic Configuration Options E-18 Coral SeaBeam Stick User Guide (Coral Sea Softswitch) Appendix E - Basic Configuration Options Table 5: General pane, Devices tab Area Ring Device Field Speaker device Description Change this field only if you want to override the devices that Coral SeaBeam automatically selected. The device from which you want to hear the phone ringing: the headset, the speakephone, or none. Camera Camera Change this field only if you want to override the devices that Coral SeaBeam automatically selected. Select the camera model. Appendix E - Basic Configuration Options E-19 Coral SeaBeam Stick User Guide (Coral Sea Softswitch) Appendix E - Basic Configuration Options Privacy Rules To allow or ban another person from contacting you, click at the top of the softphone, and select Privacy Rules. The Privacy Rules window appears. You can ban or allow an individual person, or an entire domain. You can set up a default rule, which applies when the incoming call does not fall within the scope of a specific rule.You can also ban a person from the Received, Dialed or Blocked list on the Calls tab. Right-click the name, and then select Ban this person. Note: The Allow IM and Share My Available columns are for future use only. Appendix E - Basic Configuration Options E-20 Coral SeaBeam Stick User Guide (Coral Sea Softswitch) Appendix F - Minimum Requirements In order to run Coral SeaBeam stick, ensure that your computer meets the following minimum requirements: Component Description Processor 700 MHz or higher Memory 256 RAM Operating System Windows 2000, XP, or Vista Connection IP network connection via broadband (ADSL / cable), LAN, or wireless and Network Interface Card (NIC) Sound Card Full-duplex, 16-bit Video Camera For video conferencing USB Interface USB 1.1 or higher Appendix F - Minimum Requirements F-1 Coral SeaBeam Stick User Guide (Coral Sea Softswitch) International Headquarters Tadiran Telecom Ltd. 18 Hasivim Street P.O.Box 7607 Petach Tikva 49170 Israel Tel. +972-3-9262000, Fax. +972-3-9262310 USA Headquarters Tadiran Telecom, Inc. 4 Tri Harbor Court Port Washington, NY 11050 Tel. +1-516-632-7200, Fax. +1-516-632-7210 http://www.tadirantele.com C o r a l TM S e a B e a m S t i c k S o f t p h o n e User Guide (Sea Softswitch) Edition 1.0 (2008)