1
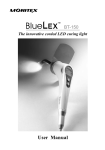
Digital Curing Light
User Manual
M-835
Table of Contents
SET UP...................................................................1
OPERATION...........................................................1
HIGH POWER MODE ............................................1
RAMP-UP MODE....................................................2
BUILT-IN LIGHT METER........................................2
CLEANING & STERILIZATION..............................3
DEVICE SPECIFICATIONS ...................................3
TROUBLESHOOTING............................................4
WARRANTY ...........................................................4
SERVICE ................................................................4
SET UP:
(1) Unpack the curing light. Place on firm flat surface or wall mount if preferred.
(2) Insert the fiber optic probe into the handpiece until firmly seated. Attach the
protective shield onto the probe.
(3) Place the handpiece in the holder.
(4) Plug the unit into an AC outlet within a range from 100V to 240V (The light
operates with a universal power supply).
(5) The CU 1000 curing light is ready for use.
OPERATION:
(1) Turn on the power switch located on the left side of base unit.
(2) The LED’s lights will run through a power up test. When the test is completed,
a “beep” sound will confirm unit is ready. The previous curing mode setting is
retained in memory.
(3) Apply composite in mm’s as indicated by composite manufacturer. Select
curing mode to begin curing process.
HIGH POWER MODE:
Press the “HIGH POWER” button for full strength curing.
There are 3 pre-set curing times - 5 sec., 10 sec., and 20 sec.
The curing cycles are activated by pressing the trigger switch
on the handpiece, which simultaneously activates the magnetic
fan for cooling.
5 sec.
– The curing cycle ends with a “beeping” signal. The fan will continue
running for automatic cooling (varies from mode to mode).
10 sec. – A “beeping” signal is sounded at 5 second intervals before the auto
shutdown.
20 sec. – A ”beeping” signal is sounded at 10 second intervals before the auto
shutdown.
1
SOFT-UP MODE:
The mode is designed to prevent composite shrinkage during
polymerization. It is also very beneficial to use when curing
dual-cure resin cement, all-ceramic and poly-ceramic systems.
The “SOFT-UP” button activates a curing cycle with increasing
intensity from low to high power light output.
Pressing the trigger switch on the handpiece will start or stop the
curing light at anytime.
10 sec. –This curing cycle begins with 5 seconds of increasing intensity until
reaching the maximum, and then stays at maximum curing power for
5 seconds (“Beeping” signal sounds at 5 second intervals).
20 sec. –This curing cycle begins with 7 seconds of increasing intensity until
reaching the maximum, and then stays at maximum curing power for
13 seconds (“Beeping” signal sounds at 10 second intervals).
30 sec. –This curing cycle begins with 10 seconds of increasing intensity until
reaching the maximum, and then stays at maximum curing power for
20 seconds (“Beeping” signal sounds at 10 seconds and 20 seconds).
BUILT-IN LIGHT METER:
This feature is designed to measure the intensity
of the lamp output and use these readings to auto
adjust the curing time to compensate for any light
deterioration. This function is fully computerized
and automated when necessary.
The light will automatically adjust the curing time
based on the following guidelines:
GREEN
GREEN
YELLOW
RED
–This color indicates that the light intensity is within accepted curing
range at over the 600mW/cm2.
YELLOW –This color indicates that the light intensity has fallen into a weakerthan-normal-range - between 200~600mW/cm2. At this point, the
curing-time adjuster will extend the curing time relative to how much
the halogen bulb has deteriorated, using the following guidelines:
(a) If the light intensity is between 400 mW/cm2 to 600mw/cm2, the
selected normal curing time will be extended by 3 seconds.
(b) If the light intensity is between 200 mW/cm2 to 400mw/cm2, the
selected normal curing time will be extended by 6 seconds.
2
Any changes will be stored in memory until unit is turned off.
Recallibrate the light intensity reading by turning the power off then on to
reset the memory.
! CAUTION:
RED
–Indicates that the light intensity has fallen below 200mW/cm2 . At this
point, a continuous short “beeping” signal will sound as a reminder to
replace the halogen bulb.
CLEANING & STERILIZATION:
1 - Light Guide
After each patient, the light guide should be sterilized.
Autoclave at 135ºC for 5 minutes.
2 - Use a cloth wipe and gentle cleansing agent to clean control unit and
handpiece surfaces.
! CAUTION:
Never use a solvent based cleaner. This will cause surface printing to fade.
DEVICE SPECIFICATIONS:
Voltage: AC 110V - 220V, 50/60Hz
Effect: A
Classification: Class I
Protection against electric shock: Type B applied part
Protection against harmful ingress of water: Ordinary equipment, IPX0
Mode of operation: Continuous operation or 30 seconds
3
TROUBLESHOOTING:
PROBLEM
CAUSE
METHOD
No power when switch is on
Cord or plug connections
Inspect the power connection
and handpiece cable
No power when switch is on
Fuse
Inspect fuse and change if needed
If it fails again, send for repair
No light from Handpiece
Halogen bulb not working
Replace bulb
Unexpected “beeping”
Some buttons are pressed
Check all buttons
No light after a few uses (if bulb okay)
Cooling fan not working
Send for repair
BUILT-IN LIGHT METER:
This product is designed for use in a dental office and this warranty is not
applicable to other uses. The unit is warranted for twelve (12) months from
date of purchase against manufacturing defects in materials and workmanship;
Henry Schein® will repair or replace the unit at its sole discretion. This warranty
shall be limited to replacement or repair of the unit or its parts and shall not
extend to any other claims, including but not limited to loss of profit, cost of
removal or replacement, incidental or consequential damages or other similar
claims arising from the use of this product. Damages to the product resulting
from acts of God, faulty installation, misuse, tampering, accident, abuse,
negligence or unauthorized repairs or alternations unrelated to problems with
materials and workmanship are not covered by this warranty.
4
INDUSTRIAL CO., LTD
6F, 70 GUANG-FU ROAD SEC. 1,
SAN-CHONG CITY, TAIPEI, TAIWAN
TEL : 886-2-29993869 FAX: 886-2-29993647
E-mail : [email protected]
http://www.monitex.com.tw