1
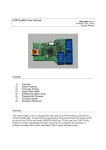
USBTinyMkII User manual USBTinyMkII Rev 1.1 Copyright Tom_L 2010 All rights reserved Contents 1) 2) 3) 4) 5) 6) 7) 8) Overview Switch Positions Connector Pinouts Using USBTiny MkII with Studio Using USBTiny MkII with Avrdude Preparing the Firmware Firmware Update Disclaimer Statement Overview The USBTInyMkII is an avr programmer that uses the LUFA firmware to emulate an Atmel AVRISP-MkII. It supports the programming of the entire 8-bit AVR range via ISP as well as the PDI (for the newer XMEGA AVRs) and TPI (for the 6-pin TINY AVRs). Features include upgradeable firmware and switch selectable USB or target supplied power. Switch positions NOTE: *** IN PDI MODE, ONLY USE TARGET POWER *** The target chip can be powered from the USB VBUS (+5v) or from the target board itself. When the power select switch is in the position toward the USB plug it will be USB powered and when switched toward the target plugs it is powered by the target board as indicated below. The IC2 uses the power from the target device to determine the programming voltage. Target power has been tested from 1.8 to 5v. In USB mode, the target must be 5v tolerant. In PDI mode, xmega chips are not 5v tolerant! Connector Pinouts The ISP header is used for standard 8bit avr devices, the PDI header for the newer XMEGA AVRs and the TPI header for the 6-pin TINY AVRs. Using USBTiny MkII with Studio The USBTiny MkII is programmed to emulate a standard avrisp mkii. To connect to the programmer, plug it into your pc USB port and start up Studio 4. Click on the connect icon to open up the programmer selection dialog and select AVRISP MkII from the menu and press the connect button. Once connected the device selection menu will pop up. Connect the programmer cable to the appropriate header to flash the target device depending on target device selected. Be sure your target device is 5v tolerant if you select the USB powered mode. CAUTION: *** IN PDI MODE, ONLY USE TARGET POWER *** Using USBTiny MkII with Avrdude The USBTiny MkII uses libusb to communicate with avrdude. To download a program to your target device use the following line adjusting it for your target chip. avrdude -c avrisp2 -P usb -p t26 -U flash:w:main.hex:I where -p is the part number.. t26 is tiny26, t10 is tiny10, m644 is mega644 etc. To write the fuses: avrdude -c avrisp2 -P usb -p t26 -U lfuse:w:0xDD:m -U hfuse:w:0xDF:m -U efuse:w:0x00:m To write to the internal eeprom: avrdude -c avrisp2 -P usb -p t26 -U eeprom:w:eeprom.eep:i To read the contents of the eeprom: avrdude -c avrisp2 -P usb -p t26 -U eeprom:r:file.txt:i Preparing the Firmware The firmware for the USBTiny MkII is entirely open source and can be downloaded from the LUFA project. You are encouraged to always use the latest release for updates. From the LUFA 100512 update forward, the USBTinyMkii has been added to the project as a board define. This simplifies the compile procedure requiring only minor changes to the project makefile. First copy the LUFA project to your hdd. Next make the following changes to the avrisp-mkii makefile: MCU = at90usb162 BOARD = USBTINYMKII F_CPU = 16000000 The firmware may be compiled with an additional option, CDEFS += -DLIBUSB_DRIVER_COMPAT which enables compatibility with the "avrdude" software, but breaks compatibility with AVRStudio. This is due to an incompatibility with the avrdude and AVRStudio drivers and the firmware. When compiled without this option, the programmer will work with AVRStudio only. Once configured run "Make Clean" and "Make All" from the AVRISP-MKII directory and follow the Firmware Update directions below. By default after compiling, the update file will be in the LUFA\Projects\AVRISP-MKII directory. Firmware Update To update the firmware you will need a copy of FLIP from Atmel (Flexible In-System Programmer) or DFU-Programmer (Device Firmware Update programmer). Following is a step by step to get the new firmware uploaded to your target programmer using FLIP. To put the USBTinyMkii into DFU programming mode, push and hold the 'HWB' button. While the 'HWB' button is depressed press the 'RESET' button then release both. The green led should go out indicating it is in program mode. Click on the 'chip' icon or 'Device Select' menu option and select the device from the dropdown menu (at90usb162). Click on the 'USB cable' icon and select 'USB' from the menu and connect to the device. Load the new hex file from the 'LOAD hex file' icon or from the 'File LOAD HEX file' menu. Click on the 'RUN' button in the lower left corner. DONE! Your programmer should be up to date now. Disclaimer Statement No warranty is offered for the USBTiny MkII or it's use or misuse. I can not be held liable for any damages caused to your USBTiny MkII programmer, target device or computer system. Having said that, I will attempt to ensure the highest level of quality and resolve any issue promptly.