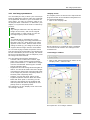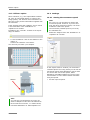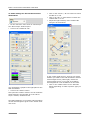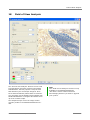
1
September 2009
Operating Instructions
PALM RoboSoftware 4.3 SP1
This document is only supplied to those persons who are trained and authorized by Carl Zeiss MicroImaging
GmbH.
No part of this document may be reproduced or distributed in any form or by any means without the prior
written consent of Carl Zeiss MicroImaging GmbH.
11th edition, September 2009
Regulatory Notice: PALM MicroLaser Systems are intended for research use only and are not approved for
medical applications in the United States and Canada.
LMPC is a trademark of Carl Zeiss MicroImaging GmbH
PALM is a trademark of Carl Zeiss MicroImaging GmbH
The following technologies have been patented by Carl Zeiss MicroImaging GmbH:
-
Laser catapult technology (Laser Pressure Catapulting LPC)
Patents: US 5,998,129, EP 879408 B1 and others.
Three-dimensional laser beam positioning system
Patents: US 5,689,109, EP 679325 B1 and others.
Element List
Patent: US 6,930,764.
Additional patents pending.
Carl Zeiss MicroImaging GmbH
07740 Jena, Germany
BioSciences/ Location Munich
Phone:
+49 89 90 9000 800
Fax:
+49 89 90 9000 820
E-mail:
[email protected]
www.zeiss.de/microdissection
© Carl Zeiss MicroImaging GmbH, 2009. All rights reserved.
2
415109-2614-101 e 09/09
Contents
Contents
Chapter
Page
1
1.1
1.2
1.3
1.4
1.5
1.5.1
1.5.2
1.6
1.7
1.8
1.9
1.9.1
1.9.2
Introduction . . . . . . . . . . . . . . . . . . . . . . . . . . . . . . . . . . . . . . . . . . . . . . . . . . . . . . . . . 9
Functionality of PALM MicroLaser systems . . . . . . . . . . . . . . . . . . . . . . . . . . . . . . . . . . . . 9
PALM RoboSoftware. . . . . . . . . . . . . . . . . . . . . . . . . . . . . . . . . . . . . . . . . . . . . . . . . . . 10
Basic and Pro Mode . . . . . . . . . . . . . . . . . . . . . . . . . . . . . . . . . . . . . . . . . . . . . . . . . . . 10
InformationCenter . . . . . . . . . . . . . . . . . . . . . . . . . . . . . . . . . . . . . . . . . . . . . . . . . . . . 10
About this user manual . . . . . . . . . . . . . . . . . . . . . . . . . . . . . . . . . . . . . . . . . . . . . . . . 11
Contents . . . . . . . . . . . . . . . . . . . . . . . . . . . . . . . . . . . . . . . . . . . . . . . . . . . . . . . . . . 11
Conventions . . . . . . . . . . . . . . . . . . . . . . . . . . . . . . . . . . . . . . . . . . . . . . . . . . . . . . . . 11
Installation . . . . . . . . . . . . . . . . . . . . . . . . . . . . . . . . . . . . . . . . . . . . . . . . . . . . . . . . . 11
File Mode and Database Mode . . . . . . . . . . . . . . . . . . . . . . . . . . . . . . . . . . . . . . . . . . . . 11
Launching and exiting the program . . . . . . . . . . . . . . . . . . . . . . . . . . . . . . . . . . . . . . . . 12
Launching other programs from PALM RoboSoftware . . . . . . . . . . . . . . . . . . . . . . . . . . . . 13
InformationCenter . . . . . . . . . . . . . . . . . . . . . . . . . . . . . . . . . . . . . . . . . . . . . . . . . . . . 13
AxioVision and Cellenger . . . . . . . . . . . . . . . . . . . . . . . . . . . . . . . . . . . . . . . . . . . . . . . 13
2
2.1
2.2
2.3
2.3.1
2.3.2
2.3.3
2.4
2.4.1
2.4.2
2.4.3
2.4.4
2.4.5
2.5
Program layout and operation . . . . . . . . . . .
PALM RoboSoftware layout . . . . . . . . . . . . . . . .
Customizing the user interface . . . . . . . . . . . . .
Operation . . . . . . . . . . . . . . . . . . . . . . . . . . . .
Mouse . . . . . . . . . . . . . . . . . . . . . . . . . . . . . .
Context menu . . . . . . . . . . . . . . . . . . . . . . . . .
Software modes . . . . . . . . . . . . . . . . . . . . . . .
Help and information about PALM RoboSoftware .
Online Help. . . . . . . . . . . . . . . . . . . . . . . . . . .
The PALMRobo Instructor . . . . . . . . . . . . . . . . .
Program, license and manufacturer . . . . . . . . . .
System information . . . . . . . . . . . . . . . . . . . . .
PALMRobo Information. . . . . . . . . . . . . . . . . . .
Status display . . . . . . . . . . . . . . . . . . . . . . . . .
...........................
..........................
..........................
..........................
..........................
..........................
..........................
..........................
..........................
..........................
..........................
..........................
..........................
..........................
15
15
17
20
20
20
20
21
21
21
22
22
23
24
3
3.1
3.2
3.3
3.4
3.5
3.6
3.7
3.8
3.9
3.10
3.11
3.12
Settings . . . . . . . . . . . . . . . . . . . . . . . . . . . . . . . . . . . . . . . . . . . . . . . . . . . . . . . . . . . .
Launching settings . . . . . . . . . . . . . . . . . . . . . . . . . . . . . . . . . . . . . . . . . . . . . . . . . . .
"Basic" and "Advanced" display modes. . . . . . . . . . . . . . . . . . . . . . . . . . . . . . . . . . . . . .
Setting slideholder. . . . . . . . . . . . . . . . . . . . . . . . . . . . . . . . . . . . . . . . . . . . . . . . . . . .
Settings for the joystick and the arrow keys . . . . . . . . . . . . . . . . . . . . . . . . . . . . . . . . . .
Setting the selection of the available laser functions . . . . . . . . . . . . . . . . . . . . . . . . . . . .
Turning on automatic focusing for elements . . . . . . . . . . . . . . . . . . . . . . . . . . . . . . . . . .
Saving and loading settings . . . . . . . . . . . . . . . . . . . . . . . . . . . . . . . . . . . . . . . . . . . . .
Restoring settings . . . . . . . . . . . . . . . . . . . . . . . . . . . . . . . . . . . . . . . . . . . . . . . . . . . .
Short-term alarm . . . . . . . . . . . . . . . . . . . . . . . . . . . . . . . . . . . . . . . . . . . . . . . . . . . .
Setting camera parameters . . . . . . . . . . . . . . . . . . . . . . . . . . . . . . . . . . . . . . . . . . . . .
Set image parameters . . . . . . . . . . . . . . . . . . . . . . . . . . . . . . . . . . . . . . . . . . . . . . . . .
Displaying color and brightness values for the microscope image . . . . . . . . . . . . . . . . . . .
25
25
26
27
27
28
29
29
30
31
31
35
37
4
4.1
4.2
4.3
4.4
4.5
Calibrating the system . . . . . . . . . . . . . . .
Preliminary remarks . . . . . . . . . . . . . . . . . .
Setting the magnification . . . . . . . . . . . . . . .
Setting the laser marker . . . . . . . . . . . . . . .
Calibrating the movement of the stage . . . . .
Calibrating the offset . . . . . . . . . . . . . . . . . .
39
39
39
40
41
42
415109-2614-101 e 09/09
.
.
.
.
.
.
.
.
.
.
.
.
.
.
.
.
.
.
.
.
.
.
.
.
.
.
.
.
.
.
.
.
.
.
.
.
.
.
.
.
.
.
.
.
.
.
.
.
.
.
.
.
.
.
.
.
.
.
.
.
.
.
.
.
.
.
.
.
.
.
.
.
.
.
.
.
.
.
.
.
.
.
.
.
.
.
............................
...........................
...........................
...........................
...........................
...........................
3
Contents
4.6
4.7
4.8
Reset calibration . . . . . . . . . . . . . . . . . . . . . . . . . . . . . . . . . . . . . . . . . . . . . . . . . . . . . 43
Adjusting the Objective Offset. . . . . . . . . . . . . . . . . . . . . . . . . . . . . . . . . . . . . . . . . . . . 43
Resetting the Objective Offset. . . . . . . . . . . . . . . . . . . . . . . . . . . . . . . . . . . . . . . . . . . . 44
5
5.1
5.1.1
5.1.2
5.1.3
5.1.4
5.1.5
5.1.6
5.1.7
5.1.8
5.2
5.3
5.4
5.5
5.6
5.7
Positioning the stage . . . . . . . . . . . . . . . . . . . . . . . . . . . . . . . . . . . . . . . . . . . . . . . . .
Movement types . . . . . . . . . . . . . . . . . . . . . . . . . . . . . . . . . . . . . . . . . . . . . . . . . . . . .
Positioning the stage with the mouse: Stage Mode . . . . . . . . . . . . . . . . . . . . . . . . . . . . .
Positioning the stage with the mouse: Scroll. . . . . . . . . . . . . . . . . . . . . . . . . . . . . . . . . .
Positioning the stage with the scroll bars . . . . . . . . . . . . . . . . . . . . . . . . . . . . . . . . . . . .
Positioning the stage with the keyboard . . . . . . . . . . . . . . . . . . . . . . . . . . . . . . . . . . . . .
Positioning the stage with the joystick . . . . . . . . . . . . . . . . . . . . . . . . . . . . . . . . . . . . . .
Positioning the stage with the Centering Tool . . . . . . . . . . . . . . . . . . . . . . . . . . . . . . . . .
Moving the stage during an automatic cutting laser function. . . . . . . . . . . . . . . . . . . . . . .
Further possibilities for positioning the stage . . . . . . . . . . . . . . . . . . . . . . . . . . . . . . . . .
Stopping the stage in an emergency . . . . . . . . . . . . . . . . . . . . . . . . . . . . . . . . . . . . . . .
Setting speed . . . . . . . . . . . . . . . . . . . . . . . . . . . . . . . . . . . . . . . . . . . . . . . . . . . . . . .
The Reference Position of the stage . . . . . . . . . . . . . . . . . . . . . . . . . . . . . . . . . . . . . . . .
CapCheck . . . . . . . . . . . . . . . . . . . . . . . . . . . . . . . . . . . . . . . . . . . . . . . . . . . . . . . . . .
Load Position . . . . . . . . . . . . . . . . . . . . . . . . . . . . . . . . . . . . . . . . . . . . . . . . . . . . . . .
Centering the stage . . . . . . . . . . . . . . . . . . . . . . . . . . . . . . . . . . . . . . . . . . . . . . . . . . .
45
45
45
46
46
46
46
47
47
47
48
48
50
51
52
52
6
6.1
6.2
6.3
6.4
6.5
6.6
6.7
6.8
6.9
6.10
6.11
PALM Navigator . . . . . . . . . . . . . . . . . . . . . . . . . . . . . . . . . . . . . . . . . . . . . . . . . . . . . .
Starting PALM Navigator. . . . . . . . . . . . . . . . . . . . . . . . . . . . . . . . . . . . . . . . . . . . . . . .
Making the settings for a scan . . . . . . . . . . . . . . . . . . . . . . . . . . . . . . . . . . . . . . . . . . .
Scanning a sample . . . . . . . . . . . . . . . . . . . . . . . . . . . . . . . . . . . . . . . . . . . . . . . . . . .
Stopping and canceling or continuing a scan in progress . . . . . . . . . . . . . . . . . . . . . . . . .
Scanning a section from the overview scan . . . . . . . . . . . . . . . . . . . . . . . . . . . . . . . . . .
Saving and reloading the scanned image . . . . . . . . . . . . . . . . . . . . . . . . . . . . . . . . . . . .
Displaying elements in the scan . . . . . . . . . . . . . . . . . . . . . . . . . . . . . . . . . . . . . . . . . .
Displaying a particular tile on the monitor . . . . . . . . . . . . . . . . . . . . . . . . . . . . . . . . . . .
Positioning the microscope stage. . . . . . . . . . . . . . . . . . . . . . . . . . . . . . . . . . . . . . . . . .
Analyzing images using the "AxioVision" software . . . . . . . . . . . . . . . . . . . . . . . . . . . . . .
Analyzing images using the "Definiens" software. . . . . . . . . . . . . . . . . . . . . . . . . . . . . . .
53
54
54
57
59
60
61
62
63
63
64
65
7
7.1
7.2
7.2.1
7.2.2
7.3
7.3.1
7.3.2
7.3.3
7.3.4
7.3.5
7.3.6
7.3.7
7.3.8
7.3.9
7.3.10
7.3.11
7.3.12
7.4
7.5
7.6
Drawing and measuring . . . . . . . . . . . . . .
General procedure . . . . . . . . . . . . . . . . . . . .
Creating a new set of elements . . . . . . . . . . .
Working in File Mode . . . . . . . . . . . . . . . . . .
Working in Database Mode . . . . . . . . . . . . . .
Drawing new elements. . . . . . . . . . . . . . . . .
Selecting a laser function . . . . . . . . . . . . . . .
Defining well for catapulting . . . . . . . . . . . . .
Drawing in the various program modes . . . . .
The Reference Point Tool . . . . . . . . . . . . . . .
The Freehand Tool. . . . . . . . . . . . . . . . . . . .
The Line Tool . . . . . . . . . . . . . . . . . . . . . . .
The Rectangle Tool . . . . . . . . . . . . . . . . . . .
The Grid Rectangle Tool . . . . . . . . . . . . . . . .
The Circle Tool . . . . . . . . . . . . . . . . . . . . . .
The Dot Tool . . . . . . . . . . . . . . . . . . . . . . . .
The Stamp Tool. . . . . . . . . . . . . . . . . . . . . .
The Text Tool . . . . . . . . . . . . . . . . . . . . . . .
Displaying and hiding elements . . . . . . . . . . .
Centering elements on the monitor . . . . . . . .
Selecting and deselecting elements . . . . . . . .
67
68
68
68
69
71
72
72
72
73
73
73
73
74
74
75
75
75
76
76
77
4
.
.
.
.
.
.
.
.
.
.
.
.
.
.
.
.
.
.
.
.
.
.
.
.
.
.
.
.
.
.
.
.
.
.
.
.
.
.
.
.
.
.
.
.
.
.
.
.
.
.
.
.
.
.
.
.
.
.
.
.
.
.
.
.
.
.
.
.
.
.
.
.
.
.
.
.
.
.
.
.
.
.
.
.
.
.
.
.
.
.
.
.
.
.
.
.
.
.
.
.
.
.
.
.
.
............................
...........................
...........................
...........................
...........................
...........................
...........................
...........................
...........................
...........................
...........................
...........................
...........................
...........................
...........................
...........................
...........................
...........................
...........................
...........................
...........................
415109-2614-101 e 09/09
Contents
7.6.1
7.6.2
7.6.3
7.7
7.8
7.8.1
7.8.2
7.8.3
7.8.4
7.8.5
7.9
7.9.1
7.9.2
7.9.3
7.10
7.11
Selecting elements using menu commands in the main window . . . . . . . . . . . . .
Selecting and deselecting elements on the monitor . . . . . . . . . . . . . . . . . . . . . .
Selecting and deselecting elements in the "Element List" window . . . . . . . . . . . .
Deleting elements and restoring deleted elements. . . . . . . . . . . . . . . . . . . . . . .
Processing elements . . . . . . . . . . . . . . . . . . . . . . . . . . . . . . . . . . . . . . . . . . .
Editing elements . . . . . . . . . . . . . . . . . . . . . . . . . . . . . . . . . . . . . . . . . . . . . .
Copying elements . . . . . . . . . . . . . . . . . . . . . . . . . . . . . . . . . . . . . . . . . . . . .
Enabling or disabling the element numbering display . . . . . . . . . . . . . . . . . . . . .
Updating the element numbering . . . . . . . . . . . . . . . . . . . . . . . . . . . . . . . . . .
Adding a name or a comment to elements . . . . . . . . . . . . . . . . . . . . . . . . . . . .
Changing colors and line thickness . . . . . . . . . . . . . . . . . . . . . . . . . . . . . . . . .
Presetting colors and line thickness . . . . . . . . . . . . . . . . . . . . . . . . . . . . . . . . .
Selecting colors for elements to be drawn new . . . . . . . . . . . . . . . . . . . . . . . . .
Change colors of elements that have already been drawn . . . . . . . . . . . . . . . . .
Working with element groups . . . . . . . . . . . . . . . . . . . . . . . . . . . . . . . . . . . . .
Measuring . . . . . . . . . . . . . . . . . . . . . . . . . . . . . . . . . . . . . . . . . . . . . . . . . .
8
8.1
8.2
8.3
8.4
8.5
8.6
8.6.1
8.6.2
8.6.3
8.7
Working with the "Element List" Window . . . . . . . . . . . . . . . . . . . . . . . . . . . . . . . . . 91
Items shown on the "Slide" tab . . . . . . . . . . . . . . . . . . . . . . . . . . . . . . . . . . . . . . . . . . . 91
Items shown on the summary tab . . . . . . . . . . . . . . . . . . . . . . . . . . . . . . . . . . . . . . . . . 92
Functions in the "Element List" window . . . . . . . . . . . . . . . . . . . . . . . . . . . . . . . . . . . . . 93
Allocating a laser function to elements . . . . . . . . . . . . . . . . . . . . . . . . . . . . . . . . . . . . . . 94
Allocating an objective to elements . . . . . . . . . . . . . . . . . . . . . . . . . . . . . . . . . . . . . . . . 94
Defining wells for the next laser operation . . . . . . . . . . . . . . . . . . . . . . . . . . . . . . . . . . . 95
Defining wells manually . . . . . . . . . . . . . . . . . . . . . . . . . . . . . . . . . . . . . . . . . . . . . . . . 95
Setting automatic distribution of the elements to wells . . . . . . . . . . . . . . . . . . . . . . . . . . 96
Automatic calculation of the distribution of the elements . . . . . . . . . . . . . . . . . . . . . . . . . 99
The "Serial Sections" function . . . . . . . . . . . . . . . . . . . . . . . . . . . . . . . . . . . . . . . . . . . . 100
9
9.1
9.2
9.3
9.4
9.5
Saving and printing elements . . . . . . . . . . .
Settings for saving elements in File Mode . . . . .
Saving and loading elements in File Mode . . . .
Saving and loading elements in Database Mode
Exporting and importing elements . . . . . . . . . .
Printing elements . . . . . . . . . . . . . . . . . . . . .
10
10.1
10.2
10.3
10.3.1
10.3.2
10.4
10.5
Save Images . . . . . . . . . . . . . . . . . . . . . . . . . . . . . . . . . . . . . . . . . . . . . . . . . . . . . . . 113
Insert a Copyright Note . . . . . . . . . . . . . . . . . . . . . . . . . . . . . . . . . . . . . . . . . . . . . . . . 113
Specify folder to store images in . . . . . . . . . . . . . . . . . . . . . . . . . . . . . . . . . . . . . . . . . . 114
Saving images manually . . . . . . . . . . . . . . . . . . . . . . . . . . . . . . . . . . . . . . . . . . . . . . . 115
Saving images in File Mode. . . . . . . . . . . . . . . . . . . . . . . . . . . . . . . . . . . . . . . . . . . . . . 115
Saving images in Database Mode . . . . . . . . . . . . . . . . . . . . . . . . . . . . . . . . . . . . . . . . . 116
Saving images automatically during a laser function . . . . . . . . . . . . . . . . . . . . . . . . . . . . 116
Saving images and videos using the Recorder function . . . . . . . . . . . . . . . . . . . . . . . . . . 117
11
11.1
11.1.1
11.1.2
11.1.3
11.1.4
11.2
11.3
11.4
11.4.1
Cutting and Catapulting . . . . . . . . . . . . . . .
Laser functions . . . . . . . . . . . . . . . . . . . . . . .
Automatic laser functions . . . . . . . . . . . . . . . .
Laser function Oneclick-LPC . . . . . . . . . . . . . .
Three-dimensional cutting . . . . . . . . . . . . . . .
Non-automatic laser function . . . . . . . . . . . . .
Procedure. . . . . . . . . . . . . . . . . . . . . . . . . . .
Selection of automatic laser functions . . . . . . .
Specifying laser settings. . . . . . . . . . . . . . . . .
Setting energy and focus . . . . . . . . . . . . . . . .
415109-2614-101 e 09/09
.
.
.
.
.
.
.
.
.
.
.
.
.
.
.
.
.
.
.
.
.
.
.
.
.
.
.
.
.
.
.
.
.
.
.
.
.
.
.
.
.
.
.
.
.
.
.
.
....
....
....
....
....
....
....
....
....
....
....
....
....
....
....
....
...
...
...
...
...
...
...
...
...
...
...
...
...
...
...
...
77
77
78
78
80
80
83
83
84
84
84
85
86
87
88
90
. . . . . . . . . . . . . . . . . . . . . . . . . . . . 107
. . . . . . . . . . . . . . . . . . . . . . . . . . . . 107
. . . . . . . . . . . . . . . . . . . . . . . . . . . . 108
. . . . . . . . . . . . . . . . . . . . . . . . . . . . 110
. . . . . . . . . . . . . . . . . . . . . . . . . . . . 111
. . . . . . . . . . . . . . . . . . . . . . . . . . . . 112
.
.
.
.
.
.
.
.
.
.
. . . . . . . . . . . . . . . . . . . . . . . . . . . 121
. . . . . . . . . . . . . . . . . . . . . . . . . . . 121
. . . . . . . . . . . . . . . . . . . . . . . . . . . 121
. . . . . . . . . . . . . . . . . . . . . . . . . . . 123
. . . . . . . . . . . . . . . . . . . . . . . . . . . 123
. . . . . . . . . . . . . . . . . . . . . . . . . . . 123
. . . . . . . . . . . . . . . . . . . . . . . . . . . 123
. . . . . . . . . . . . . . . . . . . . . . . . . . . 124
. . . . . . . . . . . . . . . . . . . . . . . . . . . 124
. . . . . . . . . . . . . . . . . . . . . . . . . . . 125
5
Contents
11.4.2
11.4.3
11.4.4
11.4.5
11.4.6
11.5
11.6
11.7
11.8
11.9
11.10
11.11
Setting number of passes and three-dimensional cutting . . . . . . . . . . . . . . . . . . . . . . . . .
Activating and deactivating autofocus . . . . . . . . . . . . . . . . . . . . . . . . . . . . . . . . . . . . . .
Other general laser settings . . . . . . . . . . . . . . . . . . . . . . . . . . . . . . . . . . . . . . . . . . . . .
Special laser settings for the "LineAutoLPC, "AutoLPC" and "Close&Cut+AutoLPC" functions .
Special laser settings for the "RoboLPC" function. . . . . . . . . . . . . . . . . . . . . . . . . . . . . . .
Finding suitable laser settings . . . . . . . . . . . . . . . . . . . . . . . . . . . . . . . . . . . . . . . . . . . .
Selecting elements for the next laser action . . . . . . . . . . . . . . . . . . . . . . . . . . . . . . . . . .
Starting the automatic laser functions . . . . . . . . . . . . . . . . . . . . . . . . . . . . . . . . . . . . . .
Indications of the operating state of the laser . . . . . . . . . . . . . . . . . . . . . . . . . . . . . . . . .
Stop / continue . . . . . . . . . . . . . . . . . . . . . . . . . . . . . . . . . . . . . . . . . . . . . . . . . . . . . .
Working with the laser function Oneclick-LPC . . . . . . . . . . . . . . . . . . . . . . . . . . . . . . . . .
Cutting and catapulting without automatic laser functions . . . . . . . . . . . . . . . . . . . . . . . .
12
12.1
12.2
12.2.1
12.2.2
12.2.3
12.2.4
12.2.5
12.2.6
12.3
12.4
12.4.1
12.4.2
12.4.3
12.4.4
PALM RoboMover and PALM CapMover II . . . . . . . . . . . . . . . . . . . . . . . . . . . . . . . . . 137
Opening the "RoboMover" or "CapMover II" window . . . . . . . . . . . . . . . . . . . . . . . . . . . . 137
Working with PALM RoboMover or PALM CapMover II. . . . . . . . . . . . . . . . . . . . . . . . . . . . 138
Preparing a collector . . . . . . . . . . . . . . . . . . . . . . . . . . . . . . . . . . . . . . . . . . . . . . . . . . 138
Defining the sequence of the wells for the next laser action (only PALM RoboMover) . . . . . . 139
Catapulting elements . . . . . . . . . . . . . . . . . . . . . . . . . . . . . . . . . . . . . . . . . . . . . . . . . . 140
Viewing the catapulted samples . . . . . . . . . . . . . . . . . . . . . . . . . . . . . . . . . . . . . . . . . . 140
Stopping PALM RoboMover or PALM CapMover II in emergencies: . . . . . . . . . . . . . . . . . . . 141
Placing the collector in the "Home" position . . . . . . . . . . . . . . . . . . . . . . . . . . . . . . . . . . 141
Diffusor option . . . . . . . . . . . . . . . . . . . . . . . . . . . . . . . . . . . . . . . . . . . . . . . . . . . . . . 142
Settings . . . . . . . . . . . . . . . . . . . . . . . . . . . . . . . . . . . . . . . . . . . . . . . . . . . . . . . . . . . 142
Setting the movement speed . . . . . . . . . . . . . . . . . . . . . . . . . . . . . . . . . . . . . . . . . . . . 142
Positioning wells in x/y-direction . . . . . . . . . . . . . . . . . . . . . . . . . . . . . . . . . . . . . . . . . 143
Positioning wells in the z-direction. . . . . . . . . . . . . . . . . . . . . . . . . . . . . . . . . . . . . . . . . 143
Referencing PALM RoboMover or PALM CapMover II . . . . . . . . . . . . . . . . . . . . . . . . . . . . 144
13
13.1
13.2
13.3
13.4
13.5
13.6
13.7
13.8
13.9
13.10
13.11
13.11.1
13.11.2
13.11.3
13.11.4
13.12
MicroTweezers (Option) . . . . . . . . . . . . . . . . . . . . . . . . . . . . . . . . . . . . . . . . . . . . . . 145
Essential settings . . . . . . . . . . . . . . . . . . . . . . . . . . . . . . . . . . . . . . . . . . . . . . . . . . . . 145
Setting power and focus for the trapping laser . . . . . . . . . . . . . . . . . . . . . . . . . . . . . . . . 146
Finding suitable power and focus settings for the trapping laser . . . . . . . . . . . . . . . . . . . . 148
Defining a reference position . . . . . . . . . . . . . . . . . . . . . . . . . . . . . . . . . . . . . . . . . . . . 149
Moving trapping laser beam to the center . . . . . . . . . . . . . . . . . . . . . . . . . . . . . . . . . . . 149
Moving the trapping laser beam to a particular point . . . . . . . . . . . . . . . . . . . . . . . . . . . . 150
Settings for the footswitch . . . . . . . . . . . . . . . . . . . . . . . . . . . . . . . . . . . . . . . . . . . . . . 150
Activating and deactivating the trapping laser. . . . . . . . . . . . . . . . . . . . . . . . . . . . . . . . . 151
Indications of the operating state of the laser . . . . . . . . . . . . . . . . . . . . . . . . . . . . . . . . . 151
Moving objects in the z-axis . . . . . . . . . . . . . . . . . . . . . . . . . . . . . . . . . . . . . . . . . . . . . 152
The moving trap . . . . . . . . . . . . . . . . . . . . . . . . . . . . . . . . . . . . . . . . . . . . . . . . . . . . . 152
Setting speed of the moving trap . . . . . . . . . . . . . . . . . . . . . . . . . . . . . . . . . . . . . . . . . 152
Moving the trapping laser beam with the mouse: TrapXY-1[TrapXY-2] Mode . . . . . . . . . . . 154
Moving the trapping laser beam with the keyboard . . . . . . . . . . . . . . . . . . . . . . . . . . . . . 155
Moving the trapping laser beam with the joystick . . . . . . . . . . . . . . . . . . . . . . . . . . . . . . 155
Moving objects along defined paths . . . . . . . . . . . . . . . . . . . . . . . . . . . . . . . . . . . . . . . 155
14
14.1
14.2
14.3
14.4
14.5
14.6
Working with Fluorescence (Option) . . . . . . . . . . . . . . . . . . . . . . . . . . . . . . . . . . . . 157
General introductory remarks . . . . . . . . . . . . . . . . . . . . . . . . . . . . . . . . . . . . . . . . . . . . 157
Settings for working with fluorescence - manual microscope . . . . . . . . . . . . . . . . . . . . . . 157
Settings for working with fluorescence - motorized microscope . . . . . . . . . . . . . . . . . . . . . 157
Activating a fluorescence settings record . . . . . . . . . . . . . . . . . . . . . . . . . . . . . . . . . . . . 158
Freeze Mode . . . . . . . . . . . . . . . . . . . . . . . . . . . . . . . . . . . . . . . . . . . . . . . . . . . . . . . . 158
Opening and closing the shutter . . . . . . . . . . . . . . . . . . . . . . . . . . . . . . . . . . . . . . . . . . 159
6
127
127
128
128
130
130
132
133
134
134
135
135
415109-2614-101 e 09/09
Contents
14.7
14.8
14.9
14.10
14.11
14.12
Selecting fluorescence excitation filter and assigning filter names . . . . . . . . . . . . . . . .
Editing reflector settings . . . . . . . . . . . . . . . . . . . . . . . . . . . . . . . . . . . . . . . . . . . .
Editing a fluorescence settings record . . . . . . . . . . . . . . . . . . . . . . . . . . . . . . . . . . .
Adjusting the reflector offset . . . . . . . . . . . . . . . . . . . . . . . . . . . . . . . . . . . . . . . . .
Activating and deactivating the timer. . . . . . . . . . . . . . . . . . . . . . . . . . . . . . . . . . . .
Colibri: fluorescence illumination with LEDs . . . . . . . . . . . . . . . . . . . . . . . . . . . . . . .
15
15.1
15.1.1
15.1.2
15.1.3
15.1.4
15.2
15.3
15.4
15.5
15.5.1
15.5.2
Control Microscope (Zeiss Axio Observer) . .
The "Microscope Tools" . . . . . . . . . . . . . . . . . .
Setting required magnification . . . . . . . . . . . . .
Setting the focus . . . . . . . . . . . . . . . . . . . . . . .
Defining and setting fixed positions for the focus
Making illumination settings . . . . . . . . . . . . . . .
Making pre-settings for the microscope . . . . . . .
The "Microscope" window . . . . . . . . . . . . . . . . .
Status display ApoTome . . . . . . . . . . . . . . . . . .
Hardware configurations . . . . . . . . . . . . . . . . .
Setting up a hardware configuration . . . . . . . . .
Editing the list of hardware configurations . . . . .
16
16.1
16.2
16.3
16.4
16.5
Multi-channel fluorescence, extended focus and time lapse (options) . . . . . . . . . . 177
Multi-channel fluorescence recordings . . . . . . . . . . . . . . . . . . . . . . . . . . . . . . . . . . . . . . 177
Extended focus . . . . . . . . . . . . . . . . . . . . . . . . . . . . . . . . . . . . . . . . . . . . . . . . . . . . . . 179
Time Lapse . . . . . . . . . . . . . . . . . . . . . . . . . . . . . . . . . . . . . . . . . . . . . . . . . . . . . . . . . 181
Preview . . . . . . . . . . . . . . . . . . . . . . . . . . . . . . . . . . . . . . . . . . . . . . . . . . . . . . . . . . . 182
Viewing images in the picture viewer . . . . . . . . . . . . . . . . . . . . . . . . . . . . . . . . . . . . . . . 182
17
17.1
17.2
17.3
17.4
Incubation (option). . . . . . . . . . . . . . . . .
Making settings for the logging . . . . . . . . . .
Making settings for the incubator . . . . . . . .
Starting and stopping logging . . . . . . . . . . .
Displaying log file . . . . . . . . . . . . . . . . . . .
18
Field of View Analysis . . . . . . . . . . . . . . . . . . . . . . . . . . . . . . . . . . . . . . . . . . . . . . . . 189
.
.
.
.
.
.
.
.
.
.
.
.
.
.
.
.
.
.
.
.
.
.
.
.
.
.
.
.
.
.
.
.
.
.
.
.
.
.
.
.
.
.
.
.
.
.
.
.
.
.
.
.
.
.
.
.
.
.
.
.
.
.
.
.
.
.
...
...
...
...
...
...
160
161
162
164
165
165
. . . . . . . . . . . . . . . . . . . . . . . . . . . 167
. . . . . . . . . . . . . . . . . . . . . . . . . . . 167
. . . . . . . . . . . . . . . . . . . . . . . . . . . 167
. . . . . . . . . . . . . . . . . . . . . . . . . . . 167
. . . . . . . . . . . . . . . . . . . . . . . . . . . 168
. . . . . . . . . . . . . . . . . . . . . . . . . . . 169
. . . . . . . . . . . . . . . . . . . . . . . . . . . 170
. . . . . . . . . . . . . . . . . . . . . . . . . . . 171
. . . . . . . . . . . . . . . . . . . . . . . . . . . 171
. . . . . . . . . . . . . . . . . . . . . . . . . . . 172
. . . . . . . . . . . . . . . . . . . . . . . . . . . 172
. . . . . . . . . . . . . . . . . . . . . . . . . . . 174
. . . . . . . . . . . . . . . . . . . . . . . . . . . 185
. . . . . . . . . . . . . . . . . . . . . . . . . . . 185
. . . . . . . . . . . . . . . . . . . . . . . . . . . 185
. . . . . . . . . . . . . . . . . . . . . . . . . . . 187
. . . . . . . . . . . . . . . . . . . . . . . . . . . 187
Appendix A: Glossary . . . . . . . . . . . . . . . . . . . . . . . . . . . . . . . . . . . . . . . . . . . . . . . . 193
Appendix B: Keyboard Shortcuts . . . . . . . . . . . . . . . . . . . . . . . . . . . . . . . . . . . . . . . 196
Index . . . . . . . . . . . . . . . . . . . . . . . . . . . . . . . . . . . . . . . . . . . . . . . . . . . . . . . . . . . . . 197
415109-2614-101 e 09/09
7
8
415109-2614-101 e 09/09
Functionality of PALM MicroLaser systems
1
Introduction
1.1
Functionality of PALM MicroLaser
systems
PALM MicroLaser Systems are modular in design
and extremely flexible.
PALM MicroBeam
PALM MicroBeam offers the greatest degree of precision in the field of non-contact laser microdissection and manipulation. It can be used in virtually
all areas of molecular research.
Your PALM MicroBeam is designed to enable you to
cut sections from your sample and detach them
from the surrounding material under the microscope, and then to catapult them into a collecting
cap.
PALM MicroTweezers
With PALM MicroTweezers, you can trap objects
under the microscope and lift them away from the
plane of the slide. It can be employed as standalone technology or in combination with PALM
MicroBeam as PALM CombiSystem.
PALM MicroTweezers is available in four configurations:
- with a fixed laser beam (Mono)
- with a movable laser beam (MonoFlex; moving
trap)
- with one fixed and one movable laser beam
(DuoFlex)
- with two movable laser beams (TwinFlex)
Devices for positioning caps or vessels
Carl Zeiss MicroImaging GmbH offers various possibilities for positioning different caps:
- PALM RoboMover
PALM RoboMover is our special solution for
working at high throughput rate. Time-saving,
automatic sample capture and additional sorting functions of the captured samples, enable
above all, deployment in the "routine laboratory". PALM RoboMover makes automatic positioning of caps over your sample possible.
There are various inserts (collectors) available,
each of which contain one or more vessels. All
of PALM RoboMover functions can be controlled
by PALM RoboSoftware.
- PALM CapMover II
PALM CapMover II makes automatic positioning
of caps over your sample possible. There are
various inserts (collectors) available, each of
which contain one vessel. All of PALM
CapMover II functions can be controlled by
PALM RoboSoftware.
Fluorescence Unit
With the addition of a fluorescence unit PALM
MicroBeam System can be used as a fluorescence
microscope. According to the equipment (basic or
advanced), this module can be used for non-simultaneous application of fluorescence and laser function or even for simultaneous laser function under
fluorescence illumination.
If you have purchased a system with laser beam
positioning (moving trap), you can move a trapped
object with the laser beam parallel to the plane of
the slide. The systems with two laser beams enable you to trap two objects at the same time and
move one or both parallel to the plane of the slide.
PALM RoboStage II
Using PALM RoboStage II it is possible to process
up to three slides at a time, a feature that opens
up completely new possibilities for working with
serial sections, and that is not all. It is also possible to use 35 mm or 50 mm culture dishes for processing living cells.
415109-2614-101 e 09/09
9
PALM RoboSoftware
1.2
PALM RoboSoftware
PALM RoboSoftware is designed to facilitate operation and control of PALM MicroLaser Systems.
PALM RoboSoftware places at your disposal all the
functions you require for precise control of the following functions:
- Display of the microscope image recorded by a
camera on the monitor.
- Software-controlled movement of the stage.
- Definition and processing of lines and areas
(elements) for marking and further processing
with the laser.
- Measurement of dimensions of the sample
parts (length and area). The measuring function offers an approximate value only and must
be calibrated by the operator with the help, for
example, of an ocular micrometer.
- Saving and loading of the geometry and position of defined elements.
- Exporting and importing of the elements and
their properties: sequential number, type,
number of laser operations performed, size of
area, position, etc.
- Saving the portion of the microscope image visible on the monitor as an image.
- Loading and saving of settings: movement
speed of the stage, laser settings, pre-selected
folders for storing images, elements etc.
- Processing of the defined elements with the
cutting laser:
Automatic cutting along defined lines followed
by catapulting.
- Controlling the devices for positioning collection vessels (PALM RoboMover or PALM
CapMover II).
- Processing of a series of samples with the cutting laser; i.e. the areas to be cut and catapulted are defined on one sample and can be
transferred to other samples.
- If you have purchased a system with a motorized microscope, you can also create settings
for the microscope via PALM RoboSoftware.
The software can be upgraded in line with your
specific requirements, e.g. with automatic image
recognition software or special functions, e.g. for
Time Lapse experiments, multichannel fluorescence recordings and recordings with extended focus.
10
1.3
Basic and Pro Mode
The PALM RoboSoftware is available in two license
versions: Basic and Pro Mode. The "Basic" license
provides you with all the basic functions for your
work with PALM MicroBeam and PALM
MicroTweezers. The Pro version includes a series
of more advanced functions (including Autofocus,
Recorder, Field of View Analyse).
If you have the Pro version, you can switch between the "Basic" and "Advanced" display modes
(refer to chapter 3.2). You can access all functions
of the PALM RoboSoftware with the "Advanced"
setting. The "Basic" setting provides a simplified
user interface.
1.4
InformationCenter
The program "PALM InformationCenter" is a component of PALM MicroLaser Systems. The program
is to display and post-process the sample data
generated using PALM RoboSoftware.
The InformationCenter recognizes two operating
modes: File Mode and Database Mode (refer also
to chapter 1.7. Database Mode is available only
when an appropriate software license has been
purchased).
The standard version of the "Information Center"
program (file-based File Mode) can be used for organizing the stored microscope images. You can
thus view the stored images, display them in the
form of a slideshow, creating a video sequence
from the slideshow, save them in a different format as well as display, edit or export information
that was saved with the images.
In the upgraded version of the program (file-based
and database-based: File Mode and Database
Mode) you can access even more powerful functions for documenting your work than those included in the standard version. If you are working
with PALM RoboSoftware in Database Mode (refer
to chapter 1.8 "Launching and exiting the
program"), not only the images you are saving are
stored in a database, but also the elements you
draw, information on samples, experiments and
microdissection operations. You can also enter additional information to be attached to the images,
or you can archive all images and elements for the
same project together.
In the upgraded version of the InformationCenter
you can switch at any time between Database
Mode and File Mode.
415109-2614-101 e 09/09
About this user manual
1.5
About this user manual
1.5.1 Contents
This user manual describes all functions that are
provided by PALM RoboSoftware (refer to
chapters 1.1 "Functionality of PALM MicroLaser
systems" and 1.2 "PALM RoboSoftware").
Info:
Like PALM MicroLaser Systems, PALM
RoboSoftware has been designed on a modular basis. During system installation by Carl
Zeiss MicroImaging GmbH, it will be adapted
exactly to your system configuration, i.e., the
program will provide those tools and commands which you require to control your particular system. Tools and commands which
relate to components which have not been installed, will not appear.
Each chapter begins with a brief summary of the
functions that it covers, followed by instructions
for using and executing the functions.
The instructions are organized so that they can be
followed step-by-step. However, you should always read the summary at the start of each chapter first and familiarize yourself with all the
operational tasks of a section before you put them
into practice. A laser function carried out by mistake or with incorrect settings could destroy your
sample. Until you gain experience with the program functions, work on samples that are no longer required for testing.
1.5.2 Conventions
To help you find your way around the text, it has
been organized into distinctive sections.
- Indented paragraphs with a dash provide a
swift overview of various functions or properties of PALM RoboSoftware.
• Indented and bulleted paragraphs provide
instructions for executing certain functions.
Menu names, menu commands, and the names of
icon buttons and windows are set in inverted commas. In addition, you will always be referred to the
menu or bar where the command or button is located.
Note!
This indicates important information. Read
this information to maintain your system's
high level of performance and safety, and to
prevent malfunction or damage to your sample.
Info:
This indicates tips on correct use and offers
useful notes for getting the best use of PALM
RoboSoftware.
1.6
Installation
PALM RoboSoftware is already installed on the
computer upon delivery or initial operation of your
system. If you experience problems, or if you want
to work with another computer, please contact
Carl Zeiss MicroImaging GmbH.
1.7
File Mode and Database Mode
PALM RoboSoftware recognizes two operating
modes: File Mode and Database Mode. File Mode is
always available. Database Mode can only be used
if an appropriate license has been purchased for
PALM RoboSoftware.
In File Mode you can save microscope images and
elements in folders on a data carrier (e.g. your local hard disk). Elements are geometric figures that
you draw. You may, for instance, identify areas for
processing with the laser.
In Database Mode, PALM RoboSoftware is linked
with a database. If you save images, then they are
stored in the database. Furthermore, any elements that you draw are automatically stored in
the database in exactly the same way as information on samples, experiments and microdissection
operations. The "InformationCenter" allows you to
create databases, and to display and edit their
contents (read the section in the manual about the
"InformationCenter" for more details).
Special markers in the left margin indicate text
that you must not fail to read:
Caution!
This indicates a potentially dangerous situation. You must observe the precautions
marked like this to avoid injury or damage.
415109-2614-101 e 09/09
11
Launching and exiting the program
1.8
Launching and exiting the
program
To exit PALM RoboSoftware:
To launch PALM RoboSoftware:
•
Click on "Programs>Palm>PALMRobo" in the
Windows Start menu.
If your system does not include a database license,
then PALM RoboSoftware will be launched.
If your system does include a database license,
then you can choose whether to work in database
or File Mode (refer to chapter 1.7). Depending on
the initial settings (refer to chapter 3.1) PALM
RoboSoftware will be launched
- either in File Mode
- or in Database Mode with the database preselected under Settings,
- or there will be a dialog for you to specify which
mode you wish to start in.
•
•
Click on "Exit PALMRobo" in the "File" menu.
Info:
If necessary, when the program is closed, a
prompt appears as to whether you want to
save your settings or your elements for later
use (only in File Mode – in Database Mode your
elements are saved automatically; refer to
chapter 3.7 "Saving and loading settings" or
chapter 9.2 "Saving and loading elements in
File Mode").
In this case you should select the database you
wish to work with and click the "DB Mode" button, or
click on the "File Mode" button if you wish to
work in File Mode.
Note!
When PALM RoboSoftware is launched you
can choose between Database and File Mode.
Once the program is running this is no longer
possible. Once the program is running it is
also not possible to change the database. You
should exit PALM RoboSoftware and restart it
if you wish to change to a different mode or
database. If necessary you must first modify
the initial settings as described in chapter 3.1.
12
415109-2614-101 e 09/09
Launching other programs from PALM RoboSoftware
1.9
Launching other programs from
PALM RoboSoftware
PALM RoboSoftware has interfaces with other programs. The programs concerned are programs for
organizing and editing images and detecting structure:
- InformationCenter
(a component of the PALM MicroLaser Systems)
- AxioVision
(can be accessed via Carl Zeiss MicroImaging
GmbH)
- Cellenger from Definiens
(can be accessed via Carl Zeiss MicroImaging
GmbH)
1.9.1 InformationCenter
The PALM InformationCenter is a component of
PALM MicroLaser Systems. Its functionality is described briefly in chapter 1.4. Further details can
be found in the Manual of the InformationCenter.
To launch the "InformationCenter" program:
•
Click on menu item "Open
InformationCenter ... " in the "File" menu of
PALM RoboSoftware main window.
1.9.2 AxioVision and Cellenger
To allow you to enhance your system Carl Zeiss
MicroImaging GmbH offers approved image processing programs which, for instance, enable you
to localize specific objects or structures within your
microscope image with an automated search function: these programs are "AxioVision" and "Cellenger" from Definiens. Both of these programs
can be activated in Navigator (refer to chapters
6.10 and 6.11).
415109-2614-101 e 09/09
13
14
415109-2614-101 e 09/09
PALM RoboSoftware layout
2
Program layout and operation
2.1 PALM RoboSoftware layout
1
2
3
10
4
11
12
13
14
15
6
7
5
8
9
Menu bar, toolbars and tools
1
Menus
2
Tool Bar
10
Speed Tools
3
Camera Tools (camera and display settings)
11
Laser Tools
4
Microscope Tools (settings for the microscope,
for fluorescence and hardware)
12
Start cutting laser
5
Status Bar
13
Cutting laser status display
6
Cut Tools
14
Switch on/off trapping laser,
trapping laser status display
7
Selection of a well for a collection device
15
Setting for arrow keys and joystick
8
Graphic Tools
When the program has been launched, the main
window of PALM RoboSoftware as depicted above
will appear, showing the camera image, the Menu
Bar, various icon bars and tools, as well as the
Status Bar.
415109-2614-101 e 09/09
9
Color Palette
The icon bars, the tools and the Status Bar can be
toggled on and off, as shown in chapter 2.2.
15
PALM RoboSoftware layout
Info:
The possible options (refer to chapter 1.1)
which are available, are dependent upon the
configuration of your system. This can be
adapted to your personal requirements. Please
contact Carl Zeiss MicroImaging GmbH if you
wish to upgrade your system.
-
The third field indicates which slide is being
shown on the monitor (this only applies when
you are using a slide holder that accommodates
more than one slide), or a message is displayed
whilst elements are being calculated by PALM
RoboSoftware.
If you double-click on the field, the "Navigator"
window will open (refer to chapter 6).
-
The fourth field shows the name of the current
active setup file (file extension .set). If you
have not saved or loaded any settings, which
means that you are working with the "factory
defaults", this field is empty.
-
The fifth field shows either the number of the
drawn elements or the number of the element
presently positioned at the center of the image
(x of ...) and the number of all existing elements (... of y).
If you double-click on the field, the "Element
List" window will open (refer to chapter 8).
-
The sixth field shows the current program
mode (Cursor Mode, Stage Mode, Scrolling
stage, Calibration, Laser-Point, Continuous,
Position, Laser ON, Trap-1, Trap-2). If you are
just in the process of drawing or editing an element, its current size is indicated. If no action
is currently in progress, then "Idle" is displayed.
-
The field on the right shows the coordinates of
the unit currently being moved or most recently
moved.
Stage: current coordinates relative to the point
of origin of the drawing plane (x/y). The point
of origin of the drawing plane is permanently
preset (refer to chapter 5.4).
Movement of the trapping laser (moving trap):
coordinates of the laser focus relative to the
point of origin for the movement.
Info:
If the camera image does not appear when the
program is launched, check that all connections
to the microscope and also the settings on the
microscope have been made correctly.
Depending on the activated laser, in the area of
the camera image you will see various markings
and information (chapter 2.2 describes how you
can activate and deactivate or change the items
shown):
- Darkred crosshairs; these mark the exact center of the image.
- A solid blue triangle (the Cutting Laser Marker),
a red Y-shape marking as well as (if you purchased the DuoFlex/TwinFlex system) a green
square (the Trapping Laser Marker). The Laser
Markers indicate the target for the laser.
- You will see a dotted line rectangle on the border of the image - this is the "Scroll Rectangle".
- At the bottom on the left a scale bar and
Copyright Note (if specified) are displayed
(refer to chapter 10.1).
The Status Bar at the bottom of the program window provides you with information on a number of
current settings. Some of the fields feature a window that opens when the field is double-clicked.
-
-
16
If you double-click on the field, the "PALMRobo
Information" window will open (refer to
chapter 2.4.5).
There is an icon in the second and/or third field
if control of the trapping laser beams with the
joystick is activated. If there is no indication
here, you will control the stage or (if this is at
the CapCheck) the collection device using the
joystick.
415109-2614-101 e 09/09
Customizing the user interface
PALM RoboMover/PALM CapMover II:
Coordinates of PALM RoboMover/PALM
CapMover II.
2.2 Customizing the user interface
Info:
Please note that the following possible settings described here, may not be available,
depending upon the configuration of your
PALM MicroLaser System.
If you double-click in the field, the "States" window will open. Amongst other things, this window displays the coordinates of all units (refer
to chapter 2.5).
PALM RoboSoftware offers a number of ways to
customize the appearance of the program window
to meet your requirements.
- You can change the size of the program window. The aspect ratio of the microscope image
remains unaltered.
- You can display or hide all icon bars, tools and
the Status Bar.
- You can change the size of the icon buttons.
- You can move all icon bars and tools to other
positions, even positions outside the program
window.
- You can display or hide the Crosshairs, the
Laser Markers, the Scroll Rectangle, the Scale
Bar and the Copyright Note.
- You can change the appearance of the Laser
Markers.
These settings will be retained after you exit and
relaunch the program.
You resize the program window in the same way as
in all Windows programs.
To change the size of the icon buttons:
•
In the "Adjustment" menu, click on the menu
item "PALMRobo ... ".
The "Preferences and Configuration" window
opens.
•
•
415109-2614-101 e 09/09
Select the "Appearance" tab.
Select the required size in the "Size of the
icons" section.
17
Customizing the user interface
To display or hide all icon bars and tools:
•
Click on menu item "Show All Bars" resp. "Hide
All Bars" in the "View" menu.
Info:
There is only one menu item. Depending on
the current state the entry switches into the
other state. The menu item description toggles between “Hide All Bars” and “Show All
Bars”.
To display or hide a bar or tool:
To restore the default configuration for all
bars and tools:
•
Click on menu item "Default Bar Configuration"
in the "View" menu.
To switch the Scroll Rectangle or the screen
center display on or off:
•
In the "View" menu, click on "Scroll Rectangle"
or "Screen Center" to display or hide the Scroll
Rectangle.
To show or hide the Scale Bar:
•
In the "Adjustment" menu, click on the menu
item "PALMRobo ... ".
The "Preferences and Configuration" window
opens.
•
Click on menu item "Yardstick" in the "View"
menu to display or hide the Scale Bar.
The size of the Scale Bar is dictated by PALM
RoboSoftware depending on the magnification setting; this cannot be modified.
Note!
The scale is dependent on the calibration
(refer to chapter 4).
•
•
Select the "Appearance" tab.
In the "Bars" section, click in the checkbox for
the bar or tool that you want to show or hide.
To show or hide the Copyright Note:
To move the individual tools or icon bars:
•
•
Click on the white vertical bar at the left end of
the icon bar or the horizontal double bar beside
the name of the tool that you want to move and
keep the mouse button pressed.
Drag the bar or the tool to the required position. Release the mouse button.
•
Click on menu item "Copyright" in the "View"
menu to display or hide the Copyright Note.
Info:
Don't forget that the Copyright Note can only
be displayed if you have defined it in advance
(refer to chapter 10.1).
Info:
You can also move tools to positions outside
the program window (e.g. to a second monitor if you have one connected).
18
415109-2614-101 e 09/09
Customizing the user interface
To switch the display of a Laser Marker on or
off:
In the "Laser-Marker" field you can select the Laser Marker whose appearance you want to change.
If you want to change the appearance of more
than one Laser Marker, you can change from one
to the other here.
•
In the "Laser" menu, click on menu item "View
Laser-Marker".
•
A submenu opens containing a list of all available
Laser Markers.
• Click on the name of the Laser Marker you want
to show or hide.
•
To change the appearance of a Laser Marker:
•
•
Select the required shape for the Laser Marker
from the "Type" list.
Select the required style for the Laser Marker
from the "Style" list.
Set the required height and width for the Laser
Marker using the "Height" and "Width" arrow
buttons.
Set the required line thickness of the border for
the Laser Marker using the "Line" arrow buttons.
Info:
The line thickness setting only has an effect if
you have selected "line" as the style.
•
•
In the "Laser" menu, click on menu item
"Layout Laser-Marker".
Select the required color for the Laser Marker
from the "Color" list.
A submenu opens containing a list of all Laser
Markers.
• Click on the name of the Laser Markers whose
appearance you want to change.
This opens the "Laser-Marker" window.
415109-2614-101 e 09/09
19
Operation
2.3 Operation
All program functions can be accessed using the
menu bar, various icon bars or using special tools.
There are additional keyboard shortcuts for several functions. These are summarized in Appendix B:
Keyboard Shortcuts.
2.3.1 Mouse
You will almost always be working with the primary mouse button, that is the left mouse button in
the default configuration. If it is necessary to use
the secondary mouse button, the right button in
the default configuration, this will be indicated explicitly.
2.3.2 Context menu
Several functions can also be accessed via the context menu.
To open the context menu:
•
20
Right click on any dot in the image.
2.3.3 Software modes
Info:
This section refers to the software modes of
PALM RoboSoftware. These are not related to
the operating modes Database Mode or File
Mode or to the license versions "Basic Mode"
or "Pro Mode" and are completely independent of these features.
The PALM RoboSoftware operates in various
modes: Cursor Mode, Stage Mode, Freeze Mode,
Scrolling stage, Calibration, Laser-Point, Continuous, Position, Laser ON, Trap-1, Trap-2. The mode
that is currently active is indicated in the Status
Bar. You can, and in fact must, switch between
Cursor Mode and Stage Mode or Freeze Mode, and
between Cursor Mode and Trap-1 or Trap-2 Mode
manually. All other modes are activated or deactivated automatically by the program when the corresponding functions are selected.
- Cursor Mode: This is the standard mode which
opens by default when the program is
launched. In Cursor Mode you can open menus,
select functions, click on icon buttons or draw
elements.
- Stage Mode: In the Stage Mode you can synchronize the movement of the stage with that
of the mouse movement (refer to
chapter 5.1.1.)
In Stage Mode, you can only access commands
and functions that can be operated with keyboard commands.
- Freeze Mode: In Freeze Mode the movement of
the stage and the microscope image on the
screen is frozen.
In Freeze Mode, all functions that cause or
require movement of the stage (such as scrolling, positioning of elements, targeting specific
points, positioning a Laser Marker, laser functions) are blocked.
This function is particularly useful when working with fluorescence (refer to chapter 14.5).
- Trap-1 Mode and Trap-2 Mode (only if you have
purchased a system with one or two movable
trapping laser beams): In Trap-1 [Trap-2]
Mode you move the trapping laser beam synchronously with the mouse (refer to
chapter 13.11).
415109-2614-101 e 09/09
Help and information about PALM RoboSoftware
2.4 Help and information about
PALM RoboSoftware
PALM RoboSoftware includes a general Help
Function (PALMRobo Help), as well as a tutorial for
several very important functions: the PALMRobo
Instructor. You can also call up information about
the program and the manufacturer.
2.4.1 Online Help
Online Help provides information about the program layout and the meaning of the icon buttons,
the menu commands and the tools.
2.4.2 The PALMRobo Instructor
The PALMRobo Instructor explains in detail how to
carry out the following functions:
- Calibrating the system
- Defining the objective offset
- Saving elements in a file
- Retrieving elements from a file.
Besides this the PALMRobo Instructor contains a
link to directly open the trouble shooting page of
the online help. So you have a direct way to this
information if you have problems or questions.
To open the PALMRobo Instructor:
To open the Online Help:
•
•
Click on "PALMRobo Help" in the "Help" menu.
The Help window opens.
• Click on the point in the Help window about
which you have questions, or enter a key word.
Click on "PALMRobo Instructor" in the "Help"
menu.
The "PALMRobo Instructor" window will open.
To close the Help window:
•
Click on the Close button in the top right corner
of the Help window.
•
Click on the function about which you want
more detailed information.
The "PALMRobo Help" window opens; the required
help topic is displayed.
The "PALMRobo Instructor" window stays open. If
you arrange both windows side by side on your
monitor, you can select several or all topics in the
Instructor one after the other and have them displayed in the Help window.
To continue working with PALM RoboSoftware, you
must close the "PALMRobo Instructor" window
again. You can leave the "PALMRobo Help" window
open.
415109-2614-101 e 09/09
21
Help and information about PALM RoboSoftware
2.4.3 Program, license and manufacturer
2.4.4 System information
To view information about the program, your
license and the manufacturer:
To display a range of information about the
system:
•
Click on "About PALMRobo ... " in the Help
menu.
•
A window with information on your system opens
(hardware, software components licensed and installed, license information of the dongle).
•
Click on "PALMRobo SystemInfo ... " in the
Help menu.
A window containing information about your
system will open.
Info:
You can click on the "eMail" entry and in this
way open your e-mail program and send an
e-mail, provided you are connected to the network.
Info:
You can create a file with information on your
system by clicking on the “Export Details” button. You can, e.g. send this file to service at
Carl Zeiss MicroImaging if you have questions
about your system configuration.
22
415109-2614-101 e 09/09
Help and information about PALM RoboSoftware
2.4.5 PALMRobo Information
The PALM RoboSoftware displays messages in certain situations. These appear in the "PALMRobo
Information" window.
•
Click on the "...less" button or the "more..."
button to show or hide the message history.
In this window you can see, along with the current
message, all messages that the program has output since it was last started.
• Click on the "more..." button.
The list with the message history is displayed.
Instead of the "more..." button, a "less..." button
appears.
• Click on the "less ..." button to hide the message history list.
You can open the "PALMRobo Information" window
at any time.
To open the "PALMRobo Information"
window:
•
Double-click in the field at the leftmost end of
the Status Bar.
The "PALMRobo Information" window is opened.
415109-2614-101 e 09/09
23
Status display
2.5 Status display
PALM RoboSoftware "States" window provides you
with details of the current status of your system
components.
To open the "States" window:
•
Double-click in the field at the rightmost end of
the Status Bar.
The system components are shown in the lefthand column, and the current status in the righthand column. Columns "X", "Y" and "Z" provide
information on the current coordinates of each
component.
24
415109-2614-101 e 09/09
Launching settings
3
Settings
When working with PALM RoboSoftware, you will
make various settings. All of your settings will be
retained until they are actively changed again,
even if you exit the program and relaunch it. You
can also save your settings in a file for non-volatile
storage and load them again later.
3.1
All factory default settings can be restored at any
time.
If your system does include database functionality,
you can choose whether to work in Database Mode
or File Mode. PALM RoboSoftware allows you to
specify which mode the program should start in:
- File Mode: the program will start up in File
Mode; database functionality is not available.
- Database Mode with selectable database; when
the program is launched you can select which
database you would like to use, or whether you
wish to work in File Mode.
- Database Mode with pre-selected database:
you can specify a database for PALM
RoboSoftware to open automatically when it is
launched.
This chapter contains information on the following
settings:
- settings for launching PALM RoboSoftware
- changing between the "Basic" and "Advanced"
display options
- switching software over for different slideholders
- turning automatic focusing on and off for saved
and reloaded elements
- settings for the saving of settings
- saving and loading settings.
- unlocking software components purchased
later
- setting a short-term alarm
All other settings are explained in detail elsewhere:
- Settings for moving the stage: chapter 5.3.
- Settings for drawing elements: chapter 7.9.
- Settings for the laser functions:
Chapter 4 "Calibrating the system",
Chapter 11.4 "Specifying laser settings", and
Chapter 13 "MicroTweezers (Option)".
Launching settings
If your system does not include database functionality, you will always be working in File Mode (refer
to chapter 1.7). In this case there is no need to
configure the launch settings.
Info:
The procedure for creating a database is
described in the InformationCenter manual.
To specify which mode PALM RoboSoftware
should start up in:
-
Settings for catapulting elements: chapter 8.6
and chapter 12.
•
-
Settings for saving elements: chapter 9.1.
-
Settings for saving images: chapter 10.
The "Preferences and Configuration" window
opens. The "Configuration" tab will be displayed.
•
415109-2614-101 e 09/09
In the "Adjustment" menu, click on the menu
item "PALMRobo ... ".
In the "Operating Mode" section select the
mode for PALM RoboSoftware to operate in
when launched.
25
"Basic" and "Advanced" display modes
If you have chosen "Database Mode with pre-selected DB":
• Choose the database you wish to work with
(using either the selection list or the button
).
Note!
You can protect your database with a password and user ID (see InformationCenter
manual). If you enter this information here,
then PALM RoboSoftware will be automatically linked with the selected database every time it is launched. This means that
every user who starts PALM RoboSoftware
will have access to your database.
To prevent unauthorized access to the database it is therefore not advisable to enter
the User ID and password here in the launch
settings. These will then be requested each
time PALM RoboSoftware is launched.
•
26
"Basic" and "Advanced" display
modes
If you have the Pro version, you can switch between the "Basic" and "Advanced" display modes.
You can access all functions of the PALM
RoboSoftware with the "Advanced" setting. The
"Basic" setting provides a simplified user interface.
•
In the "Adjustment" menu, click on the menu
item "PALMRobo ... ".
The "Preferences and Configuration" window
opens.
• Select the "Appearance" tab.
If required, enter the relevant User ID and
password.
Note!
It is not possible to switch between File and
Database Mode or to change database from
within PALM RoboSoftware. You should exit
PALM RoboSoftware and restart it if you wish
to change to a different mode or database. If
necessary, you must change the launch settings as described above.
If more than one user is working on the system and using various different databases or
modes, you are advised to choose the startup setting "Database Mode with selectable
DB".
•
3.2
•
Select the required display mode.
Close this window by clicking on "OK".
415109-2614-101 e 09/09
Setting slideholder
3.3
Setting slideholder
With PALM RoboStage II you can use various inserts: up to three slides, 35 mm or 50 mm culture
dishes or capillaries. Several windows in PALM
RoboSoftware contain tabs which depict the insert
or which provide a separate tab for each slide
(refer to chapter 6 "PALM Navigator" or chapter 8
"Working with the "Element List" Window"). The
software must be notified about which insert you
are using.
To set the type of slideholder that is being
used:
•
In the "Adjustment" menu, click on the menu
item "PALMRobo ... ".
The "Preferences and Configuration" window
opens. The "Configuration" tab will be displayed.
•
In the "Stage" section choose the slideholder
you are using.
3.4
Settings for the joystick and the
arrow keys
If you have connected a joystick, you can control
the stage, the PALM RoboMover or the trapping laser beams using the joystick. For this purpose the
joystick must be activated (refer to the end of this
chapter). You can also control the units mentioned
using the arrow keys on the keyboard.
You can set which unit you control using the two
buttons on the joystick or using checkboxes in the
main window of the PALM RoboSoftware. The settings also apply to the arrow keys.
Setting on the joystick:
- Using the bottom left button you can activate
and deactivate the control of the trapping laser
beam 1.
- Using the top right button you can activate and
deactivate the control of the trapping laser
beam 2.
- If the control of both trapping laser beams is
activated, you will move the two beams simultaneously and in parallel.
- You can move the stage using the joystick
when the control of both trapping laser beams
is deactivated.
- You can move the PALM RoboMover using the
joystick when the control of both trapping laser
beams is deactivated and the stage is at the
CapCheck (refer to chapter 5.5). The stage
retains its position during this process.
Setting using the PALM RoboSoftware:
Info:
You can also set the slide using the menu
command "Motion>Goto Loadposition" (refer
to chapter 5.6).
-
-
415109-2614-101 e 09/09
If the checkbox at the top is activated, you will
control the stage.
If the stage is at the CapCheck (refer to
chapter 5.5), all buttons are deactivated and
you will control the PALM RoboMover. The stage
retains its position during this process.
If the checkbox in the middle is activated, you
will control trapping laser beam 1.
If the checkbox at the bottom is activated, you
will control the trapping laser beam 2.
If the checkbox in the middle and the checkbox
at the bottom are activated, you will control
both beams simultaneously and in parallel.
27
Setting the selection of the available laser functions
You can also see which unit is moved using the
joystick or the arrow keys in the Status Bar.
a
a:
b:
c:
d:
b
c
d
Stage or PALM RoboMover
Trapping laser beam 1
Trapping laser beam 2
Both trapping laser beams simultaneously
3.5
In "Cut Tools" select the automatic laser function
you want to apply to your sample (refer to
chapter 11.3).
You can set which laser functions appear in "Cut
Tools". Thus you can, e.g., hide the laser functions
you do not require.
Info:
All automatic laser functions are described in
chapter 11.1.1.
To activate the joystick:
•
In the "Adjustment" menu, click on the menu
item "PALMRobo ... ".
The "Preferences and Configuration" window
opens. The "Configuration" tab will be displayed.
•
•
In the "Adjustment" menu, click on the menu
item "PALMRobo ... ".
The "Preferences and Configuration" window
opens.
• Select the "Appearance" tab.
Click the "Activate Joystick" checkbox to activate the joystick.
•
28
Setting the selection of the available laser functions
In the "Laser function configuration" section
select the laser functions you want to use.
415109-2614-101 e 09/09
Turning on automatic focusing for elements
3.6
Turning on automatic focusing for
elements
In addition to the coordinates describing its position on the drawing plane (x and y coordinates),
each element also has a z coordinate. This z coordinate is represented by the focus value of the motorized microscope. When you save elements, this
z-coordinate is also stored with each element
(refer to chapter 9 for details of how to store elements).
As you approach elements, the focus is automatically set to the appropriate value.
However, focusing is also temperature-dependent.
This means that if the temperature is different
when an element is approached than it was when
the element was drawn, there is a possibility that
the focus setting will be incorrect. Correct focusing
is only possible if the work area has a stable temperature and if your system has been moderated
for a sufficient length of time (see microscope
manual for further information). The fluctuation in
room temperature must not exceed 1 degree, and
your system should be moderated for a minimum
of four hours.
In order to avoid focusing problems you can turn
the automatic mode on and off; the system will
then automatically use a stored value.
3.7
Saving and loading settings
You can save your settings in a file and reload
them for future work. This also means that a backup copy is created of all the settings you have
made.
To save settings, you can
- specify a folder.
When you save your settings later, this folder
will be selected automatically. However, you do
not have to accept this specification. You can
also save your settings later in another folder.
You can also create a new folder when saving.
- specify, whether the settings should be saved
automatically when the program is closed.
To specify a folder for saving the settings:
•
In the "Adjustment" menu, click on the menu
item "PALMRobo ... ".
The "Preferences and Configuration" window
opens. The "Configuration" tab will be displayed.
To turn automatic (stored value) focusing on
and off:
The name of the currently set folder appears in the
"Folder" field of the "Saving Setting Files" section.
•
In the "Adjustment" menu, click on the menu
item "PALMRobo ... ".
The "Preferences and Configuration" window
opens.
• Click on the "Elements" tab.
•
•
Click on the button
.
The "Select new setting folder" window opens. A
directory tree structure is displayed in the window,
and the currently set folder appears underneath in
the "Folder" field.
• Select the desired folder and click on "OK" to
close the window.
Tick the check box "Go to the element z-focus"
if focusing is to be carried out automatically.
415109-2614-101 e 09/09
29
Restoring settings
To save your settings automatically when
exiting the program:
Info:
PALM RoboSoftware essentially saves the settings which are valid on exiting the program.
These settings are automatically loaded at
the next start and remain valid until you
change them or load a previously saved settings file.
The function described here saves your settings in a file that can be reloaded any time even if you have changed the settings in the
meantime.
To save your settings:
•
Click on "Save Settings ... " in the "Adjustments" menu.
The "Save Settings as" window opens. The folder
that you have specified for your settings files
opens automatically.
• Select a different folder to store your settings
files as necessary.
• Enter a name for your file and click on "Save".
The window will close. The new file name will appear in the Status Bar.
To load a settings file:
•
To toggle this function off or on, tick the "Save
Setting file on program exit" check box in the
"Save Setting Files" section of the "Configuration" tab in the "Preferences and Configuration"
window.
Note!
The "Save Setting file on program exit" default setting is only effective if you have already saved your settings when you were
working, or you have loaded a settings file.
If you subsequently change the settings, they
will be saved automatically to the current settings file when you exit the program. (The
name of the current settings file appears in
the Status Bar.)
The current file will also be overwritten.
•
Click on "Load Settings ... " in the
"Adjustments" menu.
The "Load Settings" window opens.
• Select the settings file you want to load and
click on the "Open" button.
The window will close. The name of the settings file
will appear in the Status Bar.
3.8
Restoring settings
You can restore the factory default settings at any
time.
To restore settings:
•
Click on "Load Factory Defaults ... " in the
"Adjustments" menu.
Note!
If you restore the settings, all those settings
which you created will be deleted including any
change in the position of the Laser Marker.
30
415109-2614-101 e 09/09
Short-term alarm
3.9
Short-term alarm
PALM RoboSoftware has a short-term alarm that
you can set to a fixed, pre-defined (1, 2, 3, 5 or
10 minutes) time or set to a freely selectable time
(seconds, minutes). There is also an option to enter a message text. At the end of the specified period a message window is displayed showing any
text that you may have entered.
You may wish to use this short-term alarm as a
timekeeper in time-critical operations or as a reminder to switch off the trapping laser with temperature-sensitive samples or to switch off the
fluorescent illumination with samples sensitive to
fluorescence before the sample begins to suffer
any damage.
To set the short-term alarm:
Alarm Bell
•
3.10 Setting camera parameters
You can connect several AxioCam series cameras
to your microscope. To work with one of the cameras connected, you must select the required camera and make a series of settings in PALM
RoboSoftware. The available settings depend on
the camera selected.
The following examples show the procedure for the
AxioCam MR3.
You can make some important settings in the
"Display Tools". You will find further settings in the
"Live Image" window.
To make the basic camera settings in the
"Display Tools":
•
•
In "Display Tools", click on the "Camera" tab.
Select the required camera in the "Camera"
drop-down list.
Click on the "Alarm Bell" icon button on the Tool
Bar.
The "Alarm Bell" window opens.
AxioCam ICc1
•
•
Select the required time and enter a message if
you want to.
Start the alarm timer by clicking on the "OK"
button.
415109-2614-101 e 09/09
AxioCam MRc/m Rev.3
31
Setting camera parameters
Depending on the camera type the controls of the
supported features are visible in the camera tool
bar:
- Autoconfig: automatic adjustment of exposure
time, white balance, brightness and contrast.
- Auto Live function: Automated and continuous
adaption of camera exposure times of the live
image during e.g. objective change or move of
the sample.
Info:
If you change the exposure time manually the
Auto Live check box is switched off automatically.
-
-
-
-
•
Measure: automatic adjustment of the exposure time. If you are not satisfied with the
result, you can set other values using the arrow
keys.
Gain:
AxioCam ICc1:
The AxioCam ICc1 supports an analog gain
from 0 … 24 dB.
AxioCam MRc/m Rev.3 :
The AxioCam MRc/m Rev.3 uses a gain factor
(0 … 5) as power of 2 for the gain adjustment.
This way gain values of 1, 2, 4, 8, 16, 32 are
possible.
The AxioCam MRc/m Rev.3 supports an additional camera gain (Camera Gain 2x).
White Balance: automatic white balance. You
can perform the automatic white balance using
any microscope image. It is not necessary for
the camera to see a completely empty, bright
image.
Advanced Settings: use this button to open the
"Live Image" window with further settings (e.g.
the beam path settings).
Click on the related button to activate the function resp. enter the required settings.
Gain Factor 0
32
Gain Factor 2
Gain Factor 3
Exposure Time 400ms
To make basic camera settings in the
"Live Image" window:
•
Click on the "Advanced Settings" button in the
"Display Tools", "Camera" tab.
Gain Factor 1
415109-2614-101 e 09/09
Setting camera parameters
This opens the "Live Image" window. You will find
the settings for the camera on the "Camera selection" and (in this example) "AxioCamMR3" tabs.
•
•
Click on the "Adjust" tab.
Select the camera required in the
"Framegrabber" drop-down list on the "Camera
selection" tab.
For some cameras (e.g. for the AxioCam MR3) you
can select whether you want to display a blackand-white image (mono) or a color image (RGB).
• Click the "mono" or "RGB" radio button.
• Select the beam path required from the "Sideport" list.
• In the "Exposure" section set the required
exposure time.
Info:
You can also set the exposure time on the
"AxioCamMR3" tab and in the "Display Tools".
You can also set the exposure time automatically there.
To make further camera settings:
Info:
The following example is based on the
AxioCam MR3. The settings for other cameras
may vary from those described.
•
Click on the "Advanced Settings" button in the
"Display Tools", "Camera" tab.
This opens the "Live Image" window.
• Click on the "AxioCamMR3" tab.
Here you will find the settings for the following parameters:
- Exposure time
- White Balance: you can select a dot in your
image for the white balance, perform the white
balance automatically, set the color temperature to 3200K (default value for halogen light),
or set the portion for each color channel separately.
- Color Saturation: changes color saturation.
Reducing this setting results in a weakening of
the colors leading ultimately to a black/white
image; increasing it results in extremely intensive colors.
You will find further information on the parameters
in the text above and in the AxioVision User´s
Guide.
415109-2614-101 e 09/09
33
Setting camera parameters
•
Click on the "General" tab.
The "Shading Correction" function
You can optimize your live image using the
"Shading Correction" function (recommended for
all camera types).
In this way you can compensate for a reduction in
brightness at the edges of the image. You must
have already set the lamp brightness and also
have performed a white balance.
•
•
Ensure the camera is looking at a completely
empty, light image (move the stage such that
the image is pointing at an area outside of your
sample, or remove the slide).
Click on the "Shading Correction" button.
Here you will find the settings for the following parameters (you will find detailed information on
these parameters in the AxioVision User´s Guide
and in the AxioVision online help):
- Digital Gain
- Image Orientation
- Black Reference
- Shading Correction
- Sharpening
- Shutter
34
415109-2614-101 e 09/09
Set image parameters
3.11 Set image parameters
You can modify the way in which your microscope
image is displayed in order to make any areas that
are of particular interest for your work stand out
more clearly. You may, for instance, want to run
an analysis under "AxioVision" or "Definiens" (see
chapter 1.9.2) because of the clearer results they
produce.
"Display Tools"
The "Display Tools" are shown in the top left of the
program window in the standard configuration of
the PALM RoboSoftware.
• Click on the "Display" tab.
Info:
Any changes made here will only affect the
image on the screen, and not the original
camera image, in other words you are not
reconfiguring any camera settings.
Info:
You should bear in mind that one consequence of changing the image parameters is
that there may be a delay before the image
appears on the screen, because each time a
change is made (e.g. the stage is moved) the
original camera image must be recalculated.
So it is worth trying to obtain a optimum result
from the camera in the first place. The settings can
be seen immediately in the live image, but cannot
be seen in the Navigator (refer to chapter 6) until
the image has been scanned.
You can change the following parameters:
- Contrast: When contrast is increased, light
parts of the image become lighter and dark
parts become darker, i.e. differences in brightness are accentuated. Reducing the contrast
has the opposite effect.
- Brightness: the entire image becomes lighter or
darker. You should be aware that if the brightness setting is altered too much the light parts
of the image may become completely white or
the dark parts completely black.
- Gamma: corrects the linear nature of the
brightness pattern between black and white.
- Black and white point: in this way you can
define the percentage for the brightest and
darkest pixels that will be displayed as completely white or completely black.
On the tab there is a histogram with a gradation
curve and several buttons. The settings are described below.
"Live Image" window
•
Click on the "Advanced Settings" button in the
"Display Tools", "Camera" tab.
The settings are in the "Display Tools" and in the
"Live Image" window.
This opens the "Live Image" window.
415109-2614-101 e 09/09
35
Set image parameters
•
Click on the "Display" tab.
On the tab there is a histogram with a gradation
curve and several sliders and buttons.
To change how the histogram is displayed:
•
Click on the "Log" button to switch between
logarithmic and linear display of the histogram.
The "Skip" function is particularly useful if there
are large, very bright and/or very dark areas in
your microscope image. In such cases the histogram is primarily defined by these pixels. In the
remaining area of the histogram it is very difficult
to detect differences. Using "Skip", these extreme
values in the histogram are hidden and the histogram is re-scaled.
• Click on the "Skip" button to hide the brightest
and darkest pixels in the histogram.
To set brightness, contrast and gamma using
the histogram:
If you move the square at the bottom left,
particularly the darker areas of the image
will be changed.
If you move the square at the upper right,
particularly the brighter areas of the image
will be changed.
Other squares (2, 4): the shape of the gradation curve will be changed. The brightest
and darkest points in your image will retain
their brightness, however the brightness
curve between black and white will no
longer be linear (change to the gamma
value).
To have the software find the optimal parameters automatically:
•
Click on the "BestFit" button.
To reset the modified settings:
•
Click on the "Linear" button.
To set the black point and white point:
•
1
•
36
2
3
4
5
Click on one of the black squares on the histogram and drag it up, down, to the left or to the
right with the mouse button pressed.
Moving a square has the following effects:
- Square in the middle (3): the gradation
curve is moved in parallel. In this way you
will change the brightness of the image
evenly over all areas, i.e. the entire image
will become brighter or darker.
Movement to the left: the image will become
brighter; very bright parts of the image may
become completely white.
Movement to the right: the image will
become darker; very dark parts of the
image may become completely black.
- Squares at the end of the curve (1, 5): the
gradation curve retains its shape, but
becomes steeper or shallower. In this way
you can change the contrast and the brightness.
Select the required value in the "Thousandths"
field.
The histogram will be adjusted such that the selected number of thousandths (in the image example 5 thousandths) of the brightest pixels in the
image will be set to completely white and the darkest pixels in the image will be set to completely
black.
To set the gamma value to 0.45:
•
Click on the "G 0.45" button.
At a gamma value of 0.45 you will obtain realistic
color reproduction with the AxioCams.
415109-2614-101 e 09/09
Displaying color and brightness values for the micro-
To set the brightness, contrast and gamma
using the sliders:
(only in the "Live image" window)
3.12 Displaying color and brightness
values for the microscope image
1 Brightness
2 Contrast
3 Gamma
•
Click on the "Advanced Settings" button in the
"Display Tools", "Camera" tab.
The "Live Image" window is displayed.
• Select the "Measurement tools" tab.
1
•
2
3
Drag the slider to the required value.
To display the brightest and darkest areas of
your image:
•
Click on the "Min/Max" button.
To save and load a setting:
•
Click on the "Save" button.
The current settings are saved. A further "Restore"
button appears.
•
If you have the changed the settings after saving and want to return to the previous settings:
click on the "Restore" button.
•
•
Click on the "Pickup" button in the "Pixeldata"
section.
Move the mouse pointer to the point on the
microscope image for which you want to display
the color values and brightness and click on it.
The fields "Red", "Green" and "Blue" show the
brightness values for the three primary colors and
their ratio to one another, while the "Brightness"
field shows the brightness of the selected point in
the image.
To display the lowest and highest brightness
value for the entire image:
•
415109-2614-101 e 09/09
Click on the "Refresh" button in the
"Imagedata" section.
37
38
415109-2614-101 e 09/09
Preliminary remarks
4
Calibrating the system
Note!
The system is calibrated by the manufacturer
for the objectives with which it is supplied. It is
therefore not usually necessary to recalibrate.
Recalibration is only necessary, if, despite exact
positioning of the Laser Marker and correct choice
of objective, differences occur between the drawn
contours and those processed by the laser.
4.2 Setting the magnification
Before you start work, you must set the microscope magnification in PALM RoboSoftware.
To set the required magnification:
Carry out a recalibration as described in
chapters 4.1 to 4.5 and 4.7. You can reset the calibration to the factory default setting at any time
(refer to chapter 4.6 or 4.8).
4.1 Preliminary remarks
To achieve the desired results with the laser functions, the following points must be fulfilled:
- the program must be set to the microscope's
magnification setting,
- and the movement of the stage and the trapping laser (if you have installed a system with
Laser Beam Positioning) must have been calibrated,
- the Laser Markers (in the default setting, the
green triangle or the red and green squares in
the middle of the monitor) must have been
aligned with the laser foci, and
- if the magnification is changed, any deviations
through the objectives must be compensated
(Objective Offset).
Calibrating with the software establishes a relationship between the dots in the image and the actual positions of the stage. This ensures that
automatic laser functions are performed at precisely the required locations.
The Laser Markers must mark the points where the
laser beams strike the sample. To check the correct setting of the Laser Markers, you must release
the laser. Hold a sample that you no longer need
for examination, or one containing areas that are
no longer needed for examination ready. A slide
that has been colored with a black felt pen is particularly helpful for setting and checking the Trapping Laser Marker.
•
Select the required magnification in the
"Microscope Tools", "Common" tab.
Info:
The available selection depends on which objectives are fitted to your microscope and
whether they have been configured in the MTB
2004.
•
Adjust the microscope to the desired magnification (only necessary for a manual microscope; on motorized microscopes adjustment is
automatic).
Note!
Note that the trapping laser can only be used in
conjunction with 63x and 100x lenses.
Note!
To obtain a correct display of the drawn elements and to achieve a correct laser function,
the setting in the Microscope Tools must match
the magnification that is selected on your microscope. If the settings do not correspond to
each other, the actual cut lines and catapult
points of the laser will not be correctly displayed on the monitor.
You must check and if necessary correct the position of the Laser Marker before you start, after a
relaunch and after a change in the magnification.
415109-2614-101 e 09/09
39
Setting the laser marker
4.3 Setting the laser marker
To determine the focus point of the cutting
laser:
•
The Laser Markers are shown as follows with the
default program configuration:
- blue triangle (Cutting Laser Marker)
- red "Y" (Laser Marker for trapping laser
beam 1)
- green square (Laser Marker for trapping laser
beam 2; only DuoFlex/TwinFlex system)
The apex (of the triangle) or the center (of the "Y",
squares) should indicate the point at which the
respective laser beam will strike the sample upon
release.
Note!
PALM RoboSoftware calculates the cutting
functions of the cutting laser from the position
of the Laser Marker. The position of the Laser
Marker should therefore always match that of
actual laser focus. Only then the correct results
can be achieved with the automatic laser functions. You should therefore check the position
of the Laser Marker before you start work. For
the trapping laser also, you can only achieve
accurate results if the Trapping Laser Marker is
exactly aligned with the laser focus.
Remember that the position of the Laser Markers may vary for use with different objectives.
To set a Laser Marker position correctly, you must
release the laser and determine its actual focus
point. Then you must set the associated Laser
Marker to the focus point of the laser.
In order for you to be able to check the position of
a Laser Marker and adjust it if necessary, the Laser
Marker must be displayed (refer to chapter 2.2).
Using any of the methods described in
chapter 5 move the stage so that an area of
your sample which you do not require for your
work appears in the middle of the monitor, or
insert a membrane-coated slide.
Stage Mode
•
•
•
Switch to Stage Mode (click on the icon "Stage
Mode" in the Tool Bar).
Release the laser with a single short application
of pressure to the footswitch.
Check the result. You should see a small,
almost circular area where material has been
removed. This is most easily visible on the
membrane.
Info:
In some circumstances you will not see any effect from laser activation, or there will be a
large hole in your sample. In this case, check
that there is nothing obstructing the laser
beam in the microscope's laser light path or
conduct preliminary tests to determine the optimum settings for laser energy and focus. For
instructions on how to do this, refer to
chapter 11.5.
To determine the focus point of the trapping
laser:
•
•
•
Insert a slide that has been colored with a black
felt pen.
Switch the trapping laser on briefly (toggle the
"On/Off" button in the right border of the program window to switch the laser on and off).
Check the result. You should see a small,
almost circular area where color has been
removed.
Info:
In some circumstances you will not see any effect from laser activation, or there will be a
large hole in your sample. In this case, check
that there is nothing obstructing the laser
beam in the microscope's laser light path or try
again with different settings for laser power
and focus (refer to chapter 13.2).
40
415109-2614-101 e 09/09
Calibrating the movement of the stage
To set the position of a Laser Marker:
•
•
•
In the "Laser" menu, click on the menu item
"Position Laser-Marker".
Click on the name of the Laser Marker whose
position you want to change.
Click in the center of the laser focus for that
laser beam.
4.4 Calibrating the movement of the
stage
Calibration is done in several steps. PALM
RoboSoftware will guide you through this process.
• Insert a sample and focus the image.
• Set the chosen magnification for the microscope, as described in chapter 4.2.
• In Stage Mode, choose a low or a medium
speed setting for the stage (refer to
chapter 5.3).
Note!
Do not use the "Invert Stage Motion" function
when calibrating (refer to chapter 5.1.1).
Note!
Be sure to assign the Laser Markers to the correct laser beams.
•
Click on "New Calibration" in the
"Adjustments>Calibration" menu.
A submenu will open.
• Click on the menu item "Stage".
• Look for a dot, preferably as small but as significant as possible, in your image.
Note!
The farther the dot is from the image center
(both vertically and horizontally), the more
accurate your calibration will be.
•
Note this dot and click on it with the cursor tip.
The cursor will disappear and the program will
switch automatically to Stage Mode.
• Use the mouse to move your selected point to
the crosshairs at the image center and click the
left mouse button.
The cursor will reappear; the program automatically switches out of Stage Mode. The following
message will appear: "Calibration is finished.
Check position of Laser Marker". This message will
disappear automatically after a few seconds.
• Check the position of the Laser Marker as
described in chapter 4.3.
You can check the calibration by drawing an element and activating the automatic laser "Cut"
function. Calibration is correct when the cut line
exactly follows the element you have drawn (for
415109-2614-101 e 09/09
41
Calibrating the offset
instructions on working with these functions (refer
to chapter 7 "Drawing and measuring" or
chapter 11 "Cutting and Catapulting").
Note!
The calibration only applies to the camera selected and the magnification selected before
the calibration. If you intend to work with various magnifications, you must recalibrate for
each change of magnification.
4.5 Calibrating the offset
Note!
In a TwinFlex system (Double Beam system
with two movable laser beams) both offsets
(Trap-1 and Trap-2) must be calibrated.
Recalibration is necessary if the position of the Laser Marker and the active laser position do not behave together in a proportionally consistent
manner, when in motion. If they do move together
in a proportionally consistent manner, but do not
coincide, only the Laser Marker must be readjusted (refer to chapter 4.3).
•
•
•
Activate the trapping laser (click on the "On"
button on the right border of the monitor).
Adjust the power and focus so that you can see
an effect of the laser beam (if you are using a
slide colored with a black felt pen, a hole in the
colored coating will be visible at the appropriate
settings).
Switch to Trap-1 Mode (click on the item "Trap
1 Mode" in the "Motion" menu).
The cursor will disappear; every movement of the
mouse will be reflected in a movement of the laser
beam.
• Move the laser beam by dragging the mouse
into a corner of the image in your image window.
Note!
The farther the dot is from the image center
(both vertically and horizontally), the more
accurate your calibration will be.
•
Double click there to exit Trap-1 Mode again.
•
Click on "New Calibration" in the "Adjustments>Calibration" menu.
Calibration is done in several steps. PALM
RoboSoftware will guide you through this process.
Note!
Before you carry out the calibration, you must
have set the Laser Markers as described in
chapter 4.3.
•
Insert a sample and focus the image.
Info:
The Laser Beam Positioning can only be calibrated with the trapping laser switched on.
Accordingly, you should use a sample that you
no longer need for your work.
A slide that has been colored with a black felt
pen is particularly suitable.
•
Set the magnification selected in the microscope in "Microscope Tools" as described in
chapter 4.2.
Note!
Note that you can only use the trapping laser in
conjunction with oil objectives (60x), 63x and
100x.
•
•
•
42
If it is hidden, enable the screen center display
(click on item "Screen Center" in the "View"
menu).
For the Laser Beam Positioning, choose a low to
medium speed setting ("TrapXY"; refer to
chapter 13.11.1).
Choose low power and focus settings for laser
beam "Trap 1" as described in chapter 13.2.
A submenu will open.
• Click on the menu item "Trap-1".
• Click on the actual position of the laser beam
with the mouse.
The program will switch automatically to Trap-1
Mode.
• Use the mouse to move the laser beam to the
crosshairs at the image center and click the left
mouse button.
The cursor will reappear; the program automatically switches out of Trap-1 Mode.
• If you purchased a system with two movable
laser beams, calibrate the second laser beam in
a similar manner to the first laser beam.
Note!
The calibration only applies to the camera selected and for the magnification selected before
the calibration. If you intend to work with various magnifications, you must recalibrate for
each change of magnification.
415109-2614-101 e 09/09
Reset calibration
4.6 Reset calibration
4.7 Adjusting the Objective Offset
You can reset the calibration to the factory default
setting at any time.
If you have drawn elements with one magnification and then select another magnification (a different objective), the microscope image on the
monitor may appear to be shifted slightly, although the stage has not been moved. Your elements are no longer in the correct position. The
automatic laser functions will then not process exactly the areas you wish.
You must compensate for this difference by setting
the Objective Offset.
•
Click on "Factory Calibration" in the
"Adjustments>Calibration" menu.
Note!
These differences between the objectives are
adjusted for the objective supplied by a factory
default setting for the Objective Offset.
You only need to adjust the Objective Offset if
the elements are moved when altering the
magnification.
To adjust the Objective Offset:
•
•
•
•
•
Select the Cut laser function (refer to
chapter 7.3.1).
Draw an arbitrary cut line at the magnification
currently set (e.g. using the Freehand Tool).
Trigger the cutting laser (refer to
chapter 11.7).
Check the cut line. It should be exactly aligned
with the cut line drawn. If not: adjust the Laser
Marker as described in chapter 4.3 and restart
from the beginning.
Choose the desired magnification.
Pointer Tool
•
Select the Pointer Tool in the Graphic Toolbar.
•
Click on the menu item "New Reflector-Offset"
in the "Adjustments>Calibration" menu.
All available elements are automatically selected
and surrounded by a selection rectangle (the selection rectangle is indicated by a white line).
Info:
If you have drawn elements that are currently
positioned outside of the monitor section, some
or all of the borderlines of the selection rectangle will also be outside the monitor section. In
this case the border lines are not visible.
415109-2614-101 e 09/09
43
Resetting the Objective Offset
•
Click on any dot within the selection rectangle
and hold the mouse button down.
Note!
If you click inside the rectangle and inadvertently do not hold the mouse button down, the
selected elements will not be moved to the correct position. In this case, reset the Objective
Offset as explained in chapter 4.8 and start the
operation again.
•
Align the element you cut previously using the
laser (with the mouse button pressed) with the
cut line and release the mouse button.
Then, even elements that are outside the current
monitor section will be moved.
4.8 Resetting the Objective Offset
You can restore the default factory settings for the
Objective Offset at any time.
To reset the Objective Offset:
•
Click on the menu item "Factory ObjectiveOffset" in the "Adjustments>Calibration"
menu.
Note!
The Objective Offset will also be reset if you restore the factory default settings (refer also to
chapter 3.8).
44
415109-2614-101 e 09/09
Movement types
5
Positioning the stage
PALM RoboSoftware offers various methods of
moving the stage:
- with the mouse (Stage Mode and Scroll)
- with the scroll bars below and to the right of the
microscope image
- with the keyboard (arrow keys),
- with the joystick
- via commands that target predefined positions
or elements (positioning)
- with the PALM Navigator (refer to chapter 6.9).
When the automatic cutting laser functions are
started, the stage is automatically moved along
the defined cut lines or from dot to dot.
You can set the speed to suit the various methods
of moving the stage (refer to chapter 5.3).
In order to prevent the stage from being moved inadvertently, you can freeze its movement in any
position, ie, disable all functions that would cause
the stage to move.
The program distinguishes accordingly between
the various movement modes and the Freeze
Mode. The active mode is displayed on the Status
Bar. You can and must disable Stage Mode and
Freeze Mode yourself. To use the other movement
methods you must be in Cursor Mode: the modes
are automatically entered as soon as you select
the appropriate functions and automatically exited
at the end of the movement task.
5.1
Movement types
5.1.1 Positioning the stage with the
mouse: Stage Mode
In Stage Mode you control the movement of the
stage synchronal with the mouse. Each mouse action is translated into a movement of the stage.
If you are using an objective that inverts the image, a mouse movement to the right in Stage
Mode will appear on the monitor as a movement to
the left. If you select "Invert Stage Motion", the
stage will be moved in the opposite direction to the
mouse movement. In this case the motion of the
image on the monitor is in the same direction as
the movement of the mouse.
To invert stage movement:
•
Click on the menu item "Invert stage motion" in
the "Motion" menu to switch the function on or
off.
Info:
You must invert the movement of the stage before switching to Stage Mode. You cannot access this command when you are in Stage
Mode.
You can immediately interrupt the movement of
the stage, for example in case of an emergency.
Note!
Do not use the function "Invert stage motion"
if you want to calibrate the system.
The speed with which the stage is moved can be
programmed separately for each movement type.
To switch to Stage Mode:
•
Click on the menu item "Stage mode" in the
"Motion" menu.
Info:
The cursor is not displayed in Stage Mode. In
Stage Mode you can only change the speed and
energy or power of the stage and the focus of
the laser by means of keyboard commands
(note that you can only change the settings for
the laser beam that is selected in "Laser
Tools"). You cannot access any other functions.
To switch from Stage Mode back to Cursor
Mode:
•
415109-2614-101 e 09/09
Click once with the left mouse button.
45
Movement types
5.1.2 Positioning the stage with the
mouse: Scroll
5.1.4 Positioning the stage with the
keyboard
In Cursor Mode, you can use the scroll function to
move the stage.
• If you want to move the stage horizontally, vertically, or diagonally, move the cursor to an
edge of the image or a corner of the image outside the Scroll Rectangle (but still within the
image itself).
Info:
If the Scroll Rectangle is not displayed, you can
activate it by clicking on "Scroll Rectangle" in
the "View" menu.
Scrolling with the mouse also works when the
Scroll Rectangle is not displayed.
•
•
Info:
If the stage is at the CapCheck (refer to
chapter 5.5), the button will not be available.
In this case you will not move the stage using
the arrow keys, but your capture device.
Press and hold the mouse button down.
The stage is moved in the direction of the arrow.
You can also change the direction of movement
during the movement itself by moving the cursor
from an image edge towards an adjacent corner or
vice versa.
• Release the mouse button when you have
found the required area of your sample and
positioned it in the correct place.
The "Scroll" function is only active as long as the
cursor is outside the Scroll Rectangle. Movement
of the stage is therefore also stopped when you
drag the cursor into the Scroll Rectangle with the
mouse button depressed.
5.1.3 Positioning the stage with the
scroll bars
Click on the button at the top right edge of the
program window in the "Arrow keys-/Joystick
mode" area.
•
Press one of the four arrow keys. The stage will
continue to move until you release the key.
If you press two arrow keys simultaneously (eg,
↑→), you can also move the stage diagonally.
5.1.5 Positioning the stage with the
joystick
You can move the stage in any direction using the
joystick.
Note that the joystick must be activated to be able
to use it (refer to chapter 3.4).
Scroll bars are located on the bottom and right
edges of the microscope image. With these you
can move the stage.
• Click once on one of the arrow icon buttons
until the stage has reached the desired position, or
drag the position cursor on the scroll bar to the
desired position.
If you want to move the stage in steps of one image width or height:
• Click beside the position cursor on the scroll
bar.
•
Click on the button at the top right edge of the
program window in the "Arrow keys-/Joystick
mode" area.
Info:
If the stage is at the CapCheck (refer to
chapter 5.5), the button will not be available.
In this case you will not move the stage using
the joystick, but your capture device.
The speed of the movement is dependent on the
deflection of the joystick. The speed you have set
for the "Scroll" function (refer to chapter 5.3) is
also the maximum speed for movements using the
joystick.
46
415109-2614-101 e 09/09
Movement types
5.1.6 Positioning the stage with the
Centering Tool
5.1.7 Moving the stage during an automatic cutting laser function
The Centering Tool can be used to shift any point
on the microscope image into the center.
As soon as you start the cutting laser, the stage is
automatically moved along the defined cut lines or
from point to point. You do not have to select any
particular type of movement in this case.
5.1.8 Further possibilities for
positioning the stage
•
Click on the top button at the right edge of the
program window in the "Arrow keys/Joystick
mode" area.
Info:
If the stage is at the CapCheck (refer to
chapter 5.5), the button will not be available.
Center
•
•
Click on the Centering Tool in the graphics toolbar.
Click on the point in the image that is to be
moved to the center.
The Centering Tool will continue as the active tool
until you click on any other tool on the graphics
toolbar.
Aside from the mentioned possibilities, you can
move or precisely position the stage using the following methods:
- Centering elements: The stage is so positioned
that a previously selected element will be displayed in the center of the monitor (refer to
chapter 7.5).
- To move to the Load Position (refer to
chapter 5.6). When the stage is in the Load
Position, you can easily change the slide and
the slideholder.
- To move to the CapCheck (refer to
chapter 5.5). When the microscope stage is at
the CapCheck, you can observe catapulted
samples in the collection device under the
microscope.
- Centering the stage (refer to chapter 5.7)
- Navigating with PALM Navigator: With one
mouse click, you can freely center positions on
the monitor (refer to chapter 6.9).
Note!
Do not confuse the Centering Tool with the
Oneclick LPC tool. The Oneclick LPC tool also
moves the point you click on to the center.
However, it also simultaneously triggers a
laser pulse (refer to chapter 11.10).
415109-2614-101 e 09/09
47
Stopping the stage in an emergency
5.2 Stopping the stage in an emergency
5.3 Setting speed
You can stop the movement of the stage at any
time, for example in an emergency or in the event
of a malfunction.
You can set the speed separately for every type of
stage movement:
- Stage: movement speed in Stage Mode (move
using mouse).
- Arrow (keys): movement speed using arrow
keys. For movement with the arrow keys (as
was described for "Position") you can set higher
speeds than for the other movement types.
This movement type is therefore particularly
suitable for rapid movements over larger distances.
- Scroll: speed of the movement during scrolling
(movement of the stage by pressing the left
mouse button outside the Scroll Rectangle) as
well as maximum speed for the movement of
the stage using the joystick.
- Position: speed for automatic targeting of elements and defined positions (CapCheck, Load
Position) and speed for automatic laser function
"LPC"; the defined dots for this function are targeted sequentially at the set speed. For this
movement type (as was described for "Arrow"),
you can set much higher speeds than for other
movement types.
- Cut: speed for automatic laser function "Cut".
- LPC: speed for automatic laser function
"AutoLPC"; the defined dots for this function
are targeted sequentially at the set speed.
To stop all current movement:
The quickest way to stop all movements is to use
the following commands:
Stop
•
Click on the "Stop" icon button in the Tool Bar
(in PALM RoboSoftware main window or in the
"Element List" window – see chapter 8),
or
• Press "Esc" on the keyboard (you can only use
these commands if PALM RoboSoftware main
window is the active window).
In addition, you can also stop the movements using a menu command:
•
Click on the menu item "Stop" in the "Motion"
menu (in PALM RoboSoftware main window or
in the "Element List" window).
All current operations are stopped immediately.
Repair the malfunction if necessary.
Info:
The "Stop" function ends all ongoing actions,
including any ongoing cutting laser functions
and movements of the capture device.
The "Stop" function also switches off the trapping laser if necessary.
You can save the speed settings together with other parameters in a settings file (refer to
chapter 3.7).
You have two options for setting the movement
speed of the stage:
- with the "Speed Tools" tool
- with keyboard or menu commands: (Speed
slower/Speed faster). These setting options are
intended particularly to allow changes with a
movement operation in progress.
You can set the speeds of all types of movements
with the "Speed Tools" tool. Speed changes with
keyboard or menu commands always refer to the
type of movement that is currently selected in the
"Speed Tools" tool.
Note!
The settings that you enter always apply to
the magnification that you have set in the
program. As soon as you have set another
magnification, the values that were last used
or the factory defaults are automatically applied. Therefore, prior to setting the speed,
first select the magnification that you want to
work with.
48
415109-2614-101 e 09/09
Setting speed
Before you initiate a movement of the stage, all
three setting options are available for both movement types. While the stage is moving, you can
only change the speed of the "Cut" movement type
using the "Speed Tools" tool. In the case of the
other movement types, the speed can be changed
with keyboard commands.
To change the speed of the "Speed Tools"
tool:
Info:
If you have selected too fast a speed for Cut
Mode, it may happen that your sample is not
cut through completely. In this case, reduce
the cut speed.
To select the unit for speed setting:
•
For the speed setting you can select between two
different units: percent and µm/sec.
•
In Speed Tools select the movement type for
which you want to change the speed.
In the "Adjustments" menu, click on the menu
item "PALMRobo ... ".
The "Preferences and Configuration" window with
the "Configuration" tab opens.
•
In the "Metric" section, click on the radio button
"Logic" (units: percent) or "Micrometer / sec"
(units: µm/sec) .
The Speed Tool for the selected movement type is
shown (in the example shown above: Scroll). The
maximum selectable speed is dependent upon the
chosen movement type.
• Enter the desired value.
To change the speed with menu commands
or with keyboard shortcuts:
•
•
415109-2614-101 e 09/09
If you want to reduce the speed, press key
combination Ctrl+S, or
click on the menu item "Speed Slower" in the
"Motion" menu.
If you want to increase the speed, press key
combination Ctrl+F, or
click on the menu item "Speed Faster" in the
"Motion" menu.
49
The Reference Position of the stage
Info:
Changes with keyboard or menu commands
always refer to the type of movement that is
currently selected in the "Speed Tools" tool.
Therefore, activate the tool display before carrying out any speed changes with keyboard
shortcuts or menu commands. Otherwise you
will not be able to see which movement type
the changed speed setting will affect.
Info:
Using the keyboard commands you can change
the speed in the following cases, even during a
movement:
- During an automatic laser operation of type
"Cut".
- If you are in the Stage Mode.
5.4 The Reference Position of the stage
In the drawing plane, PALM RoboSoftware requires
a reference position for calculating the coordinates
of your elements. This reference point with its coordinates 0/0 is stipulated by PALM RoboSoftware:
With each start of the system the stage is moved
to the end positions in x- and y-direction. This position is defined as Reference Position.
The Reference Position is retained for as long as
the controller unit remains switched on, and even
if you shut down and restart PALM RoboSoftware.
The point of origin is particularly important when
you have drawn elements and have saved them
for later use. The automatic positioning of the
stage to the Reference Position ensures that on reloading your elements they will appear at the same
positions at which you drew them. To work with
saved elements, you need only insert the respective sample into the slideholder and reload your elements.
Note!
Make sure you reinsert the slides in the correct order and that you insert each slide exactly as you had it inserted during previous
processing, i.e. not tilted or even rotated
180°.
Info:
It may also happen that the drawn elements
shift after you change objectives: If the optical
axes of both objectives do not match exactly,
the microscope image on the monitor will be
displayed as slightly offset. In this case, you
will have to redefine the Objective Offset (see
chapter 4.7).
50
415109-2614-101 e 09/09
CapCheck
To set the Reference Position of the stage:
Normally it is not necessary for you to reference
the stage. If, however, a disruption should occur
(e.g., you may have moved the stage unintentionally by hand), you can reset the Reference Position
of the stage:
•
•
5.5 CapCheck
When you catapult samples into a collection device
using the automatic laser functions, you can then
observe the contents of the collection device under
the microscope. For this purpose PALM RoboStage
has a notch through which the microscope objective can be moved upwards. The corresponding
position of the stage is referred to as the
CapCheck. You can automatically target the
CapCheck with a menu command.
Caution!
Set the objective to the lowest possible position, before you move the stage to or from the
CapCheck! If the objective is set too high, the
stage will collide with it. This can cause serious
damage to the objective and to your sample (if
you have purchased a system with motorized
microscope, the objective is moved automatically).
Click on the menu item "Initialize Unit" in the
"Motion" menu.
Click on the menu item "Stage" on the submenu.
Note!
Note that the Reference Position for the stage
has no relationship to the definition of a
Reference Position for the movable trapping
laser beam (refer to chapter 13.4).
To move the stage to the CapCheck:
•
•
If you do not have a motorized microscope:
Move the objective down as far as possible.
Click on the menu item "Goto CapCheck" in the
"Motion" menu.
Note!
To avoid damage to the objective or to the
sample: Move the stage back again to the
original position, after observing the collection vessel.
For this proceed solely as described below.
To return the stage to its original position:
•
•
415109-2614-101 e 09/09
If you do not have a motorized microscope:
Move the objective down as far as possible.
Click on the menu item "Goto CapCheck" in the
"Motion" menu.
51
Load Position
5.6 Load Position
To return the stage to its original position:
When the stage is in the Load Position, you can
easily change the slide and the slideholder.
Caution!
Set the objective to the lowest possible position, before you move the stage to or from the
Load Position! If the objective is set too high,
the stage will collide with it. This can cause serious damage to the objective and to your sample (if you have purchased a system with
motorized microscope, the objective is moved
automatically).
To move the stage to the Load Position:
•
•
If you do not have a motorized microscope:
Move the objective down as far as possible.
Click on the menu item "Goto Loadposition" in
the "Motion" menu.
The stage is moved to the Load Position. The
"PALMRobo Select Holder" window will open.
•
•
If you do not have a motorized microscope:
Move the objective down as far as possible.
•
Click on "Return to the working area" in the
"PALMRobo Select Holder" window.
5.7 Centering the stage
You can move the stage to the center point of the
area in which it can be moved using a menu command.
•
•
Drag the cursor on item "Goto Center" in the
"Motion" menu.
Click on the menu item "Stage".
The stage is centered.
Change the slideholder and/or the slide and
choose the corresponding entry from the
"Holder" field.
Note!
To avoid damage to the objective or to the
sample: Move the stage back again to the
original position, after changing the slide and
the slideholder.
For this proceed solely as described below.
52
415109-2614-101 e 09/09
6
PALM Navigator
The PALM Navigator will provide you with an overview of your sample or a section of your choice.
First of all, scan your sample. A picture of the sample is then displayed in the PALM Navigator window.
By clicking at any point in scanned image, you can
position the stage at this point and thus display
particular areas of your sample on the monitor
very rapidly.
If your system is equipped with the "Definiens"
software or AxioVision image analysis, you can
analyze the scanned section directly using a script
or a set of rules (see chapter 6.11). To facilitate
analysis, the "Live Image" window enables you to
modify various parameters for the image (contrast, brightness, saturation, color, gamma value)
(see chapter 3.10).
The Navigator window includes the "Navigation"
and "Scan" tabs. The "Navigation" tab displays an
image of your slideholder. The "Scan" tab shows
the area to be scanned or the current scan.
A scan is created by sections - the stage is positioned then an image of the area visible in the
PALM RoboSoftware main window is recorded. The
stage is then moved so that the immediately adjacent section of your sample is visible. Another image is recorded. This process is repeated until your
entire sample or the section you specified has
been scanned. An individual scan section is
referred to below as a "tile".
You can save and reload the scan, either in its
entirety or with the individual tiles. The scan is
saved with its coordinates. This means that you
can use the reloaded image in exactly the same
way as with a new scan.
You can set a parameter to specify that your elements will appear on the scans.
If you have used a corresponding slideholder in
PALM RoboStage II, you can also make scans of
several samples and switch between them in the
view.
First of all, produce what is known as an overview
scan. Within this overview scan, you can select a
section if required and then scan it with greater
magnification (section scan).
415109-2614-101 e 09/09
53
Starting PALM Navigator
6.1
Starting PALM Navigator
6.2
Making the settings for a scan
To prepare a scan:
•
•
Click on "Navigator Window" in the "View"
menu, or
Info:
If the display is set to non-linear, the individual
tiles of the image in the Navigator may be
displayed with varying brightness in certain
circumstances.
press the function key F4.
The "Navigator" window with the "Navigation" tab
opens. This contains an image of your slideholder
(see Figure on previous page; shows 3x1.0 slideholder, which can hold three slides; slide 2 is currently selected here).
In the "Display Tools" in the PALM
RoboSoftware main window, select the
"Display" tab and click on "Linear".
•
Choose the desired magnification.
Info:
The duration of the scan is dependent upon the
magnification set on the microscope and the
size of the area to be scanned (Region Of Interest). Set to a high magnification (e.g., 100x),
the scanning process would take several hours.
Therefore, you should adjust the magnification
set on the microscope and the size of the region of interest to one another - first select a
low magnification on the microscope, e.g. 2.5x
or 5x. In this way, you can produce an overview scan within a few minutes.
Info:
Note that the type of slideholder must also be
set in PALM RoboSoftware (see chapter 3.3).
Info:
If you are working in Database Mode, the slides
for which you have not yet entered any data
(see chapter 7.2.2) are shown shaded.
Note!
Make sure that you have set the same magnification on the microscope as is in PALM
RoboSoftware (see chapter 4.2; with a motorized microscope, the magnification will be
automatically set to that selected in the software).
•
Insert the slideholder.
•
Focus the image.
•
Click on the "Set Workpos" button in the
Microscope Tools (motorized microscope only;
see chapter 15.1.3).
•
If necessary, select the desired slideholder on
the "Navigation" tab in the "Navigator" window.
Click on the slide, or
click on one of the "Slide Navigation" arrow buttons in the top right to switch from one slide to
another.
54
415109-2614-101 e 09/09
Making the settings for a scan
•
Click on the "New Slide" button to delete an
image already displayed.
•
Repeat this process for the other slideholder
positions if you want to produce scans of
several samples.
•
Move the stage such that the top left corner of
the area to be scanned is displayed in the
middle of the monitor.
•
Click on the "Set ROI-top-left" button.
How to specify the area to be scanned:
•
You can specify areas to be scanned for all three
slideholder positions. Carry out the steps described below for all desired positions:
Move the stage such that the bottom right corner of the area to be scanned is displayed in the
middle of the monitor.
•
Click on the "Set ROI bottom-right" button.
•
Using the mouse drag a rectangle over the
image of the slide that covers the area you
want to scan.
If you only want to scan a small section from your
sample or you do not know exactly where the area
of interest is located, proceed as follows:
415109-2614-101 e 09/09
The rectangle selected is displayed on the image of
the slide. In the Navigator window, controls
appear for specifying the type of focus correction
during the scan and the type of scan (see Figure
below).
55
Making the settings for a scan
How to set a focus correction during the
scan:
How to specify the type of scan:
As soon as you execute the scan command, the
sample will be scanned, section-by-section. For
this, the focus setting will be applied which was
valid before the command was sent. You can
choose whether and how the focus setting should
be corrected for each scanned section: automatically (only if you have a motorized microscope with
automatic focusing), manually, or not at all.
-
"Live image": Scan of the normal microscope
image as is displayed on the monitor.
-
"Multi-channel": Scan of a multichannel fluorescence recording.
-
"Extended Focus": Scan of a recording with an
extended depth of field (for thick samples).
You can choose between the following scan types:
Info:
The "Multi-channel" and "Extended Focus" options are only available if your system has an
appropriate license. Please contact Carl Zeiss
MicroImaging GmbH if you wish to upgrade
your system.
You can set the focus correction type on the
"Navigation" and "Scan" tabs.
•
Note!
To use the "Multi-channel" and "Extended
Focus" scan types, you must have made the related hardware settings as well as defined and
selected an experiment (see chapter 16).
Select "None" if you do not want any focus correction during the scan.
Select "Suspend scan for focus" if you want to
manually readjust the focus for each section
scanned.
Select "Use Auto Focus" if you have a motorized
microscope with automatic focusing that you
want to use.
You can set the scan type on the "Navigation" and
"Scan" tabs.
"Navigation" tab
If you have selected "Suspend scan for focus" or
"Use Auto Focus", you can specify after how many
tiles each correction is to be carried out.
"Scan" tab
•
Select the "Every ... tile" checkbox and enter a
value for the number of tiles.
If the checkbox is not selected, correction will be
carried out before scanning each tile.
Info:
If you readjust the focus for each section to be
scanned, you will get a far sharper overall result. However, the duration of the scanning
process will increase considerably.
•
Open the drop-down list next to the "Scan all
ROIs" button on the "Navigation" tab or next to
the "Scan" button on the "Scan" tab and select
the type of scan you want to perform.
Info:
For multi-channel fluorescence recordings,
only the superimposed image made up from
the separate channels is displayed in the
Navigator. However, the information for the
individual channels is stored in the saved tile
images. They can be used for script analyses in
"Stored Tile" mode or viewed in the picture
viewer (see chapter 16.5).
Note that especially scans of the "Extended Focus"
type can take a long time: several images must be
recorded for each scan section and the image with
extended focus calculated from each.
56
415109-2614-101 e 09/09
Scanning a sample
6.3
Scanning a sample
You can start the scan from the "Navigation" tab or
the "Scan" tab.
-
-
Starting the scan from the "Navigator" tab is
useful if you want to scan specified areas on different slides without any further actions. Clicking scans the specified areas of all slide
positions in turn. For example, this method
enables you to run time-consuming scans with
high magnification on several slides unsupervised overnight.
On the "Scan" tab, you can only ever start one
scan for a previously specified slide position.
However, here you have the option of interrupting the scan and then continuing, for
example to correct the focus. You can then
rescan tiles that have not been scanned
sharply. In addition, the specified area fills the
entire display area on this tab, i.e. it is larger
than on the "Navigation" tab.
How to scan a single specified area:
•
Make sure that you have made all settings as
described in chapter 6.2.
•
On the "Navigation" tab, select the desired
slide.
Click on the slide, or
click on one of the "Slide Navigation" arrow
keys in the top right to switch from one slide to
another.
•
Select the "Scan" tab.
The tab displays a single-colored area with the
same proportions as the rectangle you drew with
the mouse (see Figure on next page).
How to scan several specified areas (ROIs)
with one click:
•
Make sure that you have made all settings as
described in chapter 6.2.
•
On the "Navigation" tab, click on the "Scan all
ROIs" button.
The scan begins. Instead of the "Scan all ROIs"
button, the "Stop Scan" button appears. Click on
this button if you want to cancel the scan.
The specified areas of all slide positions are
scanned in turn. The areas already scanned (tiles)
are shown in the slide image in the Navigator window. When the scan is complete, you can work on
them as described in chapters 6.5 to 6.11.
Info:
When using automatic focusing, make sure
that the thickness of the samples on the different slides is approximately the same.
415109-2614-101 e 09/09
57
Scanning a sample
The following details can be found in the
"Information" section (some of them depend on
the slideholder fitted; those specified here relate
to a 3x1.0 slideholder).
-
Slide1, Slide2 or Slide3: Position of the slide to
be scanned in the slideholder.
-
Section 0: Overview scan
-
Number of tiles in this scan
-
Scan status
•
Click on the "Scan" button.
When the scan is complete, the "Information"
section shows the magnification at which the scan
has been performed (see Figure on next page).
The selected area is scanned section-by-section (a
section is referred to as a tile). You can follow the
progress in the window.
Depending on your setting for focus correction,
either the focus is corrected automatically or the
scan stops so that you can adjust the focus manually.
The remaining duration of the scan is specified in
the "Information" section.
Info:
The specified time remaining is a rough
estimate. The program cannot calculate in
advance exactly how long any focus correction
will take.
You can cancel or interrupt the scan, e.g. to make
corrections to the focus setting. This gives you the
option of rescanning tiles that have not been
scanned sharply (see chapter 6.4).
58
415109-2614-101 e 09/09
Stopping and canceling or continuing a scan in progress
6.4
Stopping and canceling or
continuing a scan in progress
You can interrupt a scan in progress at any time.
After doing this, you can completely cancel or
continue the scanning process, for example after
making corrections to the focus setting.
How to stop a scan in progress:
While a scan is in progress, the "Stop Scan" button
appears instead of "Scan".
•
Click on the "Stop Scan" button.
The scan in progress is interrupted.
How to continue a stopped scan:
•
Select the "Continue at actual position" checkbox.
The "Continue" button appears instead of "Scan".
You can then continue the scan from the point at
which you interrupted it. However, you can also
click on any of the tiles already scanned. The scan
will then be continued from the selected tile. The
existing images of this and the subsequent tiles already scanned will be discarded. For example, this
can be useful if you notice that some tiles have not
been scanned sharply.
How to cancel a scan:
•
If necessary, click on the first tile to be
rescanned.
The stopped scan is canceled if you start a new
scan: Clicking on the "Scan" button, which appears
again after stopping, discards the previous scanning result and the scanning progress starts over.
The corresponding section of your sample is displayed in the PALM RoboSoftware main window.
•
Correct the focus setting.
•
Click on the "Continue" button.
Info:
You can also restart the scan from a selected
tile once the scan has been completed.
415109-2614-101 e 09/09
59
Scanning a section from the overview scan
6.5
Scanning a section from the
overview scan
You can select an area of an overview scan and
then scan it. This gives you an enlarged view of
the selected area. The overview scan itself is retained.
•
In the overview scan ("Section 0") on the
"Scan" tab, use the mouse to draw a rectangle
around the area you want to scan.
•
Click on the "Scan" button.
To change between the overview scan and
the scan of the section:
The "Information" section specifies whether you
can currently see the section (Section 1) or the
overview scan (Section 0) in the window.
The selected section will be scanned. "Section 1" is
displayed in the "Information" section.
The process and the available actions are the same
as for an overview scan (see page 57 and
chapter 6.4),
Info:
You can pull up a frame in the scan of a section
in order to scan the area once more. The
previously scanned section will then be lost.
60
•
Click on the arrow button in the "Section
Navigation" area to the top right of the window
to switch between the section and overview
scan.
415109-2614-101 e 09/09
Saving and reloading the scanned image
6.6
Saving and reloading the scanned
image
You can save the scan displayed in the Navigator
window, either the overview image only or the
overview image and the individual tiles.
Info:
The overview image of the scan has a maximum resolution of 900 x 900 pixels; this is
significantly lower than the resolution of the individual tiles.
In the second case, when you load a saved scan
you have the same options as with a scan that has
just been created. For example, if you click on a
tile, the corresponding section of your sample is
displayed in the PALM RoboSoftware main window.
You can perform an analysis using the AxioVision
program and generate elements (see
chapter 6.10).
How to load a saved scan:
•
Click on the "Load" button.
The "Open scanned picture" window opens.
•
Select the image you want.
•
Click on the "Open" button.
The image is loaded and displayed.
Info:
To coordinate the positions in the scan and
actual positions, the slide must be at the same
position in the slideholder and inserted with the
same alignment as when scanned.
Info:
If the stage has been re-initialized between
saving and loading the scan, there may be a
misalignment between the scan and the actual
positions.
How to save a scan:
•
On the "Scan" tab, click on the "Save" button.
The "PALMRobo Input Request" window opens.
•
Click on "Yes" if you want to save the individual
tiles in addition to the overview image.
Click on "No" if you only want to save the overview image.
The "Save scanned picture" window opens.
The overview image and tiles are saved. If you
only want to save the overview image, several file
formats are available.
•
Select the file format in which you want to save
the image (JPEG, TIFF, or Windows bitmap).
•
Choose the folder in which you want to save
your image.
•
Enter a name for the image.
•
Click on the "Save" button.
Info:
For multi-channel fluorescence recordings,
only the superimposed image made up from
the separate channels is displayed in the overview image.
Info:
If you are saving your scan with tiles and the
number of tiles is very high, saving can take a
relatively long time.
415109-2614-101 e 09/09
61
Displaying elements in the scan
6.7
Displaying elements in the scan
•
Select the "Elements" checkbox to display all
elements except text elements.
•
Select the "Marker elements" checkbox to display text elements.
The elements appear both in the overview scan
and the section scan.
62
Info:
Text elements are used for marking and
information purposes; they do not describe a
section of your sample in the way, for instance,
that freehand elements do. They therefore
always appear the same size on the screen
irrespective of the magnification setting. If you
have chosen a low level of magnification it is
therefore possible that text elements may
cover areas that are significant for you. In this
case you can turn off the text elements; other
elements will continue to be displayed.
Info:
You may, for instance, use text elements to
mark the area on the sample that you wish to
scan. In this way the section of interest can be
found more easily on the overview scan.
415109-2614-101 e 09/09
Displaying a particular tile on the monitor
6.8
Displaying a particular tile on the
monitor
•
In the "Navigation Mode" section of the "Scan"
tab, click on the "Stored tiles" radio button.
•
Click on an icon button in the "Tile Navigation"
area:
-
First tile
Previous tile
Next tile
Last tile
or click on a tile in the overview image.
The corresponding tile is displayed in the PALM
RoboSoftware main window instead of the live image. This tile has a green border in the Navigator.
Info:
The stage is not moved when you change from
one tile to another.
Info:
Double clicking on a tile reverts to live mode
and moves to the tile you have clicked on.
415109-2614-101 e 09/09
6.9
Positioning the microscope stage
Using the Navigator you can move the stage to
specific points of your sample.
•
On the "Navigation" tab, click or use the arrow
buttons to select the slide you want to view.
•
Scan your sample as described in chapter 6.3,
if it has not yet been scanned.
•
On the "Scan" tab, click on the "Live" radio
button under "Navigation Mode".
•
Click on the point to be displayed in the PALM
RoboSoftware main window (either on
the"Navigator" tab or on the "Scan" tab; here
you can select between the overview scan
"Section 0" and the section scan "Section 1" if
required, see chapter 6.5).
The stage will be positioned at the desired point.
63
Analyzing images using the "AxioVision" software
6.10 Analyzing images using the "AxioVision" software
The "AxioVision" software enables images of samples to be analyzed using scripts that have been
defined in advance, and also allows elements to be
generated. This helps with routine operations to
automate the selection of the areas of interest.
Info:
This analysis feature is only available if your
system has the AxioVision modules for image
analysis. Please contact Carl Zeiss
MicroImaging GmbH, if you wish to upgrade
your system.
The "AxioVision" program allows you to generate
and save scripts that you can then use to analyze
your sample (see "AxioVision" manual).
•
Open the Navigator window.
•
Select the "Navigation" tab and define the area
(ROI) that is to be analyzed (as described in
chapter 6.2).
•
Select the "Scan" tab.
•
Select the "Elements" checkbox.
•
If necessary, select the overview scan
("Section 0") or the section scan ("Section 1")
in the "Section Navigation" area, depending on
which you want to analyze.
•
Select the "AxioVision Analyze" tab.
Scripts created in "AxioVision" are shown in the
"Analyze scripts" drop-down list in the Navigator.
•
From the "Analyze scripts" drop-down list,
choose the script you want to use for the analysis.
•
Click on the "Adjust parameters" button to set
the parameters for your sample.
A preview window opens in which you can check
the results of your parameter settings.
•
If necessary, activate the "Use Auto Focus"
function or the "Suspend scan for focus" function on the "Scan" tab in the "Navigator"
window, as described in chapter 6.2.
•
Click on the "Analyze ROI" (Region Of Interest)
button.
The selected area of your sample is analyzed.
64
415109-2614-101 e 09/09
Analyzing images using the "Definiens" software
You can display separate tiles as on the "Scan"
tab:
•
Info:
In "Live" mode, the image is re-recorded using
the current camera settings and then analyzed,
while in "Stored tiles" mode the saved images
(from a previous scan) are analyzed.
Select the "Stored tiles" radio button.
Buttons appear for navigating between the tiles
(see chapter 6.8).
6.11 Analyzing images using the "Definiens" software
The "Definiens" software enables images of samples to be analyzed using sets of rules that have
been defined in advance, and also allows elements
to be generated. This helps with routine operations
to automate the selection of the areas of interest.
Info:
You can only utilize this analytical facility if
your system includes the "Definiens" software.
Please contact Carl Zeiss MicroImaging GmbH
if you wish to upgrade your system.
•
Select the "Definiens Analyze" tab.
•
From the "Analyze Ruleset" selection list,
choose the set of rules you wish to use for the
analysis.
•
Select the "Parameter" tab.
A number of sliders for setting various parameters
now appear on the left-hand side of the window.
Info:
The parameters that you can set here depend
on which set of rules you have chosen.
•
Open the Navigator window.
•
Select the "Navigation" tab and define the area
that is to be analyzed (as described in
chapter 6.2).
As a rule one does not know at first which parameter settings will deliver the optimum analysis
result.
•
Select the "Elements" checkbox on the "Scan"
tab.
•
•
Click on the "Test" button.
415109-2614-101 e 09/09
Configure initial values for the parameters.
65
Analyzing images using the "Definiens" software
The parameter settings are tested with the current
microscope image. The result is displayed below
the buttons on the right-hand side of the window.
•
Optimize the parameter values if necessary.
When you have found the optimum values:
•
If necessary, activate the "Use Auto Focus" or
"Suspend scan for focus" function on the
"Scan" tab, described in chapter 6.2.
•
Click on the "Analyze ROI" button (ROI: Region
Of Interest).
The selected area of your sample is analyzed.
Info:
The "Job Status" tab shows information about
the progress of the analysis. The "Image acquisition", "Analysis" and "Element import" processes do not run synchronously; this tab thus
shows the status of all processes.
You can display separate tiles as on the "Scan"
tab:
•
Select the "Stored tiles" radio button.
Buttons appear for navigating between the tiles
(see chapter 6.8).
Info:
In "Live" mode, the image is re-recorded using
the current camera settings and then analyzed,
while in "Stored tiles" mode the saved images
(from a previous scan) are analyzed.
66
415109-2614-101 e 09/09
7
Drawing and measuring
The automatic laser functions allow you to cut
along defined lines and catapult individual points
or areas out of your sample. For a summary of the
automatic laser functions refer to chapter 11.1.
You can also lift parts cut from your sample from
the slide plane using PALM MicroTweezers and
transport them to a different place (refer to chapter 13).
Before you use these laser functions you must
define these cut lines or areas; they are called elements. PALM RoboSoftware offers you a range of
tools in the graphics toolbar for drawing elements.
You can draw elements one after another for different laser functions; for example, elements that
are to be cut and catapulted completely
(RoboLPC), beside those that are only to be cut
(Cut), or those that are only to be catapulted
(LPC). You define which laser function is applied to
the related element prior to drawing the element;
however, you can also still change the laser function selected later. As soon as you start the laser,
all elements (or only the elements you have selected) are processed using the laser. During this
process the PALM RoboSoftware automatically activates the laser function you have selected for the
related element.
In addition, you can save the section displayed on
the monitor with the elements on it in a file for
documentation purposes. Elements stored in this
way cannot be reloaded into PALM RoboSoftware.
For instructions on how to do this, refer to
chapter 10.3 "Saving images manually" and chapter 10.4 "Saving images automatically during a laser function".
In order to draw elements you must display the
section of your sample on the monitor that you
want to process. Refer to chapters 5 or 6.9 for instructions on how to move the stage in order to
display the required section of your sample on the
monitor. However, you can also draw elements
that extend beyond the section displayed on the
monitor. Chapter 7.3.3 includes instructions on
the factors you must consider for this.
When processing elements you will often be working with the "Element List" window. This window
provides a summary of your elements and their
properties and allows you to make changes to
them and to perform various program commands
(refer to chapter 8).
Previously drawn elements can be changed by
their shape and size, they can be numbered, annotated and deleted again. You can calculate their
area or length and you can select colors and line
thicknesses in which your elements are to be displayed.
Note!
The measuring functions of PALM
RoboSoftware and the scale bar are not calibrated at the factory; they are an estimated
value only. Carl Zeiss MicroImaging GmbH
does not guarantee the accuracy of the performed measurements.
The measuring functions have to be checked
and, if necessary, calibrated by the user (for
example, with a ocular micrometer).
You can save your elements as a set, or load a previously saved set of elements. In addition, you can
save the properties of your elements in a file, reload them in another program and process them
further. For instructions on how to do this, refer to
chapter 9.
If your system includes database functionality and
if you are working in Database Mode, then your elements will be saved automatically in a database
and can be reloaded from there (refer to
chapter 1.8 and the "InformationCenter" program
manual).
415109-2614-101 e 09/09
67
General procedure
7.1
•
•
•
•
•
•
•
•
•
•
General procedure
Insert your sample in the slideholder.
Add a new set of elements (chapter 7.2).
If you want to catapult: prepare the PALM
RoboMover or PALM CapMover (refer to
chapter 12). Select the well into which you
want to catapult the element (refer to
chapter 7.3.2; you can also make this selection
again later or change it; refer to chapter 8.6).
Select the required magnification (refer to
chapter 15.1).
Select the required laser function for the next
element to be drawn (refer to chapter 7.3.1;
you can change this selection again later).
Select the required color for the display of the
element on the monitor and in the Element List
(refer to chapter 7.9).
Draw the element.
Repeat the last three steps for all elements that
you require.
Make all the necessary settings for the laser
(refer to chapter 11.4).
Start the laser.
7.2
Creating a new set of elements
The procedure varies according to which mode you
are working in - Database Mode or File Mode.
Info:
Database Mode is only an option if your system
is configured accordingly. Please contact Carl
Zeiss MicroImaging GmbH, to upgrade your
system if required.
Info:
When the program is launched you decide
whether you want to work in File Mode or
Database Mode (refer to chapter 1.8). It is not
possible to switch between these two modes
whilst the program is running. If you want to
change mode you must first shut down PALM
RoboSoftware and then relaunch it. If necessary you must first modify the initial settings as
described in chapter 3.1.
7.2.1
Working in File Mode
You can start drawing elements as soon as you
have launched the program and adjusted the sample in the microscope.
If you have already drawn elements during your
current session and you want to process another
sample, you must first, after saving it if you wish,
remove the existing element set from the monitor.
To prepare a new sample for processing in
File Mode:
•
•
If you want to save previously drawn elements
for later work, save them as described in chapter 9.2.
Click on "New Elements / Delete all" in the
"File" menu in either the main window or the
"Element List" window.
If elements exist, they will be deleted.
68
415109-2614-101 e 09/09
Creating a new set of elements
7.2.2
Working in Database Mode
In Database Mode, after the program has been
launched you can initially draw only a single element using the Freehand Tool (refer to
chapter 7.3.5) in order to test the laser settings for
instance. To distinguish it from other elements,
this element is displayed on the monitor with a
dashed line.
Before you can draw elements you must enter various details of your sample and your project. Without this data your elements cannot be saved in the
database.
To prepare a new sample for processing in
Database Mode:
•
The "Please select or enter data!" window opens.
Info:
If you are using a multiple slideholder, a separate tab will be displayed for each slideholder
position (as well as a tab for entering data for
the catapulted samples).
If you wish to draw elements for more than one
slide, you must enter data for each slide to be
processed.
When this data is entered, distinctions are made
between three hierarchical levels which you might
use in the following way (see illustration beneath):
- Source Data: represents the tissue sample that
you wish to process.
-
Specimen Data: represents a wafer of the tissue sample that is placed on the slide for processing.
-
Experiment Data: represents the specific examination that you intend to perform on the
wafer.
Click on "Enter/Select Data ..." in the "File"
menu in either the main window or the
"Element List" window.
Click on the "Enter/Select Data ..." icon button.
If you would like to create a new set of objects for
the same slide, you should enter a new "experiment". If you want to work with a different wafer
of the same tissue sample you must enter the required data in the "Specimen" section. If you
would like to work with a different tissue sample,
you must describe it in the "Source Data" section.
•
Enter the details for your sample. Start with the
uppermost field and move down one field at a
time.
Info:
If you would like to resume work on an existing
experiment or with an existing sample you can
specify this using the selection lists for the
"Label" fields.
The "more" buttons bring up further fields for you
to enter additional details of your source, your
sample and/or your experiment.
415109-2614-101 e 09/09
69
Creating a new set of elements
•
Click on the "more" button in the area for which
you have supplementary information to enter.
•
If you want to catapult samples: select the
"Collection Device Data" tab.
•
Enter details of your collection device
(CapMover II, RoboMover).
One of the windows "Source Data Details",
"Specimen Data Details" or "Experiment Data
Details" will open.
Three planes
Info:
If you wish to resume work on an existing experiment or with an existing sample you can do
this using the selection list for the fields.
The "more" button provides access to further fields
for entering supplementary details.
• Click on the "more" button.
The first field in each of these windows is prepopulated with the "Label" entries from the window "Please select or enter data!".
If you have added your own additional fields to the
database, these will also appear in the "Data Details" windows (the "InformationCenter" manual
explains how to create additional fields).
• Enter the details you wish to record, then close
the window by clicking on the "OK" button.
• Proceed in the same way for each slide position
if you wish to work with more than one slide.
70
The "Collection Device Data Details" window
opens:
•
Enter the details you wish to record, then close
the window by clicking on the "OK" button.
Info:
Slide positions for which you have entered information are represented in the Navigator as
white areas. Positions for which no data has
been entered are shown shaded (see illustration in chapter 6.1).
415109-2614-101 e 09/09
Drawing new elements
7.3
Drawing new elements
PALM RoboSoftware provides a range of tools for
drawing elements.
- Freehand, Line, Rectangle and Circle Tool: With
these tools you can draw shapes, along which
you can later cut with the "Cut" laser function,
or the area content of which you can catapult
later with the "AutoLPC" or "RoboLPC" automatic laser functions.
-
-
The elements are displayed on the monitor as colored lines, dots or areas. You can preset the colors
and line thickness or the dot sizes for display, and
you can change them later (refer to chapter 7.9).
The program automatically assigns a number to
each drawn element. If you have not changed the
default setting this number is displayed (refer to
chapter 7.8.4).
Info:
In some cases the elements you have drawn
will be changed automatically by the PALM
RoboSoftware, e.g. open elements may be
closed or closed elements opened. This action
is dependent on the laser function selected and
especially on the parameters that you can set
for the individual laser functions (refer to
chapter 11.1 "Laser functions" and
chapter 11.4 "Specifying laser settings").
Using these tools you can also identify lineshaped structures that you can then catapult
later using the automatic "LineAutoLPC" laser
function (e.g. dendrites).
Elements drawn using these tools are collectively designated elements of type "Figure".
Dot Tool: Use the Dot Tool to mark individual
cells for subsequent catapulting with the "LPC"
laser function.
Grid Rectangle Tool: Use this tool to draw a
rectangle that is automatically divided into the
number of smaller rectangles you define. When
the laser function is triggered, the individual
rectangles are cut and catapulted if necessary.
Using this feature in combination with the PALM
RoboMover operating mode "morphology conserving", you can catapult sections from your
tissue wafer into wells; during this process the
arrangement of the sections is retained (refer
to chapter 8.6, section "Operating Mode "morphology conserving"").
-
Stamp Tool: Using this tool you can copy existing elements and position the copies in the required position with a mouse click.
-
Ruler: Use the Ruler to measure zonal lengths.
The zone is shown as a line.
-
Text Tool (Text): With the Text Tool you can
identify individual areas of your sample, so
that, for example, they can be easily located
again, and annotated. These comments are
then displayed at the specified position on the
monitor.
-
Reference Point Tool: Use this tool to define reference points. For example, you need them for
the "Serial Section" function (refer to
chapter 8.7).
Note!
It is sometimes not possible for the laser to
process elements located very close to the
edge of the slide. If you draw elements here,
they will be deleted automatically by PALM
RoboSoftware.
When installing your sample on the slide make
sure that the areas to be processed do not
come too close to the edge of the slide.
To activate one of the graphic tools:
•
Click on the icon of the desired graphic tool in
the Graphic Toolbar.
The tool selected remains active until you select
another drawing tool or another function.
Using the "Field of View Analyse" function you can
also generate elements automatically (refer to
chapter 18).
"Ruler", "Text" and "Reference Point" type elements have no effect on the laser functions. Select
the required laser function for elements of other
types before you draw the element.
415109-2614-101 e 09/09
71
Drawing new elements
7.3.1
Selecting a laser function
7.3.3
Before you draw an element, define the laser function that is to be applied to the element.
•
Open the "Cut Tools" drop-down list (in the
default configuration in the bottom left corner
of the program window) and select the required
laser function.
If you do not select a laser function, the laser
function set prior to drawing will be assigned to
the element.
Info:
You can define which laser functions appear in
the drop-down list as described in chapter 3.5.
Info:
You can again change the laser function that is
to be applied to the element after drawing
(refer to chapter 8.4).
7.3.2
Defining well for catapulting
With PALM RoboMover you can use inserts with
several wells. You can activate automatic distribution functions with which your elements will be automatically catapulted into the defined wells (refer
to chapter 8.6.2). Even before drawing you can
define a well for each element:
•
Open the Well drop-down list (in the default
configuration at the bottom left of the main
window) and select the required well (the coordinates of the well as displayed in the PALM
RoboMover window are given).
Drawing in the various program
modes
Info:
This section is concerned with the software
modes in PALM RoboSoftware. These are totally unrelated to the Database and File operating
modes.
As is described in chapter 2.3.3 PALM
RoboSoftware works in a number of modes. You
can draw elements in Cursor Mode and in Freeze
Mode. Cursor Mode is the default mode for PALM
RoboSoftware; it is set automatically when the
program is launched. Chapter 14.5 includes instructions for switching into and out of Freeze
Mode.
In both modes, you can draw elements inside the
Scroll Rectangle without limitations and with all
graphic tools (you can switch the display of the
Scroll Rectangle on and off using menu command
"View>Scroll Rectangle"). Outside the boundary of
the Scroll Rectangle, you can also draw with all
graphic tools in Freeze Mode, and with all graphic
tools except the Freehand Tool in Cursor Mode:
- If you are in Freeze Mode and move outside the
Scroll Rectangle with the mouse while drawing,
the stage does not follow the movement. However, you can continue to draw even beyond
the border of the visible image. You can check
the result by exiting Freeze Mode again and
moving the stage so that your element is displayed in its entirety on the monitor. However,
this practice of drawing outside the border in
Freeze Mode is not to be recommended because it means that you have no control over
your drawing.
-
If you are in Cursor Mode and you move outside
the Scroll Rectangle with the mouse while
drawing, the stage follows the movement automatically for all tools except the Freehand and
the Line Tool (refer to chapter 7.3.5 "The Freehand Tool" and chapter 7.3.6 "The Line Tool").
Select a low scrolling speed for the stage, so
that the movement of the image on the monitor
can be easily followed with the naked eye.
You can also make this selection later or change it
later; refer to chapter 8.6.
Info:
The coordinates given in the drop-down list are
dependent on the type of collector used. Note
that PALM RoboMover must be configured for
well coordinates to appear in the drop-down list
(refer to chapter 12.2.1).
72
415109-2614-101 e 09/09
Drawing new elements
7.3.4
The Reference Point Tool
7.3.6
Reference Point Tool (Reference Point)
With the Reference Point Tool you define reference
points on your sample. For example, you need
them for the "Serial Sections" function (refer to
chapter 8.7).
• Select the Reference Point Tool in the Graphic
Toolbar.
• Click on that point in your image at which you
want to set a reference point.
7.3.5
The Freehand Tool
Freehand Tool
Use the Freehand Tool to draw irregularly shaped
elements.
• Select the Freehand Tool in the Graphic Toolbar.
• Move the cursor to the dot where you want to
begin your drawing.
• Hold the mouse button down while you draw
the required shape and release it at the end
dot.
Info:
In Cursor Mode, you can only use the Freehand
Tool inside the Scroll Rectangle. When you
reach the edge of this rectangle, the line stops
automatically. The program switches to Scroll
Mode, the stage is moved.
As soon as you release the mouse button and
the stage stops moving, you can continue the
line as explained in chapter 7.8.
In Freeze Mode you can continue to draw with
the Freehand Tool outside the Scroll Rectangle
(for a detailed explanation, refer to
chapter 7.3.3).
The Line Tool
Line Tool
Quadratic Attribute
Use the Line Tool to draw straight lines.
• Select the Line Tool in the Graphic Toolbar.
If you select "Quadratic Attribute" as well, the
drawing function is limited to horizontal and
vertical lines.
• Click once on the dot where you want to start
your line.
• Click once on the point at which you want to set
a corner dot.
• Double click on the dot where you want to end
your line.
Info:
In Cursor Mode, you can only use the Line Tool
inside the Scroll Rectangle. When you reach
the edge of this rectangle, the line stops automatically. The program switches to Scroll
Mode, the stage is moved.
As soon as you release the mouse button and
the stage stops moving, you can continue the
line.
In Freeze Mode you can continue to draw with
the Freehand Tool outside the Scroll Rectangle
(for a detailed explanation, refer to
chapter 7.3.3).
7.3.7
The Rectangle Tool
Rectangle Tool
Quadratic Attribute
Centric Attribute
Use the Rectangle Tool to draw rectangles. The dot
at which you begin your drawing becomes a corner
of the rectangle.
• Select the Rectangle Tool in the Graphic Toolbar.
If you select "Quadratic Attribute" as well, the
drawing function is limited to squares.
If you select "Centric Attribute" as well, the dot
at which you begin your drawing becomes the
center point of the rectangle or the square.
• Move the cursor to the dot where you want to
begin your drawing.
• With the mouse button pressed down, drag the
rectangle or square out until it is the desired
size and then release the mouse button.
415109-2614-101 e 09/09
73
Drawing new elements
7.3.8
The Grid Rectangle Tool
Grid Rectangle Tool
7.3.9
The Circle Tool
Circle Tool
Quadratic Attribute
You can draw a rectangle using the Grid Rectangle
Tool; this rectangle will be automatically divided
into a matrix of smaller rectangles you have defined. Each individual rectangle is considered an
independent element by the PALM RoboSoftware
and has its own number in the Element List (refer
to chapter 8.1). You can now catapult the elements into PALM RoboMover wells such that the
morphology is retained, i.e. their arrangement in
the wells is exactly the same as the arrangement
in the sample.
• Click on the arrow beside the tool.
• Click on the "Configure" menu entry.
The "Morphologic grid configuration" window
opens.
•
•
•
•
74
Centric Attribute
Use the Circle Tool to draw circles or ellipses. The
dot at which you begin your drawing becomes a
corner of a perceived rectangle enclosing the circle
or the ellipse.
• Select the Circle Tool in the Graphic Toolbar.
If you select "Quadratic Attribute" as well, the
drawing function is limited to circles.
If you select "Centric Attribute" as well, the dot
at which you begin your drawing becomes the
center point of the ellipse or the circle.
• Move the cursor to the dot where you want to
begin your drawing.
• With the mouse button pressed down, drag the
oval or circle out until it is the desired size and
then release the mouse button.
Enter the number of rows and columns into
which the rectangle to be drawn is to be
divided.
Select the required numbering sequence for the
elements produced (row by row or column by
column) in the "Orientation" list.
Close the window.
Draw the rectangle.
415109-2614-101 e 09/09
Drawing new elements
7.3.10 The Dot Tool
7.3.12 The Text Tool
Dot Tool
Text (Flag)
Use the Dot Tool to mark, for example, individual
cells that are to be catapulted with the "AutoLPC"
automatic laser function.
Info:
The Dot Tool only appears on the Tool Bar if
you have enabled the "AutoLPC" laser functions
in the configuration (refer to chapter 3.5).
•
•
Select the Dot Tool in the Graphic Toolbar.
Click roughly in the middle of the cell you later
want to catapult.
The selected location is displayed as a dot.
Use the Text Tool to add markings with or without
textual comments to your image. The marked sites
are displayed as flags, the comments in a rectangle. Comments are always displayed on one line.
You can select or subsequently change the color of
the comment background and flag, as described in
chapter 7.9.
Text elements are ignored by the laser functions.
To place a marking:
•
•
Select the Text Tool in the Graphic Toolbar.
Click on the point at which you want to place
your marking.
7.3.11 The Stamp Tool
Stamp Tool
Using the Stamp Tool you can copy existing elements and place the copy in the required position
with a mouse click.
• Click on the arrow beside the tool.
• Click on the "Select new template" menu entry.
• Click on the element you want to copy.
A marking will appear as a flag at the selected site.
The "Text element" window opens.
• Enter, if required, a comment and close the
window by clicking on the "OK" button.
The mouse pointer changes to a hand.
• Click on the position in your microscope image
where you want to place the copy.
The copy is positioned such that the center of the
element is at the position clicked on. If you use the
"Center RoboLPC" laser function for the element
(refer to chapter 11.1), the laser catapult shot is
placed at the position clicked on.
Your comment will appear at the foot of the flag.
You can continue placing copies of the selected element until you select another element or another
drawing tool.
415109-2614-101 e 09/09
75
Displaying and hiding elements
7.4
Displaying and hiding elements
All elements are displayed in the default configuration of PALM RoboSoftware. You can hide the elements.
To center a defined element using the
"Element List":
•
To display or hide elements:
•
Click on the menu item "Show Elements" in the
"View" menu.
The menu command works as a toggle.
Info:
If the display has been switched off, then it is
switched back on automatically when new elements are drawn.
7.5
Centering elements on the
monitor
In the "Element List" window select the element
that you want to center (click in the row that
contains the element you want to select).
Goto selected element
•
Click on the menu item "Go to Element" in the
"Motion" menu.
Info:
You can change the movement speed of the
stage when targeting the desired element.
Refer to chapter 5.3 for instructions on how to
proceed (speed for the "Position" movement
type).
The image on the monitor only represents a section of your sample. If you have drawn multiple elements, usually not all of these are visible on your
monitor at the same time. If you want to view a
particular element, you can have PALM
RoboSoftware display it for you automatically at
the center of the image.
In main window certain elements can be centered
automatically using icon buttons or menu commands:
- the first or last element drawn;
-
the element drawn immediately before or after
the element currently centered.
In the "Element List" window you can center any
element.
To center defined elements in the main
window:
•
76
Click on one of these entries in the "Motion"
menu:
"Goto First Element",
"Goto Prev Element",
"Goto Next Element" or,
"Goto Last Element".
415109-2614-101 e 09/09
Selecting and deselecting elements
7.6
Selecting and deselecting
elements
You can select elements either on the monitor in
the microscope image or in the "Element List" window. The result of the two methods is the same:
elements selected on the monitor are automatically also selected in the Element List and vice versa.
Which method you should choose for your purpose
depends on the next operation you want to do with
the selected elements. If, for instance, you want to
edit an element (refer to chapter 7.8.1), it is generally advantageous to select the element on the
monitor. If you want to select several elements at
the same time, this action is normally easier in the
"Element List" window, as here you have an overview of all elements drawn.
7.6.1
Selecting elements using menu
commands in the main window
You can either select all elements at the same time
or all elements that belong to the current slide (if
you have inserted a slideholder that can hold several slides, e.g. the SlideHolder 3x1.0).
7.6.2
On the monitor selected elements are displayed
with a surrounding white rectangle. At all corners
and in the center of each rectangle side a white
square is displayed.
Info:
The white selection rectangle partly covers the
lines of the elements. You cannot see the selected element completely; if you have selected a rectangular element for example, you see
the selection rectangle only.
To select a single element:
Pointer Tool
•
•
To select all elements:
•
Click on the menu item "Select all (all positions)" in the "Edit" menu (main window).
To select all elements on the current slide:
Selecting and deselecting
elements on the monitor
Select the Pointer Tool in the Graphic Toolbar.
Click once with the mouse on the element, or
move the cursor with the mouse button
depressed to pull up a rectangle that surrounds
the element you require entirely or partly.
Ctrl key + Pointer Tool
If your elements are overlapping, you might not be
able to select a single element with the described
methods without selecting adjacent elements also.
• In this case keep the Ctrl key pressed and click
on the desired element until it is selected: with
each click the next of the stacked elements will
be selected.
To select multiple elements:
Shift key + Pointer Tool
•
Click on the menu item "Select all (current positions only)" in the "Edit" menu (main window).
•
•
•
415109-2614-101 e 09/09
Select the Pointer Tool in the Graphic Toolbar.
Click on the first element you want to select.
Press and hold down key "Shift"; click on all
other elements you want to select as well.
77
Deleting elements and restoring deleted elements
To stop selection of elements:
•
Click on the menu item "DeSelect All" in the
"Edit" menu, or
click in the microscope image on any dot outside the selection rectangle.
Info:
If elements outside of the image section displayed on the monitor are selected, it is possible that you do not see the selection rectangle
as it is larger than the monitor. In this case you
cannot deselect the elements with one mouse
click.
Info:
If you want to deselect only single of multiple
selected elements, first you have to deselect all
elements; then select the desired elements
again.
7.6.3
Selecting and deselecting
elements in the "Element List"
window
The selected elements in the "Elements List" window are highlighted in blue.
To select or deselect all elements:
•
Click on the menu item "Select All" or "DeSelect
All" in the "Edit" menu ("Element List" window).
To select or deselect single elements:
•
•
If you want to select a single element, click on
the corresponding entry in the table of the
"Element List" window.
If you want to select multiple elements, keep
the "Ctrl" or "Shift" keys pressed and click on
the corresponding entries successively.
If you want to deselect the elements, click in an
empty line in the table.
7.7
Deleting elements and restoring
deleted elements
PALM RoboSoftware provides various possible
ways to delete elements:
- all existing elements at once
-
the last element drawn
-
one or more selected elements
In addition, you can delete all elements that you
have drawn for a slide (if you have used a slide
holder that can hold several slides, e.g. the
SlideHolder 3x1.0). The elements on the other
slides are retained.
Info:
In the Database Mode (refer to chapter 1.7) it
is not possible to delete elements already processed with the laser.
To delete all elements:
•
Click on the menu item "Delete all elements" in
the "Edit" menu of the PALM RoboSoftware
main window.
All elements are deleted (if you are working in
Database Mode, only the elements that have not
yet been processed with the laser).
Info:
If you are working in File Mode (refer to
chapter 1.7), you can also delete all elements
by clicking on "New Elements / Delete All" on
the "File" menu. In this case, any elements that
have already been processed by the laser will
also be deleted.
If you are working in Database Mode and create a new record group (refer to chapter 7.2.2)
or select a new record group (see chapter 9.3),
your elements will likewise disappear from the
screen. They are, however, saved in the database and can be retrieved at any time.
Info:
With this method you can select groups of elements of the same type and color by clicking on
the corresponding entry in the table on the
"Summary" tab. Depending on the choice
made in the "Show summary for" field (refer to
chapter 8.2), either all elements or the elements on one slide are shown.
78
415109-2614-101 e 09/09
Deleting elements and restoring deleted elements
To delete the last drawn element:
To restore deleted elements:
•
Click on the menu item "Delete last element" in
the "Edit" menu of PALM RoboSoftware main
window.
•
Info:
You can repeat this function many times. Each
time, the latest of the remaining elements will
be deleted.
If you are working in Database Mode, you cannot delete the last element drawn if it has already been processed using the laser. In this
case the menu command is disabled.
The last performed deletion command is undone.
Click on the menu item "Undelete" in the "Edit"
menu (in the main window of PALM
RoboSoftware).
Info:
If you have deleted several elements, you can
call up the function repeatedly.
To delete any elements:
•
•
Select the element you want to delete (in PALM
RoboSoftware main window or in the "Element
List").
Click on the menu item "Delete selected elements" in the "Edit" menu (in the main window
or in the "Element List").
If you select multiple elements, you can also delete multiple elements simultaneously with this
command.
To delete all elements on a slide:
•
•
•
In the "Element List" window select the tab for
the slide with the elements you want to delete
(e.g. with the SlideHolder 3x1.0 the "Slide 1",
"Slide 2" or "Slide 3" tab).
Select "All" on the "Show Types" drop down
list..
Click on the menu item "Delete all elements" in
the "Edit" menu.
All elements on the selected slide are deleted (if
you are working in the Database Mode, only those
elements that have not yet been processed with
the laser).
Info:
Elements hidden using the "Show Types" drop
down list are not deleted. I.e., you can use the
function to delete elements of a specific type.
415109-2614-101 e 09/09
79
Processing elements
7.8
Processing elements
You can process and change drawn elements in total or in part in various ways:
- You can edit elements (refer to chapter 7.8.1),
-
You can copy elements (refer to chapter 7.8.2),
-
You can update the numbering of the elements
(if you have deleted some elements; refer to
chapter 7.8.4),
-
You can add comments to the elements or edit
existing comments (refer to chapter 7.8.5),
-
You can change the color in which the elements
are displayed on the monitor (refer to
chapter 7.9.3).
7.8.1
To show or hide the anchor points of the
elements:
•
Click on the menu item "Show Points" in the
"View" menu.
The menu command works as a toggle.
Editing elements
There are a number of ways for you to change
drawn elements at a later time. The options available to you depend on the type of the element.
"Figure" elements (lines, rectangles, ellipses):
- You can move these elements.
-
You can change their shape.
-
You can extend lines.
-
You can merge two elements into one.
"Dot" elements, "Ruler" elements (measuring
lines) and "Reference" elements:
- You can move these elements.
"Text" elements:
- You can move these elements.
-
The anchor points are displayed as white squares
and are numbered.
To move elements:
You can move elements inside the scroll rectangle,
or move elements at the same time as positioning
the stage using the Scroll function (refer to chapter 5.1.2). By this method, you can move elements
or groups of elements over greater distances
quickly.
You can change the text.
Pointer Tool
You can restore elements changed (refer to chapter 7.7).
Elements are treated by PALM RoboSoftware as
polygons; they consist of straight lines and dots,
the anchor points. Each element consists of at
least two anchor points and a line.
•
•
With some functions for editing elements you can
work more precisely if the anchor points are visible.
•
Select the element you want to move.
Position the Pointer on the element you want to
move. The cursor changes to a fourfold headed
arrow.
With the Pointer Tool, click anywhere in the element or in the Selection Rectangle (if one
exists) and drag the element to its new position
with the mouse button held down.
If you drag the Pointer out of the scroll rectangle
during this process, the PALM RoboSoftware
changes to the "Scroll" function and moves the
stage. The selected element is moved at the same
time.
Info:
If you have selected multiple elements or an element group, all selected elements or all elements of the groups respectively are moved.
80
415109-2614-101 e 09/09
Processing elements
To continue elements (lines, rectangles,
ellipses):
To join two elements (lines, rectangles,
ellipses):
Note!
Select the laser function "Cut" before continuing the element (refer to chapter 11.3 for instructions on how to proceed). Otherwise you
will not obtain the desired result.
Note!
Select the laser function "Cut" before joining
the elements (refer to chapter 11.3 for instructions on how to proceed). Otherwise you will
not obtain the desired result.
Ctrl key + Freehand Tool
•
•
•
Select the Freehand Tool.
Press and hold the Ctrl key.
Move the cursor to the start or finish dot of the
element that you want to continue (the start
and finish dots of an element are indicated by a
small square with thick black lines and the
same color as the element).
Note!
Please take care that a square with thick black
lines is displayed. A square with thin black lines
indicates an anchor point of the element. If you
continue drawing from one of these points, you
change the shape of the consisting elements
(see "To change the shape of elements (lines,
rectangles, ellipses):" on page 82).
•
Keeping the mouse button depressed, draw the
desired extension.
415109-2614-101 e 09/09
Ctrl key + Freehand Tool
•
•
•
•
Select the Freehand Tool.
Press and hold the Ctrl key.
Move the cursor to the start or finish dot of the
first element (the start and finish dots of an element are indicated by a small square with thick
black lines and the same color as the element).
Keeping the mouse button depressed, draw the
connecting line to the start or end dot of the
second element.
As soon as you have reached the start or finish
dot, a small square with thick lines in the color of
the element appears here.
Both elements are joined and are assigned a number as a new element.
Info:
If you have added a comment to each of the
two elements you want to join, the comment of
the element with the higher sequential number
is deleted by joining; the comment on the element with the lower sequential number is assigned to the new element.
If the elements you have joined were in two
different colors, the new element will be displayed in the color of the element that had the
lower sequential number.
81
Processing elements
To change the shape of elements (lines, rectangles, ellipses):
Note!
Select the laser function "Cut" before changing
the shapes of the elements (refer to
chapter 11.3 for instructions on how to proceed). Otherwise you will not obtain the desired result.
The new drawn line is joined with the displayed anchor point (see above). The previous line between
start and end dot of the correction is deleted.
Note!
If you first release the Ctrl key and then the
mouse button, the element between the start
dot of your correction and the end dot of the element is removed (see below)!
Ctrl key + Freehand Tool
•
•
•
Select the Freehand Tool.
Press and hold the Ctrl key.
Move the cursor to the area you want to edit.
To stretch elements (lines, rectangles,
ellipses):
Pointer Tool
The nearest anchor point of the element is indicated by a rectangle with black lines.
• Keeping the mouse button depressed, draw the
changed line.
•
•
Select the element you want to stretch.
Drag the Pointer on one of the squares at the
corners or sides of the selection rectangle.
The cursor changes to a double-headed arrow.
• Pull with depressed mouse button.
To rotate elements (lines, rectangles,
ellipses):
Ctrl key + Pointer Tool
•
•
As soon as you have reached the element again,
the nearest anchor point is displayed as a rectangle with black lines and the color of the element.
• First release the mouse button, then the Ctrl
key.
82
•
Select the element you want to rotate.
Drag the Pointer on one of the squares at the
corners of the selection rectangle.
Press and hold the Ctrl key.
The cursor changes to a circular arrow.
• Pull with depressed mouse button.
415109-2614-101 e 09/09
Processing elements
To rotate and stretch elements (lines,
rectangles, ellipses):
Ctrl key + Shift key + Pointer Tool
7.8.2
Copying elements
You can copy any element and insert the copy in
your image.
To copy elements:
•
•
•
Select the element you want to stretch and
rotate.
Drag the Pointer on one of the squares at the
corners of the selection rectangle.
Press and hold the Ctrl and Shift keys.
The cursor changes to a circular arrow.
• Pull with depressed mouse button.
•
To restore a changed element:
•
•
•
•
Select the element you want to restore.
Click on the menu item "Restore" in the "Edit"
menu.
Info:
If you want to use the keyboard commands
"Ctrl+C" and "Ctrl+V", the main window
must be the active window.
The last changed element will be restored.
Note!
If you have joined two elements and if you use
the function "Restore" for the new developed
element, the original element with the lower
number is restored. The original element with
the higher number cannot be restored.
Select the element you want to copy, either in
the main window or in the "Element List" window (refer to chapter 7.6).
Click on the menu item "Copy" in the "Edit"
menu (in the main window or in the "Element
List" window).
Click on the menu item "Paste" in the "Edit"
menu (in the main window or in the "Element
List" window).
A copy of the element will be pasted; the copy is
selected.
• Move the copy to the required position.
Info:
You can also select and copy multiple elements at the same time.
Info:
You can also copy elements using the Stamp
Tool (refer to chapter 7.3.11.)
7.8.3
Enabling or disabling the element
numbering display
PALM RoboSoftware numbers all the elements that
you draw: As soon as you have drawn a new element, it is assigned a number automatically. This
number is increased by one for each additional element.
You can enable and disable the element numbering display.
•
415109-2614-101 e 09/09
Click on the menu item "Show Numbers" in the
"View" menu.
83
Changing colors and line thickness
7.8.4
Updating the element numbering
If you delete elements, the remaining elements
keep their respective numbers. If you want to renumber your elements sequentially, you can perform a renumbering operation:
•
Click on the menu item "Renumber all" in the
"Edit" menu (in the main window or in the "Element List" window).
7.8.5
Adding a name or a comment to
elements
You can add a name and/or a comment to all elements (not only text elements). The name of an element is displayed at its start dot for the number
as well as in the "Element List" window in the
"Name" column. A comment is displayed in the
"Element List" window in the "Comment" column.
You can edit a name or a comment at any time. Proceed as you would for writing a name or comment.
To add a name or comment to an element:
•
•
Select the element to which you want to add a
name or a comment (in the main window or in
the "Element List" window).
Click on the menu item "Change" in the "Edit"
menu (in the main window or in the "Element
List" window).
7.9
Changing colors and line
thickness
PALM RoboSoftware includes a Color Palette and a
window in which you can select and preset the colors you want available.
- In the Color Palette select a color for new elements to be drawn. Working with this palette is
particularly advantageous if you want to draw
multiple elements of the same type which are
to be in various colors.
-
In the "Draw Preferences" window you can
define which colors are available in the Color
Palette.
In parallel, you can define the color for different
element types in the "Draw Preferences" window. I.e. if you select a different drawing tool,
the color defined here is set automatically.
These settings are overwritten later by any
subsequent changes to the Color Palette.
In the "Draw Preferences" window you can also
enter the line thickness and dot sizes for your elements on the monitor.
The settings will apply until you make new settings. Elements already drawn will not be changed.
How to subsequently change the color of elements
already drawn is described in chapter 7.9.3.
The settings are retained after the program is
closed down. If you restore the factory defaults
(refer also to chapter 3.8), all the changes you
made to color and line thickness settings will also
be lost.
The settings in the "Draw Preferences" window can
be saved with your other settings in a file to be
loaded later (refer to chapter 3.7).
The "Element Properties" window will open.
•
84
Enter your name in the "Name" field or your
comment in the "Comment" field.
415109-2614-101 e 09/09
Changing colors and line thickness
7.9.1
Presetting colors and line
thickness
Colors
•
To change the colors defined for the display
of the elements on the monitor:
•
Click on "Colors" in the Graphic Toolbar.
The "Draw Preferences" window will open.
• Select the "Element colors and thickness" tab.
From the "Elements" list in the left window
pane, select the element the color of which you
want to change.
- Cut-Line: color of the lines along which the
laser is to cut.
-
Cut-Area: color of the element areas if you
activate the function for showing or calculating areas (refer to chapter 7.11).
-
LPC-Dot: color of the dots the laser beam
touches with the automatic laser function
"LPC" in order to catapult the area.
-
AutoLPC-Dot: color of the dots the laser
beam touches in the automatic function
"AutoLPC".
-
RoboLPC-Line: if an open element is envisioned for the "RoboLPC" laser function, but
the distance between the two finish dots is
greater than the value specified in "Distance
of RoboLPC joint" (refer also to
chapter 11.4), the distance is automatically
shortened to the preset value. This automatically determined line is displayed in the
color selected here.
-
In the "Elements" section you will find a list of the
element properties for which you can change the
color; the colors available are given in the "Colors"
section.
In the "Select values for" section you will find settings for the dash thickness and dot thickness.
•
Lines that close open elements are also displayed in this color if the functions
"Close&Cut" or "Close&Cut+AutoLPC" are
selected.
RoboLPC-Dot: color of the dot the laser
beam touches with the automatic laser function "RoboLPC" in order to catapult the detached area.
-
Ruler-Line: color of the lines for measuring
(refer also to chapter 7.11).
-
Text-Field: background color of text elements (the text itself is always black).
-
Number-Field: background color of the field
with the element number and, where applicable, the comment (number and comment
are always black).
Select the desired color from the color palette
in the right window pane.
Info:
Select the colors so that they contrast strongly
with your sample. This way your elements will
be more readily recognizable.
•
•
415109-2614-101 e 09/09
Proceed the same way for all element properties for which you want to change the color.
Click on the "Apply" button (the settings are
applied, the window remains open), or
click on the "OK" button (the settings are
applied, the window is closed).
85
Changing colors and line thickness
To change the settings for the line thickness
and dot thickness:
7.9.2
You can enter values for the following parameters
in the three fields in the "Select values for:" section:
- Line thickness: thickness of "Figure" elements,
You can either select colors for new elements to be
drawn in the "Draw Preferences" window,
"Element colors and thickness" tab (refer to
chapter 7.9.1), or as described in the following
from the Color Palette. You can define which colors
appear in the Color Palette.
-
Dot thickness: diameter of "Dot" elements,
-
Ruler thickness: thickness of measuring lines
•
Enter the desired values in the corresponding
fields and confirm your entries by clicking "OK".
Info:
The set thickness of the lines or dots is not
related to the width of the laser cut line or the
diameter of the laser beam. These are dependent on the laser parameters setting: laser energy, laser focus and movement speed of the
stage; refer also to chapter 11.4.
Selecting colors for elements to
be drawn new
To define the colors displayed in the Color
Palette:
Colors
•
Click on "Colors" in the Graphic Toolbar.
The "Draw Preferences" window will open.
• Select the "Color Names" tab.
All colors that can be added to the Color Palette are
displayed on the tab. All colors with a name appear
in the Color Palette. You can enter color names by
hand or select one of the presettings:
86
415109-2614-101 e 09/09
Changing colors and line thickness
You can delete all color names using the "Clear
All" button.
7.9.3
Info:
Note that no colors are displayed in the Color
Palette if you have deleted all color names and
not selected any new colors.
The colors of elements that have already been
drawn can be changed:
- using menu commands in the main window
-
using commands in the Element List
-
Select the default color set using the "Default"
button (black, white, red, green and blue).
-
using an icon button and the Color Palette
-
You can add all the colors to the Color Palette
using the "Set all" button.
To change the color using a menu command:
•
Click on one of the buttons mentioned to select
a presetting, or
click on the name field for a color that you want
to use and enter a name for this color.
-
Info:
You can select any term as a color name, that
is not just the name of the color. In this way
you can, e.g., allocate specific colors to certain
structures in your sample, for instance
"cancer" or "liver".
If you move the mouse pointer onto a color
field in the Color Palette, the name of the color
is displayed as a tool tip.
To select a color for new elements to be
drawn:
•
•
•
Change colors of elements that
have already been drawn
Info:
For text elements the color of the flag can be
changed as described below. How to change
the color of the text background is described
further below.
•
•
Select the element whose color you want to
change (in the main window or "Element List"
window).
Click on the menu item "Change" in the "Edit"
menu (in the main window or in the "Element
List" window).
The "Element Properties" window will open.
Select the Graphic Tool with which you want to
draw the next element.
Left-click on the desired color in the Color
Palette to select it.
Draw the required element(s).
Info:
The selected color only applies to the type of elements that you selected prior to choosing the
color. If, for example, you have selected a color
for "Line" type elements and then change to
the "Dot" graphic tool, new elements of this
type will be displayed in the color that is selected in the "Draw Preferences" window, "Element
colors and thickness" tab for "LPC Dot"!
•
Select the required color on the "Color" list and
close the window by clicking on the "OK" button.
Info:
You can only change the color of one element
at a time.
415109-2614-101 e 09/09
87
Working with element groups
To change the color using an icon button and
the Color Palette:
Info:
For text elements the color of the flag can be
changed as described below. How to change
the color of the text background is described
further below.
Change Figure Color
•
•
•
•
Click on the "Change Figure Color" icon button.
Click on the desired color in the Color Palette.
Click on the element whose color you want to
change.
Click on any other tool on the graphics toolbar
to turn off the "Change Color" function again.
To change the color of the comment background for text elements:
Info:
If you follow the procedure described below
you will change the background color of all the
existing text elements. It is not possible to
change the background color of one individual
text element.
•
•
Select the Text Tool in the Graphic Toolbar.
Choose the desired background color from the
Color Palette.
The background color will be changed.
88
7.10 Working with element groups
You can merge multiple elements into a group. For
example, you need element groups for the "Serial
Sections" function (refer to chapter 8.7).
An element group can contain any element types.
In the "Element List" window groups are processed
as elements: for each group a separate entry is
displayed.
You can edit an element group similar to editing
single elements:
- You can move, stretch, straighten and rotate or
copy the entire group (refer to chapter 7.8).
-
You can edit or delete single elements within a
group like ungrouped elements (refer to chapter 7.8).
-
You can center a group of elements on the
monitor by a menu command (refer to
chapter 7.5).
-
You can add elements to a group.
-
You can delete elements from the group.
-
You can change the name defined for a group
(refer to chapter 7.8.5).
Info:
If you want to merge elements into a group,
add elements to an existing group or remove
elements from a group, you can use the menu
commands in the main window of PALM
RoboSoftware or in the "Element List" window
after selecting the elements.
Note that you have to use the corresponding
menu command in the main window, if you
have selected the elements on the monitor. If
you have, however, selected the elements in
the "Element List" window, you need to use the
corresponding menu command in this window.
415109-2614-101 e 09/09
Working with element groups
To merge multiple elements into a group:
To add other elements to a group:
•
•
•
Select the elements you want to merge into a
group either on the monitor or in the "Element
List" window.
Click on the menu item "Create Group" in the
"Edit" menu (in the main window or in the
"Element List" window).
•
Select the elements you want to add to a group
either on the monitor on in the "Element List"
window.
Click on the menu item "Add to Group" in the
"Edit" menu (in the main window or in the
"Element List" window).
If you have created only one element group so far,
the elements will be added to this group. If you
have created more than one group, the "Groups"
window will open.
• Click on the desired group to which the elements should be added and close the window
by clicking on "OK".
To remove elements from a group:
The selected elements are merged into a group. A
new entry for the group appears in the "Element
List" window. For the elements belonging to the
group, the name of the group is entered in the
"Grp" column. The name of the group is automatically assigned by the PALM RoboSoftware, in the
figure above "Grp04"; you can change the name
as described in chapter 7.8.5.
•
•
Select the elements you want to remove from
the group either on the monitor or in the
"Element List" window.
Click on the menu item "Remove from Group"
in the "Edit" menu (in the main window or in the
"Element List" window).
To ungroup elements:
•
In the "Element List" window, select the group
you want to ungroup (do not select the elements in the group).
•
Click on the menu item "Delete selected elements" in the "Edit" menu.
The selected group is ungrouped, the elements are
retained.
• Click on the menu item "Renumber" in the
"Edit" menu to update the numbering of the
remaining elements.
To the element number of each element contained
in a group the group number is prefixed. All elements of the group are displayed with a surrounding dashed rectangle.
415109-2614-101 e 09/09
89
Measuring
To select single elements within a group:
To show and hide area sizes:
On the monitor:
Element areas
Ctrl key + Pointer Tool
•
•
•
Press and hold the Ctrl key.
Click on the element within the group, that you
want to select.
In the "Element List" window:
• Click on the element you want to select.
7.11
Measuring
PALM RoboSoftware provides functions for calculating the length of lines or the size of areas.
Note!
The measuring functions of PALM
RoboSoftware are not calibrated at the factory;
they are an estimated value only. Carl Zeiss
MicroImaging GmbH does not guarantee the
accuracy of the performed measurements.
The measuring functions have to be checked
and, if necessary, calibrated by the user (for
example, with a ocular micrometer).
Correct determination of lengths and areas
requires that your system is correctly calibrated. If in doubt, refer to chapter 4.4.
Click on the "Areas" icon button in the Graphic
Toolbar.
Area sizes of all drawn "Figure" type elements will
be shown in µm². At the same time, the areas
measured will be displayed with a transparent color marking.
• To hide the area display, click again on the
"Areas" icon button in the Graphic Toolbar.
Note!
If elements are not drawn closed, the start and
end points of the elements are connected by a
straight line for calculating the area.
Info:
Only the area of elements of type "Figure"
(line, freehand, rectangle, circle) is indicated.
The displayed size of "Dot" type elements has
no relation to the diameter of the laser beam or
the size of the catapulted area; the display of
an area size for these elements therefore has
no practical use.
To measure the length of lines:
Ruler
Quadratic Attribute
•
•
•
90
Click on the "Ruler" icon button in the Graphic
Toolbar.
If you select "Quadratic Attribute" as well, the
drawing function is limited to horizontal and
vertical lines.
Click on the start dot of the line whose length
you want to determine and keep the mouse
button depressed.
With the mouse button depressed, move the
cursor to the end dot of the line to be measured
and release the mouse button.
415109-2614-101 e 09/09
8
Working with the "Element List" Window
The "Element List" window provides a summary in
tabular format of all elements and their properties.
It includes a series of functions for preparing and
managing your elements.
Depending on the slideholder used you will find at
least two tabs: one for displaying totals and one or
more for your slide(s) (in the example shown
above there is one tab each for the 3 slides in a
SlideHolder 3x1.0).
8.1 Items shown on the "Slide" tab
The "Show Types" field allows you to decide
whether all elements or only the elements of specific types are to be listed (lines, freehands, dots,
rulers, text, references, etc.).
To open the "Element List" window:
•
•
Click on the menu item "Element List" in the
"View" menu.
To close the "Element List" window:
•
Click on "Close" in the "File" menu in the
"Element List" window.
415109-2614-101 e 09/09
Open the selection list "Show Types" and select
the desired entry.
You will find the following information on the individual elements in the columns of the table (see
figure above):
- Color: color in which the element is displayed
on the monitor
-
Nr: sequential number of the element
-
Name: name of the Elements (you can enter
and edit the name via the menu command
"Edit > Change")
-
Type: element type (line, freehand, dot, ruler,
text, reference, etc.)
-
Laser function: laser function selected for the
element (you can change the laser function: refer to chapter 8.4). For elements that are not
processed with the laser (text, ruler, reference,
group) this cell remains empty.
91
Items shown on the summary tab
-
Objective: objective that is used to process the
element with the laser (as a rule the objective
that was used when the element was drawn;
you can select a different objective: refer to
chapter 8.5)
-
Comment: a comment entered by you. You can
edit this entry via the menu command "Edit >
Change".
-
Well: coordinates of the well into which the element is catapulted when a laser function with
LPC is triggered (refer to chapter 7.3.2 "Defining well for catapulting" and chapter 8.6 "Defining wells for the next laser operation".
-
Area (µm2): area of the elements of type
"Figure" (Freehand, Line, Rectangle, Circle)
-
For element types "Reference", "Reference" is
automatically entered here.
For elements that you have drawn using the
"Grid Rectangle" tool, appropriate information
is entered automatically: "morph", followed by
the number of elements, number of rows x
number of columns, orientation.
H x W: height and width of the elements
-
Position: coordinates of the element
-
Grp: name of the group, if the element belongs
to an element group
-
cut, shot: number of "cut" and "shot" laser
functions performed
Selected elements are shown on a blue background, while elements that have already been
processed by the laser are shown on a green background.
8.2 Items shown on the summary tab
If you are using a multiple slideholder (e.g.
SlideHolder 3x1.0) you can use the field "Show
summary for" to specify whether total values are
to be shown for only one slide or for all the slides
combined.
The elements are grouped in the table by color and
element type (Elements of the types "Ruler",
"Text", "Reference" and "Group" are not listed on
the "Summary" tab):
- Color: color in which the elements are displayed on the monitor
-
92
-
Number of Elements: number of elements
whose color matches "Color" column and type
matches "Type of Elements" column.
-
Area (µm2): Area of the elements (only elements of type "Figure"; for elements of other
types, an area value has no meaning)
-
Remarks
Type of Elements: element type
415109-2614-101 e 09/09
Functions in the "Element List" window
The following summary information for all elements can be found below the table:
- the total number of elements (not including
elements of the types "Ruler", "Text",
"Reference" and "Group")
-
the total area of all elements of type "Figure"
To specify which slide the total values should
be shown for:
(only for multiple slideholder)
•
Click on the arrow on the right by the "Show
summary for:" field on the "Summary" tab.
A list containing all the slides will open (example
shows the SlideHolder 3x1.0).
• Click on the name of the slide for which you
would like total values to be displayed, or
click on "over all" if total values for all slides are
to be displayed together.
8.3 Functions in the "Element List"
window
-
Copying elements (refer to chapter 7.8.2)
-
Forming and editing groups of elements (refer
to chapter 7.10)
-
Transferring elements from one sample to another sample (refer to chapter 8.7)
-
Centering an element on the monitor (refer to
chapter 7.5)
-
Selecting the laser function for an element
(refer to chapter 8.4)
-
Selecting the objective with which the element
is to be processed using the laser (refer to
chapter 8.5)
-
Selecting elements that are to be processed using the laser (refer to chapter 11.6)
-
Starting the laser (refer to chapter 11.7)
-
Stopping a running laser function (refer to
chapter 11.9).
-
Defining operating mode for PALM RoboMover
and specifying the distribution of the elements
to be catapulted to the wells (refer to
chapter 8.6).
Info:
Even when the "Element List" window is open,
you can still access all the functions that are
offered in PALM RoboSoftware main window.
This means that you do not have to close the
"Element List" to continue working.
The overview below shows which functions are
available in the "Element List" window. Many of
these functions are also available in the main window for the PALM RoboSoftware:
- Adding a new set of elements (File Mode and
Database Mode; refer to chapter 7.2)
-
Saving elements and loading saved elements
(File Mode; refer to chapter 9.2)
-
Exporting and importing the elements (refer to
chapter 9.4)
-
Printing of elements to a file or on a printer
(refer to chapter 9.5)
-
Selecting and deselecting elements (refer to
chapter 7.6.3)
-
Changing properties of elements (refer to chapter 7.8.5 "Adding a name or a comment to elements" and 7.9.3 "Change colors of elements
that have already been drawn")
-
Deleting individual elements or all elements (if
you are working in Database Mode, it is only
possible to delete elements that have not yet
been processed using the laser; refer to
chapter 7.7)
-
Updating element numbering (refer to
chapter 7.8.4)
415109-2614-101 e 09/09
93
Allocating a laser function to elements
8.4 Allocating a laser function to
elements
The laser function that is applied to the related
element when the cutting laser is started is stated
in the "Laser function" column. Initially this is the
laser function that was selected when the element
was drawn (refer to chapter 7.3.1).
8.5 Allocating an objective to elements
The objective used to process the element with the
laser when the cutting laser is started is given in
the "Objective" column. Initially this is the objective that was in use when the element was drawn.
You can change this setting for each element.
You can change this setting for each element.
•
•
•
•
Select the elements to which you want to allocate a different laser function.
Open the drop-down list with the laser functions and click on the required function.
Info:
You can also allocate a different laser function
to an individual element in the "Element properties" window. Select the element and open
the "Element properties" window using the
"Edit>Change" menu command.
94
Select the elements to which you want to allocate a different objective.
Open the drop-down list with the objectives and
click on the required function.
Info:
You can also set a different objective for an individual element in the "Element properties"
window. Select the element and open the
"Element properties" window using the
"Edit>Change" menu command.
415109-2614-101 e 09/09
Defining wells for the next laser operation
8.6 Defining wells for the next laser
operation
8.6.1 Defining wells manually
•
Select the element for which you want to define
a well for the next laser operation.
•
In the well drop-down list in the "Element List"
window, click on the coordinates of the well into
which you want to catapult the selected element.
Info:
The functions described in the following are
only available if your system is equipped with
PALM RoboMover. Please contact Carl Zeiss
MicroImaging GmbH if you wish to upgrade
your system.
For each element you can manually define the well
into which it is to be catapulted, or you can have
the PALM RoboSoftware automatically calculate
and implement the distribution of the wells. For
this purpose, first select the elements for which
you want to define the distribution in the wells.
Then select an operating mode and define various
parameters. The exact procedure and the function
of the different operating modes are described in
the following. Chapter 8.6.3 describes how the
PALM RoboSoftware calculates the automatic distribution of the elements.
Info:
Note that PALM RoboMover must be configured
before you can define wells (refer to
chapter 12.2.1).
Note!
Ensure that a well is assigned to each element
before you trigger the automatic laser functions. If a well is not allocated to an element,
the PALM RoboMover remains stationary at
the current position and the element is catapulted into the well last used.
Info:
You can also select several elements simultaneously and allocate these all to one well.
Info:
The selection "manual" means that a specific
element is not allocated to a specific well. If
this element is processed using the laser, PALM
RoboMover will not be moved. The element will
be catapulted into the last well used.
Info:
You can also allocate a different well to an individual element in the "Element properties" window. Select the element and open the "Element
properties" window using the "Edit>Change"
menu command.
The allocation of the elements to the wells is also
output using the "Export Elements" (refer to
chapter 9.4) and "Print Elements" (refer to
chapter 9.5) functions. In this way you can log
which element is in which well.
415109-2614-101 e 09/09
95
Defining wells for the next laser operation
8.6.2 Setting automatic distribution of
the elements to wells
•
•
Select the elements for which you want to
define wells for the next laser operation.
Click on the "Calculation" entry in the "Element
List" window on the "Collection Device" menu.
Operating Mode "n elements per field"
In this way you can define how many elements are
catapulted into a well. As soon as the number of elements set has been catapulted into the first well
defined, PALM RoboMover moves automatically to
the next well.
The "Distribution Calculator" window opens. Select
an operating mode in the left half of the window.
The related settings appear once you have made
the selection.
•
•
Select the required Operating Mode in the
"Operational Configuration" area.
The significance of the Operating Modes and the
related settings are described in detail in the following.
Fields that reflect the distribution of the elements
to the wells are displayed in the right half of the
window. The significance of these fields is described in chapter 8.6.3.
The window has three buttons:
- If you click on the "Cancel" button, the window
will be closed, your settings discarded.
-
If you click on the "Apply" button, your settings
will be applied (i.e. entered in the "Well" column in the "Element List" window). The
"Distribution Calculator" window remains open.
-
If you click on "OK", the settings will be applied.
The window will close.
96
•
In the "n:" field enter the number of elements
that are to be catapulted into each well.
Select the co-ordinates of the first and last well
into which the elements are to be catapulted on
the "Start with Field:" and "until Field:" drop
down lists.
Info:
The order of the wells is defined by the setting
in the “Subtype Configuration” field in the
"RoboMover" window (line by line or column
by column; refer to chapter 12.2.2).
Info:
As soon as the last well has been reached and
filled, the laser operation is interrupted, even
if further elements were selected for catapulting (refer to chapter 8.6.3).
415109-2614-101 e 09/09
Defining wells for the next laser operation
Operating Mode "spread elements evenly"
Operating Mode "sequence 1; 1+X; 1+2X;…"
With this mode you define the number of wells into
which the elements are catapulted. The elements
are divided evenly over these wells.
Using this mode one element is catapulted into the
first well, 1+X elements into the second well,
1+2X elements into the third well, etc. The number X can be selected as required.
•
Select the co-ordinates of the first and last well
into which the elements are to be catapulted on
the "Start with Field:" and "until Field:" drop
down lists.
Info:
The order of the wells is defined by the setting
in the “Subtype Configuration” field in the
"RoboMover" window (line by line or column
by column; refer to chapter 12.2.2).
Info:
Select the number of wells such that the number of elements to be catapulted is an integer
multiple of the number of wells. Put another
way, the number of elements to be catapulted
must be divisible by the number of wells in
which they are to be catapulted without a remainder. If there is remainder from this division, the elements cannot be evenly
distributed over the wells. In this case the
number of elements catapulted is limited to
the number that ensures the same number
are catapulted into each well. The remaining
elements are not catapulted (refer to
chapter 8.6.3).
Example: if you have defined 10 wells and 54
elements are to be catapulted, 5 elements will
be catapulted into each well. The remaining 4
elements are not catapulted.
415109-2614-101 e 09/09
•
•
Enter a value for X in the "X:" field.
Select the co-ordinates of the first and last well
into which the elements are to be catapulted on
the "Start with Field:" and "until Field:" drop
down lists.
Info:
The order of the wells is defined by the setting
in the “Subtype Configuration” field in the
"RoboMover" window (line by line or column
by column; refer to chapter 12.2.2).
Info:
All wells are filled one after the other as per
the mathematical series. If there are no longer enough elements available for a well, the
laser operation is interrupted. Remaining elements are not catapulted.
97
Defining wells for the next laser operation
Operating Mode "area per field"
With this mode you define the number of wells into
which a defined area is catapulted.
•
•
Enter the area that is to be catapulted into each
well in the "Area:" field.
Select the co-ordinates of the first and last well
into which the elements are to be catapulted on
the "Start with Field:" and "until Field:" drop
down lists.
Info:
The order of the wells is defined by the setting
in the “Subtype Configuration” field in the
"RoboMover" window (line by line or column
by column; refer to chapter 12.2.2).
Note!
Elements are catapulted into the individual
wells until the area you have defined is exceeded. Then PALM RoboMover is moved to
the next well.
I.e. the actual area catapulted into a well is in
general somewhat larger than the value you
have specified. Note that the area catapulted
into each well can vary if your elements are of
varying size.
Operating Mode "sequence area; area+delta;
…"
Using this mode a defined area is catapulted into
the first well, the defined area + a delta is catapulted into the second well, the defined area + 2
delta is catapulted into the third well, etc. The area
and delta can be selected as required.
•
•
Enter the required values in the "Area" and
"Delta" fields.
Select the co-ordinates of the first and last well
into which the elements are to be catapulted on
the "Start with Field:" and "until Field:" drop
down lists.
Info:
The order of the wells is defined by the setting
in the “Subtype Configuration” field in the
"RoboMover" window (line by line or column
by column; refer to chapter 12.2.2).
Info:
All wells are filled one after the other as per
the mathematical series. If there are no longer enough elements available for a well, the
laser operation is interrupted. Remaining elements are not catapulted.
Note!
Elements are catapulted into the individual
wells until the area you have defined is exceeded. Then PALM RoboMover is moved to
the next well.
I.e. the actual area catapulted into a well is in
general somewhat larger than the value you
have specified. Note that the area catapulted
into each well can vary if your elements are of
varying size.
98
415109-2614-101 e 09/09
Defining wells for the next laser operation
Operating Mode "morphology conserving"
This operating mode is for catapulting elements
that you have drawn with the "Grid Rectangle"
Tool (refer to chapter 7.3.8). During this process a
matrix of rows and columns of rectangles is created. These rectangles are individually cut and catapulted when an laser function is started. Using the
"morphology conserving" operating mode the individual rectangles are catapulted into neighboring
wells such that the arrangement of the rectangles
is represented by the wells in the collection device.
8.6.3
Automatic calculation of the
distribution of the elements
If the parameters for the selected Operating Mode
are not chosen correctly, not all elements selected
to be catapulted will actually be catapulted. Using
the "Distribution Calculator" it is easy to find the
right parameters. The "Distribution Calculator" automatically calculates the distribution of the elements to be catapulted over the number of wells
defined. The results of the calculations are displayed in the "Distribution calculation" area in the
"Distribution calculator" window.
Info:
If you have selected the "morphology
conserving" operating mode, only the number
of elements to be catapulted appears in the
“Distribution calculation” area.
Note!
Note that you must enter the same values in
the "Orientation", "Rows" and "Columns"
fields that you defined when drawing the
"Grid rectangle" element.
If you cannot remember your settings, you
can view them in the "Comment" column in
the "Element List" window.
•
•
•
In the "Orientation" drop down list select the
order in which the wells are to be used.
Enter the number of rows and columns in your
"Grid rectangle" in the "Rows" and "Columns"
fields.
Select the coordinates of the first well into
which the elements are to be catapulted in the
“Start with Field:” drop-down list.
Info:
The order of the wells is defined by the setting
in the “Subtype Configuration” field in the
"RoboMover" window (line by line or column
by column; refer to chapter 12.2.2).
The information in the fields have the following
significance:
Number of selected well(s):
Number of selected wells defined by the selection in the "Start with Field:" and "until Field:"
fields
Number of used well(s):
Number of wells into which elements are actually catapulted after the triggering of the laser
function.
Number of elements to process:
Total number of elements that are to be processed (this is the number of elements that are
selected in the "Element List" window, or the
number of unprocessed elements).
Number of elements per well:
Number of elements that are catapulted into
each well.
For the "n elements per field" Operating Mode
this figure is the number of elements defined by
you in the "n:" field.
The calculated number is displayed for the
"spread elements evenly" Operating Mode. The
number depends on the number of wells
defined and the number of elements to be catapulted.
415109-2614-101 e 09/09
99
The "Serial Sections" function
The number of elements catapulted into each
well can be or is different for the “Sequence 1;
1+X; 1+2X; …”, “area per field” and "sequence
area;..." operating modes. For this reason this
field does not appear for this operating mode.
Remaining elements:
Number of elements that will not be catapulted
with the settings selected. The reason for this
remainder is dependent on the selected Operating Mode:
"n elements per field" Operating Mode: the
number of wells defined is insufficient for all
elements.
"spread elements evenly" Operating Mode:
remainder from the division of the number of
elements to be catapulted and the number of
wells defined.
"sequence 1; 1+X; 1+2X; …" Operating Mode:
either the number of wells defined is insufficient for all the elements, or the remainder
does not fulfill the condition for the mathematical series.
8.7
The "Serial Sections" function
With the function "Serial Sections" you can transfer elements, that you have drawn for a sample, to
other samples. This method saves time when processing consecutive wafers in a tissue sample. The
elements only need to be drawn for one wafer and
are then automatically (or, if required, manually)
transferred to subsequent wafers.
When you transfer the elements, they are adjusted
in such a way that the corresponding structures in
the target sample cover them exactly. You can
also mount the samples at any angle on the slide:
Any differences in the positioning will be compensated for in the course of the adaptation. Make
sure, however, that on assembly, the samples are
not stretched or contracted.
The "Serial Sections" function enables series of
samples - especially those whose structures only
become visible following a specific treatment such
as coloring to be processed significantly more
quickly: only a single sample needs to be treated
accordingly. You then only need to draw the elements for this one sample and then transfer them
to the other samples. Through the adaptation
when transferring elements, your elements will
also be placed on the other samples on the desired
spots.
Note that the adaptation can only function satisfactorily if the relative position of the structures on
the various samples, is identical. If the tissue block
out of which you cut the samples, contains a diagonal structure for example, and the other structures are vertical, the differences cannot be
automatically compensated for. You have the possibility to correct such variations by hand after the
transfer procedure. To keep any necessary corrections small, it is recommended that the samples
are processed in the same sequence as when they
were cut out of the tissue block and to transfer
each of the elements from one sample to the next
(1 > 2, 2 > 3, ...; if necessary, after manual correction).
The sample for which you draw the elements is referred to below as the source sample. The sample
to which the elements are transferred is referred
to as the target sample.
You can carry out the transfer and adaptation with
PALM RoboSoftware; the adaptation, if required,
also manually.
100
415109-2614-101 e 09/09
The "Serial Sections" function
To carry out automatic adaptation, proceed as follows:
1. Prepare the samples: create three markings in
your block (before cutting the wafers), e.g.
three pinpricks. These markings must be
clearly visible under the microscope. Then cut
the wafers and mount them on the slides. If
required, treat one sample (the source sample) in order to make the structures visible.
2. Creating reference elements on the source
sample: Insert the first sample (your source
sample) into the microscope and define three
reference points on the markings made before
cutting.
3. Drawing and processing elements: Now draw
the elements for all the samples which are to
be processed with the laser and join them together with the reference points into a group.
4a. Preparing the target sample: insert the target
sample in the microscope, also define three
reference points here at the markings (in the
same order as on the source sample), and
combine these into a group.
5a. Transferring elements to the target sample:
PALM RoboSoftware moves the reference
points on the source sample automatically to
the locations of the corresponding reference
points on the target sample and recalculates
all the transferred elements, so that they
match up with respective structures on the
slide.
Similarly, for the manual adaptation:
1. -3. as with automatic adaptation.
4b. Preparing the target sample: position the target sample under the microscope. You do not
need to define any reference points in this instance.
5b. Transferring elements to the target sample:
To do this, move the reference elements of
the source group manually to the position of
the corresponding structures on the target
sample. PALM RoboSoftware recalculates all
the other elements to bring them into line with
the corresponding structures on the slide.
Step 1: preparing the samples (automatic
and manual adaptation)
•
•
•
Before cutting, create three markings in your
sample block that are easily recognizable under
the microscope, e.g. three pinpricks. The markings should form a triangle (i.e., not a straight
line); the further away they are from each
other, the more accurate the adaptation will be.
Make sure that you place the markings exactly
vertical to the cutting plane.
Produce the wafers from the sample.
Select a sample for the source sample and treat
it, if necessary, with a coloring substance, or
similar.
Step 2: creating reference elements on the
source sample (automatic and manual
adaptation)
•
Insert the source sample into the slideholder of
the stage.
Info:
The following image examples relate to the
SlideHolder 3x1.0. The source sample was inserted in position 1, the target sample in position 2 ("Slide 1" and "Slide 2" tab in the
"Element List" window).
Info:
Before further processing, it is advisable to
create an overview scan of the sample, with
the help of the PALM Navigator (refer to
chapter 6). This makes the targeting of individual areas of your sample far easier.
Reference Tool (Reference Point)
Freehand Tool
Now you will create the reference elements.
There are two options available:
- Insert an element of the type "Reference Point"
into the center of each marking.
- Draw three elements, which correspond exactly
to your markings. For this, it is advisable to use
the freehand tool. With which you can reproduce the shape of the markings exactly.
PALM RoboSoftware then calculates the center
of each element in succession and, at each of
these points, automatically inserts an element
of the type "Reference Point".
Info:
It is advisable not to mix both methods.
Either set or draw three reference elements.
415109-2614-101 e 09/09
101
The "Serial Sections" function
The procedure is essentially the same, whether
you draw elements with the freehand tool or set
reference elements with the reference point tool.
If you have drawn elements, you will create a reference element in the center of the elements using
the "Define Group-Reference-Figure" command.
This point is omitted if you work with the reference
point tool (refer to the following description).
It is advisable to use the freehand tool to draw elements. The subsequently necessary allocation of
the other samples to the respective markings will
then, as a rule, be more exact. This procedure is
described in the following.
• Position the stage so that one of the three
markings in your sample is displayed on the
monitor (e.g., with the help of the PALM
Navigator).
• Select the desired drawing tool (the Freehand
Tool is recommended) and draw an element to
the shape of your marking.
• Position the stage on the second marking and
draw an element here also to the shape of this
marking.
• Proceed likewise with the third marking.
• Open the "Element List" window.
Your three elements are now listed there.
• Select the three elements.
•
The next two steps are omitted if you have drawn
elements of the "Reference Point" type. (In this
case, continue with "Step 3: Drawing and Processing Elements ... ".)
•
Select the three drawn elements and click on
the menu item "Define Group-ReferenceFigure" in the "Edit" menu.
In the "Edit" menu, click on the menu item
"Create Group".
The three elements are joined together to form a
group. The group appears as a fourth element in
the "Element List" window.
Allocate a name to the group, e.g., "Slide 1":
• Double click on the element group.
The "Element Properties" window will open.
• Type a name and click on the "OK" button.
Info:
It is not essential to allocate a name to the
group. As you will no doubt later draw further
elements and create further groups, you will
thus be easily able to retain an overview.
102
This opens the "Groups" window.
• Choose the group to which the elements belong
and click on the "OK" button to close the window.
PALM RoboSoftware creates three new elements of
the "Reference" type.
415109-2614-101 e 09/09
The "Serial Sections" function
Step 3: drawing and processing elements
(automatic and manual adaptation)
•
•
Draw the elements, which are to be processed
on all samples.
Add these elements to the reference group.
(Select the elements and click on the menu
item "Add to Group" in the "Edit" menu.)
Note!
If you transfer elements to another sample,
as described below, only those elements
within the group will be considered.
Info:
With the command "Undefine GroupReference-Figure" you can undo the definition
of an element as a reference element. The
original element, along with the "Reference"type element created by PALM RoboSoftware
are preserved; just the connection between
the two elements will be deleted.
Within each of the three drawn elements, the respective reference element created by PALM
RoboSoftware, will be shown.
Step 4a: preparing the target sample
(automatic adaptation)
You have now created your reference for transferring the elements to further samples.
Likewise, you will define three reference points or
reference figures on the target samples. Proceed
in exactly the same way as described for the
source sample:
• Insert the slide, onto which you want to transfer the elements, into the slideholder.
If you use a multiple slideholder, it is advisable
to leave the source sample in place and insert
the target sample in a vacant position.
• Position the stage successively on the three
markings on the target sample and draw an
element on each in the same way as you did for
the source sample.
Note!
When creating the reference elements,
choose exactly the same sequence as for the
source sample. Otherwise, the references will
not be correctly collated.
•
•
415109-2614-101 e 09/09
If you are using a multiple slideholder, then you
should click on the tab associated with your target sample in the "Element List" window
("Slide 2" in the example image shown below).
Group the three elements and allocate the
group a name, e.g., "Slide 2".
103
The "Serial Sections" function
Step 5a: transfering elements to the target
sample (automatic adaptation)
Now transfer the elements which are to be processed with the laser, from the source to the target
sample. The reference points on the source sample
will then be aligned with those of the target sample.
•
•
Click on the menu item "Match Serial Section
Group" in the "Edit" menu.
Select the three drawn elements and click on
the menu item "Define Group-ReferenceFigure" in the "Edit" menu (not applicable, if
you have drawn elements of the "Reference
Point" type).
This opens the "Groups" window.
• Choose the group to which the selected elements belong (in the example, "Slide 2"), and
click on the "OK" button to close the window.
PALM RoboSoftware creates three new elements of
the "Reference" type for the target sample.
The "Match Serial Section Groups" window opens.
• Click on the group, in the table at the left of the
window, which you want to transfer to the other
sample (in the example "Slide1").
• Click on the sample, in the table at the right,
onto which the elements are to be transferred
(in the example "Slide2").
Info:
In the example above, only one group of elements exists on each sample. If you have created several groups, they will also appear in
the tables. Make sure you always choose the
correct group.
•
•
104
If you have inserted the target sample in PALM
RoboStage II in the same position that the
source sample occupied before, you should
select the "Delete source group after matching
elements into destination group" box.
As, in these cases, the elements are allocated
to the same slide position, they would appear
double if you didn't check this box.
Close this window by clicking on "OK".
415109-2614-101 e 09/09
The "Serial Sections" function
•
The elements are copied to the target sample. At
the same time an adaptation occurs: The reference elements are moved to the respective position on the target sample. Any differences in the
position and shape of the elements between the
two samples will be balanced-out.
Note!
Check the position of the matched elements if
your tissue block contains diagonal structures. Match the position, if required the
shape also, of such elements – by hand, if
necessary (refer to chapter 7.8.1).
The reference element "1" will be displayed on the
monitor.
• Drag the mouse cursor onto the microscope
image.
The mouse cursor changes to the "Group
Reference Pointer", recognizable by the attribute
"R". With the "Group Reference Pointer" you can
select reference elements and then move them.
• Select the reference element with a mouse click
and then drag it to the respective marking in
your sample.
Note!
Make sure that you do, in fact, move the reference element to the respective marking. If
you move it to another marking, the match
will be faulty.
Now you can process your elements on the target
sample with the laser.
Info:
Elements which have changed shape are
identified by an asterisk (*) following the element type in the table in the "Element List"
window.
Step 4b: preparing the target sample
(manual adaptation)
•
Insert the slide, onto which you want to transfer the elements, into the slideholder.
Step 5b: transferring elements to the target
sample (manual adaptation):
•
•
In the main window of PALM RoboSoftware,
move the mouse cursor to the menu item "Goto
Reference > Group" in the "Motion" menu and
click the item "Ref-1".
•
Proceed in the same way with the other two reference elements.
By moving the reference elements, the shape and
position of the remaining elements will be automatically matched.
• Click on the menu item "Match Serial Section
Point manual" in the "Edit" menu.
The pointer reverts to the standard pointer.
Note!
Check the position of the matched elements if
your tissue block contains diagonal structures. Match the position, if required the
shape also, of such elements – by hand, if
necessary (refer to chapter 7.8.1).
Select the group which you want to match (in
the example, Slide 1").
Click on the menu item "Match Reference Point
manual" in the "Edit" menu.
Info:
This menu command is only available in PALM
RoboSoftware's main window.
415109-2614-101 e 09/09
105
106
415109-2614-101 e 09/09
9
Saving and printing elements
PALM RoboSoftware has a number of options for
saving, exporting or printing the elements you
have drawn or their properties,
- to load them into PALM RoboSoftware later on
again.
This allows to reuse a sample in the stage and
superimposing the associated elements on the
monitor.
- to observe and edit the element properties in
another program.
- to enable the element properties to be archived
as a printout.
To help you with this, three functions are available
that generate the different output formats:
- "Save Elements" generates a binary file. That
binary file can be reloaded or reimported into
PALM RoboSoftware (refer to chapter 9.2).
Info:
In Database Mode (refer to chapter 1.7) your
elements are automatically saved in the database. The menu commands "Save
Elements..." and "Open Elements..." are
therefore not available if you are working in
Database Mode. Chapter 9.3 explains how
you can reload elements from the database.
-
-
"Export Elements ... " generates a text file.
That text file can be reloaded or reimported into
PALM RoboSoftware and opened with any text
editor. You can then choose to view, print or
edit the data (refer to chapter 9.4)
The file contains all the properties of elements
that are displayed in the "Element List" window
(display color, number, element type, laser
function, objective, well, area, group membership, number of laser operations performed,
comment, length x width, position) as well as
the coordinates of their anchor points.
"Print Elements ..." prints your elements on a
printer or generates an Excel import file. You
can open such a file with Microsoft Excel or with
another corresponding program. The file contains all element properties, as you have
defined with printing of the elements (refer to
chapter 9.5).
Info:
When you save images you can specify that
they are to be saved along with superimposed
elements (refer to chapter 10). However, it is
always only an image of the elements that is
stored, and you cannot load or import it back
into PALM RoboSoftware window again.
415109-2614-101 e 09/09
9.1 Settings for saving elements in File
Mode
To save elements you can specify a folder. When
you save your settings later, this folder will be selected automatically. However, you do not have to
accept this specification. You can also save your
elements later in another folder. You can also create a new folder when saving.
You can determine whether an element file which
has already been saved but subsequently
changed, is to be saved automatically when you
exit the program, or that the changes made are to
be rejected.
The settings for saving elements can be
carried out in this way:
•
In the "Adjustment" menu, click on the menu
item "PALMRobo ... ".
The "Preferences and Configuration" window
opens.
• Click on the "Elements" tab.
The name of the currently set folder appears in the
"Folder" field of the "Saving Elements" section.
•
Click on the button
.
The "Element folder" window will open.
• Select the desired folder and click on "OK" to
close the window.
You are back in the "Elements" register in the
"Preferences and Configuration" window.
•
Click on the checkbox "Save Element-files
automatically" option in the "Saving Elements"
section to enable or disable this function.
107
Saving and loading elements in File Mode
With the function enabled, the elements are saved
in a file when the program is closed. If you have
already saved your current elements and made
changes to them since the last save (e.g. drawn
new elements or deleted existing elements), the
element file is automatically saved using the name
already defined. If you have not yet saved your
current elements, a new file is created.
• Close the "Preferences and Configuration" window by clicking on "OK".
9.2 Saving and loading elements in
File Mode
Info:
In the "Element List" window, you can specify
that only elements of selected types are to be
displayed in the window (ie, elements of other
types are not included in the table in the
"Element List"; refer to chapter 8.1). This has
no effect on the Save operation: all existing elements will be saved under all circumstances.
To save your elements in a file:
In PALM RoboSoftware main window or in the
"Element List" window:
•
Click on the menu item "Save Elements ... " in
the "File" menu.
The "Save elements to file" window opens. The
exact appearance of this window depends on
which slideholder you are using (chapter 3.3
explains how you should notify the software of
which insert you are using). The illustrations below
show the windows for the PetriDish Holder and the
SlideHolder 3x1.0.
If you are using a slideholder that can accommodate more than one slide, this window can be used
to save the elements for one or more slides at the
same time. The elements for each slide are saved
in a separate file so that they can be reloaded separately (see section "To load an elements file:" in
this chapter). The window also enables you to en-
108
415109-2614-101 e 09/09
Saving and loading elements in File Mode
ter a common name that is used automatically for
all files before a suffix is added to produce a unique
file name.
• If you wish to save the elements for all slides:
Tick the check box "all active", enter a common
file name in the adjacent field to the right
("Test" in the example shown above) and then
click on the "OK" button.
• If you wish to save the elements for one or
more slides:
Tick the corresponding check boxes ("Slide1",
"Slide2" and/or "Slide3" in the example), enter
a file name for each and then click on the "OK"
button.
Your elements will be saved in the specified folder
(refer to chapter 9.1).
If you wish to save your elements in a folder other
than the specified folder:
•
Click on the button
.
The "Please enter/select a file name" window
opens.
• Select the desired folder, enter a file name and
then click on the "Save" button.
To load an elements file:
•
Click on the menu item "Open Elements ... " in
the "File" menu (in the PALM RoboSoftware
main window or in the "Element List" window).
The "Load Elements from file" window opens. The
exact appearance of this window depends on
which slideholder you are using (chapter 3.3 explains how you should notify the software of which
insert you are using). The following description applies to the SlideHolder 3x1.0. You can follow the
same procedure for other slideholders.
•
If you have saved the elements for several or
all slides with the same name and now want to
load them:
Check the "all active" box, enter the common
file name in the adjacent field to the right, if
necessary uncheck the check box for slides for
which you do not wish to load elements, and
then click on the "OK" button.
Your elements will be loaded for all the selected
slides.
• If you want to load the element files for one or
more slides that you have saved with different
names:
Select the related checkboxes (in the example
"Slide1", "Slide2" and/or "Slide3"), in each case
enter a file name (if necessary select the
required file using the
the "OK" button.
button), and click on
Info:
If you have drawn and saved elements for a
slide and now wish to continue working on the
same slide, you need not necessarily insert it at
the same position it occupied when the elements were saved.
If, for instance, you had the slide inserted at
position 1, you could now also insert it at position 2. You must bear in mind, however, that
the elements you had saved for position 1 must
now be loaded for position 2.
Info:
This method can also be used to transfer elements from one sample to another, in that you
draw and save elements for one slide and then
load them for a different slide (for two consecutive tissue samples, for instance). Remember,
though, that the position and probably also the
shape of the elements will not be exactly right
for the second sample, and you will have adjust
the position and shape by hand.
It is therefore recommended when transferring
elements from one slide to another that this is
done using the "Serial Sections" function (refer
to chapter 8.7). This function adjusts the position and shape of elements automatically.
You can also reload the most recently saved elements using the list of most recently used element
files on the "File" menu (if you haven't saved any
elements, this list will be empty):
If you are using a slideholder that can accommodate more than one slide, this window can be used
to load the elements for one or more slides at the
same time.
415109-2614-101 e 09/09
109
Saving and loading elements in Database Mode
•
In the "File" menu click on the name of the element file listed there which you wish to reload.
Info:
If you have used a slideholder that can
accommodate more than one slide, then the
position occupied by the slide when the elements were saved is shown to the right of the
file name. However, you can also load the elements file for a different position.
The loaded elements will appear on your monitor,
and the name of the elements file will be displayed
in the title bar of the program window. Any elements that were already on the monitor will be deleted.
Note!
Take particular care to insert your sample carefully and correctly. If the slide is canted or
twisted, the loaded elements will not match to
the corresponding structures of your sample.
9.3 Saving and loading elements in
Database Mode
In Database Mode you do not need to save your
elements manually: every drawn element is saved
immediately and automatically in the database.
To load elements from the database:
•
Click on "Enter/Select Data ..." in the "File"
menu in either the main window or the
"Element List" window.
The "Please select or enter data!" window opens.
•
If you are using a slideholder that can accommodate more than one slide: select the tab for
the slide for which you wish to load elements.
In the "Source Data", "Specimen Data" and
"Experiment Data" sections of the selection lists in
the "Label" fields you will find all the entries that
you have written to the database (refer to
chapter 7.2.2).
• Open these selection lists one at a time (starting at the top) and select the desired entry.
• Close this window by clicking on "OK".
Your elements are displayed on the monitor and in
the "Element List" window.
110
415109-2614-101 e 09/09
Exporting and importing elements
9.4 Exporting and importing elements
To import your elements:
With the "Export" function you create a file that
can be opened in any text editor.
Info:
The functions "Export Elements" and "Import
Elements" are intended primarily for exchanging data with other programs.
If you are working in File Mode, the "Save
Elements" function is recommended for saving
elements which you later want to reload into
PALM RoboSoftware (refer to chapter 9.2).
In Database Mode you do not need to save the
elements explicitly: they are saved automatically in the database, and can be reloaded from
there (refer to chapter 9.3).
Info:
In the "Element List" window, you can specify
that only elements of selected types are to be
displayed in the window (ie, elements of other
types are not included in the table in the
"Element List"; refer to chapter 8). This has no
effect on the Export operation: all existing
elements will be exported under all circumstances.
•
Click on the menu item "Import Elements ... "
in the "File" menu (in the PALM RoboSoftware
main window or in the "Element List" window).
The "Import Elements" window will open.
• If necessary, open the folder in which you have
saved the file.
• From the displayed list, select the file you want
to load and click on the "Open" button.
The imported elements are displayed on your
monitor. Any elements that were already on the
monitor will be deleted.
Info:
If you are using a slideholder that can accommodate more than one slide, all the existing
elements are saved in one file irrespective of
which sample you have drawn them for.
To export elements:
•
Click on "Export Elements ..." on the "File"
menu (in PALM RoboSoftware main window or
in the "Element List" window).
The "Export Elements" window will open.
• Select a folder to store your elements as necessary.
• If you have saved your elements previously,
the name of the file in which they are saved is
offered by default. If you want to overwrite this
file, do not change the name in the input field,
or
enter a new name for your element file.
• Click on the "Save" button.
You can now open the file with a text editor and
read it, print it, or edit and save it again.
415109-2614-101 e 09/09
111
Printing elements
9.5 Printing elements
The "Print Elements..." function can be used to
either print your elements on a printer or to generate an Excel import file.
To print your elements:
•
•
•
Click on the menu item "Print Elements ... " in
the "File" menu (in PALM RoboSoftware main
window or in the "Element List" window).
The "Print Elements" window will open.
Select the desired columns and column order
and click on "OK" to close the window.
In the list "Sorted by" select the element property, to which the list should be sorted.
You can select whether the file should contain element summaries:
- "print Summary !" records the number of the
elements and the sum of the sizes of their areas
for each type and color to the file.
- "print Totals !" records the total number of elements and their total area to the file.
• If you wish, check the "print Summary!" and
"print Totals!" boxes.
• In the "Print to:" section you should specify
whether you want to output the elements on a
printer or save them in a file.
• Click on "OK".
If you have chosen "File...", the "Print Elements to
File" window will open.
• Enter a name for your file, select a folder if necessary and click on "OK".
Your elements will be printed to a file.
•
•
Choose "Elements", if you want to print all elements or the selected ones only (the option
"selected" is available if only certain elements
are selected only.
In the "Types" list select the element types,
that should be contained in your file.
You can select which kind of element properties
the file should contain.
•
In the "Attributes" list select the desired entry.
As soon as you select the first entry, the "Select
Attributes and Define Columns" window opens.
112
415109-2614-101 e 09/09
Insert a Copyright Note
10 Save Images
You can save the portion of the stage that is currently displayed on the monitor. You can save in
three ways:
- Manual saving: every time you enter the corresponding command, the current image will be
saved (refer to chapter 10.3).
- Automatic saving: every time you release a
laser function, an image will be saved for each
element that has been processed with the laser
before and/or after processing (refer to
chapter 10.4).
- Recorder function (optional): this can be used
to automatically store series of images or video
sequences (refer to chapter 10.5). You can
specify the time interval between images in a
series and the duration of a recording.
You can specify a Copyright Note. If you have opted to display the Copyright Note, then it will be inserted in every image that you store (refer to
chapter 10.1).
10.1
Insert a Copyright Note
You can specify a Copyright Note that will appear
on the image on the monitor and on each stored
image if you have opted to show it (this option can
be switched on and off using the menu command
"View>Copyright").
•
In the "Adjustment" menu, click on the menu
item "PALMRobo ... ".
The "Preferences and Configuration" window
opens.
• Click on the "Images" tab.
If you save an image with the trapping laser
switched on, the image is always saved with the
Trapping Laser Markers.
If you are working in File Mode (refer to
chapter 1.7) you can specify a folder or create a
new folder for images to be stored in. You can also
specify a file name (refer to chapter 10.3).
•
Enter the desired text into the field "Text" and
close the window by clicking on "OK".
If you are working in Database Mode your images
will be stored in the database. The file name is
generated automatically.
For automatic storage of images you can specify
whether your images should be stored with or
without the superimposed elements (refer to
chapter 10.4).
On the other hand, saved images can no longer be
reloaded into PALM RoboSoftware window. However, the supplied PALM RoboSoftware package also
includes a program, which you can use to observe
and process your images: the PALM
InformationCenter. Instructions for working with
the InformationCenter are the subject of the program’s user manual.
415109-2614-101 e 09/09
113
Specify folder to store images in
10.2
Specify folder to store images in
You can specify a folder for storing all images that
are stored in File Mode - either manually, automatically or using the recorder function. If you are
storing images manually then you can choose a
different folder at the time you store them.
Note!
If you are working in Database Mode, all your
images will be stored in the database. In this
case, the folder that has been specified for
storing the images is irrelevant.
To select a folder other than the preset
folder:
•
Click on the menu item "New Image Folder ... "
in the "File" menu.
The "Select new image folder" window opens.
To specify a folder:
•
In the "Adjustment" menu, click on the menu
item "PALMRobo ... ".
The "Preferences and Configuration" window
opens.
• Click on the "Images" tab.
•
•
The name of the currently set folder appears in the
"Folder" field of the "Saving Images" section.
•
Click on the button
Select the desired folder or create a new folder.
Click on "OK".
Info:
You can also decide not to select or create a
new folder until later, when you are ready to
save an image.
.
The "Image folder" window will open.
• Select the desired folder.
114
415109-2614-101 e 09/09
Saving images manually
10.3
Saving images manually
To save your image:
Info:
Please note that the image is stored with the
elements unless the option to display them has
been switched off. The elements are stored in
the same way as they are displayed on the
screen, i.e. perhaps with their area content
specified, with or without the element number
and, if relevant, with changed image parameters (refer to chapter 3.11).
The Copyright Note and scale bar are only included with the saved image if they are displayed on the screen.
However, other features such as Laser
Markers, crosshairs, etc. are not saved.
When images are stored manually, one image is
stored every time you enter an appropriate command. If you are working in File Mode, the images
are stored in a folder, and when in Database Mode
they are stored in the linked database (refer to
chapter 1.7).
10.3.1 Saving images in File Mode
You can specify a folder and a name for the image
being saved (refer to chapter 10.2 and text below). When you save images later, the specified
image name will automatically be supplemented
with a sequential number (... 01, ... 02, ... ).
If you want to save pictures subsequently, these
assignments are selected automatically. However,
you can decide whether you want to accept them.
You can also save your images later in a different
folder. You can also create a new folder when saving and assign different names to your images.
Note!
If you select another folder or another image
name than the one proposed for saving, these
settings are adopted as the default settings and
used for all subsequent saving operations.
To enter a file name for saving images
manually:
•
•
The "Save Image As" window opens; the predefined folder and the predefined file name, with
the additional sequential number (...01, ...02,
...03, ...), are preselected and offered.
• Select a different folder if you do not want to
save your elements in this folder.
• Enter a name for your image file if you do not
want to use the preset name.
Note!
The name you enter is taken as a default setting for all subsequent image saving operations, and thus overwrites the original default
setting.
In the "Adjustment" menu, click on the menu
item "PALMRobo ... ".
The "Preferences and Configuration" window
opens.
• Click on the "Images" tab.
•
Choose the format in which you want to save
your image.
Info:
You can choose between the formats "bmp",
"tiff" and "jpg". The recommended formats are
"tiff" of "jpg" since these formats allow additional information to be saved along with the
image (stage position, microscope settings).
•
•
Click on the menu item "Save Image ... " in the
"File" menu.
Click on "Save".
Enter a name for images to be saved in the
"Filename" field of the "Saving Images" section.
415109-2614-101 e 09/09
115
Saving images automatically during a laser function
10.3.2 Saving images in Database Mode
No settings need to be made in order to save images in Database Mode. All images are stored in
the database. The file name is generated by PALM
RoboSoftware: "manual" followed by the next
number in sequence. The sequential number is incremented by one every time you save an image.
To save your image:
Info:
Please note that the image is stored with the
elements unless the option to display them has
been switched off. The elements are stored in
the same way as they are displayed on the
screen, i.e. perhaps with their area content
specified, with or without the element number
and, if relevant, with changed image parameters (refer to chapter 3.11).
The Copyright Note and scale bar are only included with the saved image if they are displayed on the screen.
However, other features such as Laser
Markers, crosshairs, etc. are not saved.
•
10.4
Saving images automatically
during a laser function
When saving images automatically, immediately
before and/or after a cutting laser operation, the
current microscope image will be saved automatically.
If you are working in File Mode (refer to
chapter 1.7), the images are saved in the specified
folder (refer to chapter 10.2). If you are working
in Database Mode, the images will be stored in the
database.
•
In the "Adjustment" menu, click on the menu
item "PALMRobo ... ".
The "Preferences and Configuration" window
opens.
• Click on the "Laser" tab.
Click on the menu item "Save image ... " in the
"File" menu.
The "Laser function" section contains four "Auto
Image" checkboxes.
• Click on the "Auto Image" button to enable or
disable the related function.
• Select the file format you want.
If the function is enabled, images for each element
processed with the laser will be saved every time
the laser function is triggered. Names have been
assigned for the images as follows:
- "x_BeforeCut",
- "x_AfterCut",
- "x_BeforeLPC",
- "x_AfterLPC".
"x" stands for an element number that is assigned
automatically by PALM RoboSoftware. This element number is incremented starting from "1" for
each save operation.
If the images are to be saved together with the superimposed elements:
• Click on the checkbox in front of the "Save
Elements in Image" to enable or disable this
function.
116
415109-2614-101 e 09/09
Saving images and videos using the Recorder function
10.5
Saving images and videos using
the Recorder function
Info:
The Recorder function is only available if you
have purchased an appropriate license. Please
contact Carl Zeiss MicroImaging GmbH, if you
wish to upgrade your system.
You can use the Recorder function to
- record video sequences
- save series of images
If you are working in File Mode (see chapter 1.7),
the images are saved in the specified folder (see
chapter 10.2). If you are working in Database
Mode, the images will be stored in the database.
You can either activate the recorder function manually or define an event to activate the function
automatically.
The required settings are made in the "Recorder
and Time Lapse Configuration" window or on the
"Recorder configuration" tab in the "Preferences
and Configuration" window. The available settings
are identical in the two windows.
To open a window for setting the Recorder
parameters:
Recorder
•
Info:
As soon as the "Recorder and Time Lapse
Configuration" window or the "Recorder
configuration" tab in the "Preferences and
Configuration" window is open, the
InformationCenter is launched, if it is not
already running.
The InformationCenter is responsible for
generating the video sequence. Therefore, do
not close this program as this will mean that no
video sequence can be generated.
Click on the "Recorder" icon button.
The "Recorder and Time Lapse Configuration"
window opens.
Or
• In the "Adjustments" menu, click on
"PALMRobo ... ".
The "Preferences and Configuration" window
opens.
• Click on the "Recorder configuration" tab.
To enter the settings, proceed as follows:
•
Activate the desired functions using the check
boxes and/or radio buttons and enter relevant
information in the fields.
All the settings are described in detail below.
You should enter various items of information on
your sample in the "Experiment" section.
- Enter a name for your series of images or video
sequence in the "Name" field (this field MUST
be filled in).
- You can enter a description in the "Description"
field.
- The "File Prefix" field contains the prefix for the
name of your video or image files. The content
of the "Name" field is entered automatically as
a default; it can, however, be modified or added
to (although the field must not be left blank).
PALM RoboSoftware automatically adds date
415109-2614-101 e 09/09
117
Saving images and videos using the Recorder function
-
and time to the prefix entered in the field.
Every video and image file thus receives a
unique name.
If you are working in File Mode (refer to
chapter 1.7) all images and video sequences
are saved in a folder. The date and time are
used to create a name for this folder, which is
created automatically in the specified folder
(refer to chapter 10.2).
If you are working in Database Mode, the
images will be stored in the database.
"Show Log-File" button: every time the
recorder function is activated PALM
RoboSoftware creates a file showing the
sequence of events for the function. This file is
saved in the same folder as the images. Click
on the button to open this file (the button
remains disabled until the sequence has been
completed).
Set the sequence of events for your recordings in
the "Time Lapse Definition Data" section.
- If you tick the check box "all time data (intervals and durations) in minutes" then all times
will be expressed in minutes (rather than the
default of seconds).
- The "Video", "Time Lapse 1" and "Time
Lapse 2" check boxes allow you to choose
whether you wish to save a video sequence or
a series of images. You can also tick more than
one check box if, for instance, you wish to
record a video and a series of images, or indeed
two series of images with different settings.
- Enter an interval between images to be stored
in the "Interval" field (applies only to series of
images).
- Enter the length for a video sequence, or how
long images should be stored in the "Duration"
field. For series of images the number of
images can thus be calculated from the time
interval between individual images and the
overall duration.
- Via the check box „endless Mode“ (only for
series of images) you can determine
- The "Endless Mode" check box (only for series
of images) can be used to specify that images
should be captured at a defined time interval
until such point as the sequence is broken off
manually.
- The "Use auto focus" check box can be used to
activate a mode in which the focus is readjusted for each new image. Above all, this can
be important if the stage is moved whilst the
image is being captured and images of different
parts of your sample are being stored.
You should be aware that it takes around 30
seconds to adjust the focus. This means that if
this function is chosen, then it is not an option
to have an interval of less than 30 seconds.
118
-
-
If you check the "Switch off transmitted light/
close transmitted light shutter between picture
recording" box, then in the time between different images being saved the microscope light is
switched off and the shutter on the microscope is
closed to prevent any light from reaching the
sample.
Please note the it takes around 10 seconds to
switch the light off and on again. This means that
if this function is chosen, then it is not an option
to have an interval of less than 10 seconds.
If you check the "Close reflected light shutter
between picture recording" box (which is only
enabled if a fluorescence unit is installed), then
the fluorescence shutter is closed during the
interval between images being saved. In this
way you can protect delicate samples against
fading.
Info:
You can either check the check box for microscope shutter control or the one for fluorescence shutter control.
In the "Trigger Point Definition" area you define
which event will be used to start the recorder function.
- Manually: the sequence is started manually by
clicking on the button "Start Recorder manually" (see page 118).
- Foot switch (Cut LPC): the sequence is started
as soon as you activate the laser using the footswitch (chapter 11.10 explains how you can set
the footswitch for "Cut" or "LPC").
- LPC laser function: the sequence is started as
soon as you activate an automatic LPC laser
function.
- Scheduled: you can set a time for the function
to be started automatically.
In accordance with the start event that has set up,
one of the following symbols is displayed in PALM
RoboSoftware main window:
manually
Start Recorder manually
Foot switch (Cut LPC) or
LPC Laser function
Scheduled
415109-2614-101 e 09/09
Saving images and videos using the Recorder function
To start the recorder function manually:
Start Recorder manually
•
Click on the "Start Recorder manually" icon
button.
To cancel the recorder function:
During video recording and the storage sequence
a "STOP" icon button appears on the Tool Bar.
Stop
•
Click on the "STOP" icon button.
415109-2614-101 e 09/09
119
Saving images and videos using the Recorder function
120
415109-2614-101 e 09/09
Laser functions
11
Cutting and Catapulting
11.1 Laser functions
JointCut
With PALM MicroLaser System you can cut on the
microscope and catapult parts of the sample. Depending on the objective of your work, you will
need variable options of this function or combinations thereof.
11.1.1 Automatic laser functions
PALM RoboSoftware gives you the following automatic laser functions:
Cut
As with function Close&Cut the laser cuts your
sample along defined lines. Start and end dot of a
line element are connected by a straight cut line.
It remains a joint between start and end dot. With
this function geometrical figures can be cut. The
cut area remains fixed within the tissue. The entire
area can be catapulted later by a single laser
pulse.
LPC
With this function, the laser cuts your sample
along pre-drawn lines ("Figure" elements: Lines,
rectangles and circles), so that a clearly split line
between required and non-required material is
generated.
In the cut area, all biological material is destroyed
by ablation. Thus a pure sample preparation can
be carried out without fear of contamination.
Close&Cut
With this function, only the cells upon which you
have drawn a "Dot" element are catapulted into
the collecting cap.
LineAutoLPC
With this function, the laser also cuts your sample
along defined lines. Unlike with the "Cut" function
however, the start and end dot of a line element
are connected here by a straight cut line.
415109-2614-101 e 09/09
A line-shaped structure is catapulted into your collection vessel using this function. The line is therefore not catapulted in one piece, but with several
laser pulses. The original structure of the material
is not retained when using this function.
121
Laser functions
AutoLPC
RoboLPC
With this function, the contents of a defined area
of glass-mounted samples are catapulted into your
cap. The area is therefore not catapulted in one
piece, but with several laser pulses. The original
structure of the material is not retained when using this function.
With this function, defined structures are cut out
and catapulted intact into the cap. When cutting,
automatically a straight line between the start and
end dots of the border line is left as a joint. You can
determine the length of this with the parameter
"Distance of RoboLPC joint". A laser pulse is then
set exactly into the center of the RoboLPC joint,
which catapults the entire cut area into the cap.
Both this function and the following one
Close&Cut+AutoLPC can only be used for glassmounted samples, i.e., these functions cannot be
used if the sample is placed on a membrane (LPC
membrane).
With glass samples only a limited amount of cell
material per laser pulse can be catapulted out with
one laser shot. Larger areas have to be catapulted
with multiple laser pulses. The exact position of
the laser pulses is calculated by PALM
RoboSoftware; you have to define only the border
line of the area and the distance (LPC distance) between the laser pulses, as well as their orientation
(diagonal or parallel).
This function is only possible when there is an LPC
membrane between your sample and the slide.
As soon as you release one of these functions, the
stage is moved automatically along the defined cut
lines or to the defined dots and the laser is activated and deactivated as necessary.
Center RoboLPC
The required distance between the single laser
pulses depends on the qualities of the tissue.
Close&Cut+AutoLPC
With the function "Center RoboLPC", defined structures are cut out and catapulted intact into the
cap. Unlike with the RoboLPC function, the laser
pulse is placed in the center of the figure for catapulting.
This function is only possible with membrane-coated samples.
This function combines the functions "Close&Cut"
with "AutoLPC" (refer to appropriate sections):
Line elements are closed and cut completely along
the border lines; the cut area contents are then
catapulted to the cap using multiple laser pulses.
122
415109-2614-101 e 09/09
Procedure
11.1.2 Laser function Oneclick-LPC
11.2 Procedure
With one click, a designated element will be located in the screen center and lifted up by a single laser pulse. Thus single cells or sperms are isolated
fast and easily, simply by clicking on the cell of interest (refer to chapter 11.10).
Before you can use automatic laser functions, you
must perform various settings:
- You must also have made settings for the laser
(energy, focus, if necessary "Auto change" and
"LPC-Distances"; refer to chapter 11.4).
It is recommended that you experiment in
order to ascertain which settings best suit your
working requirements. Chapter 11.5 gives you
instructions on finding the optimal values.
- You must have adjusted the speed of the movement of the stage during the execution of the
laser functions (refer to chapter 5).
- You must have drawn the areas to be cut and
catapulted (elements; refer to chapter 7).
If you want to release the laser with the footswitch you do not need to draw any elements.
- You must have selected the required laser function for each element (refer to chapter 11.3).
- You must have made the settings for multiple
cutting and for three-dimensional cutting if you
want to use these functions (refer to
chapter 11.4.2).
- You must have selected the elements to be processed with the laser (refer to chapter 11.6).
- You must have defined the collection vessel for
elements that you want to catapult (cap or
well; refer to chapter 8.6).
11.1.3 Three-dimensional cutting
To ensure that also thick samples can be cut without problems, the PALM RoboSoftware provides a
special setting. Here you can define how often an
element is to be cut. If more than one cutting pass
is defined, you can set that the focus is to be
changed by a specific amount for each cutting pass
(refer to chapter 11.4.2).
Info:
The function is only available in systems with
microscopes with a motorized z-focus.
11.1.4 Non-automatic laser function
Apart from the automatic laser functions, you also
have the option of releasing the laser with the
footswitch (refer also to chapter 11.10). This function is only available in Stage Mode. In this case
you must move the stage with the mouse or the
arrow keys.
Note!
Do not process your sample, or at least the areas important for your work, until you have ascertained your optimal setting by experiment.
Application of the laser with unfavorable settings can cause irreparable destruction to your
sample.
415109-2614-101 e 09/09
123
Selection of automatic laser functions
11.3 Selection of automatic laser
functions
Note!
Should the value of the "RoboLPC joint" parameter be too small or at zero, then it can occur
that automatic catapulting does not take place
in the "RoboLPC" function, as the sample possibly will not remain fixed within the tissue
when cut.
As a rule you select the required laser function for
an element before you draw the element (refer to
chapter 7.3.1). You can, however, also change the
laser function later. For instructions on how to do
this, refer to chapter 8.4.
11.4 Specifying laser settings
In order to achieve correct results with automatic
laser functions, you must set a series of parameters.
When relaunching PALM RoboSoftware the settings apply that were in use when the program was
last exited.
- Laser energy and laser focus:
You can make independent settings for the
"Cut" and "LPC" functions. However you can
also link the energy and focus values for cutting
and catapulting to each other. Set a "Delta"
value and determine in this way the difference
between the two values. As soon as you change
the energy or focus for "Cut" or "LPC", the
value for the other laser function is automatically adjusted to reflect the "Delta" difference.
The "Delta" value has to be set separately for
energy and focus.
The set values apply to all laser functions with
which you cut or catapult.
- Speed at which the microscope stage moves
during an automatic laser function:
You can set various values for the cutting process and for the speed at which catapulted dots
are sequentially targeted (LPC).
- RoboLPC joint:
This parameter is important for the functions
"RoboLPC" and "JointCut" only. It is used to
define the length of the joint that remains
between the start and finish dots of an element
when the element is cut out (refer also to the
Description of the "RoboLPC" and "JointCut"
functions in chapter 11.1). If you select the
"RoboLPC" or "JointCut" function, all elements
of type "Figure" whose start and finish dots are
closer together than the value of this parameter, are opened to this value (including closed
elements such as rectangles or squares and circles or ovals). For elements whose start and
finish dots lie farther apart (e.g., elements
drawn with the Freehand Tool), the distance
between the start and finish dots is shortened
by a straight line to the set value of the
"RoboLPC joint" parameter.
Elements as they were drawn and would be cut
with the "Cut" function.
The same elements with laser function "JointCut"
selected: for element 1, the distance from start
to finish dot is increased, for element 2 it is reduced. Close element 3 will be opened.
The same elements with laser function
"RoboLPC" selected: for element 1, the distance
from start to finish dot is increased, for element
2 it is reduced. Close element 3 will be opened.
In the center of the joint the catapult point is displayed.
-
Distance between AutoLPC shots and distance
of the AutoLPC shots from the element borderline (only applicable in the case of AutoLPC):
The number and position of the individual laser
pulses are then automatically calculated by
PALM RoboSoftware.
If you want to deselect this function, enter the
value "0".
124
415109-2614-101 e 09/09
Specifying laser settings
-
-
-
-
Position of the AutoLPC shots:
You determine whether the positions of the
laser shots are to be arranged horizontally or
diagonally.
AutoLPC Center shot:
With this parameter you define if a laser shot
should be set into the center of an element.
This makes sense when working with very
small or narrow elements for example. If the
distance of the AutoLPC shots to each other
and/or their distance from the border line of the
element is approximately as big as the element
or bigger, possibly no LPCshot is set into the
element without this function; ie, the element
would not be catapulted.
Monitor display during an automatic laser function:
You can determine whether the elements are to
be displayed or hidden on the monitor while the
laser function is in operation. The default setting is that the elements are not to be displayed.
Position of the stage after completing a laser
function.
You can determine whether the stage is to be
returned to start position on completion of the
laser function. The default setting is that the
position is maintained as it was during the last
laser function.
11.4.1 Setting energy and focus
There are several options available for setting the
laser energy and laser focus.
- with the "Laser Tools" (on the left side of the
program window in default configuration),
- using menu commands in the "Laser" menu,
- using keyboard shortcuts.
You can combine the settings for "Cut" and "LPC":
If you change the setting for one laser function,
then the other laser function is automatically
changed to compensate.
How you can find the optimal settings is described
in chapter 11.5
Note!
The optimal setting for energy and focus depend on the objective in use on the microscope. The settings that you enter always apply
to the magnification that you have set in the
program. As soon as you have selected another
magnification, the values that were last used or
the factory defaults are automatically applied.
This also applies to combining the settings for
"Cut" and "LPC".
Therefore, prior to setting laser energy and laser focus, first select the magnification that you
want to work with.
Info:
When comparing microscope images in the
case of serial images before and after cutting or
catapulting, it is advisable to return to the original position.
The set values can be saved and reloaded. You can
reset all values to the factory-default settings
(refer to chapter 3.7 or chapter 3.8).
Info:
It is recommended that you experiment in order to ascertain which values best suit your
working requirements (refer to chapter 11.5).
415109-2614-101 e 09/09
125
Specifying laser settings
To set the laser energy and laser focus with
the "Laser Tools":
•
To set laser energy and laser focus with
menu commands or with keyboard shortcuts:
Click on the "MicroBeam" tab in the Laser Tools.
Note!
Using menu commands or keyboard shortcuts,
change the settings for the laser that is selected in the "Laser Tools" (Cutting Laser/
MicroBeam or Trapping Laser/MicroTweezers).
You also change the settings when the "Laser
Tools" are not displayed; however you then
have no control over the changes that have
been carried out. Therefore, before you use
these commands, switch to the Laser Tools display and select the laser function for which you
want to change the energy and focus as described earlier in this chapter.
Auto Change
deactivated
Auto Change
activated
Setting with menu commands:
• Click on items "Energy/Power more" or
"Energy/Power less" in the "Laser" menu to
increase or reduce the laser energy.
• In the "Laser" menu, click on items "Focus up"
or "Focus down" to set the laser focus higher or
lower.
The current settings are displayed in the fields of
the "Energy" and "Focus" blocks.
• Set the required values for energy and focus
using the sliders or the arrow keys.
Setting with keyboard shortcuts:
• Use the "Page Up" and "Page Down" keys to
raise or lower the laser energy.
• Press "Home" or "End" to increase or reduce
the value for the laser focus.
To combine and separate laser energy and
focus for the cut and catapult functions:
The values that are currently set are displayed in
the "Laser Tools".
•
Click on the checkbox in the "Laser Tools"
before the "Auto Change" entry in order to
select or deselect a combination of these settings.
Info:
The setting always applies to both parameters.
•
If a combination is enabled: enter the value for
the difference between the values for energy or
focus in the "Delta:" fields.
Info:
The value for delta can be positive or negative.
126
415109-2614-101 e 09/09
Specifying laser settings
11.4.2
Setting number of passes and threedimensional cutting
11.4.3 Activating and deactivating
autofocus
Info:
This function is only available if your microscope has the autofocus facility.
•
Enter the required number of passes for PALM
MicroBeam in the "Cycles" field in the "Laser
Tools".
If you select more than one pass, a further field
appears. Make the setting for three-dimensional
cutting (see "Three-dimensional cutting" on page
123.) here.
If the autofocus is switched on, then each time an
element is targeted during a laser function (and
each time the lens is changed), the image is focused automatically.
Autofocus can be turned on and off in the Microscope Tools or on the "Laser" tab in the
"Preferences and Configuration" window.
In the "Preferences and Configuration"
window, autofocus can be turned on and off
as follows:
•
Note!
To ensure that the "Autofocus" function actually produces a sharp image, you must first have
defined the actual objective for the work position (refer to chapter 15.1.3) and the parfocality must be correctly adjusted on the
microscope.
Enter the value by which laser focus is to be
raised for each cutting pass in the "z-focus
delta" field.
•
In the "Adjustment" menu, click on the menu
item "PALMRobo ... ".
The "Preferences and Configuration" window
opens.
• Select tab "Laser".
•
In the "Laser function" section click on the
"Auto Focus: AF active" box to turn the function
on or off.
To turn autofocus on or off in "Microscope
Tools", proceed as follows:
•
415109-2614-101 e 09/09
The function can be turned on or off by clicking
on the "AF active" box in the Microscope Tools.
127
Specifying laser settings
11.4.4 Other general laser settings
You can define whether the elements are to be displayed on the monitor while the laser function is
executed, and whether the stage is to be moved
back to the start position when the laser function
is complete.
To enter these settings, proceed as follows:
•
In the "Adjustment" menu, click on the menu
item "PALMRobo ... ".
The "Preferences and Configuration" window
opens.
•
•
Select tab "Laser".
In the "Laser function" section, click in the
checkbox "Display Elements during Laser function" or the checkbox "Return to start position
after Laser function" to enable or disable these
functions.
128
11.4.5 Special laser settings for the
"LineAutoLPC, "AutoLPC" and
"Close&Cut+AutoLPC" functions
Note!
These laser functions only apply for glassmounted samples.
Note!
A lower energy and focus should be selected
for glass-mounted samples than for membrane-mounted samples.
Using the"LineAutoLPC", "AutoLPC" or "Close&Cut
+AutoLPC" functions the contents of a line-shaped
("LineAutoLPC") or area-shaped element (remaining functions) are catapulted into the collection
vessel using single laser pulses. You must make
four settings specifically for these laser functions
(for the "LineAutoLPC" only the first):
- the distance of the laser pulses to each other
(LPC distance)
- the distance of the laser pulses from the border
line of the element
- the arrangement of the dot configuration (diagonal or parallel)
- the selection, if a laser pulse should be set to
the center of the element (AutoLPC Center
Shot).
Note!
The distance settings always apply to the magnification that you have set in the program. As
soon as you have selected another magnification, the values that were last used or the factory defaults are automatically applied.
Therefore, before setting the speed, first select
the magnification that you want to work with.
415109-2614-101 e 09/09
Specifying laser settings
To enter these settings, proceed as follows:
You can make the settings in the "Preferences and
Configuration" window or in the "Draw Preferences" window.
Open the "Preferences and Configuration" window
as follows:
The rest of the procedure is the same in both windows:
•
Select the magnification for which you want to
make the settings from the "for Objective" list.
•
Enter the required value for the dot distance in
µm in the "Distance of AutoLPC shots" field.
Enter the required µm value for the distance of
the points from the border of the elements in
the field "Distance of AutoLPC shots from line".
Activate the "AutoLPC shots diagonal" checkbox to change the arrangement of the dots.
•
•
•
In the "Adjustments" menu, click on the menu
item "PALMRobo ... ".
The "Preferences and Configuration" window
opens.
•
A tick in this box indicates that the dots will be arranged diagonally. If there is no tick in the box, the
dots will be arranged vertically or horizontally.
• Click in the box "AutoLPC Center shot", if a
laser pulse should be set to the center of the
element.
Select tab "Laser".
Open the "Draw Preferences" window as follows:
Colors
•
Click on "Colors" in the Graphic Toolbar.
The "Draw Preferences" window will open.
• Select the "LPC Distances" tab.
415109-2614-101 e 09/09
129
Finding suitable laser settings
11.4.6 Special laser settings for the
"RoboLPC" function
Note!
These laser functions only make sense with
membrane-mounted samples.
If you release the "RoboLPC" function, an area element will be cut out, but a small RoboLPC joint
will be established between the start and end dots
of the cut line. A laser pulse on this RoboLPC joint
will catapult the area contents into the cap. This
function requires a special setting:
- establish the length of the RoboLPC joint
remaining after cutting.
To establish the length of the remaining joint
for RoboLPC:
You can make the settings in the "Preferences and
Configuration" window or in the "Draw Preferences" window. How to open this window is described
in chapter 11.4.5.
•
•
Select the magnification for which you want to
make the settings from the "for Objective" list.
Enter the desired value in µm for the width of
the remaining RoboLPC joint in the "Distance of
RoboLPC joint" field.
Note!
Should the value of the "RoboLPC joint" parameter be too small or at zero, then it can occur
that automatic catapulting does not take place
in the "RoboLPC" function, as the sample possibly will not remain fixed within the tissue
when cut.
130
11.5 Finding suitable laser settings
Perfect cut and catapult results can only be
achieved with optimal parameter settings. The optimal settings are not, however, the same for all
samples. You must select the best suited settings
for each type of sample by experimentation.
To achieve cut lines that are as fine as possible,
you should enter the lowest possible energy setting with which you can still achieve the required
cutting effect (sometimes multiple cutting along
the same line with lower energy achieves better
results than a single cut with higher energy). In
addition to that, the laser focus should be at the
same level as that of your sample.
With a higher energy setting you cannot just cut
within the laser focus, but also above or below. If
the laser focus happens to be in the glass, smaller
or larger glass segments are catapulted out.
The catapult function requires a different energy
and focus setting to that of the cut function. For
catapulting, the laser beam is extended to an appropriate value (de-focused). You can select separate values
- for the cut and for the catapult function, or
- combine the values for the cut and catapult
function. When you then set the values for energy and focus for a function, these values are
automatically changed for the other function by
an amount that you can set.
Note that the cutting effect of the laser is not only
dependent on the energy and focus settings, but
also on the speed at which the stage is moved. The
slower you move the stage with a fixed energy setting and defined focus, the greater is the effect of
the laser, since it works with a fixed pulse frequency. This means that there are three parameters to
set that reciprocally influence each other. Work up
to the optimal settings successively.
Essentially there are two options for ascertaining
the optimal laser settings for the cutting function:
- without using the automatic laser functions:
Enter Stage Mode, move the stage with the
mouse, release the laser with the footswitch
(refer also to chapter 11.10) and change
energy and focus with keyboard commands.
The advantage of this method is that you can
cut and test various settings at will, within certain limits. You should try to move the stage
more slowly if possible, so that you can evaluate the cutting effect during the movement. As
the cutting action is also dependent on the
speed of the movement, you should move the
stage at the speed that you want to use subsequently for the automatic cutting function
(refer to chapter 5.3).
415109-2614-101 e 09/09
Finding suitable laser settings
-
with the automatic laser functions:
You draw an element, cut along this line with
the automatic "Cut" function and change
energy, focus and speed during the cutting
operation by using keyboard settings.
The advantage of this method is that you do not
have to work with the footswitch, mouse and
keyboard at the same time, but with the keyboard alone. However, you will probably have
to draw and cut several elements until you have
found your optimal settings.
With this method you can also set higher
speeds but only evaluate the cut after concluding the automatic laser function.
Apart from that, you can also find settings for
multiple cutting processes with this method,
since the laser cuts along exactly the same line
during each operation.
In order to find the optimal values for the catapulting functions, you must draw appropriate elements for the required automatic catapult
functions (LPC, AutoLPC, RoboLPC or
CenterRoboLPC) and trigger the laser with varying
settings for the LPC Energy and LPC Focus. Disable
the combination of "Cut" and "LPC" Energy, as well
as "Cut" and "LPC" Focus, in order to be able to
perform independent settings for these functions.
Note!
The optimal settings for energy and focus also
depend on the objective in use on the microscope. The settings that you enter always apply
to the magnification that you have set in the
program. As soon as you have selected another
magnification, the values that were last used or
the factory defaults are automatically applied.
Therefore, prior to setting laser energy and laser focus, first select the magnification that you
want to work with.
To find the optimal laser settings for the
cutting functions:
:
•
•
Info:
To ascertain your optimal laser settings, you
have to know how you can set the laser focus,
the laser energy and the speed of the stage for
the different types of movement. If necessary,
refer to chapter 11.4 "Specifying laser settings"
and chapter 5 "Positioning the stage" or the
User Manual for instructions on how to proceed.
Insert a sample that has the same qualities as
the sample that you want to examine; select
the required objective and adjust it into focus.
Select the magnification set on the microscope
in the Lens menu of PALM RoboSoftware.
415109-2614-101 e 09/09
•
•
Switch on the display for Laser Tools and Speed
Tools if these have been hidden.
Set the laser focus and laser energy at median
values (50/50) or start with factory default settings (refer to chapter 3.8).
Note!
If you reset to factory defaults, not only laser
energy and laser focus are reset, but also all
other settings that you have made (refer also
to chapter 3).
The further procedure depends upon whether or
not you want to use the automatic laser functions
to find appropriate laser settings.
a) Using the automatic laser functions:
•
•
•
•
•
Set the "Scroll" function for the microscope
stage speed so that you can easily follow the
movement with the naked eye. Move the
microscope stage to test with the Scroll function (refer also to chapter 5.1.2). Change the
speed during movement in order to find an
appropriate value. Take a note of the value
established and enter it as speed for the movement type "Cut".
Draw an arbitrary "Line" image - for example a
spiral or a staggering line. The longer the line
is, the longer you have the opportunity of controlling and possibly changing the laser settings
during the cutting operation.
Set the laser function "Cut" and select the number of operations to "1" (refer to chapters 11.3
"Selection of automatic laser functions" and
11.4.2 "Setting number of passes and threedimensional cutting").
If you have drawn one or more elements, open
the "Element List" window (press F5, for example) and select the element to be cut with a
mouse click. If you have only drawn one element then that one is selected automatically.
Start the automatic laser function (press F11 or
release the laser using one of the other methods explained in chapter 11.7 "Starting the
automatic laser functions").
The stage is moved below the laser; the laser is released.
• If necessary increase the energy until the laser
achieves a cutting effect.
You will get a cut line in the sample. This line will
initially be unclear and wide or the sample will only
be cut incompletely as a result of an inadequate
setting of the laser focus and energy.
You can change the settings during the cutting
process as long as the cut line remains incomplete.
If the cutting process has been completed before
131
Selecting elements for the next laser action
you have found your optimal settings you will have
to draw a new element and restart the laser. If
possible try with multiple cutting operations.
• Change the laser focus and try to aim for a thinner cut line.
• If you have achieved that, then reduce the
energy, also with the intention of getting a thinner cut line.
• Now try to continue optimizing your results by
repeatedly changing both focus and energy.
• Once you have attained the best possible
result, you should either save or note the
appropriate settings (refer to chapter 3.7).
b) Without using the automatic laser functions:
•
•
•
As described in chapter 11.10, adjust the footswitch in such a way that it can be used to activate the cutting function.
Set the value for the microscope stage movement speed so that you can easily follow the
movement with the naked eye when in Stage
Mode: enter Stage Mode and try moving the
microscope stage with the mouse. Change the
speed during movement in order to find an
appropriate value. Remain in Stage Mode.
Release the laser with the footswitch and at the
same time move the stage.
11.6 Selecting elements for the next
laser action
It depends on your selection which elements are
processed using the laser. You can make the selection in the "Element List" window:
If you wish to process all elements that have not
yet been processed with the laser:
• Deselect all elements.
If you want to process all elements using the laser
(including those that have already been processed
using the laser):
• Select all elements.
If you wish to process individual elements with the
laser:
• Select the desired elements.
If you want to process all elements of a type and a
color using the laser:
• Click on the related row in the "Element List"
window on the "Summary" tab.
The laser remains in operation as long as the footswitch is depressed.
• If necessary increase the energy until the laser
achieves a cutting effect.
You will get a cut line in the sample. This line will
initially be unclear and wide or the sample will be
cut incompletely as a result of an inadequate setting of the laser focus and energy.
• Continue cutting and change the laser focus.
Aim for a thinner cut line.
• If you have achieved that, then reduce the
energy, also with the intention of getting a thinner cut line.
• Now try to continue optimizing your results by
repeatedly changing both focus and energy.
• Once you have attained the best possible
result, you should either save or note the
appropriate settings (refer to chapter 3.7).
132
415109-2614-101 e 09/09
Starting the automatic laser functions
11.7 Starting the automatic laser
functions
Note!
Take care that you have fully completed all settings prior to carrying out any of the laser functions. Incorrectly-set parameters can cause
your sample to be destroyed.
The laser must be activated to be able to start it.
•
Click on the "Activate" button.
The laser is activated. Instead of the "Activate"
button, a "Deactivate" button appears.
After the laser function has been released, the
stage moves automatically along the defined cut
lines or from LPC dot to LPC dot, the laser is activated and deactivated as necessary. For each element the objective is set and the laser function activated that you have defined for this element
(refer to "Laser function" and "Lens" columns in
the "Element List" window). Provided your system
is equipped with PALM RoboMover, PALM
RoboMover is moved such that each element to be
catapulted is catapulted into the well defined.
When all elements for processing have been processed, the laser is switched off. Depending on
your selection (refer to chapter 11.4.4), the stage
is moved back to the start point for the laser operation or it remains at the position the last laser operation occurred.
Your elements are displayed on the monitor again
(this only takes place during the laser operation if
you have made the appropriate settings, refer also
to chapter 11.4.4). This display serves as a check
of the laser function.
Elements that have been processed with the laser
are displayed on a green background in the
"Element List" window.
•
Click on the "Deactivate" button.
The laser is deactivated. Instead of the "Deactivate" button, a "Activate" button appears.
There are several options available for releasing
the laser:
Start Laser
In PALM RoboSoftware main window:
• click on "Start Laser" icon button below "Speed
Tools", or
click on the "Start Laser function" entry in the
"Grafic Tools", or
click on the "Start Laser function" entry in the
"Laser" menu.
In the "Element List" window:
• click on the "Start Laser" icon button, or
click on the "Start Laser function" entry in the
"Laser" menu.
With the keyboard command:
• Press F11 on the keyboard.
415109-2614-101 e 09/09
133
Indications of the operating state of the laser
11.8 Indications of the operating state
of the laser
The operating state of the laser is indicated on the
right side of PALM RoboSoftware main window.
The cutting laser is deactivated.
11.9 Stop / continue
In case of emergency you can stop all functions
and movements in progress.
To stop all current functions:
The quickest way to stop all functions is to use the
following commands:
Stop
The cutting laser is activated.
The cutting laser is activated and
has been started.
•
Click on the "Stop" icon button in the Tool Bar
(in PALM RoboSoftware main window or in the
"Element List" window – see chapter 8),
or
• Press "Esc" on the keyboard (you can only use
these commands if PALM RoboSoftware main
window is the active window).
In addition, you can also stop the movements using a menu command:
Other indications:
The laser interlock has been tripped,
please check microscope (support).
The laser is not ready for use (this indication appears during the laser warm-up
phase or if the interlock is tripped).
134
•
Click on the menu item "Stop" in the "Motion"
menu (in PALM RoboSoftware main window or
in the "Element List" window).
All current operations are stopped immediately. If
you want to continue an interrupted operation, you
must re-launch the operation.
415109-2614-101 e 09/09
Working with the laser function Oneclick-LPC
11.10 Working with the laser function
Oneclick-LPC
11.11 Cutting and catapulting without
automatic laser functions
With this laser function a designated element will
be located in the screen center and lifted up by a
single laser pulse by one click. Thus single cells or
sperms are isolated fast and easily, simply by
clicking on the cell of interest.
Even without automatic laser functions, cutting
and catapulting are possible. This is done by
switching the laser on and off using the footswitch.
However, to do so you must switch to Stage Mode
and move the stage using the mouse (refer to
chapter 5.1.1).
You can choose whether you wish to start the cutting or catapulting function when you operate the
footswitch.
To set the function of the footswitch:
Info:
You must perform this setting before switching
to Stage Mode.
This tool has different functionalities depending on
the selected menu entry:
- Menu entry “with element detection”
If an element was not lifted up properly (e.g.
because of too less energy) you can use this
tool to lift up the element again. Select the tool
and then click with the mouse pointer on the
point within the element laser shot.The PALM
System recognizes the element automatically,
positions the capture device correctly (if a well
has been assigned), performs the laser shot
and increases the shot counter of this element.
Info:
If the PALM System cannot identify an element
(e.g. you click on a position where no element
is located) no laser shot will be released. The
stage will be directed to this point only.
-
Menu entry “without element detection”
If this menu entry is activated the stage will be
centered on the clicked point and the laser shot
will be released independently of drawn elements or the position of the capture device. You
can use this functionality to collect small pieces
from a glass slide on a fast way.
•
Open the Oneclick-LPC menu on the Grafic Tool
bar.
Click on the required menu item.
Click on the elements resp. cells of interest.
•
•
415109-2614-101 e 09/09
•
•
If you have a CombiSystem with an trapping
laser, click in the Laser Tools the "MicroBeam"
tab.
Click on the left radio button for "Foot switch"
(at "Cut"), if you want to cut with the laser in
the Stage Mode or
click on the radio button on the right (below
"LPC") if you want to perform catapulting with
the laser in Stage Mode.
135
136
415109-2614-101 e 09/09
Opening the "RoboMover" or "CapMover II" window
12
PALM RoboMover and PALM CapMover II
Using the laser functions you can catapult sections
of your sample into a collection vessel. Using PALM
RoboMover and PALM CapMover II collection devices you can automatically position collection vessels over your sample.
12.1 Opening the "RoboMover"
or "CapMover II" window
To open the "RoboMover" or "CapMover II"
window:
Various collectors with one collection vessel each
are available for PALM CapMover II.
PALM RoboMover offers considerably more options. Collectors with one or more collection vessels are available (up to 96 wells with PALM
CapturePlate Collector 96). If you use collectors
with more than one collection vessel, you can have
elements of your sample automatically catapulted
into different collection vessels. You only need to
start the laser function once for this purpose.
Info:
The illustrations, descriptions and instructions below relate to PALM CapturePlate Collector 96 (PALM RoboMover) and the Single
Tube Collector 500 CM II (PALM CapMover II).
All other collectors with more than one collection vessel are used similarly. On the use of
PALM CapMover II and with collectors with
only one collection vessel, none of the functions for collectors with several collection vessels are available.
•
On the "Devices" menu click on "Capture
Device".
The "RoboMover" or CapMover II" window opens.
On the left it displays an image of the collector
used and on the right various settings and items of
information. As long as you have not yet used a
collector or have not yet made a scan for the collector used (refer to chapter 12.2.1 "Preparing a
collector"), a black cross appears in place of the illustration.
All functions for the control of PALM RoboMover or
PALM CapMover II are in the "RoboMover" and
"CapMover II" windows respectively.
415109-2614-101 e 09/09
137
Working with PALM RoboMover or PALM CapMover II
12.2 Working with PALM RoboMover or
PALM CapMover II
12.2.1 Preparing a collector
Info:
(Only for PALM RoboMover) It is recommended to find and select all interesting areas prior to fitting the liquid-filled PALM
CapturePlate Collectors 96. To avoid the evaporation of the liquid filling.
•
Prepare the collector system with which you
want to work (refer to PALM User Manual).
•
Insert the collector and click on the “Change
Collector” button.
•
Wait until PALM RoboSoftware has detected the
collector type.
An illustration of the collector fitted appears in the
"RoboMover" window. The name of the collector
used is displayed in the field at the top right. The
co-ordinates of the wells are defined by rows (A …
H) and columns (1 … 12).
Info:
On the use of microtiter plates the letters for
labeling the rows (A … H) are on the right side, the numbers for labeling the columns (1
… 12) run from right to left (refer also to product information on microtiter plates).
PALM RoboMover or PALM CapMover II is moved to
the Load Position. As soon as PALM RoboMover or
PALM CapMover II has reached the Load Position,
the "Load collector" window opens.
• Fit the collector, as described in PALM User
Manual, in PALM RoboMover or PALM
CapMover II.
To work with the collector, you must tell PALM
RoboSoftware which type of collector you have fitted.
PALM RoboMover:
-
-
"Scan new collector type" initiates a new scan
of the collector. Once the collector has been
detected, all the necessary data are read from
the configuration file.
Click on "Use same collector type" if you want
to continue to use the same collector type (a
new scan is not performed). Use this selection
if, e.g., you have only replaced the insert.
Info:
In both cases all information on the wells for
all elements is deleted.
-
•
Click on "Cancel" if you want to continue to use
all the configuration data already known to the
system including all information on the wells
already used.
Click on the button with the required function.
138
415109-2614-101 e 09/09
Working with PALM RoboMover or PALM CapMover II
PALM CapMover II:
12.2.2 Defining the sequence of the
wells for the next laser action
(only PALM RoboMover)
If you are using a collector with more than one
well, there are various ways you can define the
number of wells and into which wells your elements are catapulted. The PALM RoboSoftware
provides various operating modes for this purpose.
-
-
•
•
Click on "OK" if you want to continue to use the
same collector type. Use this selection if, e.g.,
you have only replaced the insert.
Click on "Cancel" if you want to continue to use
all the configuration data already known to the
system including all information on the wells
already used.
Select the required collector type.
Click on the button with the required function.
An illustration of the collector fitted appears in the
"CapMover II" window. The name of the collector
used is displayed in the field at the top right.
In the "RoboMover" window you can define
whether the wells are to be filled row by row or column by column. Make all other settings in the
"Element List" window (refer to chapter 8.6 "Defining wells for the next laser operation").
•
In the "Subtype Configuration" drop down list
select the order in which the wells are to be
used.
Using the "Line oriented" setting the wells are filled
row-by-row (A1, A2, A3 …), conversely with the
"Column oriented" setting column-by-column (A1,
B1, C1 …).
Info:
The "Subtype Configuration" drop down list is
not available for all collector types.
When PALM RoboMover is operating, the coordinates of the selected cap or well are displayed
in "Current Field".
415109-2614-101 e 09/09
139
Working with PALM RoboMover or PALM CapMover II
12.2.3 Catapulting elements
Start Laser
•
Click on the "Start Laser" icon (in the main
window for the PALM RoboSoftware).
12.2.4 Viewing the catapulted samples
After catapulting you can view the content of the
wells using the objective on the microscope. For
this purpose you must move the stage to the
CapCheck.
Note!
Set the objective to the lowest possible position, before you move the stage to or from
the CapCheck! If the objective is set too high,
the stage will collide with it. This can cause
serious damage to the objective and to your
sample (if you have purchased a system with
motorized microscope, the objective is moved
automatically).
The progress during the process is shown in the
illustration of the collector in the "RoboMover"
window.
•
If you do not have a motorized microscope:
Move the objective down as far as possible.
CapCheck
•
In the example the next element to be catapulted
will be catapulted into the well G9 during the current laser operation; it is marked with a red border. Elements have already been catapulted into
the wells G5 to G8. There are already catapulted
samples from an earlier laser operation in the wells
A1 to B9.
Note!
After catapulting, check that the elements
have been catapulted into the correct wells.
Click on the "CapCheck" icon button.
The stage is moved to the CapCheck (refer also to
chapter 5.5 "CapCheck").
You can position the well with the content you
want to view in two ways:
•
First well
Last well
Previous well
Next well
Click one of the icon buttons shown above until
the required well is selected, or
In the image of the collector, click on the well
with the content you want to view.
The well is positioned.
• If you do not have a motorized microscope:
manually adjust the image until it is sharp.
Info:
The focus is set to the pre-set value for viewing catapulted samples. Chapter 15.1.3
"Defining and setting fixed positions for the
focus" describes how you can change the setting.
140
415109-2614-101 e 09/09
Working with PALM RoboMover or PALM CapMover II
Even with the smallest magnification you will not
be able to see the entire well. To see other areas
in the well you can move the well in the x- and ydirection. For this purpose use the same features
as for the stage in the Stage Mode (refer to chapter 5.1 "Movement types).
• Position the well using the scroll function, using
the keyboard (arrow keys) or the Centering
Tool.
If you have connected a joystick, you can also
use it to position the well.
Info:
Set the speed for the positioning of the well as
described in chapter 12.4.1 "Setting the movement speed".
Stage
12.2.5 Stopping PALM RoboMover or
PALM CapMover II in
emergencies:
Stop
•
•
Click on the "Stop" icon button, or
switch off PALM ControlUnit.
In both cases the movement is interrupted immediately.
12.2.6 Placing the collector in the
"Home" position
In the "Home" position you can park the collector
if you do not need it.
Home
•
Click on the "Stage" icon button (in the main
window of PALM RoboSoftware).
•
Click on the "Home" icon button.
Once you have viewed your sample:
Note!
To avoid damage to the objective or to the
sample: Move the stage back again to the original position, after observing the collection
vessel.
For this proceed solely as described below.
•
If you do not have a motorized microscope:
Move the objective down as far as possible.
Point of Origin
•
Click on the "Point of Origin" icon button.
415109-2614-101 e 09/09
141
Diffusor option
12.3 Diffusor option
12.4 Settings
Some collectors, e.g., the CapturePlate Collector
96, have an integrated diffusor to improve the
image quality. You will find more information on
this topic in the product information supplied with
the collectors.
12.4.1 Setting the movement speed
Info:
As a rule it is not necessary to change the
movement speed. However, if you are working with large amounts of liquid, it is recommended to reduce the speed.
The maximum possible speed is pre-set by
the manufacturer.
If the collector fitted has a diffusor, this is shown
in the illustration in the "RoboMover" or
"CapMover II" window.
In addition, the "Tool Bar" contains a corresponding icon button.
Diffusor
•
•
Select the "Adjust" tab in the "RoboMover" or
"CapMover II" window.
To use the diffusor: Click on the diffusor in the
image, or
Click on the "Diffusor" icon button.
You can now pre-select your samples.
Diffusor
Diffusor
Diffusor
In the "Speed Control" window you will find the
"Position Speed" tool using which you can set the
movement speed. PALM RoboMover moves from
one well to the next at this speed, PALM
RoboMover and PALM CapMover II move to the
Load Position or to the Home Position and back
using this speed.
• Set the required speed.
Info:
You can also use the diffusor if you do not
want to catapult. In this case it is sufficient to
fit the collector on its own, i.e. without insert,
into PALM RoboMover or PALM CapMover II.
142
415109-2614-101 e 09/09
Settings
12.4.2 Positioning wells in x/ydirection
Info:
All settings that you make apply to the collector type currently used. You must make the
settings for each collector type you use.
The settings are saved automatically. If you
fit a different collector type, the settings
saved for this collector type are applied.
•
•
•
Set a low magnification (e.g. 5x).
(Only PALM RoboMover) Click on the well A1 on
the "Operation" tab (in the "RoboMover" window).
Select the "Adjust" tab.
In the "Fine Adjust x/y-Positions" section you will
find buttons for the fine adjustment of the x/y position for the active well. In this way you can align
the well exactly over your sample if necessary.
If your insert has more than one well (only PALM
RoboMover), the setting applies to all wells. In this
way you can compensate for manufacturing tolerances
• Click on the arrow buttons to align the well over
your sample.
• Click on the "Save Position as delta position for
the collector" button to save the setting.
12.4.3 Positioning wells in the zdirection
The height of the collection vessel above the slide
is set by the manufacturer. If necessary you can
change the setting.
Info:
All settings that you make apply to the collector type currently used. You must make the
settings for each collector type you use.
The settings are saved automatically. If you
fit a different collector type, the settings saved for this collector type are applied.
To change the height settings:
•
•
In the "Fine Adjust Z-axis" section you will find
buttons for the fine adjustment of the Z-position
for your collection device. You can define two
height settings:
- moving height: the height for all movements in
x/y-direction (e.g. for the movement from one
well to the next)
- working height: the height during a laser operation.
Note!
Note that for collection devices such as "Single tube collectors for dishes and slides" the
height for the movement in the x/y-direction
must be set especially large to prevent collisions with the dish.
To set the settings back to their factory
default values:
•
Position the collector over your sample.
Select the "Adjust" tab in the "RoboMover" or
"CapMover II" window.
Click on the "Set to default" button.
•
Click on the "Goto" Button.
First set the required height, then define whether
the setting for the height is to apply during a movement or for the working height.
415109-2614-101 e 09/09
143
Settings
Click on the left or right arrow button to move
the collection device up or down.
12.4.4 Referencing PALM RoboMover or
PALM CapMover II
The actual value is indicated in the field under the
arrow buttons.
If PALM RoboMover or PALM CapMover II should be
moved other than under program control, e.g. by
hand as a consequence of a collision, an error
message appears (e.g. "Error 18"). In such a case
you must reference PALM RoboMover or PALM
CapMover II to send the exact position to PALM
RoboSoftware.
•
Info:
You can also enter a value in the field under
the arrow buttons and click on the "Goto" button beside this field.
•
Click on the "Set" button by "moving height" or
by "working height" depending on which height
you want to define.
Info:
You can use the "Goto" buttons to move the
collection device to the "moving height" or
"working height" set.
Reference PALM RoboMover, or
Reference PALM CapMover II
•
Click on the "Reference PALM RoboMover" or
"Reference PALM CapMover II" icon button.
To set the settings back to their factory
default values:
•
Click on the "Set to default" button.
144
415109-2614-101 e 09/09
Essential settings
13
MicroTweezers (Option)
PALM MicroTweezers System is an optical tweezers
with which can you trap and move objects in suspension under the microscope. It operates using
an IR laser (trapping laser) and is available as a
single beam or double beam, each with or without
movement (moving trap) (on the DuoFlex/
TwinFlex system the laser beam is split into two
beams using a beam splitter):
- TwinFlex: Double Beam with two movable trapping laser beams:
With this system you can trap and move two
objects independently of one another.
- DuoFlex: Double Beam with one fixed and one
movable trapping laser beam
With this system you can also trap and move
two objects independently of each another,
with the limitation that one trapping laser beam
is fixed and therefore one object can only be
trapped and moved by moving the stage in the
x- and y-axes.
- MonoFlex: Single Beam with Laser Beam Positioning:
With this system you can trap and move one
object by moving the trapping laser beam (or
by moving the stage).
- Mono: Single Beam, with one fixed trapping
laser beam:
With this system you can trap an object and
move it in the x- and y-axes by moving the
stage.
In all four configurations, you can lift trapped objects in the z-axis away from the plane of the slide.
13.1
Essential settings
Before you can work with your PALM
MicroTweezers System, you must make a number
of preliminary settings. Optimum results can only
be achieved if the initial settings are correctly carried out.
- You must align the Trapping Laser Marker (in
the DuoFlex/TwinFlex system, both Trapping
Laser Markers) with the actual trapping laser
position (refer to chapter 4.3).
- You must set the power and focus for the trapping laser (refer to chapter 13.2).
If you have a system with Laser Beam Positioning,
you must also:
- calibrate the movement (refer to chapter 4.5)
- set the speed with which the Laser Beam Positioning is performed (refer to chapter 13.11.1).
You only need to calibrate the Laser Beam Positioning and adjust the Trapping Laser Marker setting if the results from using the laser are
incorrect.
For systems with positioning, you can define a reference position for each trapping laser beam (refer
to chapter 13.4).
In certain circumstances you may need to make
the settings for power and focus for the trapping
laser and the speed with which the movement is
made separately for each sample and sample type.
The following section describes how to proceed.
Thus, in combination with PALM MicroBeam, you
can for example trap objects, transport them to
the cutting laser, and process them with it.
The following chapters will explain how to operate
your PALM MicroTweezers together with PALM
RoboSoftware. A few of the functions described
are not available if you have purchased a Single
Beam System and/or a system without Laser
Beam Positioning. Please contact Carl Zeiss
MicroImaging GmbH to upgrade your system.
415109-2614-101 e 09/09
145
Setting power and focus for the trapping laser
13.2
Setting power and focus for the
trapping laser
There are several possible ways of setting the
power and focus for the trapping laser:
- with the "Laser Tools" (on the right side of the
program window in default configuration)
- using menu commands in the "Laser" menu
- using keyboard shortcuts
To couple and uncouple the focus settings for
both trapping laser beams (DuoFlex/
TwinFlex system only)
•
•
Click on the "Tweezers" tab in the "Laser
Tools".
Click on the "Simultaneous Focus" checkbox to
enable or disable the combination.
There is another option for setting the focus:
- with the scroll wheel on the mouse
If you have installed a DuoFlex/TwinFlex system,
you can set a different power value for each beam.
You can also set the focus differently for each
beam, or you can couple the focus settings together: If you change the focus for one trapping laser
beam, the focus of the other beam will automatically be adjusted to the same value.
Note!
The optimal settings for power and focus depend on the objective in use on the microscope. The settings that you enter always apply
to the magnification that you have set in the
program. As soon as you have selected another
magnification, the values that were last used or
the factory defaults are automatically applied.
This also applies for coupled focus settings.
Therefore, prior to setting power and focus,
first select the magnification that you want to
work with.
"Simultaneous Focus" activated
•
If coupling is activated: enter the value for the
difference between the values for the focus in
the "Delta:" field.
Info:
Negative values are also possible.
146
415109-2614-101 e 09/09
Setting power and focus for the trapping laser
To set the power and focus for the trapping
laser using the "Laser Tools":
•
Click on the "Tweezers" tab in the "Laser
Tools".
If you wish to set the power of trapping laser beam
"1" or trapping laser beam "2" to 100%:
• Click on item "Tr1" or "Tr2".
The power of the other beam in each case will
then be set to 0%.
If you wish to set different power values for each
of the two beams:
• Set the required relationship between the
power values in the "Balance" section (percentage of the total laser power).
To change the focus:
• Set the required value (in the related "Focus"
section).
Info:
Regulate the energy and focus for the cutting
laser using the settings in "Cut" (identical to
the related tools on the "MicroBeam"· tab; refer
to chapter 11.4.1).
To set the focus of the trapping laser using
the mouse:
"Simultaneous Focus" deactivated
If you have installed a Mono/MonoFlex system the
only settings you can choose are "Power" and
"Focus-1".
• Set the required values for "Power" and
"Focus", e.g., using the sliders.
If you have installed a DuoFlex/TwinFlex system,
you can choose between the following settings:
- Power: this is used for controlling the entire
laser output for both trapping laser beams.
- Balance/Tr1/Tr2: this is used to distribute the
laser output between the two beams.
- Focus1/Focus2: this is used to control the focus
of laser beams Trap-1 and Trap-2.
•
•
.
Under "Wheel" in the Laser Tools, click on the
radio button for the trapping laser beam whose
focus you wish to change using the mouse (left
for Trap 1, right for Trap 2).
Rotate the scroll wheel on the mouse until the
desired value appears in the text box of the
Focus Calibration Tool.
Info:
The "Wheel" radio buttons can also be used to
specify the focus that menu or key commands
will set (see page 148).
Info:
If you have purchased a DuoFlex system
(Double Beam System with one movable trapping laser beam) Trap-1 is the movable laser
beam, and Trap-2 is the fixed laser beam.
•
Set the required values for "Power" and
"Focus", e.g., using the sliders.
If you wish to divide the power equally between
the two beams (50:50):
• click on the word "Balance".
415109-2614-101 e 09/09
147
Finding suitable power and focus settings for the trapping laser
To set the power and focus for the trapping
laser using menu commands or using
keyboard shortcuts:
Note!
Using menu commands or keyboard shortcuts,
change the settings for the laser that is selected in the "Laser Tools" (cutting laser or trapping laser). You also change the settings when
the "Laser Tools" are not displayed; however
you then have no control over the changes that
have been carried out. Therefore, before you
use these commands, switch to the "Laser
Tools" display and select the laser function for
which you want to change the energy and focus
as described earlier in this chapter.
13.3
Finding suitable power and focus
settings for the trapping laser
The settings that you require for various samples
will vary to some degree. In order to determined
the optimum power and focus settings, you must
experiment on similar samples with different settings. The factory defaults may serve as suitable
starting points for your experiments. If in doubt,
start at very low power and adjust upwards gradually until you obtain the desired effects.
The focus can be set using a slide, for example,
with an area you have colored with a black felt
pen. With sufficient power, a hole appears in the
paint film, which should make the effect quite simple to assess. The more precisely the focus is set,
the smaller the hole should be.
Note!
If you have installed a DuoFlex/TwinFlex system, then menu commands and shortcut keys
are used to set the focus of the trapping laser
beam selected using the "Wheel" radio buttons
(left Trap-1, right Trap-2; see page 147).
Setting with menu commands:
• Click on the items "Energy/Power more" or
"Energy/Power less" in the "Laser" menu to
increase or reduce the trapping laser power.
• In the "Laser" menu, click on the items "Focus
up" or "Focus down" to set the trapping laser
focus higher or lower.
Setting with keyboard shortcuts:
• Use the "Page Up" and "Page Down" keys to
raise or lower the trapping laser power.
• Press "Home" or "End" to increase or reduce
the value for the trapping laser focus.
The values that are currently set are displayed in
the "Laser Tools".
148
415109-2614-101 e 09/09
Defining a reference position
13.4
Defining a reference position
If you have moved the trapping laser beam to any
position during your work, you can instruct the
system to return it to the Reference Position. This
function is useful if, for example, you have moved
the beam into an area outside the image section
displayed on the monitor and you are perhaps no
longer certain of the exact location of the beam.
13.5
Moving trapping laser beam to
the center
Using a menu command you can move the trapping laser beam to the center of the area within
which it can be moved.
You can change the Reference Position at any
time. If you have purchased a system with two
movable trapping laser beams, you can define a
separate Reference Position for each beam.
To define a reference position for a trapping
laser beam:
•
•
•
•
•
•
Insert the slide that you colored with the black
felt pen into the stage (you can also use a sample that you no longer need for your work).
Switch the trapping laser on (refer to
chapter 13.8).
Set the power so that you can see the effect of
the trapping laser beam (e.g. an eroded site on
the colored slide).
Using one of the methods described in
chapter 13.11, move the trapping laser beam
to the location where you want to mark the new
Reference Position and switch the trapping
laser off.
•
•
Drag the cursor on item "Goto Center" in the
"Motion" menu.
Click on the item "Trap 1" or "Trap 2".
The selected movable beam is centered.
Drag the cursor on item "Set Reference" in the
"Motion" menu.
Click on the name of the trapping laser beam
for which you want to re-define the Reference
Position ("Trap 1" or – if available – "Trap 2").
To move the movable trapping laser beam to
its Reference Position:
•
•
Drag the cursor on item "Goto Reference" in the
"Motion" menu.
Click on the item "Trap 1" or "Trap 2".
The selected movable beam will be moved to its
Reference Position.
415109-2614-101 e 09/09
149
Moving the trapping laser beam to a particular point
13.6
Moving the trapping laser beam
to a particular point
You can use the Centering Tool to position the
trapping laser beam at any point in the microscope
image on the screen.
13.7
Settings for the footswitch
For the footswitch, you can specify whether the
trapping laser is only to remain active while the
switch is being depressed or whether it is to function as an On/Off switch.
Info:
You can only use the footswitch when you are
in Trap Mode or Stage Mode (refer to
chapter 13.11.2 "Moving the trapping laser
beam with the mouse: TrapXY-1[TrapXY-2]
Mode" and chapter 5.1.1 "Positioning the
stage with the mouse: Stage Mode").
To set the function of the footswitch:
•
In the "Arrow keys/Joystick mode" area at the
right-hand edge of the program window, select
the check box for the laser beam you want to
position using the Centering Tool.
If you select the check boxes for both beams, the
Centering Tool will simultaneously position both
beams at the same point.
Info:
If the stage is at the CapCheck (refer to
chapter 5.5), the check boxes are not
available.
Center
(Trapping laser beam 1 is selected)
Center
(Trapping laser beam 2 is selected)
Center
(Trapping laser beams 1 and 2 are
selected)
•
•
•
In the "Adjustments" menu, click on the menu
item "PALMRobo ... ".
The "Preferences and Configuration" window
opens.
• Select tab "Laser".
If the footswitch is to operate as a pressure switch:
• Click on the "Hold" radio button. The trapping
laser remains switched on as long as you keep
the footswitch pressed.
If the footswitch is to operate as an on/off switch:
• Click on the "Switch" radio button. The trapping
laser is switched on or off by pressing once.
Click on the Centering Tool in the graphics
toolbar.
Click on the point in the image at which you
want the trapping laser beam to be positioned.
The Centering Tool will continue as the active tool
until you click on any other tool on the graphics
toolbar.
150
415109-2614-101 e 09/09
Activating and deactivating the trapping laser
13.8
Activating and deactivating the
trapping laser
You can specify whether the trapping laser is activated and deactivated by the computer or by the
footswitch. You can only use the footswitch when
you are in Trap Mode or Stage Mode (refer to chapter 13.11.2 "Moving the trapping laser beam with
the mouse: TrapXY-1[TrapXY-2] Mode" and chapter 5.1.1 "Positioning the stage with the mouse:
Stage Mode").
Info:
If you switch from Stage Mode to Trap Mode
or vice versa, the trapping laser will be
switched off if you have switched the laser on
using PALM RoboSoftware.
On the other hand, the laser remains on if you
switched it on using the footswitch in the
"Hold" position (refer to chapter 13.7) and
are continuing to keep the footswitch depressed.
The laser likewise remains on if you switched
it on with the footswitch in the "Switch" position (refer to chapter 13.7).
To activate and deactivate the trapping laser
with PALM RoboSoftware:
Info:
You can also switch off the trapping laser by
clicking on the "Stop" icon button on the Tool
Bar.
However, this results not only in the trapping
laser being switched off; all other processes
currently running will also be stopped. The
"Stop" icon button should therefore only be
used to switch off the laser in the event of an
emergency.
13.9
Indications of the operating state
of the laser
The appearance and color of the icons changes depending on the operating state of the laser. The
displays are as follows:
The laser is switched off.
The laser is switched on.
The laser interlock has been tripped,
please check microscope (support).
The laser is ready for use, but inhibited.
The laser is ready for use and enabled.
The laser is not ready for use (this indication appears during the laser warm-up
phase or if the interlock is tripped).
•
Click on the "Trap Laser on/off" entry in the
"Laser" menu, or
click on the "On" or "Off" button on the right
border of the program window.
The "Off" button appears after the trapping
laser is switched on.
Note!
Particularly living objects may suffer injury
due to the radiation of the trapping laser.
Therefore, you should not activate the trapping laser until you actually need to use it,
and keep it activated only as while you are
working with it.
415109-2614-101 e 09/09
151
Moving objects in the z-axis
13.10 Moving objects in the z-axis
13.11 The moving trap
Regardless of the configuration of your PALM
MicroTweezers, you can lift trapped objects in the
z-axis away from the plane of the slide by altering
the focus of the trapping laser beam. The object
will remain trapped in the plane of the trapping
laser focus.
With the moving trap (movable trapping laser
beam) you can move trapped objects in the x and
y direction, i.e. parallel to the plane of the slide.
It is simpler to alter the trapping laser focus with
the scroll wheel on the mouse. Chapter 13.2
includes an explanation of your options for displacing the trapping laser focus.
If you have purchase PALM MicroTweezers with
Laser Beam Positioning, you can also move
trapped objects in the x- and y-axes, i.e., parallel
to the plane of the slide (please contact Carl Zeiss
MicroImaging GmbH if you wish to upgrade your
system).
The following section provides instructions for
working with a movable trapping laser beam. If
you have purchased a system with two movable
trapping laser beams, you will use the same methods for working with both beams.
The moving trap also operates with the trapping
laser beam switched off. This means that you do
not have to switch the trapping laser on to move
the beam to a different site.
There are three ways to move the trapping laser
beam:
- with the mouse (see Chapter 13.11.2)
- with the arrow keys (see Chapter 13.11.3)
- with the Joystick (see Chapter 13.11.4)
13.11.1 Setting speed of the moving trap
You can set the speed separately for every type of
trapping laser beam movement:
- TrapXY: Speed of movement in Trap Mode.
- TrapXY: Speed when moving with arrow keys
or joystick.
If you have installed a system with two movable
trapping laser beams, the speed values set apply
to both beams.
For the speed setting you can select between the
units "steps/sec." and "Percent".
You can save the speed settings together with other parameters in a settings file (refer to
chapter 3.7).
You have the following options for setting the
movement speed of the trapping laser beam:
- with the "Speed Tools" tool
- with keyboard or menu commands
You can set the speeds of both types of movements with the "Speed Tools" tool. Speed changes
with keyboard or menu commands always refer to
the type of movement that is currently selected in
the "Speed Tools" tool.
Note!
The settings that you enter always apply to
the magnification that you have set in the
program. As soon as you have set another
magnification, the values that were last used
or the factory defaults are automatically applied. Therefore, prior to setting the speed,
first select the magnification that you want to
work with.
152
415109-2614-101 e 09/09
The moving trap
Before you initiate a movement of the trapping
laser beam, all three setting options are available
for both movement types. The speed can be varied
using keyboard commands during movement.
To change the speed of the "Speed Tools"
tool:
•
In Speed Tools select the movement type for
which you want to change the speed.
To select the unit for speed setting:
•
In the "Adjustments" menu, click on the menu
item "PALMRobo ... ".
The "Preferences and Configuration" window with
the "Configuration" tab opens.
The Speed Tool for the selected movement type is
shown (in the example shown: TrapXY). The maximum selectable speed is dependent upon the chosen movement type.
•
In the "Metric" section, click on the radio button
"Logic" (units: percent) or "Micrometer / sec"
(units: µm/sec) .
•
415109-2614-101 e 09/09
Enter the desired value.
153
The moving trap
To change the speed with menu commands
or with keyboard shortcuts:
•
•
If you want to reduce the speed, press key
combination Ctrl+S, or
click on the menu item "Speed Slower" in the
"Motion" menu.
If you want to increase the speed, press key
combination Ctrl+F, or
click on the menu item "Speed Faster" in the
"Motion" menu.
Info:
Changes with keyboard or menu commands always refer to the type of movement that is currently selected in the "Speed Tools" tool.
Therefore, activate the tool display before carrying out any speed changes with keyboard
shortcuts or menu commands. Otherwise you
will not be able to see which movement type
the changed speed setting will affect.
If a movement is in progress, the selection in
Speed Tools is automatically changed to the
current movement type, and the speed changes you make are automatically applied to the
current motion.
13.11.2 Moving the trapping laser beam
with the mouse:
TrapXY-1[TrapXY-2] Mode
In TrapXY Mode you control the movement of the
trapping laser beam with the mouse: Each mouse
action is translated into a movement of the trapping laser beam. You can also move both trapping
laser beams at the same time using the mouse.
You can perform movements in any direction.
To switch to TrapXY Mode:
•
Click on "Trap 1" or "Trap 2" in the "Laser
Tools" depending on which laser beam you
want to move with the mouse.
Info:
The cursor is not displayed in TrapXY1[TrapXY-2] Mode. In TrapXY-1 [TrapXY-2]
Mode you can alter the speed of the Laser
Beam Positioning and the power of the laser
beam using keyboard commands, and also
change the focus with the scroll wheel on the
mouse. (Note that you can only change the settings for the trapping laser beam that is selected in Laser Tools.)
To switch between "TrapXY-1" and
"TrapXY-2" Mode during a movement:
•
•
Open the context menu by right-clicking the
mouse.
Click on the TrapXY mode to which you want to
change.
To switch from TrapXY Mode back to Cursor
Mode:
•
154
Click once with the left mouse button.
415109-2614-101 e 09/09
Moving objects along defined paths
13.11.3 Moving the trapping laser beam
with the keyboard
13.12 Moving objects along defined
paths
Using PALM MicroTweezers you can transport
trapped objects along a defined path. You can use
this function, e.g., to collect several objects at one
point.
•
In the "Arrow keys-/Joystick mode" area at the
right edge of the program window, click on the
button for the laser beam you want to adjust
using the arrow keys.
If you select the checkboxes for both beams,
you can control both beams simultaneously and
in parallel.
The path is defined by an element. As soon as you
trigger the function, the trapping laser beam is
moved to the start of the element and moved
along the element to the end of the element. You
can deposit the object there by switching off the
laser. Then you can trap a further object and move
it to the same place by triggering the function
again.
To move the objects along a defined path:
•
Draw the element (e.g. a freehand line) that is
to be used as the path for the laser beam.
13.11.4 Moving the trapping laser beam
with the joystick
•
Note that the joystick must be activated to be able
to use it (refer to chapter 3.4).
•
Select this element in the "Laser Tools" in the
"Track path / Target" field.
Select the laser beam along which you want
this element to move (Trap 1 or Trap 2).
Info:
If the stage is at the CapCheck (refer to
chapter 5.5), the buttons are not available.
•
Press one of the four arrow keys. The laser
beam will continue to move until you release
the key.
If you press two arrow keys simultaneously (eg,
↑→), you can also move the laser beam diagonally.
You can activate the control of the laser beams using the joystick in the same way as using the arrow
keys (refer to chapter 13.11.3) or using the buttons on the joystick:
- Using the bottom left button you can activate
and deactivate the control of the trapping laser
beam 1.
- Using the top right button you can activate and
deactivate the control of the trapping laser
beam 2.
- If the control of both trapping laser beams is
activated, you will move the two beams simultaneously and in parallel.
The speed of the movement is dependent on the
deflection of the joystick. The speed you have set
for the "TrapXYArrow" function (refer to
chapter 5.3) is also the maximum speed for movements using the joystick.
415109-2614-101 e 09/09
The movement can be made in two ways:
- "Track with stage": in this case the stage is
moved under the laser beam in such a way that
the laser beam covers the figure required. The
laser beam itself is not moved during this process.
- "Track with Trap XY": the laser beam is moved
along the selected element. The stage is not
moved during this process.
• Click on the button for the required movement
type.
After the movement, the stage or the laser beam
stops at the end dot for the movement.
• Click on the "Back to start position" button if
the laser beam is to be moved back to its start
position.
155
156
415109-2614-101 e 09/09
General introductory remarks
14
Working with Fluorescence (Option)
A supplementary fluorescence unit is available as
an option. According to the configuration this is
suitable for the following applications:
- Configuration "Basic": non-simultaneous application of fluorescence and laser functions.
- Configuration "Advanced": the simultaneous
application of fluorescence and laser functions
is possible.
For more information about the application and the
basic settings refer to the User Manual.
Along with the standard fluorescence illumination,
fluorescence illumination using light emitting
diodes (LED) is also available. For more detailed
information refer to chapter 14.12.
14.1
General introductory remarks
The procedure to use for working with fluorescence illumination depends on the way your
system is configured. The differences concern the
manipulation of the microscope (motorized or
manual version) and the fluorescence shutter or
filter wheel respectively.
If your system is equipped with a motorized microscope, you can control all the elements that you
need to adjust specifically in order to use the fluorescence illumination via PALM RoboSoftware.
When using a manual microscope you have to
make the settings on the microscope manually;
the functions for the filter wheel and the shutter
are controlled by PALM RoboSoftware: Ie, you can
select the desired excitation filter or close and
open the shutter via a program command.
415109-2614-101 e 09/09
14.2
Settings for working with fluorescence - manual microscope
To use the fluorescence illumination, you must
make the following settings:
- switch on the fluorescence illumination (refer to
User Manual)
- select the desired fluorescence excitation filter
(necessary when using a filter wheel, only;
refer to chapter 14.7)
- swivel in the desired reflector position in the
microscope (refer to User Manual)
- switch the microscope light on or off as necessary
- activate the timer (if you want to preset a time
for which the excitation light should illuminate
your sample; refer to chapter 14.11), and
- open the shutter (chapter 14.6).
Note!
Close the shutter (chapter 14.6) before
switching on the fluorescence lamp and
before finishing or interrupting your work.
This will prevent unintentional exposure of
your sample to fluorescence light.
14.3
Settings for working with fluorescence - motorized microscope
To use the fluorescence illumination, you must
make the following settings:
- switch on the fluorescence illumination (refer to
User Manual)
- select the desired fluorescence filter unit (chapter 14.4). With this the functions "(Excitation)filter", "Reflector position", "Microscope
light", "Timer" and "Shutter" are performed via
a single command.
The basic settings of these functions has been
made during installation of your PALM system.
PALM RoboSoftware provides you with the
capability of saving various combinations of
these parameters and retrieving them when
they are needed (chapter 14.9).
157
Activating a fluorescence settings record
14.4
Activating a fluorescence settings
record
You can activate a set of fluorescence settings
(refer to chapter 14.9) as follows:
14.5
Freeze Mode
Using Freeze Mode of PALM RoboSoftware you can
display the actual fluorescence image on the monitor and edit it (for example, by drawing a freehand
line or marking objects), while the fluorescence
light is switched off again. In this way sensible fluorescence samples are protected from fading.
To switch into and out of Freeze Mode:
•
Click on the menu item "Freeze Mode" in the
"Motion" menu.
With this menu command you can toggle between
"Freeze Mode" and "Cursor Mode".
Note!
In Freeze Mode, all functions for moving the
stage or functions that cause a movement of
the stage, e.g. all positioning functions as well
as all laser functions are blocked. In this way,
an unintentional movement of the stage is prevented.
•
•
Select the "Reflected light" tab in the "Microscope Tools".
In the "Fluorescence" area select the required
set of settings.
The selected settings record is activated, ie, all in
this record defined settings are entered (For
changing the settings refer to chapter 14.9).
Note!
When using a manual microscope only the settings of the filter wheel and the shutter are activated. The position of the reflector revolver
and the microscope illumination has to be
switched on manually on the microscope.
158
After editing the freezed image, you can exit the
Freeze Mode to perform a laser function or to
observe other areas with fluorescence.
Note!
Before switching on a laser function, a position
with a beam splitter, suitably coated for this
wavelength, must be swiveled into the reflector
revolver of the microscope. For systems with
the fluorescence configuration "Basic" this is
the first position only. This position is adopted
automatically on motorized microscrope systems.
415109-2614-101 e 09/09
Opening and closing the shutter
14.6
Opening and closing the shutter
You can open and close the shutter via a menu
command or an icon button. However, you can use
the timer function (chapter 14.11) to preselect a
time after which the shutter is to be closed again
automatically after you have opened it.
Note!
In the "Basic" configuration with the manual
microscope the function "Shutter" is not active. In this case the shutter has to be operated manually (at the microscope stative).
To open and close the shutter on the filter
wheel via icon buttons:
Open Shutter
(shutter is currently closed)
Close Shutter
(shutter is currently open)
Info:
There is only one button for opening and closing the shutter. Its appearance changes according to the current status.
•
•
In the "Microscope Tools" click on the
"Reflected light" tab (refer to figure on
page 158).
Click on the "Shutter" icon button.
To open and close the shutter on the filter
wheel via a menu command:
•
In the "Adjustments" menu, click on the menu
item "Fluorescence ... "
The "Fluorescence adjustments" window will open.
• Select the "Fluorescence Shutter" tab.
The window contains three fields displaying a
number of buttons:
- "Shutter Type" field: information about the
manufacturer
- "Shutter Error" field: if there are problems with
the shutter, messages will be displayed here.
- "Actual state" field: this indicates whether the
shutter is currently open or closed.
- Buttons: for opening and closing the shutter
and for closing the window (not shown in the
figure above).
• Click on the "Close" button to close the shutter
or on the "Open" button to open the shutter.
• Close the window by clicking on "OK".
The shutter will be opened or closed depending on
its position before the command was sent.
415109-2614-101 e 09/09
159
Selecting fluorescence excitation filter and assigning filter names
14.7
Selecting fluorescence excitation filter and assigning filter names
Note!
In the "Basic" configuration with the manual
microscope the function "Fluorescence Filter"
is not active.
•
In the "Adjustments" menu, click on the menu
item "Fluorescence ... "
The "Fluorescence adjustments" window will open.
• Select the "Fluorescence Filter" tab (refer to the
figure at the top of this page).
On this tab you can select a fluorescence excitation
filter, assign names for the filters and view various
items of information on the filters.
Information about the installed filter wheel:
"Information and Control" section:
- "Filter Type" field: Information on the manufacturer of the filter wheel (Ludl or microscope)
- "Filter Error" field: This is where error messages are displayed in the event of problems
with the filter
- "Actual Position" field: This shows which filter is
currently in the fluorescence beam path. You
can also select the desired excitation filter here
(refer to page 160).
"Filter Colors (and Names)" section:
- Information about the existing filters (up to six,
if a Ludl filter wheel is installed, up to eight if a
microscope filter wheel is installed).
You can make or change any entry yourself in
the "Color" column (see below).
If you have installed a microscope filter wheel,
the names that were specified in the control
program for the microscope appear in the
"Name" column. If you have installed a Ludl filter wheel, this column is empty.
To define a name for the fluorescence excitation filter used:
You can specify names for your installed fluorescence excitation filters (e.g color names). If you
subsequently select an excitation filter the names
you specified will appear in the selection list.
• In the table, double-click in the row of the filter
for which you want to change the color information contained in the "Color" column.
• Enter the desired name for the filter.
• Repeat for all filters which you want to rename.
To select a fluorescence excitation filter:
•
Open the drop-down list "Actual Position" and
select the desired position.
In the drop-down list all possible filter settings
are listed. If you have entered names for the filters as described above, the names will be
listed, otherwise they will be numbered
from 1 to 6.
The filter wheel will move automatically to the
selected filter position.
160
415109-2614-101 e 09/09
Editing reflector settings
14.8
Editing reflector settings
To define names for the reflectors:
•
In the "Adjustments" menu, click on the menu
item "Fluorescence ... "
The "Fluorescence adjustments" window will open.
• Select the "Reflector" tab (refer to the figure
above).
On this tab you can select a filter, make various
settings and view information on the reflector.
How to calibrate the reflector (compensate for the
reflector offset) is defined in chapter 14.10, all
other settings are described in this chapter.
You can specify names for your installed reflectors
(e.g color names). When you select a reflector later, the names you have defined appear in the
drop-down list, otherwise the sequential numbers
from 1 to 6 are used.
• In the table, double-click in the row of the
reflector for which you want to change the color
information contained in the "Color" column.
• Enter the desired name.
Repeat for all reflectors which you want to rename.
To define whether the laser is allowed to be
used with a reflector:
•
Information about the reflector
"Information and Control" section:
- "Reflector Type" field: information about the
manufacturer.
- "Reflector Error" field: this is where error messages are displayed in the event of problems
with the reflector.
- "Actual Position" field: this shows which reflector is currently in the fluorescence beam path.
You can also select the desired reflector here
(see page 161).
"Reflector Colors (and Names)" section:
- Information on the existing reflectors.
You can make or change any entry yourself in
the "Color" column.
415109-2614-101 e 09/09
In the table, double-click in the row of the
reflector for which you want to change the setting contained in the "Laser" column.
Yes: the laser can be used with this reflector
setting.
No: the laser cannot be used with this reflector
setting.
To select a reflector:
•
Open the drop-down list "Actual Position" and
select the desired position.
The reflector block moves automatically to the
selected position.
161
Editing a fluorescence settings record
14.9
Editing a fluorescence settings record
If you need certain settings and sequences for fluorescence more frequently, you can save them as
a settings record. You can create and save as
many of these records as you wish. You can assign
a name to each setting. These names then appear
on buttons in the "Microscope Tools" on the
"Reflected light" tab. You can activate the related
set of settings by clicking on one of the buttons
(refer to chapter 14.4).
•
In the "Setup" menu, click on the menu item
"Fluorescence ... "
This opens the "Fluorescence" window. The "Fluorescence" tab is displayed (refer to the figure at
the top of this page).
To create a new set of settings:
•
In the table, double click in the row with the
entry "(new)", or
click once in the row with the "(new)" entry and
then click on the "Change" button, or
click on the "Insert" button.
Info:
A new entry is always added at the end of the
list over the "(new)" row. If you have already
created entries, you can select one of the existing entries with a click of the mouse. If you
then create a new record using the "Insert"
button, a new record will be inserted above the
marked record.
You can change the order of the records as will
be explained later.
This opens the "Fluorescence Entry" window.
When you create a new settings record, every field
is populated by default with "don't care". This setting means that no change will be made to the current setting for the respective part when you
activate the settings record as described in
chapter 14.4.
• Enter any name for your settings record in the
"Name:" field.
162
415109-2614-101 e 09/09
Editing a fluorescence settings record
•
Open the drop-down lists "Filter", "Shutter",
"Reflector" and "Light" one after another and
select the desired menu items.
To change a set of settings:
•
•
Click on the row in the table containing the settings record that you want to edit.
Click on the "Change" button.
This opens the "Fluorescence Entry" window.
• Make your changes as described in the previous
section.
To delete a set of settings:
You can define the entries of the drop-down list
"Filter" on your own (refer to chapter 14.7).
•
Click on the row in the table containing the settings record that you want to delete.
•
Click on "Delete".
To change the order of the entries in the list:
The entries of the drop-down list "Reflector" are
prescribed in the control program for the microscope.
The three setting options for the shutter have the
following effect if you activate one of the saved fluorescence settings records as described in
chapter 14.4:
- OPEN: the selected filter will be targeted, then
the shutter will be opened.
- CLOSE: the shutter will be closed, then the
selected filter will be targeted. The shutter then
remains closed.
- CLOSE-OPEN: the shutter will be closed, then
the selected filter will be targeted. The shutter
is then opened again.
•
•
Click on the row in the table that contains the
record you want to move up or down.
Click on the "Up" or "Down" button depending
on the direction in which you want to move the
entry.
The entry will be moved, all entries will be renumbered.
The setting for "Light" controls the microscope illumination, not the fluorescence lamp (available
with the motorized microscope only).
• Close this window by clicking on "OK".
• Repeat in the same way if you want to create
more settings records.
415109-2614-101 e 09/09
163
Adjusting the reflector offset
14.10 Adjusting the reflector offset
If you have set or changed a reflector for fluorescence, the microscope image on the monitor may
appear to be shifted slightly, although the stage
has not been moved. If you now draw elements
and then change the reflector again, your elements will not be positioned correctly. The automatic laser functions will then not process exactly
the areas you wish.
All existing elements are selected automatically
and enclosed in a selection rectangle (white line).
• Click on any dot within the selection rectangle
and hold the mouse button down.
Info:
If you have drawn elements that are currently
positioned outside of the monitor section, some
or all of the borderlines of the selection rectangle will also be outside the monitor section. In
this case the border lines are not visible.
You must compensate for this by setting the
Reflector Offset. With that you move all existing elements.
Note!
Please note that on adjusting the Reflector
Offset all existing elements are really moved,
not only the elements drawn with fluorescence
illumination. If you wish to draw elements under normal as well as fluorescent lighting you
should first check whether the Reflector Offset
is set correctly.
It may be possible that you do not see the structures of the elements with normal illumination. In
this case you have to draw a reference element on
a point of your sample, that is to be seen with both
types of illumination.
To adjust the Reflector Offset:
•
•
•
Draw the required elements with fluorescence
illumination. Draw at least one element on a
point, that is to be seen with normal illumination, also. Suitable for this is any type of element, for example "Freehand" or "Dot" (refer to
chapter 7.3.5 "The Freehand Tool" or
chapter 7.3.10 "The Dot Tool"). This element
serves as a reference for the Reflector Offset.
Switch off the reflector and the fluorescence
illumination.
Move the stage so that the reference element
and the corresponding point on your sample is
displayed on the monitor.
Note!
If you click inside the rectangle and inadvertently do not hold the mouse button down, the
selected elements will not be moved to the correct position. In this case, reset the Reflector
Offset as explained below and start the operation again.
•
Move the elements (holding down the mouse
button) so that your reference element
matches the respective structure of your sample. When you have moved the window to the
desired position, release the mouse button.
Then, even elements that are outside the current
monitor section will be moved.
To reset the Reflector Offset:
•
Click on the menu item "Factory ReflectorOffset" in the "Adjustments>Calibration"
menu.
Note!
The Reflector Offset will also be reset if you restore the factory default settings (refer also to
chapter 3.8).
Pointer Tool
•
Select the Pointer Tool in the Graphic Toolbar.
•
Click on the menu item "New Reflector-Offset"
in the "Adjustments>Calibration" menu, or
click on the "Calibrate" button in the "Fluorescence adjustments" window, "Reflector" tab
(refer to chapter 14.8) .
164
415109-2614-101 e 09/09
Activating and deactivating the timer
14.11 Activating and deactivating the
timer
14.12 Colibri: fluorescence illumination
with LEDs
PALM RoboSoftware includes a timer for your use.
Use the timer to set the shutter to close again
automatically after a period defined by you when
you have opened it.
As an alternative to the standard fluorescence illumination, a module for fluorescence illumination
with several light emitting diodes is available. The
module includes the following features:
- The excitation filters are built into the module.
You therefore no longer need separate excitation filters. With this module it is possible to
switch on LEDs with different wavelengths at
the same time and in this way perform multiple
channel fluorescence experiments without a filter change.
- The switch on/switch off times for the illumination are very short. The fluorescence illumination can therefore be limited to the time during
which the camera takes the image. As a result
the sample does not fade as badly.
Note!
In the "Basic" configuration with the manual
microscope the function "Timer" is not active.
•
•
•
Select the "Reflected light" tab in the
"Microscope Tools".
Activate the "Close Shutter: automatically
after" checkbox to enable or disable the timer.
Enter the required time the shutter is to be
open in "Seconds".
415109-2614-101 e 09/09
The Colibri fluorescence illumination module can
be equipped with various LEDs.
By combining different settings for the various
LEDs, numerous fluorescence illumination settings
are possible. You can combine sets of settings as a
hardware configuration and save them, and assign
them to a button in the "Microscope Tools",
"Reflected Light" tab (refer to chapter 15.5). It is
then possible to quickly change between different
settings using these buttons.
165
Colibri: fluorescence illumination with LEDs
To make settings for the LED fluorescence
illumination:
•
•
•
•
Click on the "All off" / "All on" button to switch
all LEDs on or off.
Click on an "On" or "Off" button to switch the
related LED on or off.
Adjust the light intensity of the related LED
using the arrow buttons.
On the "Devices" menu click on "Microscope".
The "Microscope" window opens.
• Click on the "Reflected" tab.
You can display a graphic of the light path for the
LED illumination:
• Click on the "Grafic" button.
In the "Colibri Light Source" area you can select
whether you want to work with the LEDs or with an
external light source (white light). Select the
external light source if you need an excitation
wavelength that is not available from the LEDs.
• Click on the "LEDs" button or the "External"
button depending on which exposure type you
require.
This opens the "Colibri" window. You can make the
same settings in this window as in the "Microscope" window, "Reflected" tab.
The LEDs installed in your system and information
on their wavelength are given in the "Colibri Channels" area.
166
415109-2614-101 e 09/09
The "Microscope Tools"
15
Control Microscope (Zeiss Axio Observer)
If you have purchased a system with a motorized
microscope, you can also control settings via PALM
RoboSoftware. You can specify that certain settings on the microscope are made automatically
when the PALM RoboSoftware is started and quit.
To make settings while you are working, you can
use the "Microscope Tools" in the main window as
well as the "Microscope" window. You can open it
by menu command or via an icon button. The
"Microscope Tools" enable you to make the most
frequently used settings; the "Microscope" window
offers additional setting options.
15.1.1 Setting required magnification
•
Info:
The selection available depends on which objectives are fitted to your microscope and configured in the MTB 2004.
If you are using an ApoTome on your microscope,
its current status is displayed on the monitor.
15.1
Click on the button for the objective required.
The "Microscope Tools"
15.1.2 Setting the focus
You can either adjust the focus almost constantly
in small steps of about 1µm each, or you can deliberately target defined positions (Load Position,
Working Position, Check Position; refer to
chapter 15.1.3). If your microscope is equipped
with autofocus you can perform the focusing automatically.
To set the focus:
•
Drag the slider in the "Focus" area to the
required value, or
click on the left or right arrow button to adjust
the focus up or down.
The current position is indicated in the field to the
left of the arrow buttons.
You can also make the setting using the mouse:
• Position the mouse pointer on the slider. With
the right mouse button pressed, coarsely
adjust the focus using the mouse wheel; you
can make a fine adjustment using the mouse
wheel with the left mouse button pressed.
To focus automatically:
Info:
This function is only available if your microscope has an autofocus facility.
You can make the most frequently used settings
directly in the main window on the "Common" tab
in the "Microscope Tools".
415109-2614-101 e 09/09
•
Click on the "Autofocus" button.
167
The "Microscope Tools"
To activate/deactivate the autofocus:
Info:
This function is only available if your microscope has an autofocus facility.
•
Move to the work position.
•
The function can be turned on or off by clicking
the "AF active" box.
15.1.3 Defining and setting fixed
positions for the focus
You can target three defined focus positions: two
of it are freely definable, the third position is prescribed:
- Work Position (freely-definable): The objective
is set so that the focus is in the same plane as
the slide.
In this position you can view your sample on
the monitor or in the ocular of the microscope.
Info:
The exact setting of the focus is variable for
various objectives. Because of this, you have to
define the setting of the work position for all
objectives.
However, if you are working with slides or samples of different thicknesses, you may have to
readjust the focus.
If the autofocus is switched on, then each time an
element is targeted during a laser function (and
each time the lens is changed), the image is focused automatically.
-
-
Check Position (freely-definable): The objective
is set such that the focus is on the same plane
as the cap, into which your samples are catapulted using the LPC functions (refer to
chapter 12). In this position you can check the
results of the catapulting.
Load Position (prescribed): The objective is
moved into the lowest possible position. In this
position, you can, for example, move the stage
to the CapCheck and back or change the slide
without any fear of hitting the objective with
the slide.
Caution!
Using a non-motorized microscope: If you want
to return the stage from the CapCheck, you
must set the Load Position manually, so that
the objective does not collide with the slide
(refer to chapter 5.5 for instructions on moving
the stage to the CapCheck and back).
168
415109-2614-101 e 09/09
The "Microscope Tools"
15.1.4 Making illumination settings
To define the Work Position:
To switch the microscope lamp on and off:
•
•
To define the Check Position:
•
•
Lamp (lamp is switched on)
Set the focus so that your sample is displayed
sharply.
Click on the "Set Workpos" button.
Lamp (lamp is switched off)
•
Set the focus at the Load Position on a manual
microscope.
Move the stage to the CapCheck (refer to chapter 5.5).
Click on the "Lamp" button to switch the lamp
on or off.
To regulate the brightness of the microscope
lamp:
•
Drag the slider in the "Light" area to the
required value, or
click on the left or right arrow button.
Instead of the "SetWorkpos" button, a "Set CheckPos" button appears.
• Set the focus so that a catapulted sample in the
cap is displayed sharply.
• Click on the "Set CheckPos" button.
• Reset the focus to the load position on a manual
microscope.
• Move the stage back from CapCheck.
The current brightness is indicated in percent in
the field to the left of the arrow buttons.
To set the focus to one of the default
settings:
The microscope lamp is automatically adjusted to
a color temperature of 3200 K. This is the default
value for a halogen lamp and will produce a microscope image with a coloration that is closest to the
image in the microscope's ocular.
Focus to
Load Position
•
Focus to
Work Position
Focus to
Check Position
To adjust the color temperature of the
microscope lamp to 3200 K:
•
Click on the "3200K" button.
To open and close the shutter (transmitted
light shutter, optional):
Click on the desired button.
Open Shutter
(shutter is currently closed)
Close Shutter
(shutter is currently open)
•
415109-2614-101 e 09/09
Click on the "Shutter" button to open or close
the shutter.
169
Making pre-settings for the microscope
15.2
Making pre-settings for the
microscope
You can specify a range of settings that will be
made automatically on the microscope when PALM
RoboSoftware is started and quit:
- Reflector
- Condenser
- Filter
- Shutter
- Lamp
- Baseport and Sideport
•
In the "Adjustment" menu, click on the menu
item "PALMRobo ... ".
The "Preferences and Configuration" window
opens.
• Select the "Microscope Setup" tab.
want for the respective part, which is to be selected automatically when PALM RoboSoftware is
launched or closed. Every field contains a dropdown list containing all the possible settings for the
respective microscope part. In addition, each includes an entry "don't care". If you select this entry, the setting that is currently active at the time
PALM RoboSoftware is launched or closed, will be
the one that is retained.
If all the current settings are to be retained when
PALM RoboSoftware is launched or closed:
• Click on the "Don't care" button under
"Startup" or "Shutdown".
All entries in the fields for "Startup" or "Shutdown"
will be set to "Don't care".
If certain settings for the individual parts of the microscope are to be made automatically when PALM
RoboSoftware is launched or closed:
• Open the respective drop-down list (Reflector,
Condenser, Filter, Shutter Reflected/Transmitted, Lamp, Baseport, Sideport) and select the
desired setting (of course the selection options
for launching and closing of PALM
RoboSoftware are the same).
Info:
The entries in the lists are made in the control
program for the microscope (apart from shutter and lamp) and can only be changed there.
If only the entry "<none>" is available in a list,
this means that the corresponding part is not
motorized in your system and therefore cannot
be set via PALM RoboSoftware.
On the left there is a list of the microscope parts
for which you can make prior settings. There are
two groups of fields in the middle and one on the
right, in which you can specify the setting you
170
415109-2614-101 e 09/09
The "Microscope" window
15.3
The "Microscope" window
The appearance of the "Microscope" window and
the settings that can be made in this window are
dependent on the configuration of your system.
15.4
Status display ApoTome
If your microscope is equipped with an ApoTome,
and if the ApoTome is configured in the "Microscope Toolbox", a status display will appear below
"Microscope Tools". The displays are as follows:
To open the "Microscope" window:
•
On the "Devices" menu click on "Microscope".
The ApoTome is set up in such a way that the light
beam can pass through it unrestricted. With this
setting you can work with the laser without risk of
damage to the ApoTome.
The ApoTome is set up in such a way that the grid
is positioned in the beam path.
Info:
The laser beam would destroy the grid. If the
grid is swiveled in, the laser is automatically
switched off and no laser function can be started.
The ApoTome controller is switched off. In this
case PALM RoboSoftware has no information on
the status of the ApoTome.
Note!
Check the status of the ApoTome before
switching the laser on. The grid must not be
positioned in the beam path as it would be destroyed by the laser.
You will find information on the settings in this
window and how to make the settings in the
"AxioVision" online help.
415109-2614-101 e 09/09
171
Hardware configurations
15.5
Hardware configurations
You can compile and save different hardware configurations. In a hardware configuration you define
settings for the camera and microscope components (e.g. shutter, reflector, filter, etc.). You can
activate a saved hardware configuration with a
click of the mouse. I.e., if you want to change to a
different system configuration, you do not need to
separately make the settings for each individual
component.
• Select the "HW Settings" tab in the "Microscope
Tools".
15.5.1 Setting up a hardware
configuration
Setting
•
Click on the "Setting" icon button.
The "Settings Editor" window is opened (refer to
figure on page 173).
In the "Available Components" field you will find a
list of all available components.
•
Click on the "Show all" button to display all subentries.
The "Hide all" button appears in place of this button.
•
Click on the "Hide all" button to hide the subentries.
In the "Stored hardware settings" field you will find
a list of all existing hardware configurations.
The elements and related settings for a new configuration or a configuration selected in the
"Stored hardware settings" field are displayed in
the "Selected Setting" field.
To add a new configuration or change an
existing configuration:
If you want to change a configuration:
• Select the required configuration in the "Stored
hardware settings" field.
If you want to add a new hardware configuration:
• Click on the "New..." button.
To activate a hardware configuration:
•
In the "Settings" area click on the button with
the name of the required hardware configuration.
172
If you want to copy an existing hardware configuration:
• Select it in the "Stored hardware settings" field
and then click on the "Duplicate" button.
You can change the copy and save it with a new
name.
415109-2614-101 e 09/09
Hardware configurations
HW settings
The rest of the procedure is the same in all three
cases:
If you want to add individual components:
• Select the components in the "Available Components" list and click on the "Add" button.
If you want to add all components:
• Open the drop-down list for the "Add" button
and select "Add all".
If you want to remove a component from your
configuration:
• Select this component in the "Selected Setting"
field and click on the "Remove" button.
If you want to remove all components:
• Click on the "Remove all" button.
•
To change the name of a configuration:
•
•
Click on the button on the "Edit" column to
change the parameters for the related components.
A window opens in which you can make the
related settings.
415109-2614-101 e 09/09
Select the configuration that you want to
rename in the "Stored hardware settings" field.
Click on the "Rename" button and enter a new
name.
To activate a hardware configuration:
•
•
Click on the "Save" button to save your
changes.
•
Select the required configuration in the "Stored
hardware settings" field.
Click on the "Apply" button.
173
Hardware configurations
15.5.2 Editing the list of hardware configurations
The "Hardware setting adjustments" window will
open.
•
Click on the "Assign HW settings" button in the
"Microscope Tools" on the "HW Settings" tab.
HWSettingAdjustment
To add an additional configuration or replace
a configuration with another configuration:
Info:
An additional configuration is added at the end
of the list above the "(new)" row.
An additional configuration is inserted above a
marked configuration using the "Insert" button.
You can change the order of the configurations
as explained below.
If you want to add a further hardware configuration:
• In the table, double click in the row with the
entry "(new)", or
click once in the row with the "(new)" entry and
then click on the "Change" button, or
Click on the "Insert" button.
If you want to replace a configuration with a different configuration:
• Double-click on the row with the related configuration, or
click on the row with the related configuration
once and then click on the "Change" button.
Button Assignment
174
415109-2614-101 e 09/09
Hardware configurations
To delete a configuration from the list:
•
Click on the row with the configuration you
want to delete in the table in the "Hardware
setting adjustments" window (refer to
page 174).
•
Click on "Delete".
Info:
Only the entry in the list is deleted, not the
configuration itself.
To change the order of the configurations in
the list:
•
•
Click on the row with the configuration you
want to move up or down in the table in the
"Hardware setting adjustments" window (refer
to page 174).
Click on the "Up" or "Down" button depending
on the direction in which you want to move the
configuration.
The configuration is moved, all configurations are
re-numbered sequentially.
415109-2614-101 e 09/09
175
176
415109-2614-101 e 09/09
Multi-channel fluorescence recordings
16
Multi-channel fluorescence, extended focus and
time lapse (options)
As an option your PALM RoboSoftware can be
licensed for the "Multi-channel fluorescence" and
"Extended focus" functions. Please contact Carl
Zeiss MicroImaging GmbH if you wish to upgrade
your system.
With multi-channel fluorescence two or more
recordings of the sample are made in succession
with different fluorescence excitation filters. As a
result a series of different images is available in
which different structures in your sample are visible. These images can be overlaid. In this way
structures in your sample can be made visible that
would hardly be visible using a single fluorescence
channel, or perhaps would not be visible at all.
The "Extended focus" option is particularly suitable
for thicker samples or samples that do not lie
exactly on a plane. Such samples cannot normally
be displayed with full sharpness: the focus must
be changed for different areas of the sample.
Using the "Extended focus" function, several
images are taken of the sample with different
focus settings. The program analyzes these
images and calculates from the sharp portions of
each image a sharp overall image that is then displayed on the monitor.
16.1
Multi-channel fluorescence
recordings
Before you can generate a multi-channel fluorescence recording, you must make the following
preparations:
-
Add a corresponding hardware configuration
-
Make settings for the experiment
-
Select an experiment
To prepare a multi-channel fluorescence
recording:
Setting up the hardware configuration:
•
Open the "Multi-channel fluorescence" menu in
the toolbar.
•
Click on "Create hardware settings".
The "Setting editor" window opens where you can
make settings for your hardware.
You can also use both functions for scanning your
sample using the Navigator (see chapter 6.2).
You can also combine the two methods to create
multi-channel fluorescence images with extended
focus. You can also combine them with a time
lapse function, i.e. the recordings are automatically repeated at defined time intervals.
This chapter briefly describes how to prepare and
use the functions. You will find more detailed information on this topic in the "AxioVision" online help.
415109-2614-101 e 09/09
•
Make your settings (see chapter 15.5).
•
Click on the "Save" button to save the configuration you have created.
177
Multi-channel fluorescence recordings
Making settings for an experiment:
Selecting an experiment:
•
•
Click on the "Create/modify multi-channel
experiments" option from the "Multi-channel
fluorescence" menu.
A window opens where you can make settings for
a new experiment or change settings for an
existing experiment.
Click on the "Select multi-channel experiment"
option from the "Multi-channel fluorescence"
menu.
A window with a list of the existing experiments
opens.
•
Select the experiment you want.
Info:
With multi-channel fluorescence recordings
you can also use the "Extended focus" function
(see chapter 16.2).
To generate a multi-channel fluorescence
recording:
Multi-Channel
•
Click on the "Multi-Channel" icon button.
The multi-channel fluorescence recording is
started. A "Multidimensional Acquisition Preview"
window opens, showing the progress of the
recording (see chapter 16.4).
•
Make your settings (refer to AxioVision online
help).
178
As soon as the recording sequence is complete, a
fluorescence image appears on the monitor. PALM
RoboSoftware automatically switches to Freeze
Mode.
Additional options appear in the "Multi-channel
fluorescence" menu, which you can use to call up
the following functions:
-
Save the recording as a multi-dimensional
image
-
Display individual channels or a superimposed
overall image in the PALM RoboSoftware main
window
-
Display individual channels or a superimposed
overall image in the picture viewer (see. 16.5)
415109-2614-101 e 09/09
Extended focus
To save your images and display them on the
monitor:
•
Click on the "Save multi-dimensional image as
zvi-image" option (special Zeiss format) if you
want to save the images (save the image in
jpg, bmp or tif format as described in
chapter 10).
16.2
Extended focus
Before you can generate a recording with extended focus, you must make the following settings:
-
Add a corresponding hardware configuration
-
Make settings for the experiment
-
Select an experiment
To prepare a recording with extended focus:
Setting up the hardware configuration:
The images are saved in a file as a multidimensional image.
•
Open the "Extended focus" menu in the toolbar.
•
Click on "Create hardware settings".
The "Setting editor" window opens where you can
make settings for your hardware.
•
Click on the "Channel …" or "Overlay" button to
display the individual images or the superimposed image on the monitor.
Info:
You can use the "F" and "B" keys to scroll forwards and backwards through the individual
channels.
Note!
The multi-channel fluorescence recordings
are not live images of your sample. PALM
RoboSoftware therefore automatically
switches to Freeze Mode as soon as you start
a multi-channel fluorescence experiment. You
can exit Freeze Mode at any time to see the
live image from the camera on the monitor.
Using the commands described above, you
can return to the fluorescence recordings, but
only if you have not moved the stage in the
meantime. As soon the stage is moved, the
fluorescence images are lost.
•
Make your settings (see chapter 15.5).
•
Click on the "Save" button to save the configuration you have created.
Making settings for an experiment:
•
Click on the "Create/modify z-stack
experiments" option in the "Extended focus"
menu.
A window opens where you can make settings for
a new experiment or change settings for an
existing experiment.
415109-2614-101 e 09/09
179
Extended focus
To generate a recording with extended focus:
z-stack
•
Click on the "z-stack" icon button.
The recording is started. The "Multidimensional
Acquisition Preview" window opens, showing the
progress of the recording (see chapter 16.4).
As soon as the recording sequence is complete,
the sharp image calculated from the individual
images appears on the monitor. PALM
RoboSoftware automatically switches to Freeze
Mode.
Additional options appear in the "Extended focus"
menu, which you can use to call up the following
functions:
•
-
Save the recording as a multi-dimensional
image
-
Display the calculated sharp image in the PALM
RoboSoftware main window (if you have exited
Freeze Mode in the meantime)
-
Display individual images in the picture viewer
(see chapter 16.5)
Make your settings (refer to AxioVision online
help).
Selecting an experiment:
•
Click on the "Select z-stack experiment for
Extended focus" option in the "Extended focus"
menu.
A window opens with a list of the existing experiments (see related illustration in chapter 16.1).
•
Select the experiment you want.
180
415109-2614-101 e 09/09
Time Lapse
To save your images and display them on the
monitor:
16.3
You can combine multi-channel fluorescence
recordings and images with extended focus with a
time lapse function, i.e. the recordings are
repeated at defined time intervals.
•
•
Click on the "Save z-stack as zvi-image" option
in the "Extended focus" menu if you want to
save the images (save the image in jpg, bmp or
tif format as described in chapter 10).
The images are saved in a file as a multidimensional image.
Time Lapse
Click on the "Create/modify multi-channel
experiments" option in the "Multi-channel
fluorescence" menu.
The "Multidimensional Acquisition" window opens.
•
Select the "T" tab.
•
Make your settings (refer to AxioVision online
help).
Note!
The image with extended focus is not a live
image of your sample. PALM RoboSoftware
therefore automatically switches to Freeze
Mode, as soon as you start an experiment.
You can exit Freeze Mode at any time to see
the live image from the camera on the monitor (see chapter 14.5). Using the commands
described here you can return to the image
with extended focus, but only if you have not
moved the stage in the meantime. As soon as
the stage is moved, the image with extended
focus is lost.
•
Click on "Extended Focus Image" to display the
calculated image on the monitor again.
415109-2614-101 e 09/09
181
Preview
16.4
Preview
As soon as you start a multi-channel fluorescence
recording or a recording with extended focus, the
"Multidimensional Acquisition Preview" window
opens.
16.5
In the bottom left there are various buttons that
can be used to interrupt or cancel the recording.
The last image recorded appears on the right. The
buttons below the image can be used to influence
how it is displayed (for the function of the buttons
see chapter 16.5).
Viewing images in the picture viewer
For recordings with extended focus, the PALM
RoboSoftware main window only shows the overall
image calculated from the individual images
("Extended Focus Image").
182
The progress of the recording is shown in the top
left.
In the picture viewer, you can view all of the individual images recorded in experiments with extended focus, as well as images from multichannel fluorescence experiments, in conjunction
415109-2614-101 e 09/09
Viewing images in the picture viewer
with the time lapse function, if used. You can display a superimposed view of the individual images
from multi-channel fluorescence experiments.
Multi-channel fluorescence:
1
1
To view a multi-channel fluorescence image:
•
You also use this menu to open the picture viewer
if you want to view a series of recordings from a
combination of multi-channel fluorescence and
extended focus.
Switch between display in false colors ("On")
and original images ("Off")
Select fluorescence channel for individual or
superimposed image display
2
Click on the "Show with picture viewer" option
in the "Multi-channel fluorescence" menu.
2
Info:
For recordings with a monochrome camera,
only the false color images can be superimposed.
•
Click on the relevant button to select the
options described.
Extended focus:
To view an image recorded with extended focus:
•
Click on the "Show with picture viewer" option
in the "Extended focus" menu.
Use the buttons in the bottom section of the window to select the image to be displayed and make
settings to improve the image display.
•
Time Lapse:
•
Selecting the image to be displayed:
If you are combining a multi-channel fluorescence
recording with a recording with extended focus, for
each fluorescence channel the number of images
with different focus settings that you specified in
the extended focus settings will be recorded (see
chapter 16.2). For example, if you are using two
fluorescence channels and seven focus levels in an
experiment, a total of 14 images will be recorded.
If you have also used the time lapse function for
an experiment, a multiple of this number of
images will be recorded depending on your
setting. For example, if you have configured your
experiment in such a way that images have been
recorded at two times, there will be a total of 28
images in the above example. You can view all of
these individually in the picture viewer. To display
a particular image, select the fluorescence channel, the focus level and the time lapse cycle.
415109-2614-101 e 09/09
Click on the arrow buttons to the right of the
z-stack symbol to select the desired focus level.
Click on the arrow buttons to the right of the
time lapse symbol to select the desired cycle.
Set the image size and section:
1
2
3
4
5
1
2
3
4
5
Move section displayed
Set image magnification to default value
Fit image to window
Zoom in
Zoom out
•
Click on the relevant button to select one of the
specified settings.
183
Viewing images in the picture viewer
Setting image parameters:
Info:
The setting options described below are only
active when individual fluorescence channels
are displayed. They cannot be used with the
superimposed image.
•
This opens a window in which you can enter the
time in milliseconds.
•
1
1
3
4
Optimum display of lightest and darkest gray
or color value (excluding specified maximum
and minimum values)
Optimum display of lightest and darkest gray
or color value
Linear display of all possible values
Set gamma value to 0.45 for realistic color
reproduction
2
3
4
•
2
Click on the relevant button to select one of the
specified settings.
Click on the "Timer" button to set the display
time for each individual image.
Click on one of the buttons shown below to
start the slideshow:
1
1
2
3
2
3
Display from last image to first
Display from first image to last
Display from first image to last and then
from last image to first
The slideshow automatically starts over as soon as
all images have been shown.
Display images as slideshow:
You can display the individual images as a slideshow. To do this, select whether you want to see
the images with different focus settings (extended
focus) for a particular time lapse cycle, or images
for a particular focus level over all time lapse
cycles. You can also select whether you want to
see a particular fluorescence channel or the superimposed image.
•
Click on the "Time Lapse" or "z-stack" button to
select which series of images you want to display as a slideshow - time lapse images with a
particular focus setting or images with different
focus settings from a particular recording time.
•
Use the "Z" arrow buttons to select the focus
level or the "T" arrow buttons to select the
recording time for the images to be displayed.
•
Select the fluorescence channel or activate the
superimposed images.
184
•
Click on the "Stop" button to end the slideshow.
415109-2614-101 e 09/09
17
Incubation (option)
You can add an incubator to your system. The incubator is controlled using the program
AxioVision. The PALM RoboSoftware has an interface to this program.
-
This chapter describes how you can make the settings for controlling the incubator. You will find a
description of the parameters to be set in the
AxioVision online help.
If you have selected "Time controlled logging":
• In the "Intervall" field, enter the intervals at
which the log entries are to be made.
The settings for the incubator parameters are
logged in a file.
17.1
•
17.2
•
Making settings for the incubator
Making settings for the logging
•
•
Time controlled logging: the current values are
added to the log file at regular intervals.
Click on the radio button for the required logging type.
Open the menu for the "Incubation" icon button.
Click on the "Configuration" menu entry.
The "Incubation parameter logging configuration"
window opens.
On the "Devices" menu click on "Incubation
Device".
The "Incubation" window is opened. In this window
you will find three tabs for the settings for temperature, atmosphere and Y-modules (see figures on
page 186). Make the settings for all parameters in
the same way:
The current value of the related parameter is displayed in the "Measured" field.
• Set the required setpoint for the related parameter in the "Setpoint" field.
• Click on the "On" or "Off" button in the
"Heating" area to switch the control of the
related parameter on or off.
Info:
The logging settings are also available in the
"Preferences and Configuration" window,
"Incubation" tab. You can open this window
using the menu command
"Adjustments>PALMRobo...".
•
•
Click on the button
.
Select the folder in which your log file is to be
saved.
The logging can be either event-controlled or timecontrolled:
- Event controlled logging: only changes to the
incubation parameters are logged, independent
of the time.
415109-2614-101 e 09/09
185
Incubation window
186
415109-2614-101 e 09/09
17.3
Starting and stopping logging
17.4
•
•
•
•
Displaying log file
Open the menu for the "Incubation" icon button.
Click on the "View Log-file" menu entry.
Open the menu for the "Incubation" icon button.
Click on the "Start Logging" menu entry.
The logging is started. The "Stop Logging" menu
entry appears.
• Click on the "Stop Logging" menu entry to stop
the logging.
415109-2614-101 e 09/09
187
188
415109-2614-101 e 09/09
Field of View Analysis
18
Field of View Analysis
The "Field of View Analysis" function can be used
to automatically generate elements using PALM
RoboSoftware. For this purpose a script is used
that searches your microscope image for structures and automatically marks them as elements.
You can either use the default script supplied with
PALM RoboSoftware or integrate and choose from
up to ten custom scripts.
Info:
The "Field of View Analysis" function is only
available in the PALM RoboSoftware
"Pro Mode". Please contact Carl Zeiss
MicroImaging GmbH if you wish to upgrade
your system.
The analysis always covers the image section
currently visible in the PALM RoboSoftware window.
415109-2614-101 e 09/09
189
Field of View Analysis
How to integrate custom scripts:
How to select the script to be used:
•
•
In the "Adjustments" menu, click on the
"PALM Robo ... " option.
Open the "Field of View Analysis" menu in the
toolbar.
The menu contains the "Default" option, followed
by all custom scripts you have integrated.
"Default" refers to the default PALM RoboSoftware
script.
The "Preferences and Configuration" window
opens.
• Select the "FoV Script Assignment" tab.
•
Select the script you want.
The appearance of the icon button depends on
your choice of script (see Figure below).
How to perform an analysis:
Field of View Analysis
("Default" script selected)
Field of View Analysis
(script integrated by user selected)
•
Click on the "Field of View Analysis" icon
button.
The "Thresholds interactive" window will open.
Info:
The exact appearance of the window and the
setting options available depend on the
selected script. The following description
relates to the "Default" script.
•
•
•
Open the drop-down list for the first field and
select the desired script.
Select any other scripts you want to use in the
subsequent drop-down lists.
Close this window by clicking on "OK".
In this window you can mark the structures of
relevance to you by setting a color threshold. This
action is performed either by simply clicking in the
image using the color pipette (appears automatically) or by setting threshold values in the three
color channels. After clicking on the "OK" button,
script execution is continued and a line is generated around the areas marked previously. This
enclosing line is displayed in the PALM RoboSoftware main window and saved in the "Element
List". It is used as a cut line that the laser follows.
Some of the settings available in this window are
described below. You will find a detailed description of the function in the manual for the AxioVision program.
190
415109-2614-101 e 09/09
Field of View Analysis
Add color
Remove color
To add a color to the selection:
• Click on the "Add color" button.
• Click on an area with the required color in the
image.
To remove a color from the selection:
• Click on the "Remove color" button.
• Click on an area with the color to be removed
in the image.
To undo all your settings:
• Click on the "Reset" button.
Undo
Redo
To undo your last change:
• Click on the "Undo" button.
To redo a change you have undone:
• Click on the "Redo" button.
To activate or deactivate display of the selected
areas:
• Activate or deactivate the "Show graphics
plane" checkbox.
415109-2614-101 e 09/09
191
Field of View Analysis
192
415109-2614-101 e 09/09
Appendix A: Glossary
AutoLPC
Close&Cut + AutoLPC
Automatic catapulting of larger areas of samples
mounted on glass. With glass samples only a limited amount of cell material per laser pulse can be
catapulted out with one laser shot. Larger areas
have to be catapulted with multiple laser pulses.
The distance between the individual laser pulses
on the cut is dependent on the properties of the
tissue and is pre-selected in the "Draw Preferences" window, "LPC Distances" tab or in the "Preferences and Configuration" window, "Laser" tab.
Closing the marking line and cutting before catapulting. With critical samples, the marked area
must first be detached from its immediate surroundings by a clear cut line. Only in this way can
pure sample preparation be assured when catapulting.
Moving trap (movement of the trapping
laser)
Using the Laser Beam Positioning function on the
trapping laser, you can move trapped objects in
both the x and y axes, ie, parallel to the plane of
the slide.
Cutting along a selected line. The laser cuts precisely along the pre-drawn line, so that a clear line
of detachment is created between required and
unrequired material. In the cut area, all biological
material is destroyed by ablation. Thus a pure
sample preparation can be carried out without fear
of contamination.
Center
Double Beam System
The center point of the microscope image displayed on the monitor. It may be marked with
crosshairs. The crosshairs can be displayed or hidden with the "Screen Center" command in the
"View" menu.
PALM MicroTweezers is available as a Single Beam
System and as a Double Beam System. In the
Double Beam System, the trapping laser beam is
split into two beams. Depending on the configuration, one or both of the beams (DuoFlex or TwinFlex system) can be moved within the field of view
(moving trap). This means that you can trap two
objects and move them relatively towards each
other. You can select different power and focus
values for each of the two split beams.
Center RoboLPC
Cuts an element of the freehand, line, rectangle or
circle type and catapults the entire area to the center of the element with a laser pulse.
CapCheck
A position of the stage. If you move to the
CapCheck, the circular opening of the stage is positioned within the beam path of the microscope.
After catapulting the sample into the cap it can be
observed with the microscope through this opening.
Check Position
Freely-definable focus setting of the objective, to
set by a menu command (motorized microscope
only). The setting should be defined so that the
catapulted sample in the cap is displayed sharply
on the monitor or in the ocular.
This function can only be used with glass-mounted
samples.
Cut
Three-dimensional cutting
The element is cut several times. During each cutting process the focus is changed by a specific
amount such that each cutting pass is made in a
different plane on the sample. In this way it is possible to cut even thick samples without problems.
Element
An element is a drawing on your monitor. Elements serve to define selected areas for the application of laser functions, to annotate selected
points of the microscope image, to measure length
and areas and to define reference points. Accordingly the program differentiates between five
types of elements: Figure (freehand, line, rectangle and circle), dot, ruler, text and reference point.
Close&Cut
Closing and Cutting. An incompletely closed element is automatically closed and cut completely
according to the given conditions.
415109-2614-101 e 09/09
193
Extended focus
The "Extended focus" option is particularly suitable
for thicker samples or samples that do not lie exactly on a plane. Such samples can normally not
be displayed with full sharpness: the focus must
be changed for different areas of the sample. Using the "Extended focus" function, several images
are taken of the sample with different focus settings. The program analyzes these images and calculates from the sharp portions of each image a
sharp overall image that is then displayed on the
monitor.
Figure
The element types "Line", "Freehand", "Rectangle"
and "Circle" are known collectively as element type
"Figure".
JointCut
As with function Close&Cut the laser cuts the sample along defined lines. Start and end dot of an
open path figure are connected by a straight line.
It remains a joint between start and end dot. With
this function figures can be cut. The cut area remains fixed within the tissue. The entire area can
be catapulted later by a single laser pulse on this
joint.
Laser Microdissection and Laser
Pressure Catapulting (LMPC)
This technology combines microdissection, in
which the samples are cut out with zero contact,
with Laser Pressure Catapulting (LPC).
Laser Pressure Catapulting (LPC)
With a single laser pulse, objects marked with an
LPC dot are aimed and catapulted into a cap.
LineAutoLPC
Using this function a line-shaped area is pre-drawn
and catapulted into your cap. This element is
therefore not catapulted in one piece, but with
several laser pulses.
Load Position
Stage:
Position of the stage where the stage insert or a
slide can be changed. The stage can be moved to
the Load Position and back using a menu command.
PALM RoboMover or PALM CapMover II:
Position of PALM RoboMover or PALM CapMover II
at which the collector can be replaced. PALM
RoboMover or PALM CapMover II can be moved to
the Load Position using a command.
Laser Marker
There is a Laser Marker for each laser beam. Its tip
should display the point where the laser beam
meets the sample when released. For a fixed laser
beam such as the cutting laser and the trapping laser beam without Laser Beam Positioning, this is
roughly the middle of the monitor; for a beam that
is movable, this point may be located elsewhere.
PALM RoboSoftware calculates the cutting functions of the cutting laser from the position of the
Laser Marker. The position of the Laser Marker
should therefore always match that of actual laser
focus. Only then the correct results can be
achieved with the automatic laser functions. Likewise, using the trapping laser you can only capture
objects without difficulties and, if your system is
appropriately configured, move precisely using the
adjustment if the position of your Laser Marker is
correctly set. You should therefore check the position of the Laser Marker before you start work.
The position of the Laser Marker may vary with different objectives.
194
Load Position (Focus)
Default focus settings of the microscope, which
can be set by a menu command (motorized microscope only): lowest possible position of the objective. Before the stage is moved to its load position
or to the CapCheck, the load position of the objective must be set to avoid damage to the objective
or the stage and the slide respectively.
Multichannel fluorescence
With multichannel fluorescence two or more recordings of the sample are made in succession
with different fluorescence excitation filters. As a
result a series of different images is available in
which different structures in your sample are visible. These images can be overlaid. In this way
structures in your sample can be made visible that
would hardly be visible using a single fluorescence
channel, or perhaps would not be visible at all.
415109-2614-101 e 09/09
Oneclick-LPC
With this laser function a designated element will
be located in the screen center and lifted up by a
single laser pulse by one click. Thus single cells or
sperms are isolated fast and easily, simply by
clicking on the cell of interest.
Reference Position (trapping laser)
The reference position for the trapping laser can
be defined as required. The laser beam can be
moved back to the reference position under program control.
Reference (Stage)
PALM RoboSoftware uses the Reference Position of
the stage as the point of origin for calculating the
coordinates of your elements.
With each start of the controller the stage is
moved to the end positions in x- and y-direction.
This position is defined as a reference point automatically. The Reference Position is retained for as
long as the controller unit remains switched on,
and even if you shut down and restart PALM
RoboSoftware.
RoboLPC
With RoboLPC an element is detached and catapulted into a cap in a single operation (only possible with membrane-mounted samples). The drawn
line is completely closed. Then the laser first cuts
along the line but leaves a narrow joint. The width
of the joint can be pre-selected in the "LPC Parameter" window. The joint is displayed on the monitor
with an LPC dot. Finally the sample is catapulted
from here.
Single Beam System
PALM MicroTweezers is available as a Single Beam
System and as a Double Beam System. The Single
Beam System configuration is equipped with one
trapping laser beam, and may optionally include
Laser Beam Positioning (MonoFlex/Mono system).
Work Position
Freely-definable focus setting of the used objective, to set by a menu command (motorized microscope only). The setting should be defined so that
the sample is displayed sharply on the monitor or
in the ocular.
415109-2614-101 e 09/09
195
Appendix B: Keyboard Shortcuts
Keyboard
Shortcuts
Icon Button/Menu Command
Keyboard
Shortcuts
F1
Help > PALMRobo Help
Ctrl+K
Motion >
Goto CapCheck / Return
F2
Incubation
Ctrl+N
New Elements
Devices > Incubation Device
F3
InformationCenter
File >
Open InformationCenter ...
Alt+F4
F4
View > Navigator Window
F5
Motion > Speed slower
Ctrl+V
Edit > Paste
Ctrl+Y
Alt+P
Alt+Enter
Stage
Alt+F
Trap-1 mode
Motion > Trap-1-mode
Ctrl+F7
Trap 2 mode
Alt+X
Backspace
Start Laser function
Change
Freeze Mode
View > Hide All Bars /
View > Show All Bars
Delete last element
Edit > Delete last element
Alt+Backspace
Del
Edit > Undelete
Delete selected elements
Edit > Delete selected elements
Motion > Trap 2 mode
F11
Toggle switch between standard
pointer and reference pointer
Motion > Freeze Mode
Motion > Stage Mode
Shift+F7
Edit > Delete all unprocessed elements
Edit > Change
Microscope Window
Devices > Microscope ...
F7
Ctrl+S
Element List
View > Element List
F6
File > New Elements
File > Exit PALMRobo
Navigator Window
Icon Button/Menu Command
End
Esc
Laser > Focus down
Stop
Laser > Start Laser function
F12
Motion > Stop
Capture Device
Home
Laser > Focus up
Devices > Capture Device
Page up
Laser > Energy/Power more
Ctrl+A
Edit > Select All / DeSelect All
(Current position only)
Page Down
Laser > Energy/Power less
Ctrl+C
Edit > Copy
B
Page backwards through multichannel fluorescence images
Ctrl+F
Motion > Speed faster
F
Page forwards through multichannel fluorescence images
196
415109-2614-101 e 09/09
Index
A
Collector
prepare 138
Alarm timer 31
Color Palette
change colors 86
ApoTome, status display 171
Autofocus
activate 127
automatic focusing 167
deactivate 127
for element with laser function 29
AxioVision 13, 64
Color value (microscope image) 37
Combination
trapping laser focus 146
Comment
add 84
change 84
Context Menu 20
B
Brightness value (microscope image) 37
Control microscope 167
Copyright Note
specify 113
switch display on/off 18
C
Crosshairs
show/hide 18
Calibration
movement of stage 41
reset 43
trapping laser movement 42
Cursor Mode
select 45
Camera settings
AxioCam 33
exposure time 31
white balance 31
CapCheck 193
definition 51
return to original position 51
targeting 51
Catapult 121
Catapult elements 140
PALM CapMover II 140
PALM RoboMover 140
Catapulted samples
view 140
Cellenger 13
Center 193
Centering tool 47
Centric Attribute 73, 74
Change color (elements) 87
Check Position
define 169
meaning 168
set 169
415109-2614-101 e 09/09
Customize
User Interface 17
Cut 121
D
Database Mode
change database 12
change to File Mode 12
InformationCenter 10
load elements 110
PALM RoboSoftware 11
save elements 110
save image 116
Definiens 65
Definiens (Cellenger) 13
Delete elements
all 78
all on a slide 79
any 79
last drawn 79
Deselect elements (element list) 78
Dot thickness
change definition 86
Double Beam System 193
197
Draw elements
circle 74
dot 75
grid rectangle 74
line 73
line (freehand) 73
measuring line 90
rectangle 73
Reference Point 73
resume 81
text 75
remove from a group 89
reposition 80
restore 79, 83
restore changes 83
restore deleted 79
resume 81
rotate 82
save 107
select 77
select within a group 90
set color 84
set color for new elements 87
set line thickness 84
settings for saving (File Mode) 107
show anchor points 80
stretch 82
stretch and rotate 83
switch on and off numbering 83
types 71
ungroup 89
z-Focus 29
E
Element
allocate laser function 94
allocate objective 94
Element List
allocate laser function to element 94
allocate objective to element 94
allocate well to element 95
open 91
overview of functions 93
Slide tab 91
Summary tab 92
Element types
dot 71
grid rectangle 71
line 71
Reference Point 71
ruler 71
text 71
Elements
add comment 84
add elements to a group 89
center 76
change color 87
change comment 84
change/correct shape 82
copy 75, 83
create new set 68
definition 193
deselect (monitor) 78
display 76
dot thickness 86
draw 71
edit 80
export 111
group 89
hide 76
import 111
load 109
merge 81
naming 84
number 84
print 112
process 80
198
Export of elements 111
Exposure time
automatic adjustment 32
Extended focus
generate recording 180
prepare recording 179
save image 181
show image 181
F
Factory defaults 30
Field of View Analysis 189
integrate script 190
run analysis 190
select script 190
File Mode
change to Database Mode 12
InformationCenter 10
load elements 108
PALM RoboSoftware 11
save elements 108
save images 115
Fluorescence
activate set of settings 158
adjust Reflector Offset 164
name of filter 160
name of reflectors 161
reset Reflector Offset 164
selecting a Fluorescence Excitation Filter 160
selecting a reflector 161
settings (manual microscope) 157
settings (motorized microscope) 157
shutter 159
415109-2614-101 e 09/09
timer 165
working with fluorescence 157
Fluorescence settings
change sequence 163
create new set 162
delete 163
edit 163
Focus
cutting laser 125
microscope 167
trapping laser 146
Footswitch
cutting laser 135
trapping laser 150
I
Icon button
change size 17
Import of elements 111
Incubation
logging 185
InformationCenter
functionality 10
start 13
Initial settings
mode 25
Installation 11
Freeze Mode 158
Functionality 9
G
Graphic Tool
activate 71
circle 74
dot 75
freehand 73
grid rectangle 74
rectangle 73
Reference Point 73
ruler 90
stamp 75
text 75
types 71
Group of elements
add elements 89
forming 89
remove elements 89
select single elements 90
ungroup 89
J
Joystick
activate 27
PALM RoboMover 27
stage 27
trapping laser 27
K
Keyboard shortcuts
summary 196
L
Laser (cutting laser)
continue 134
indication of the operating state 134
stop 134
Hardware configuration
activate 172
add to the list 174
change name 173
change sequence 175
Laser (trapping laser)
combination focus 146
define Reference Position 149
indication of the operating state 151
move objects in z-axis 152
movement 152
position using joystick 27
set focus using the mouse 147
settings 145
switch on and off 151
Help
general 21
PALMRobo Instructor 21
Laser energy (cutting laser)
link Cut and LPC 126
set 125
Histogram 36
Laser focus (cutting laser)
link Cut and LPC 126
set 125
H
415109-2614-101 e 09/09
199
Laser focus (trapping laser)
set 146
set with the mouse 147
Laser functions (cutting laser)
allocate to an element 94
AutoLPC 122
Center RoboLPC 122
Close&Cut 121
Close&Cut+AutoLPC 122
Cut 121
JointCut 121
LineAutoLPC 121
LPC 121
Oneclick-LPC 135
RoboLPC 122
select 124
set available functions 28
set number of passes 127
three-dimensional cutting 127
Laser Marker
change appearance 19
meaning 194
standard layout 16
Laser power (trapping laser)
set 146
Laser settings (cutting laser) 124
energy and focus 125
find suitable values 130
footswitch 135
general 128
set available functions 28
Laser settings (trapping laser)
find suitable values 148
footswitch 150
power and focus 146
M
Measuring 90
area 90
length of lines 90
Message history 23
Microscope (motorized)
activate autofocus 167
adjust light intensity 169
Check Position, meaning 168
default settings 170
define Check Position 169
define Work Position 169
Load Position, meaning 168
open/close shutter 169
set Check Position 169
set focus 167
set Load Position 169
set Work Position 169
switching the lamp on and off 169
Work Position, meaning 168
Microscope Tools 167
fluorescence 158
Microscope Window 171
Mode 20
Cursor Mode 45
Stage Mode 45
Trap Mode 154, 155
Multi-channel fluorescence
generate recording 178
navigator 56
save images 179
show images 179
Laser Tools
trapping laser settings 126, 146, 147
N
Line thickness
change definition 86
Naming (element) 84
Linking
Cut and LPC energy and focus 126
Load elements 109
Load Position
return to original position 52
Load Position (objective)
meaning 168
set 169
Load Position (stage)
define 52
targeting 52
200
Navigator
continue scan 59
focus correction 56
interrupt scan 59
load scanned image 61
multi-channel fluorescence 56
prepare scan 54
save scanned image 61
scan section 60
show elements 62
specify scan type 56
start 54
tile 53
415109-2614-101 e 09/09
O
Objective Offset
adjust 43
reset 44
Operating mode 96
Overview scan
go to section scan 60
Program
exit 12
functionality 9
general help 21
installation 11
layout 15
operation 20
PALMRobo Instructor 21
software modes 20
standard configuration 15
start 12
P
PALM CapMover II 137
catapult elements 140
position collection vessel 143
prepare collector 138
set speed 142
settings 142
PALM RoboMover 137
catapult elements 140
define sequence for the wells 139
operating mode 96
position using joystick 27
position wells 143
prepare collector 138
set speed 142
settings 142
PALMRobo information 23
PALMRobo Instructor 21
Pen 73
Position collection vessel 143
Position marking (text element) 75
Position stage 45
center 52
center elements 76
centering tool 47
in Stage Mode 45
joystick 46
keyboard 46
return from CapCheck 51
return from Load Position 52
scroll 46
Scroll Bar 46
set speed 48
stop movement 48
target CapCheck 51
target Load Position 52
with mouse (in Stage Mode) 45
with mouse (scroll) 46
Position wells 143
Print elements 112
415109-2614-101 e 09/09
Q
Quadratic Attribute 73, 74, 90
R
Recorder function 117
make settings 117
Reference 195
Reference Position (trapping laser movement)
define 149
move to 149
significance 195
Reference Position (trapping laser)
define 149
Reference the stage 50
Reflector Offset
adjust 164
reset 164
Restore 83
changed element 83
deleted element 79
Retain morphology
grid rectangle 74
operating mode 99
Ruler 90
S
Save elements 107
Save images 115, 116
automatic during laser function 116
Copyright Note 113
create folder 114
manually 115, 116
select folder 114
201
specify file name 115
time lapse (Recorder) 117
Save video sequence
time lapse (Recorder) 117
Scale Bar
switch display on/off 18
Scanning
interrupt scan 59
load scanned image 61
save scanned image 61
section 60
show elements 62
Screen Center
show/hide 18
Scroll Bar
position stage 46
Scroll Rectangle
show/hide 18
Section scan 60
go to overview scan 60
Select elements (element list)
all 78
single or multiple 78
within a group 90
Select elements (monitor) 77
all 77
deselect selection 78
multiple 77
single 77
within a group 90
Serial Sections
edit elements 103
prepare samples 101
reference elements of original sample 101
reference elements of target sample 103
transfer elements automatically 104
transfer elements manually 105
Set camera parameters 31
Set color 84
"Draw Preferences" window 84, 85, 129
current elements 87
for new elements 87
Set image parameters 35
Set Laser Marker 40
Set magnification 39, 167
Set RoboLPC joint 130
Set speed
keyboard commands 49
menu commands 49
PALM CapMover II 142
202
PALM RoboMover 142
set speed (stage) 48
Speed Tools 49
stage 48
units 49
Set speed (stage)
keyboard commands 49
menu commands 49
Speed Tools 49
units 49
Set speed (trapping laser movement) 152
keyboard commands 154
menu commands 154
Speed Tools 153
units 153
Settings 25
adjust Reflector Offset 164
automatic saving 30
camera parameters 31
fluorescence (manual microscope) 157
fluorescence (motorized microscope) 157
histogram 36
image parameters 35
Laser Marker 40
magnification 39, 167
Objective Offset 43
PALM CapMover 142
PALM RoboMover 142
reset calibration 43
reset Objective Offset 44
reset Reflector Offset 164
restore (factory defaults) 30
save elements (File Mode) 107
save images (automatic) 116
slideholder 27
Shading correction 34
Single Beam System 195
Slideholder
settings 27
Software modes 20
Cursor Mode 45
Stage Mode 45
Trap Mode 154, 155
Speed Tools 49
stage 49
trapping laser movement 153
Stage
reference 50, 195
Stage Mode
exit 45
invert movement 45
select 45
set speed 48
415109-2614-101 e 09/09
Status Bar 16
Status display 24
T
W
Wells
define 95
defined sequence 139
operating mode 96
Three-dimensional cutting 127
White balance 32
Time Lapse 181
Window
Draw Preferences 84, 85, 86, 129
Element List 91
Laser Marker layout 19
microscope 171
states 24
System Info 22
Time Lapse function
cancel 119
Timer (alarm) 31
Timer (fluorescence) 165
Tool Bars
show/hide 18
Tools
Laser Tools (cutting laser) 126
Laser Tools (trapping laser) 146, 147
Microscope Tools 158, 167
show/hide 18
Speed Tools (stage) 49
Speed Tools (trapping laser movement) 153
Track path 155
Work Position
define 169
meaning 168
set 169
Z
Z-Focus 29
Trap Mode
exit 154
select 154, 155
set speed 152
toggle between Trap-1 and Trap-2 154
Trapping laser movement 152
define Reference Position 149
function 193
move to Reference Position 149
set speed 152
Trap Mode 154, 155
U
User Interface
customize 17
415109-2614-101 e 09/09
203
204
415109-2614-101 e 09/09
Carl Zeiss MicroImaging GmbH
07740 Jena, Germany
BioSciences /Munich Location
Phone:
+49 89 90 9000 800
Telefax: +49 89 90 9000 820
E-Mail:
[email protected]
www.zeiss.de/microdissection
SAP No. 415109-2614-101